 Body Tub ALMOST done!
Another busy week working on the Jeep every morning and evening (plus weekends). Not quite as fast of a pace as I was hoping, but still getting lots of progress. Going back and forth between working on the engine, painting various things, and drilling holes in the new body tub..

Holes and more holes drilled! More on this in a few…

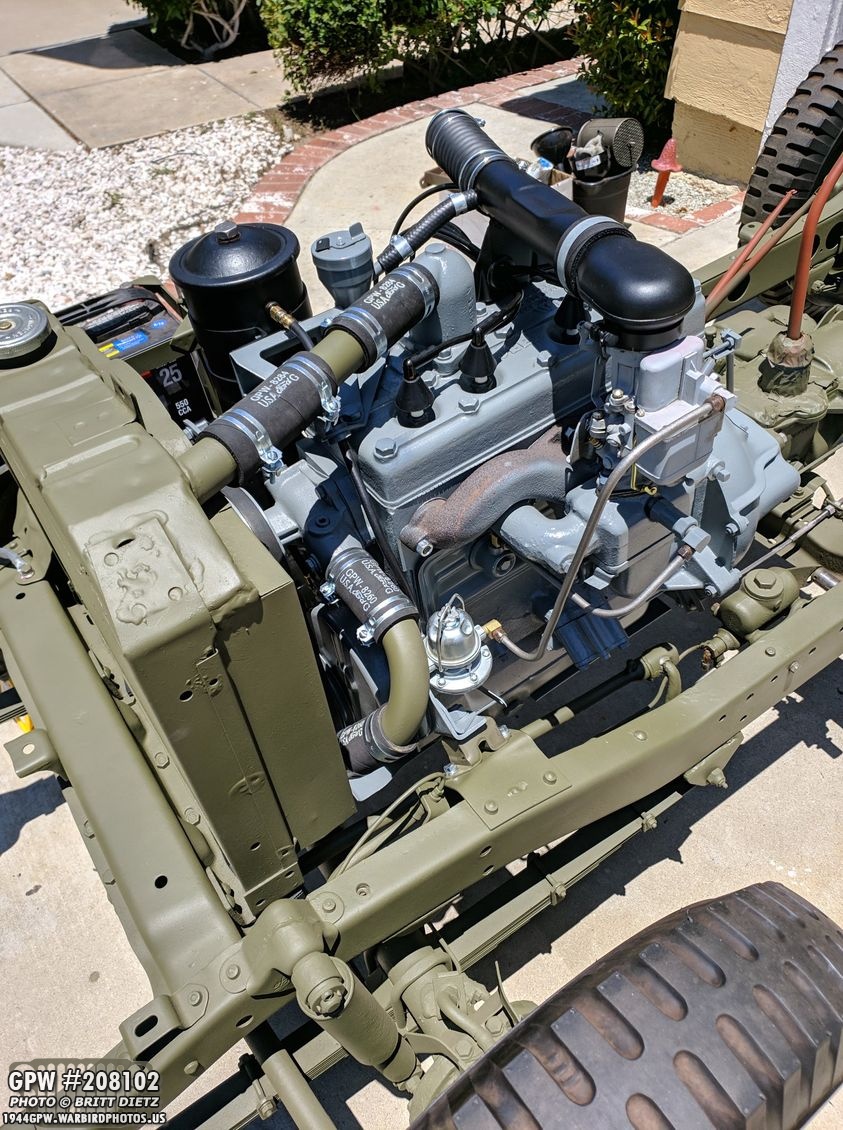
I pulled out the Jeep frame/engine over the weekend so I could touch up some of the Ford Engine Gray paint that had been scratched up when installing the engine parts. Took some time to get some shots of how it looks so far.

Happy with the engine so far, let’s hope I’m still happy once I attempt to start it up!

I went ahead and added the other hard fuel line that takes the fuel from the flexible lines (and the inline filter I’m adding) into the fuel pump.

Here’s where that line from the fuel filter comes out under the alternator. That brass port will have a flexible fuel line connected to it. This side is mostly complete, but still needs the distributor….
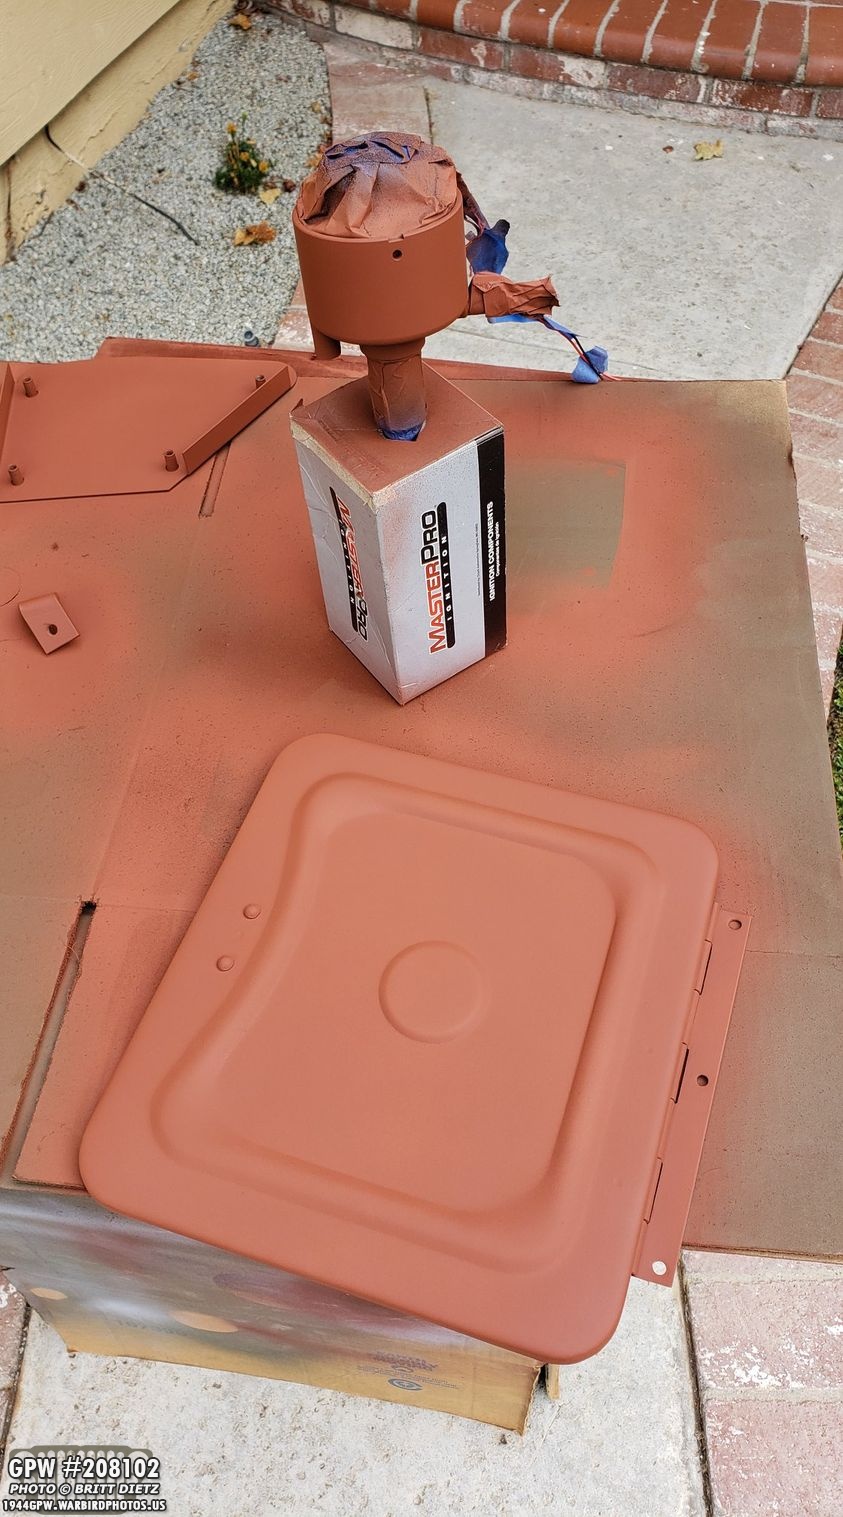
The distributor that came with the Jeep is an electronic distributor. If you remember from my update last week, I decided to repaint it to look more like the WW2 distributors. Well, the black paint I used on the distributor body didn’t adhere well, so I ended up sanding it all off and priming it first. The black took much better! Also finished priming the toolbox lids and the crash pad mounting brackets.

Distributor loosely installed! It’ll still need to be timed, but for now, I went ahead and put it all together. Looks much better! The issue now, is that there’s an obvious modern looking positive and negative wires that come out from the distributor and connect to the coil. I have the original distributor, so I’m still debating on which one I want to use.

Now that the paint was touched up and everything locked down tight on the front of the engine, I went ahead and installed the radiator along with the top and bottom radiator hose tubes with the correct GPW rubber holders and clamps. That was a challenge!

Underneath the radiator, I installed two more ground bond straps that go from the radiator bolts on the bottom to riveted in bolts on the front crossmember. Took a bit of searching the internet to figure out this is where they go.

All put together! The radiator is installed and ready for coolant!

Added the original Ford engine splash shield (under that fuel line port) and the battery tray. Went ahead and put the battery on the tray and added the hold down J brackets and the hold down tray. Everything is coming together!
Getting closer to being able to fire it up! Just a little bit more that I need to add and I can start hooking up the battery with the minimum required to get it running.

I cleaned up the radiator cap, and it looks brand new now. The engine really is coming along nicely!
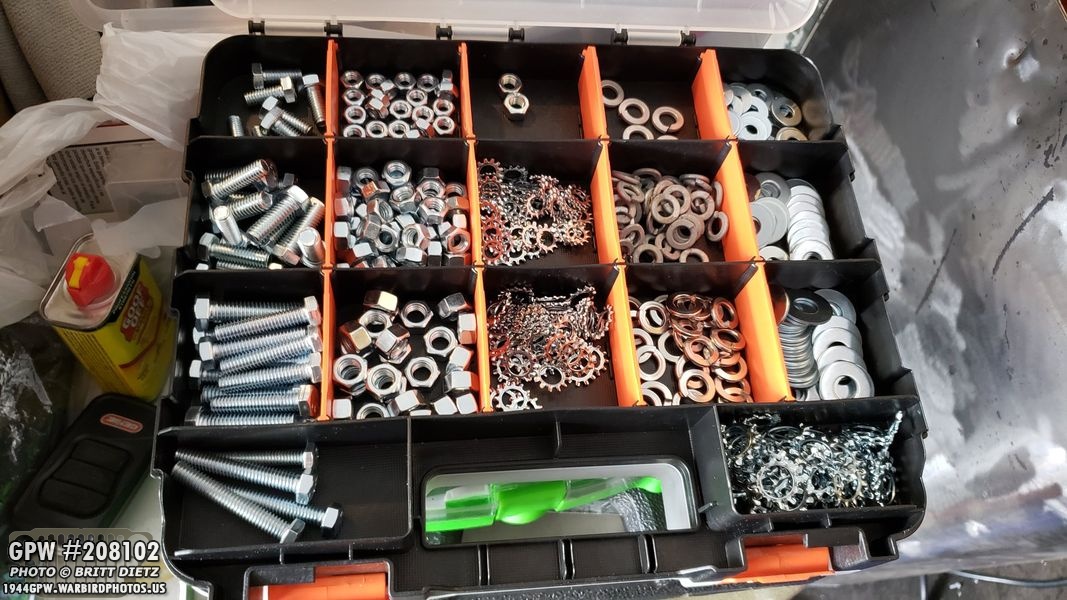
Shift gears (see what I did there?), one thing that’s been a huge help the last week was going out to Home Depot and buying a ton of bolts, nuts, washers, lock washers, and tooth washers in various sizes for putting the Jeep back together. It’s been nice not having to continually run to Home Depot every few days to get bolts!
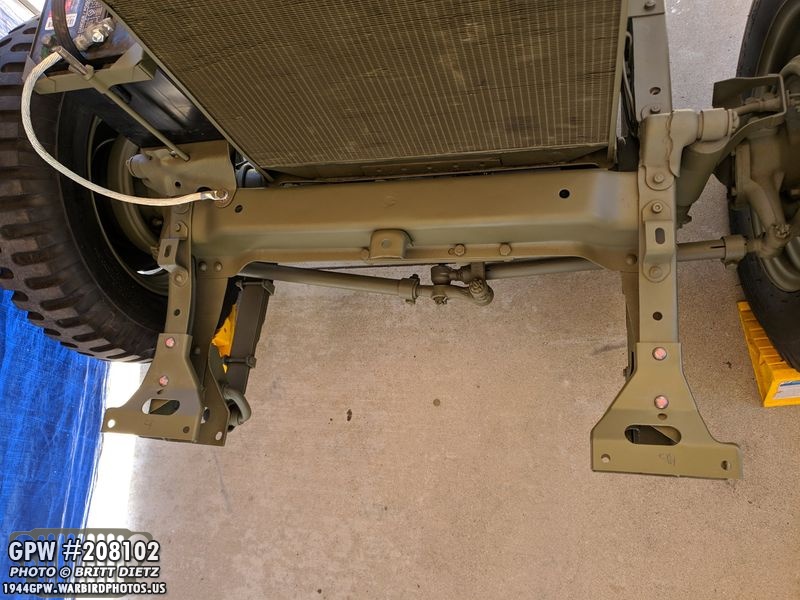
Over the weekend, I took some warmer weather as another opportunity to do some painting and touch up the frame with some OD Green (along with the engine mounts). It was also time to paint the front gussets! If you’ve been following along, I used special allen wrench screws instead of rivets on the front gussets (that were missing from my Jeep). The idea is that these screws can be torqued about as tight as a rivet would be. The also allows for the changing of the gussets in the future if need be. After tightened, you just have to fill the hex heads and sand them, and it’ll look like a rivet! I used bondo spot filler to build up and sand to a nice finish. Time to paint!

All painted, and they sure do look like rivets! Hooray!

I’ve struggled for a few months in finding a good source that has trailer sockets in stock, and not horribly expensive. Most places have raised their prices (the 2 places that have them in stock in the US) and they most overseas places were also pretty expensive. When I was in Europe, I asked the three Jeep stores there if they had the front wood filler for the bumper and a trailer socket, and all three stores (mind you they were Jeep stores that only carry Jeep products!) they were totally out. With trailer sockets, they are getting hard to find because NO ONE makes reproductions. So you can only find NOS (New Old Stock) ones. I found a website in the Netherlands, Jemax-Jeeparts, had them for sale and with shipping from the Netherlands to California, USA, it was cheaper for the Trailer Socket AND GPW wood filler with shipping than most other places charged JUST for the trailer socket alone! Thanks Jemax-Jeeparts!

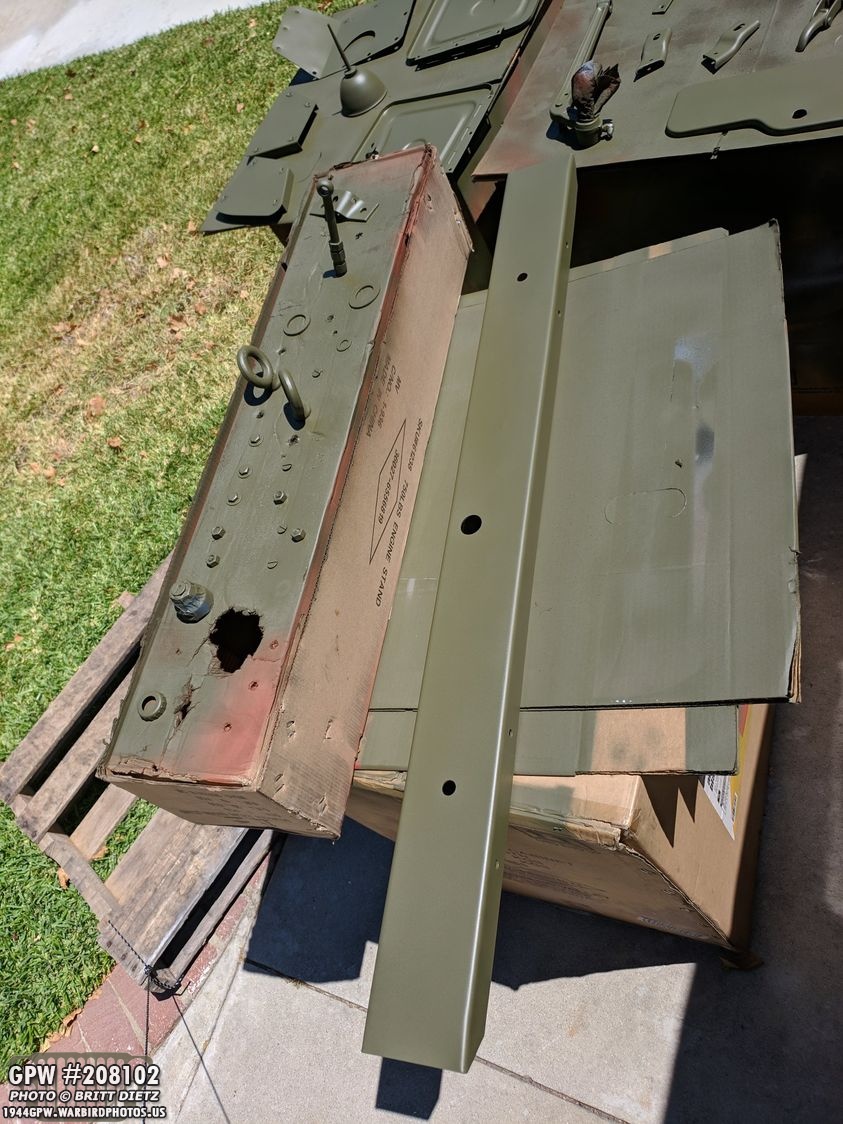
Here’s the Ford F stamp on the wood filler for the bumper. What is a wood filler? I’ll show you…

Here’s a test fitting of the front bumper with the wood filler. You can see it helps add support for the front bumper. It was a bit tight, but using a rubber mallet, I was able to get it in there.
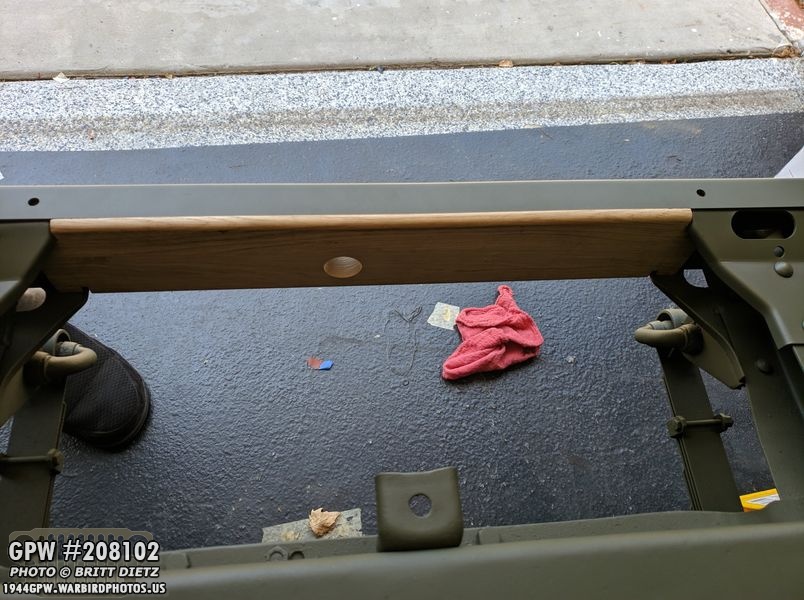
Here’s a look from the other side showing the wood filler. That large hole in it and the front bumper is for putting the crank through to manually start the Jeep. now that I know it all fits, time to get to work on it!

The one issue was sadly, the holes were not drilled in the wood filler for the screws that go from the front bumper through the top gusset through the entire width of the wood filler through the bottom gusset and finally through the bottom of the bumper. So that meant I had to drill them. Drill press to the rescue! Took a bit to figure out the best way to drill the hole as the drill bits were not long enough to go all the way through, but I got them drilled…

And they lined up pretty good! Whew. Here’s the wood filler in without the front bumper on to show you how it sits in there with the gussets.
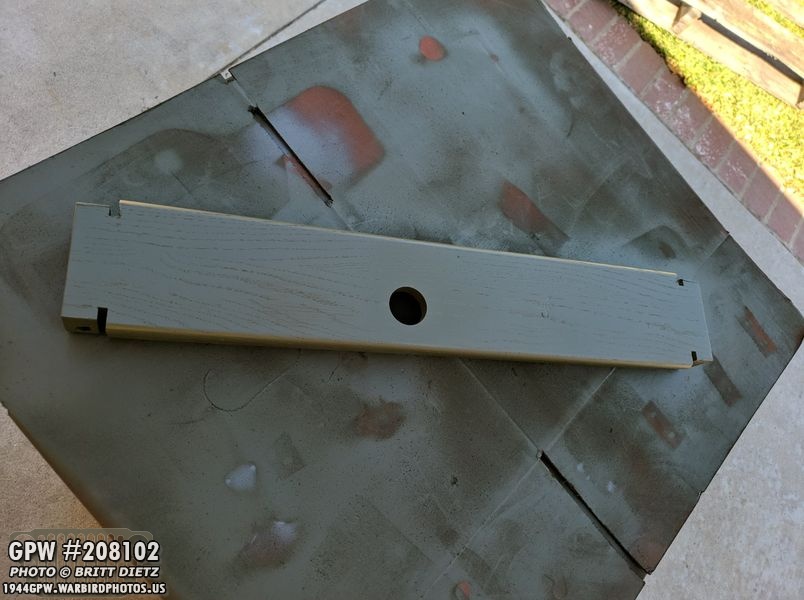
There’s a bit of a debate on the G503 (Jeep website) forums on if the wood fillers are painted OD Green or kept natural with just some wood treatment. Most of the photos I’ve seen (not to mention most of the hundreds of Jeeps I saw in Europe earlier this month) had painted wood fillers, so I am doing the same!
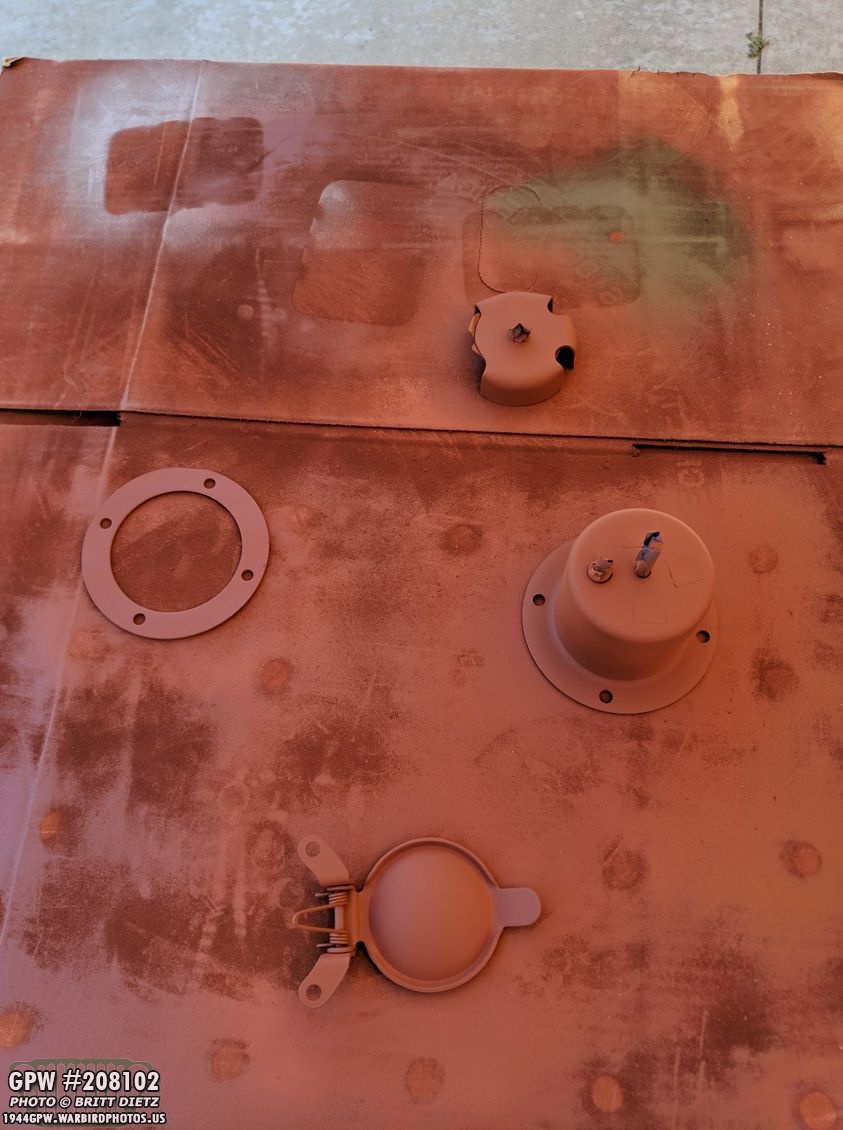
Shifting gears again, I went ahead and took apart the trailer socket into various pieces to paint it. I forgot to take a photo of the socket when it was all together from the side showing all the surface rust it had. I took a wire wheel and removed it all to a nice almost-new finish. I decided to paint all of it (except the inside) OD Green after priming with red oxide. Technically, only the cover is OD Green, but I want to stop rusting from happening on it again, and the backside will be covered from view with a socket cover in the tool box.

After finishing the primer on various parts, it was time to give them the first coats of OD Green! This includes the glove box door, windshield hold down clips, grill wiring clips, crank hold down bracket, brake arm, and more.
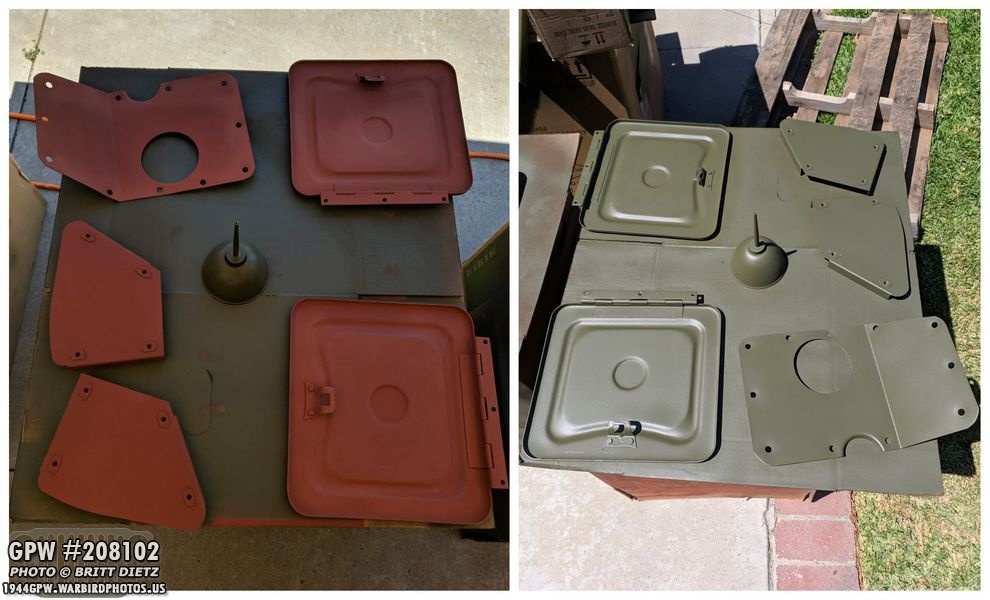
Also painted the transmission inspection floor cover, the crash pads, and the insides of the tool box doors. Also painted the new ‘eagle’ oil can I got in Normandy.
Painted more nuts and bolts along with the key ignition switch cover (since it was a darker green), pintle trailer hitch O rings, and another coat on the front bumper. Sadly, shortly after this photo the wind caught the front bumper just right and knocked it off onto the driveway. Sigh. Going to need to sand out all the scratches and repaint it.

The next day (24 hours later) I was able to paint the inside of the glove box door, inside of the toolbox doors, other side of the brake arm, and other sides of various items. Gave a second coat to the oil can.
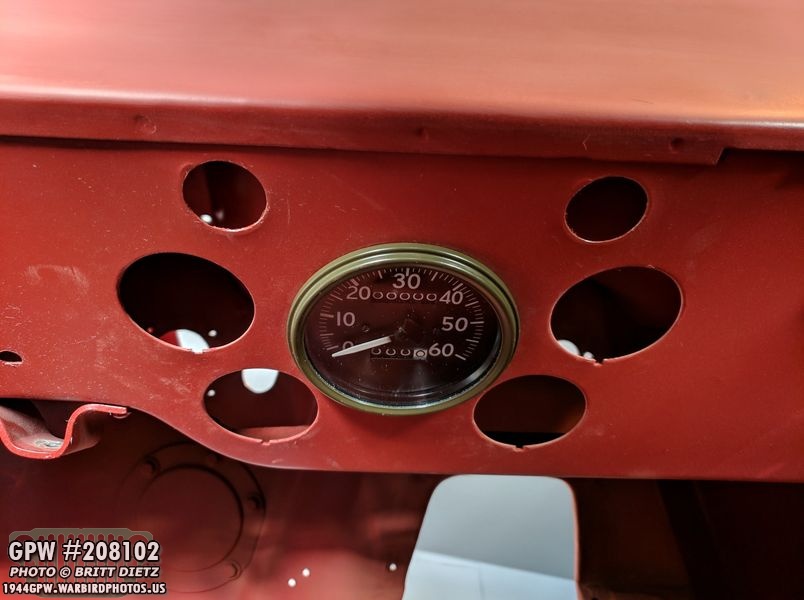
Let’s move back over to the MD Juan body tub that’s been being worked on concurrently. I used my Dremel to grind away a bit at the main speedometer hole, and with just a little bit of work the new speedometer fits nice and snugly!

In the last update, I had almost finished the passenger side of the tub drilling all the holes. I kept trying to map out the rear top bow pivot bracket and reflector holes, but kept not liking how they lined up with the original. Again, as mentioned, the MD Juan body doesn’t quite line up with my original 1944 tub, so I’ve had to make some compromises. Here I’ve mapped out the 5 holes within 1/8 of where the templates say to put them and where they are on my original tub. Good enough!

DONE! All drilled and test fitted! Here’s the two hand hold brackets, the two top bow brackets, reflectors, and crash pads all test fitted! Looking like a Jeep!

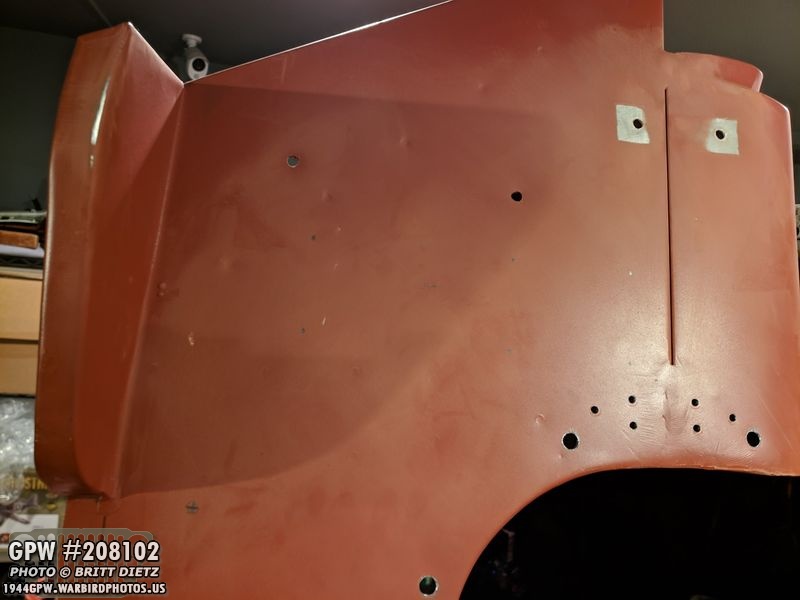
Now to shift gears to the driver’s side, which has 14 more holes on this side than the passenger side. First task was the figure out what holes are supposed to be there, and what holes did ‘bubba’ drill on the Jeep over the last 75 years?
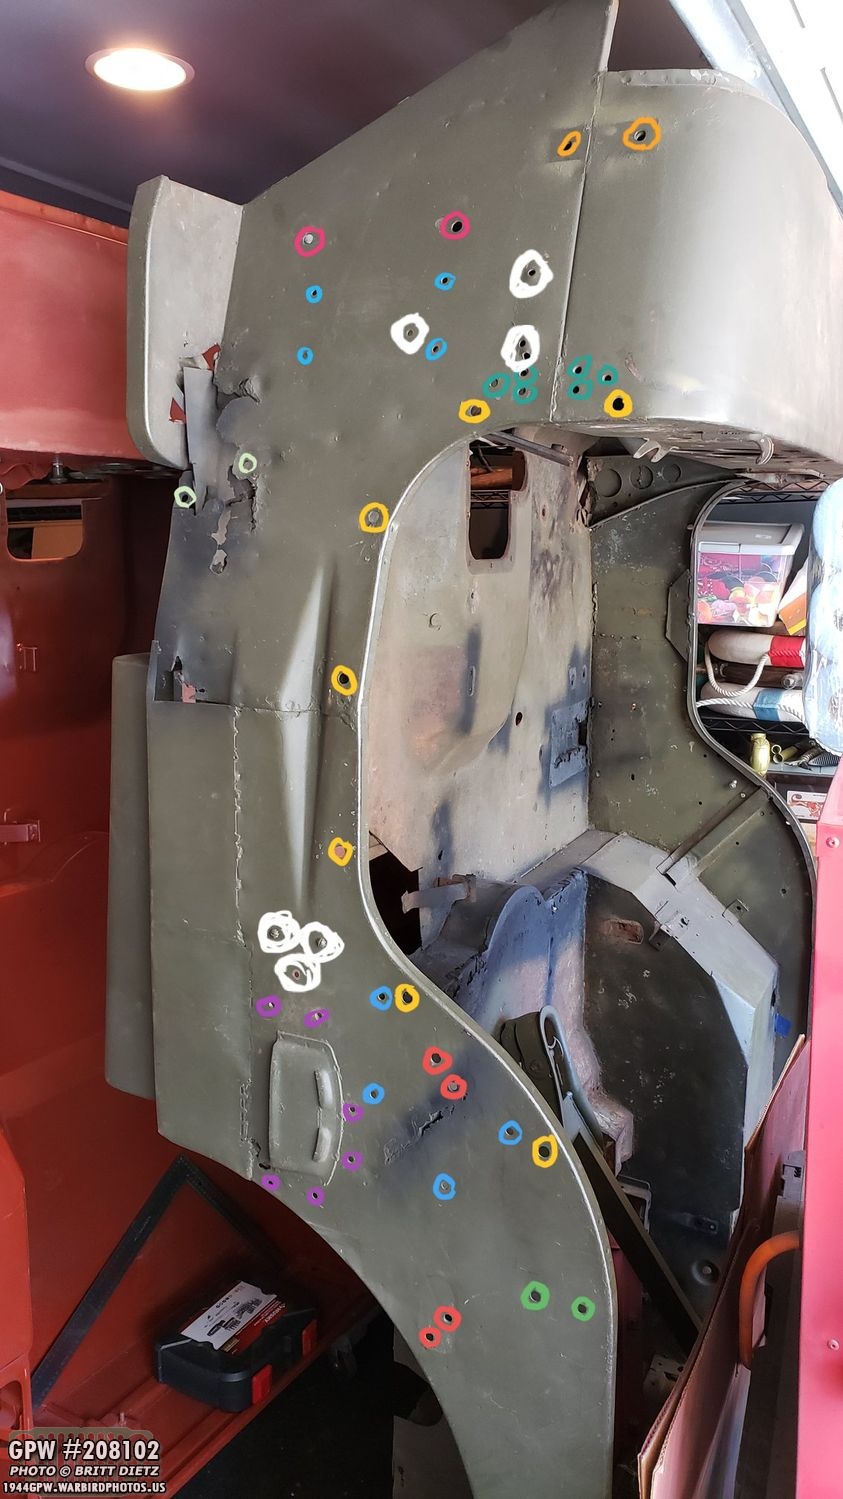
With Roger Smith’s help, and this colorful guide, I was able to figure out what all should and shouldn’t be there. It turns out only two of the top white circled holes are not supposed to be there.Gold- Windshield swivel bracketMagenta – Shovel hold down bracketSky blue and white – fire extinguisher bracketTurquoise – Mirror mountYellow – Half door socketsLight green – (By the step) Front Axe LoopBottom white – Footman Loop for tying down the shovel handle and single hole for a clip holding an electrical linePurple – footman loopsBlue – Crash PadRed – Side Handle Green – Front top bow bracket

Thankfully, there were several holes already drilled by MD Juan! All the footman loops, the internal electrical line clip hole, and the two holes for the axe head swivel bracket are drilled! BUT, sadly, they don’t line up well. So I had to slot the holes a little bit to get a better fit (this is before any drilling or slotting)

I had an idea… since using butcher paper to copy the holes from the original tub to the new tub didn’t work, I figured… maybe doing the holes from the passenger side to the driver’s side would work since it’s the same tub. It would depend on how well MD Juan got both sides of their bodies…

And it worked! Here you can see the pencil markings. After I marked them, I used a ruler and my drafting compass and it was so close of a match I said it was good enough! Time to drill!
Holes drilled and test fitted the first few items! Mirror, handle, and crash pads line up great!
The additional holes include the front axe loop and the fire extinguisher bracket (6 holes seen here in small pencil marks).

For the bottom top box bracket and reflector I did the same with the butcher paper on the passenger side, marking the holes and transferring it over to the driver’s side.

Holes for the fire extinguisher drilled along with the front axe loop! I put the axe loop and the shovel hold-down bracket (which were pre-drilled) on to test the fitting. I’ll get the correct hardware for the shovel hold down bracket in the next few days. Since I may not have a fire extinguisher on the Jeep, because it interferes with driving often, I’ll put holds in those holes to give the illusion something is there.

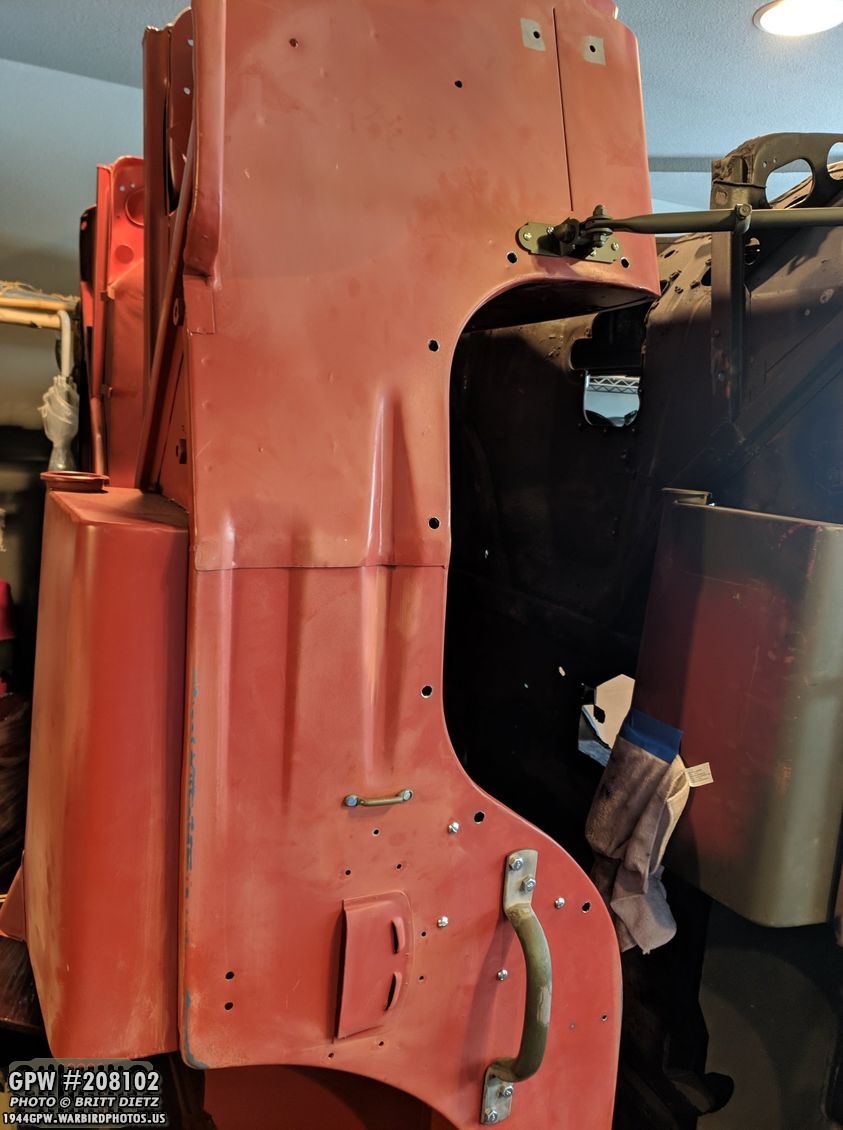
Crash pad, footman loops, forward top bow bracket, and the swivel axe bracket are all installed! This was after a lot of work slotting some of the pre-drilled holes to make things fit.
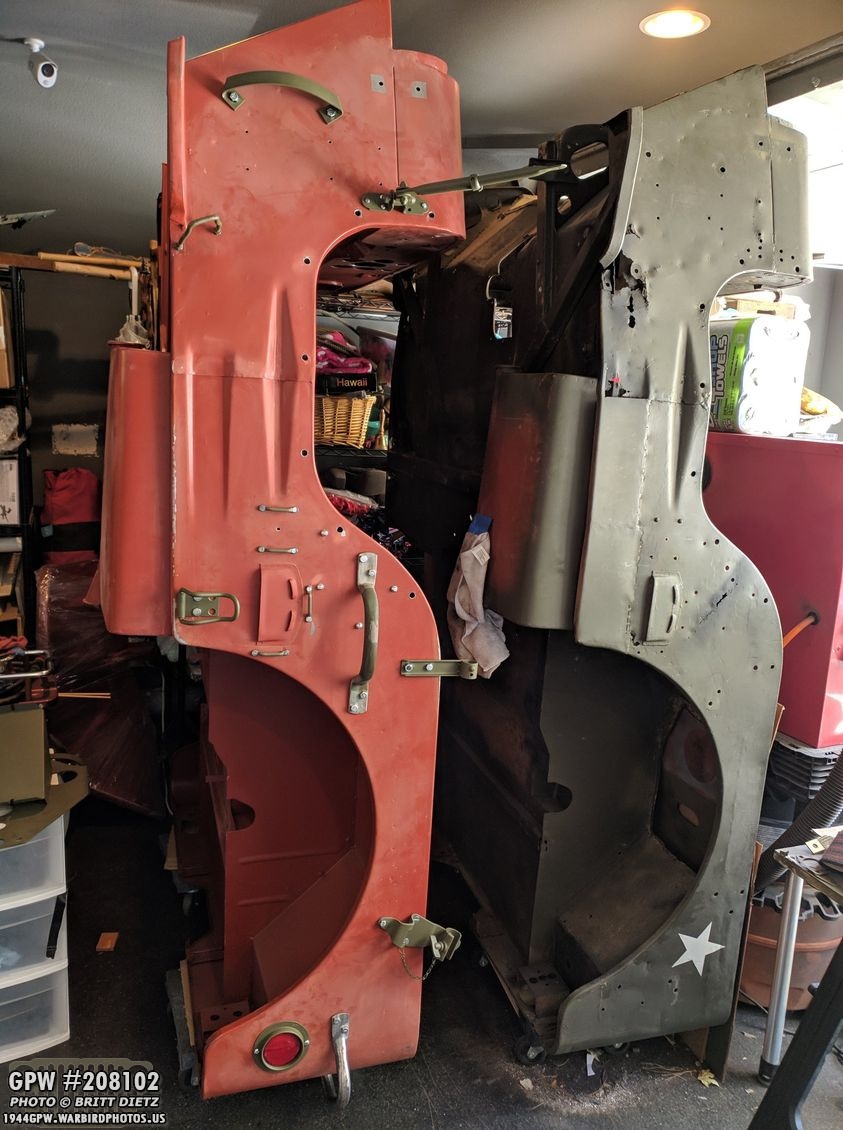
Finally, here’s a look at the driver’s side all completed! Reflector, read handle, and read top bow bracket test fitted! Next up for this weekend is to remove all these things, put both tubs on their sides and work on the tail of the body tub drilling around 10 holes on there. Then to verify all the holes on the firewall of the tub are there… after that, it’s time to put the tub on the Jeep frame to mark the mounting holes, the seat holes, and verify I have all the holes drilled! Then I can clean up the tub, touch up the red oxide primer in spots, then prep it for OD Green painting! Lots of work ahead… Till next update!