 Body Tub Test Mounted!
Work continues at as fast of a pace as possible trying to get the Jeep ready by July 27th! Lots of new holes drilled, items test fitted, and a LOT more! This is a big update!

The body tub has been fitted to the frame! My brother came over and we decided to go ahead and put the MD Juan tub on the frame along with the fenders so I can mark and drill the mounting holes. Lots of issues came up…

One of the other reasons we moved the tub was so I could drill the 12 holes on the back of the Jeep. But here’s where you can start to see the issue… the tub isn’t sitting right on the frame.

Turns out, the bumper outer ‘wings’ on the frame are actually bent a bit. Because of this, only the inner bolt holes (mostly) line up. If I mount the outer holes, the tub is pulled back on the frame and nothing else lines up. So for once, it’s my original frame that is the issue and not the MD Juan tub! What I will have to do is heat/hammer the outer part of the bumper back into position.
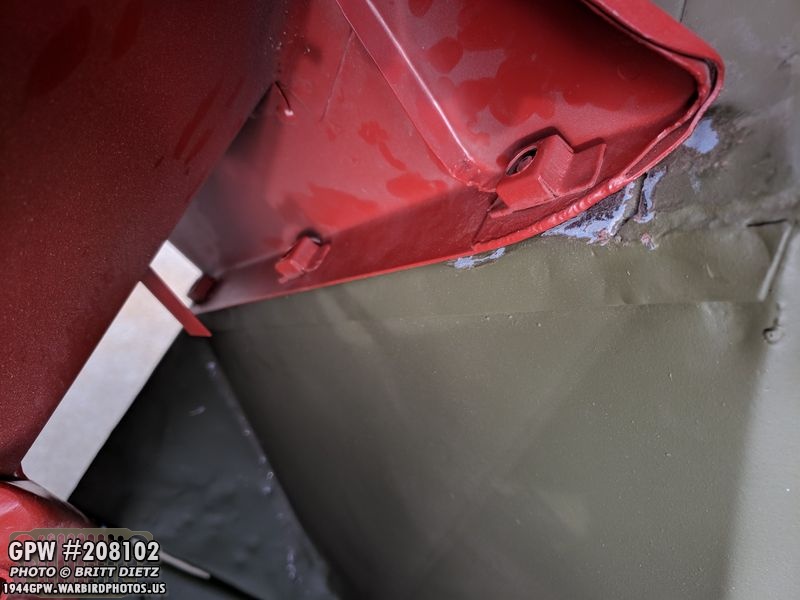
The other issue is the original fenders and the tub… I can get one side of the fenders to work, but the other one won’t fit. I think this may be partly because of the issues with the back bumper alignment and also original vs repro. You can see all the paint that’s rubbed off the fender from trying to get this side to fit. I will try removing the fenders and see if I can attach them first to the tub and then to the fender.

This side is the same way (I haven’t painted this fender yet because it needs some welding work still). If I get this side all lined up, the other side doesn’t line up. Frustrating!

After being frustrated with the fenders and mounting alignment, I decided to shift gears to mounting various things on the tub to make sure they fit. First up, the windshield. After the issues with the fenders, I was concerned that my original windshield wouldn’t fit… but it fit GREAT! Whew!
I was most worried about these pivot bracket points and if they’d line up or if it was too wide/too short. It was just perfect. It rotates just fine and the thumbscrew works great.

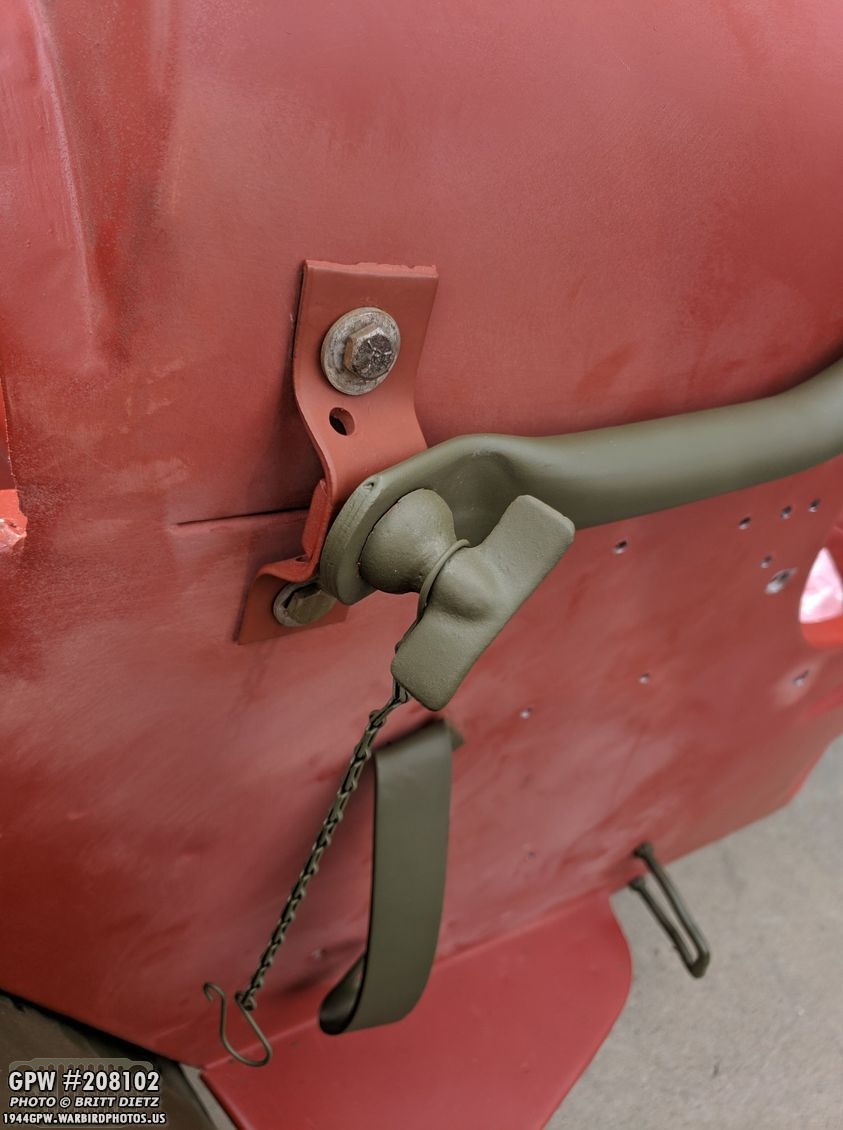
This was the other issue with the windshield, the lockdown clamp alignment. I couldn’t remove the ‘hook’ from the original tub, but the MD Juan came with a new set of hooks and lock latches. At first, I decided to use the all new hardware for this entire system but quickly realized that the latches had many issues. I went back to the original latches (which were already painted) and they worked PERFECT! Yay! Just needs some paint touch-up and it’ll be great!

With the windshield all good, I went about the next task… the top bows for the canvas top! This is a very critical piece and must be aligned very carefully otherwise you’ll either have 1) a canvas top that isn’t tight enough and comes off in your face while driving, or 2) is too tight and it won’t fit.
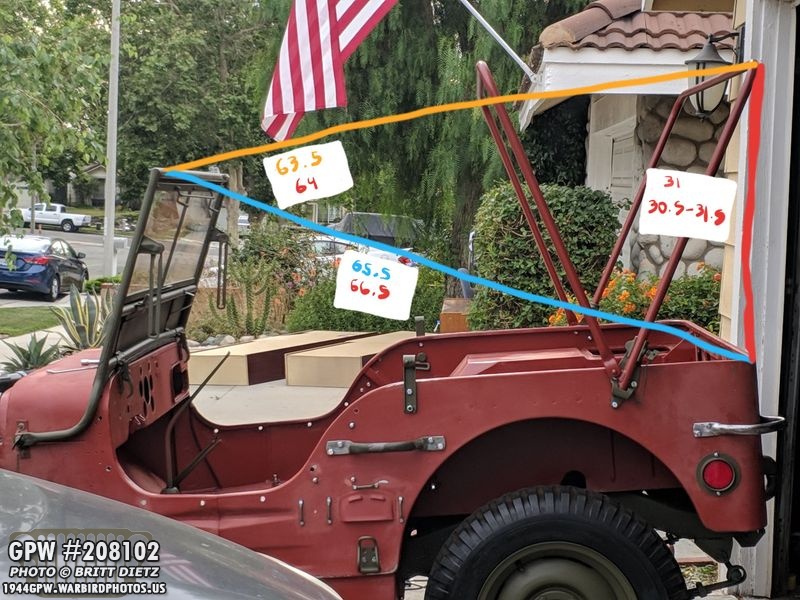
Using a chart given to me by Roger, I measured three lines critical for the top bows and canvas top from the windshield to the back. There are two sets of numbers here for each line… the top number is the actual measurement I got, the bottom number is what the chart said. I got it very close on the orange line (.5 off), and perfect on the red line (in the range). The blue line, however, is off by an inch. But until I start moving things (which in the case of the blue line I can’t move anything because it’s the windshield to the back of the tub) I will wait till the canvas top arrives from canvasco in the next week or so and see if what I did is all close enough to work.

Next up, I put the seats into the Jeep. The driver and passenger seats are just sitting there while the back seat is actually held in place. Starting to look like a Jeep again! All be it a very assorted colors jeep.

The backset is actually sitting in it’s pivot channel and locked in with the side springs. It was a perfect fit to my original backseat, which is awesome. Folds and pivots perfect! So I took the seat off the next day and gave it to the local sandblaster to get all the paint off!

The passenger seat will need holes drilled for the pivot brackets. This seat can pivot forward so you can put the canvas top, when folded, underneath. It also needs some welding work on the backrest.
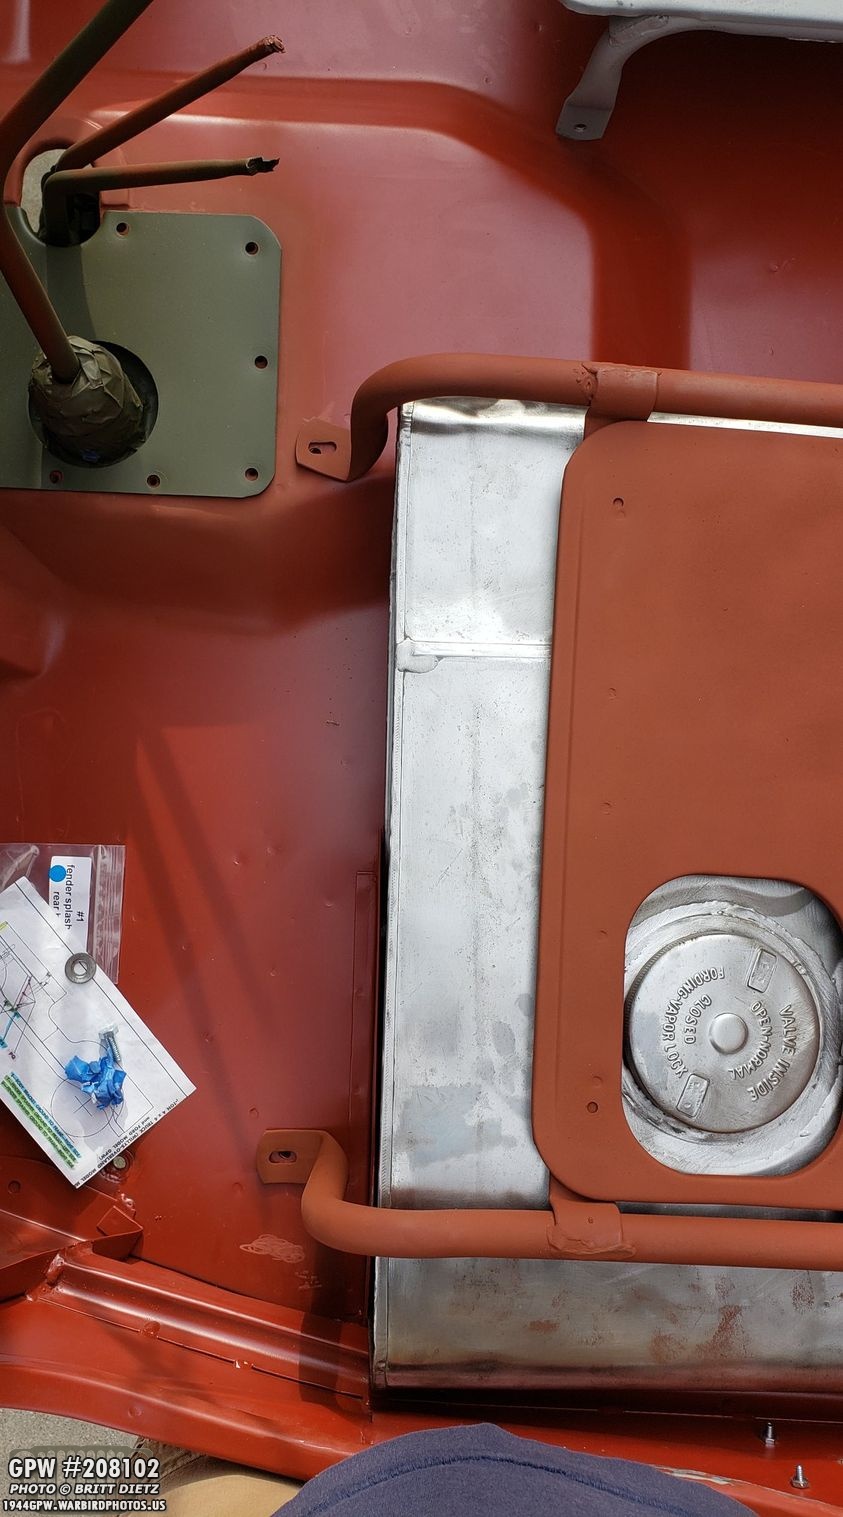
I put in the original fuel tank (which fits perfect) and the driver’s seat on top. The holes for the driver’s seat are pre-drilled with capture nuts by MD Juan. They almost line up, so so close… but they are slightly off as you can see here. I think I can manipulate the legs slightly to make it fit though.

A look at the font of the Jeep. I can almost imagine it being complete! Remember, the body tub is just sitting on the frame, nothing is bolted down at this point until I can get some help to fix the mounting issues.

I moved on to adding items to the back of the Jeep. Some things were already pre-drilled but needed some adjusting, like the Jerry Can strap support bracket and the spare tire bracket. Thankfully those required minimal fixing to fit my original parts. The bolts that were used for them on my original tub (pictured) were incorrect, so I bought correct bolts from Lowes and ground off the markings on the head.
Here is the spare tire bracket with the correct bolts when test fitting the next day, just before I ground off those markings.

And the correct bolts for the jerry can (gas can) strap support bracket and the jerry can holder itself. I had to drill the 4 holes for the holder, which I was able to get easily from my original tub with a butcher paper tracing. I also drilled the 4 holes for the trailer socket (to the left of the holder) and you can see I installed one of the 2 rear reflectors (I drilled the two holes for that)
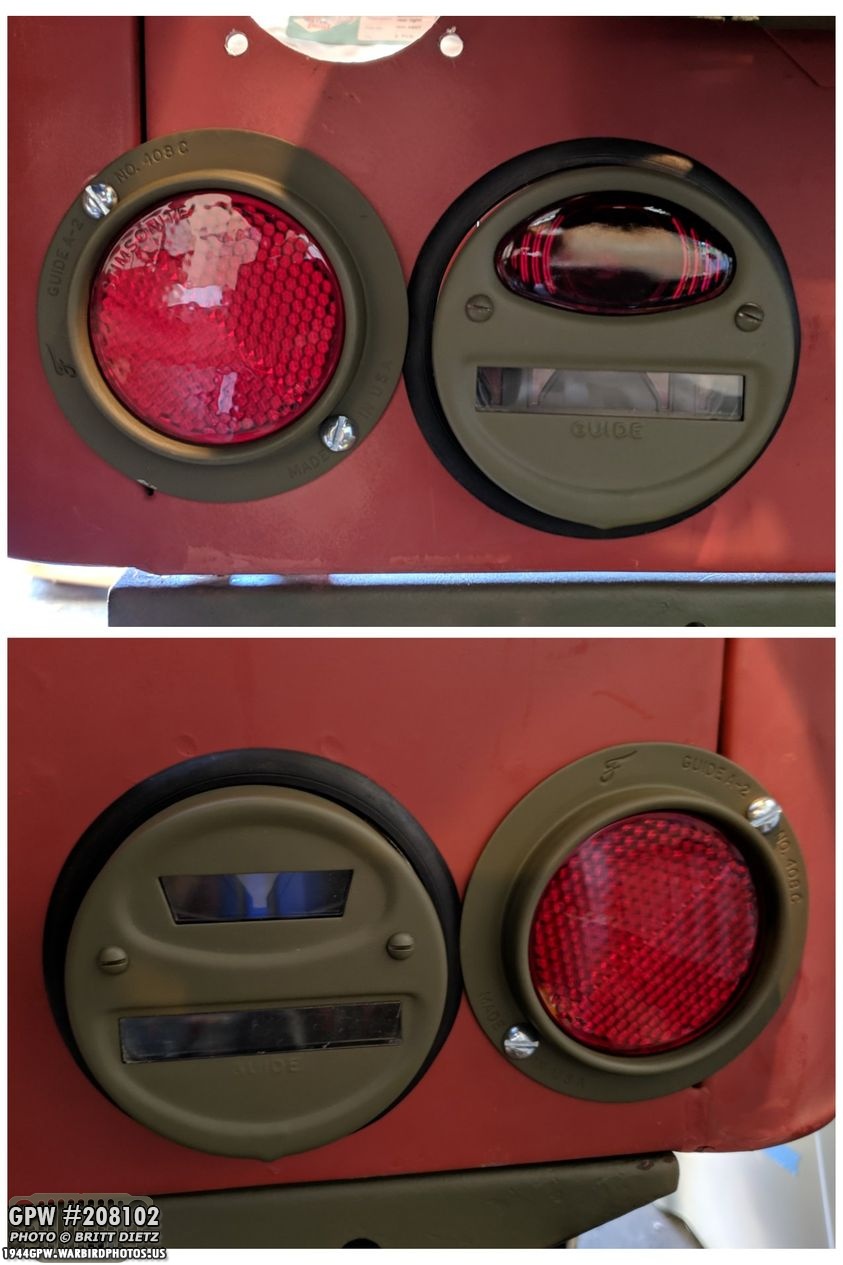
Speaking of the reflectors, here’s a look at both reflectors (left on top, right on the bottom) after drilling and testing the fitting. I also test fit the rear taillights and rubber gaskets. The rear light holes are a little larger than I’d like them to be, so they are not as tight to the lights when the gasket is installed (you can see the small gap around the top one).

Moving on from the tail, I drilled and installed the two dash eye bolts that hold the safety strap. Used the original tub as a reference again for the exact center. On Fords, they actually are turned horizontal, which I hadn’t done at this point I took this shot.
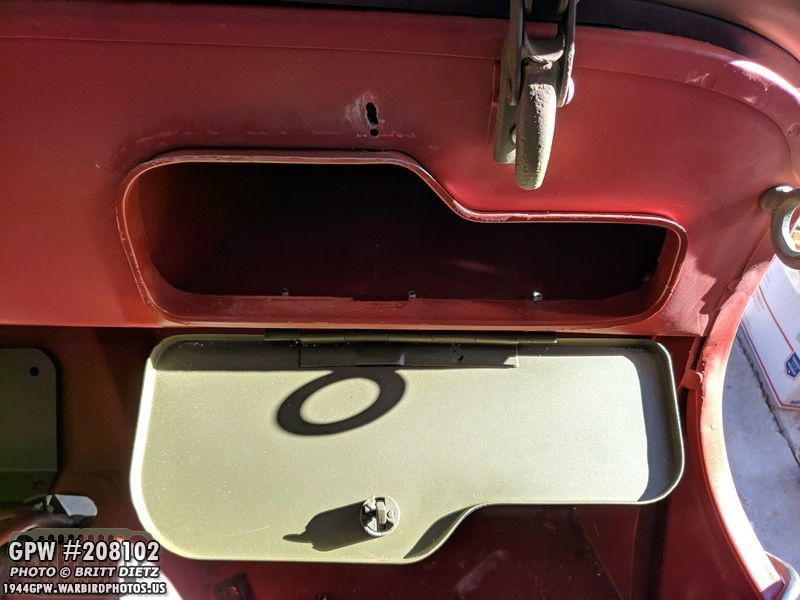
Next up, tackling the glove box door! If you remember from the previous update, I decided to use the glove box door that came with the MD Juan because it fit better than the other repro door that came with the Jeep when I bought it. So next up was drilling the hole and installing the striker plate that latches the door closed. I tried to use the same hole as my original tub, but the MD tub’s glove box compartment is a bit different than my original tub. So I kept having to lower the hole. As you can see from the not so straight slotted hole, none of those worked. I then spent time measuring and eyeballing the push button and where it would hit the striker plate, and found the exact spot in the single hole drilled under. Way way lower than the original tub. Oh well, fits great though after I also ground down some of the outer lip under the hole.

So I put some JB weld steel into the slot to fill it up.

After sanding that, a little spot fix which I’ll sand and you’ll never know I had a terrible slotted hole there!

Another shipment from Ron Fitzpatrick Jeep Parts! This time with a lot of hardware (correct bolts/screws for the Mirror, Tool Box, Glove Box, Headlight bracket bolts that are Ford F stamped, and the front shovel bracket. I also got the canvas straps for the shovel/axe and a special Ford washer hardware set for the coil on the engine.

I masked off all the dash gauges to paint the bezels the same OD green as my Jeep (33070). This took some careful planning and making exact circles the side of the inner glass in photoshop, printing them out, putting two strips of blue masking tape on wax paper, then carefully using that print out to cut perfect circles that I could then stick on the glass. Worked perfect.
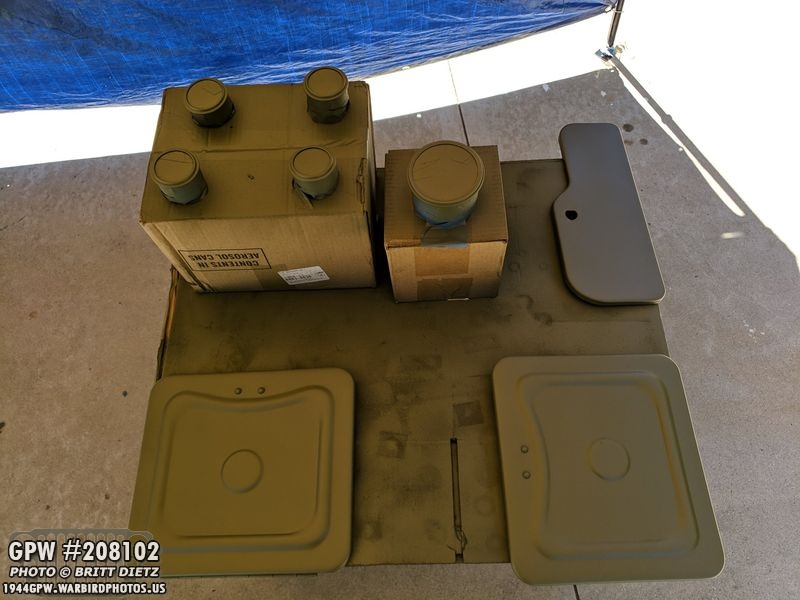
Here’s those same gauges being painted! And another coat on the glove box door and two tool box doors.

And more items getting paint, including the first foot pedal and the arm for the brake petal.
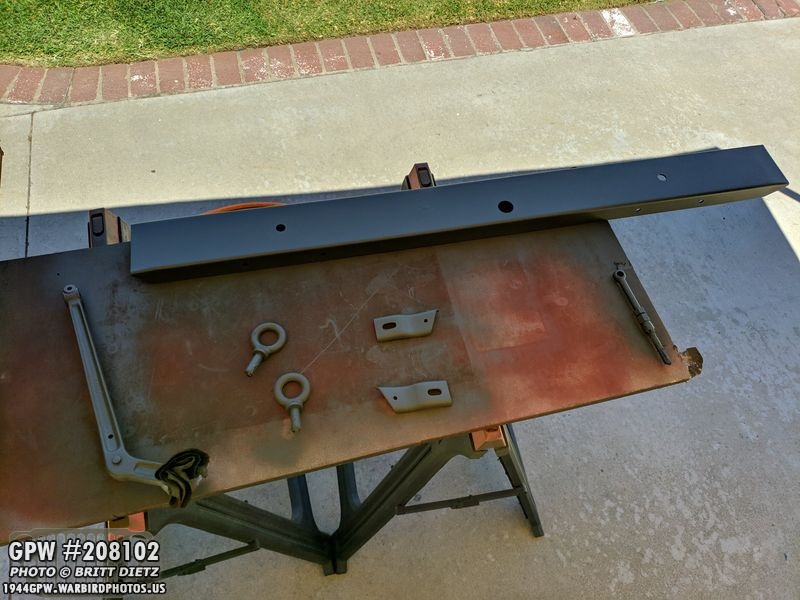
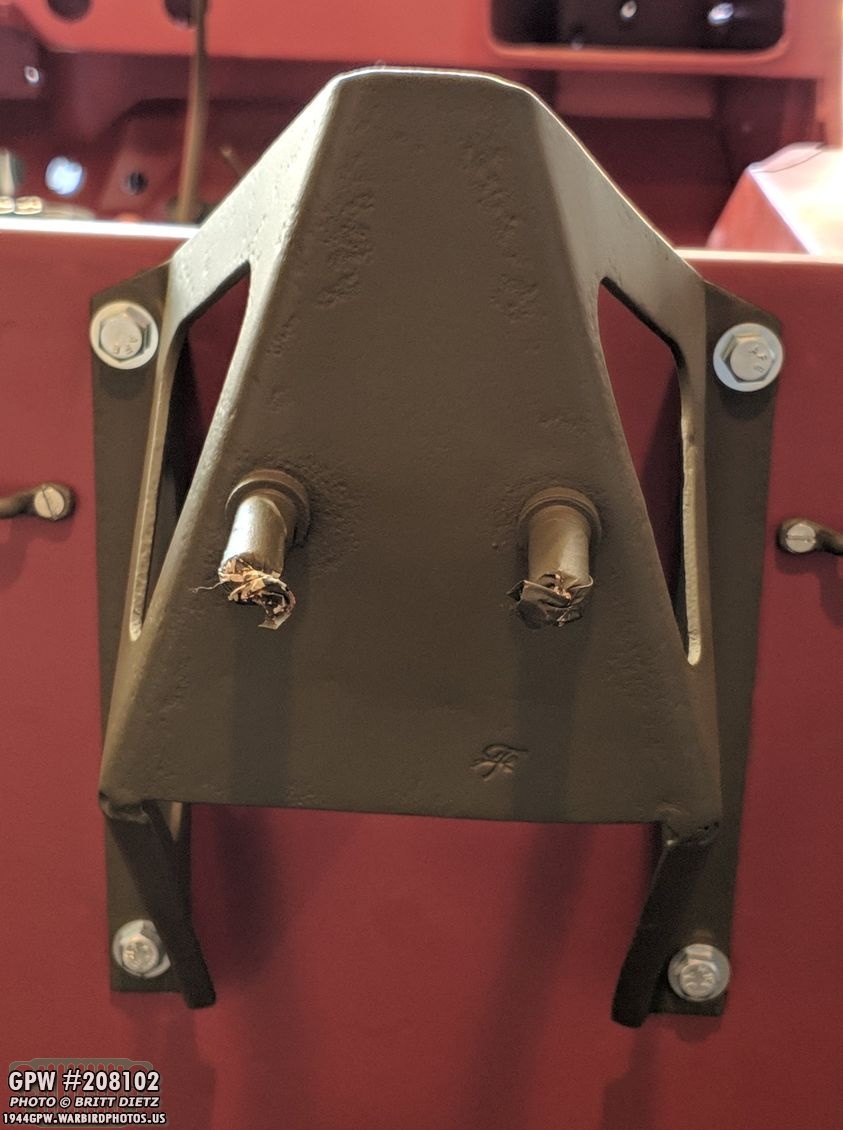
Another coat of paint on the bumper after last week’s accident with the wind knocking it over onto the ground. Also the pintle hook eye bolts, body tub to frame mounting brackets, and the brake push rod getting paint.

After dismantling the entire trailer socket, cleaning the surface rust, painting, and letting dry, I put the whole thing back together. Looks brand new! Just need to paint the bolts!

Which, speaking of bolts, it was time to start painting the bolts for the various items I’ve been mounting.

First they get primed with red oxide…

Then painted with OD Green! They will be scratched up when I put them back on the jeep and tighten them, but I will do a mass painting of everything on the Jeep tub once it’s installed to fix any issues.

Another item that arrived from Ron Fitzpatrick Jeep Parts is the driver’s seat gas tank guard. I thought what I had was the correct part, but turns out it wasn’t. Here is that part getting some red oxide primer. This part shields the gas tank from being hit under the driver’s seat.

Next up, it was time to start drilling holes for the data plates on the glove box door! Using the original unrestored door with original plates, I lined up the new repro plates and marked the holes with a pencil.

Drilled one at a time very carefully… using a punch to make sure the drill bits don’t walk.

Then after each one is drilled I sat in the rivets just to make sure it’s a nice fit. These are the correct style late-war Ford rivets.
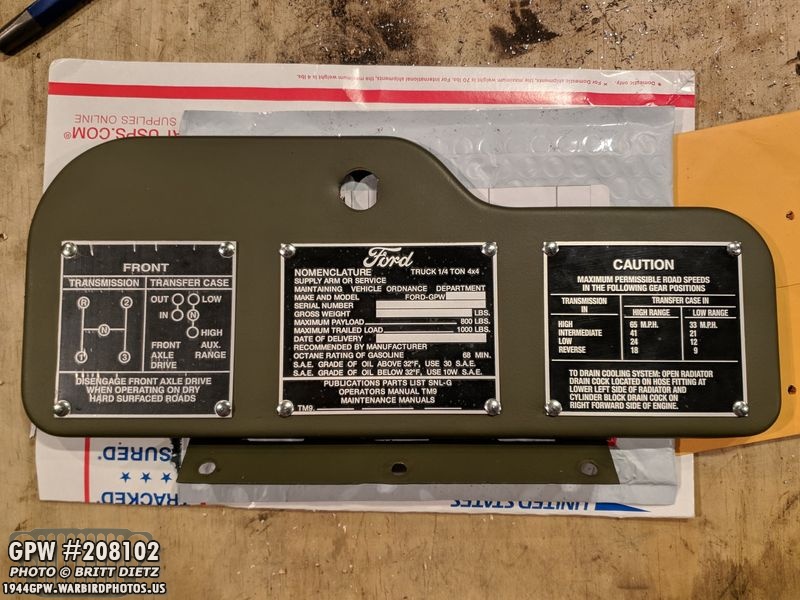
All done drilling and looks great! I still have to squish the rivets so it’s a permanent attachment, which I have a special tool to do that. I’ll wait on that since I still need to stamp the data onto the middle plate, which I’ll be doing myself. I did some research and found an 85% match to the original font on my data plates!

Another issue with the MD Juan tub was the foot rest bracket holes did not line up on the side of the wheelhouse. (sorry, forgot to get an overall shot inside the tub to show where this is). Int he first photo, you can see behind those holes are capture nuts… and those small holes above them are where I drilled the holes that need to be. So, I decided to remove the capture nuts via a cut off disk, drimel, and a flap wheel so I could widen the holes where they needed to be. The next photo (top right) is after I got the capture nuts removed. Next (bottom left) is after using the flap wheel to smooth it all out nice and flat. I could then widen the holes which in the last image (bottom right) the foot rest has been installed on the other side and the new holes widened. I’m not going to fill the original holes for now, but I will eventually fill them and re-add the capture nuts onto the new correct holes. I also put some spot filler on those gash marks from the cut off disk (whoops). You won’t be able to tell once it’s sanded and painted as this is all inside the wheel well.

I installed those special Ford washers and hardware kit onto the coil. These are not really necessary on the Jeep, but it adds to the correct look.

Close up, you can see the Ford F stamp on the large washer. What this was for was to prevent the black coil bracket from cracking under stress and vibrations from the engine with the over-tightening of the washer and nut.
One of the least enjoyable things I’ve done on my Jeep so far as tinning the grill for the bond straps. Tinning is essentially soldering a layer of solder metal onto certain spots to allow for good bonding/grounding of thems. It was mainly used to help with the bond straps for radio suppression (to minimize radio interference from the electrical system). In late late war, they moved to using toothed washers vs tinning. SInce my Jeep is 1944, technically it is using a II suppression system, so I decided to tin the areas you can see, like 4 top spots on the grill. This is after the tinned the spots (forgot to take photos it was so difficult), but the process basically is basically removing the paint from the area around the hole, covering it with this instant solder I got, and then heating it with the torch. It also makes the paint around the area bubble up from the heat, so I had to spend all this time sanding the surrounding areas to remove the bubbles. Doh!
So after sanding, I put some tape over the tinned areas (which you could see in the previous photo) and lightly re–primed those areas. I’ll hit the top of the grill with OD Green again and hopefully, I can then put everything back together and finish the grill. I’m not going to tin the bottom of the marker light holes as it’s not seen and a toothed washer will do the same thing. Until next week! Lots and lots of work ahead!