 TBM Avenger, Fuel Sender, & restoring a Fuel Strainer
This week’s update includes a trip to the Planes of Fame Air Museum to see a TBM Avenger, more updates on my Fuel Sender float, some mail call items, and a complete look at how a Fuel Strainer works and restoration!
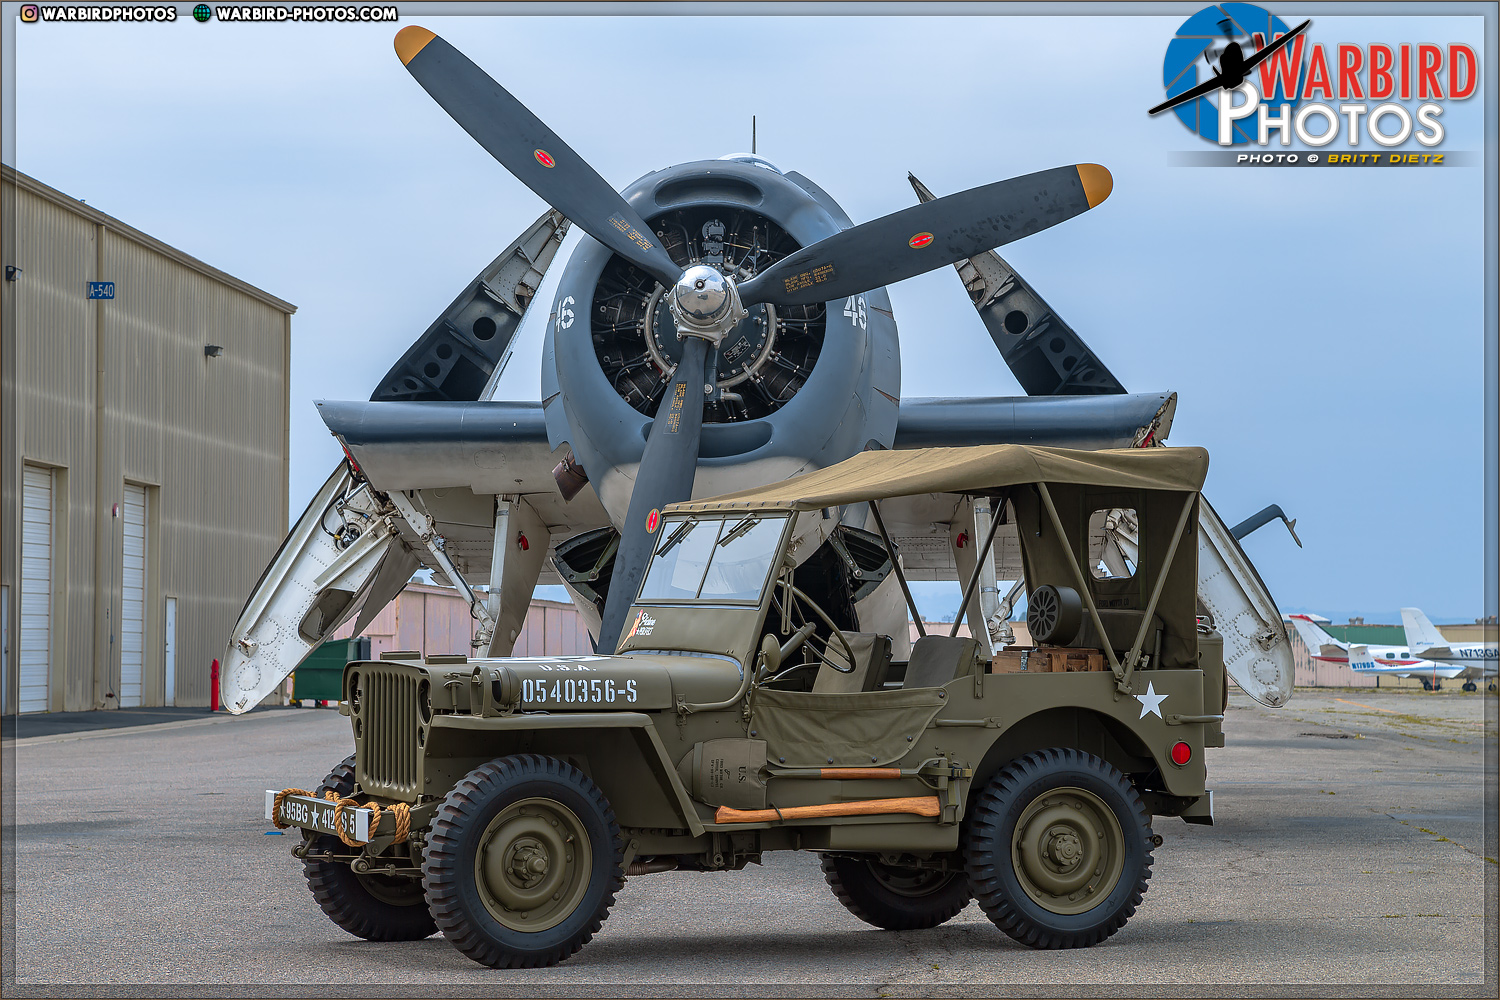
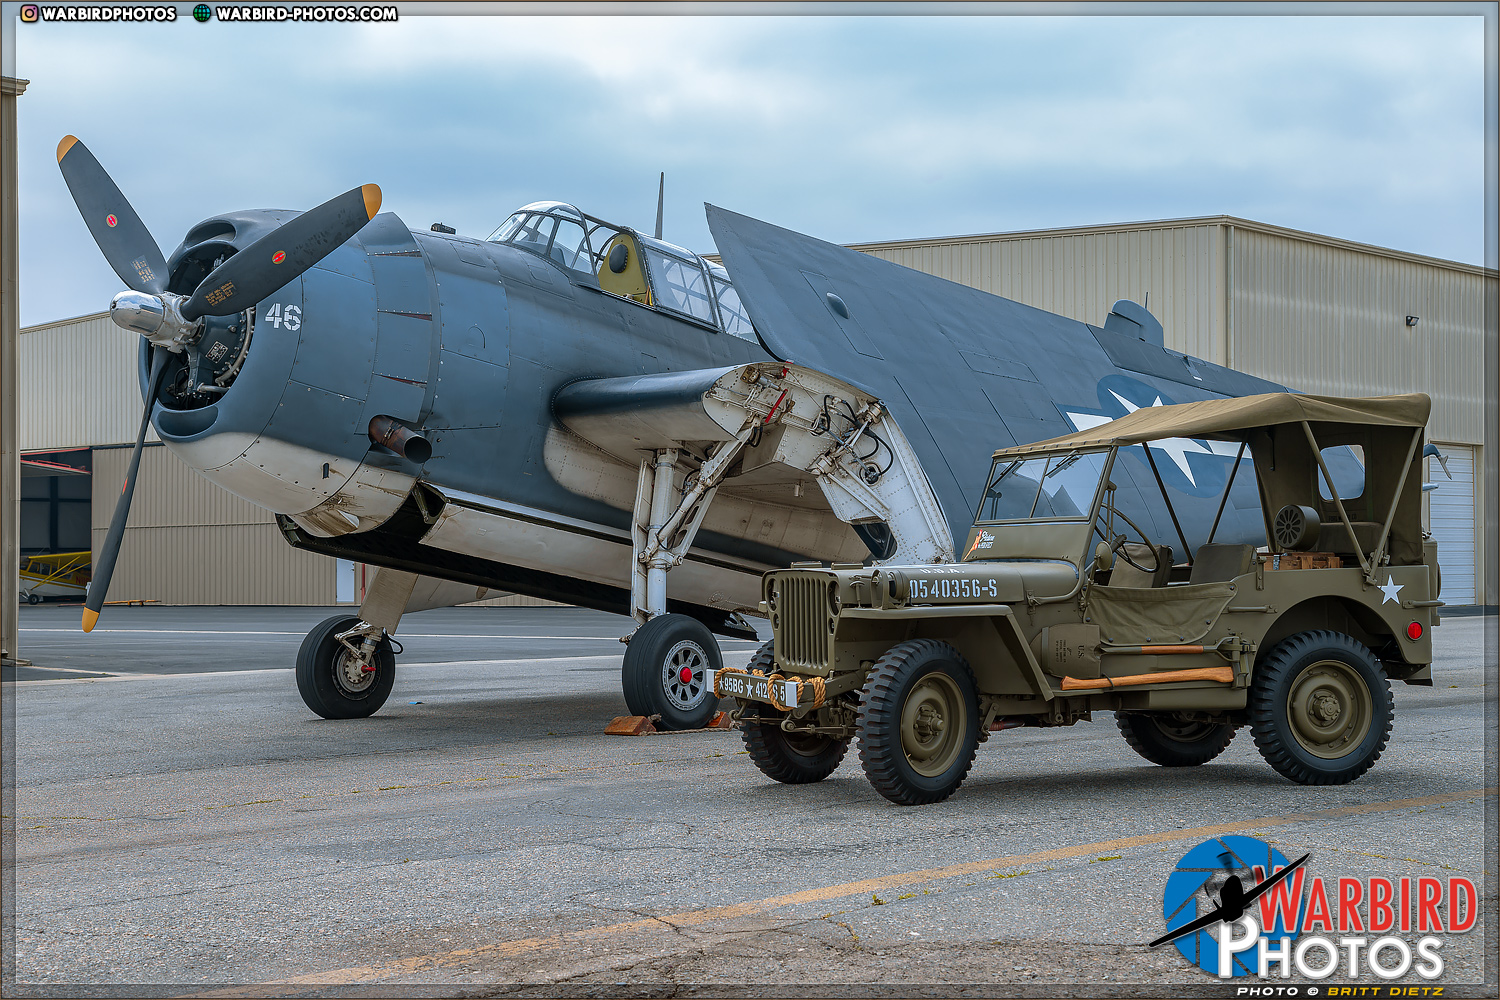
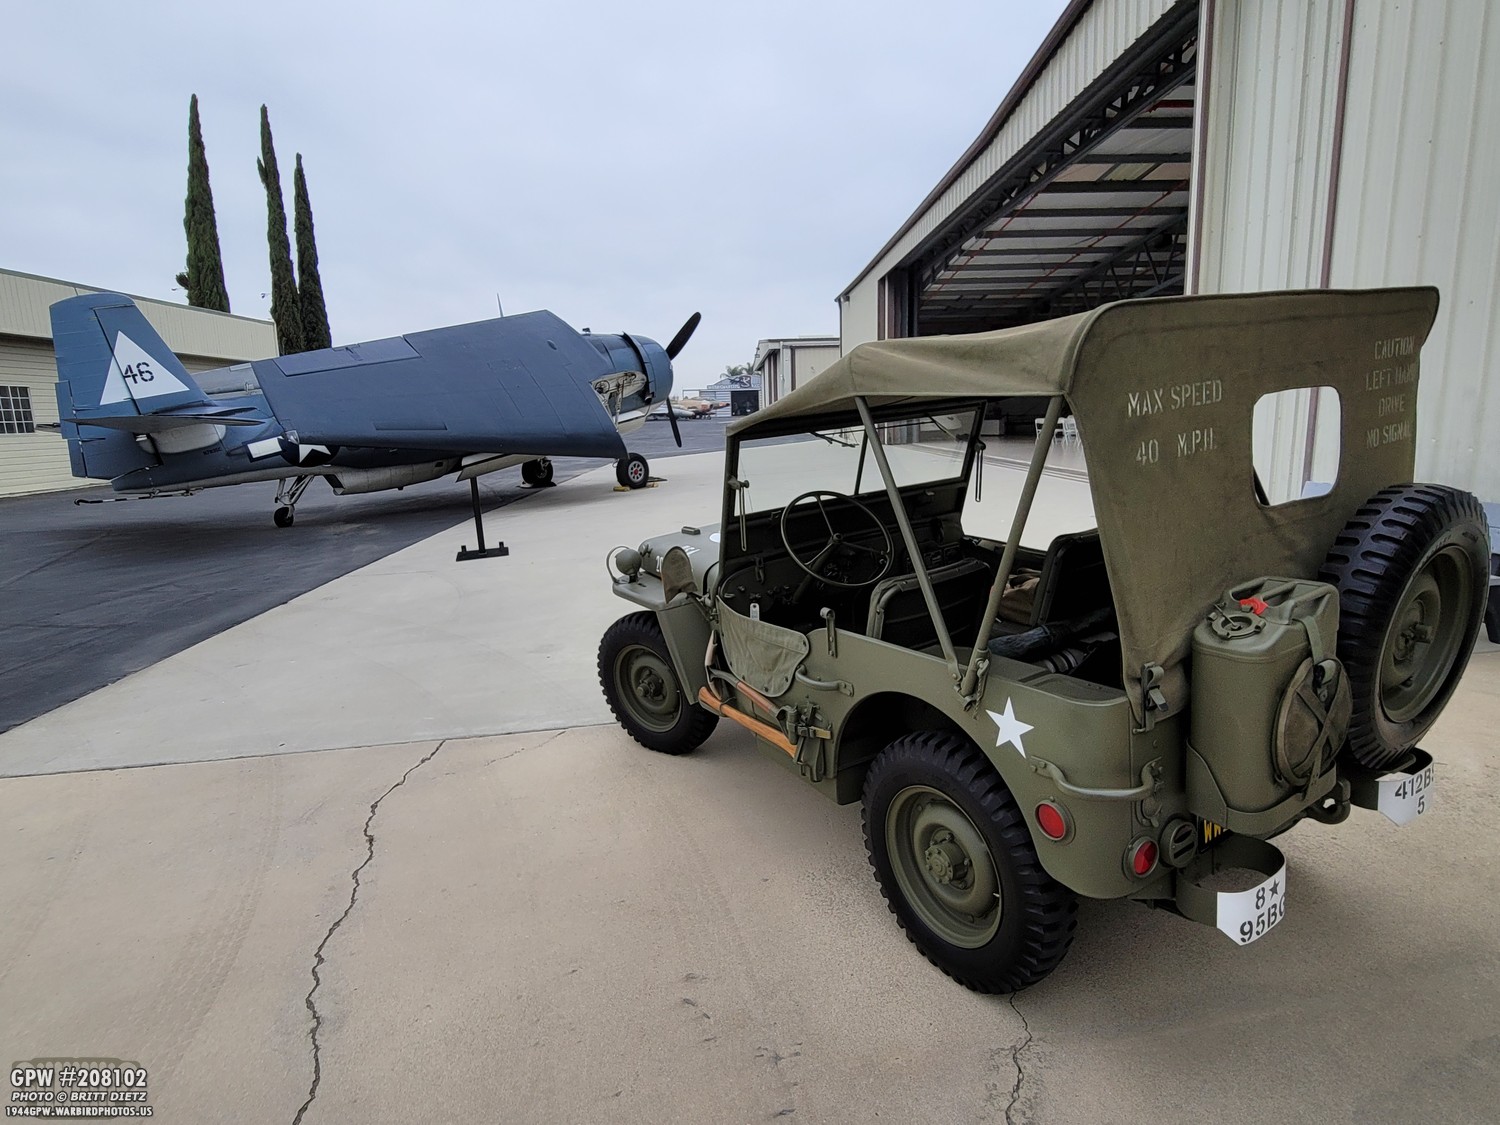
My 1944 GPW #208102 with 1945 Grumman TBM-3E Avenger. My jeep is actually older than this Avenger! Let’s dive into this week’s packed update!
On April 2nd, I took the Jeep out to Chino Airport, CA, for the monthly Hangar Talk event at the Planes of Fame Air Museum . It’s been a few months since I last brought the Jeep to the museum and I’ve not gotten shots of the Jeep with the Avenger yet.

Quite the sight pulling into the museum courtyard! Can someone get this ‘turkey’ out of my way? (that’s a joke, the TBM Avenger is nicknamed the ‘turkey’)
On display right near the main star of the event!

Surrounded by good company, a North American P-51D Mustang behind me.

And a second visiting TBM Avenger across the courtyard!

For the display this month, along with the standard Jeep info board I designed, I had an assortment of USAAF/USN items.
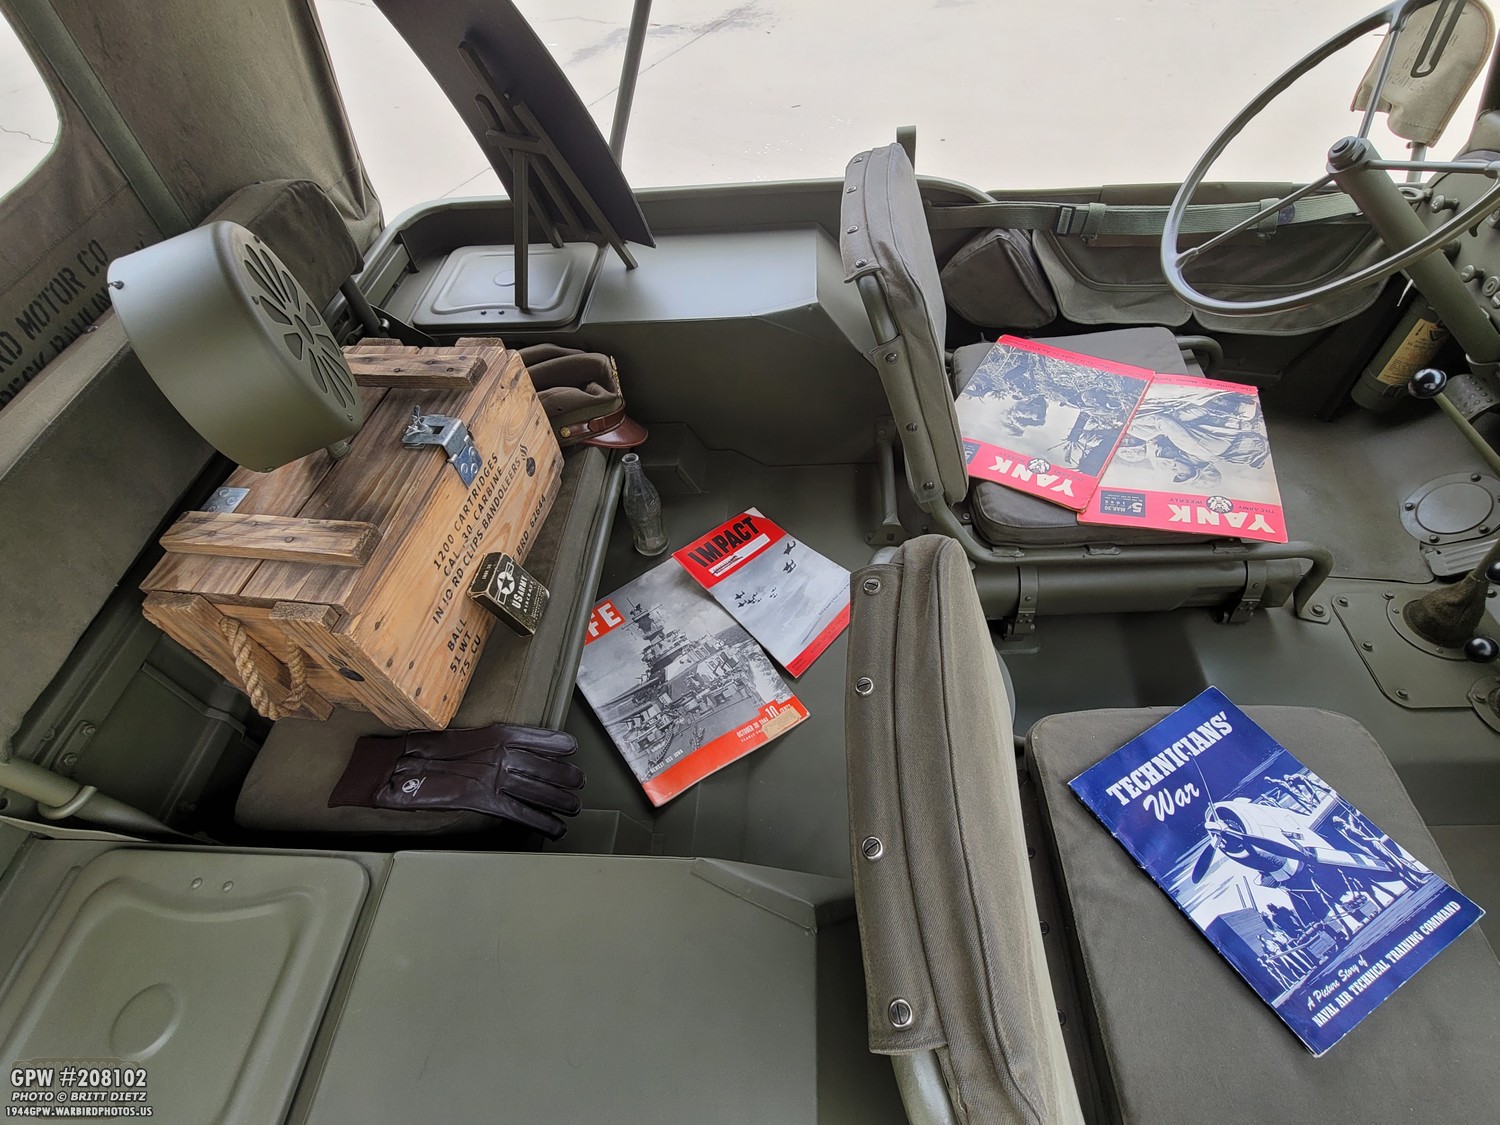
In the front seat I brought two Pacific Theater articled YANK magazines, and a Naval Air Technical Training Command magazine featuring a TBM on the cover.

In the back, I had my usual custom-built ammo crate radio (how to: https://www.1944gpw.warbirdphotos.us/blog/ammo-crate-radio-gpw-display-sign-flea-market-finds/ ) playing 1940s music and commercials. The battery has been amazing for it, I can have it run all day without even losing 10% of the battery! I also have some AAF items including a A-1 Glove, Crusher Cap, and Aircraft spotter cards. A wartime clear Coke (which was found on Utah Beach) that I got in France, and two more magazines with a USS Iowa LIFE magazine and a USAAF Impact magazine on the Pacific Theater.

These photos were all taken before the doors opened, so there was no crowds yet. But the Jeep always gets a lot of people looking at it and taking photos. It’s always a proud moment to see all the work you’ve put into something admired by crowds. I also love chatting with people about the Jeep and teaching them some things about it and the history. It’s the main reason I wanted a Jeep!

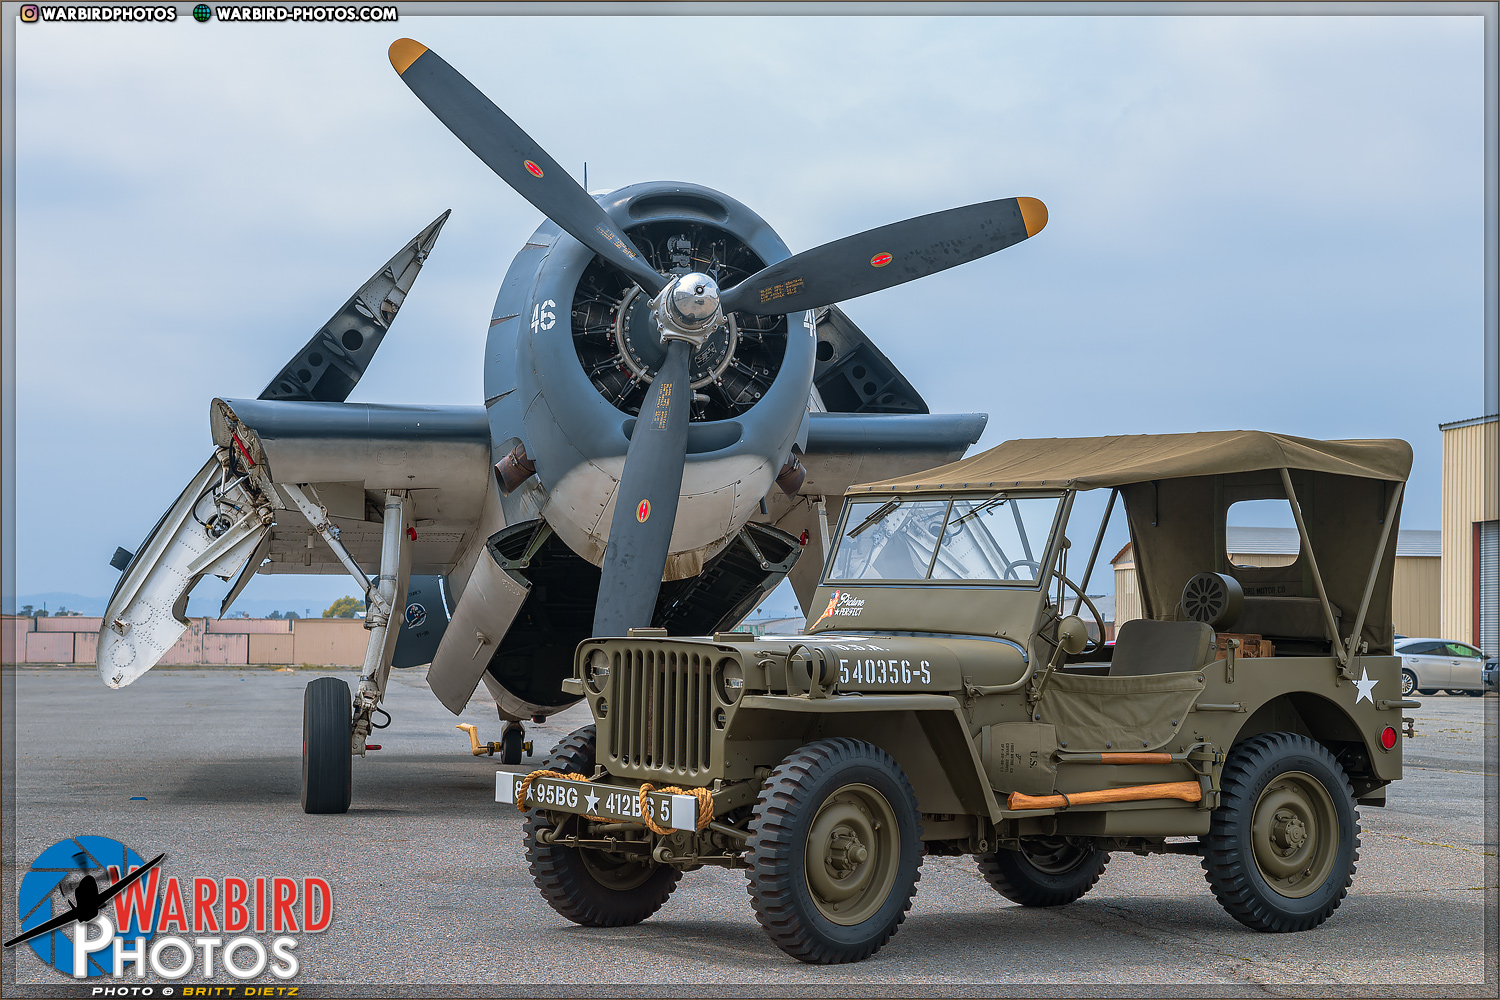
After the TBM Avenger’s flight demo, I pulled the Jeep out to the ramp to get some shots with the TBM. My goal is to get photos of my Jeep with as many different types of aircraft as possible!

This TBM-3E was built in 1945 in Trenton, New Jersey. It was meant to join the USS Franklin (CV-13) but the carrier had limped to the Brooklyn Naval Yard to undergo extensive repairs from fighting in 1944 off the coast of Japan. The war ended before the TBM, and the Franklin, could go back into service.
The TBM was then placed into storage moving between different Naval bases, including NAF El Centro, CA.

It was removed from Naval records in 1950 and was acquired by the museum in 1959. It was restored to flight in 1976.

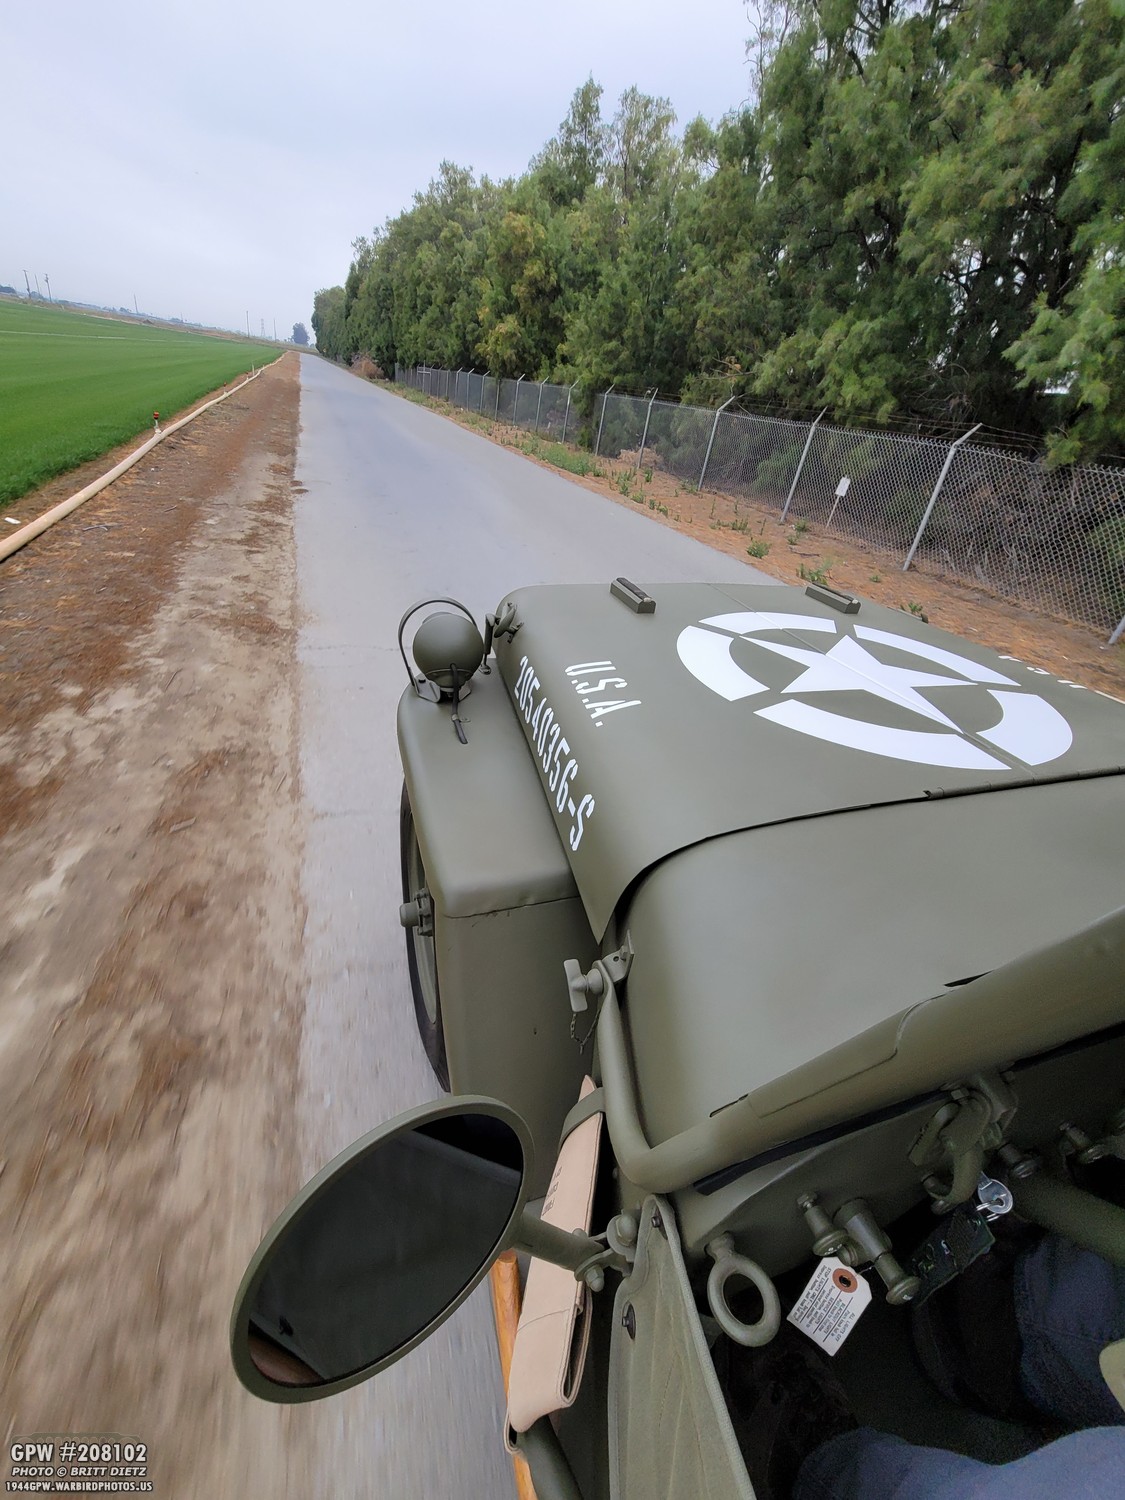
Driving on the surface streets are always a nerve-racking thing here in CA when you have a slow-moving vehicle and people who are in such a huge rush that they need to do 60+ (not on the freeway even!). I much more enjoy driving on the quiet perimeter road of the airport. No other cars in sight and a nice drive!
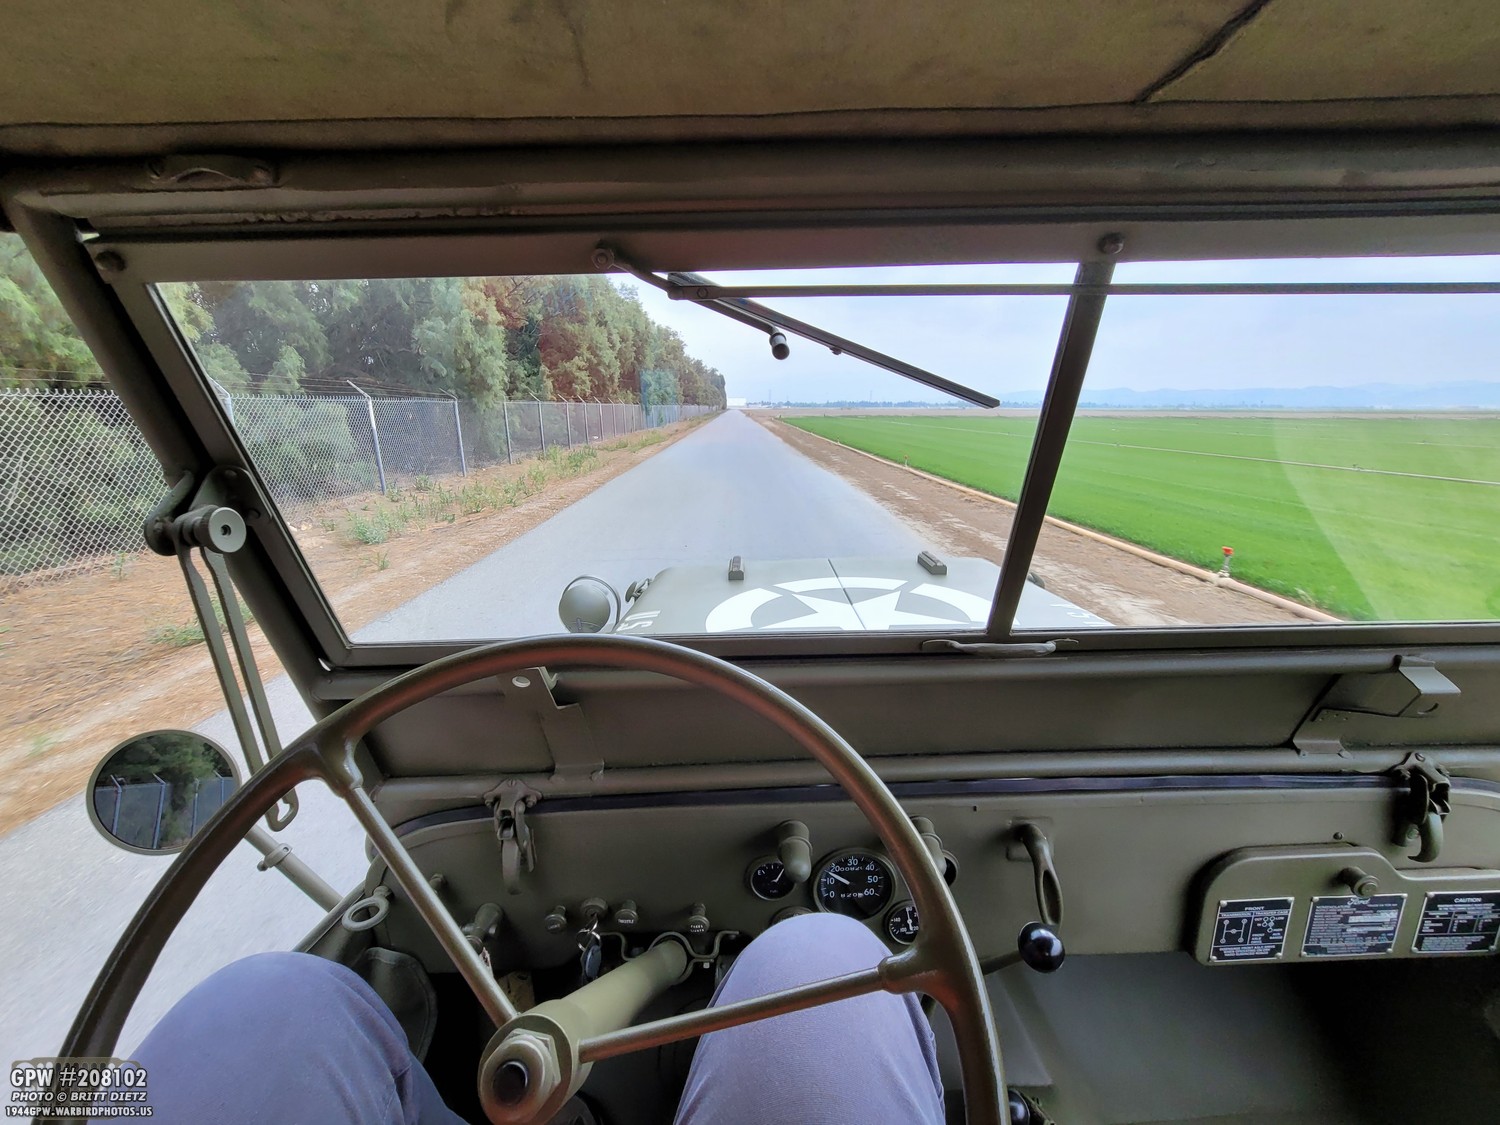
Some good news, if you look down to the upper right of the steering wheel column, you’ll notice the fuel gauge is still working!

In the last update, I discovered that my fuel sender float had a pin-hole-sized hole that had developed in the soldering of the two brass pieces. This allowed fuel into the float, and made it sink. I dipped the float, just to test, in Red Kote fuel liner to seal up that hole.
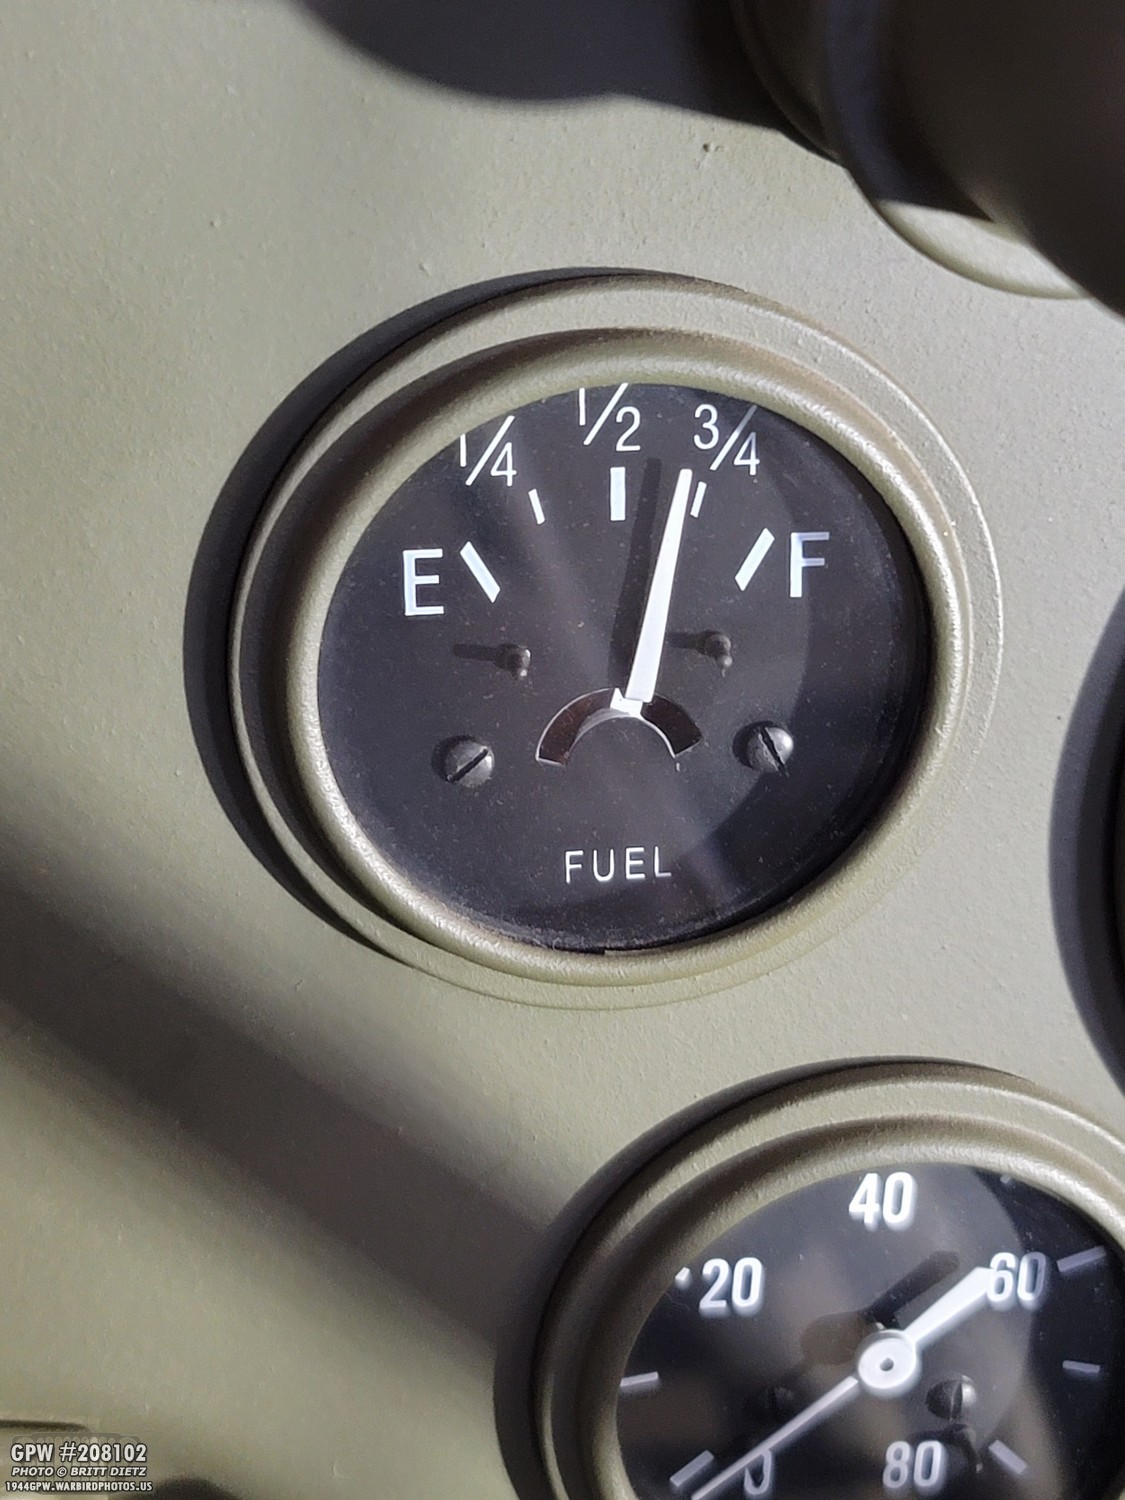
Naturally, it’s been working great for over two weeks now! So, even though I’ve already ordered a replacement, this one is working. Go figure.

And after I topped off the Jeep a little bit, you can see, compared to the last photo, that the fuel level did rise!

That being said, I did order a new solid one-piece plastic float from Kaiser Willys Auto Supply.

This is a better solution, overall, for the fuel float. As my friend Roger has said, as long as I have this plastic float, the Red Koted brass float will continue to work fine! Haha. So, I’ll keep this in reserve if the brass one does decide to quit again.

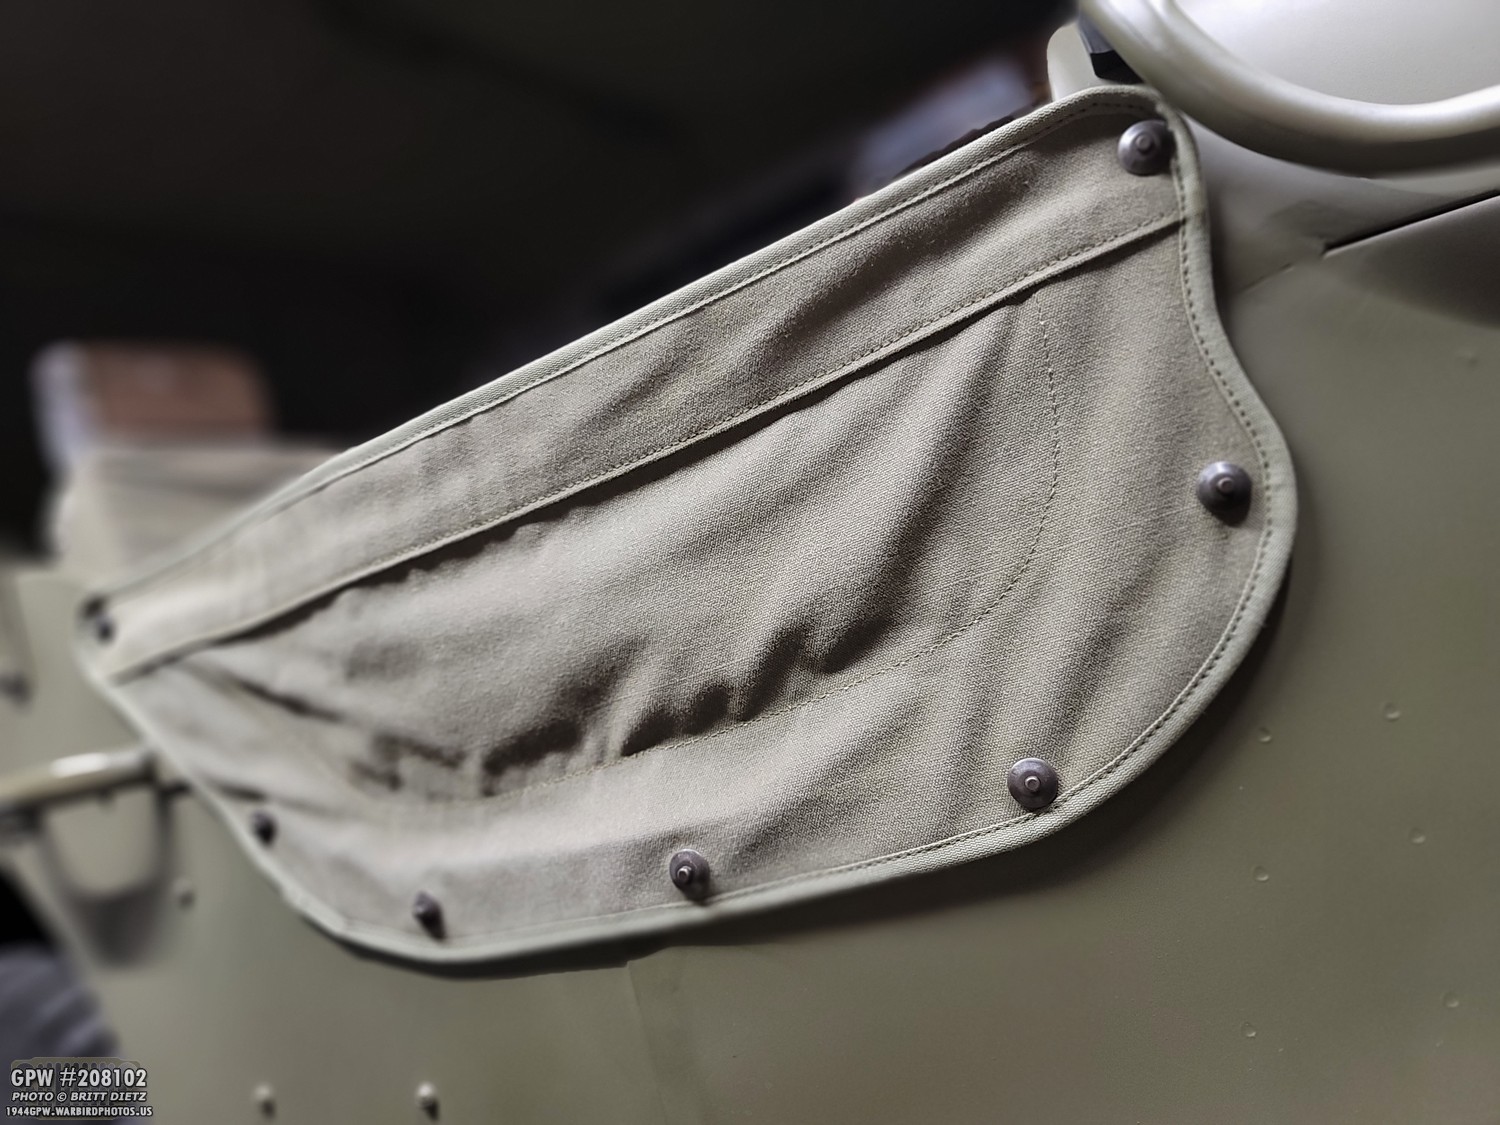
So, one thing that’s bothered me a bit lately is my shovel cover fading in the sun. On the nicer photos I shoot with my DSLR, I do touch up the OD Green color so it doesn’t stand out, but I’ve gotten tired of spending time doing that and I’ve meant to do something about the fading. Now yes, I will say (as always) that this shovel cover is a fantasy item. But, it does protect the paint from the shovel and, I think, looks pretty neat!

I didn’t get many photos of the process, but I decided to try and dye the cover using some Dark Green and Dark Brown RITE dye. I used a lot of Dark Green, and only a little bit of Dark Brown. Here’s the result after 35 minutes in the hot water. Looks a ton better! But it always dries lighter.

Thankfully, it dried a nice color! It’s a bit more brown than I’d like (probably could have used more Green). But it’s much better than it was, and no more photoshopping needed!

A few months ago, I got ahold of an actual WW2 Dodge ignition switch (that was totally dead and unrepairable), and so I had an idea to turn it, along with part of a H700 key, into a decorative prop that I could put into the key slot when the Jeep is on display to simulate it being a knob ignition switch, as it would have had. The H700 key was modified so the key could not be turned to start the Jeep.

As I was getting out of the Jeep a few weeks ago, I dropped this knob, and the key broke out of the knob. Doh! So I decided to completely redo it. I took another H700 key and ground down the ridges again. This time, I Dremeled a deeper slot into the knob so the key could go inside it more. I JB epoxy glued it in place, and then used some JB weld steel to build up the base to lock in the Key. Much stronger and better now.
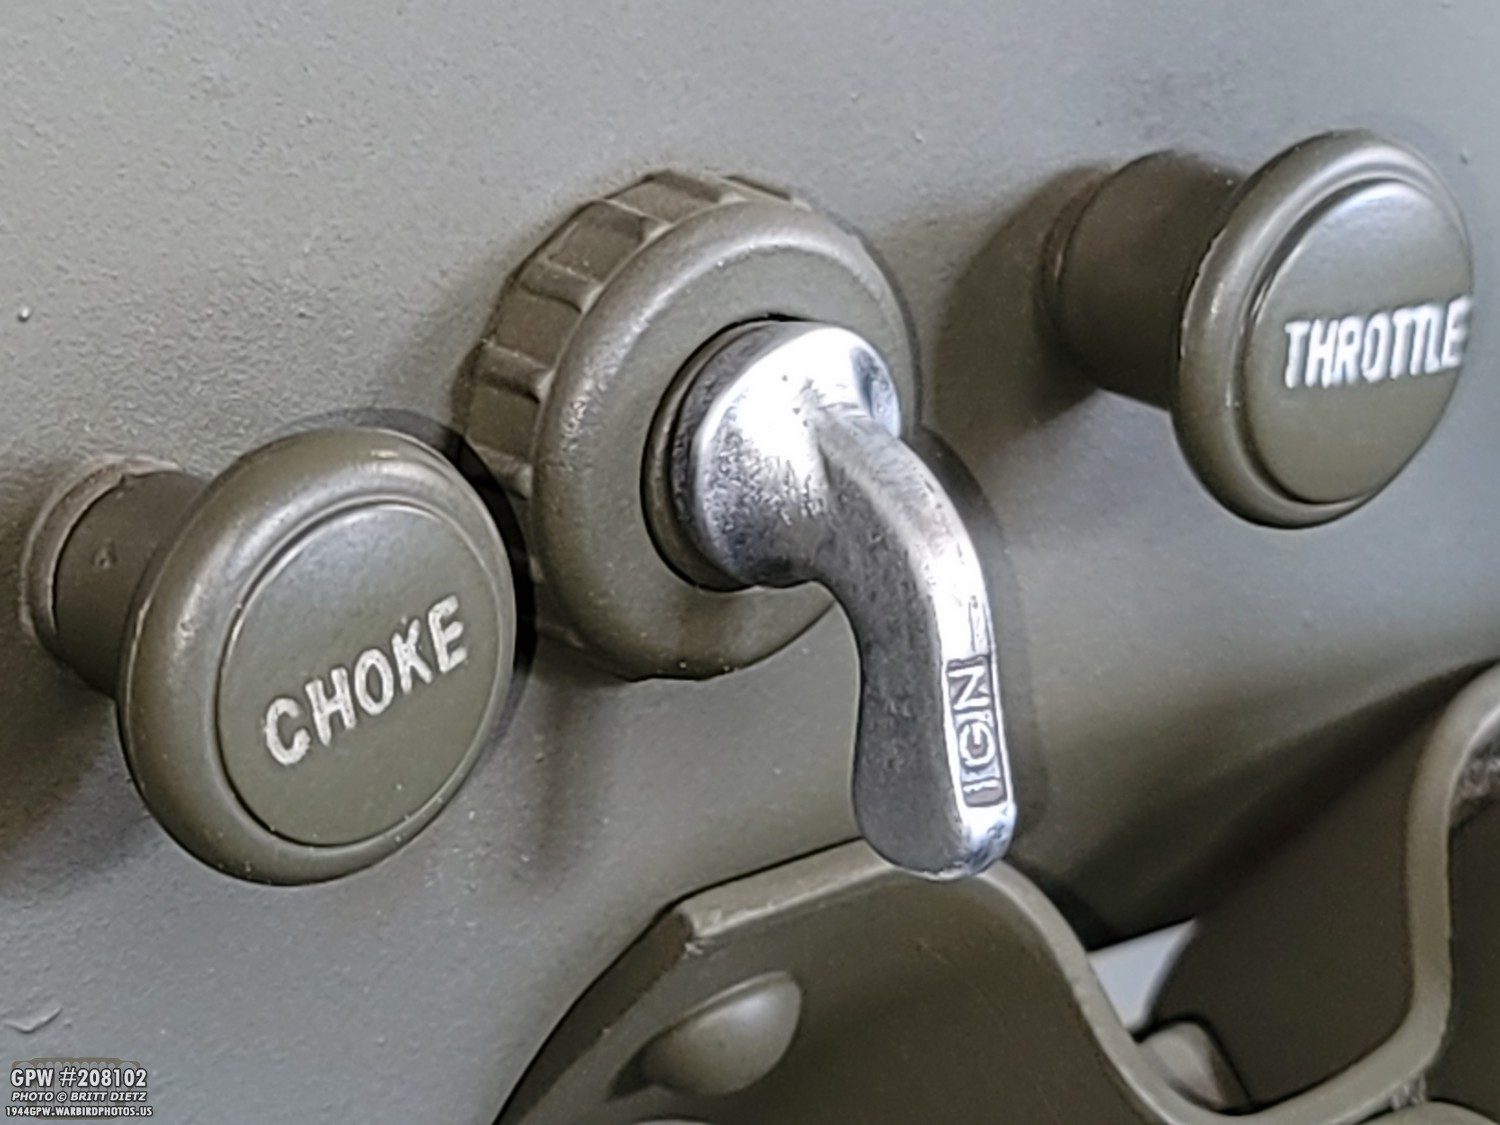
It’s not painted, but it still looks great. I had a thought after I did all this… why not make a mold and get molded copies made? So I’m talking with a friend now who’s going to help me make a mold of this and, using some strong material like cast steel, etc, I’m going to make some copies that I’ll offer for sale for those who might want one. They will work great for when Jeeps with keyed ignition switches are on display!

Since I used one of my spare H700 keys, I went ahead and ordered another one, this time I decided to go with one of the nicer ones from Ron Fitzpatrick Jeep Parts that are an exact copy of the originals with the larger H700 engraving, correct diamond logo on the back, and the aged look.

Another fun set of goodies I got this week are more technical manuals for Jeeps (and beyond) from eBay. Here’s all the manuals I got this time around. Top right clockwise: 1945 Ord 9 (thinking it’s repro), Post-War 1952 TM 9-1825B on Auto-Lite Electrical Equipment, a very nice 1944 TM9-803 manual on Jeep use and care, 1944 TM9-1829A on Speedometers/Tachometers/Recorders, a 1944 TM9-1826A on Carter Carburetors, a 1956 TM21-305 Manual for the Wheeled Vehicle Driver, and a 1971 TM9-2320-218-10 Operator’s Manual for M151 Mutts and other vehicles.
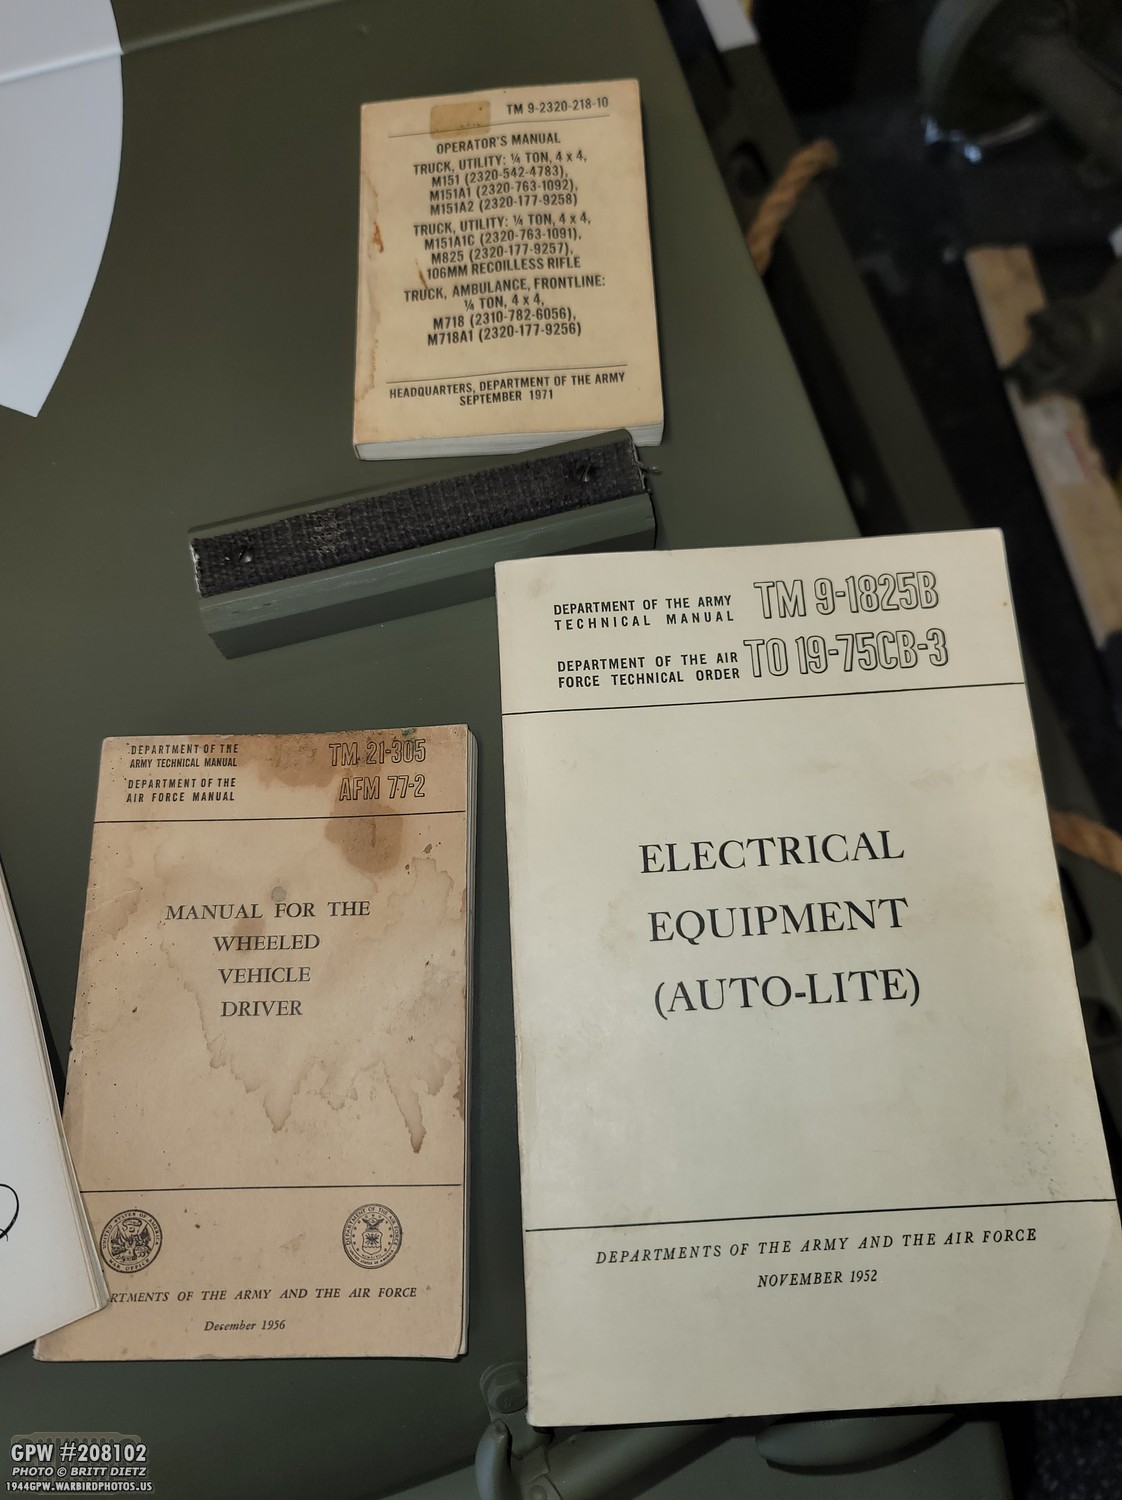
Here are the post-war manuals a bit closer. These I don’t really need, but I’ll glance through them all.

The wartime manuals go nice with the collection of other manuals I’ve started to amass! And the two nice comprehensive manuals from Portrayal PresS on the left.

I’m slowly getting all the ‘extra’ manuals for the various items on a Jeep… the Speedometer, Carburetor, and Oil Filter.

I now have three Ord9s. The original 1945 Ord9 on the left, what I think is the new Repro one in the middle (same as the left one), and a 1949 Ord9 on the right. I have two TM9-803s. One from 1944 and one from 1947.
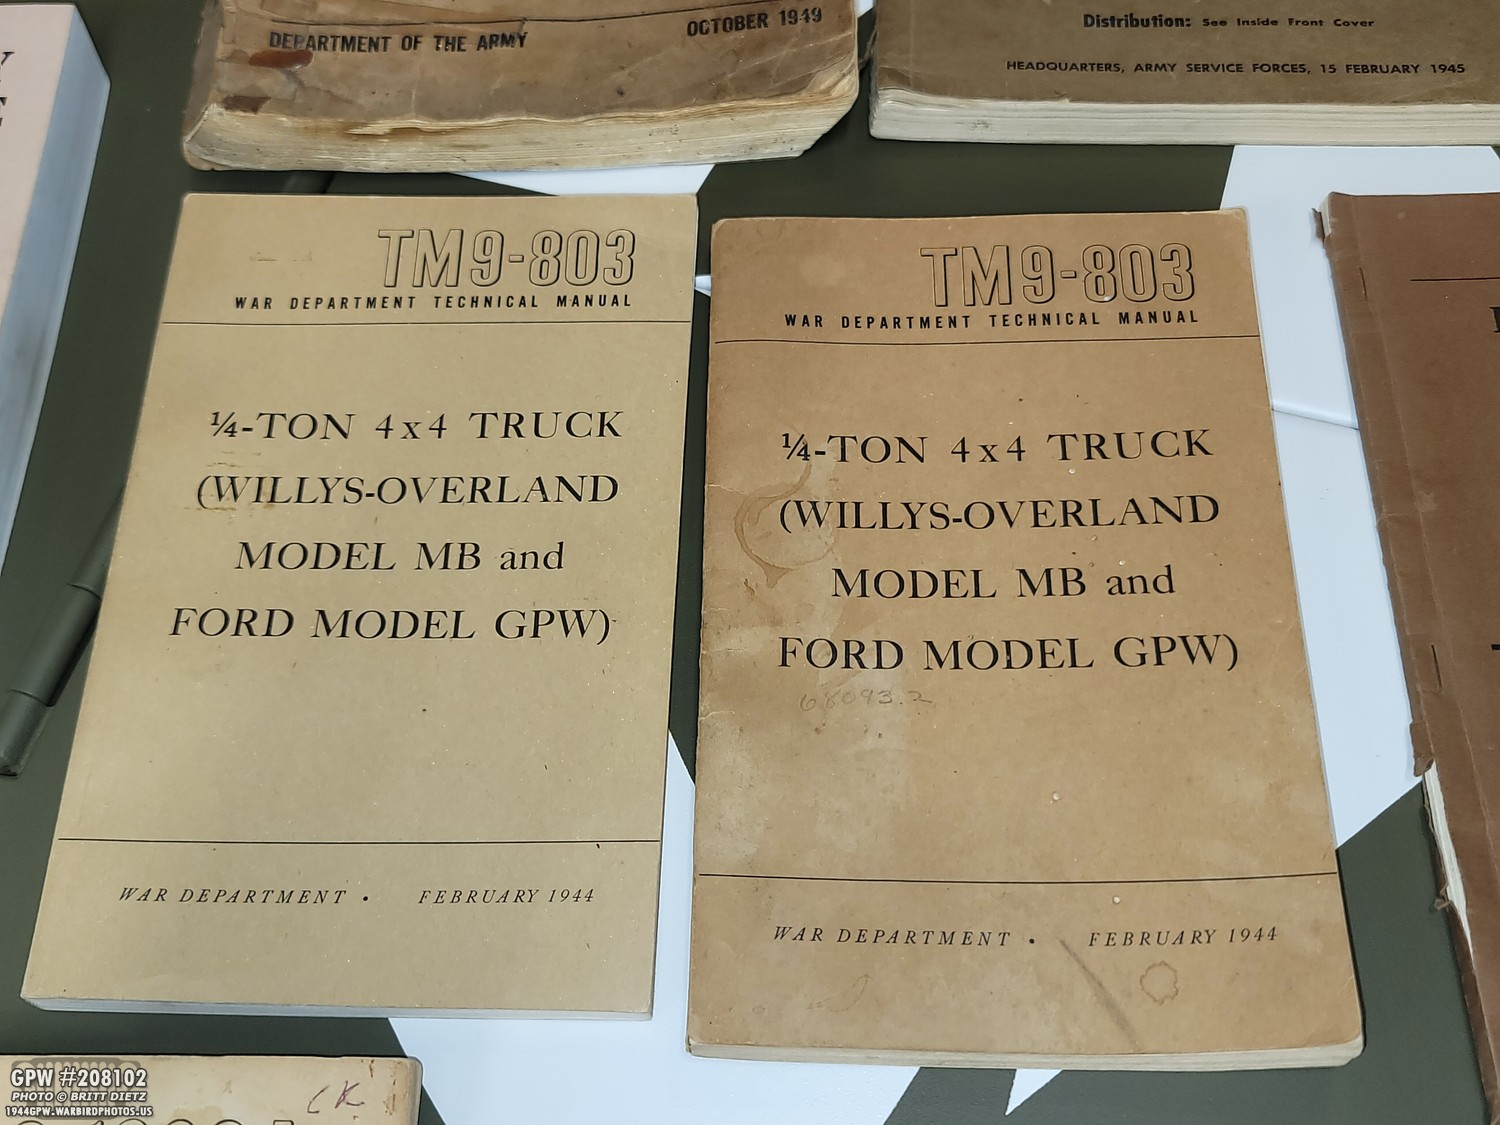
Here are both the TM9-803s. The left is the 1944 one, and the right is the 1947 one. Pretty much no difference between the two that I know of.
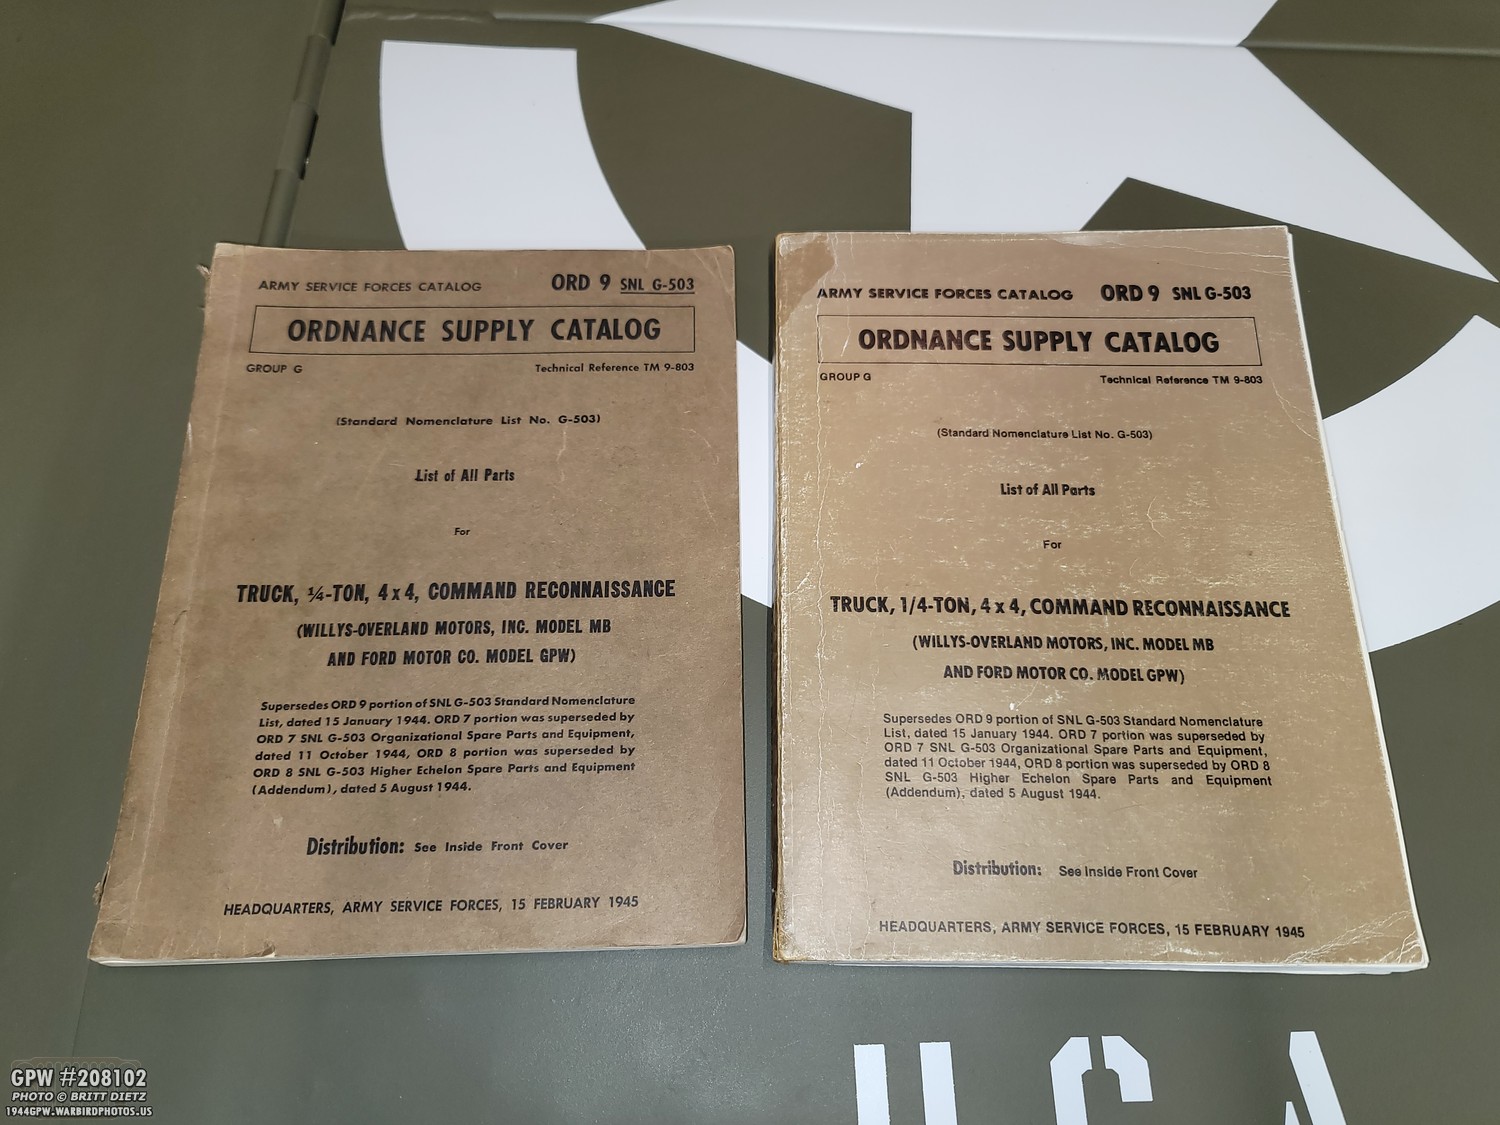
So now, looking at the Ord9s from 1945. I know the left is an original, but the one I just got on the right has a few differences that make me think it’s a repro. While it looks old, the cover is made of a stiffer material than the left original. And it’s more of a muted gold color.

Top photo: on the left is the new one, which has satin thicker white pages with less quality graphics. The right is the original that has higher resolution images and more typical browning paper. Bottom photo: Top is the original, bottom is the new. So all this makes me think that the new one is repro. Not a huge deal, I can use it to look up things instead of handling the original one. The original can stay safe in the bookshelf!

Moving on to the main feature: the Fuel Strainer! Here’s a look at my friend’s Jeep. He hasn’t started a full restoration of his Jeep, and it’s currently sitting at the Planes of Fame Air Museum. I’ve been helping him here and there keep the bad rust away and start to figure out how to dive into the restoration of it. I volunteered, since I miss restoring items, to work on his fuel strainer (fuel filter) which is on the far left with the two tubes coming out of it. As you can see, this strainer is far from looking good, and it was leaking fuel from the bottom.

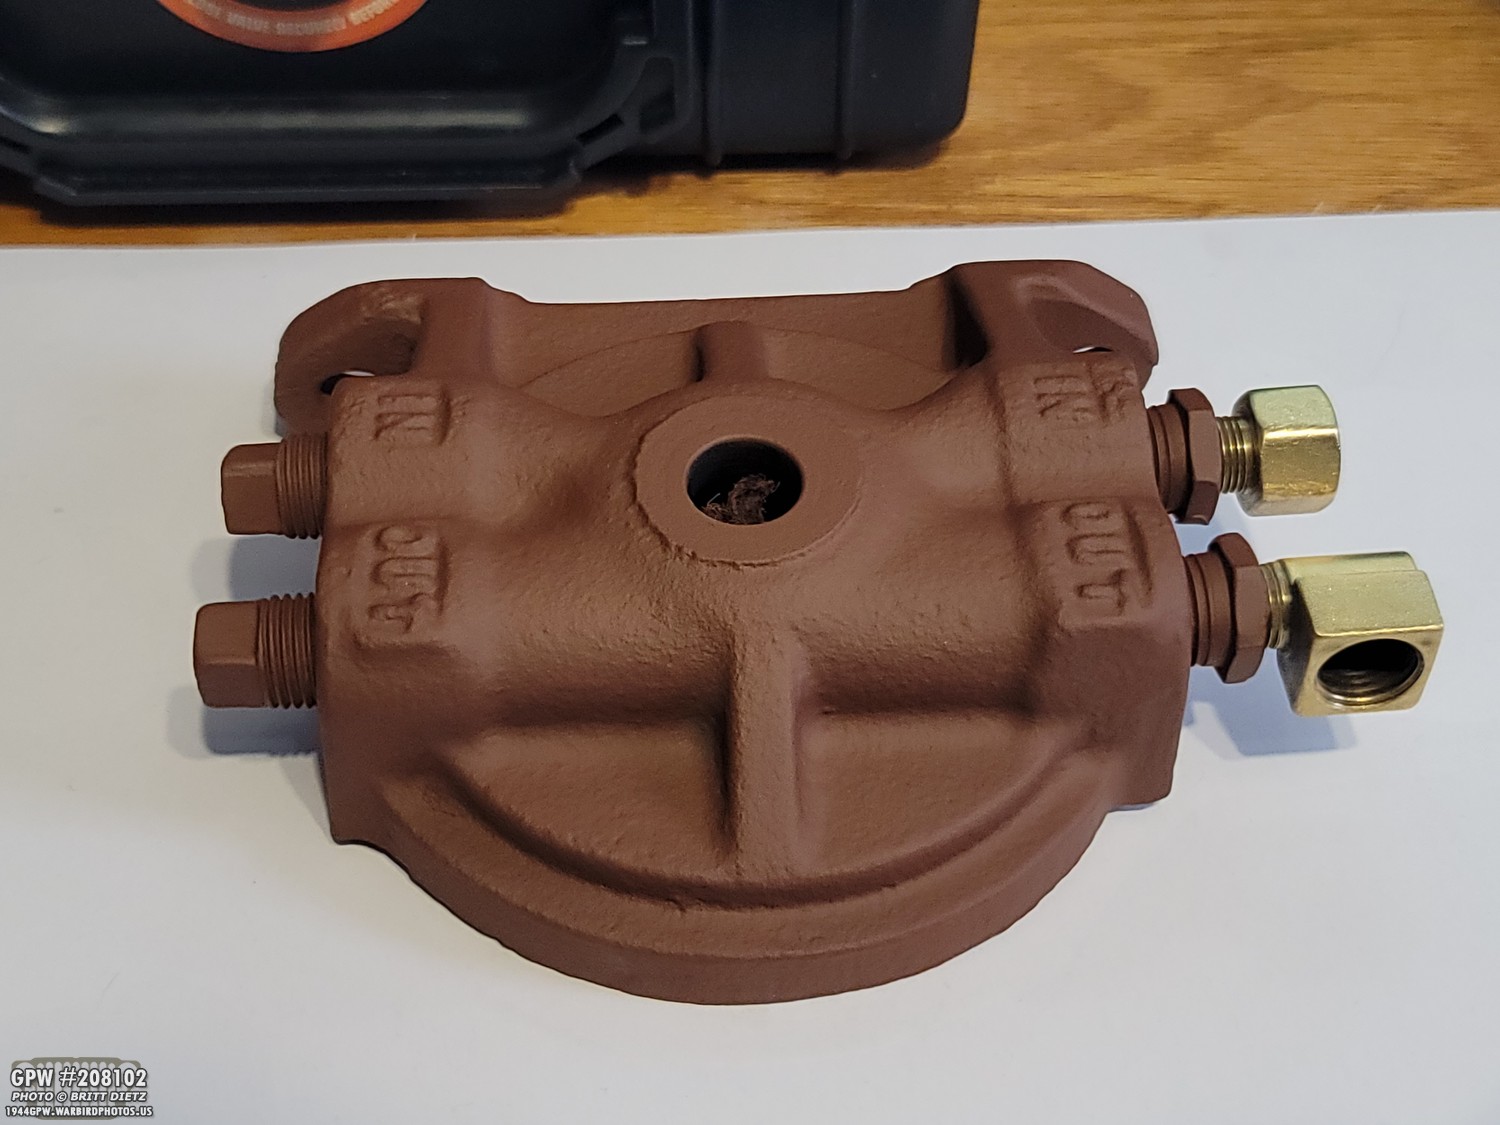
So, I took the whole assembly home and took it apart. I inspected all the items (and sadly, didn’t get photos except this), before dunking them all in a bucket of gasoline to clean them up. It has some interesting markings on the lid with the correct 1504212 Willys MB lid number on the inside.

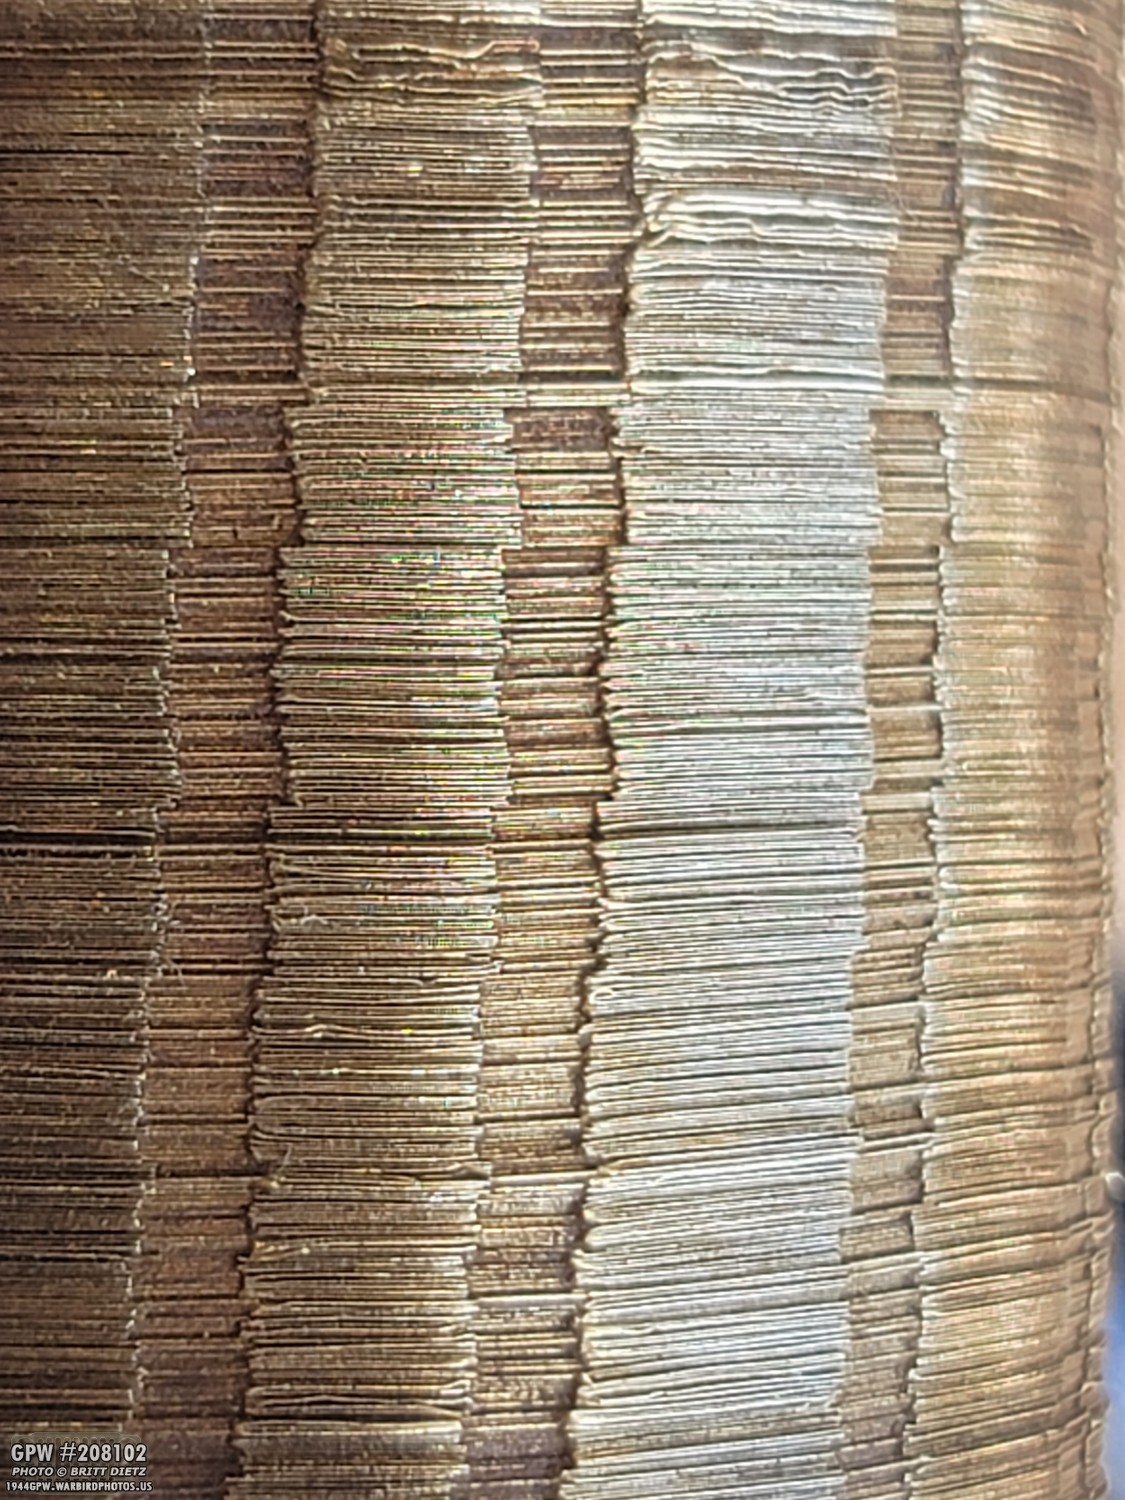
So, how does a fuel strainer work? I made this diagram for an upcoming article for the MVPA so I thought I’d share it here. Fuel comes into a tunnel in the lid via steel pipes from the fuel tank. The suction from fuel pump vaccums it in. From there, the fuel is dropped into the bowl. In the middle of the bowl, sitting on a spring so that it’s pressed up against the lif, is the strainer itself. It’s made of hundreds of paper thin brass disks that are hollow in the middle and have slots all around the circumference. The fuel will be able to travel between the disks (microscopically), but harmful particles will not. The fuel then travels through those slots up into the top area of the strainer where the cleaned fuel is sucked out another tunnel and out to more steel pipes that eventually go to the fuel pump. Three gaskets (large one around the inside lid to keep the bowl lid from leaking, one on the top of the strainer to keep the bad/clean fuel from mixing, and one under the top bolt to keep the fuel from leaking there.

I had forgotten about the fuel filter in the bucket of gasoline for a few months, so once I took it out, just a quick wire wheeling and we have something that looks almost brand new!

Here’s the inside of the lid after cleaning. I removed the now super stiff gaskets, those will have to be replaced with new ones. You can see the two holes where the fuel is brought in out (one side is capped off). On the inside larger opening, you can just see the two other tunnels that suck the fuel out.

I cleaned up the brass fittings and used a drill wire brush to clean up all the threads.
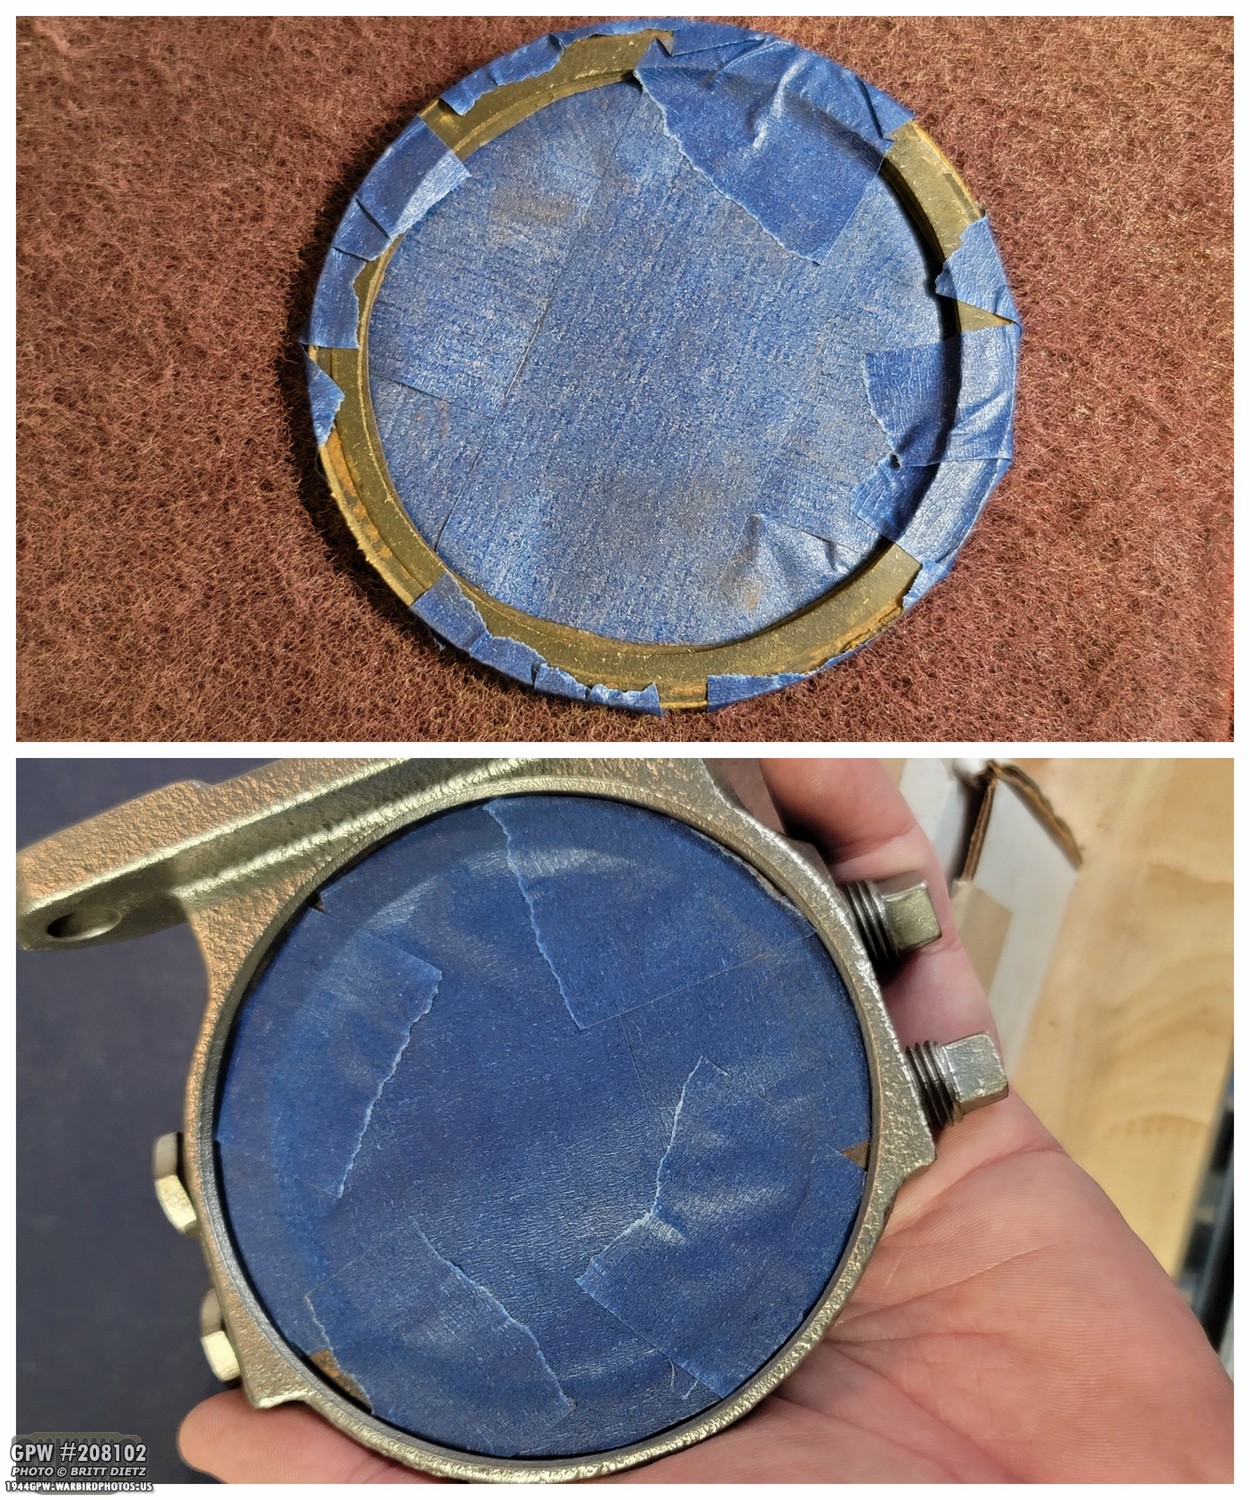
Using the large gasket, I covered it with painter’s tape as it’ll be a perfect protector for the inside of the lid when I prime it all.

All primed!
Two coats of primer, and it’s ready for OD Green! I put the brass fittings in just to keep them together with the lid, for now.

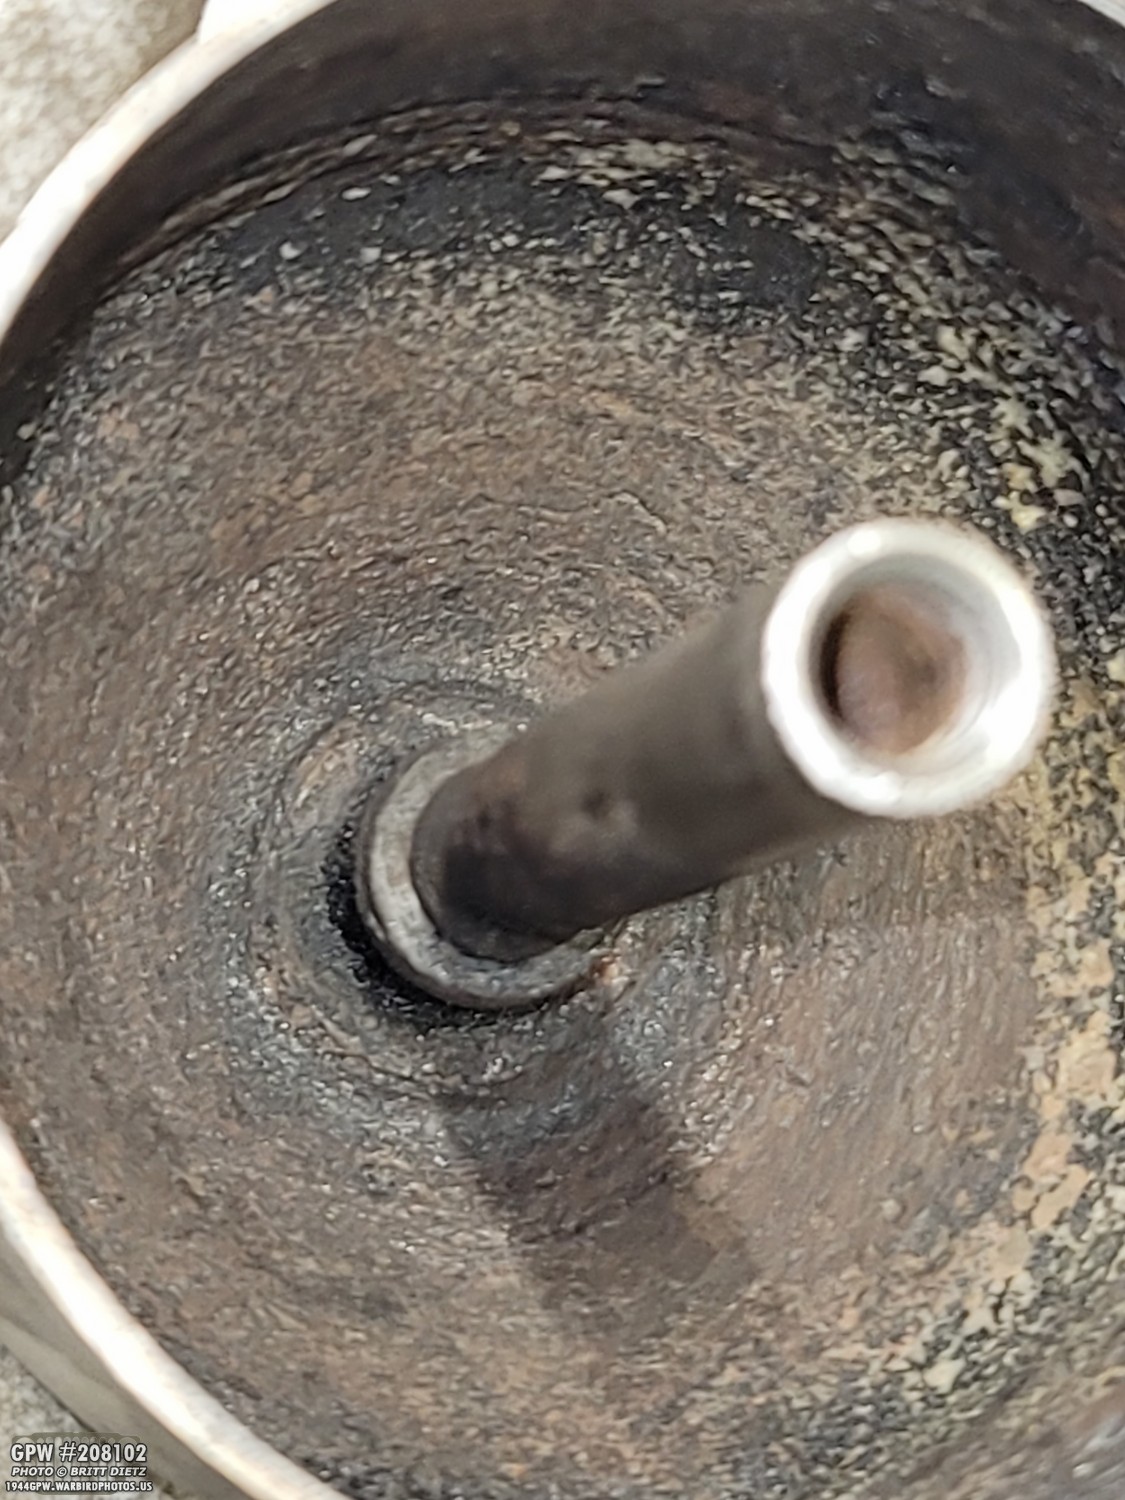
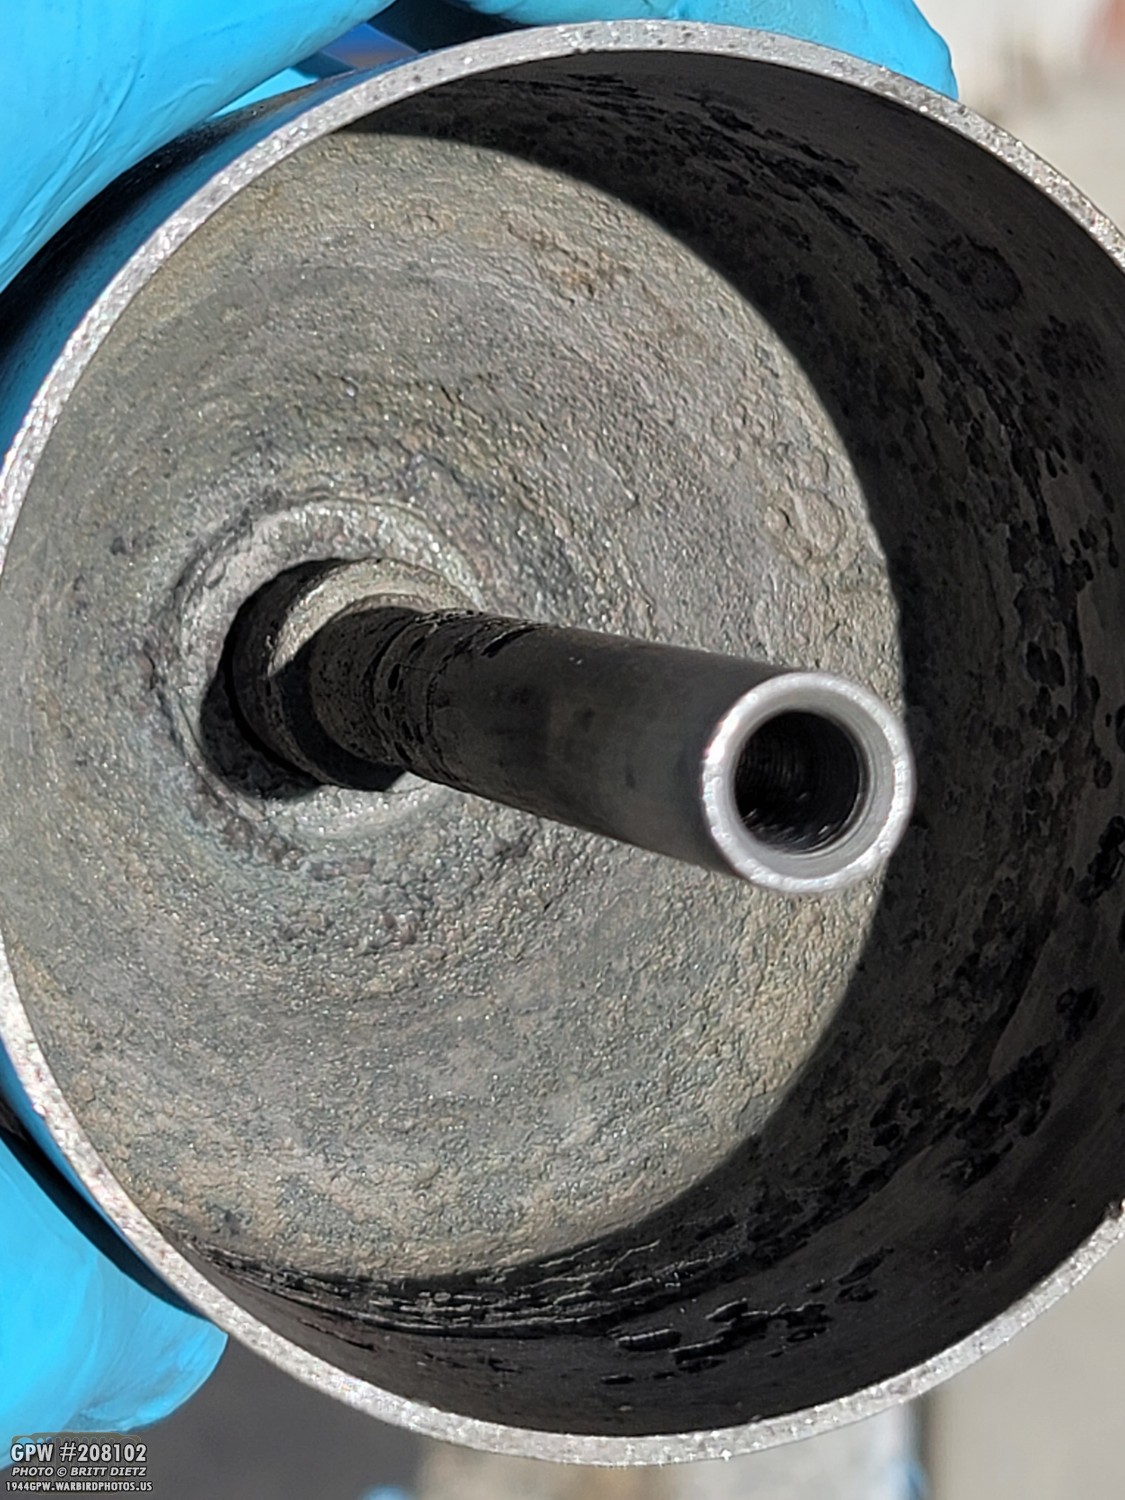
Moving on to the bowl, the inside was pretty nasty. Even with a few months of soaking in the bucket of fuel, it had all sorts of crud in there, and rust. To find the source of the fuel leak, I’d need to remove all that.

Wire wheeling with a small brush did nothing. Using a wire brush did nothing. So, I thought I’d try and remove the brass plug at the bottom, so I started to heat the brass to break it free. While doing that, I suddenly noticed the inside starting to catch on fire. Not because of fuel remnants, it had been cleaned several times at this point. It was some sort of coating in the bowl. So, I put my torch in there and hit it for a while letting everything burn off. This was as I was burning whatever this stuff was off. I noticed it was starting to flake off revealing metal.
It took a while, but I was able to burn most of it off till it flaked off. Using a wire brush, I was able to get most of it out.

Here’s what came out of it. A large pile of something? I made sure not to breathe the fumes or this dust.
Now that it was mostly metal, I could sand blast it. Here’s the result. Much better, all metal and no crud/rust!

As you can see, though, there’s some heavy pitting. It’s still structurally sound, though. So my first thought was that I could Red Kote the bowl and stop the leak. But I first needed to find where the leak was…

The outside of the bowl looks really great.

If you didn’t look inside the bowl, you’d think it was a brand new assembly!

So looking inside with the bowl pointed at the sky, I spotted not just one little hole, but a whole crack.
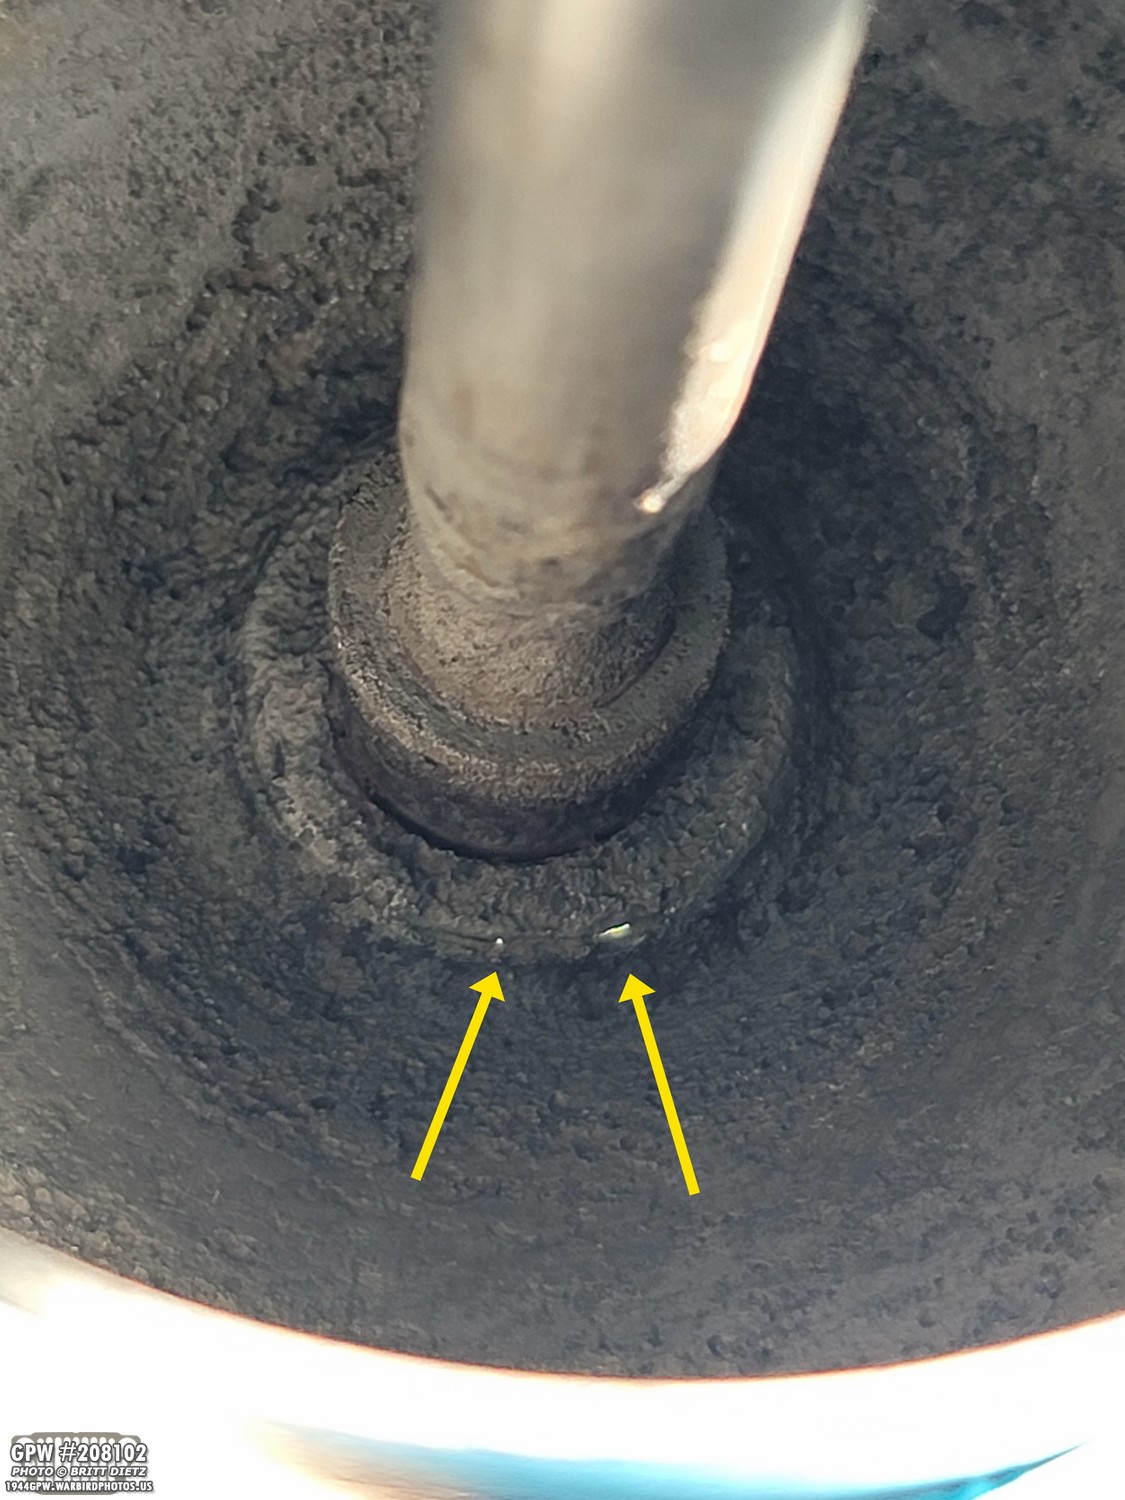
On the other side, there were two more holes. So whatever the crud was in the bowl was covering these rusted out holes. Probably would have eventually opened up with more leaks. This presented a major problem. I couldn’t just Red Kote this, as structurally there’s pressure from the strainer and spring on this center shaft with the lid. So it’s possible that more rusting could break the whole center shaft and bottom! So, I gave my friend the bad news that he’d have to buy a new bowl. He said that was okay, so I said if he didn’t mind, I wanted to try and fix this for fun. He said okay.

It’s not pretty, and I didn’t think it would go as well as it did, but I was able to weld the bowl and seal up the holes along with reinforcing the center! Seriously, when conversing with my friend Roger on the phone, he did not think I would be able to weld this, that it was so pitted it would blow through. I was surprised! It’s not pretty as the space to get the welder in there is very small and tight.
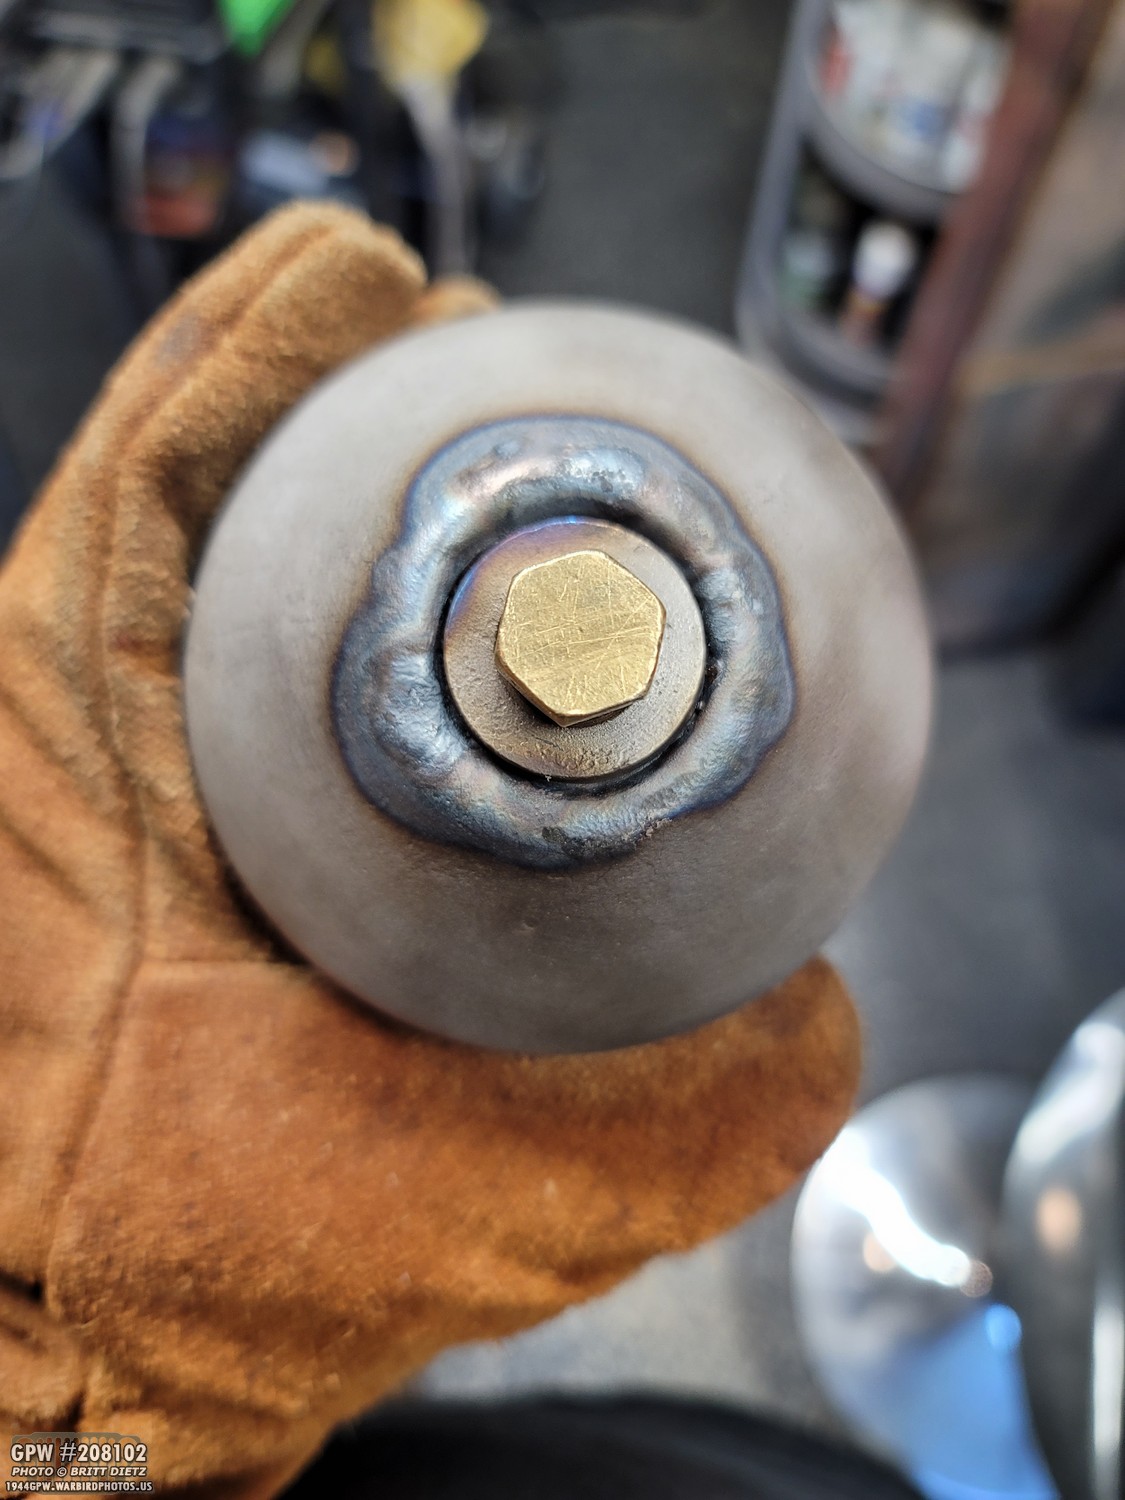
And just in case anyone is not sure, the outside shows very good weld penetration. It’s nice and solid!

Just in case there were any pin-sized holes I missed (I held it up to the light and slowly inspected the entire bowl and didn’t see any light) and also help reinforce the pitted walls, I would still coat the inside with Red-Kote.
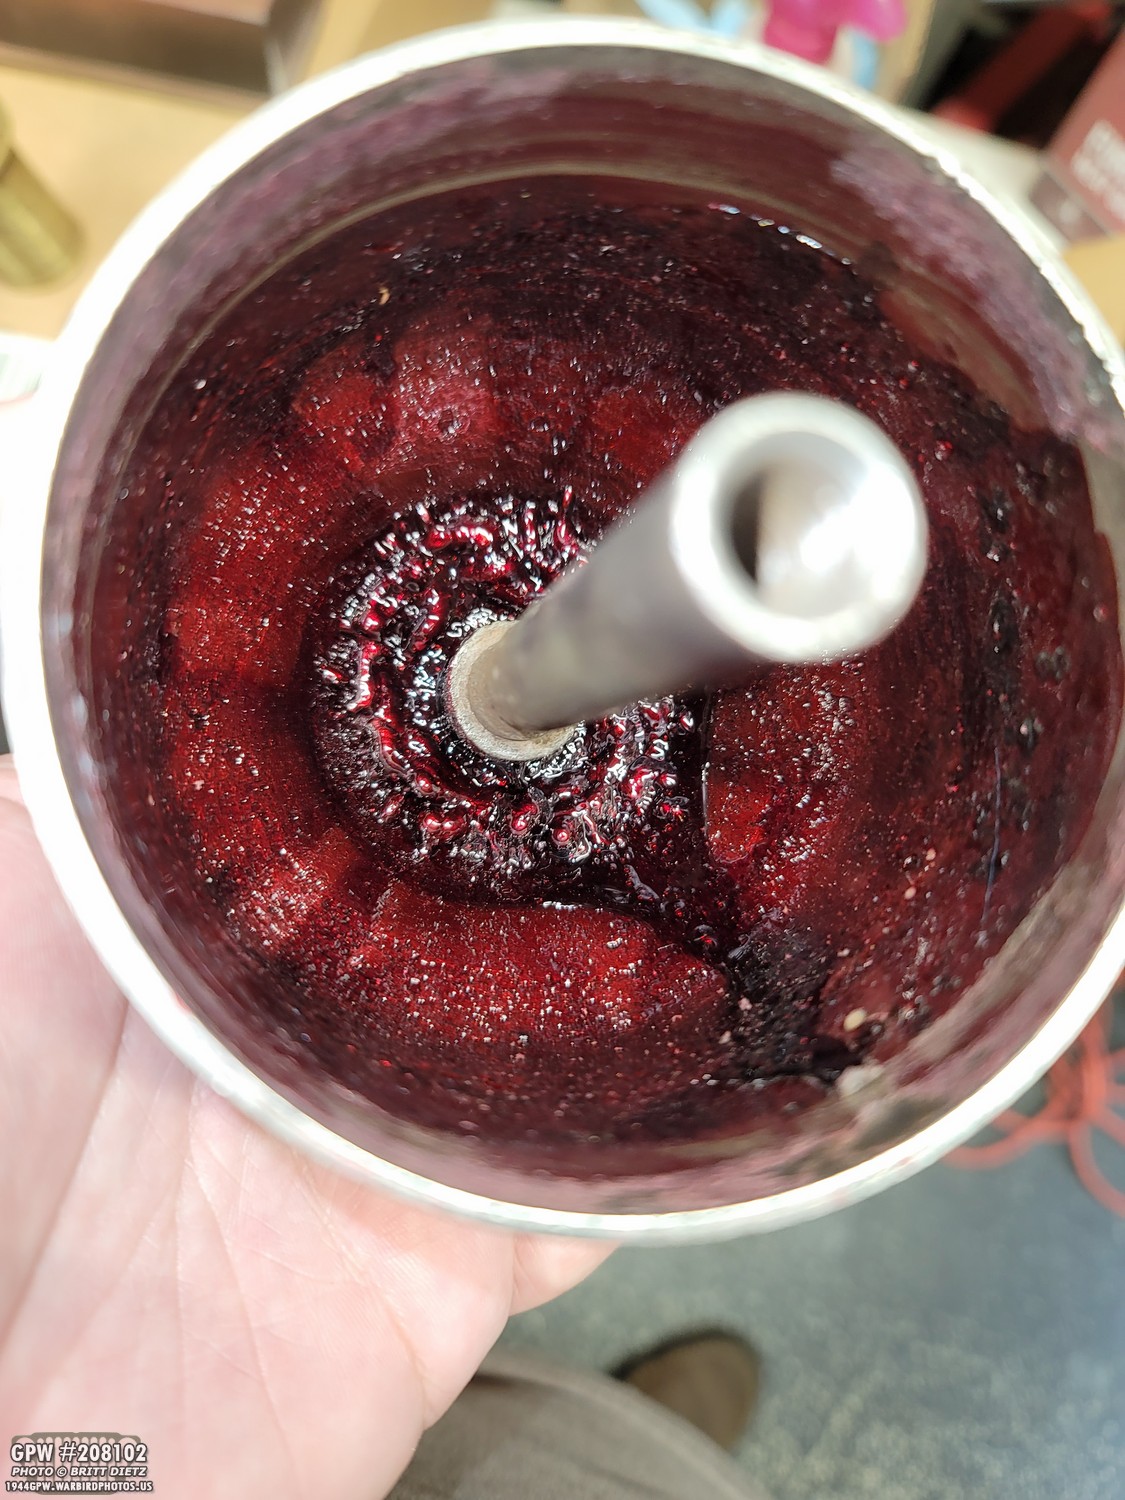
It’s not pretty either, and looks like the inside to some alien creature, but I got everything coated. As I type this, it’s almost been a week since I coated it, so this weekend I’ll put some fuel into the bowl to check and make sure there’s no more leaks. I think this bowl is ready for another 70
years!

Now, I could have kept the outside bare metal, as it should be. But these bowls rust in a hurry. So I’m going to do what I did to my Jeep’s bowl and paint it to look metal. First, red oxide primer.

Then the magic is this Rustoleum Metallic flat antique nickel spray paint. It does a great job making it look bare metal.

See? Looks bare metal! Even with a metal texture. So now no worries about rust, and it’s easier to clean. It’s still wet here.

Once dry, it’s a nice natural sheen to it.

Now for the AC strainer decal. I happened to have a spare that I didn’t use. It’s a water decal, and perfect for the Willys strainer. After letting it sit for 30 seconds in luke warm water, it was easy to slide the decal off.

After putting the decal on the bowl, I used MicroSol to help set it and contour it to the bowl’s texture.

After letting it dry a little, I wiped off excess water/micro sol.

And then I sprayed a satin clear coat over the entire outside of the bowl. Locks in the decal so it can’t be removed, and protects the antique nickle! This bowl is ready to go!
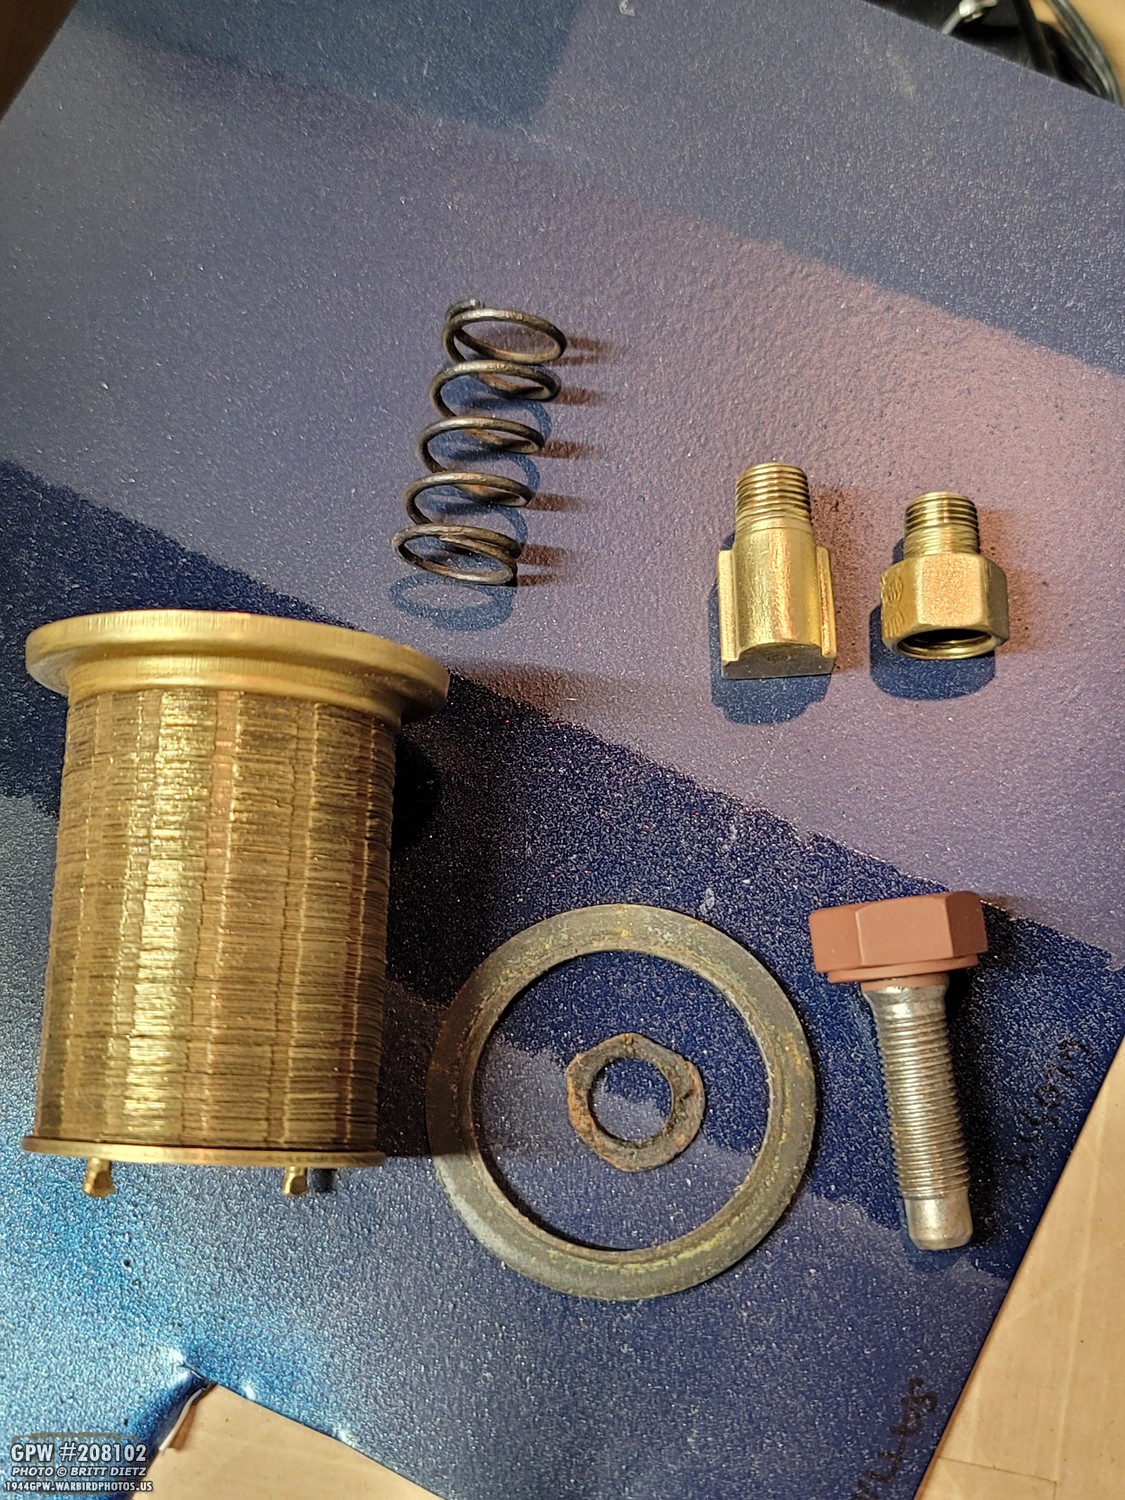
The rest of the strainer items include the spring, the brass strainer with all the disks, the top large bolt for the lid, the input/output brass fittings, and the gaskets (only the smaller two of the three shown here).

The strainer was a bit dirty, but just needed some light cleaning.
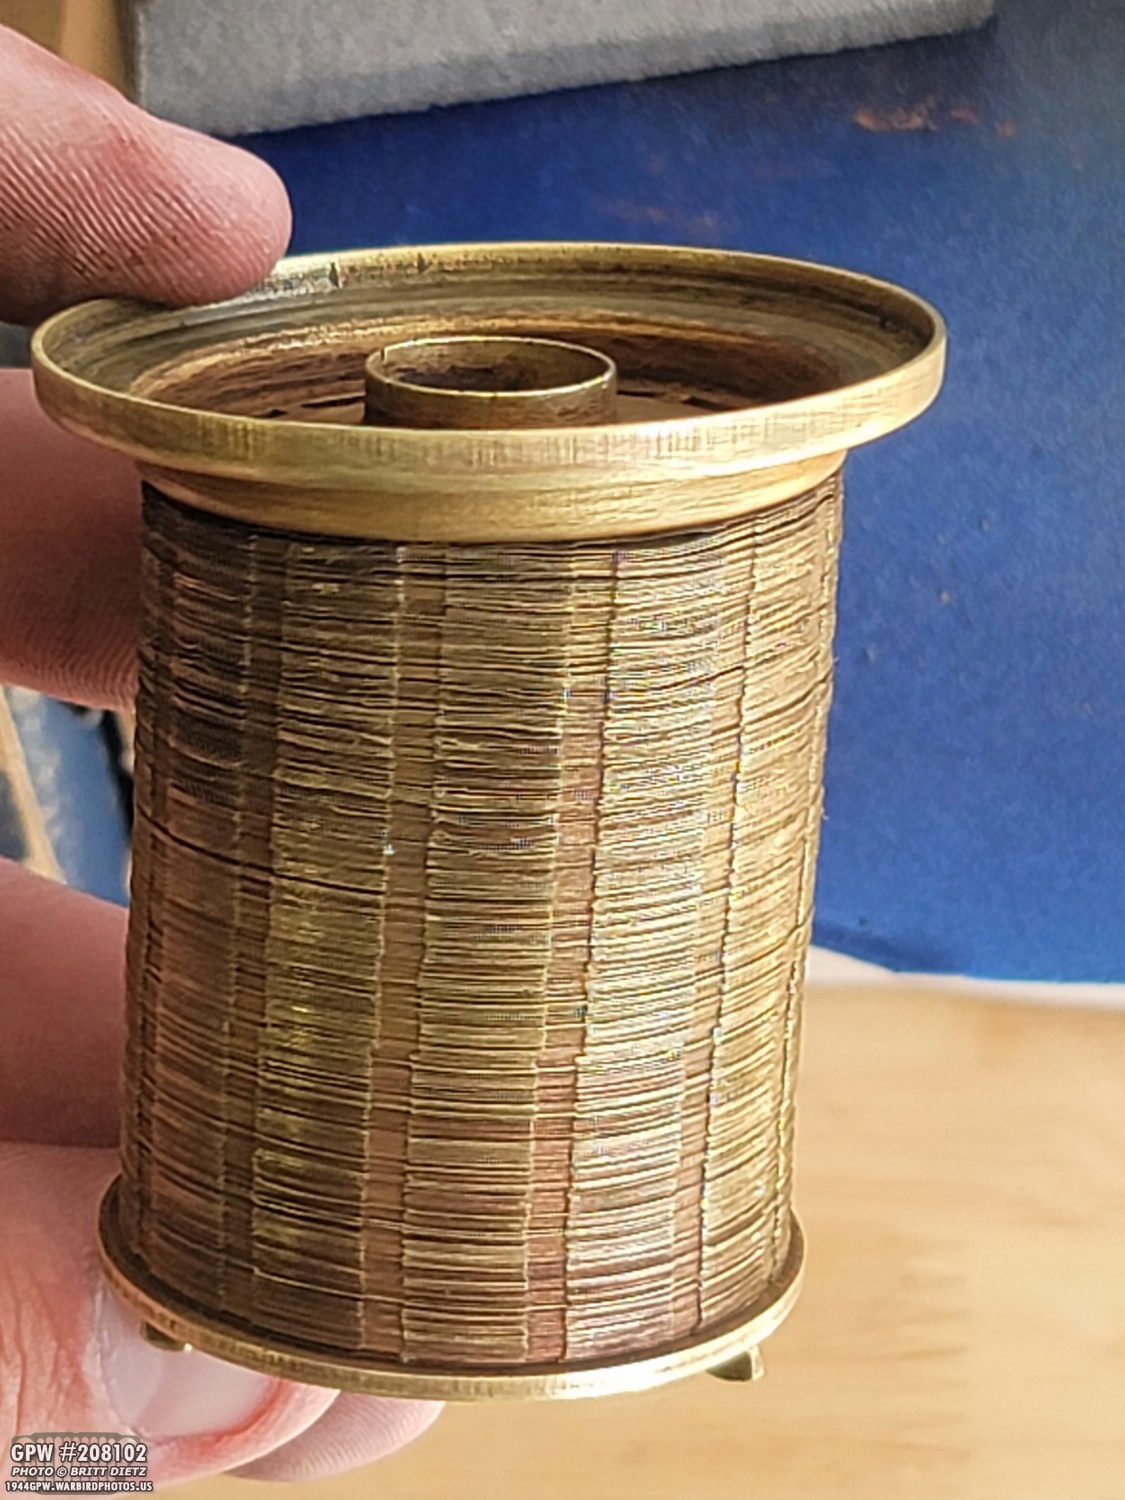
All the discs are in good shape, so after a cleaning, it looks ready to go.
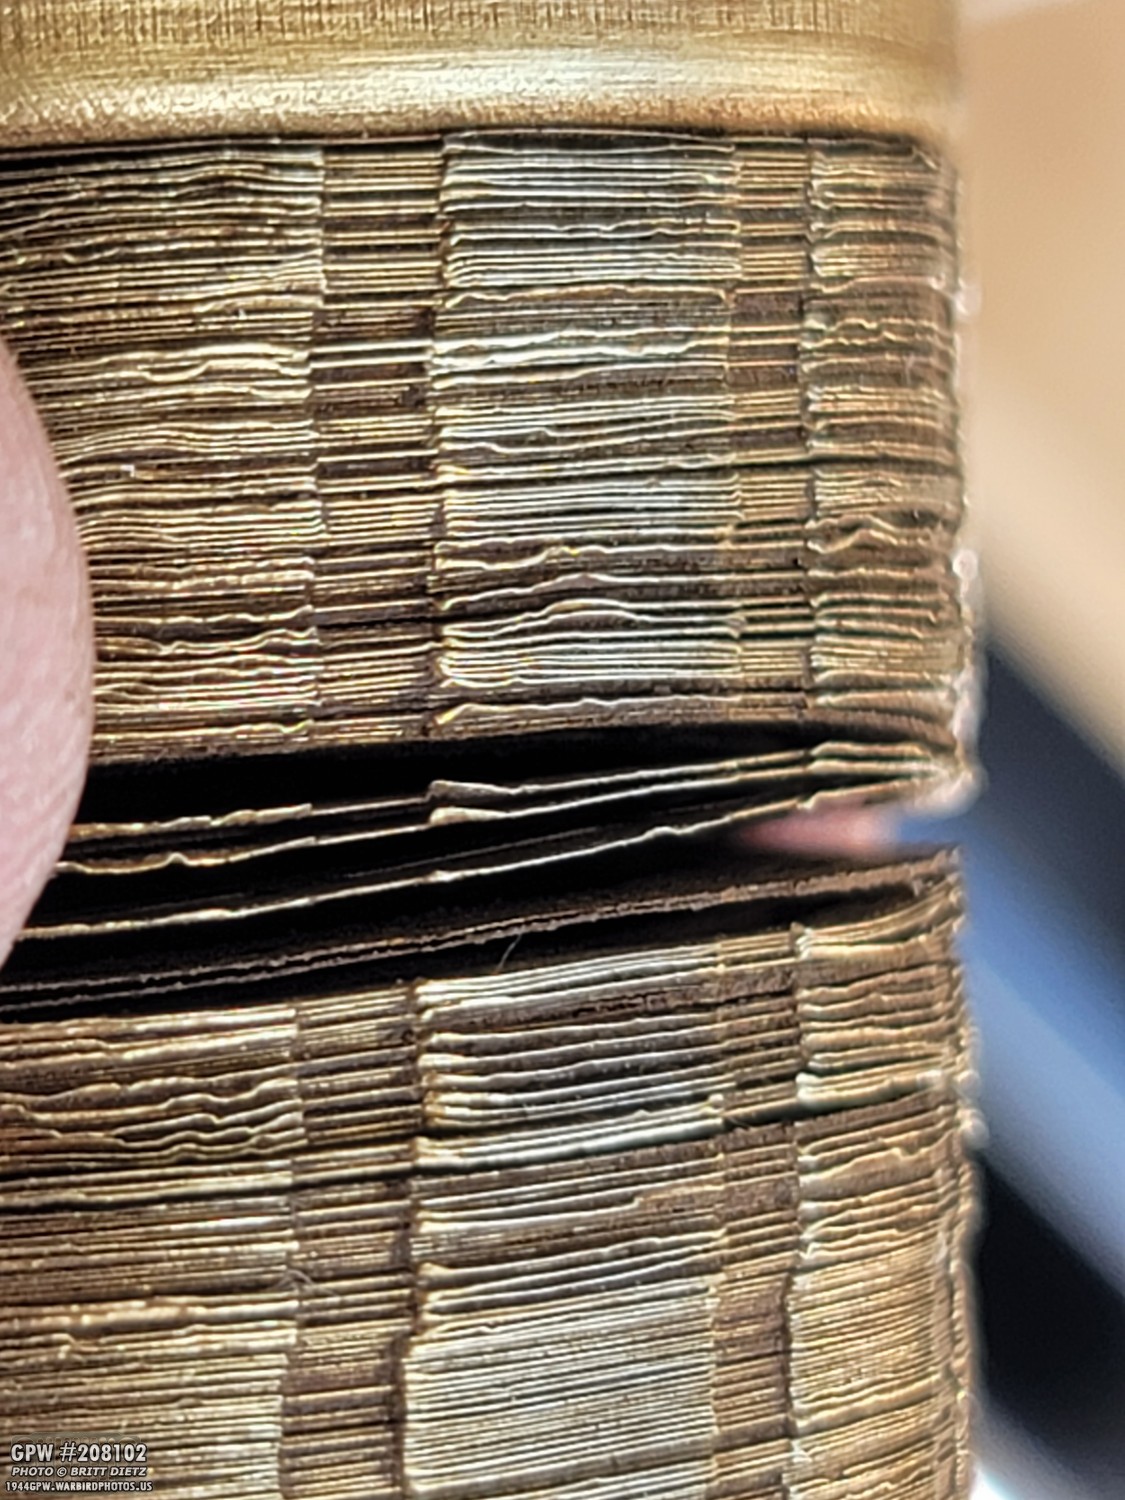
And here’s a look at the discs separated. The spring under the strainer and the top lid compress all the discs together.
Here’s after the strainer sat in the bucket of fuel for a few months and the gasket on top removed.

All cleaned and ready for reinstall!

The top lid bolt was wire wheeled and the head primed. Ready for OD Green paint.

And the spring is still in nice shape, some slight surface rust, but it still is nice and strong. So this is where things are at for this sub-project. It’s been fun restoring something again, and I told my friend I’d help him do more. I’ll have more updates in the next few weeks as I finish this strainer!
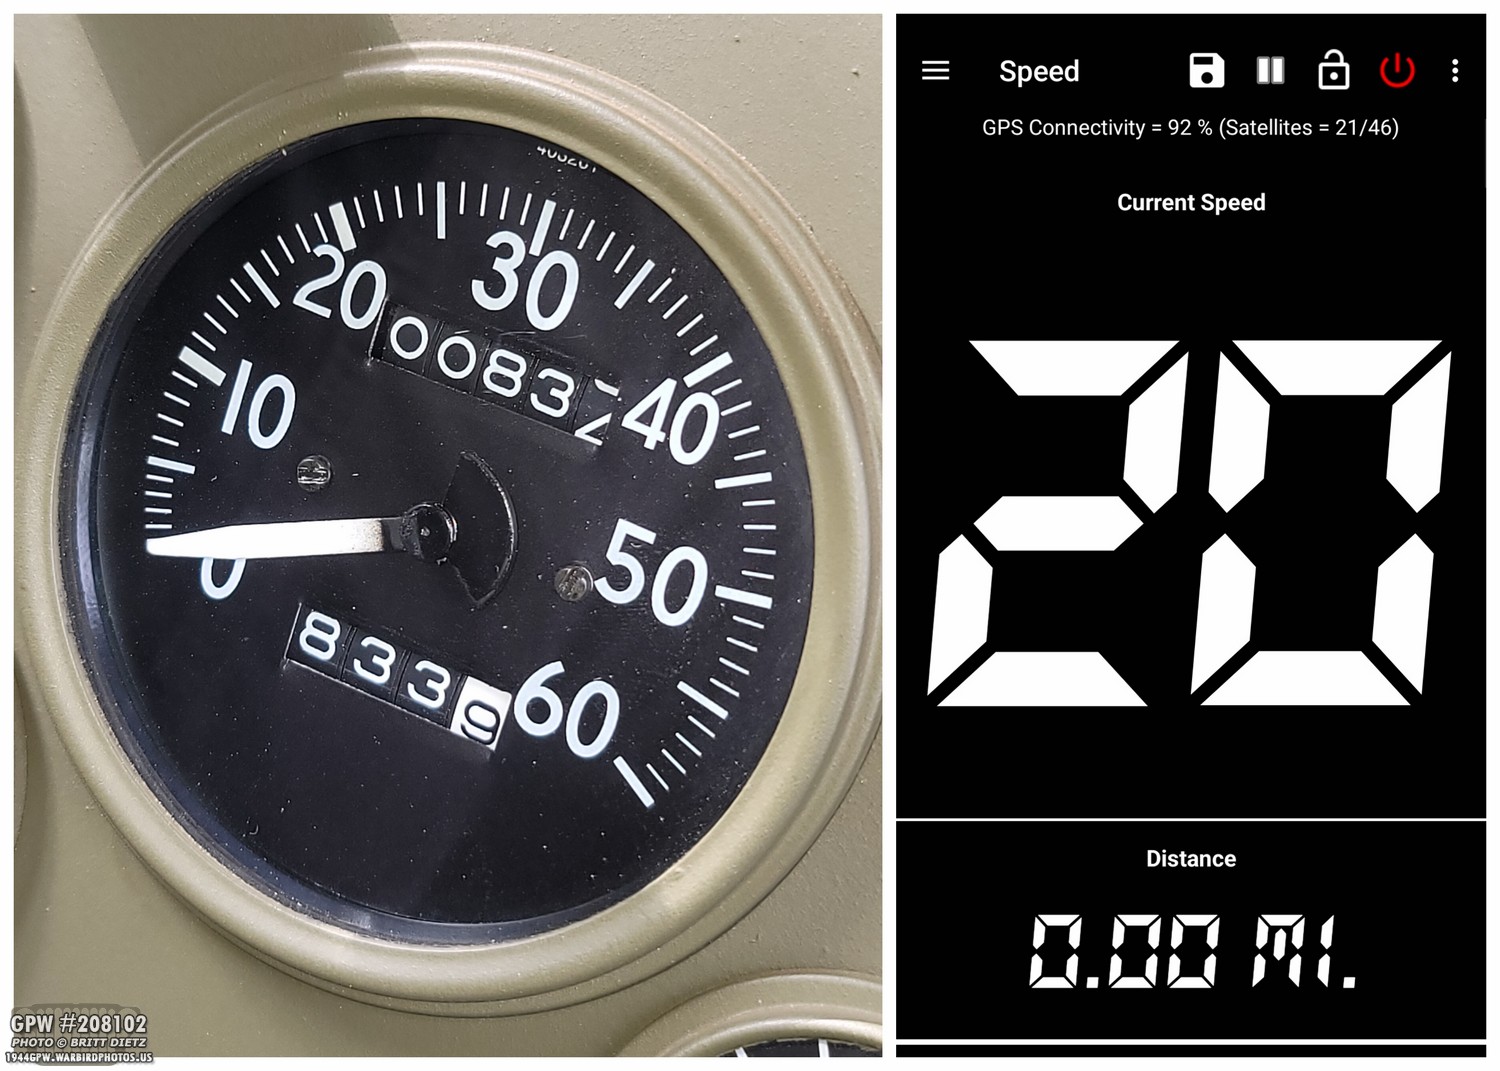
One thing I wanted to note as a PSA. So, I’ve always thought that when I’m driving the Jeep, it seems to be going faster than what my Joes Motor Pool GPW speedometer says. But I never really thought much of it, nor did I bother to check. A thread on the G503 forum the other day brought to light that the speedometers are incorrectly showing the wrong speeds. It was acknowledged by Joes Motor Pool staff that they are working on getting the correct ones and the difficulties with making reproductions like this. Especially when the initial test ones and first batches worked just fine. So, I wanted to test mine to see if I had a bad one. So I downloaded a speed app on my phone and went for a drive. Sure enough, my speedometer is off by 10 MILES AN HOUR! That means, when I’m traveling 20mph, I’m doing 30. When I would think I was topping out at 45mph, I was really doing 55mph! That’s a big difference. So I’ll keep that in mind for now, and it sounds like I’ll be able to replace mine for a corrected one in the near future. So I tip my hat to JMP for their customer service and determination to get it right.
As I wrap up this update, I wanted to mention that I’m writing articles now for the Military Vehicle Preservation Association – MVPA magazine ‘History in Motion’. I had an article published in the latest issue on my very popular Alternator that looks like a generator installation with the Powermaster PowerGen alternator. In the next issue (I’m writing the article now) I’ll be going over canvas items for Jeeps and how to fold a Jeep top!
So that is it for this week! It was nice to get the Jeep out for another public event, and also work on restoring another Jeep item just like the ‘old days’ two years ago when I was neck-deep in my Jeep’s restoration! Really makes me miss those days of being always busy with Jeep projects! Till the next update…