 WW2 Jack, March Field Museum, & Extras!

A new flea market find, while not a WW2 Jeep jack, it’s pretty much the same with a slightly different design! I take a look at how it works and the full restoration. I then shift focus to an ongoing Fuel Sender issue. Also, I went to the March Field Museum in Riverside and took a look at the Jeeps there.
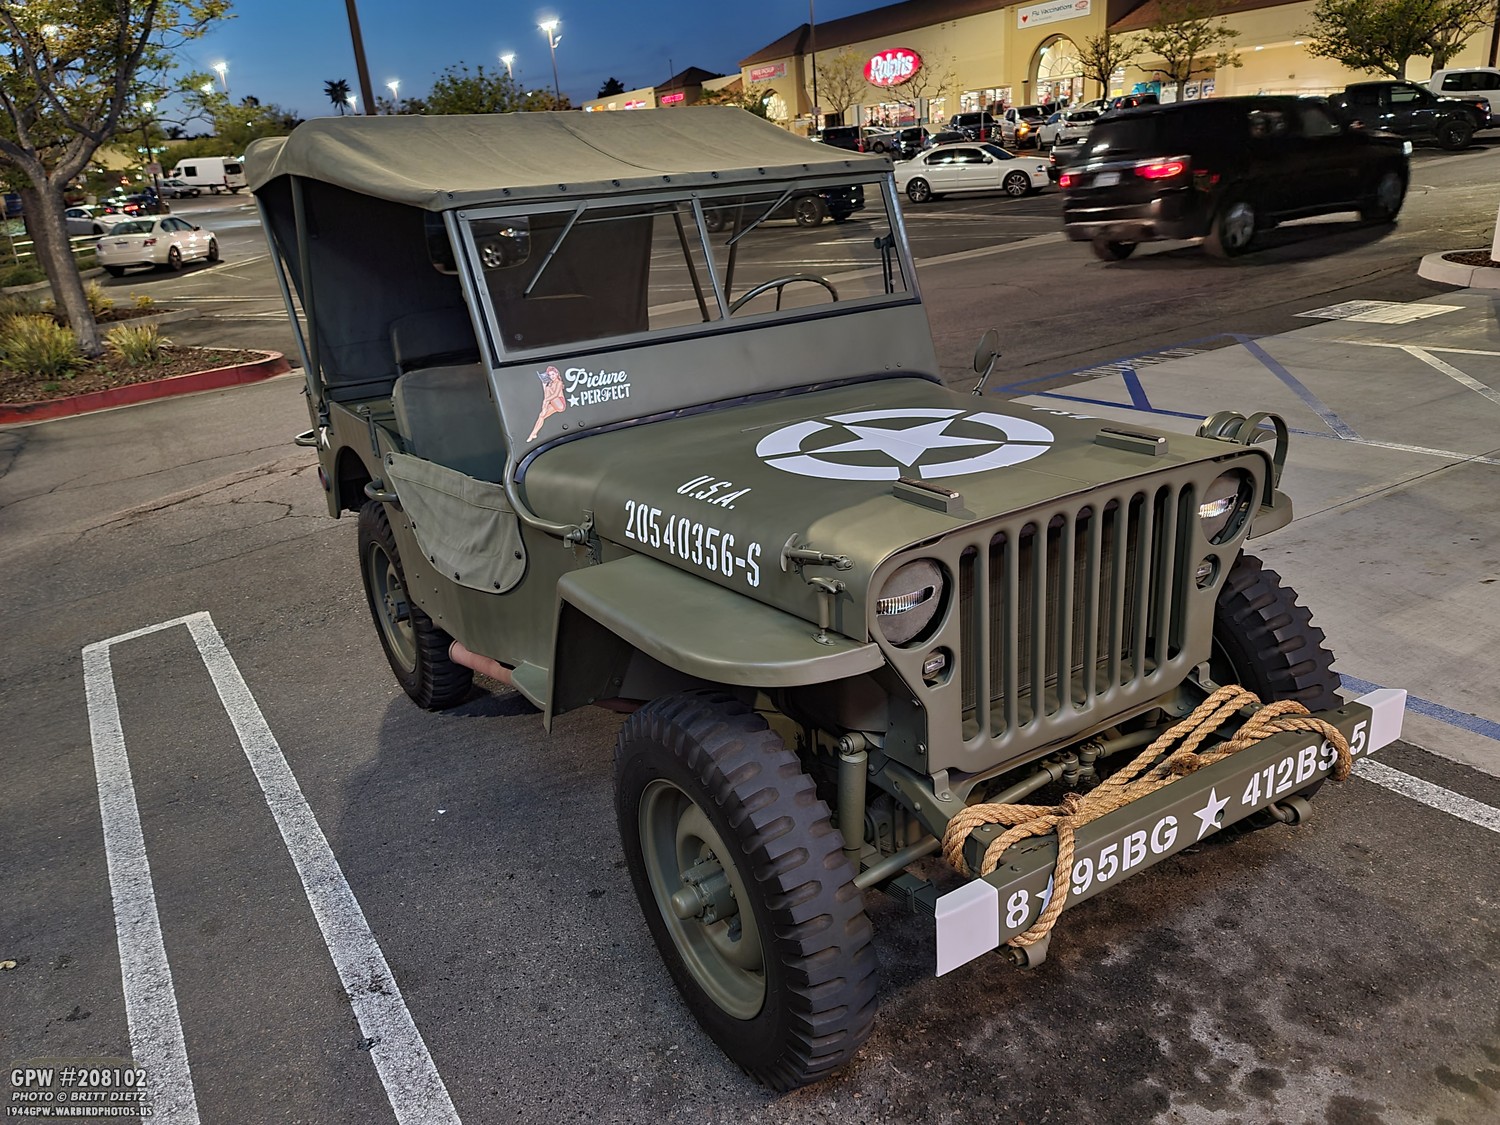
Always nice to take the Jeep out on small trips in the local area, even just to get some groceries! Always turns heads and gets thumbs up where ever she goes!

While at a local flea market this past week, I stumbled across this lovely find… a nice 1940s era vehicle jack! It’s almost identical to the jacks included in Jeeps, with some slight differences. But it’s close enough for me to pick it up for $10!

It was dirty and rusty, but still worked as it should. I’ve been wanting to get a Jeep jack, but they have been a bit on the pricey side for originals and reproductions, so I have put it off. It’s good to have one, however, with me when driving the Jeep just in case (much like the small automobile fire extinguisher I keep in the tool box).
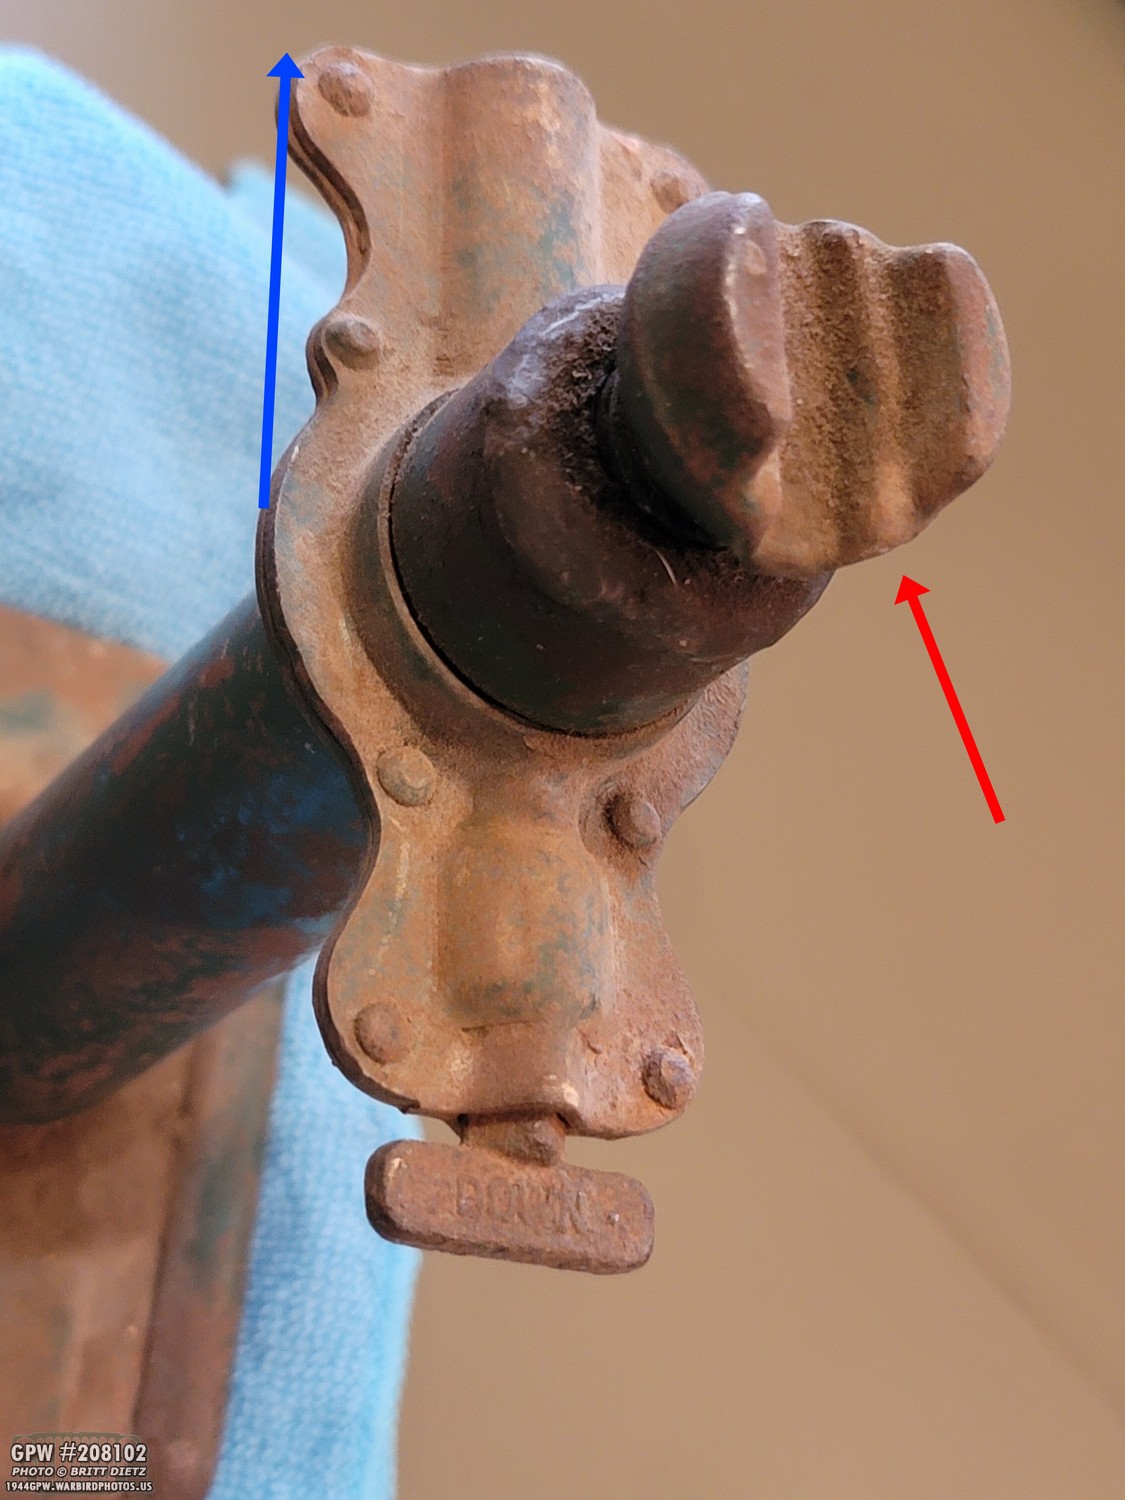
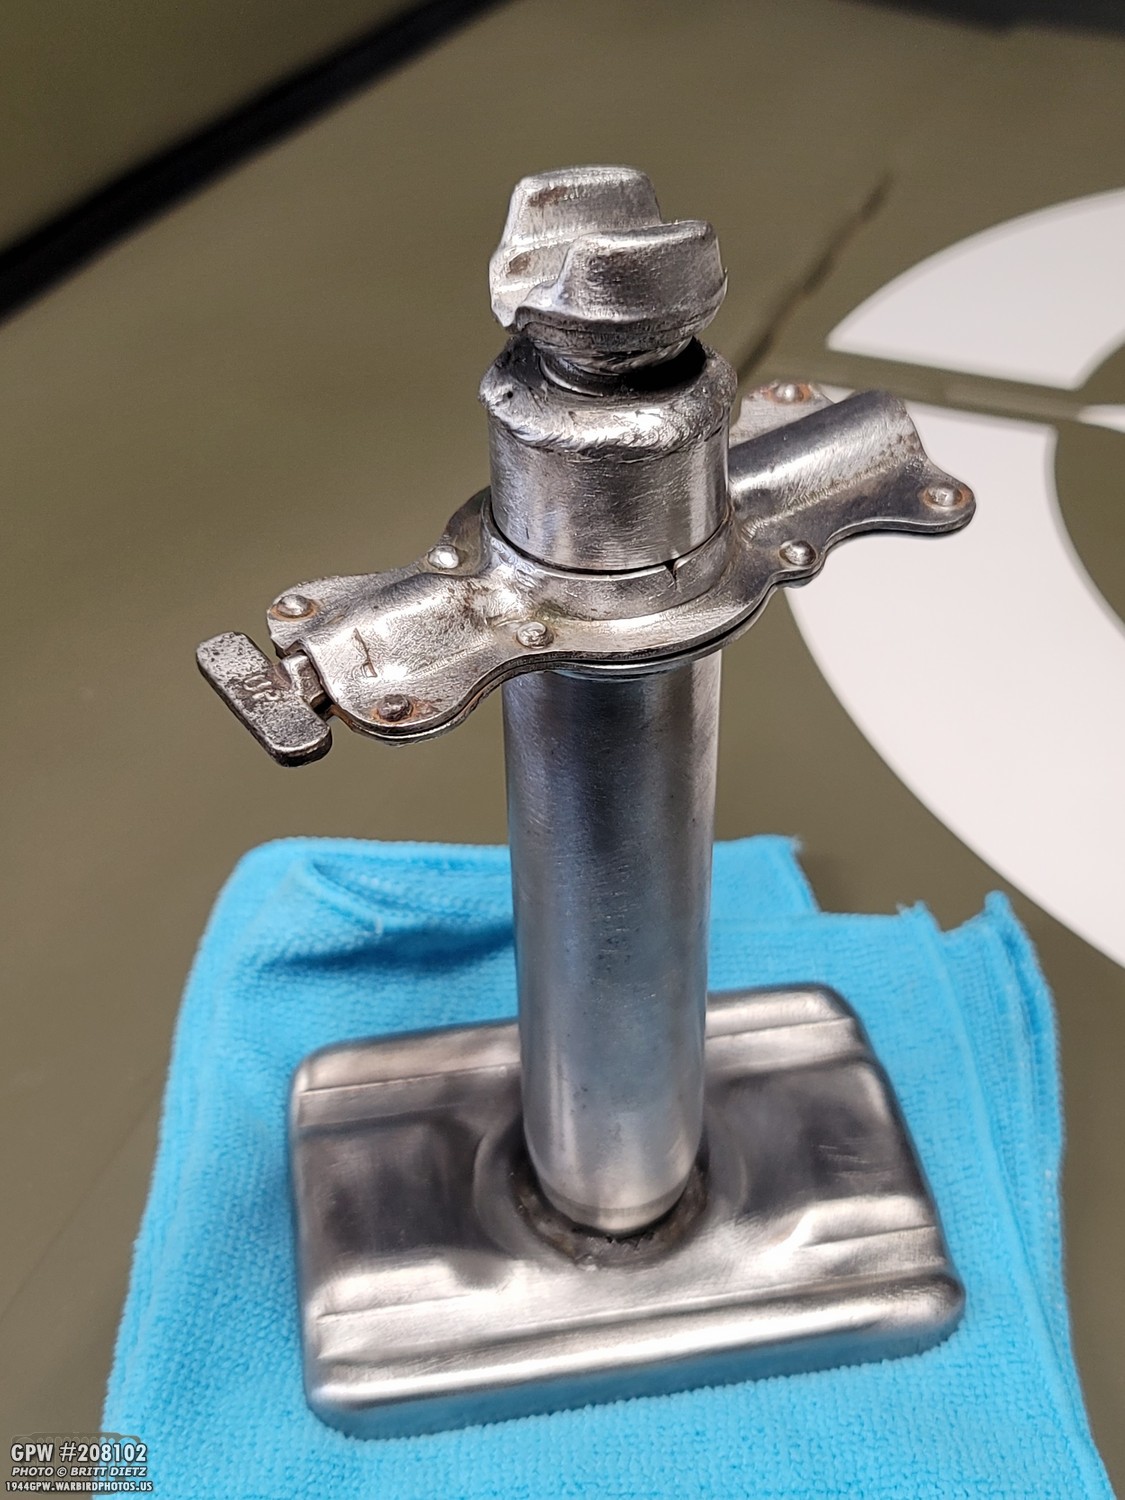
So, how does it differ from a Jeep jack? There are three tell-tale signs. First, the top ‘cup’ on the Jeep style is more like an actual cup about twice the width and without those grooves. This design is a little better, I feel, as it will be better to grab hold. The ratcheting bracket on the Jeep has a straightish line in the rear rather than the wavey line on this one. Again, minor differences.
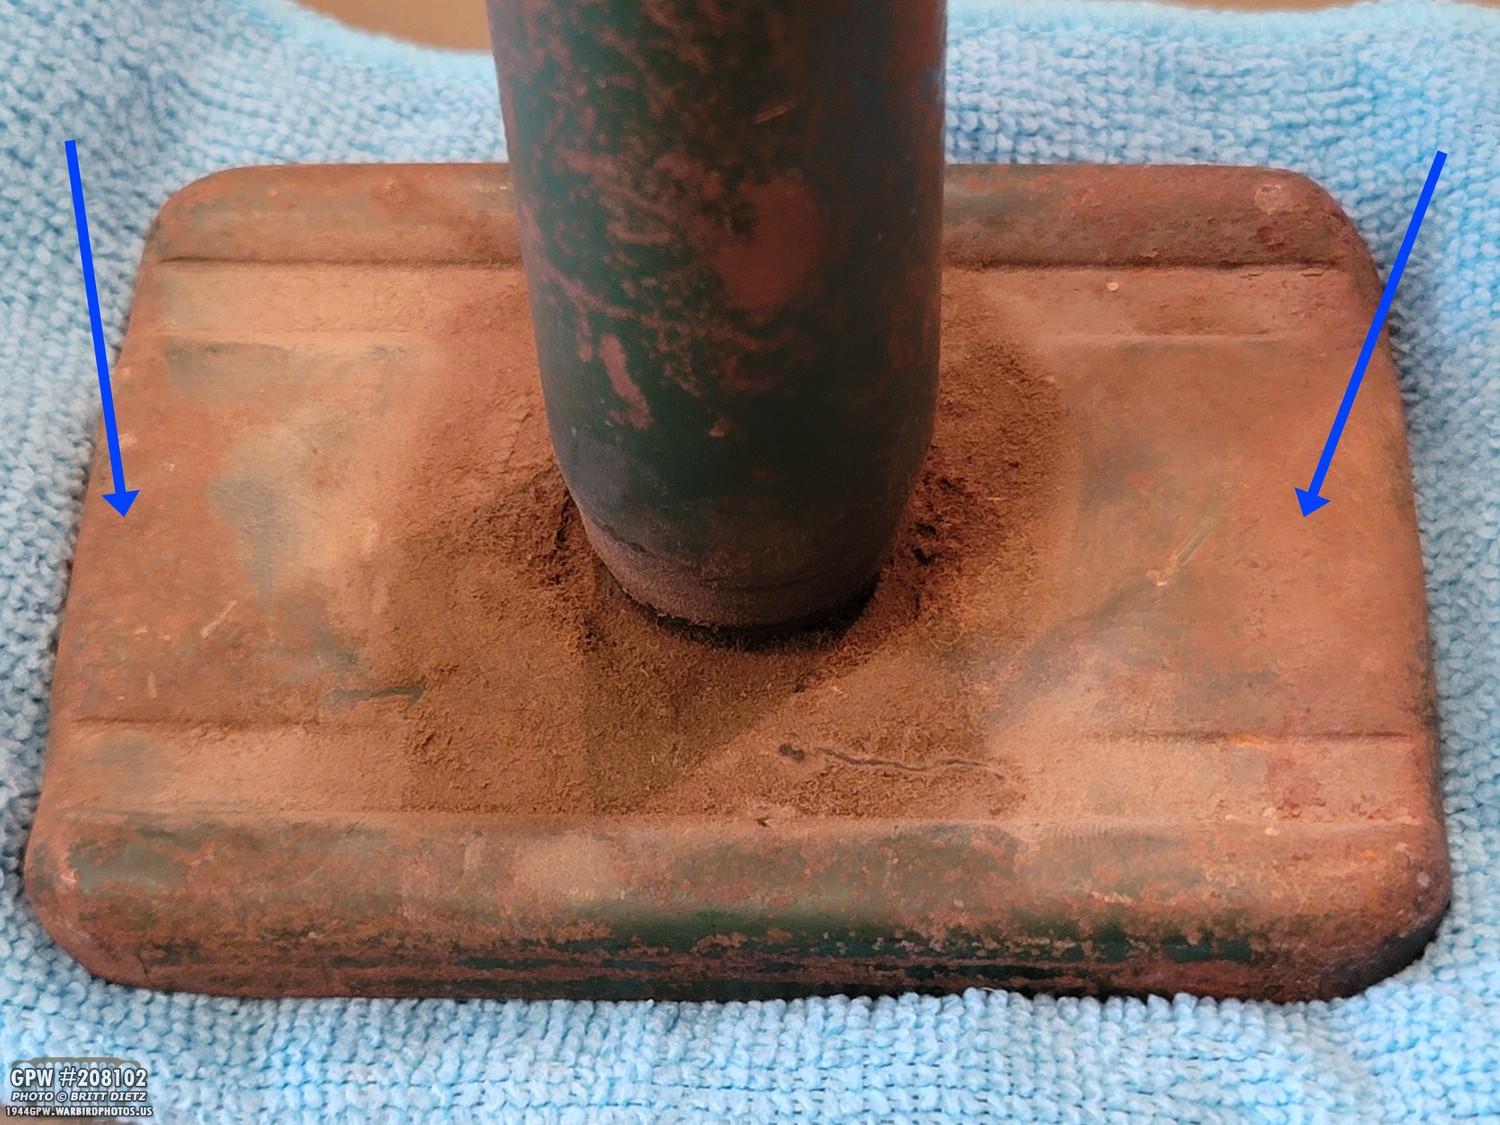
Finally, the last difference is the base. On the Jeep jack, it’s a rectangular base like this, however, instead of two full-length grooves, it has two notches where the arrows are. Now, this jack could have been used anywhere, even on a different WW2 vehicle. I have yet to find any civilian references to this style. Even the post-war CJ Jeep jacks, which are also similar, have a different design than this one.
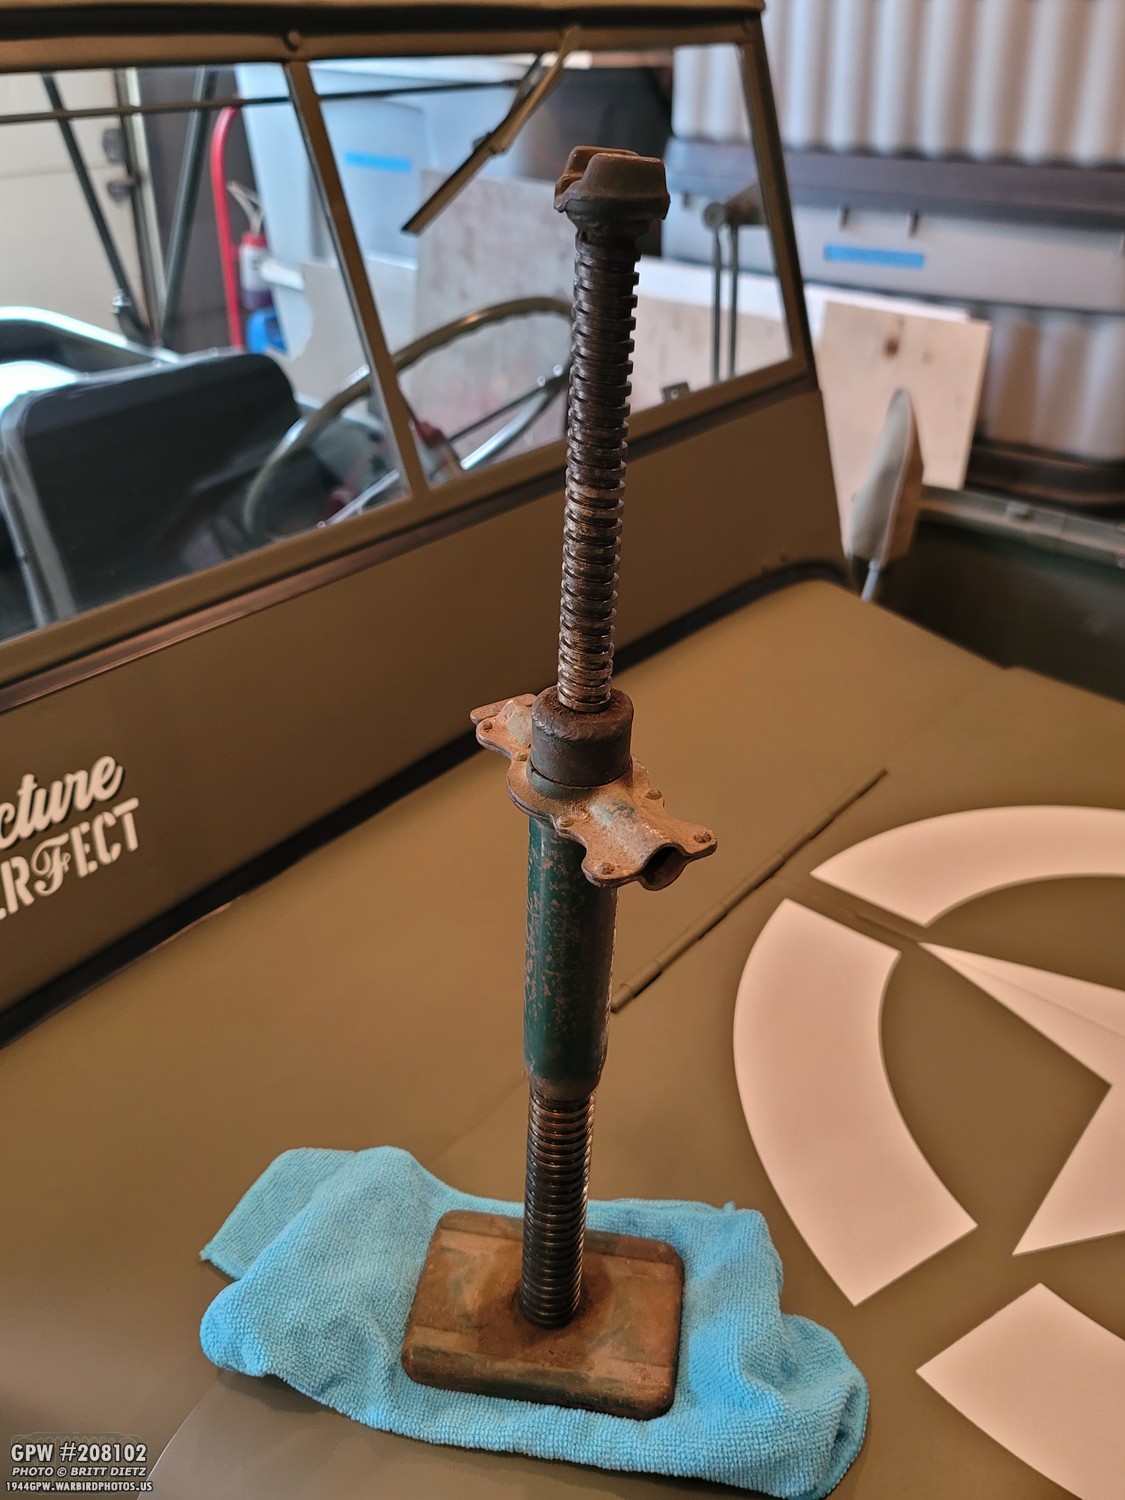
But the good news is that it works great. I was initially surprised at how small it is when compacted up. I’ve yet to see one in person, and in all the photos I’ve seen it’s hard to convey scale. But, when fully extended, it gets pretty tall! Pretty neat design with counter-rotating screws that allow the bottom and top to extend. No hang-ups, no gunk in it. Spins pretty freely!

After checking it out, I threw it in my ‘bucket O gas’ for 24 hours to soften up the paint, remove any dirt, and further clean up the threads.

What’s interesting is the green paint on it faded to a brighter green. I don’t believe it’s a military paint, even when it was darker before the fuel bath.

Overall, the fuel bath cleaned it pretty well, but it needed further cleaning before I could paint it.
I gave it the wire wheel treatment! Didn’t want to sandblast it, as I knew the sand would gunk up the threads. It wire wheeled nicely!

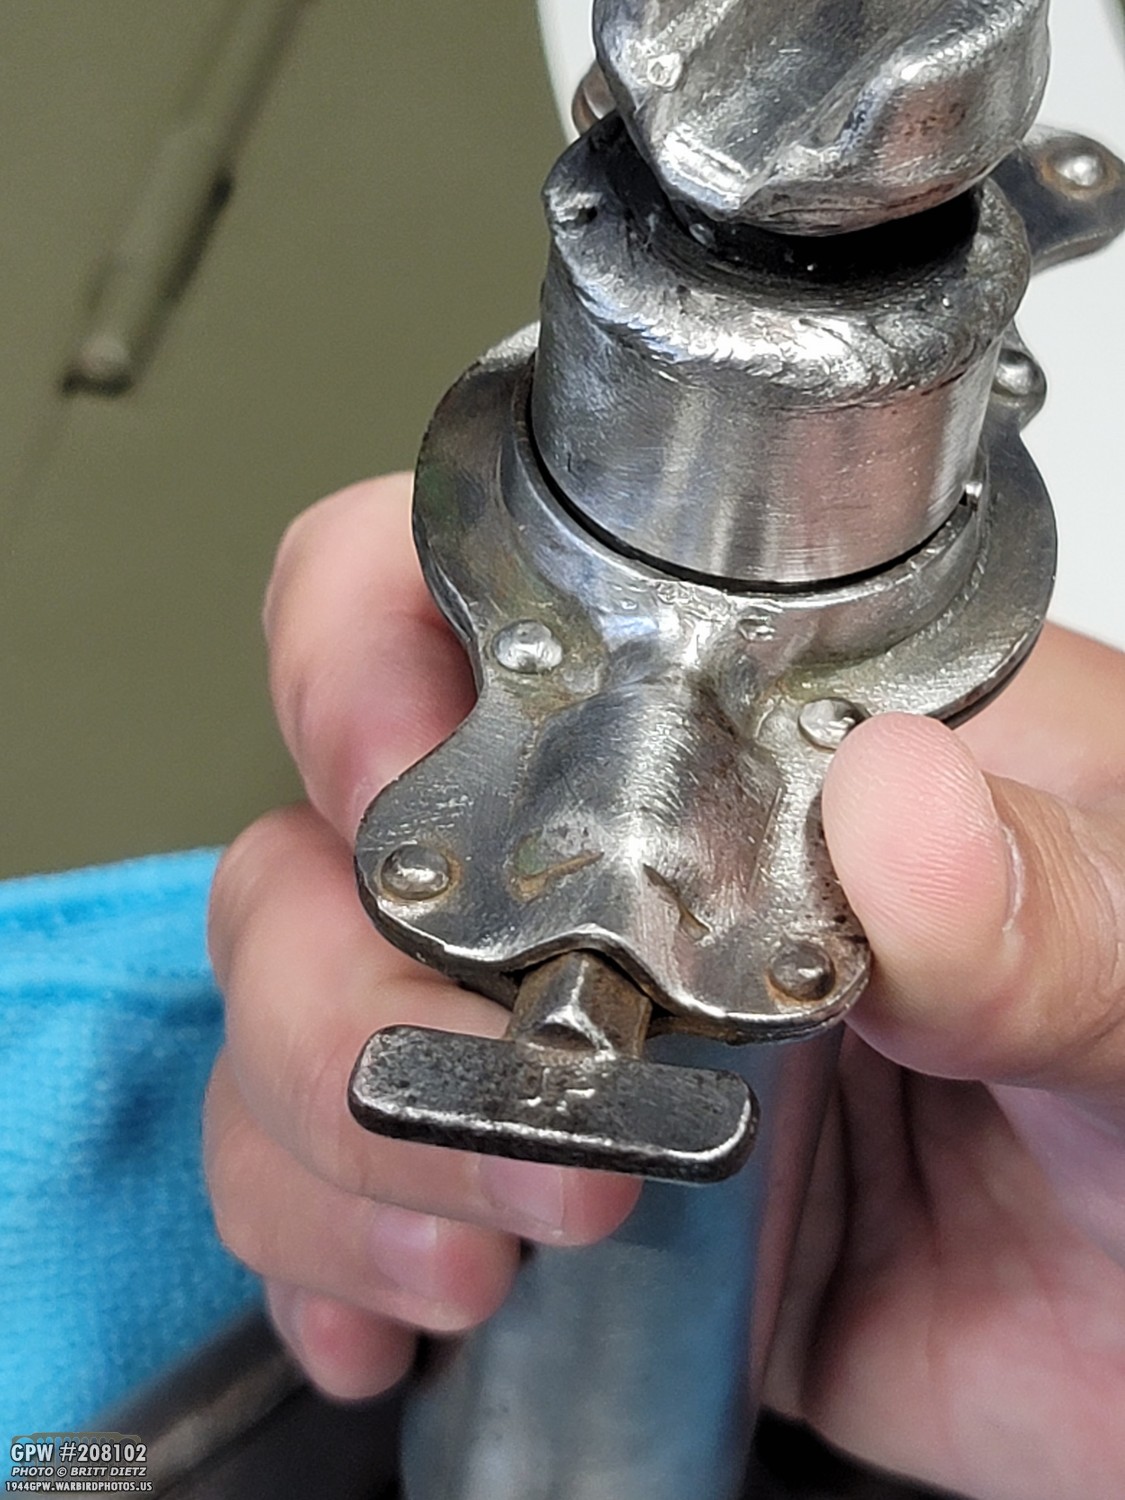
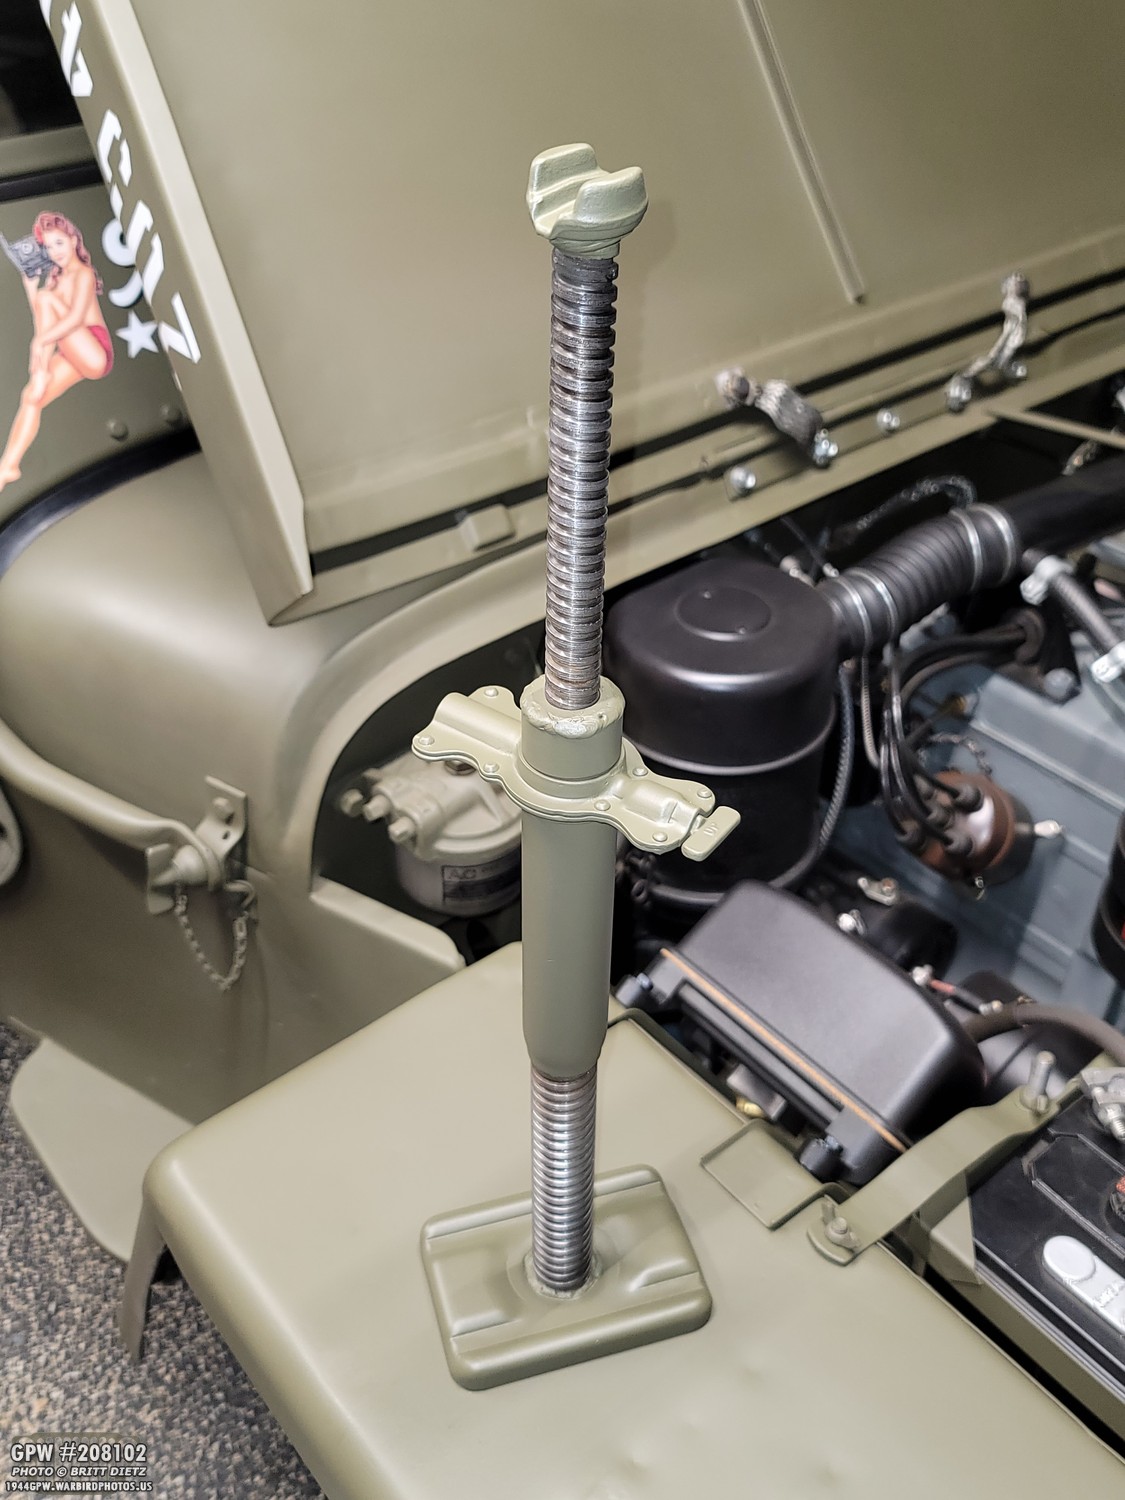
So, let’s take a look at how it works. Aside from the base column being turnable so you can extend and lower the jack, there’s a flat bracket near the top that is there to allow the user to ‘rachet’ the jack up and down. To do this, there’s a little knob on the end that says UP on one side, and DOWN on the other. You pull out the tab in order to rotate it to either position.
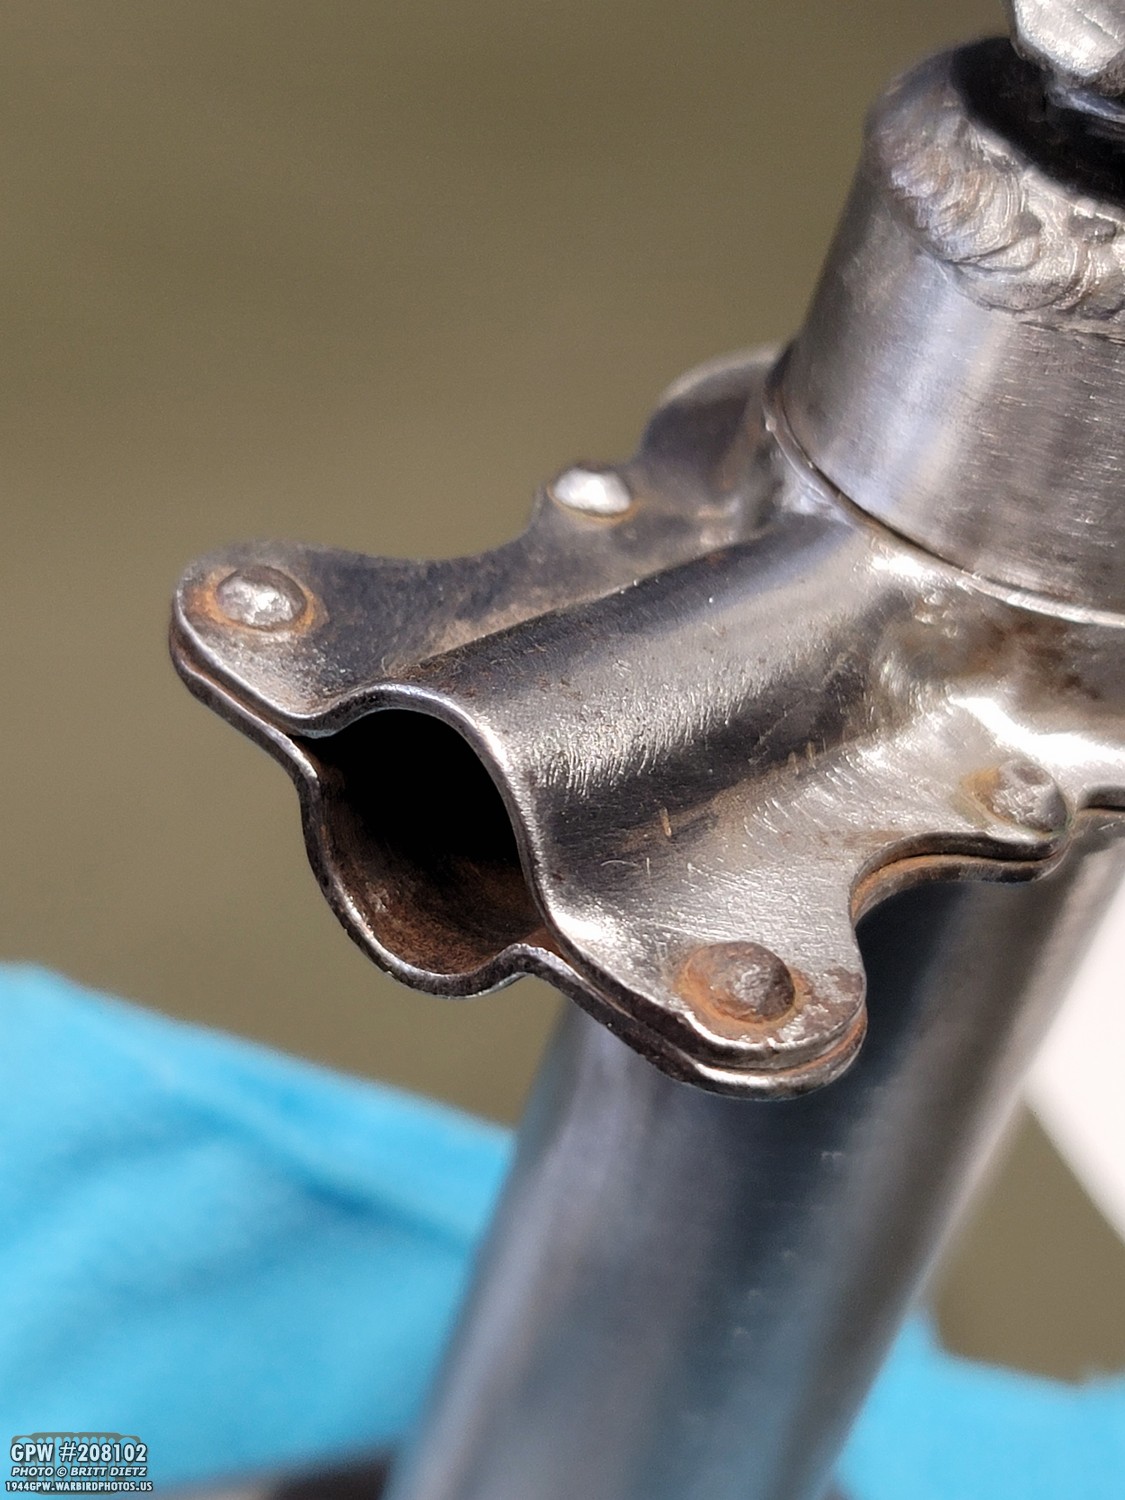
On the other side of this bracket, you have a shaft to insert something.
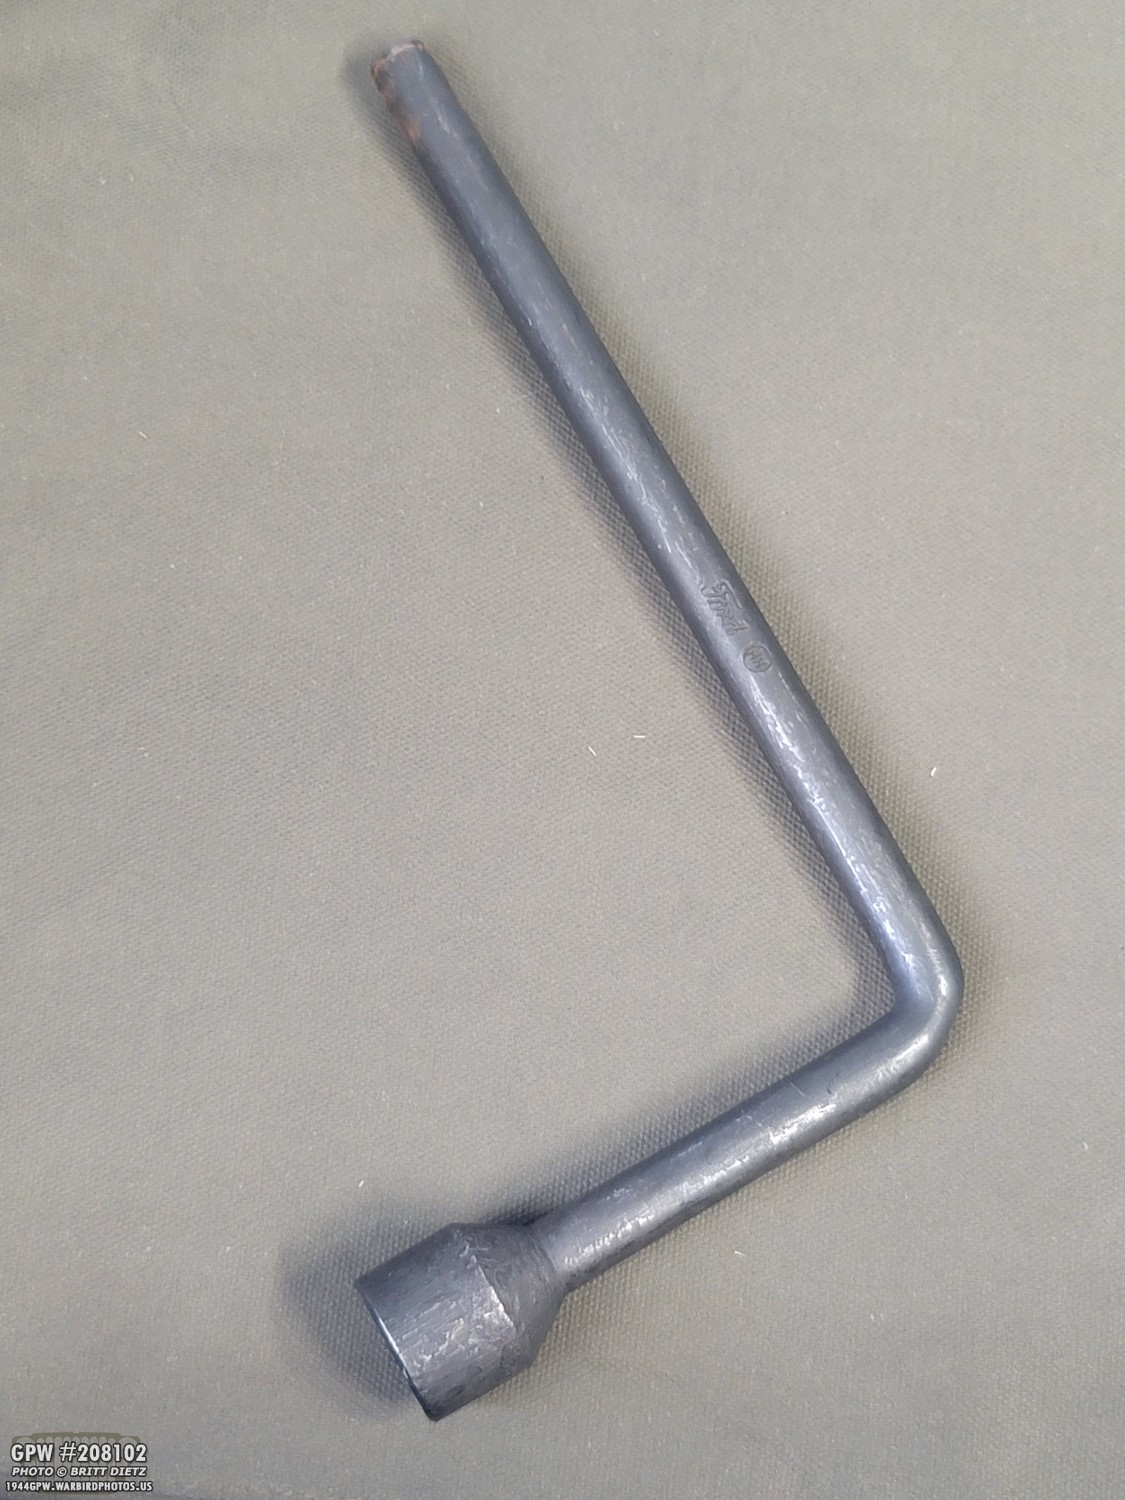
That something is the lug nut wrench! Here’s my GPW one.

You insert the wrench into the shaft like so. The idea behind the ratcheting feature is that when under the Jeep, you might not be able to rotate the wrench around 360 degrees without hitting something, so with limited space (and the Jeep being too heavy to extend the Jack with just your hand), you need to rachet it.

The other side of the knob that you can pull out and rotate to UP or DOWN has a special spaced end to a shaft that runs all the way to the main center shaft with the two screw shafts.

That special end will lock into holes every inch or so. When in the DOWN position, you can ONLY move the rachet, which will also turn the main shaft, counterclockwise. It will ‘click’ into each hole as you turn it lowering the jack. If you try to go clockwise, that special-shaped end for that knob will engage the end of one of the holes you’re on and NOT let you turn it the other way.

Here, I’ve pulled out the knob so you can see how far it needs to be pulled out before you can rotate it to the other side. It’s spring-loaded, so you can’t take it all the way out.
When in UP, you can rachet the jack clockwise, moving the jack up. But it will catch the side of the hole when trying to go counterclockwise and not move. Pretty simple but smart design!
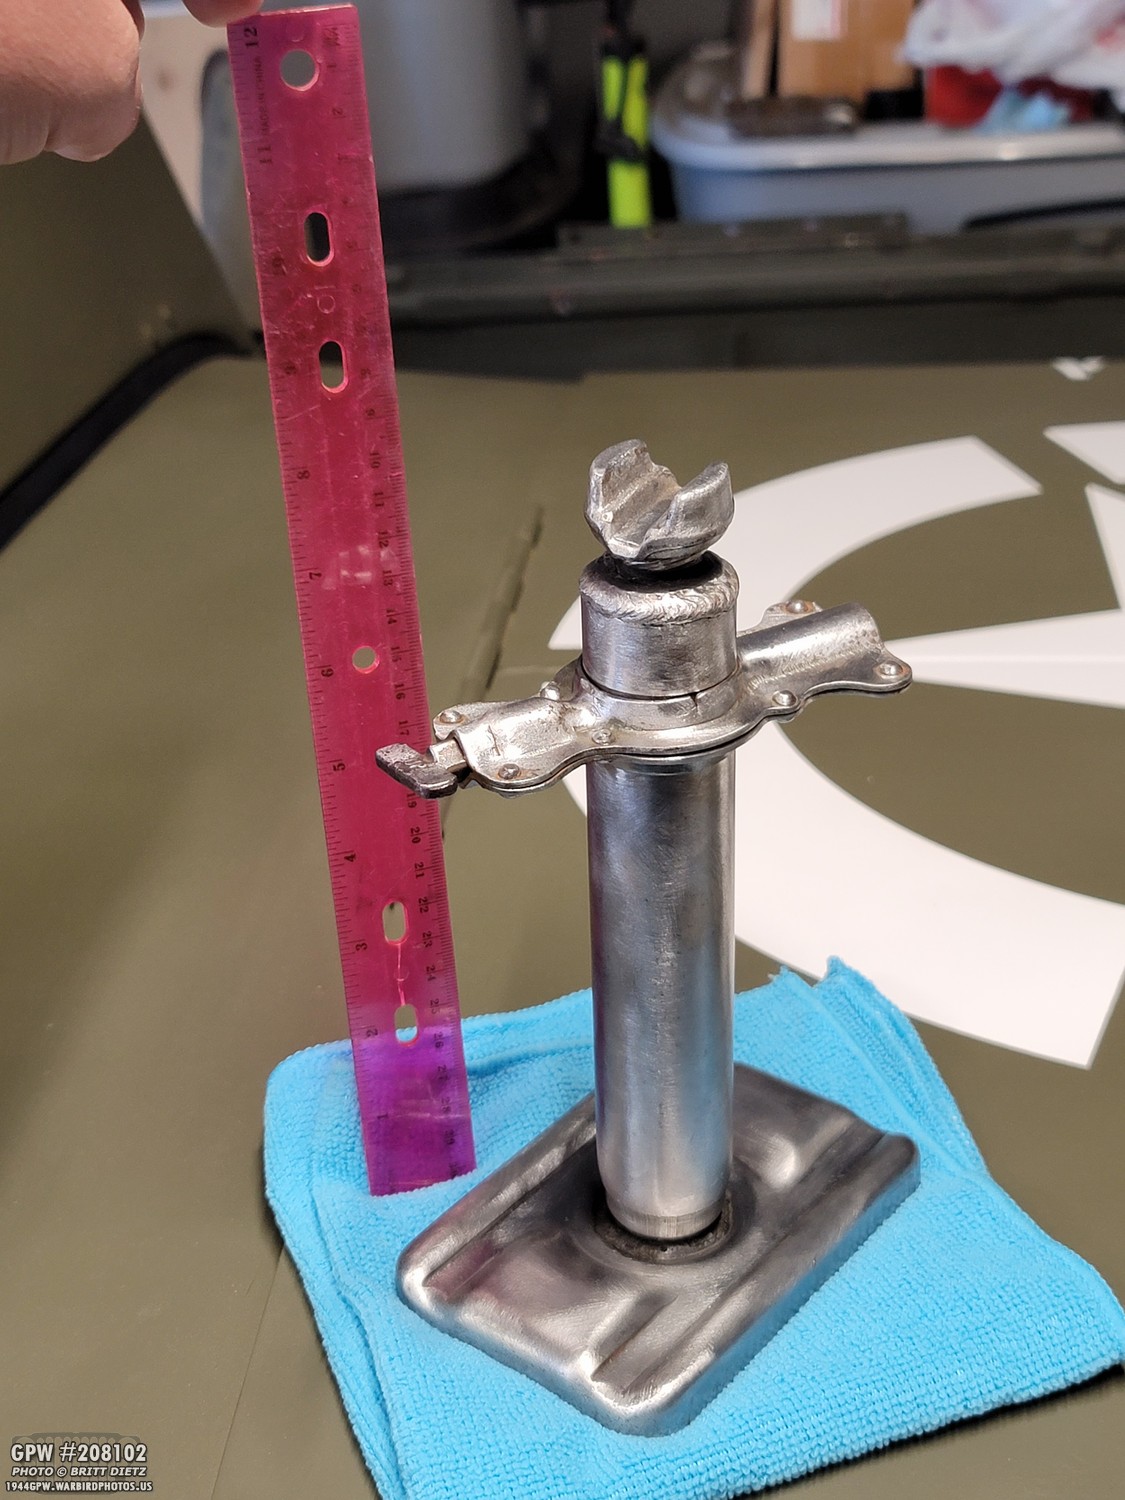
And you can see here, with a foot-long ruler, it’s about 9 inches tall. Pretty small and portable!

Back to the restoration, I hit it with the red oxide primer. I turned the knob halfway between UP and DOWN so it was partially extended allowing me to hit it with the primer.

And I made sure to get the bottom with primer as well.
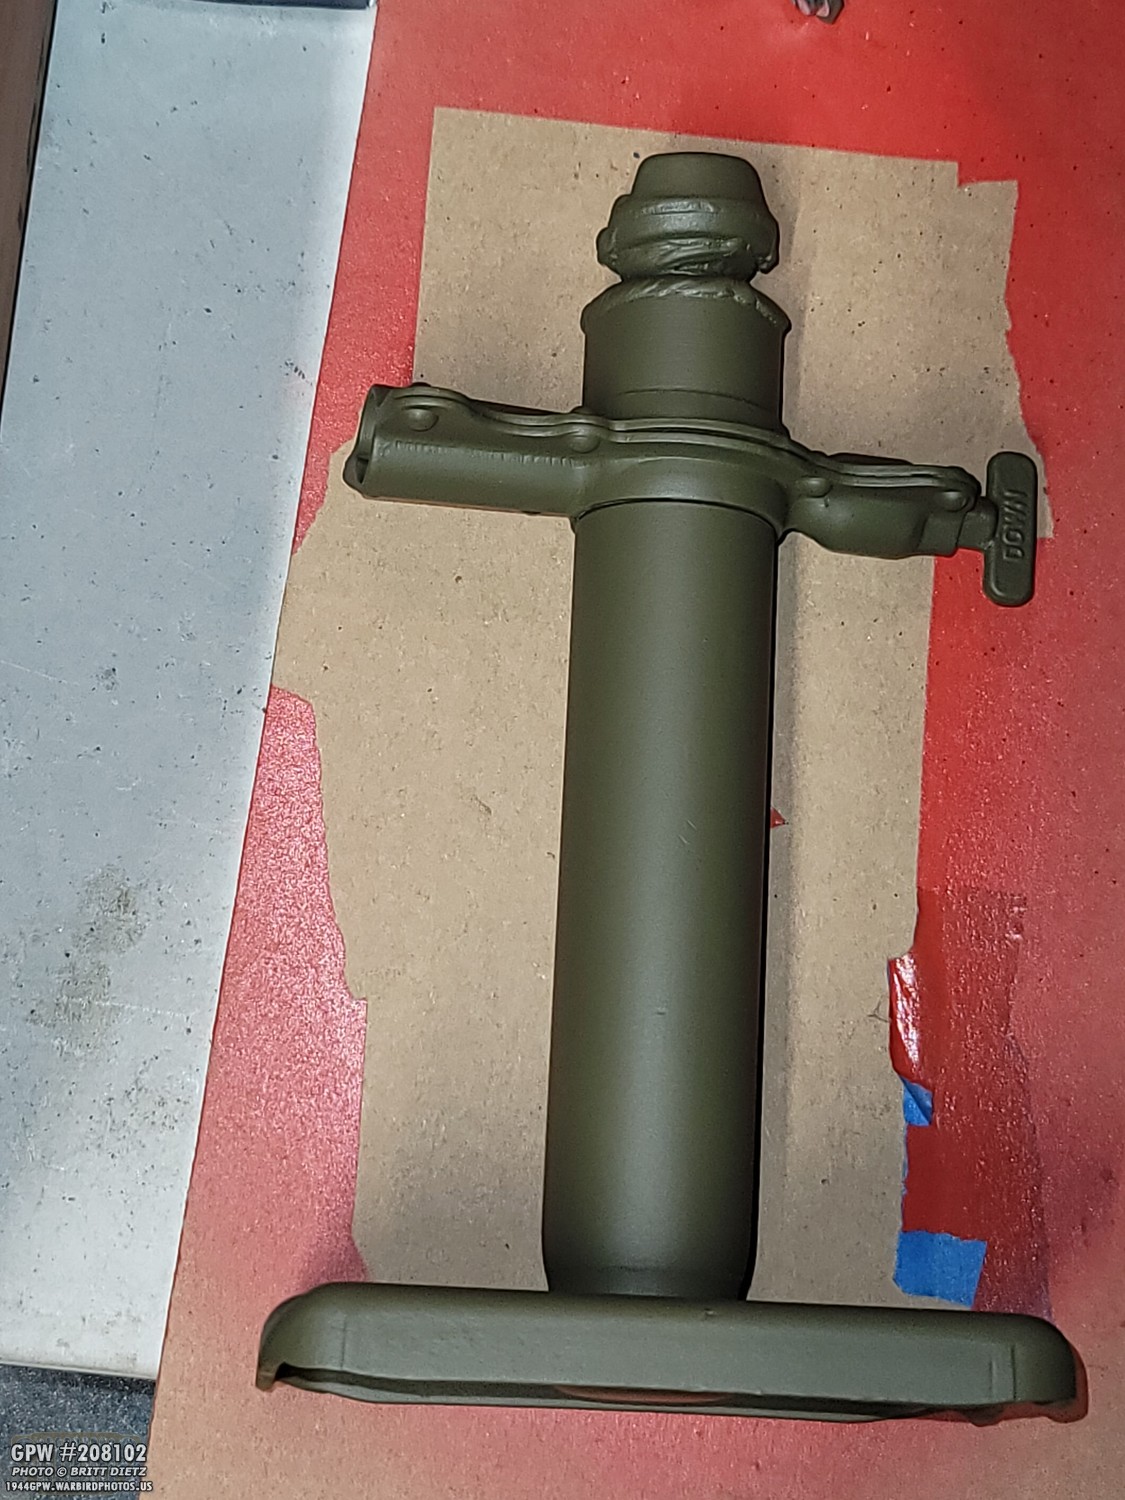
And here it is after a few coats of 33070 OD Green! Looking nice and new!

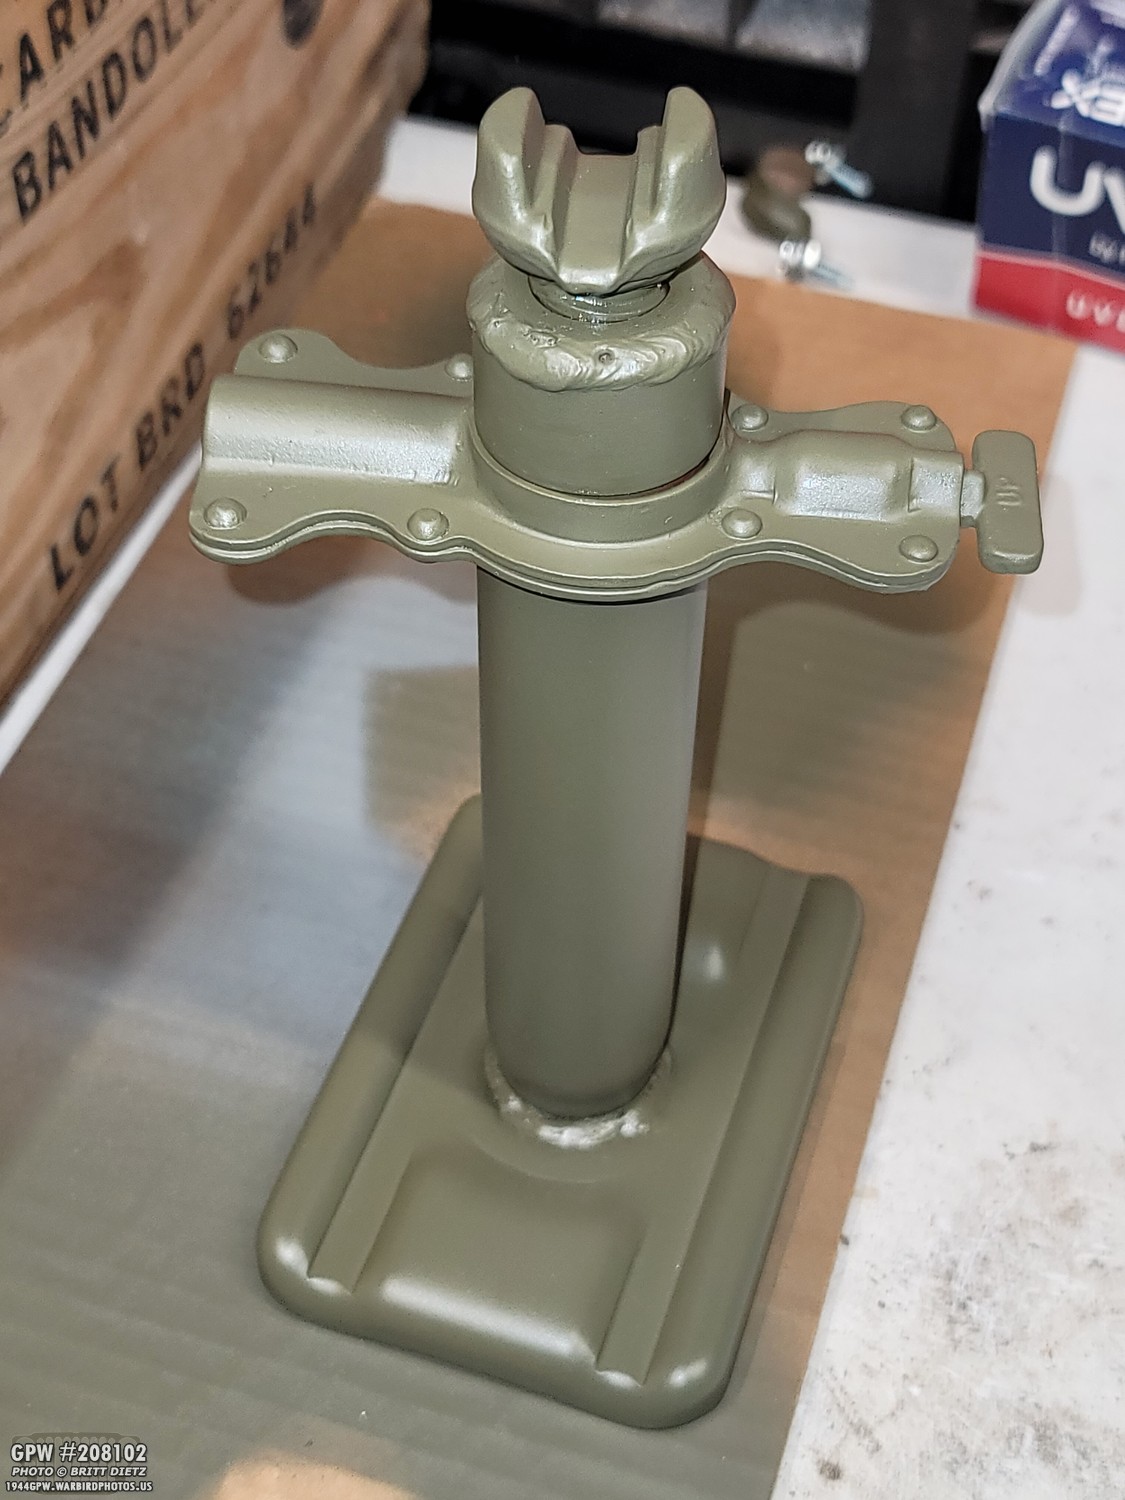
Because I knew this would get a little banged up in my Jeep’s toolbox (I am looking into having a custom bag for it made like I did for the small modern automobile fire extinguisher), I hit it with a matte clear coat a few times to protect the paint. If I have to use this jack, which hopefully I never do, I wanted to keep it nice. The only downside of using a matte clear coat is, that while it says matte, it always leaves a slight sheen compared to the lusterless paint. Not a big deal for this, but not something I’d do for anything you can see on the Jeep.
Looks really nice! I cleaned up the screw threads as well.

Looking at the ratcheting bracket, all nice and painted. The letters on the knob really pop.

And here’s a look at the top ‘cup’.
Even though it extended and compacted just fine, I wanted to give it some lube to help it be butter smooth. So I hit the threads with some WD40 and extended/compacted it a few times. It’s silky smooth. Probably hasn’t worked this week since it was made in the 1940s!

Moving on to another project, I’ve had issues with my fuel gauge and fuel sender since I installed them in 2019. When I first installed everything, it worked for a few days then the gauge would always register empty. I replaced the circuit breaker and pulled out the sender, and everything still worked. So I put it back in, and after a few days, it again went to empty. I took out the sender again and tested it in a small bucket of fuel to find that the sender float was… sinking! No wonder it was showing always empty. So I got a replacement and things worked well for about 1-2 weeks, then it went empty. I gave up on it and said I’d deal with it another day. It’s been like that for about two years now.

Now, before everyone starts to say ‘you have a bad ground!’ I wanted to show my setup. The sender (green arrow) which is under the driver’s seat on the top of the fuel tank has two wires coming from it. The main wire goes to the fuel gauge (yellow arrow), and a secondary wire I added just for ground (red arrow).
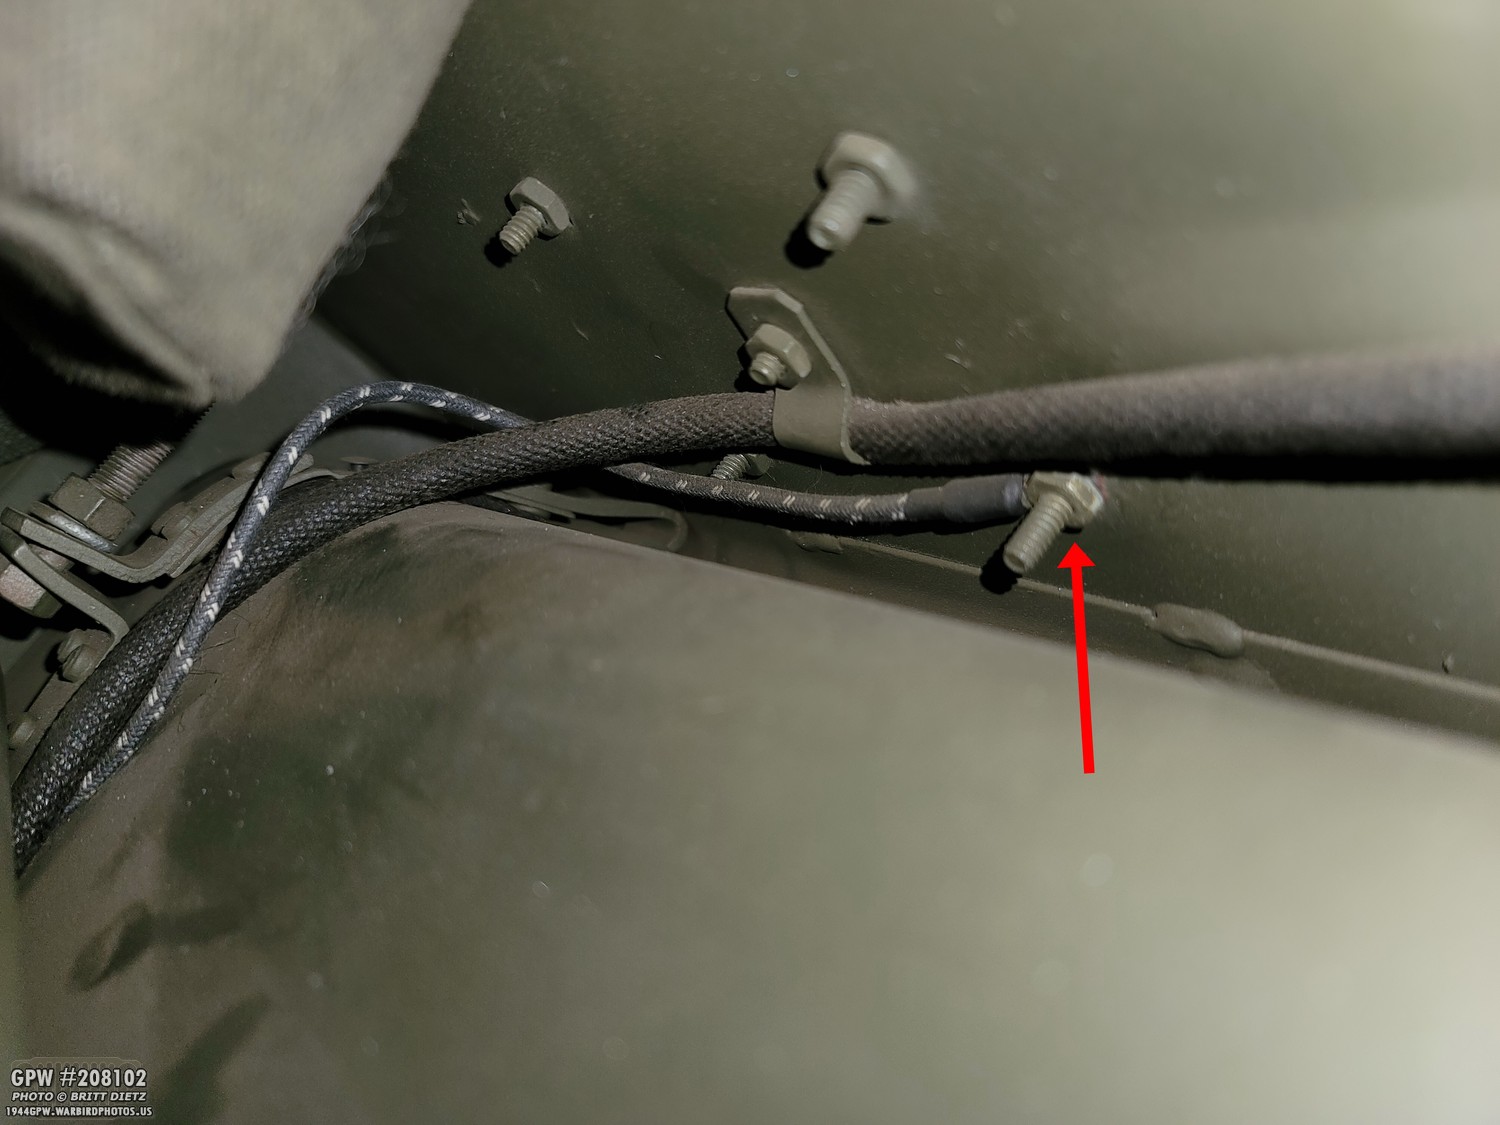
That special ground wire I have going to one of the bolts with a footman loop on the side of the tub. Perfect ground and that secondary wire, though not ‘correct’ for a wartime Jeep, is something I think that’s a very good idea to have. Most people will not even see it’s there, especially if you have crash pads and half doors.
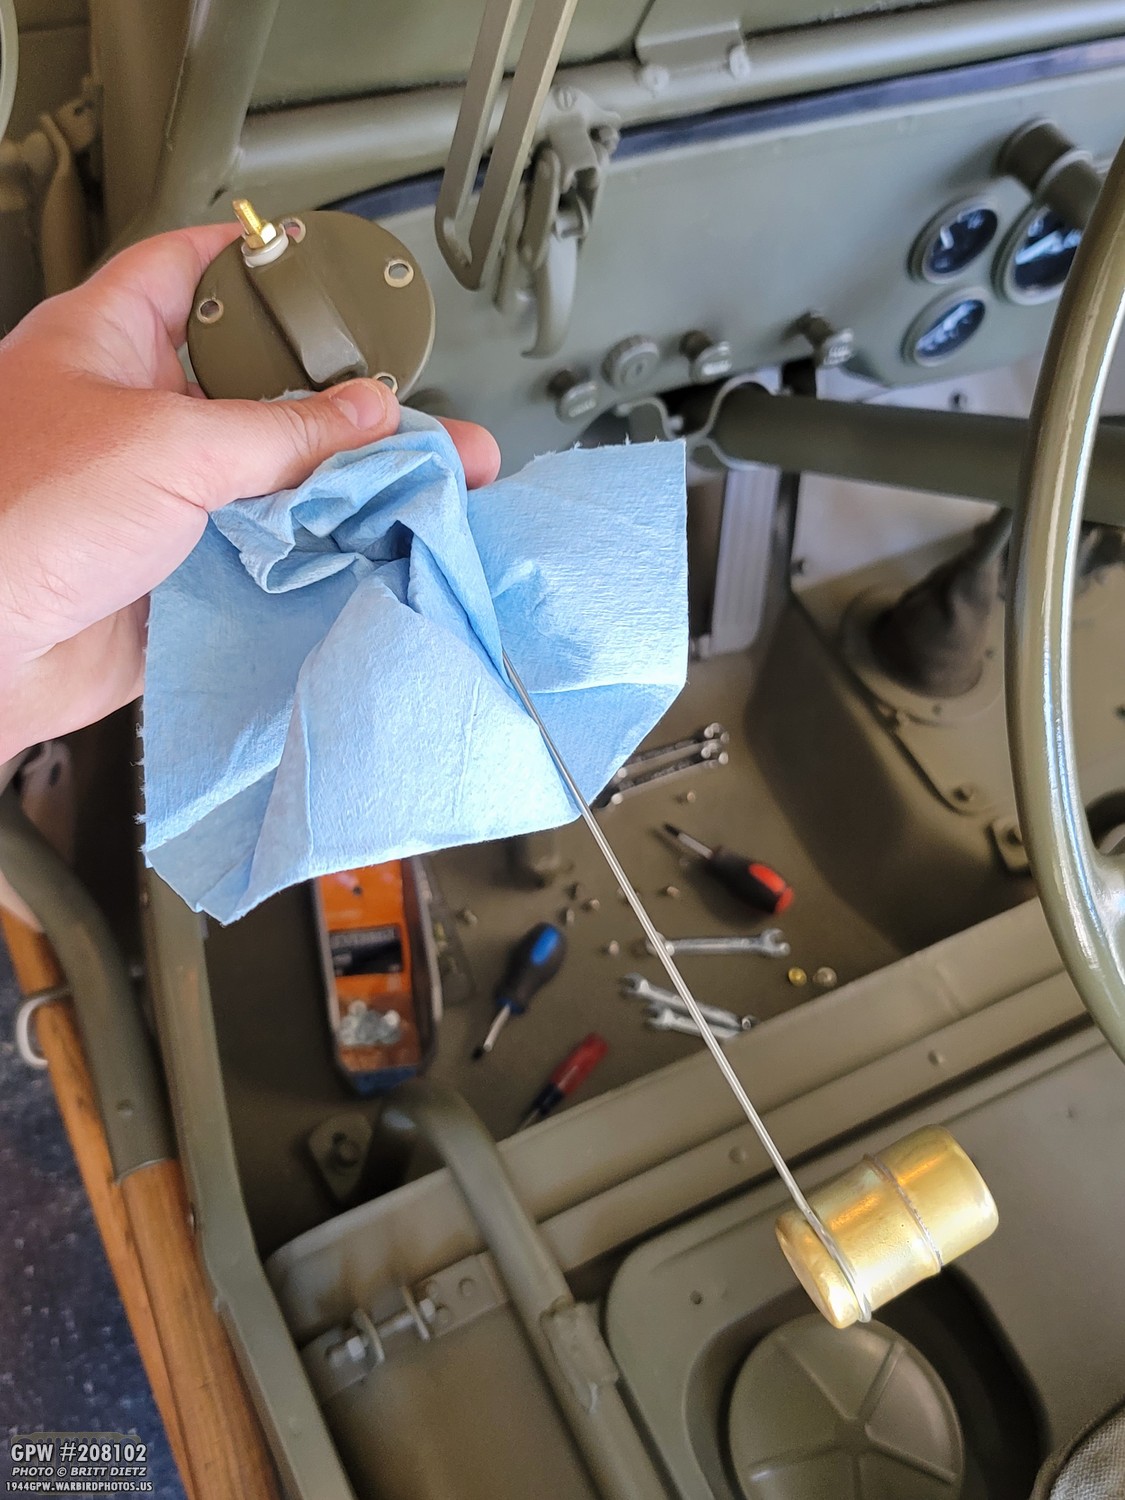
And here’s a look at the sender, removed from the gas tank.
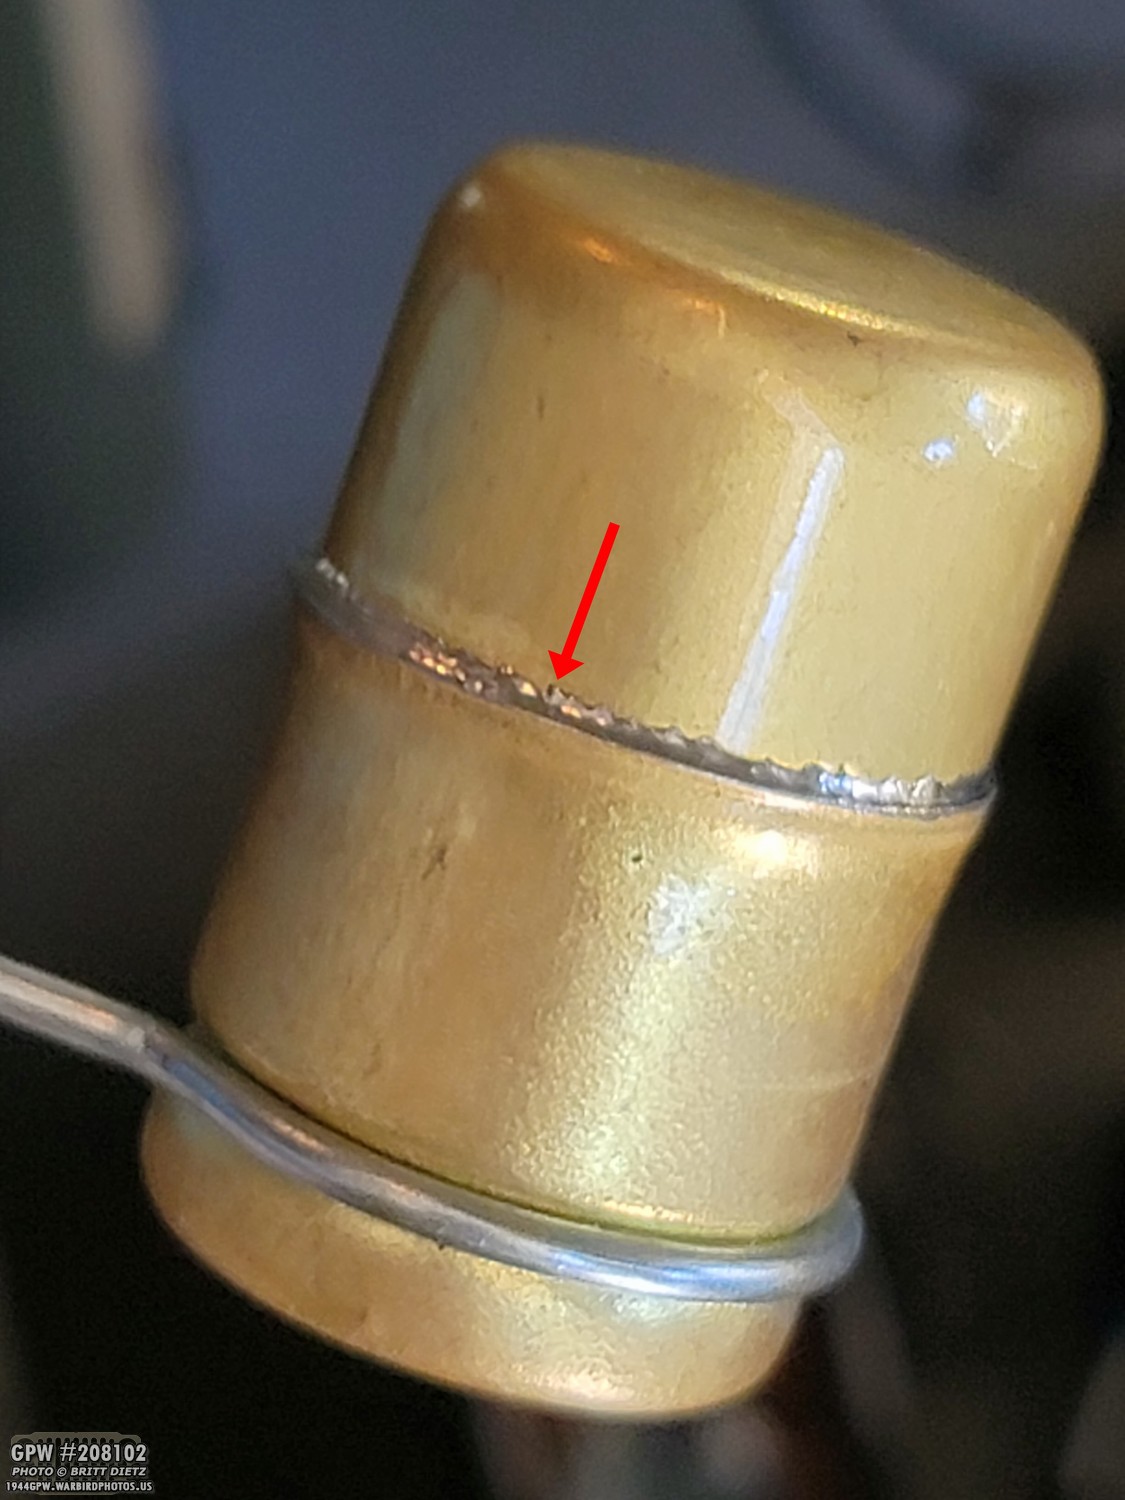
After taking a closer look at the brass float, I realized that it has a leak where two halves of the brass float come together. That’s allowed the float to take on fuel and sink. Second time now! Our gasoline in California is pretty harsh on things, but I think this was just a bad soldering job sadly. I decided to get one of the newer plastic floats, which are made to withstand modern gasoline and are a sold molded piece with no seams. I will get that in this weekend, so I’ll do the switch next week.
After taking a closer look at the brass float, I realized that it has a leak where two halves of the brass float come together. That’s allowed the float to take on fuel and sink. Second time now! Our gasoline in California is pretty harsh on things, but I think this was just a bad soldering job sadly. I decided to get one of the newer plastic floats, which are made to withstand modern gasoline and are a sold molded piece with no seams. I will get that in this weekend, so I’ll do the switch soon.

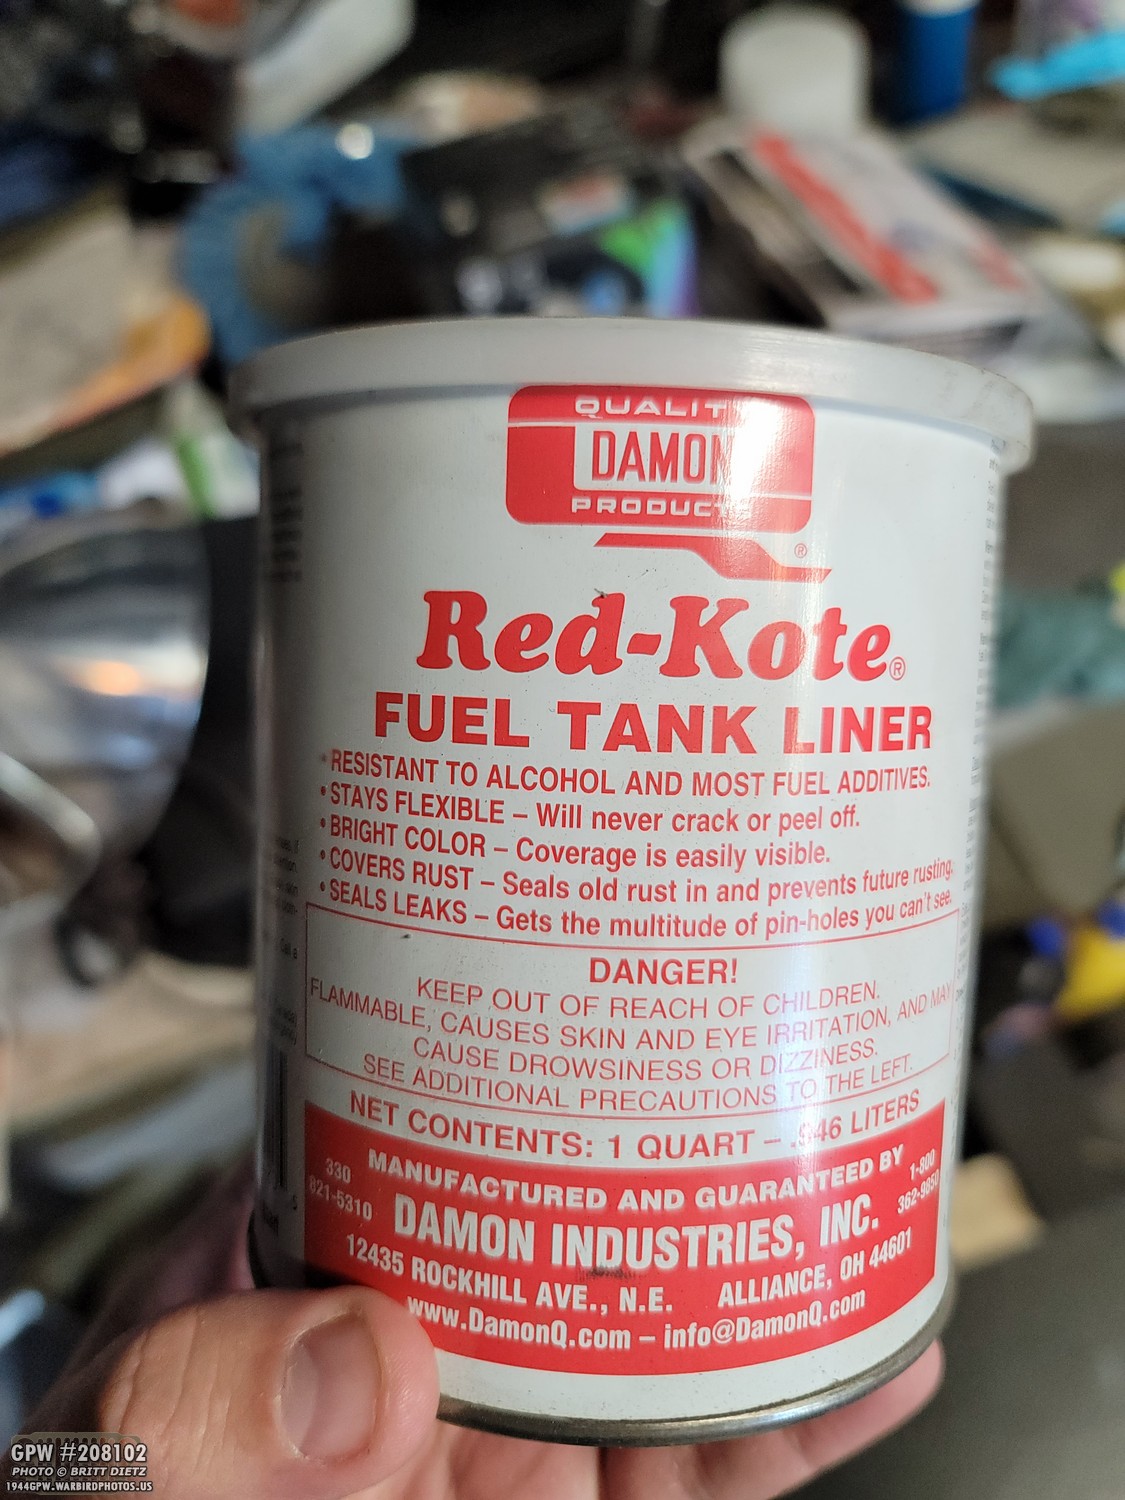
So, I coated the end of the float with the Red Kote! I made sure the area where the soldering was had a nice layer of it on it.

After waiting 48 hours until it was totally dry and rock hard, I decided to test it. I took an old lid from a tub of bondo and filled it with some gasoline.
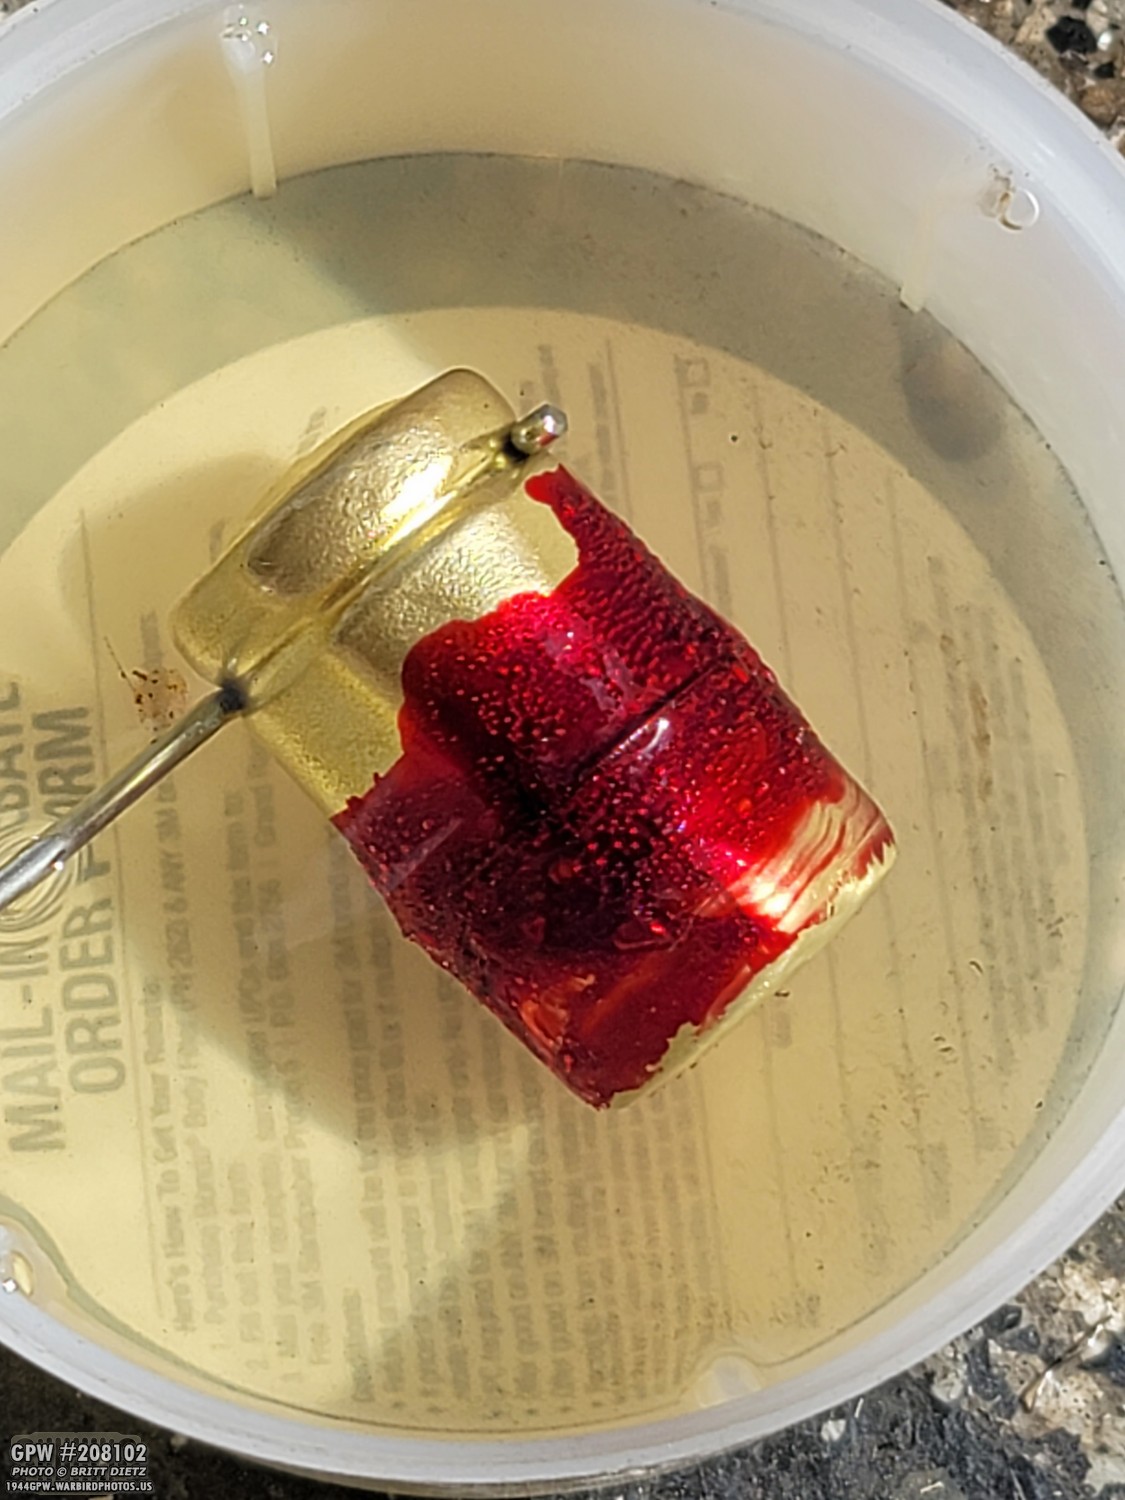
I needed to make sure the Red Kote was truly dry and the leak was sealed. Success! No more bubbles and the Red Kote was nice and dry. The float had no issues floating!

I did notice, however, that there was some resistance with the float arm that might not allow the float to move. It’s supposed to have some resistance, but it just felt like too much. So I hit the pivot point with some WD40. That seemed to loosen it up much more, but still have the required resistance to form the electrical connections needed.

After I put the sender back in the fuel tank and got everything screwed down, I gave it a try. Success! It was working again! But, we’ll see what happens. I’m thinking of trying this out for a week and see if it ends up sinking again. By then I’ll have the new plastic float, so I can switch to that instead.
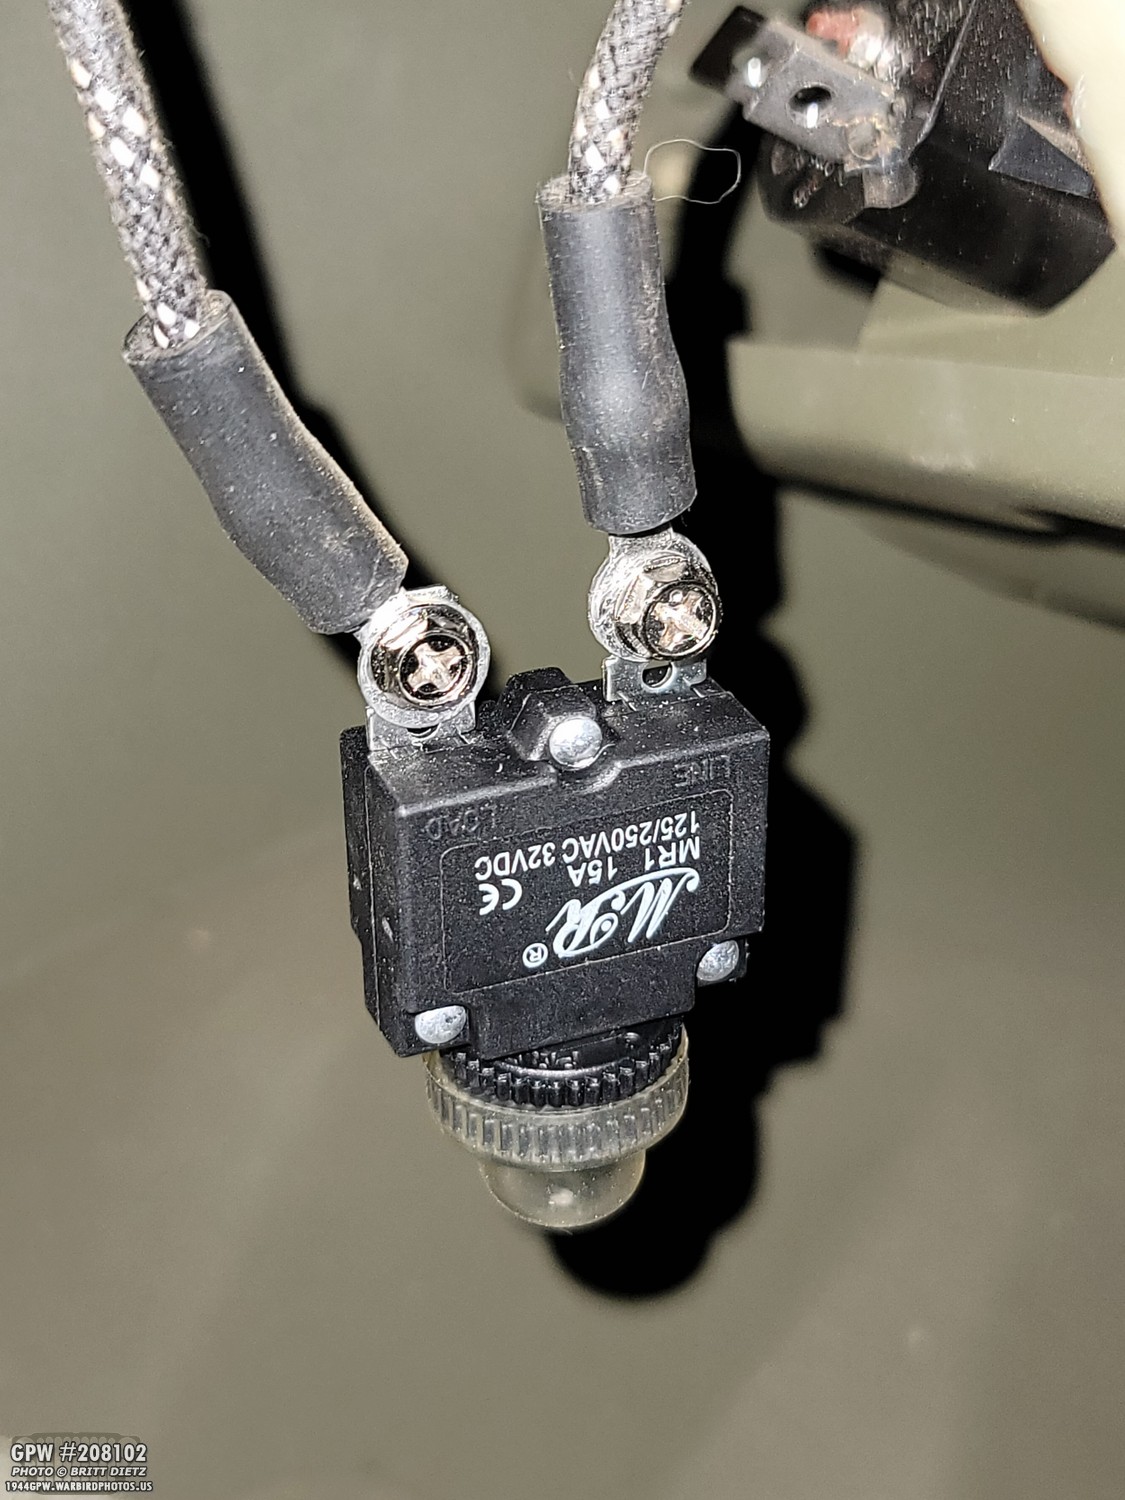
I wanted to make sure the circuit breaker was not being an issue, so in the meantime, I bypassed the WW2 style circuit breaker and I’m using this modern circuit breaker that allows for an easy push-button reset. I’ll tuck this up into the dash so no one can see it, and if the gauge reads empty I can hit the reset button much easier to test it than getting under the dash and turning the tiny screw in the WW2 style breaker to reset it. Once I know for sure the electrical aspect is not in any way part of this ordeal, I’ll switch back to the WW2 style breaker (which you can see top right).

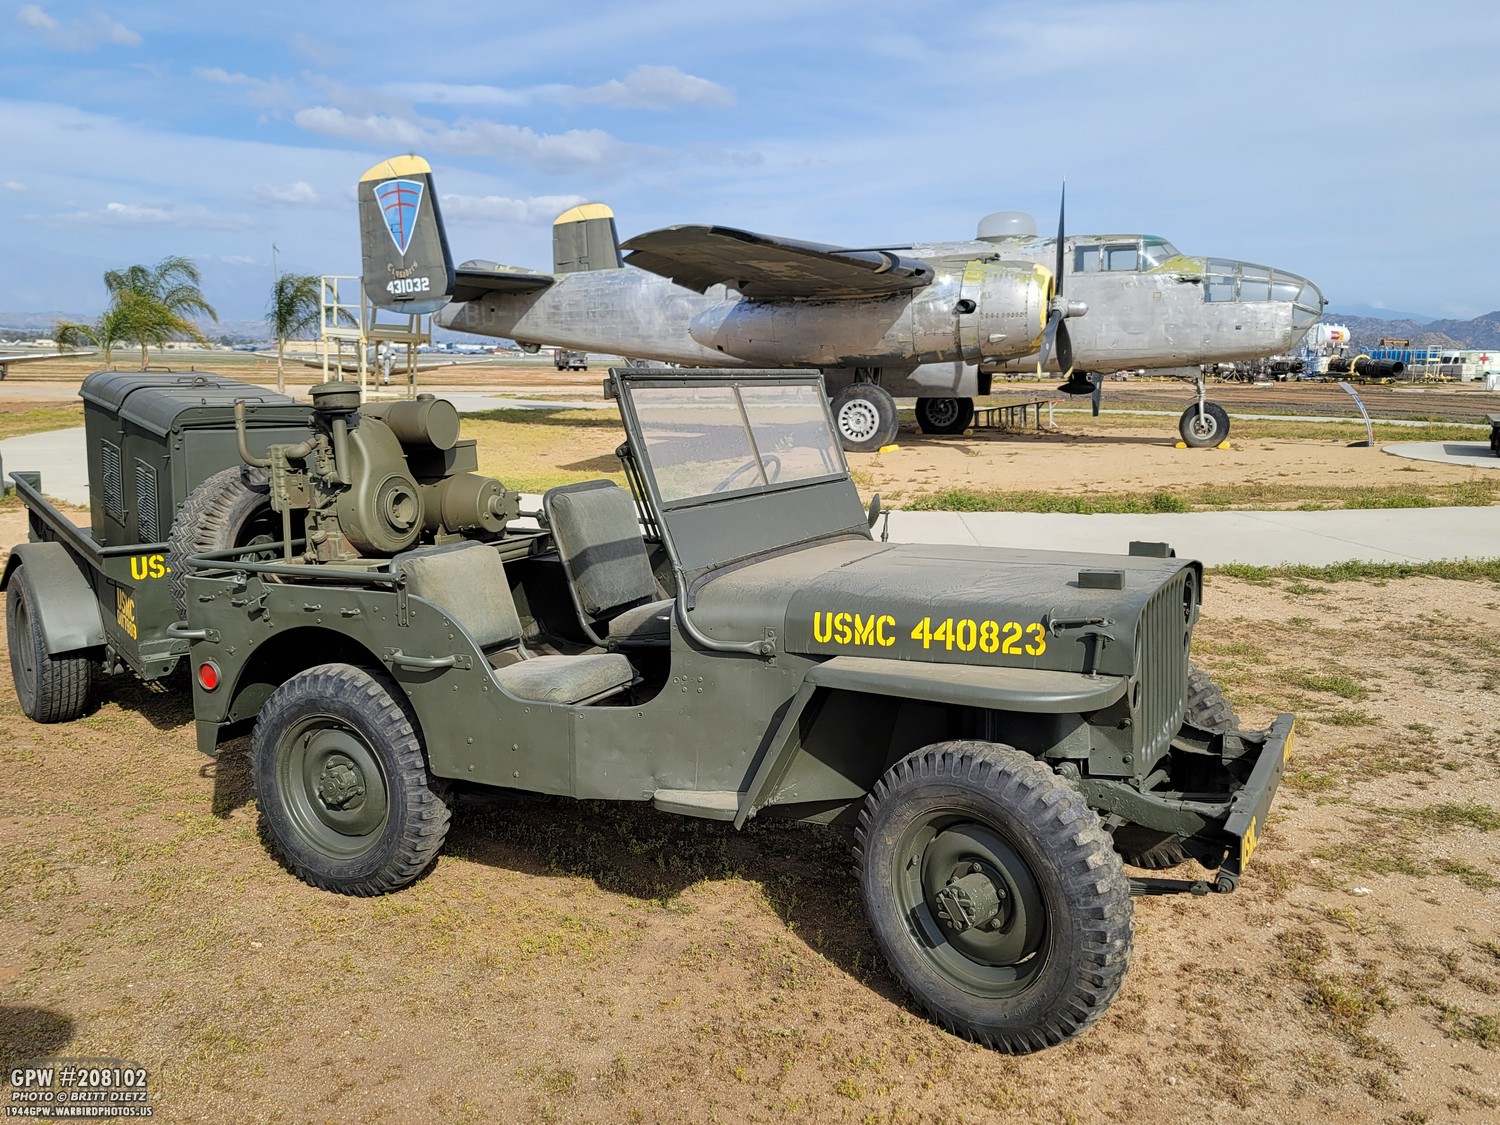
Let’s move on to some show and tell! Last weekend, I was invited to come out to the March Field Air Museum in Riverside, CA to shoot a special flyover of various WW2/military/aerobatic aircraft. I went to the museum a bit early so I could walk around a bit (I’ve been here before, but they’ve changed a lot since my last visit). I was surprised to see some Jeeps there! As I always do when I see a Jeep, I document it through photos!

This one here was a nice Ford GPW. Not sure what is original and repro, but it looked pretty complete!
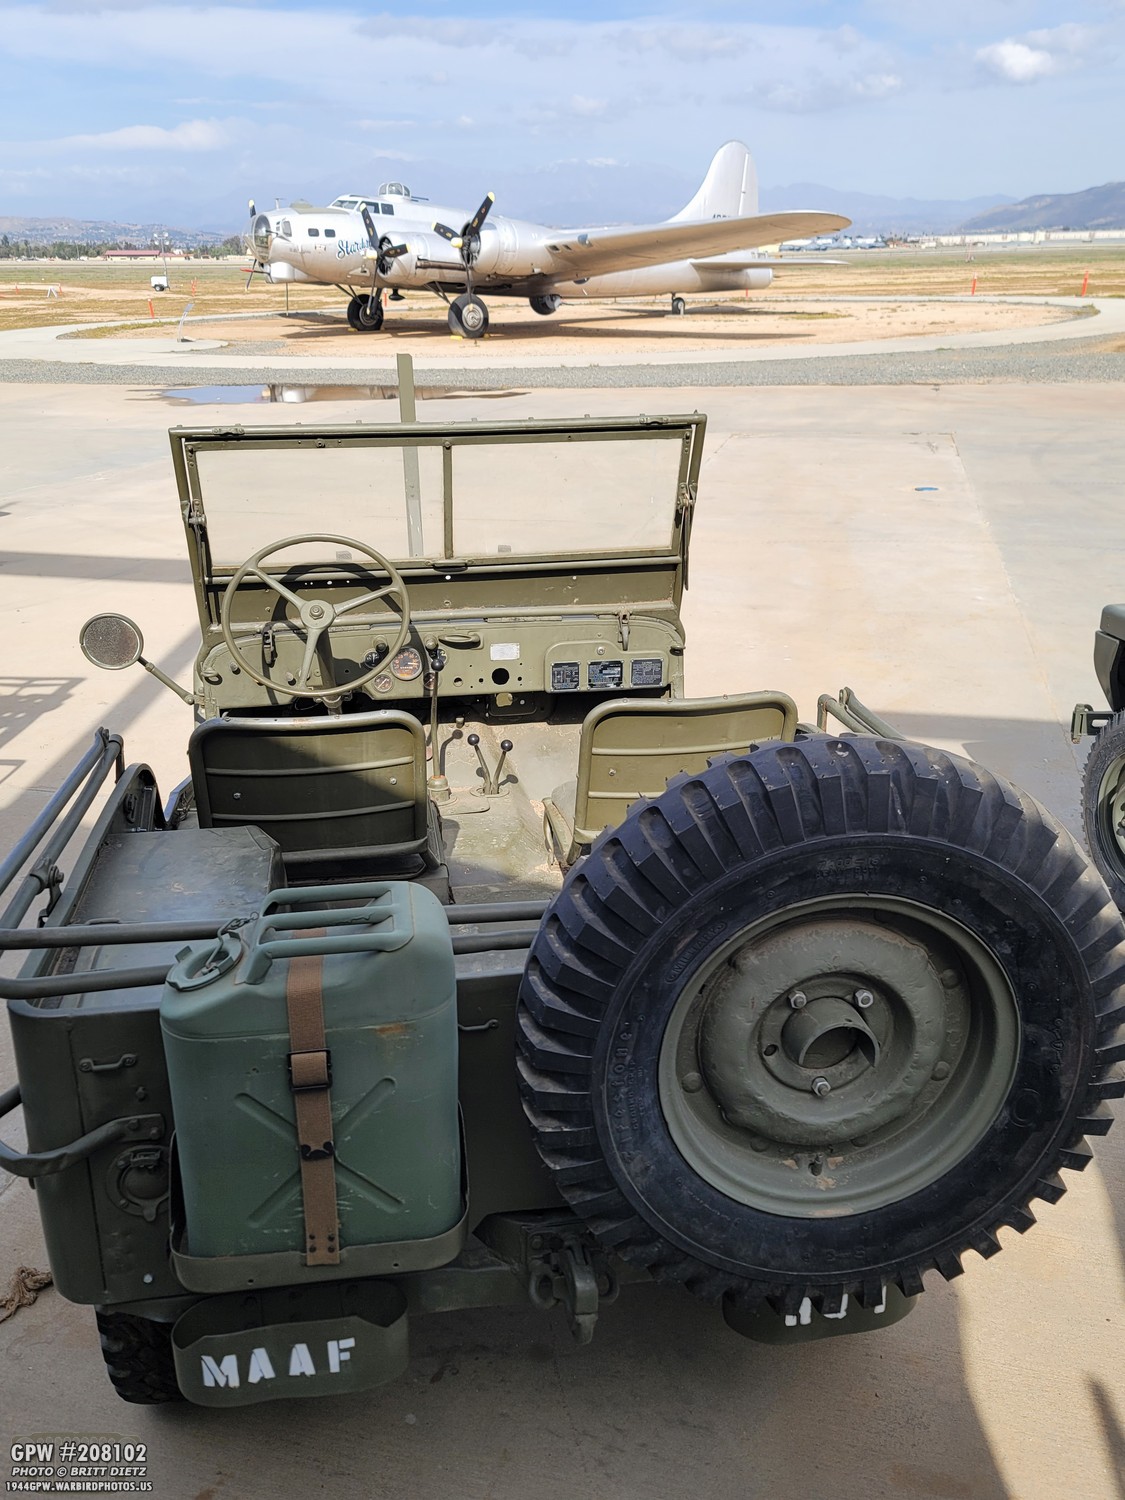
I envy this Jeep getting to stare at the B-17G Flying Fortress every day! Not to mention March Air Reserve Base with C-17s, KC-135s, F-16s, and F-35s in the distance! Based on the bumperettes, it appears to represent March Army Air Field which is what the base was called in WW2. It hosted B-24s for training during the war.

Apologizes for the not-so-great quality, I didn’t realize till after I took the photo. The datatags on this Jeep are repro, so I can’t confirm if they are correct. But it appears to be November 4, 1944, with no serial number.
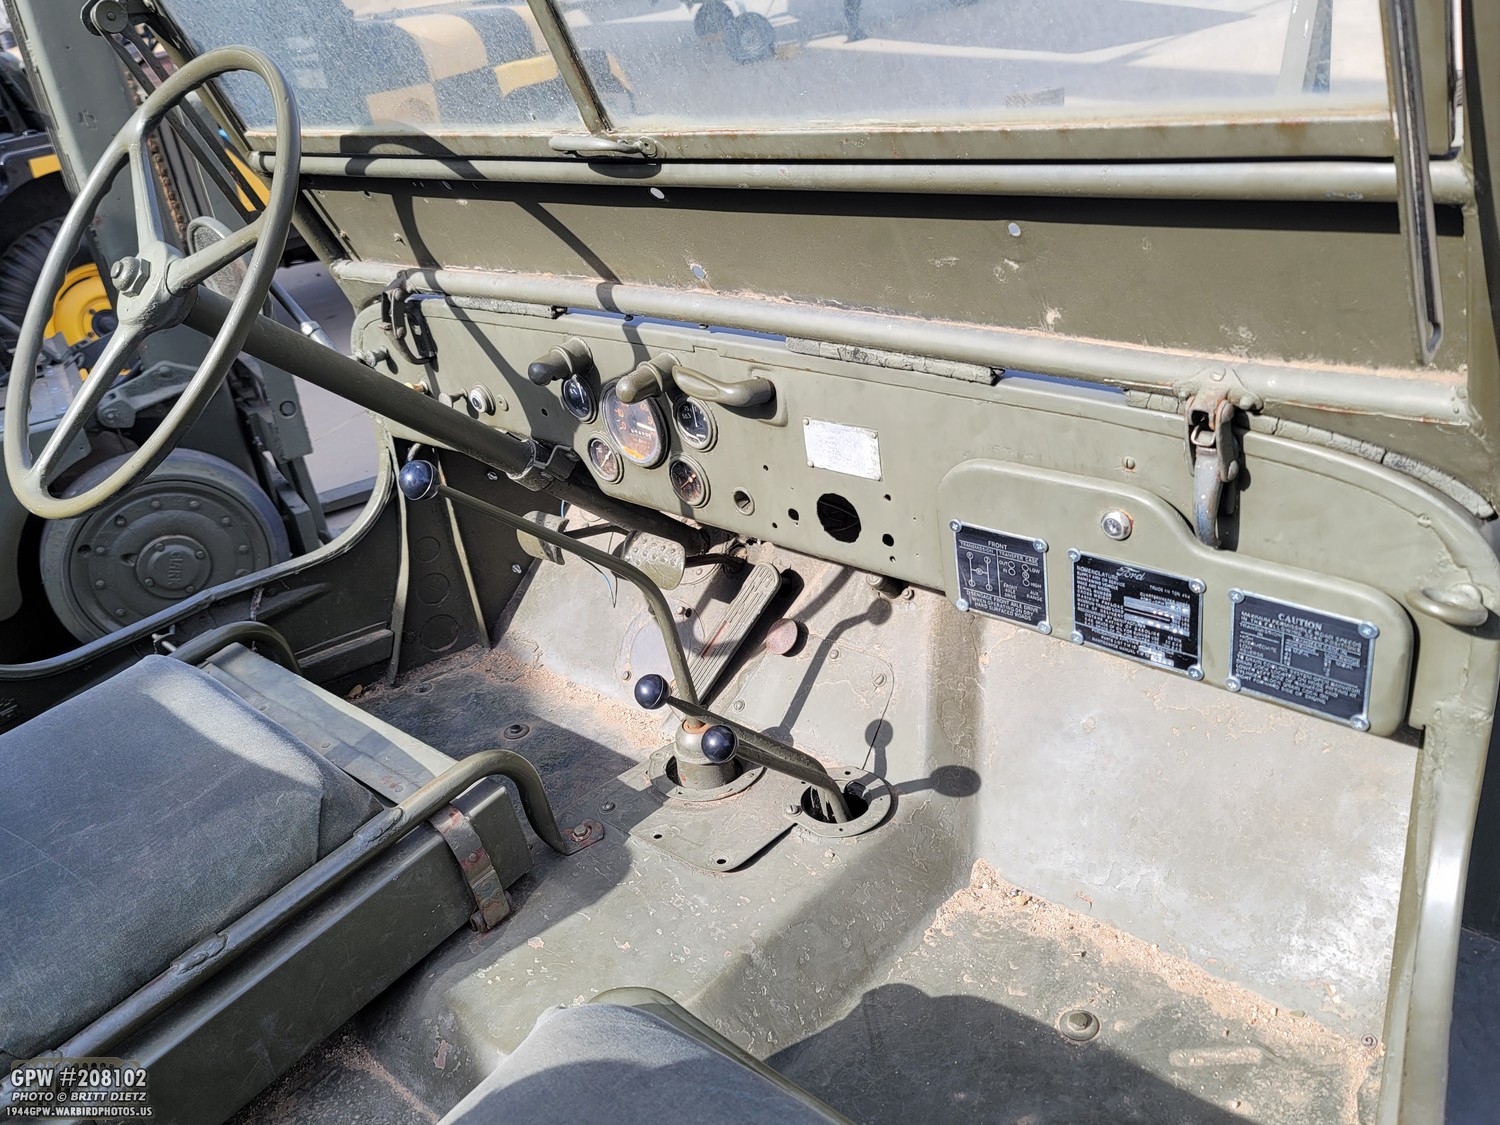
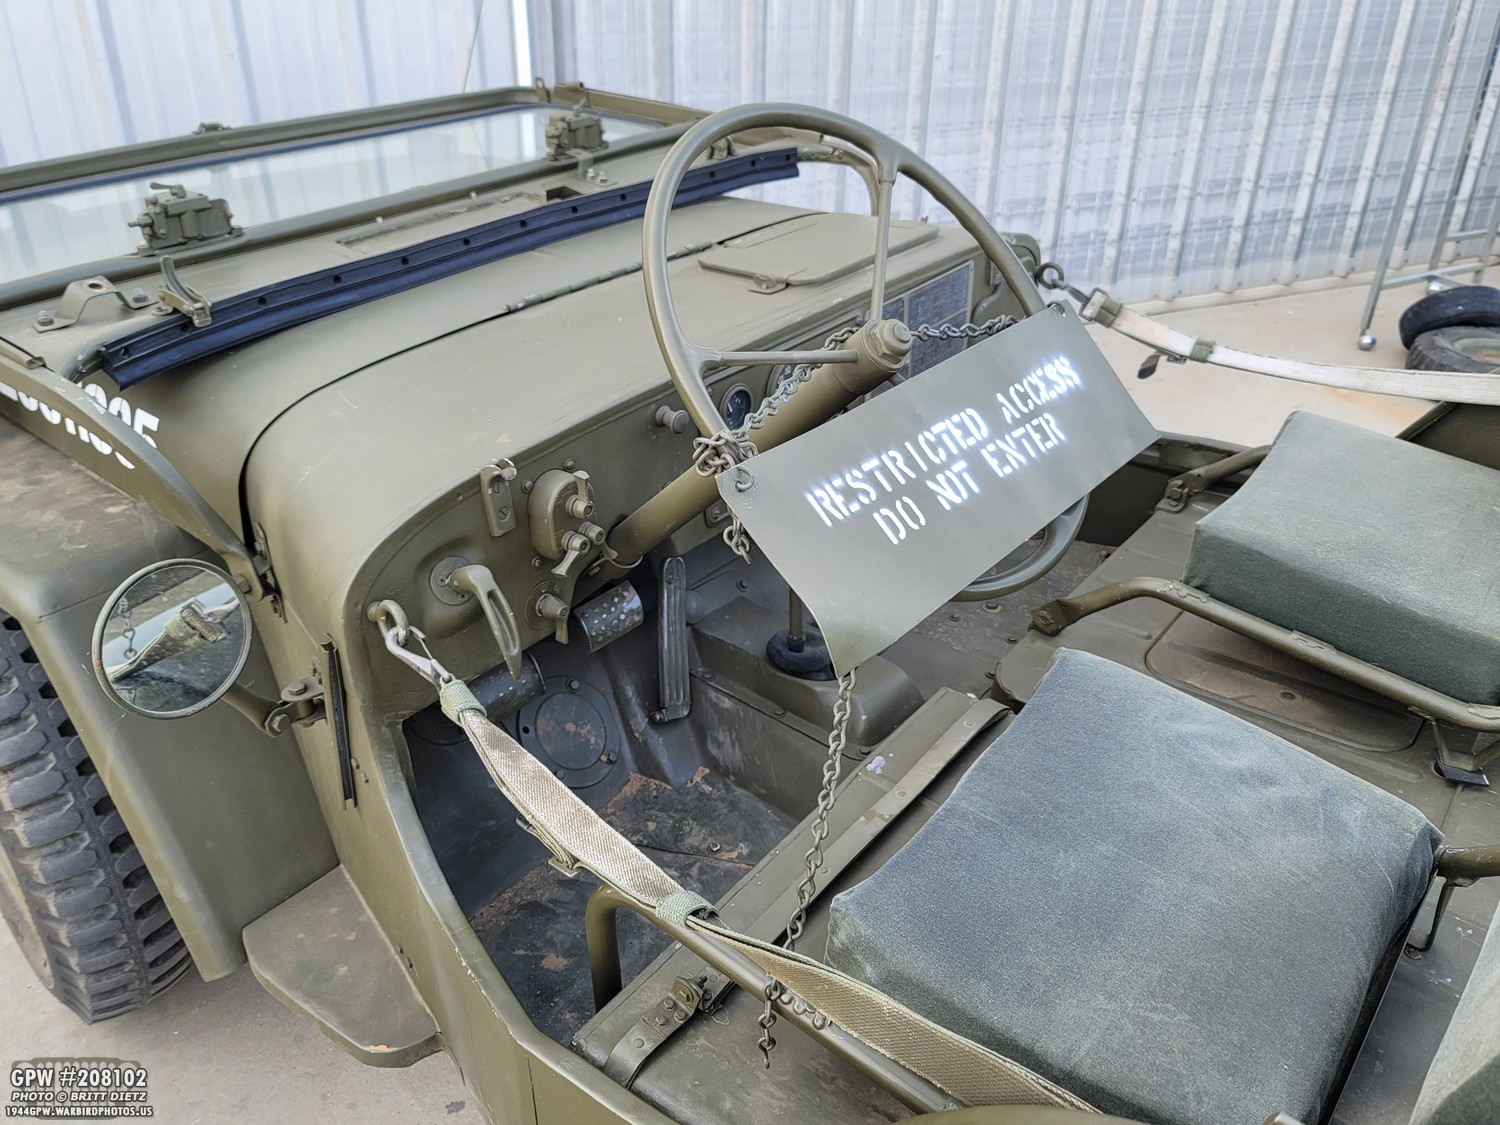
Here’s a look at the dash. The shipping plate looks pretty original, and possibly some of the gauges. It’s mostly there, with some additional holes.

It’s missing a rear seat, but the tub appears to be original. Looks like a GPW tub pre-ACM. The passenger side tool box lid is the MB flat style.

I always find it fascinating to see the variations on Jeeps. They tell a story, as from when it left the factory to today, it could have been modified at any time. In this photo, you can see a custom-made front bumper (and custom front gussets). The marker lights are post-war and it has a hydraulic system on the front axle to combat the jeep-pull when stopping (the function of the torque reaction spring normally).
I spotted this shield attachment welded to the shovel bracket on the side of the tub. First time I’ve seen something like that!
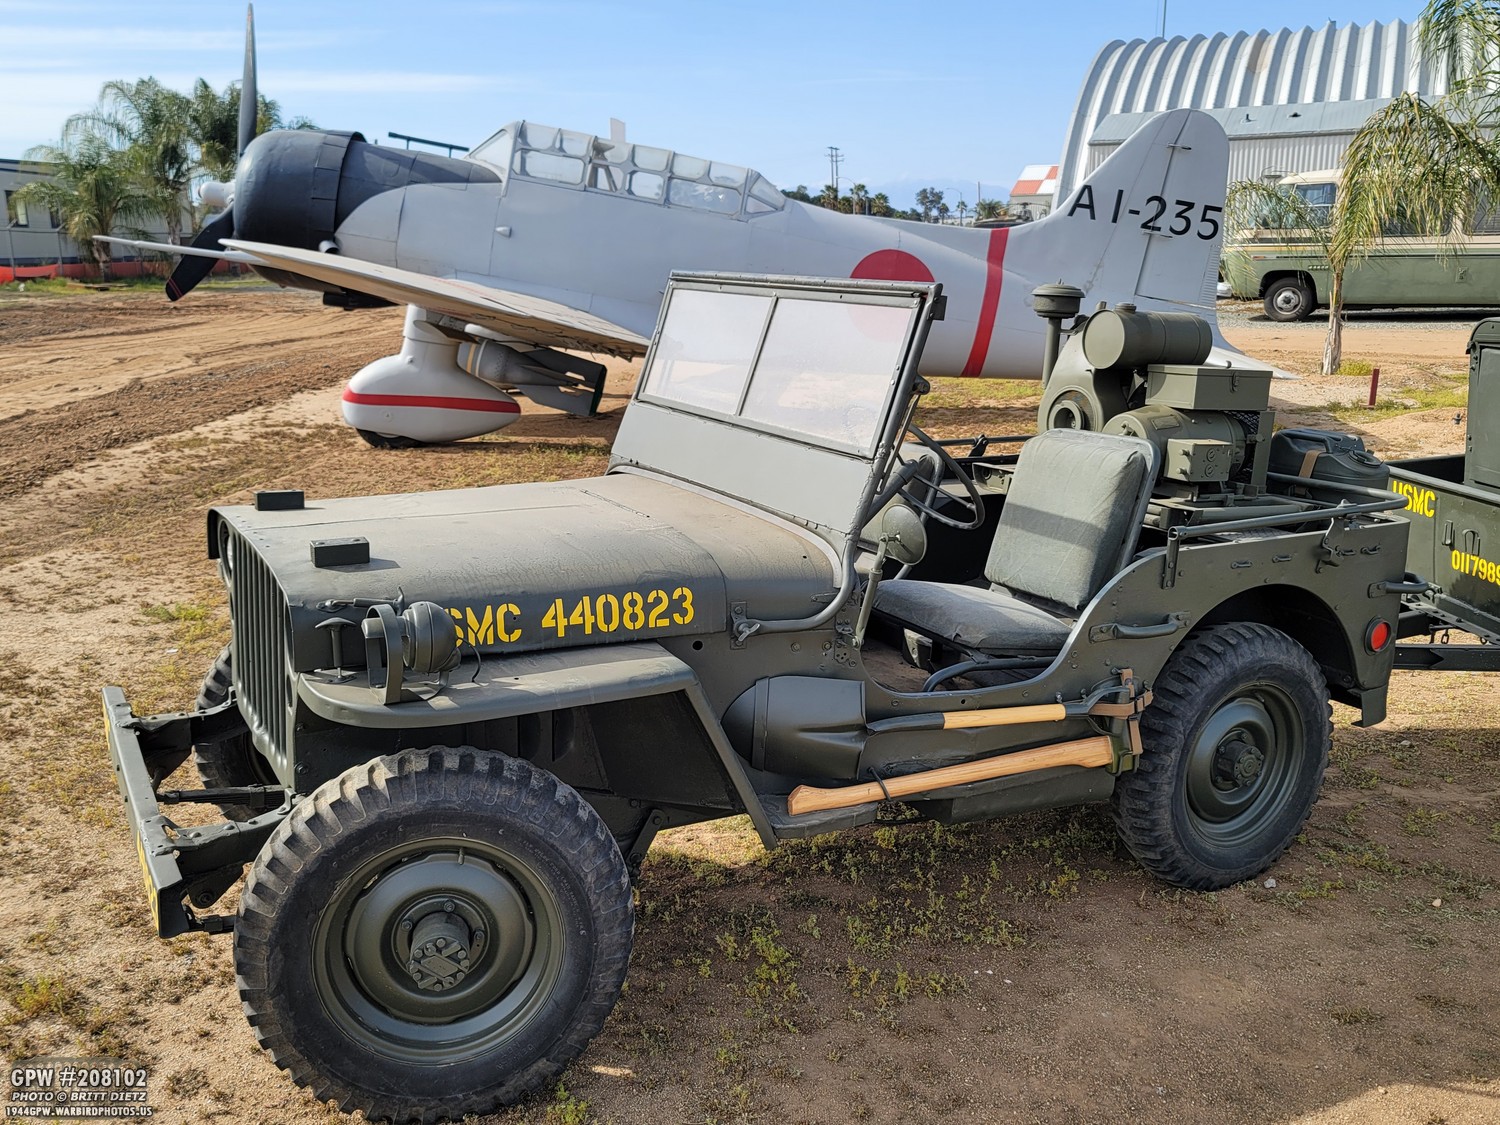
Moving down the museum, I spotted another Jeep! This time (in good company with a ‘Tora Tora Tora’ movie converted BT-13A to resemble a D3A Val) a Willys MB USMC Jeep with trailer.

This one looked a lot more original with lots of correct items on it. Though the front gussets were welded to the top of the bumper.

The rims are civilian style, and the front axle has lockout hubs. The rear bumper was definitely modified. In place of the backseat was some sort of generator or APU, I think.
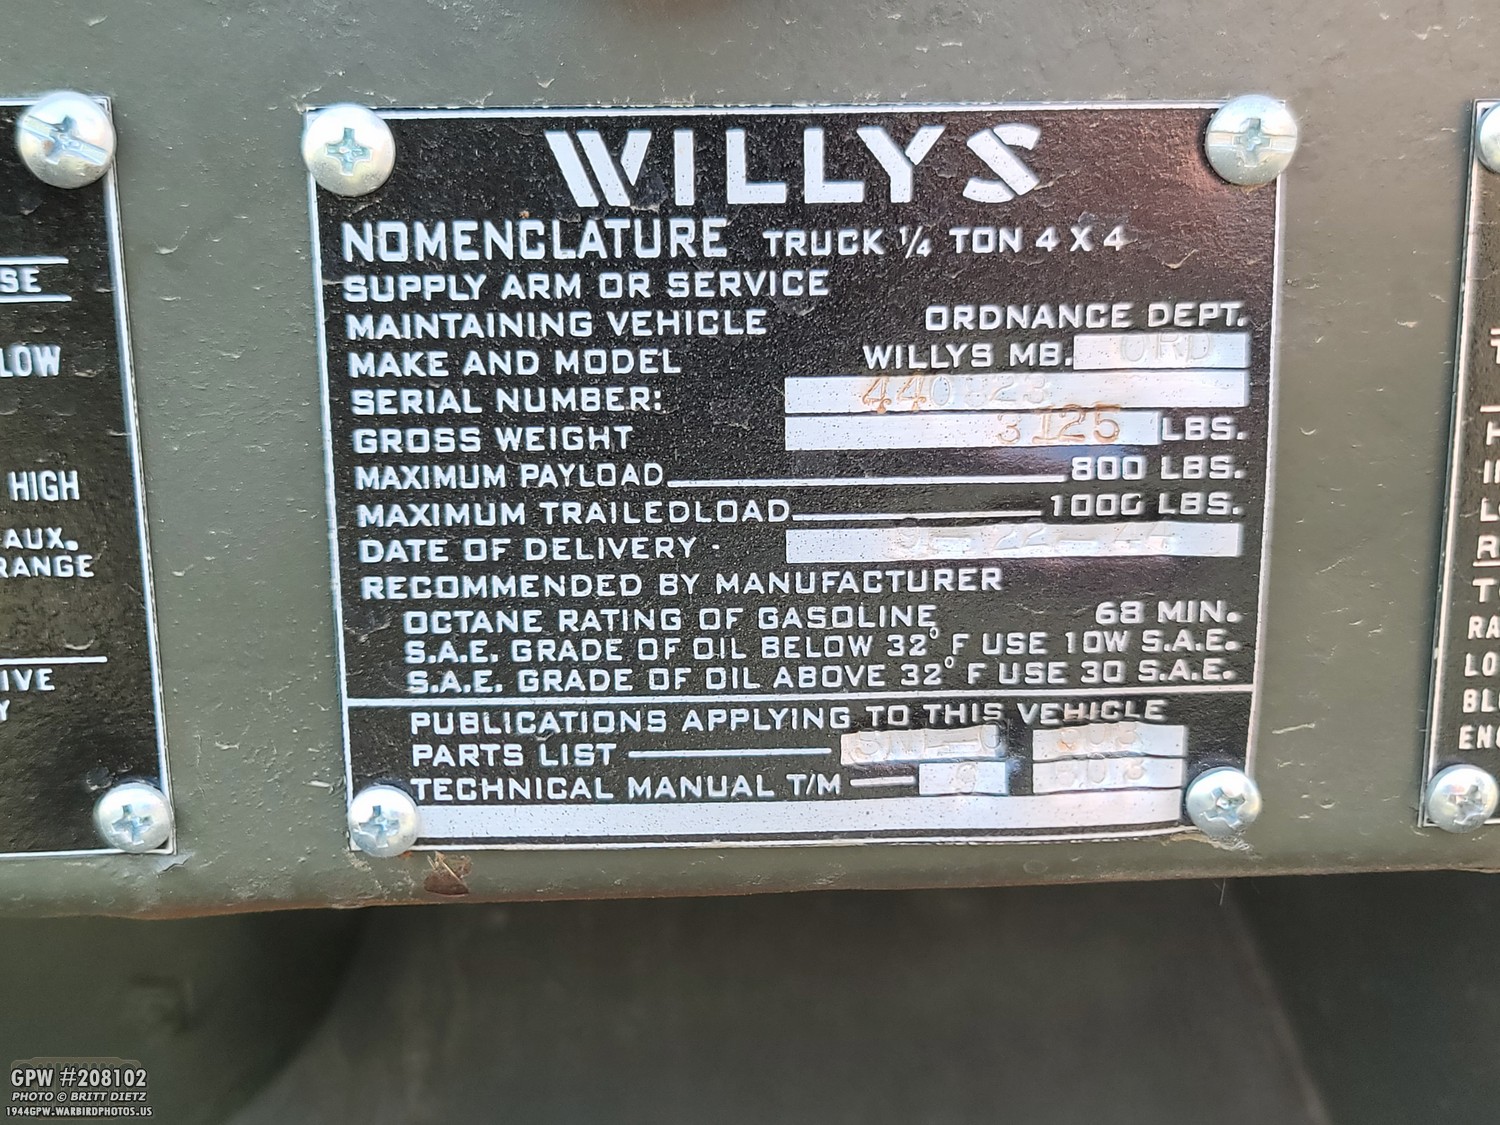
Looking at the dataplate for this one, it appears to be 440828 from September 22, 1944.

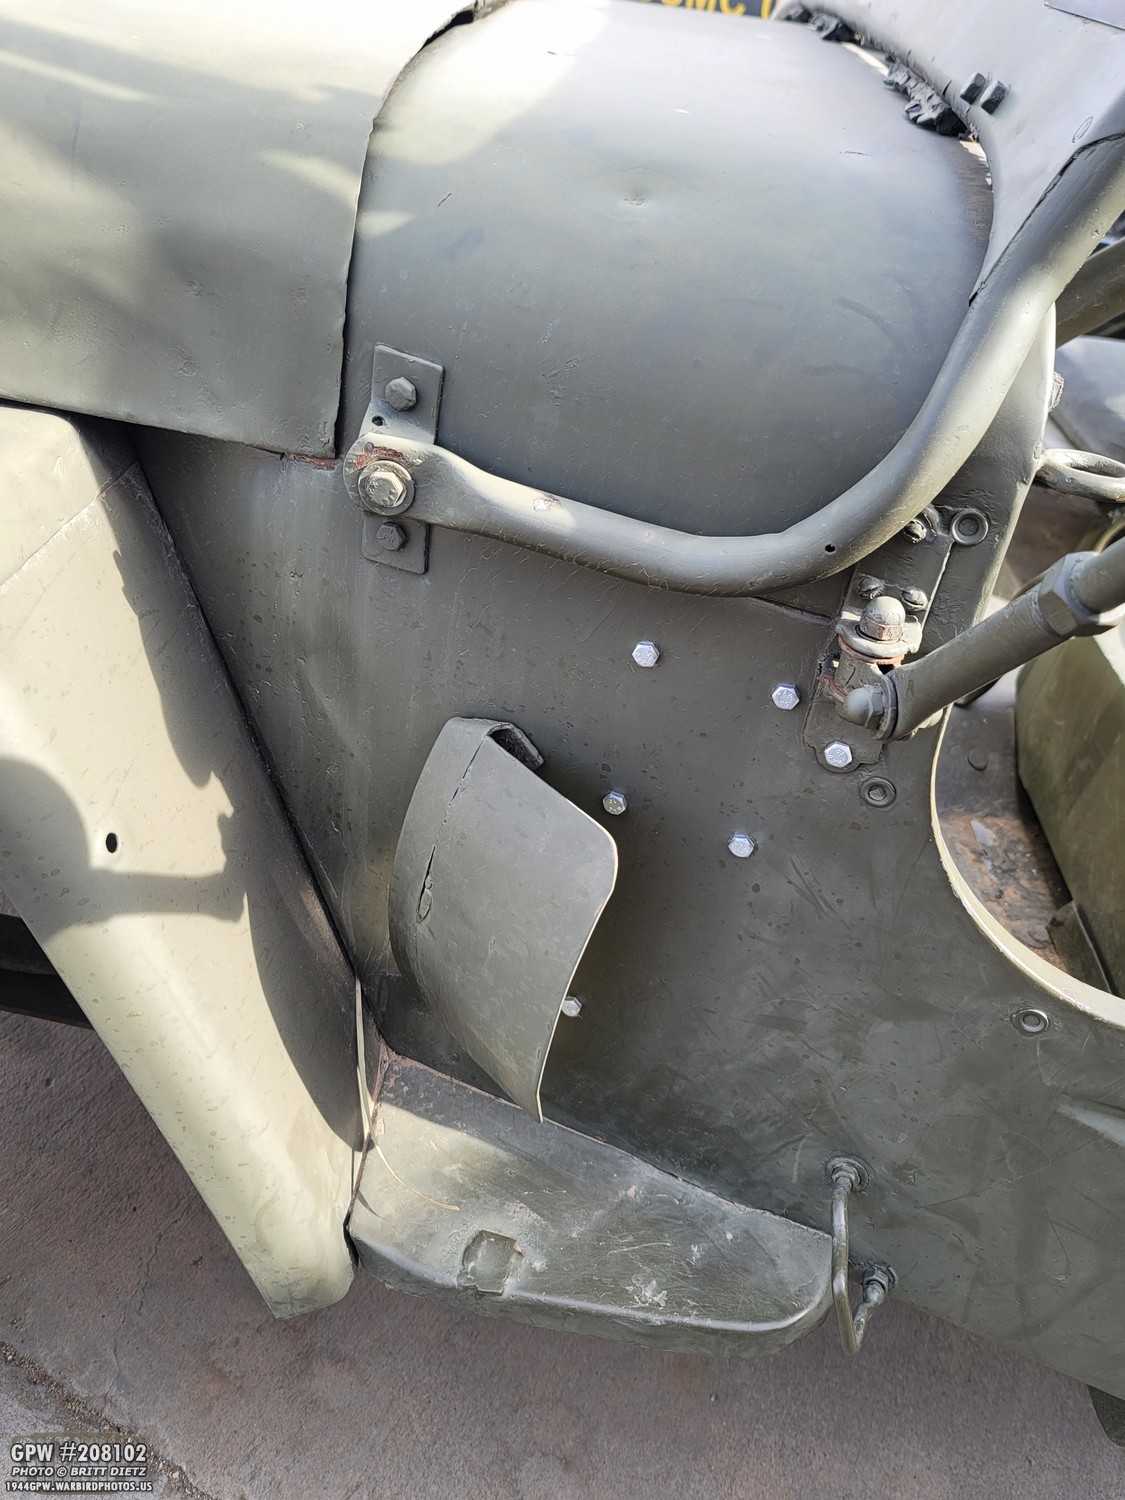
I have no idea what this device is in the backseat. It looks like a fuel tank on top, and possibly a generator of some kind on the side. Possibly an early APU for the larger generator in the trailer?
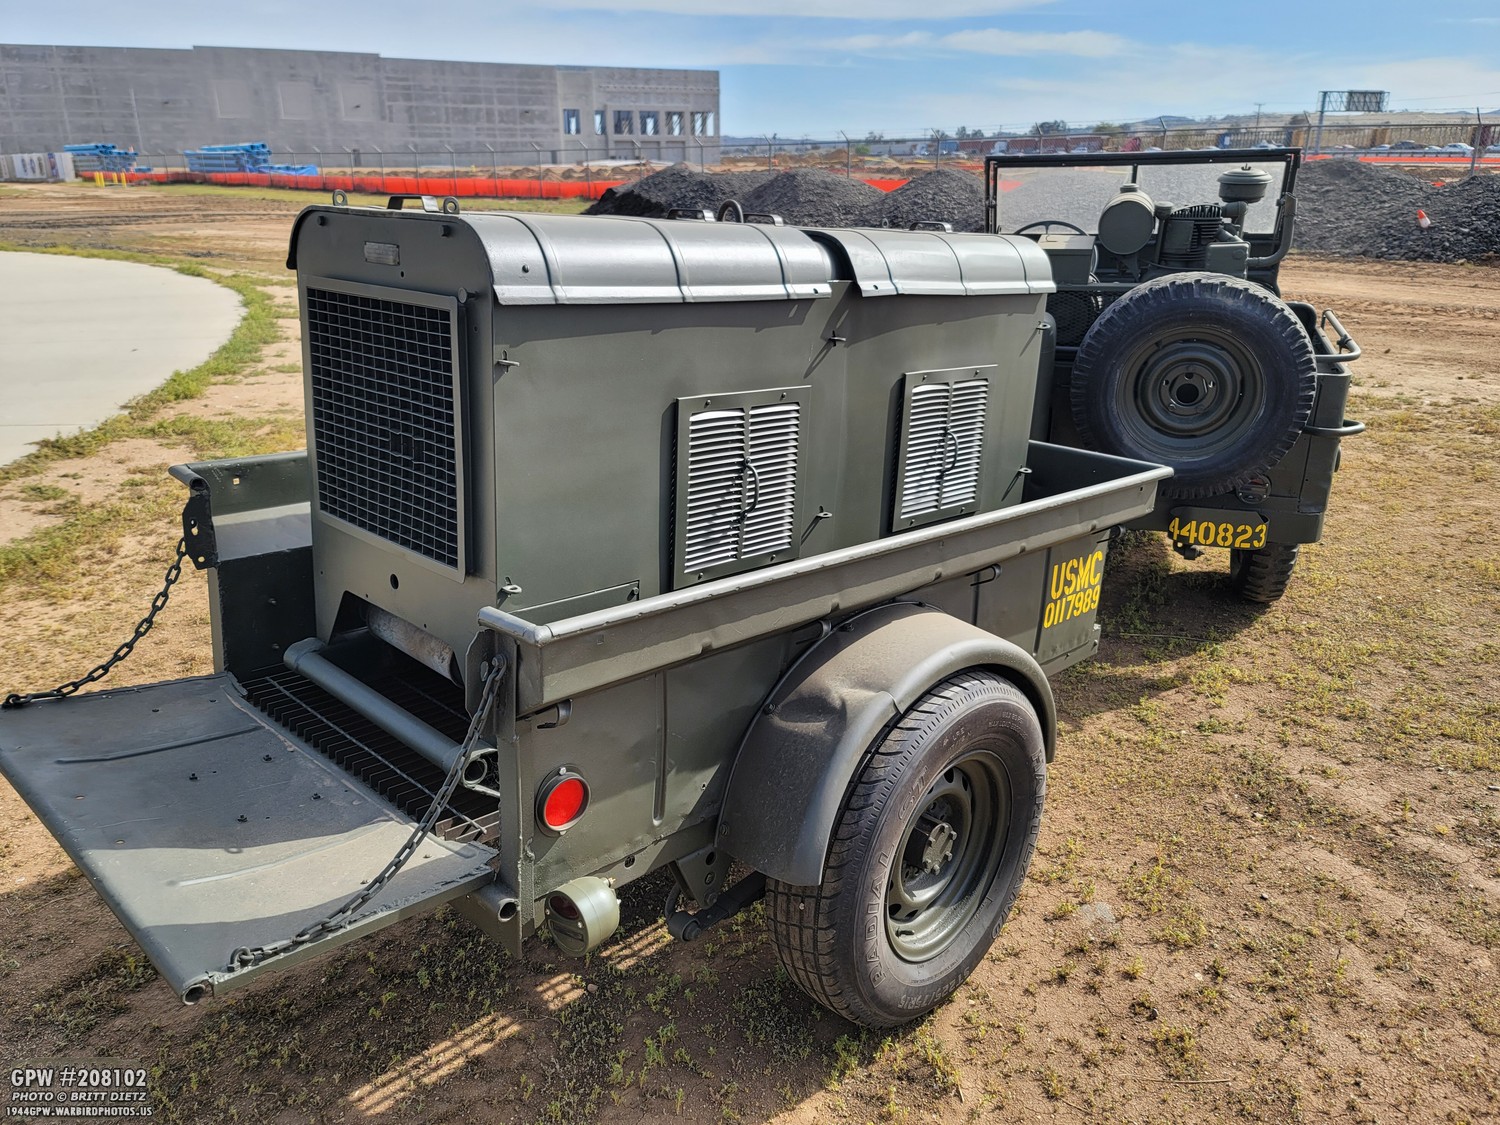
In the trailer, it appears to be an aircraft startup generator/apu.

Overall, it looks more freshly restored than the other Jeep.
Along with the Tora Tora Tora Val, this USMC Jeep shares a spot with a North American B-25J Mitchell (undergoing restoration)

This jeep had the marker lights turned around to face inward. Not sure if there was a reason for that.
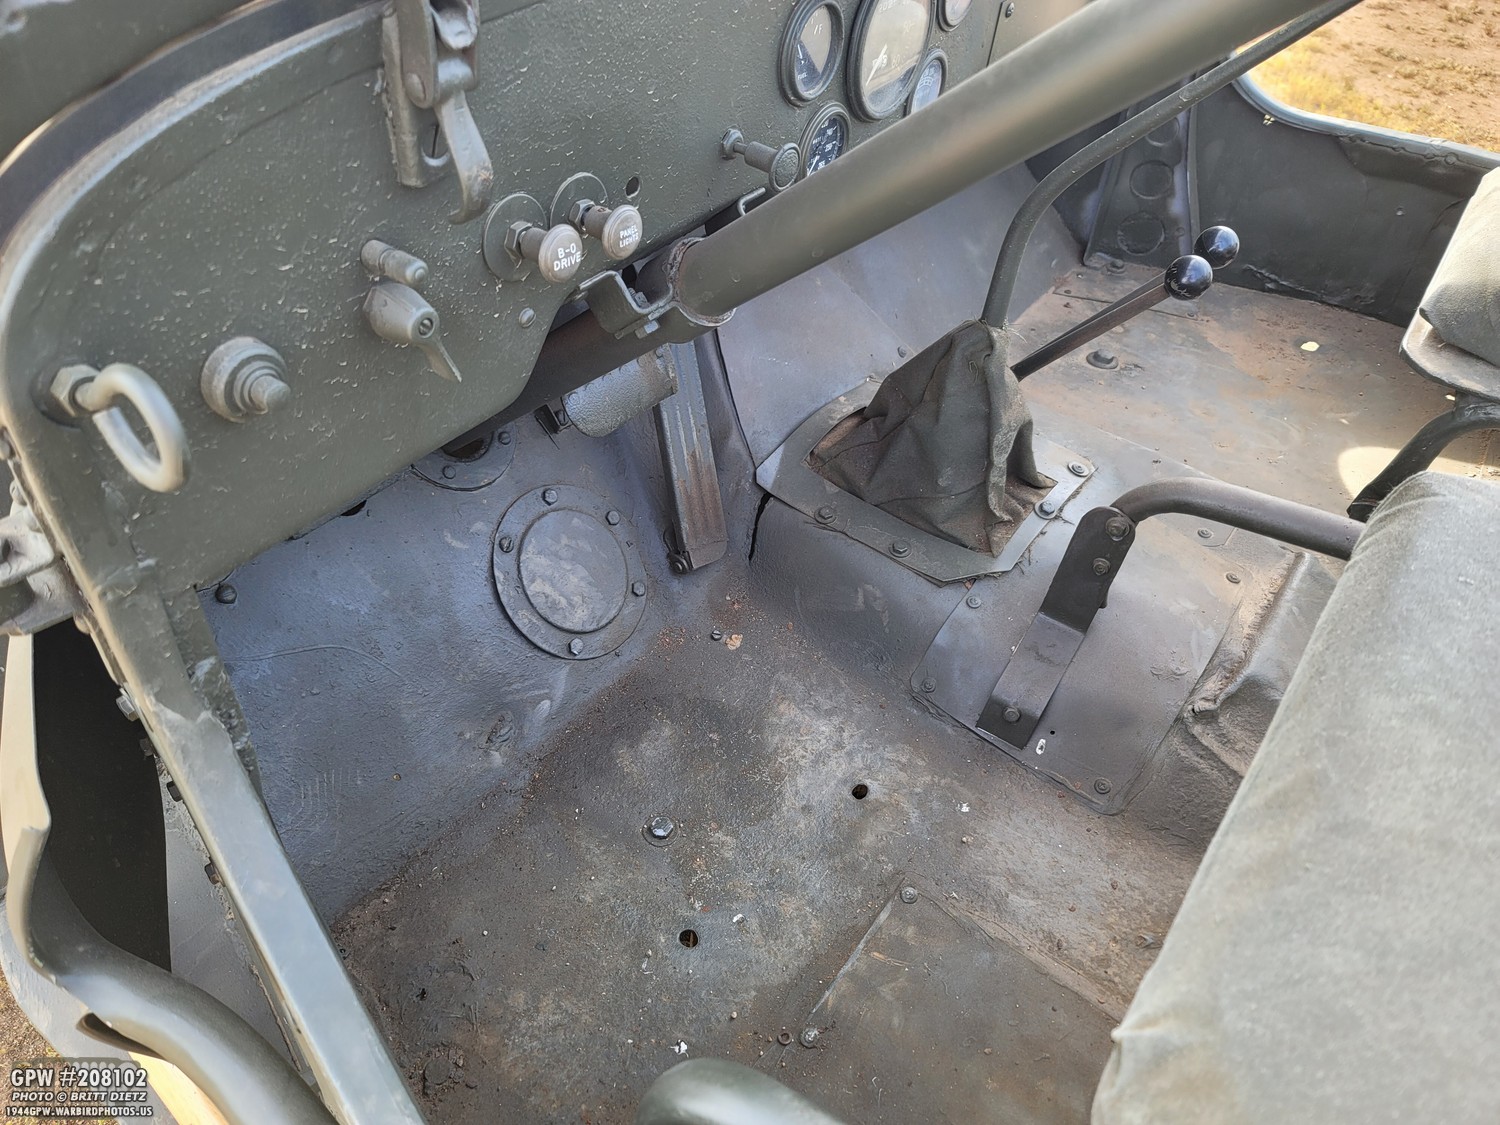
Looking inside the Jeep, it’s a bit all over the place. It appears to have been sprayed with some thick primer under the green paint. The middle hump has a bunch of issues, possibly a T-90 post-war transmission?

Also on the field was a post-war CJ Jeep dressed to look like a wartime Jeep.
Always neat to contrast/compare how the Jeep evolved after WW2. They kept some of the best features and improved others.

Missing the rear seat, you can see how the wheel wells/tool boxes changed, the rear floor was ribbed and leveled, and a tail gate added.

From this angle, it almost looks like a wartime Jeep. It actually has wartime axles and some little bits are, I’m sure, the Willys/GPW style.

Also on the field was this 1953 Willys M38A1 ‘follow me’ Jeep. The M38A1 was made from 1952 to 1971.

From the looks of it, it could be portraying the scheme worn by follow me Jeeps at the airfield in the 1950s.
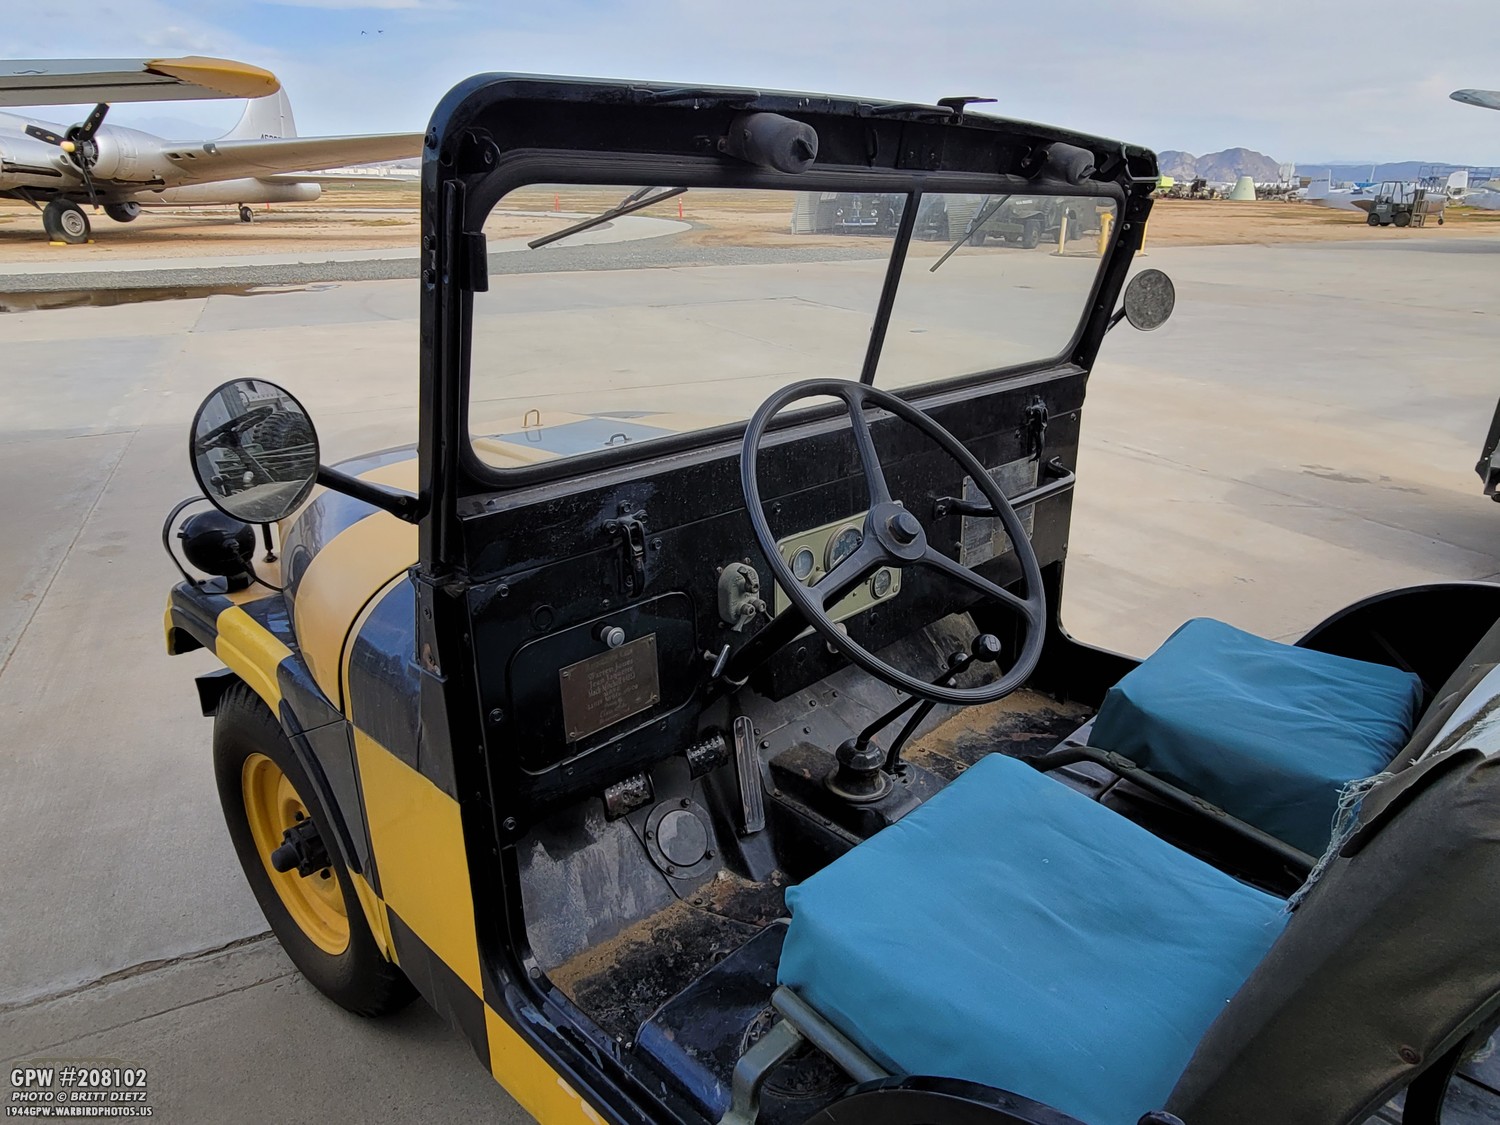
While keeping some of the original design, you can see the windshield and dash has started to evolve into the more modern Jeep styles.
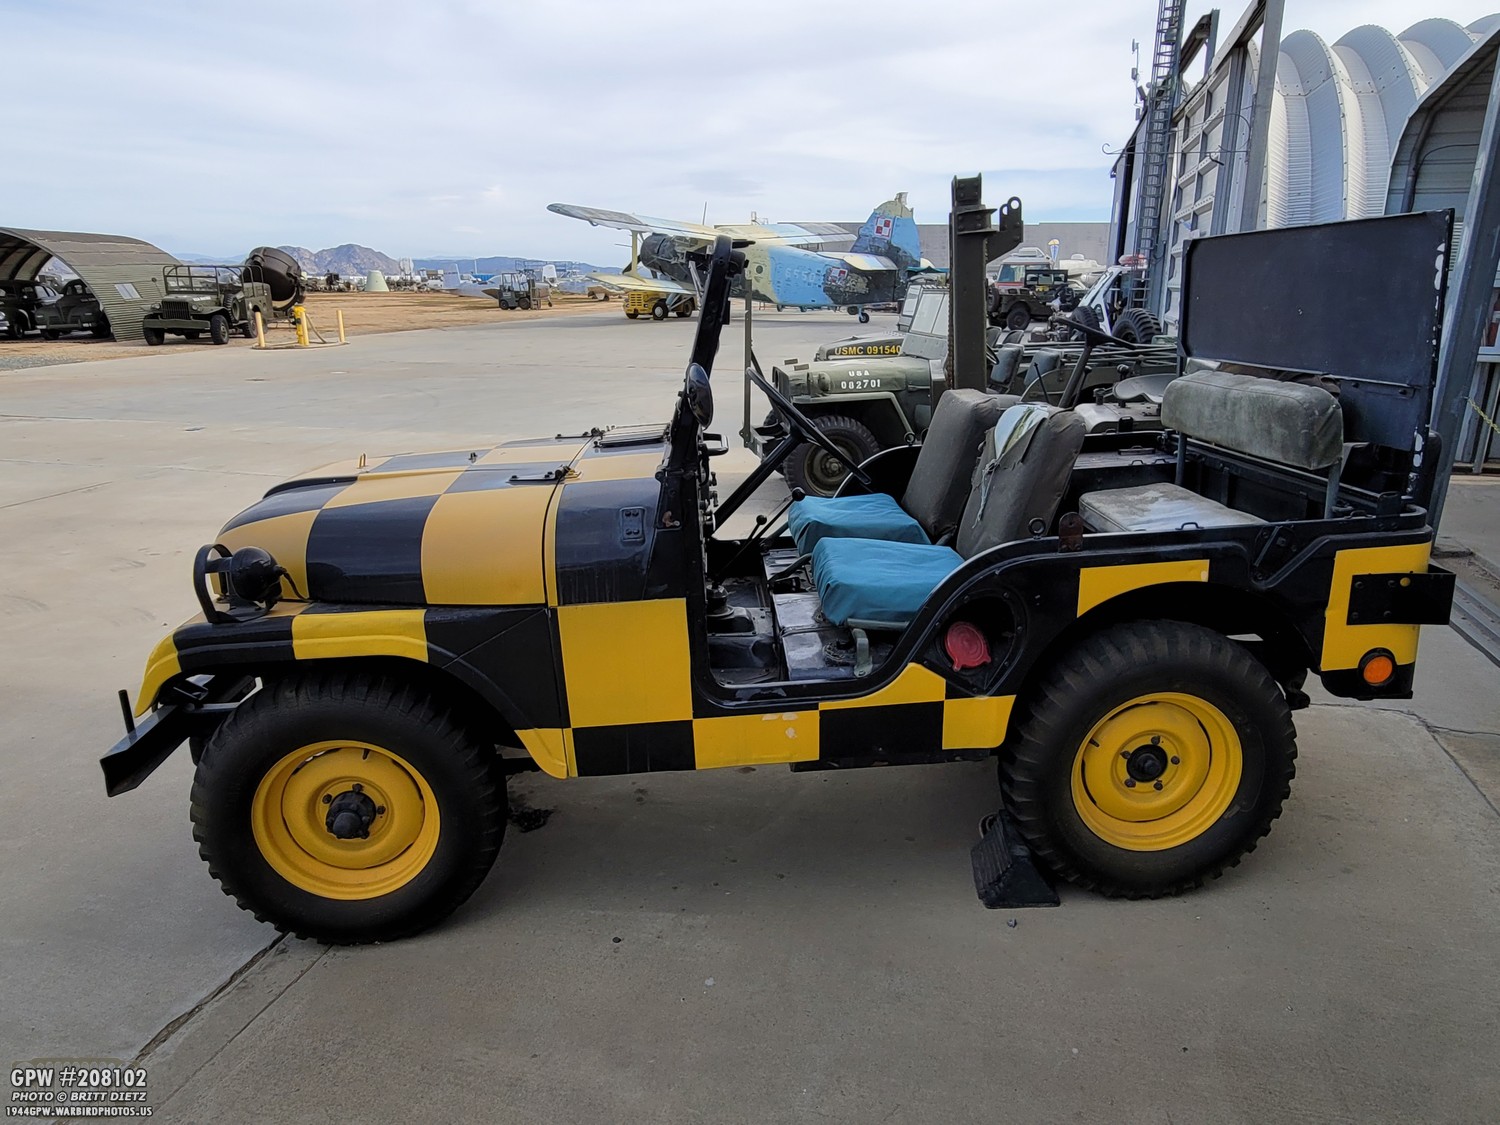
Looking at this angle, you can see the more modern lines starting to appear. It’s really a mix between the CJ Jeep and the early Jeep Wrangler.

And to compare and contrast with the wartime GPW Jeep, here’s the M38A1 with the 1944 GPW.
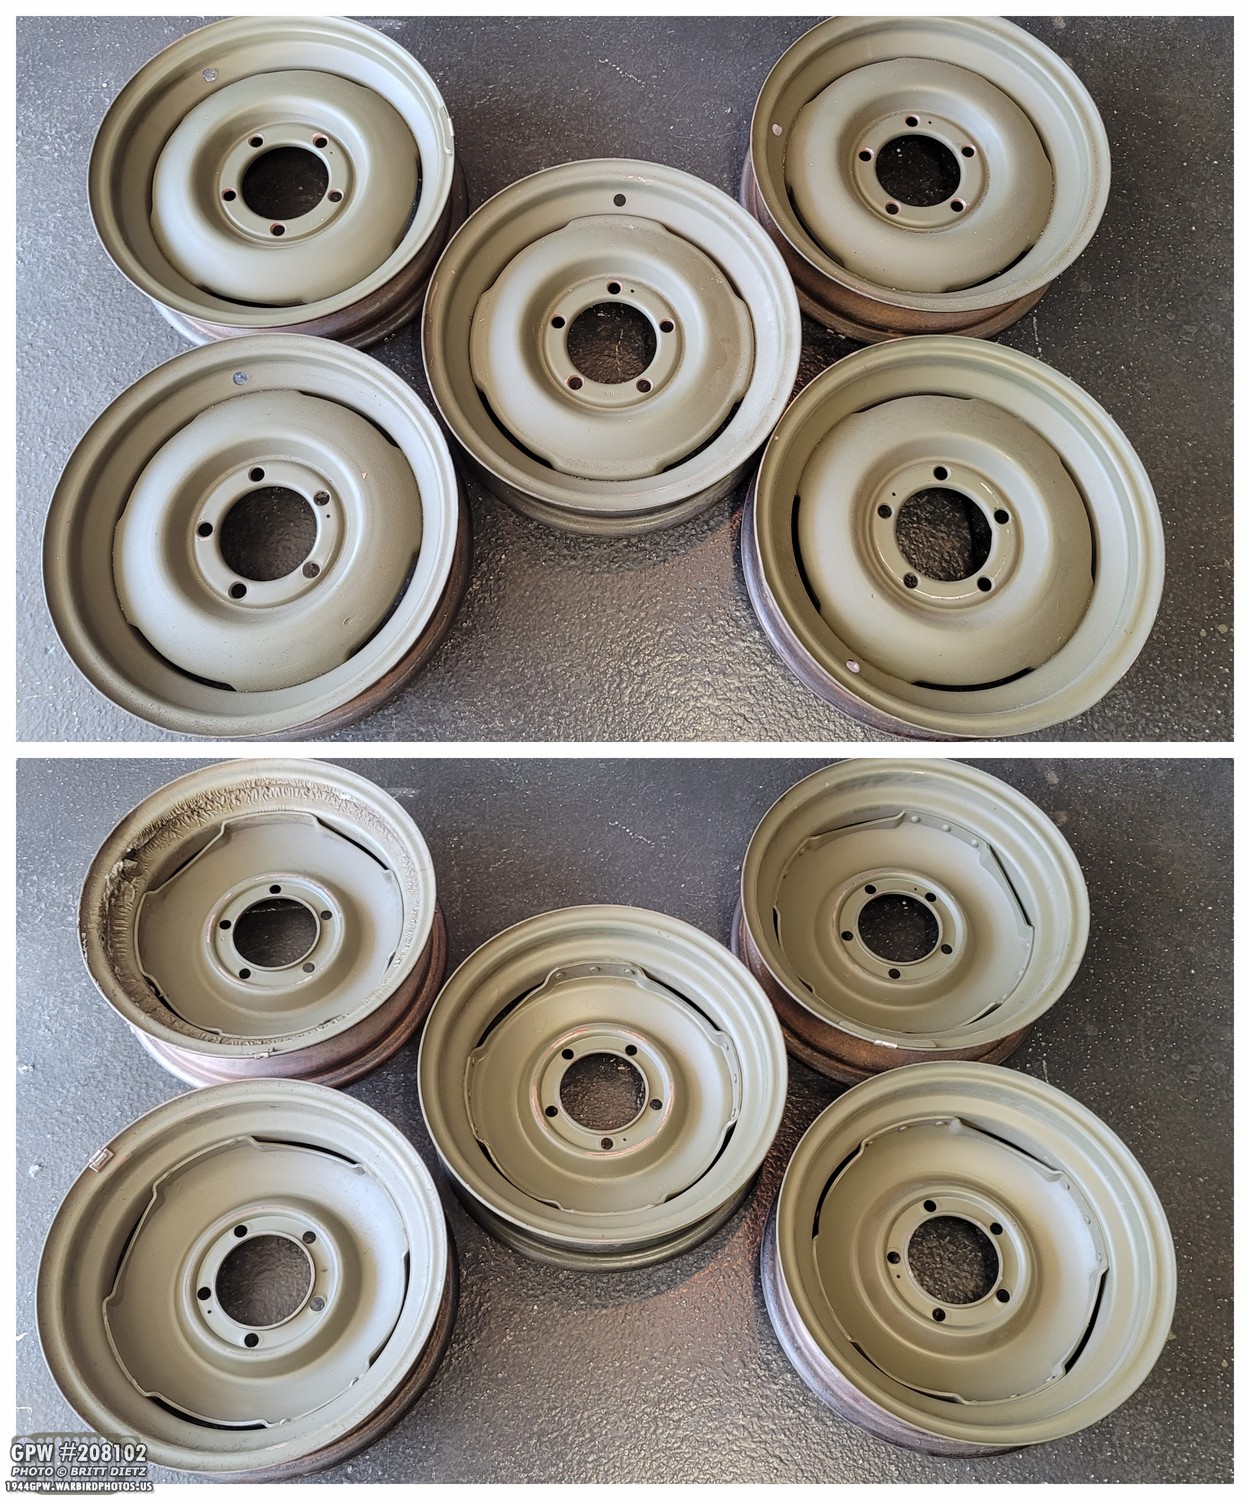
Moving on, one of the questions I get all the time is if I have spare parts or leftover items from the restoration. So I thought I might post a few of the larger items I’m looking to part with if anyone is interested. Starting off, I have five 1950s Kelsey-Hayes M38 rims. These were on my Jeep when I got it and I’ve since replaced them with Combat Rims.

Three of them have markings (which will be on the next slide) and are all in very sound shape.

Here’s a look at the various stamps. This one is dated January 1, 1952. There’s an inspector stamp, and you can just make out the partial Kelsey-Hayes stamp to the bottom left of the large circle.
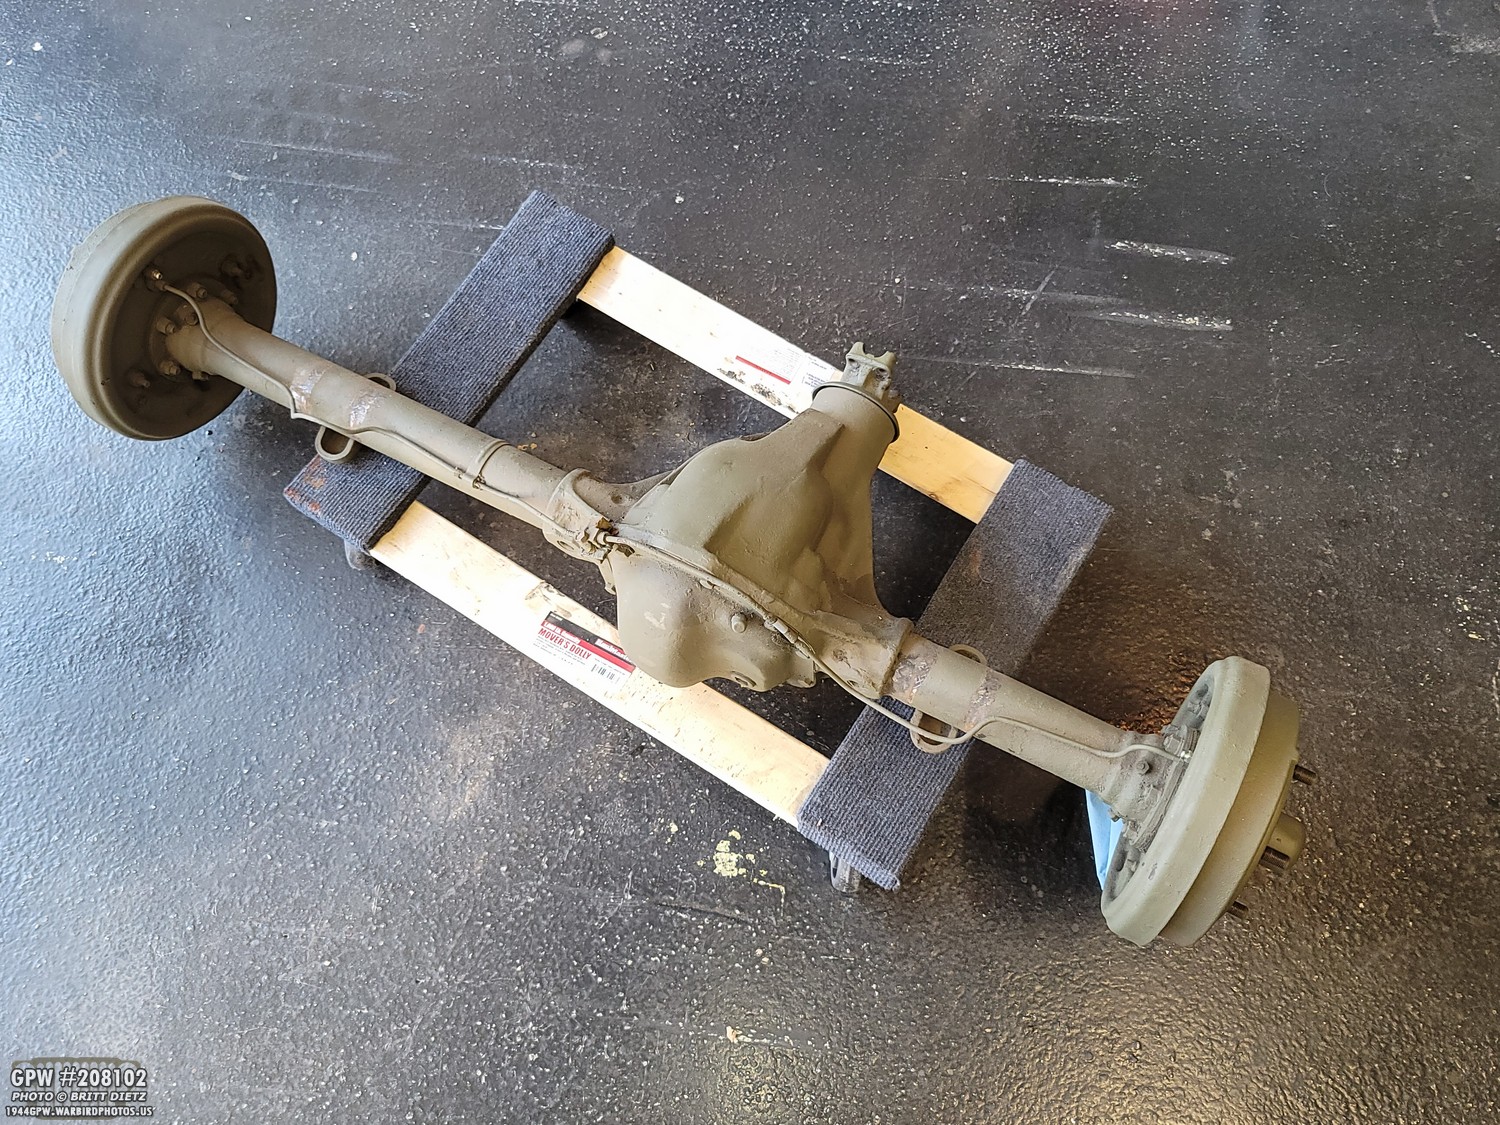
I also have the axles that came with my Jeep when I got it. Both are early CJ rims in great shape ready to pop on a CJ (or Jeep). Here’s the rear axle. This one has a leaking master cylinder (easy and cheap fix to replace it) on one side, but otherwise it was working perfectly when I had them on the Jeep.

And here’s the front axle with the bell crank and (not pictured) drag link. The post-war CJ axles eliminated the Jeep lurch from stopping eliminating the need for the torque reaction spring. They bolted the bell crank to the forward cross member. This stopped the front axle from rotating forward, causing the Jeep to turn left, when stopping. This axle is ready to go. Pop it in another Jeep and start driving!

The brake drums on the front axle are dated July 24 and 25, 1953. It is listed as G253 and G243. The first letter is the month (G=7, July). The next single or double digit is the day (24 and 25), and the last digit is the year (3, and since the axles are 1950s, it’s 1953).
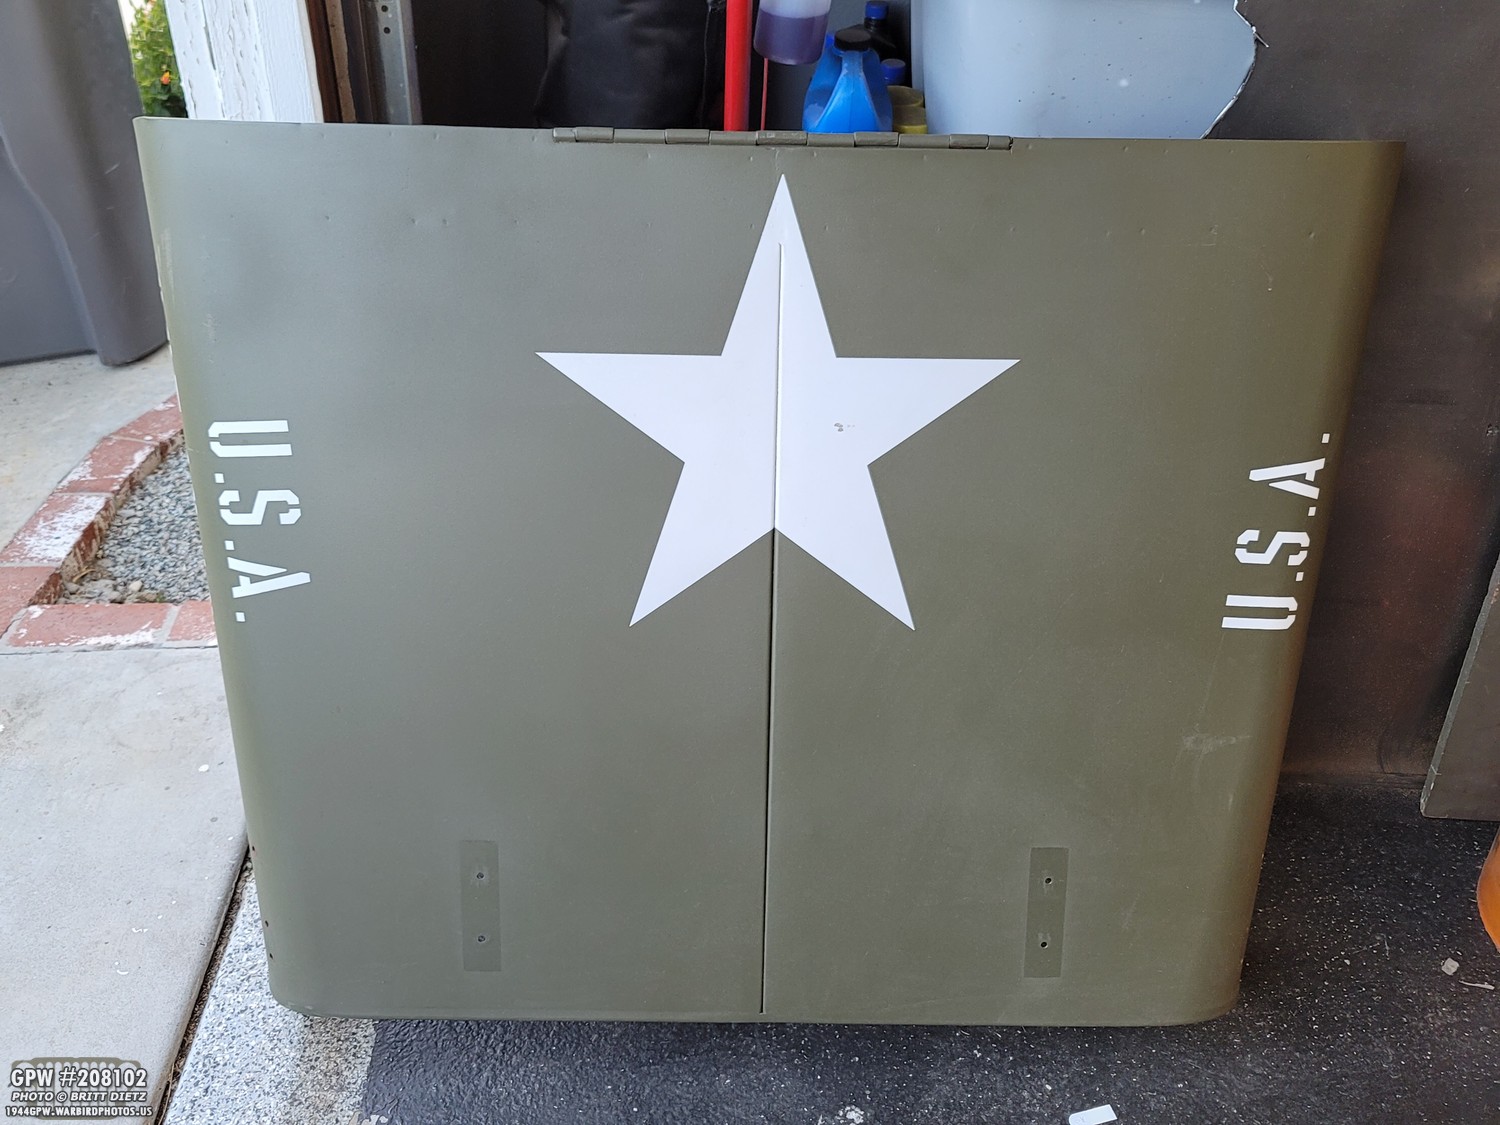
I also have my MD Juan repro hood that I removed and replaced with an original GPW hood that I restored. My original hood that’s original to my Jeep is too far gone to restore to use, so it’s become wall art since it has the original factory numbers on it. I have no need for this repro hood, so I’m wanting to part with it. I have a lot more items I’m going to be selling off in the near future.

So that’s it for this update! A nice look at the restoration and operation of a Ww2 style vehicle jack, some fuel sender fixes, and a look at Jeeps at the March Field Air Museum!
Till the next update…