 Preventative Maintenance: Part 2 and more
Here’s part 2 of preventative maintenance on a Jeep including checking fluid levels and common areas to check elsewhere on the Jeep. Also, a quick replacement of the Axe clamp turns into a huge project. Finally, a look at a recent Air Museum event, a special license plate project, and more!

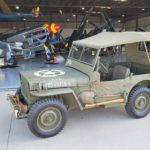
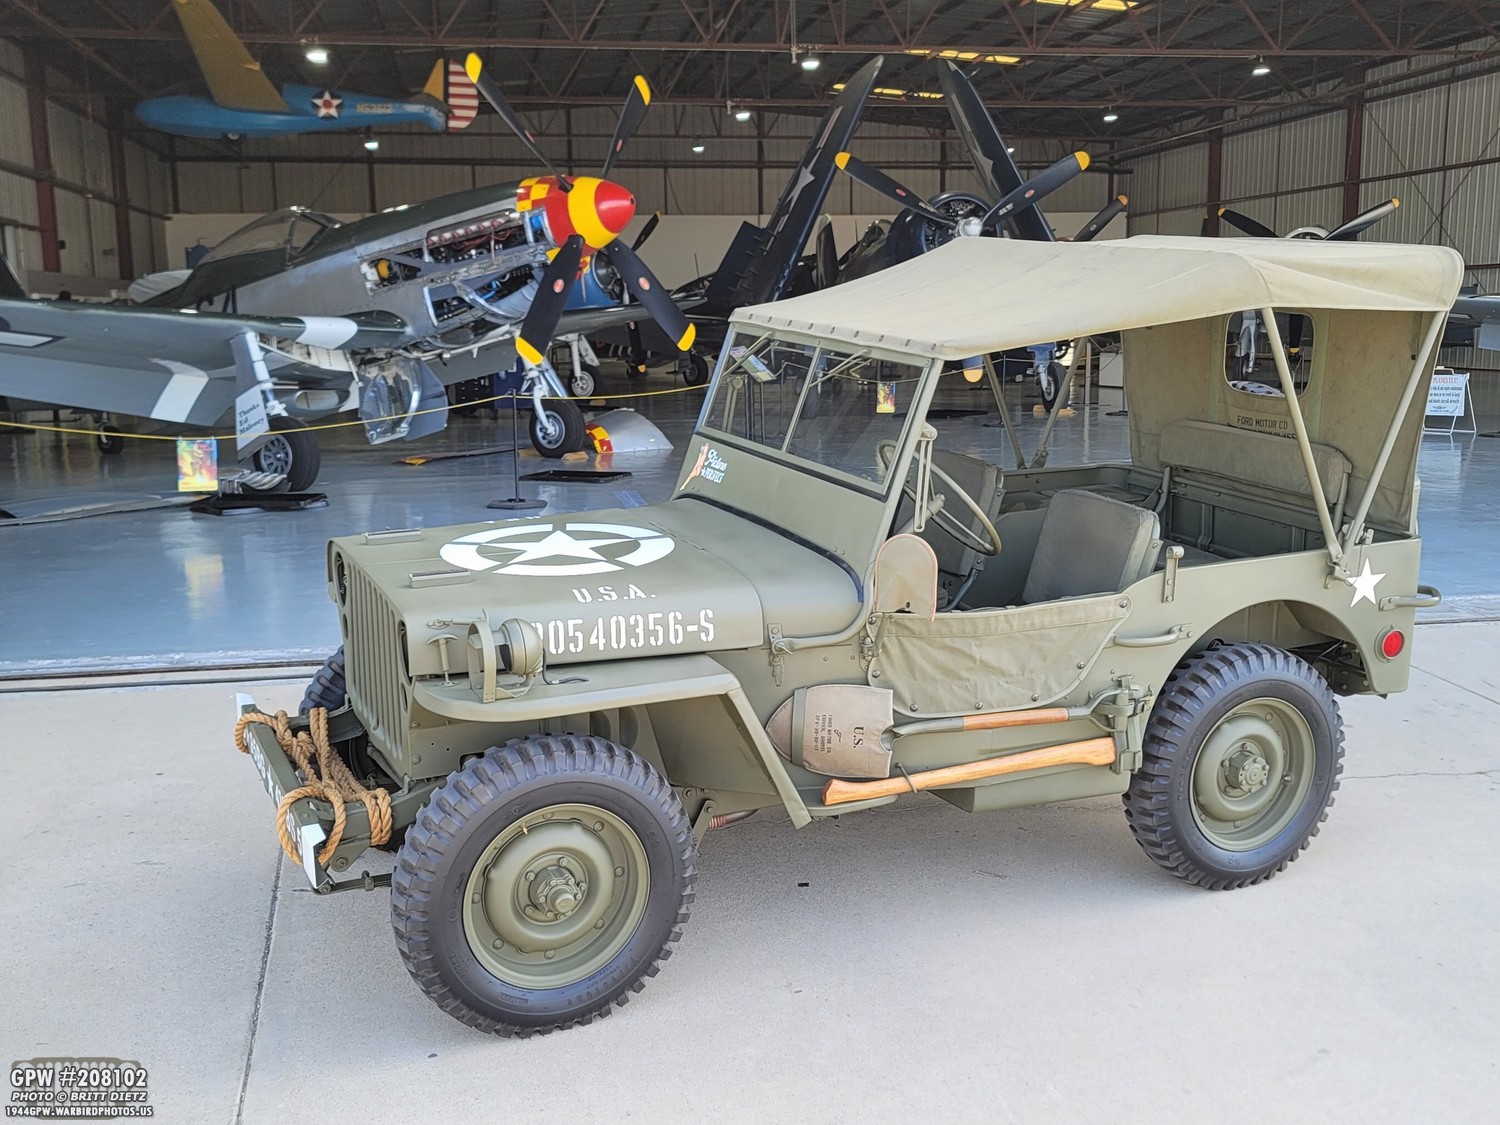
It’s been a few weeks since the last update, and a lot has happened! A preview of the visit to the Planes of Fame Air Museum, which I’ll cover later in this post. But let’s get back to Jeep preventative maintenance!

In part 1 (see here: https://1944gpw.warbirdphotos.us/blog/preventative-maintenance-part-1/) I covered greasing the various spots on the Jeep and changing the oil. Now let’s look at how to check the fluid levels. The first areas are the front and rear axles.
Here’s a look at the front axle differential. That screw plug is where you will be able to check the oil inside. You’ll need to unscrew that plug out completely.

Once out, it’s pretty simple to check the fluid levels. Basically, if the fluid isn’t right up to the bottom of this plug opening, then you probably should top it off with more fluid.

Looks can be deceiving, especially when you shine a light in there or try to take a photo with a phone. It may look like the levels are low. But there’s an easy way to test it…

Just stick your finger in there. It should be pretty easy to feel the fluid level. For my axles, the fluid level was right at the bottom of the plug hole, so they are nice and full! If they weren’t, I would use SAE 80W-90 Gear Oil to top off the axles.
After checking both, I took the plugs and added some Permatex non-permanent thread sealer to the threads to help stop any leaks.

Next up, do the same method for the T-84 Transfer case. Here you can see the fill plug in the middle of the photo under the F stamp. Top off if needed.

And the same is done for the D-18 Transfer case, with the fill plug seen here at the top. Top off it needed.

While you’re under the Jeep, now is the time to check out the transmission, transfer case, and emergency brake for any major leaks. I have some very light slow leaks in two spots, which one day I’ll address.
Though, the age-old adage with Jeeps goes: “If it isn’t leaking, it’s out of fluids!”

Next up, move to the engine bay and check the Carter carburetor and manifolds for any fuel leaks. Also, check the fuel lines at the connection points.

Another tube that could possibly have an issue (though more unlikely unless the Jeep has sat for some time) is the oil gauge line going down from the firewall. Check it for any oil leaks and/or splits/cracks in the line.

Finally, it’s always a good time to check out the tire pressure on the wheels! Tire pressure should be 30 pounds for each tire. There is a debate between 30 or 35 pounds for 600-16 tires. TM publications list both pressures, so it can be a bit confusing, but the general consensus is 30 pounds.

Make sure those valve stem protectors are nice and secure, and the valve caps are screwed on tight. And there you go, you should have a Jeep ready for another year!

Moving on to another project, my axe clamp that came with the Jeep was a non-F stamped repro. I decided, because I’m really crazy like that, to go ahead and get an F one to replace it. A few days later, I had one from Ron Fitzpatrick Jeep Parts. I figured this would be a pretty easy off-and-on replacement. I was wrong.

Taking a look at the repro one I had, the screw were too large and didn’t quite sit full in the recessed area of the clamp bolt holes, and it had a bit of a weird bend to the arm, which didn’t sit right on the axe.

I went ahead and started to unscrew it… well, I tried to. But the screws wouldn’t budge. Uh oh. I tried and tired, they wouldn’t move. I then used a screw extractor (since I wasn’t resuing these screws) and broke them loose… but only to a point and then they just spun and spun. Whhhaaaa? Oh yeah, I forgot… this tub didn’t have capture nuts there and there are actual nuts behind there. Ugh. And to make matters worse, there’s no gaps or openings to get to those nuts. So how do you get to them?

If you’re thinking, ‘Oh man, he’s going to have to remove the driver’s seat and the fuel tank!’ then you’d be right. And that’s what I realized at that moment as well, much to my frustration and anger at forgetting about the non-capture nuts. And I couldn’t just screw back in the two screws since I’d totally mangled them with the screw extractor and they are partially unscrewed.

I waited a few days till I knew I had most of the day free, and got to work. Out first was the driver’s seat.

Unfortunately for me, I had just fueled up the Jeep so it was well over half full. Way too heavy to lift, and the fuel would pour out if I removed the main fuel line. Sigh…

So a quick trip to Harbor Freight and I got an electric transfer pump. Took two large fuel containers to get all the fuel out. But I got about 99% of it out.

Now I could remove the tank, after detaching the hold-down straps and the main fuel line. This is what I was met with. What a mess, just goes to show all the stuff that falls down into the fuel sump! At least I’d be able to clean it all up.

I didn’t get a photo of it, but with the sump removed, I was able to get the nuts off the screws and finally take off the old axe clamp. I sanded the tub on this side since the old clamp had dug into the paint and left some marks. I then primed it with Red Oxide.

I decided, while I’m not going to replace this clamp again (unless I find an F stamped original), I wasn’t going to go through this again, so I decided to make me own capture nuts. Since the holes are just above the sump, you can’t see them when the fuel tank is in (which is why I had to take it out). So, I took some sheet metal I had, and cut a rectangle larger than the width of the axle clamp. I then placed the clamp in the middle and colored where the holes are.

I drilled the holes into the metal, and then welded two of the nuts that came with the new F stamped clamp. Not my best welding job, but again, it’s not visible at all when installed.

A quick test to make sure it’s all lined up. Notice how the new screws are more recessed into the axe clamp holes. Looks good!

Before going onto the final step, I hit the area I had primered with the Red Oxide with 33070 OD Green and let that dry for a bit.

You might be asking, how am I going to affix the metal plate with the nuts to the body tub? Well, I could have welded it here, but because I didn’t want to deal with having to wire wheel the tub to get bare metal for a good ground for the welder, I decided to use JB Weld Steel epoxy glue. I roughed up the other side of the plate, and I roughed up the inside of the tub where it would contact. I then put on the 2-part very strong glue, and pushed it in place. I then put on the new clamp and screwed it on. That pressure would help really lock in that glue. You can see a little bit of the glue that oozed out on top from being pulled tightly to the tub. I then hit it with Red Oxide primer. There you go, poor man’s capture nuts!

On the other side, here’s how the new clamp looks. I then hit the screws with 33070 OD Green to finish it off.

And even though you won’t see it, I hit the inside with 33070 as well.

Moving onto the fuel sump, I cleaned it all out. There were some areas where the paint had gotten some issues, so I smoothed it out and primed it.

And then later more 33070 OD Green.

While the fuel tank was out, and just about empty, I was able to inspect what 2 years of use had done. I was able to touch up the OD Green paint in some areas, and I noticed there was a pin-hole fuel leak from under the drain plug where the two seams meet on the edge. That’s one of the reasons the paint had gotten some issues in the fuel sump area.

I didn’t document what I did, but I basically sealed the two seams, which you can see here to the left of the drain plug going all the way from the top to the bottom of the photo. It was right in the curved 90 degree turn that the leak was coming out. So I removed the paint, cleaned it up, and used some Red Kote to seal up the seams. I let it dry for a few days until it was cured, and then I primed and painted it. That should seal it up.

Finally, time to put things BACK in the Jeep instead of taking them out!

Fuel tank is back in.

Hold-down straps are back on. I touched them up with some sanding/primer/paint as well.

Fuel sender reconnected (with my special ground wire connected to the tub).

Before putting the seat back in, I went ahead and put the axe back on. MUCH better fit with the clamp!

And when all is said and done, you might say… ‘was it all worth it for a better fit of the axe and an F mark you have to put your face against the wheel to even see?’ The answer is yes.

Now it was time to put the seat back on! Finally, we’re back to being driveable again. Note – I did hit the bolts on the seat legs with paint after this shot.

And the reason I needed it all to be back together was I had the first event of the year to take my Jeep to! I hit the road on a cold Saturday morning and headed to Chino Airport.

I had the Jeep on display for the February Hangar Talk Flying event at the Planes of Fame Air Museum (Chino Airport, CA).

A few photographers asked if they could ‘borrow’ my Jeep for a photoshoot with the reenactors there, so I pulled it over in front of the P-40 Warhawk (the featured aircraft of the day) and we all got some shots.

Always nice to get some photo work with the Jeep!

I had the idea of the USAAF guys looking at a map to simulate them briefing on the hood of the Jeep. We literally couldn’t find a vintage map, so a map of the museum had to do! Ha ha. (ignore the people and food truck to the left!)

A tighter shot makes for a better angle. Looks like that tigershark on the Warhawk is about to eat the pilot.

After the event, I started to head home. Always love driving on the perimeter road of the airport. You don’t have to worry about cars going 70mph on the roads getting right up on your bumper!

On the way home, I decided to stop and go down a new road I hadn’t been on, but had seen the last time I drive the route. I thought there might be some nice picture spots, and I found some nice ones!

There are mostly farms in this area of Chino/NorCo, so it really makes it look more vintage.

Going further down the road, there was this nice densely packed tree area with barbed wire.

Even the house to the right looks to have been there since at least the 1950s.

It was nice to get some more recent shots of the Jeep! Been a while since I’ve taken her out for some ‘glamour shots’.

There was a little secret road I spotted as well that led to a large hill and a clearing. It’s too bad the Jeep was backlit by the sun, as this would have been a pretty epic shot otherwise. But still turned out nice! Unfortunately, even if the sun was at the better angle in front, there were large trees on either side of me as I shot this that would have shaded the Jeep.

As I mentioned a few updates ago, I had this idea on a way to make my license plate look more… 1944 authentic. Here you can see an original 1941 California plate with an original 1942 top tab, and an original 1943 V tab in the corner. Under it is a custom 1941 plate I had made in that same style from a seller on Etsy, using the actual plate letters from my real plate (bottom).

I had a spare original 1942 top tab and original 1943 V tab to put on it.

And here’s how it would look, compared to the real 1941 plate on top. Much more authentic to the WW2/1940s style!

And another comparison. Even though I went for the custom ‘retro plate’ CA offers (bottom), it is the 1960s style.

The Etsy plate doesn’t come with holes for mounting, so I put the actual 1941 plate on top and traced the top holes.

After carefully drilling the holes (and making sure to not warp the plate), here’s the finished plate with the OD Green screw cap nuts.

And here’s how it looks on the Jeep. SO much better! But, there are two issues.
1) The DMV required month and year tags are not present.
2) Technically doing this is not 100% legal and is a sort of grey area. While I’m using my actual plate, and I’ll have the real plates in the tool boxes just in case, there is a chance I could get pulled over for this. Odds are, however, that if an officer is going to pull me over, it’s to check out the Jeep.

So, I decided to make a little swivel holder out of metal that could have the two tags on it. I drew out a concept design on paper.

The template was cut out, and at the bottom you can see how it will pop out from the side of the plate.

I cut out two rectangles in the exact size of the month and year stickers, perfect fit.

I then traced the template onto the sheet metal.

Here it is cut out, the edges smoothed, and a hole for the bolt drilled.

And now here’s how it looks when swiveled down. You can’t see it at all from the front!
Looking at the back, you can see it pointed down. The two black items are rubberized super strong magnets that attach the plate to the Jeep. I’ve had these with my real plates on my Jeep for two years now, and there’s been no issues with it falling off. They are VERY strong.

And here’s how it looks when the holder is swiveled out, it will show the two stickers. So, at events I can swivel it down, if I want to, to hide the modern tags.

And here’s how it looks attached to the back of the Jeep. Now I need to get the month/year stickers to put on there. That will be for a future update!

Moving on to some final projects, one thing I’ve been experimenting with lately is a better paint ‘wrinkle’ finish for the voltage regulator. I’ve never been happy with the textured finish I got (which was the second attempt at getting something closer to the original texture).

I’ve been playing with all sorts of different spray paints, wrinkle paints, heating tricks, multiple layers of different things, etc. Still just can’t get with that right look.

I recently discovered a new type of spray paint, that when combined with a certain finish paint, makes something that’s a bit closer (and at the least, much more textured). It’s a good start, and I’m going to continue to do testing to see what I come up with!

As mentioned a few days ago, I found this awesome original propaganda poster from WW2 featuring an early Jeep! It was being sold at a local flea market. Truth be told, I’d seen it there before, but passed it up due to the price. But I still wanted it, and I was finally able to work the guy down to a good deal!

It’s a very large poster, so I’m going to try and find a place large enough to put it. I wish it would fit in the garage with the Jeep and all the other Jeep/1940s pinup posters I have on the walls!

According to the bottom, it’s from 1942. A nice add to the collection!

And that’s it for this update! It was great to take the Jeep out to the Air Museum for the first event it’s been to. There’s a few more events on the horizon for the Jeep, including the Los Angeles Air Raid of 1942 being held at Fort MacArthur Museum on February 25th! Back in 2020, that was the Jeep’s first public outing right before the pandemic hit, so I’m excited to take it back there once again.
Till the next update…