 More Painting and small jobs
Another week of smaller jobs here and there getting various items prepped for the eventual return to the Jeep. Some of the larger items, like the fender and grill, have been painted with a final coat of primer and OD Green!

First coat of paint on the grill! More on that in a bit…

Attempting to finish the voltage regulator, one of the last steps was to restore the data plate for it. I decided to try and paint it myself rather than just get a new repro one like many people do. I first masked off the areas that are supposed to be not painted (like the serial numbers and the outside edge). I used an exacto knife and regular tape so I could see where I was cutting.
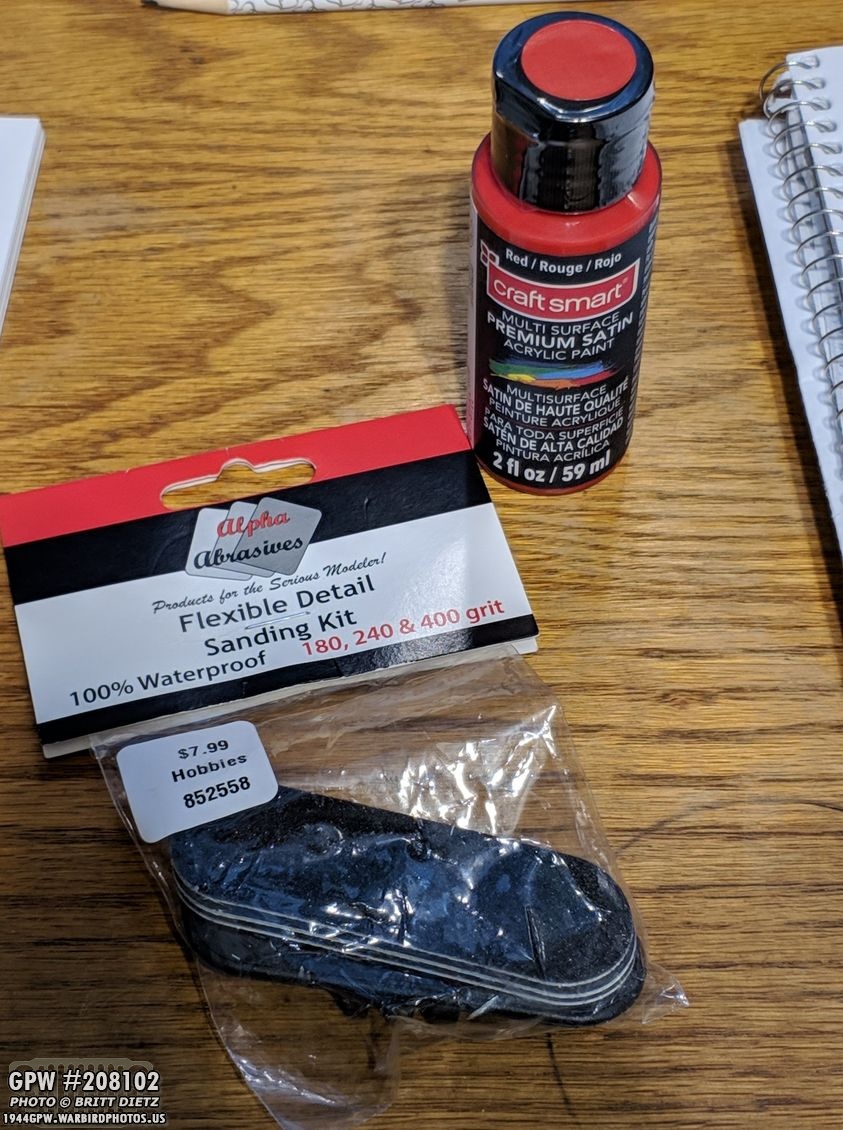
My idea at first was to use craft paint to paint it all red, then use these model building fine (and flat) sandpaper disks to carefully bring back the lettering.

I used a similar red paint to what the originals look like… but after painting them with the brush, it looked terrible. I didn’t like it at all, the brush texture and the way this paint went on didn’t work.
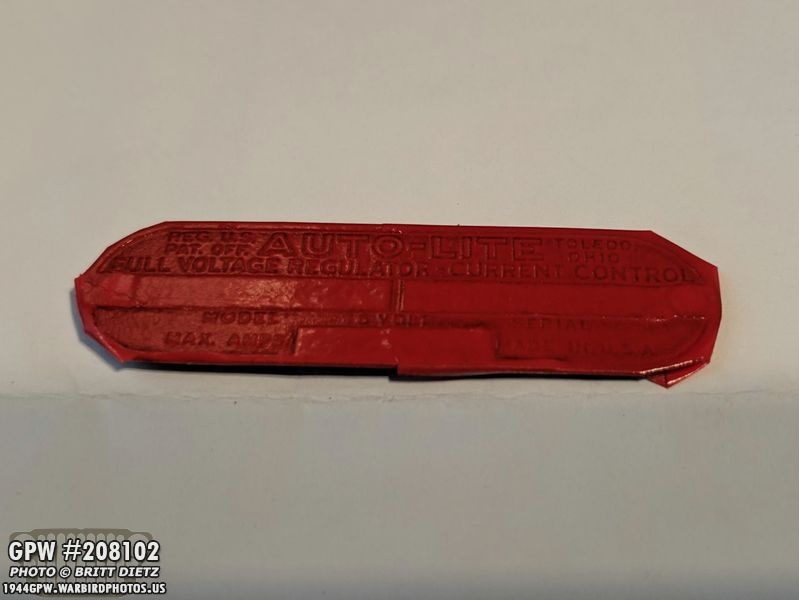
So I sandblasted that paint off once it had dried, and started over by using red spray paint. MUCH better.

Removing the scotch tape, my masking mostly worked well.

Starting to use the sandpaper disk (that large black object) and a flat exacto knife to slowly reveal the lettering.
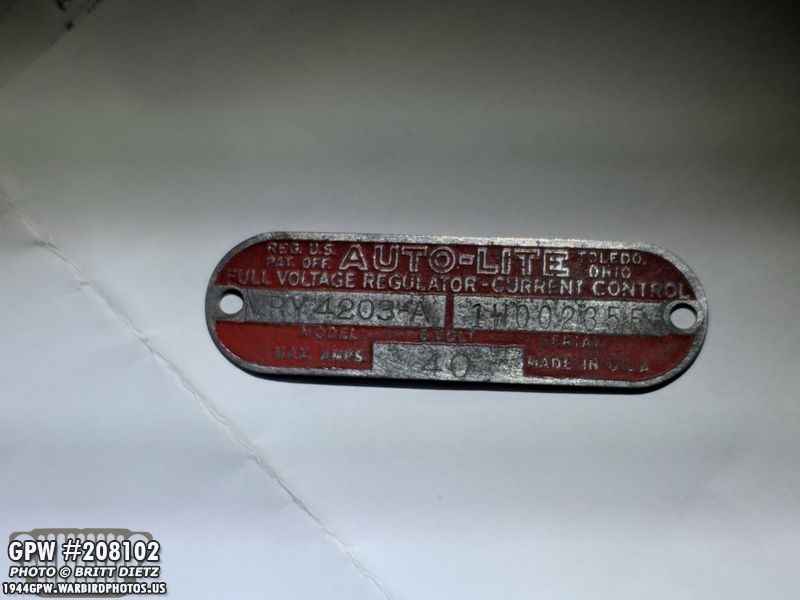
After it was done, I realized that I should have sanded the metal before I painted it… because it would have made it look new. BUT, a it actually made my data tag look like it was weathered from the 1940s, so I decided to leave it at this stage. All the lettering is silver, (and at a different angle it looks a lot cleaner), but it should have been perfect if the metal was sanded better. Good enough!

Other small projects have been going through my catalog of bolts/nuts/washers for the Jeep and seeing what is missing and what I’ll need to replace.
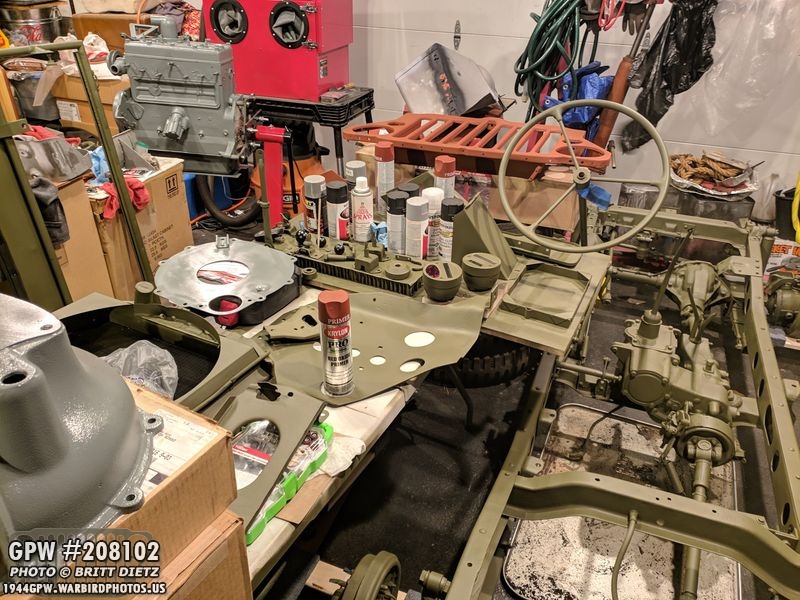
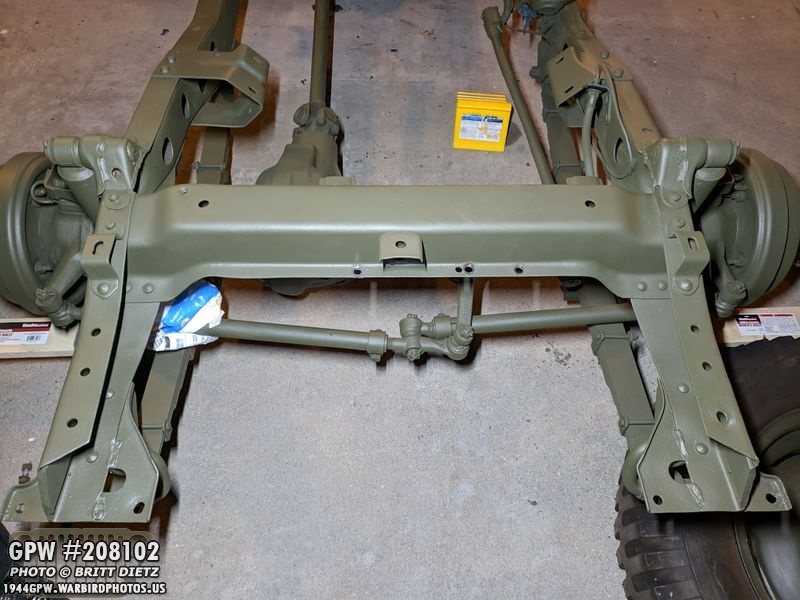
Here’s a look at the garage, my ‘jeep’ workstation with the frame, engine, and various parts.

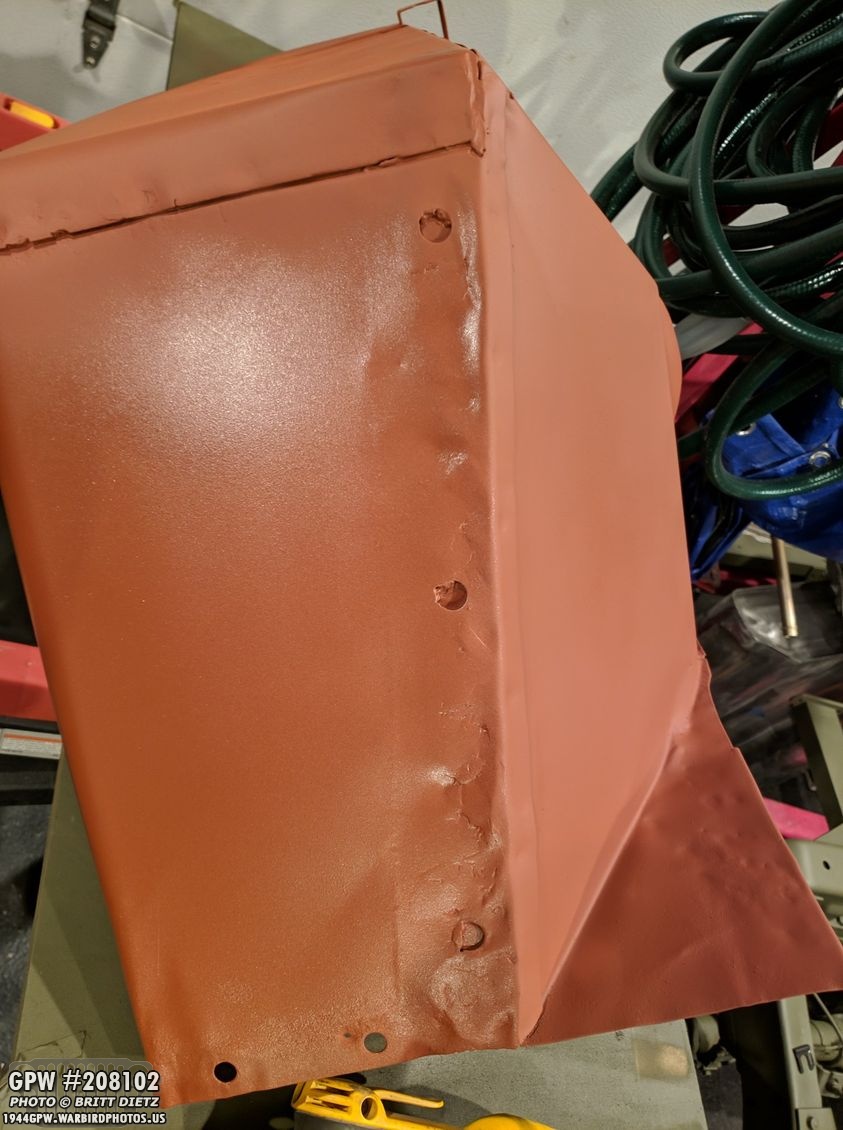
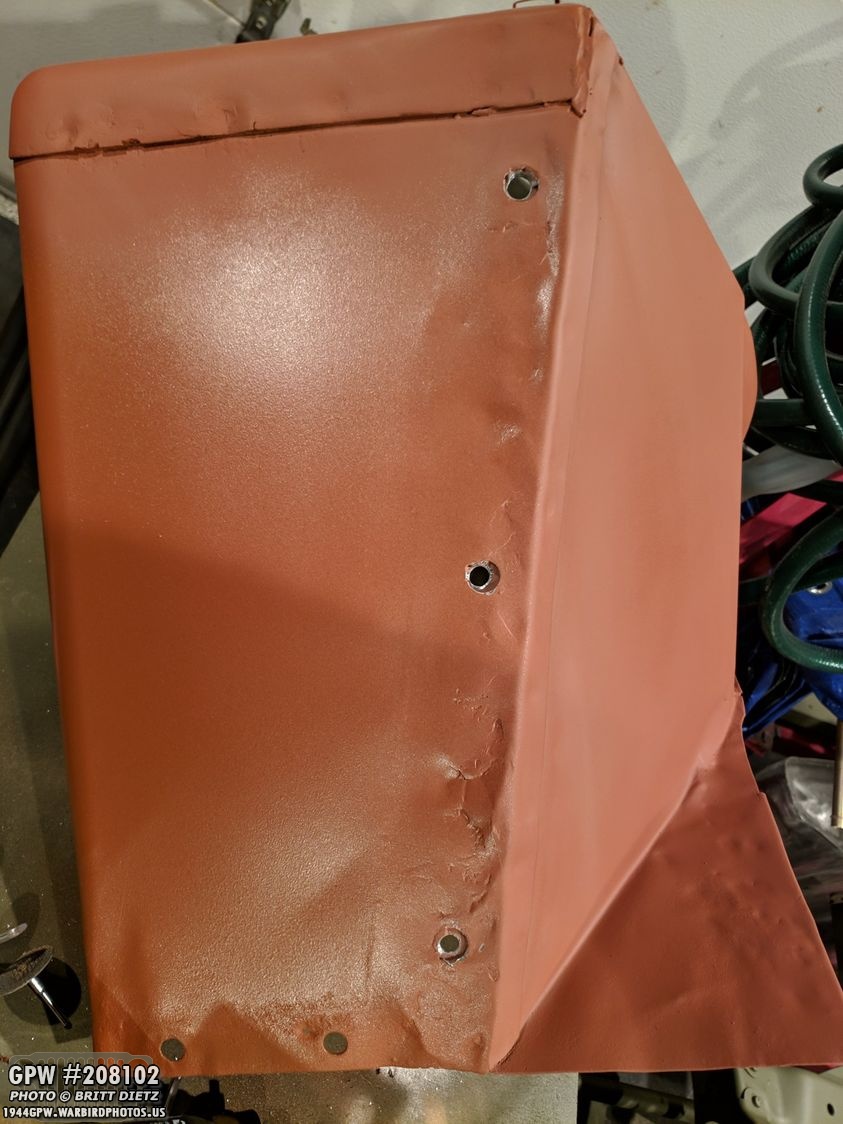
Time to paint the rest of the fender! I had bought, a few months ago, a gallon of red oxide primer in prep for possibly having to primer my body tub if I ended up trying to fix it. Since I’m going with a repro tub at the moment, I never used the gallon of primer. So I thought, why waste the spray cans when these large parts can be sprayed? So I sprayed the fender and a few other items… and was not happy with the result.
It actually made me appreciate the red oxide spray paint cans from Lowes (by Krylon) that much better. They dry fast (like super super fast), go on super smooth, and go on pretty thick. This gallon Rustoleum paint went on ‘orange skin’ texture, super wet and thick, and took forever to dry. Not sure what I did wrong in this instance. It ran super easy, which was a challenge and meant I’d have to do some sanding.

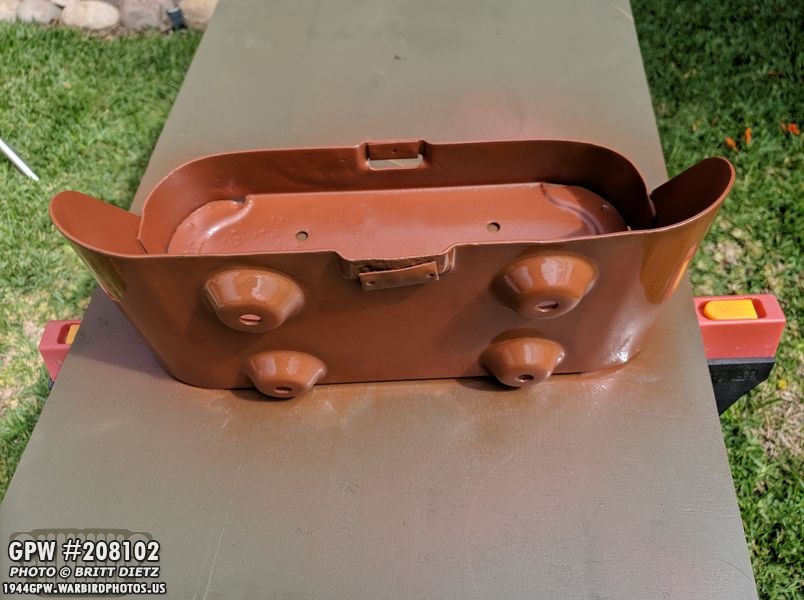
This spare tire rest bracket was the only thing that came out okay, but this gallon also left everything with a glossy finish, which the spray paint leaves a matte finish (which I like better).

So, after studying the fender and other items after I hit them with this paint, I decided from now on I’m going to stick to the spray paint red oxide.

After 24 hours of drying, I sanded the fender a bit and then hit it with the spray paint, so much better looking and no weird texture.
After that was dry, it was time to re-drill the holes where I welded the new metal onto the fender. I would need a 9/16 size drill bit. I went to Lowes and they had one, but sadly, the hardware/tools guy gave me some bad info, and the drill bit would not fit my drill. Dangit!
So, I ordered one on amazon, but I wanted to get these holes done. So instead, I started with a small drill bit and worked my way up to 1/2, which was the largest I had. I then took my Dremel and opened them up further. Not the full 9/16 size, but enough for the bolt to easily go through. If needed, I can always open them up wider later on now that I have a correct 9/16 drill bit.

A major hurdle to putting the engine back on the frame is the tires. The civilian style rims are in not-so-great shape, with paint cracking and flaking off. I’ll need to remove the paint on all 4 rims (and the 5th spare tire eventually) and repaint them with primer and OD Green paint before I put them back on the frame.
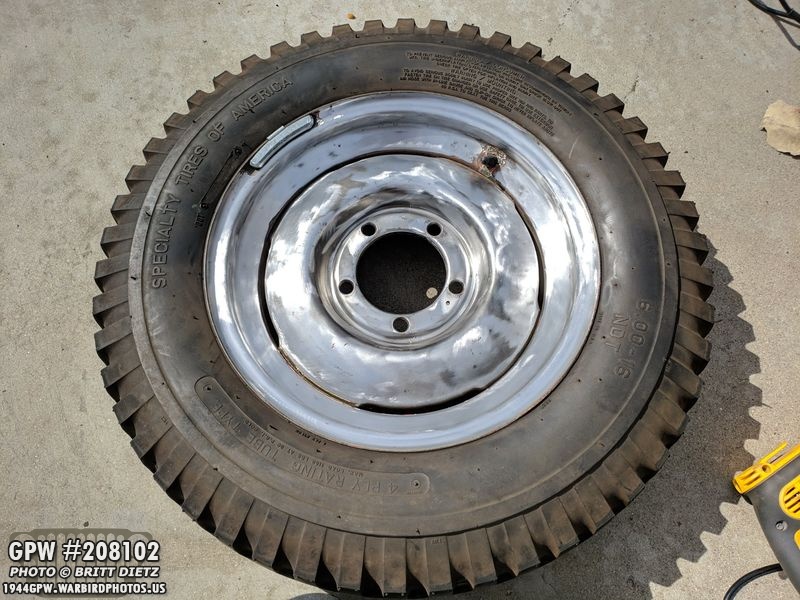
Took about 30-40 minutes with the wire wheeler and an abrasive wheel, but I got all the paint off this first tire. And it tired me out (no pun intended). Either I continue it this way, or I take it to an auto shop and have them remove the rims for me to then take to the sandblaster… I’m still deciding.

Next up, another bit of paint added to the frame. On a Ford GPW Jeep, not only is the engine and bell housing the Ford Engine Gray color, but so is the transmission case. Rather than take out that case, I decided to just hit the top cover with the Ford Engine Gray, that way when you take off the floor seal on the Body Tub to get access to the transmission case, it looks like it’s supposed to.

Here’s a good look to see that cover with the Ford Engine Gray after it dried and I removed the painters tape. Next on the agenda was to lift up the entire transmission and replace the two mounts to the frame that came in the mounting kit. They were still in decent shape, but I figured, why not replace them? Here the transmission is hoisted up and I’ve already taken off the flat mount (on the ground with the black color) and the donut-shaped mount (to the right which I’ve already put the new one on)

Here’s where the flat mount was under the transmission case. As was I cleaning up the oil and liquid/gunk that had accumulated I noticed something…
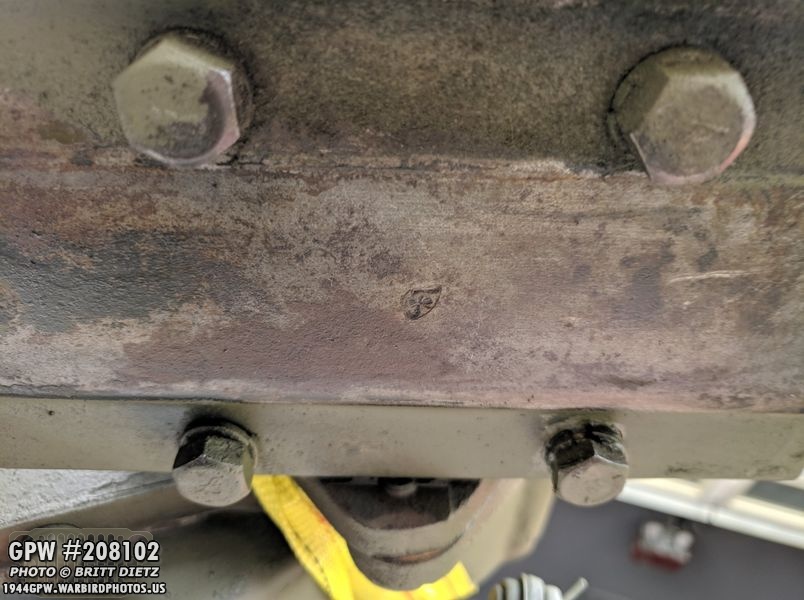
The plate at the bottom of the transmission case has a very nice Ford F stamp that literally no one will ever see unless you replace the flat mount! I figured I’d document it before it goes back into darkness for another 30+ years.

Here’s a look at the original (left) and new (right) flat mounts.
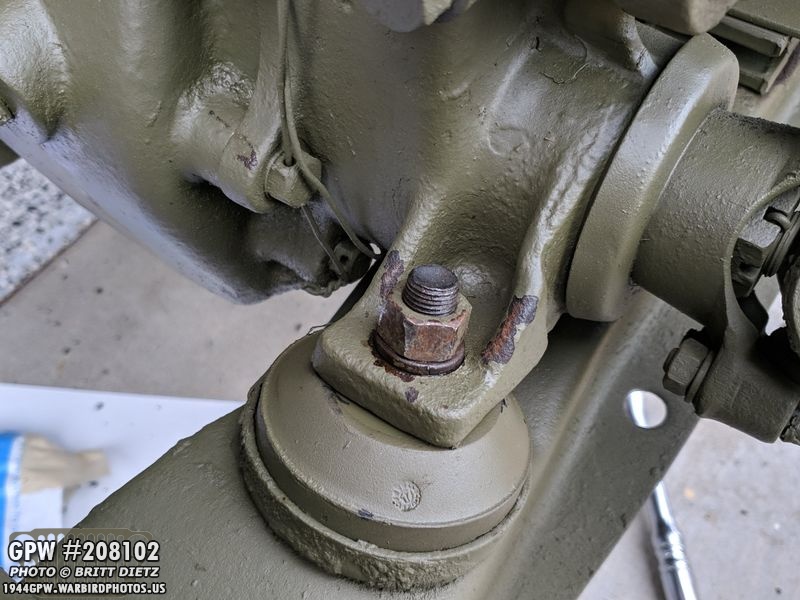
Here’s the new donut-shaped mount once and new bolt once the transmission was lowered back down. Rubbed off the paint pretty good with the wrench as it was scratching against the paint, whoops. The frame needs another layer anyway.
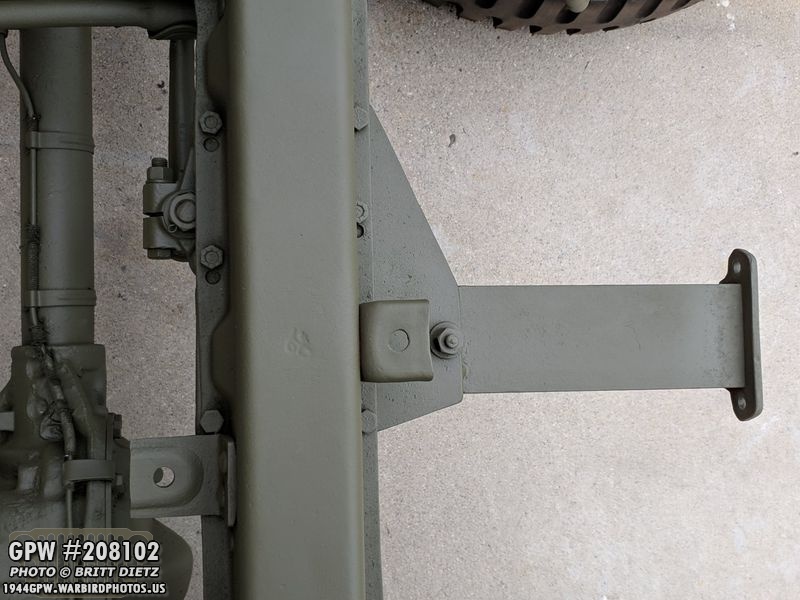
Next project, this was something that has been bothering me for months now. My Jeep has a post-war CJ (Civilian Jeep) steering system and axles. I will eventually replace them with wartime ones, but for now I’m using them. The main difference visually is that the steering system connects to the main crossbar on the frame where the radiator and grill sit, VS connecting to the front axle itself. A thick mounting plate was added to the bottom of that cross channel for the steering to bolt to, and someone added a C channel bracket that goes from the cross member and mounting plate to the bumper, where it was screwed in (to an incorrect bumper, which is removed in this shot)…
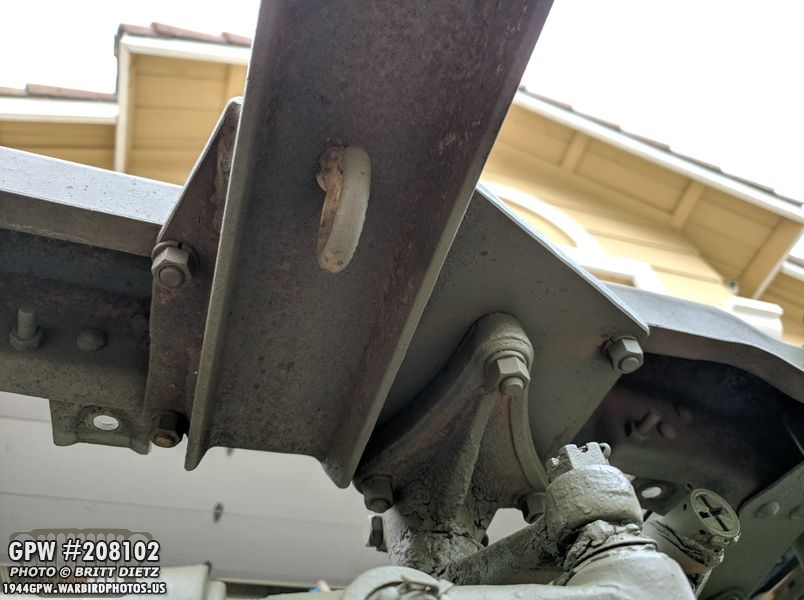
Here’s a look underneath with the steering connected in that curved edge triangle to the bottom middle, and the C channel bracket that goes top to bottom with an eye hook for attaching a safety chain when pulling something via the front. (ironically, that eye hook is the same style that holds the safety straps to the dash). You can also see the large mounting plate all this attaches to. The frame cross member goes left to right.

Here’s a look at the backside, and you can see the steering system (left) doesn’t attach to that C channel bracket (middle), so I’ll remove that C channel to make it look more correct.

In order to remove that, I will need to cut it off as it was welded to that mounting plate. So I decided to remove the entire thing so it’ll be easier to cut off, and I can inspect the steering system (remember the frame is on furniture dollies, so no steering system needed right now). Here’s a look at the steering bracket after I removed that mounting plate and c channel from the frame.

Here’s a look at the c channel bracket welded on the mounting bracket. Now that it is off, it’ll be easier to remove.
Looks so much better without that on, so I’ll remove the C Channel and cut the mounting plate to be flush with that cross member, and then it’ll be less obvious I have post-war steering.
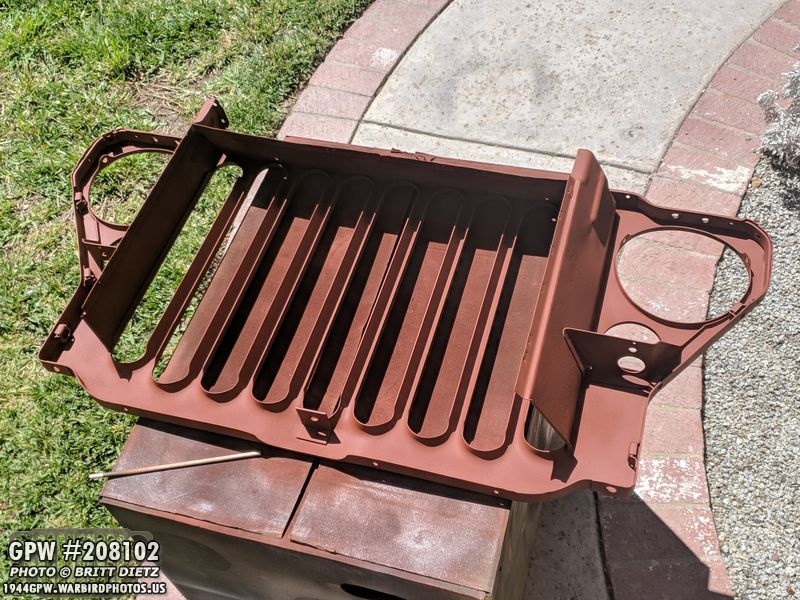
Another coat of red oxide primer (spray can!) to the backside of the grill. It’s ready for OD Green!

Final coat of red oxide on the driver’s side fender, it’s ready for OD Green as well!

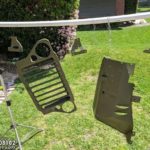
And that day has come… Thursday morning there was only a light wind, so I strung up the grill, driver’s fender, two repro top gussets, and the spare tire support bracket and hit them with all the OD green I have left in the gallon bucket!

I also hit the two bumperettes, which had been waiting for OD Green for a while.

I also put the last coat of paint on the radiator, make it all ready to be put back on the Jeep! This put OD green on all the little fins that I bent back into shape.

Closer look at the driver’s fender basking in OD Green glory!
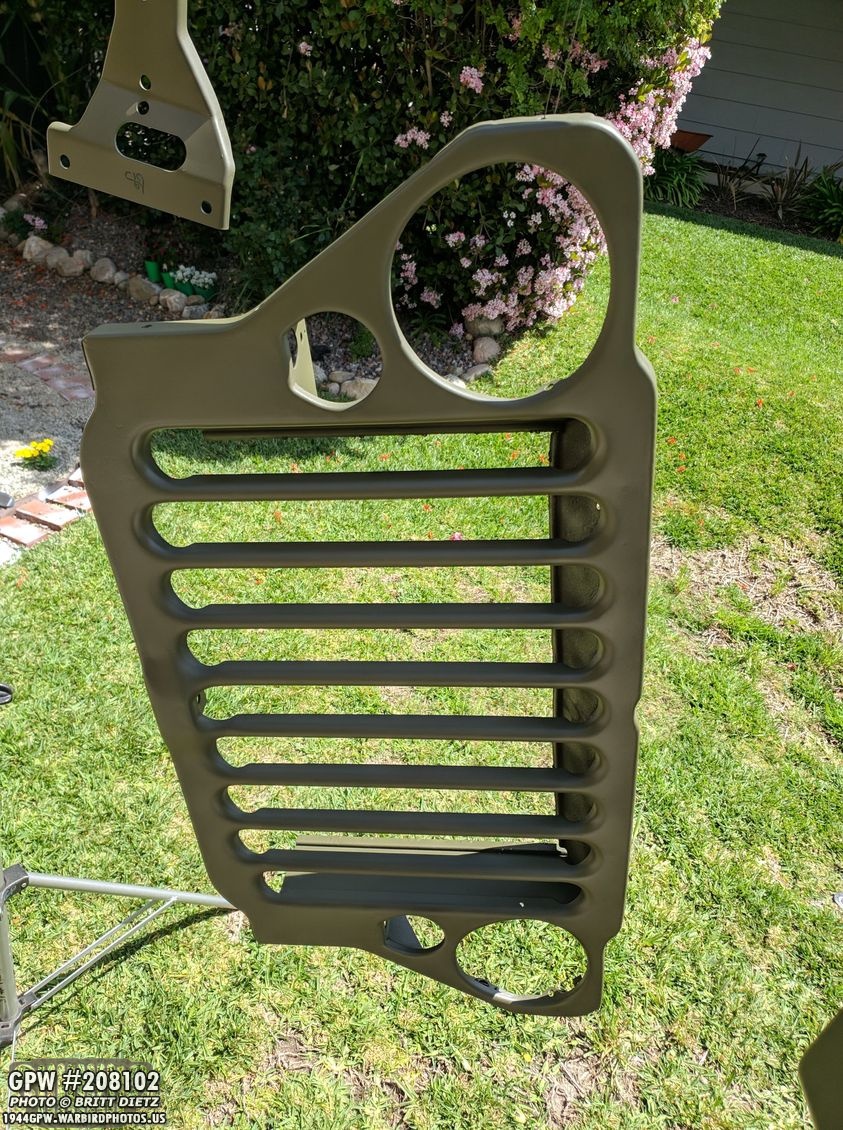
That grill looks so much better, but it’ll need 3 coats to really finish it off, so with the last of my 33070 paint used up I have another gallon on order.
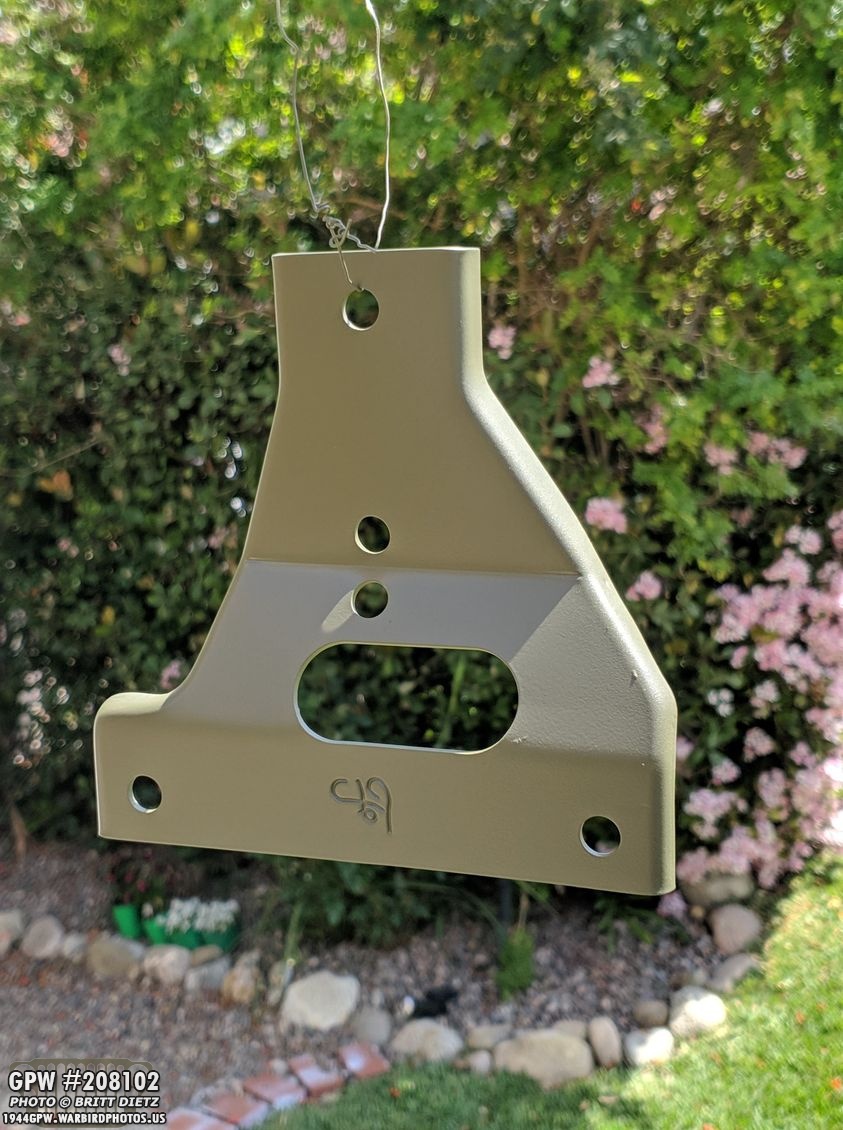
The two repro gussets look good! They were already primered, so I just sanded them and hit them with the paint.

I can actually imagine the fender and how it will look when reattached to the Jeep! It’ll take about a week or so for the next gallon to arrive, so this will probably be the last bit of OD Green painting for a little while sadly.

Finally, here’s another look at a project I’ve been working on for a week, building a virtual wiring harness for my Jeep in Photoshop with each wire on a different layer. This allows me to visualize how everything will attach, and since each wire is on a different layer, allow me to use this document to see exactly where everything will go and what I’ll need to bypass. That’s it for now, until next week’s update!