 Fire Extinguisher, more Horn Work, Axle work, and more!
This week continues the busy work with all the new items I acquired for the Jeep in the previous updates. I changed the mount for my Horn based on some new evidence, finished the restoration of a proper Fire Extinguisher, installed the GPW dipstick, I started work on the replacement GPW hood, and more axle work (which ran into a major halt).

Another week, another step closer to changing out the axles, rims, and wheels! But, there was another setback this week. More on the later…

A recap from last week’s two updates, I found an original (what appears to be) Sparton horn that works! It had an original vibration mount on it and an F bolt screwed into it. Pretty awesome score for less than $20.

After a complete cleaning and restoration (and adding a tiny inline 12v to 6v resistor inside the horn), I added it to my Jeep replacing the 12v M.V. Spares horn. I used the repro GPW horn vibration mount I got from Ron Fitzpatrick Jeep Parts to mount it. To see all this in detail, see the Part 1 update from last week.

I had thought that this was the correct mount for a GPW, unlike the original one that was on the original horn, which I thought to be MB. I was sad not to use the original mount, but I wanted to be correct. I did use the original F bolt, as shown in this photo. I only had one F marked 1/4 x 5/8 fine thread bolt (anyone have a spare one I can buy off them to complete the set?)

Bill Mullen commented on one of my photos from the last update with this photo showing a crated GPW in 1943 with, what I thought was, the MB mount. He said he recalled that both versions were used on GPWs… So I decided, that’s proof enough for me to change the mount over to the original one!

Changing the mounts, I paused this time to take a photo showing the differences between the two. It’s just a design difference really, the screw/bolt holes are the same one both. Top is the original MB/GPW mount that was on the original horn, bottom is the repro GPW mount.

So here it is installed like in the photo Bill Mullen posted! I’m glad to have the original mount back with the original horn!

I did go out and get a 1/4 x 5/8 fine thread modern bolt to replace the screw. It’s missing the F, of course, but it looks better than a slotted screw head.

And for those curious how the horn is mounted to the vibration mount and that is mounted to the bracket, here’s a look showing all the layers. Mostly lock washers, nuts, and the bolts/screws. This is also how it was on the horn when I found it.
And one final look. It’s a lot louder than the M.V. Spares horn, but has the same MEEP MEEP sound. It’ll get people’s attention for sure!

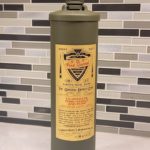
Moving on, the next project I continued to work on was the correct style fire extinguisher for the Jeep. I managed to score this post war late 1940s extinguisher, which is exactly the same as the WW2 style except for the brass plate. ‘Quick Aid’ was registered, as I recall, in 1947. But the extinguisher body, itself, is perfect to convert to a WW2 one.

I removed the plate last week with my torch (it’s just soldered on) and removed the cap to get to the insides. I did a thorough cleaning of everything including sandblasting and wire brushing.
The inside metal ends are pretty pitted, but after using a wire brush, they started to shine (while still pitted). Doesn’t really matter, it’ll never be seen again unless someone else opens this up in the future!

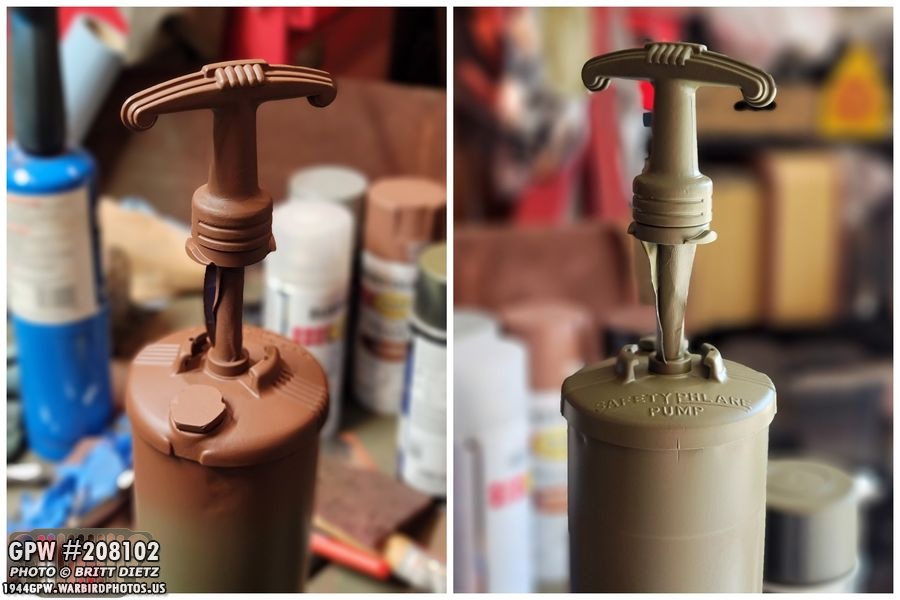
Here’s a look at the cap and the pump handle after a light sanding.

There were a few dents in the body, dents I just couldn’t get to in order to attempt to pop out, so I just used some bondo to fill them.

In order to get everything primed, I masked off the handle rod with painter’s tape while it was extended and hit it with Ron Fitzpatrick Jeep Parts Rex Oxide primer.

I then did the main canister body with Red Oxide primer. After it was dry, I used a scotch pad to scuff up the primer for better paint adhesion.

I did a quick light coat of 33070 OD Green on the canister before I put the cap back on. I had to lightly hammer the cap on, so it was pretty secure. But originally they were soldered shut. Since I’m not filling this with any liquid, I just used the torch again to lightly head the cap edge. Any residual solder that was on there sealed it shut. I also made sure to scuff up the OD green for the second coat.
One final coat of red oxide primer for the cap, then 24 hours later I hit the top with 33070 OD Green. Again, I lifted the handle when painting with the handle rod masked off to get into everywhere.

After the top had dried, I painted the rest of the extinguisher and hung it to dry.

24 hours later, it was ready for the last step! First, I carefully sanded the area where the brass plate would have been to roughen up the OD Green paint.

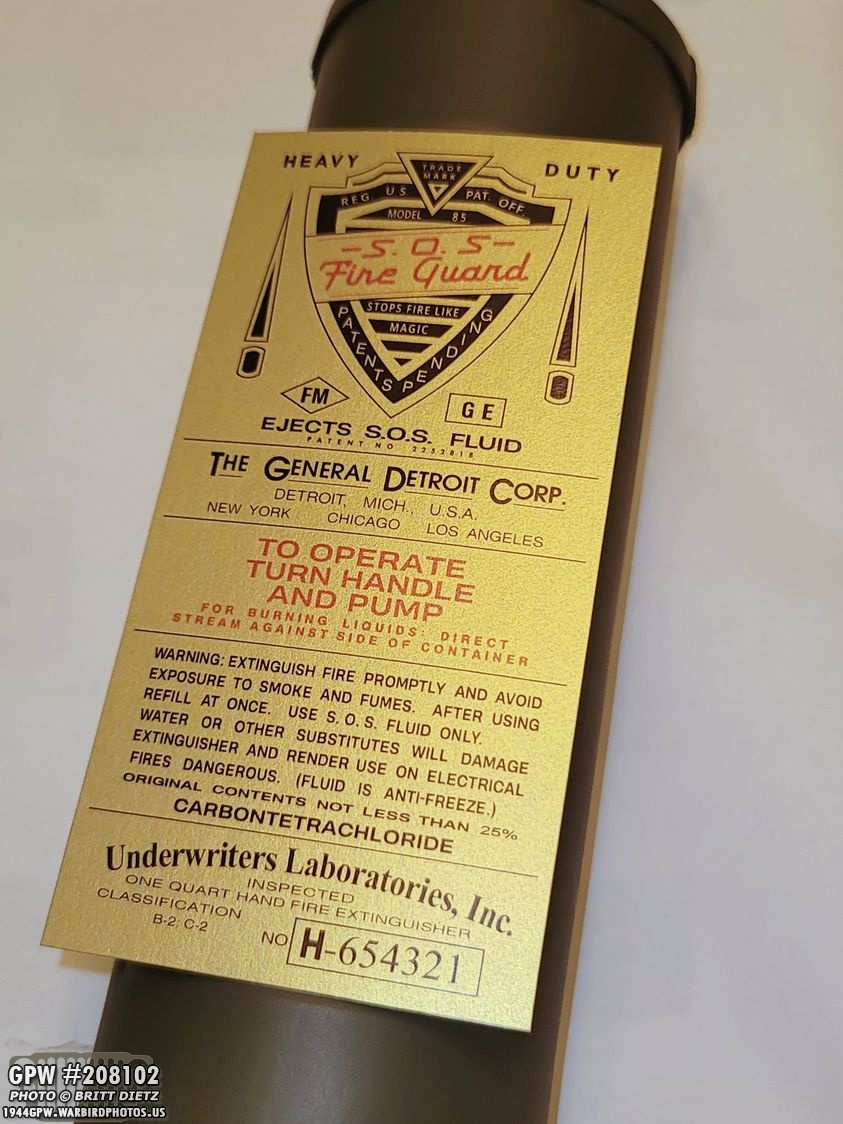
If you’ve been following along for a while now, you saw a few weeks ago when I custom made my own correct decals for the fire extinguisher. Using original photos and an original brass plate that I scanned in high res, I custom made everything as close as I could get down to the fonts and printed them on goldish paper that had a correct style sheen to it. I also created a MB version of this decal.
After cutting out the decal, it’s ready to be applied to the extinguisher!

And after carefully lining it up (and relining it up twice), I got it on as best as I could get it. Sure looks good!

I took it over to some better light to get some photos. Looks pretty darn good to me, especially for something that most people may not even notice under the dash.

It’s hard getting photos of the extinguisher to show the sheen on the decal. Here’s two that I thought represented it better. The color balance also goes whacky on my phone when I shoot it, probably because it wants to correct for the decal or the OD Green.

Time to install it in the Jeep! But first, I took out the post-war extinguisher I had in there as a place holder till I found a correct wartime style. Here’s a good look at the two. Can you find all the differences? (answers on next photo)

The main differences are in the caps (top photo). There are lines that go outwards towards the edge on the wartime style, and there are no ‘anti-freeze’ lettering above ‘Safety Phlare’. The other major difference is the decal size, the wartime ones are 3×6, while the post-war ones are more like 2.5×5. I shrunk down my custom made decal and put it on the post-war one to look the part.
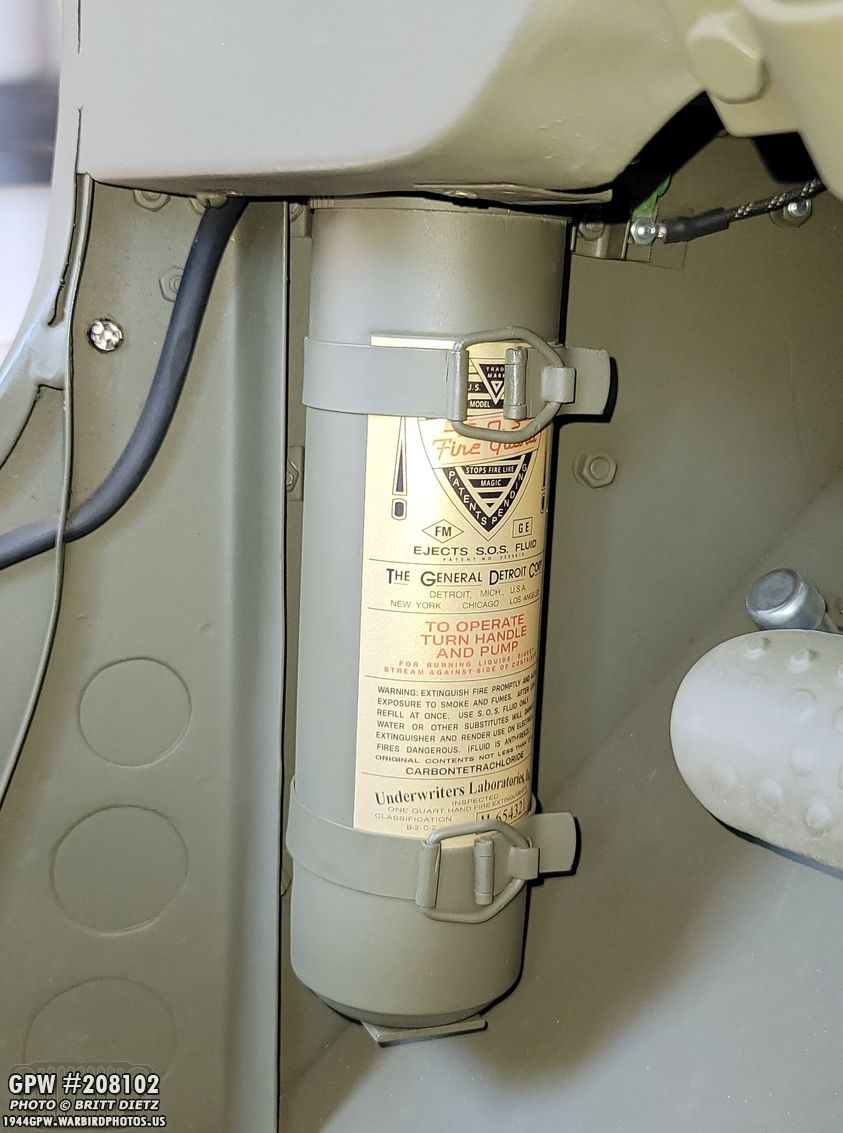
And here it is, the correct style finally installed! You can’t really see the cap, sadly, but at least the decal is the correct size.

Here’s a better look at how it sits in the Jeep. No one will really be able to get in there to see it’s a wartime style, but I know! Happy to have this little detail finished.

And one final look at it in the Jeep. Now I just have to be careful not to mess it up with my shoe!

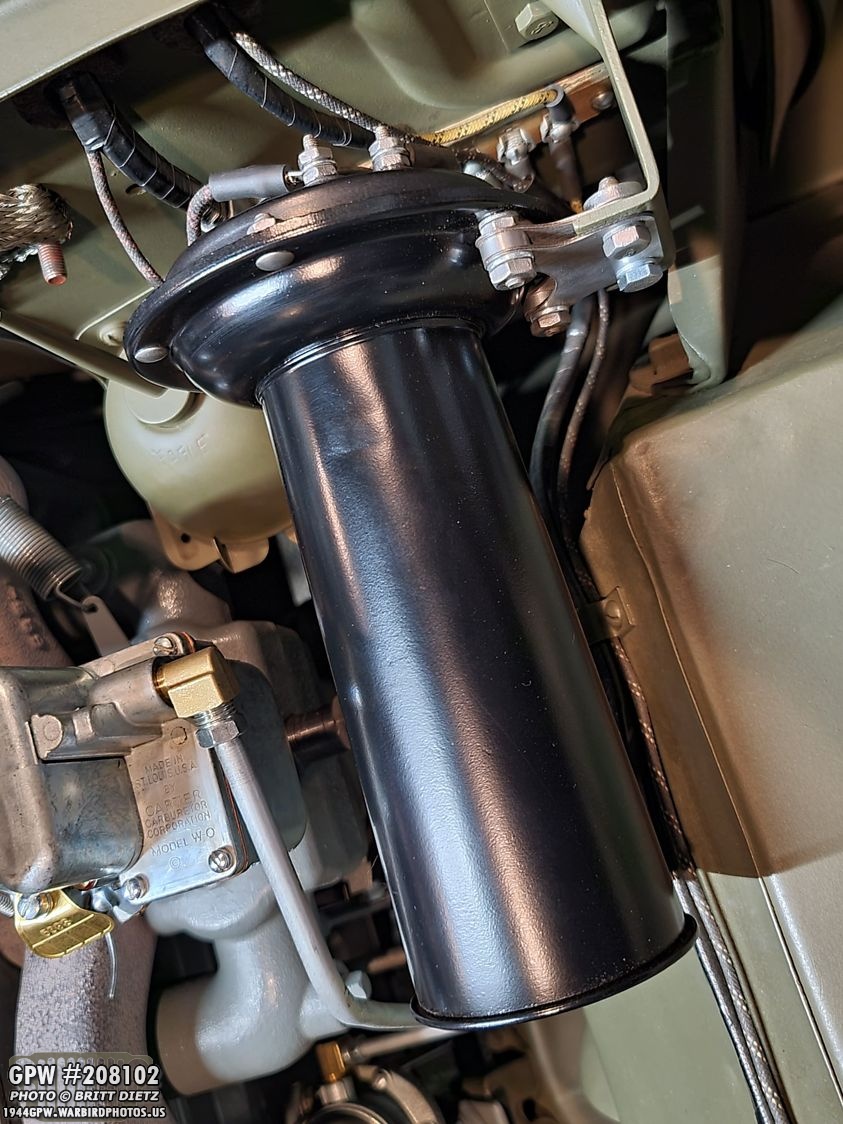
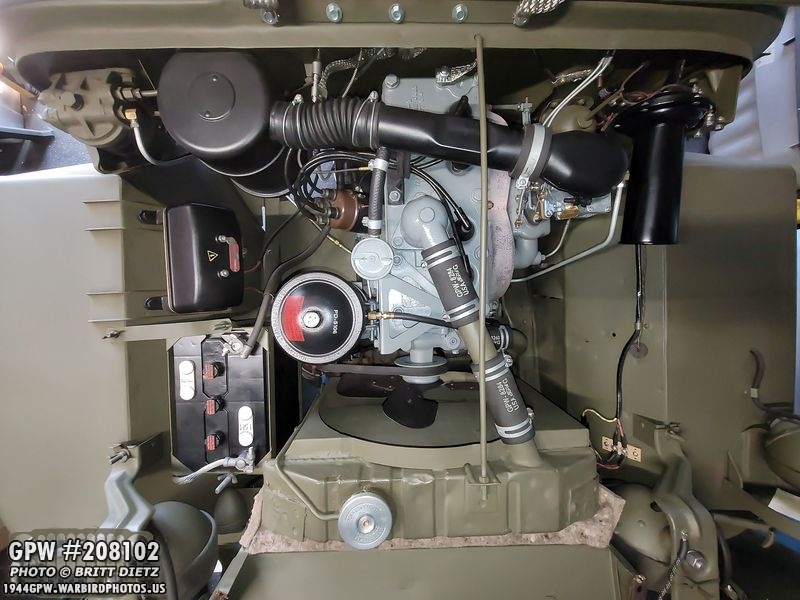
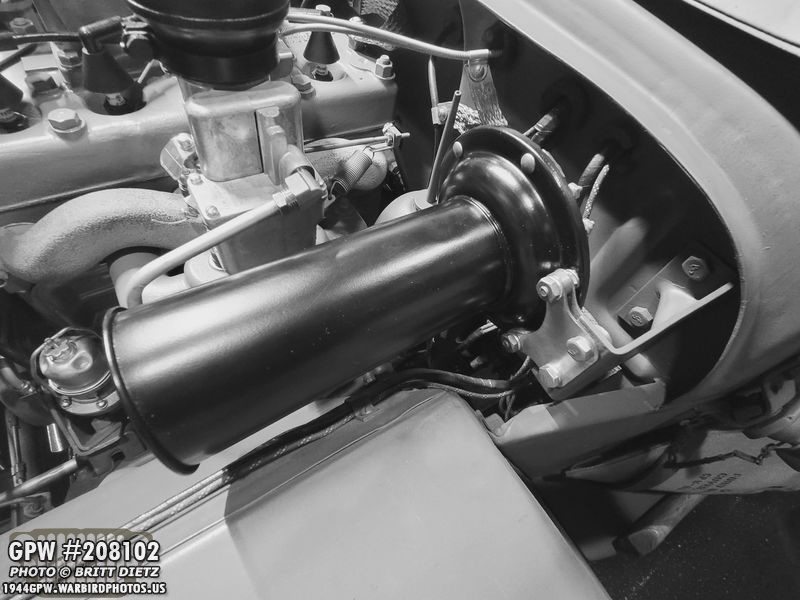
Moving on to the next project, installing the GPW dipstick and tube that I restored in last week’s update.

Before installation, I went and sanded down the paint where the rubber tube goes from the air filter cross over tube to the dipstick tube. That will help put that rubber on this part, and also avoid something I will mention in a second…

Here’s the CJ dipstick on the block. I wasn’t looking forward to replacing these as that bolt that is holding the clamp on the top of the dipstick to the oil filter bracket is a PAIN to get back in. But I decided to just do it! The first step is to remove that bolt, then undo the screw clamps on the rubber hose. Then pull out the tube from the rubber hose and it’ll be time to pull it out of the block.

Here is is after said steps. But, that rubber hose did NOT want to let go of the dipstick tube. Turning it back and forth, I wouldn’t get it to come loose… until it decided it had enough and suddenly let go sending the dipstick tube across the bay…

… and smacking the voltage regulator taking off a nice chunk of paint. UGH. I’ll get to this later.

The original GPW tube I got was missing the clamp, so I ‘borrowed’ the one from the CJ tube. Perfect fit.
And now it was time to install the new one… and this is the part I dreaded, putting the short bolt back in this spot.. it has to go through the clamp (which doesn’t want to close tightly but spring open), the oil filter bracket, and the oil filter to block bracket that has the capture nut. That’s a lot of things the bolt needs to go through.
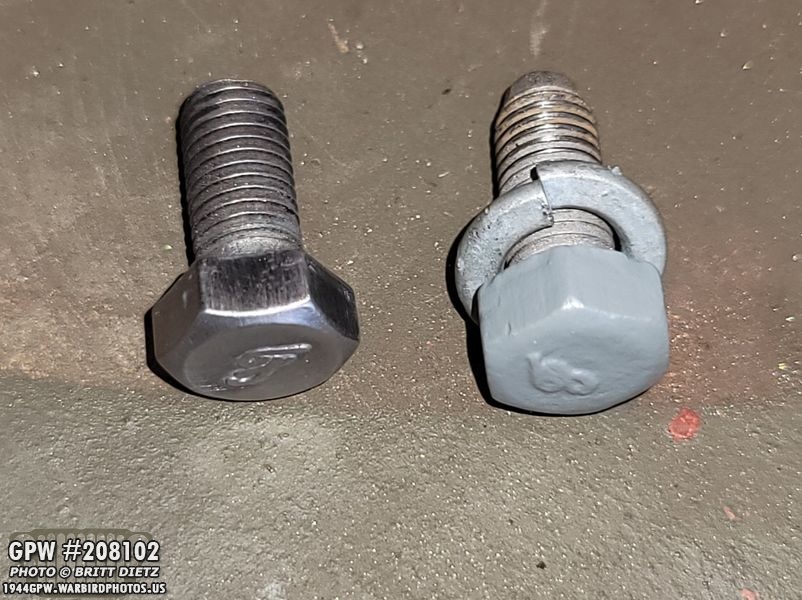
I looked in my box of F bolts, and found one that is a bit longer than the one I was using (on the right), so I quickly painted that one with VHT Ford Engine Grey. I was all excited that I could use the one I had in there for the bottom of the horn vibration mount.. till I realized this one is 5/16 x 5/8 fine thread, not 1/4 x 5/8 fine that I needed. Darn! But that’s why the one on the left is all cleaned up.

So after struggling to get that bolt into the capture nut, I finally got it, and here’s the original GPW dipstick and tube all installed! It was a lot easier to get the rubber hose on the tube with the paint removed.

Here’s a close up of the cap. It’s pretty much the same as the CJ, just the caps are really different. But it’s nice to have another original item, and GPW at that, on the engine.
Looking pretty good! But, there were some things still to do…

Since I had to repaint the area on the voltage regulator cover that was scuffed from the CJ dipstick tube, I had tp remove the battery wires (to avoid getting shocked while taking off the regulator cover). I decided, since the battery wasn’t hooked up anyway, I should take off the GPW battery hold down and give it a quick sanding and repaint as it had gotten a few nicks here and there.

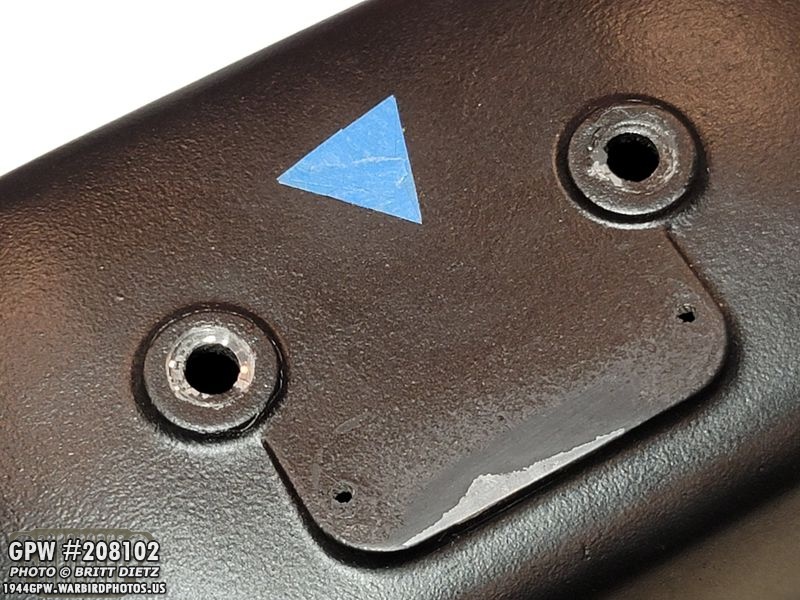
Switching to the voltage regulator as the hold-down bracket dried after painting, I carefully removed the rivet screws holding the data plate on and sanded the cover where the nick happened.

I also took some time to attempt to clean up the metal on the data plate a bit, so the numbers are seen better.
After all the work I put into that darn inspector’s stamp, I didn’t want to have to do it again. So I used some painter’s tape to mask it off. A bit silly, I know, but still.
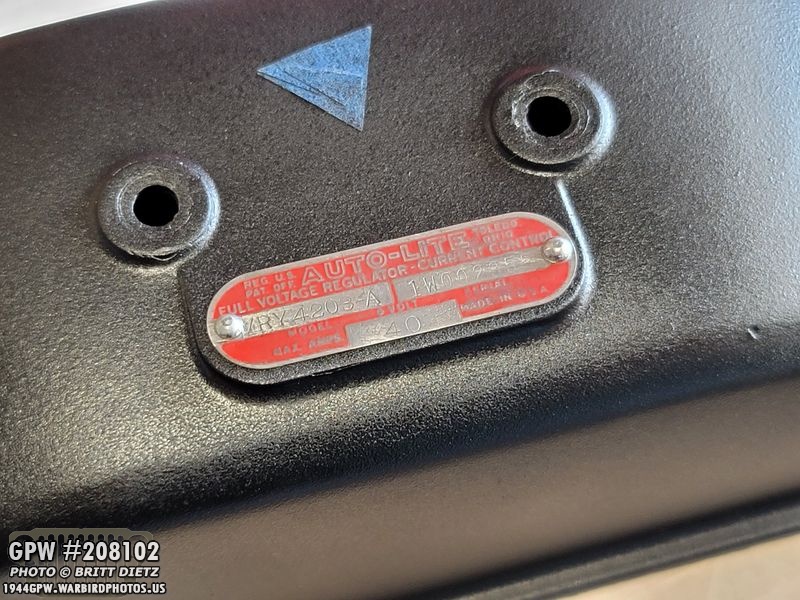
It was a nice 100-degree day in Southern California when I sprayed it Thursday morning, so the VHT wrinkle paint dried quick and matched perfectly to what I had painted. After it was dry, I put the data plate back on and added the rivet screws.

And here it is, along with the battery hold-down bracket, back on the Jeep looking good!
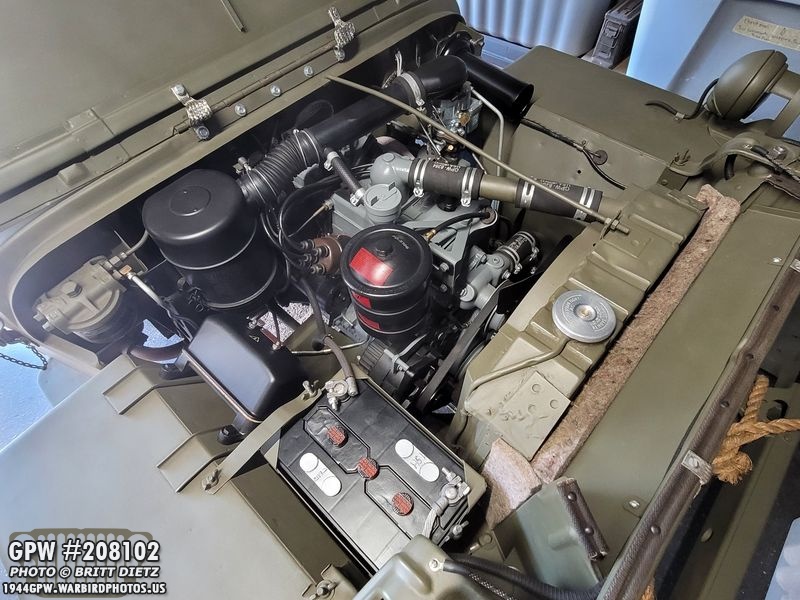
There’s not a lot of little details left in the engine bay to do, but I’ll continue to replace any repro items with original items when I get them or convert/add 12v items that are correct looking. Most of the engine bay is original at this point anyway!

Moving on, so my hood is an MD Juan replica hood, as my original hood is too far gone to repair. It will, instead, be wall art with the original factory numbers preserved on it. The numbers on my repro hood are incorrect, as they were from the online hood estimator, but amazingly only 51 numbers off! It should be 20540356. But having spent money for the stencils for these generated numbers, I’ve been waiting to find another original GPW hood to put on here, and once it’s painted, I’ll put the correct numbers on.

Last week, I showed one of the crown jewels of my finds last week with this early original GPW hood! I got a good deal on it, and aside from two areas that need some light welding to fit minor issues, it’s in great original shape! I decided to spend some time removing the original hardware from it and do some investigations into its history.
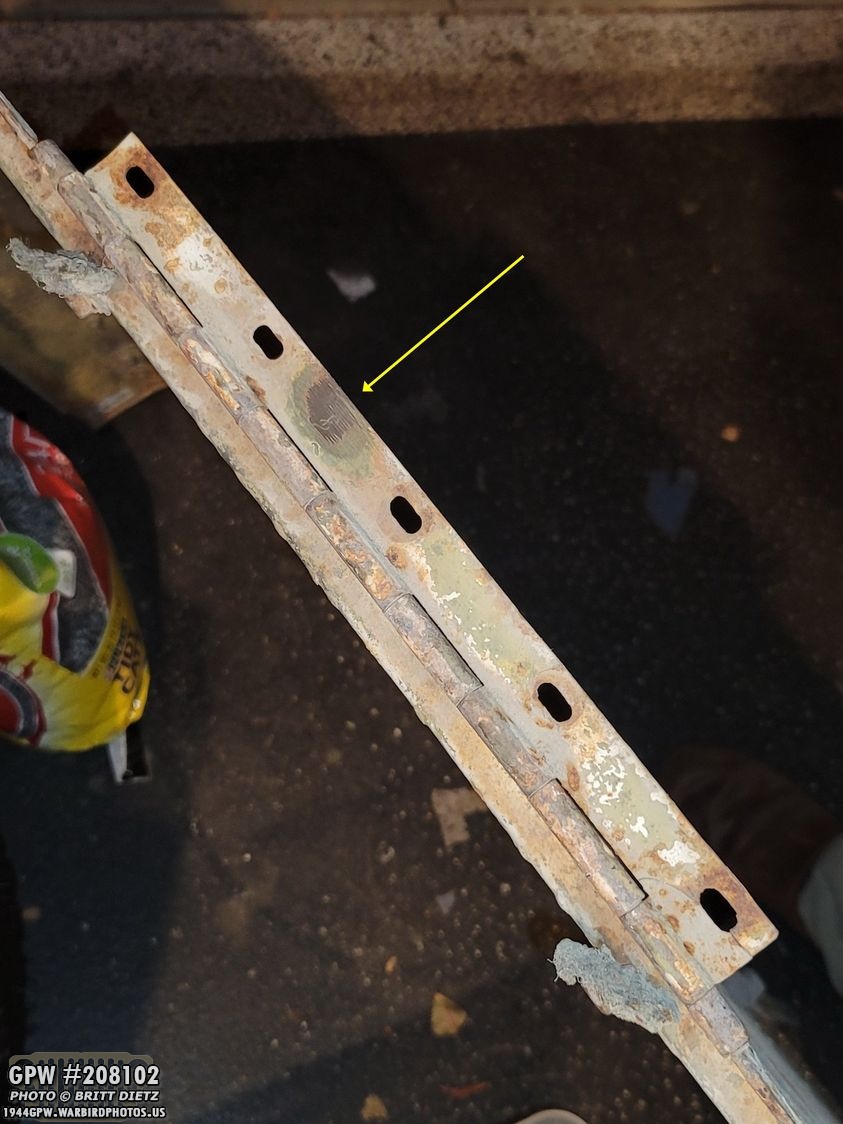
And since someone asked last week, here’s where the F is on the hinge. It’s on the underside (if you’re standing on the top of the hood side looking down at the hinge.

The hood catches and latches look original to me and don’t appear to have ever been removed. No F stamps, I was kind of hoping I could find some to add to the ongoing debate about F stamps on these bolts.

Here’s a look at the catches and latch inside. I soaked them in PB Blast as they had a bit of rust. They actually came off relatively easy after a bit of force and more PB Blast.

The now petrified early GPW rubber hood blocks were held on with screws and nuts. These did NOT want to come off no matter what I did, so I had to cut the screws. Not sure what I’m going to do with these hood blocks. They could make nice paper weights.
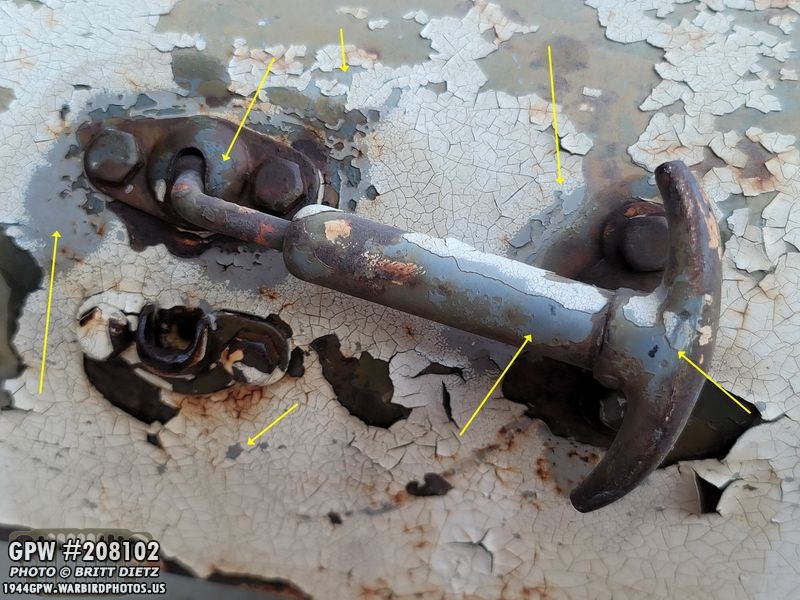
Looking at the latch and hood catches on the other side, there’s evidence (pointed out here with the arrows) that this might have come from a US Navy GPW Jeep. That sure looks like remnants of the Navy Battleship Gray.

As I was looking over the hood on the side getting ready to start wet sanding for any factory numbers, I stopped as I noticed something… that looks like a partial number to me!
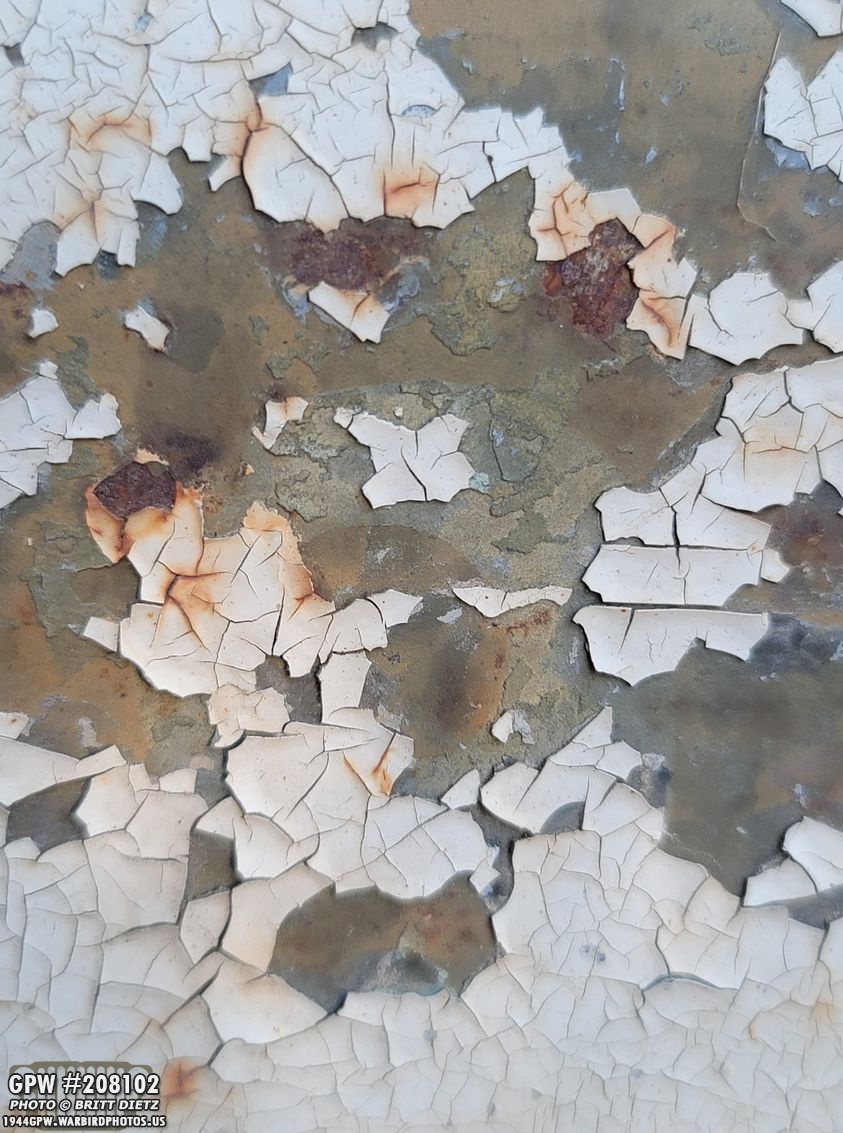
And then I looked over a bit more, and another partial number! They are covered with this thick white paint that’s somewhat flaking off too much for me to figure out what they are right off the bat, but that’s pretty awesome to see!

After wetting it with some WD40, I could make out what looks like 3 numbers. But I still can’t tell what they are. That white paint is thick as heck, and the areas that don’t want to flake off don’t want to wet sand. So this is going to be a challenge to get figured out. I would love to find and document these numbers before I wire wheel/sandblast the hood. Any suggestions on how I can get through this thick white hardened paint?

Moving on, I went to work removing the original remnants of bond staps on the hood near the hinge. The bolts weren’t F stamped, nor did they have a star washer. But they sure looked original. Here’s before and after.

There’s evidence of some tinning, I believe, under where those bond straps were as well. It’s an interesting nut, welded on vs a caged nut that’s on my original hood and the MD Juan.

Moving on to the axles! So last week I finally was able to set my pinions in the GPW axles, but we had to wait to set the carriers as the bearings ended up being bad and needing to be replaced. We used the bearings already on there and got the carriers shimmed up correctly. After removing the bearings, we used zip ties to keep those shims on each side.

Here’s a look at both the carriers with the shims held in place so we don’t need to re-shim them.

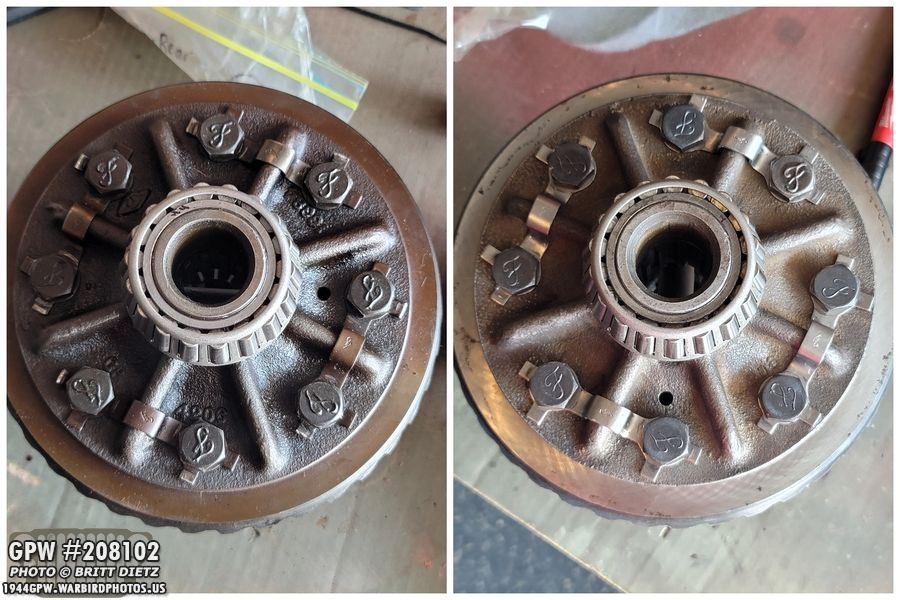
Last week I got a set of Joes Motor Pool Bearings, and after heating them I was able to get them set on the carriers. I was excited to get these installed in the axle housings so I could continue work on them!

But first, I needed to re-add the ring to the carriers. So here I’ve started to re-add the F bolts and the NOS GPW F stamped lock straps.
Finally, all bolts added and torqued to about 33-35 foot-pounds. Now time to lock them in place with the lock straps…
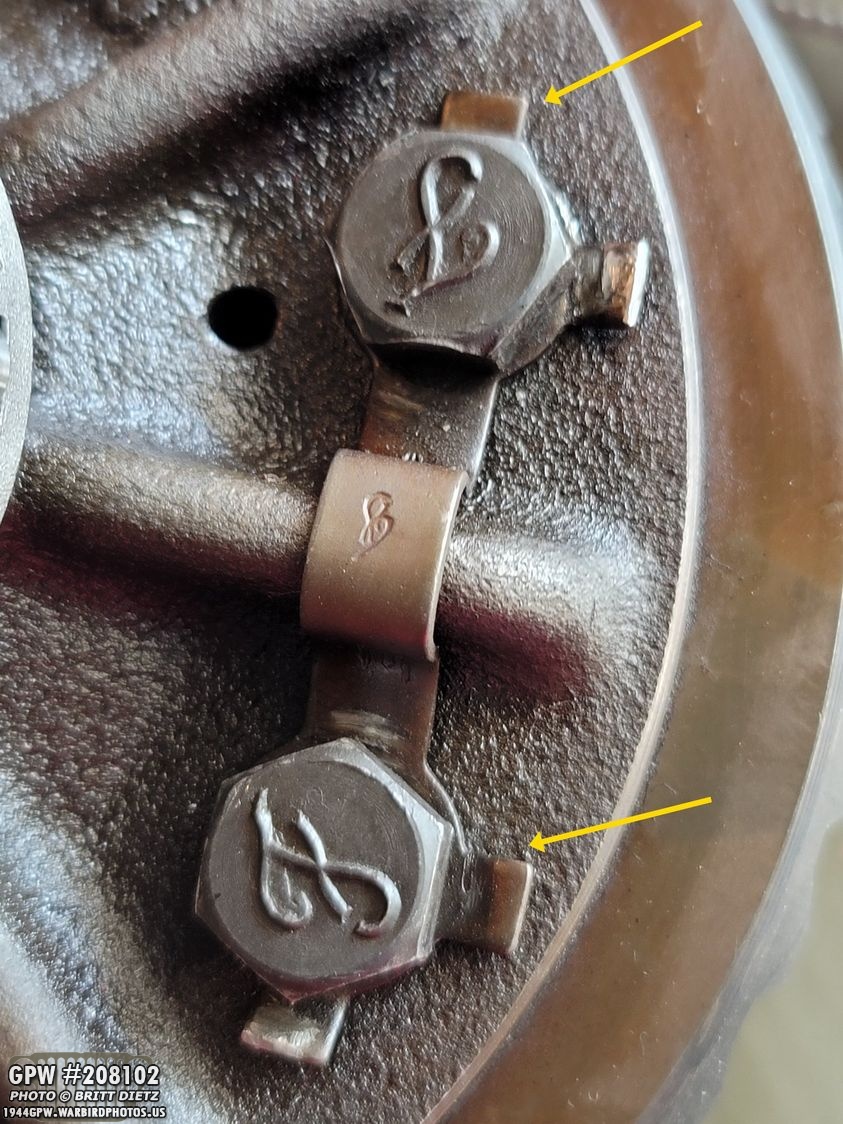
Each lock strap has two tabs for each bolt. At least one of the two will line up so it will lie flat against a flat side of the bolt. That will help stop the bolts from vibrating out.
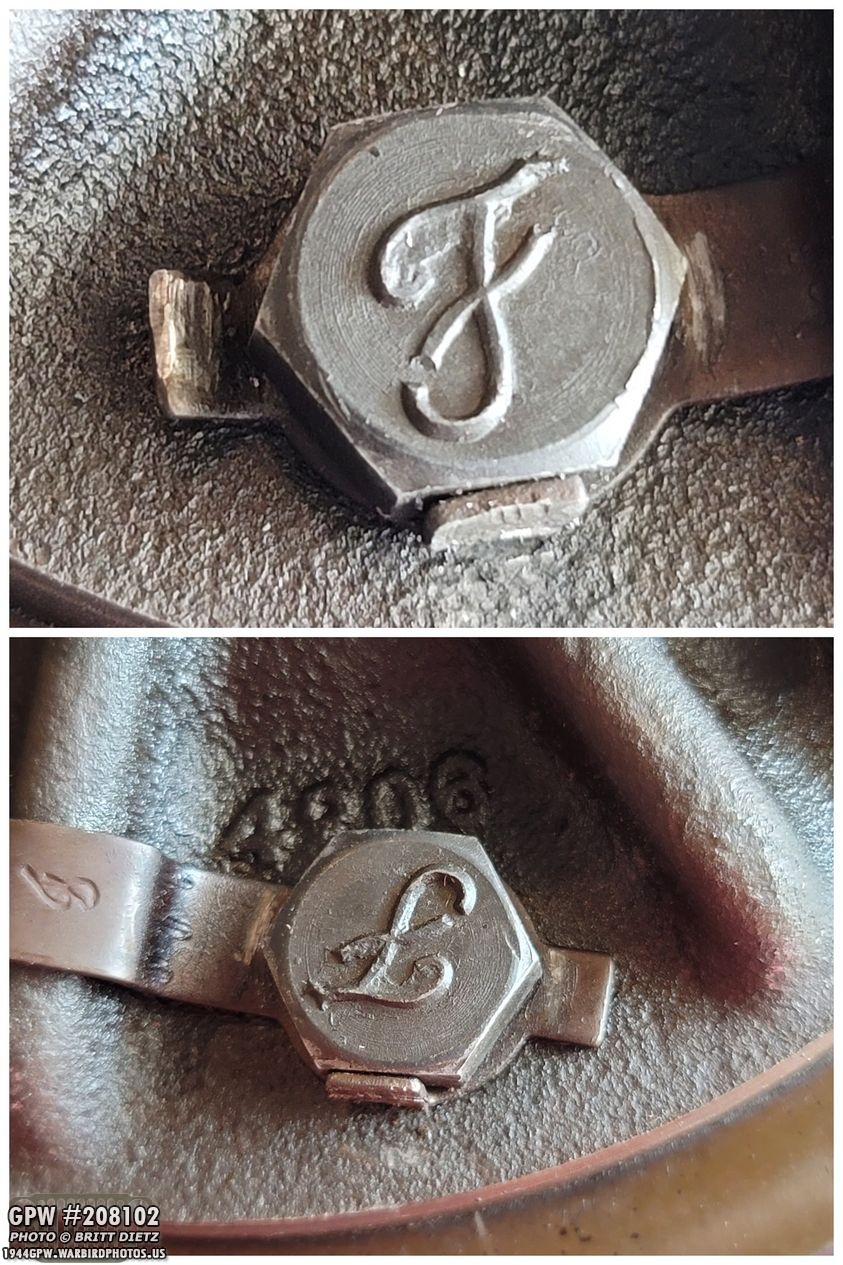
Here’s a look at two different bolts with the tabs carefully hammered to lock the bolt in place.
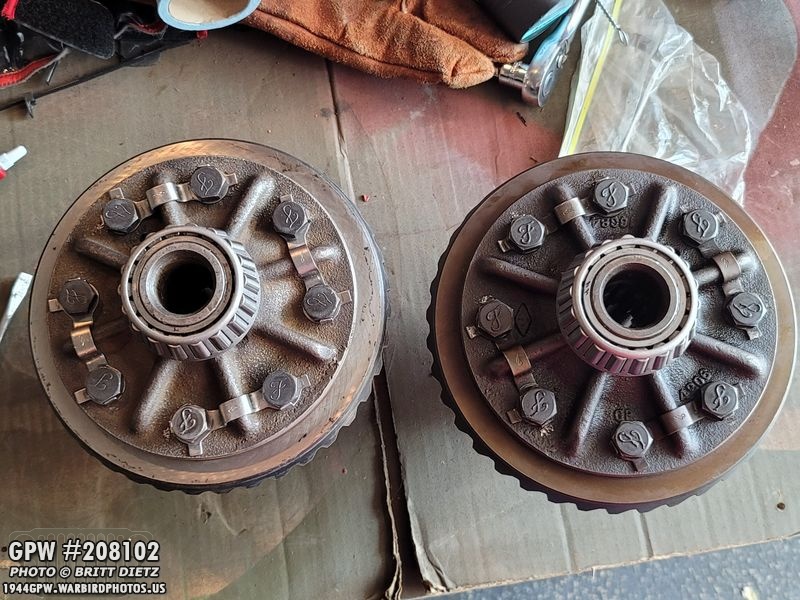
Both carriers, locked and ready to go! I didn’t take any photos between this shot and the next one.. but I need to explain what happened. I took the bearing cups, put them on the bearings, and dropped them into the axles… and they didn’t go in. Huh. Tired it several different times, the carriers were too long and wouldn’t drop in either axle. UGH! I tried and tried to no avail… then I saw the problem.

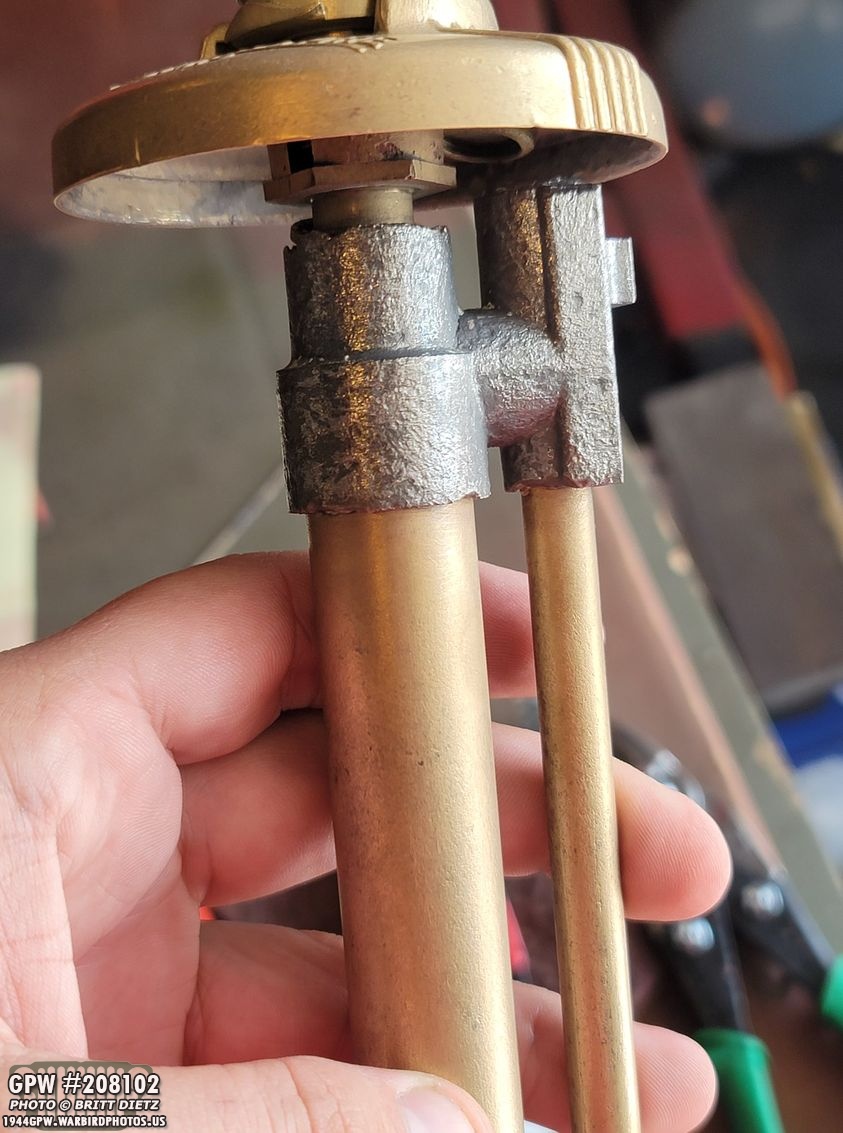
Turns out, the Joes Motor Pool bearings were WAY taller than the original Timkens! The original Timken is on the left, the right is JMP. Measuring the difference with a digital caliper, the originals were about .9020… the JMP ones were .9675!!! Huge difference. At the time, I thought ‘well, I can remove the shims’, but even with removing them, I don’t think they would have still fit since there were only 2-3 shims per side.
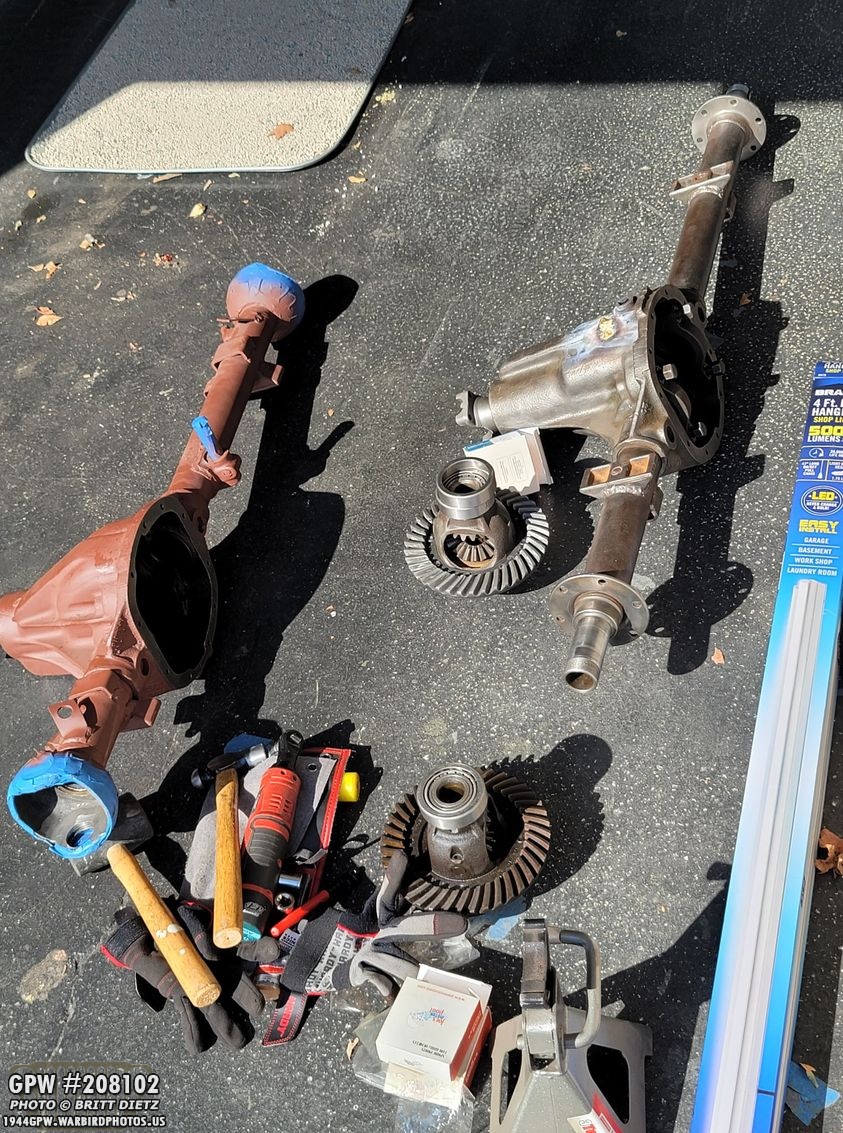
It was then I realized that I don’t have a bearing remover kit. So, I put everything back inside the garage and sped off to Harbor Freight Tools.

And while it was a nice kit I got, 1) those bearings did NOT want to come back off after being put on, and 2) the bearing slipped on my first one grabbing the cage on accident and totally ruining the bearing. UGGGH. So, after that I decided to wait and will hopefully going up to a friend’s house in the next few days to have them removed with much better tools. In the meantime, I contact Ron Fitzpatrick Jeep Parts, who I bought the bearings from. Ron’s customer service is incredible, he messaged me back and said he’d send out some replacements asap. More on this in a few…
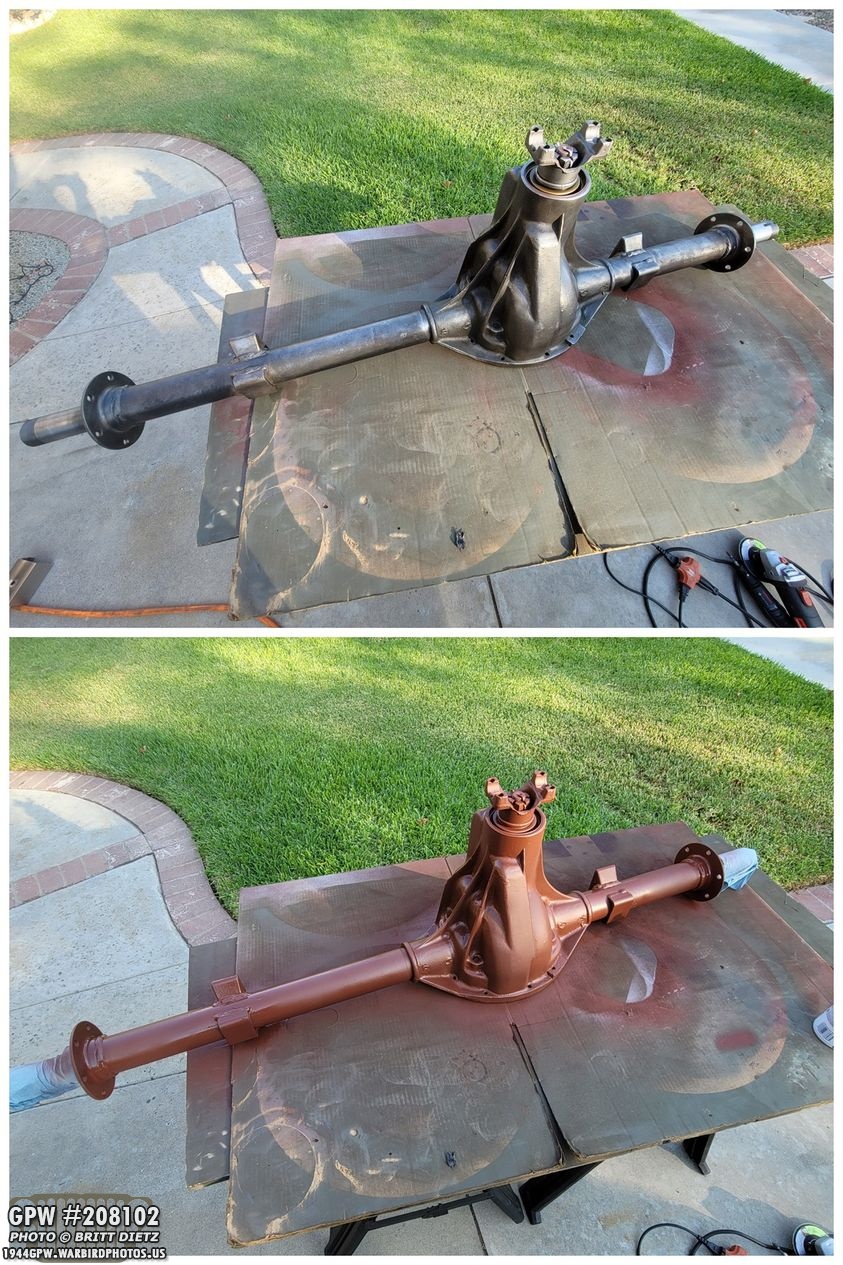
After being defeated with the carriers, I went to work on cleaning up the rear axle and hitting it with Red Oxide primer since I’d not done that yet. Here’s the before and after.

I forgot to take a photo of it, but I did grind down the brazing we did to the rear axle so it was a lot smoother looking. You can still see it, but I didn’t want to remove all the brazing as that could re-introduce the crack, and it’s on the bottom of the axle and hard to see. So good enough! After everything is installed on the axles, then they will get the final 33070 OD Green!
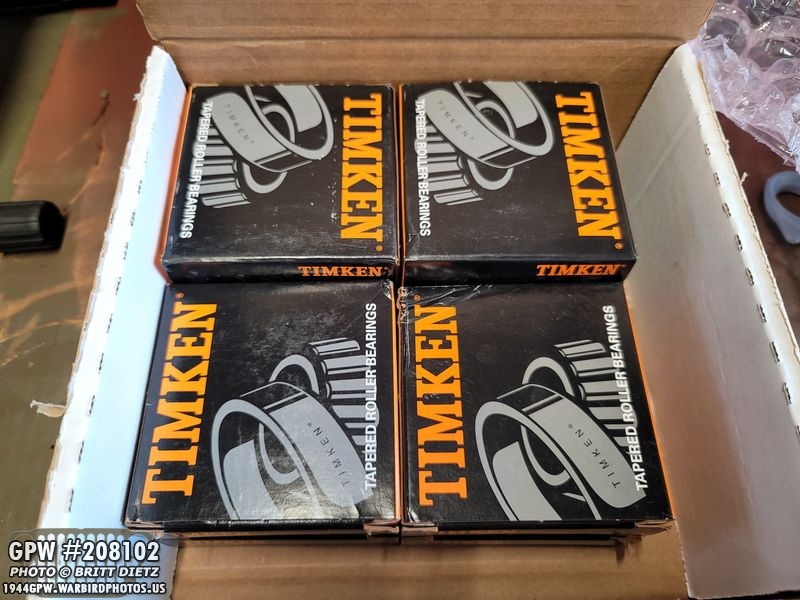
Back to Ron Fitzpatrick Jeep Parts, he not only shipped me replacements, but he shipped me Timken replacements! These should be perfect with my originals. Once I get the JMP bearings removed, I’ll be sending those back to him along with one of my original Timkens (which I won’t need) so they can take a look at the JMP batch I got and compare. Ron really takes care of his customers, and I can’t thank him enough for the set of Timkens!

As I wrap up this update for this week, I wanted to share a few shots. I used a special filter on my Samsung Note 20 Ultra phone to shoot this photo which mimicked a WW2 photo of a Jeep I gave it as a comparison. It did a fantastic job, and looks almost like a WW2 photo! Just add some image noise, a shallow depth of field, and some edge blurring and it’ll look like a wartime photo.
Same filter, with the horn.
And, had to show one more photo of the fire extinguisher! Glad to have that detail done!

And that’ll wrap up this update! Next week will hopefully have more axle work, possibly some more flea market additions for the Jeep, and more work on the GPW hood. Till next week…