 Axle work begins and a Fire Extinguisher!
PART 2: Going through the rest of the items from the haul last week including restoring the GPW Dip Stick and tube. Also, axle work finally begins on the replacement GPW axles! And wrapping up this special update, I get to work restoring a proper fire extinguisher for the Jeep!
And here we are again, a second update for last week! Let’s jump right in…
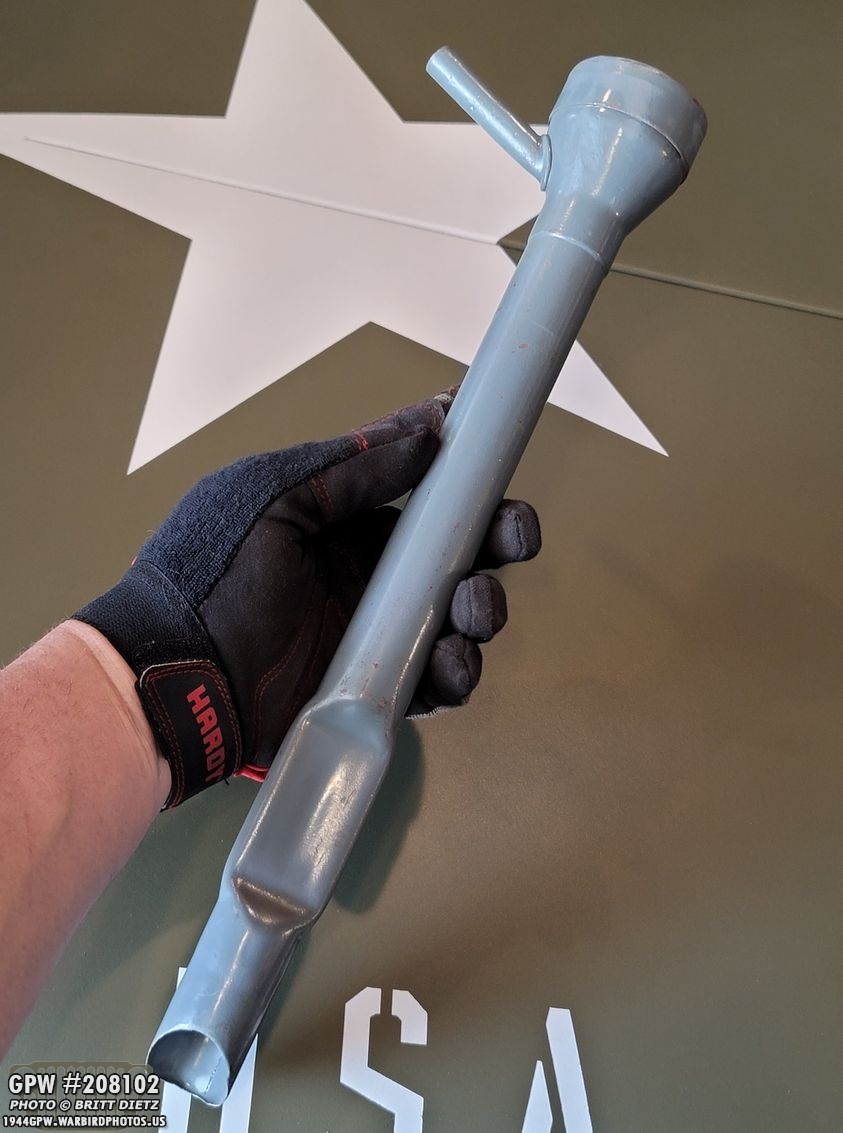
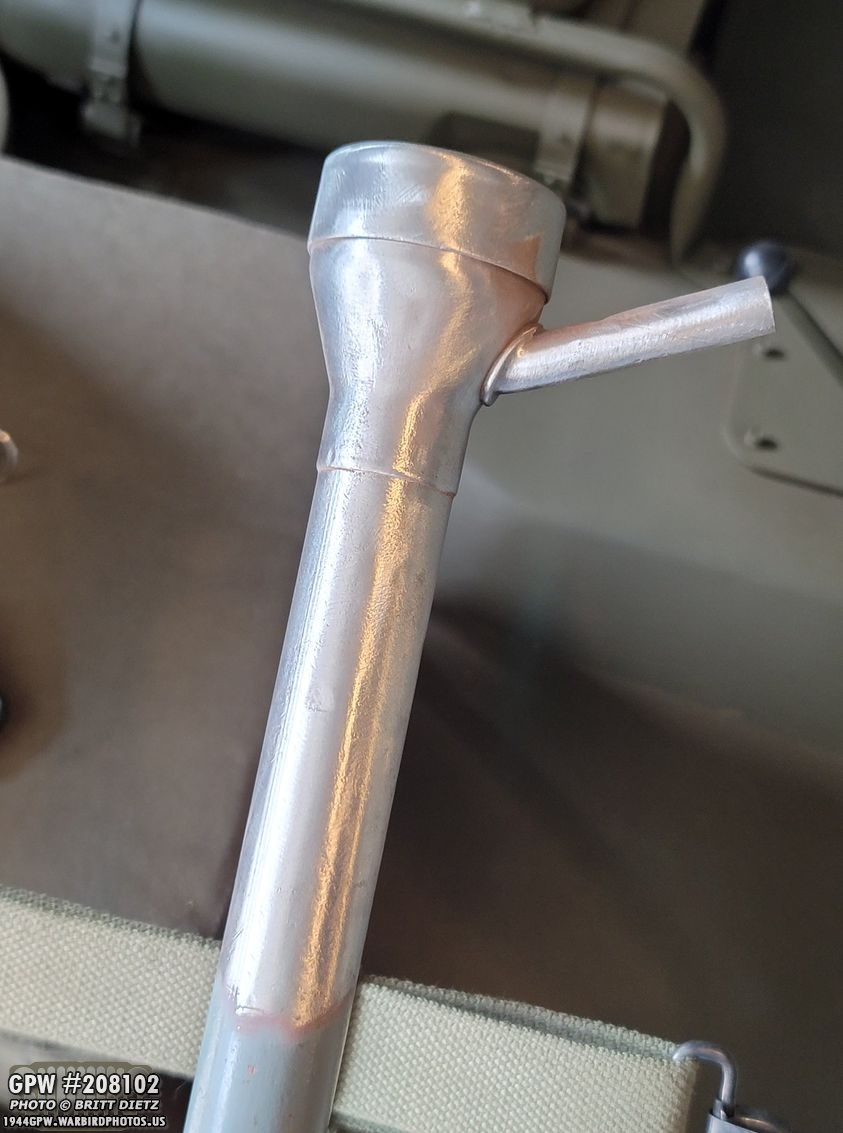
Another item I got at the military vehicle swap meet was an original GPW dipstick tube and dipstick. Here’s a look at the tube. It looks pretty much identical to the one currently on my Jeep, which is a CJ2 dipstick and tube.
And here’s a look at the dipstick itself. It missing the little disc on it that keeps the stick aligned in the tube.

But there’s a nice F stamp on it! The FULL/EMPTY marks are a bit difficult to make out, but they are enough I can still read them when checking the oil levels.

Here’s a look at the dipstick top cap, that’s what appears to be original Ford Grey paint.

Here’s after I’ve wire wheeled it completely clean.

Since this dipstick was missing the disc, I ‘borrowed’ the one off the CJ dipstick and put it on this. The problem is that the little catch area that holds the disc in place has worn down, so the disc would fall off. This is common on WW2 dipstick over time. So, I did two quick little zaps with the welder (right photo), and it’s now not going anywhere but still can wiggle! Quick easy fix.

While the tube doesn’t look any different between the WW2 one and a post-war CJ one, the cap shows some differences. Here’s the original GPW one on the left and the post-war CJ one on the right. Notice the GPW ones has notches all the way around, and a different top to the cap.

Primed with Ron Fitzpatrick Jeep Parts red oxide, and then painted with VHT Ford Engine Grey!
I then went to work on the tube, wire wheeling it clean since the original paint was missing in some areas.

Before I removed all the paint, I took a moment to compare the original Ford Grey with the VHT Ford Engine Grey. Here’s the generator bracket I had just painted (so it was a little wet still). The original grey looks a tad darker, but to me, they are pretty close shade wise. And once the paint dries on the generator bracket, it should be a bit darker as well.

All wire wheeled!
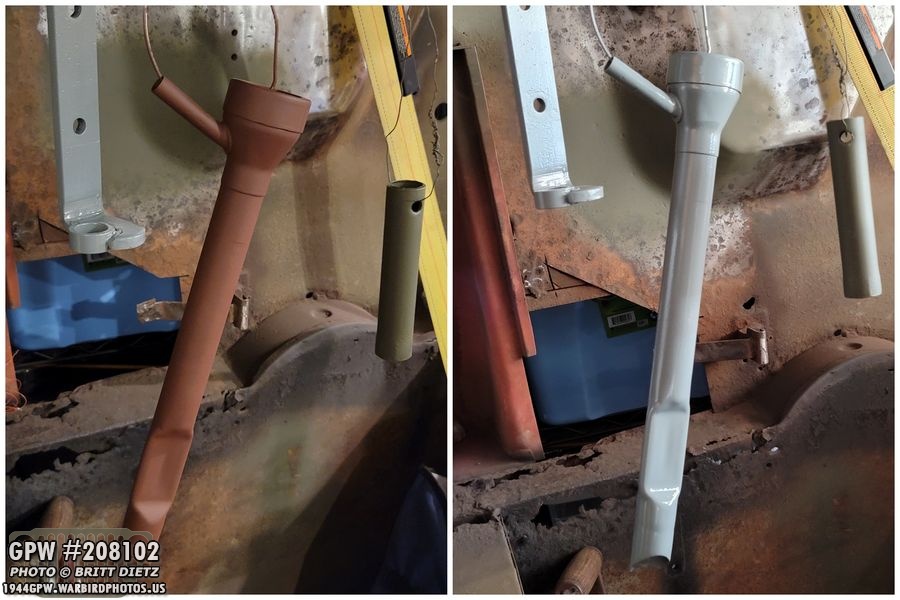
And again primed with Red Oxide, and then painted with the VHT Ford Engine Grey. Looks great!

The next day, it was all dry and ready for install! Look for that in Friday’s normal update.

Moving on to the exciting part of this part 2 update… FINALLY after many months, I’m working on the replacement 1943 GPW axles! I’ve been stuck with them as the rear axle needs a crack repair, and the ring/pinions needed to be set. As a reminder, I currently have CJ2 axles on my Jeep, so these will be replacing them. I packed up the axles in my car along with other parts and headed out to a friend Tom Read’s house.
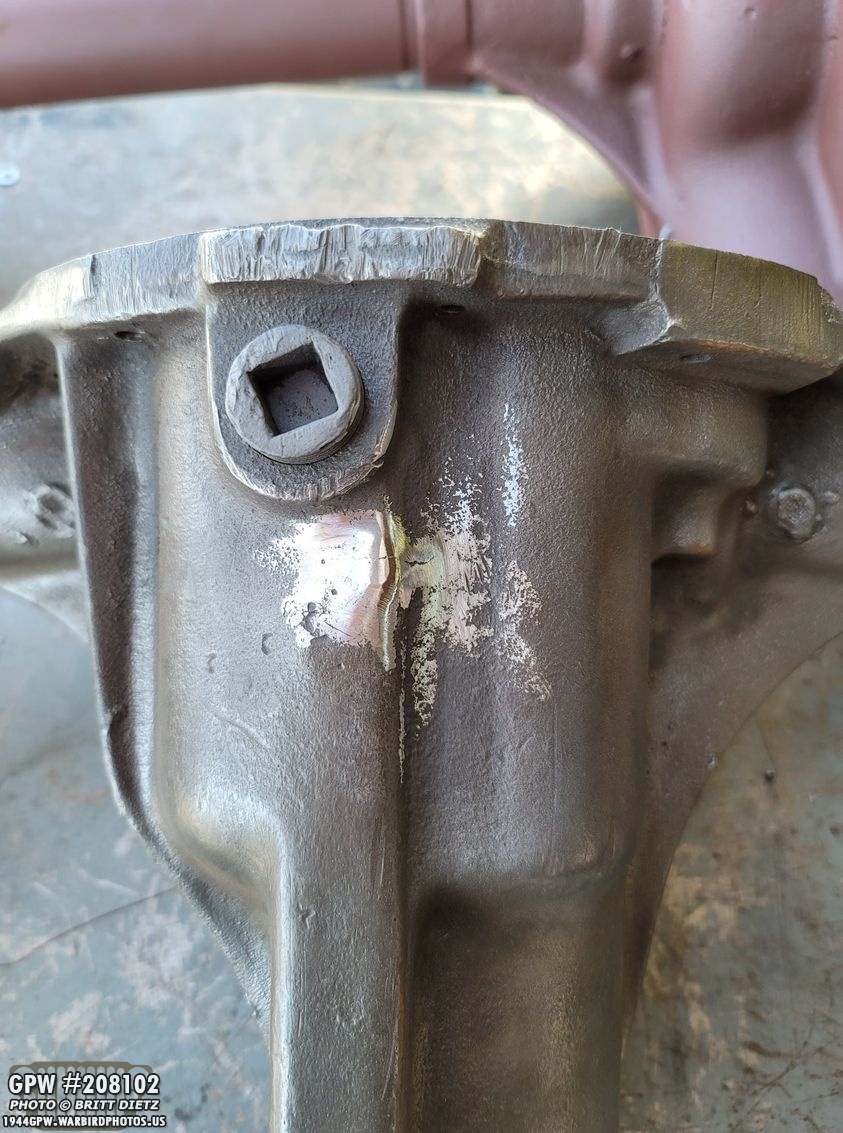
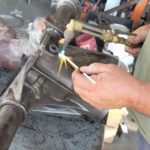
First step, repair the rear axle that was damaged during a spider gear explosion at some point before I got the axles. Here we’ve cleaned up the area around the crack in prep for blazing.

Here’s Tom masterfully brazing the crack with brass.

And the end result! The brass fills the crack, and it’s good as fixed! I’ll carefully smooth out the repair so it’s not as bubbly.

Next step was to add a Joes Motor Pool bearing from Ron Fitzpatrick Jeep Parts to the NOS pinion I got to replace the damaged one in the rear axle. Here Tom is using a press and a piece of pipe to push it on after heating it.

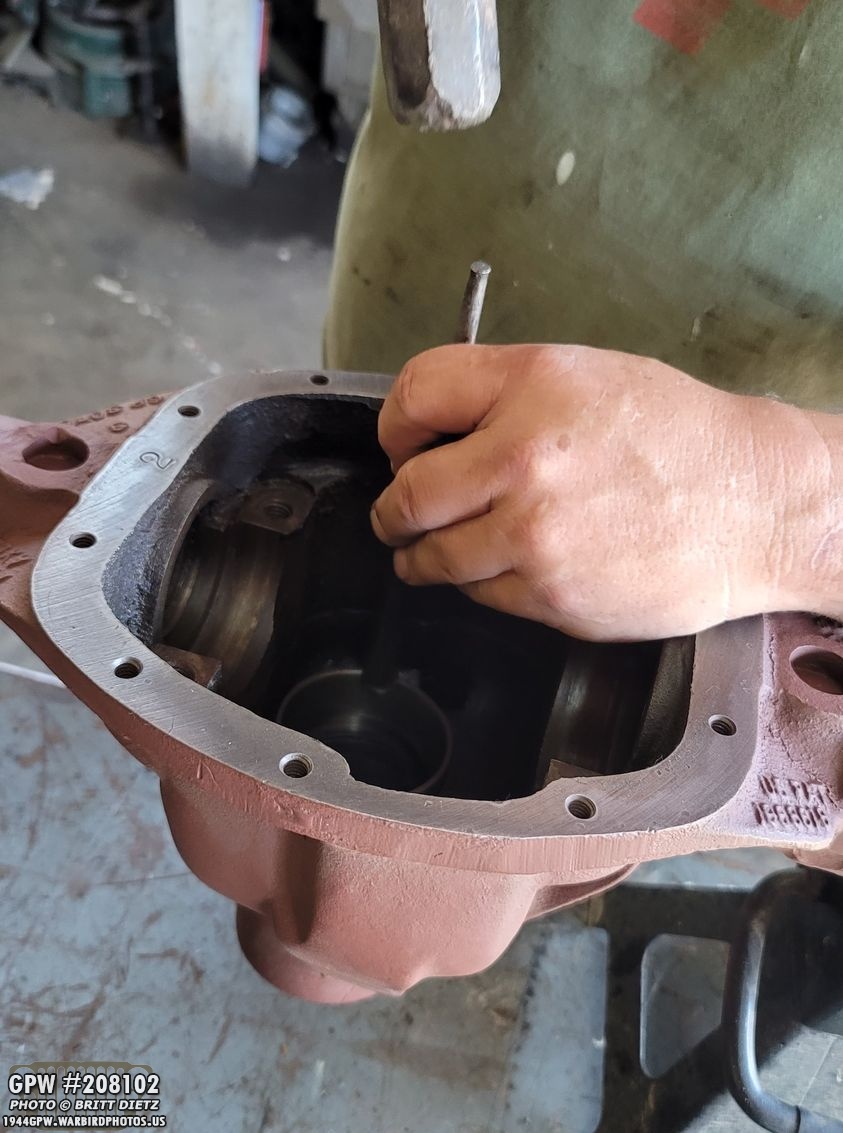
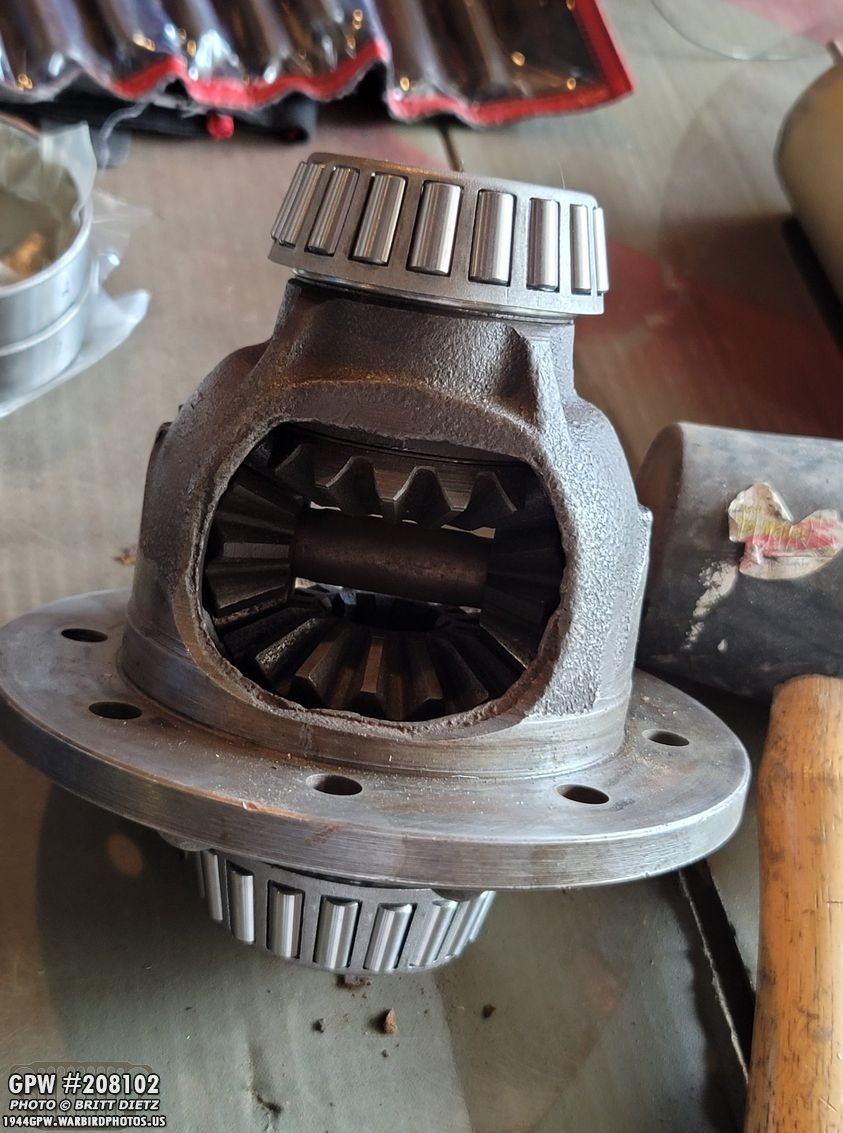
Here’s a look at the pinion back in the rear axle for the first time in almost a year!

I was interested in seeing the process of setting a pinion depth. It’s not complicated, it’s just tedious and time-consuming. It involves putting together the pinion, bearings with cups, yoke, the carrier with the bearings, and checking (I’ll show this in a few photos) white grease. The problem is, if you need to change it by adding or taking away shims (spacers) on the pinion… you have to take ALL that apart again and drive out the inner bearing cup. Ugh.
Here’s Tom driving the cup back into the axle after we added some more shims to the pinion.

So how to check for proper pinion depth… once you get everything installed in the axle, you put some white grease on a few teeth of the ring, push down on the ring to simulate some load, and slowly spin it so the teeth with the grease go past the pinion.

You can see how the carrier is installed in the axle. I got a shim kit from Ron Fitzpatrick Jeep Parts, so we could add or remove shims which will raise or lower how the pinion contacts the ring teeth shown here.
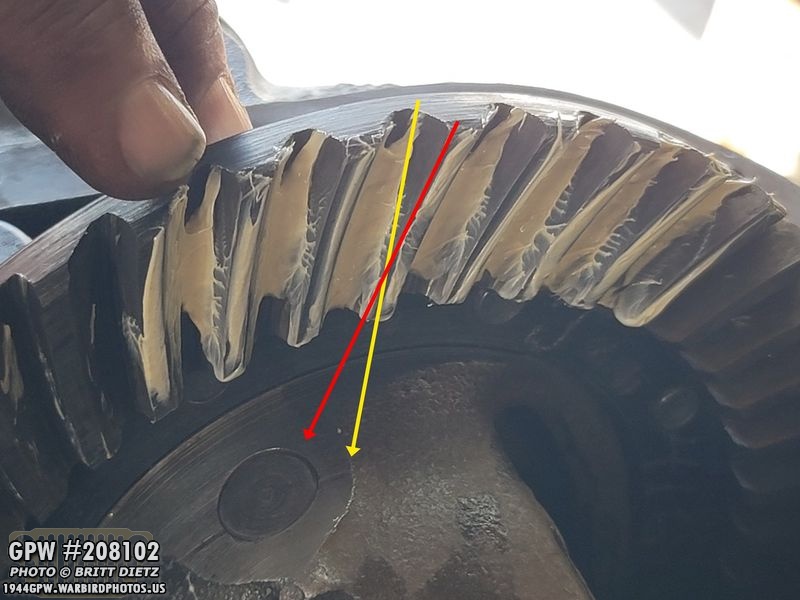
First time we tested it, the ring was off. See how there’s a diagonal area missing grease? That’s where the pinion pushed against these teeth, and it did so more towards the edge. It’s not a nice even lifting of the grease, but an angle.

After we adjusted the shims (and we only did this once, Tom, who’s done this countless times, just knew how many we needed to change after that first test), this is the second test which shows perfect even wear on the teeth from the pinion. See the difference from the previous image?

After that was set, we could install the new oil seal, shown here!

And then put the yoke on with the crown nut! After using an impact rachet to get that crown nut tight, we added a cotter pin and the pinion is DONE!

Next is to check the blacklash, or how much ‘play’ the carrier has with the pinion. You only want a certain amount so the pinion teeth and ring teeth are not sloppy when catching. Here we’re using a special meter to measure the backlash. If it’s not in certain tolerance, you have to take the carrier out, take the end bearings off, and either add or remove shims on them. Again, another time-consuming process.

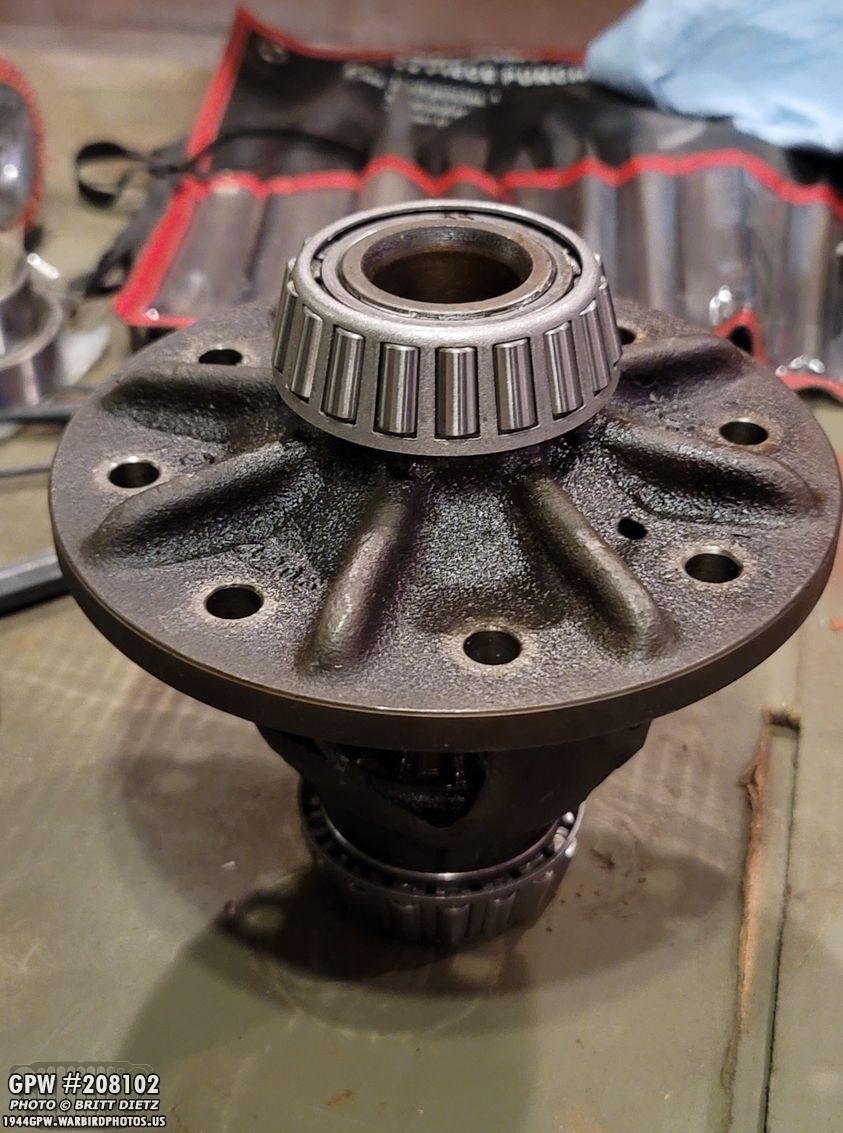
Here’s a look at the shims on the carrier. On this particular side, there are 4 shims.

As we starting to put the carrier in and set, Tom noticed one of my cups had some rust damage, enough that he felt it was safer to replace the cup (which means you have to replace the bearing as well… and since you’re doing one side, you should do the other to match).

So, we went back to the press with the carrier and removed all the bearings from both carriers.
We then twisty tied/zip-tied the shims on each side since we got those set within spec before removing the bearings. So this was another pause as I waited for new bearings to arrive from Ron Fitzpatrick Jeep Parts
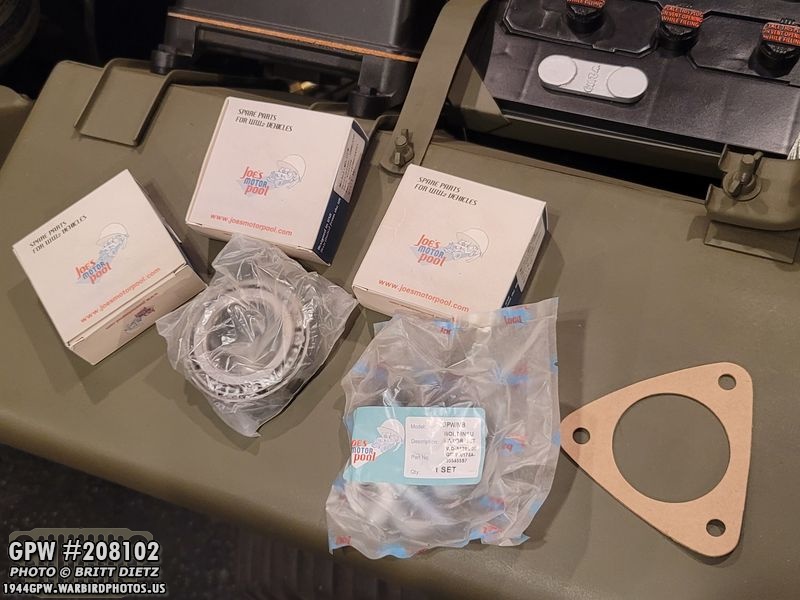
A few days later, I had four new Joes Motor Pool bearings with cups! I also got a new thermostat elbow gasket as I’ll be needed to probably do another flush of the coolant system again (story for another day). I also got a hardware/gasket kit for the generator bracket.
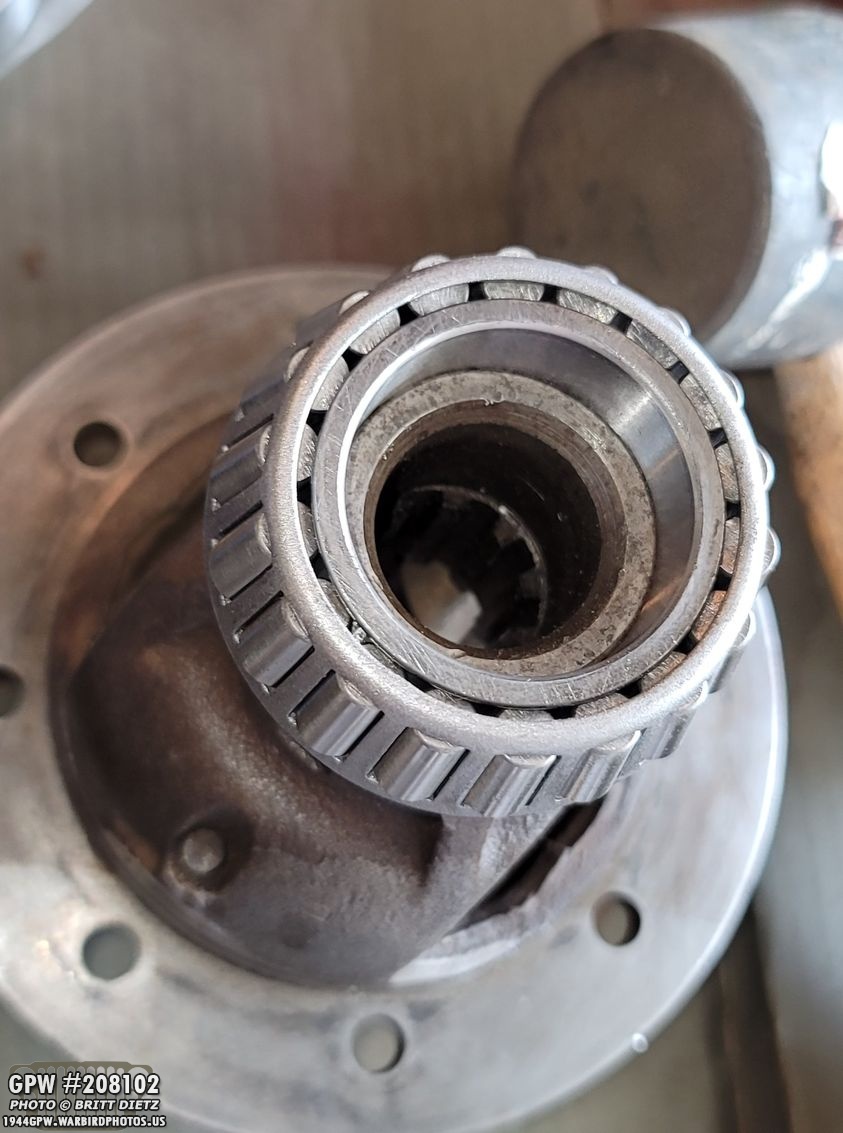
Putting the JMP bearings on the carrier went actually rather easy, I heated them up a little, then carefully got them started with a rubber mallet.

I then used a 1-3/8 socket to hammer the inside of the bearing down. This worked perfectly.

To match sure I kept the cups with the proper bearings (which I found out later wasn’t too critical because they are all new), I put numbers on each so I knew what went with what.
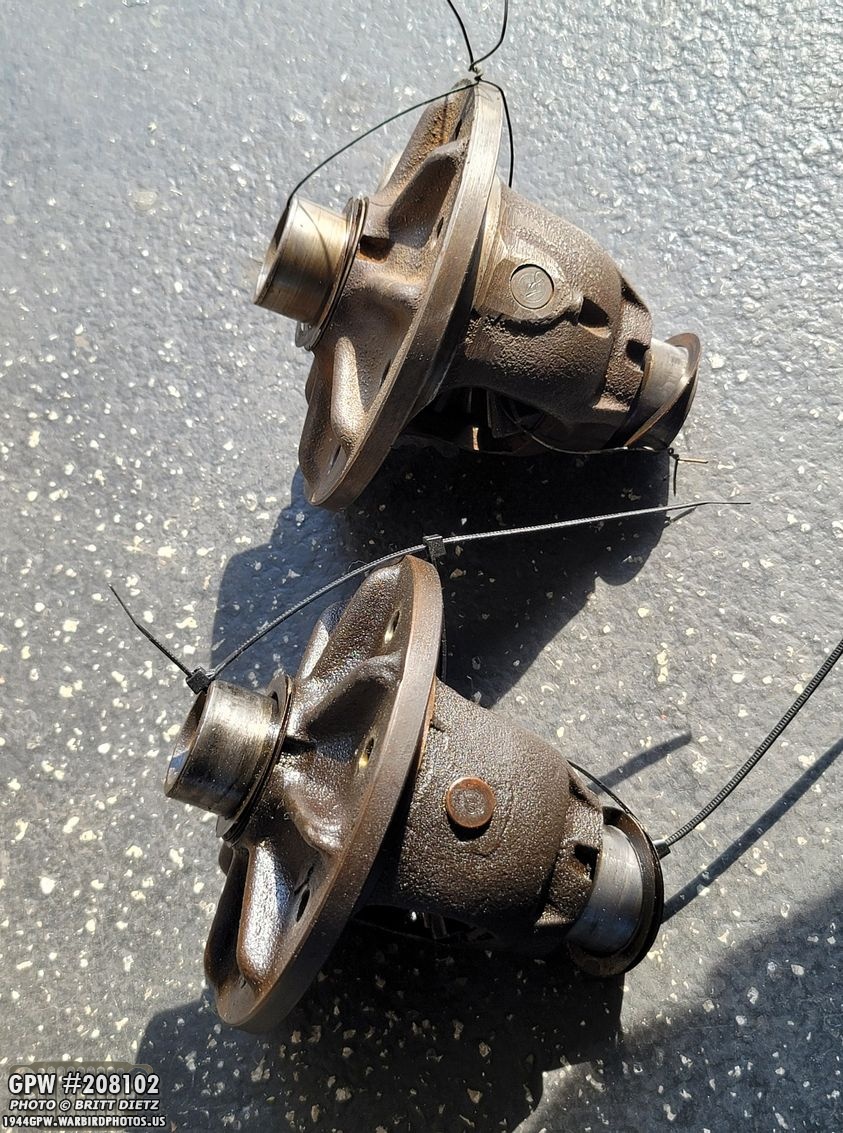
Rear carrier finished!
The front carrier finished! Well, at least I thought it was finished. In Friday’s update, I’ll talk about how I’m going to have to remove these bearings now, sadly.

I took some time to clean off all the grease from the rear axle ring as that can mess with the oil that will be in the axle. So this is where I paused as of last week with the axles. Look for much more Friday!

Even though I don’t have a generator yet for the Jeep (have an alternator, looking for a 12v generator), I decided to go ahead and install the hardware to the now finished original generator bracket. Getting this darn rubber gasket/bearing inside the hole was not fun nor easy. It’s a tight fit, and it took a lot of squeezing of the rubber to get it to slide through.

I finally got it, but I sure as heck don’t look forward to doing the one on the engine plate, as that will be much harder to get to.

And here I’ve added the hardware (I know, the other hardware is in the bolt hole that goes into the engine block, that’s just to keep it all together till it comes time to install this). I’ve thought about taking the alternator off and getting a long bolt to make it so the alternator works with this original generator bracket.
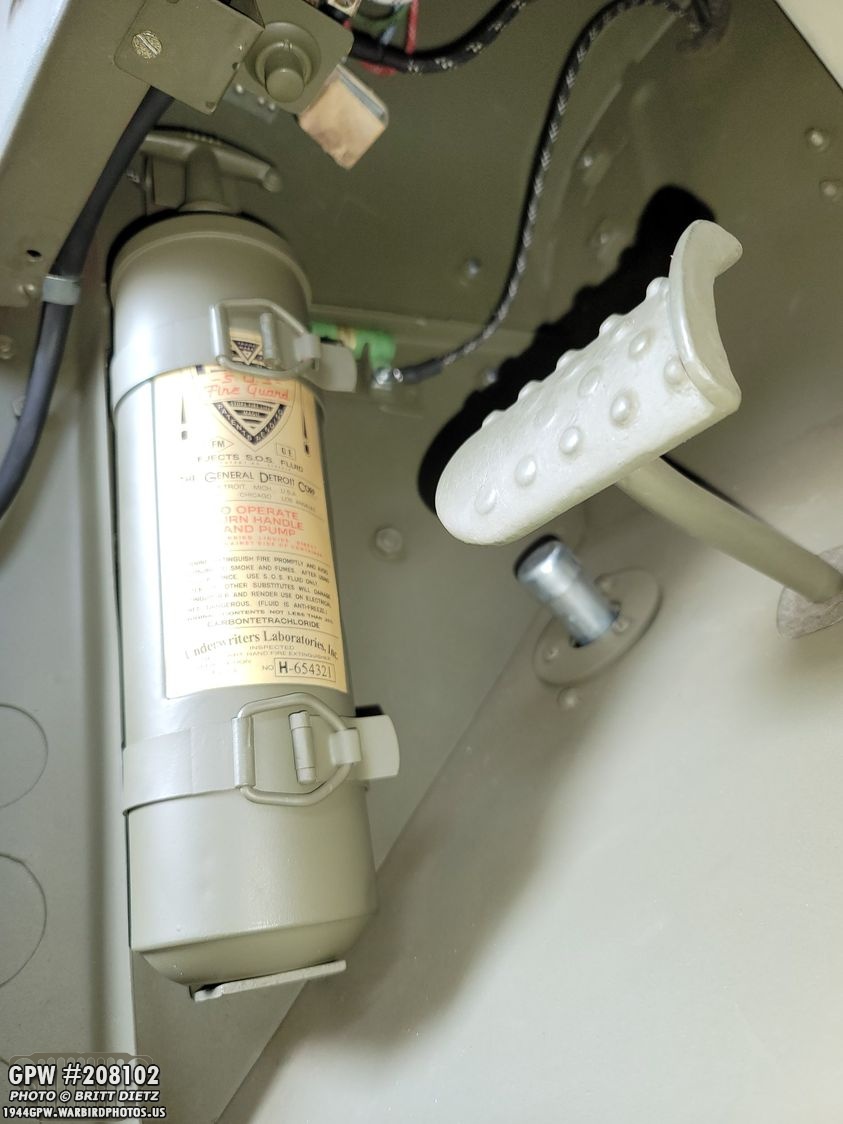
Moving on, the last few weeks I restored a post-war fire extinguisher and put it on the Jeep. It has a smaller sized decal that I custom designed since the post-war SOS Fire Guard extinguishers had smaller brass plate/decals. This was just until I found a proper wartime one…
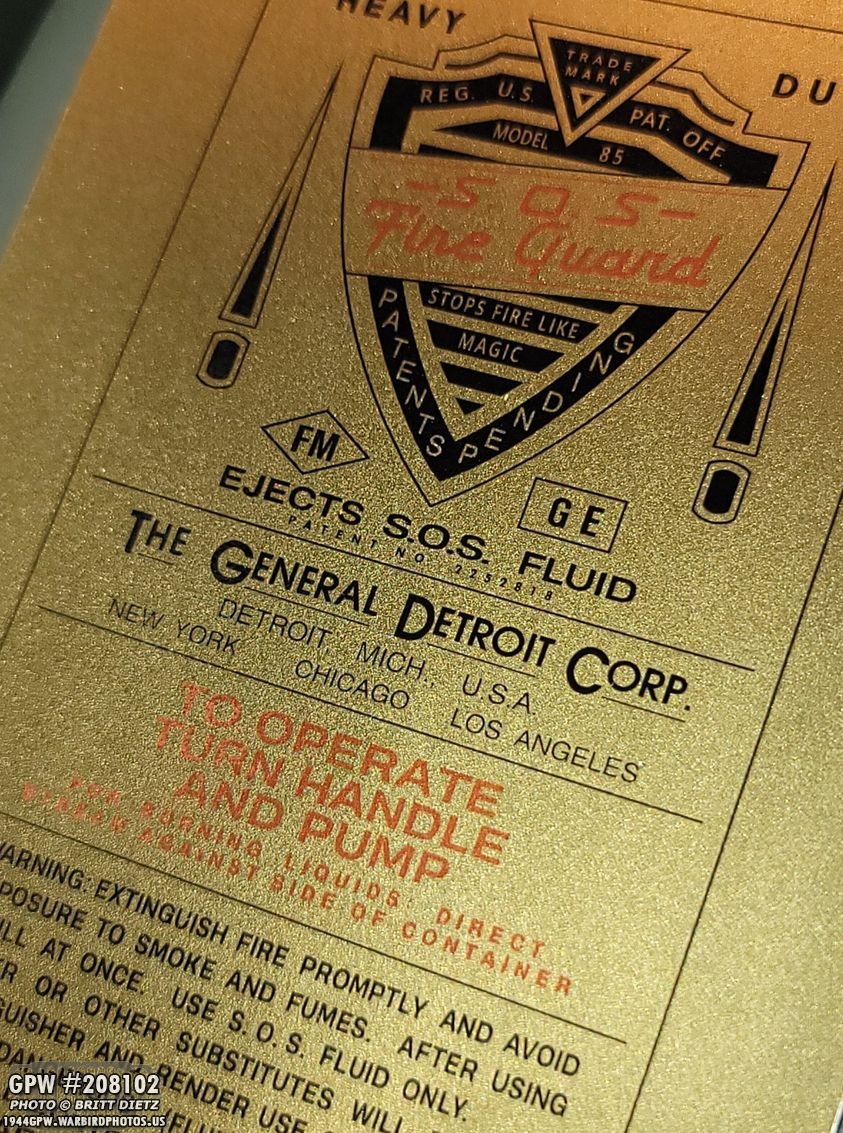
And here’s a look at my hand made SOS Fire Guard decal I custom made, as the decals you can buy from pretty much all vendors online are wrong! So I recreated one using an original brass plate with all the correct fonts, lettering/line spacing, etc.
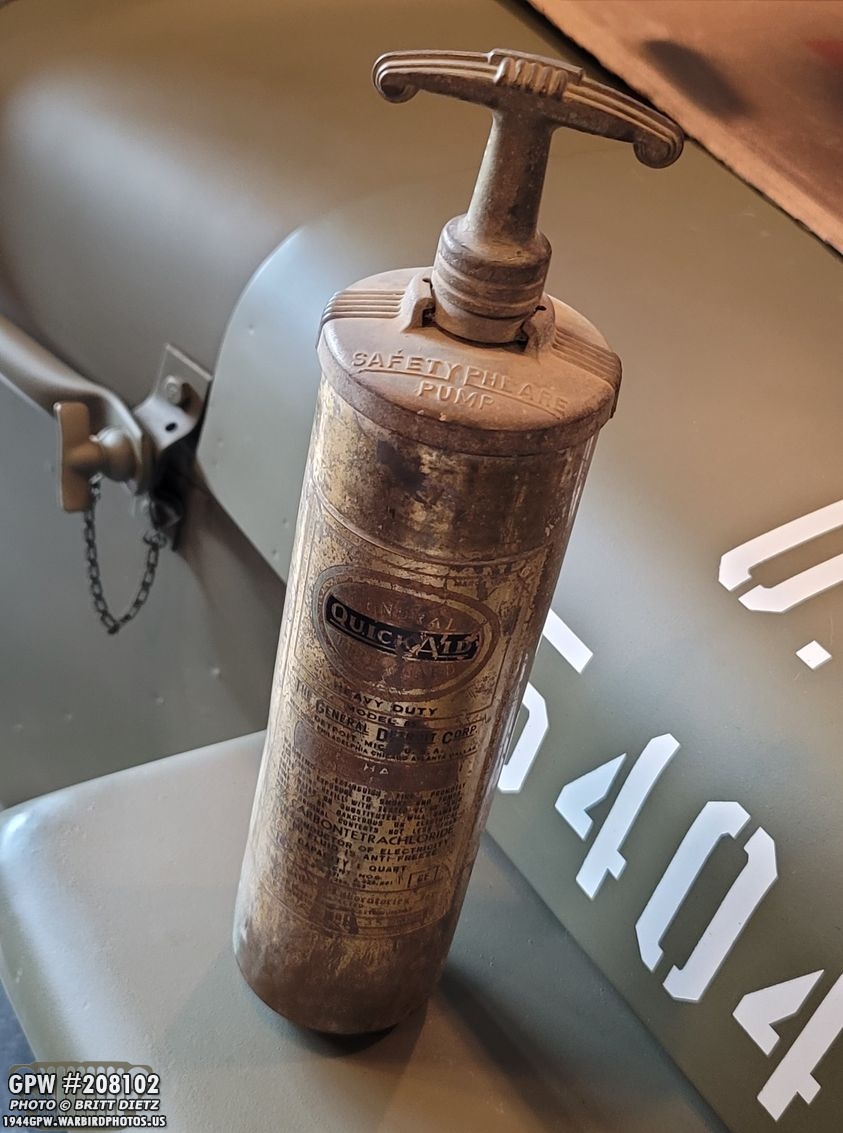
Last week, a correct wartime design style (but post-war since ‘quick aid’ came about in 1948, as I recall) popped up on ebay. A lot of people convert these to wartime ones, as you only need to pop-off the brass plate and it’s basically a WW2 SOS Model 85 extinguisher. It was pretty beat up scratch and rust wise, but that wouldn’t matter as I’d be painting it after a full cleaning.
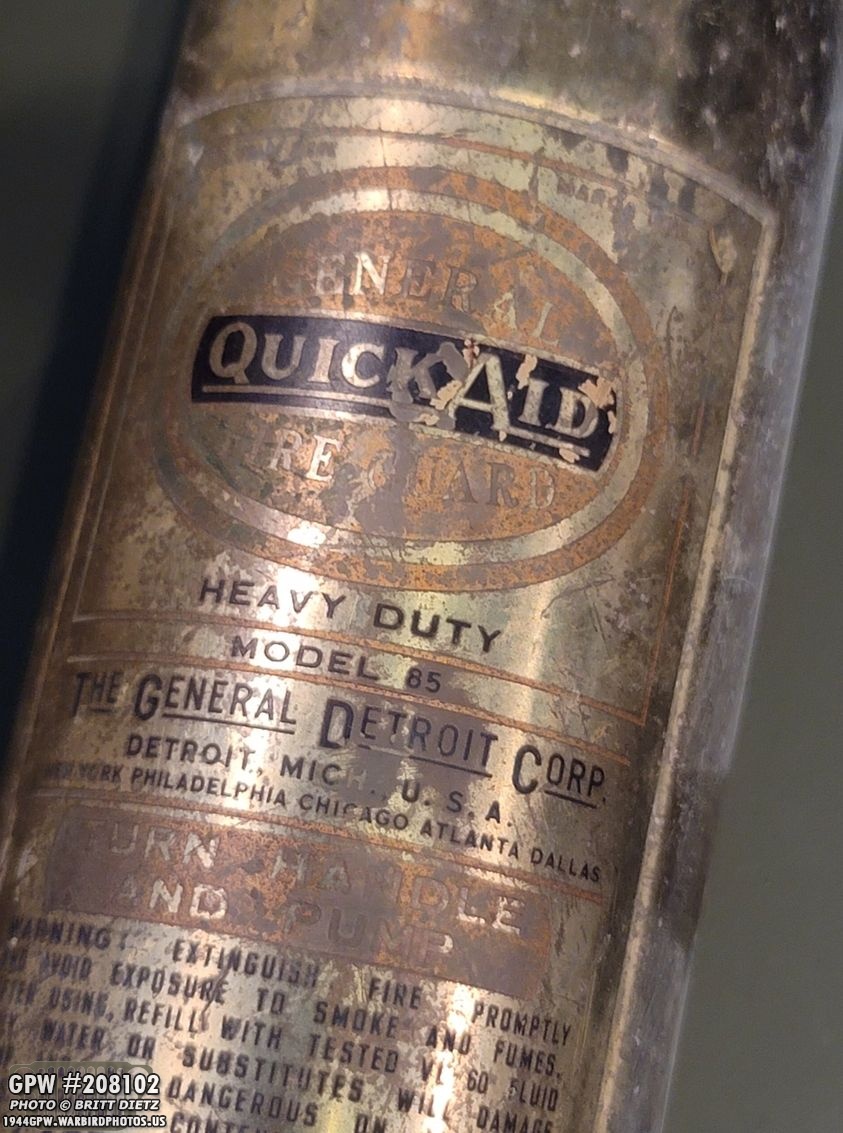
Here’s a look at the post-war plate.
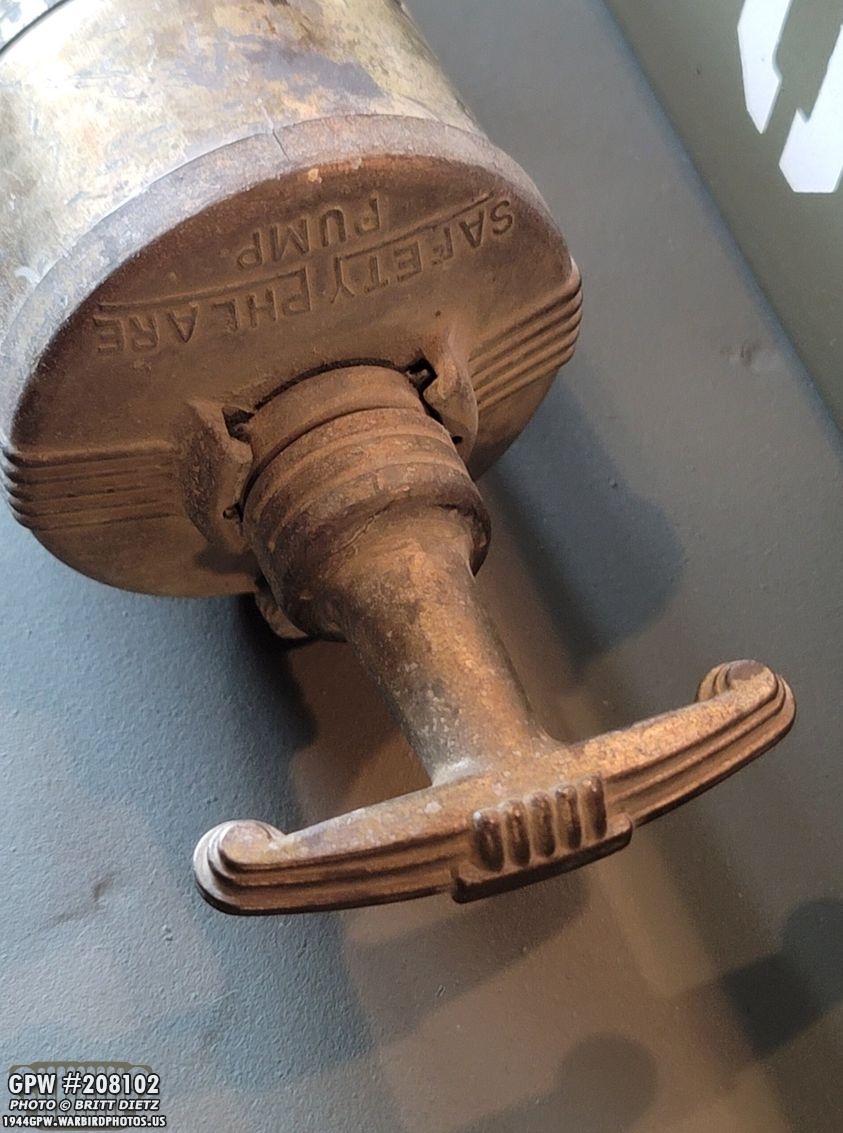
Aside from the larger sized decal/plate size, these features on the cap are the correct wartime style. The side stripe lines, the Safety Phlare above pump, etc.
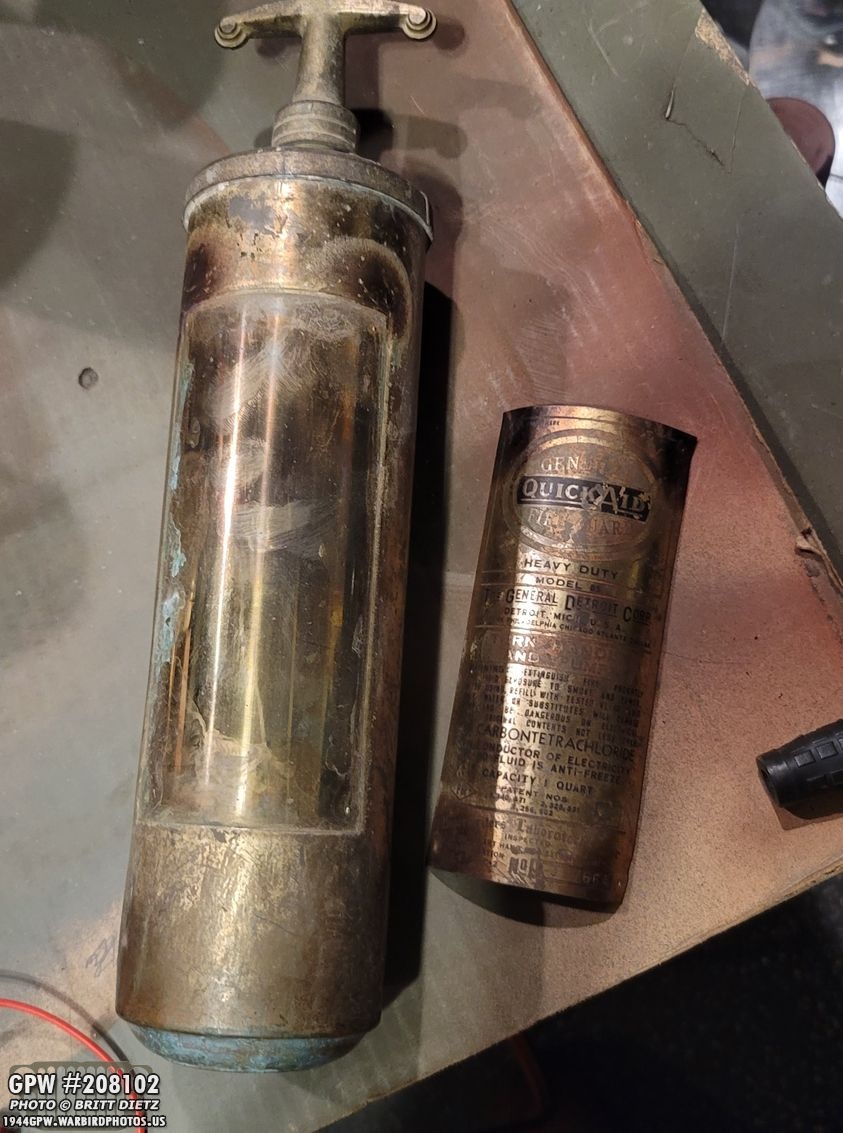
Getting the brass plate off was easy. After taking my torch to it and carefully heating up the four corners, the solder liquified and the plate pretty much fell off. Woohoo!

I then decided that I wanted to do a full restoration, including the inside as I could hear things rattling around inside (like debris). So I heated up the cap softening the solder and used a small screwdriver with the hammer to slowly pry it off.

The top got a little warped from using the screwdriver to pry it off, but thankfully, it’s easy to bend it back into shape.

Here’s a look at the inside, crusted with what I assume to be dried remnants of the chemicals that used to be in it. This stuff was rather thick, and I worried a bit that I wouldn’t be able to get it off.
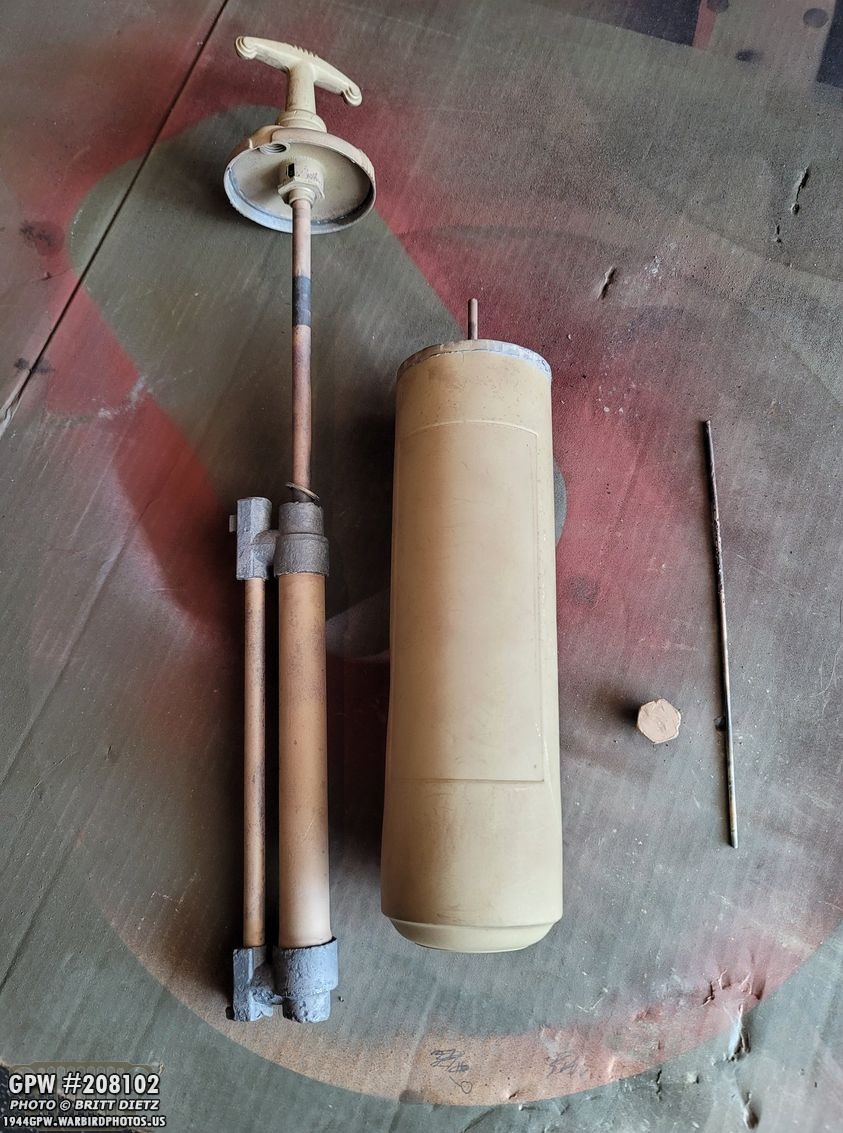
But it was no match for the wire wheel. Nice and clean! I also put both the insides/cap with the main canister into the sandblaster and got everything nice and clean (shown here).

I thought about restoring inside, which is heavily pitted, but there’s really no point. I’m not going to put anything into it.

After using a scotch pad to scratch everything up, the insides ended up coming out beautiful (minus the heavy pitting) with a beautiful shine on the metal and brass parts. Look for the rest of the restoration in Friday’s update!

And that’s it for this part 2 update! Since it’s Monday, a ‘preview’ of what’s to come Friday includes more axle work (and some disappointing news), finishing up the fire extinguisher, works starts on the GPW hood, and more! Till Friday…