 Birthday Present for the Jeep!
This week I had a few small projects, and started one big project! Since the Jeep turned 76 last week, I got ahold of an original GPW head block which I’ll be putting on the engine with the correct studs/F Bolts! This week includes PART 1 of installation! I also continued work on adding recessed head bolts, attempted to make inspector stamps for the Voltage Regulator, and more. It’s a bit of a smaller update than usual, but still some good work!

The Jeep has been down for the last week as she undergoes a ‘transplant’ of sorts… and here’s how she has looked for the last week!

She turned 76 a week ago today, so last Friday I took her out for one final ride before the big project began! Here’s a quick shot as I took her around the neighborhood.

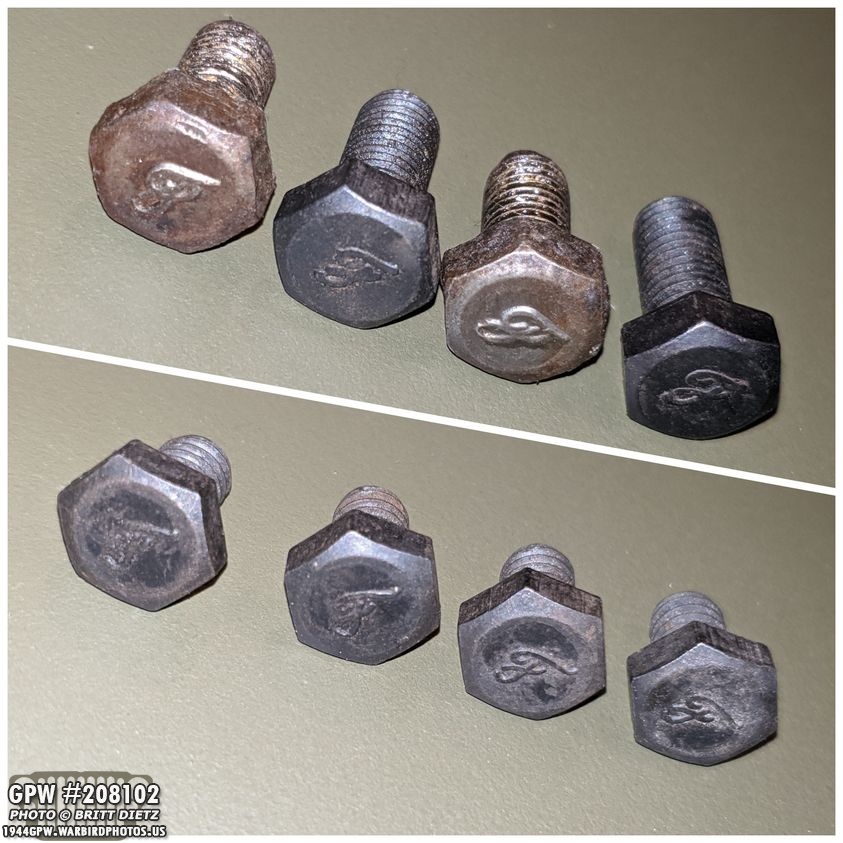
I’ve been hinting at the special birthday present for the Jeep the last two updates… Long F stamped bolts, large studs, and a mysterious large wrapped item. If you know your Jeeps, you might have figure out what all these are for.

And here’s the dead giveaway with the F stamped bolts painted with Ford Gray. What’s it all for?

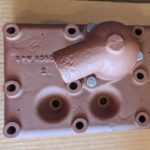
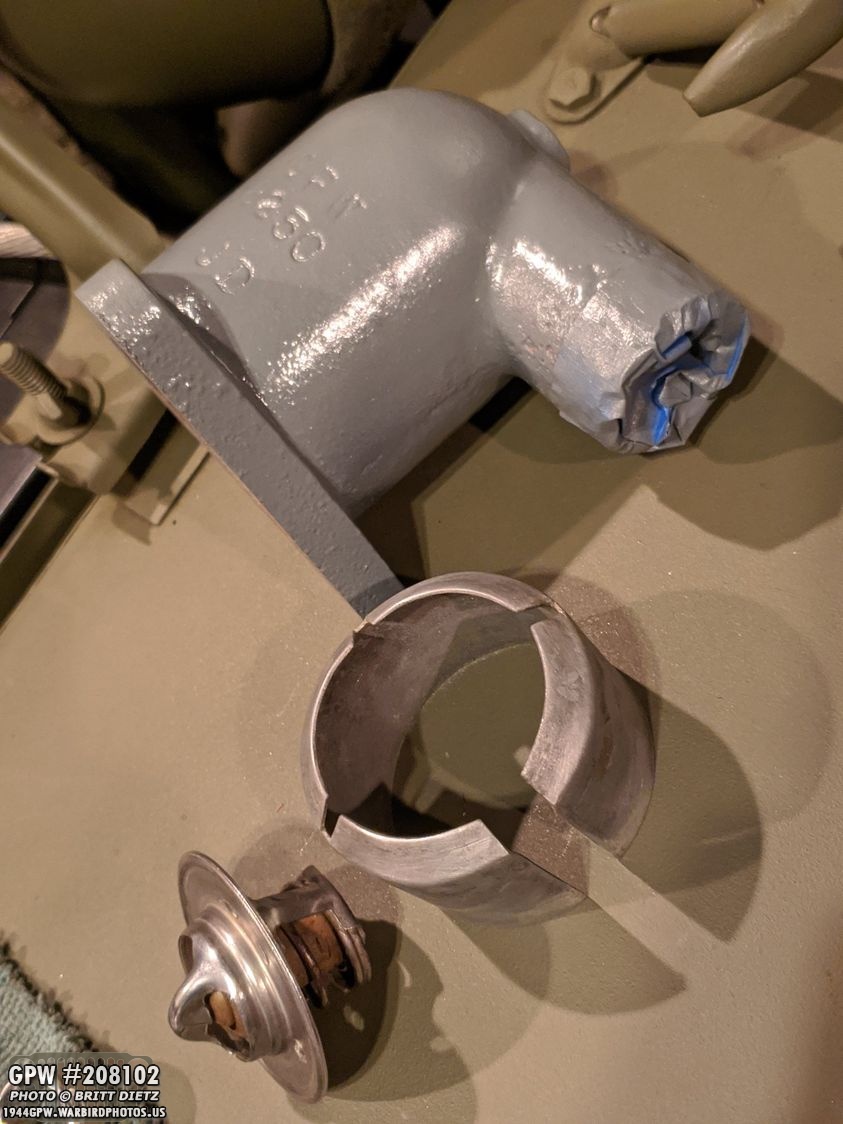
I acquired an original wartime GPW head to replace the CJ2 head currently on the Jeep! Along with the head, it has F stamped thermostat elbow bolts, and all the F bolts/studs and a new copper gasket! I purchased the head off of Roger.

It has nice GPW stamping! This will really be a nice detail for the engine. While the engine itself is a CJ2 engine (which is better balanced and better built overall), you’ll have to look hard to see it’s not a GPW engine
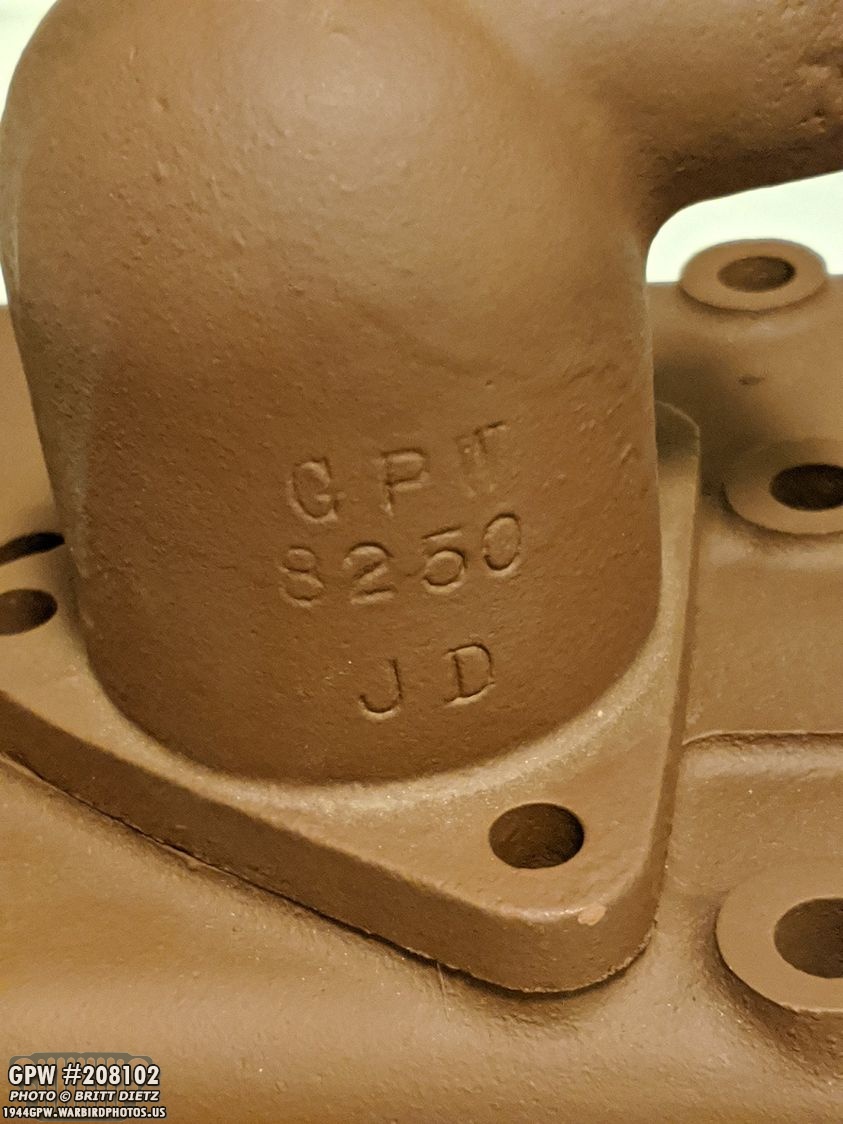
And as a bonus, I was given a GPW Thermostat elbow to go along with it! This particular thermostat elbow is a licensed built by John Deere (JD) for Ford, so it doesn’t have an F stamp.

And here’s a look at the original F stamped bolts for the Thermostat elbow after I test fitted them. I already painted them with Ford Engine Gray.

Here I’ve painted the thermostat elbow in the Ford Engine Gray (using VHT high temp Ford Engine Gray, GREAT stuff), and I’ve just sanded the primer on the head in prep for the final paint. I added my ‘paint spark plugs’ which I’ve used to paint the engine in the past.

All painted and looking pretty nice!
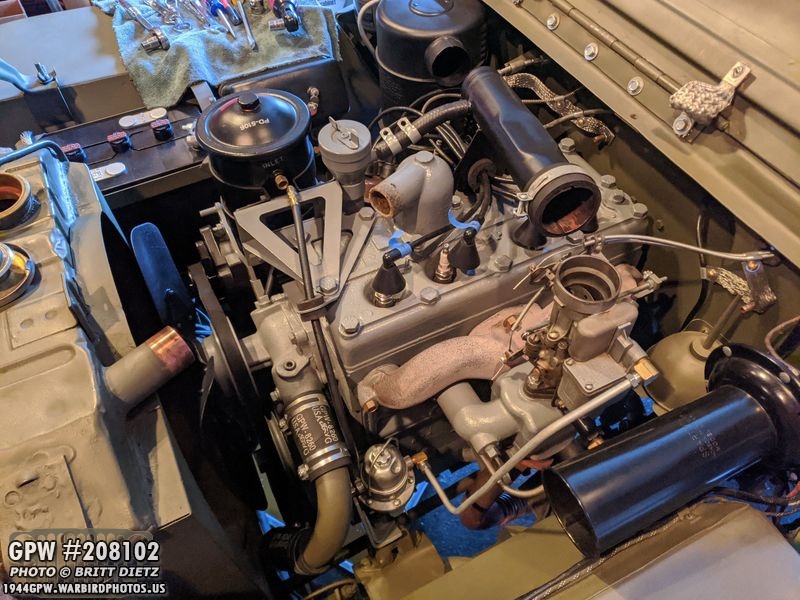
So, PART 1 of replacing the head begins! Here I’ve taken off the thermostat crossover to the radiator tube. Everything on top of the engine will need to be taken off.
Here’s everything removed (with the new GPW head).

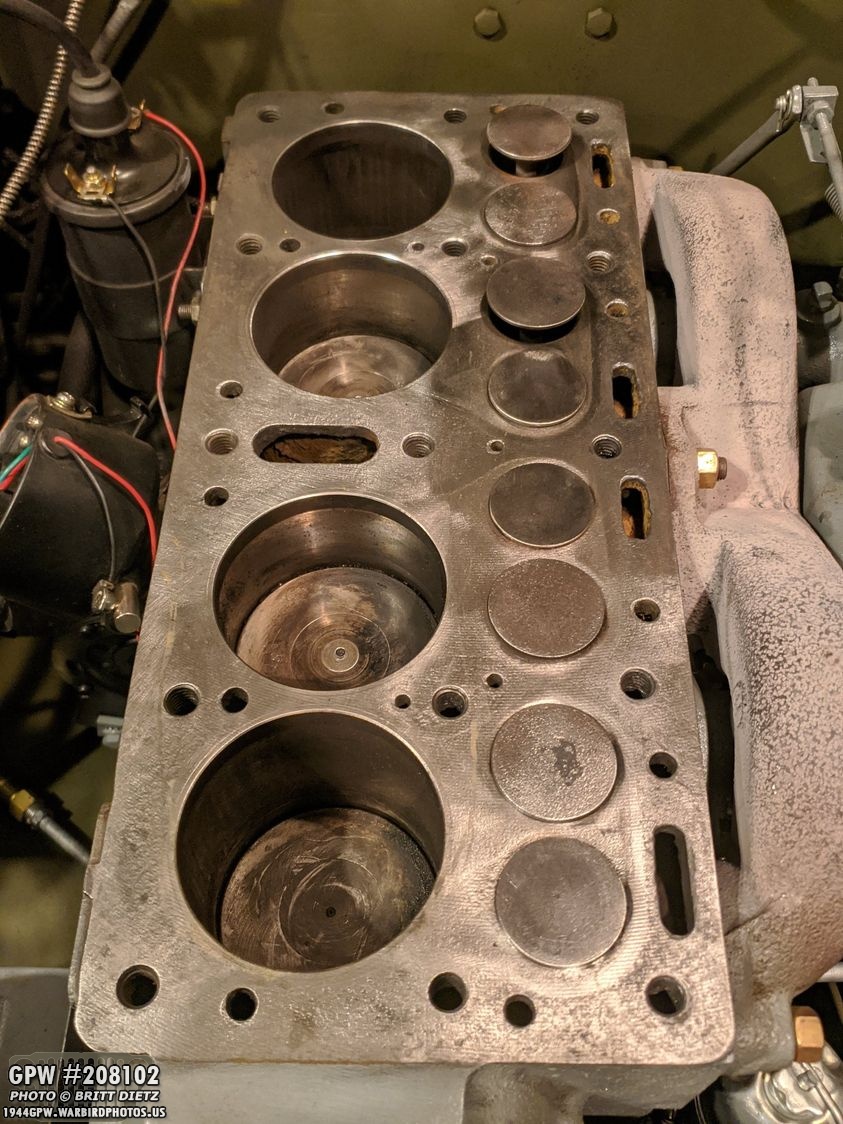
Everything is off but the thermostat. Here’s a good look at the CJ2 engine head. The head had bolts rather than studs holding it on.

And here’s a comparison showing the CJ2 head (top) with the wartime GPW head. You can see that one of the biggest improvements to the post-war head was the addition of ribs to strengthen the head from cracking. The thermostat elbow is identical in pretty much every way.

With the CJ2 head removed, I put the GPW head on just to see how well it matches up.

And here’s a look how each head would look. If I went with all bolts like it was, I could add the copper gasket, bolt it down (torquing the bolts), and put everything back on to be on my way. But, I since I’m taking the head to a wartime look, I need the correct bolts and studs.
Before getting to the studs, I first needed to clean the block surface. I forgot to get a photo before I cleaned it, but I wanted to make sure it’s as clean as possible and took a lot of time to get it super clean.

Now on to the studs! Using this chart from jeepdraw.com, you can see which spots are bolts and which spots are studs. Basically, 5, 7, 9, 10, 15, and 14 (changed after GPW #188637, which I have 208102), and bolts went on 1, 2, 3, 4, 6, 8, 11, and 13. The stud at position 12 is a special longer stud, which I’ll explain later.

I got the studs from eBay from a dealer. I believe these are Joes Motor Pool studs, rated for double the torque values needed. These studs have ‘shoulders’ (bumps above the threads) which were developed later in the war during 1945 to help seal the thread holes better and prevent several issues from happening. The thread holes actually go into the coolant system.

One thing to help seal the threads in, I used permatex threat sealant (high temp) on the bottom of the threads to help seal the studs.

I hand tightened the studs in each of the thread holes, as you don’t want to torque the studs as that can cause issues as well. I made sure they were tight as I could get them hand tight wise, and then I double nutted the top thread to tighten them a bit more till they were snug. I then wiped off the excess thread sealant that seeped out, that could cause sealing issues if not removed.

Here are all the shorter stud locations on the 1944 Jeep. Eventually, late in the war, ALL spots turned into studs. But for my 1944 Jeep, it was still a combination of studs and bolts.
After installing the short threads, I went and removed the thermostat and retainer from the CJ thermostat elbow, and then installed it in the GPW thermostat elbow. Pretty simple swap! I made sure to clean them both up.

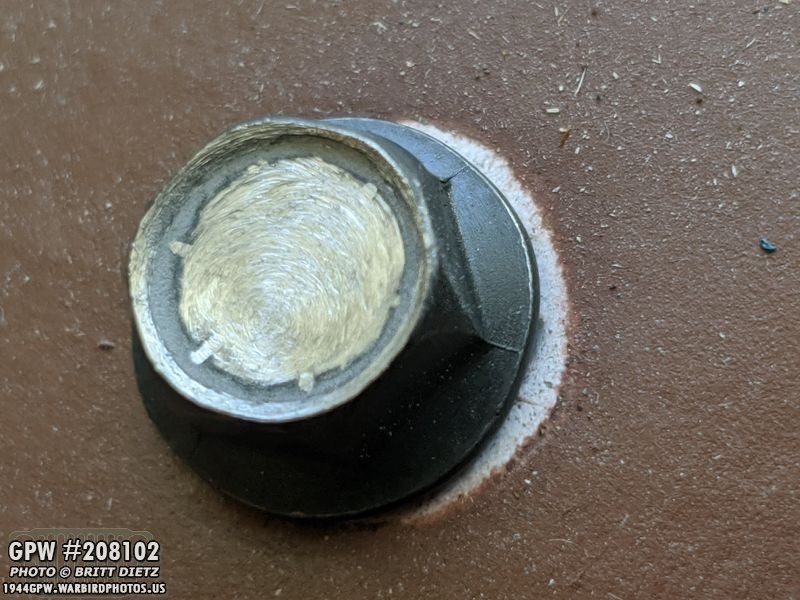
I also needed to install the screw bolt for the temperature gauge wire. This hollow threaded bolt screws to the side of the head and the temperature gauge wire then screws into the inner threaded part. I tried to figure out if they were painted or not during WW2, and most photos I saw made it seem like it was painted Ford Gray like the rest of the engine, so I went that route.
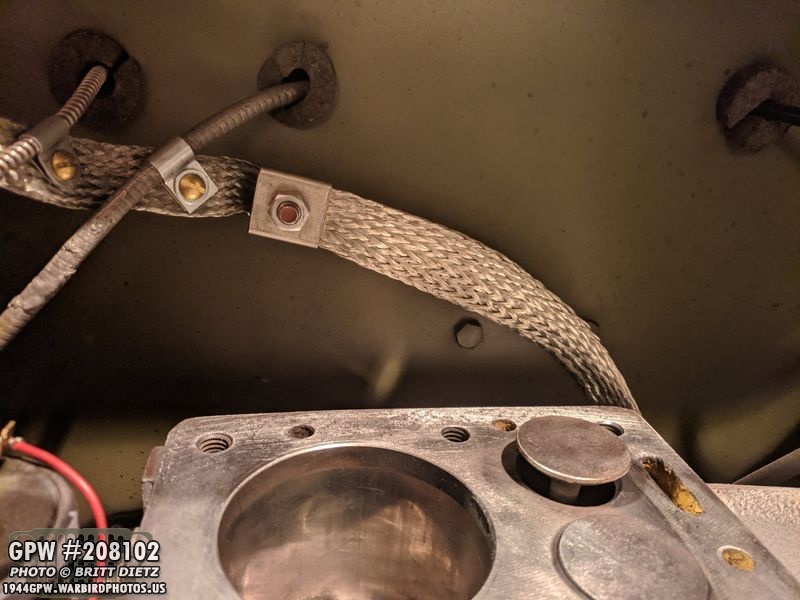
Now, on to why that one stud needs to be longer… (this photo was taken before I started adding the other short studs). That middle threaded hole you see has a long stud that’s there specifically for this bond strap you see against the firewall there. It’s just hanging there right now, but on the other side that you can’t see is another end with a bolt hole. That goes on the longer stud and then a nut on top of that. That makes that stud needing to be slightly longer to accommodate the bond strap.

Problem was, just about EVERY vendor was out of stock of the long stud. RFJP, Debella, Kaiser, D&L, etc all were out expecting a shipment of them, hopefully within 1-2 weeks. Not wanting to wait that long as the engine is exposed, I eventually found, after much trouble, Army Jeep Parts had them in stock. I wasn’t impressed with them, sadly, and even though I thought I bought 2-day shipping, it ended up being shipped slower and won’t be here till Monday. So, till then the Jeep is going to look like this for the weekend. This ends the first part of the head change… hopefully next week’s update sees the long stud arriving and I can finish the project, which should only take an afternoon to do!
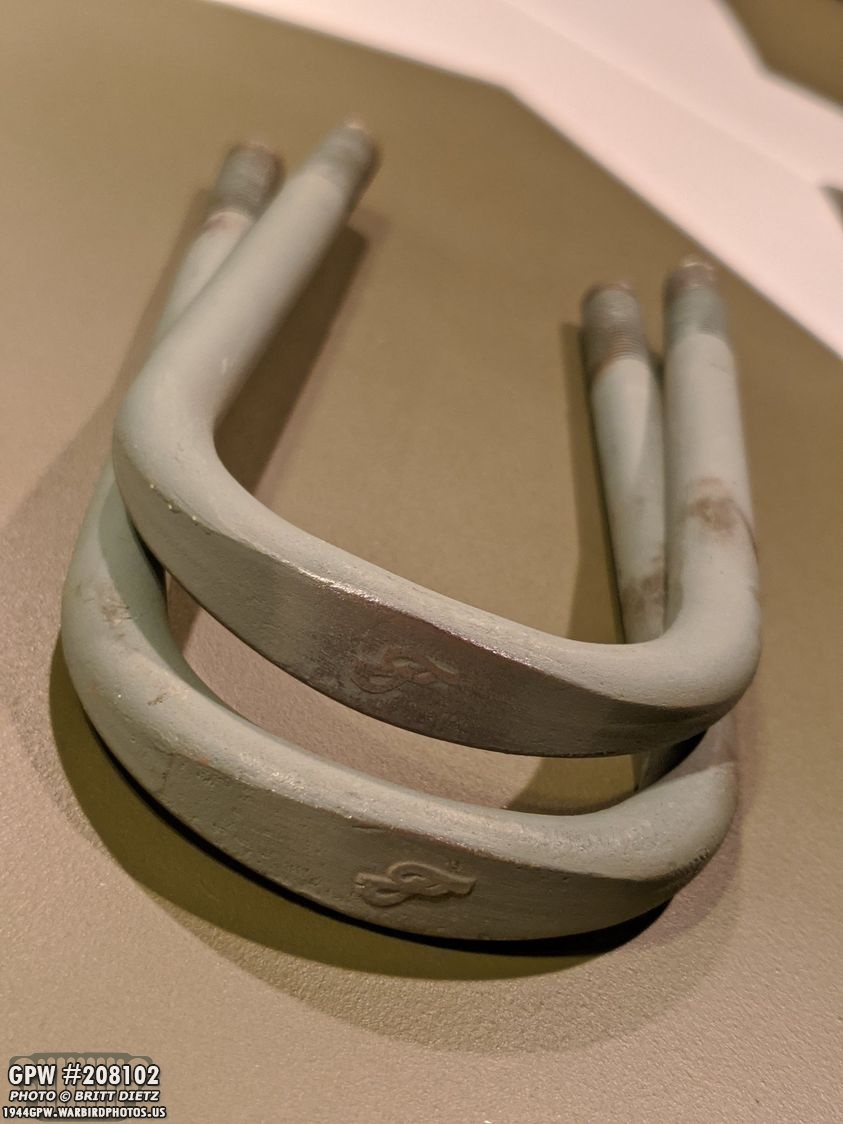
In order to get the GPW head, I drove up to Lancaster, CA to pick up the head from Roger Smith. He gave me a couple of goodies up there including two F stamped spring U bolts!
I also got some more original F bolts to replace a few more items on the Jeep from plain bolts to original F stamped ones!

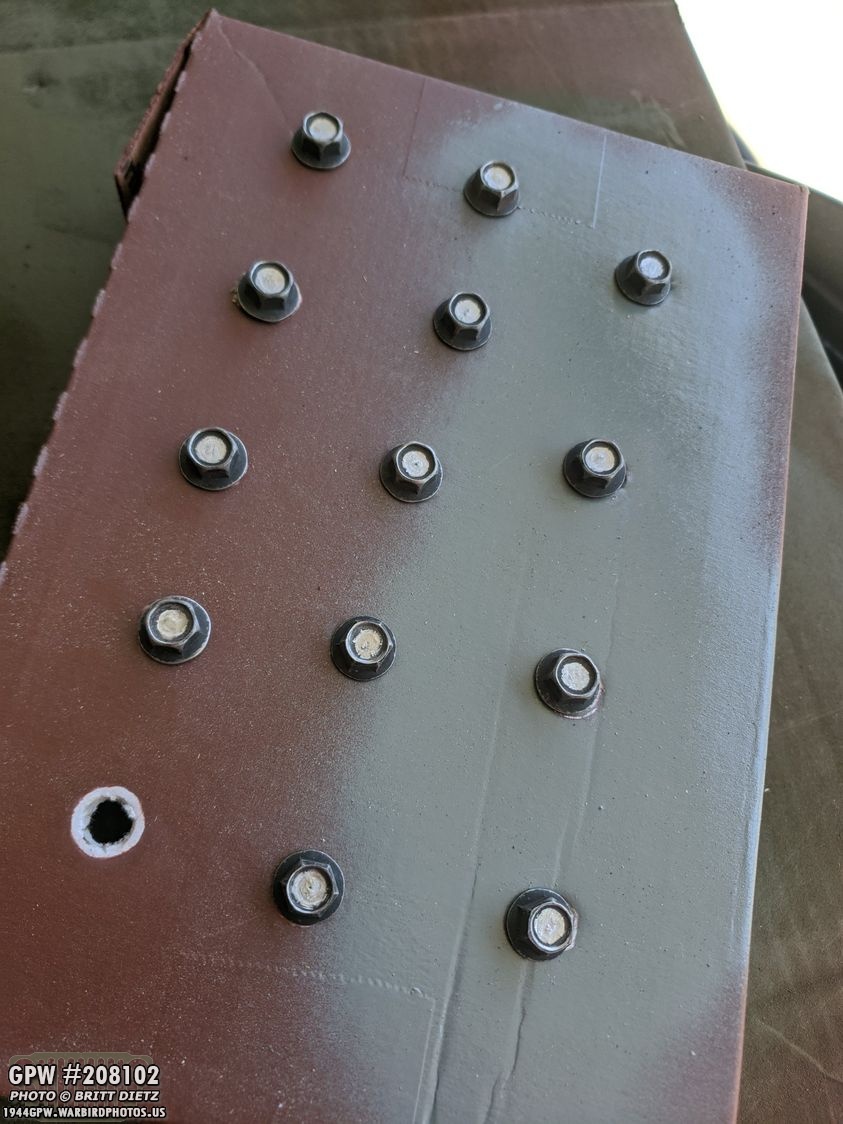
Speaking of bolts, last week I talked about how GPWs have recessed head bolts in certain spots inside the Jeep. The yellow arrows are 1/4-20 x 5/8, while the red arrows are longer 1/4-20 x 3/4 or 1 inch since these bolts need to be longer going through rings and the leather boots.

I used boltdepot.com, which I love for getting bolts and there’s minimums on any of the bolts. Last week, I got this as a test to see how it would look.
I grounded off the head, which I realized I’d have to do to all the bolts.

And here’s how the test looked, which came out good! SO I went back to boltdepot.com…

And I ordered several various sizes. 1/4-20 x 5/8 (Main ones, I got 13)1/4-20 x 3/4 (Got 4 for the longer bolts)1/4-20 x 1 (Just in case 3/4 was too short)And for the driver’s seat, I got 5/16-18 in two different sizes to see which would work better.

The bolts should have a toothed star washer under the flange, so I added one to each bolt.
After grinding off the markings on the head, it was time to paint.
All painted! Two of the bolts, as you can see, had recessed markings instead of raised ones, so I had to fill them after primer with some bondo.
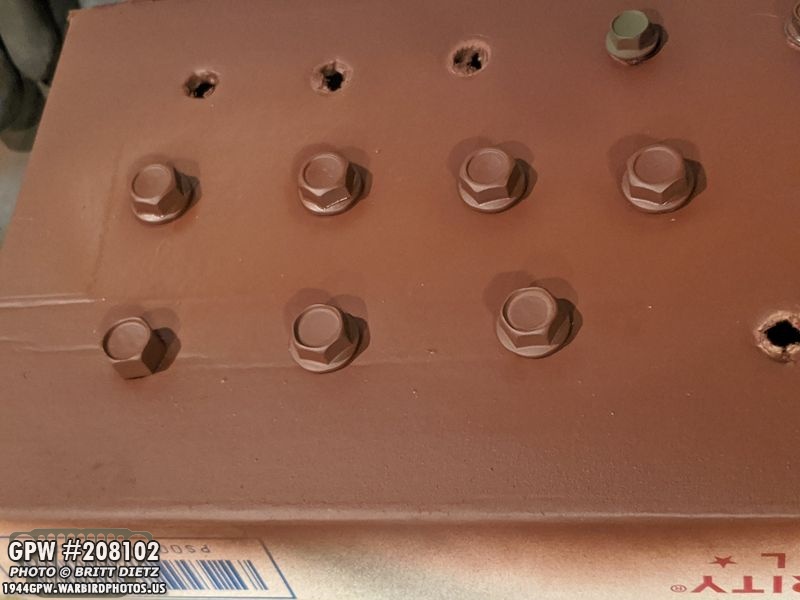
Here I’m removing the hex bolts and the washer, sanding the area since the washer dug into the paint, and installed the primered bolts. I didn’t paint them OD Green as when tightening them it often will scrape the paint.

All bolts installed, but one of the longer 1/4 bolts I ran into a snag.. the darn caged nut broke out of the cake, and caused all sorts of issues. It took a while to get it tightened down, which involved me going under the jeep with pliers to hold the cage close by hand as my girlfriend ratcheted the bolt down. I really don’t like caged nuts for bolts. I’ll take a welded nut anyday!
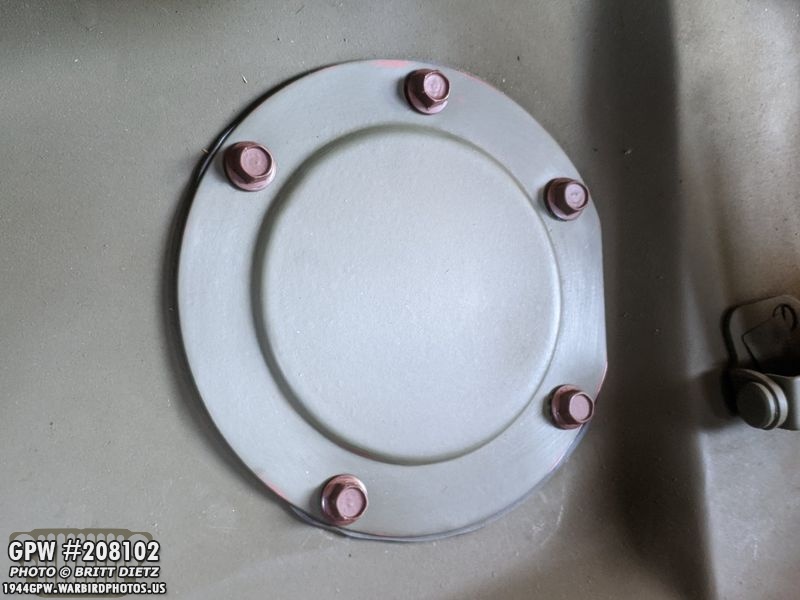
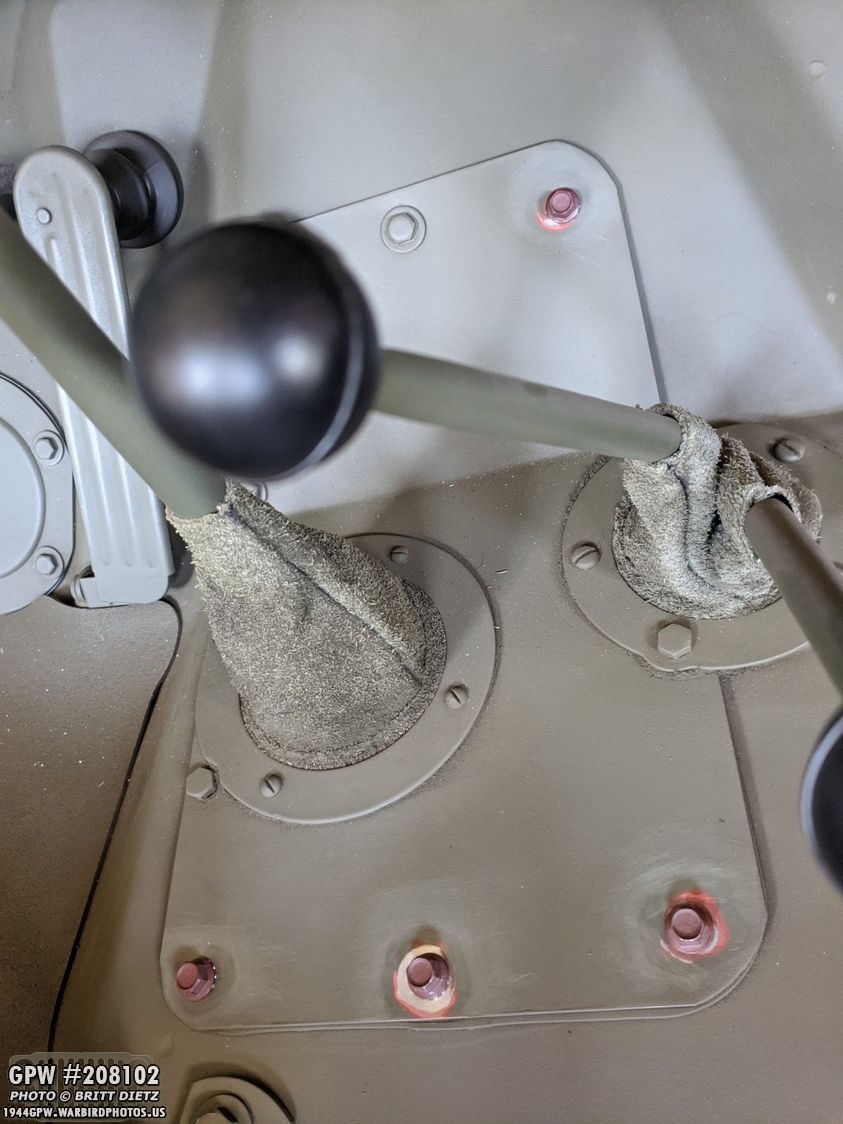
After completing the transmission cover, I moved to the master cylinder inspection cover with the 1/4 recessed head bolts with star washers under them.

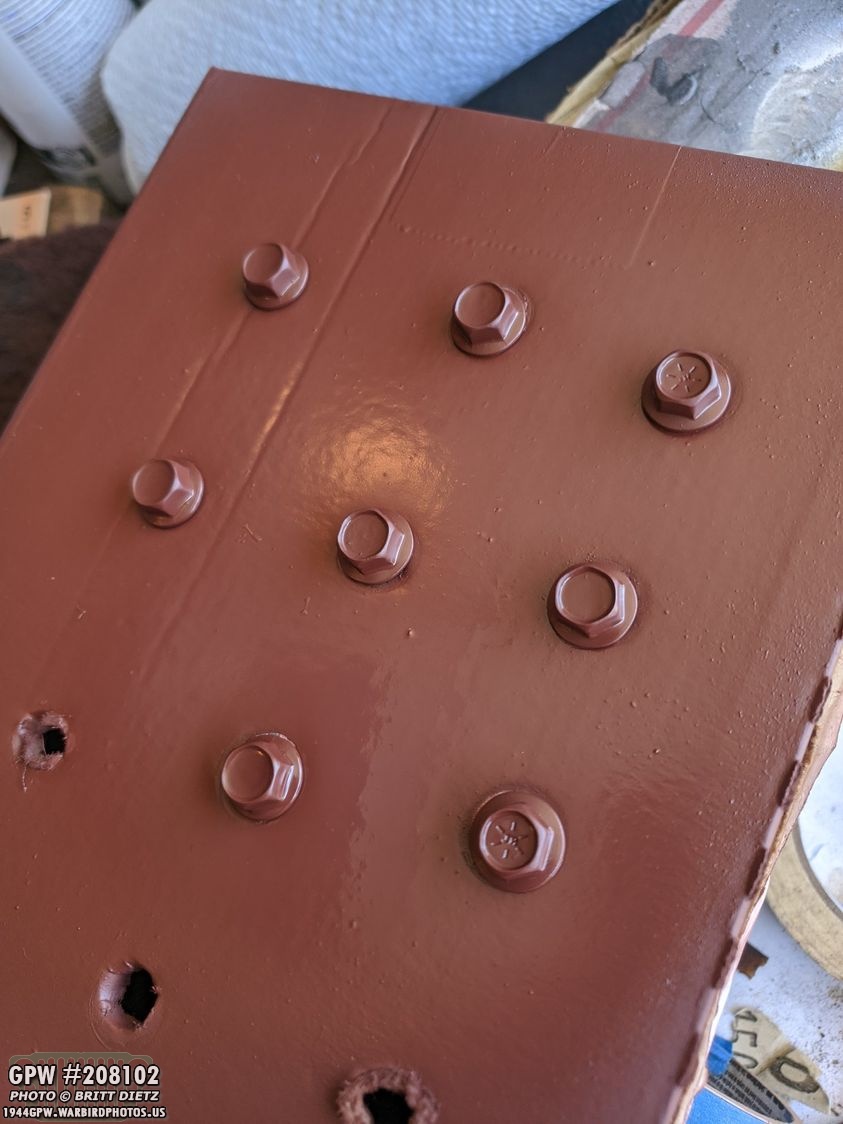
After all was snugged down, I carefully painted each bolt with &Ron Fitzpatrick Jeep Parts’s 33070 OD Green spray paint!

And same with the inspection plate cover bolts!

I then moved on to the gas tank shield behind the driver’s seat. These should also be the recessed head bolts with a star washer, but with how much work it takes to get this lined up, I decided to leave the washers on. At least they are recessed heads! This is after the bolts were replaced and painted.

I moved on to the larger 5/16 bolts for the driver’s seat… these had recessed markings, so I filled them with bondo, let them dry, and sanded the inside.

Top two have the sanded bondo insides. Technically, these bolts shouldn’t have a flange under the recessed head… but I’ve found it tough to find that in 5/16 size. So I tried to grind down the flange on the bottom bolt and see how it looks. It came out alright, but it’s WAY too tall.
I also noticed that the flange edge for the 1 inch vs the 3/4 for the 5/16 bolts have different recessed edges, as seen here. I didn’t like the upper thicker ones, so I had to use the two 3/4 length bolts.

Here’s a look at one of the 5/16-18 x 3/4 bolt on the right side driver’s seat arm. I’m not sure how I like this look, so I’m going to give it a few days before I decide to put one on the left side.
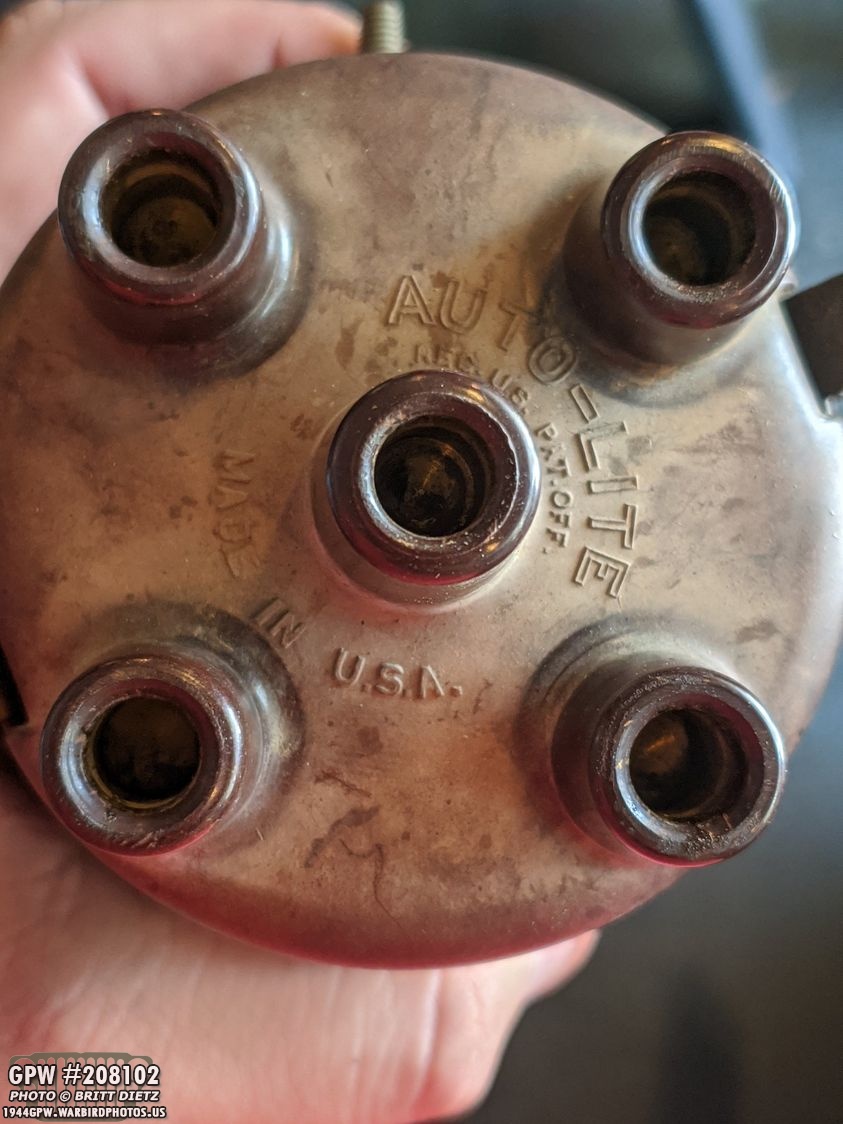
Moving on, something I wanted to share is my original distributor. I have an electrical distributor that looks exactly like the original on the Jeep now, but I was given the original when I bought the Jeep. It apparently works, but needs some TLC. I was going through my Jeep parts box to find something and I decided to pull it out and take a close look at it to date it. Here’s a look at the AUTO-LITE cap.

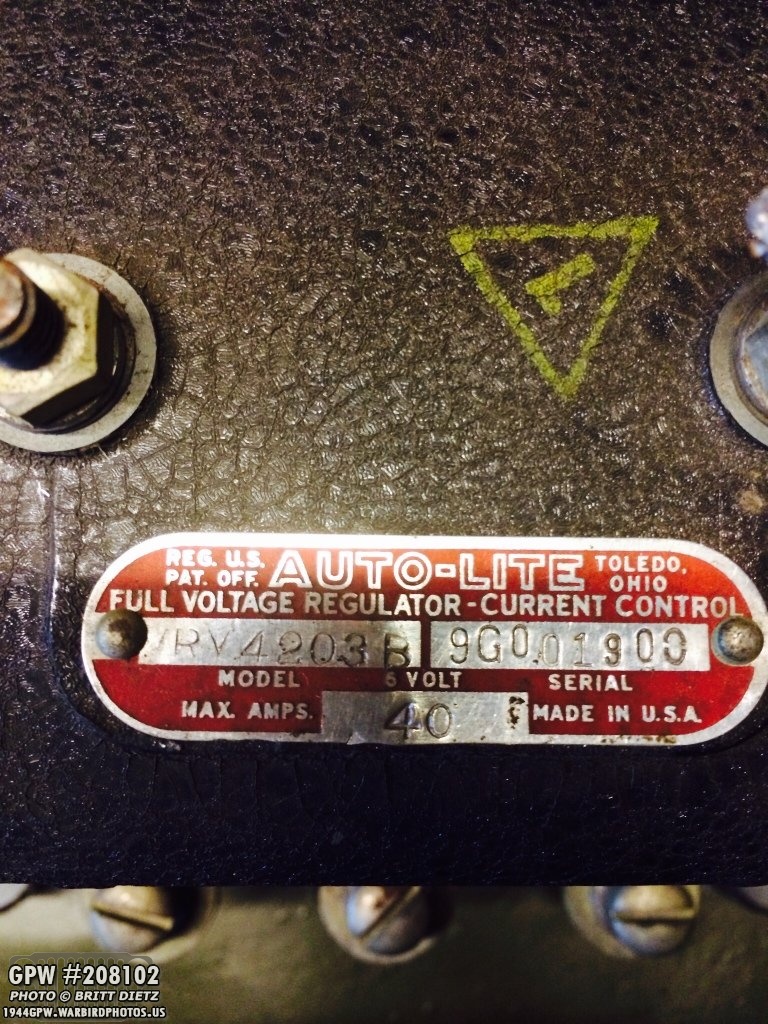
And here’s a look inside as I went through the various parts. Seems to be in excellent condition, just needs some cleaning and oiling. I don’t have any plans on replacing the electric one with this, as I enjoy not having to change points on it. But it’s nice to have this as a backup in case I do want to change back.

Looking at the data plate, I thought I wouldn’t be able to find any information on it at first glance… but I decided to try and lightly sand it.
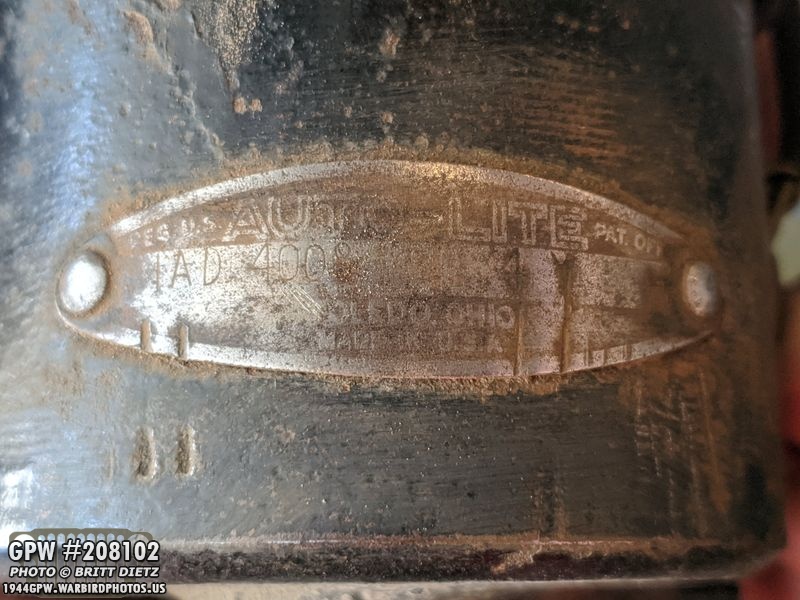
Success! It’s a IAD 4008 Auto-Lite distributor with a date code of April 1944 (4Y)! That makes sense for a June 1944 Jeep, as I’ve read Ford had about 2 months of distributor supplies on hand. Pretty awesome!
Moving on, I’ve often tried to go for the smaller details on my Jeep, especially when it comes to stamps and markings. This photo, from the G503 forums, shows something my Jeep is missing… an inspector stamp on the voltage regulator. There are several types of stamps, including this triangle with a 1.
Another stamp, seen on this 1943 GPW Jeep in an original wartime photo, has a white or gray circle with a 1.

I went into photoshop and carefully replicated both stamp styles, and decided to try and do them myself with the Cricut machine making a stencil. Here’s the triangle with 1 after being cut on the Cricut and ready for application.

I decided to test it first, don’t want to mess this up! So I took a piece of metal and sprayed it with the same wrinkle finish as the voltage regulator. The stencil stuck on just fine, and I took some yellow paint with a foam stamper to add some yellow paint. But, since the texture is pretty thick, the paint ran. To the right is just after I painted and removed the outer part of the stencil. The inner part I can’t remove until it dries more.

While it was drying, I tried the circle with the 1… the same problem, it seeped under the stencil.
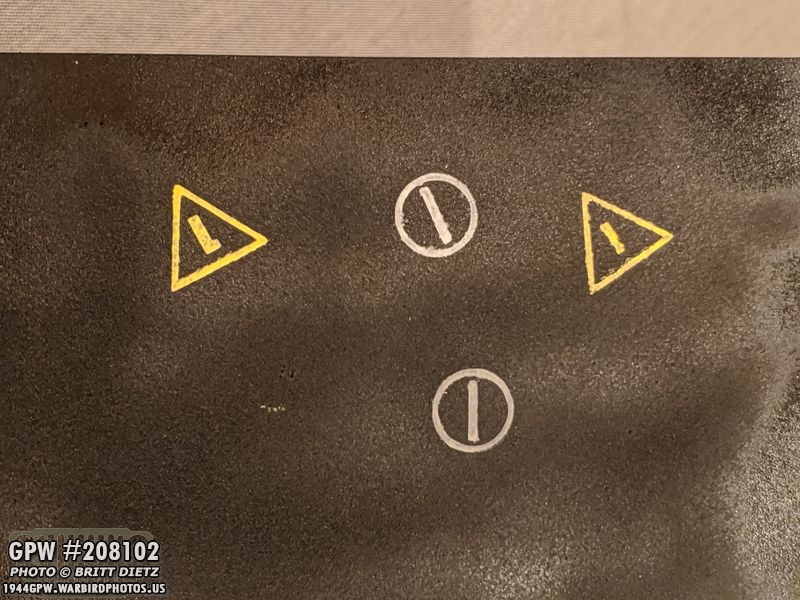
I tried another method using a brush (left triangle and bottom circle), and it came out better, but looked painted on rather than stamped.
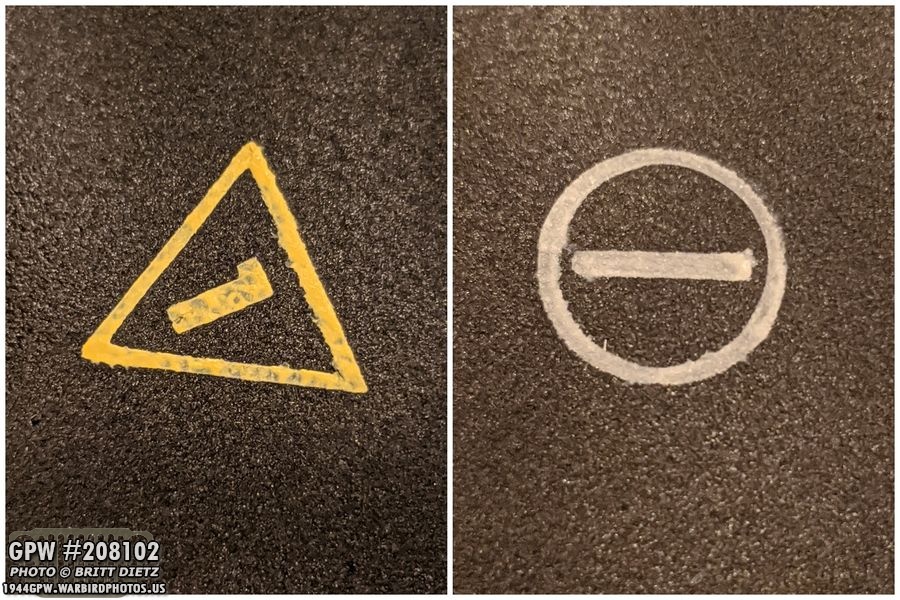
A close up of the two better ones, it still looks painted and not stamped. So I decided to stop here, and I went online and used the templates I made in photoshop to make actual stamps! They should arrive in about 2 weeks. I’ll use this same test piece of metal to try them with the paint and see how they look!

Before I wrap up this update for this week, I wanted to mention another side project I’m working on. If you’re a transformers fan, they recently released a bumblebee from the recent Bumblebee movie where he transforms into a WW2 Jeep. I managed to get two of the with the idea that the second Jeep I’d repaint from the yellow to be painted up like my Jeep. This project is still ongoing, but hopefully next week I can share the results!

And that’s it for this week! Next week I hope to finish the GPW head install, finish the recessed head bolts, work on adding more bond straps, ordering the ring/pinion needed to continue work on the wartime GPW axles, and maybe even the new tires and combat rims! Till next week….