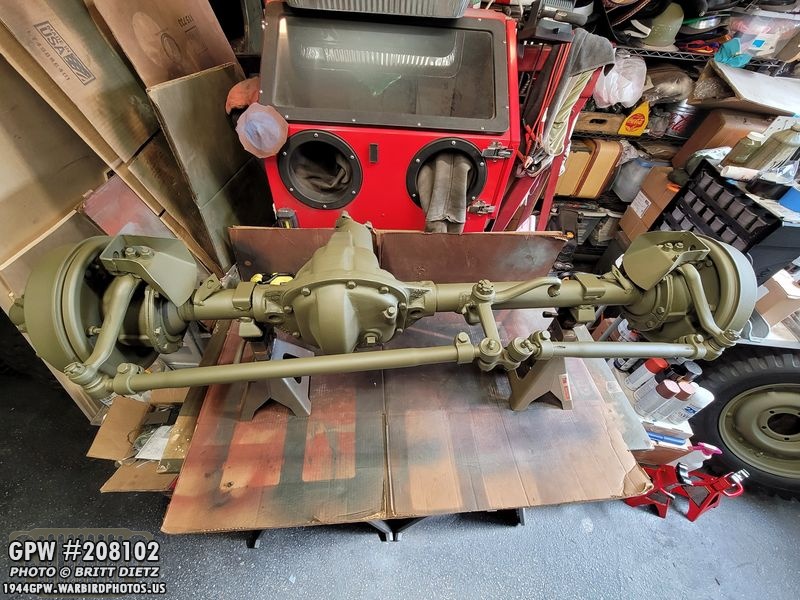
 AXLES FINISHED!
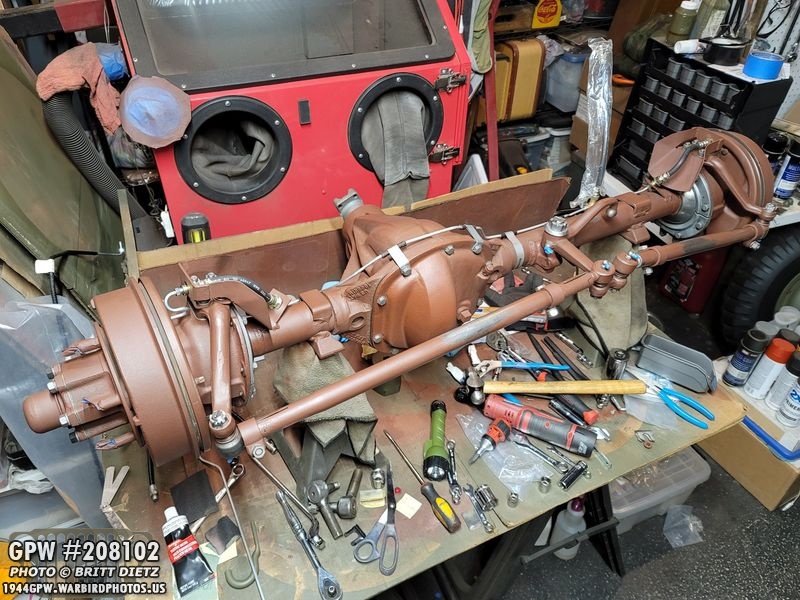
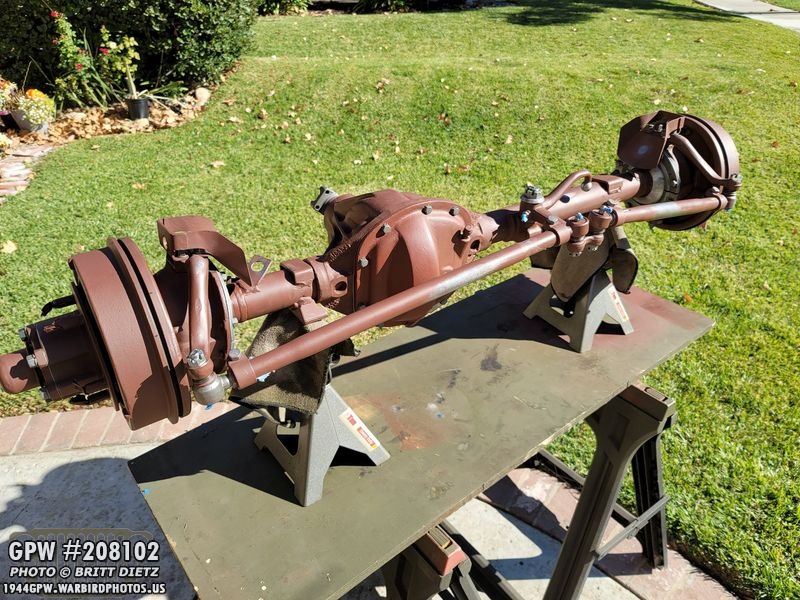
This past week was quite busy with lots of work done on the GPW front axle, and it’s FINALLY done bringing the restoration of the axles to a close! I installed the Tie Rods, prepped the brake lines, painted the axle, cleaned up some important things, added the brake lines, and greased it up! Also in this update, a quick update on the GPW hood and two original WW2 Jeep books I recently picked up.
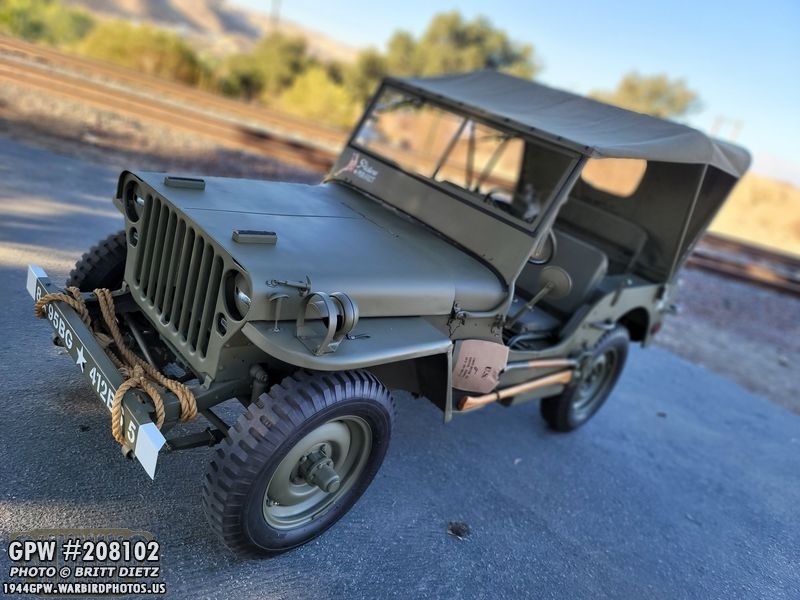
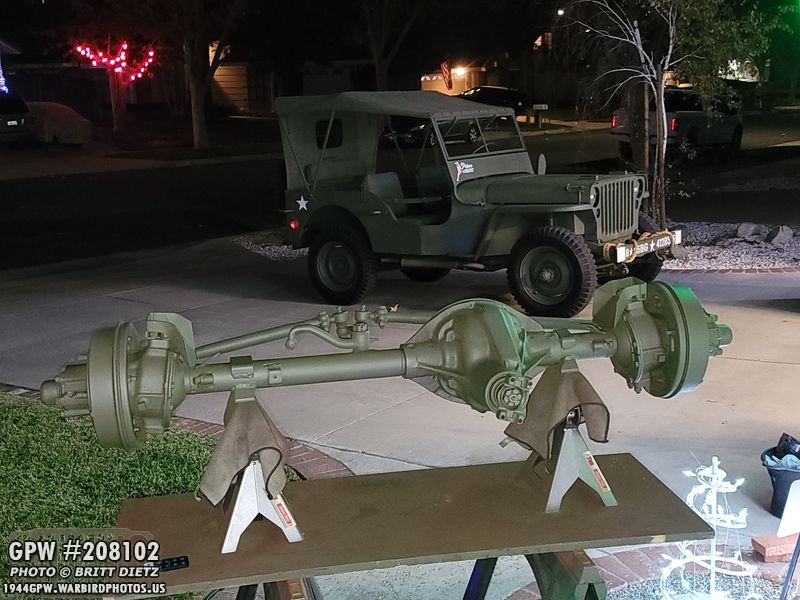
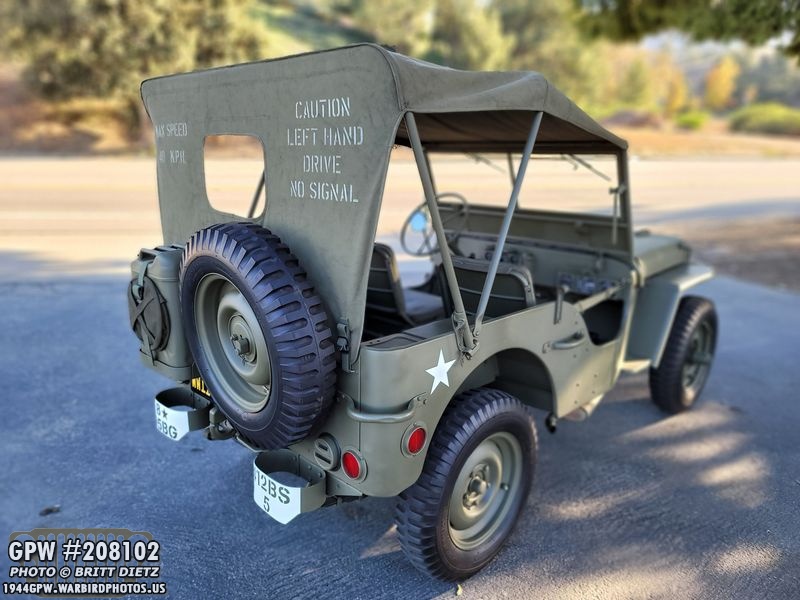
Here’s the Jeep from this week during a quick little shoot I did of the last time it will have the post-war CJ axles! Excited to change them out in the next few weeks! And I’m waiting on the hood star and numbers, which should be here in the next few days.
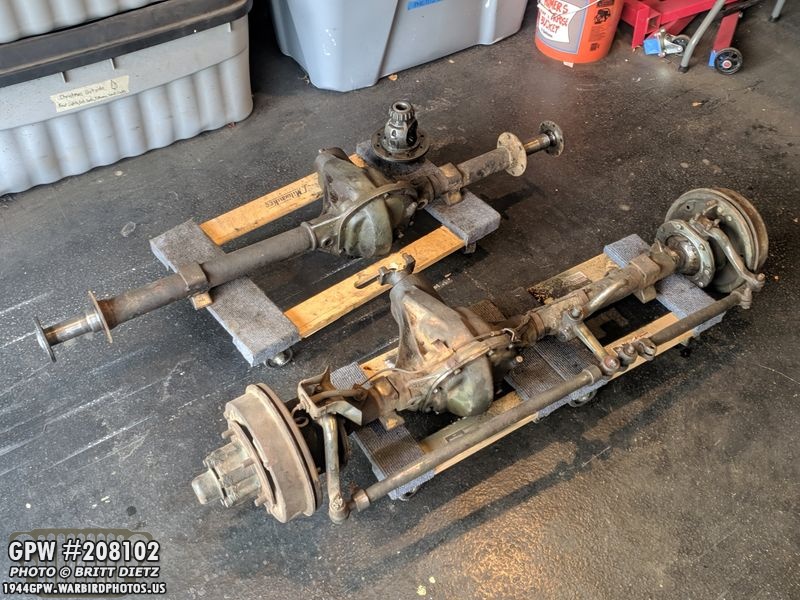
The usual recap of where things are… my Jeep has post-war CJ axles on it along with post-war rims. I was given two 1943 GPW axles one year ago from a fellow G503 member. This photo was taken after I had already started stripping down the rear axle. It’s taken me an entire year to strip both axles, repair several issues, source NOS parts, and put them back together. The rear axle was finished a few updates ago, but the front axle has been ongoing the last 2 updates.
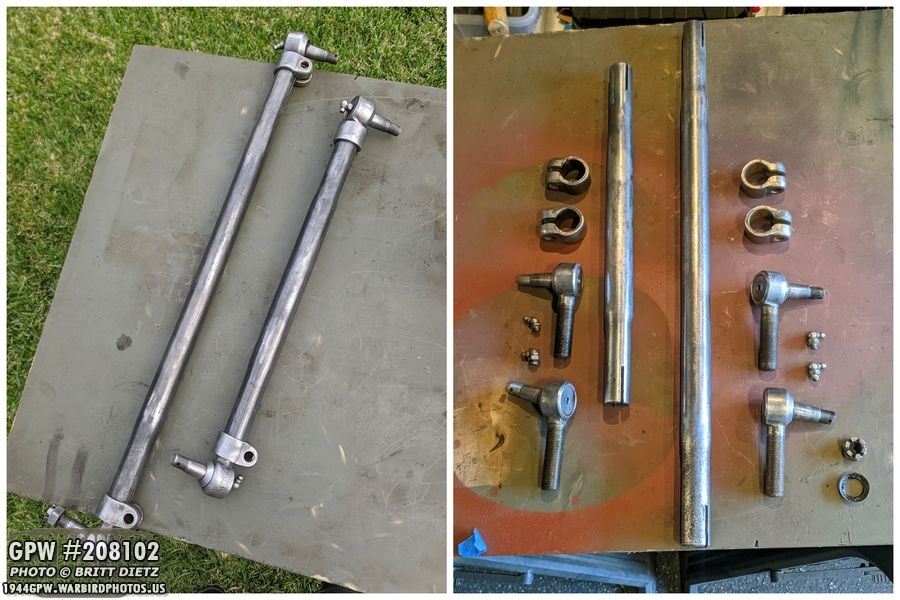
Earlier this year right before the pandemic started, I started work on taking apart the front axle. The front axle had 99% original parts on it, everything was F stamped. It was quite the effort, but I was able to get the tie rods apart. They have been together for 76+ years!
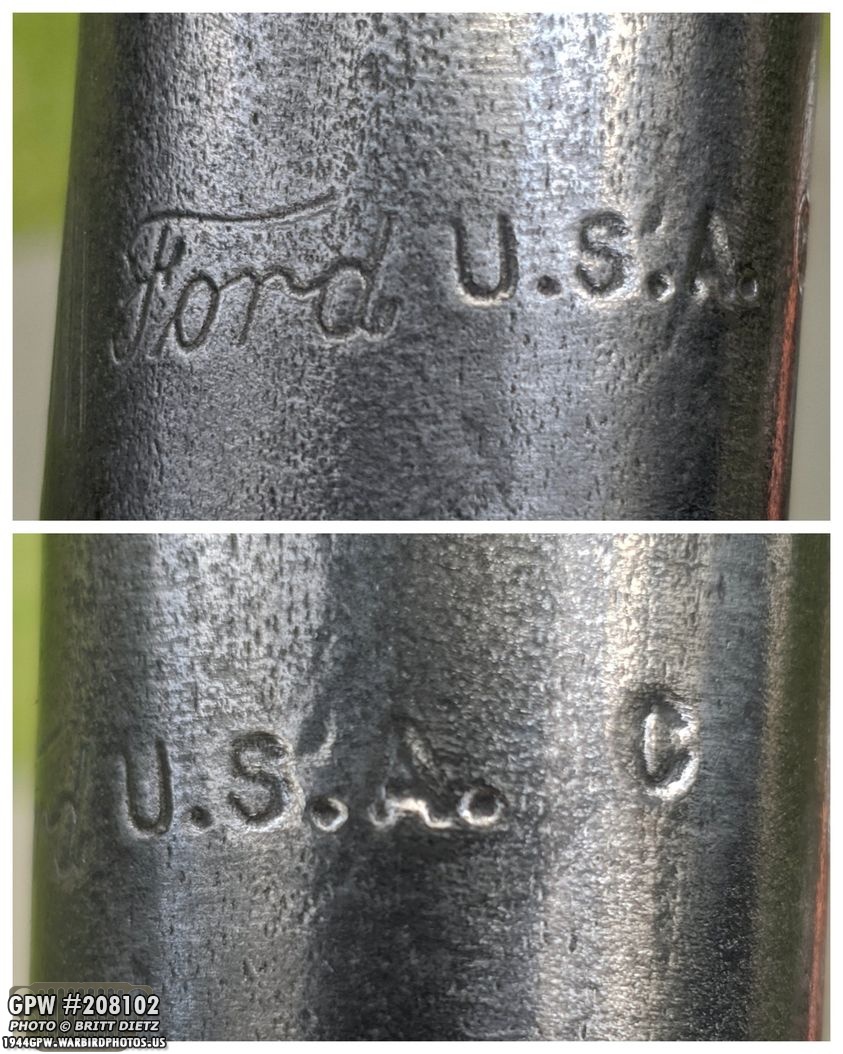
The tubes are marked with wonderful Ford stamps.
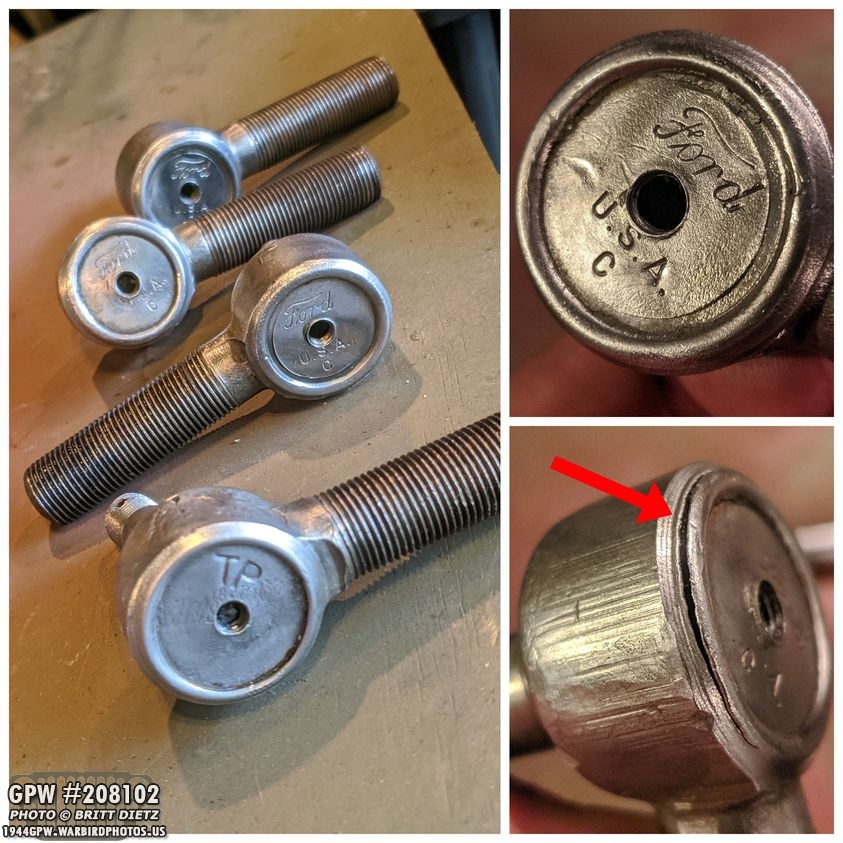
The Tie Rods were all original but one, which was marked TR (meaning it’s an original MB Jeep Tie Rod). One of the tie rods had cracked, so I decided to replace it and the MB TR tie rod (so they match).
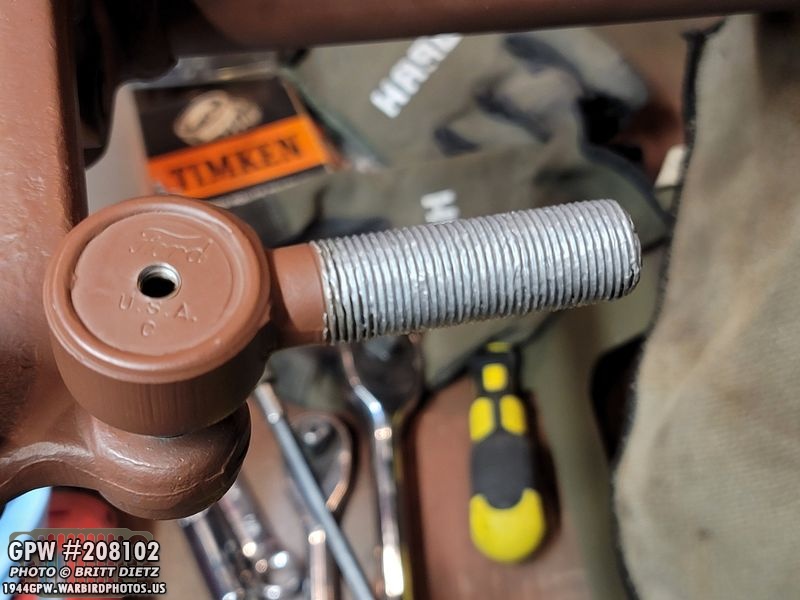
I got a F marked pair from &Ron Fitzpatrick Jeep Parts. They are identical in every way, except the repros are just marked with an F instead of a full Ford logo. Shown here is the comparison with an original and the repro.
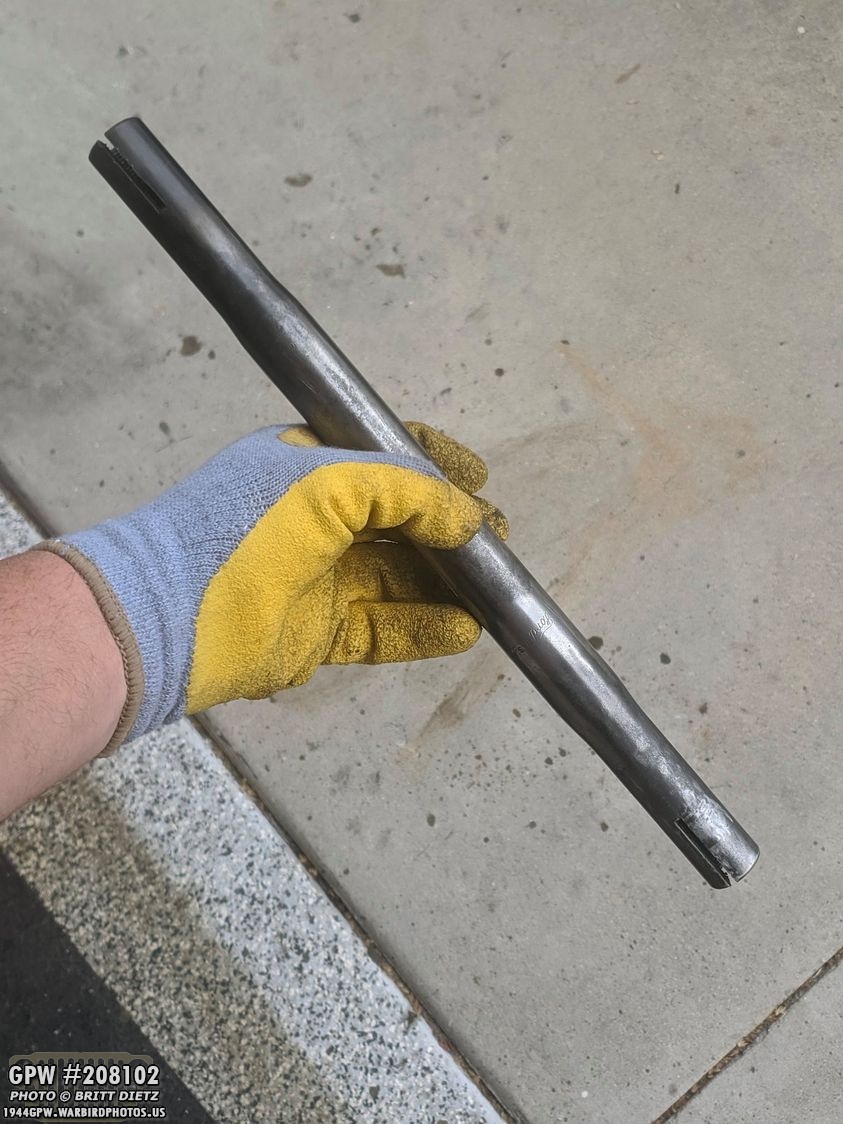
The tubes were a paint to get apart and clean up. The threads had a lot of surface rust, and it’s hard to get in there to clean it up. At least three of the tie rods, again, have been in there for 76+ years.
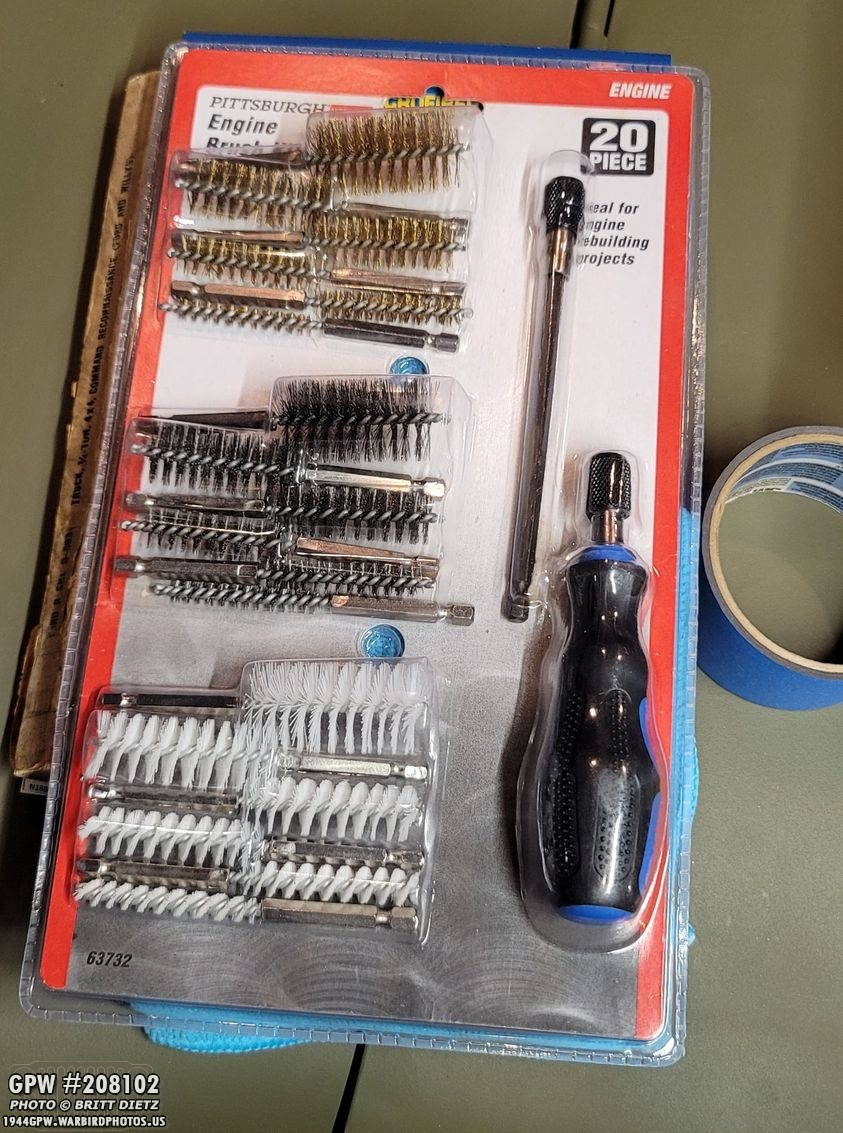
I bought this set of engine brushes from Harbor Freight Tools. They connect to a power drill and can get into tubes like on the front axle to clean the threads. That helped a lot.
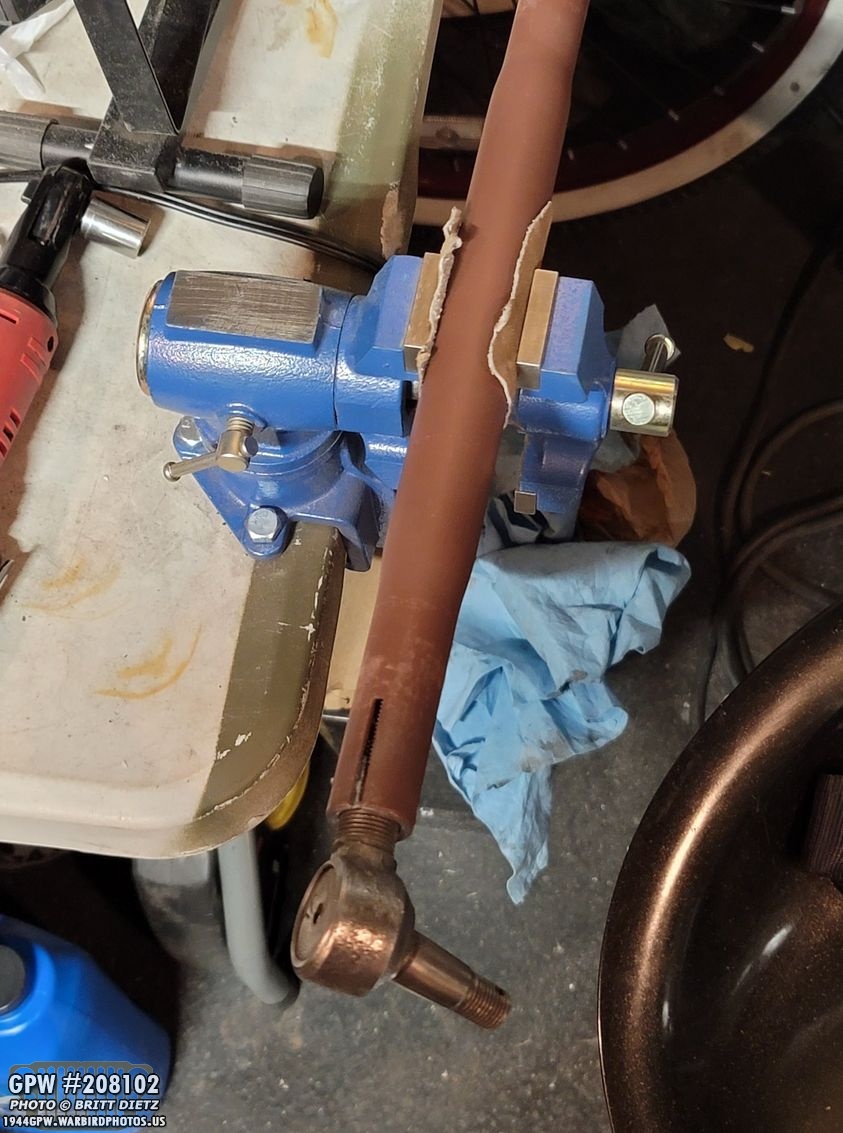
Once the inside of the tubes were clean, I decided to go one step further and screw in tie rods all the way. You want to start with them all the way screwed in, that way you have room to adjust. After priming the tube, I put it on my vice and used the two original tie rods I wasn’t using, which thankfully were a right and left hand thread pair, to clean the threads further. I put WD-40 on the tie rods and screwed them in.
Unfortunately, once the tie rod would get to the point where the one was screwed into, it would stop. That meant several threads out. So I had to take a wrench to slowly force it to turn, a 1/4 turn at a time. It was a process and killed my arms.
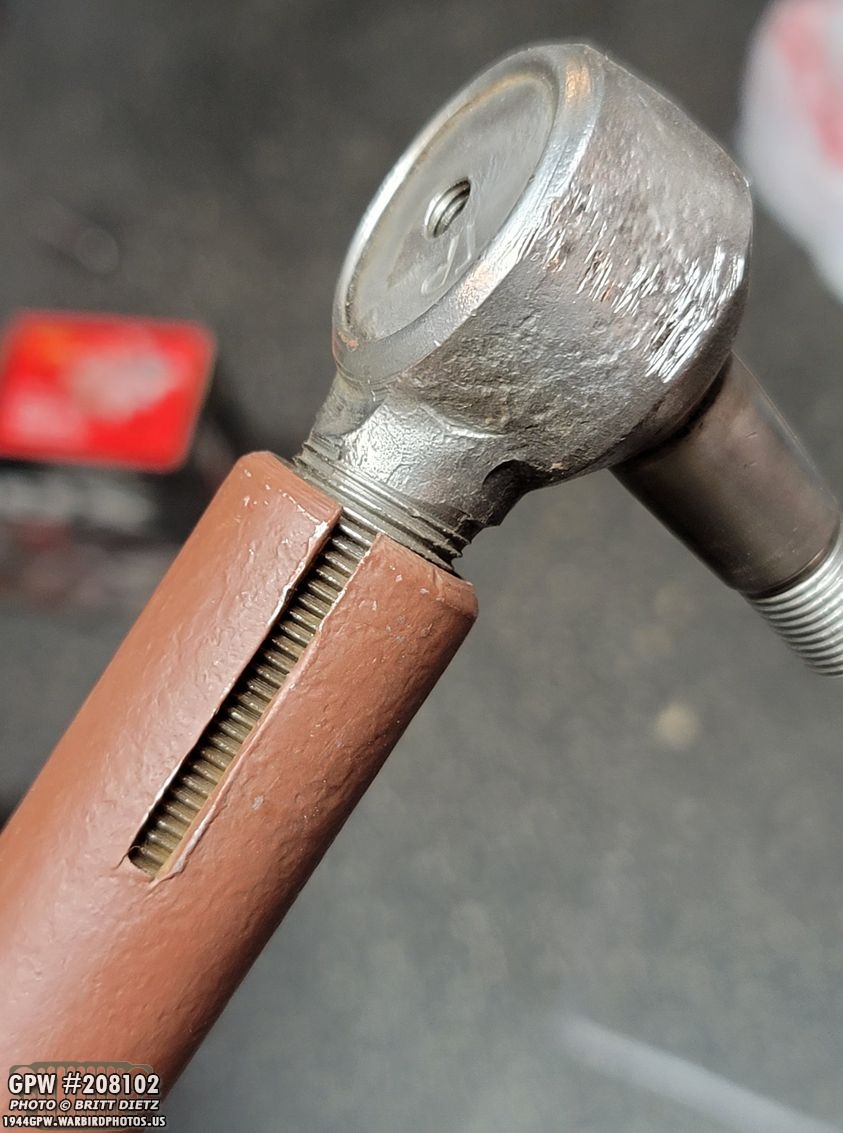
For one of them, this is as far as I could turn the tie rod. It would NOT go any further whatsoever. As you can see, the wretch chewed up the tie rod, so I’m glad I’m not using these ones.
With the threads as broken into as I could get them in the tubes, I went to put the real tie rods on. I put a coat of Permatex anti-sieze on the threads, which will help.
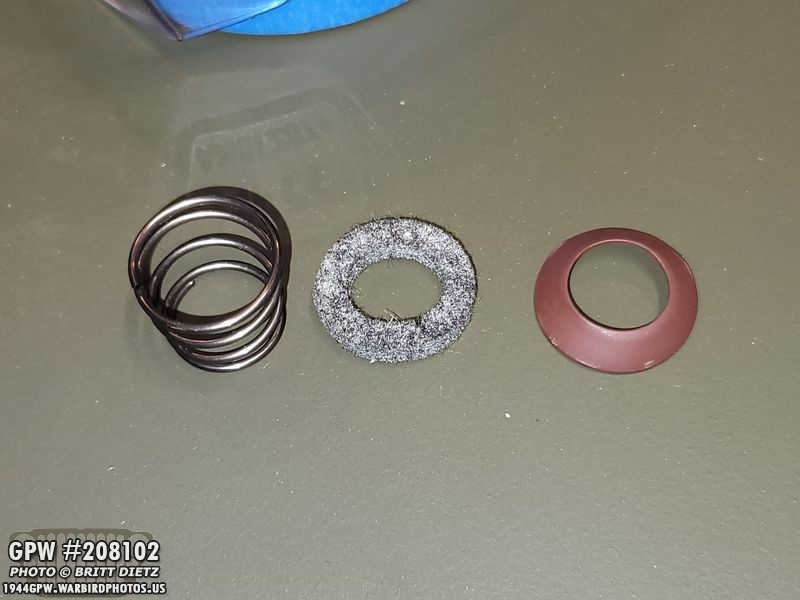
To secure the tie rods to the kingpin arms and the bell crank, for a GPW you’ll need these items. I’m using my original dust shields (the primered one on the right) with a new Joes Motor Pool kit that came with springs and a felt seal. The original felt seals were gunked up and unusable.
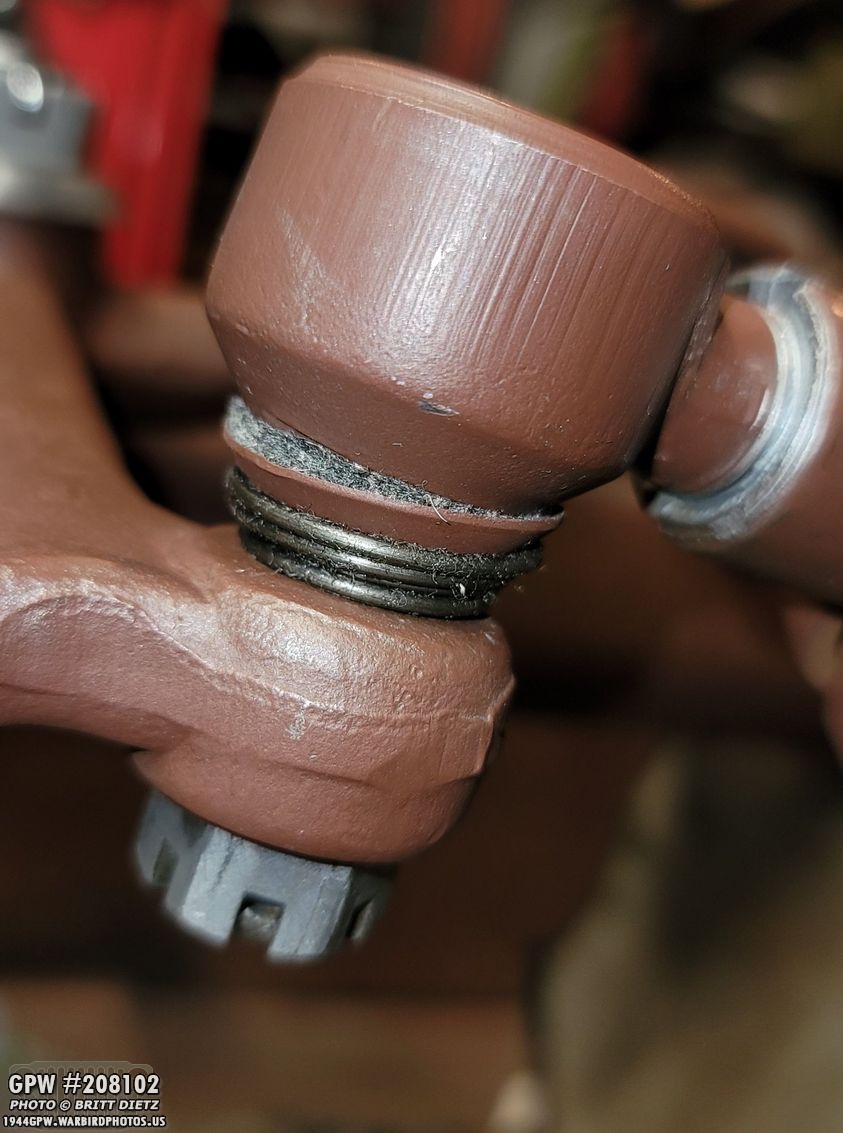
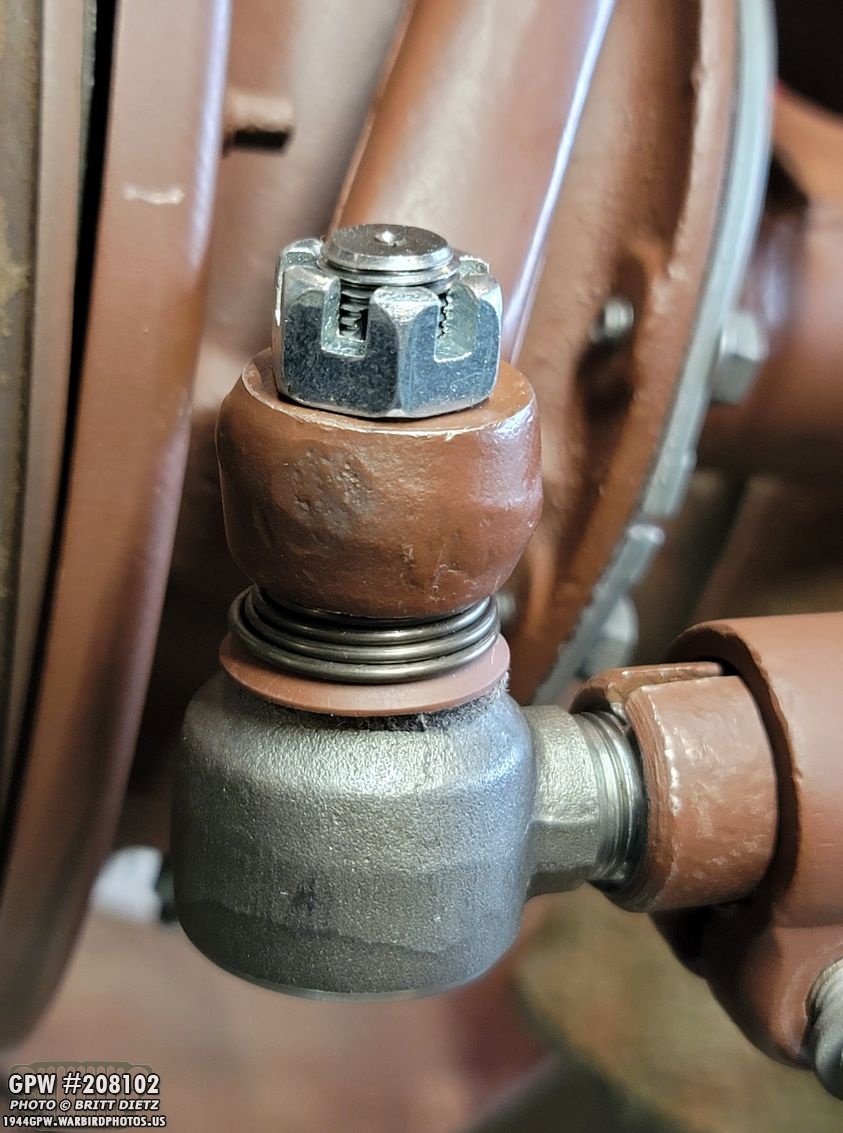
Here’s a look at one of the Tie Rods all installed. You can see the felt is ‘cupped’ by the metal shield with the spring under that. The crown nut at the bottom ties it all together. I haven’t added the zerk grease fitting in this photo yet.
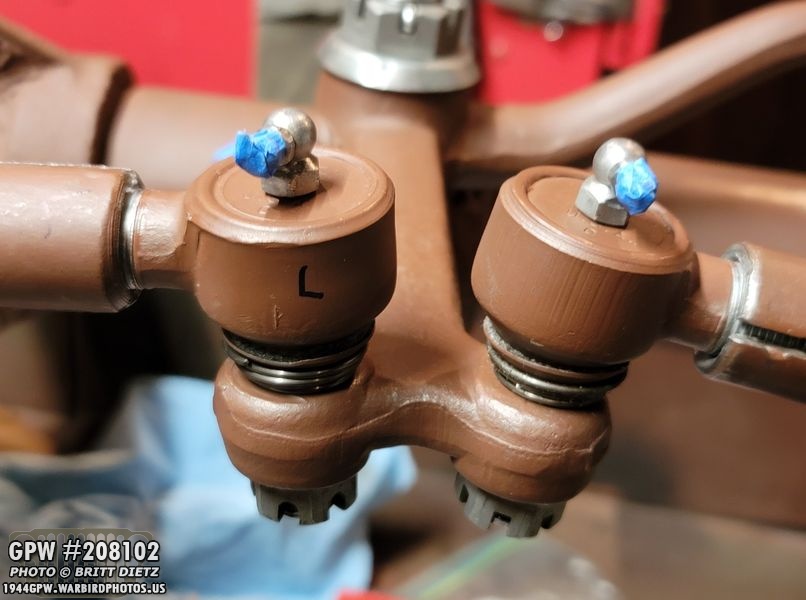
And now with the grease fittings installed. The L I have written on the tie rod lets me know that it’s a left-hand thread (one side is left, the other right on each tube). I labeled Rs and Ls on each tube side and the tie rods so I could make sure they match up. The grease fittings have painter’s tape so I don’t paint the very tip and block the hole for the grease gun.
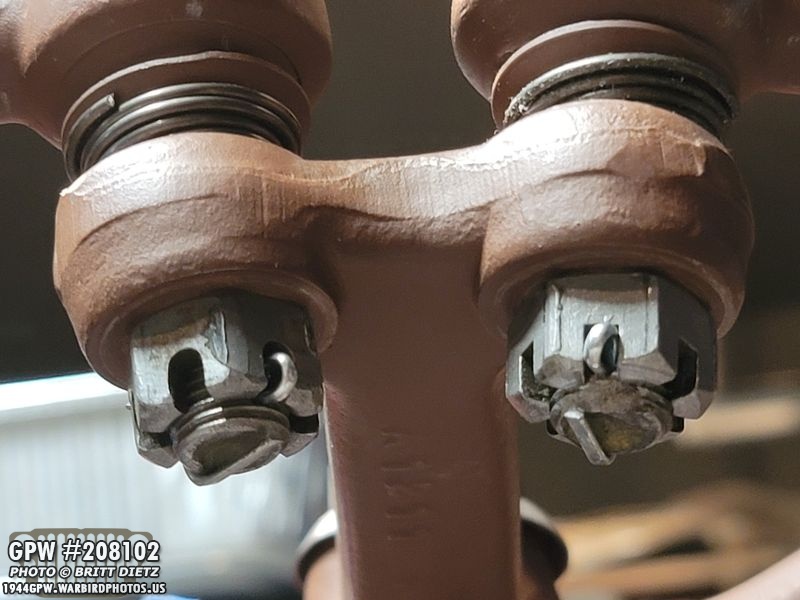
On the bottom, here’s a look at the crown nuts with the cotter pins installed. You want these to be pretty tight. I used a 35 foot-pound electric rachet to get them tight, then I manually turned it to the next slot where the cotter pin hole lines up. Cotter pin was pushed through and the ends were folded over.
Moving on to the kingpin arms on the knuckle, here’s a look at the tie rod on the passenger side. Both the kingpin arm tie rods are upsidedown.
And the driver’s side. I originally was going to use the grease fitting you see in this shot, but I quickly found out the ones I had for these kingpin arm tie rods were too low, and I couldn’t get the grease gun to go on the end of the fitting. I was hitting the tie rod. So I ended up changing them out later on.
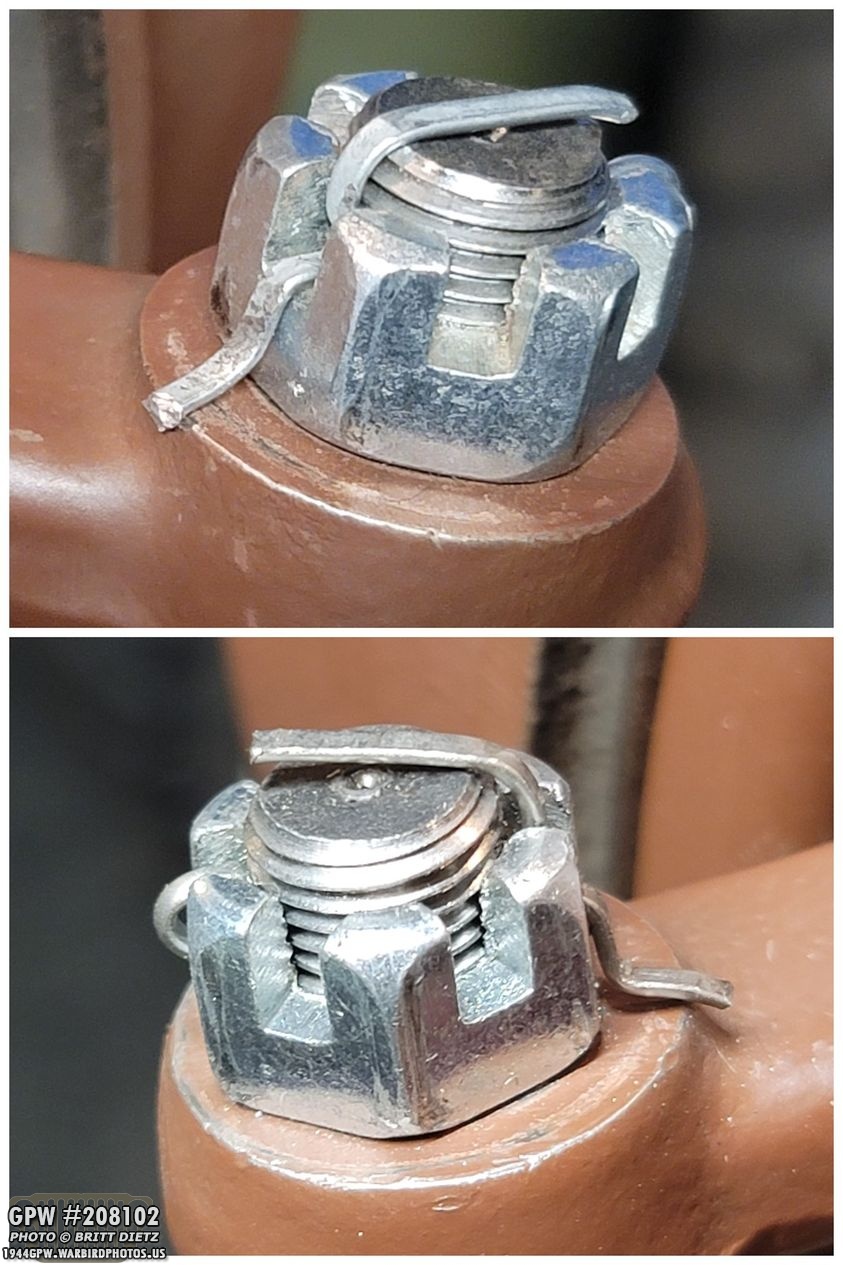
Finally, I added the cotter pins to the kingpin arm tie rods. These were longer than they needed to be, so I ended up trimming them down once I figured out how much I needed.
After trimming and bending the cotter pins, here’s how they look.
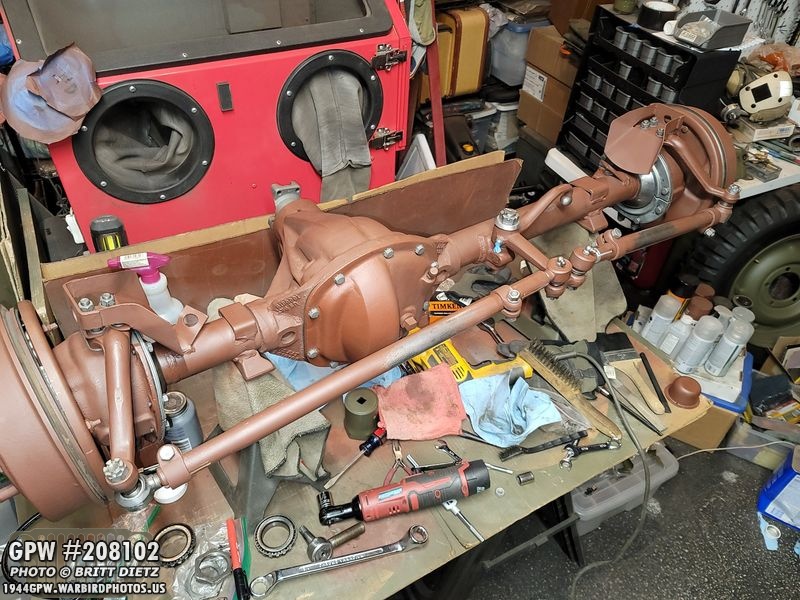
And here’s a look at all four tie rods installed! Ignore the very messy workbench. Lots of things going on at once!
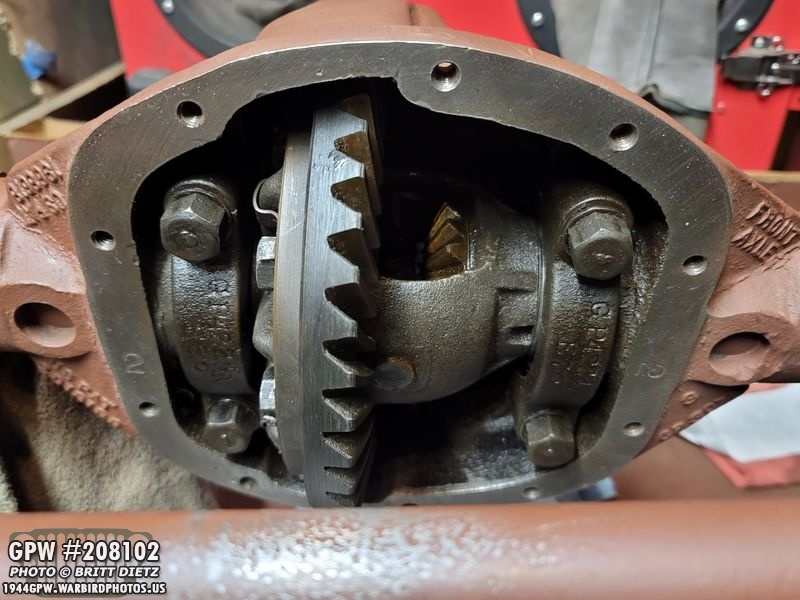
Next up, I took the differential housing cover off (hopefully) for the last time as I still needed to install the paper gasket. I made sure to take a photo as, if all goes well, I shouldn’t need to look in here for a long, long time.
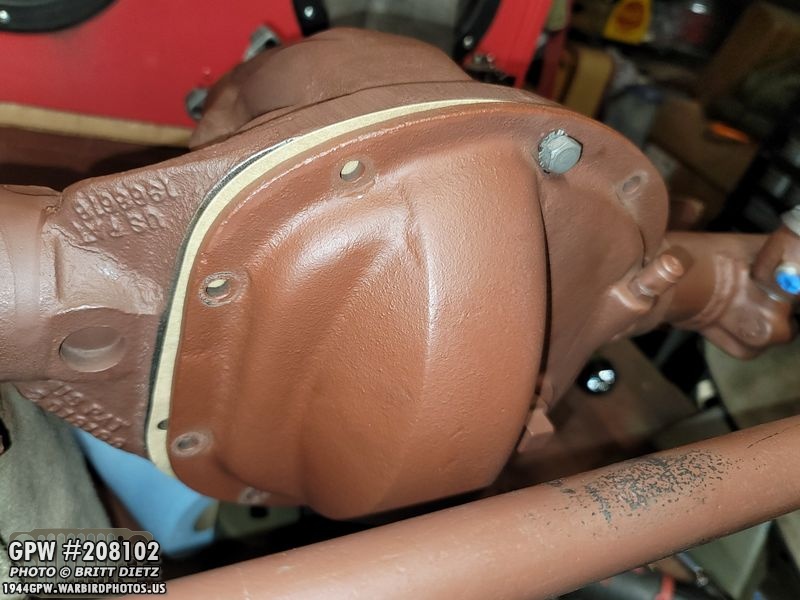
And here’s the cover going back on with the paper gasket from &Ron Fitzpatrick Jeep Parts.
Before the next step, I wanted to test fit the brakes and look for any issues. Better to do that now than when it’s all painted and I scratch up the paint!
This included the clips that go from the housing cover to the brake lines.
And taking the original shaft clips and putting them back on. I cleaned them up, sandblasted them, and sanded them to a shiny finish a few months ago. Pretty cool to have originals! Little dinged up, but they work as they should.
I didn’t go as far as installing the brake line clips, but (as you can see from the scratched paint, I did test to see how hard they are to get in there. It’s not easy!
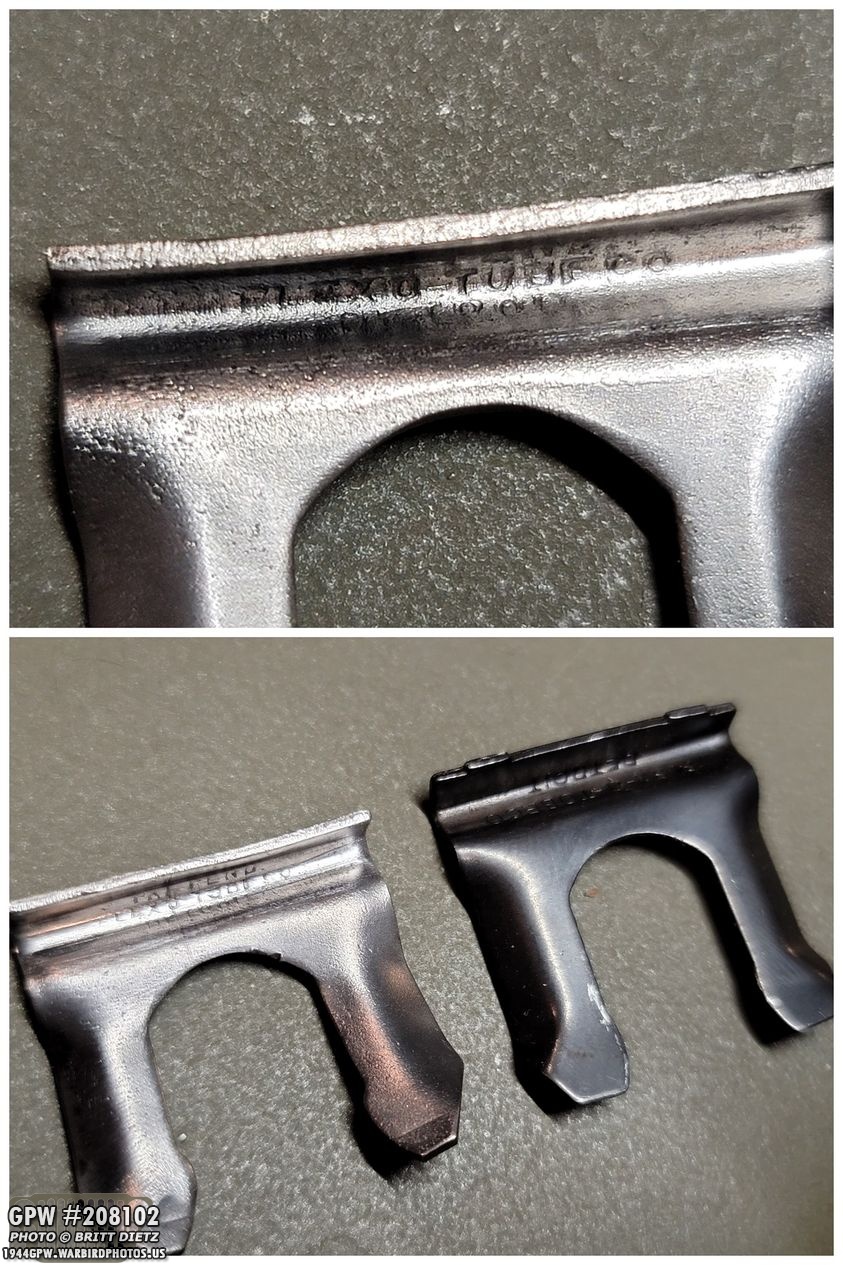
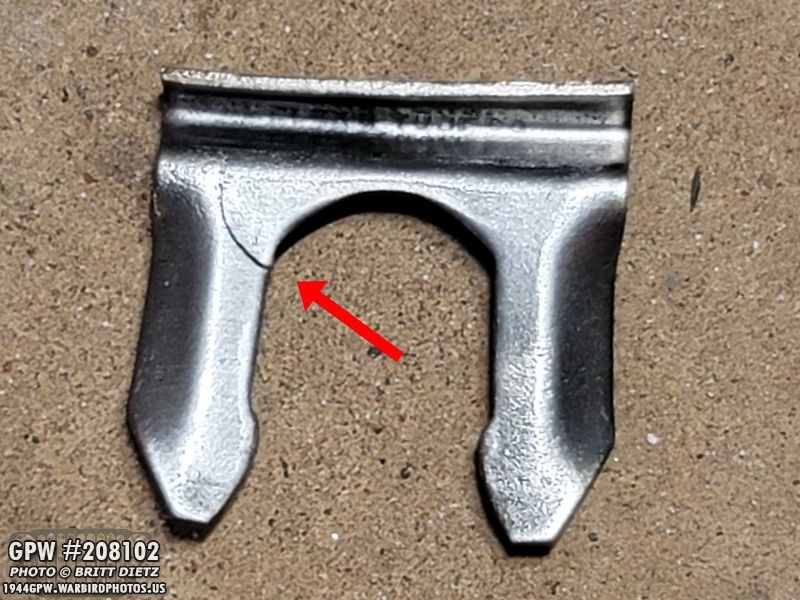
Furthermore, I have two of the original clips which came off the front axle that were in great shape. I had bought a pack of reproduction ones as these two were the only ones on the front axle when I got it, but these are original! How can you tell…?
They have the correct Flexo Tube Co markings on them! The bottom photo shows one of the originals with one of the repros. The repros also have the flexo tube co markings, but they are upsidedown for some reason.
Taking the brake lines back off, it’s time for the next step… PAINTING! But I was faced with a problem, this axle weights a CRAZY lot. So much so, my girlfriend and I could not lift it up and down. Uh oh. What to do?
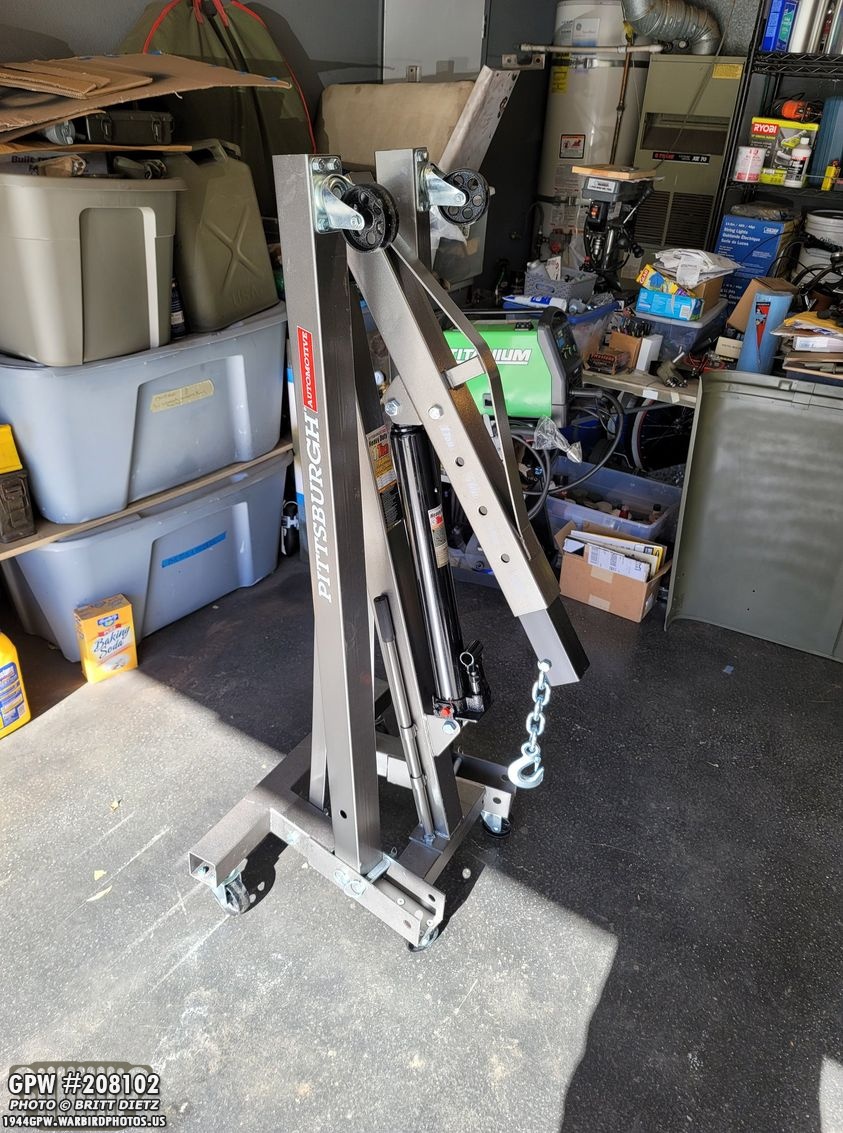
Harbor Freight Tool’s black friday deals to the rescue! Managed to get this 1 ton crane (which folds up super nice and compact, as seen here) for $30 off the normal price.
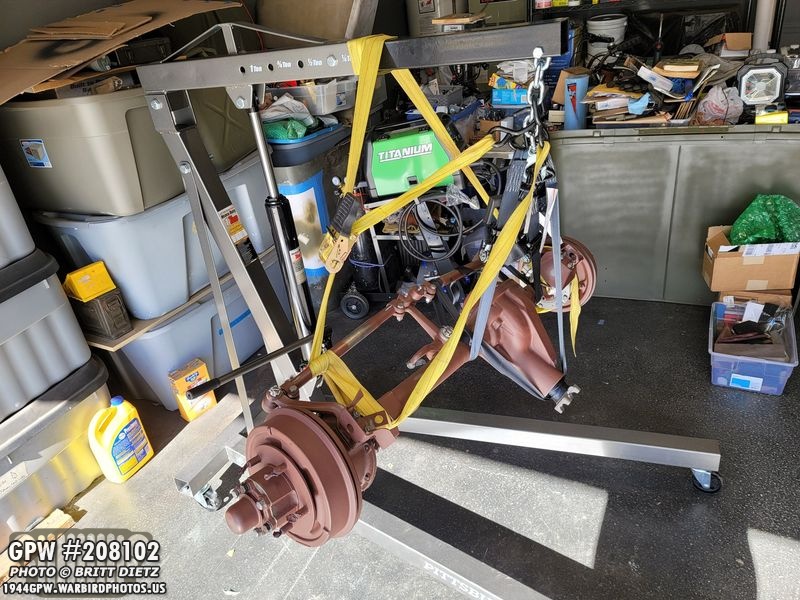
It’s not the most ideal, but using rachets and straps, I got it off the workbench! (this was the first time, so it’s leaning a lot, in the next few times I used the crane I figured out ways to level it much better).
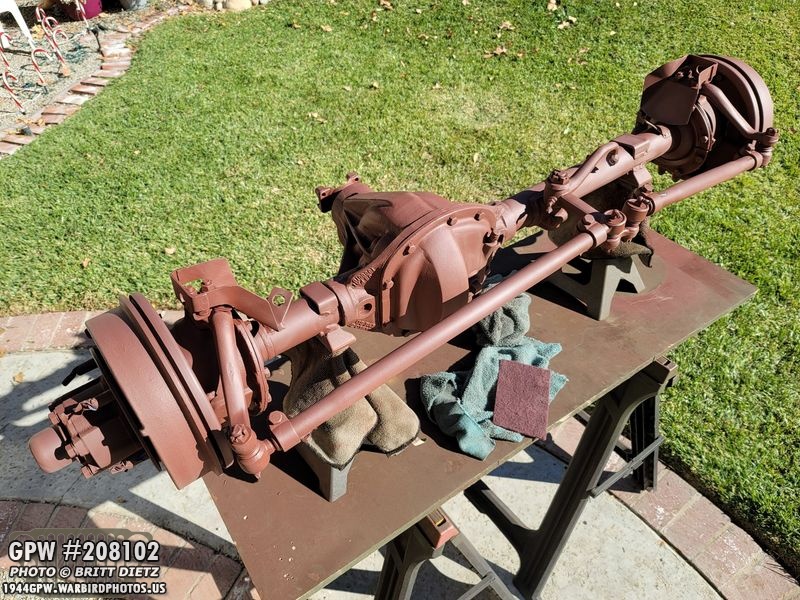
Now I was able to take the axle out to the front yard for painting! It’s been pretty warm still here in Southern California, but the winds are starting to pick up. So I had a short window of no-wind days to paint. This first day was all about touching up the rod oxide primer. Here’s the axle after I sanded down some knicks it had gotten during the reinstallation of things.
And a very nice coat of primer later, it’s looking real nice! I ended up doing two coats of primer that day. I then let it sit for several hours in the sun to dry before using the crane to take it back into the garage.
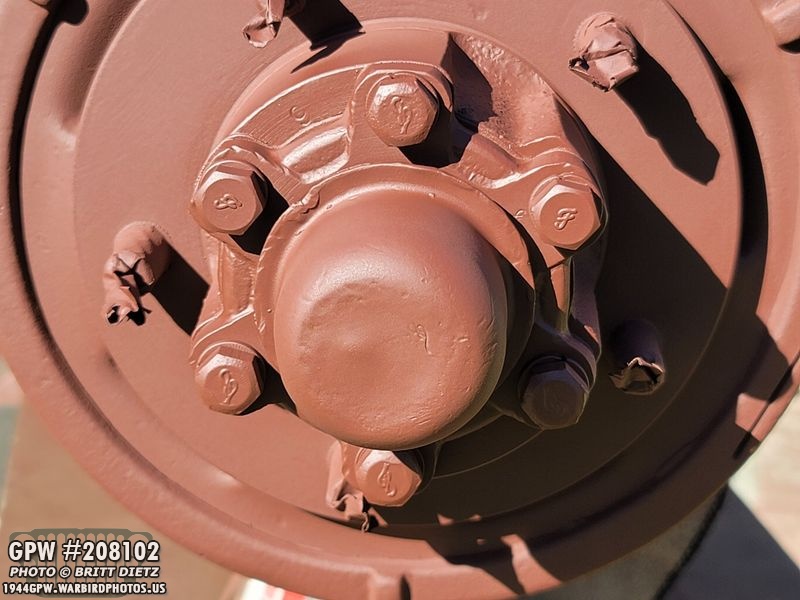
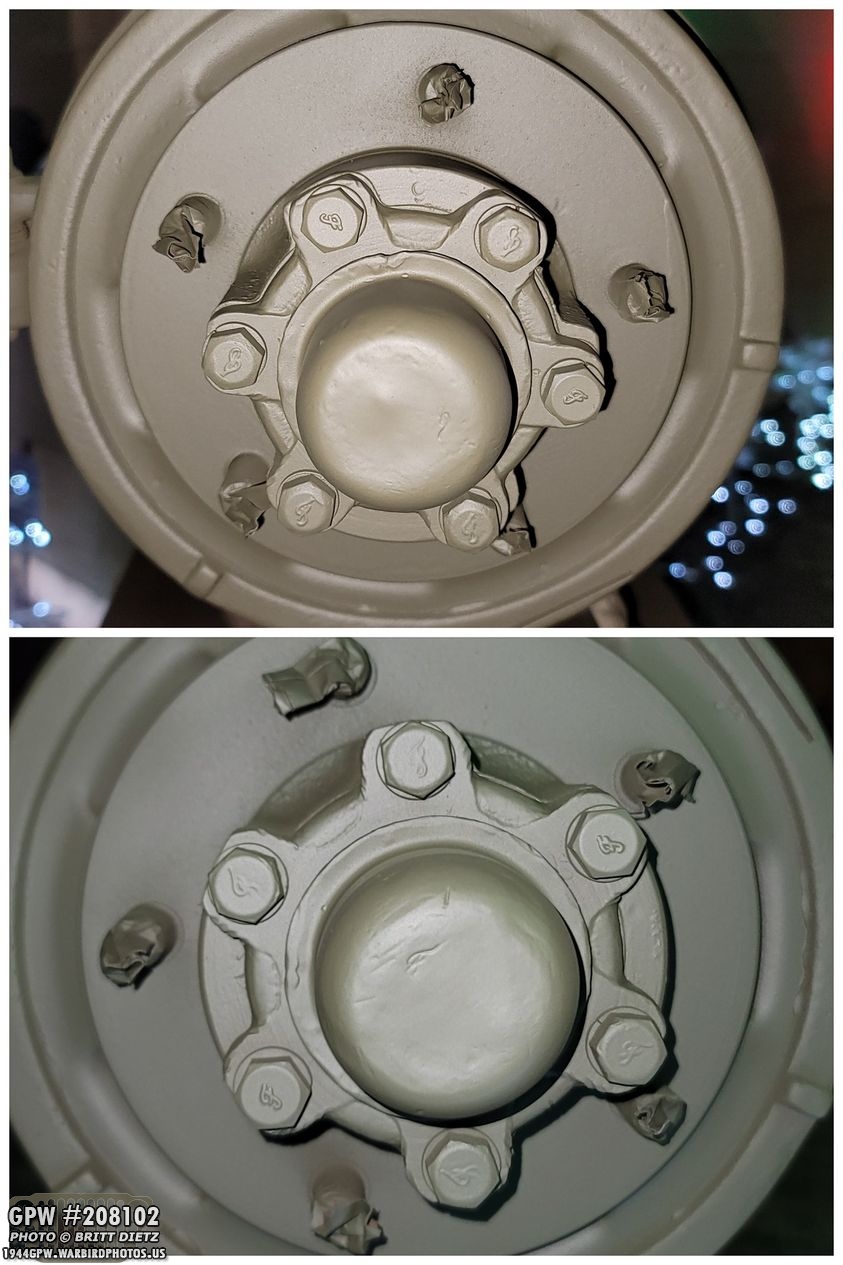
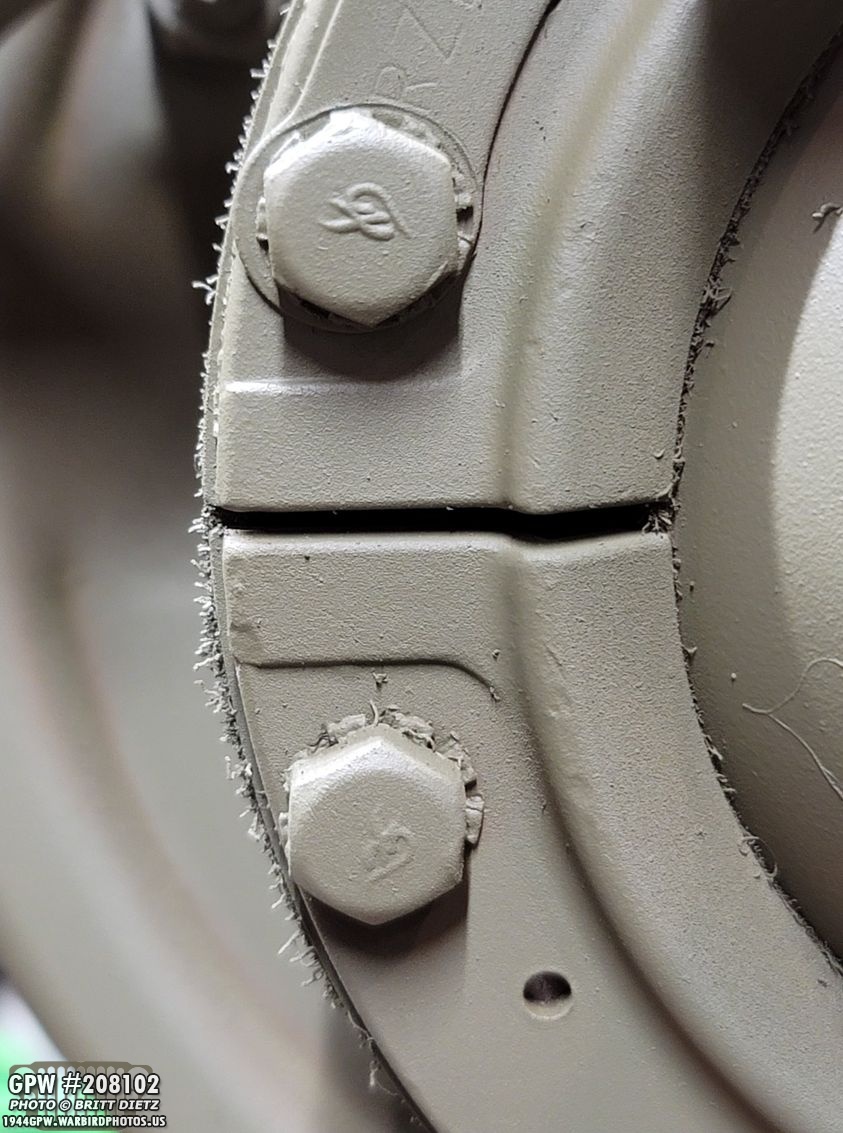
Looking at one of the hubs, you can really make out the F stamps. And you can tell which bolts were repro and which were original. Maybe I should have scuffed up the repro ones a bit.
The next day, took the crane and moved the axle back outside. Again, a lucky no-wind day… but the next day it was forecasted to be quite windy. So I started early by taking a scotch pad and scuffing up the entire axle for better top layer adhesion.
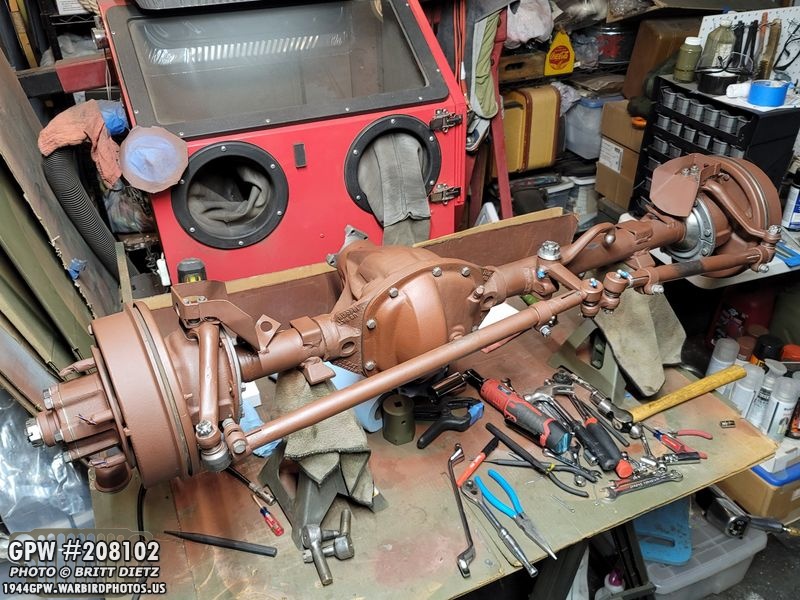
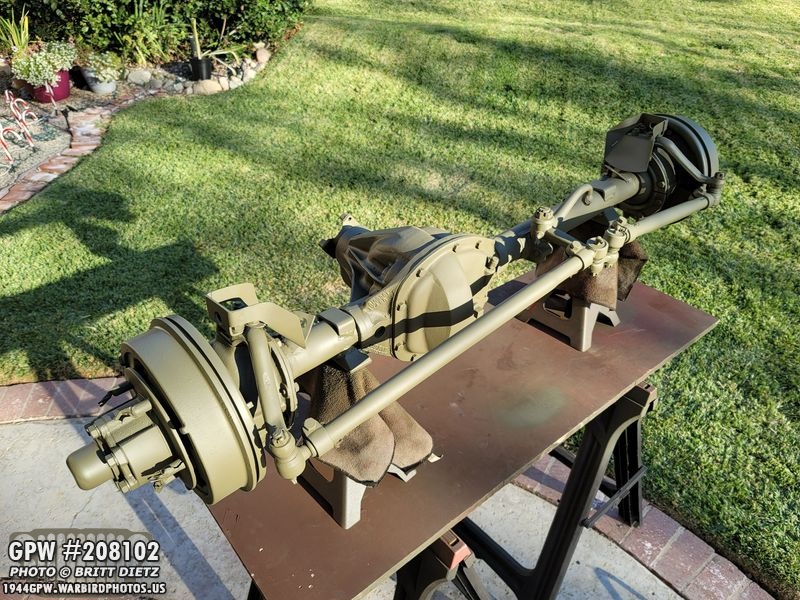
And like the snap of fingers, it’s now painted with 33070 OD Green! I used the gallon form from &Ron Fitzpatrick Jeep Parts with a Harbor Freight Tools spray gun. With the Xylene thinner, the paint would dry almost immediately in the sun, but I waited about 30 minutes between coats. Three coats total that day, then I again let it sit outside for several hours before using the crane (this time with bubble wrap to protect the paint) to take it back in the garage.
And here’s a look at both of the hubs all painted! Ignore the shift in colors between the two, the Christmas lights were casting a different glow onto them.
Before taking the axle back into the garage, I had to take this shot. A bit of symbolism since very soon this axle will be under the Jeep.
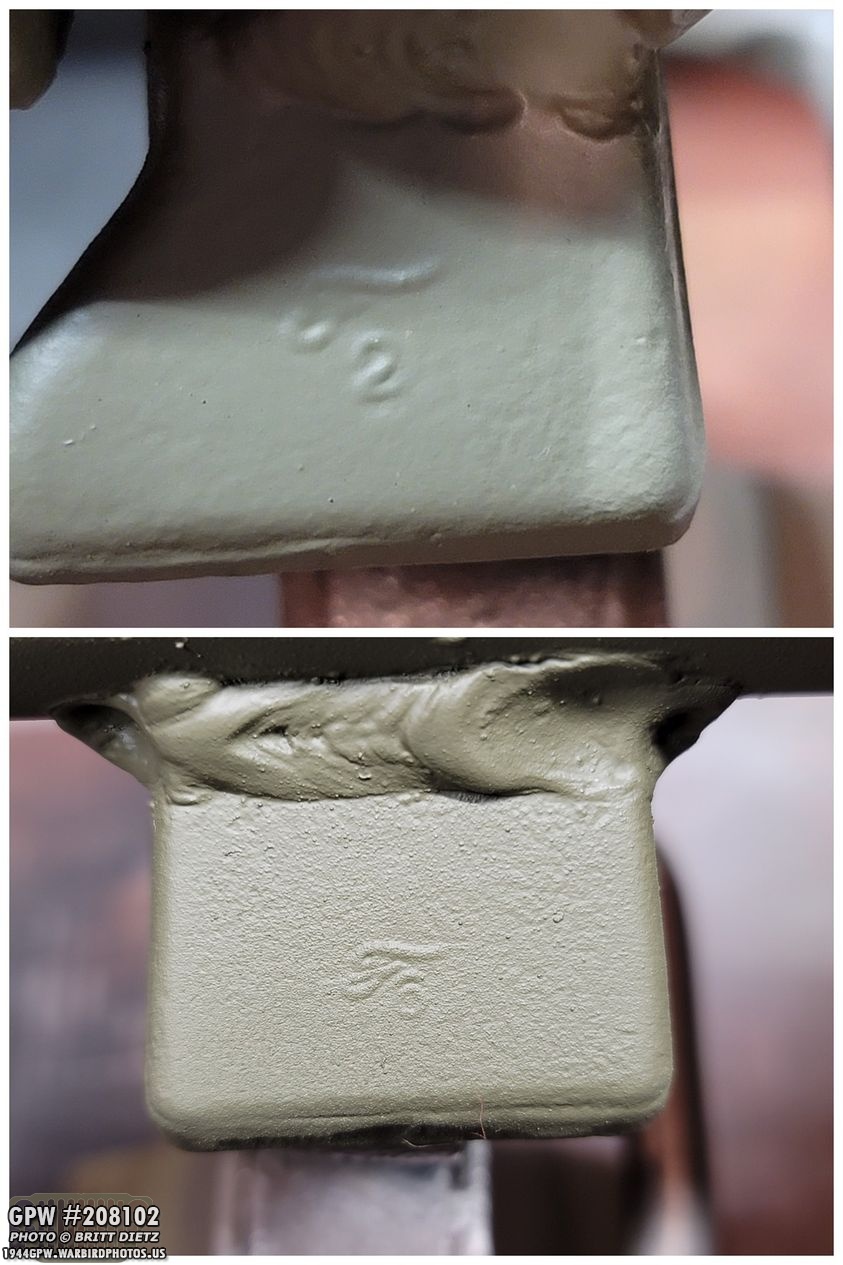
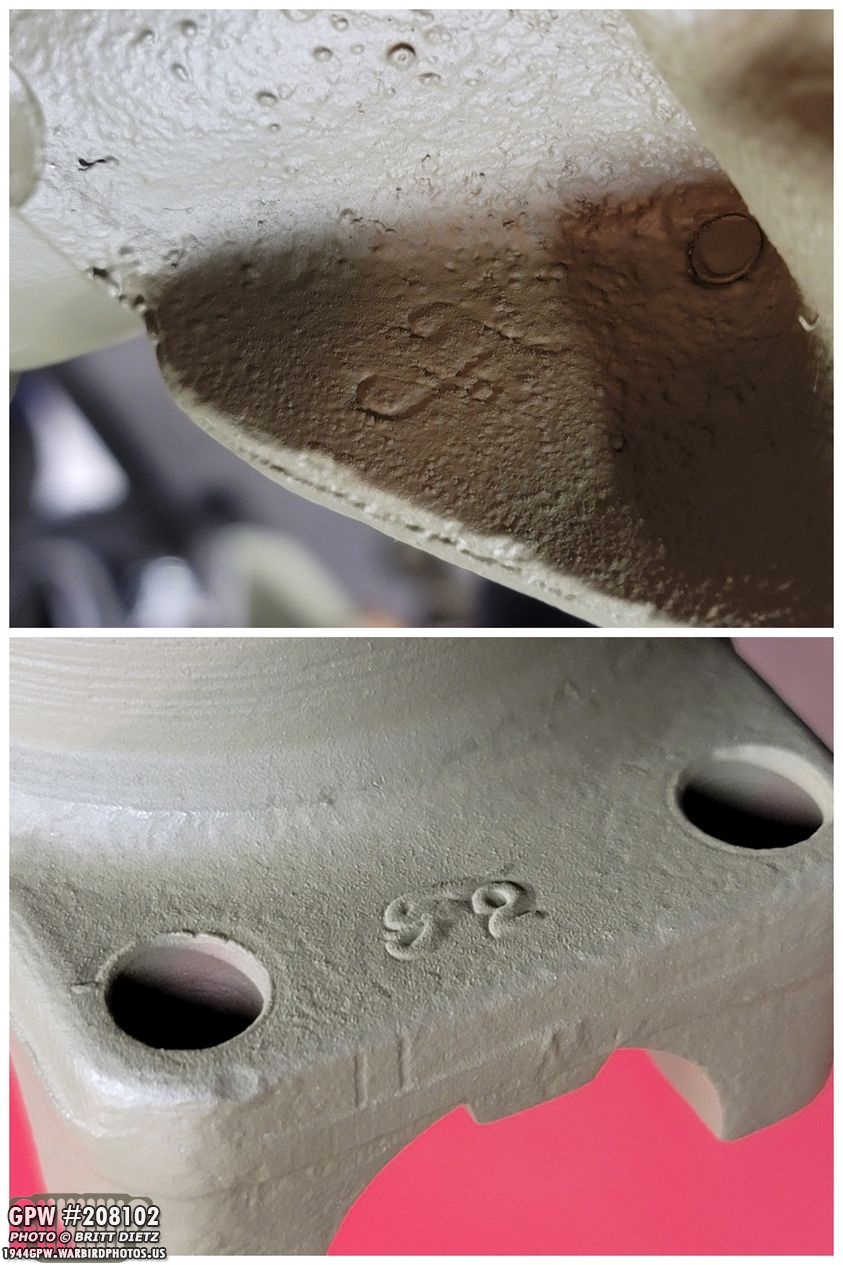
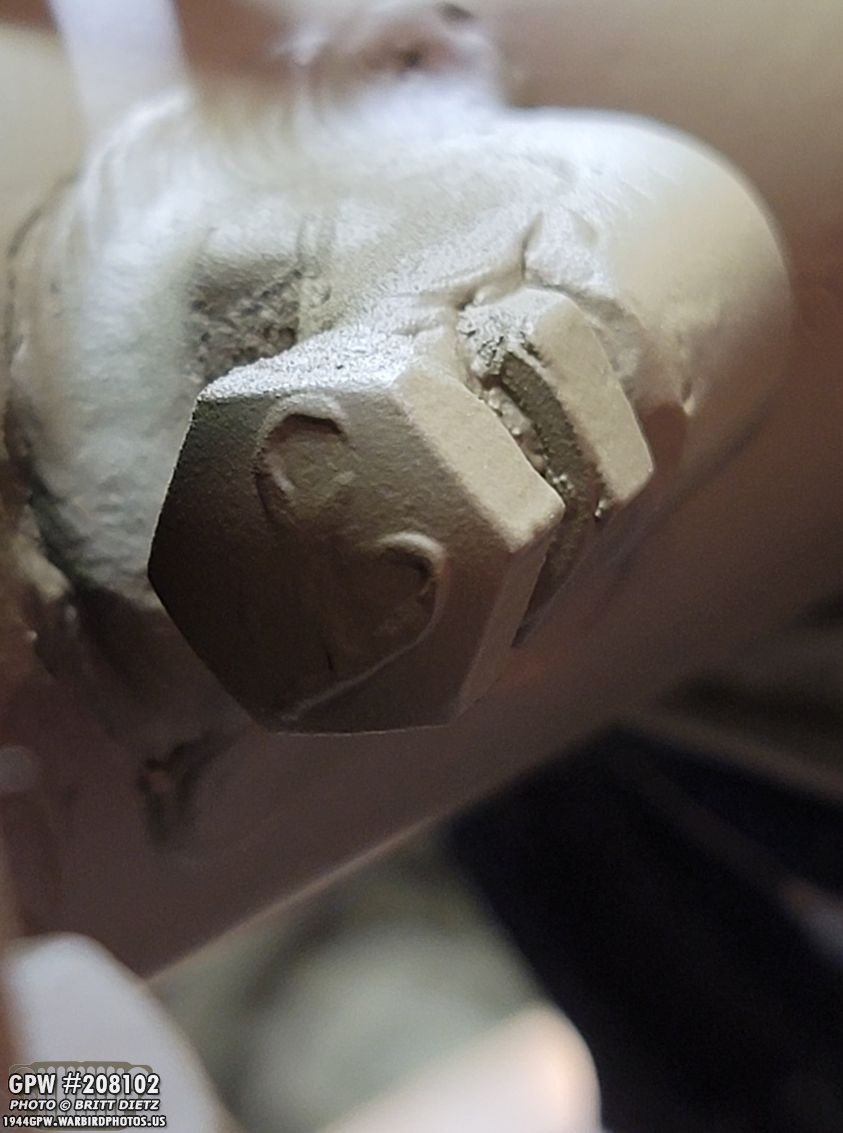
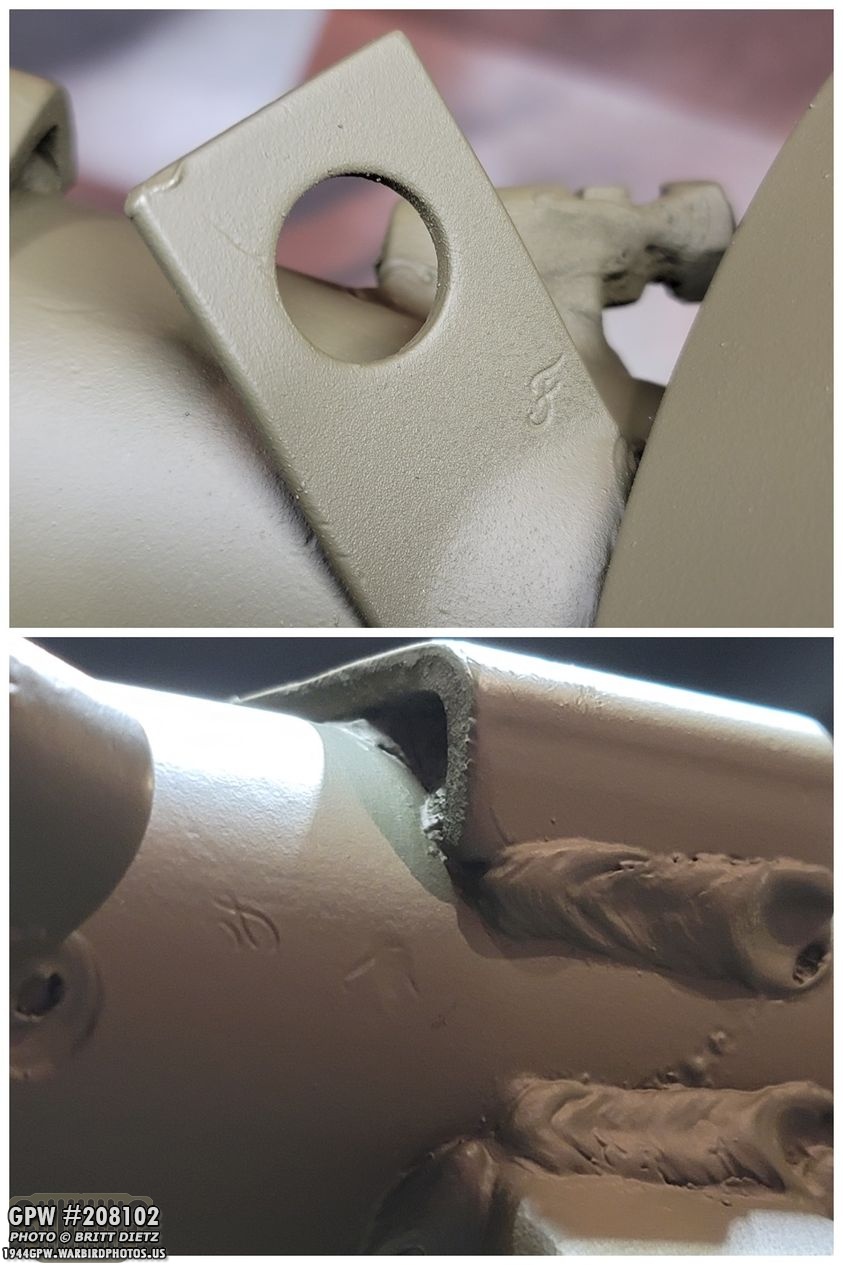
I wanted to document some of the F stamps, now that the axle is painted, since they will be hard to see once the axle is installed. These next few photos show all these F stamps. These are ORIGINAL stamps, not repro. Here’s the stamps on one of the kingpin brake shields (both sides have the same stamps).
Here’s the F stamps on the feet of the axle.
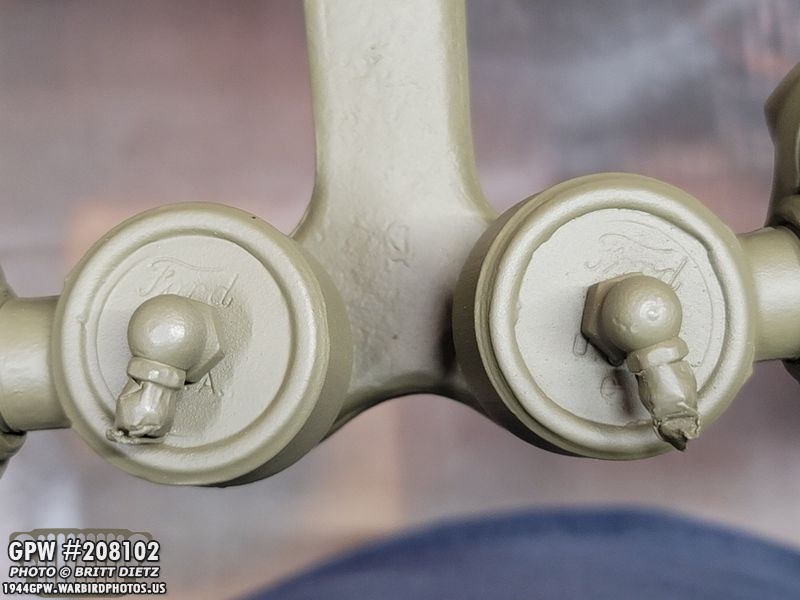
The F stamps on the center Tie Rods.
F stamped bolts on the knuckle dust shields.
The K (Kelsey Hays/Bendix brake plate) and the GPW drum. (Same on both sides).
The housing itself with a large F and the F on the pinion yoke.
The F on one of the knuckle stopper bolts. This is there to prevent overturning the wheel.
The F on the flexible to hard-line brake bracket, and a partial F on the axle shaft tube itself. These are only a small some of the F stamps on this axle. Pretty crazy!
Now it’s time to install the brake lines!
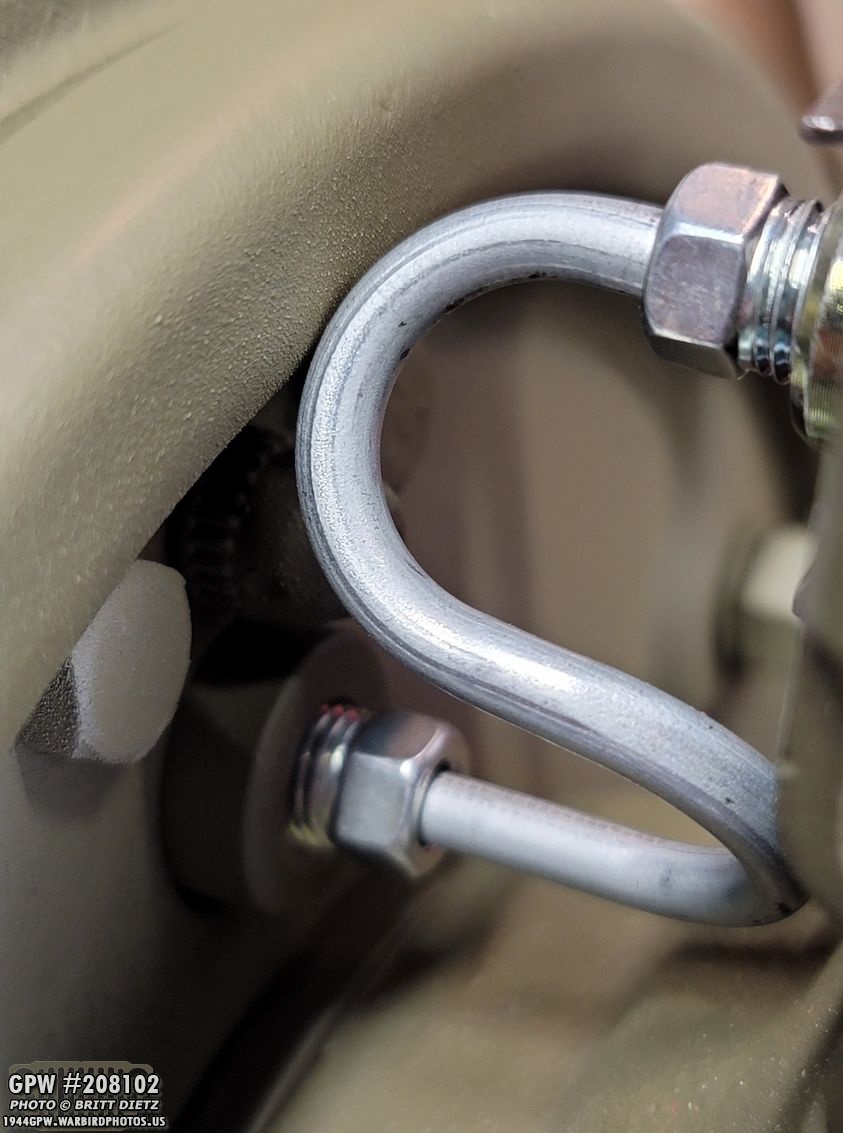
Since I pre-fitted them before, I knew exactly what I needed to do. There’s many ways to do this, this is how it worked for me. I found installing the S lines first the easiest.
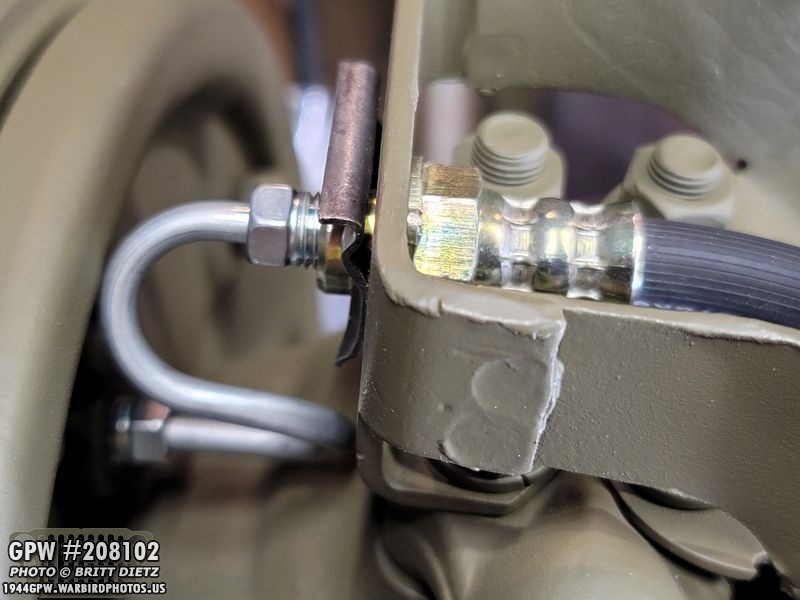
I then connected the flexible line but I didn’t tighten it. I know the clip is in place here, but I actually did that after the next step on the next photo.
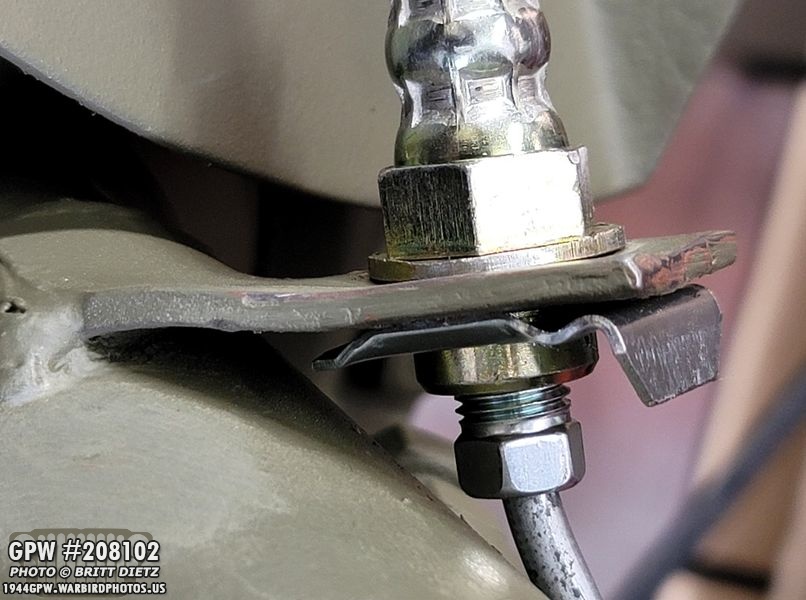
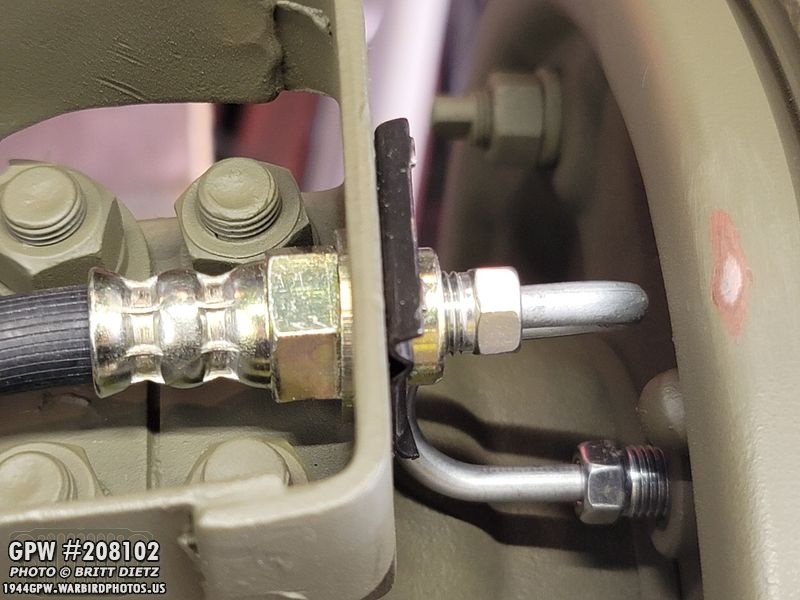
On the bracket tab on the axle tube, I then connected the other end of the flexible line to the next hard line piece. I then installed the clips on both sides. This was a PAIN, those clips don’t want to go in for a reason. The trick I found was to make sure the flexible line is flat as can be against the bracket, take the clip and put it in at a 45 degree angle and push it in as best you can to get it started, then smack it with a hammer. Might take a few attempts, but it will eventually catch and go in.
Here’s another look showing how the clip is installed. It should clip the groove area on the flexible line, holding it to the brackets.
Unfortunately, I had a ‘man down’ and one of the two original clips cracked. DOH! Thankfully I had the pack of repro extras.
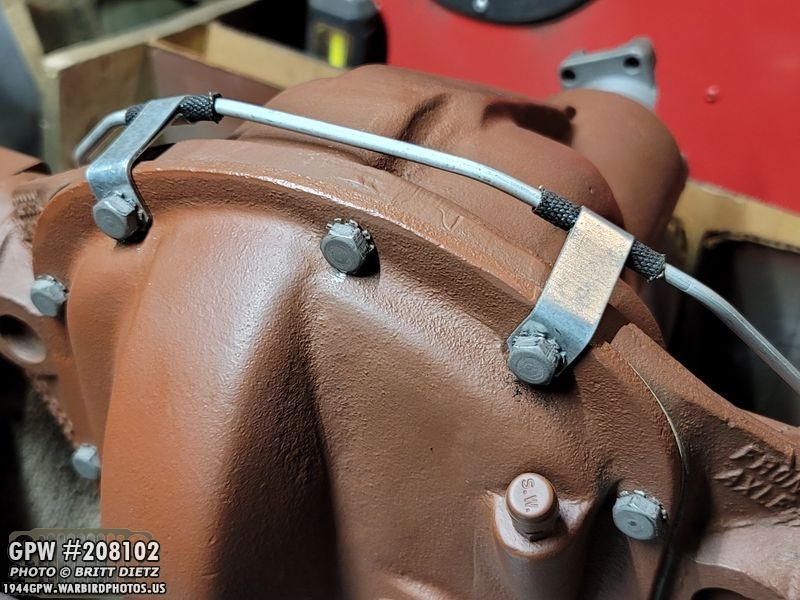
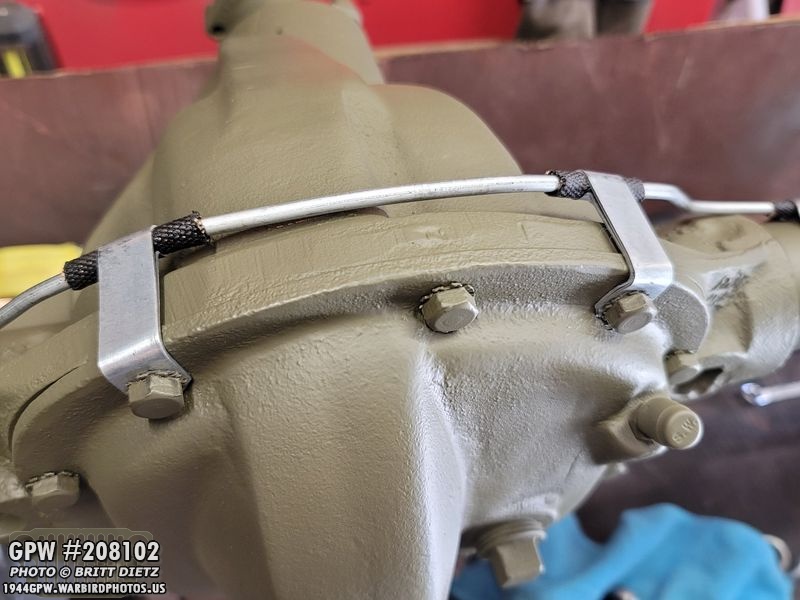
Next up, I added the clips on the housing cover.
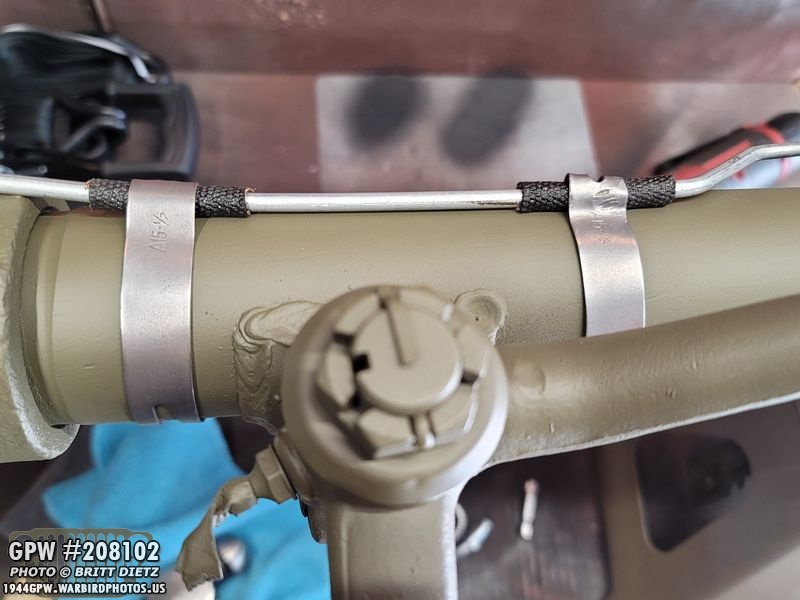
Then I added the two original straps.
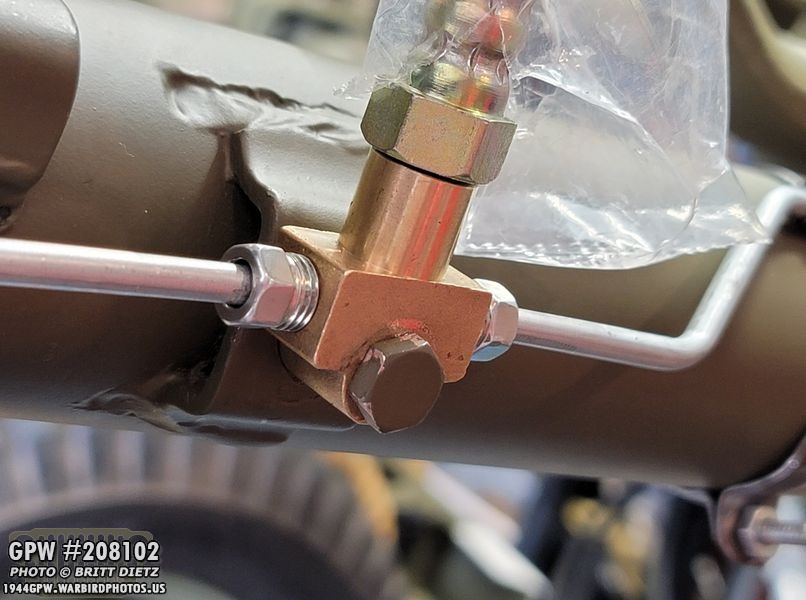
And I added the three-way tee connector. This is bolted into the axle directly with a 1/4 bolt. I forgot to put a lock-washer on it, so I’ll take it off eventually and put the lock washer on. I’ll also sand off the OD Green paint from the bolt head so it’s natural.
Then on to the other side, for this side, I went with the lower axle mounted bracket first connecting the hard line to the flexible line. And as before, I didn’t put the clip in until AFTER I had both sides of the flexible tube connected to hard lines.
And here’s the top with the S line. I used one of the repro GPW clips on here in place of the cracked one. I also managed to scuff the plate up a bit, doh!
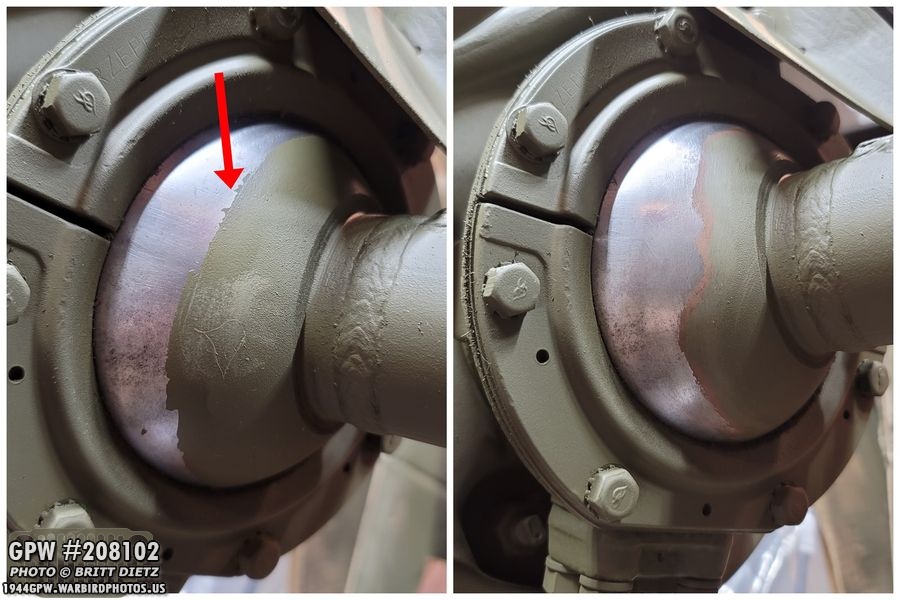
On the knuckle ball, I was hoping the oiled up surface would make it so the paint wouldn’t stick. Sadly, that didn’t work for some reason and the paint still stuck. Doh! As you can see when I turn the knuckle, the oil mark is where the knuckle turns over the paint. This presents a problem.
While the paint itself isn’t bad and will eventually scrape off, the problem is the hard lines where the multiple layers of paint built up. You can see that thick line on the left photo. What needs to be done is to sand down all the lines of paint on both sides of both knuckle balls, or you will wind up tearing your felt shields. This was a tip given to me by Roger Smith. The right photo is after sanding the lines smooth.
With that, the front axle is DONE! FINALLY!
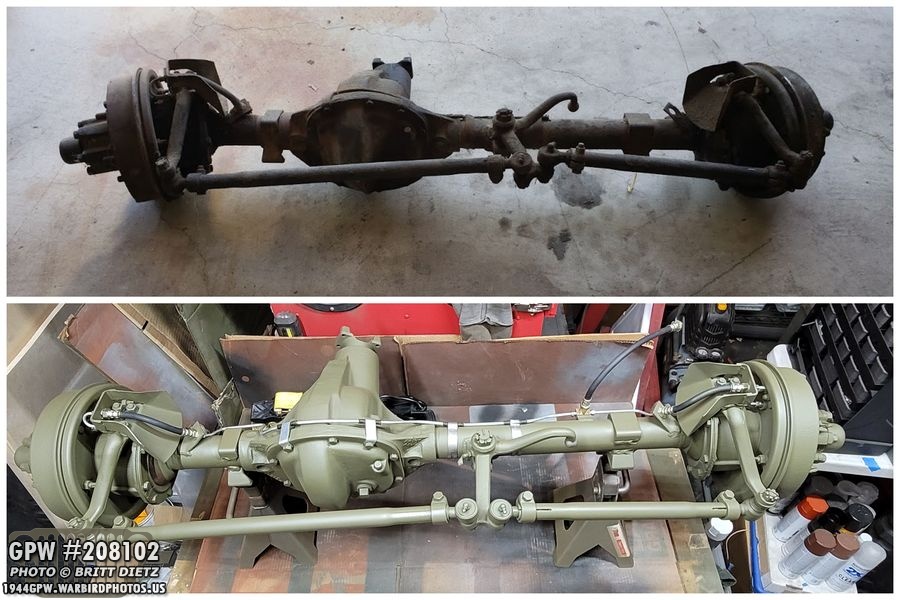
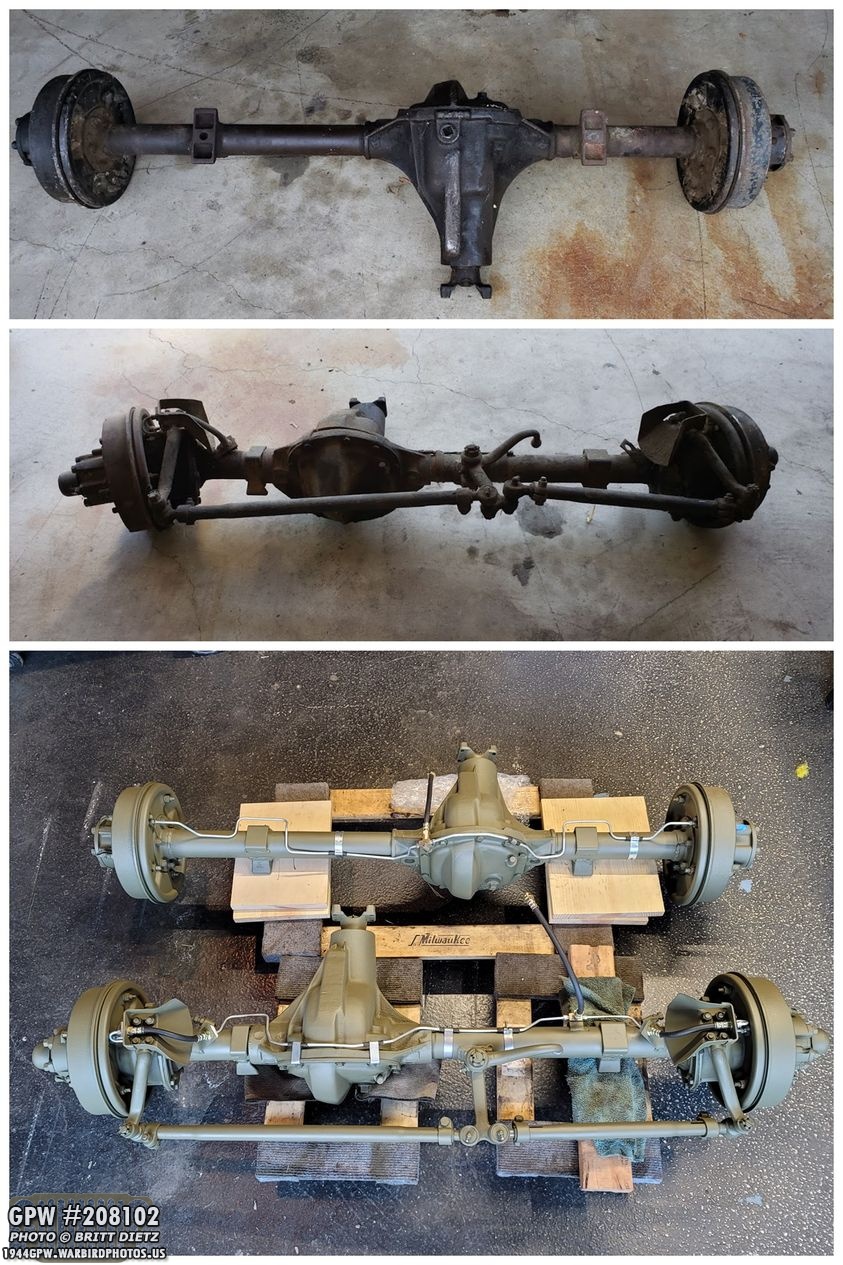
Taking a look at the before and after… the top is how the axle looked when I got it. The bottom is the finished restored axle. It’s been a long long journey!
Before I could be totally finished, I need to grease the various spots on the axle. First up, I used my grease gun to hit the zerk fitting on the bell crank. I kept going until I started to see grease start to just barely ooze out. I had already pre-greased this mostly when putting it together, so only took two pumps of grease.
Next up, the bell crank tie rods. They had no grease, so it took about 6 pumps before it started to ooze out near the felt dust shields.
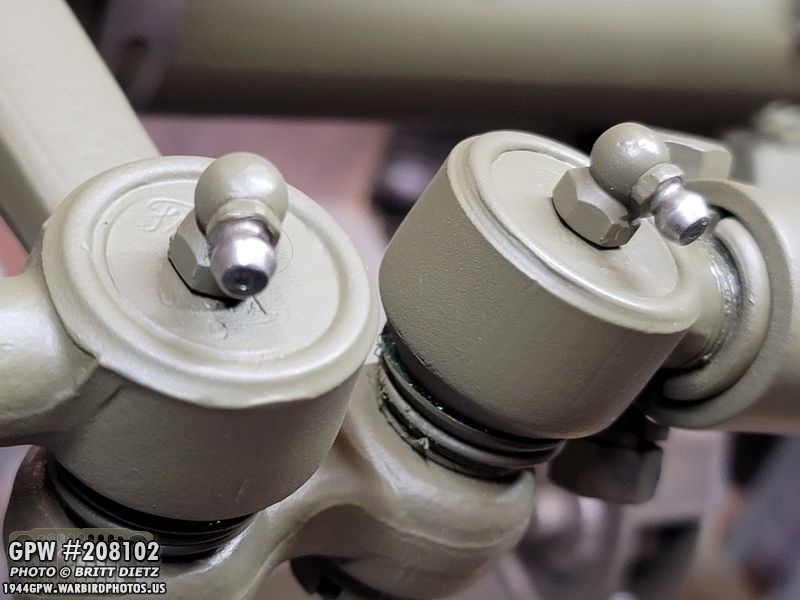
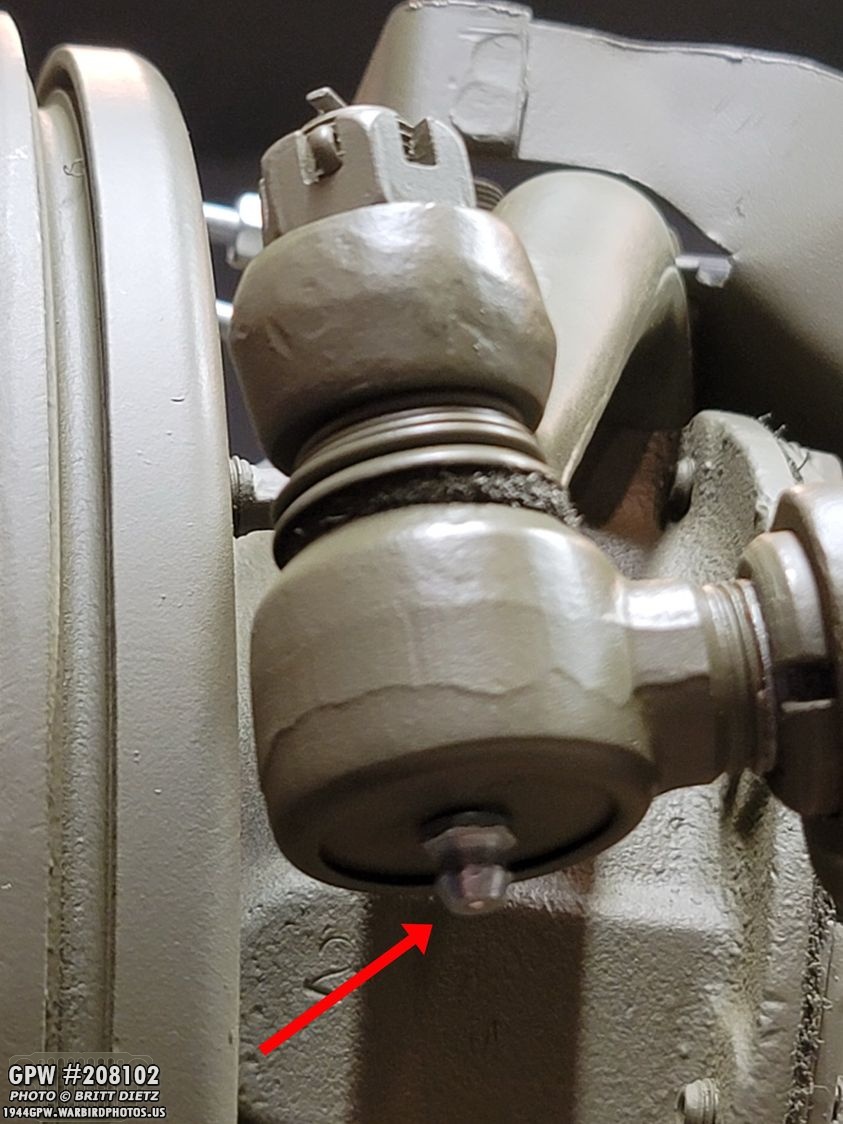
For the kingpin arm tie rods, I ended up installing these small pointed zerk fittings on both of them as I didn’t have any 90 degree fittings that fit in the threads that also cleared the tie rod edges. They are underneath, so no one will see them.
And here’s a look at both the axles together, before and after. I picked these axles up in late November last year, and it’s taken just about exactly one year to get them totally tore down, cleaned/restored, replacement parts sourced, the many rear axle repairs from damage from a spider gear explosion, reinstallation, and painting. Pretty huge difference.
And here’s another look at both of them, ready for install!
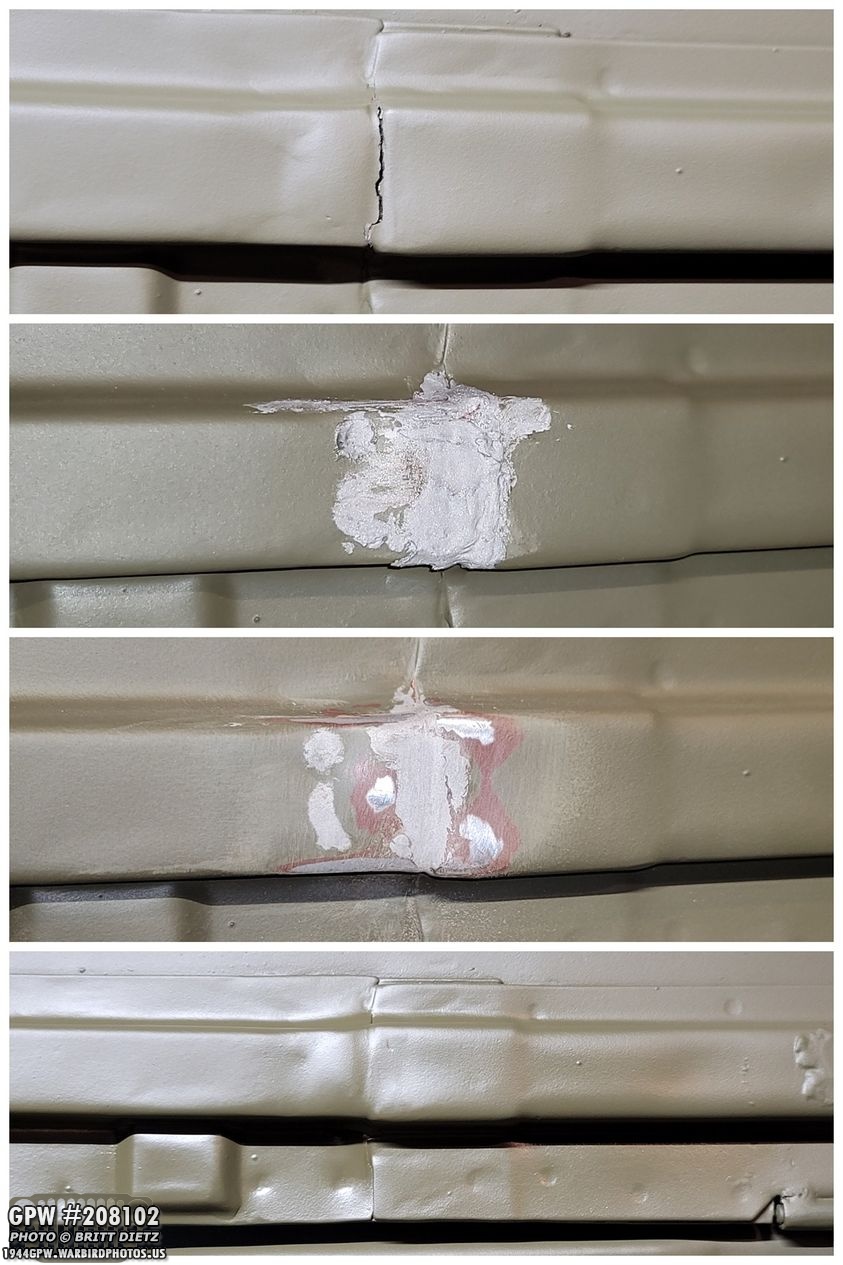
Whew! Moving on, last week when I installed the new original GPW hood (my original hood is not repairable, so I had a MD Juan repro which I recently replaced with another original GPW hood that I restored) the area where the middle channel overlaps the passenger side-channel cracked, again, after several repairs. I figured out why, it’s because when the hood is closed, that area us under strain, and thus causes the crack. So, this time I used ‘plastic metal’ and expanded the crack a bit before filling it. Once dry, this stuff was like metal in terms of hardness, but I could sand it. After sanding and painting, it seems to have worked for now. We’ll see if it cracks again in the future.
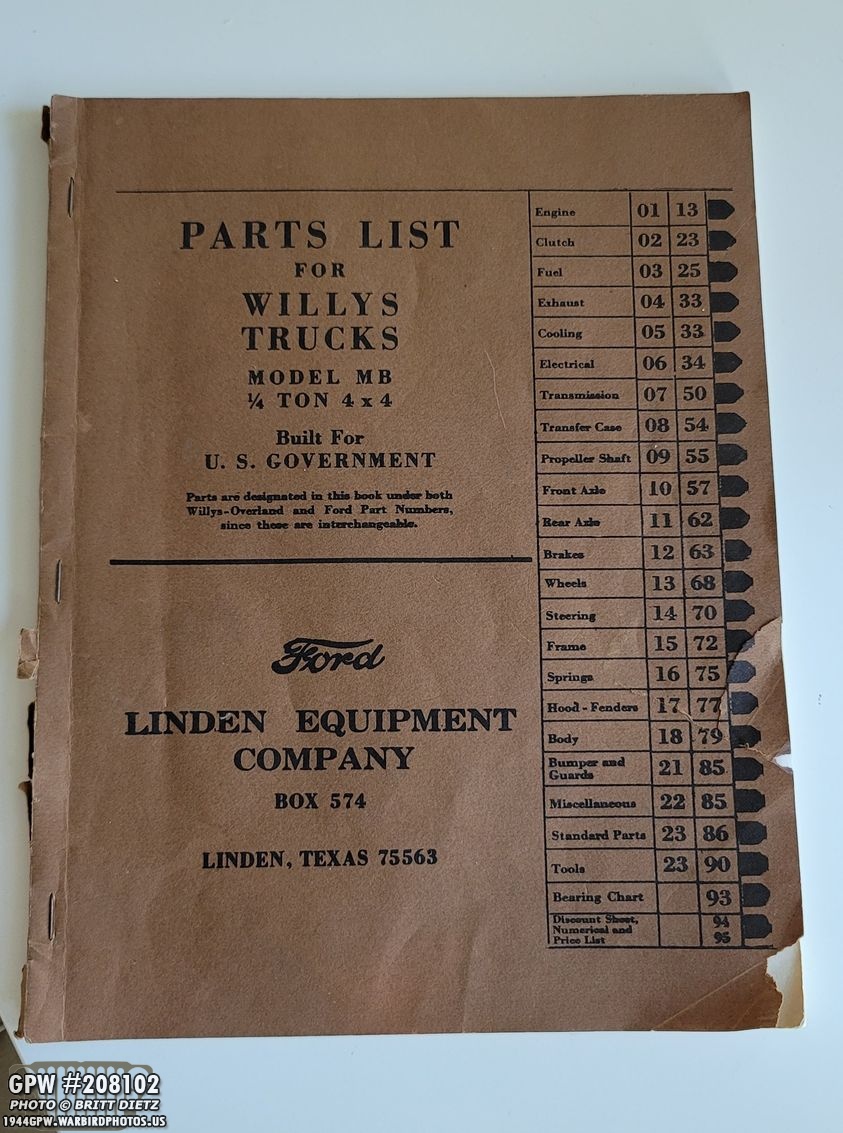
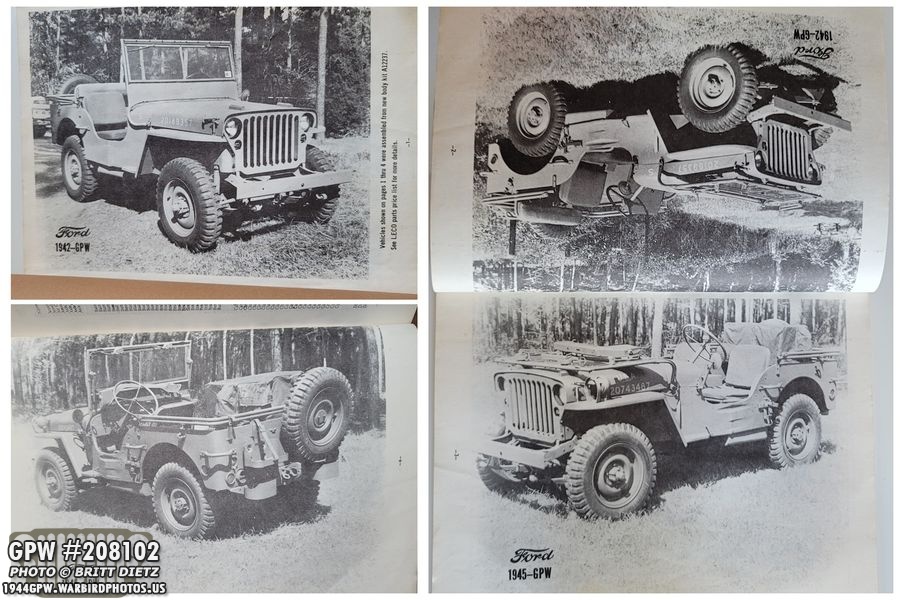
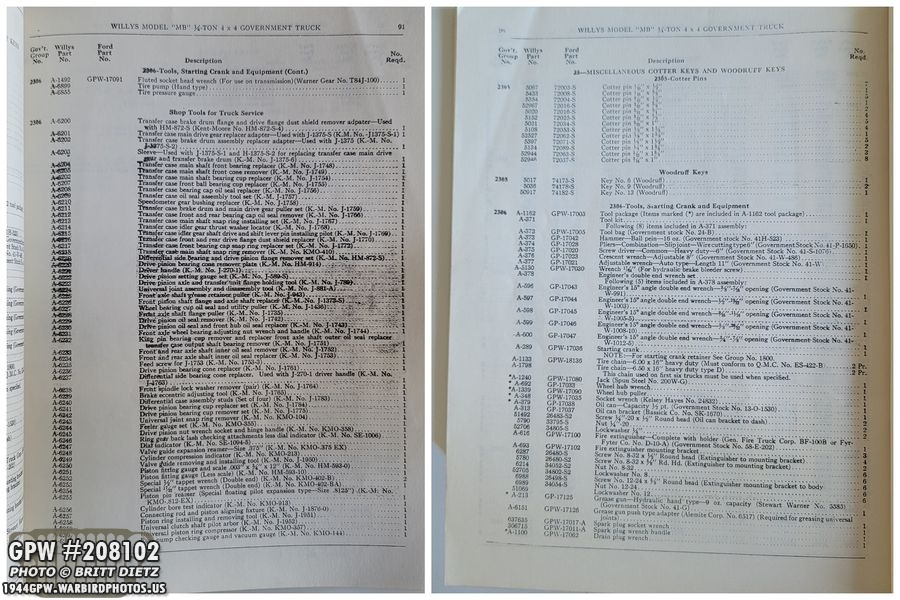
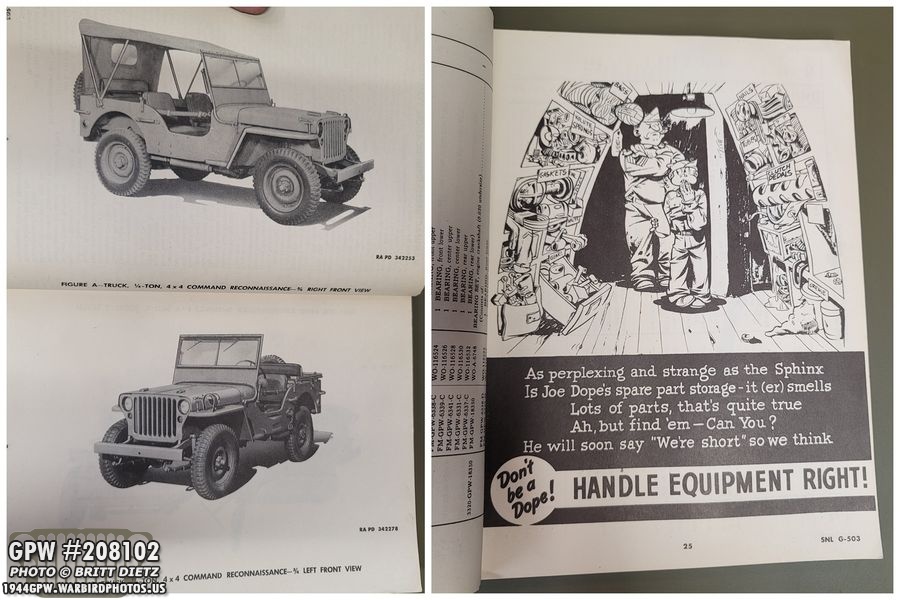
With all those things out of the way for this week, I wanted to mention two cool items I recently got for my Jeep collection. First is this rare parts list book that I’ve never seen before. It’s a shortened version of the Ord 9, and almost seems to be hand done.
The first four pages show different GPW jeeps from 1942 and 1945.
At the end of the book, it has a nice chart of all the different bearings needed on the Jeep and what Timken/Bower numbers they are. Figured this might be handy for some people. Download the image to see it in better resolution.
Here’s a look at some of the other items in it that I thought were a bit different than your typical Ord 9 book.
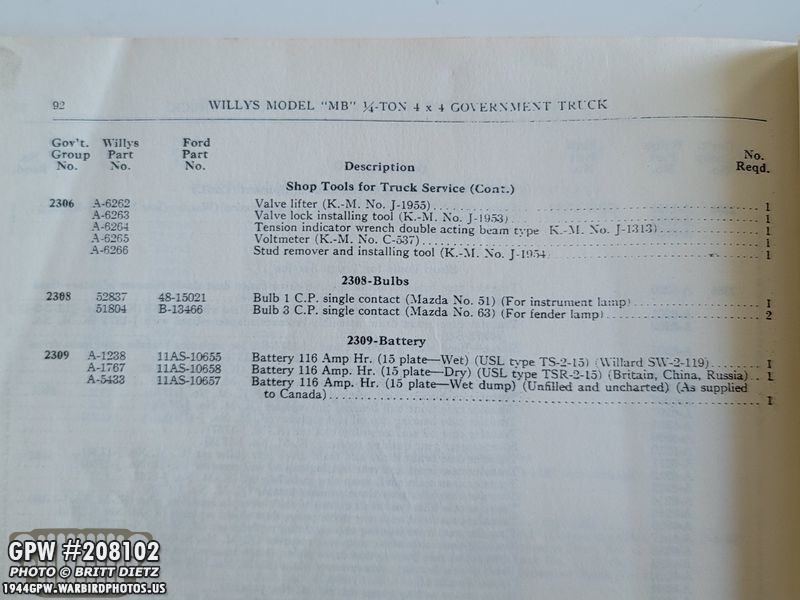
Even has info on the bulbs, battery, etc!
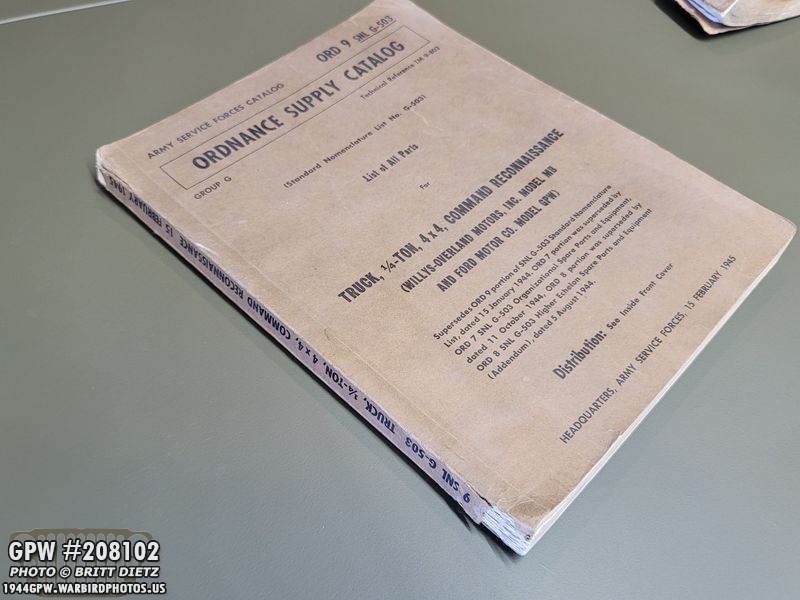
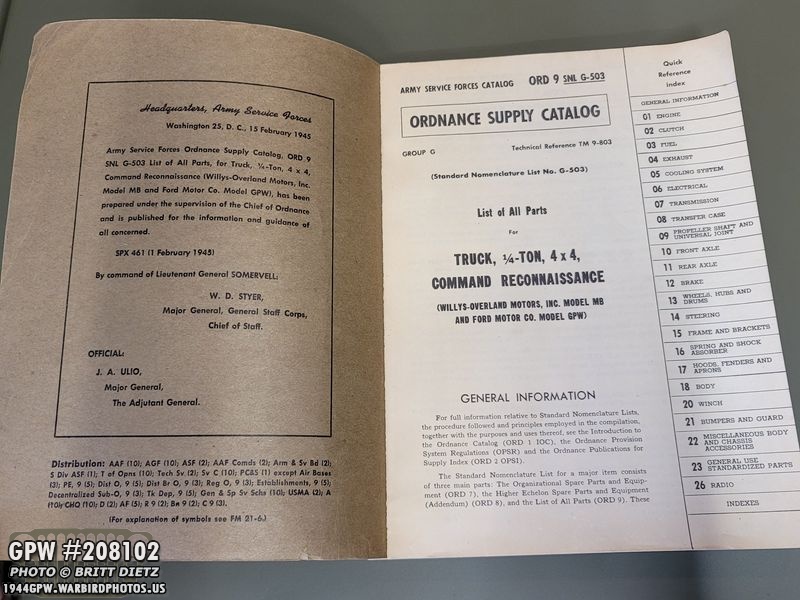
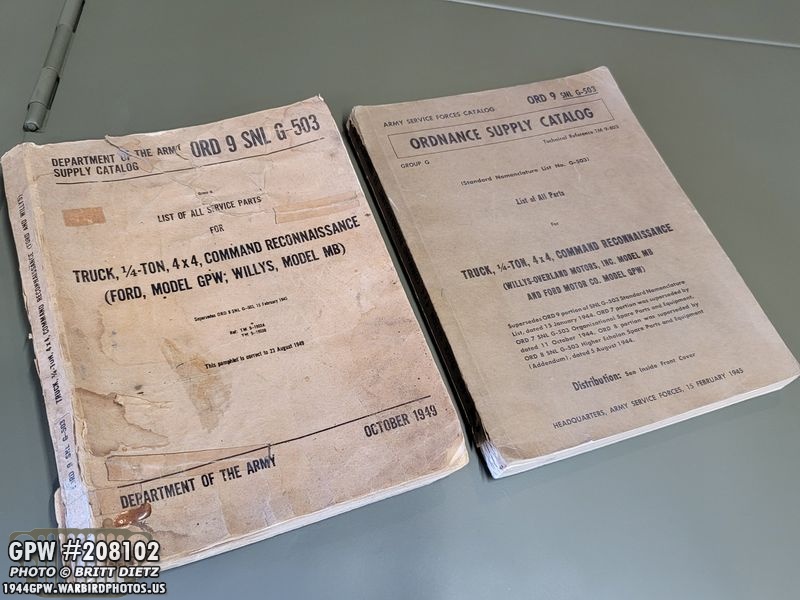
The other item I got, which is now the holy grail of my collection so far, is an original GREAT condition Feb 15, 1945 Ord 9! Aside from some missing parts on the spine, it’s flawless inside!
No stains, marks, rips, etc!
Pages are super clear. Got it for a steal on ebay!
It goes along with my post-war 1949 dated Ord 9 that I’ve been using (which is a lot more beat up condition). I’d love to find an early 1943 edition at some point.
Wrapping up this week’s update, I will be starting the process of removing the post-war CJ rear axle first, shown here, and going through my springs/shocks restoring them completely. The Jeep will be down for a few weeks as I do this, so I made sure to take the Jeep out for one last ride on Wednesday.
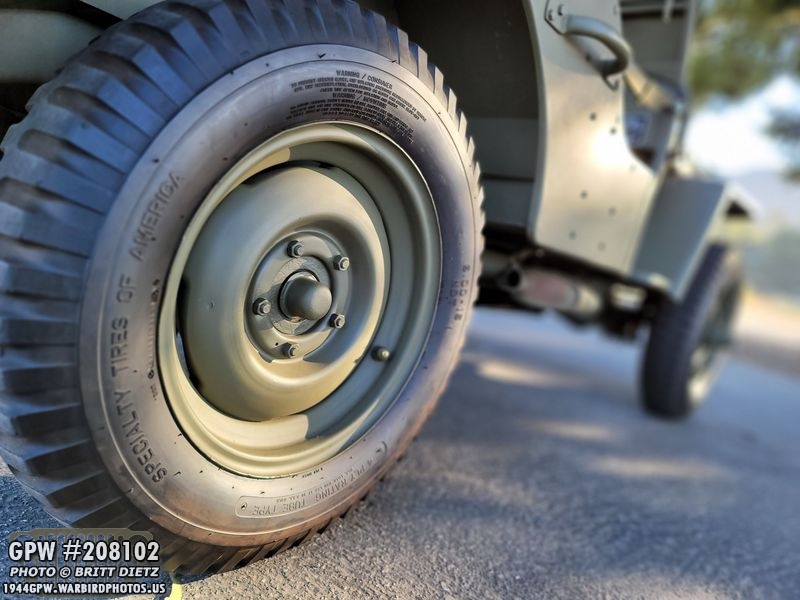
My goal is to have the rear axle replaced and the GPW one on with the combat rims and new firestone tires but Monday evening if all goes well! I already realized I will need some parts, so I made another order from &Ron Fitzpatrick Jeep Parts which should be here by Friday.
So that’s it for this busy week of axle work! Seeing the light at the end of the tunnel on this Jeep restoration (that’s good and bad!), and the pace has picked up for sure. Till next week…
