 Axle replacement begins!
This past week was another busy one with the start of one of the last major projects on my Jeep’s restoration… replacing the post-war axles with the 1943 GPW axles! I started work on the rear of the Jeep first, taking most of the week to clean/restore my springs, shocks, and other items in prep for the new axle!

What a week of work! I figured it would take more than two weeks to change out the axles, but now it’s looking more like possibly 3-4 weeks before I finish this project. Mostly because instead of just changing the axles and moving on, I’m taking the time to restore the springs, shocks, etc. So let’s dive in!

Last week I finally finished the 1943 GPW axles after a year-long restoration. When I got my Jeep, it had post-war CJ axles on it. I got these original GPW axles from a fellow G503 member which were in pretty much unrestored shape for 76+ years. After fixing damage to the rear axle and doing a complete restoration, they are ready to go!

So, with the axles finished, it was time to get to work! I decided on doing the easier axle, the rear, first. After doing one last drive (since I knew the Jeep would be down for a while), it was time to get started!

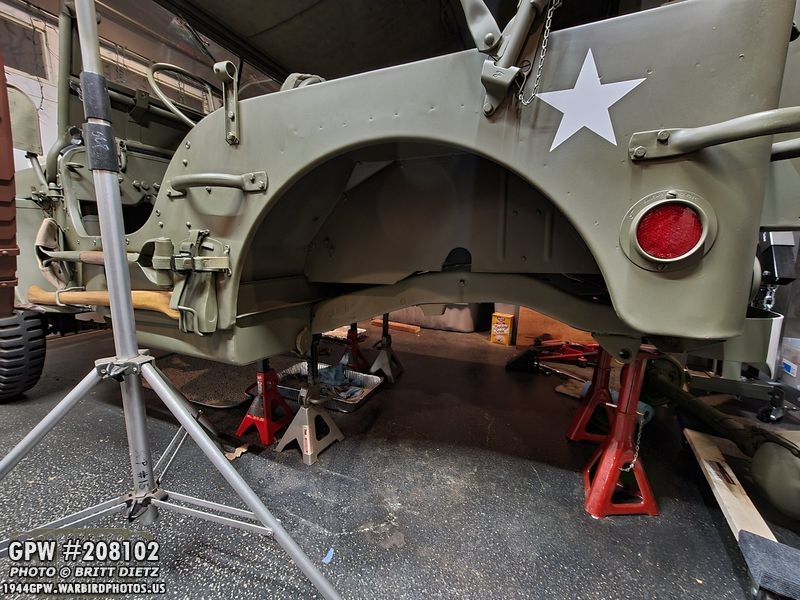
First up, safety! Since I’ll need to have the Jeep on jacks for a few weeks and I’d be spending quite a bit of time underneath the Jeep, I wanted to make sure there would be no accidents. In all, I have three sets of jacks on the Jeep. These two jacks are what will be holding the brunt of the weight, positioned just forward of the spring bracket. Two more of the same jacks will be right next to them (but one height level lower) so if these fail, the other pair will catch it. Then, on the rear bumper, I have two more jacks to catch if any of the others fail.

With the main jacks in place, I used a floor dolly with a piece of wood to jack up the rear axle till both the wheels were off the ground enough that I would extend the jacks and let down the floor jack slowly. Sicne I’m removing the springs, you want to make sure that you are not putting an opposite load on the springs lifting the axles off the ground. So you want the Jeep to be jacked up just high enough on the stands that the wheels are just touching the ground and putting slight load on the ground.

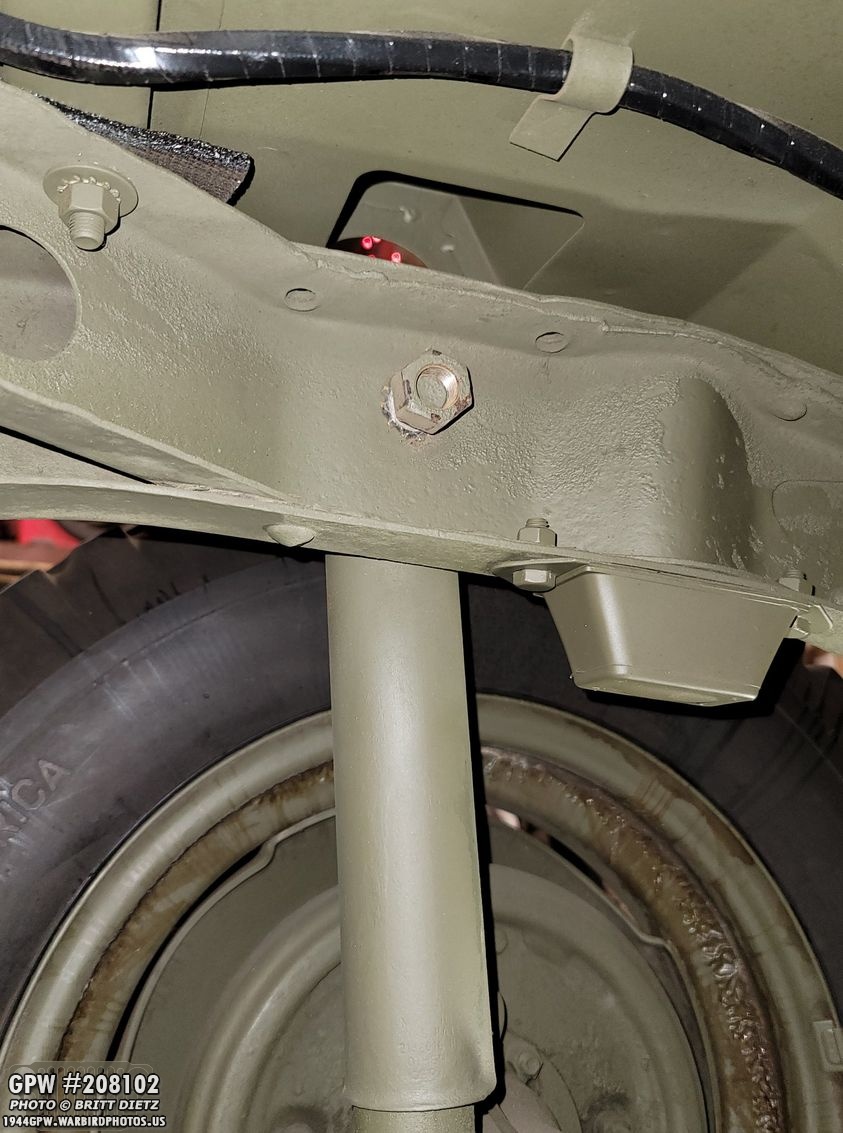
With the Jeep jacked up, it’s time to begin! First off, taking off the shocks. As I’ve shown before, the shocks have been relocated and done in a very ‘bubba’ way. The top shock brackets are missing, and instead, a bolt is holding them to the frame itself.

Earlier this year, I got two take-off rear GPW shock brackets which I cleaned up, prepped, and painted for installation on the Jeep. Look for the installation of these in next week’s update.
Looking at the backside, I was able to break free the nut. The hole this large bolt is going through and those two holes on the frame above that are for the shock bracket.

On the bottom of the shock, I noticed there was a nut on the end of the leaf spring plate holding the shock… odd, it should be a cotter pin, not a nut.

After I got the large nut off the top of the shock, I was able to pull off the shock. This was how the top looked. Just a large bolt, washers, and two large nuts (one on each side of the frame). Not how it’s supposed to be.

And then I realized, in order to get that large bolt through someone drilled the hole on the frame for the bracket about twice as large as it was. UGH. I’ll have to weld that close and redrill the hole before I can install the shock brackets.

Looking at the bottom leaf spring plate, I could see something wasn’t right. It didn’t look normal. But I’ll have to get it off first. The four nuts holding the U bolts were NOT fun to remove. All four on both sides of the rear axle took an extreme amount of effort to remove. I heavily sprayed them with PB blast to loosen them up, but it was still a tiring effort while laying on my side under the Jeep. I couldn’t use the impact air gun to get them off as there wasn’t enough clearance. So I had to manually turn the nuts all the way off with a rachet. My arms were quite sore after that day.

With the plate off, the axle started to separate from the springs. Progress!

With the leaf spring plates off, I was able to take a closer look at them. There shouldn’t be thread there, instead, it should be a solid rod with a hole for a cotter pin. After doing some research, turns out, these are CJ plates. So, I’ll have to order correct MB/GPW ones.
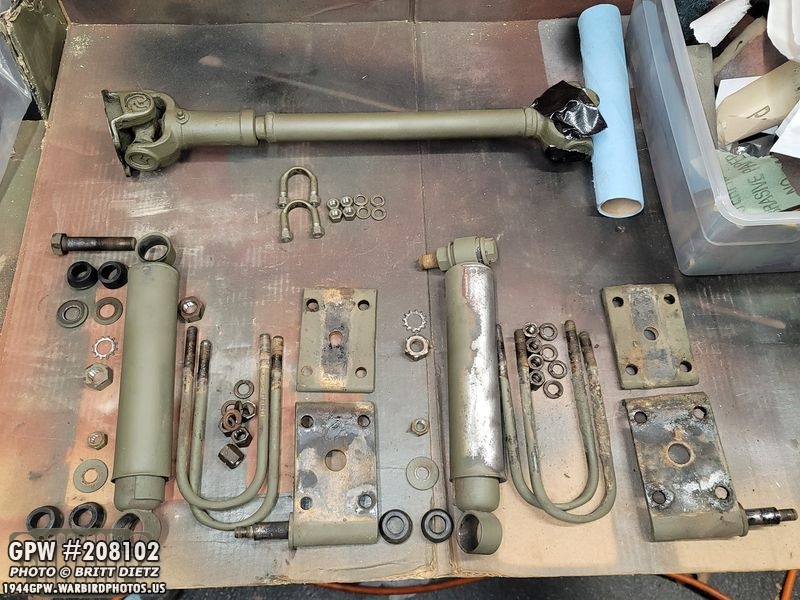
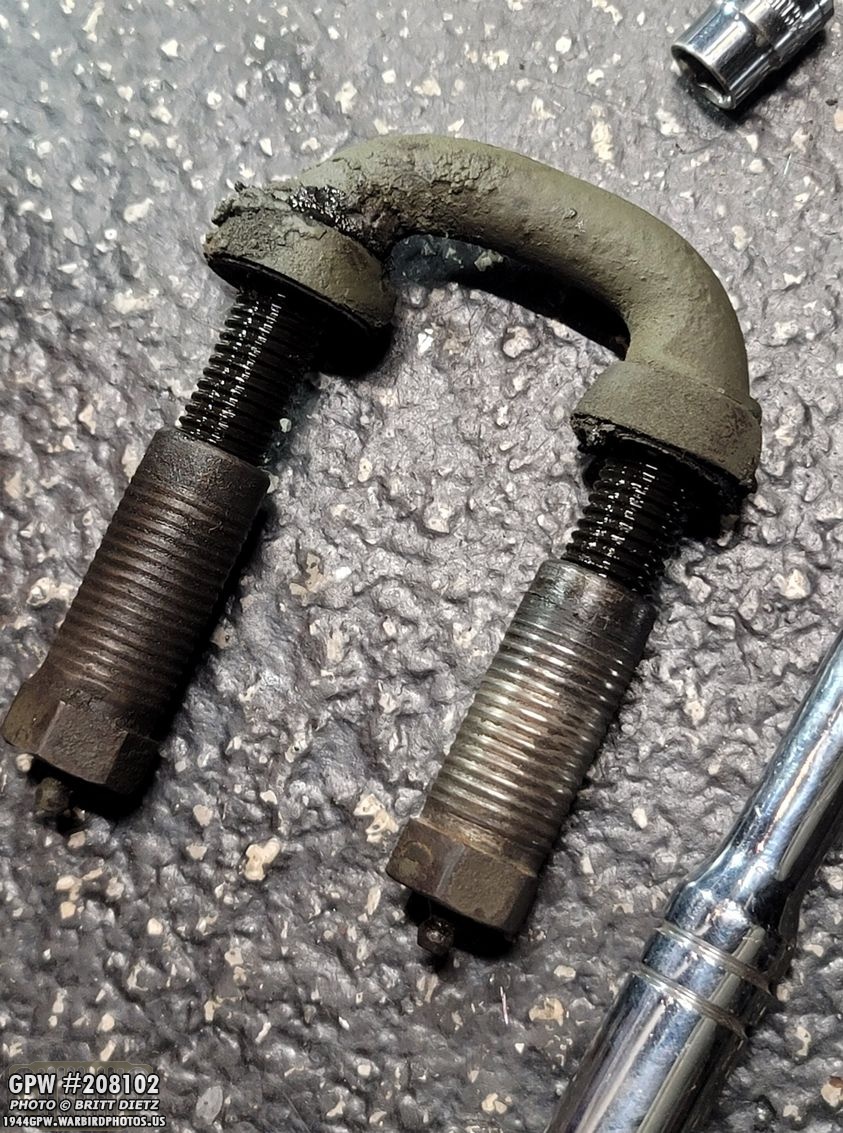
With the shocks off, U bolts, plates, extra plates which were between the leaf spring plates and the springs, and also the propeller shaft going from the rear axle to the transmission… I was able to really study what I have. The U bolts appeared to be way too long, so I believe these are CJ U bolts as well.
Time to remove the springs! First up is removing the shackles. They are in pretty good shape, as there was quite the resistance taking them off.

With the shackle off, I was able to slowly let down the spring. I had some padding down below incase it got away from me and fell down when removing the shackle.

With both springs taken off the Jeep, I’m finally done with the rear axle removal process! Here’s a look at everything I had to take off.

Taking a look at the springs, they are in great shape, though pitted and very dirty/caked with grime. I’ll need to replace the bushings on the springs, but otherwise they look good.

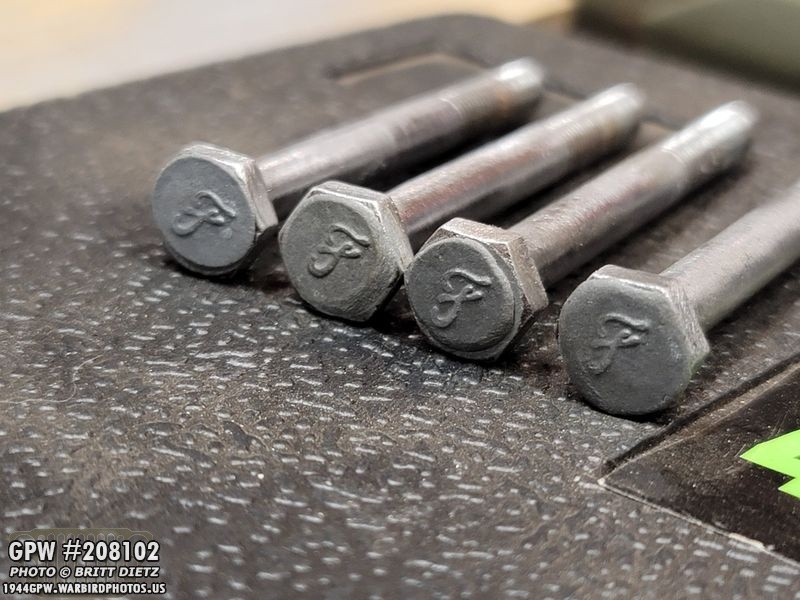
The clips on the springs are the GPW style, but the bolts have long since been replaced with Dorman bolts (which I’m told are just everyday bolts).

Since these bolts are seen, I decided to do my custom F stamping on them (which I’ve detailed in a past update how to do). In short, I used the belt sander to grind off the modern head markings, then used a course 60 grit sandpaper to scratch up the head. Then you take a small blob of JB Weld steel and press it on the bolt. I’d actually recommend even less than I show on the right image. And why didn’t I just buy F bolts? These are special 1/4 bolts that I’ve yet to see being sold by any parts dealers with F stamps. Originally they did have F stamps on them, so this is the next best thing.

Here are my F stamp templates. Each of these are a large blob of JB Weld Steel that I’ve pressed F bolts into in various hardness, let harden, and I’ve put some Permatex anti-seize on them so the JB Weld on the bolt head doesn’t stick.

After pressing it into the mold, where’s what the result looks! Now to let it harden for 24 hours.
Here’s the four bolts stamped but not yet smoothed out (they still need to harden).

The next day, you can start to sand down the edges to smooth it out. This first batch wasn’t my best.

Time to move on to the shackles. I labeled them as best as I could so I knew which one went where. The rear left shackle has a left hand thread.

With all the old grease and grime, I put the shackles in my ‘bucket-o-fuel’ to soak for a few days. Gasoline is an amazing cleaner for grease and grime.
Now to focus on the springs. I started to wire wheel them with the abrasive wire wheel. It’s a long process.

When I got to the spring clips, I found a lovely surprise… F stamps! I knew these are GPW springs by the scalloped ends of the leafs, but this confirms it even if I wasn’t sure.

The smaller clips look like they had an F stamp at one point, but it’s been worn away.

Jut a bit of wire wheeling, and it’s already looking great! Normal pitting, but not bad.

Took a while, but got one of them all cleaned up. Here it is next to the other spring which I’ve not started yet. It looks dirty, but that’s just the pitting.

Before starting on the other spring, I moved on to the shocks. After wire wheeling the paint off, it does indeed appear to be two original Gabriel shocks. A few months ago, I had wire wheeled the shocks while they were on the Jeep to find out what they were, so I knew they were Gabriels.

Here’s another look at the markings for reference. No F stamp, sadly, but the area above GABRIEL is worn a bit, so it’s possible they were there at some point.

After a bit of time, both shocks were totally cleaned.

Moving on to the next spring, I went above cleaning up the bolts and adding the custom F stamps to them.

This batch came out a LOT better. This time I made sure to press hard enough to really expand the JB Weld Steel.
After sanding them down the next day, this batch came out perfect!
Starting on the springs, the same thing… the two bigger clips had F stamps!

And the smaller clips again look like they have partial F stamps, but the rest has worn away.

After I finished removing all the rust and paint from the second spring, I went ahead and reinstalled the bolts. They look the part!

Both springs are finished and ready for painting!

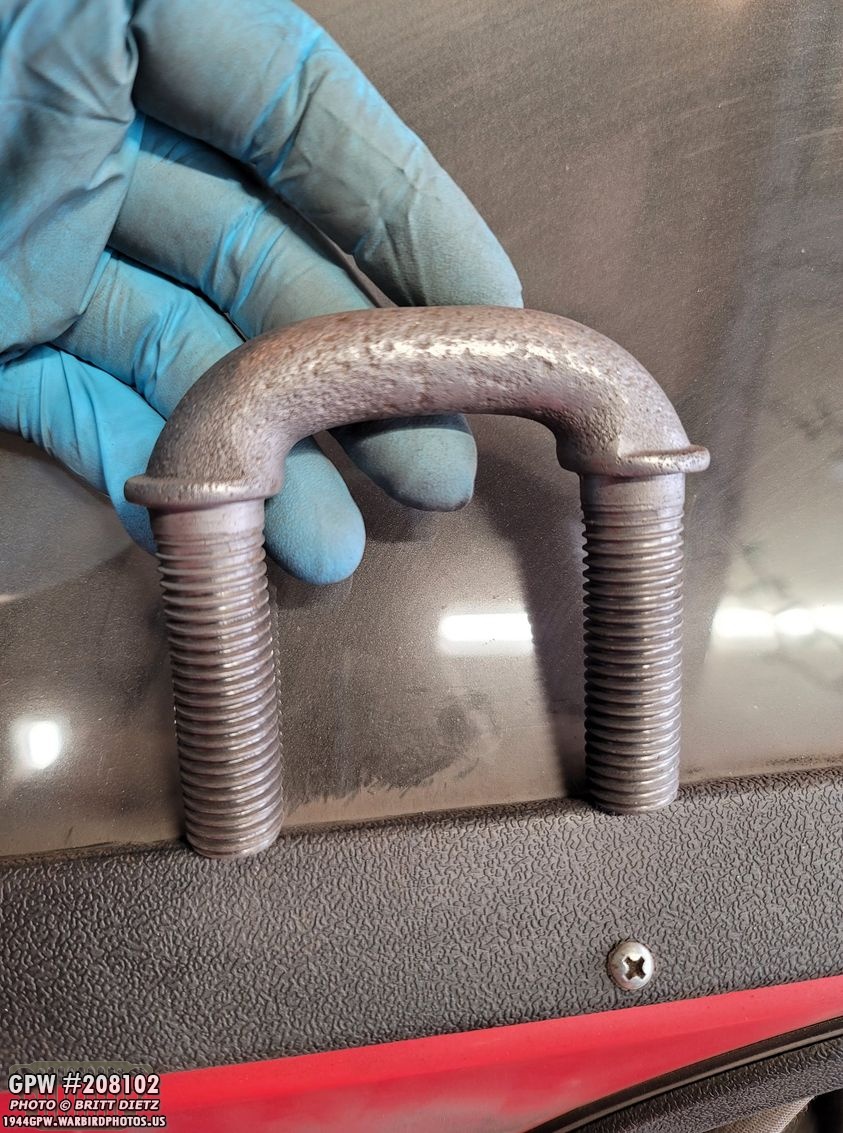
As mentioned earlier, since I had CJ U bolts and leaf spring plates, I went ahead and ordered the correct ones from &Ron Fitzpatrick Jeep Parts. They arrived 2 days later. I could have tracked down NOS or Take-Off parts, but for safety, I decided to go new. I also got rubber bushings for the shocks.

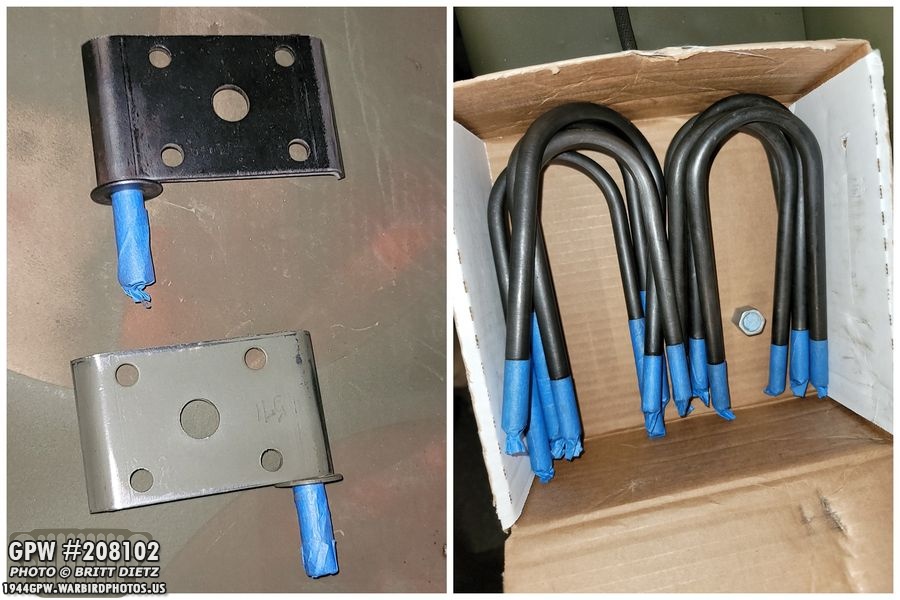
Here’s a look at the difference between the CJ leaf spring bracket (top) and the MB/GWP style (bottom).
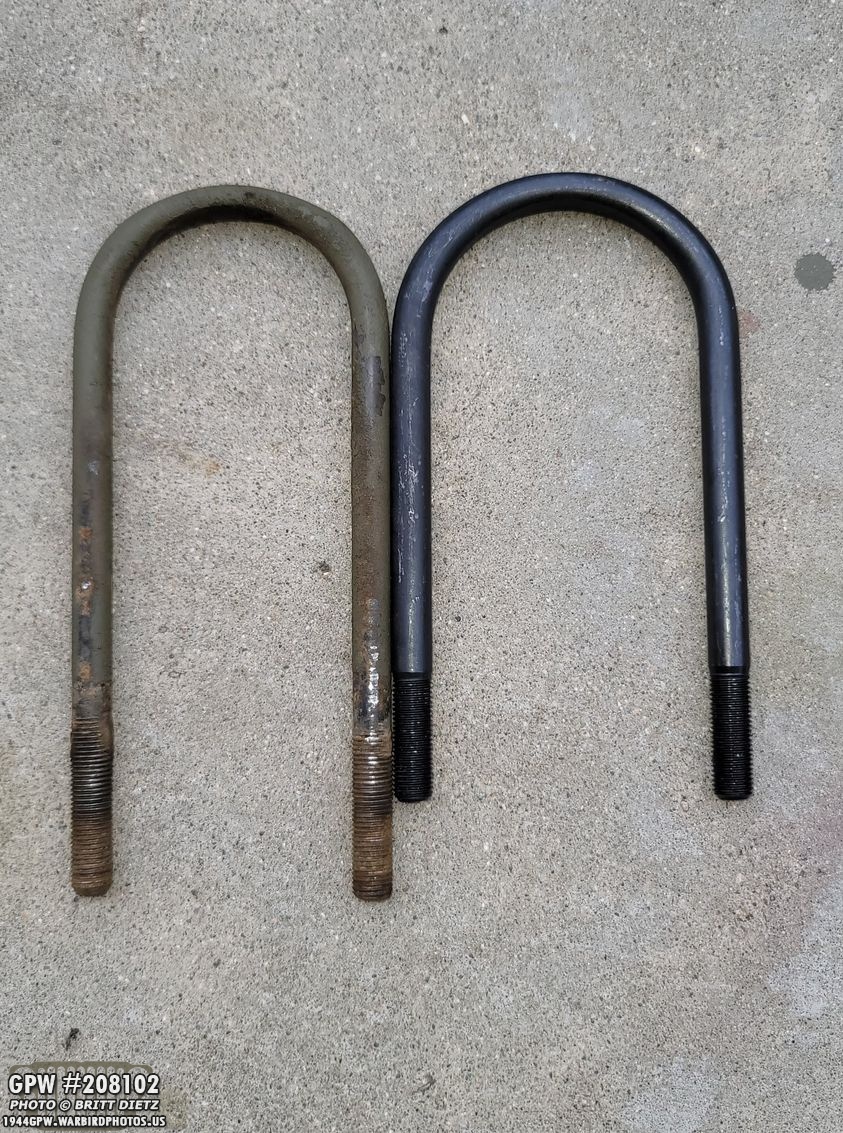
And here’s a look at the CJ extended U bolts (left) and the GPW/MB style (right).

I have to say, though, &Ron Fitzpatrick Jeep Parts GPW U bolts are a perfect match. Even the F stamps are perfect. The outer ones are originals I got from Roger Smith the inner black ones are the repros. Great job RFJP!
Next, it was time to sandblast! Haven’t sandblasted parts in some time! Pitted, but the shackle came out pretty good.
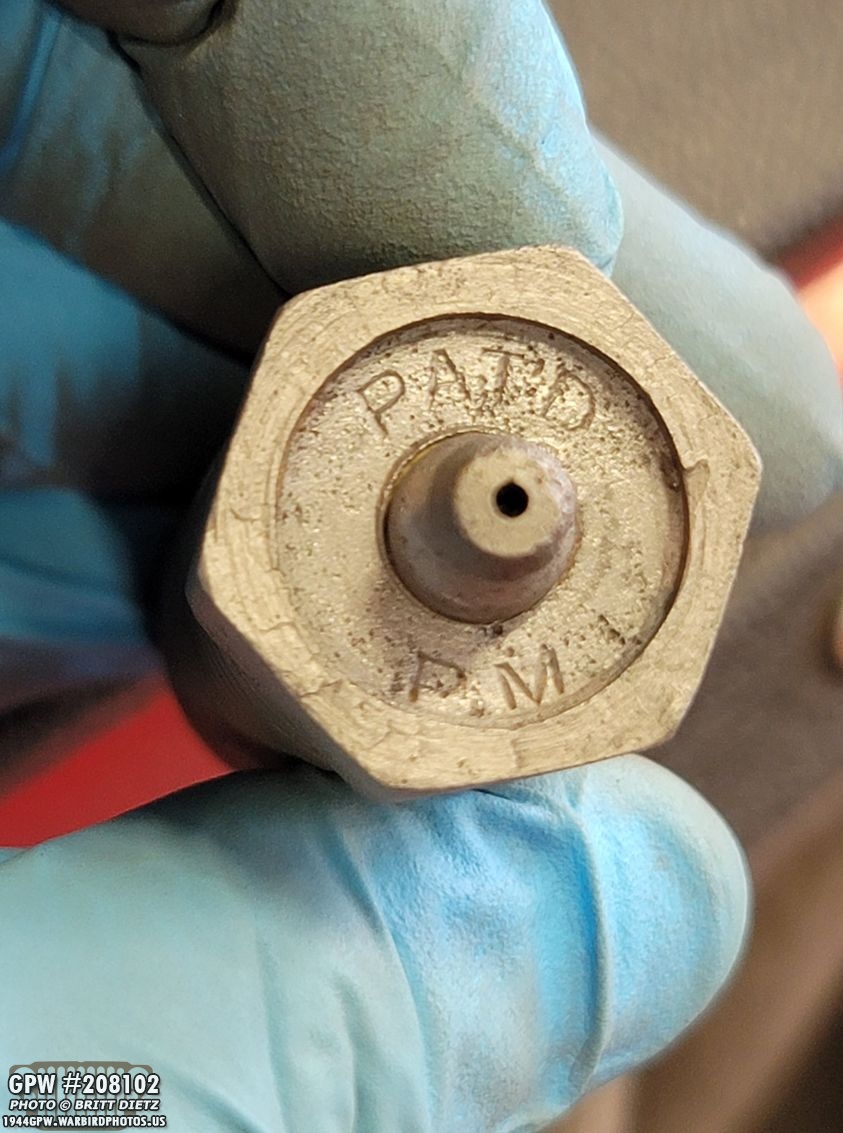
The shackle bushing caps have PAT’D PM on them. I couldn’t find much information on these if they are original or replacements. I saw one post on G503 mention they might possibly be early MB style, with the cast zerk fittings.

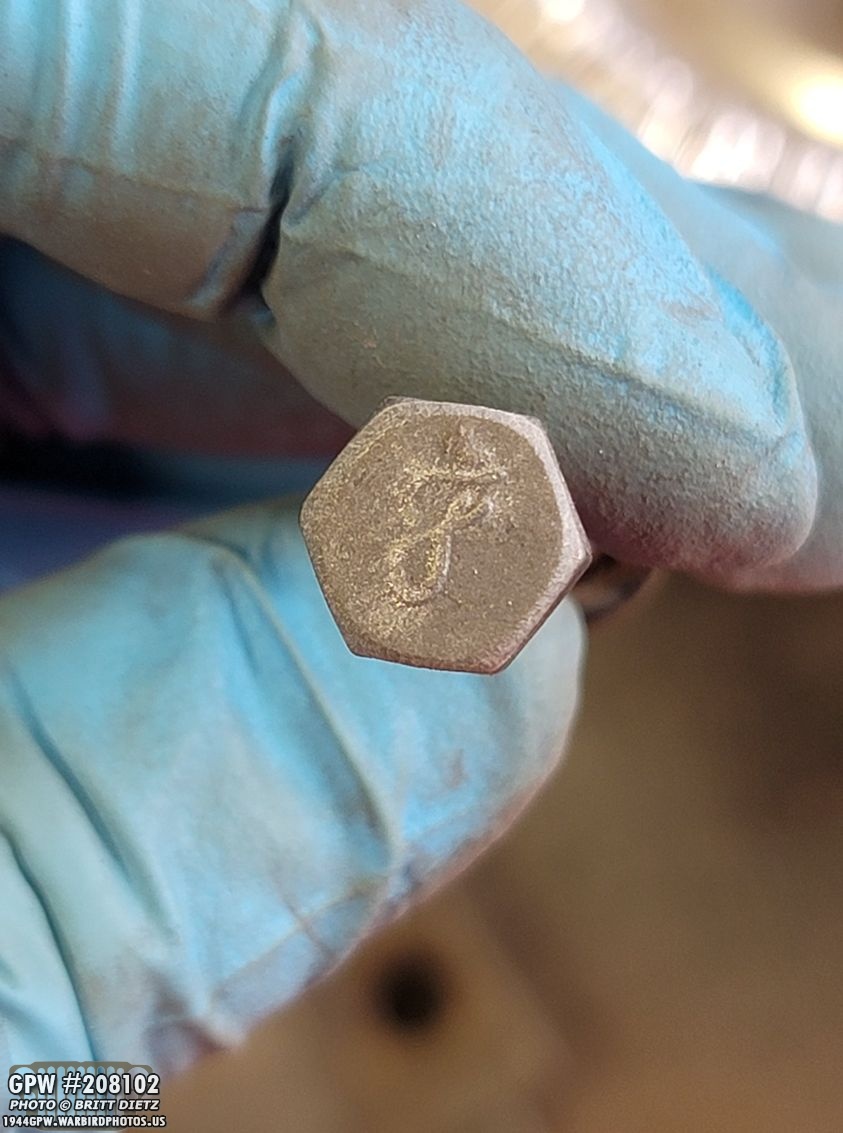
When cleaning the retainer cups, I noticed a tiny F stamp on one of them! Pretty cool to see. The other three could have F stamps, but they were pitted to the point that they are not visible anymore sadly.

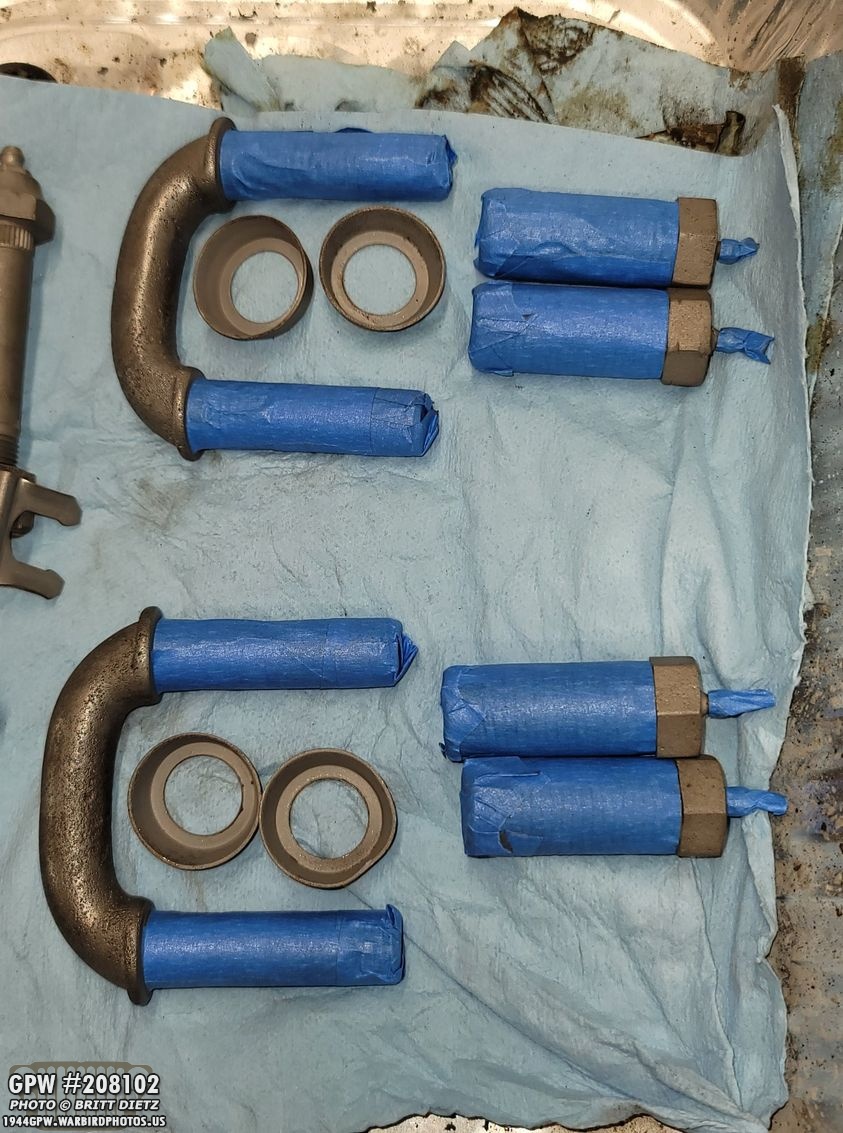
All clean and ready for paint!

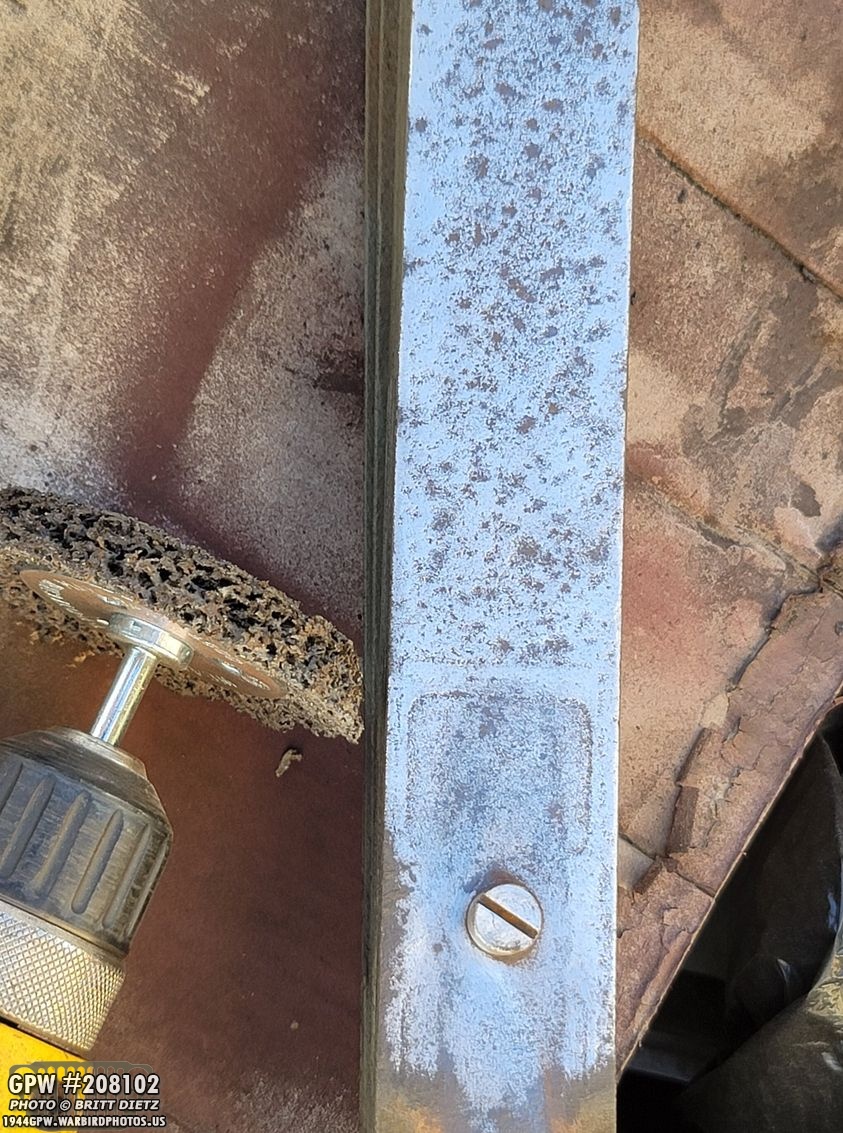
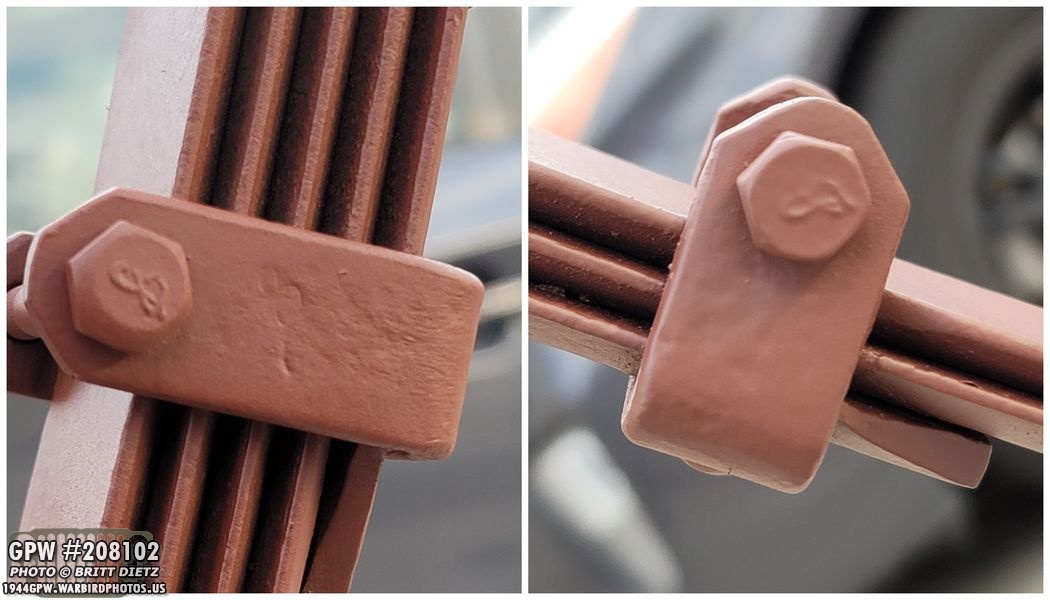
The brake line clip holding the rear axle flexible brake line to the main hard line is an original clip. After cleaning it up in the sandblaster, you can easily see the Flex-o-tube co markings. I’ll reuse them back on the Jeep when putting the new brake lines in.
After using a scotch pad to rough up the paint, the two rear repro leave spring plates and U bolts are ready for paint. I wanted to protect the threads on the U bolts.
Shackles are ready for painting!

First up was &Ron Fitzpatrick Jeep Parts Red Oxide Primer on the U bolts, retainer cups, and the U bolt nuts.

I did hit the leaf spring plates with some touch up red oxide primer as well, then once they were dry, I hit them with 33070 OD Green.

The next day, I hit the U bolts and shackle parts with 33070 OD Green as well. Three coats total.

Shackles are all finished!
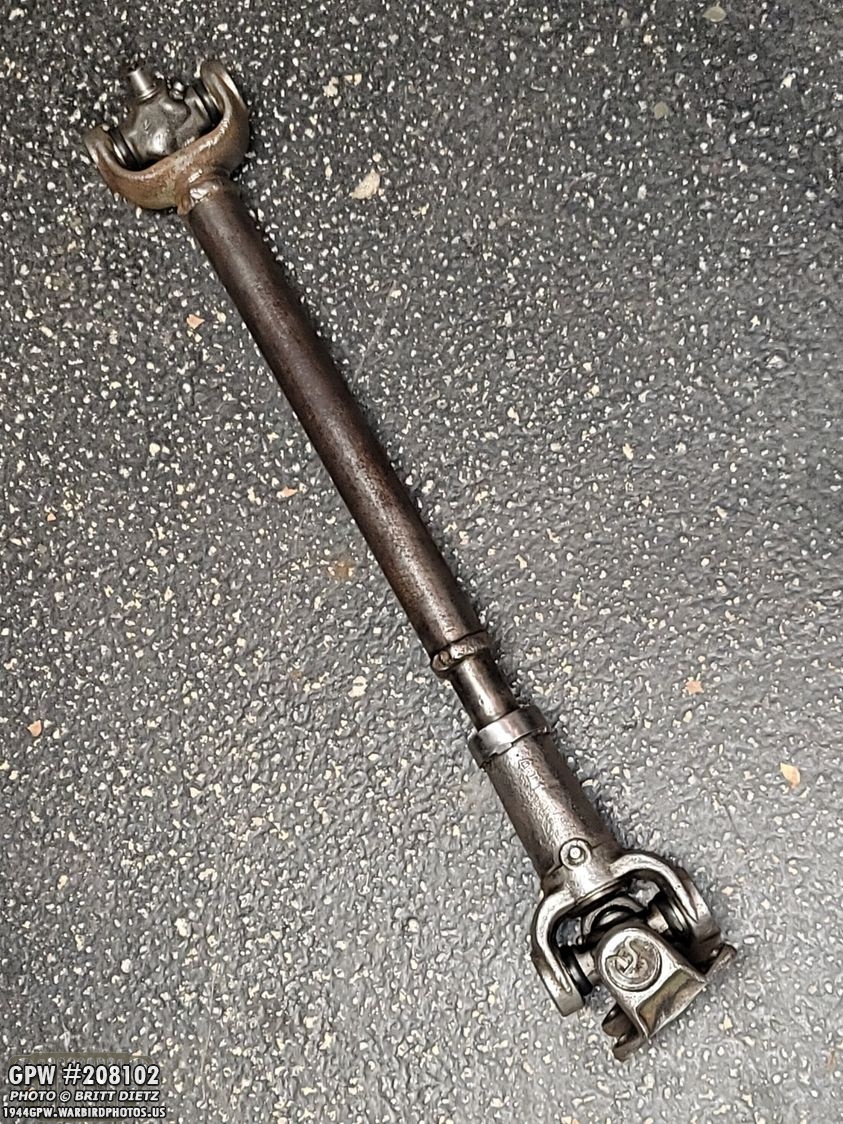
I spent some time wire wheeling the rear propeller shaft. Got it as clean as possible!

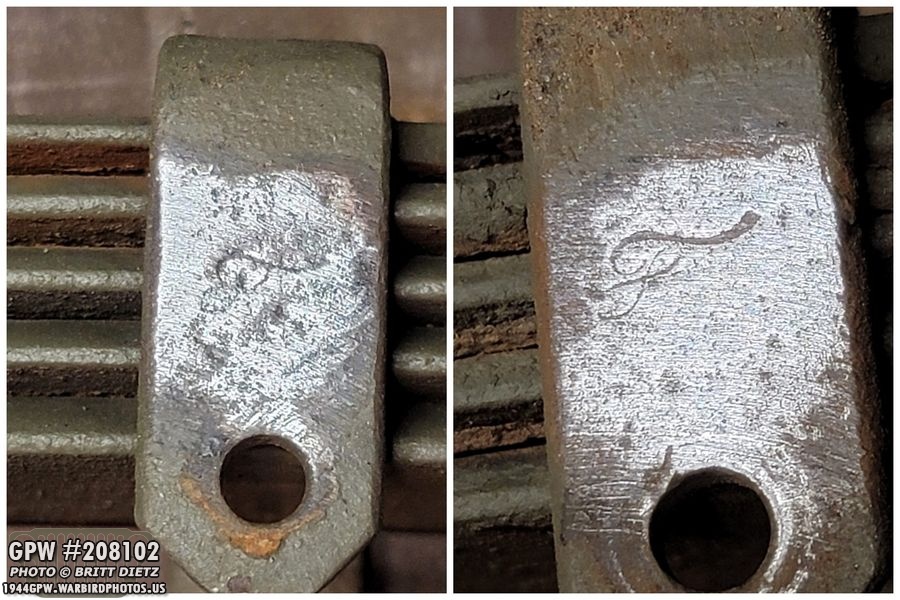
Investigating the yoke on the end of the propeller shaft, I happily spotted a GP number (GP 4866) and a faint F stamp!

The shaft also has these markings on them. R means Rear maybe?

And some other markings on the propeller shaft ends.

Also, in a very hard to photograph and see area, what looks like HUBBARD and a large W. Has anyone seen anything like this before? Can’t find any info on it.

Before I could start painting the springs, I need to replace the bushings in them. I had bought a set of them from &Ron Fitzpatrick Jeep Parts a few weeks ago.

Looking much better after cleaning the end up (after wire wheeling, I also used a wire brush on a drill bit to get into the tighter areas, and soaked both ends of the spring in fuel.

To drive out the bushings, I found that a 13 long socket worked perfectly. Large enough to evenly push on the bushing, but not tight enough that it would get stuck when driving out the bushing. I also heated up the area around the bushing, which seemed to really help loosen it up.

And here’s a look at the first bushing after it was driven out.

To drive in the new bushing, I first cleaned out the inner surfaces of all grease and grime, then I heated the outer area with the torch again. I then softly tapped in the new bushing with a hammer to get it started. I then took a thick piece of metal to use as a buffer as I hammered it so it was evenly hammering the bushing downward.

After a bit of work, I got the bushing nice and flush!

Time to primer! First up, the shocks and the propeller shaft. I did two coats of primer on them.

With the bushings in place on the springs, time for them to get red oxide primer! I used spray paint for these rather than the spray gun. Two coats of primer for everything.
Here’s a look at the fake F stamps, looks pretty real to me! Also the F stamp on the clip is showing through the primer.

24 hours later, another non-windy day (rare around here in SoCal), so I was able to put three coats of 33070 OD Green on the shocks, springs, and propeller shaft. What a difference from how they started.
Another look at the F stamps on the springs. I’m happy the F stamps on the clips still show through the multiple layers of paint. When I took them off the Jeep, you couldn’t see them at all.

Being a photographer, it’s nice to have light stand tripods that I can use to hand parts to dry. A long piece of PVC pipe with holes drilled on either side makes a perfect hanging rack.
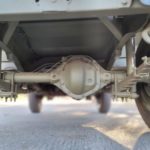
Finally, I took the wheels off the rear axle, and put the rear axle on a dolly then rolled it out. I will need to get underneath this tight area to do some welding for the shock brackets… not looking forward to that! Jeep looks odd without rear wheels!

A look underneath in this camped area where I’ll be working the next few days. Here you can also see the six jack stands I have. Call me paranoid, but I’d prefer not to be crushed by a 1/4 ton Jeep!

Here’s a quick shot of the CJ rear axle next to the covered up GPW real axle. As I work around the Jeep, I wanted to protect the GPW rear axle from any accidents. I’ll try and get a photo of both axles without covers for comparison. But it’s getting closer to replacement time!
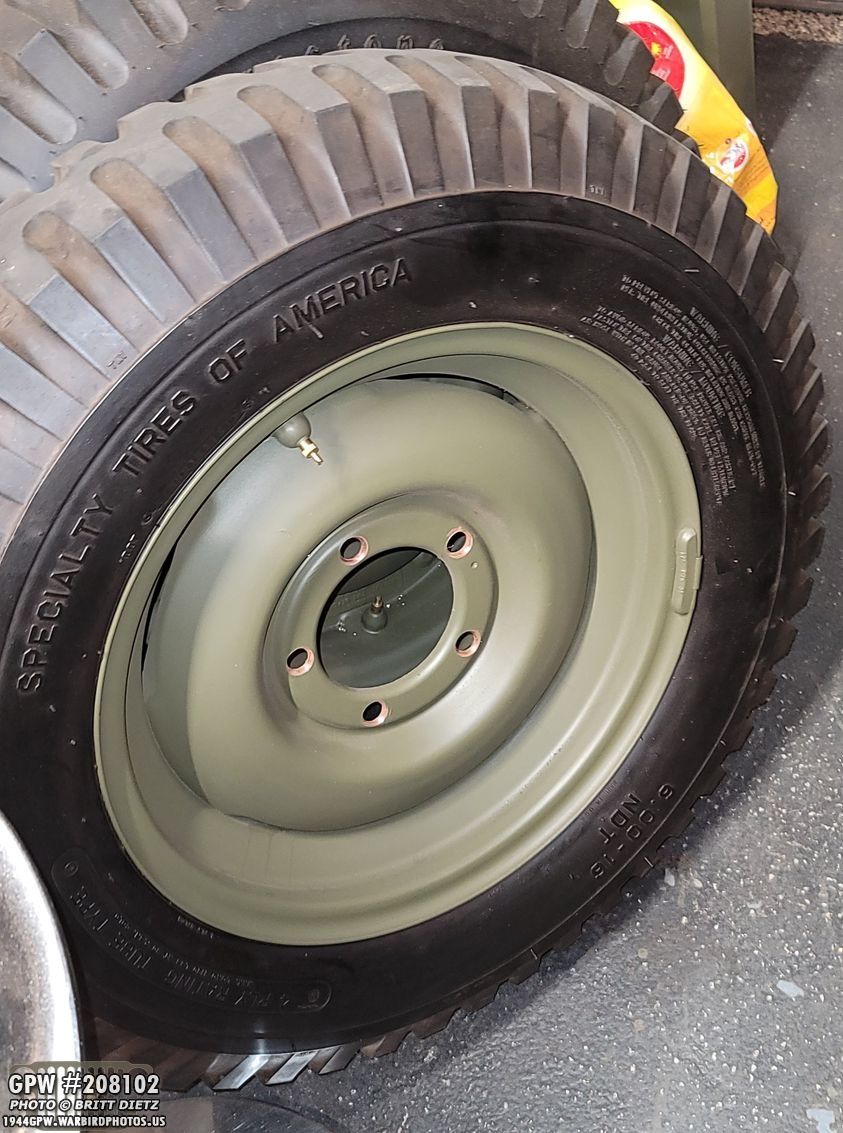
The tires on these CJ rims are spoken for, but I plan on selling the rims, brake lines, CJ axles, CJ spring parts, CJ Steering system, etc once this project is done. If anyone reading is interested or knows someone wanting perfectly good CJ axle items, let me know!
Wrapping up the update for this week, I wanted to post about a tool I got via ebay which will come in handy once the axles are installed and I bleed the brakes. This is a @[1332556716805973:274:M.V. Spares] replica of the original brake bleeder tools. Shout out to curtsjeeprestorations on ebay who wrote a nice note on the order receipt saying he’s a fan of the restoration page!
And that wraps up this week’s update! Lots of work, and it’s not even half over yet! Next week I’ll be installing the rear shock brackets, reinstalling the springs, shocks, and rear axle with combat rims! Till next week…