 Work continues as more gets added to the Jeep
The last week has been pretty busy with work done on the Jeep each day. The pace has certainly slowed down dramatically, and many of the projects I have left take a long time to complete, so it’s not as productive feeling since these projects are tedious. The good news is the Jeep RUNS! The bad news… there’s another issue.

I installed the air cleaner bath in the engine (much to the not quite aligned MD Juan holes for the brackets). But this was the last major item I had to install in the engine.

Since my voltage regulator is 6 volts, I can’t use it with my 12 volt Jeep. BUT, I can hook up the alternator to the voltage reg on the BATT terminal to act as a ‘pass-through’ to make it appear the voltage regulator is being used. You really have to stick your head into the engine to see that it’s just using the BATT terminal. Eventually, I’ll either 1) get 12-volt guts for the inside, or 2) get junked up regulator guts and make a pass through bypassing the coils.

From this angle, you can’t tell the voltage regulator is not totally hooked up correctly, and you can’t even see the solenoid nor all the wires that go to it. I think I did a pretty good job hiding things. Not that I’m going to get this Jeep judged for an award, there’s still a lot on it that needs changing eventually (like the CJ Engine and Axles).

With the wiring finished, here’s a look at my wire creation and modification station inside the house. Soldering iron, wire clip ends, heat shrink wrapping, etc.

Now that the Jeep tub is fully mounted and torqued to the frame, I was able to drill and mount the spare tire support bracket. That is the last thing I need to drill on the back of the Jeep, and one of the very last things overall needing any drilling. Speaking of spare tire…
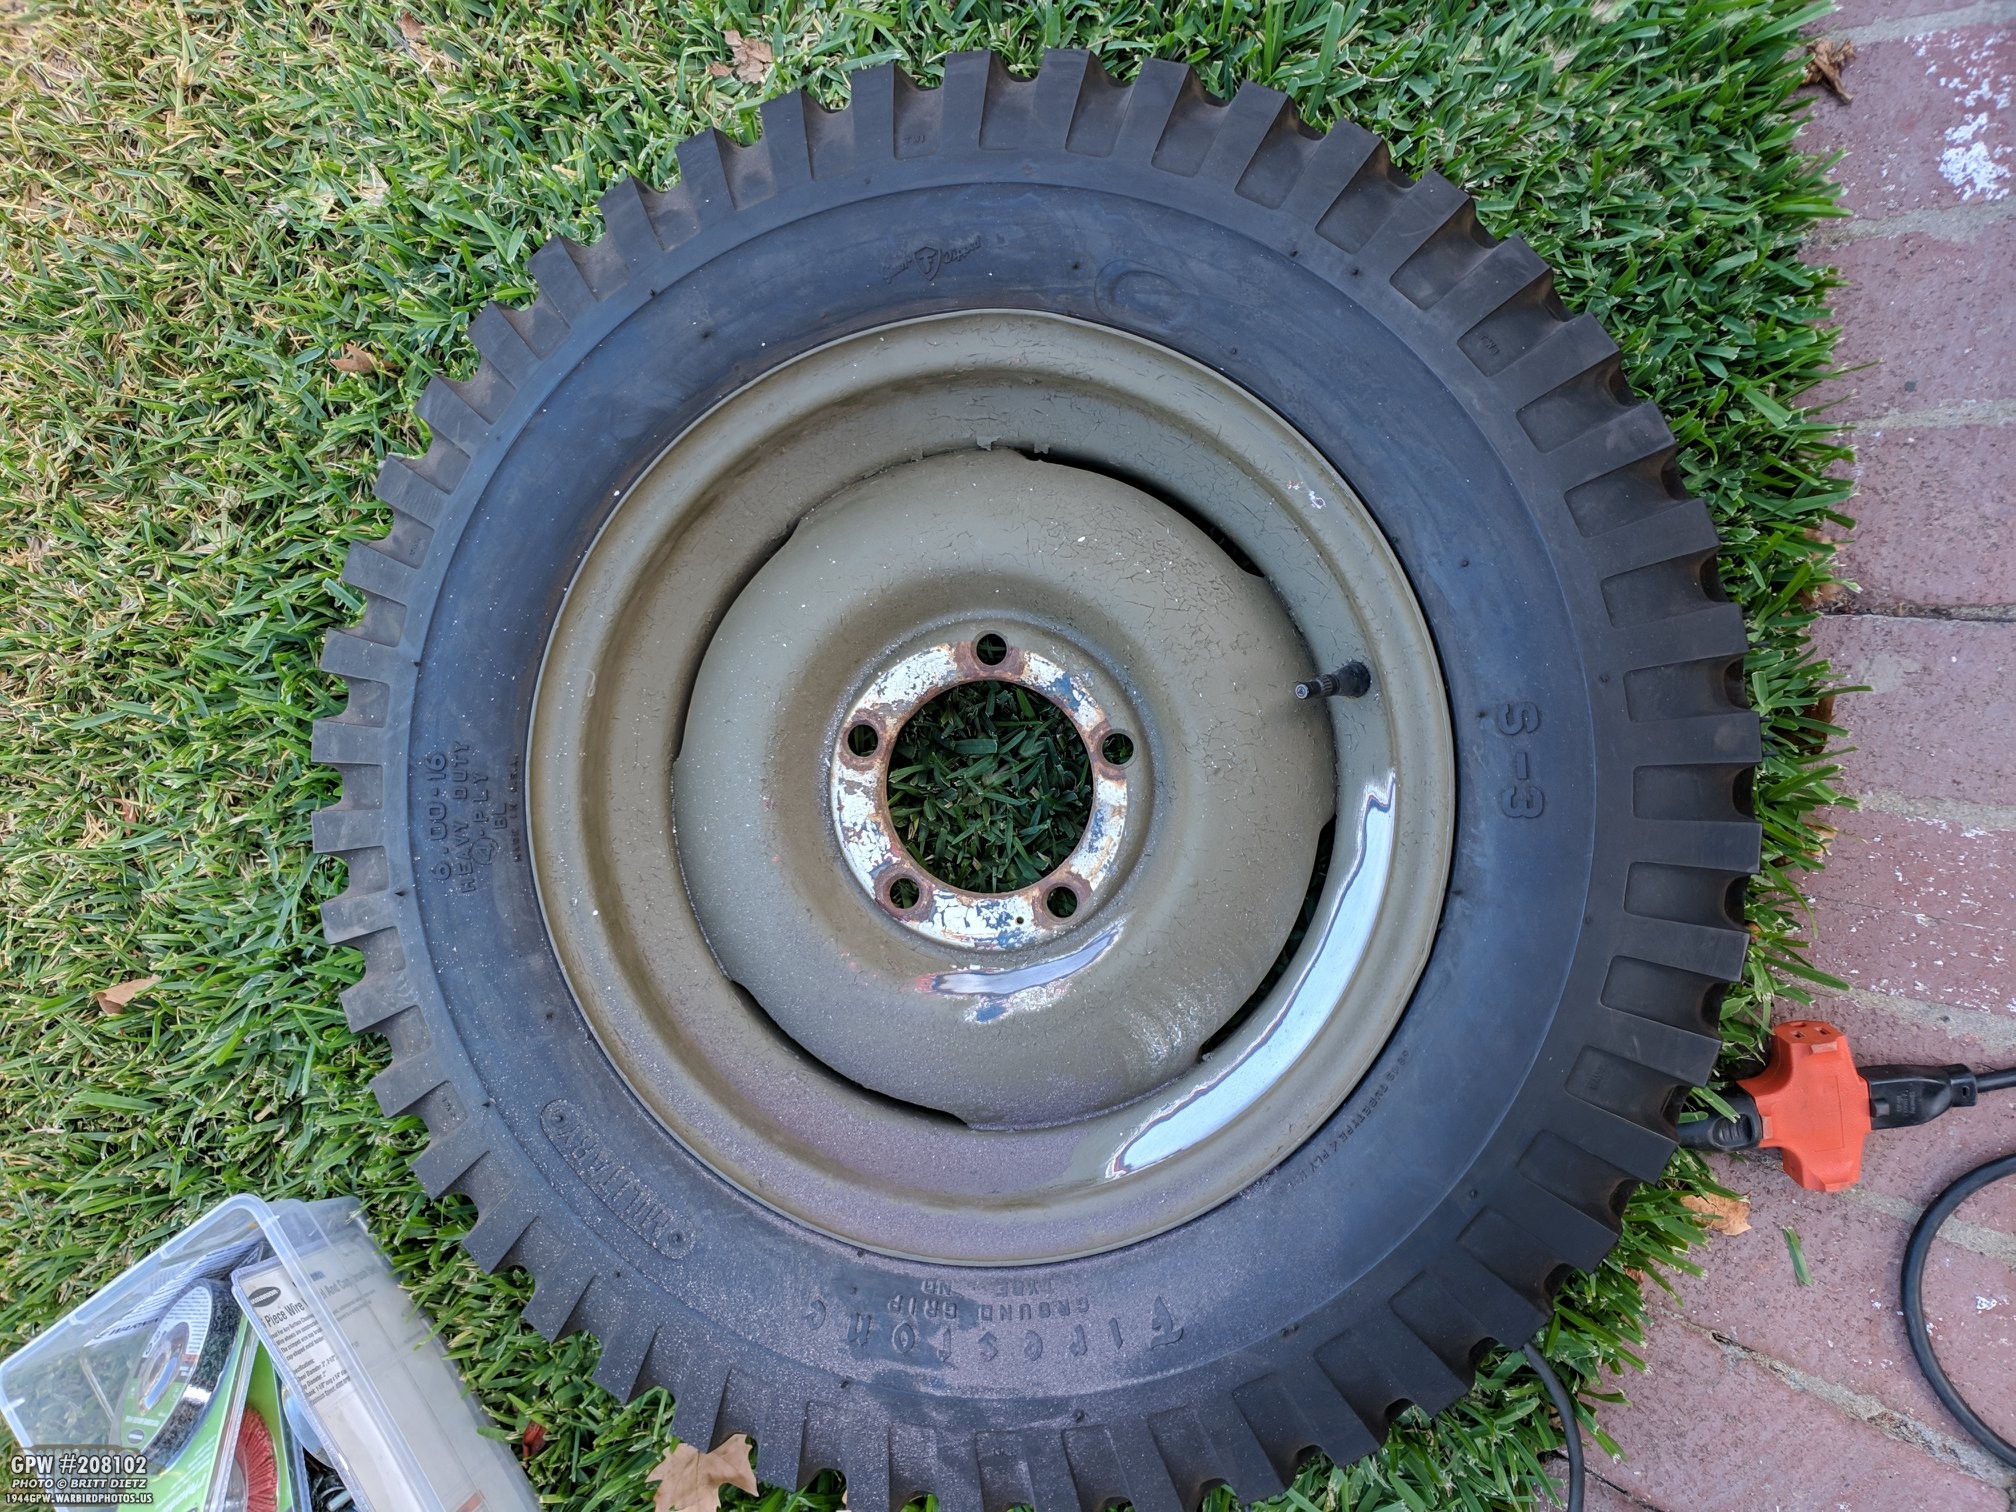
It was time to get to work restoring my spare tire. Here it is as I started the long process of removing all the paint and primer. Yes, this is not a combat rim, but those are over $200 per tire… so times 5 tires you get over $1,000. I’m not in any hurry to replace them. I’ll wait till I get the GPW axles and get the combat rims then.
About halfway done on the front side of the tire. It’s a slow process, done with a drill and a nylon wire wheel.

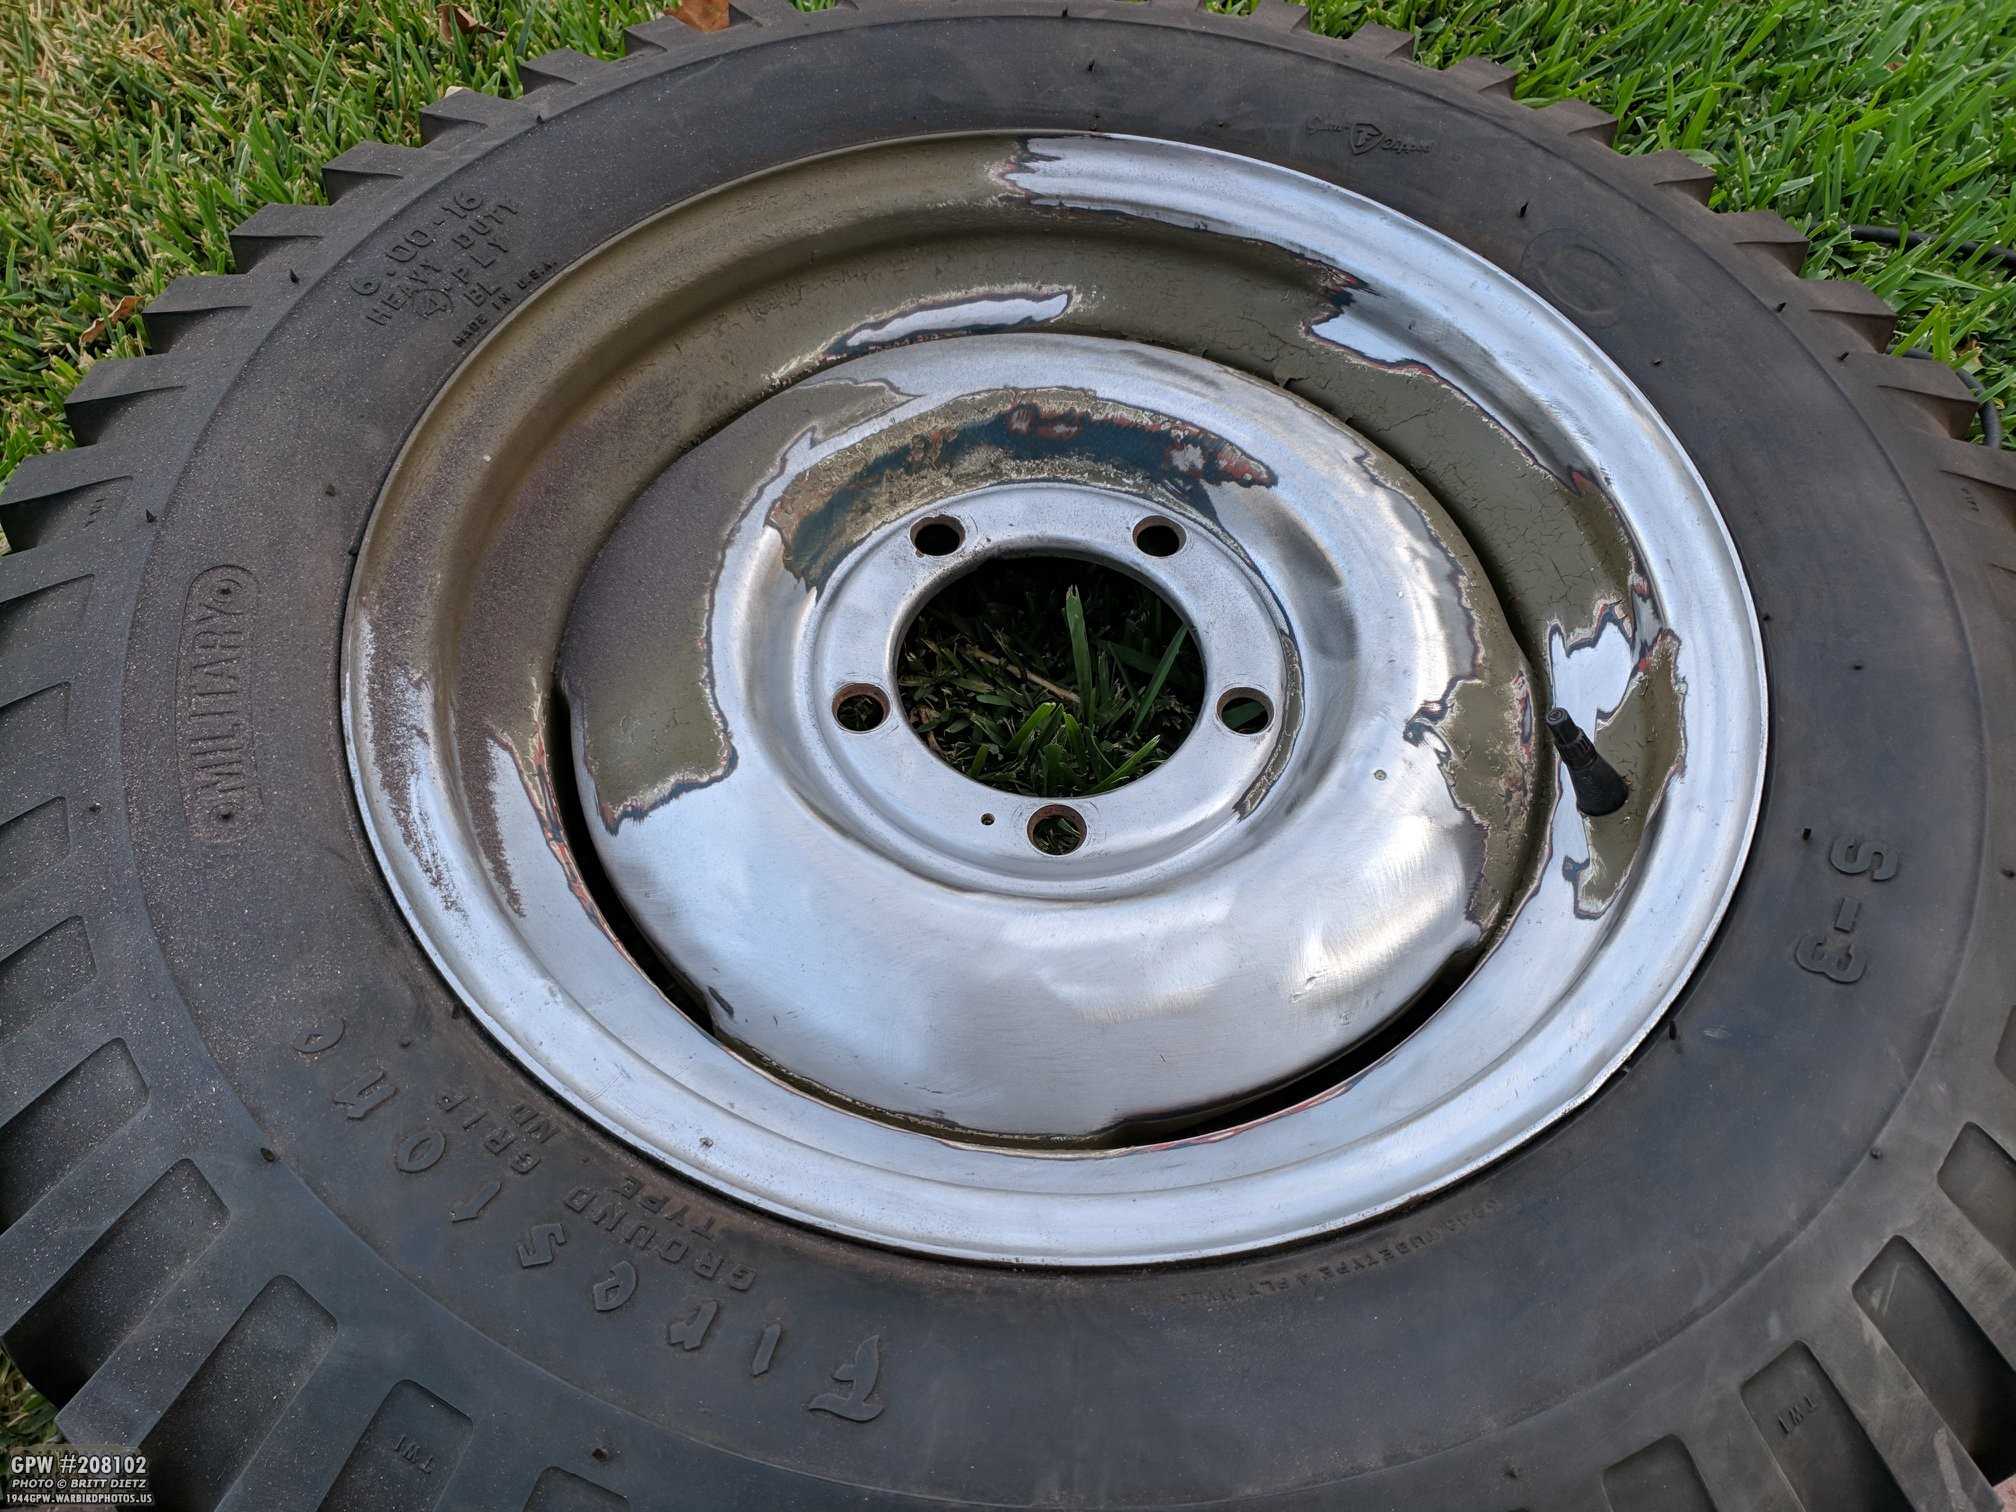
A while later… it’s all done! I continued with the other side, but not as perfect of a job since it won’t be seen much.

With the paint removed, I then used acetone to clean the rim really good and used the trusty blue painter’s tape to mask off the rubber for painting. I used newspapers to help widen the masked area without having to use an excessive amount of tape.

Here’s the inside of the wheel all painted with red oxide primer! This weekend it will get the first and second coats of OD Green paint. Hopefully, by Monday or Tuesday, I can mount it on the Jeep!

Looking inside the Jeep, the wiring is so close to being finished. Just some things to clip, holes to drill, and replacing that faulty circuit breaker (see the previous update).

Here’s the fuel sender wire that goes from the fuel gauge to the fuel sender on the gas can. I’ve drilled a hole on the bottom dash lip for a clip that holds it in place. It appears this is often forgotten about when many people restore jeeps. My original tub had this hole for this clip.

Next to that clip, I drilled and mounted the special custom push-button starter bracket I made. This is before I tightened the bracket, so it’s a bit tilted. The screw is also unpainted.

Here’s a look inside the dash at how that push-button starter and the custom bracket that hides it sits. It’s pretty solid and is super easy to push the button. Remember, you can either push this button or use the normal foot starter switch to start the Jeep. I also like that it acts as another clip, per se, for the fuel sender wire.

The very last wiring needing to be done was on hold until a replacement 10 amp circuit breaker arrived. Peter Debella Jeep Parts send me a replacement even though I had ordered the breaker set back in December! Thanks Peter! After it arrived I immediatly hooked it up, put the fuel wires back on it, and tested the sender. SUCCESS!
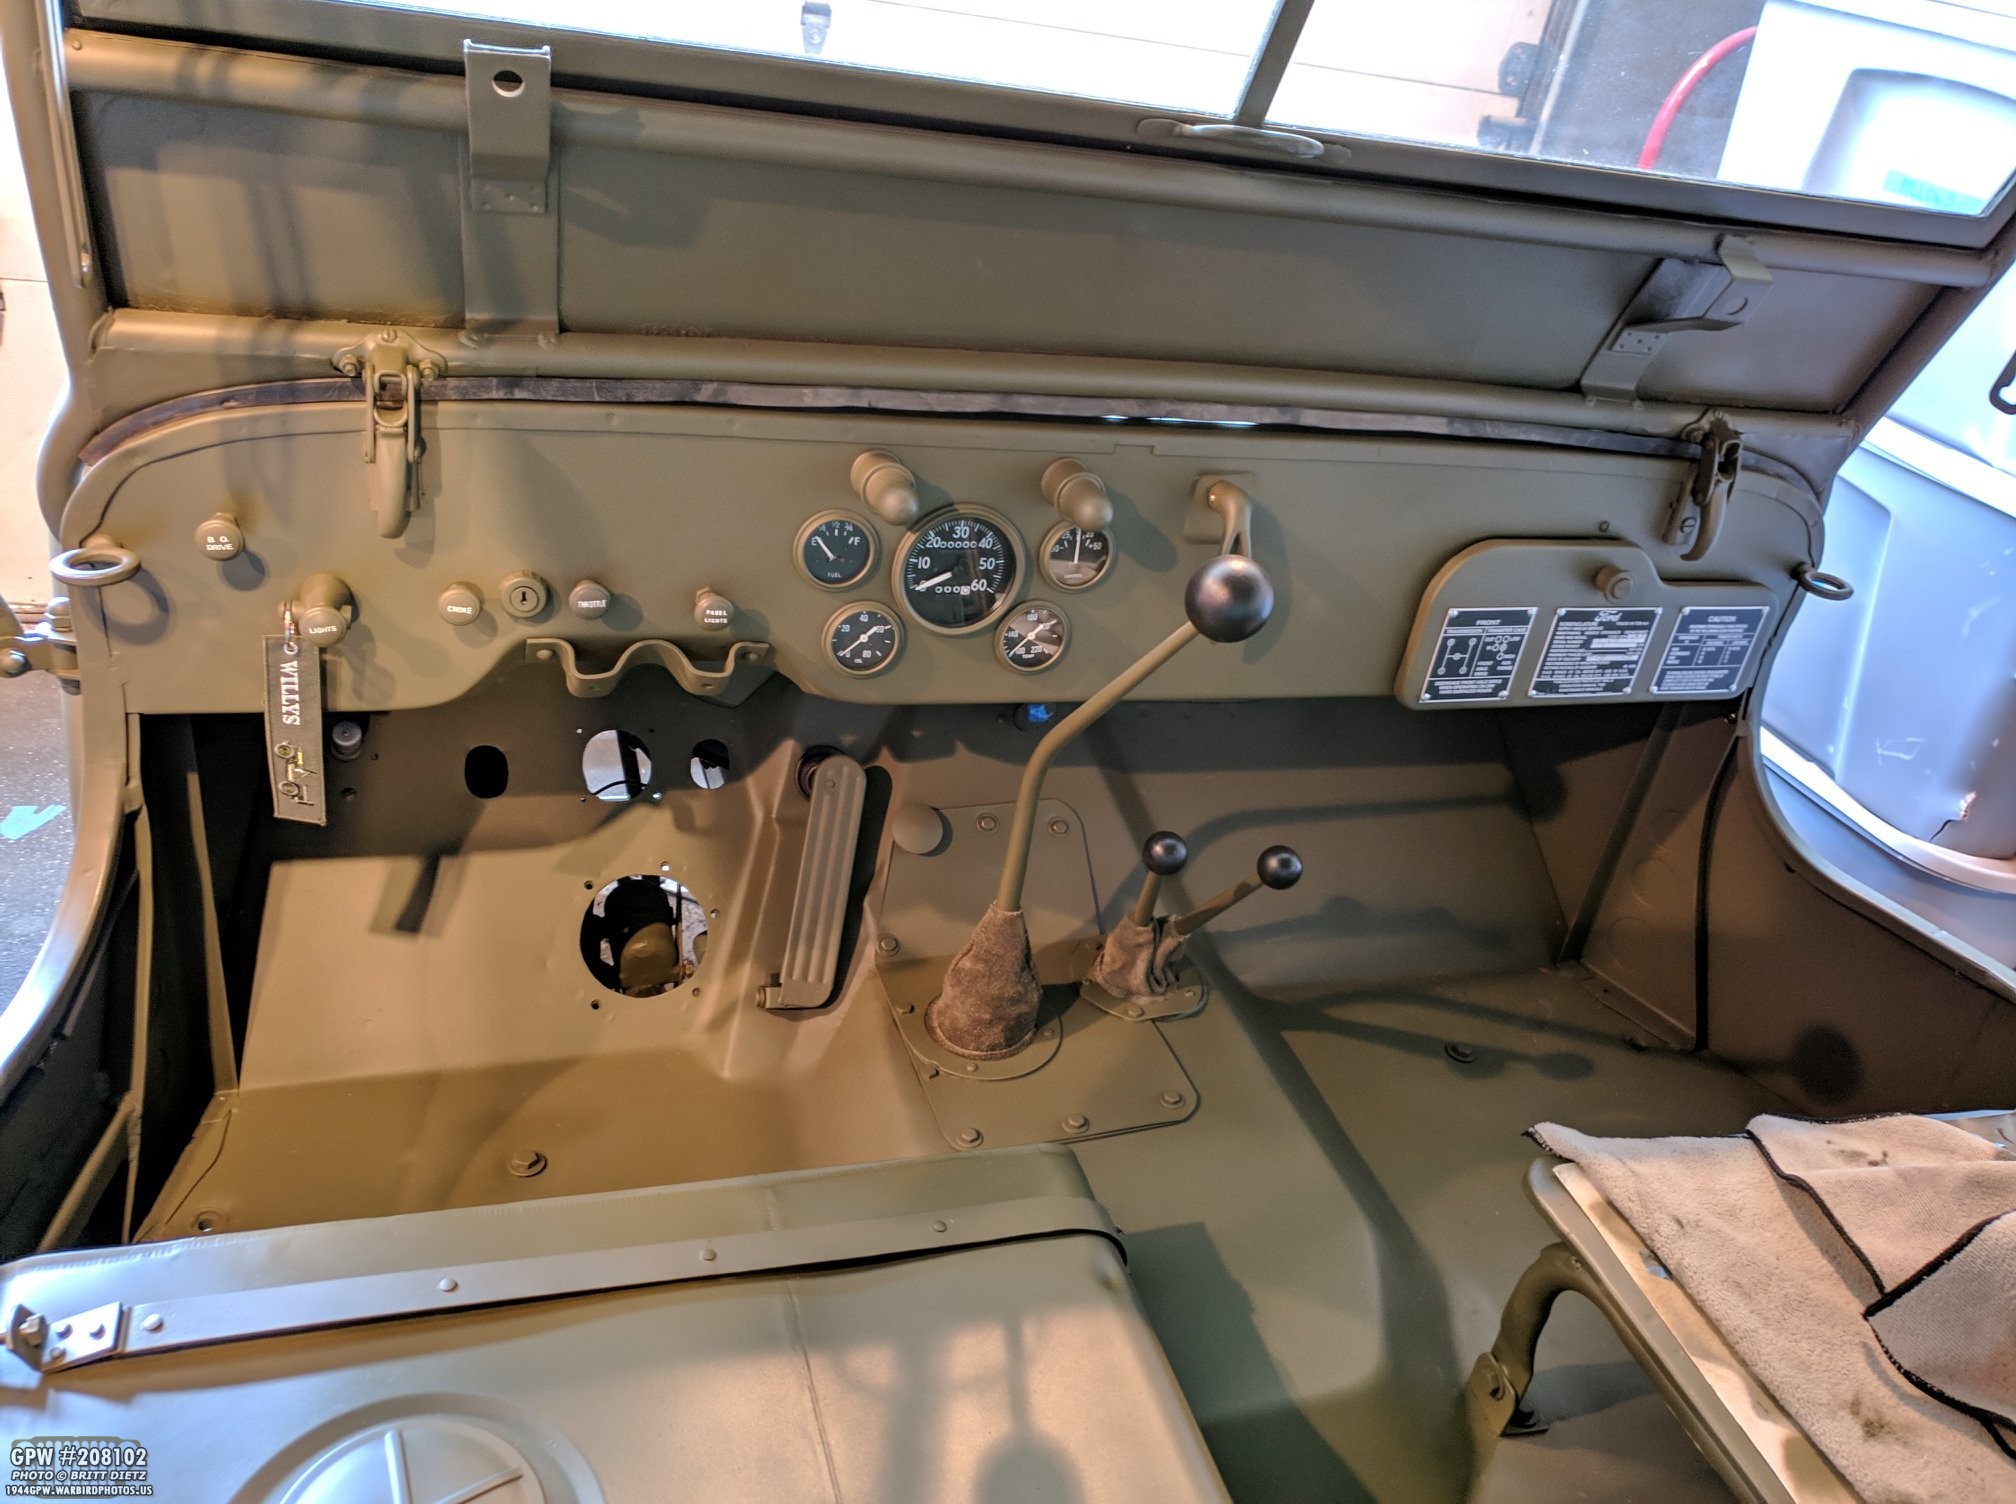
With that, the dash wiring is complete! Looks nice and clean, and unless you know it’s there, you won’t be able to see the push-button starter.

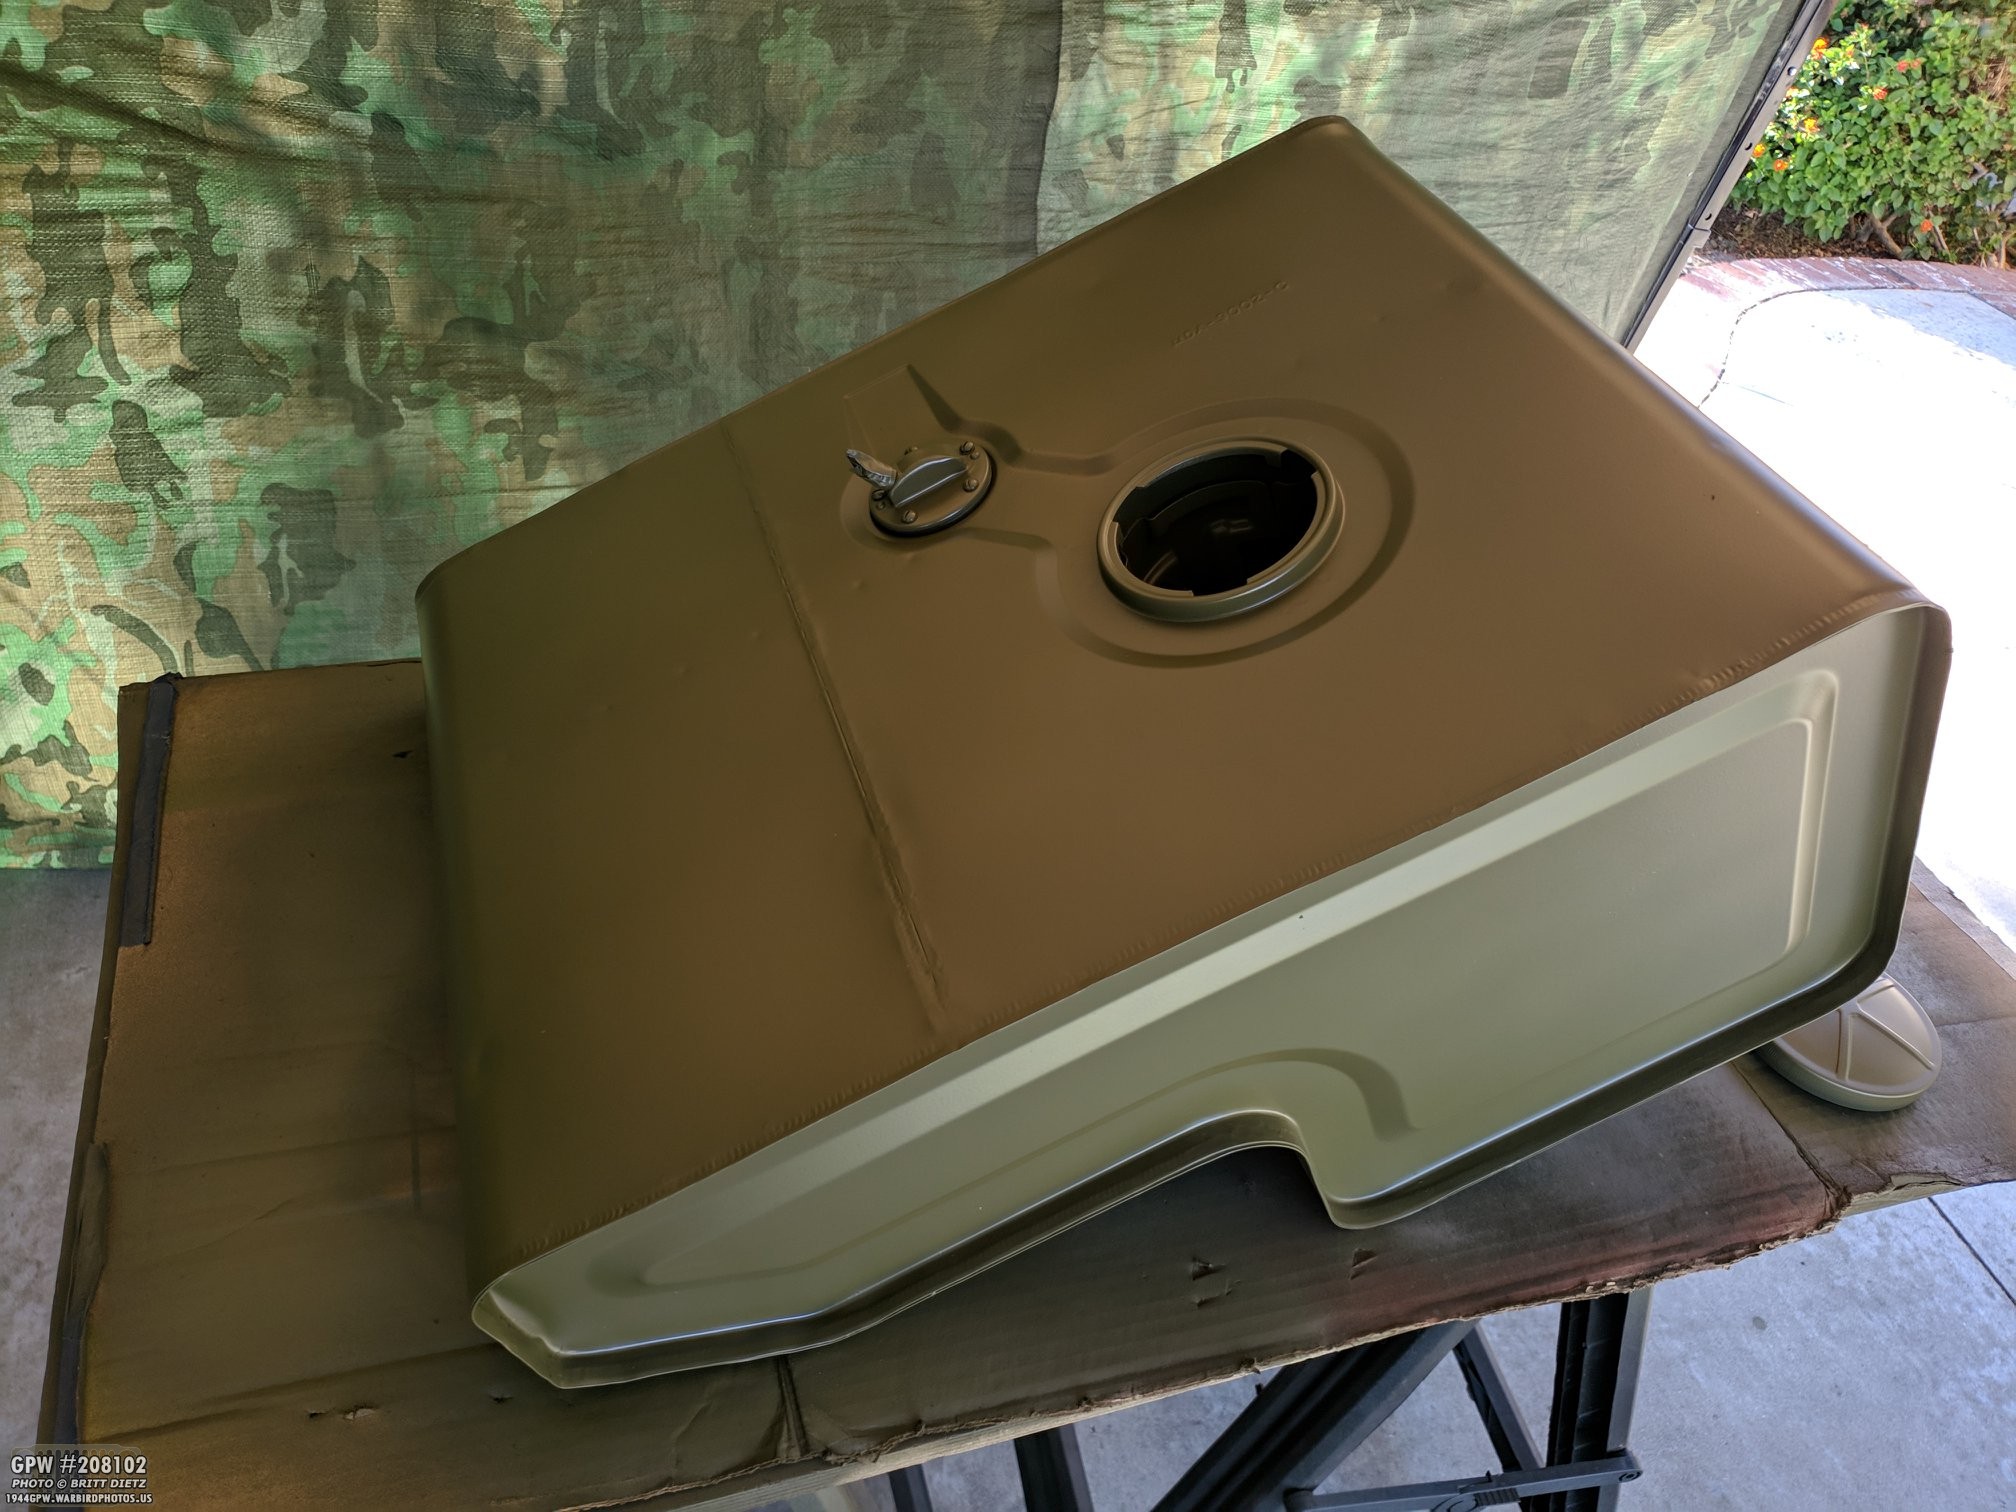
Speaking of the gas tank… the new tank I got from Ron Fitzpatrick Jeep Parts has been sanded, roughed up with a scotch pad, and primered any areas that had some metal come through. Ready for painting!

Here’s a look at the Joes Motor Pool gas tank filter and cap vs my original. The original has gotten pretty rusted (just surface rust) from when the radiator shop was going to try and repair it. The JMP repro filter and cap are actually more authentic to the standard Jeep style. My original one I haven’t done enough research to know if it’s a wartime variant, but I believe it is.
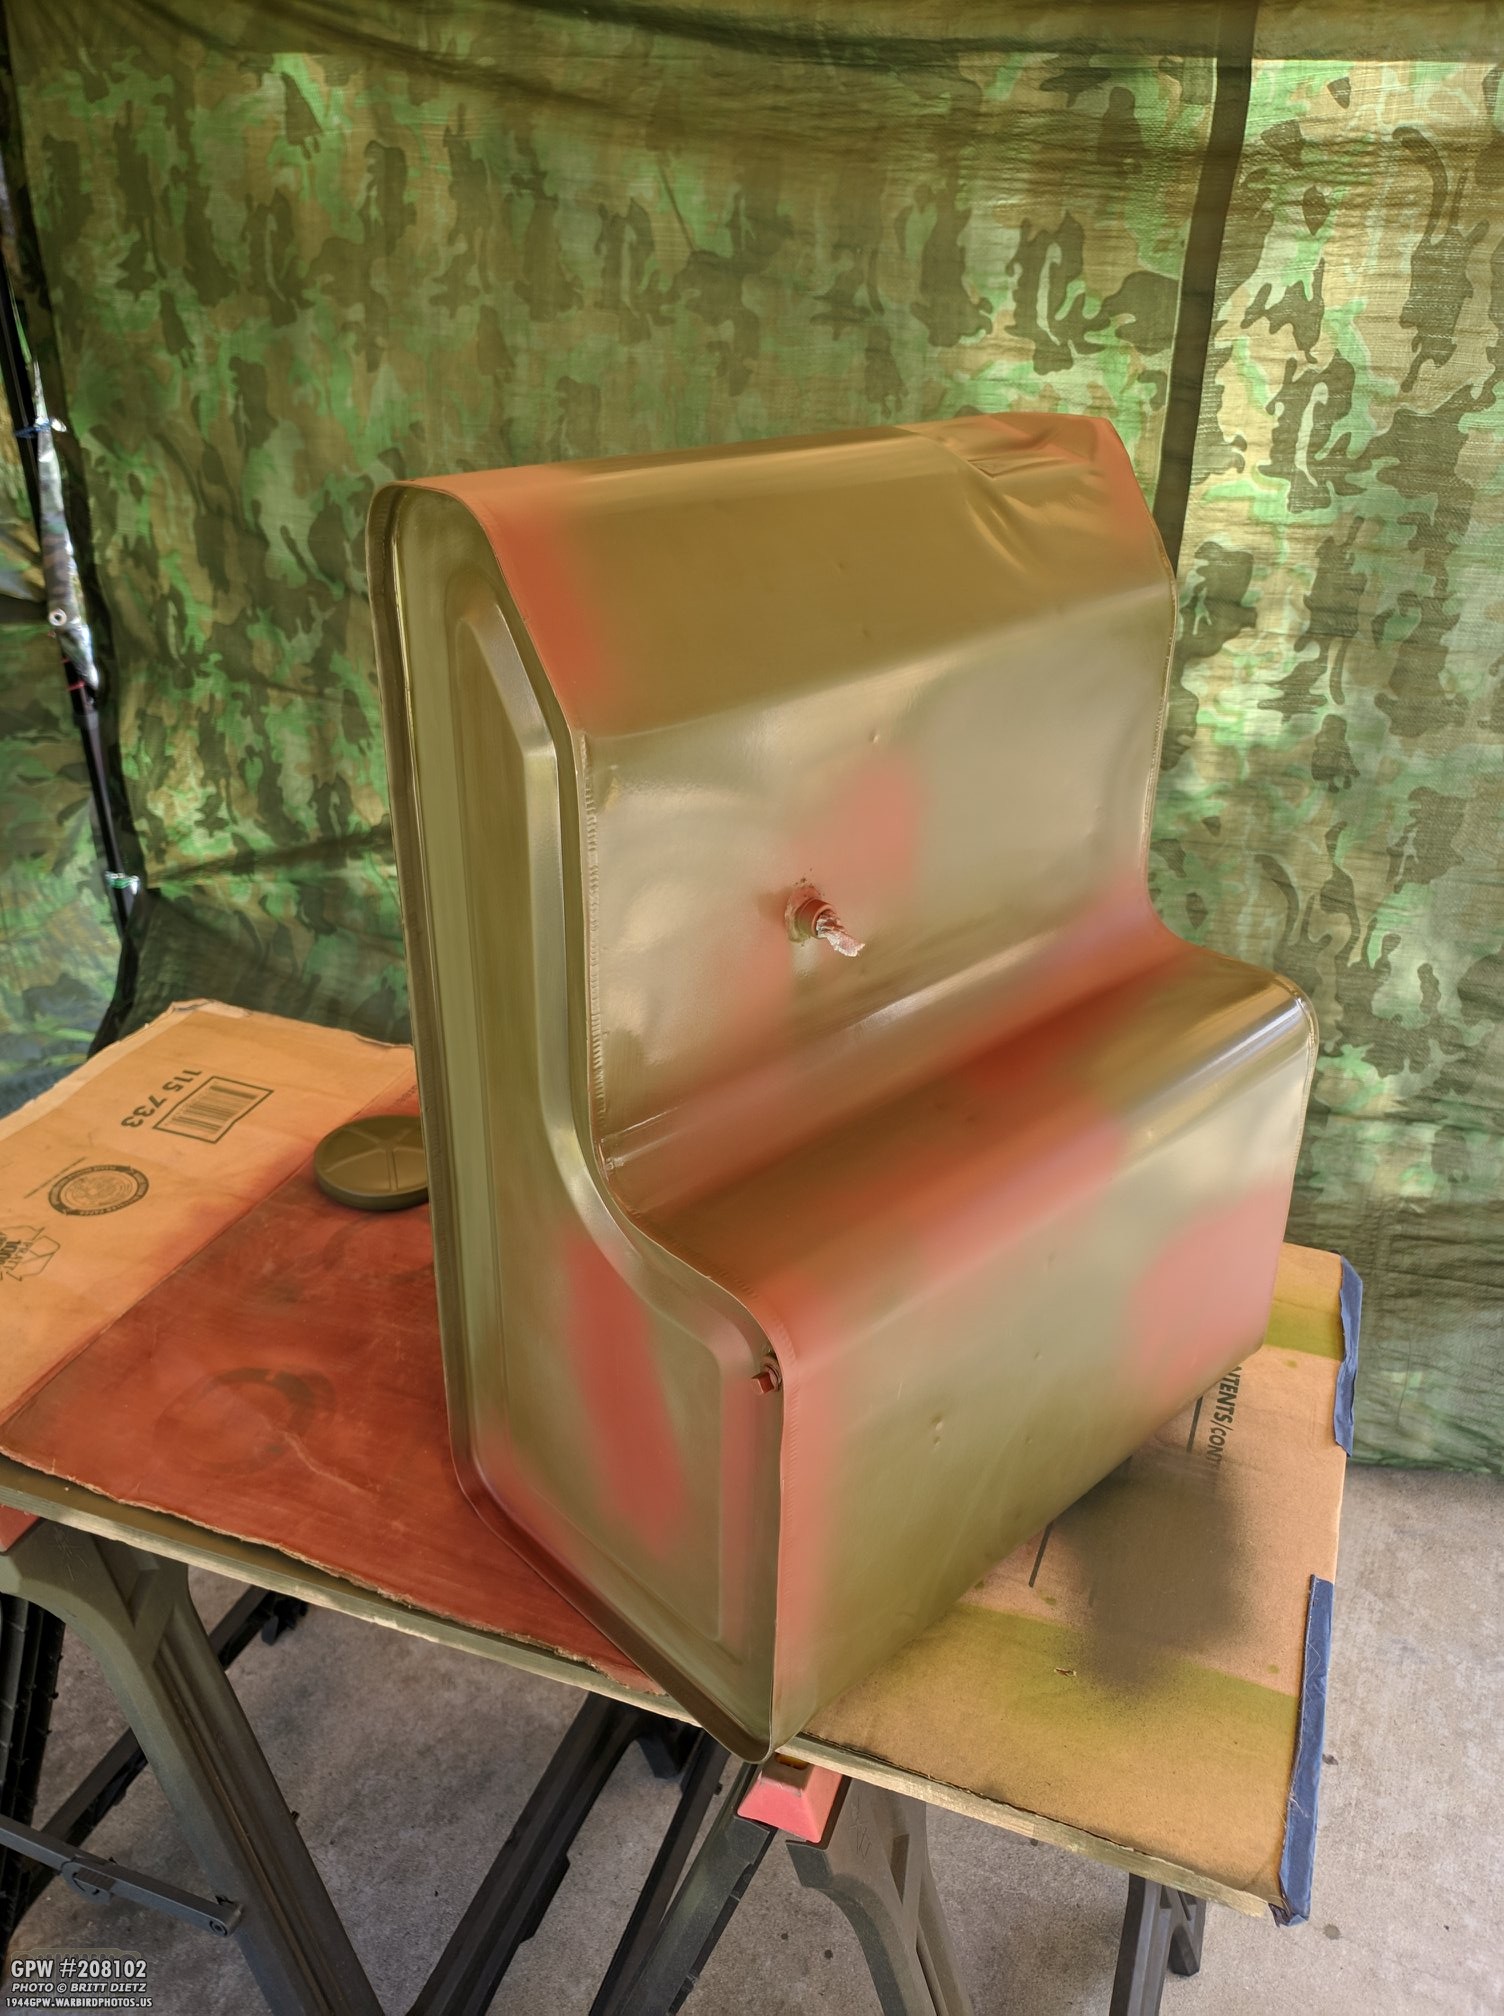
It’s been non-stop windy here in SoCal the last few weeks/months, so I’ve had to construct my paint booth (a 10×10 canopy with tarp walls) for large items needing painting, like the gas tank here.

BOOM! First coat applied. With the hot weather, it dried pretty quickly, even using lacquer thinner, so I was able to install the fuel sender before the next coat.

Some people leave these un-painted, some people paint them. I’ve seen people source original documents that say either-or, and I’m sure there’s overspray that got on them during the war. I like the look of them painted, so I’ll make it match. Masked off the screw area, however, since that’ll stay brass.

Painted! Looks nice and uniform!
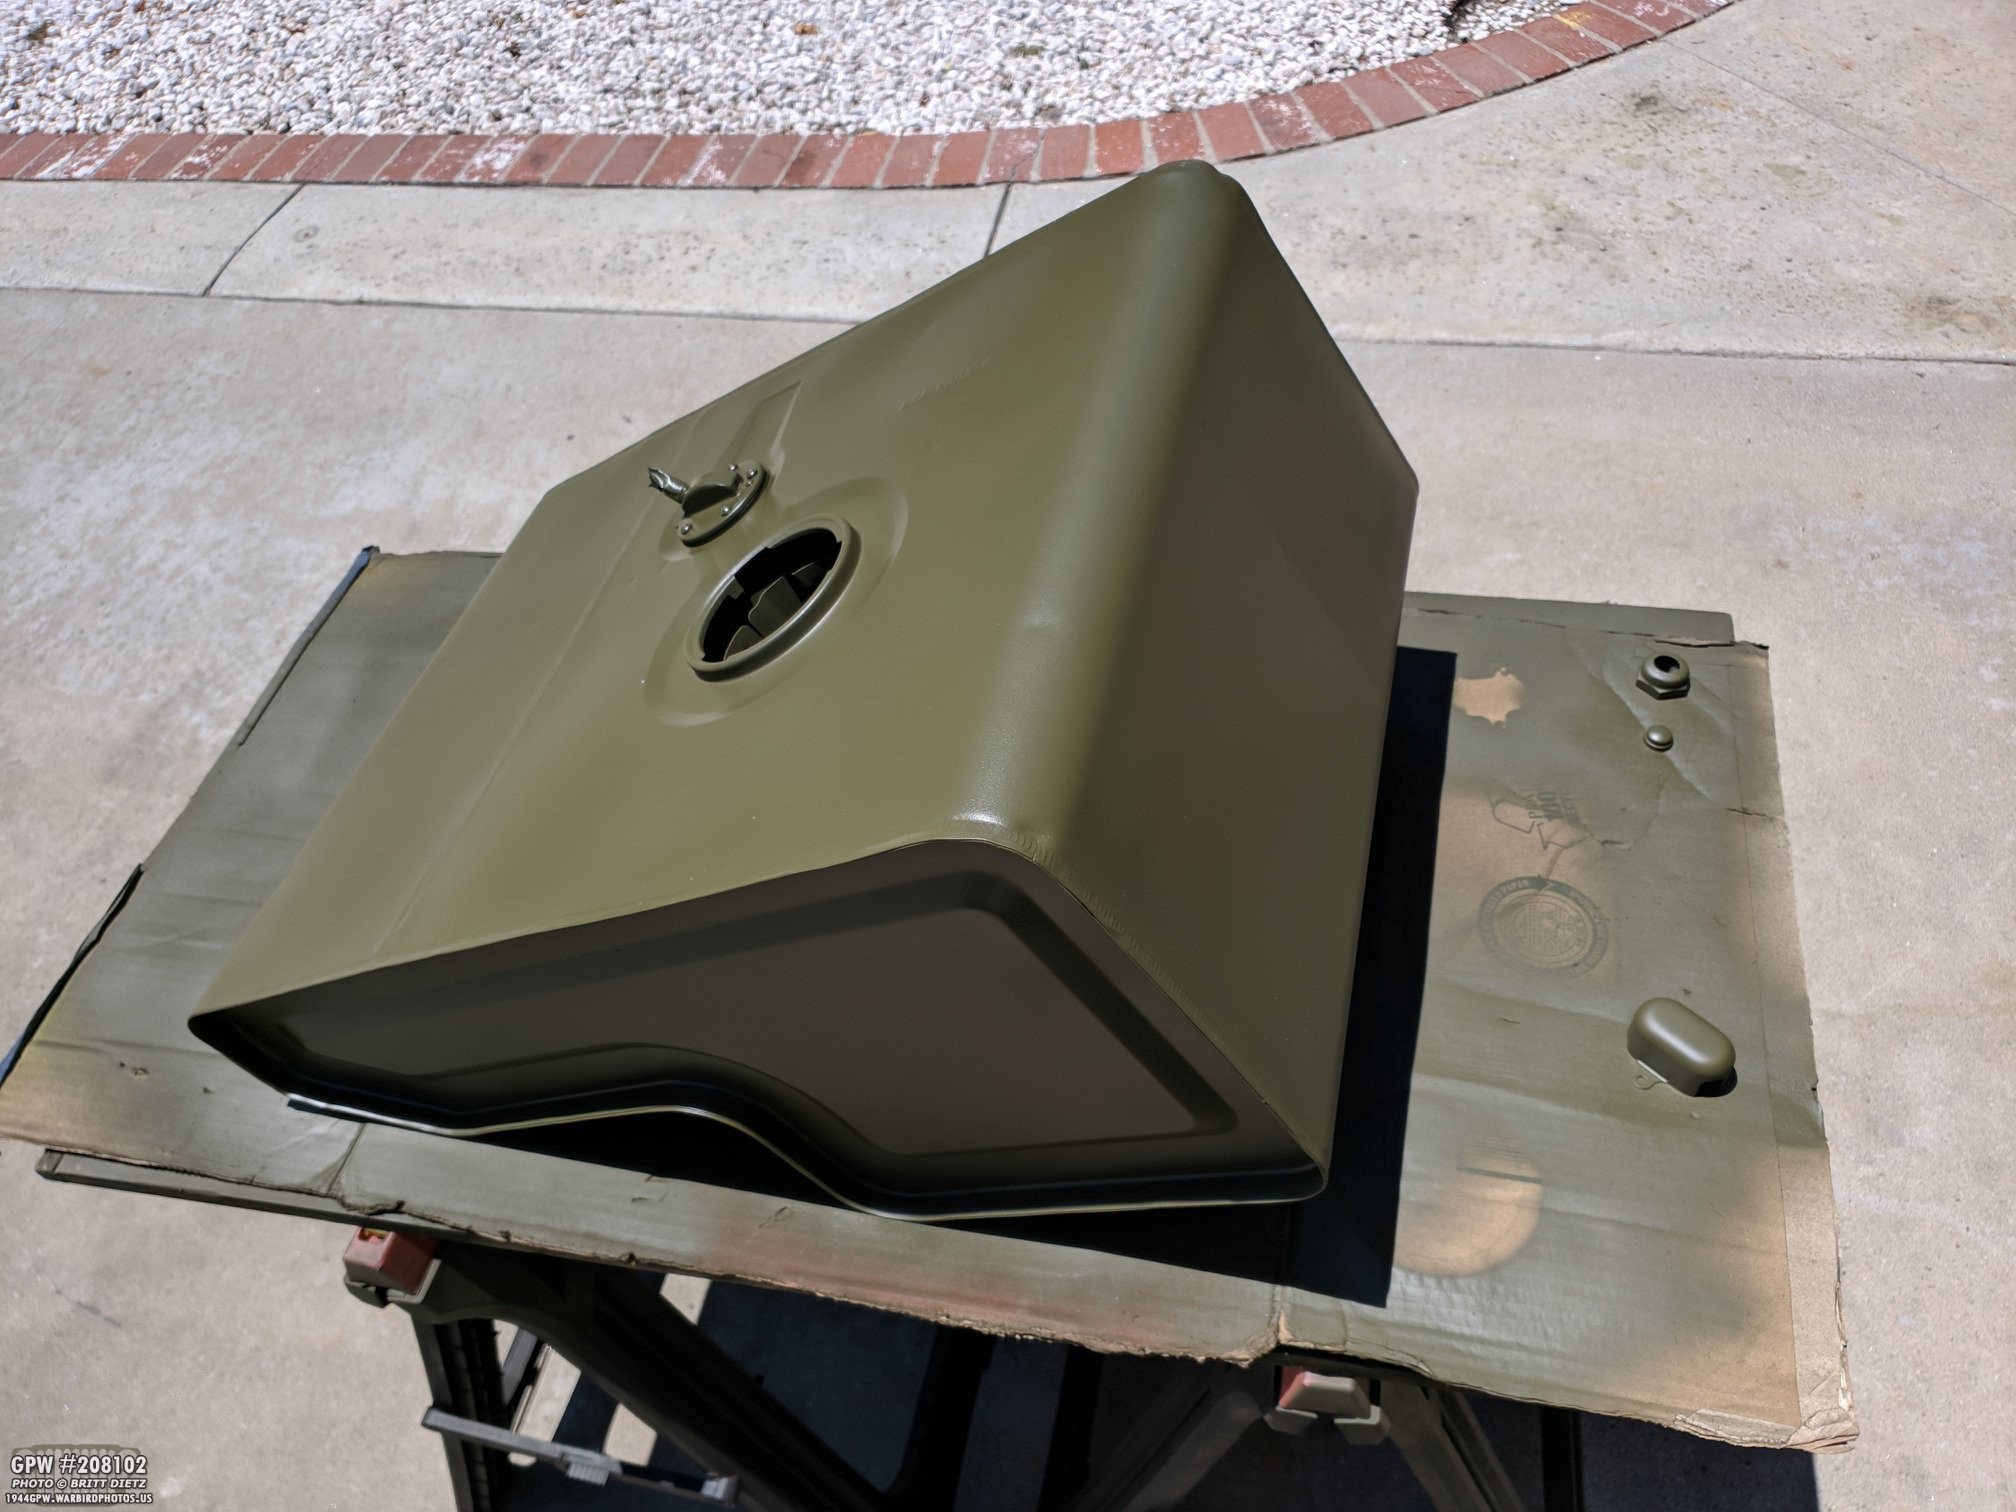
This latest batch, as I mentioned in the last update, of Rapco Parts Company Gillespie 33070 lusterless OD Green seems to be much shinier than the last three gallons. I’m a bit sad I didn’t order all my gallons at the same time. It’s not bad, but it’s for sure got a bit more of a shine than I’d really want. Here’s the tank with a final third coat drying in the heat the next day.

Once dry, I test fitted it into the tub again, all seemed to fit well. Yes, I said seemed… get to that in a few photos.

After all seemed well, I took the tank back out and attached the felt spacers onto the bottom of the tank.

I put the tank back in the sump, and even with the spacers, it fits nice and snug, going to where it’s supposed to be. I also attached the wires to the fuel sender and ground, then put the cover on.

Next up, I installed the two original gas tank straps and got them as tight as I could. The one closest to the engine didn’t quite reach all that well, so there’s a bit more of a gap on that one than the other.

But here’s where the first issue came up… the darn sender cover didn’t quite fit in the hole on my original driver’s seat when I went to put it in. I think it was due to several factors, one being I think the tank is a bit taller in design, and the original tank didn’t have the felt spacers.

Here’s another look showing how close to the edge the fuel sender cover is. There’s no room to really move the driver’s seat. I ended up having to take it all back out, down to the gas tank, so I could lift the tank up and reseat it back down.

I found out, doing this gave the tank some clockwise/counter-clockwise play to turn it. Making it straight as I could lined up with the back wheel well, I went ahead and strapped the straps on again. Here’s another look at the gap between the front two straps. Not bad, and it holds down the tank really well. It’s not going anywhere.

Here’s another look at the straps and wires. You may be asking, why two wires? Jeeps only had one! Well, the second smaller wire wrapped around is a ground wire. In order for the fuel guage to work, you need a good ground. And since the tank is on felt spacers, the only way to get a good ground is through the fuel lines up onto the firewall where a clip attaches to the bond strap that eventually is grounded to a screw thread welded to the firewall. I was not getting any ground that way (mostly because the clip is too loose), so I did the more modern ‘hack’ of adding a second wire, slightly hidden as best I could. Since it’s the same cloth automotive cable as the rest of the harness, most people won’t know. Plus the seat will cover most of it. It connects to a footman loop screw, and now I have great ground!

Finally, everything is put back together… but when I went to install the gas tank shield that connects to the driver’s seat, it was majorly mis-aligned. Ugh. Using three screwdrivers in the holes on the top of the gas tank shield going through to the driver’s seat holes (these holes will have screws mounting the bottom seat cushion), I was able to finagle into place the gas tank shield.

Here’s the shield from the backseat looking forward. I’ll need to paint touch-ups for the damage caused getting it to fit. Earlier Jeeps had a wood spacer underneath the shield to make it higher, and sometimes it was even welded onto the seat.

After some touch-up paint (still wet in this shot), it looks a lot better!

On the subject of touch-up paint, I’ve been using this nifty ‘make your own spray paint’ that I found at Home Deport (Lowes carries it as well). You simple put your paint and thinner in the same ratio you would for your air gun then attach the top and it becomes, essentially, a spray paint of your exact paint! It’s has a few draw-backs (it is VERY prone to spilling or dripping due to a poorly designed vent hole), but overall it saves me the time of having to set up the air gun and compressor to spray quick touch-ups and have top then clean the gun up.

Next up, I installed the crash pads. These were tricky to do by myself, but I got both of them. Sadly, it did a number on the outside tub wall’s paint job around the crash pad screws.

I ended up having to do some small area sanding to smooth out where the darn lock washers just peeled away the paint as the screws tightened. Ugh. I’ll have to touch this area up again with more paint.

Here’s the crash pad on the other side all installed. I’ll need to touch up the outside area as well on this side. One thing many people forget to check when drilling the holes for their passenger seat is the pivot clearance with the crash pad. Thankfully, since I used my original tub’s measurements to make the passender seat mounting holes, it’s a perfect clearance.

I also tried to install the very over-priced half door sockets in the tub. A kit of these is nearly $50. I didn’t quite understand how they were supposed to snap in when I first put them in, so they are not fully locked when I shot this. I’ve since taken them out until I can really spend some time to make them go in correctly.

Moving on inside the Jeep, I installed the two rear seat hold down L brackets, as seen here, and painted touch ups from the scratches the rear seat and the side walls got.

All that’s left to do to the rear seat is to put the seat cushions on! Eventually I’ll install the correct brackets for the tire pump under the seat bottom, but for now it’s good enough.
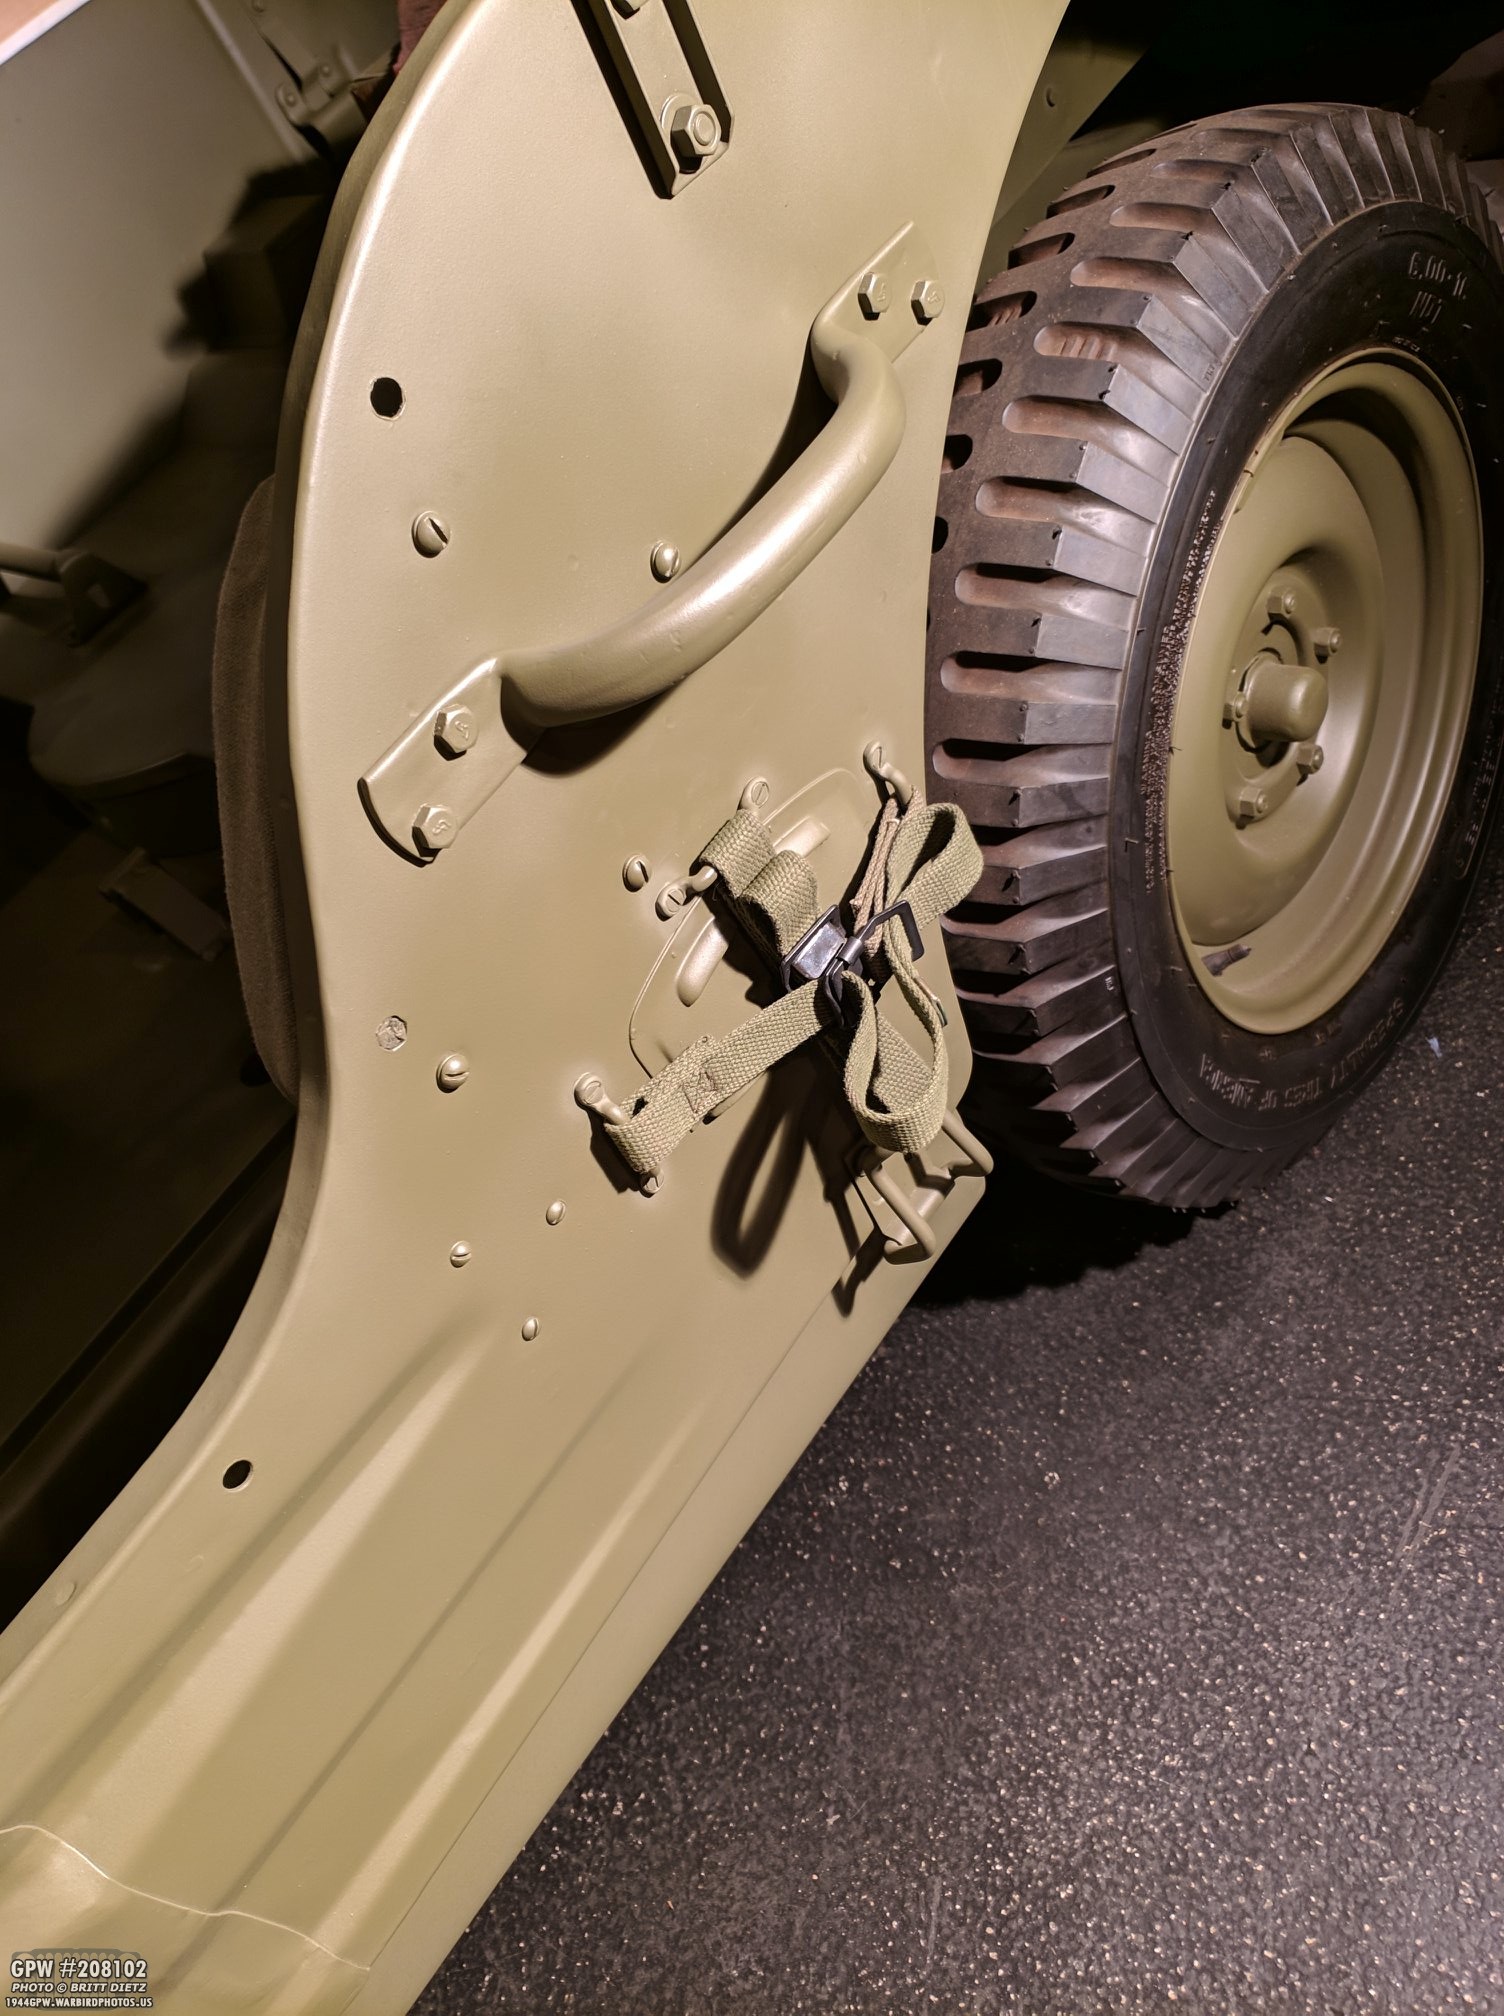
I then installed the axe and shovel straps to the side of the Jeep. This meant unscrewing some of the footman loops to get the straps to slip on the loops. This caused more paint issues, so this photo was taken after I installed everything, retightened the screws from them all, and carefully touched up the paint (which is still wet)

I made a third attempt with a special wood stain I bought to darken the wood axe handle. It still didn’t work well, and this is after I REALLY sanded the heck out of the handle trying to get any coatings off. The three times I’ve stained it have made it slightly darker, but not by much. In this shot I’ve just stained it for the third time. I would go on to wait about 15 minutes then carefully removed the excess stain. I might try a fourth stain and leave it on even longer.

Moving to the rear of the Jeep, I installed the two bumperettes that have been freshly painted with Army Air Force markings! ‘Uh oh, you installed them upsidedown!!!’ Actually, that’s true… but not how the Army Air Force guys did it in WW2. I have MANY documented photos of Jeeps in AAF service with the bumperettes flipped upsidedown. The main reasoning, I’ve heard, is that when the air crews would pile on the Jeep, it was easier to use the bumperettes as a step to put your feet on. So I installed it that way to be authentic.
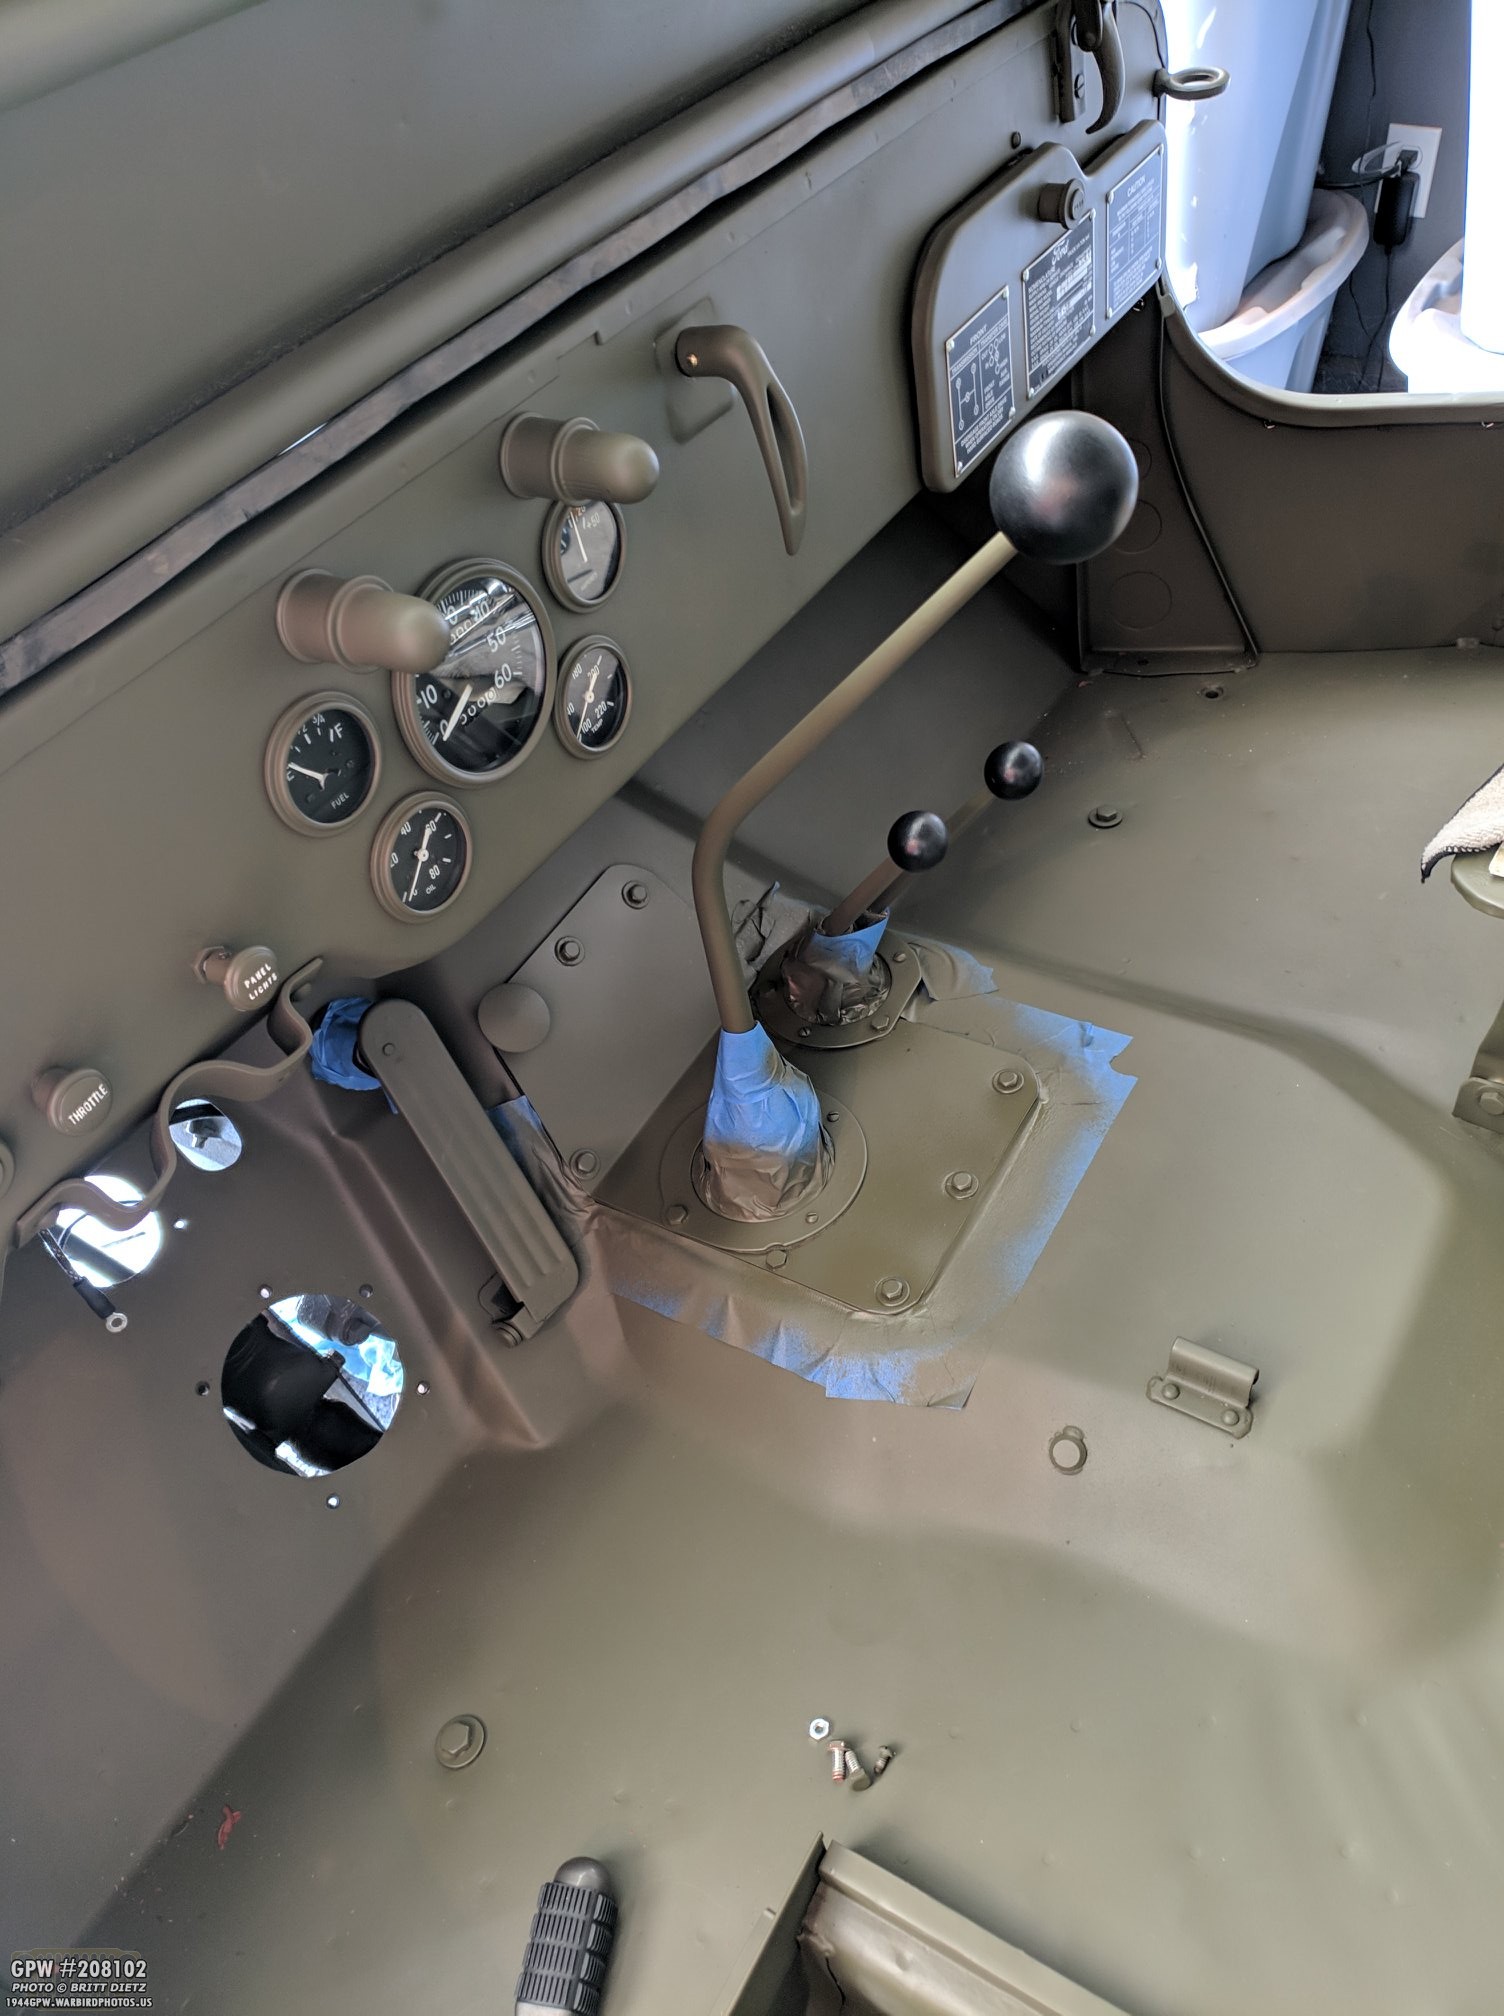
Next up, finishing the install of the transmission and transfer maintenance cover. I had given up a few weeks ago getting frustrated with things not lining up and screws not long enough. I said to myself ‘I need to finish this.’ Took about an hour of work, but I got it all bolted down with the leather covers for the shifter arms. Here I’ve masked off some of the areas so I could tough up the paint from heavy scratching when tightening the bolts.

Removed the masking from around the panel, just need some final blending!

All done and tape removed, looks great. Originally I didn’t like that the leather ‘boots’ were a dark green color instead of brown. But, I realize now that will match all the darker green color of my canvas all over the jeep. So, win I guess?

I will be sending my steering box out in the next day or so to get rebuilt with new bushings. Until then I decided to tackle the main steering shaft with worm gear. Here I’ve installed new ball bearings in both caps and installed a brand new cap and snap ring on the bottom. Those ball bearings are sure amazing, the shaft spins incredibly.

I also soldered the horn wire that goes from the top button to the brass ring. Thankfully, even though it wasn’t hooked up and working, the original solder was still slightly there on the brass ring, so I was able to reuse it and make a nice strong solder. I flattened it out a little bit to help with clearances of things sliding over. I tested the continuity, and the wire is perfectly grounded.

Moving on, I put another 1.75 gallons of coolant in the radiator, making it nice and full! This will help cool the engine a lot more when it’s next started up… speaking of which…

As many of you saw with the video earlier this week, we got the Jeep started! It wasn’t after a LOT of trial and error. Everything from replacing the spark plugs with new ones to timing, checking for sparks, checking wire connections, etc etc etc. After figuring out the timing issue with the distributor, we got the Jeep to start and idle… but not without a big issue.

The Carter WO carburetor. This Carb has been the key issue with the Jeep’s startup issues. Now that we got the Jeep running, it was quickly discovered that the Jeep can only idle/run when the carb is choked almost completely. This means that something in the carb is not giving the engine enough gas at idle. So what does that mean? It means I’ll have to take it all apart.

Here’s a look at the other side before I started taking the entire thing apart. The idea is to take almost everything apart and dunk it in a carb dip letting it soak for about a day. That’ll get any gunk/build up out that might be blocking any of the jets or passageways.

Here’s a look at the carb mostly taken apart, I’ve carefully grouped parts based on a Carter WO service manual from 1946 that I used to help me take it all apart. Sadly, another major issue came up with I was taking it apart.

On this part of the carb, I found out that the inner idle well jet is stuck… and not just stuck, the screwdriver slot is almost totally stripped. It appears that the mechanic who worked on this carb and rebuilt it (just before I bought it) tried to get that jet out and totally damaged it. Ugh, there’s no way I can get it out. I took it to a carb place in Fullerton, even they said you can’t salvage the jet and the only thing I can do is drill it out (which they wouldn’t even do nor really believed it would work). So, Tom Read is going to try and remove it. If I can get it out, I can put a new idle well jet in there and not have to drop another $200-$320 for a new carb. Crossing fingers.

On Thursday, another shipment from Ron Fitzpatrick Jeep Parts arrived with a set of felt grommets for the Jeep (to add to my original ones since I’m missing a few of them), two large pedal felt grommets for GPW Jeeps, the missing two large washers for the brake/clutch pedal arm shaft, and a throttle wire clamp that is missing from the Carter carburetor.

Back to the new felt grommet set, I replaced the rubber grommet I had used for the hole in the toolbox where the trailer socket wire comes through. Looks much better!

My Jeep was missing the grommet for the blackout drive light wire hole on the fender. Much better now!

Finally, it was also missing the felt grommet for the oil gauge oil line that comes out from the dash, so I put one on (took a lot of effort to get it to snap into place). The right three felt grommets are original to the Jeep. I decided to leave them in since they are original. They don’t match 100%, but it’s nice to keep what original things I can.
That’s it for this week, check back next week for, hopefully, much more progress!