 Transmission Project Continues…
After last week’s successful dismantling of the transfer case, this week I work on cleaning/painting the case to a nice OD Green! I also replaced some bushings in the T-84 transmission gears and realized some issues with another gear. Also, in this update, I show how the T-84 works in first, second, third, and reverse. Lastly, I finally found a war-time jerry can nozzle and show the differences between wartime and post-war nozzles!
After the busy two weeks taking apart the transmission and transfer case, this week was a bit slow as I’m waiting on parts. So instead of documenting the start of the T-84 rebuild, instead I’m getting things ready as I wait. Unfortunately, due to the winter weather across the country, the shipments of parts are delayed. Hopefully, they come in soon so I can get started!
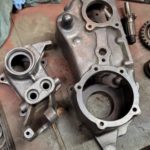
Recapping, last week I took apart the transfer case removing all the gears, shafts, gaskets, shims, bearings, etc. The transfer case was 100% F marked parts, and looked to never have been opened in 76 years.

With everything removed, it was time to clean it up! First up, a degreaser bath to clean off most of the oil and crud.

After all the degreaser was cleaned off, I used rubbing alcohol to clean everything so it wouldn’t rust. The next day, I started to wire wheel the case. Here you can see the surface that mates with the T-84 and how nice it looks compared to the other surface that’s not been cleaned. It’s an oddly satisfying feeling watching things get that nice and shiny!
Here are both parts of the case after the initial wire wheeling of the paint. I still need to use the smaller wire wheels and my Dremel to get the harder-to-reach places.

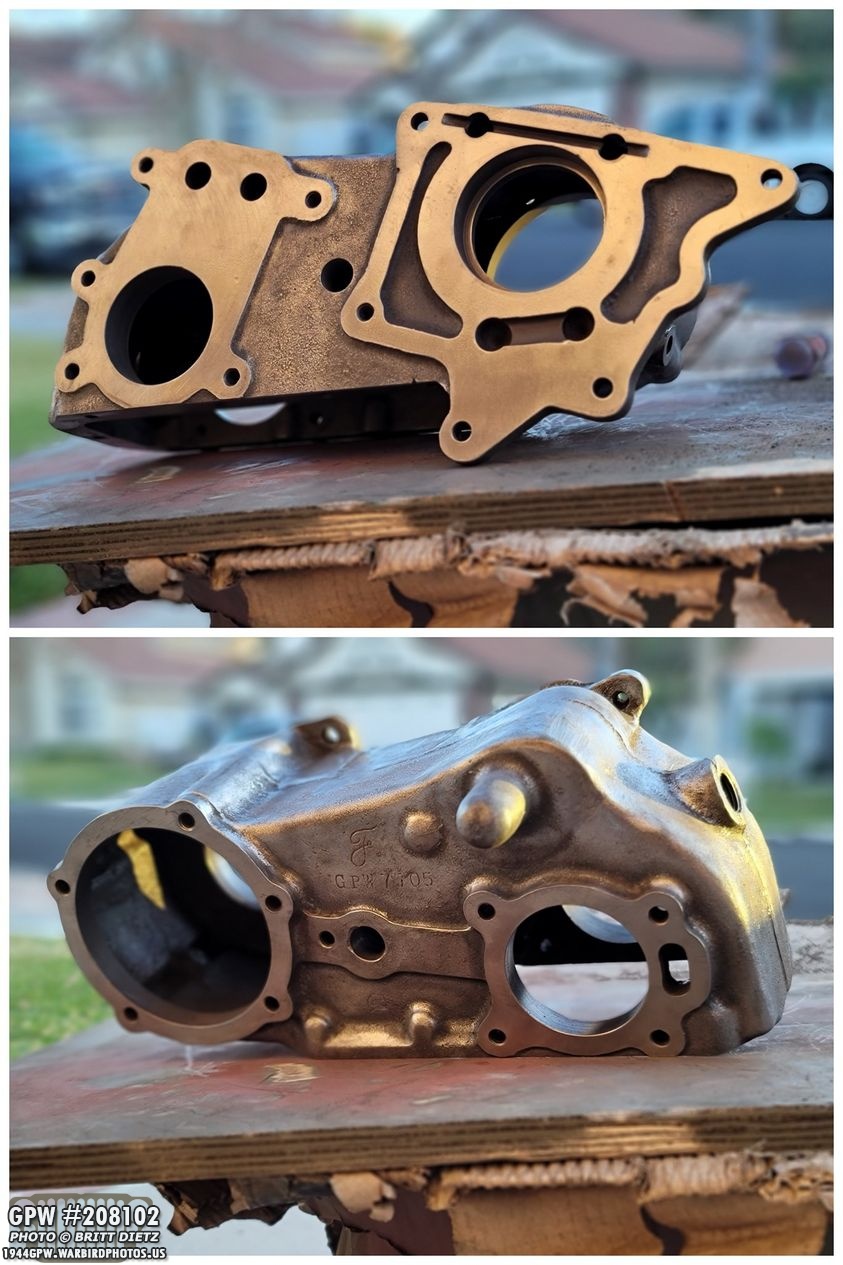
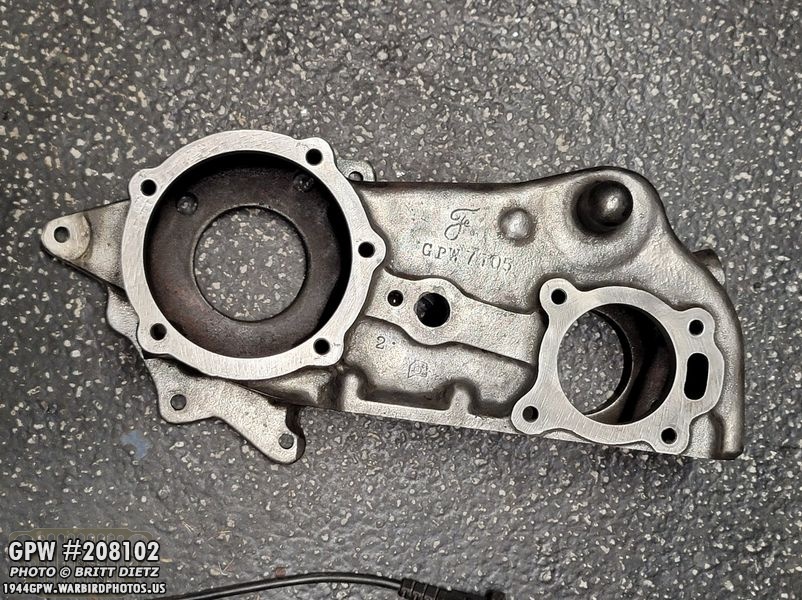
Here’s a good look at the F stamp and GPW 7705 on the main case.

And here’s the output cap cover with an F stamp, GPW 7774, and a 1.

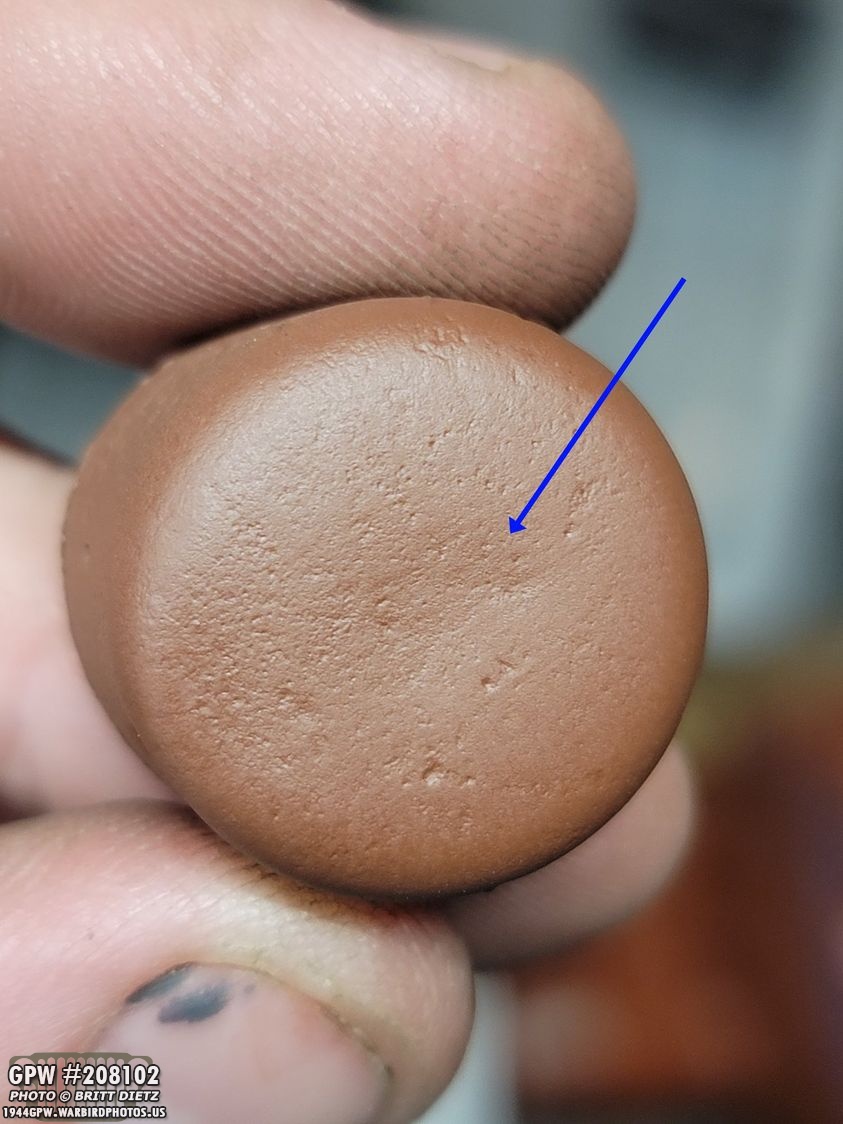
Two curious things stamped into the main transfer case are a number 2 (blue arrow), and also a strange symbol I’ve not seen (red arrow, see next image for a better look)…
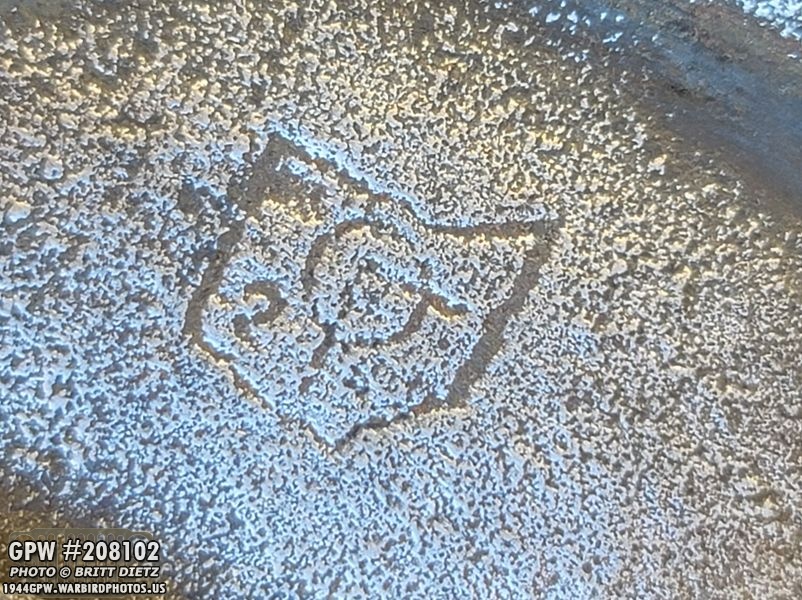
It appears to be the shape of something, like a state or county with a clock. There’s a 2 on the bottom right. The clock appears to be 3:30 perhaps? It almost appears like the county of Louisville (which could also be my imagination). Any thoughts on what this is? It’s also upsidedown going by the 2…
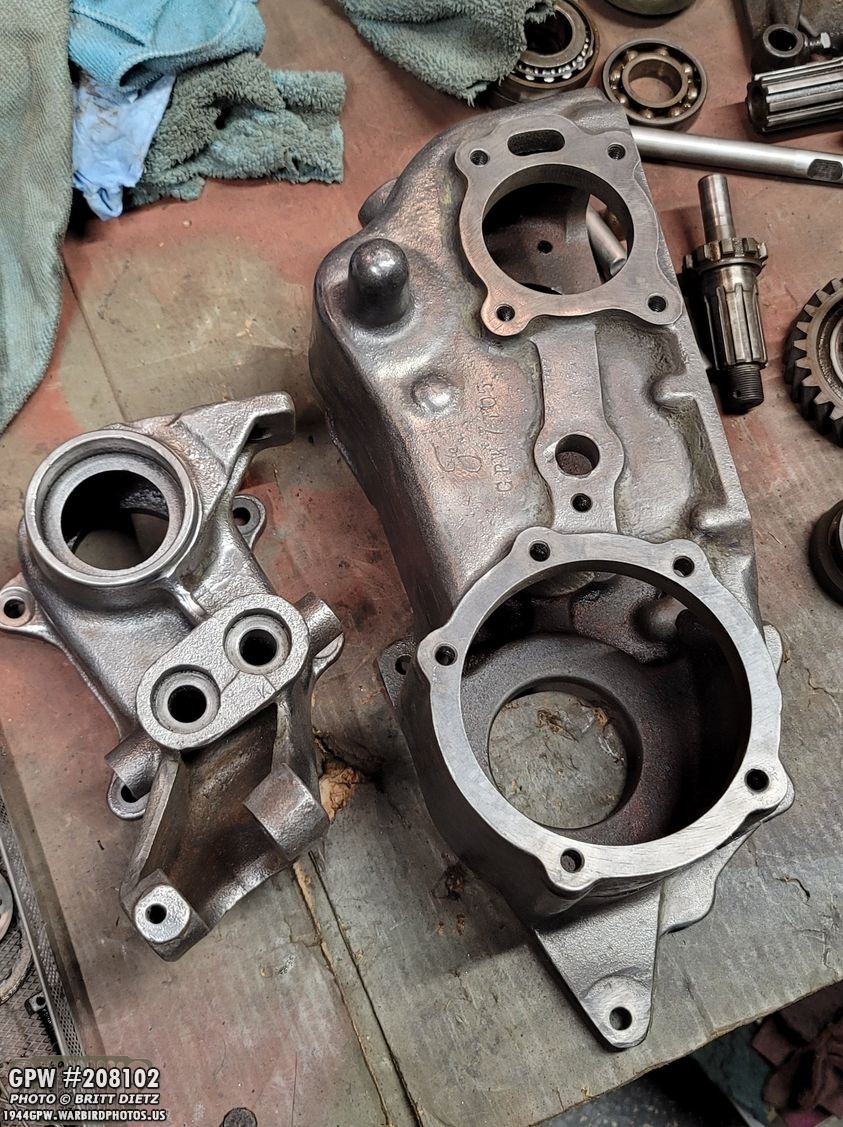
After the Dremel with wire attachment and the smaller wire wheels, the main case is done!

I also used a drill brush to clean out all the holes.
This case is as clean as it’s going to get, and probably the cleanest it will ever be.

I then took some time to manually clean the transfer case forms, output shaft, etc in the Gunk cleaner solution, then manually used a scotch pad to clean up the metal.
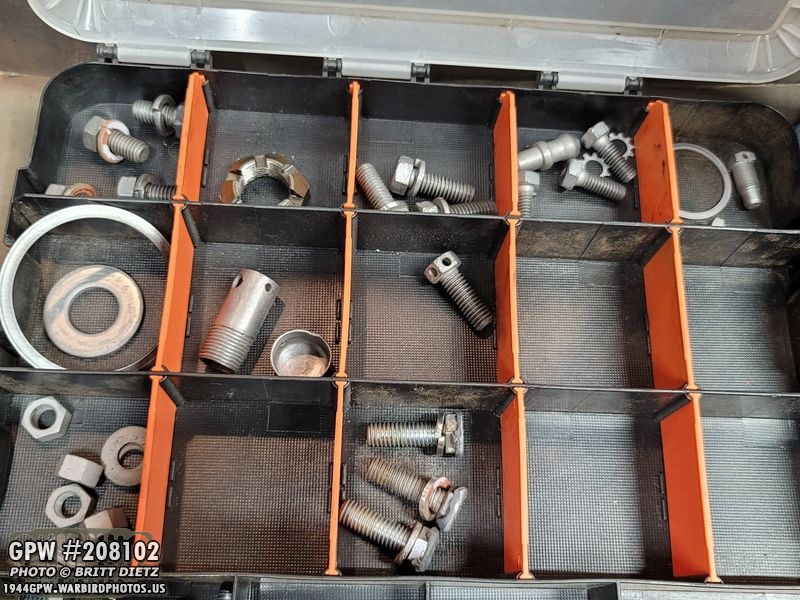
I also took a day to sandblast the various bolts for the transfer case to nice and clean metal.
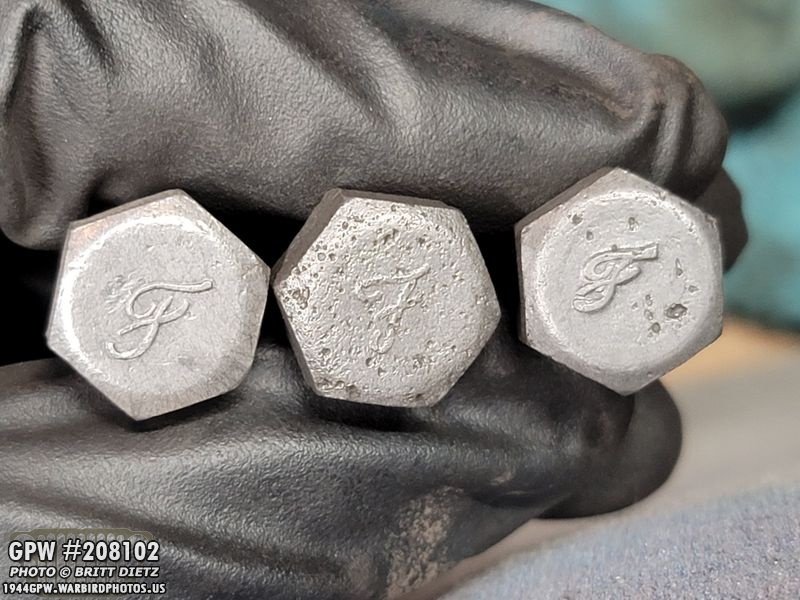
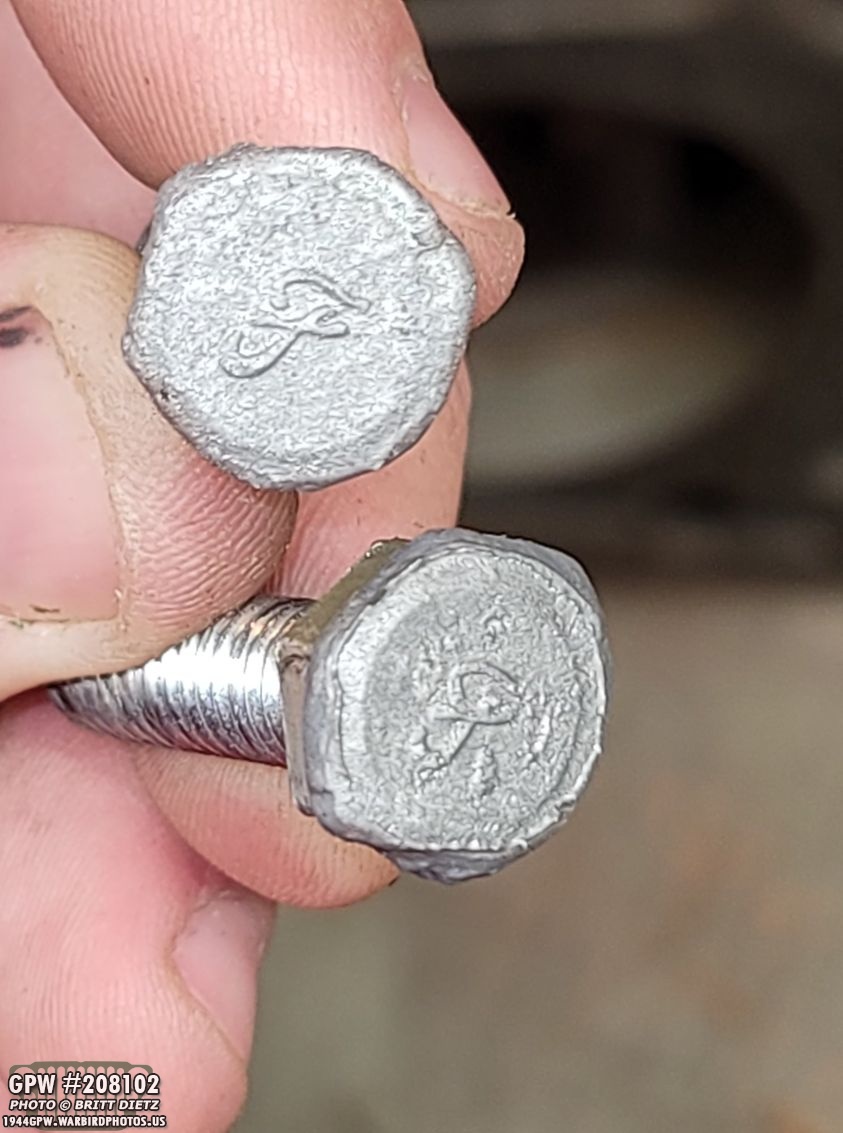
One interesting thing to note, these three bolts are all original F-stamped bolts, all completely different F stamps (and not all that centered on the bolts!), all the same 3/8 size bolts and same lengths, and all were with the T-84 support bracket! Just goes to show they probably had a box of F bolts and just grabbed whatever.

Last week, I took apart and removed the breather tube and cap. I was asked if there was an F stamp on the cap, as it’s an easy quick way to find an F stamp.

I had a chance to sandblast the cap, and at first I was sad to see there was no F stamp… but looking harder as I spin the cap in the light, I could just barely make out an F stamp. Can’t see it? Go to the next photo…
After priming it with Red Oxide, you can see the very very faint F stamp! So at least it’s there, too bad it’s nearly non-existent and will probably be not viewable once the OD Green goes on.

Yup, after adding the OD Green, it is not really visible anymore. Darn! But at least I know it is there under the paint. I went ahead and put it back on the tube then put a new cotter pin on to lock the cap in place.

Another item I cleaned up are the two shims. I cleaned them back to metal and made sure they are nice and straight. I’ll be reusing these shims and either adding or taking away some as I will be changing the bearings, which will probably change the shimming.

Here’s a look at the F stamp on the thicker shim.

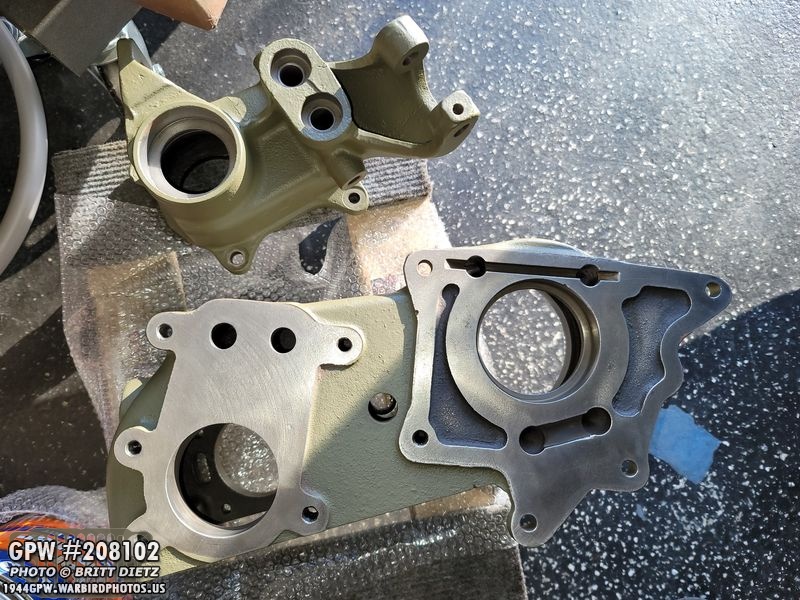
I put the output cap/cover into the sandblaster to get into the hard-to-reach areas. This is about as good and clean as it gets!

After a good final cleaning of rubbing alcohol, I masked off the open areas and put back in the small oil seals to use for painting.

With the output cap on, the oil pan on, and everything else masked off, it was time for 3 coats of Red Oxide primer!

During the priming, I didn’t think about hanging it on something to paint, so I waited till the next day to prime the other side. You can really see the marks on the oil pan where 76 years of the emergency brake cable has worn down the metal. I thought about filling it with bondo, but it’ll just wear back in so I decided to just leave it.

It was on the third day I had the idea to hang it from the strong mount arm to paint. You can see it looks faded here, this is because I just used a scotch pad to scruff up the primer for the OD Green.
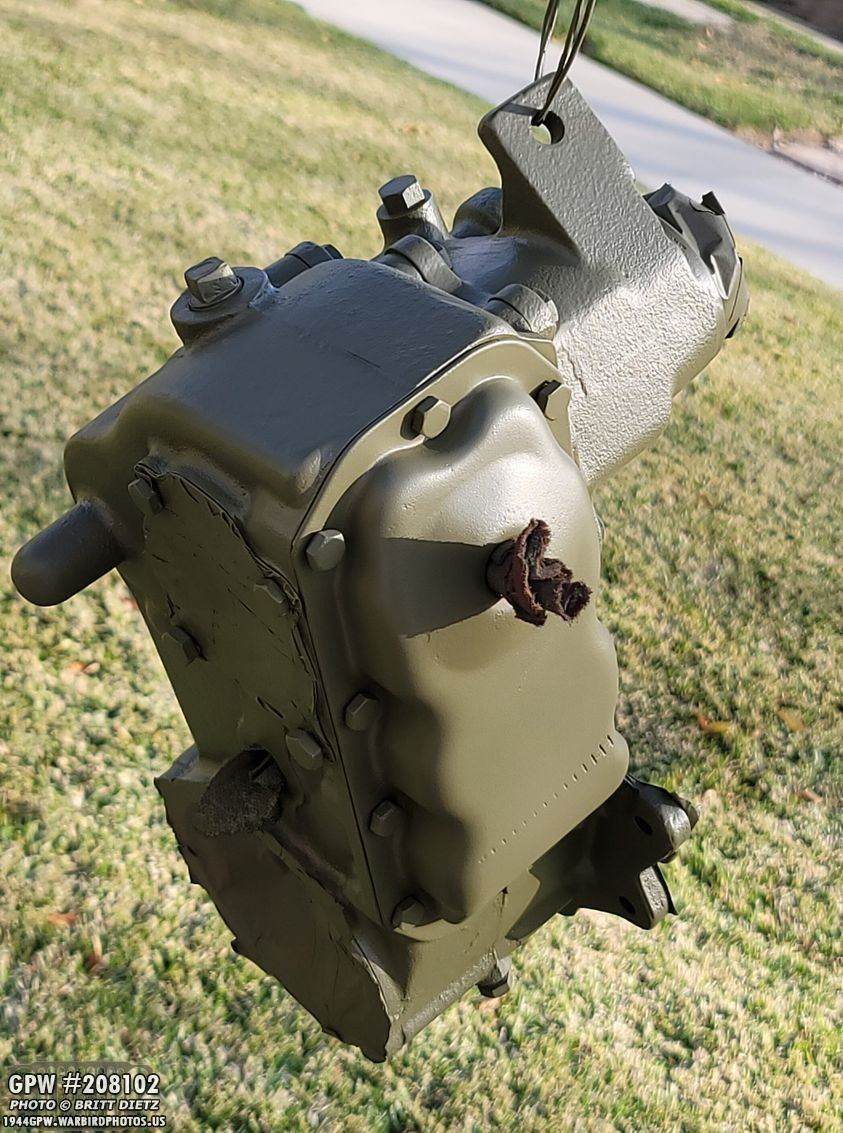
BOOM! 33070 OD Green applied via @[256477467720803:274:Ron Fitzpatrick Jeep Parts] gallon paint with the air gun. 3 coats with Xylene thinner (love how fast it dries and how smooth it goes on!).
24 hours later, I was able to remove all the masks and take off the output cap. Ready for the rebuild now!

Sadly, that will have to wait as I still am waiting for the replacement parts and don’t have them all yet. So I decided to test the most expensive gear in the entire transmission/transfer case… the 999 gear. It’s good to test out things before you button them down for good.

To test the 999 gear, I first put the brand new roller bearings inside the 999 gear. They just slide right in.

I have two brand new thrust washers as the originals were getting pretty worn down.

To hold the thrust washers in place as I set the 999 gear, I put a light coat of grease on the washer which will act as a ‘glue’ to hold them in place.

Putting the notch side into the slot on the collar, you can see how the grease sticks the washer.

Here’s what happens if you don’t add grease… as you can see, the bottom one just falls down. Once the 999 gear is in, if those things fall, you have to take the gear back out to put them back in place.

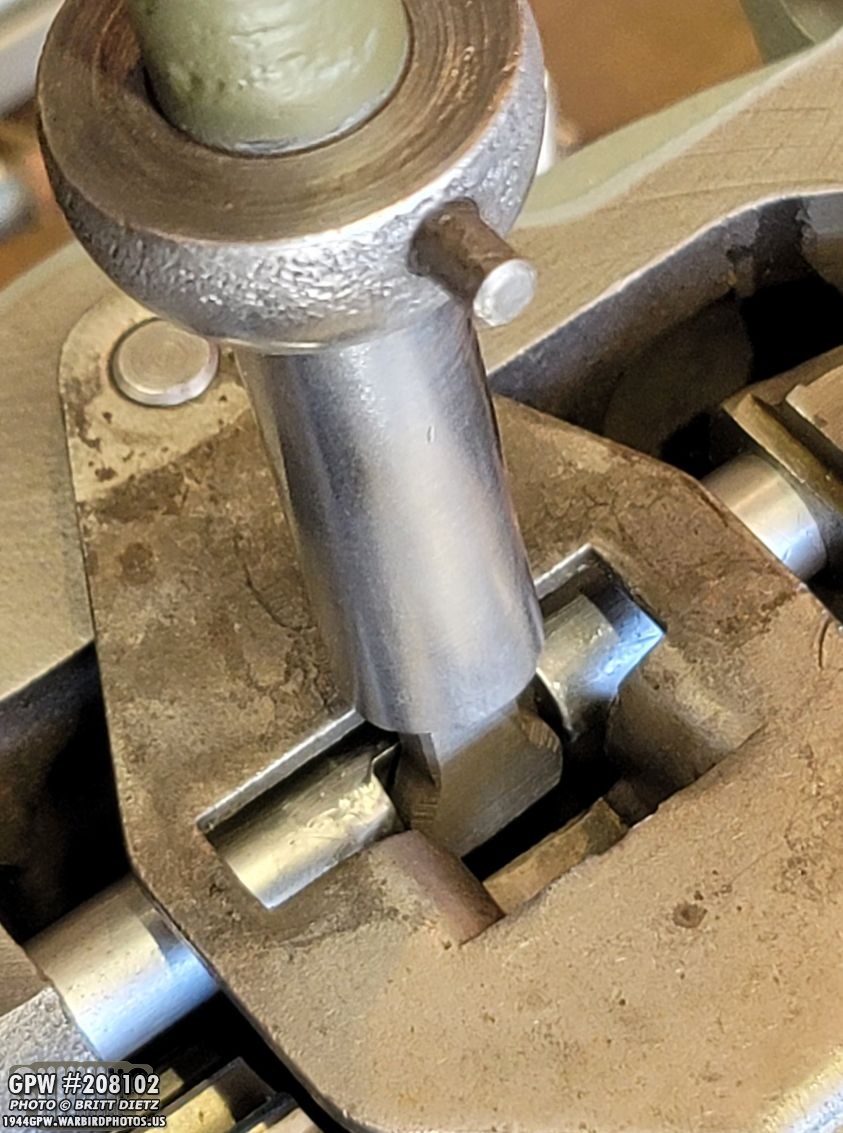
Place the 999 gear inside between the washers, and then go ahead and slip in the pin. I have to use a large punch to help keep everything in position on the other side as I slipped the pin in. I then pulled the punch out as I pushed the pin in. You don’t need to push the pin all the way in, but it needs to connect and partially go into the other side to lock in place.
And here’s a look at the 999 gear installed. Good news, it’s solid as a rock. No forward and back movement, and only the very slightest wiggle that you’d probably barely even be able to read with a dial indicator. So success, no need to have to get a new one! And also, success on keeping another original F stamped item.

Moving on to other projects, I needed to clean up the crossmember support brackets on the frame under the Jeep. These were caked with grease and dirt, and I need to get these cleaned and painted before putting the crossmember with the completed transmission back on. Here’s after I wire wheeled them removing most of the dirt and smoothing out the paint.

While these look like the same bracket (With the same ruffles in the metal), they are actually different! Here’s after I re-primed them with red oxide.
In order to get to that bracket on the passenger side, I needed to unscrew the muffler and let it sit on the ground for better access as the exhaust tube blocks the bracket. In doing so, I decided to do my fake F stamp trick on the two bolts I took off. This is before they were cleaned up.
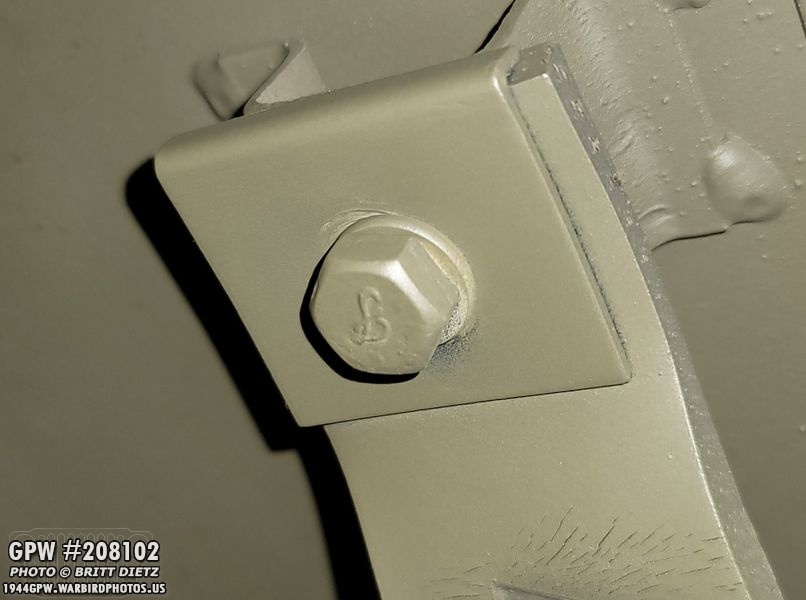
And here’s a look at one of the two bolts after being cleaned up and screwed in. I quickly hit it with paint, but need to go back and touch up the other side that missed. But looks great with the F!

Here’s the muffler all put back together.

finally, I painted the brackets green. They are good to go for when I finish this transmission project.

I did get one of the two orders from @[256477467720803:274:Ron Fitzpatrick Jeep Parts], before I made a second order of some items I forgot to get and before the current winter storm hit the US causing mail delays. This includes new bearings for the T-84 and Transmission Case, new pins, poppet ball/springs, etc.
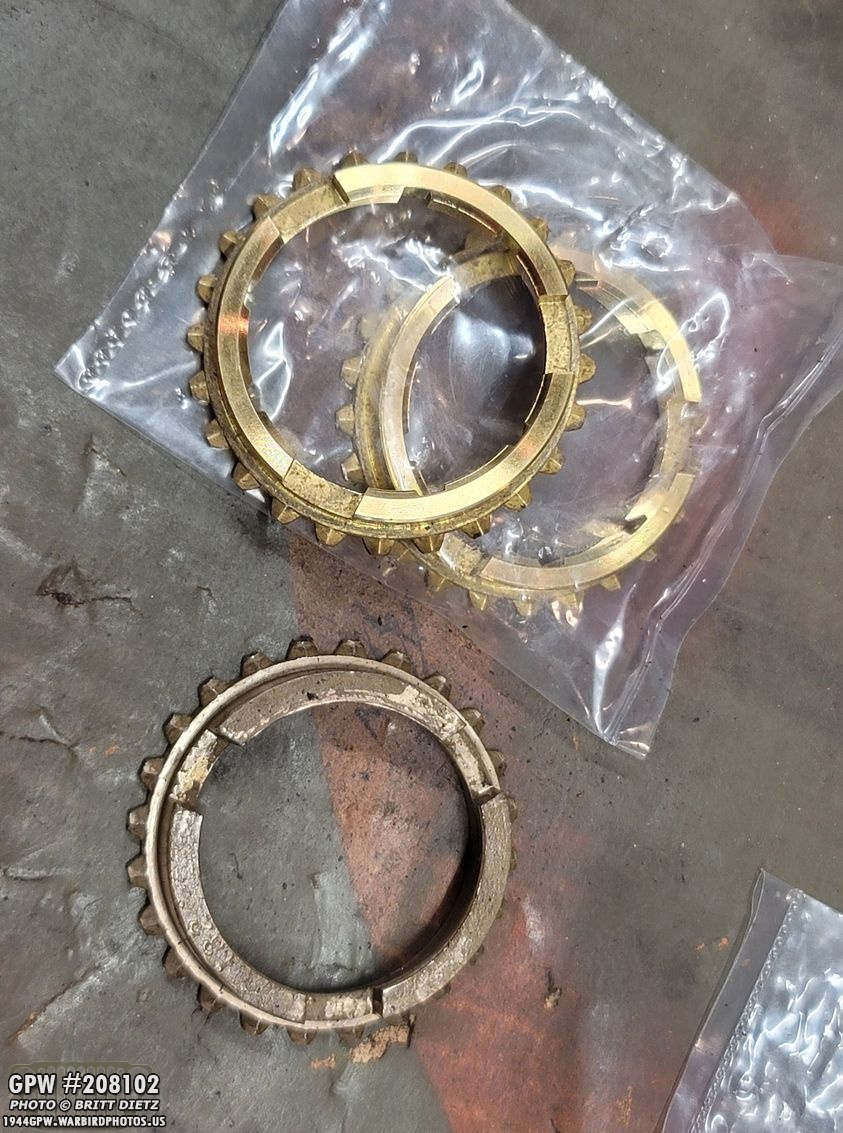
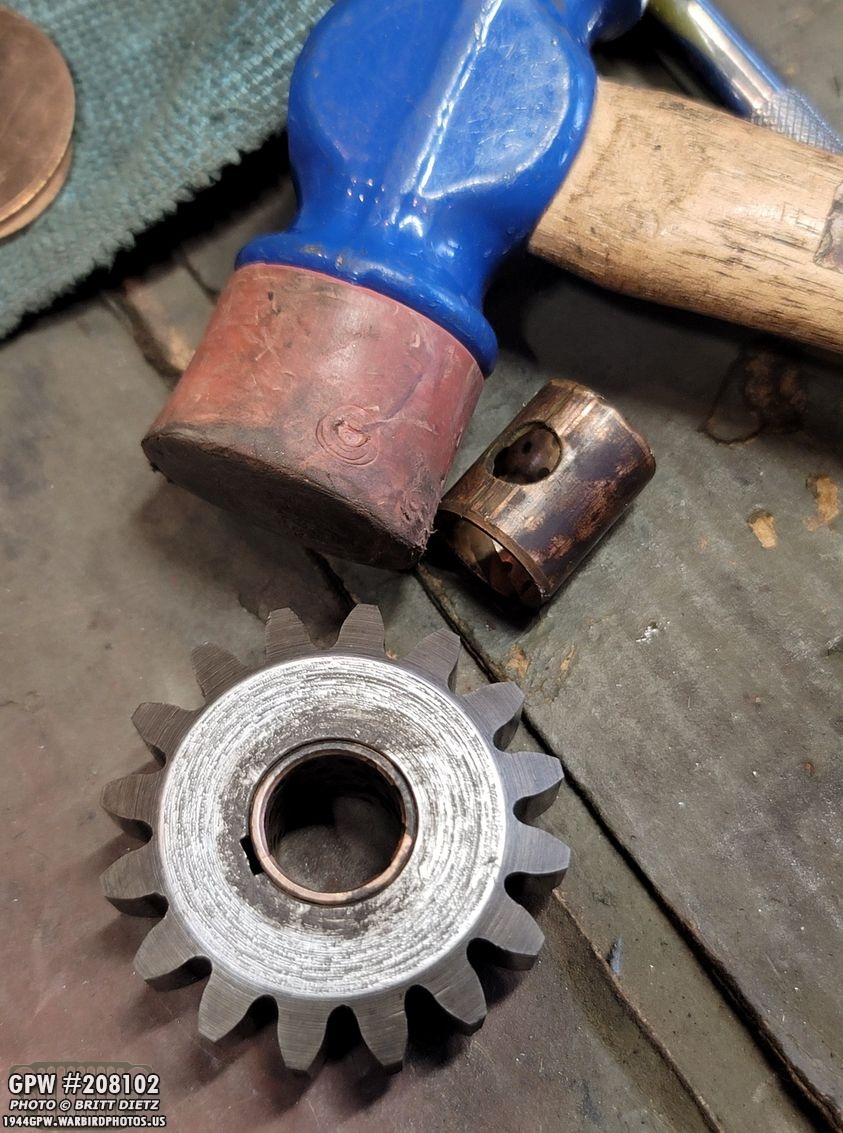
I also got a set of brass blocking rings for the T-84. The originals (one shown at bottom) were pretty worn.

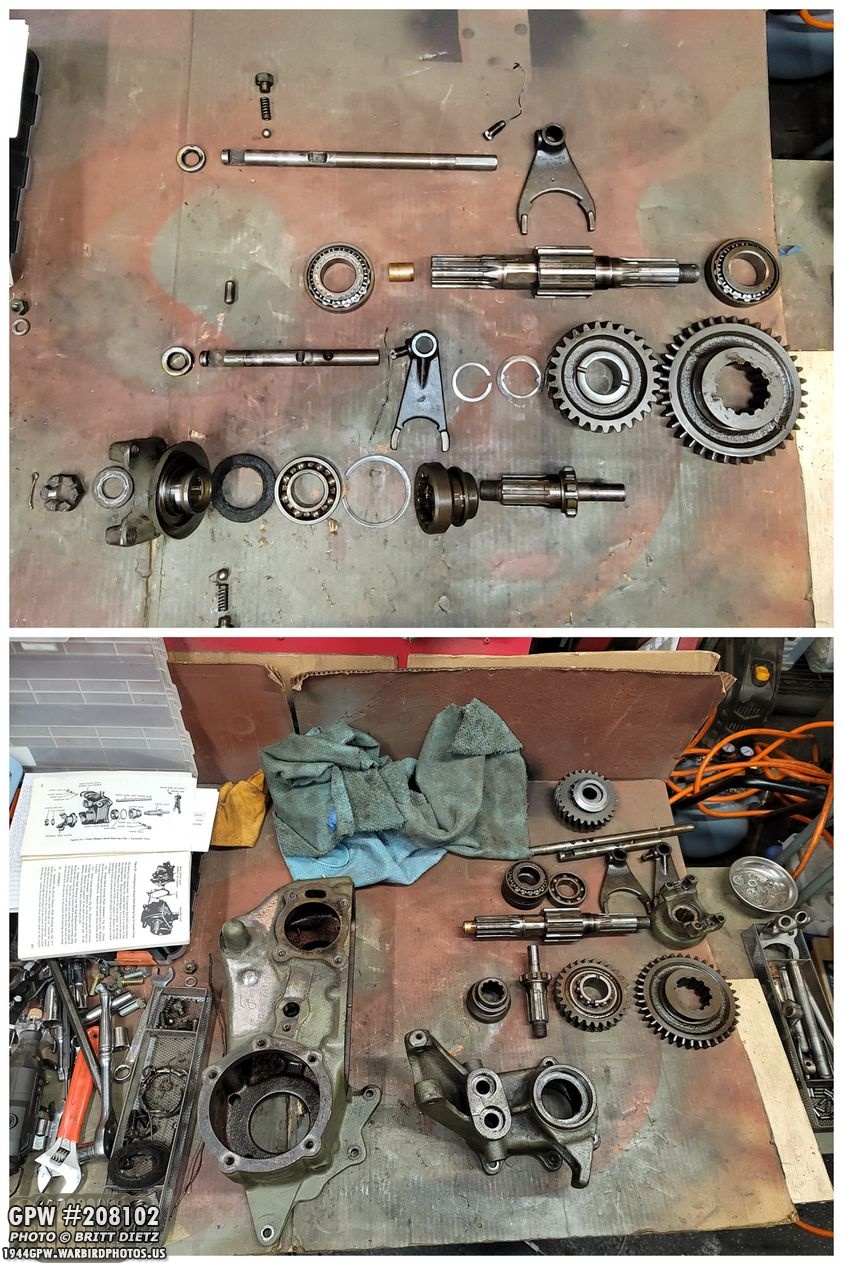
Taking a look at the T-84, it’s ready to go for a rebuild. Since I don’t have all the parts, I decided to at least get things ready.

All the gears have been cleaned and scotch pad sanded for the T-84.
I removed the bushing from the reverse gear and put in a new one. I had to use the Dremel to get the old one out as it was in there super tight.

I also put in the two bushings and the middle space in the cluster gear.

When taking a close look at how the traveling first/reverse gear goes back on the output shaft, I noticed that it was catching on something. Taking a look inside, I noticed these carved areas. Ugh! So that means I’ll need to replace this gear. But, so far that’s the only gear I will need to replace.
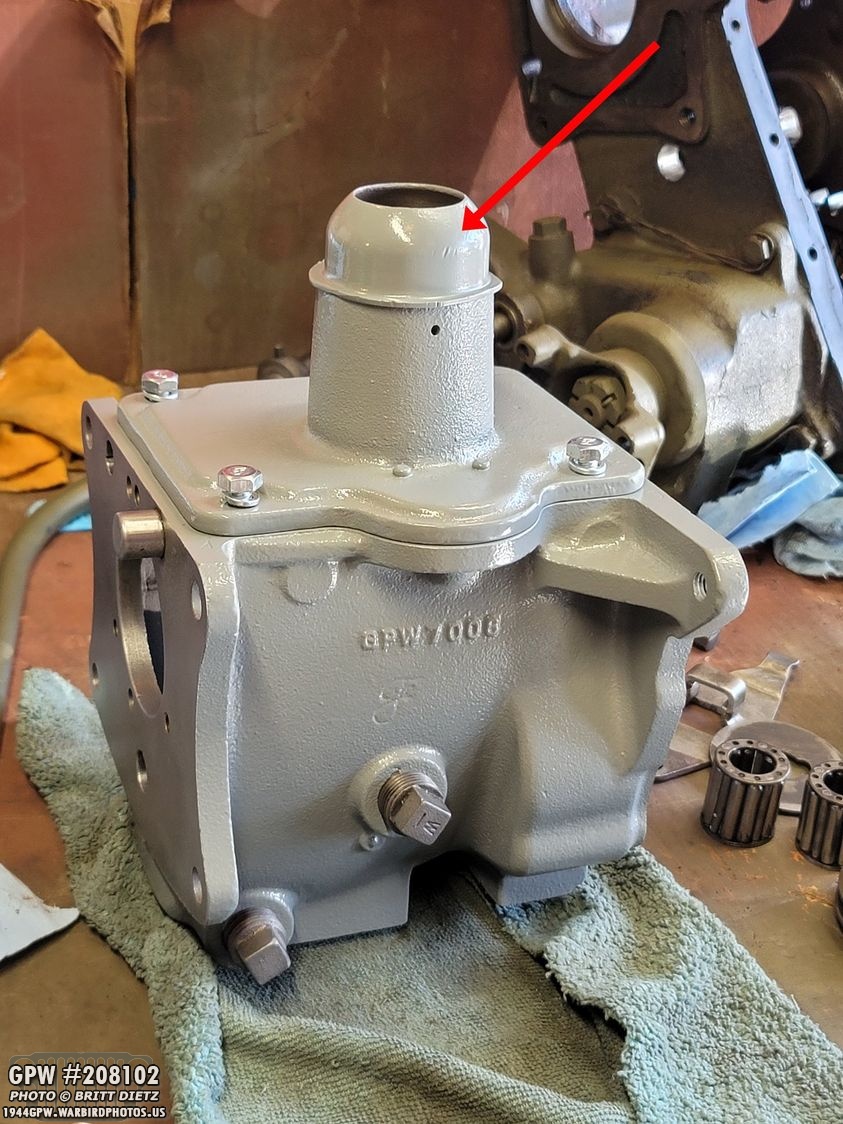
Going back to the T-84 itself, one thing that’s happened in the past is I’ve had the shifter jump into neutral when I was going into second gear, so I couldn’t change gears. One of the biggest reasons for this happening is where the shifter cane rides on the top cover. If you unscrew the cap…
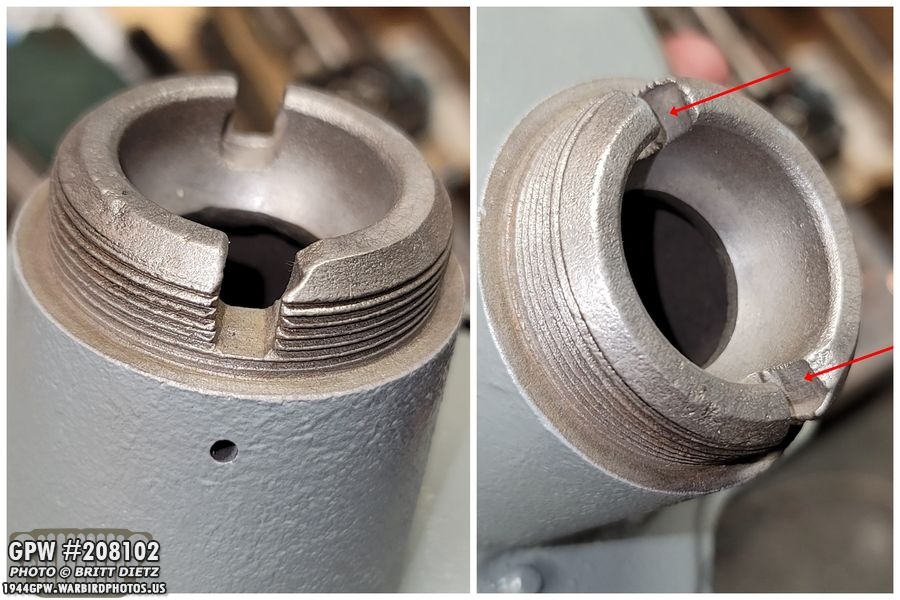
You can see the notches where the shifter cane pins pivot. If you look at mine, there’s some severe wear on the notches. Thankfully, my friend Tom Read has a way to build that back up, so I won’t need a new cover!

I wanted to do a tutorial on how the T-84 works. In order to do that, I needed to make sure that the output shaft bearing won’t push out while testing the gears shifting. The output shaft will easily just fall out with the output shaft when trying to shift into second gear. So, I put some strong wires on the back spun around four bolts going across in an X pattern. It’s nice and tight, so the output shaft is locked in place as if the transfer case was connected.
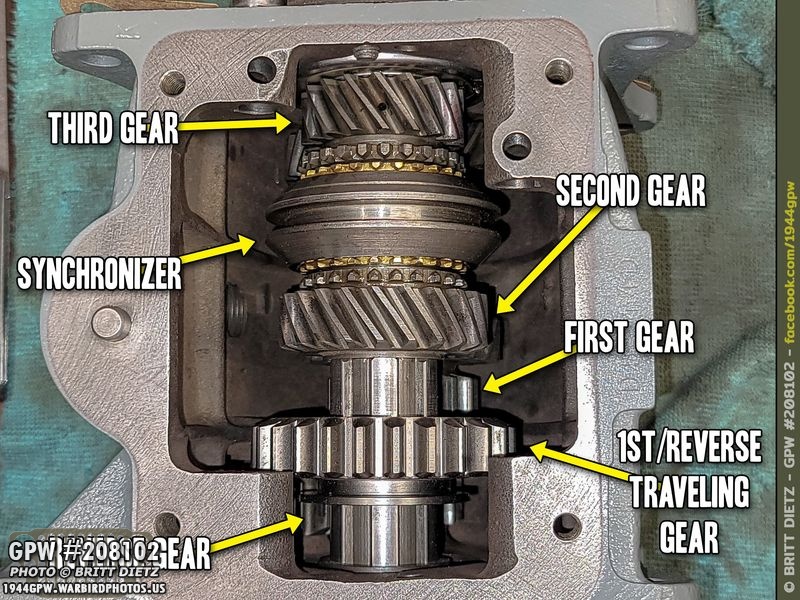
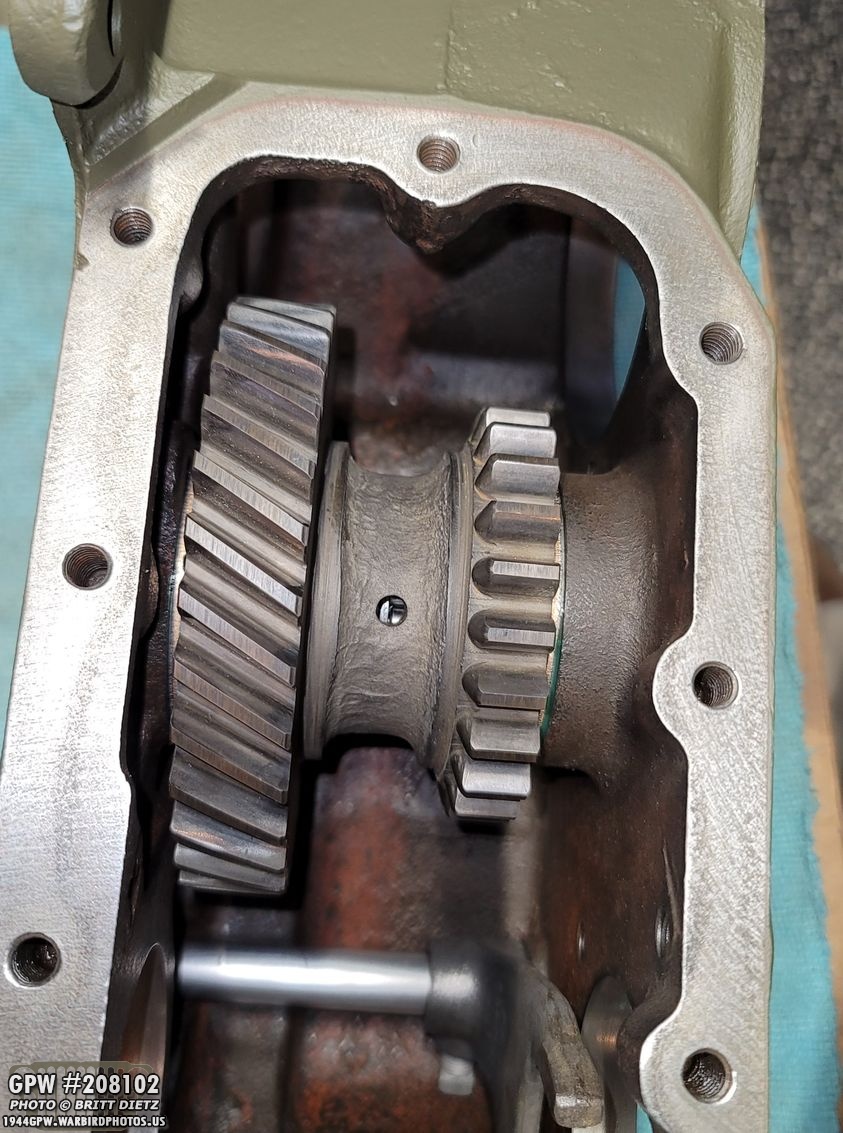
Let’s take a look inside the T-84. Here’s the list of all the gears. First gear is actually underneath the top output shaft gears part of the one-piece clustergear. Reverse gear is the small gear also underneath in the back corner. Second gear is on the output shaft, and third gear is directly on the input shaft. The 1st/reverse traveling gear will switch between 1st and reverse via a shift fork… the synchronizer will move forward for third gear, and backward for second gear.
Things are shifted via the shifting plate and the shifter cane, shown here. The shifter can will either move the shifter plate, which moves to first gear/reverse, or it will directly move the 2nd/3rd gear shaft itself without moving the shifter plate. Here, you can see the shifter cane directly interfacing with the 2nd/3rd gear shaft.

To get started, this is the shifter plate. It is held in place on one side by a pin on the T-84 case. There’s a spring washer underneath that keeping it level. The shifter cane will go into this area where the arrow is and move according to have you move the cane itself.
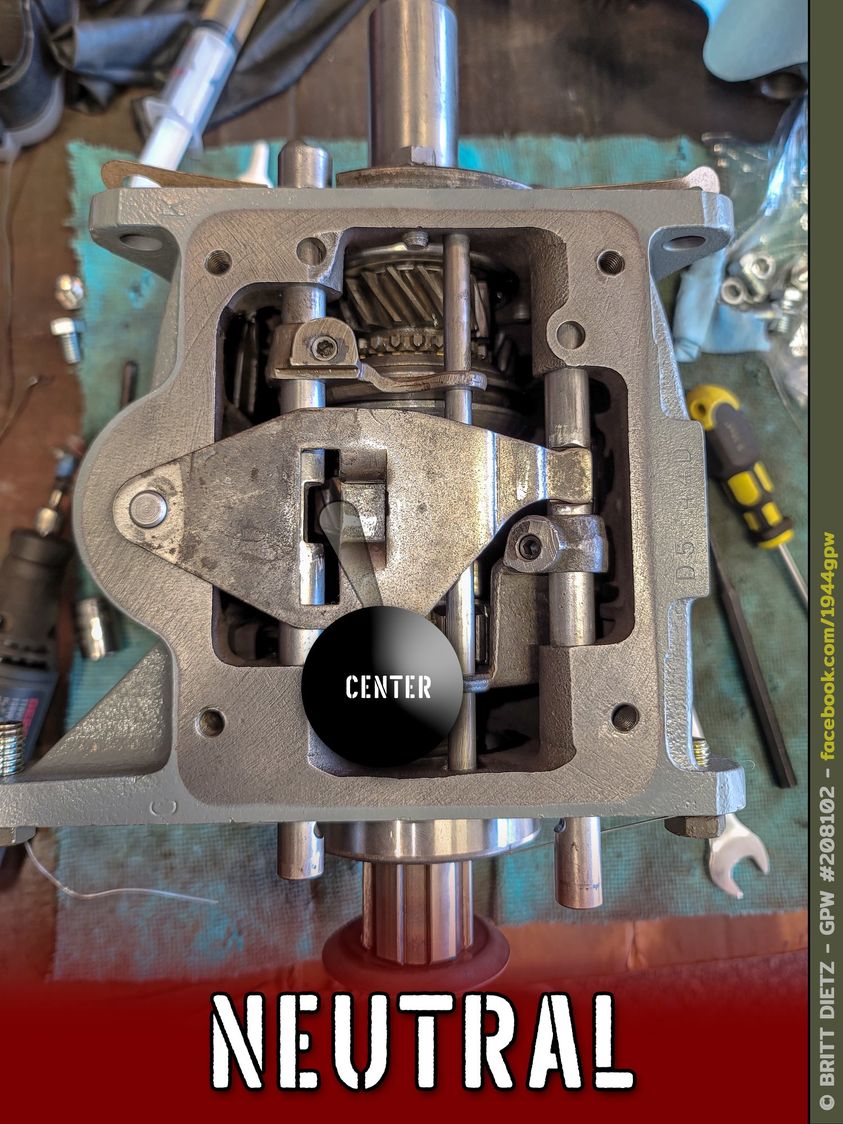
Here’s neutral, which is when the cane is centered. Note, the black shifter knob ball won’t be directly over the T-84 since it has the bend. As you can see, the shifter plate is perfectly horizontal, and the 2nd/3rd shift rail on the left is center veritcally.

Moving the shifter cane to the left and downwards puts it in first gear. The shifter cane will move the shifter plate upwards, which then pushes the right shifter rail upwards, which moves the fork which moves the 1st/Reverse raveling gear upwards to engage with the 1st gear on the clustergear underneath.
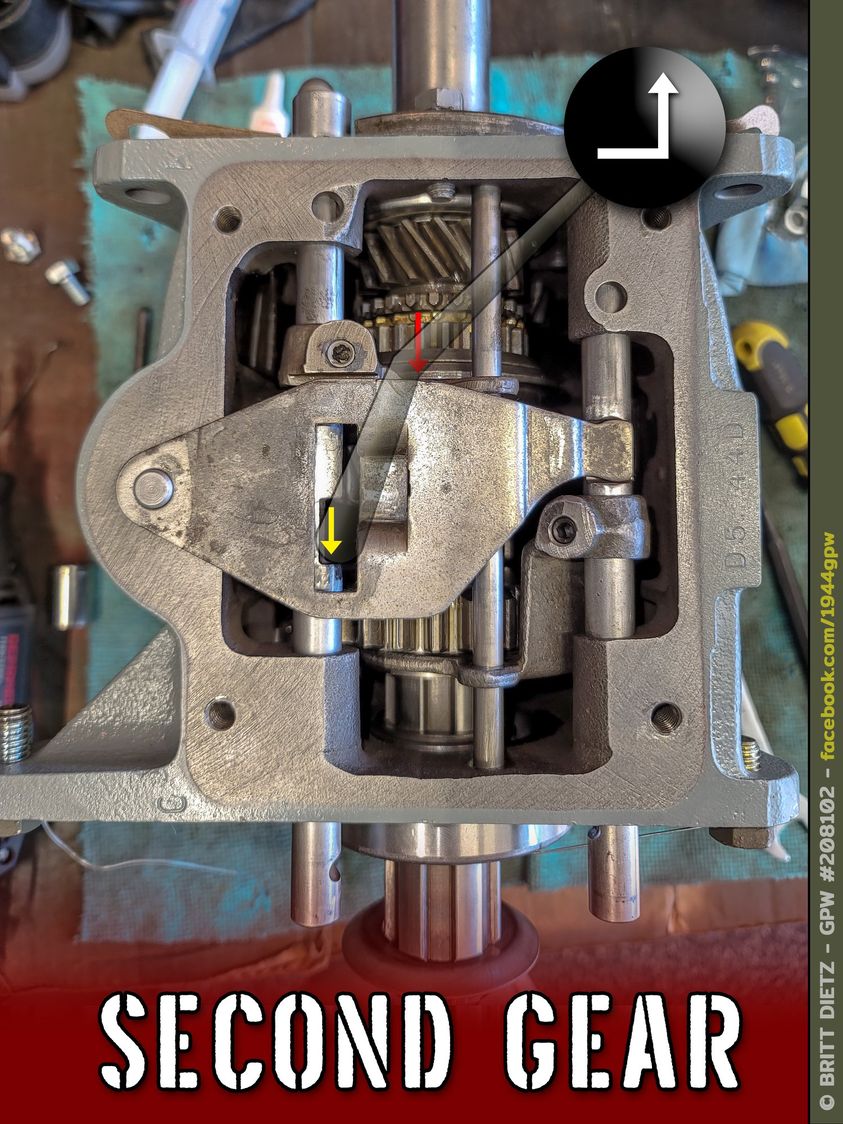
Move the shifter cane to the right and upwards, that will engage the shifter cane directly with the left 2nd/3rd shifter rail moving it downwards. That moves the connected fork on that side downward with the synchronizer engaging second gear. Notice how the shifter plate hasn’t moved, only the left rail.

Move the shifter cane to the right and downwards, and that will move the 2nd/3rd shifter rail upwards, which moves the fork with the synchronizer engaging third gear.
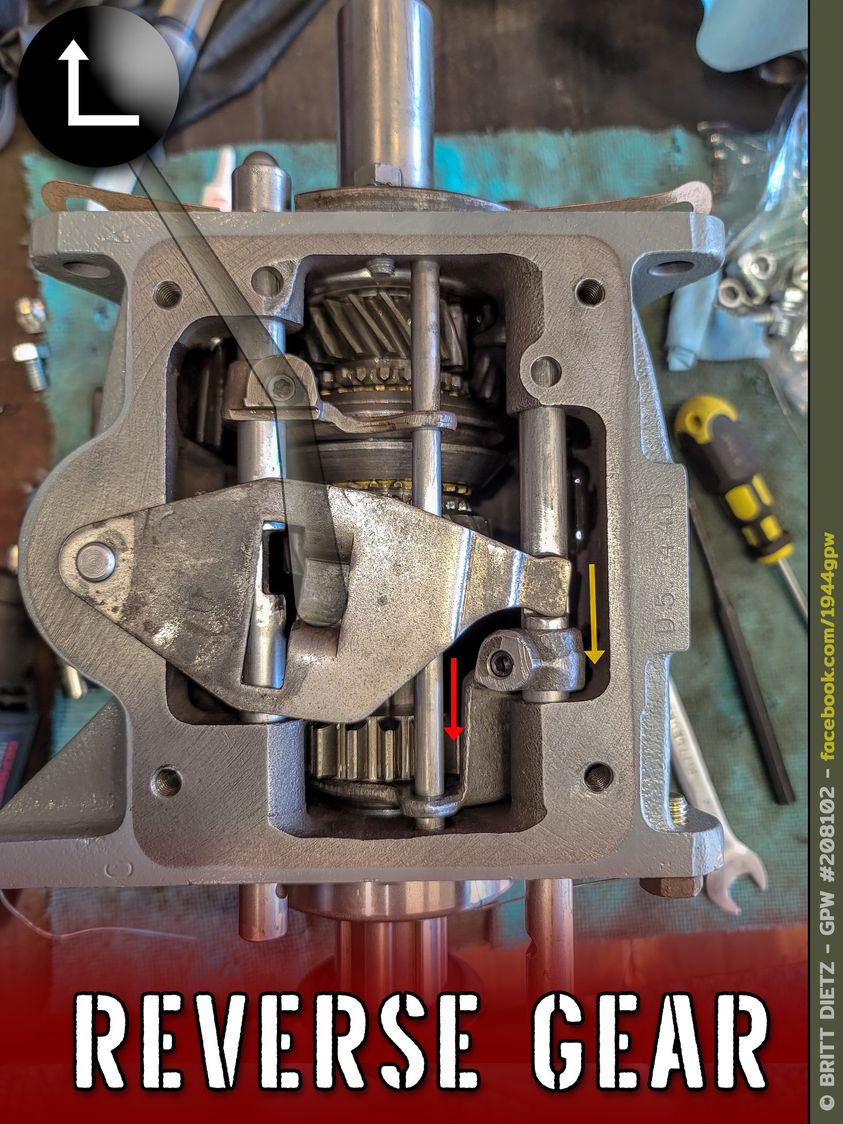
Finally, move the shifter cane to left and upwards, and you’re in reverse. That moves the plate downward, which moves the 1st/Reverse rail downwards with the fork and the traveling 1/stRevese gear engaging it with the small reverse gear in the back corner. And that is all the gears and how the T-84 parts move!

Moving on, so last year in October, I got excited as I found this Jerry Can spout/nozzle thinking it was wartime. I had totally mixed up the wartime version with the post-war one. How can you tell the difference? The post-war spout has rivets (shown here). I didn’t realize it until someone corrected me on here after I’d taken time to restore it! Whoops!

So, last weekend I was in an antique store in Temecula and I saw another spout sitting among a bunch of tools for sale. I only saw it in the corner of my eye. When I turned to look, I got super excited… SCREWS! And for $14, it was an instant buy!
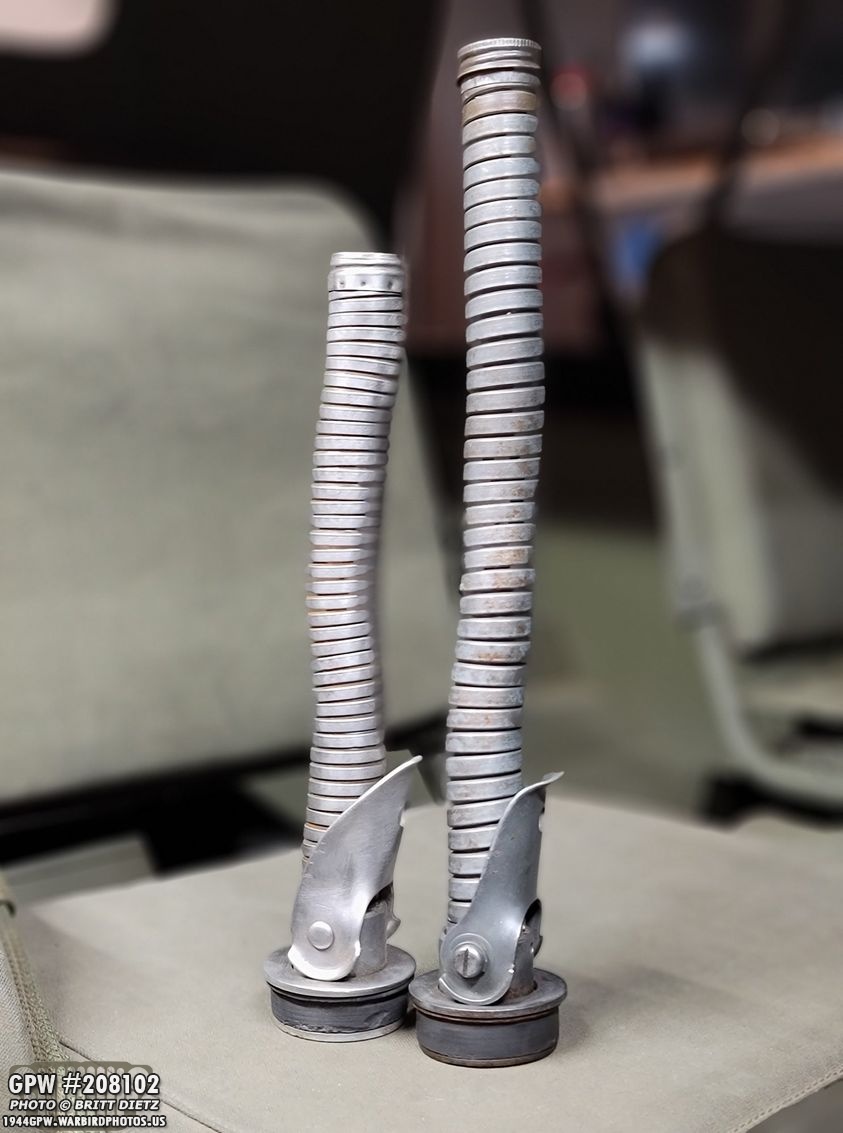
Bringing it home, one of the first things I did was compare it to the post-war one (on the left). There’s a huge difference in size between the two! I didn’t even realize.

Here’s a look at the two versions, riveted and screwed in. So, post-war on the left, and wartime on the right.
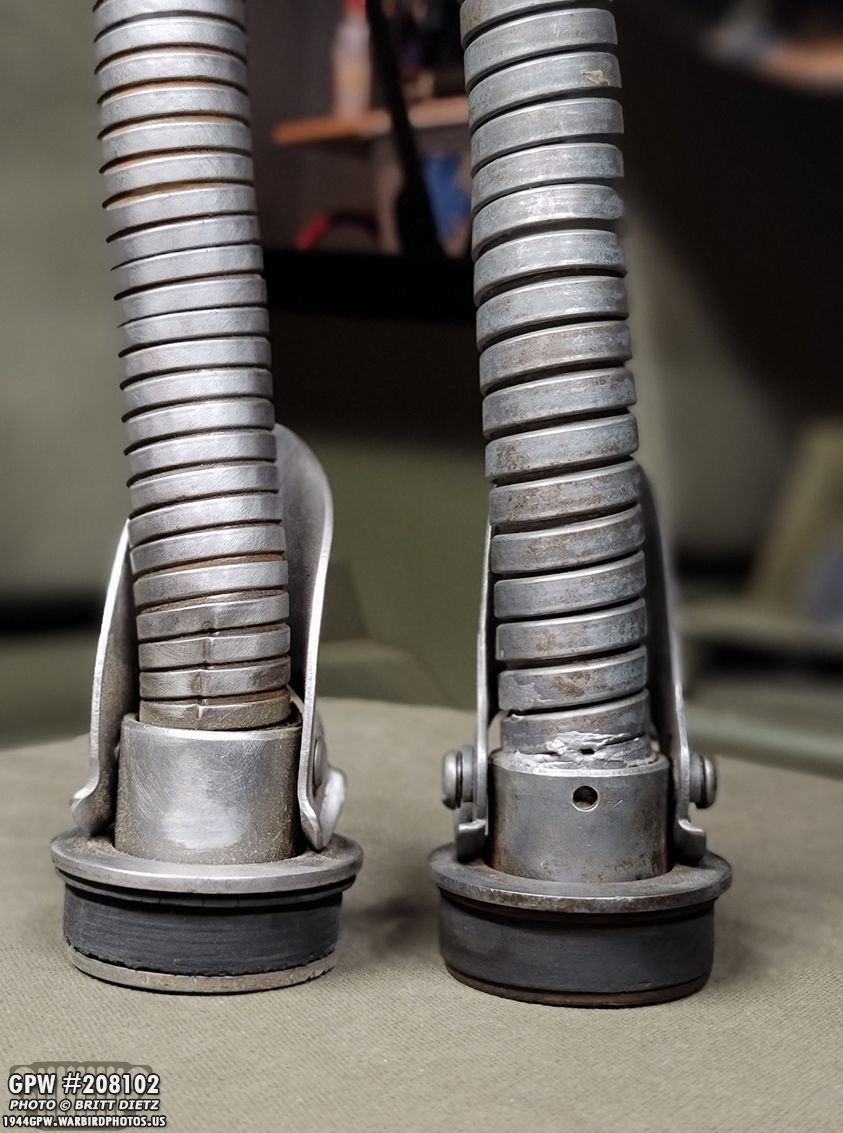
Here’s another look at the differences. Looks like someone did some soldering to it to stop a possible leak.

Again, left is post-war, right is wartime. Looks like a brass ring on the bottom of the wartime one. Also, the filter on the end is flat on the post-war one, and coned on the wartime one.
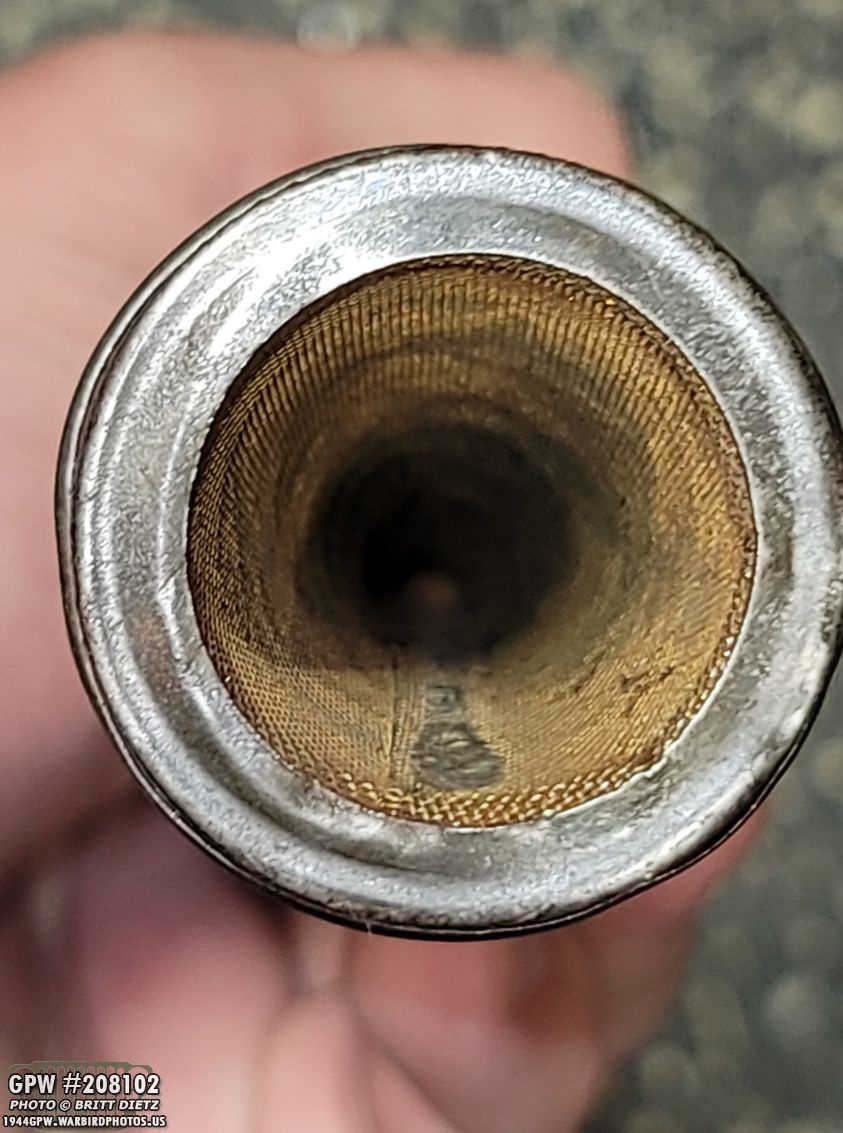
Here’s a look at the coned filter that screws on to the top of the spout.

Taking everything apart, here are all the pieces.

After a bit of TLC, wire wheeling, and cleaning, looks almost new!

And a final look at the screw after cleaning.

The brass cleaned up well, same with the top filter. I soaked it in gasoline for a few hours then sanded it clean.

And here the finished product is put into the 1943 jerry can on the back of the Jeep. This is how it attaches. Of course, I’m not leaving it on here. It will go in the toolbox. But another great piece to add! And since this is a great rear shot of the Jeep, that will end this week’s update! Not as much work as the last few weeks, but once the parts get here, things go into high gear with the rebuild of everything! Look for those (I hope) starting next week! Till next week…