 Engine Work Continues & 4th of July
After finally replacing the engine valve adjuster screws and starting to get things back on track, following the local 4th of July parade, the Jeep hits a major setback and (almost literally) stops in its tracks.
Continuing with part 2 of the June-July valve and other issues… which we’ll get to in this update. What started as a simple ‘hey, it’s about time that I finally got to those noisy valves on the Jeep after nearly 8 years of owning it’ went from a one-day project to a multi-week project… and I was on the clock for TWO events that were a short time away.
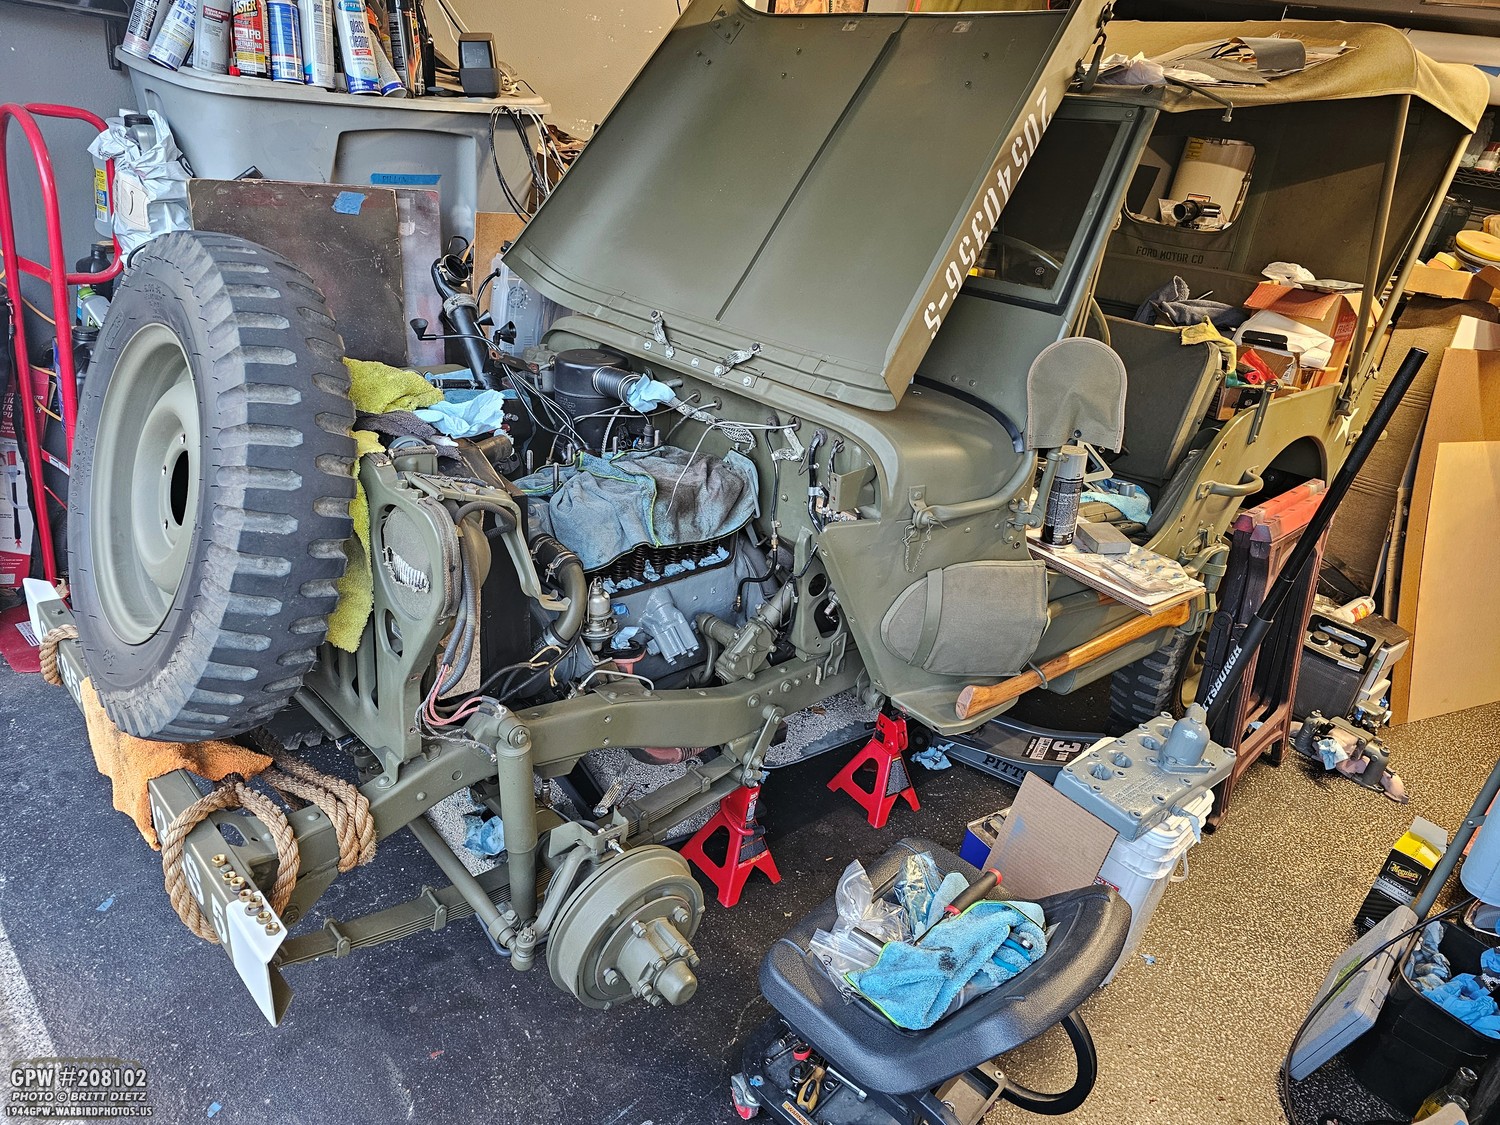
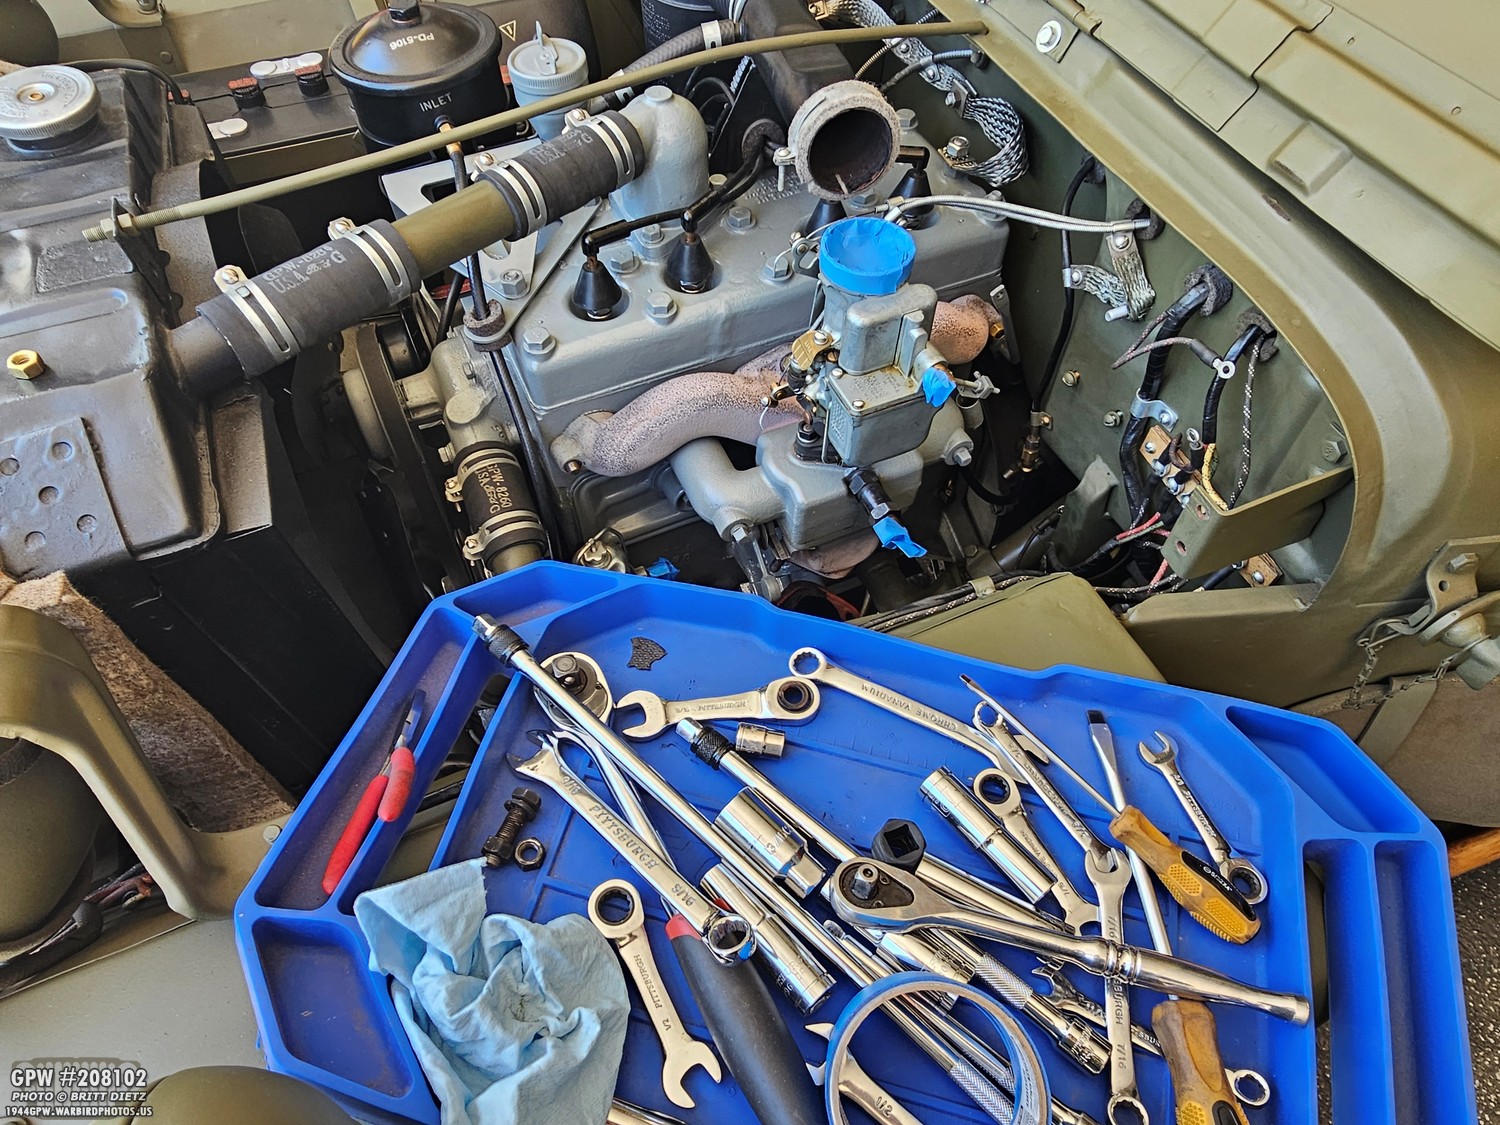
Where you left off last time was when I had just replaced the valve adjuster screws, which ended up requiring the removal of the head of the engine. Something I didn’t want to have to do. The Jeep spent a lot of time looking like this as I waited for replacement parts to arrive. While Ron Fitzpatrick Jeep Parts gets me parts within 2 business days, the problem was 1) I didn’t realize on the first order I needed more things, and 2) both times I ordered, it was later in the week, which meant I had to wait out the weekend for them to ship.
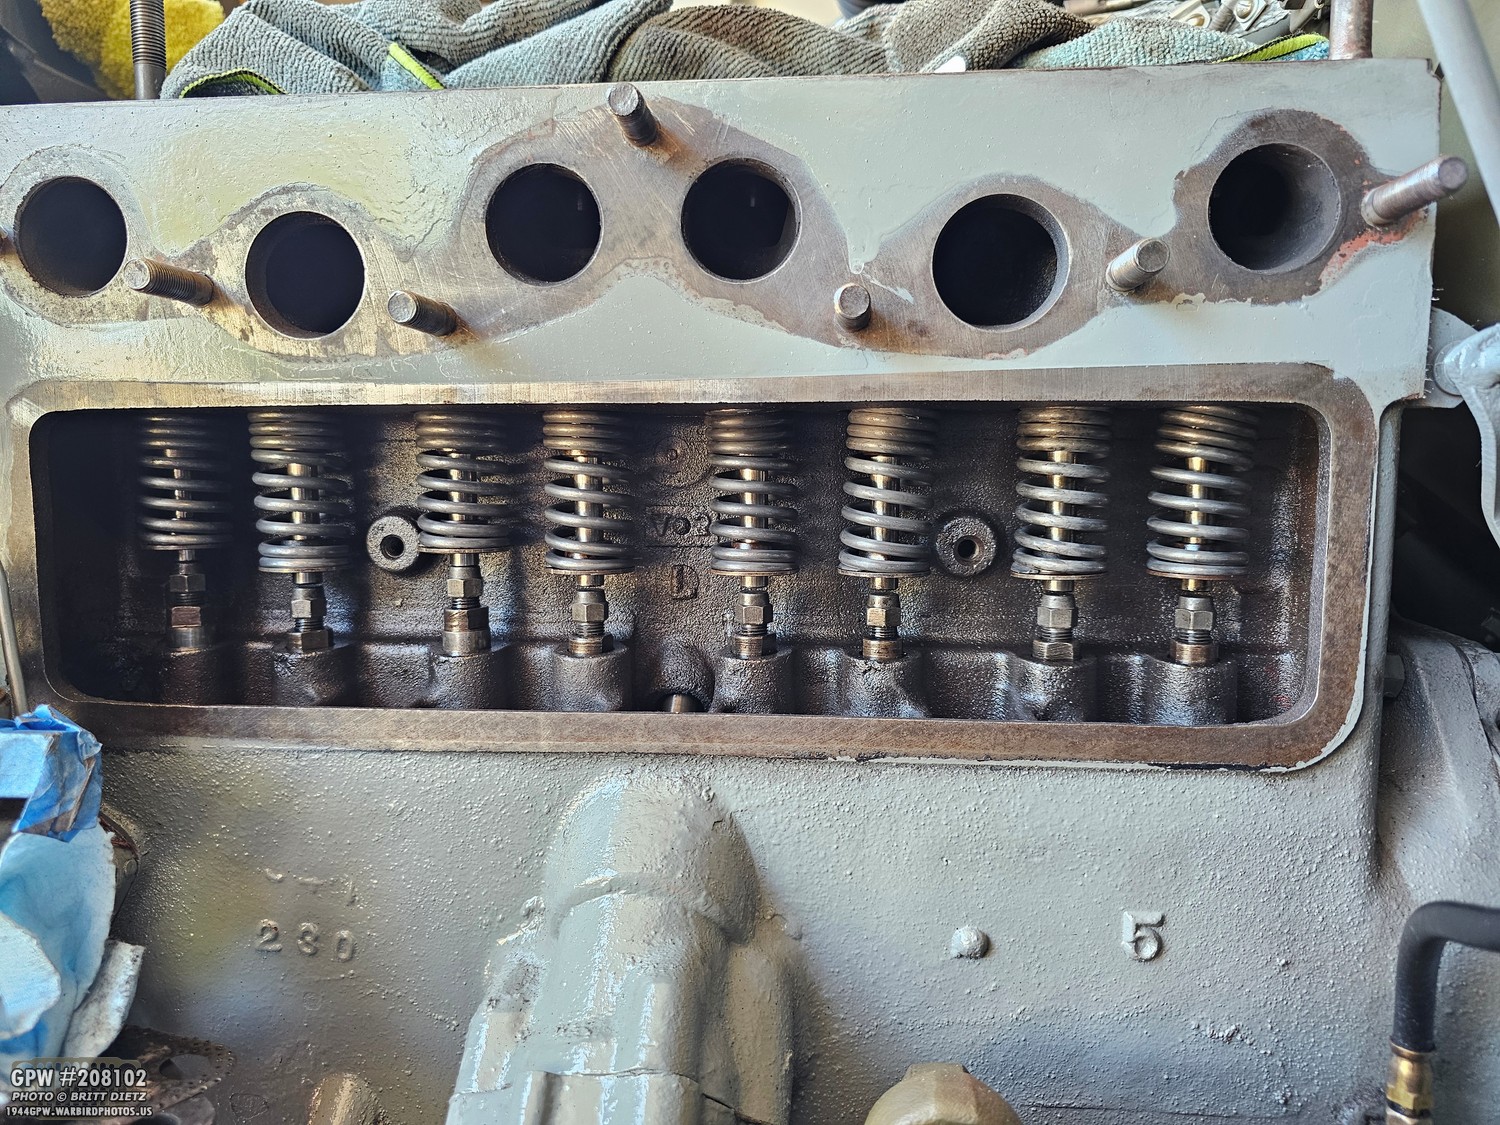
But I finally got all the valve adjuster screws in, put on new springs, and got everything correctly adjusted. Well, or so I thought. Remember, it was heavily recommended to me to use the .013 gap setting. That would end up coming back to bite me a bit. We’ll get to that.
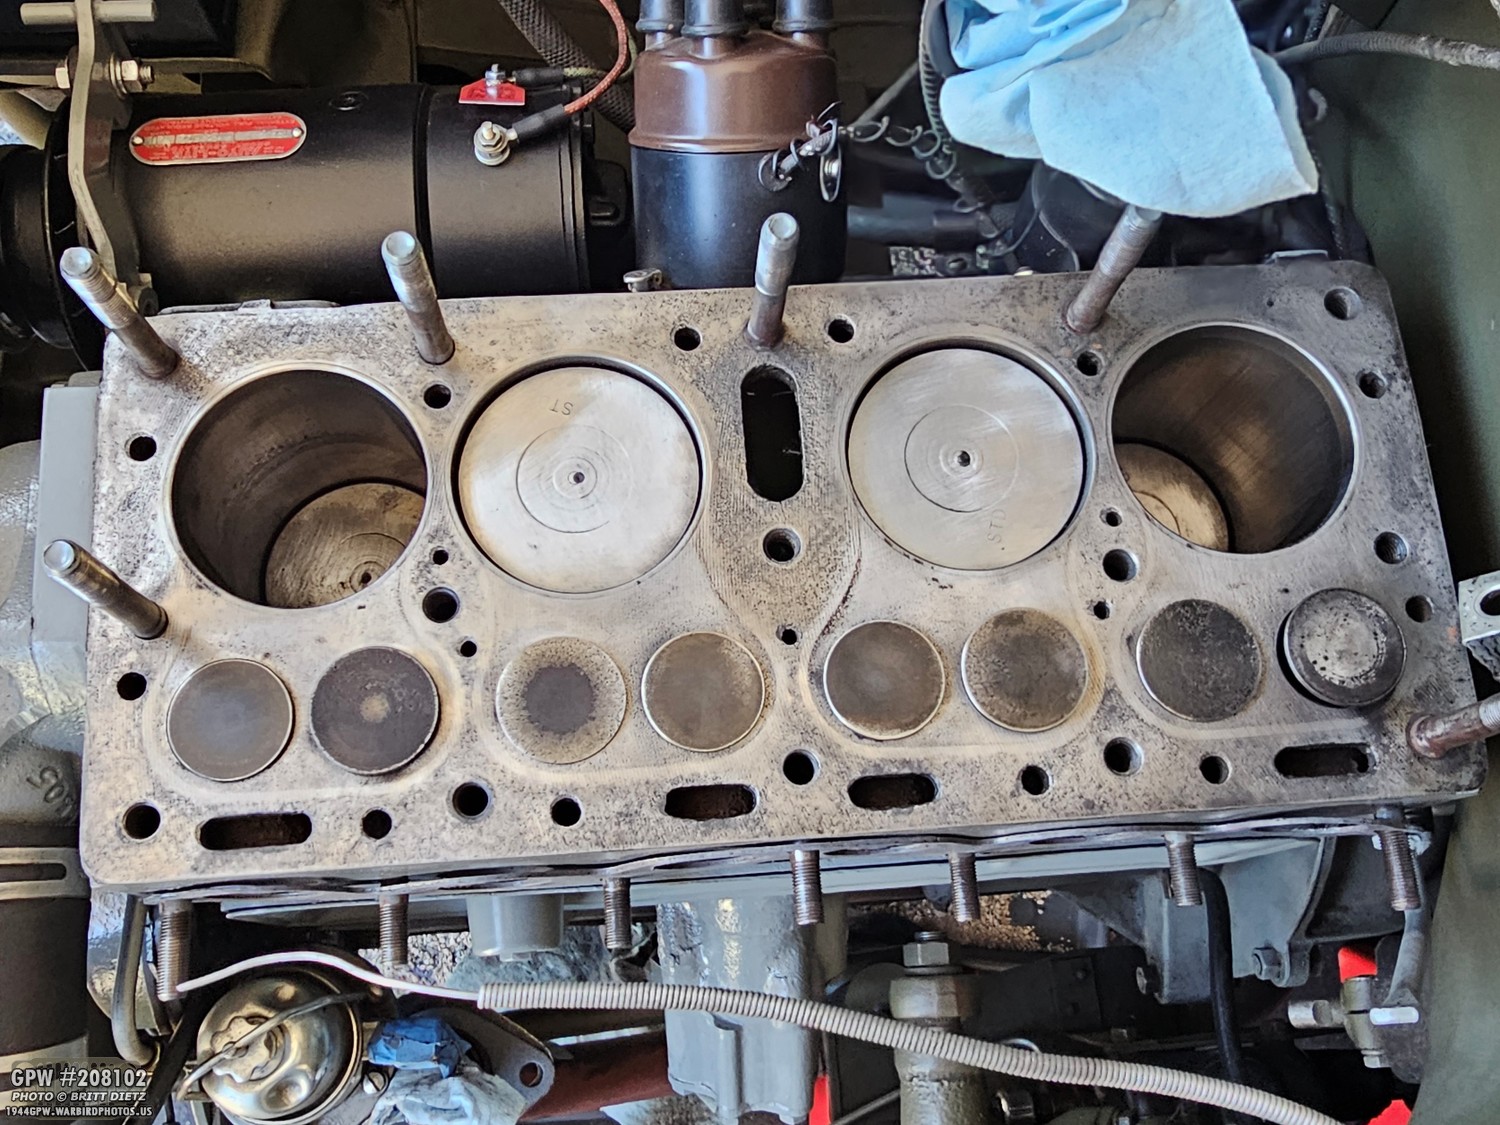
I did spend time cleaning up the top of the block as best I could. A clean block top means better sealing of the head gasket!
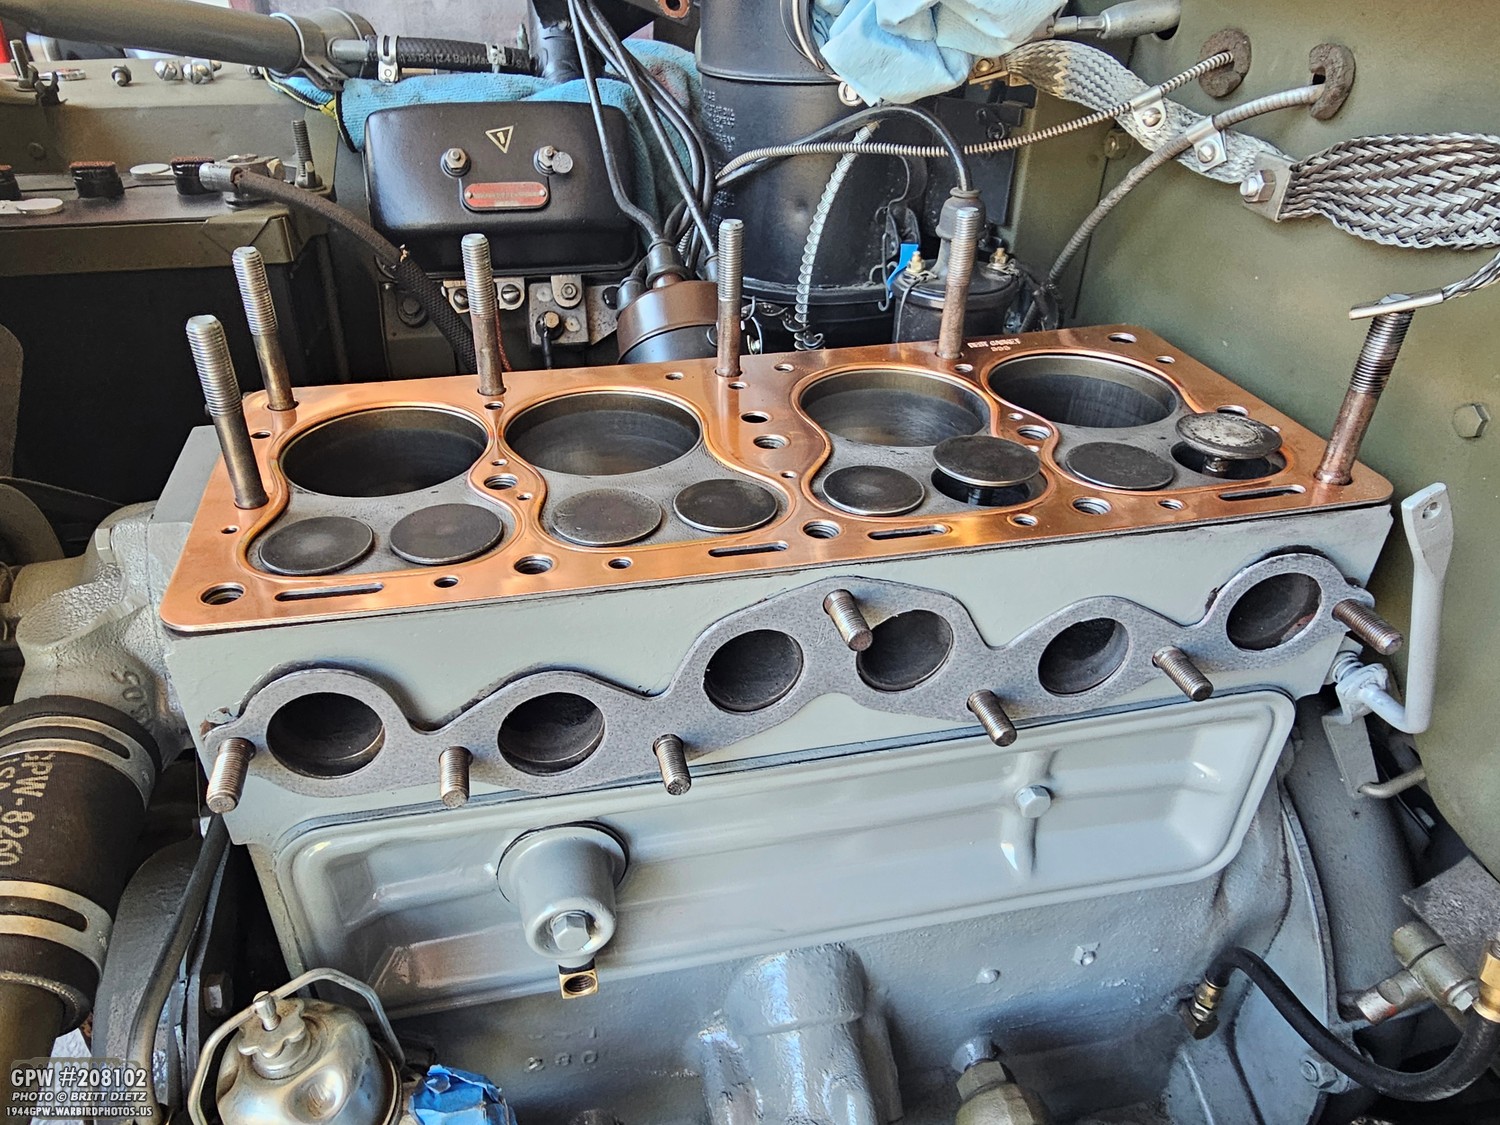
So, where we left off in the last update was after everything was adjusted, and I installed the new head gasket after test fitting it (shown here) and coating it with copper spray AND also using some RTV around the coolant holes. There’s the recap. So let’s move on!
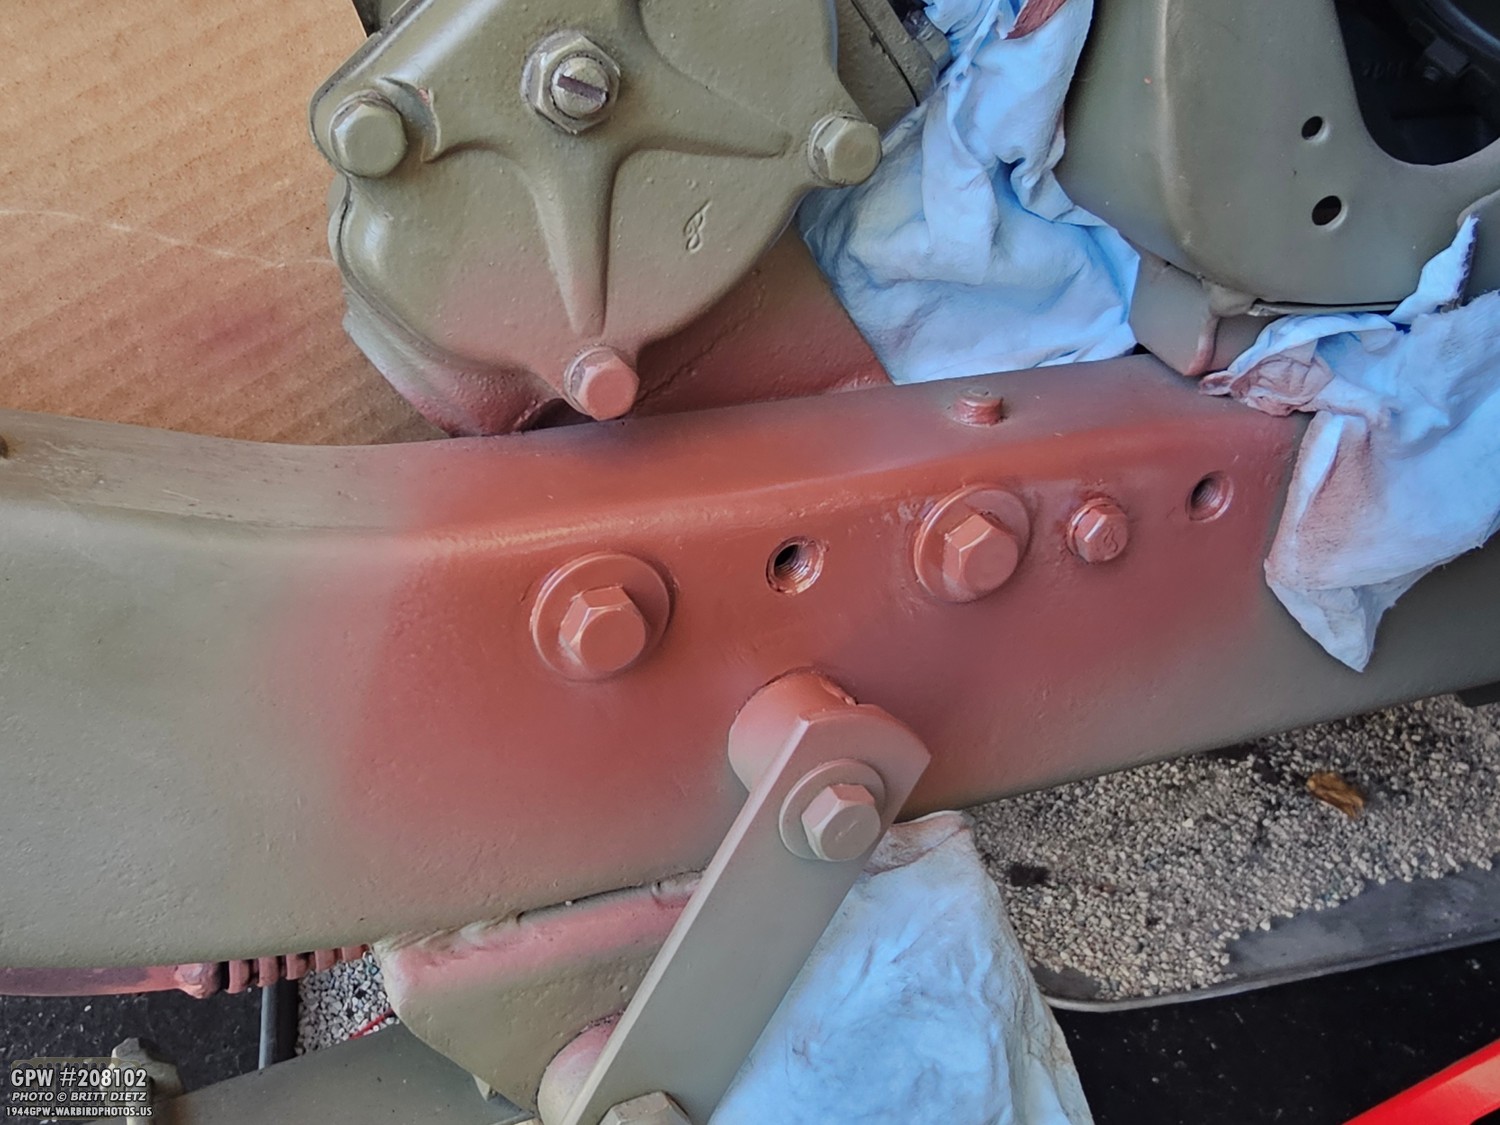
While waiting for things to arrive, I didn’t just sit by and twiddle my thumbs… in fact, I tried to make use of the time where I could. Like replacing the last two ‘modern’ bolts (with modern markings on the head) here on the frame. These are the bolts that hold the steering box. I got new mark-less ones to replace them. Some red oxide paint before OD Green.
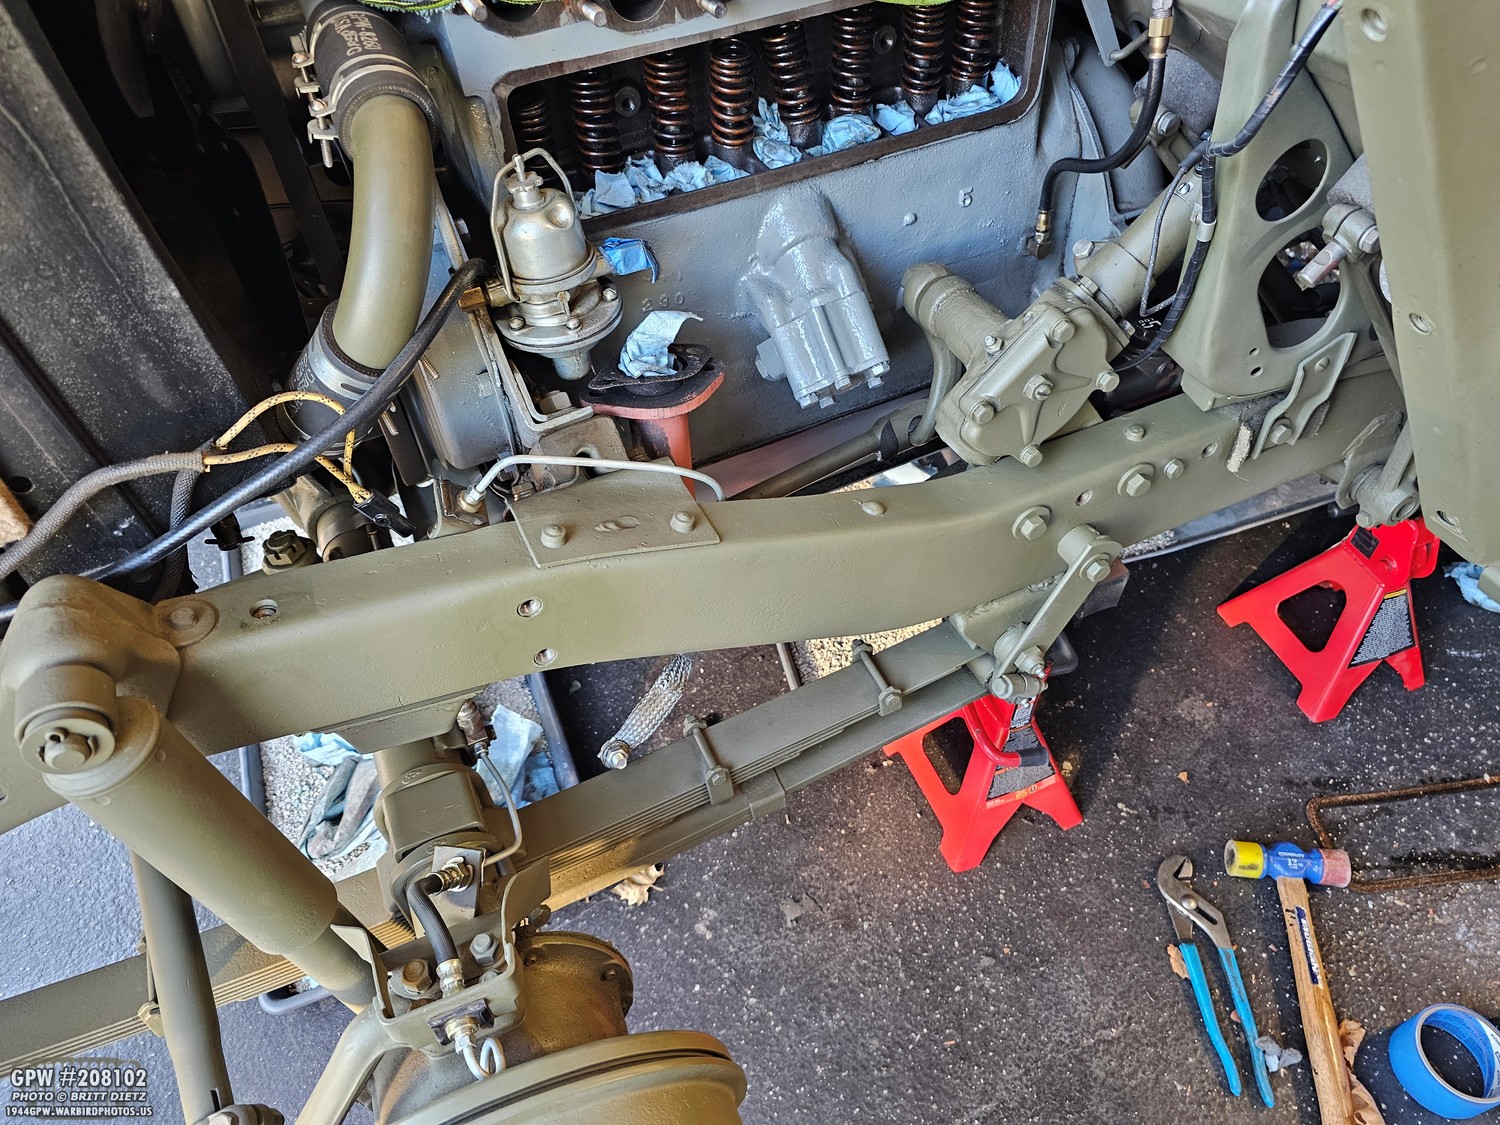
And after that, a nice touch-up of everything with the 33070 OD Green, and it looks good as new!
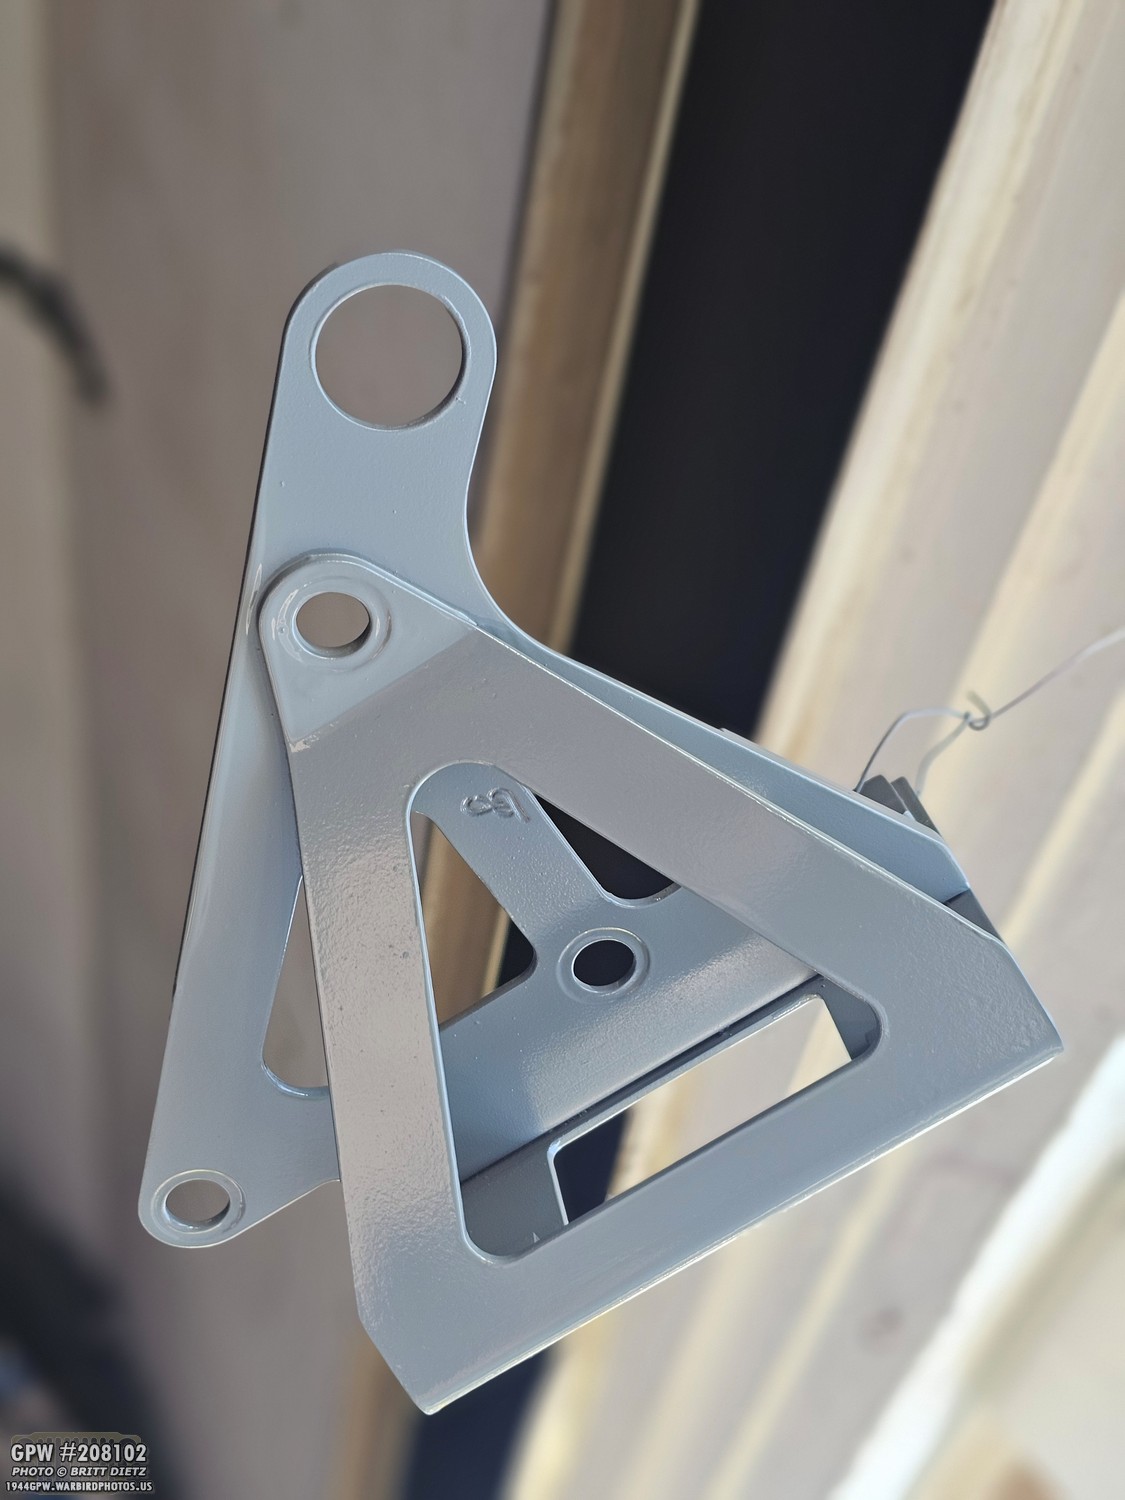
I also repainted the oil filter bracket, which got scratched up from removing the nuts on the studs. Good ole VHT Ford Engine Grey. I still have two cans of it left, which thankfully last a long, long time. But I’ll miss it when they finally run out, and I have to look for an alternative.
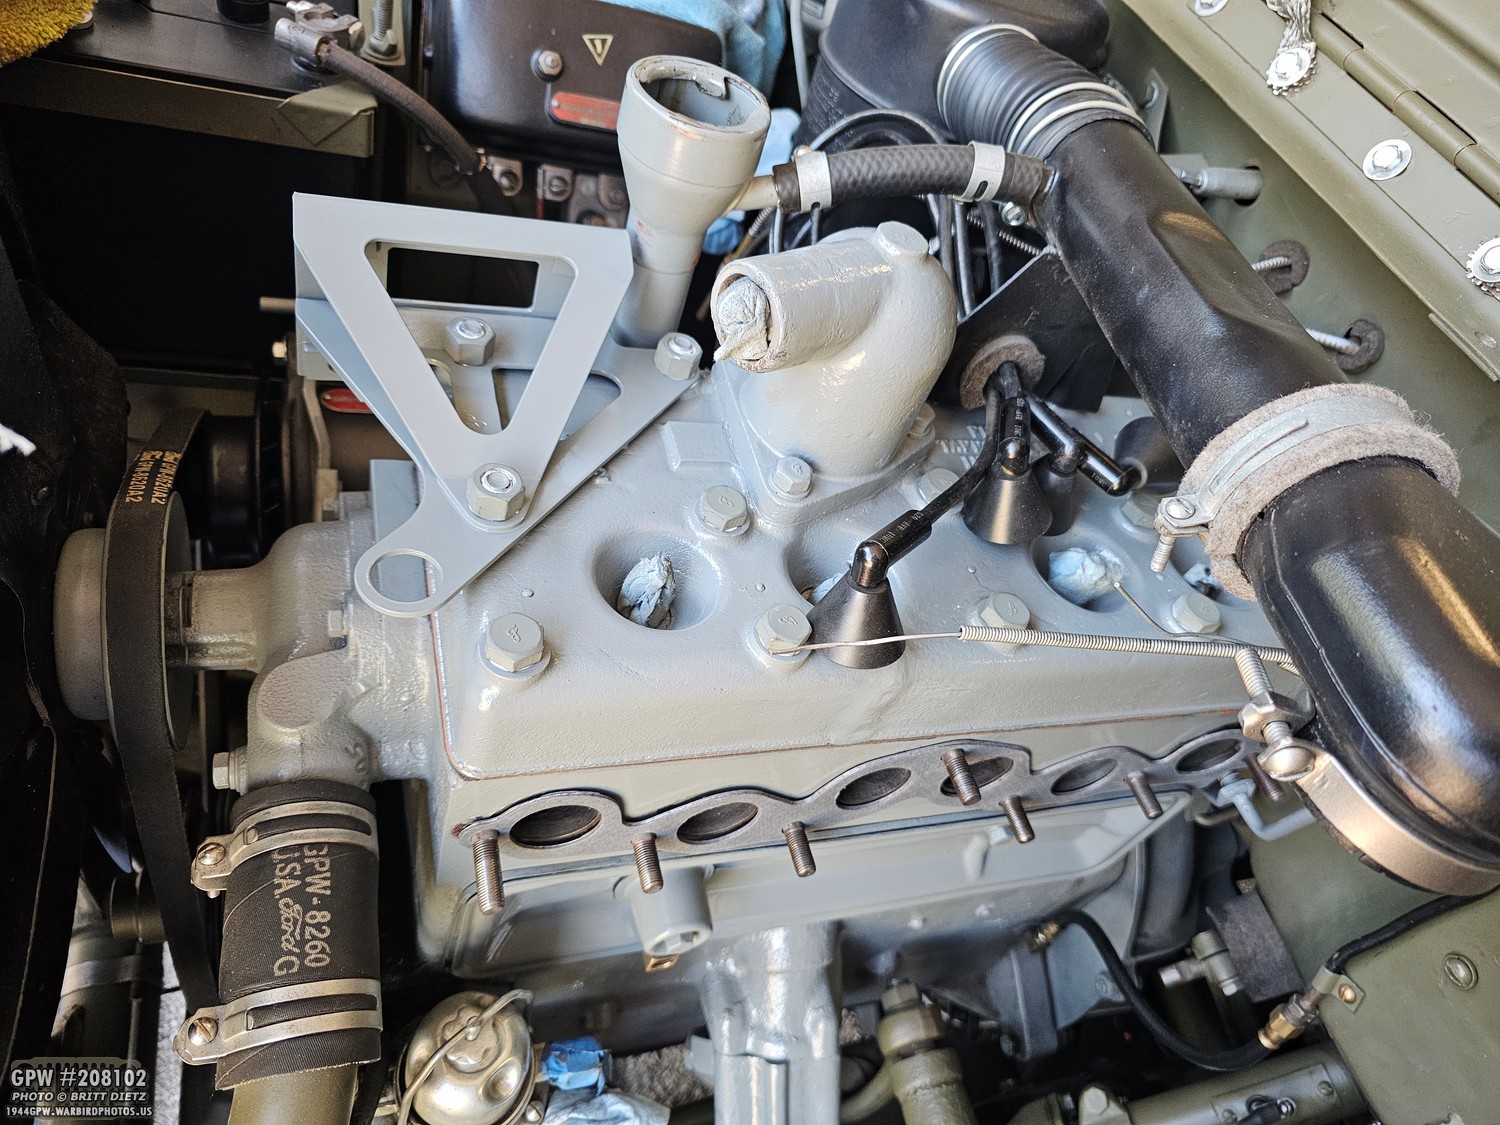
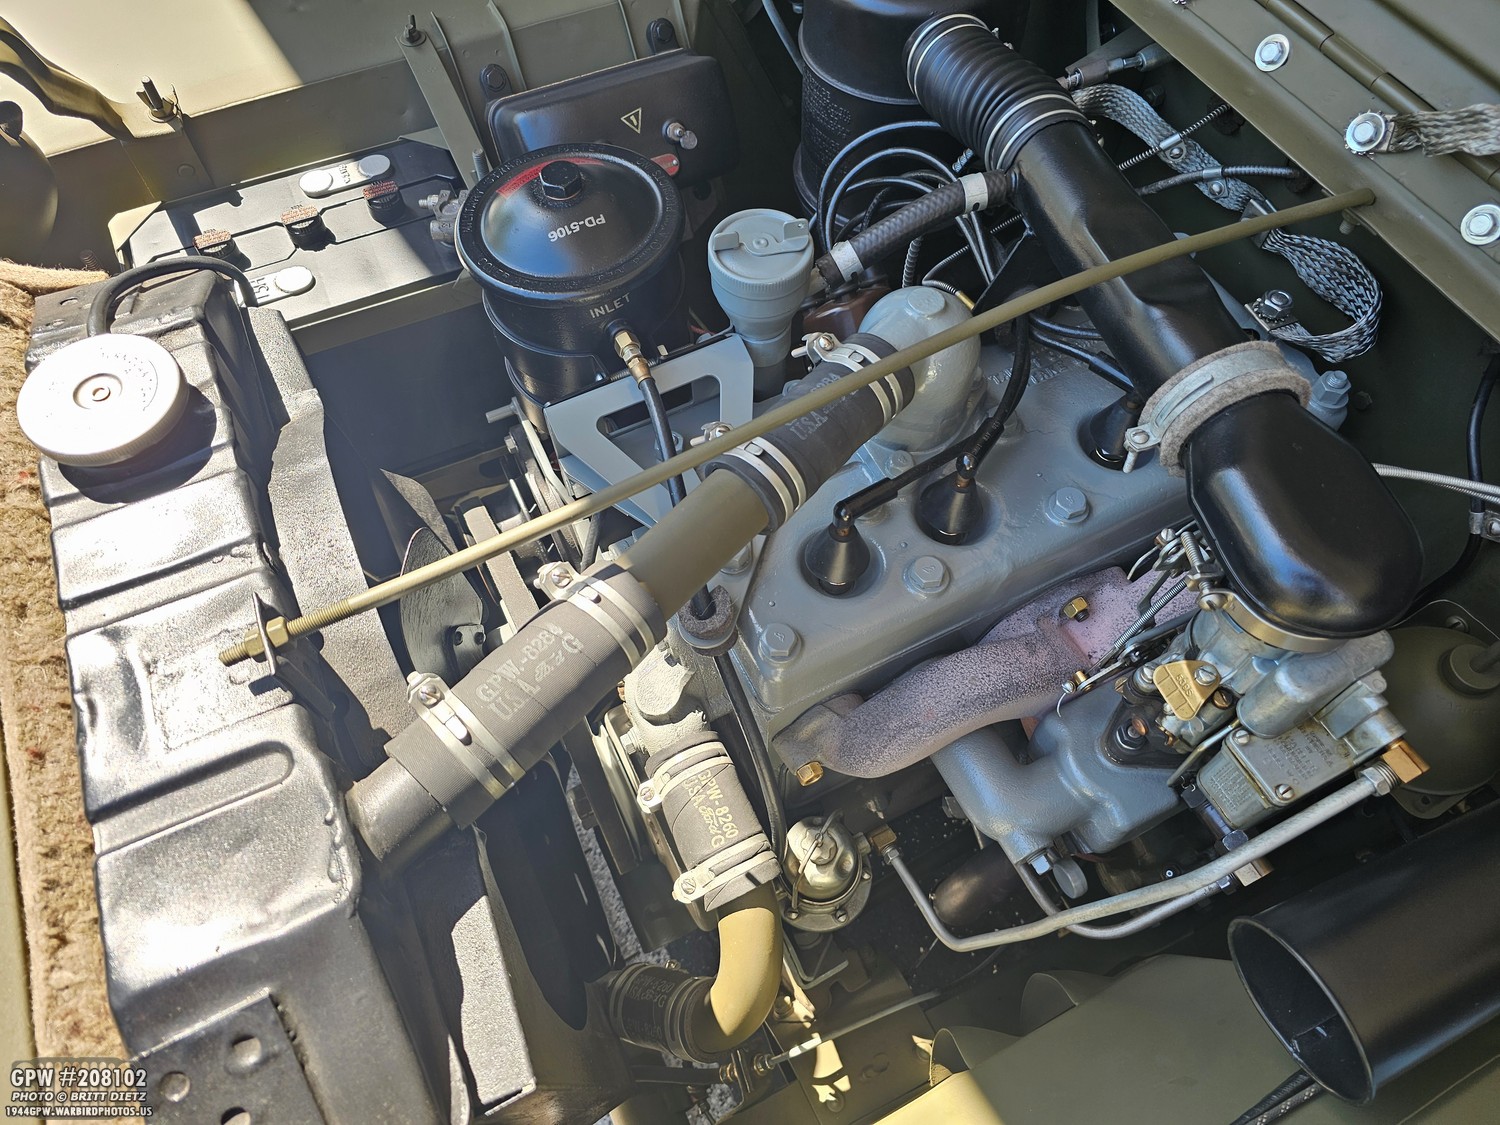
With the head back on, I was able to start the long process of torquing the bolts/nuts. Remember, there is a specific torque order you need to follow, and there are different torque settings for nuts and bolts, so pay attention! And, to make things more difficult, you have to install the air cleaner to carb crossover tube and the old filter bracket when putting the head bolts/nuts back on. That makes things difficult to torque… but not having the radiator crossover tubes on helps a TON.
Note the white thread sealer on the oil filter nuts. That’s an area where oil often will leak, so I make sure the bottom of the bracket and the bottom of the nuts have thread sealer to try and stop this.
Note the white thread sealer on the oil filter nuts. That’s an area where oil often will leak, so I make sure the bottom of the bracket and the bottom of the nuts have thread sealer to try and stop this.
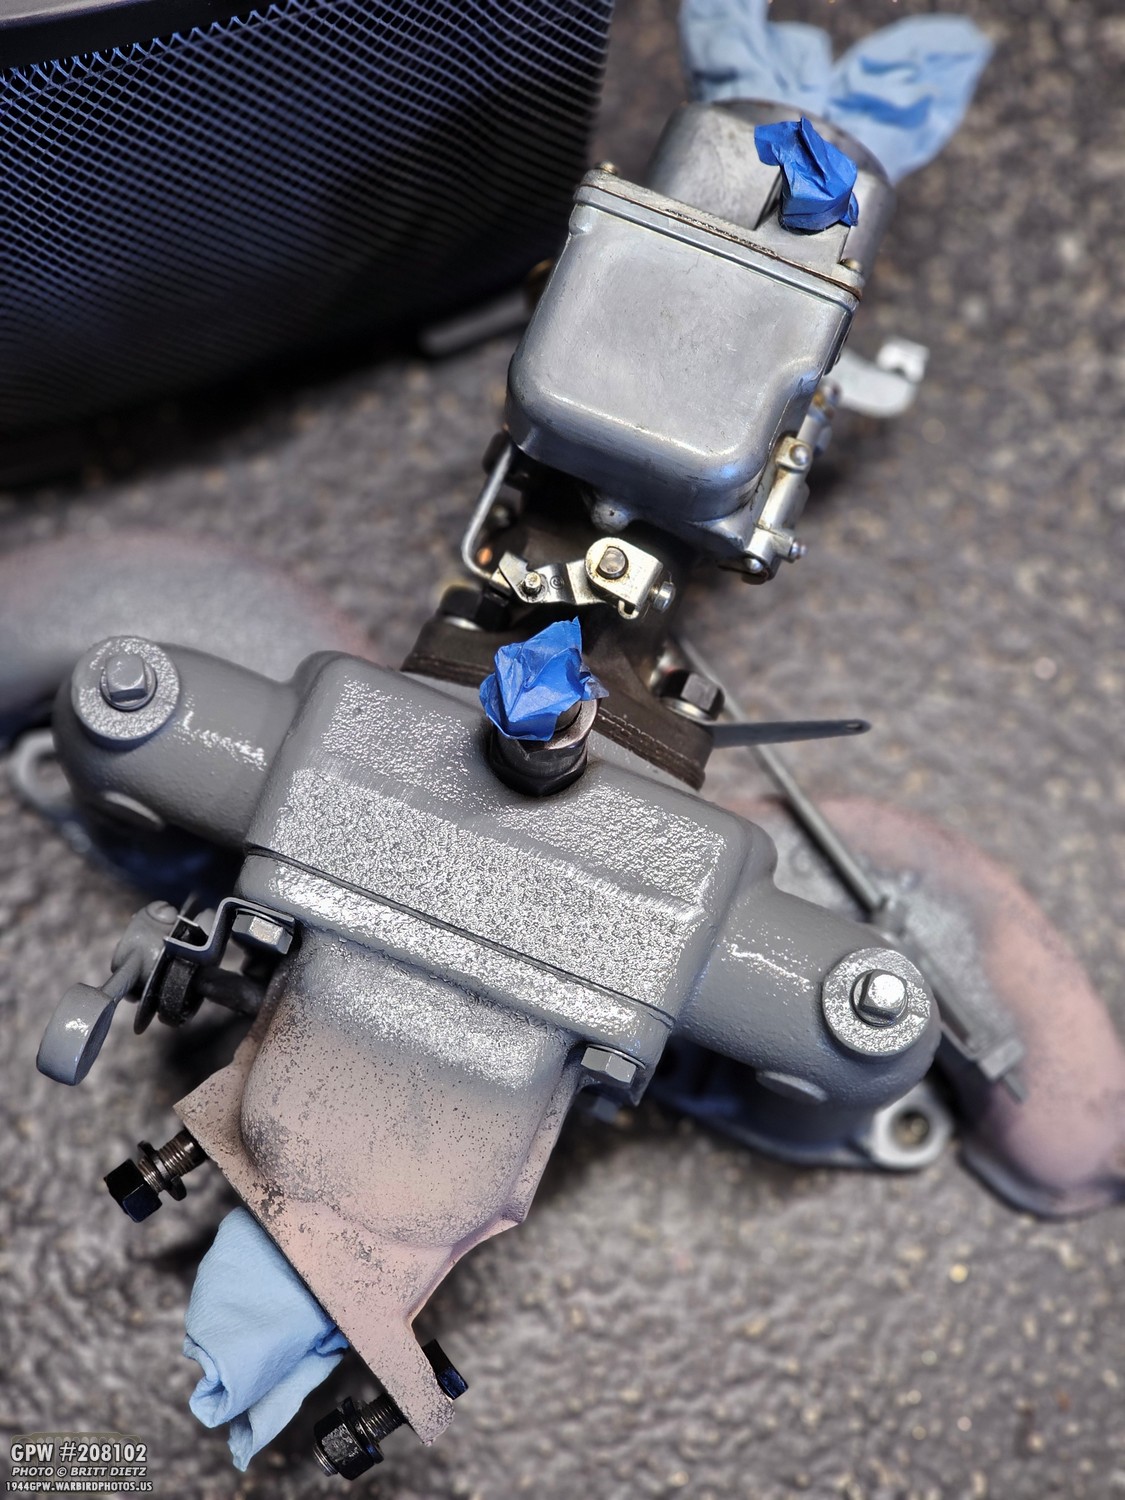
I had left the manifolds and carb all together as one unit, so I wouldn’t need to replace the gaskets. It’s been carefully put on its side for the last few weeks during the whole ordeal, awaiting reinstall.
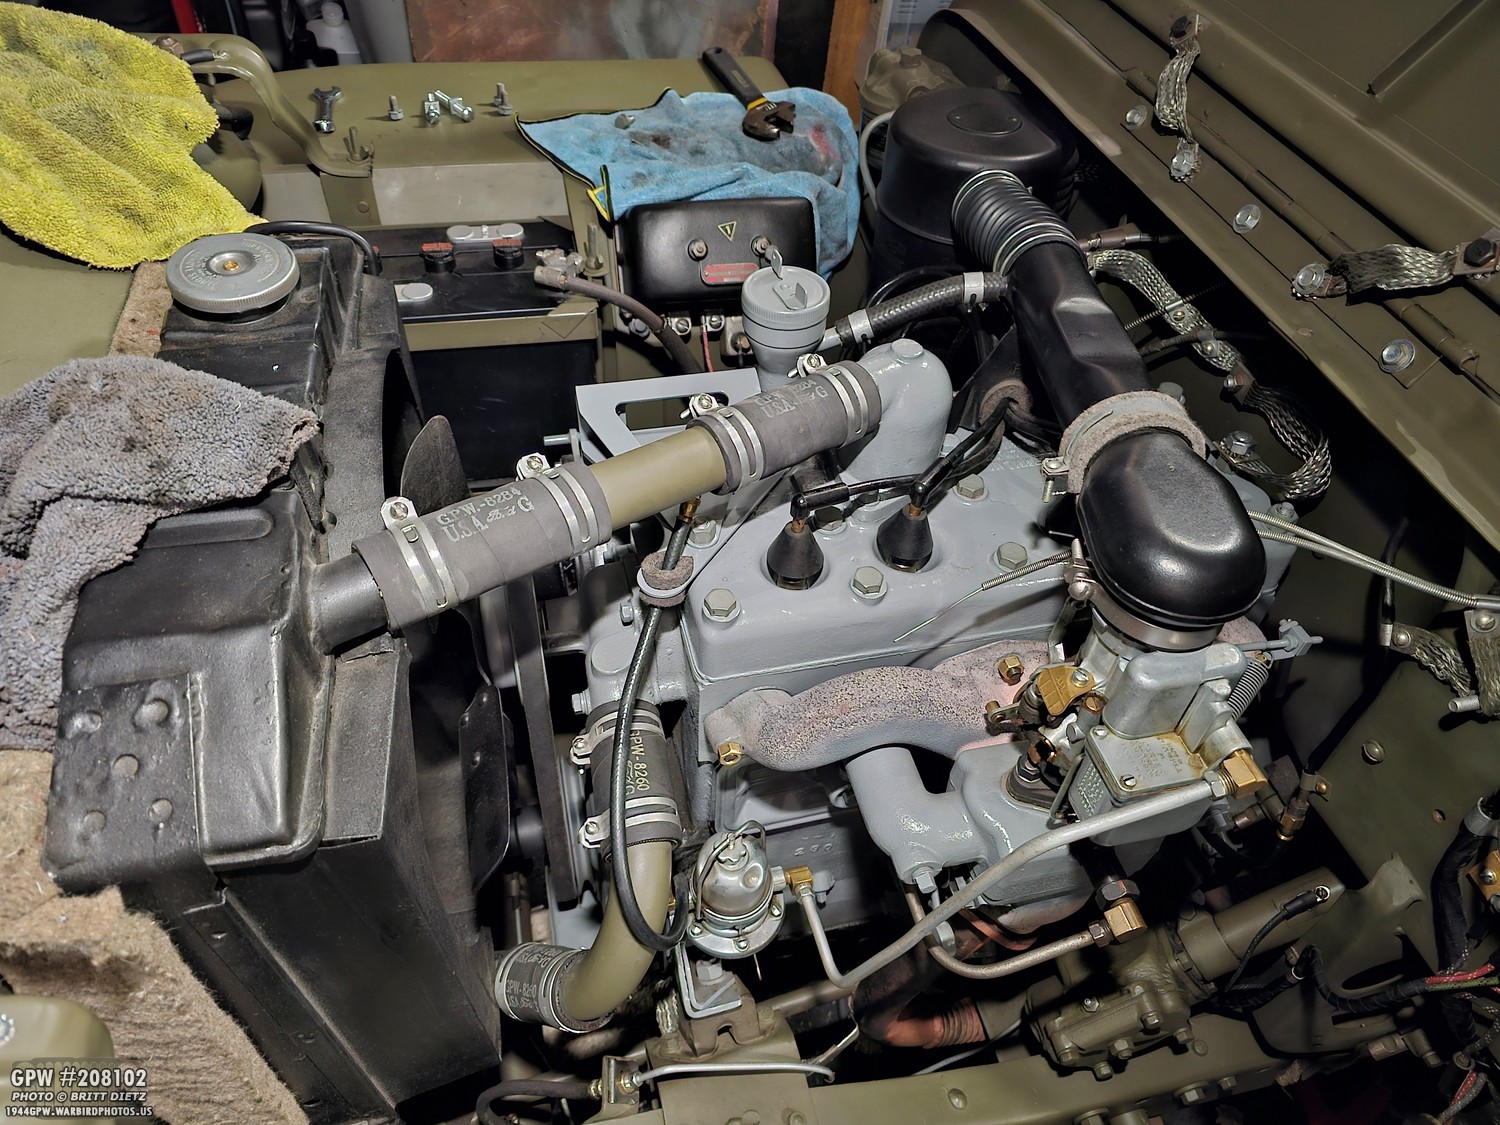
That said, I still replaced the manifold-to-block gasket with a brand-new one before reinstalling. Everything is almost back together here!
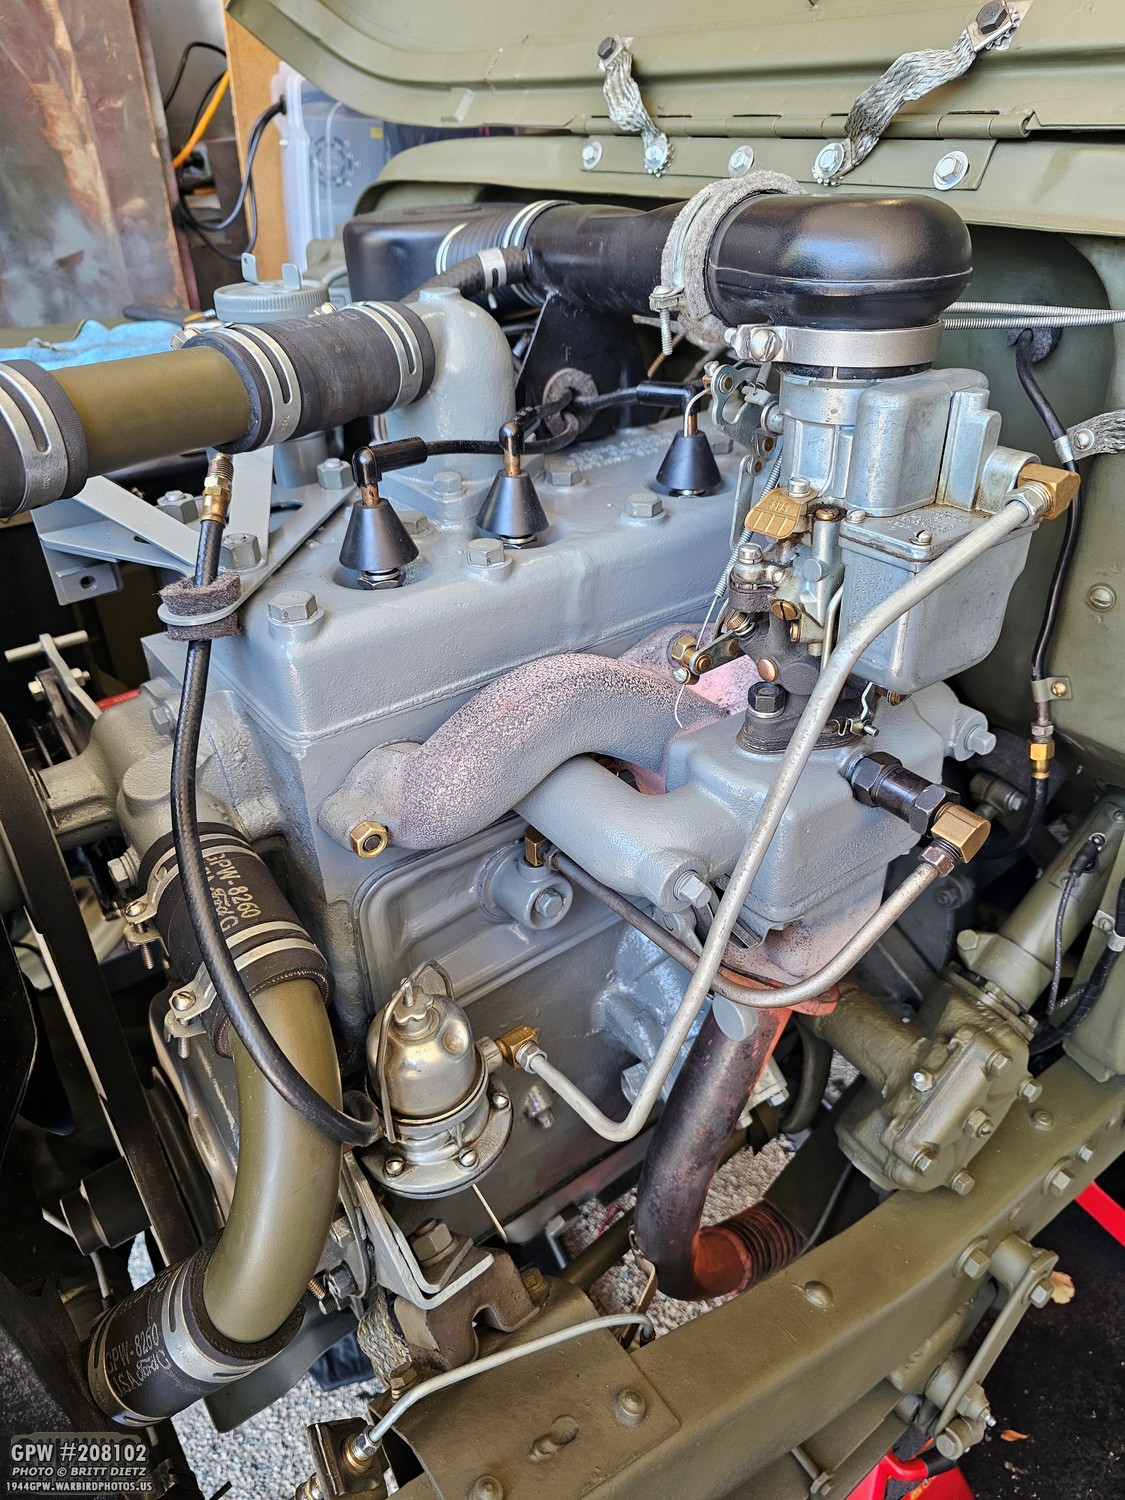
Almost done getting everything back together. It’s nice to get some photos of this area without the fender for reference.
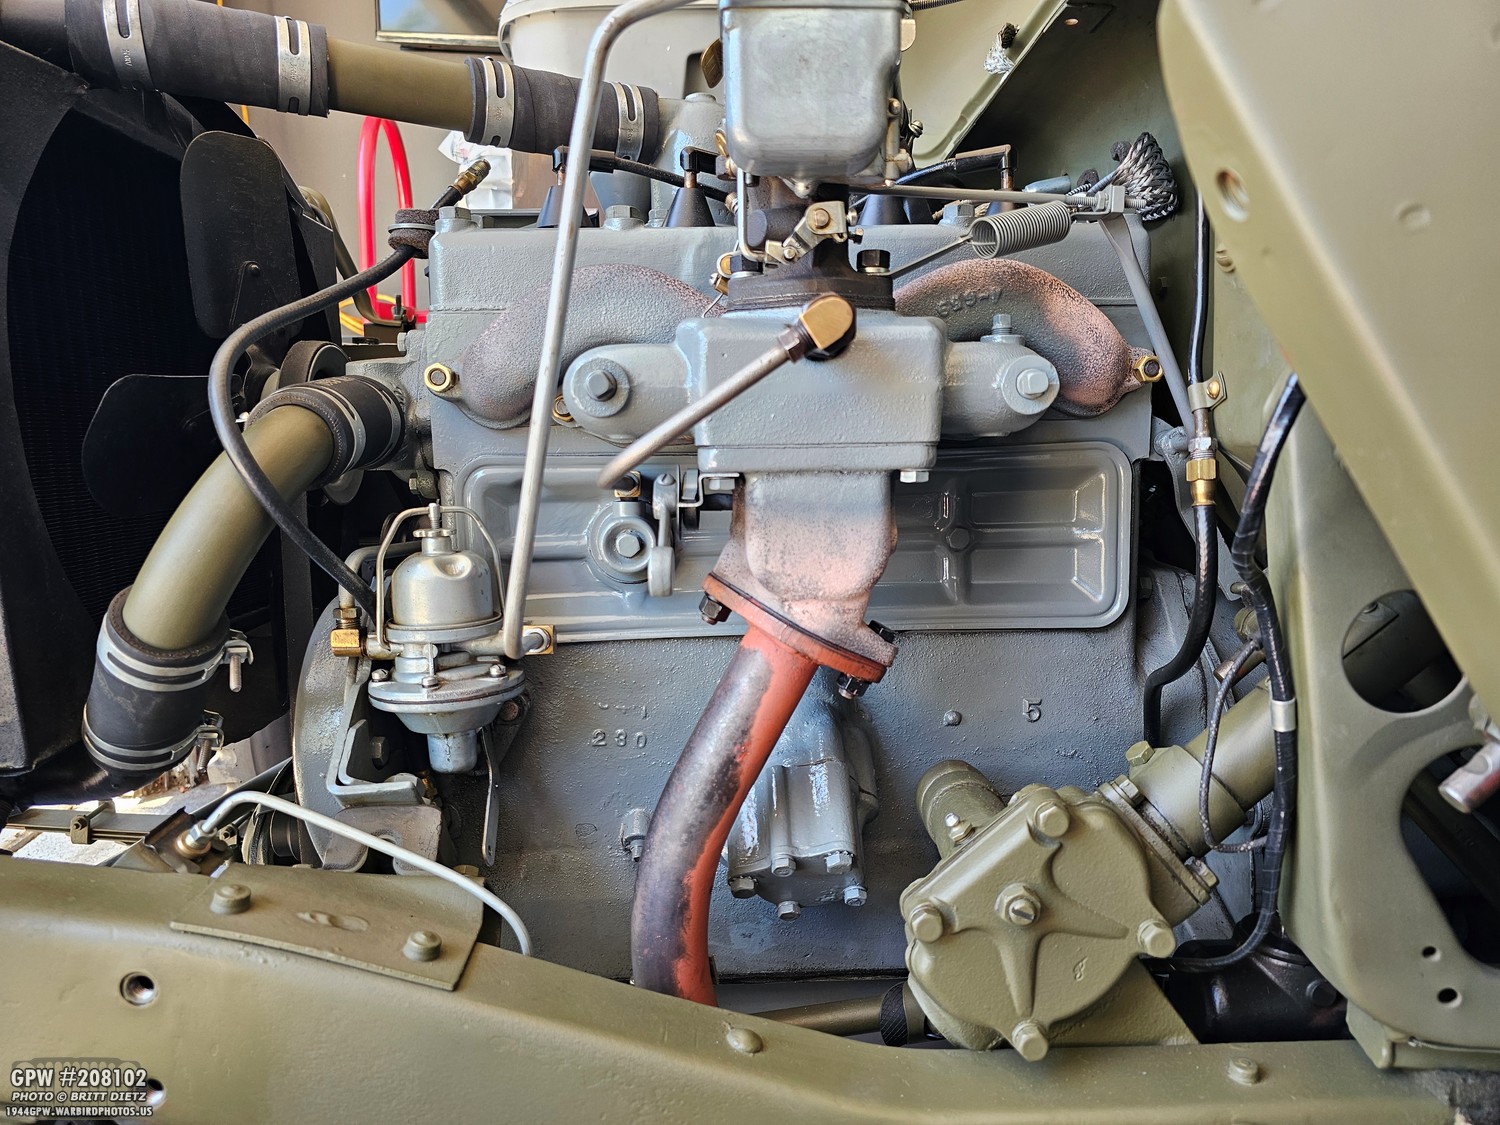
Especially an angle like this, not often photographed since the fender is often in the way.
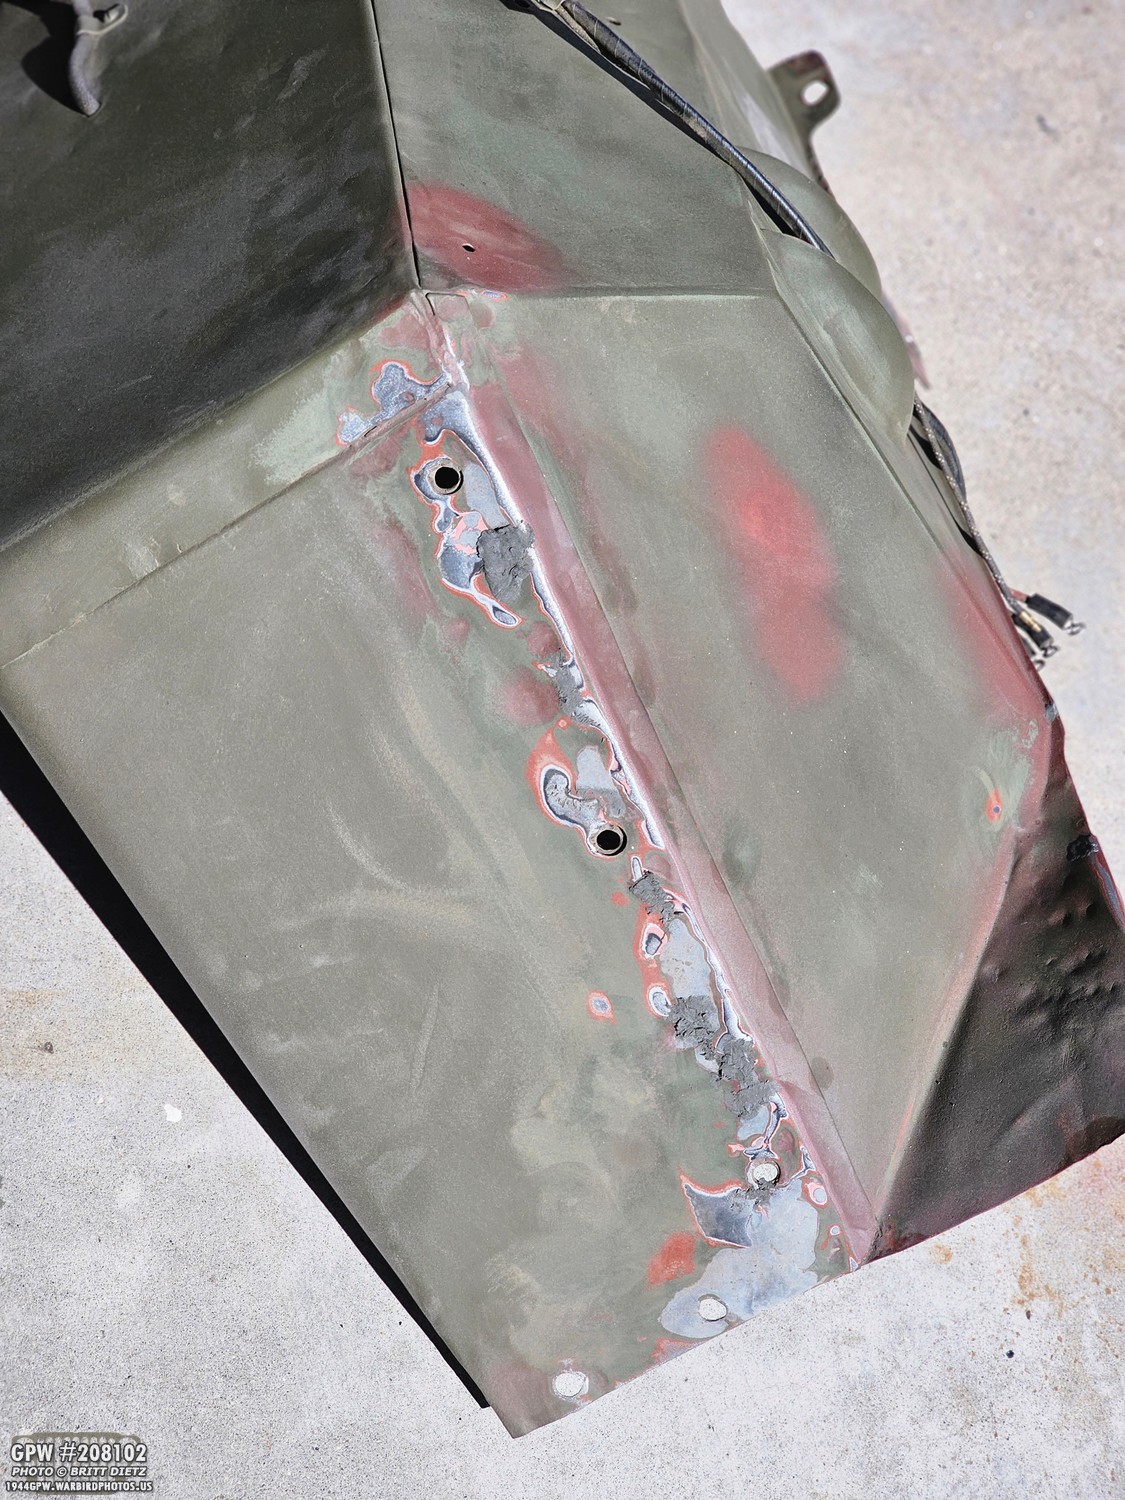
Speaking of the fender, it was another thing I worked on while waiting for parts to arrive. Naturally, where the body tub cowl rubs against the fender, it had taken a beating. It’s always been an area that’s had some micro holes and various warps. So, I decided to try and smooth things out with some JB Weld Steel.
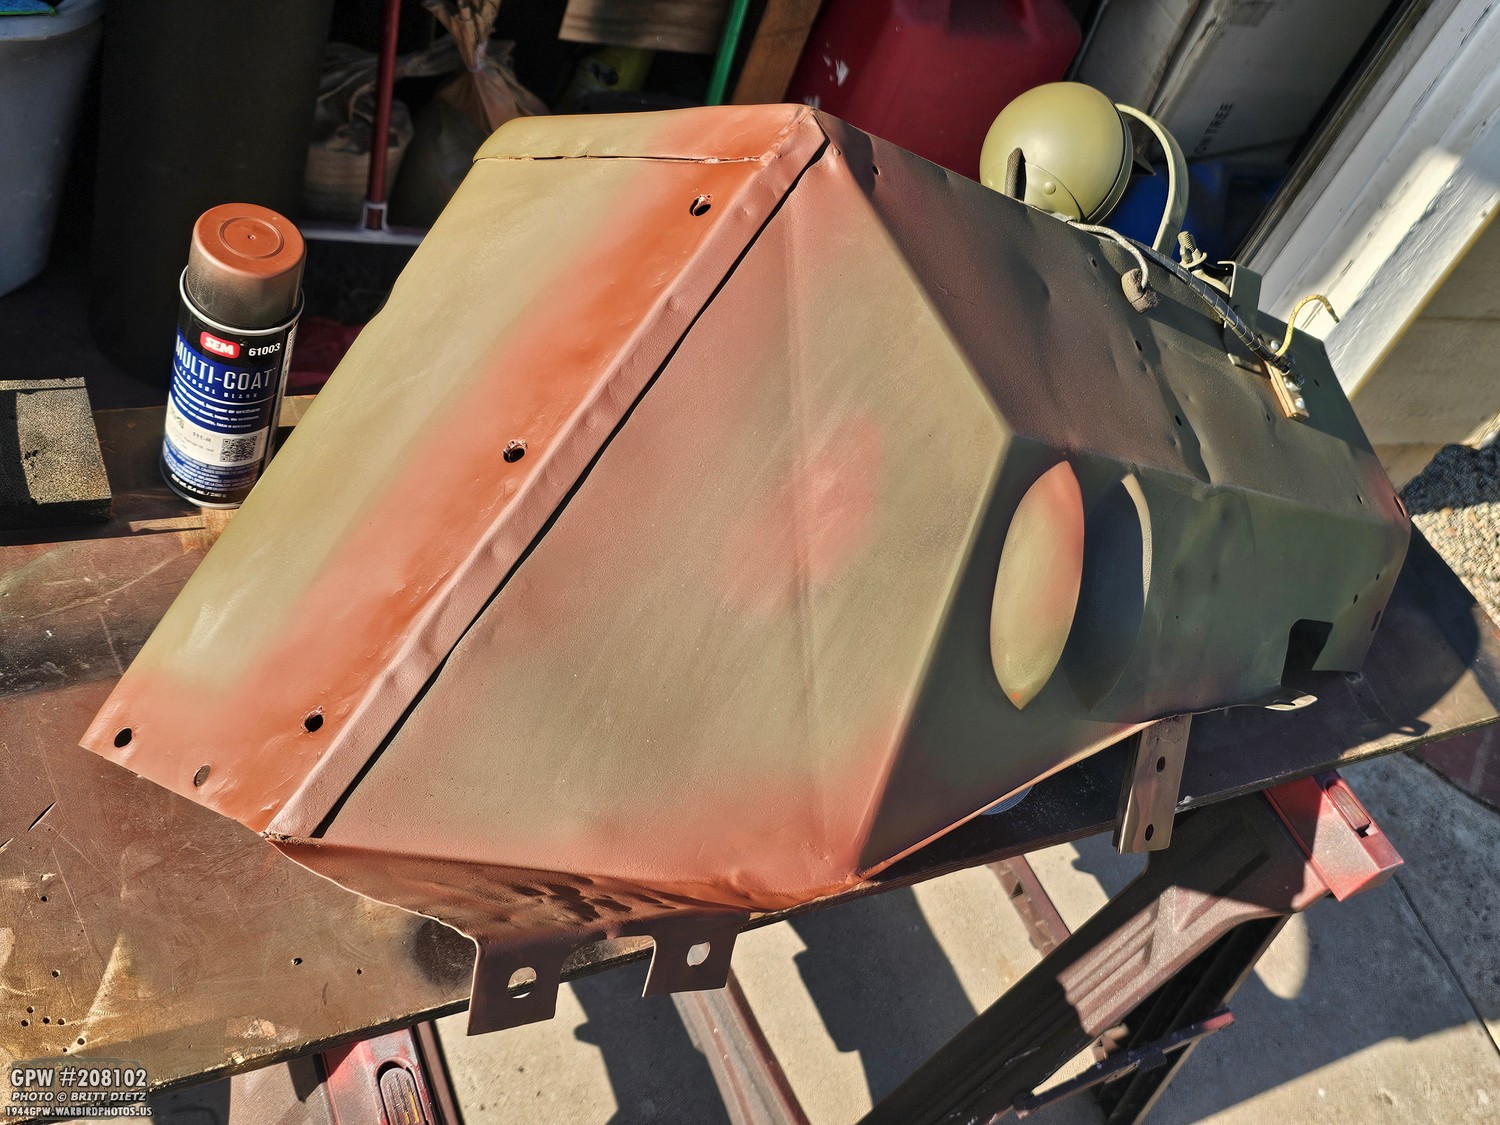
I also cleaned up some paint scratches and other micro-holes, etc. Looking much better already! The fender-to-body cowl hole area isn’t perfect, but it’s insanely better than it was.
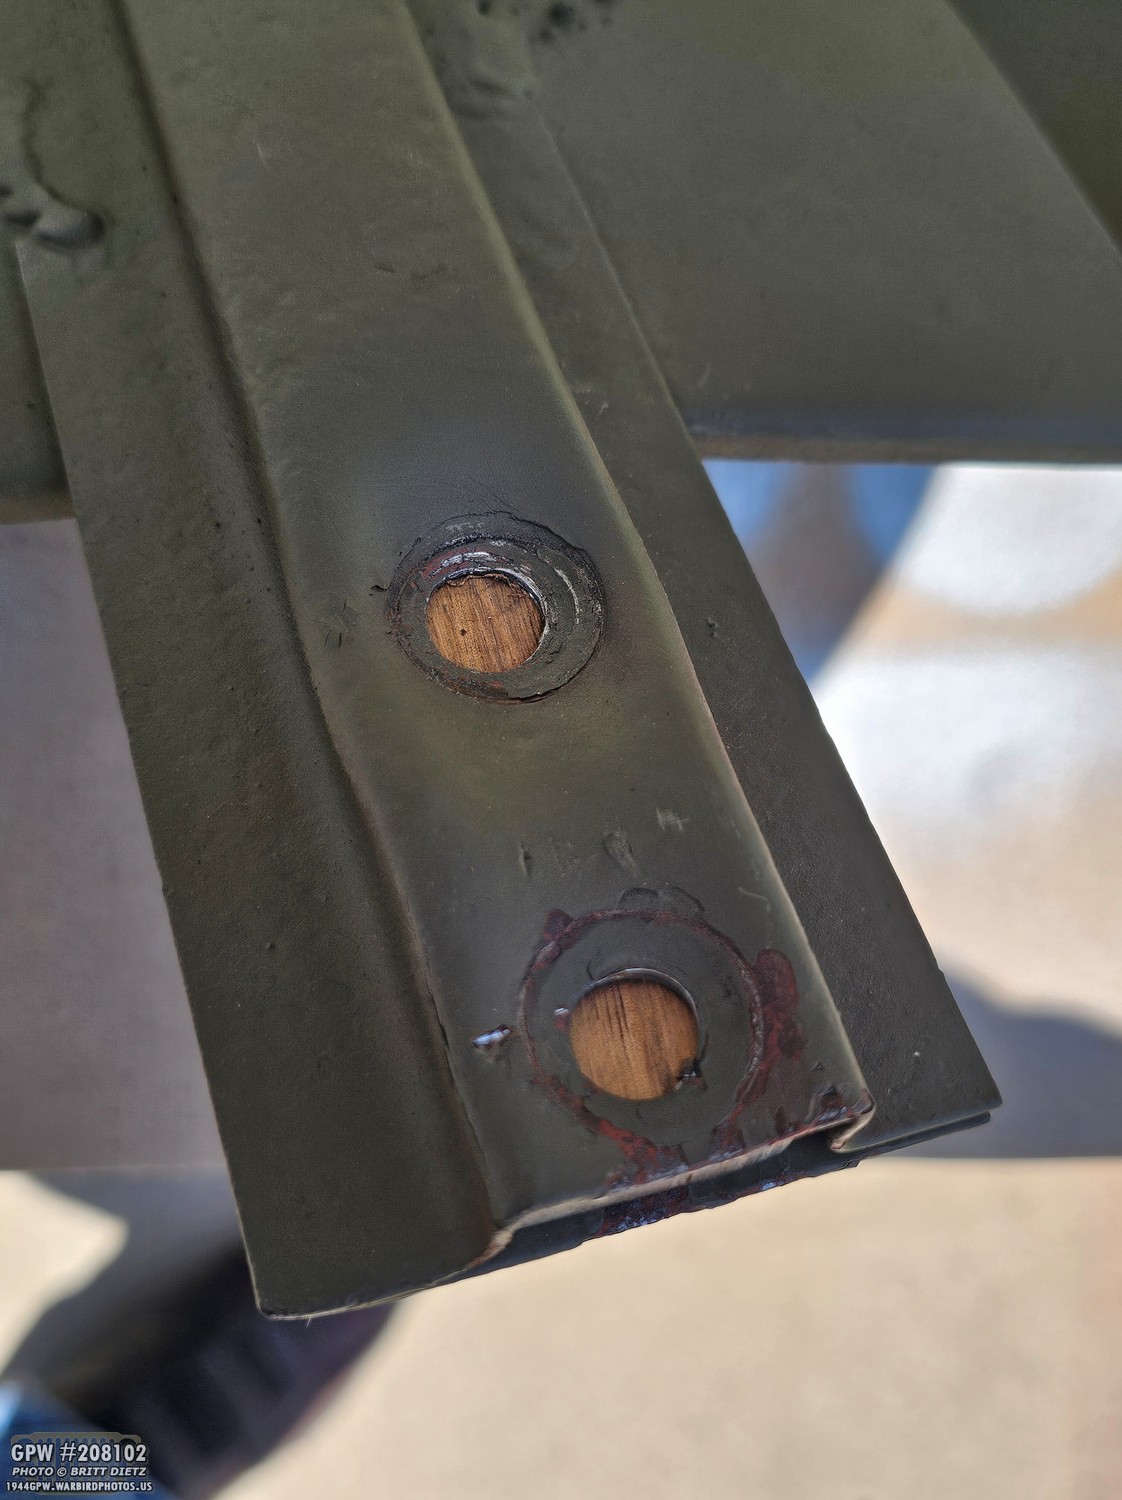
One thing that has been missing is wood inside the hat channel that has the two long bolts that hold the fender to the side of the frame. This is always something that has worried me, as if you REALLY tighten the bolts on the frame, it starts to collapse the hat channel. So, I decided to do something about it. I got some waterproofed wood that I had lying around and cut it to fit in the channel. I tried to ‘un-collapse’ the hat channel as best I could and expand it out, but I could only do so much without a special tool. But it worked, and the wood went in there nice and snug.
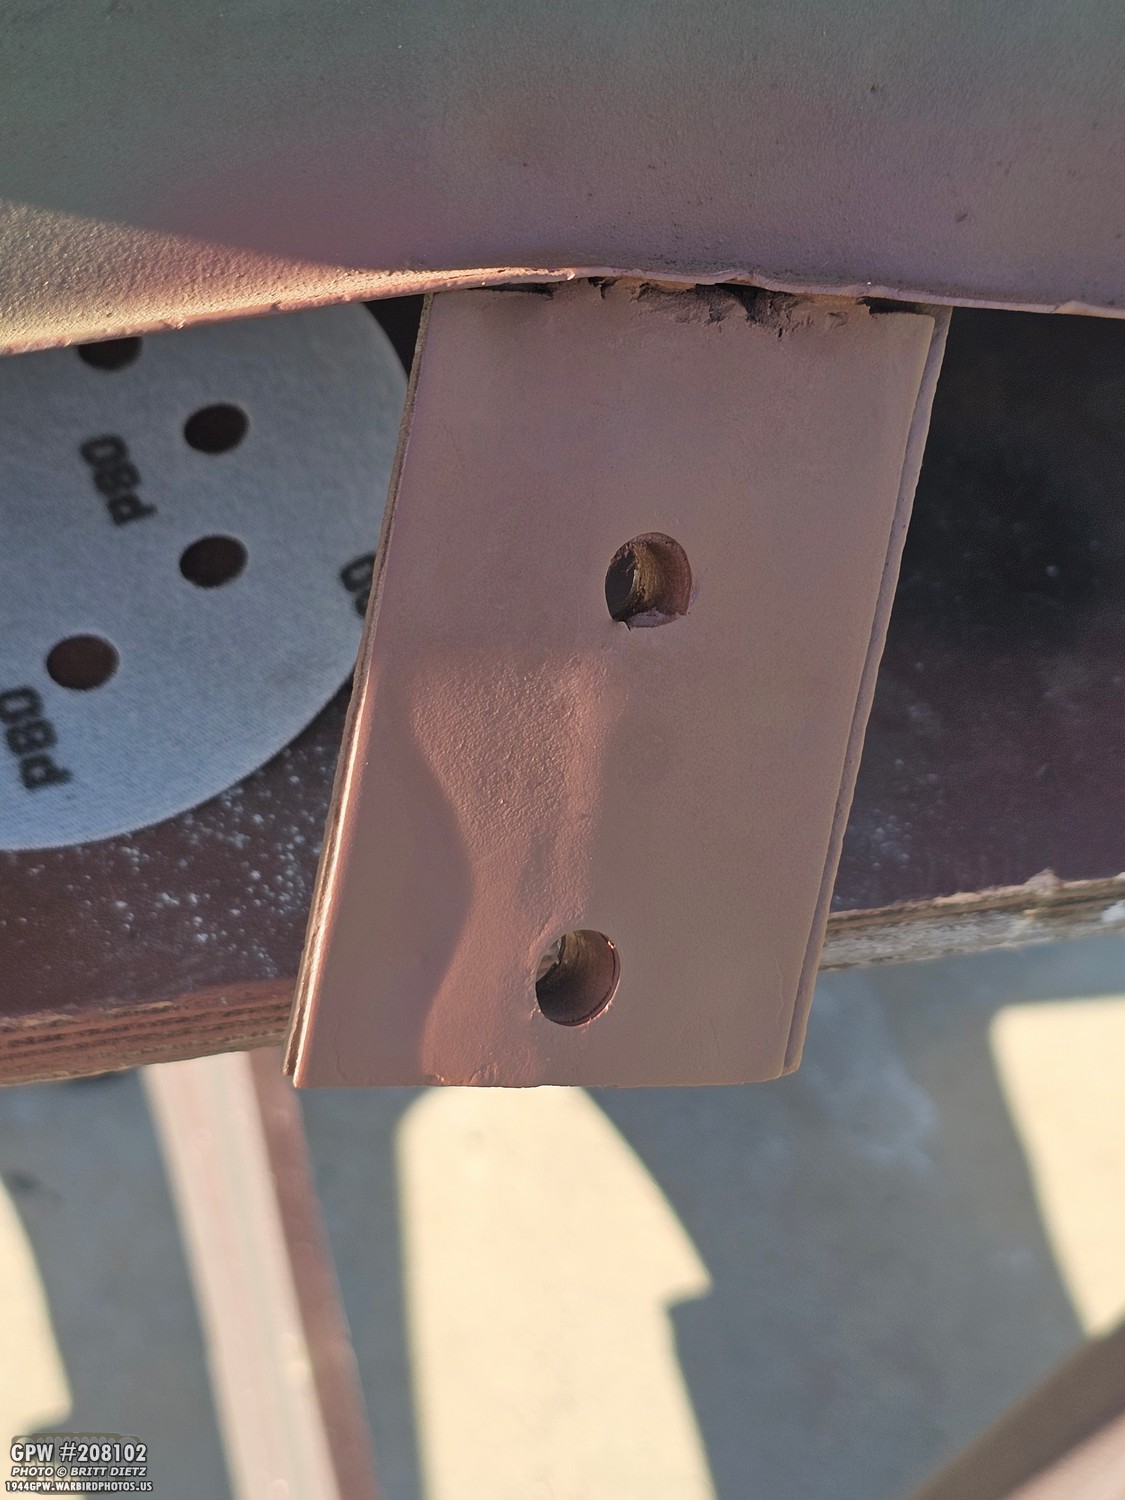
I then used a drill to drill the holes through the wood. I also used JB Weld Steel to close up some more micro holes. A bit messy at the top, but that’s all hidden anyway.
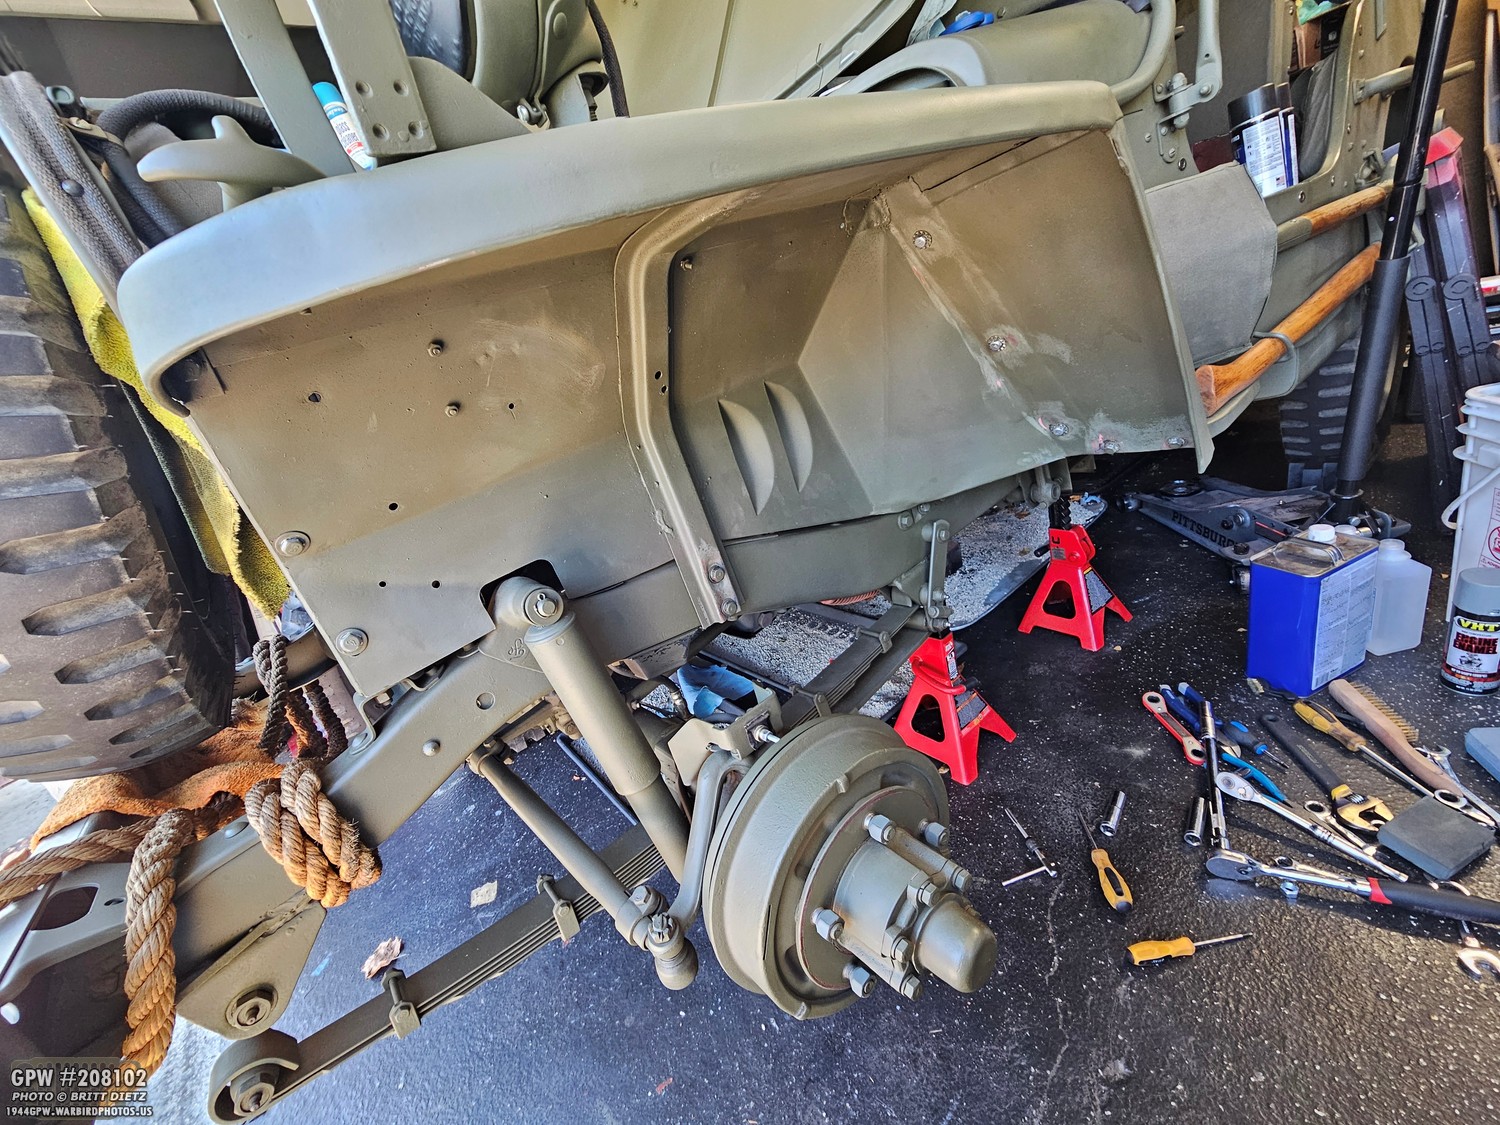
With the fender finished, it was ready for reinstall! I normally hate reinstalling fenders. On my Jeep, it takes a long time to get everything lined up, especially the dumb fender-to-body cowl bolts. But this time I tried something different… I started with those bolts FIRST. It actually worked much better doing those and getting them lined up, then moving on to the hat channel brace and the grille bolts. So, I guess I’ll be doing it that way from now on.
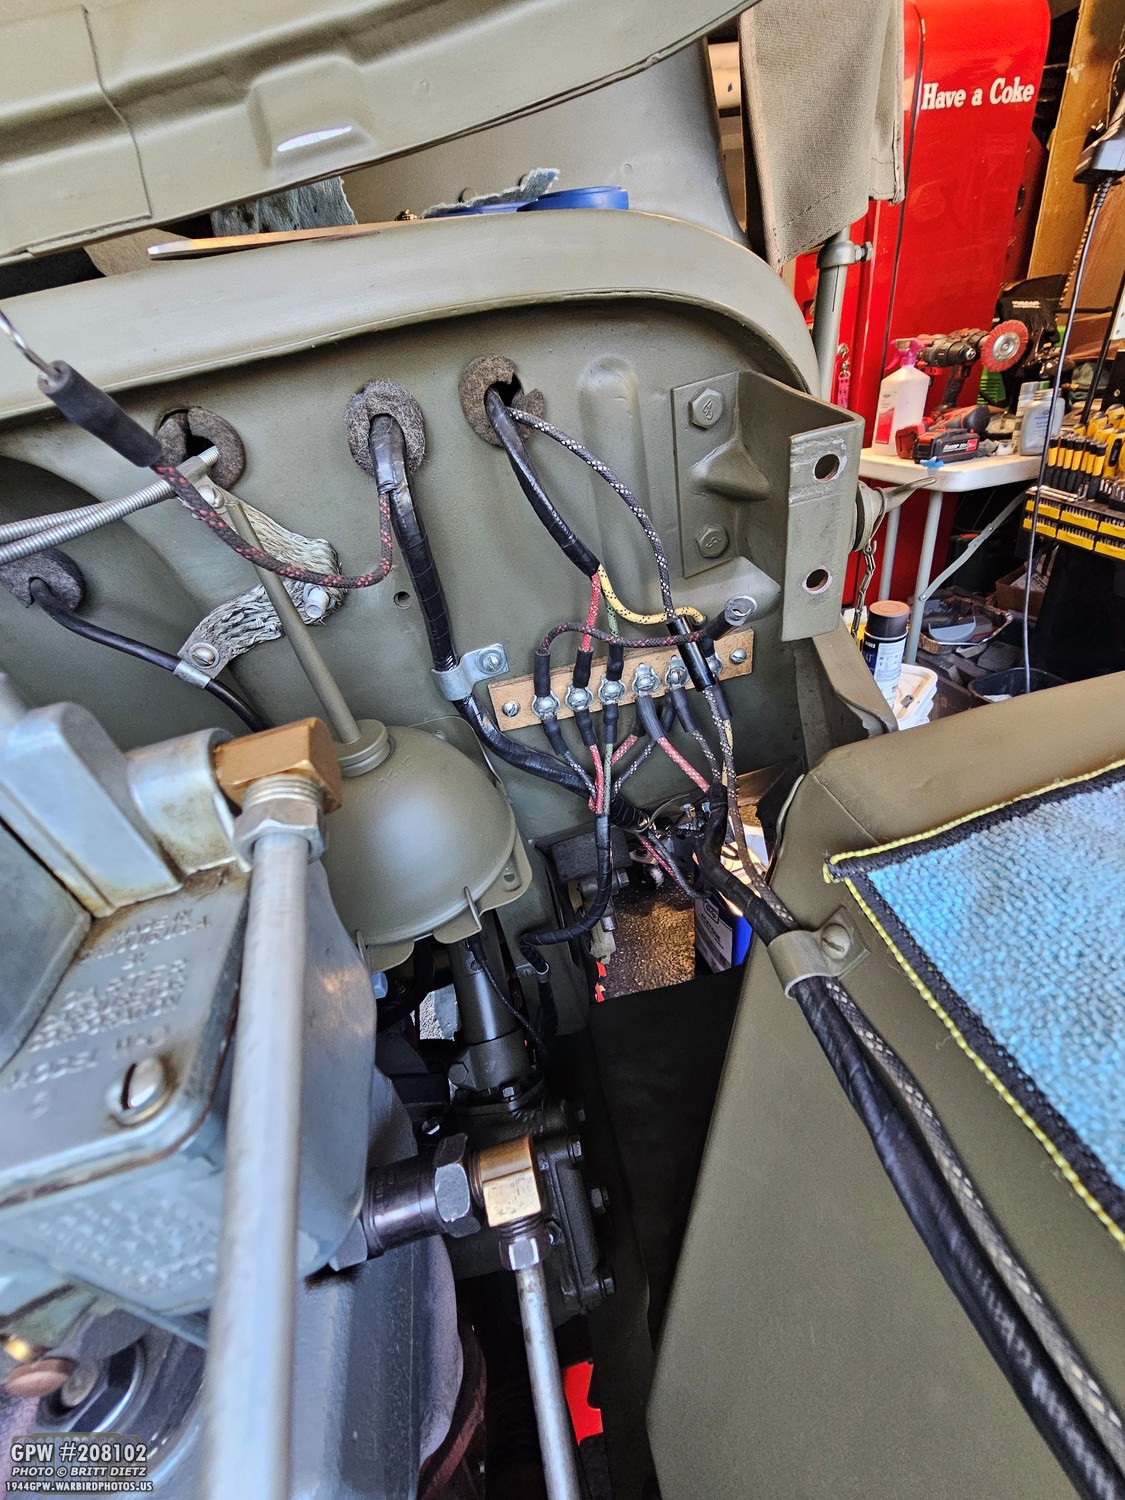
I then reattached the headlight, marker light, and fender blackout light wires to the main terminal junction.
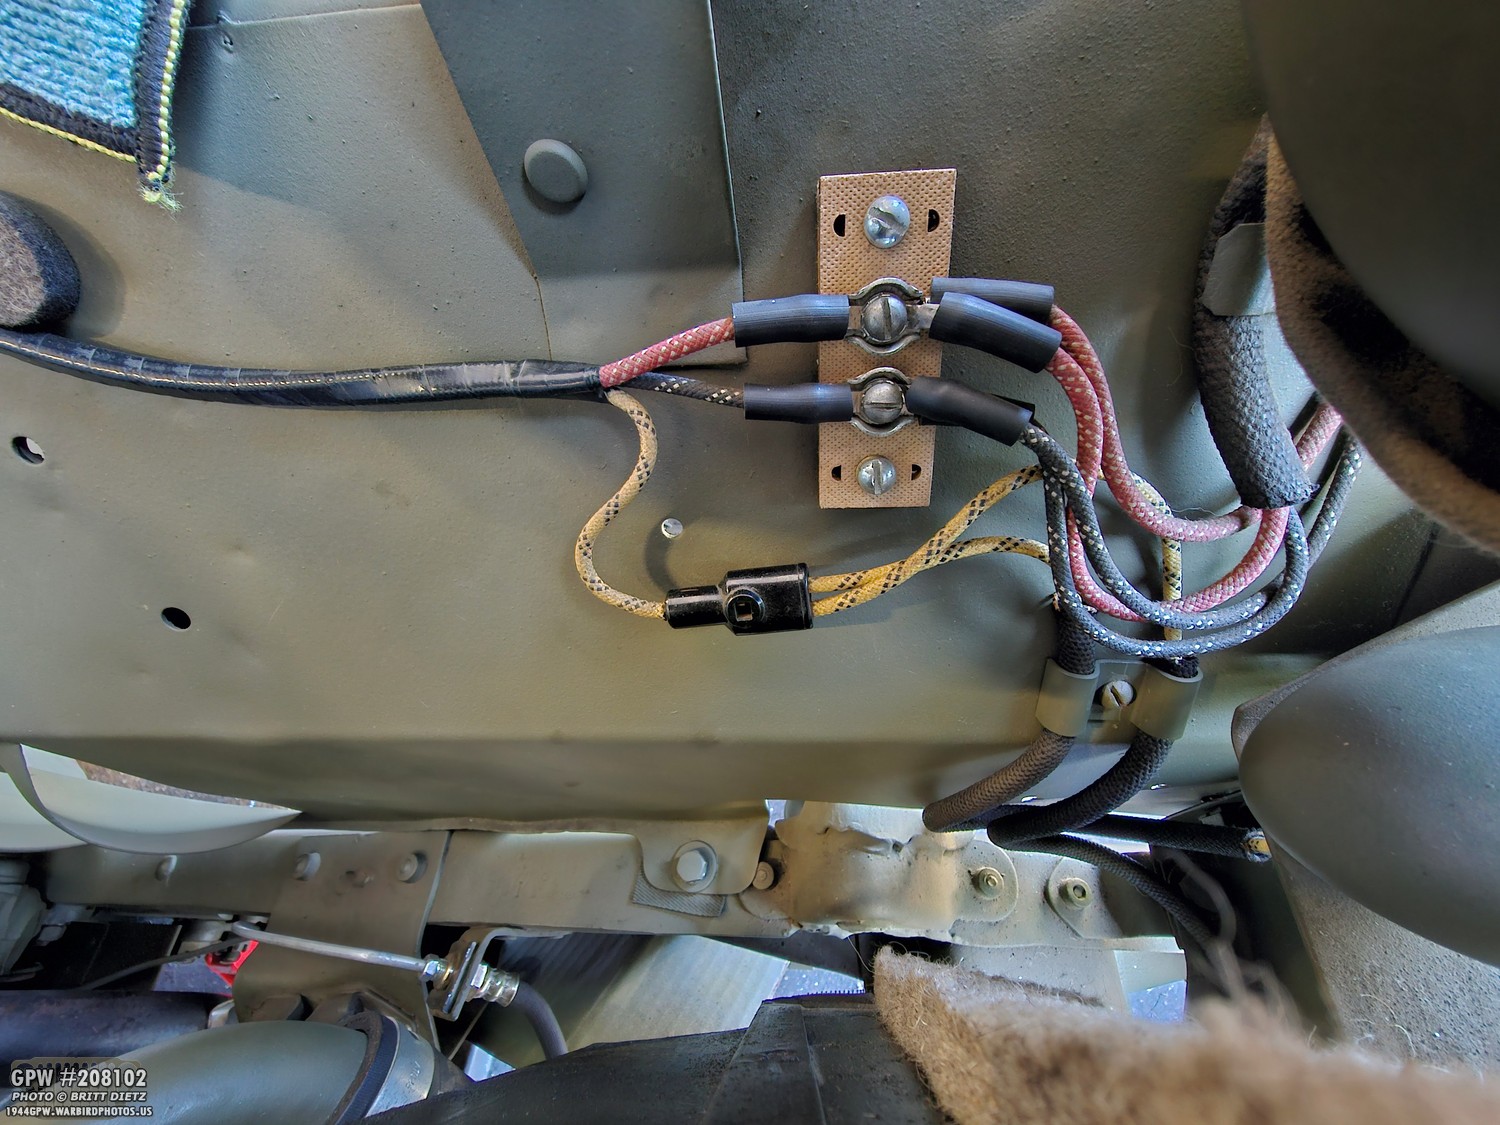
And reattached the connectors for the headlights and marker lights on the smaller junction near the front of the fender.
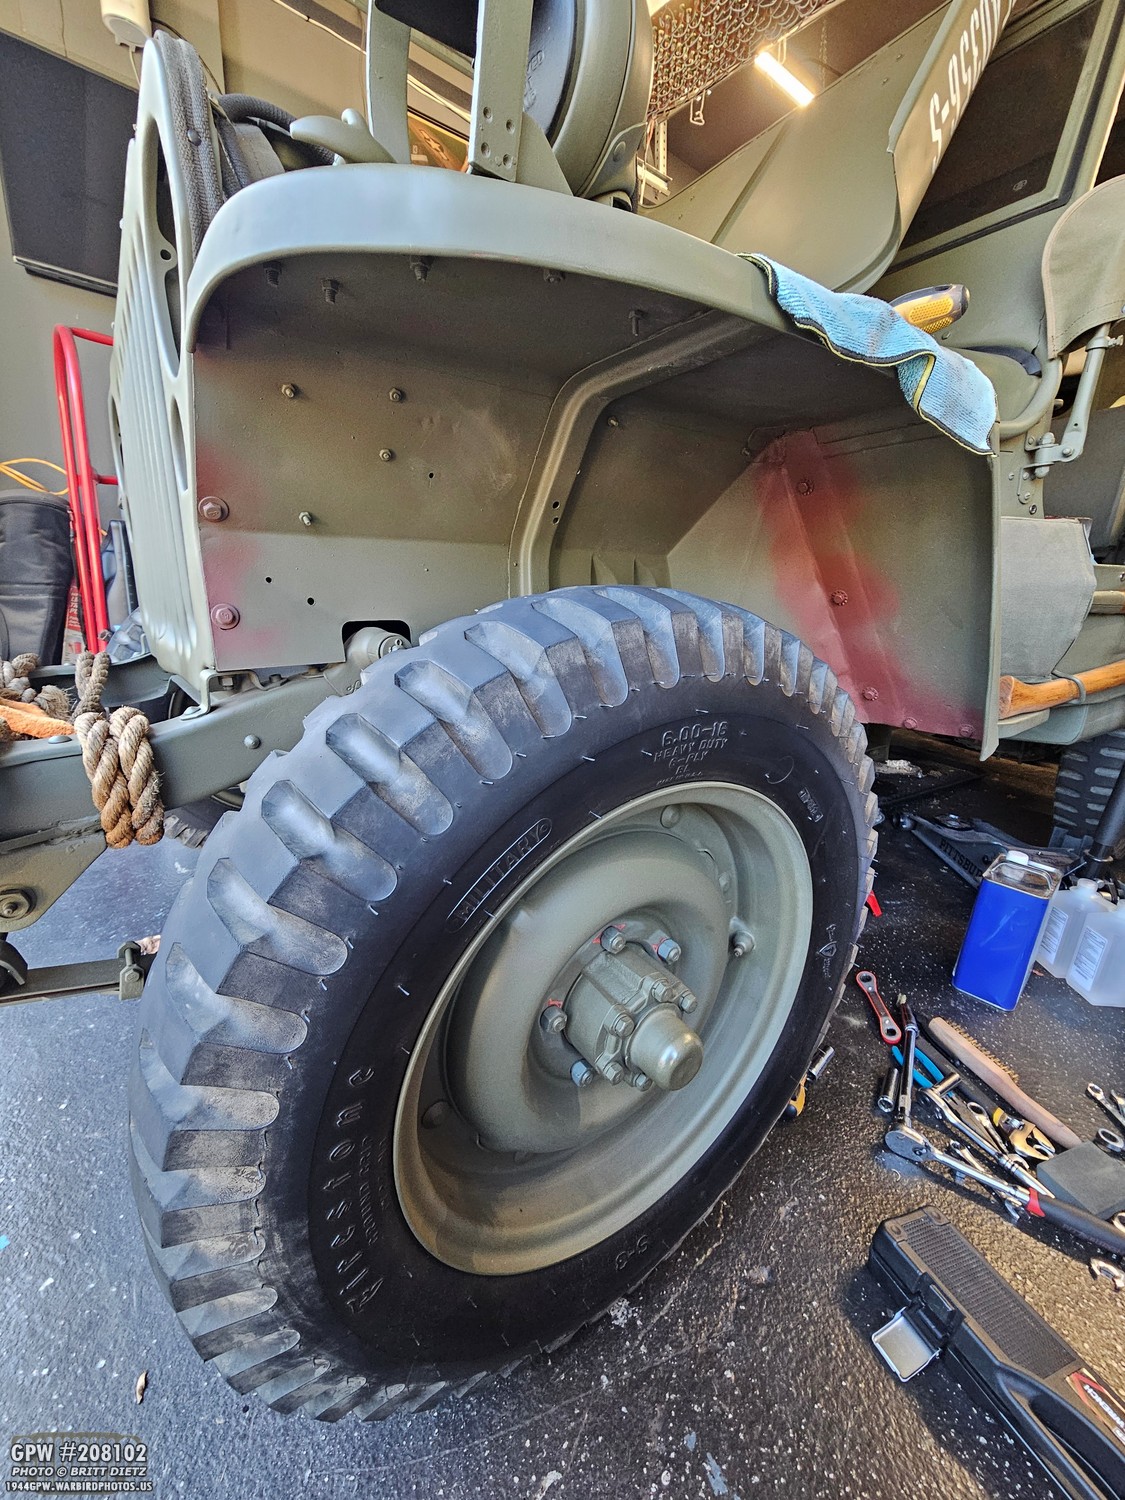
After reinstalling the wheel and lowering the Jeep, I was able to touch some things up with red oxide primer, like the bolts and nuts.
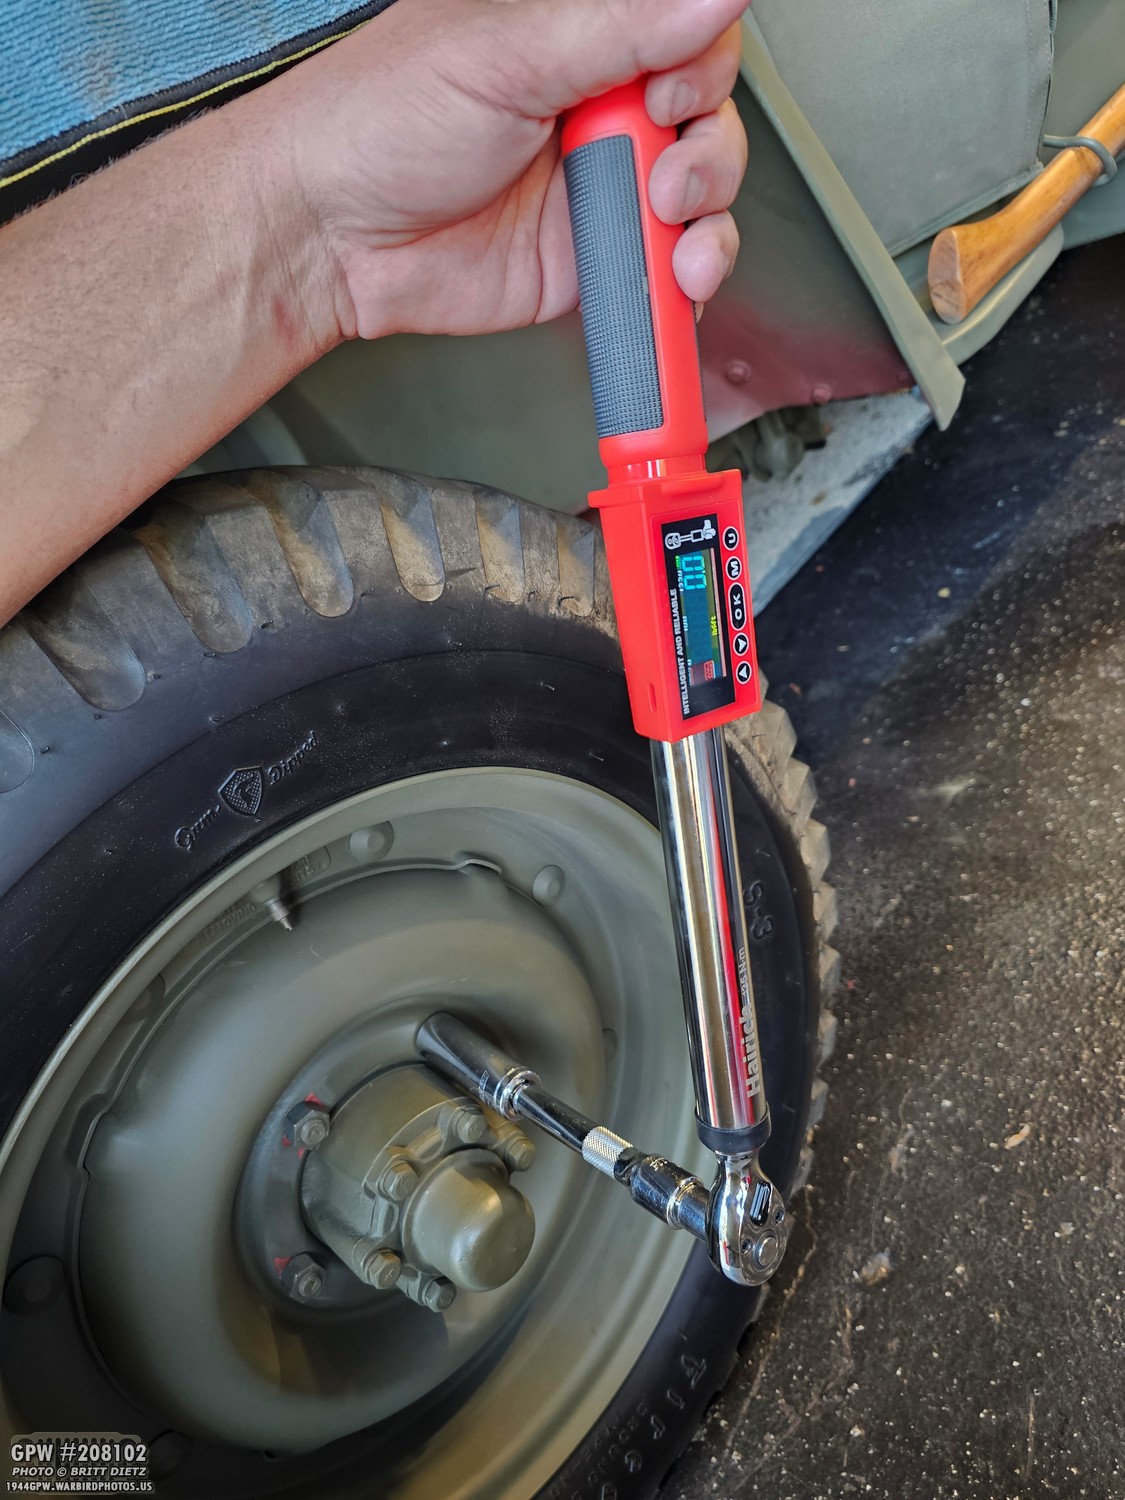
I tried out my new digital torque wrench to get the proper wheel torque. Not a fan of this one. Spend the money and get a nice one; even though this wasn’t the cheapest one on Amazon, it certainly wasn’t the best.
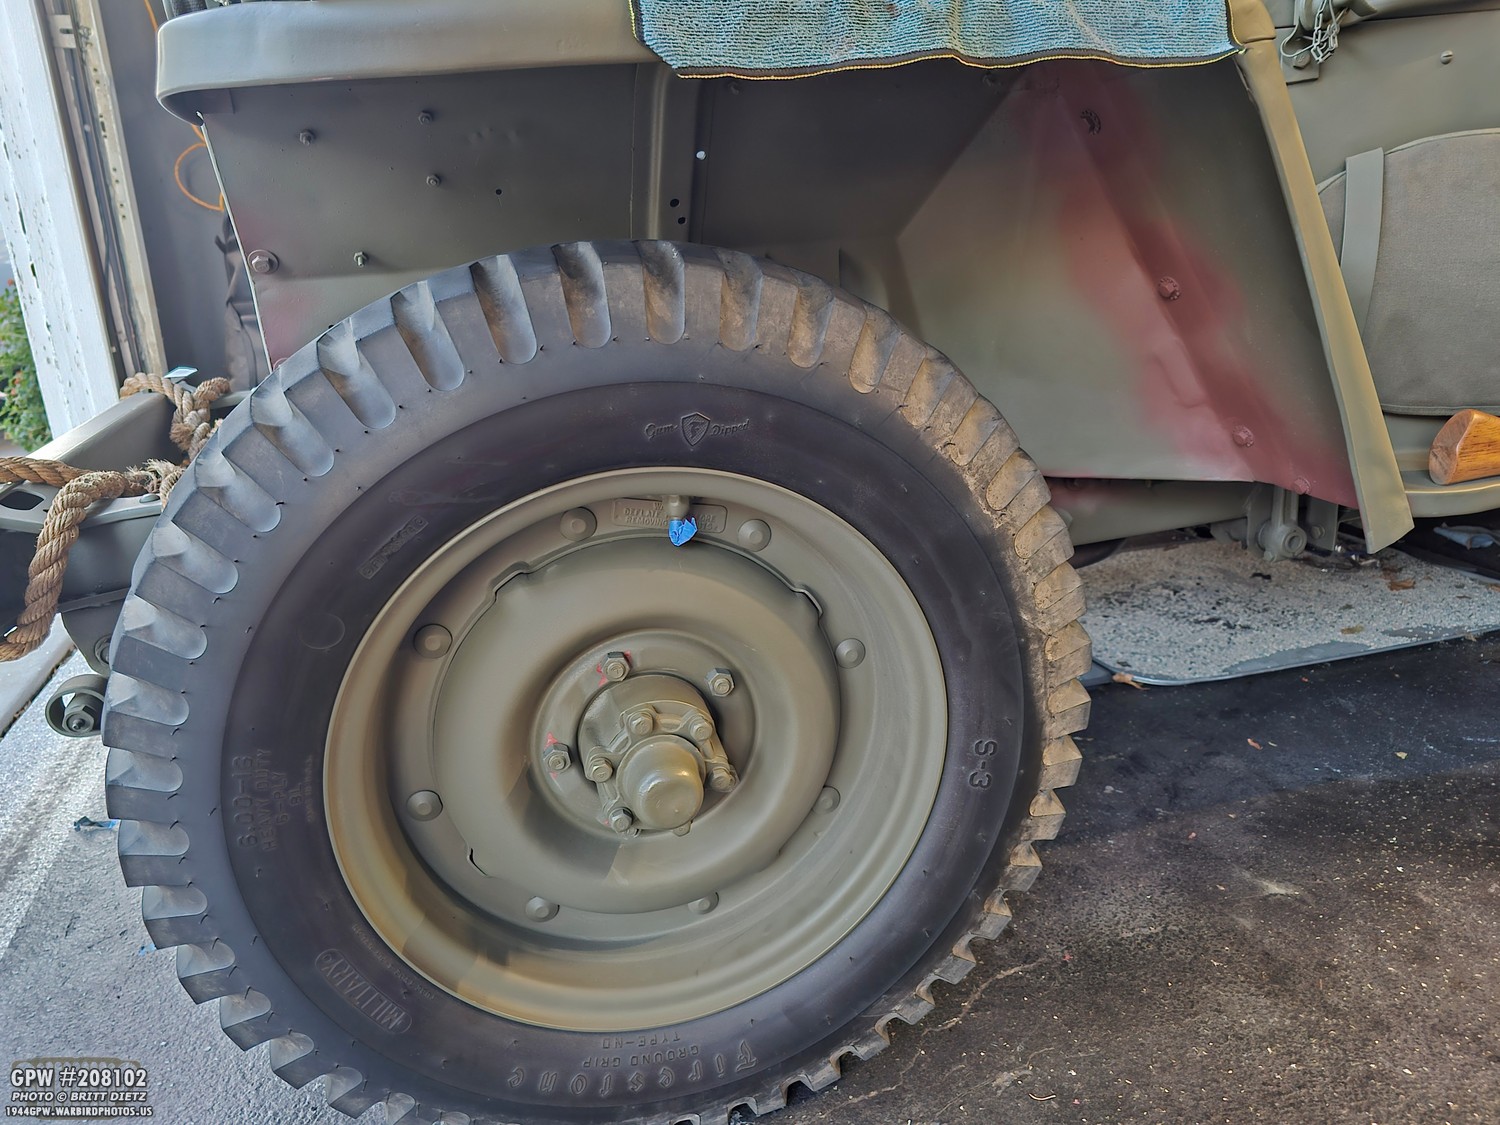
All torqued and just needing some OD Green paint!
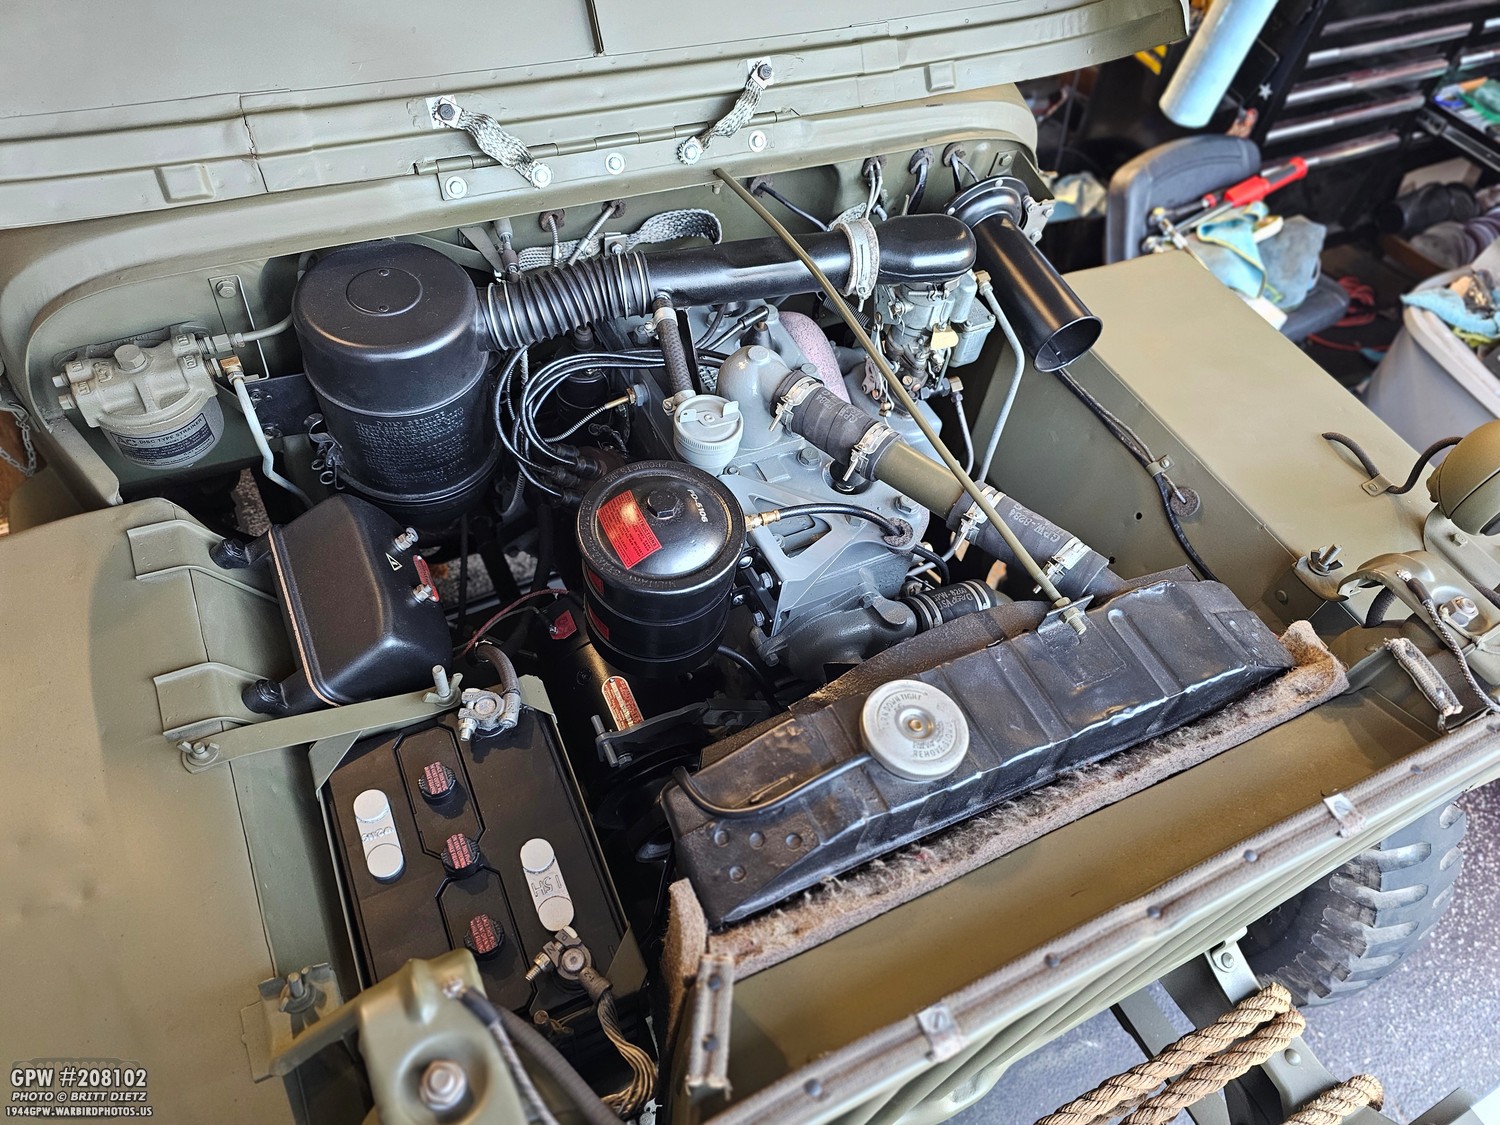
Finally, all back together, including the horn and the radiator hold-down brace. I should mention here I was cutting this VERY close to the last minute. This photo was shot at 7:37pm right when I finished; the next morning, my Jeep was to be in a car show in Corona, CA that I had paid for! Literally had to be there in about 12 hours! Up until this point, I wasn’t sure I was going to make it… But it worked out.
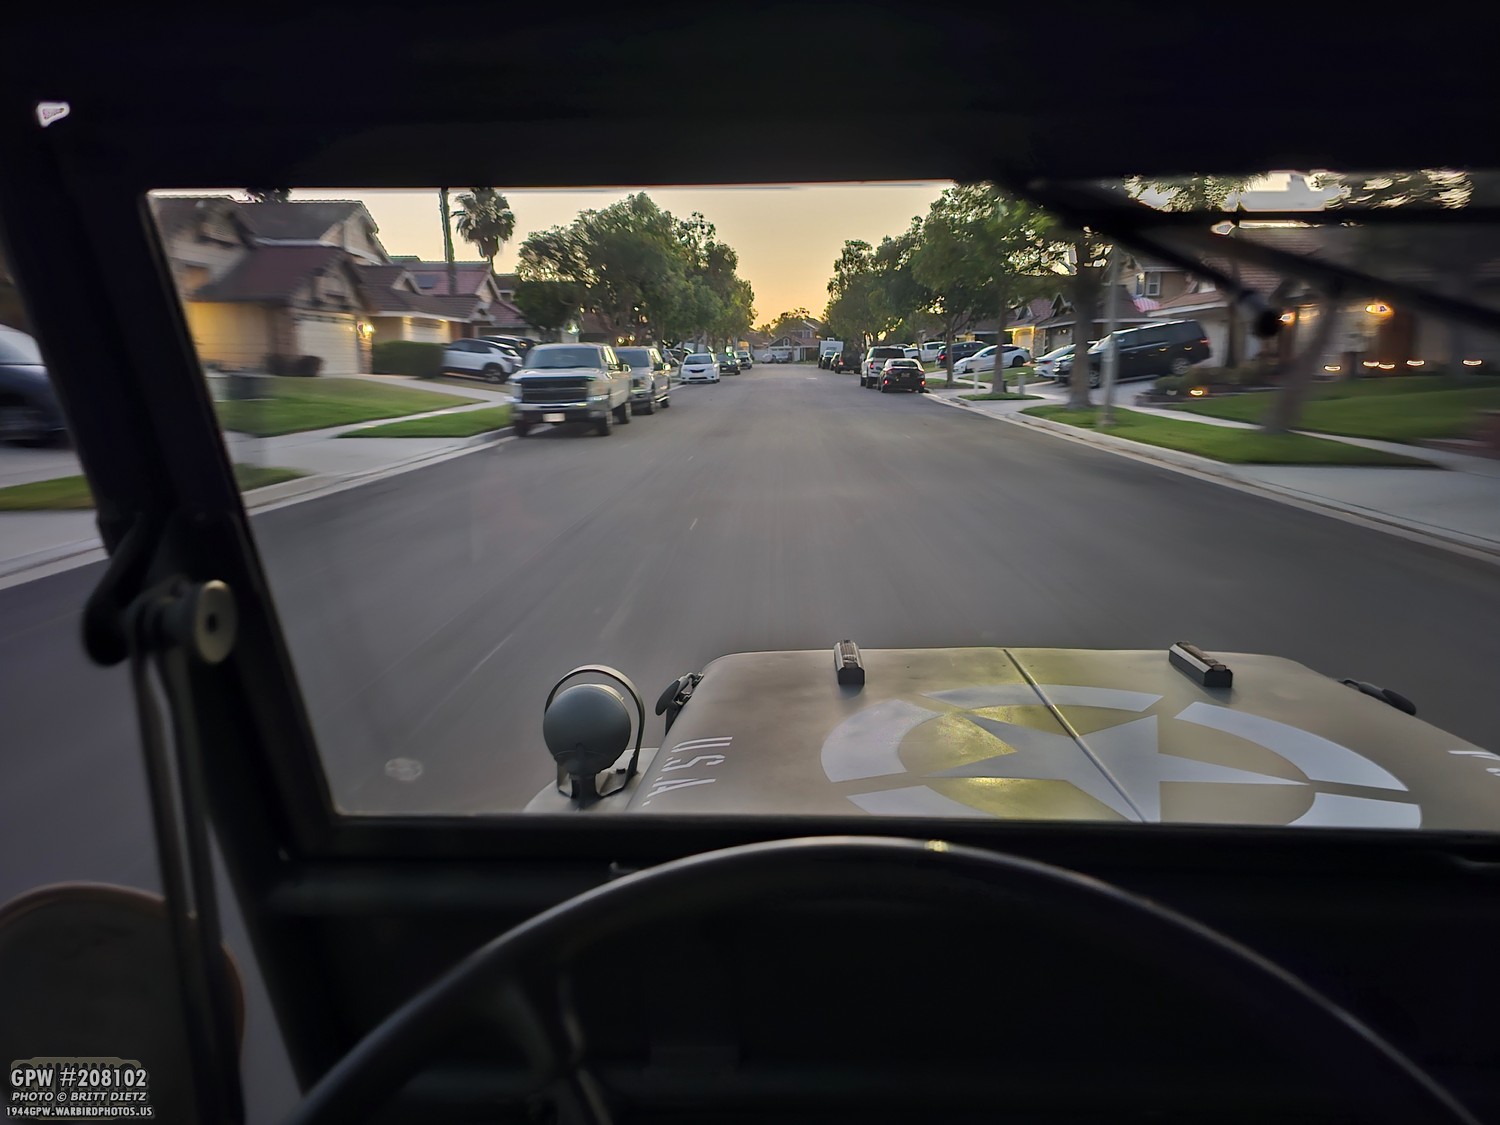
After refilling the coolant, I did the vacuum test to time the engine again… just in case. The first sign of some trouble was that I couldn’t get the vacuum levels where I had them last time. It still timed and smoothed out, but not as strong as before taking apart the engine. Hmmm. Regardless, I was able to fire her up for the first time in about 3 weeks! I took her on a test drive around the area. So, you might be asking… how did she sound? Did the tappity valve chatter go away? Well, it seemed like it at first… but then it seemed to come back as I drove it. I was pretty upset. I figured it might be a worn bearing or something in the engine that might be the sound… but we’ll get to that in a bit.
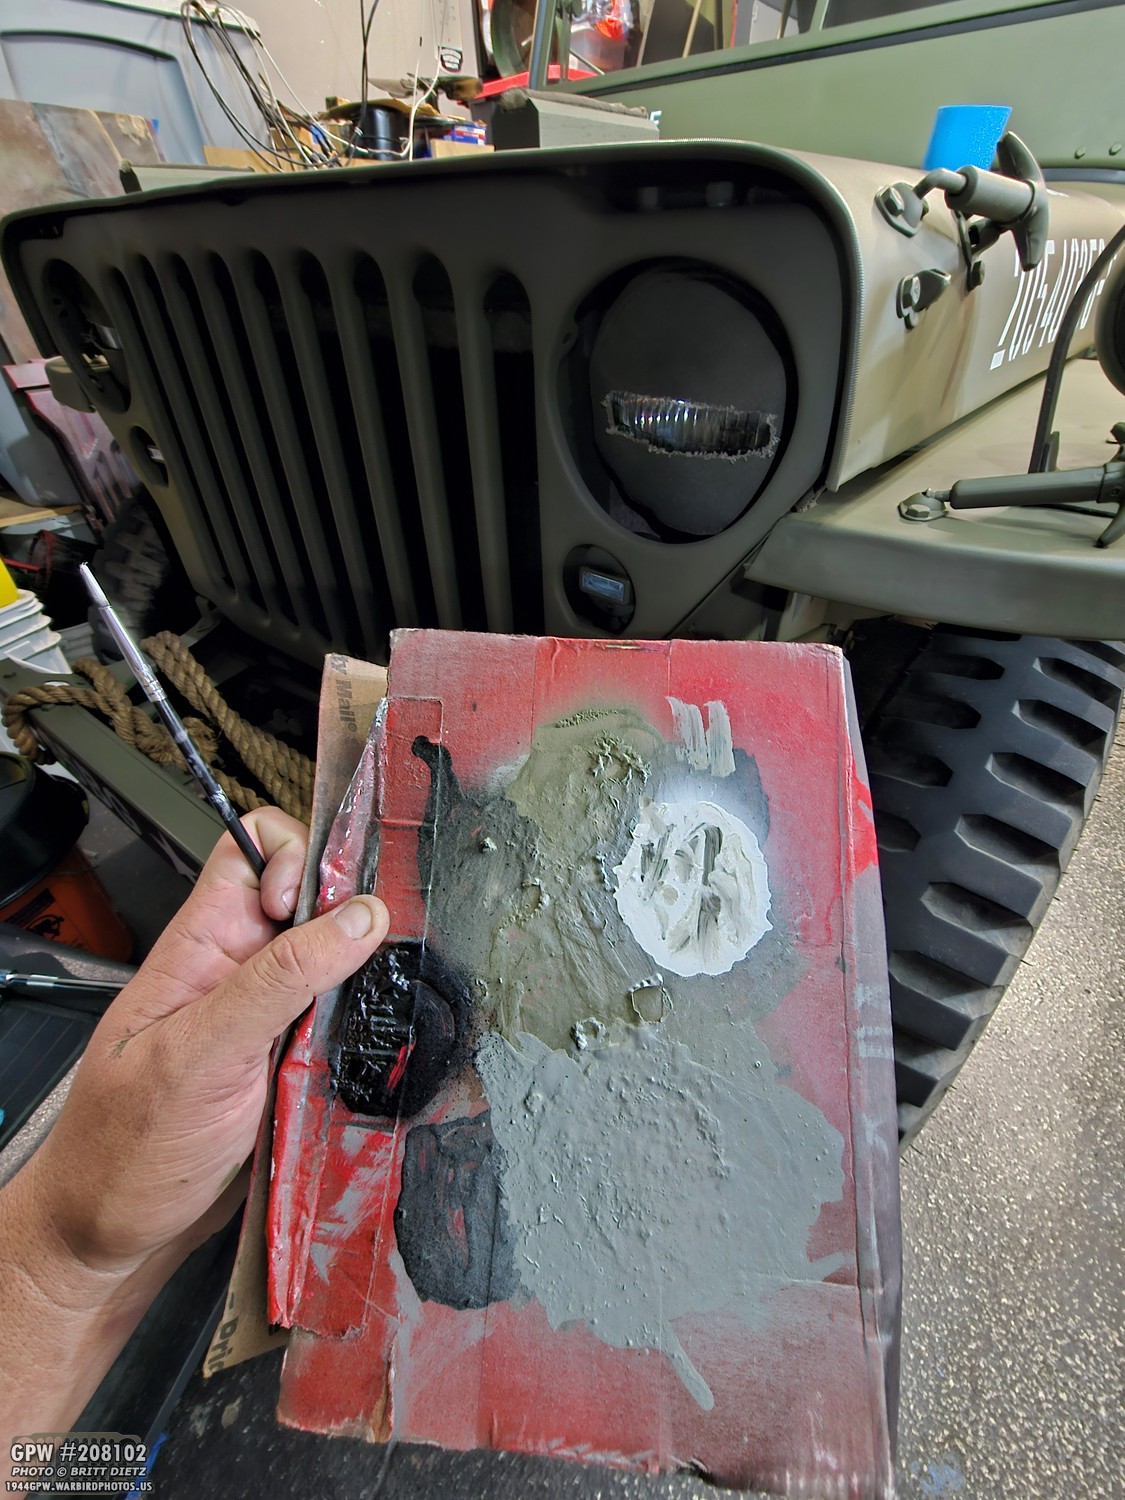
With dusk turning to night, I had one last thing to do… paint the Jeep. No, not with a spray can… but by hand. After retorquing all the nuts/bolts on the engine head one more time after the test run, I had to paint all the nut and bolt heads. I used my trusty artist palette that I’ve used to manually paint the Jeep for nearly 8 years. Lots of layers of paint on here. I spray the paint on here and use a brush to apply it. NOW the Jeep was car show ready!
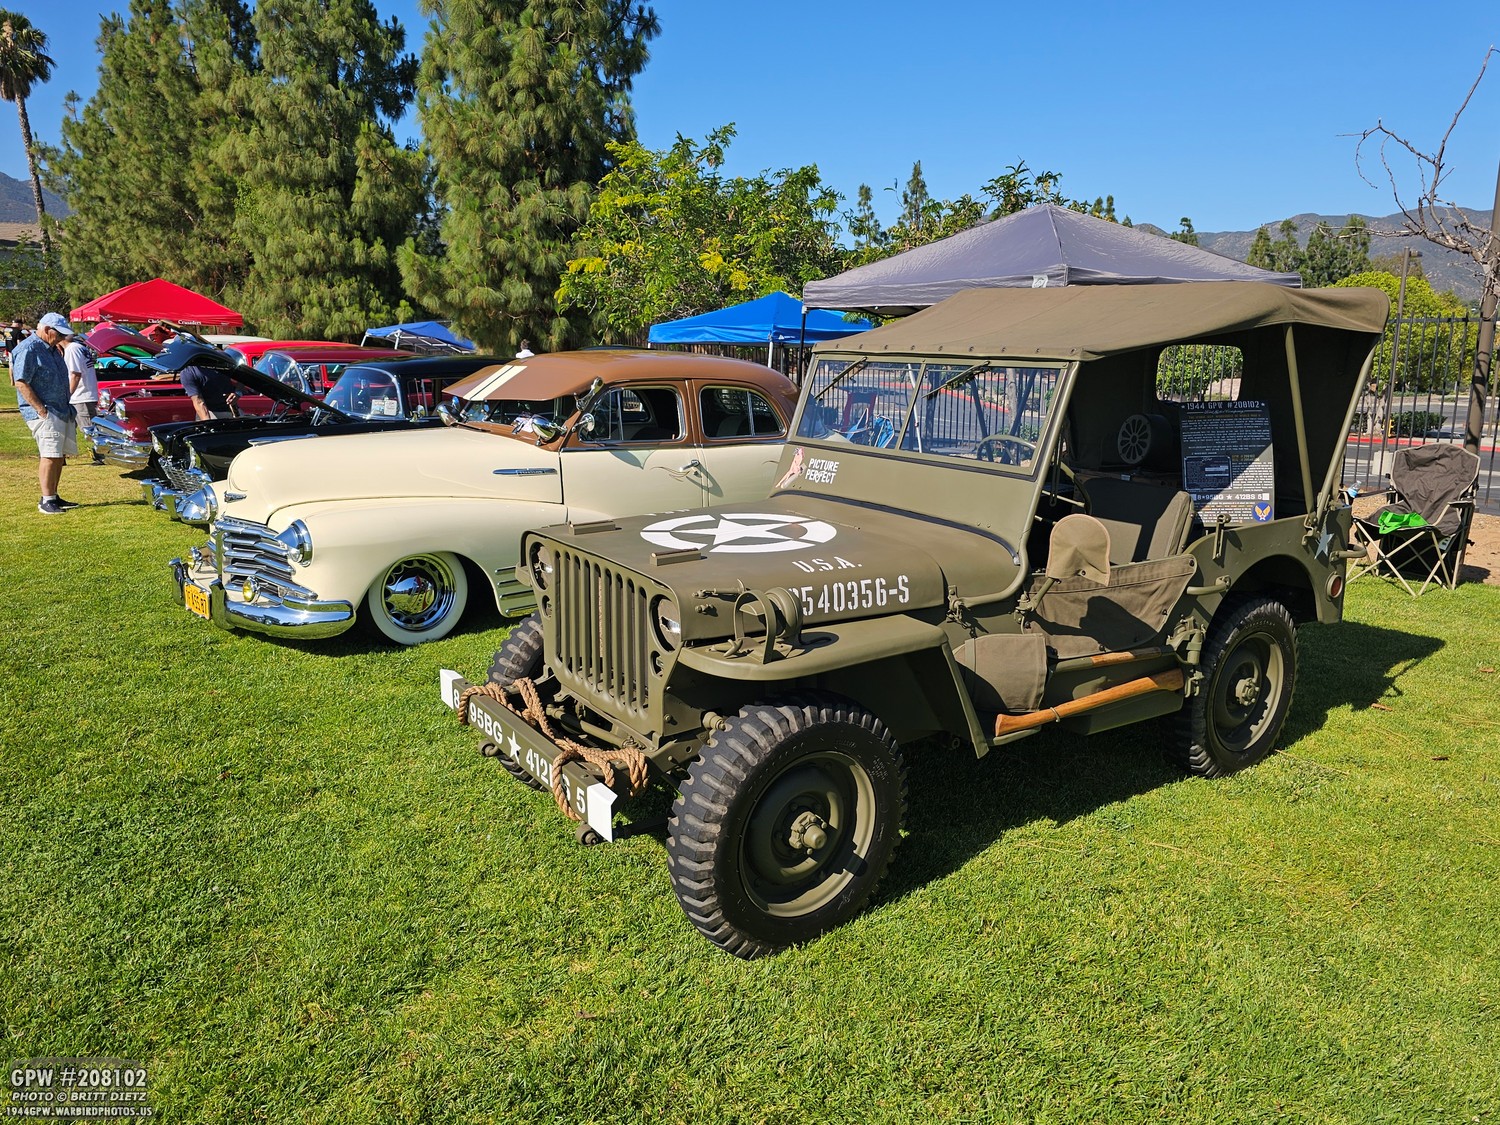
And the next morning, my Jeep was there. A goal that seemed so far away when I started the valve project that the thought of missing it didn’t even cross my mind till working on the Jeep just mere hours from the event. The drive from the house to the event was uneventful, BUT, the Jeep sounded terrible. Something for sure was wrong. It made it there just fine, but something wasn’t right. After driving your Jeep for many years, you just know what it should and shouldn’t sound/feel like… and something was off. At least it made it to the show.
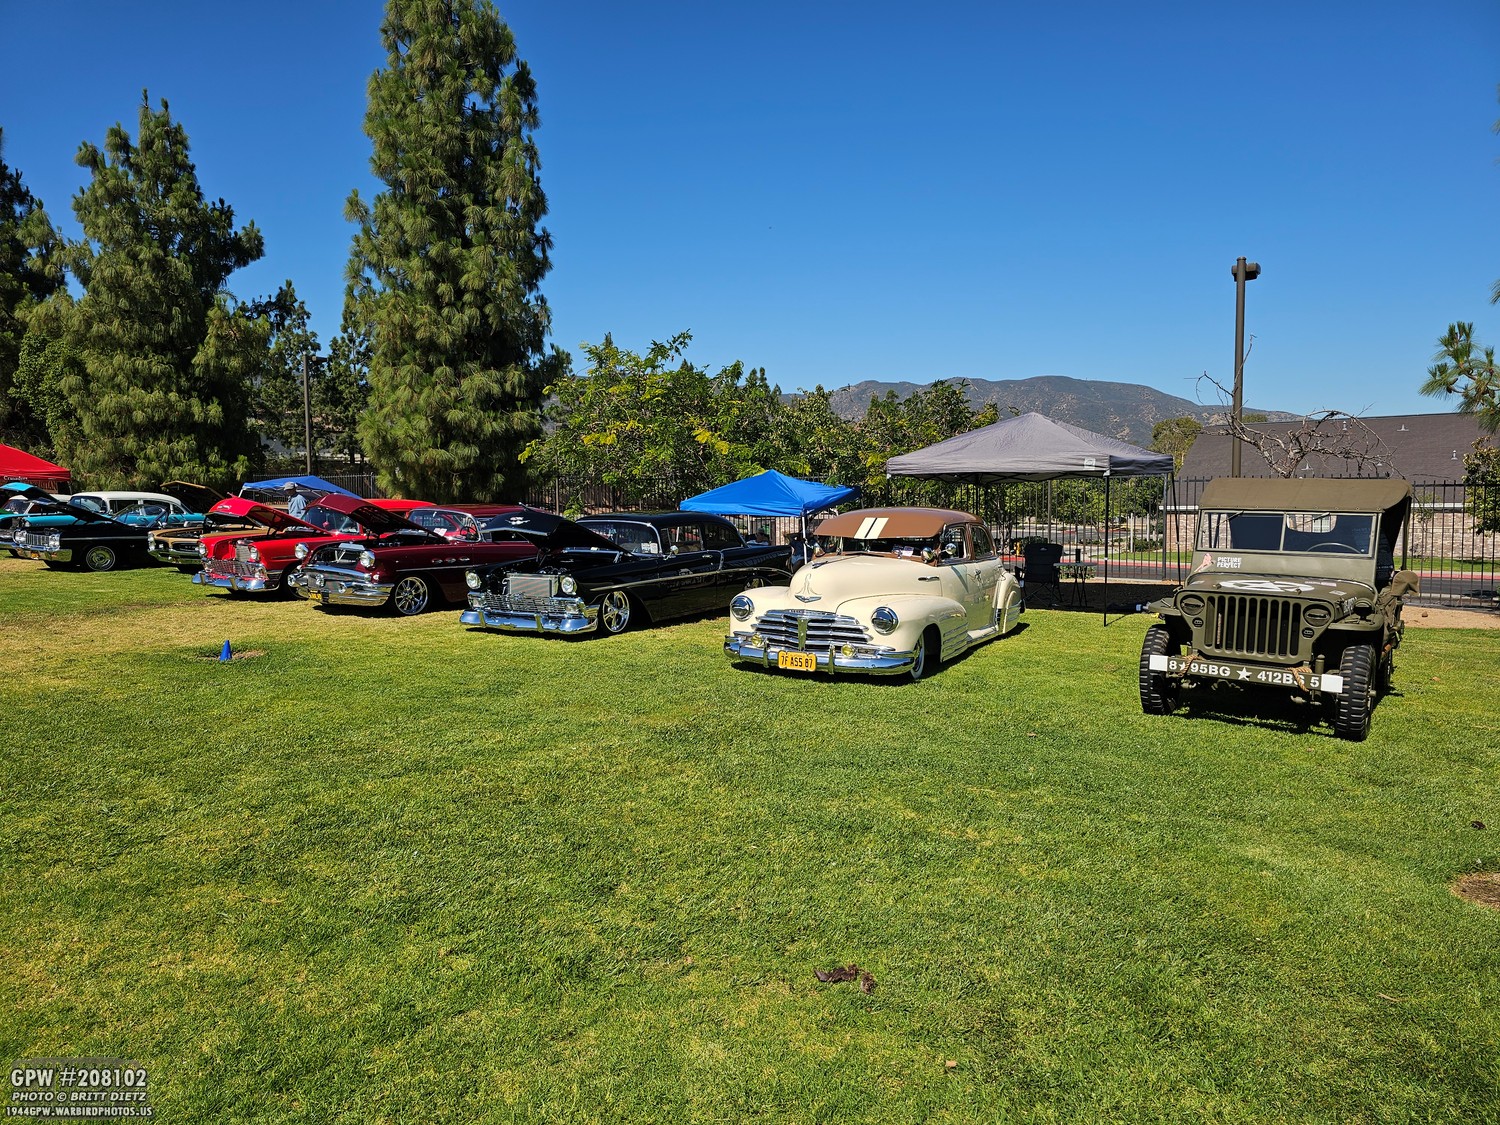
There were a lot of classics there, but I had the only Jeep/military vehicle. Some really great classic cars lined the field at the Corona Friends Church. I had to miss last year’s event due to conflicting events, but was glad to make it again this year.
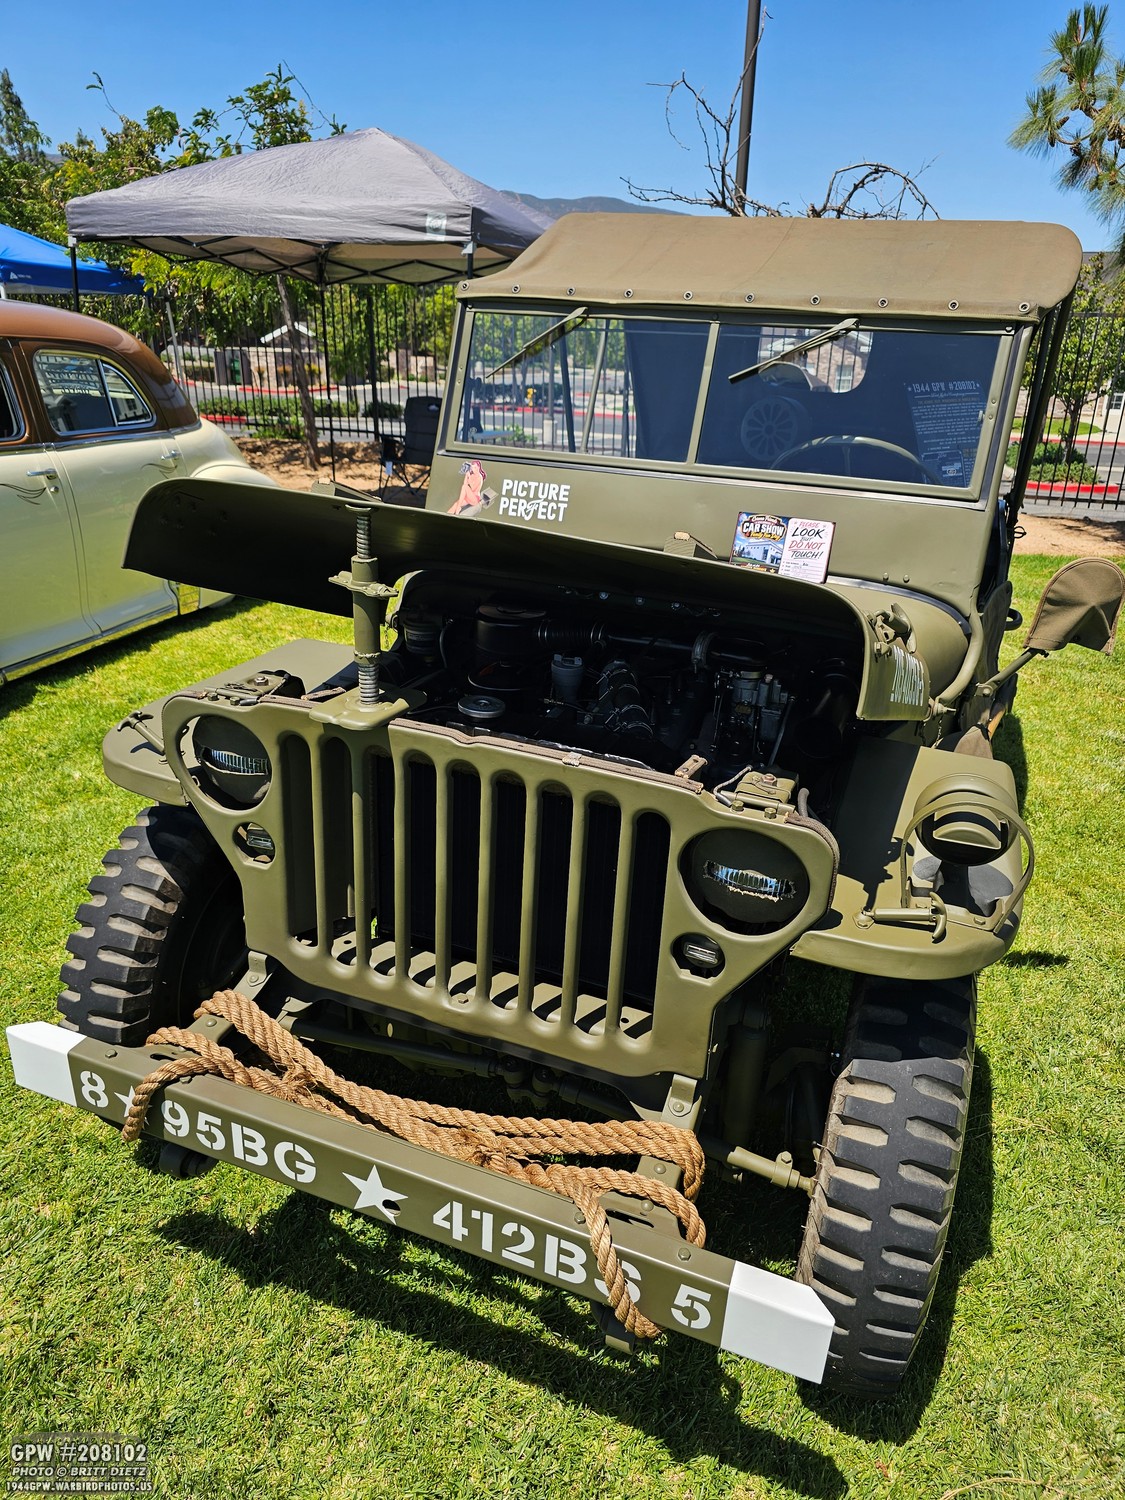
One thing that’s always bugged me is you can’t really display the Jeep with the hood open partially. Some people use wooden dowels, but I wanted some way people could peek inside the engine bay but also not block the nose art or look of the Jeep. I had an idea… why not use the Jeep jack?
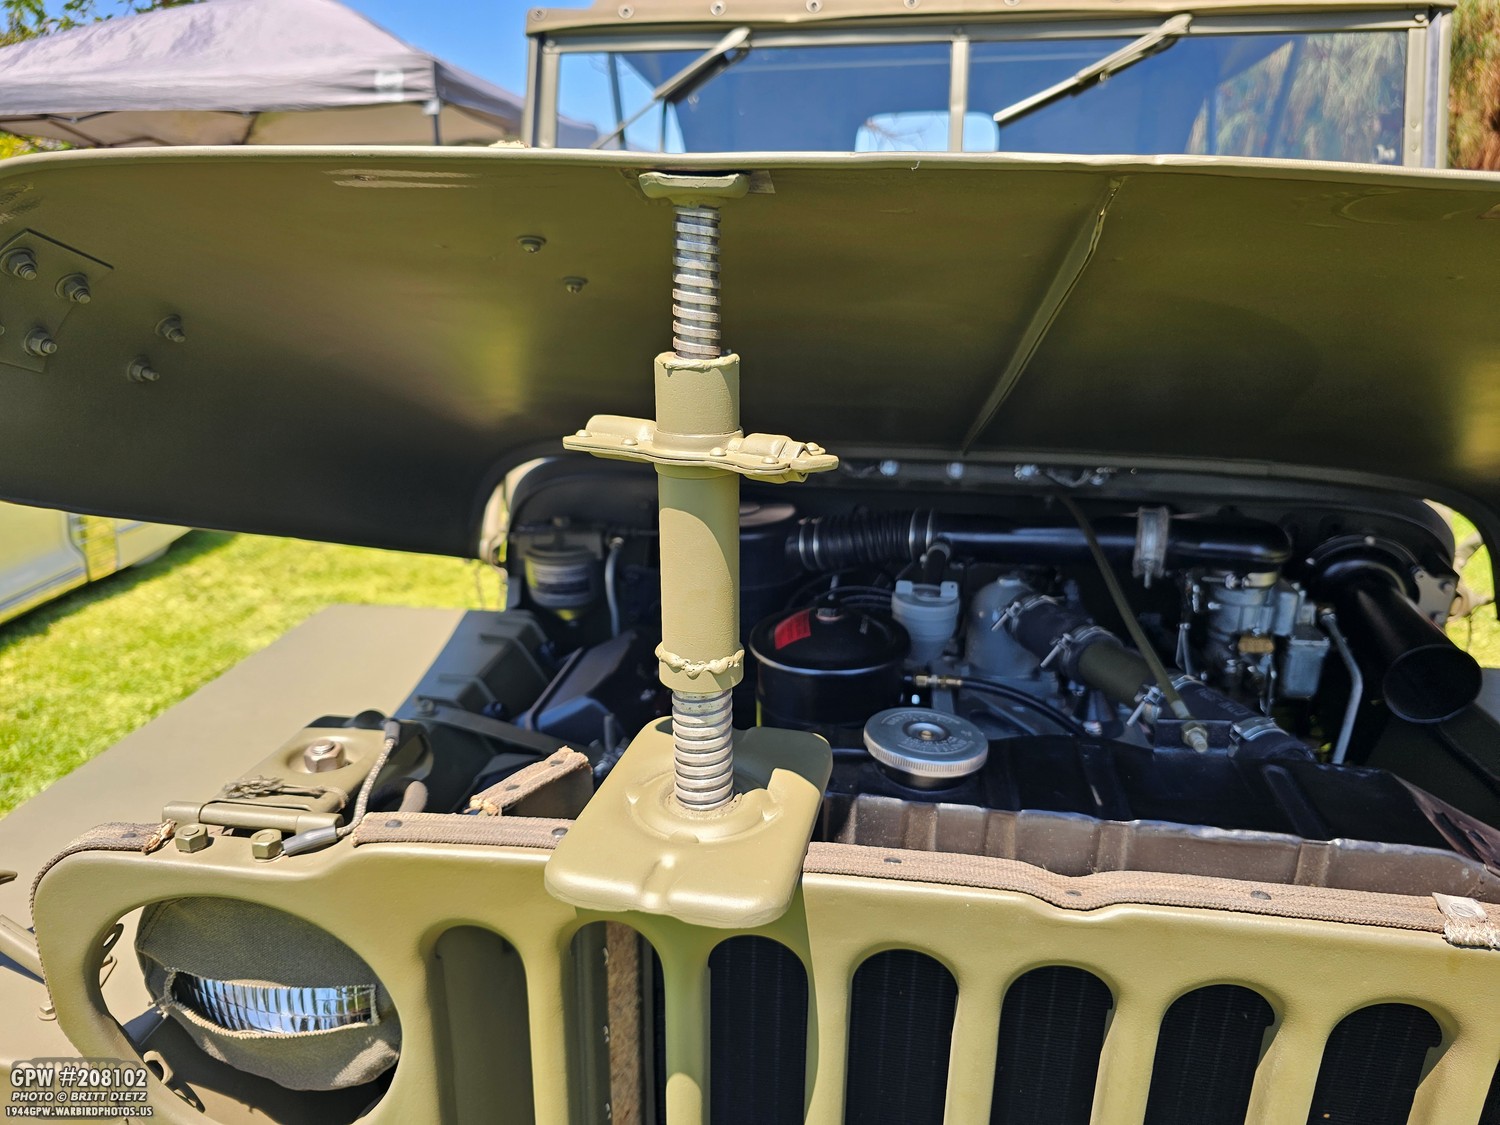
I grabbed my original Jeep jack from the toolbox and partially extended it. Worked perfect! And looks better than a wooden dowel. Plus, you can adjust how much open you want the hood to be! So, if you have a Jeep jack, there’s your easy way to show off that engine bay.
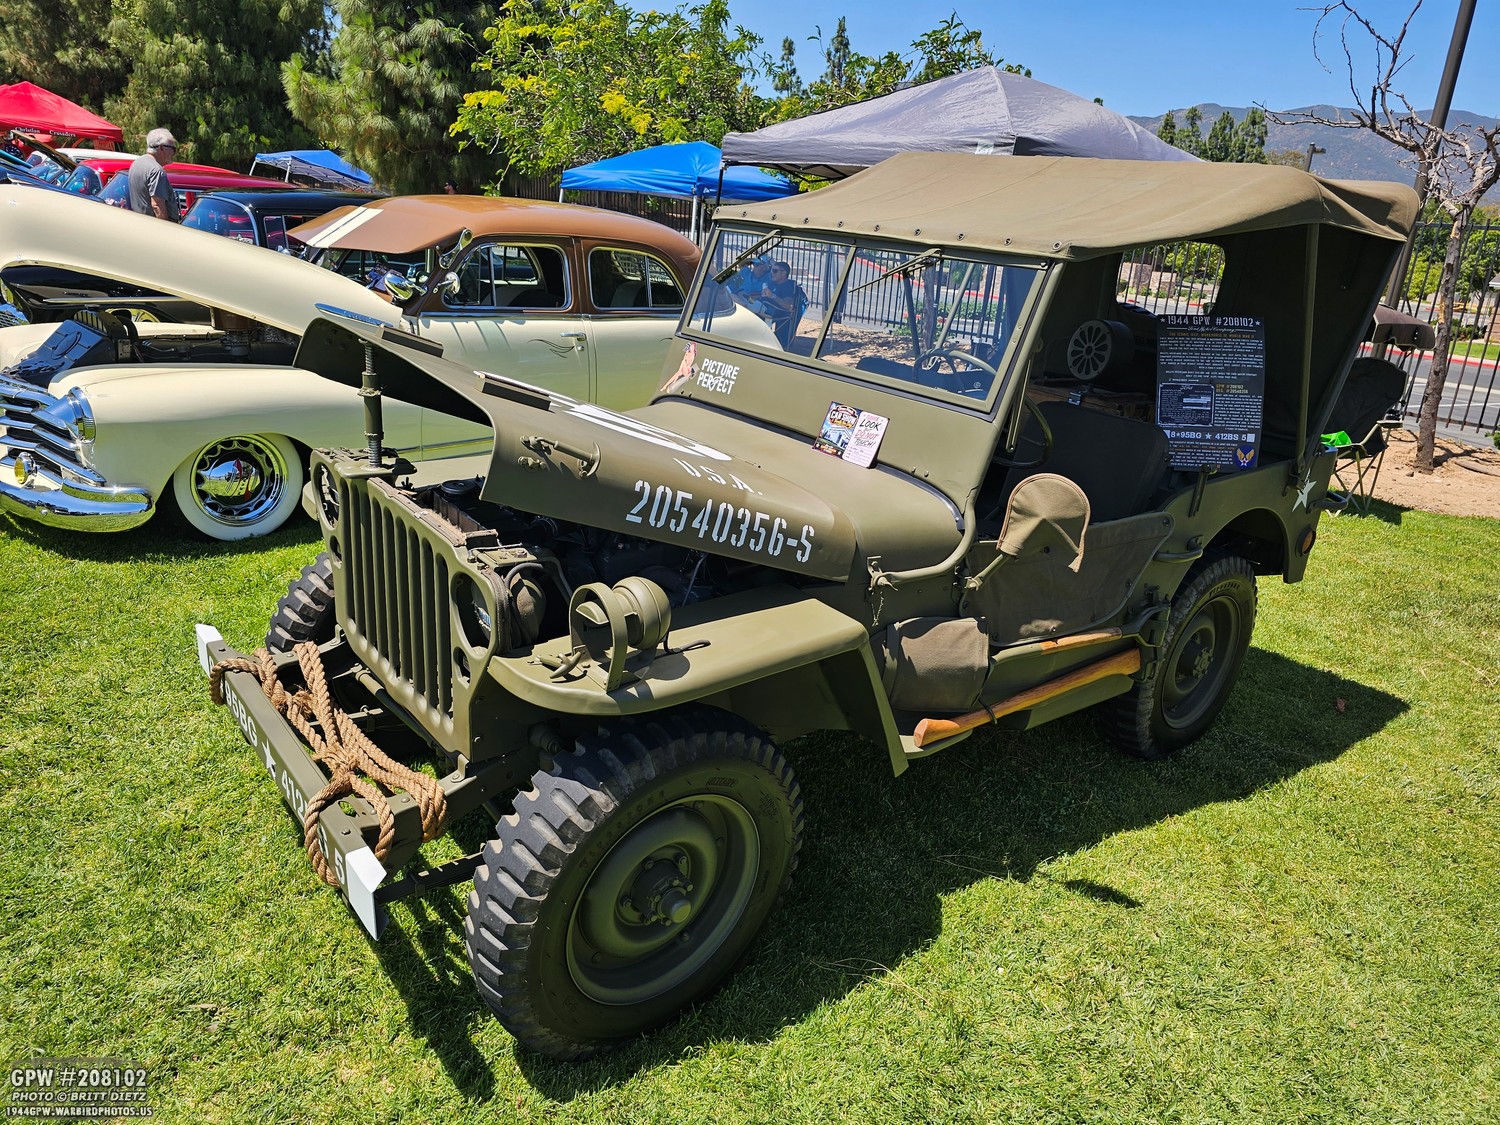
And the hood cracked open doesn’t completely break the classic ‘look’ of the Jeep. I brought out my usual info board I made on the history of the Jeep with the magnetic OD Green stand, and also my ammo crate radio, which was playing 40s music in the backseat.
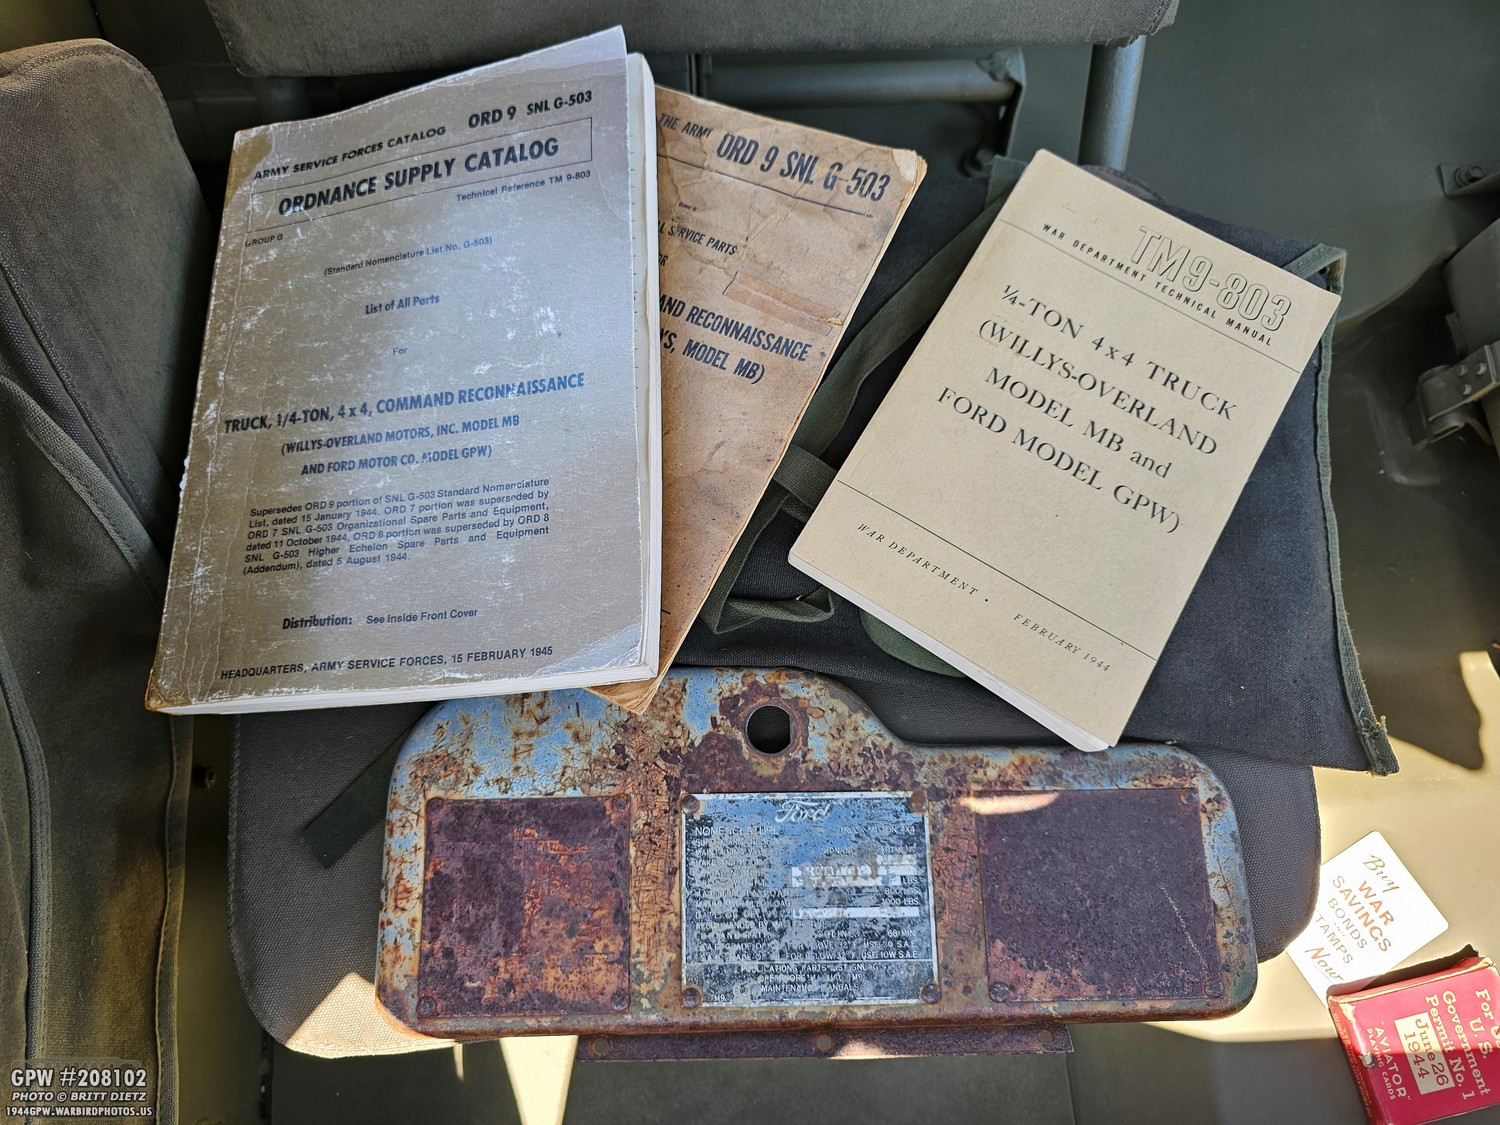
Before we get back to the Jeep issues, I wanted to show what I typically showcase inside the Jeep at events like a car show. I have an original 1945 ORD 9 and the original 1949 ORD 9, along with an original 1944 TM9-803. My original un-restored glovebox is also on display, showing the original US Navy colors the Jeep had.
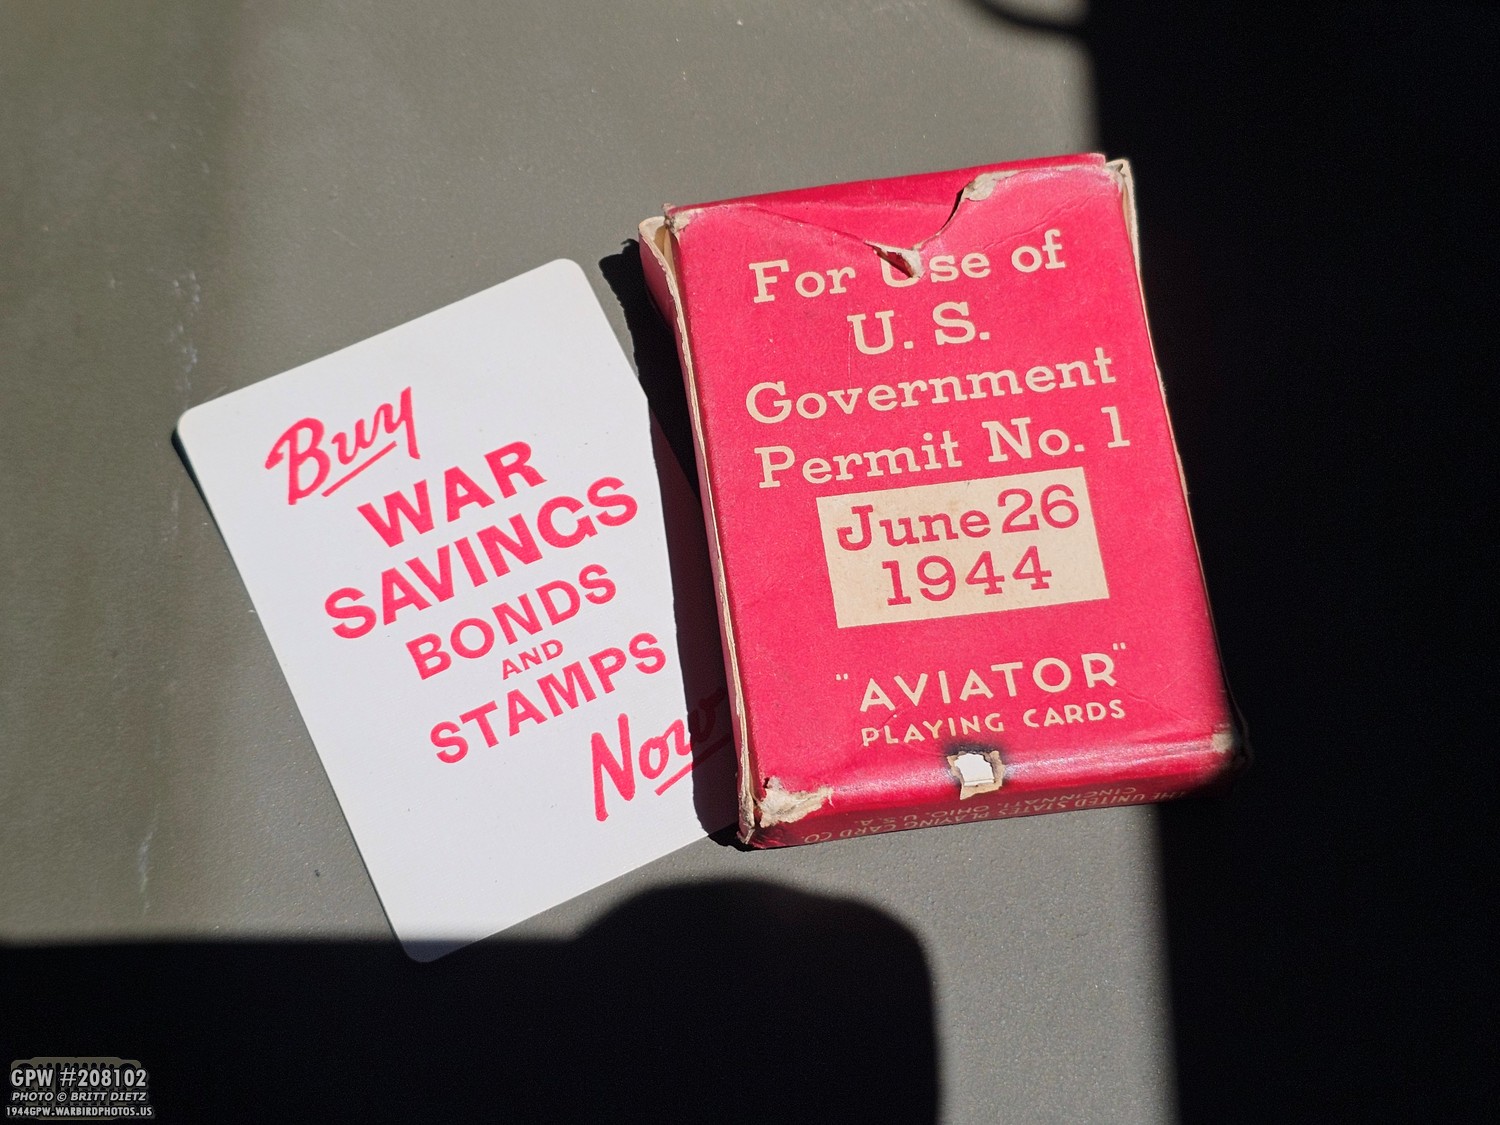
Something new I added that I got on eBay recently was this wartime deck of playing cards. While the cards themselves are not all that special (not common, but not super rare), what makes this cool for my Jeep is the date. June 26, 1944… that’s the date of my Jeep! I couldn’t pass that up as an addition to put on display!
Okay, back to the Jeep. I didn’t win anything, sadly, at the car show, but on the drive home I once again noticed the Jeep was acting weird… being sluggish, coughing, feeling underpowered. Something just wasn’t right. I tried retiming it again, and it just wasn’t giving me the numbers I wanted. Something was wrong.
The one good thing: I noticed I was dripping less oil on the front catch. I had tightened all the bolts on the oil pan, and that really helped. Normally there’s a fair bit of oil dripping on this catch plate after a long drive.
Going through a checklist of everything that could have gone wrong… head gasket? No, no leaks and holding well. Coolant? No, all full. Oil? No, all full and no new leaks. Manifold leak? No, doesn’t appear to be any leaks from the test. Compression seemed okay. I spent about a week testing things. Nothing seemed out of place. But then I remember something…
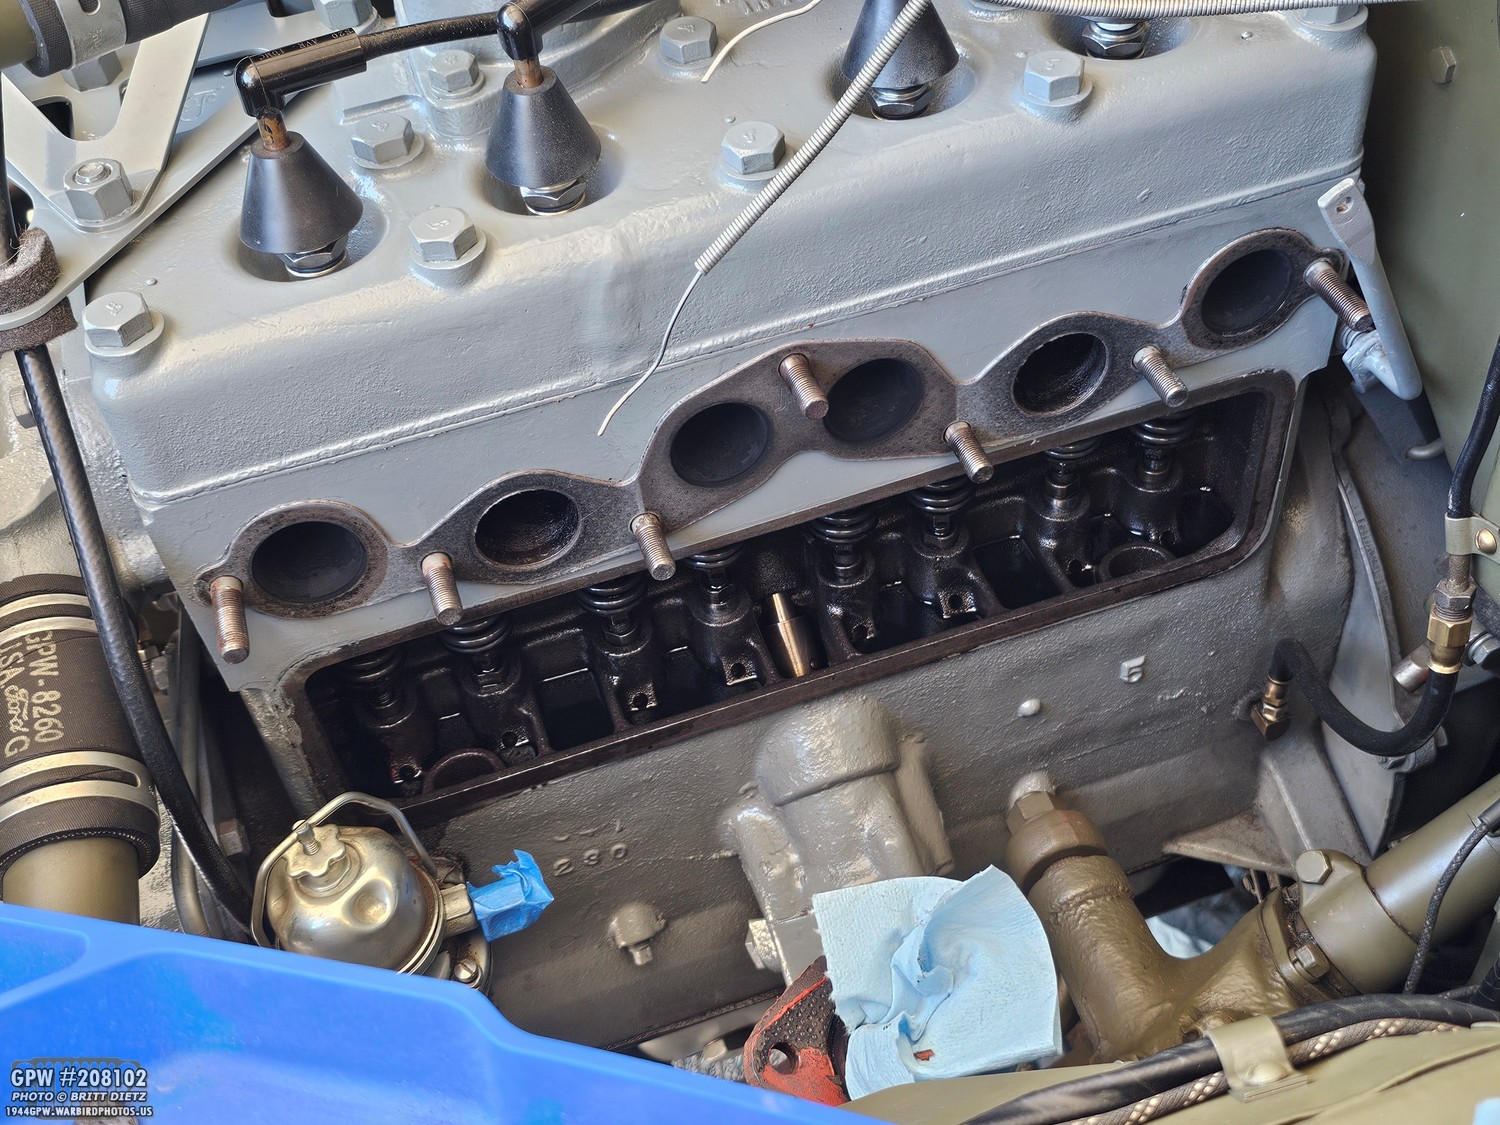
Remember how I had been told by a few people to set the valve gap to .013? Well, I seemed to remember having issues with the Jeep when I set that a long time ago when adjusting the valves for the first time… and I had to change it to .014 (standard). So, I figured… why not? I took off the manifolds and carb, and removed the valve door and got to work. I did NOT remove the fender or wheel this time. I readjusted all the valves in the same rule of 9 method I described in the last update, and adjusted them all to .014. I triple-checked they were all .014 before putting the engine all back together again.
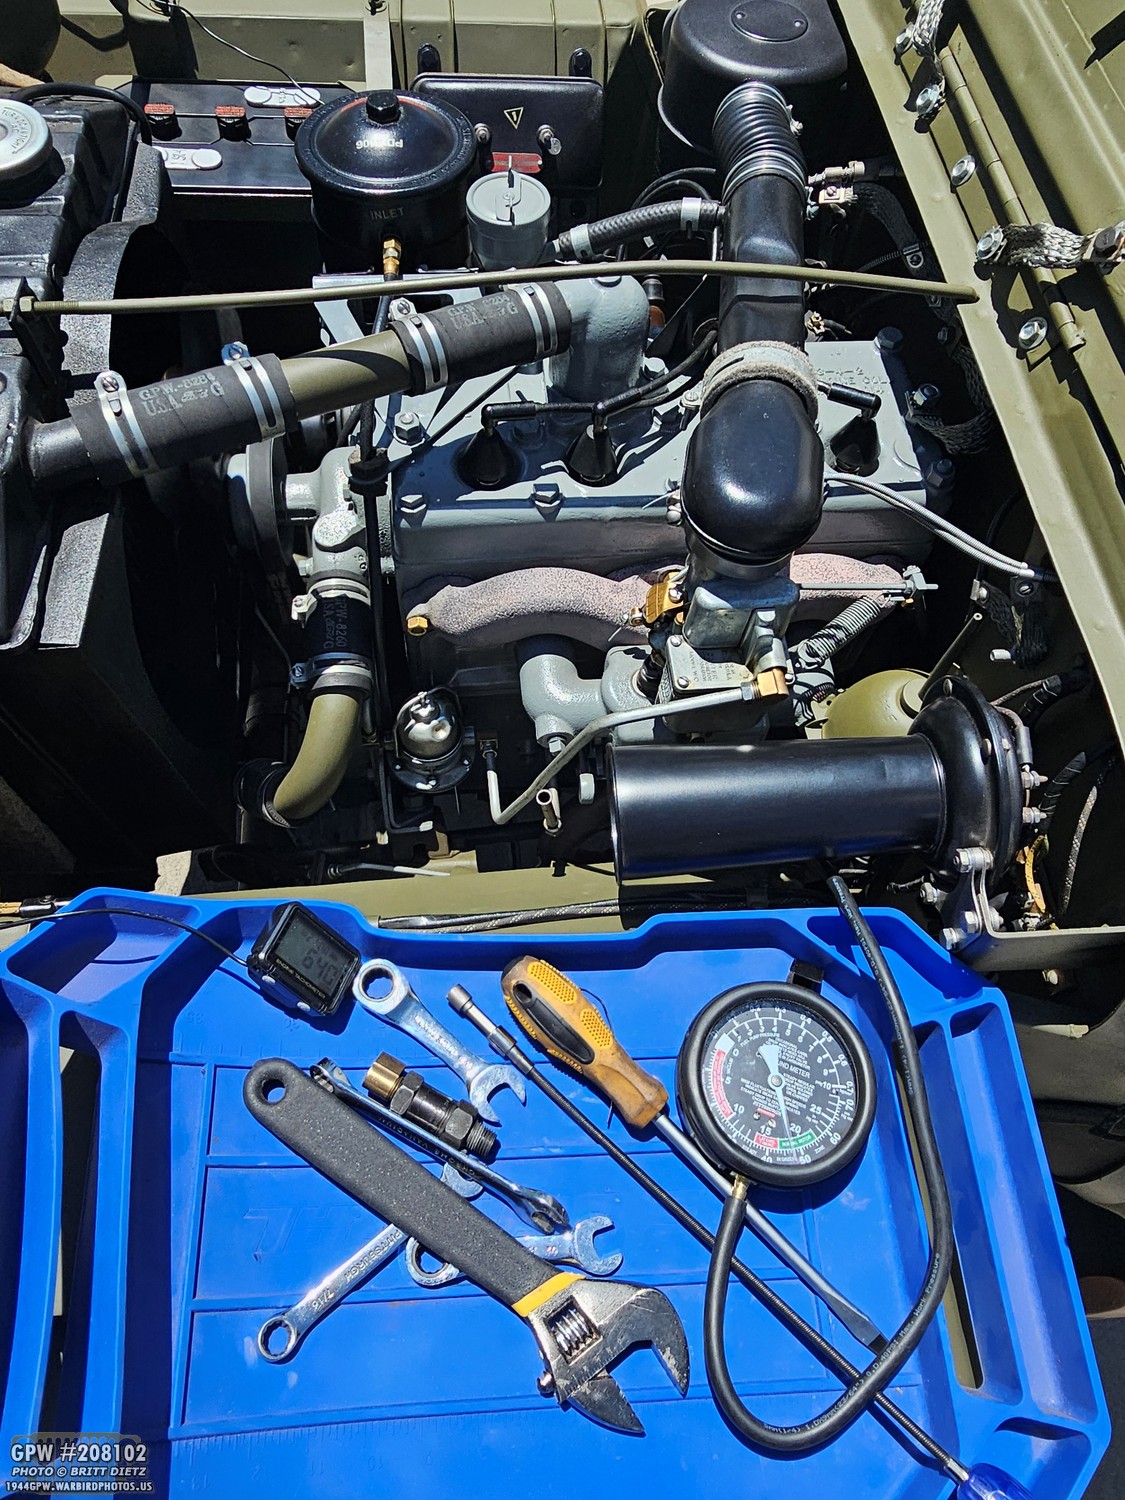
The next day I pulled out the Jeep and fired her up. I immediately redid the vacuum timing on the engine… and this time it was almost exactly the results I got when I successfully vacuum timed the Jeep before the valve adjuster screw change! I was getting excellent vacuum at perfect RPM. The cough went away, and the engine sounded softer.
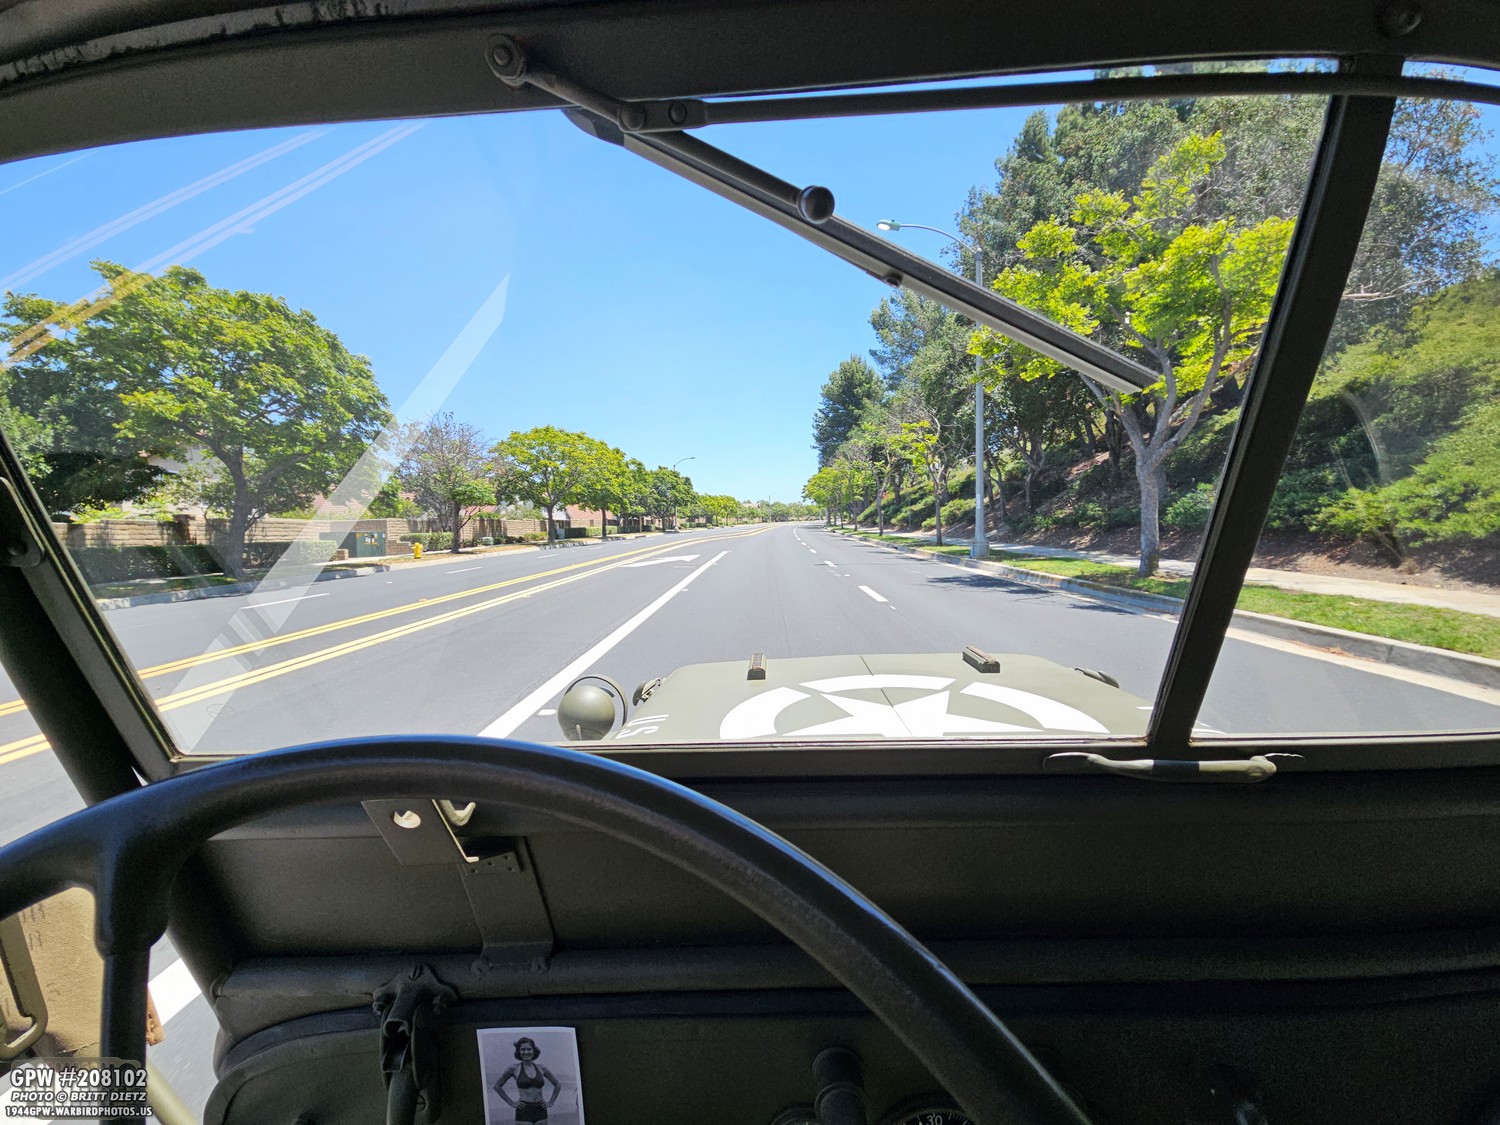
So, I took her on a run through the area. Night and day difference; she was running GREAT. Great power, no sluggish performance, sounded just right. In fact, the tapping sound softened quieter than I’d ever heard it. It was barely noticeable. So, that means that my particular engine with that combination of springs, valve adjuster screws, and valves likes .014 for the gap. That will be etched in my mind from now on!
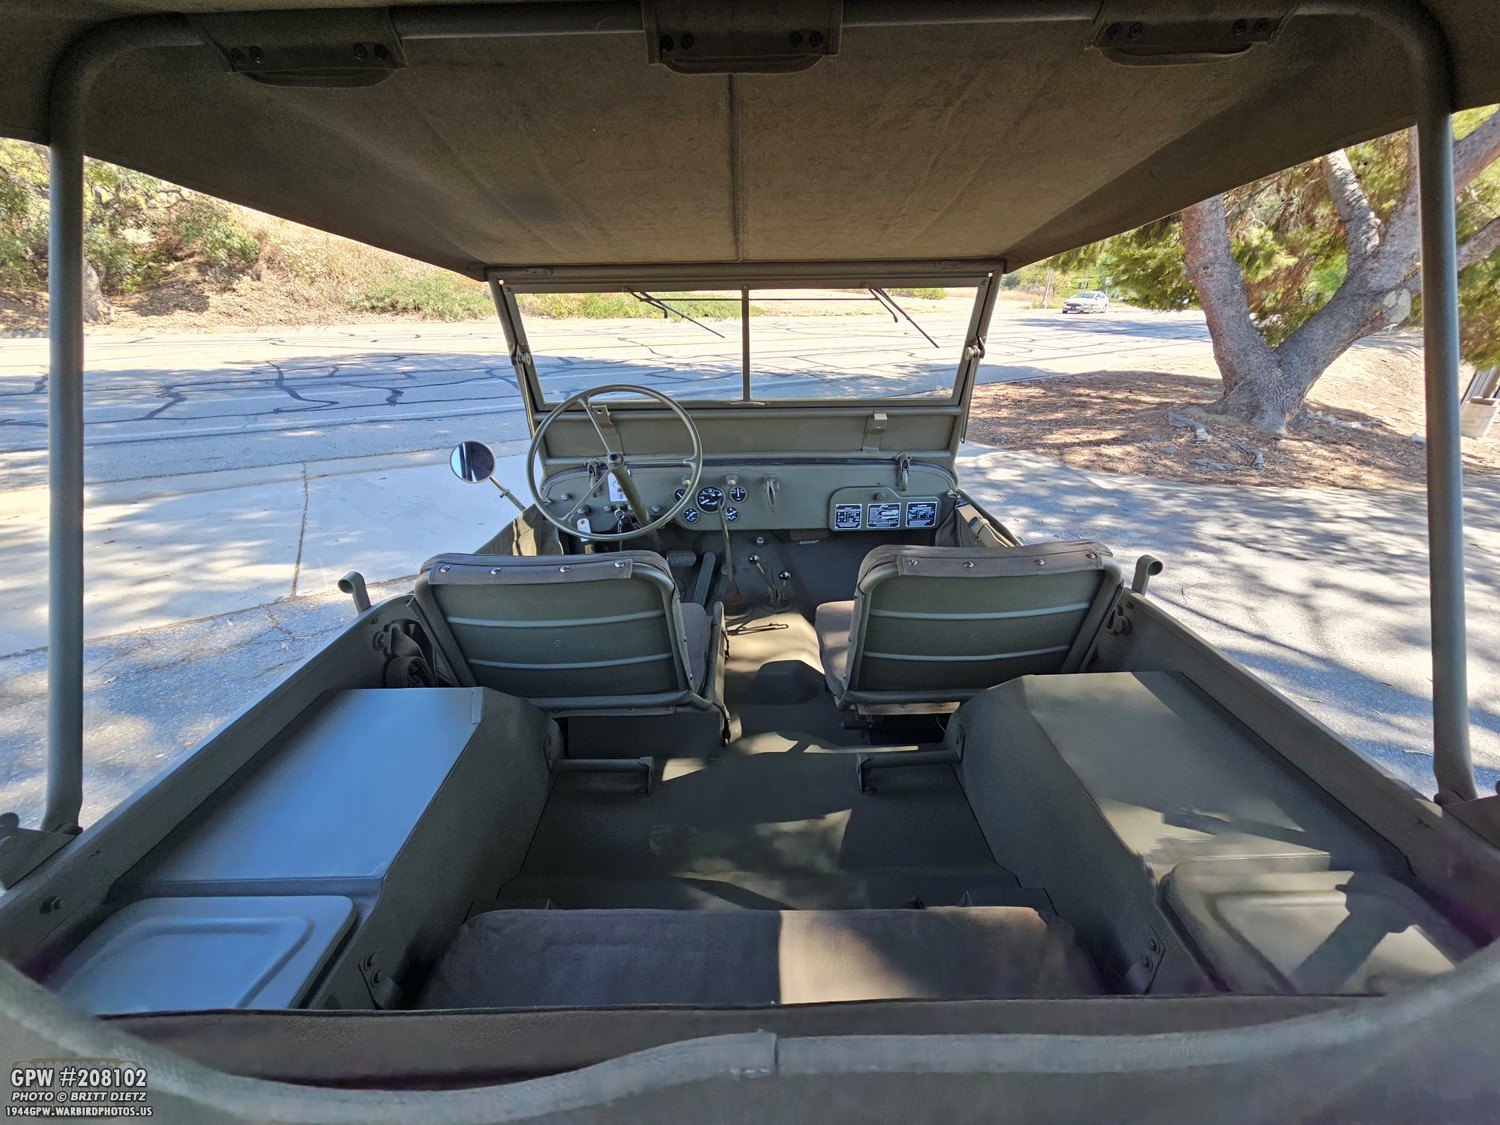
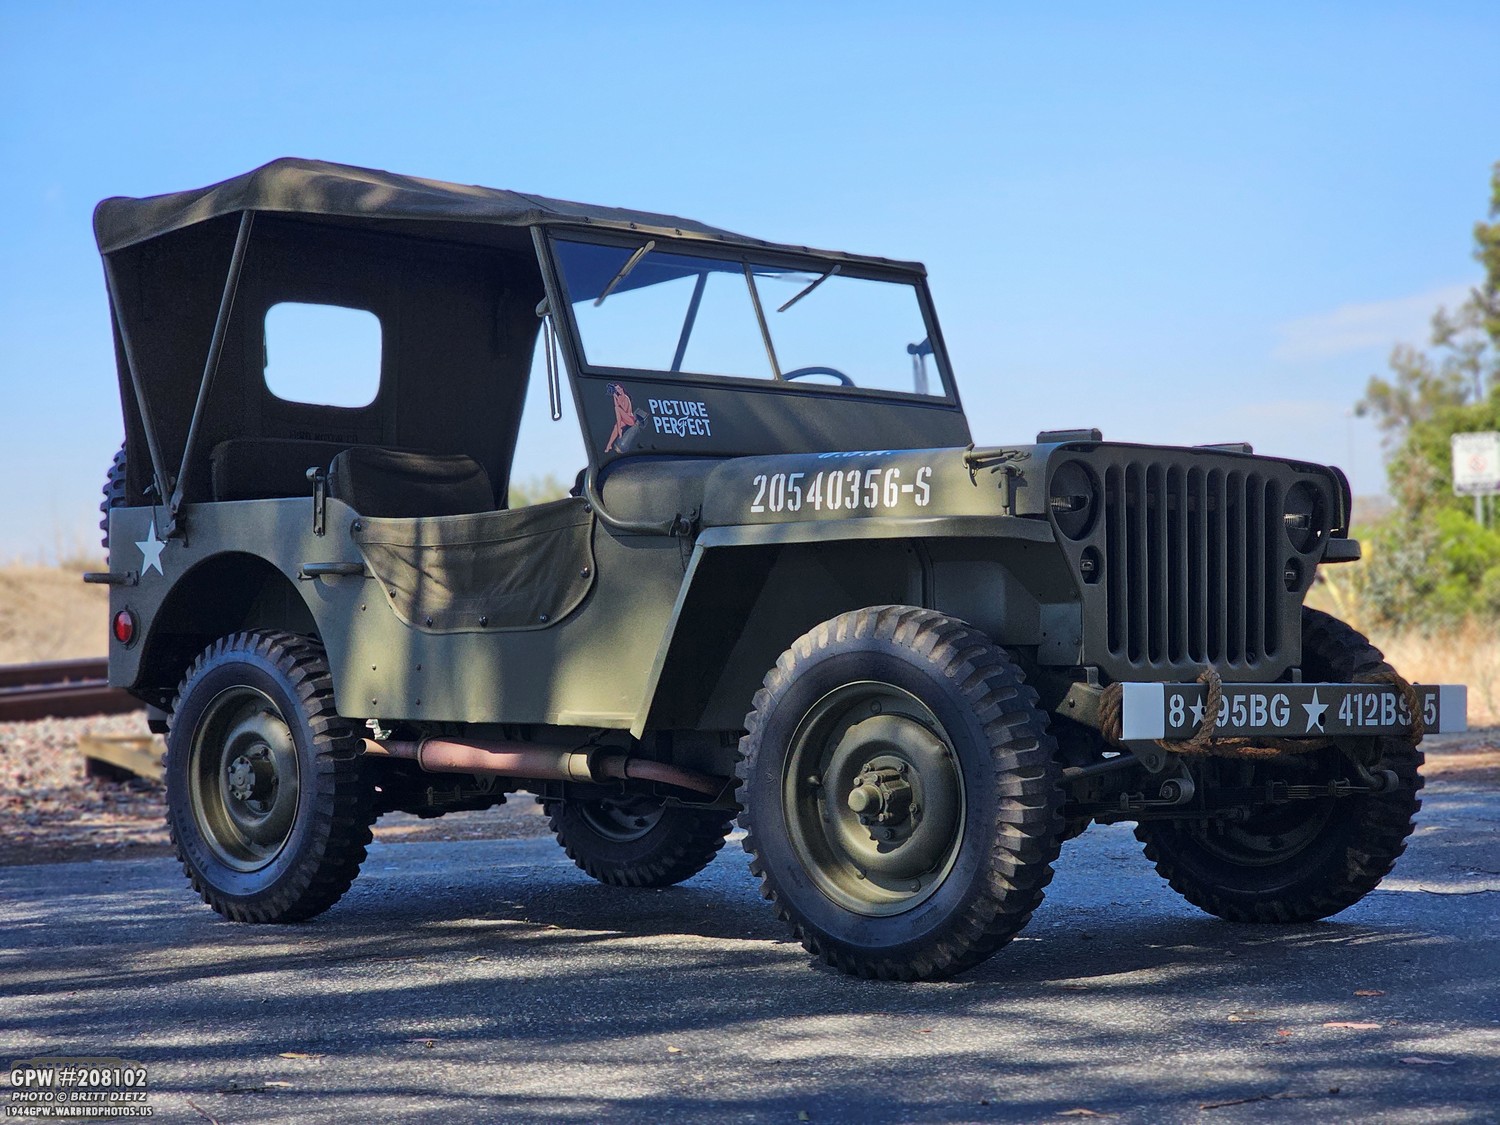
By this time, it was the Jeep’s 82nd birthday on June 26th, so I took her to an area where I could get some nice photos (which I posted on the day and also is the first photo in this update). I was finally feeling that my troubles were behind me and I’m back to having a finely tuned machine! Foreshadowing again: No, I wasn’t!
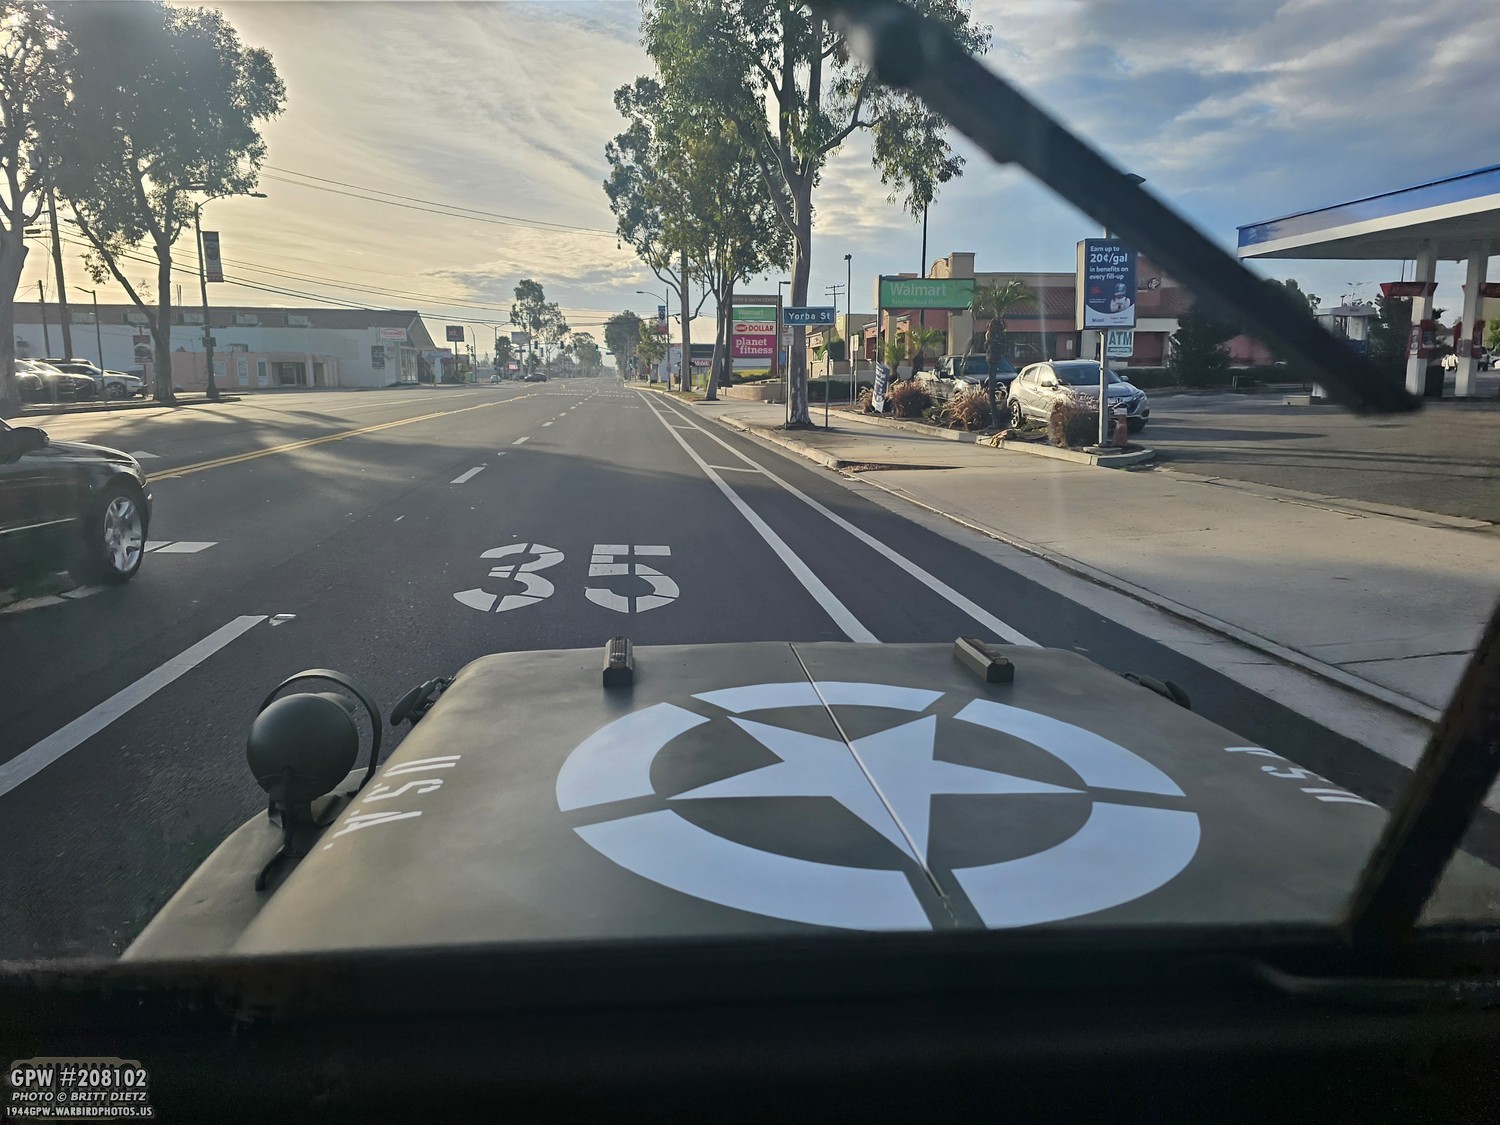
A week later, I was on my way to the Corona, CA 4th of July parade on the morning of the 4th. Jeep was running pretty well, though I noticed she took a little longer than usual to fire up. But otherwise, things were going well.
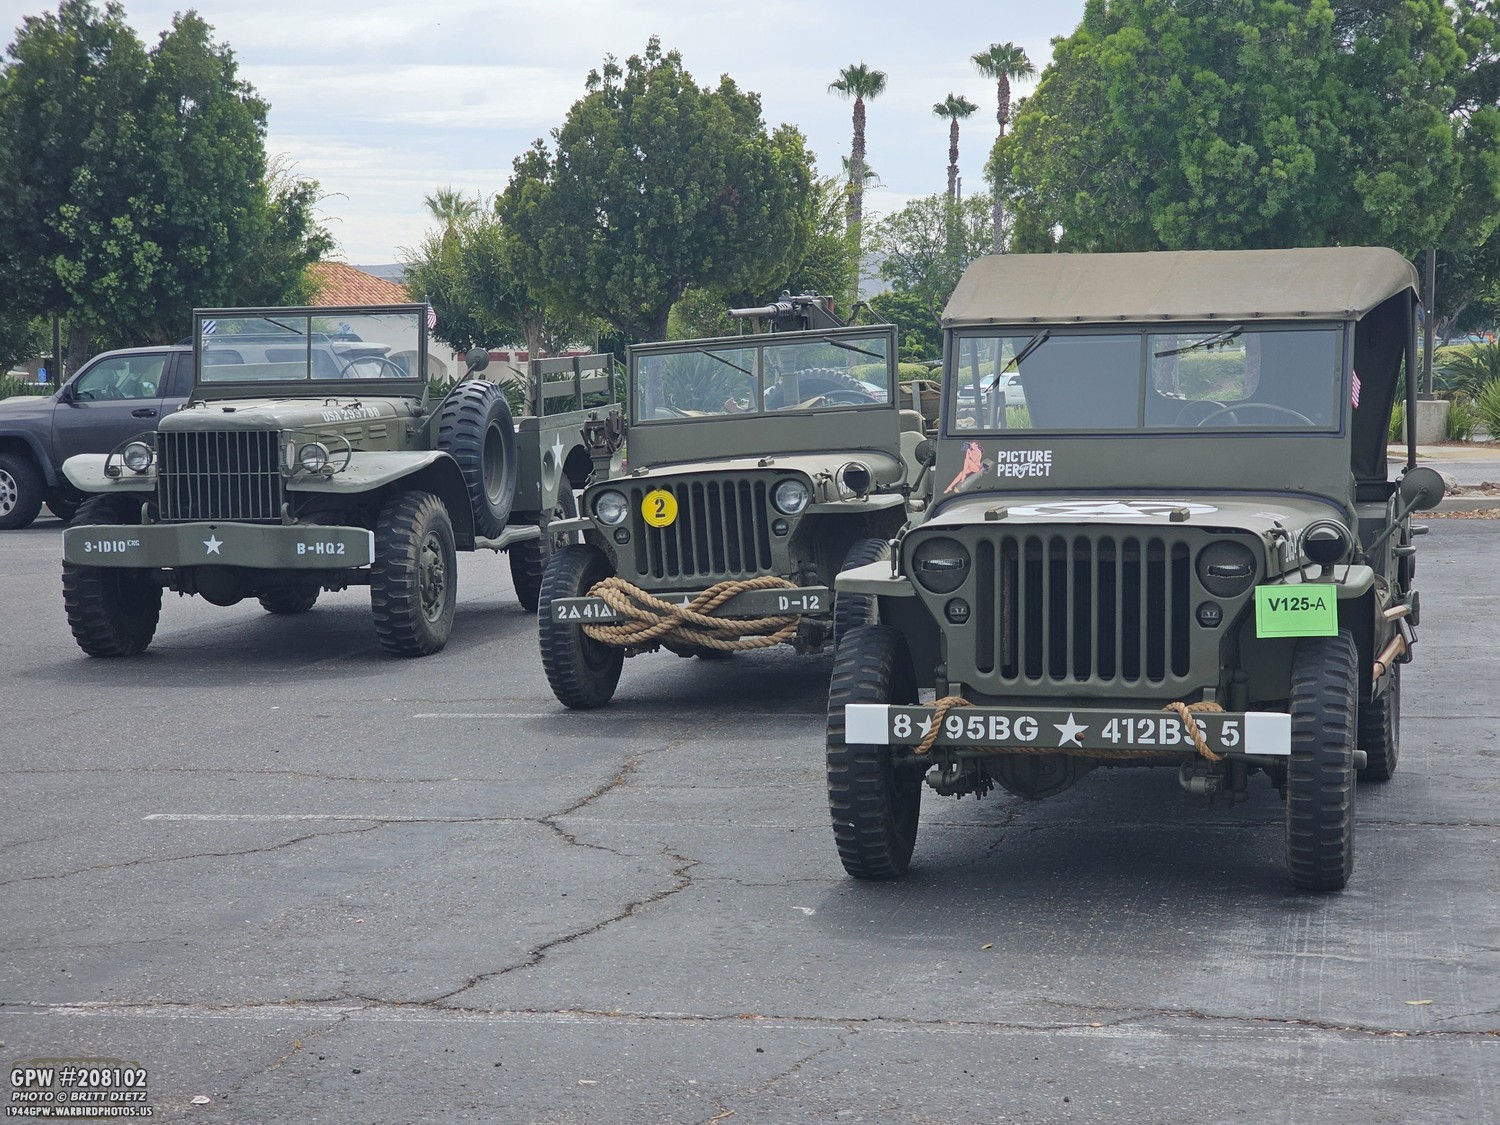
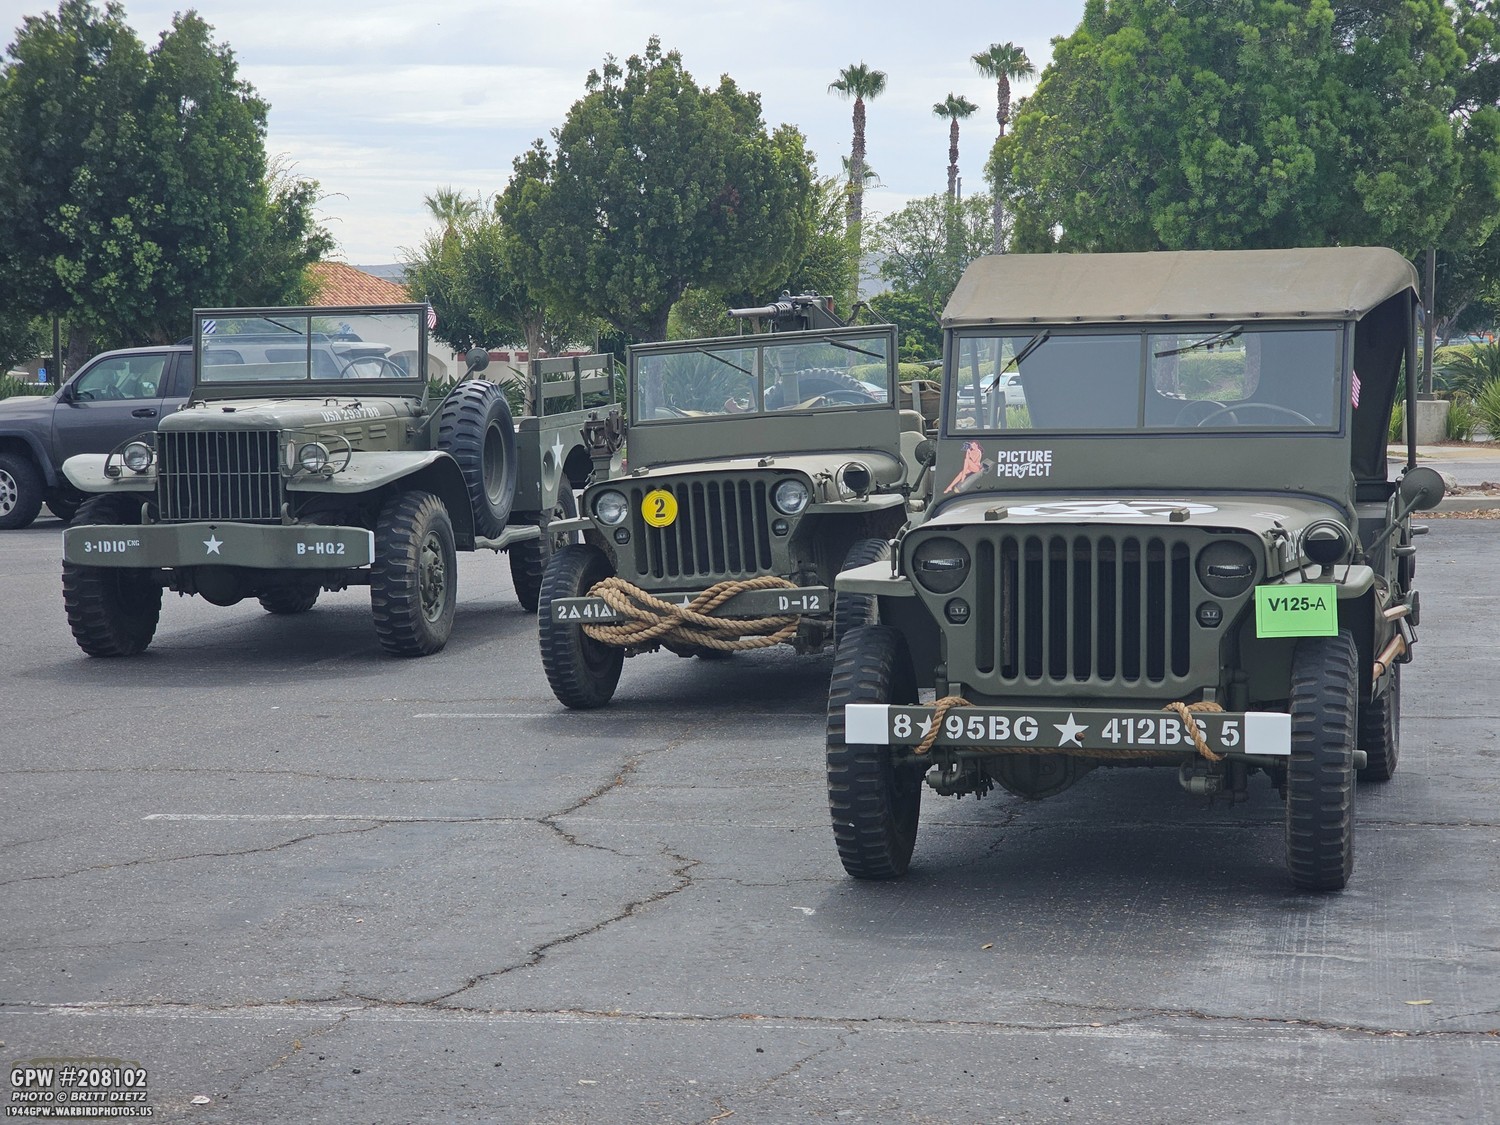
For the parade this year, we had a trio of vehicles… my 1944 GPW (front), a 1944 MB, and a 1944 Dodge Weapons Carrier courtesy of the Planes of Fame Air Museum motorpool. The green paper was required to be on the vehicles so the speakers along the parade route knew what group we were.
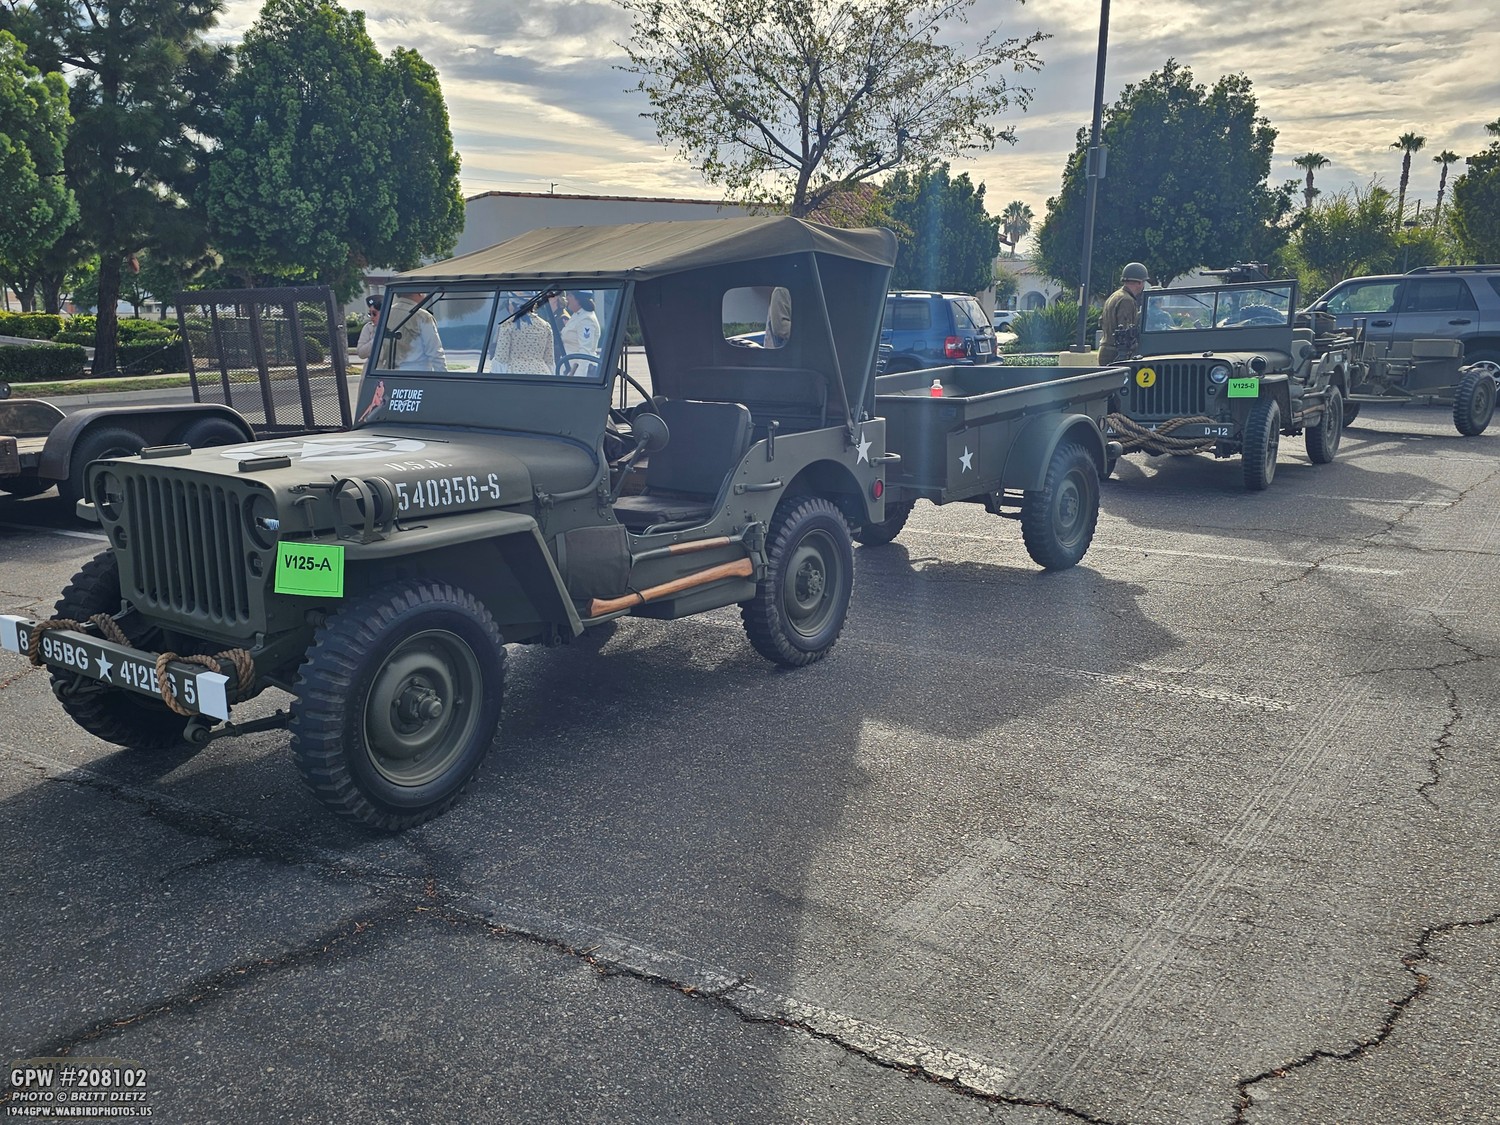
I once again was able to tow a borrowed Bantam trailer. Always fun to tow one, though I need a LOT more practice backing up with one attached. I decided to tow it to match the Willys with us, as it was towing a small artillery cannon. These photos are the pre-pre-staging where we met before heading to the parade staging.
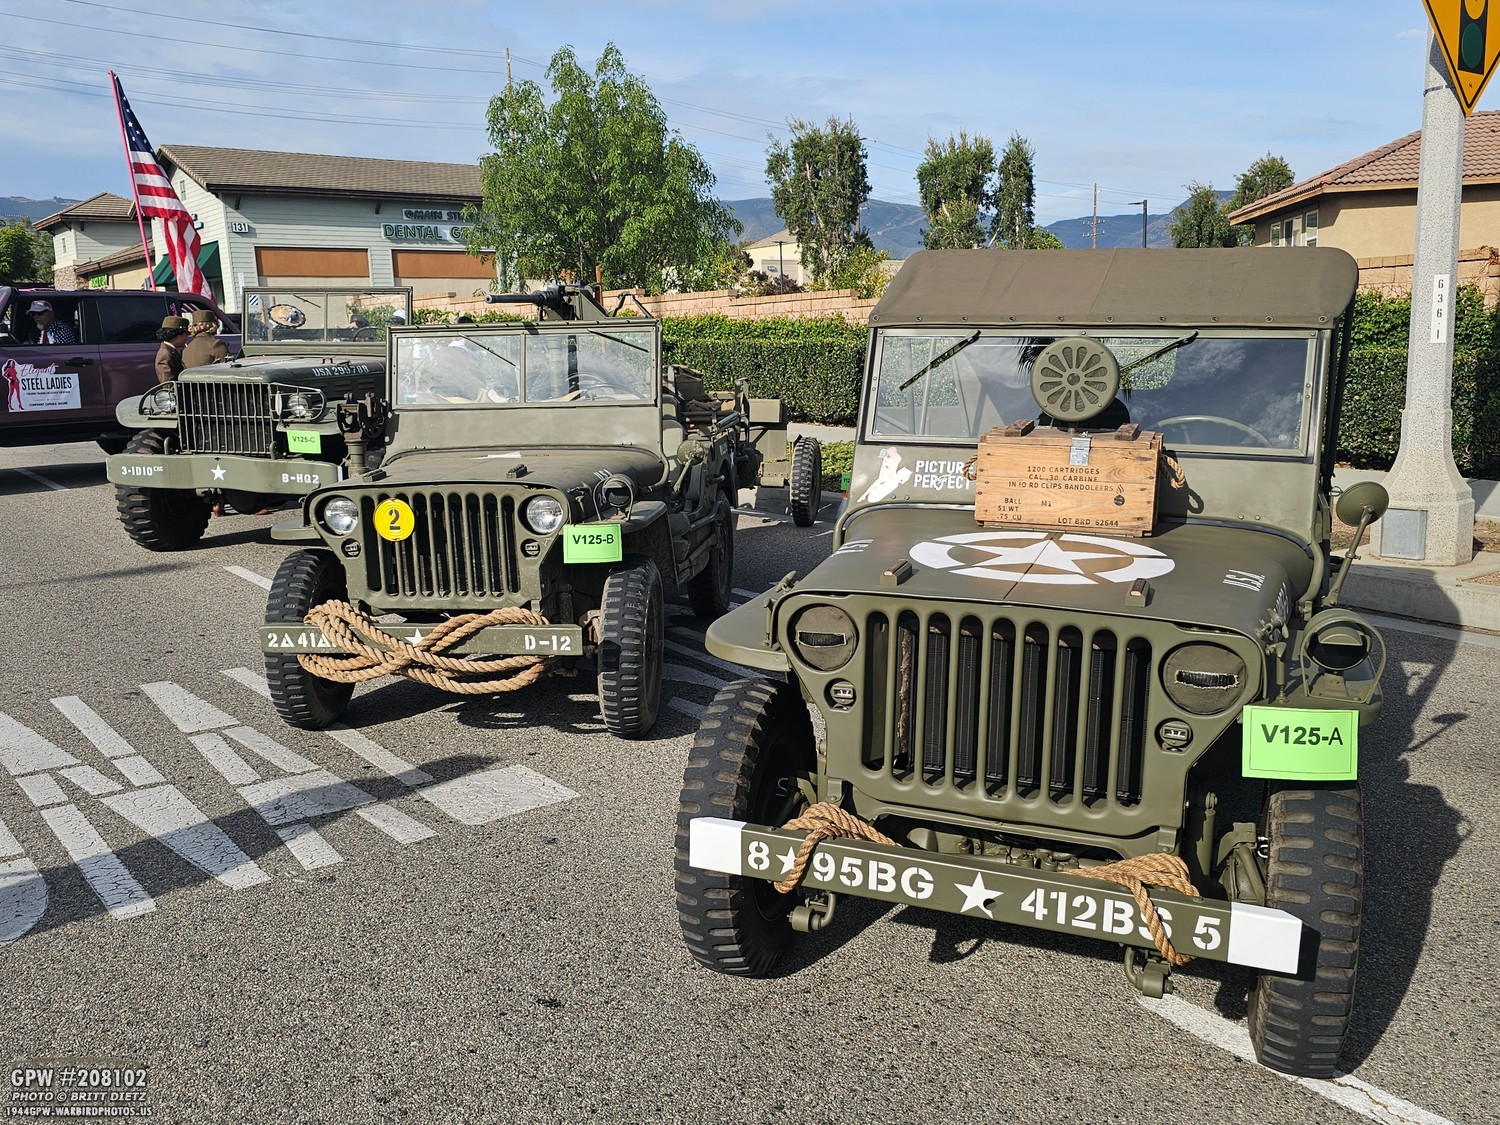
And here we are all lined up for the parade staging along Main Street at the top of the parade. I put the ammo crate radio, as I normally do, on the front of my Jeep so I can blast 1940s patriotic swing instrumental music as we head down the parade route. We were one of two WW2 military groups. We had hoped to join together as one big unit, but the parade organizers split us up for reasons I’m not exactly clear on. Oh well.
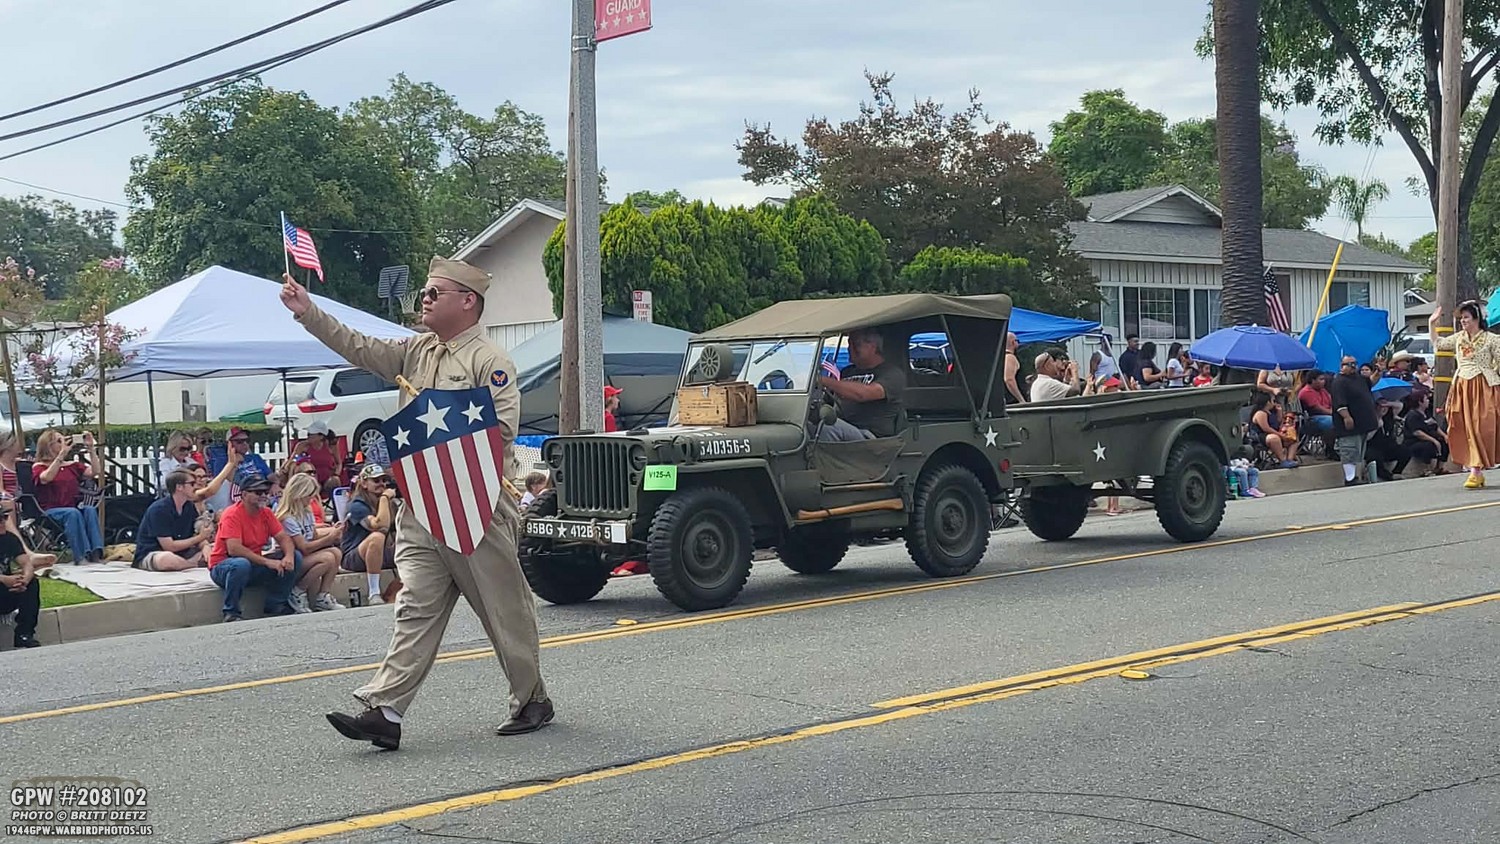
And here I am coming down the parade route. Behind me was the Willys MB, and behind him was the Dodge WC. We had several reenactors with us, and a bunch of WACs (who were all in the back of the Dodge). The best thing about this parade is that it’s downhill the ENTIRE route… so put the vehicle in neutral, and let it coast all the way down. Just need to apply the brakes now and then. Easiest parade ever. I really hope, next year, to get a BUNCH of Jeeps together. I’d love a large grouping of them going down the parade route.
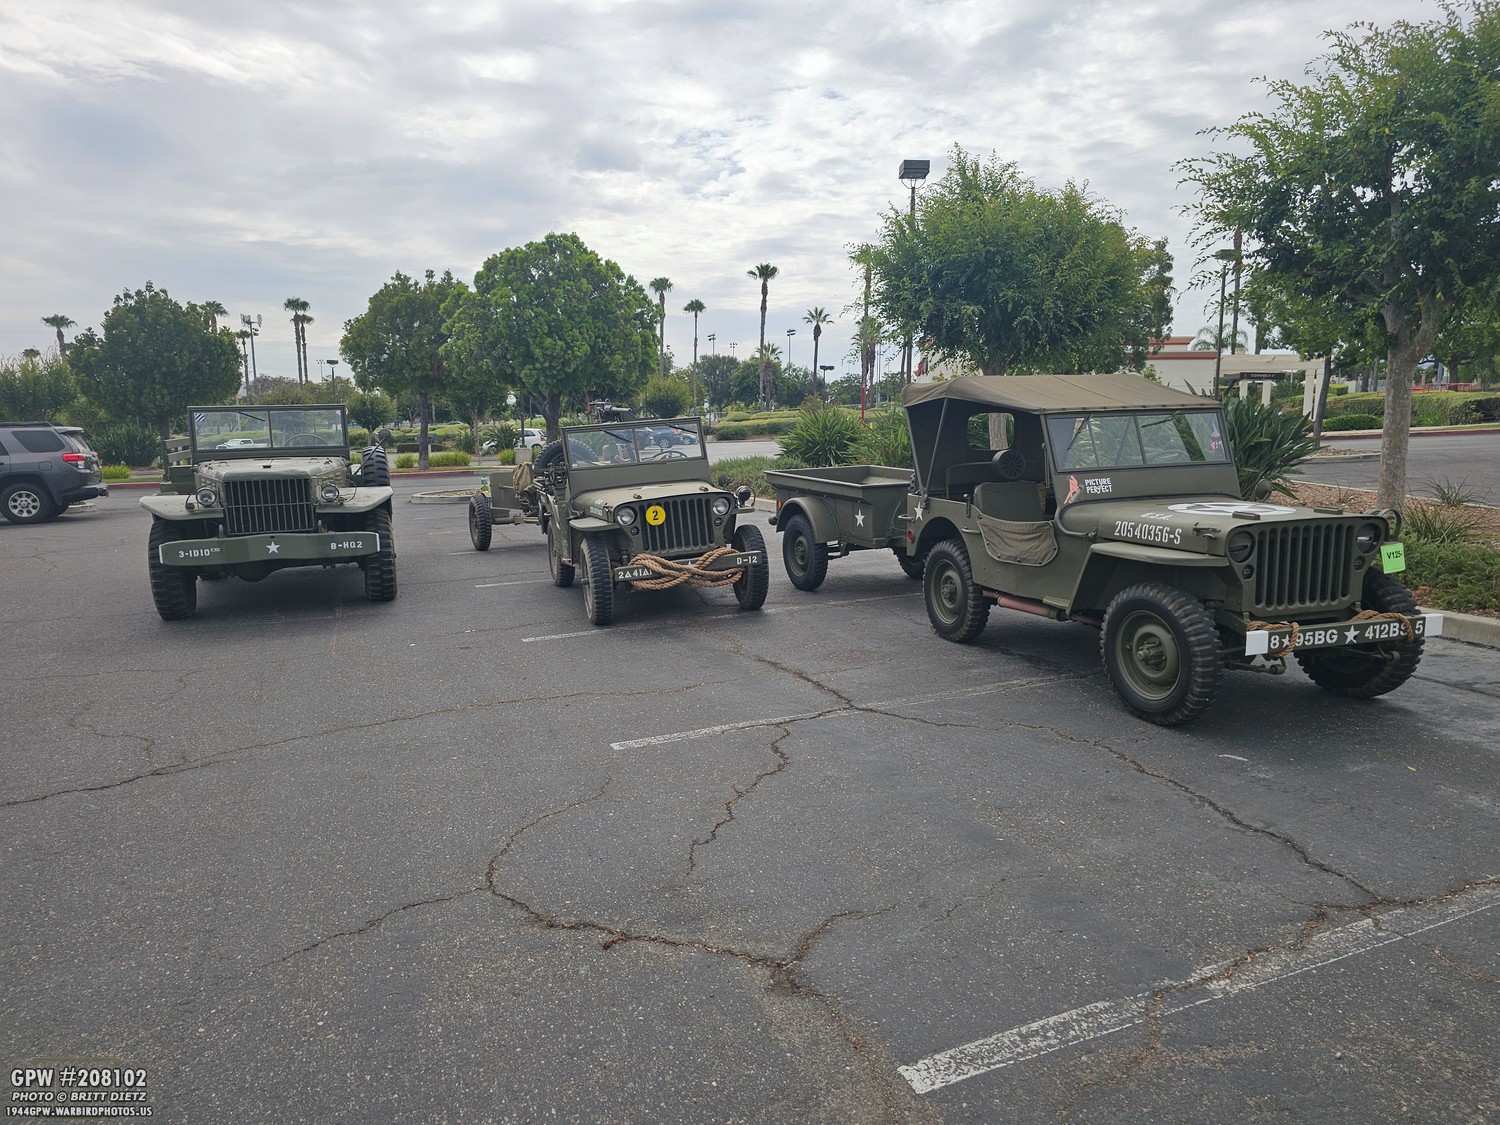
The parade went great. No issues the entire route. But I didn’t expect there to be any because it was downhill. Too bad I didn’t realize things would go downhill from there. After the parade, we drove back to the pre-pre-staging area. This way we could drop off reenactors at their cars. We spent some time chatting in the parking lot. It came time for everyone to part ways, and I needed to return the trailer, which was back near the end of the parade route. This photo was taken just a little bit before disaster. Just goes to show that you never know what might be waiting to fail…
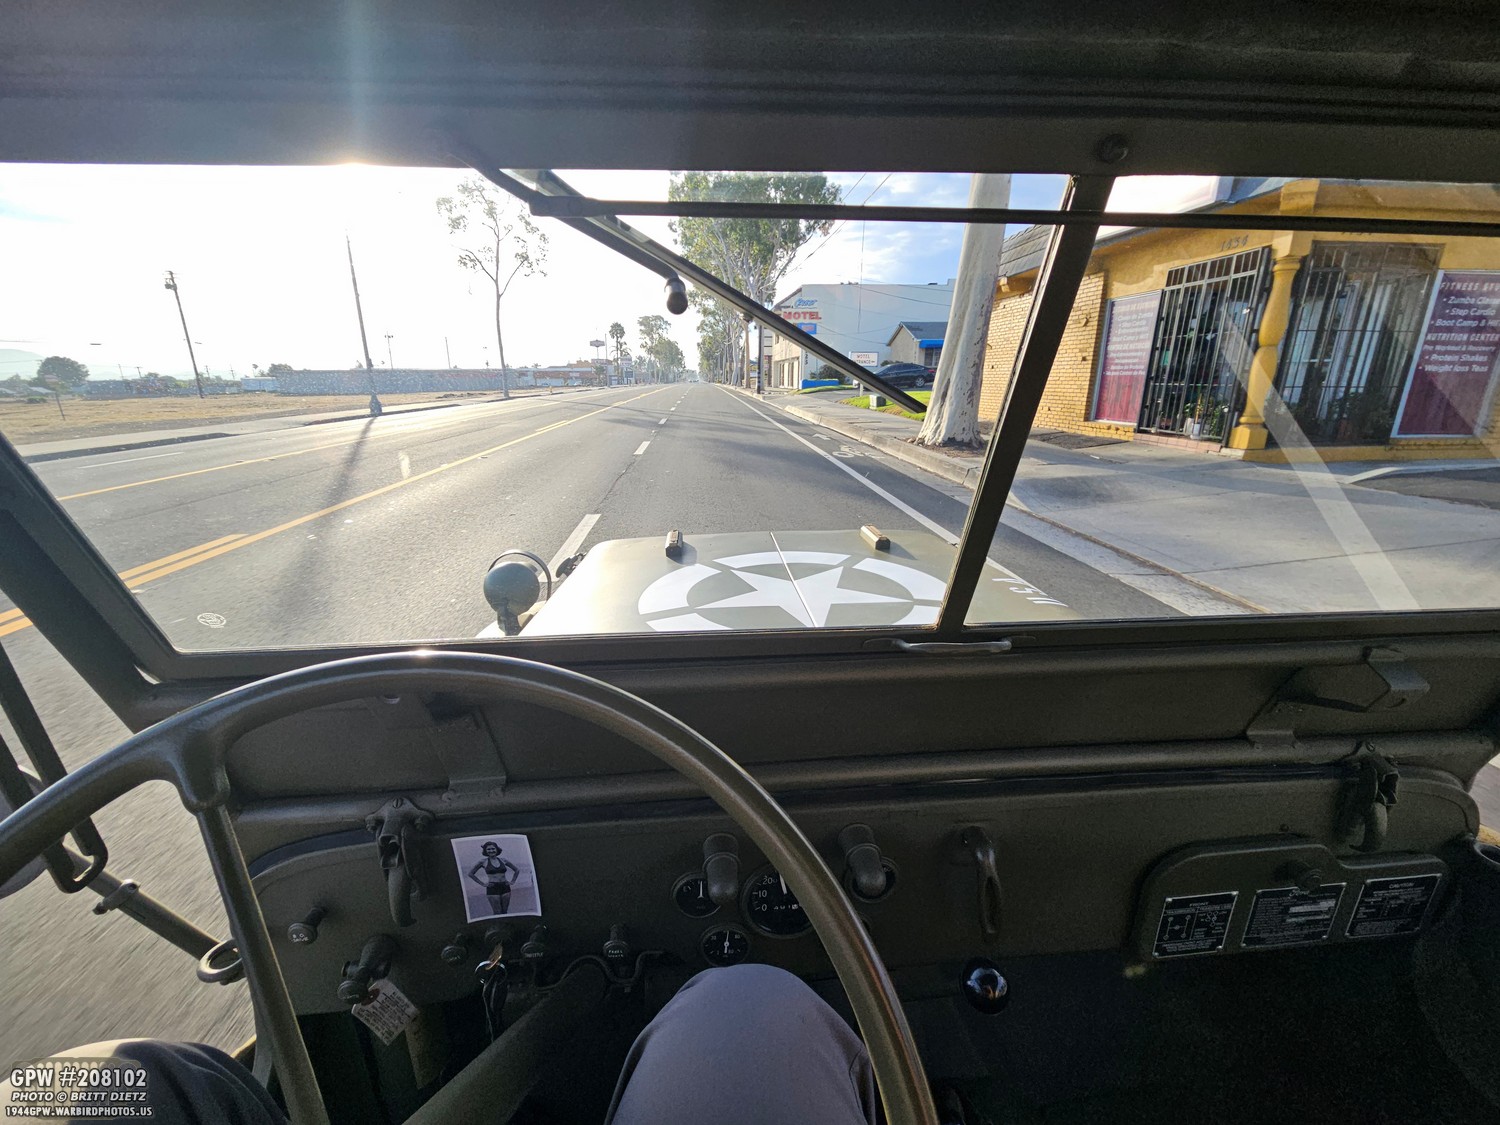
This photo was taken before the parade; it’s just a placer to talk about what happened. As I left the parking lot, I stopped at the light of a very busy intersection. I was alone in the Jeep and taking the trailer back to the owner. Everything was still fine. The light turned green to go straight, so I hit the gas… and as I rolled into the intersection, the Jeep died. Thinking I might have killed it somehow, I instinctively turned the key off/on and tried to restart it as I was rolling into the middle of the intersection. Wouldn’t start. Tried again, won’t start. I started to feel the panic… thankfully, I had enough momentum from hitting the gas before it died to make it through the intersection, along with it also being on a slight downhill… especially pulling a trailer. I still had some momentum, but it was dying fast, so I needed to think quickly. There was a left turn right after the intersection (no light) into a neighborhood, so I coasted it into the left turn (thankfully no cars were coming at that second, so I didn’t have to stop) and was able to find a spot to pull over before the momentum stopped.
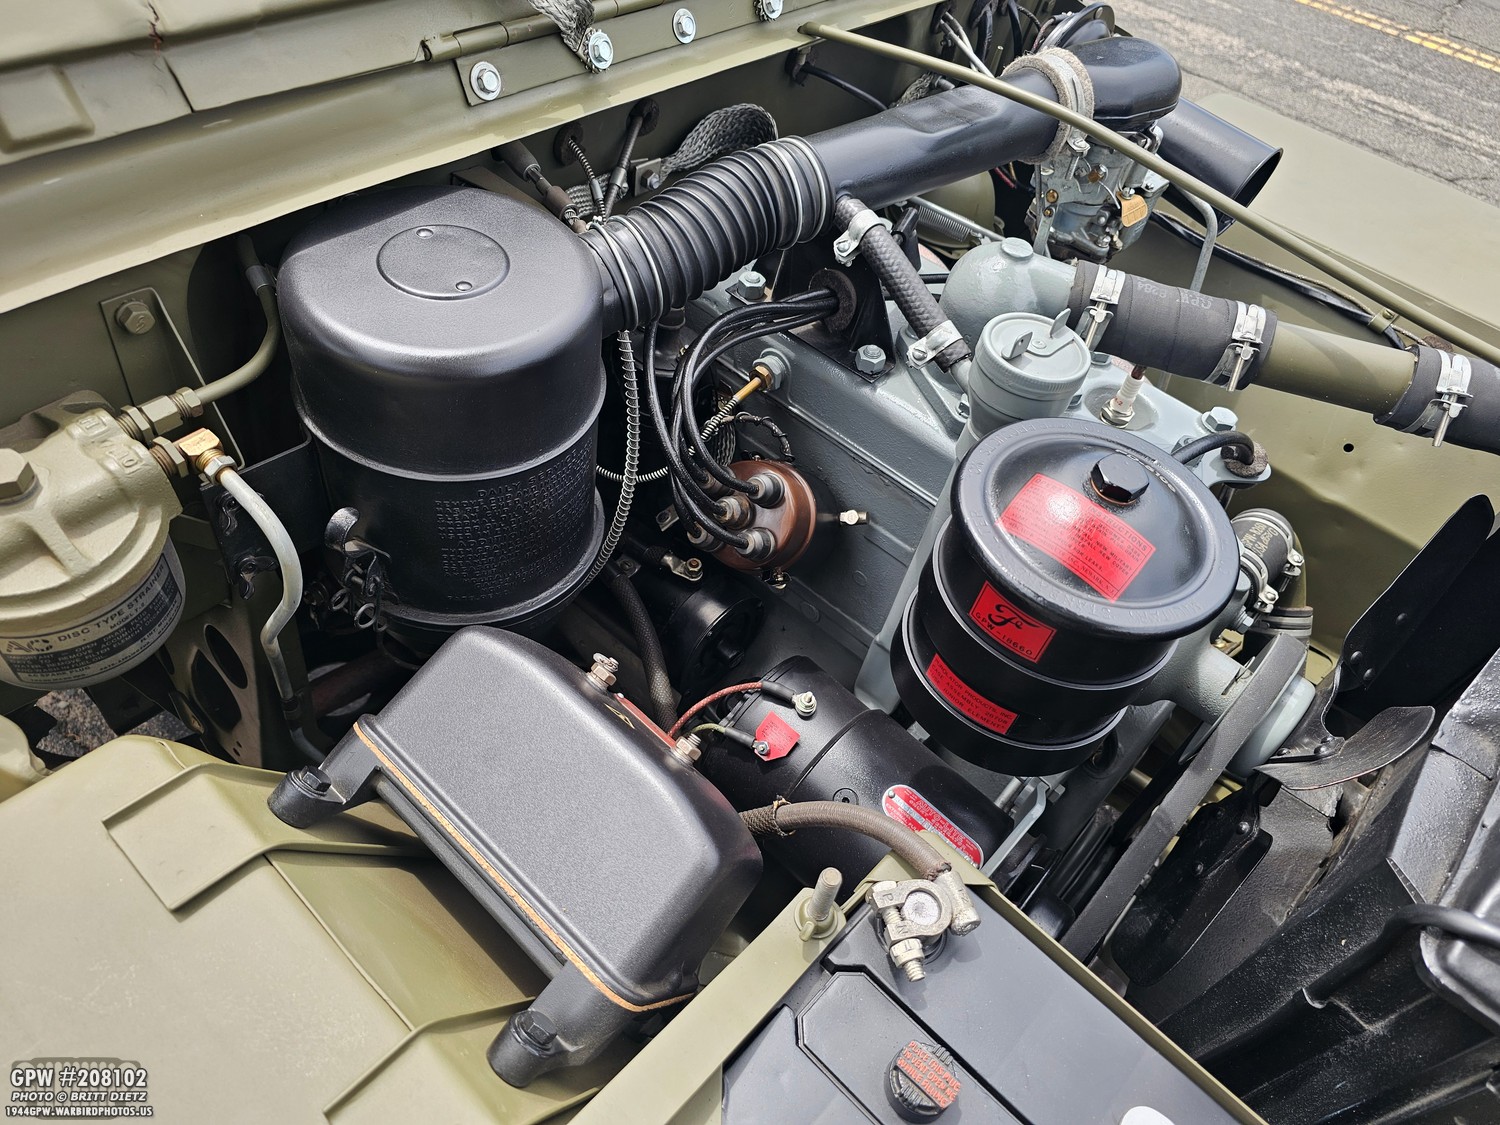
As I sat in front of some random person’s house, I tried to restart it several times. It turned over just fine, but it wouldn’t start. So, the battery was okay, and the starter was okay. I got out and popped open the hood (taking this photo). I did an instant inspection of the entire engine bay. No wires had come undone. Nothing burned up. Nothing exploded. Nothing was leaking. Nothing was out of place. Everything was tight. It was time to roll up my sleeves and figure this out… because I was literally stuck.
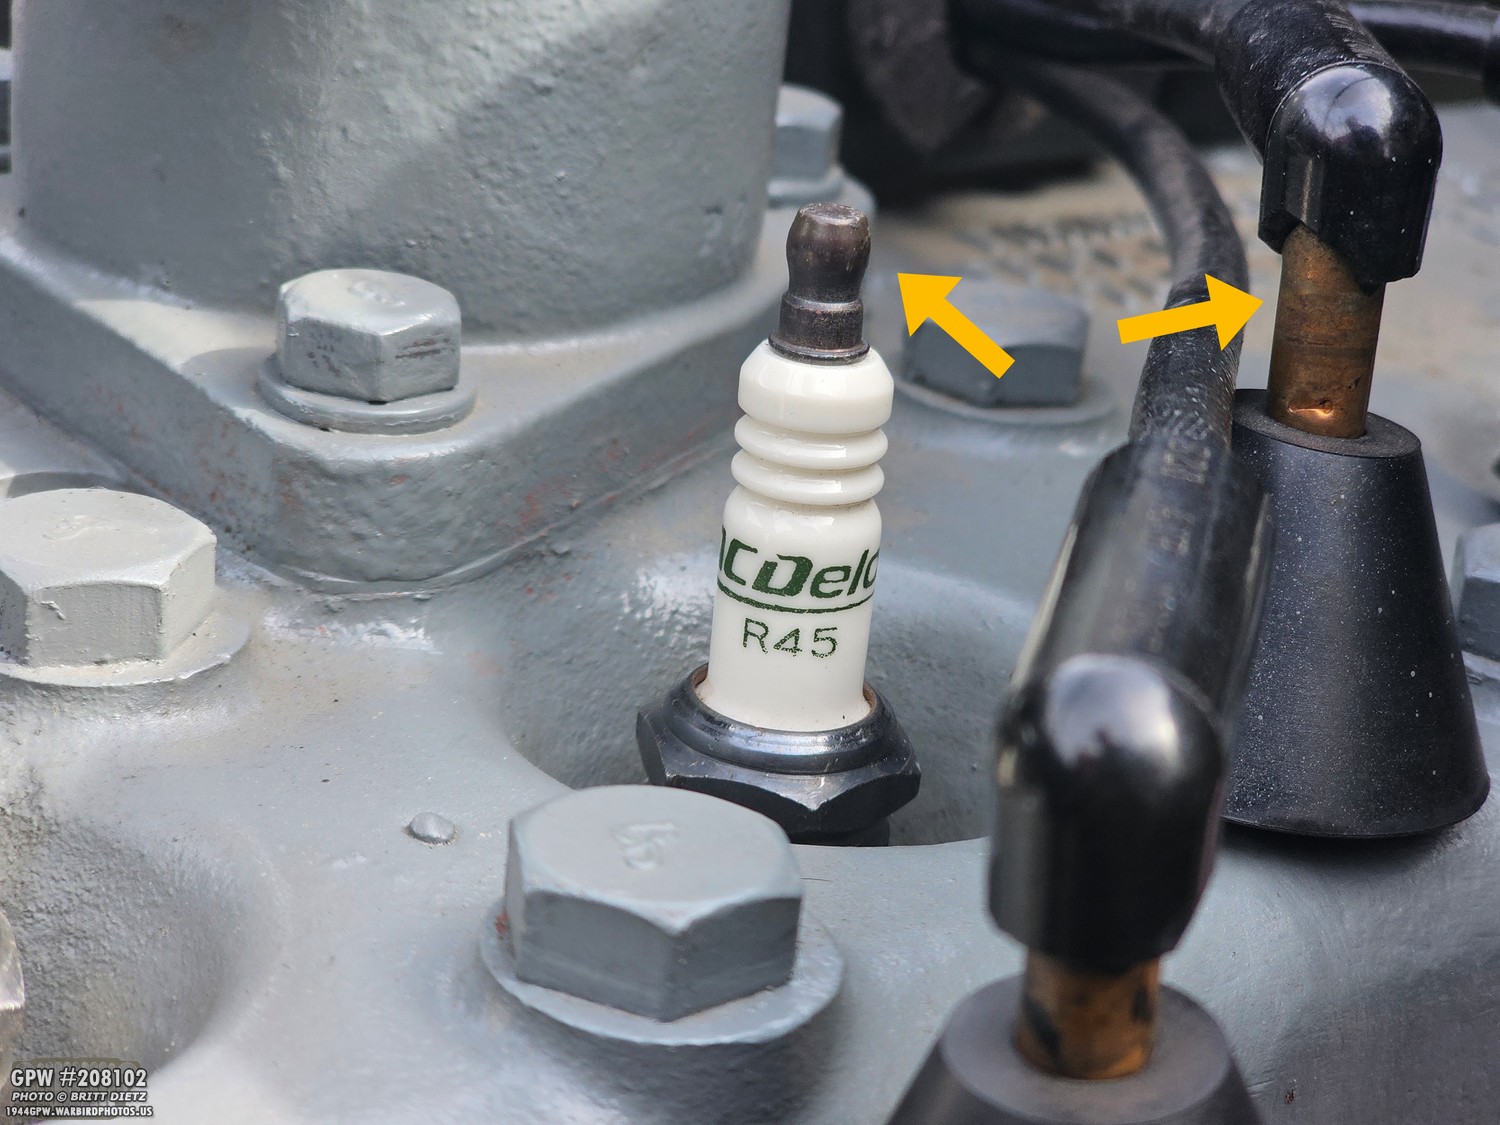
The key to finding a problem is the process of elimination. Start in one spot and work backwards. Follow the route of the engine. I knew I was getting power to the ignition, lights, horn, etc, so I started with the final spot the electricity goes for the engine… the spark plugs. To test this (this photo doesn’t show it, but gives the idea), take one of the spark plug wires off and carefully put it very close but not touching the top of the spark plug. Start the engine. If you are getting electricity from the distributor, you should see a spark jump from the copper on the spark plug wire to the top of the spark plug. I saw no spark… so that was the problem. Now to work backwards.
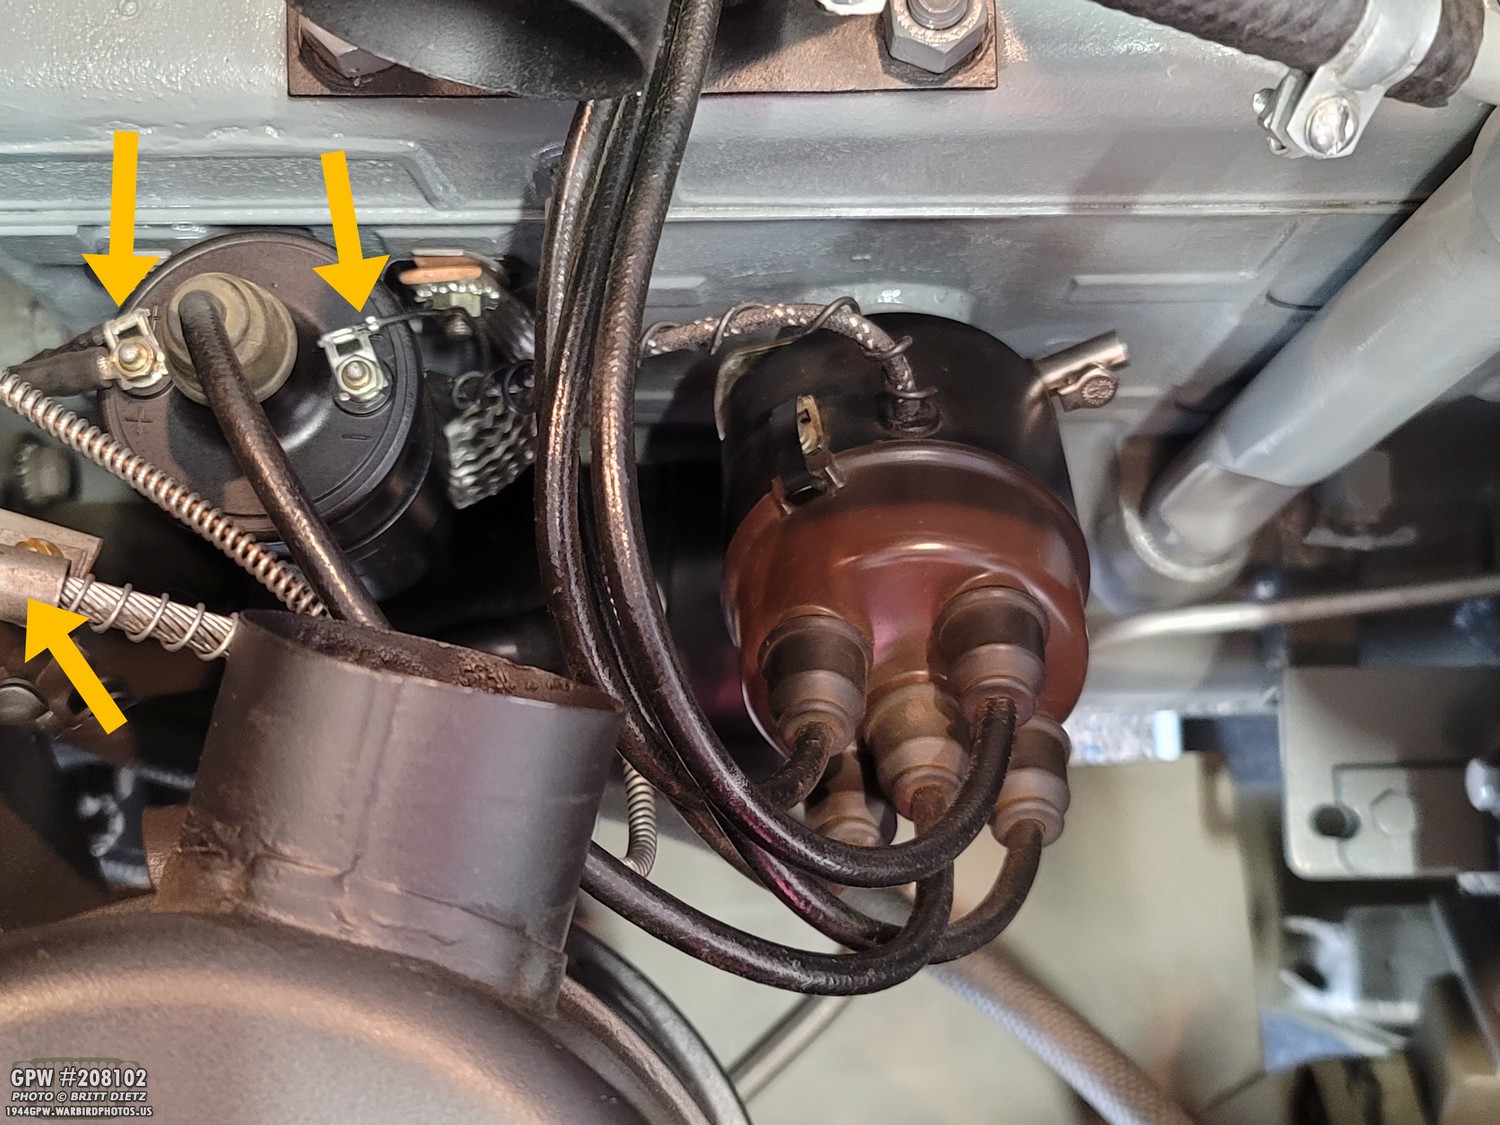
There’s no easy way to check the distributor, so I immediately went to the coil. This photo shows the top of the coil (from another time when I had the flexible air crossover tube removed). To test this, take a screwdriver and touch the metal to the positive side to something grounded on the Jeep. In my case, I touched a screwdriver to the positive terminal and then to the clamp holding the temp gauge probe, which is grounded. Do this while the ignition is turned on. I got a spark. That means that power was coming to the coil. That narrows the problem down to the coil or the distributor. I then tried the negative of the coil to see if I got a spark the same way… I didn’t see one. That meant the coil was dead: power is coming in but not going out. Not a huge deal; there was a Napa not far that I could easily have someone get me a new coil… But that wasn’t the problem.
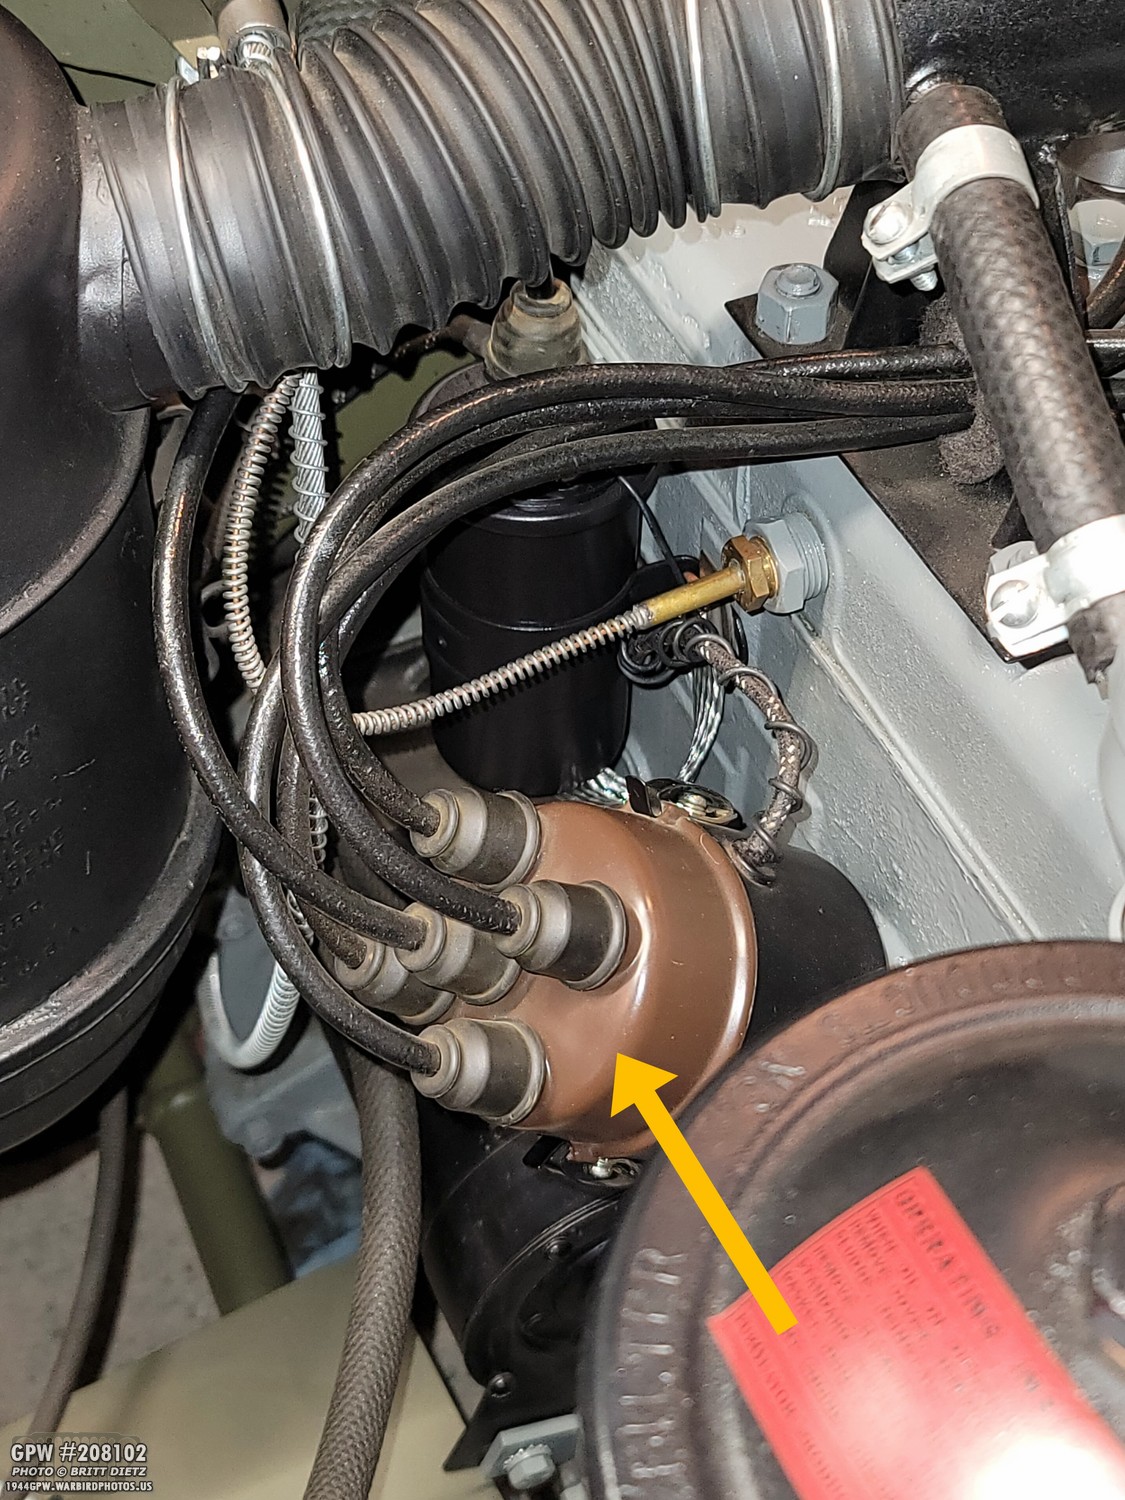
I had called the guys who were driving the Dodge WC during the parade, and they decided to come help me out once they got the Dodge back to the Air Museum. As I waited for them, I was pretty sure it was the coil being the problem; however, I decided to test things one more time. I tested the positive of the coil again… big ZAP spark! I tested the negative again and then changed the angle I was standing at to get a better look… and sure enough, there was a spark. A very tiny, silent, blue colored spark like the spark plug wire-to-spark plug type spark. I had forgotten that a grounded spark coming out of the coil would be smaller than the spark coming in due to the coil output having nearly 20k volts but virtually zero amperage and only for a microsecond when it fires. That meant the coil was just fine! By process of elimination, that left one thing that it could be…
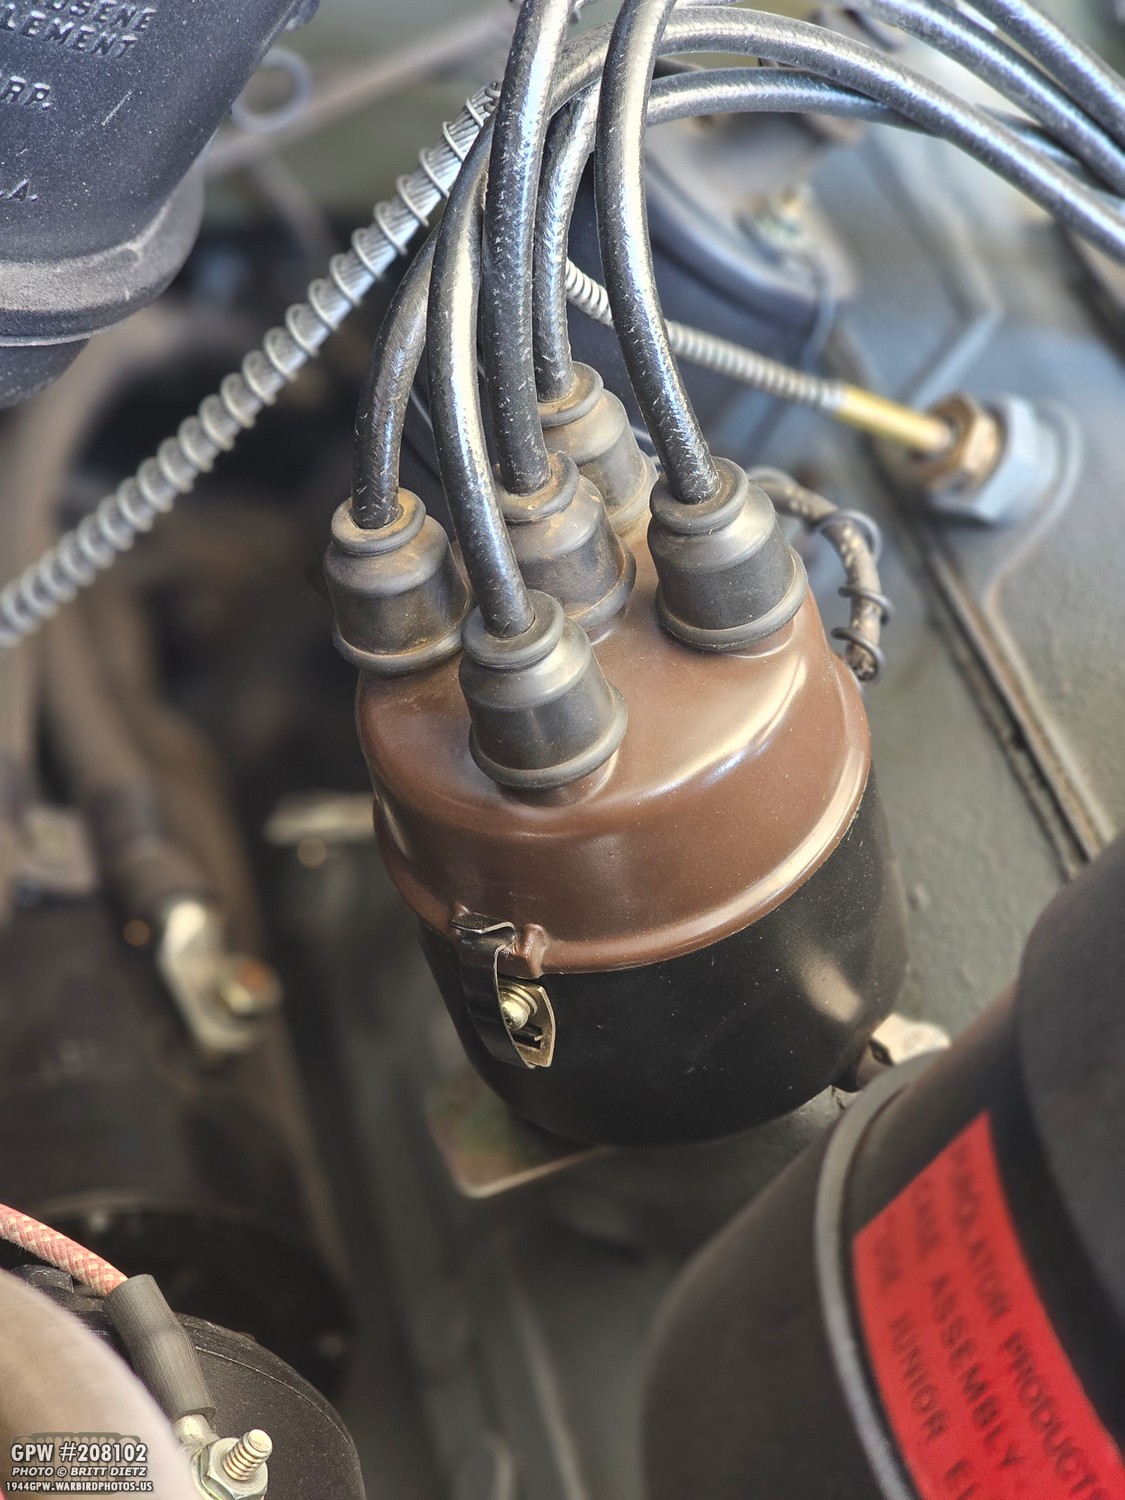
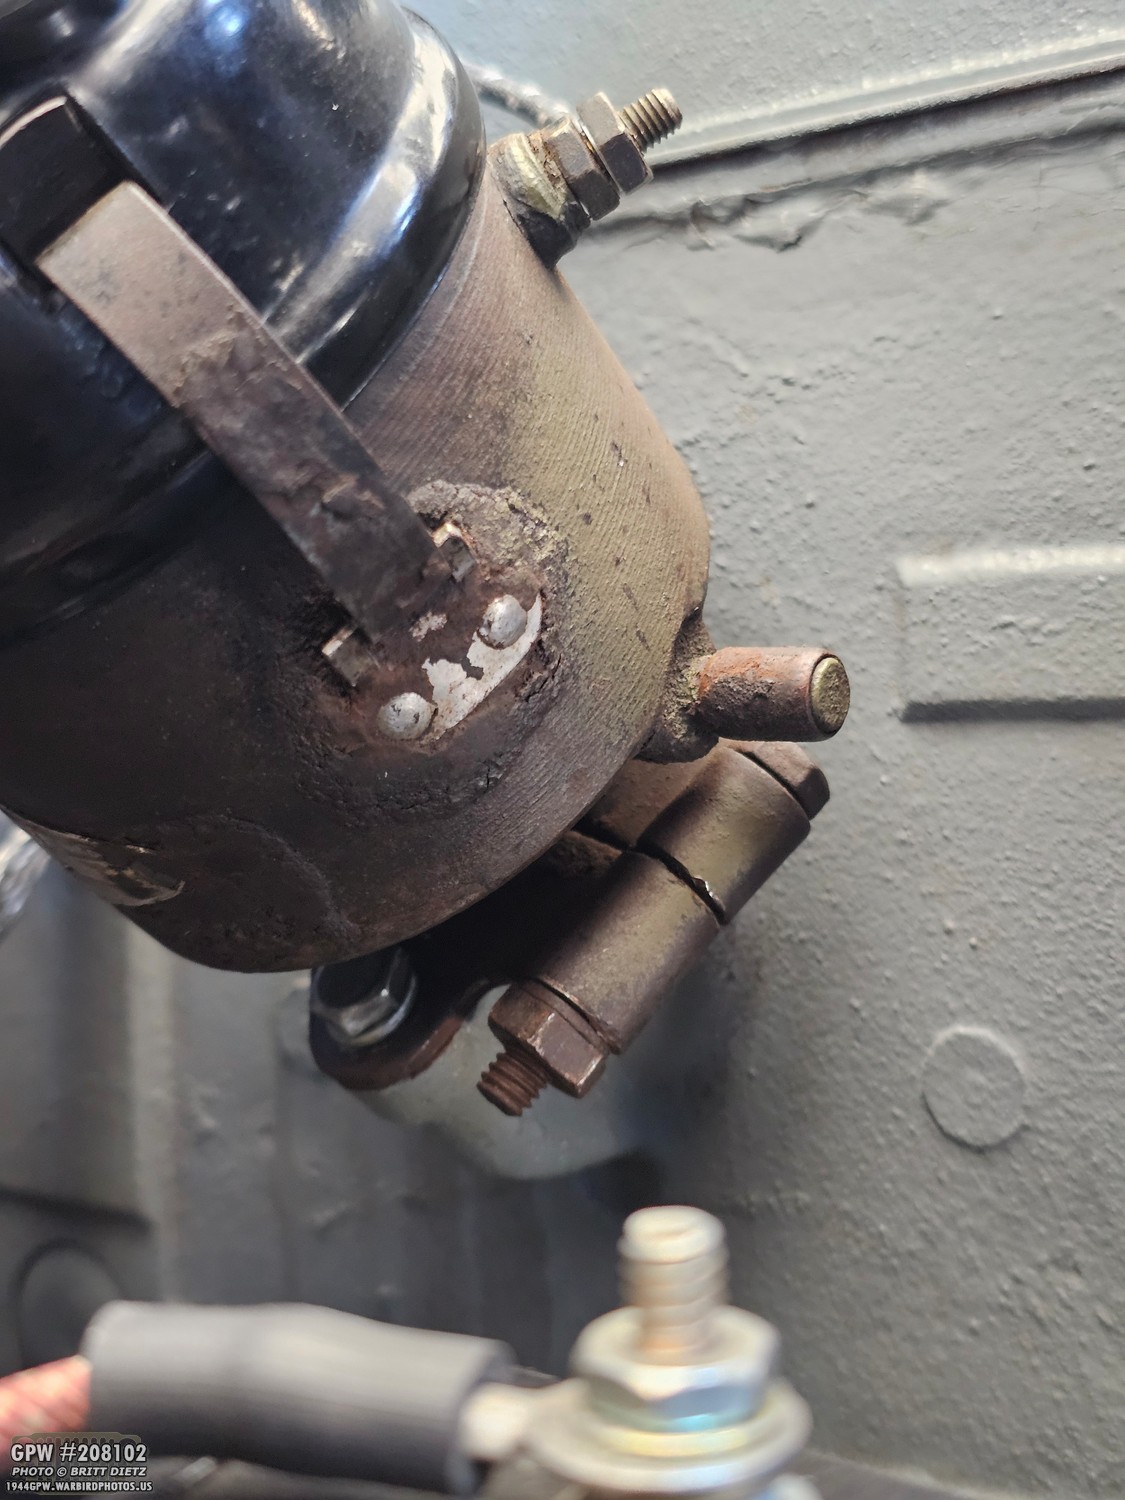
The distributor. Now, I’ve had an electronic distributor since I got my Jeep. It’s worked fantastically. No need to change points, looks the part, and I’ve never had a problem with it. I even modified how the wires (that are permanently attached) look to make them appear more correct. Perhaps it didn’t like all the moving it’s been doing for the vacuum timing. Or perhaps the contacts inside just gave up. It’s tough to tell, and I had no way of testing it there on the roadside. But there was NO power going to the spark plugs. And there was power coming out of the coil. So, the distributor was dead. After trying to short out the distributor while trying to start it, we got it to fire up once, and it idled… but as soon as I applied some gas, it instantly died like in the intersection. That pointed again to the distributor not being able to take a load. It could be shorted out to start working for a short time at low power, but when the current increases, it just dies.
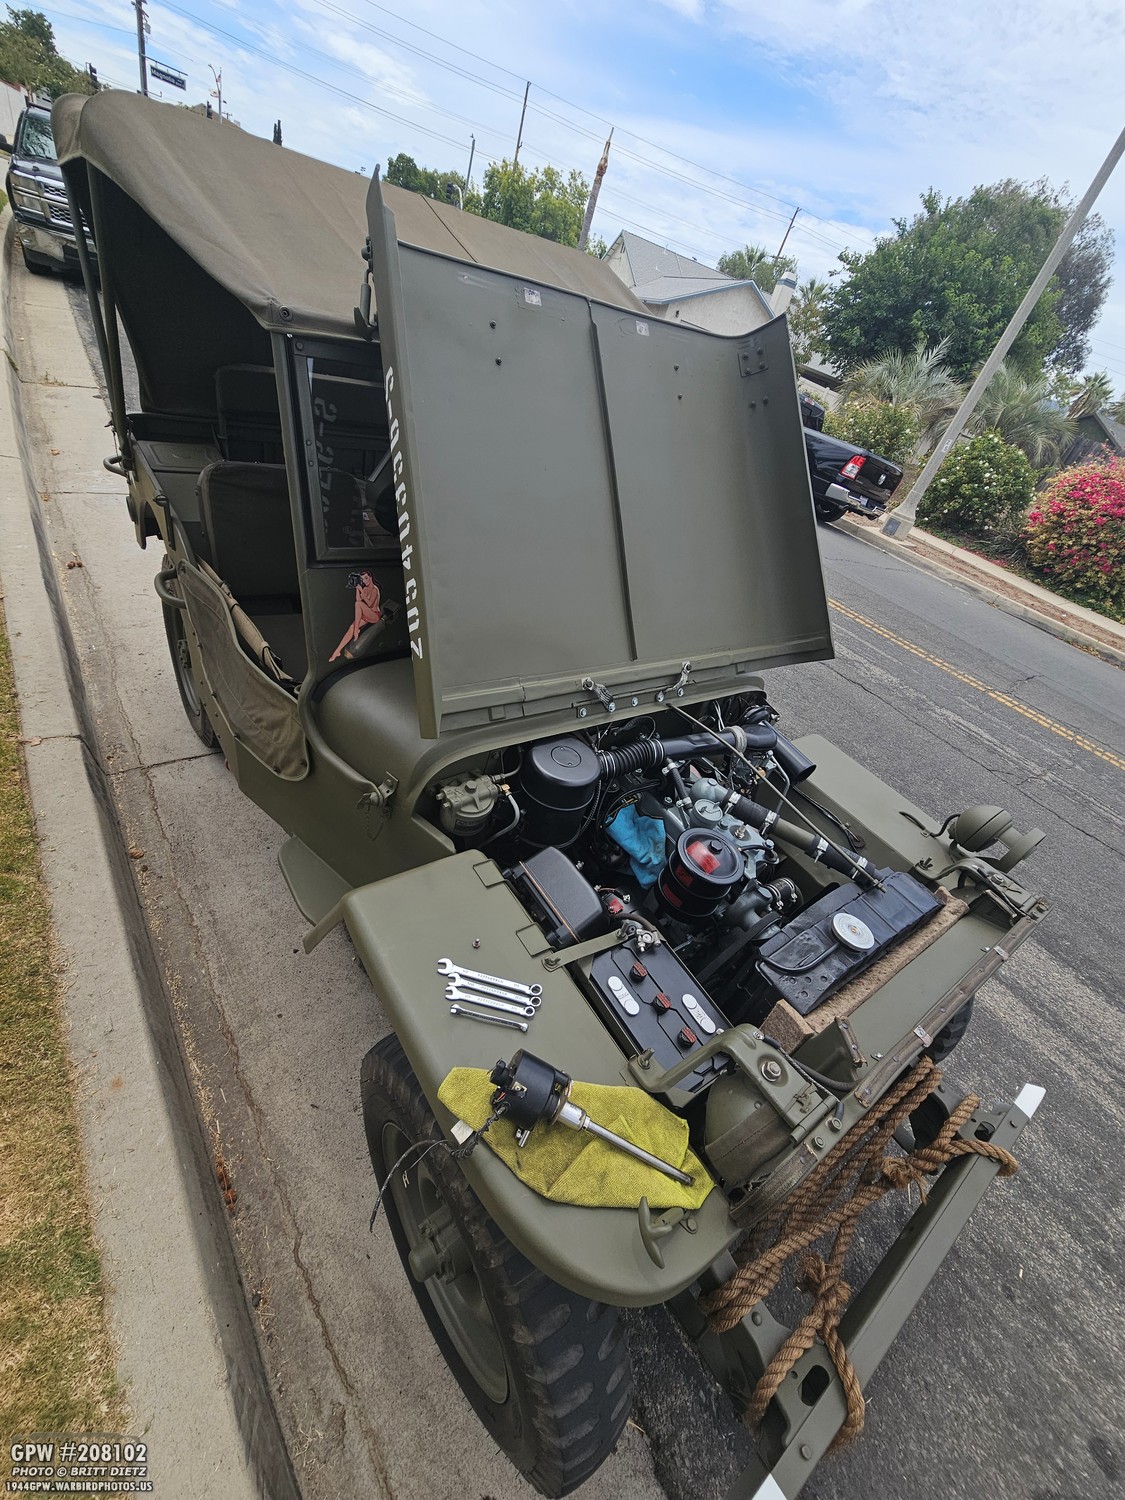
Here’s the only photo I took of the Jeep as a whole sitting on the side of the neighborhood. The owner of the trailer came by and was able to get that from my Jeep so I wouldn’t have to worry about taking it back. As you can see, I already have the distributor out. I keep several sets of wrenches, sockets, screwdrivers, etc with my Jeep at all times in the tool bag in the toolbox, so I was able to get it out pretty easily.
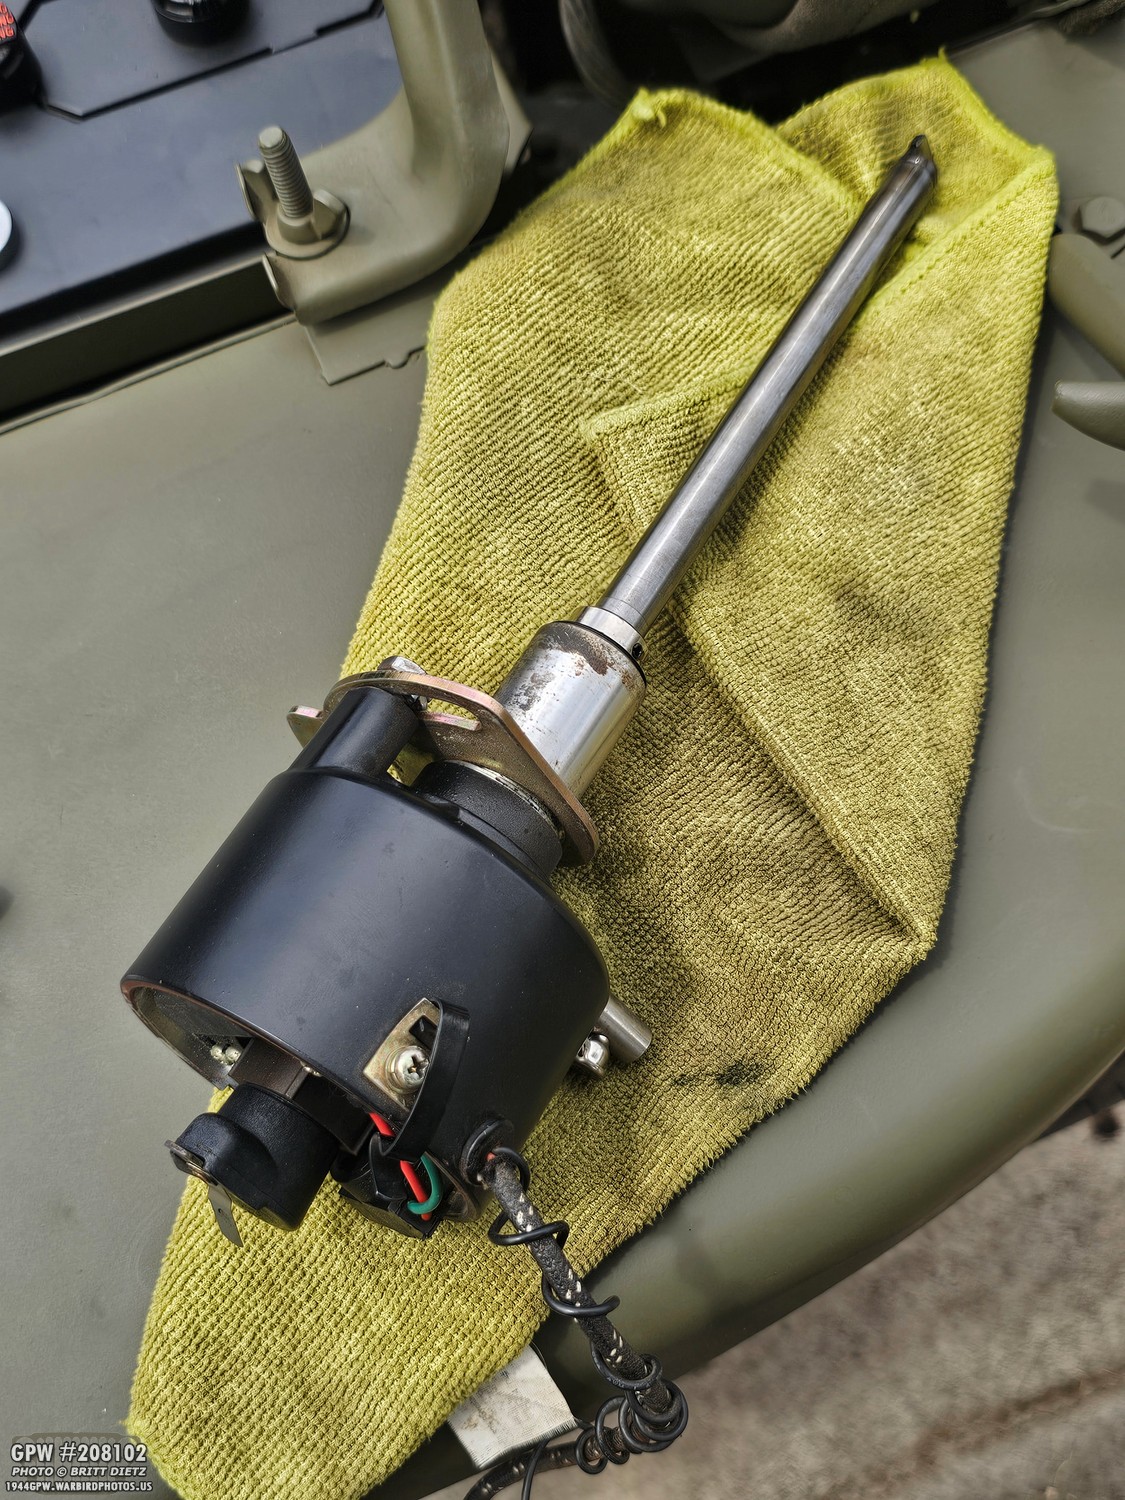
And that really made me realize the inherent problem with electronic distributors. While they make life easier with no points and last a while… when they die, they die. Unlike a normal distributor, which you often just carry around spare points and a condenser. It dies, you change the points and condenser, regap the points, and you’re on your way. With a dead distributor, I couldn’t just go to Napa and get a new one, so no way? Well, one of the two guys who were with the Dodge, I’ve been helping him restore his Jeep lately. He has a distributor he’s not using (his) right now, as his Jeep is still being rebuilt. His Jeep wasn’t terribly far, so he drove over there to get it.
I was rushing to get home, so I didn’t get many photos. It had now been 2 hours since I was parked in front of the random house on the side of the street. I will say, during that time I had several people stop by and ask if I was okay and if I needed help. Nice neighborhood! Anyway, my friend Andy arrived with his distributor, and we got to work installing it. Took a bit to figure out the correct orientation and get it timed by ear (since my vacuum gauge was at home). Here’s the distributor installed on my Jeep. This one is unrestored.
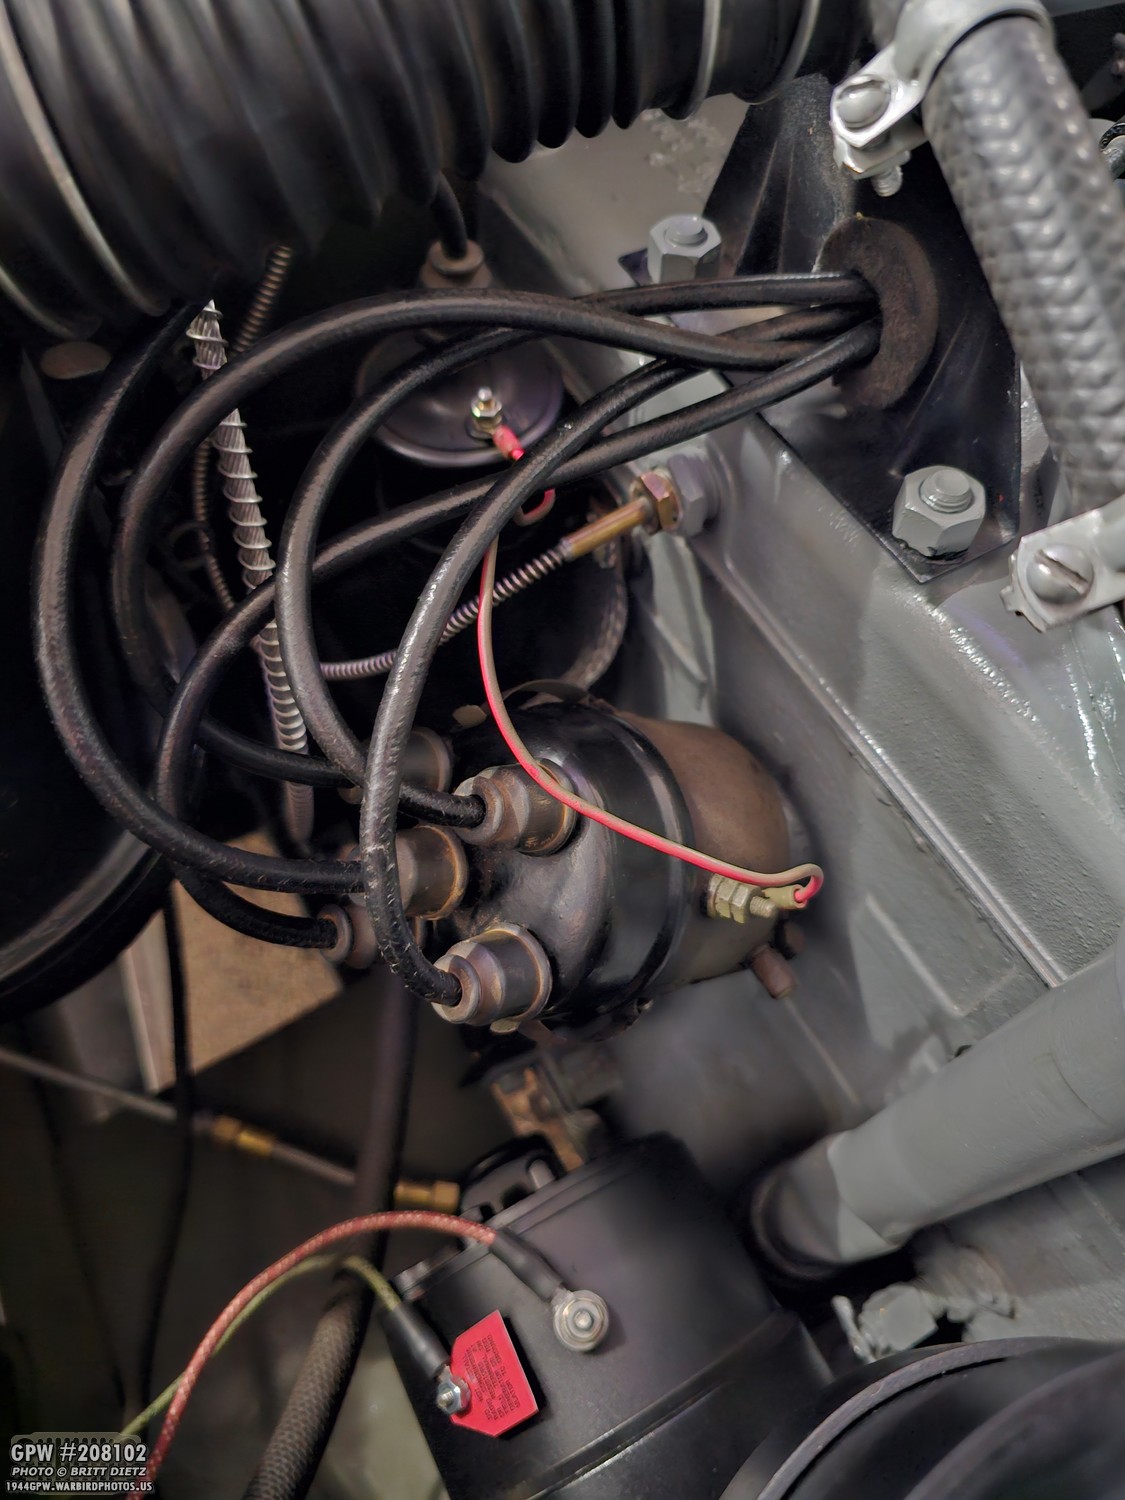
With it fully installed and the correct orientation achieved (trial and error, listen for backfiring to know it’s 180 the wrong way), we got the Jeep back up and running. I then was able to proceed home without any further issues. That was a LONG 4th of July morning/afternoon!
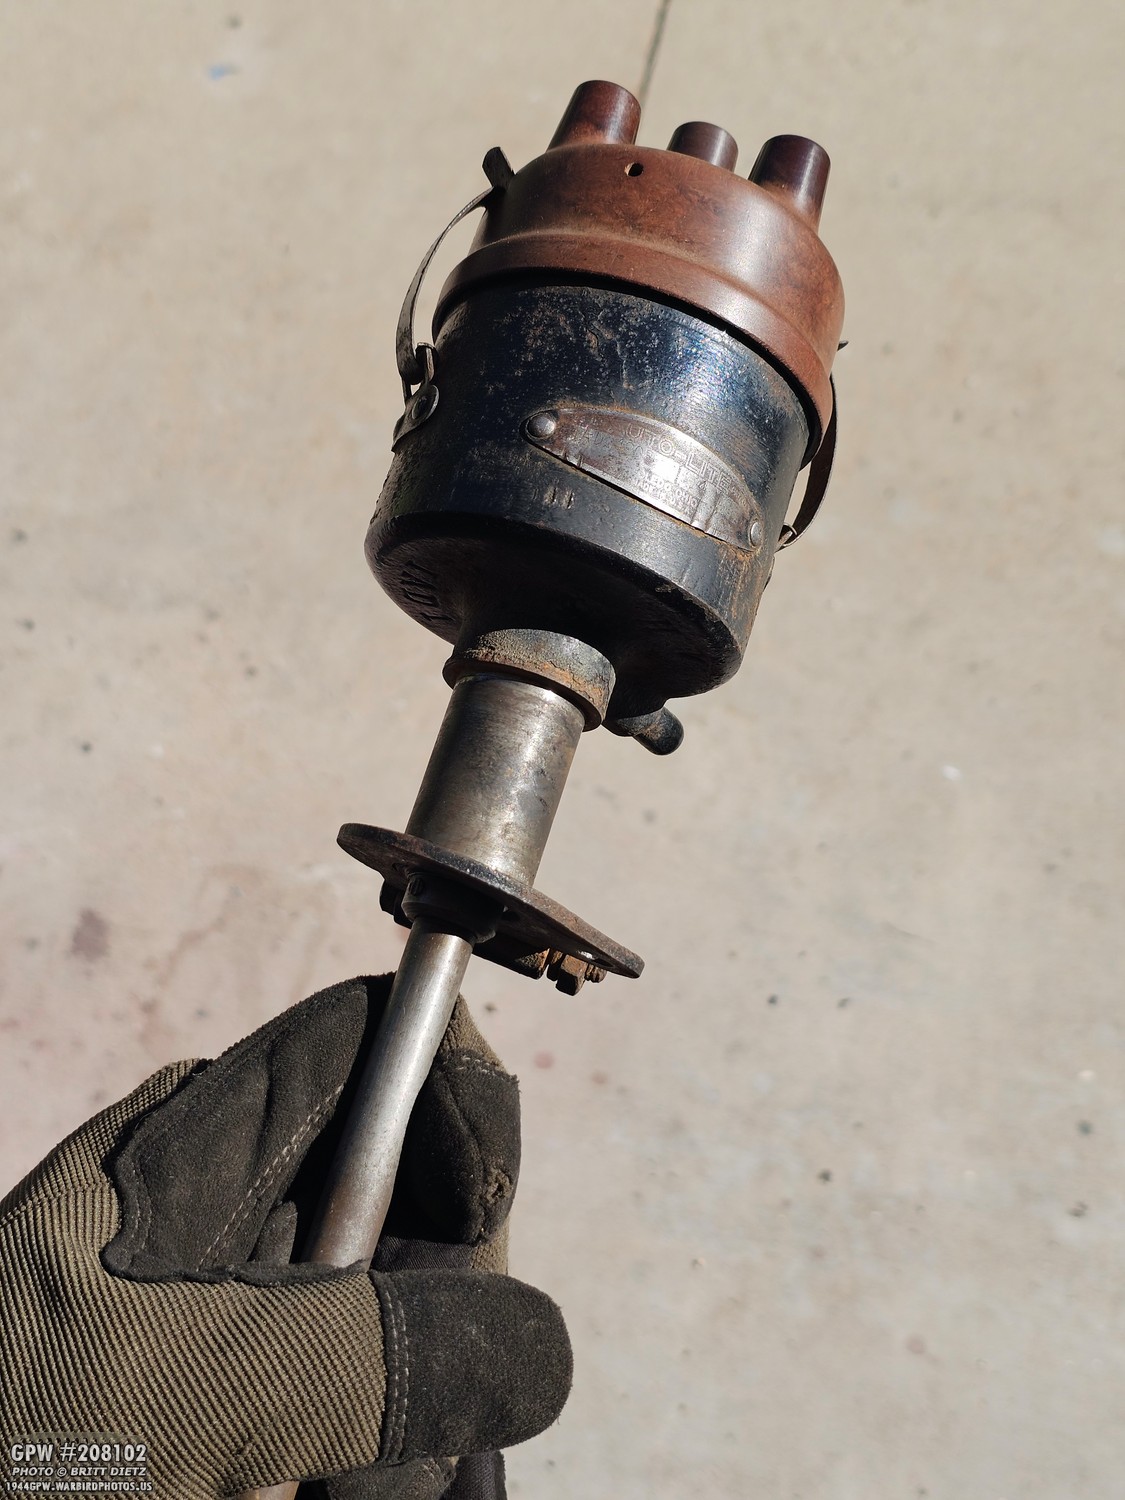
The next day I went to work figuring out a replacement distributor so I could give back my friend’s. When I bought the Jeep, it came with a bunch of spare parts. One of the spare parts was the actual original April 1944 distributor, complete. It was not being used because the electronic distributor was installed. I fished the original out of the ‘Jeep spare parts bin’ and immediately decided that I was going to get this working rather than purchase another electronic distributor, which are insanely expensive!
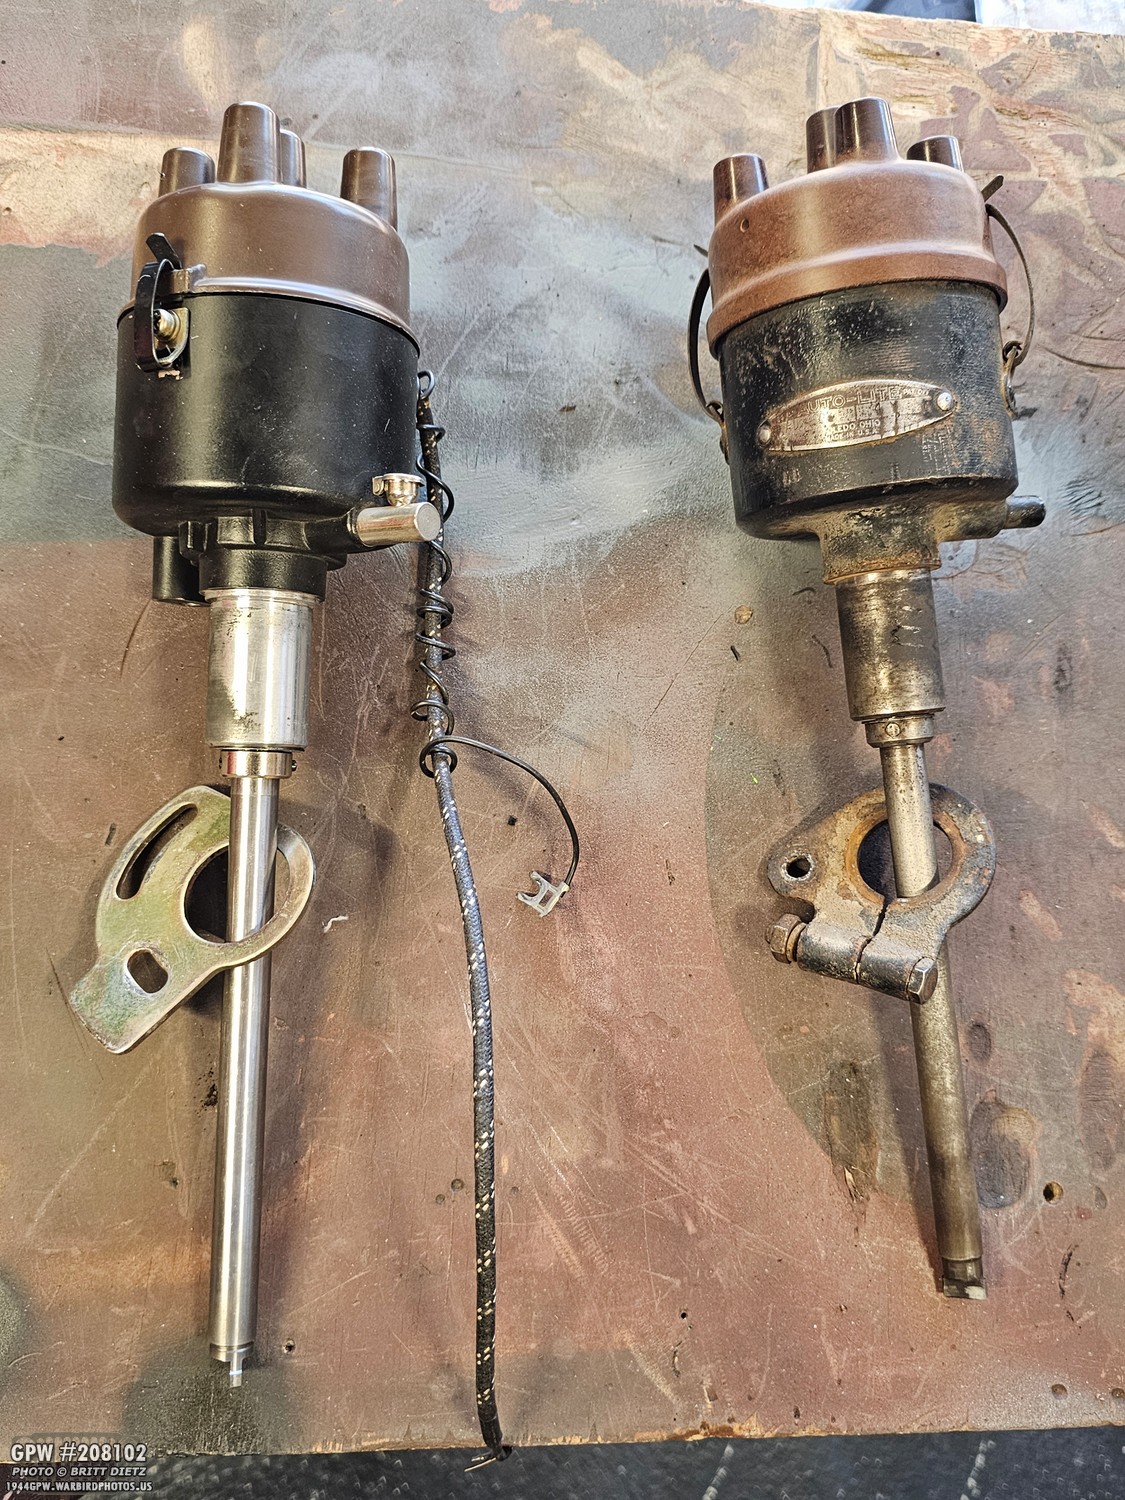
Here’s a look at the electronic distributor that died (left) and my original April 1944 distributor (right). I’m going to save the next steps for the next update, but this update isn’t done yet!
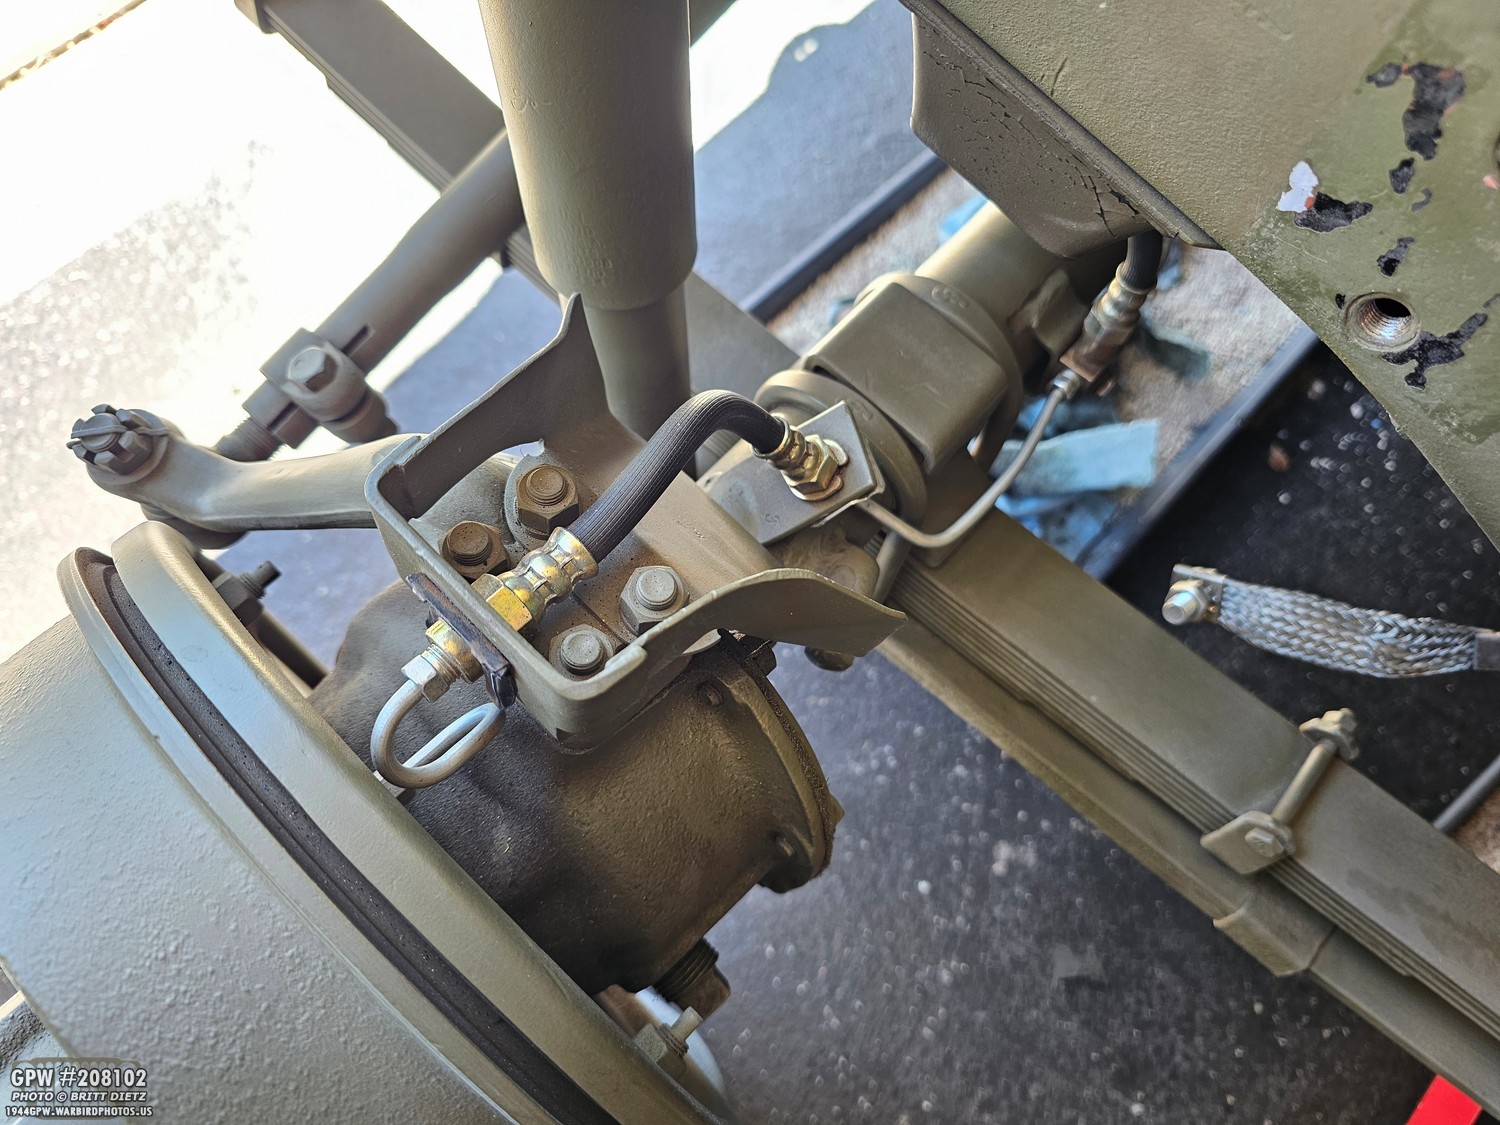
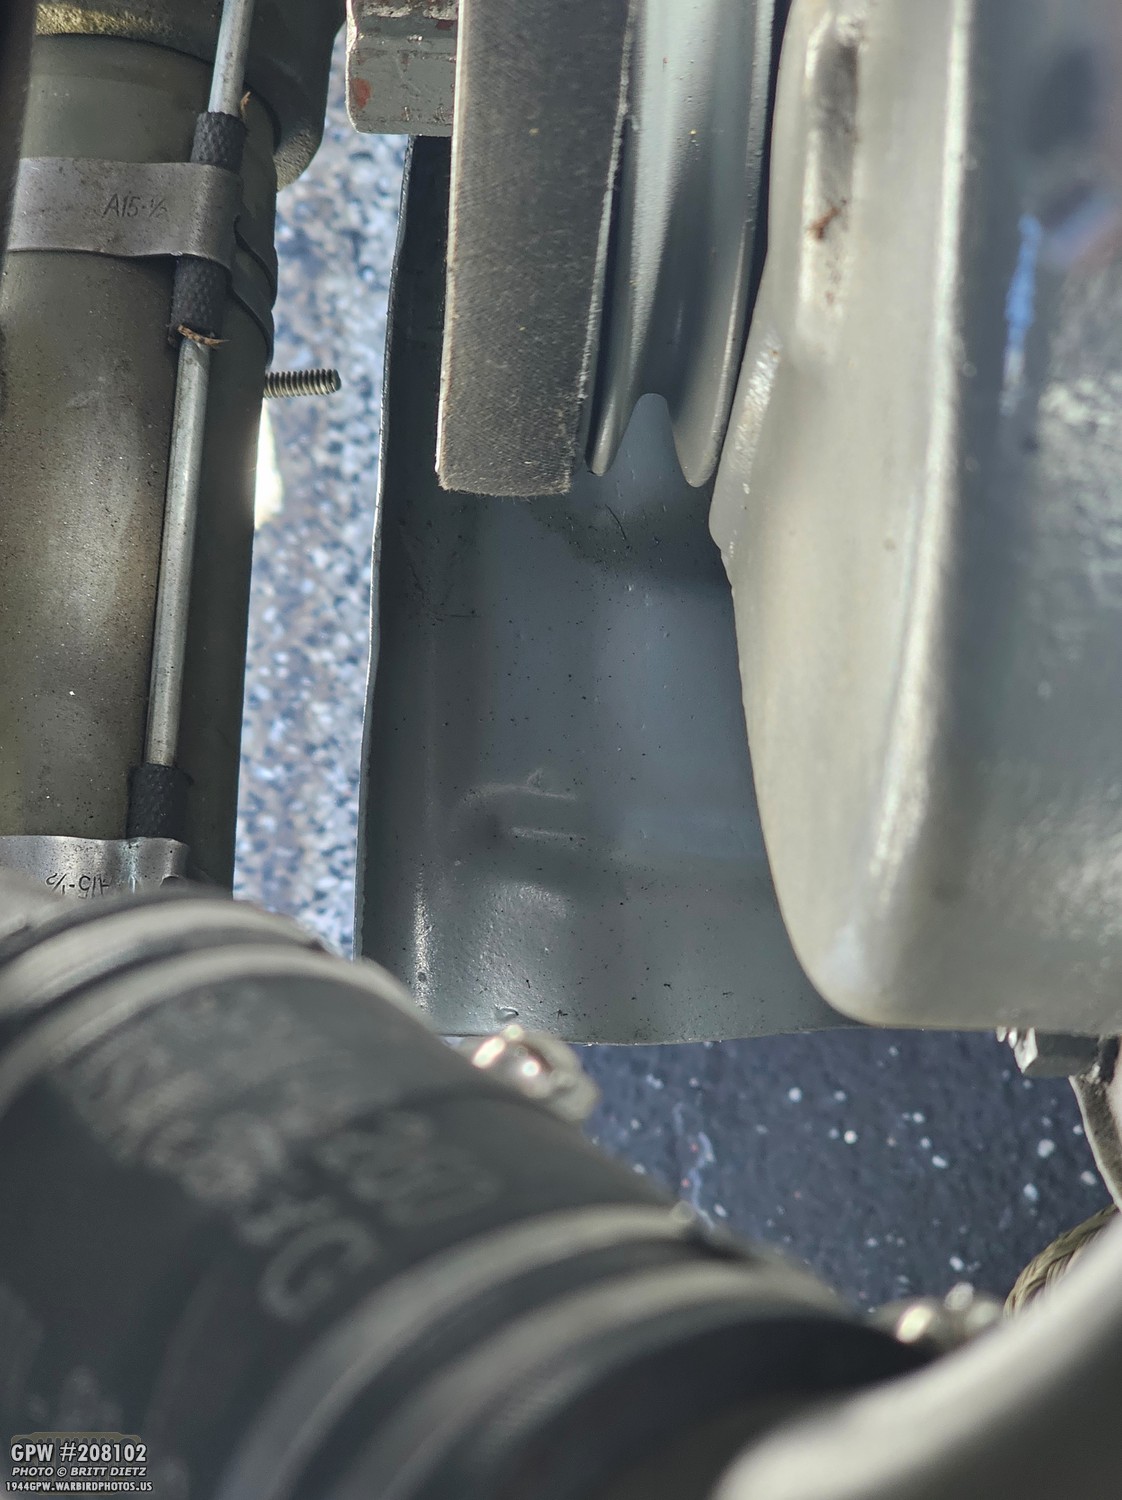
Let’s rewind back to when I had the fender off during the valve changes. As I was sitting there, I looked down, and it occurred to me just how many F stamps there were in this photo. I thought some of you might find this interesting…
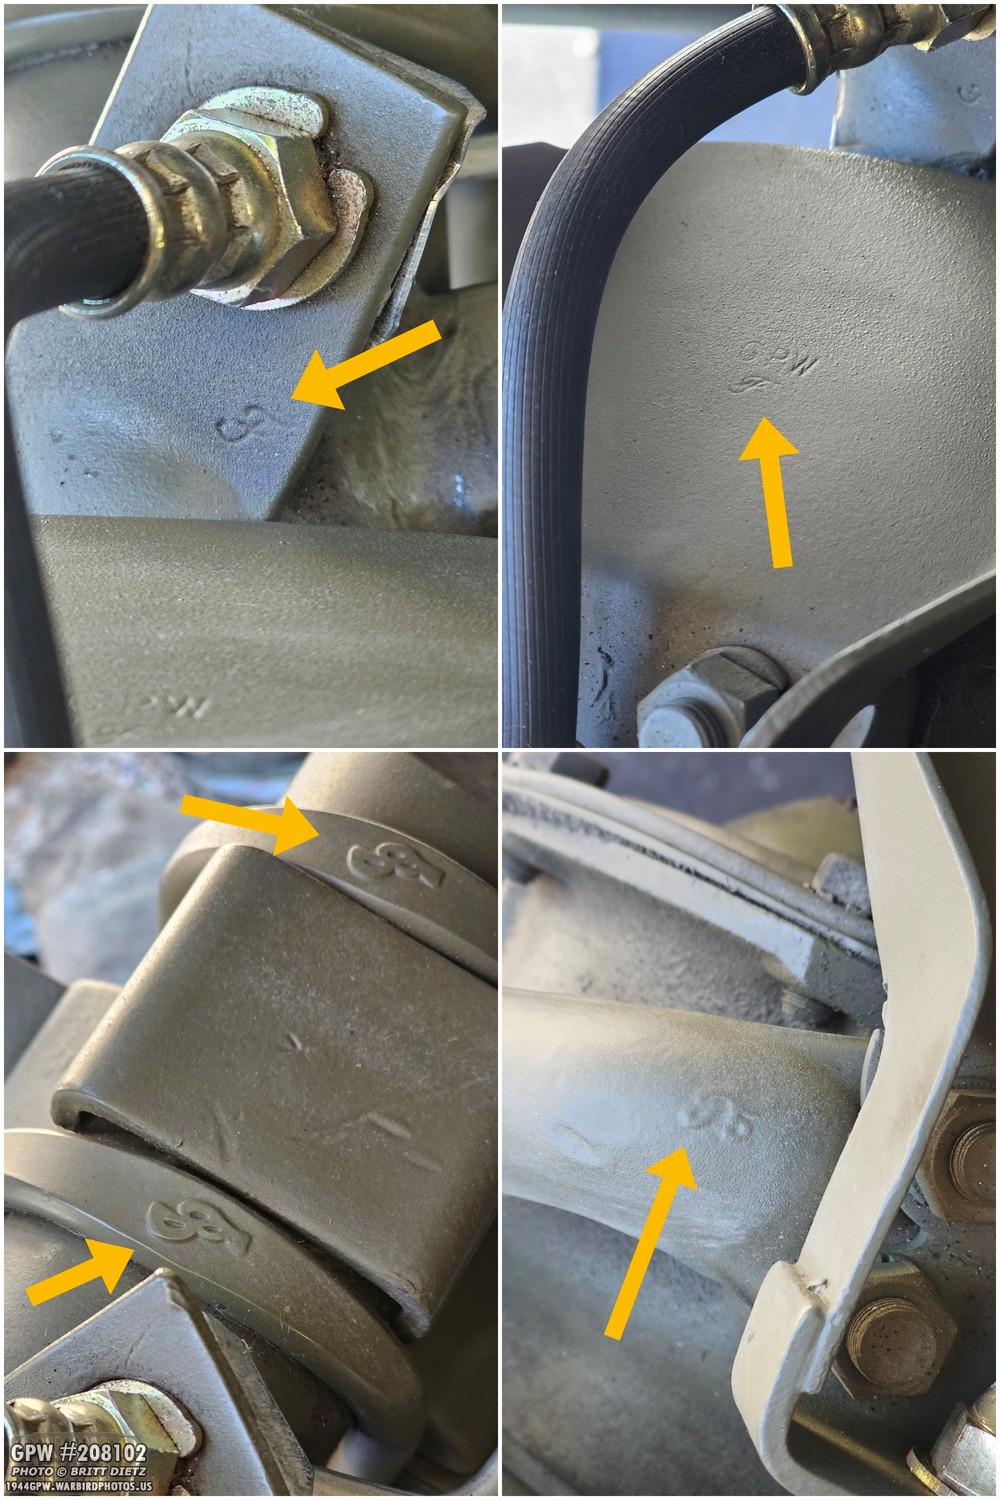
First, we have one on the front axle brake flange, one on the brake flex line guard with a GPW, one on each of the two U bolts for the springs, one on the steering arm…
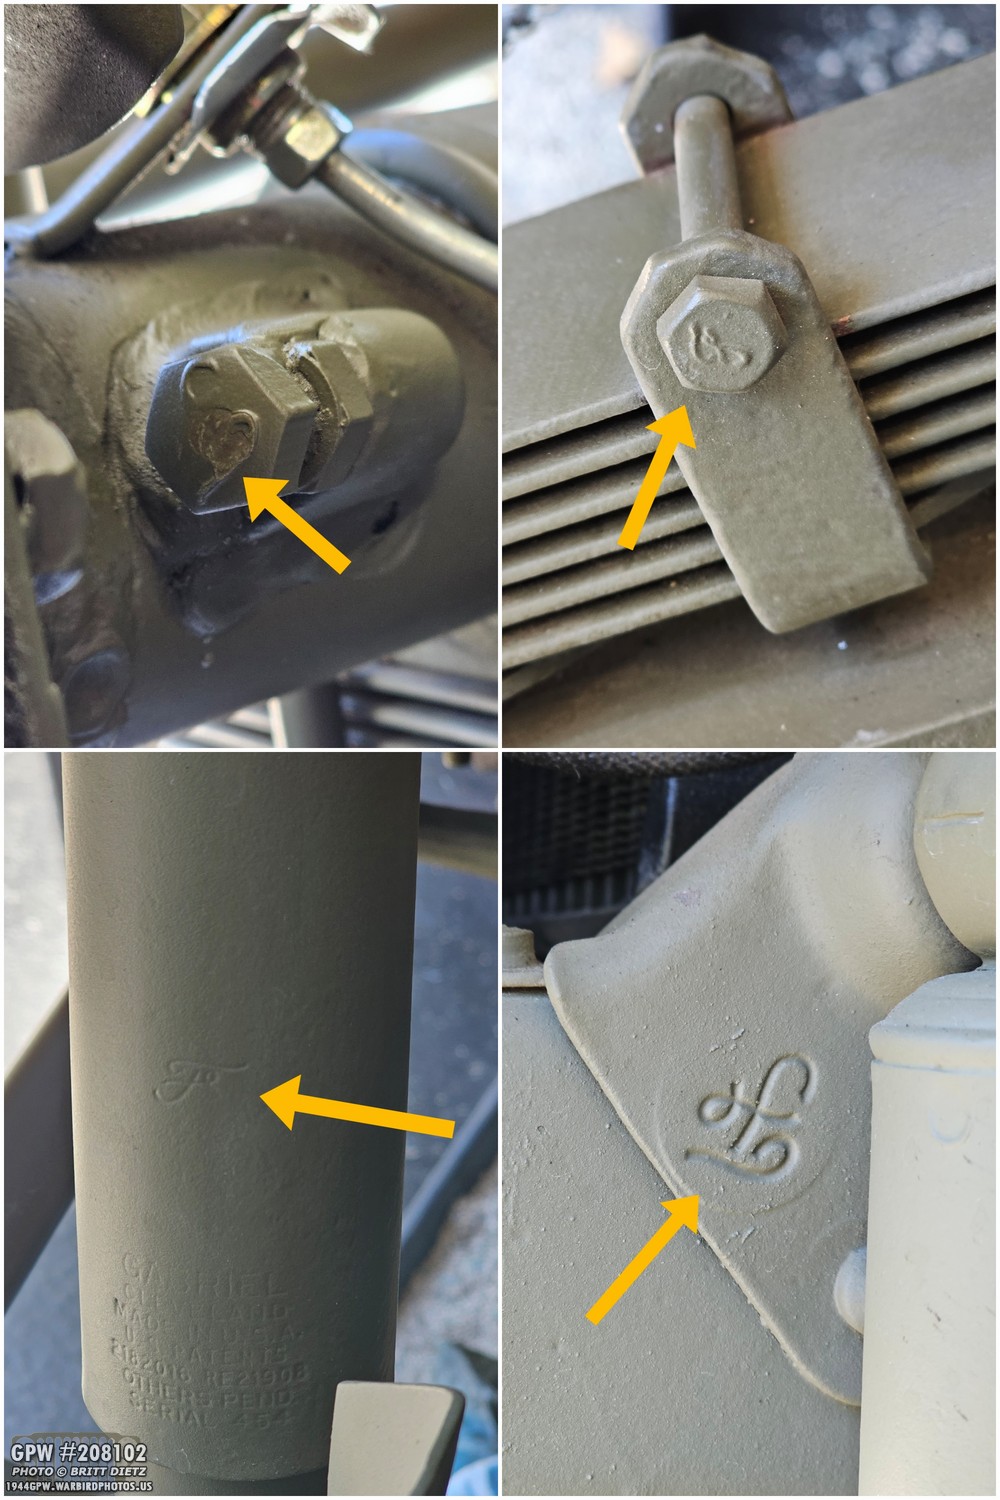
A large one on the wheel turn stopper head, one on each of the spring clip bolts, one on the Gabriel shock (original!), and a large one on the frame shock mount bracket.
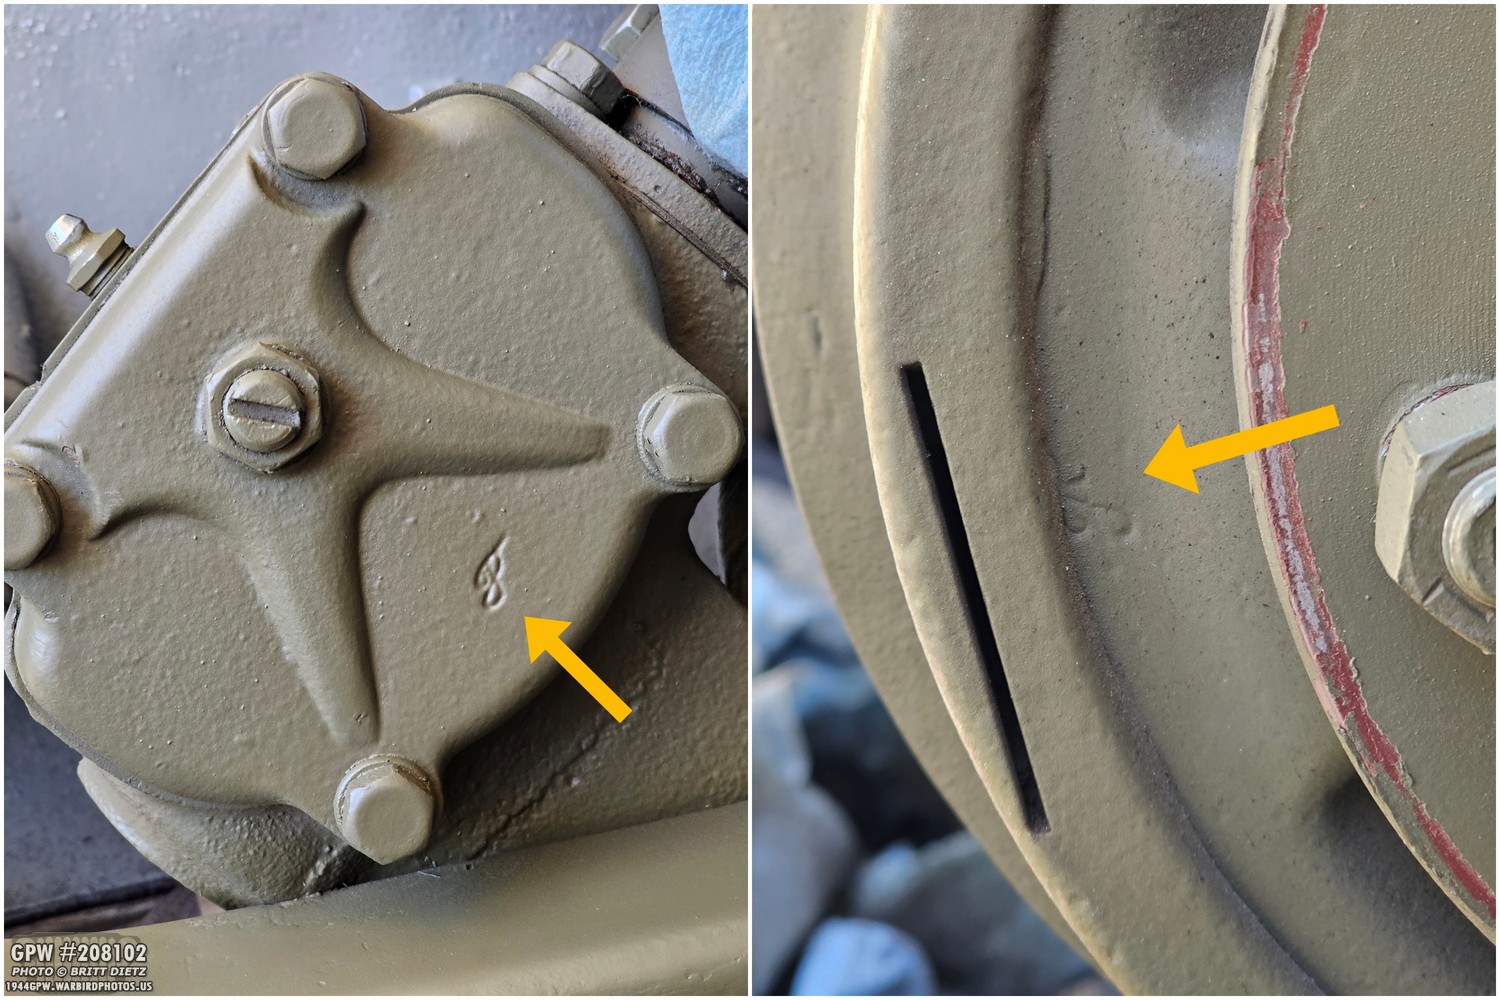
Extra credit: there’s one on the steering box cover and one on the wheel drum. Every one of these F stamps is original!
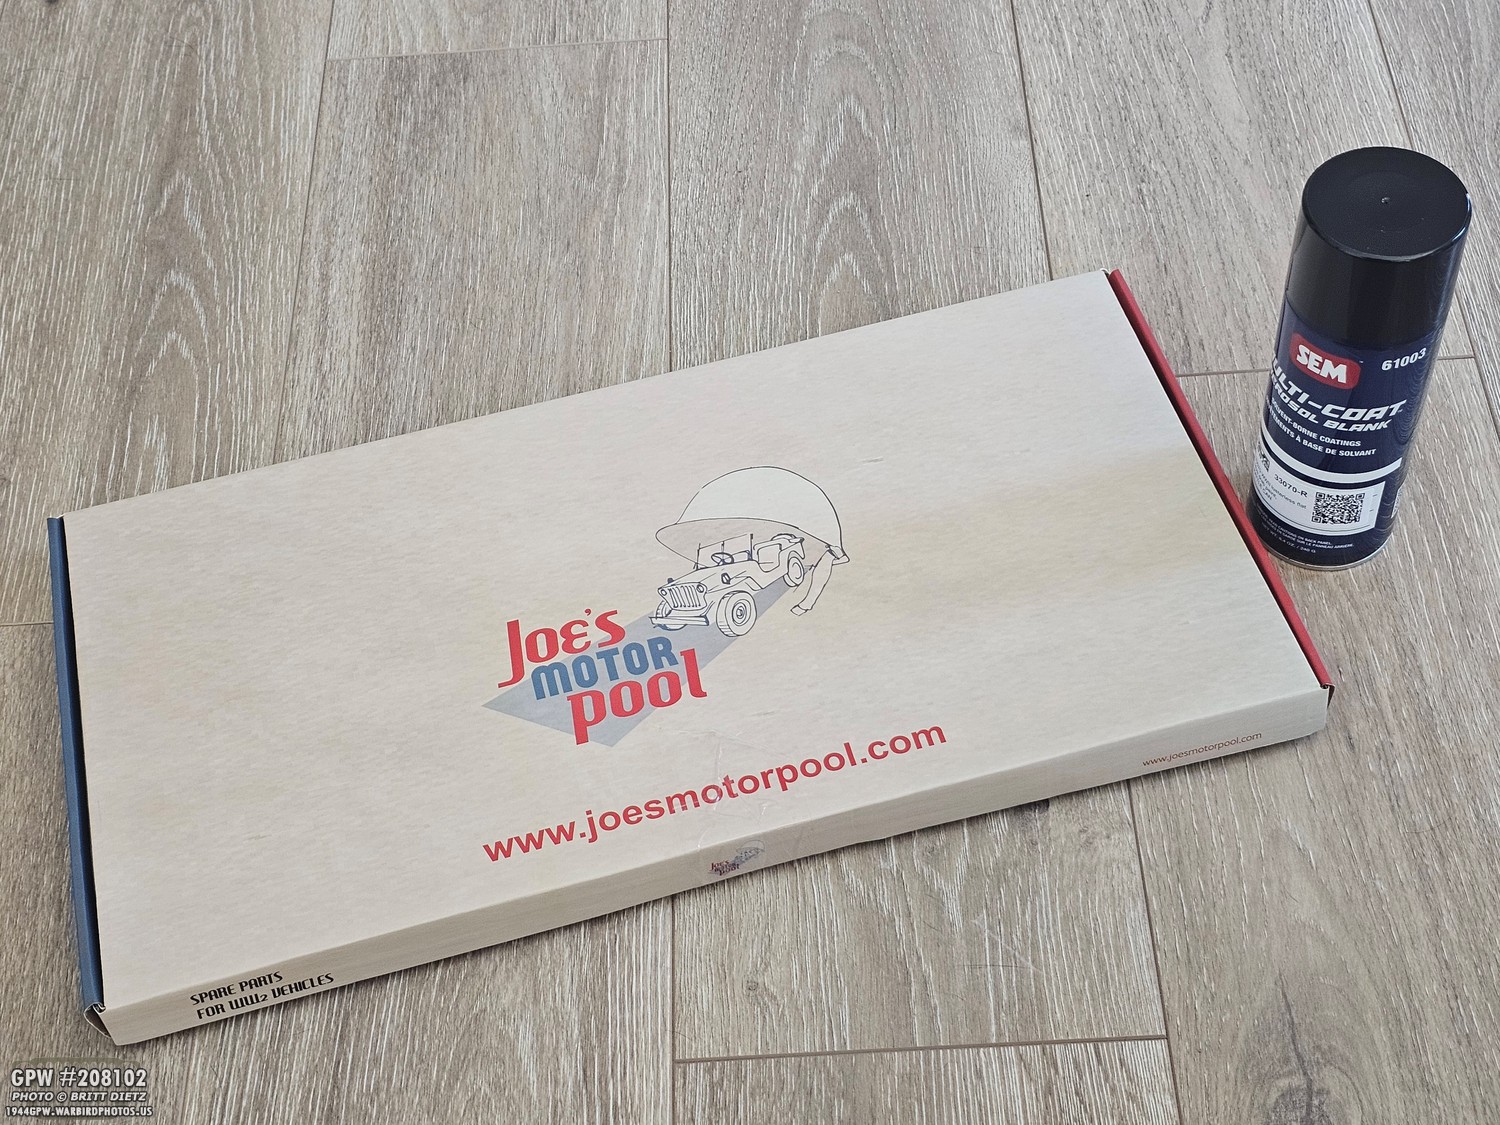
Moving on, I wanted to mention the new ‘all-in-one’ engine/transmission gasket kit from Joe’s Motor Pool. I ordered this from Ron Fitzpatrick Jeep Parts almost instantly after he got them in stock. It comes in a nice little cardboard case.
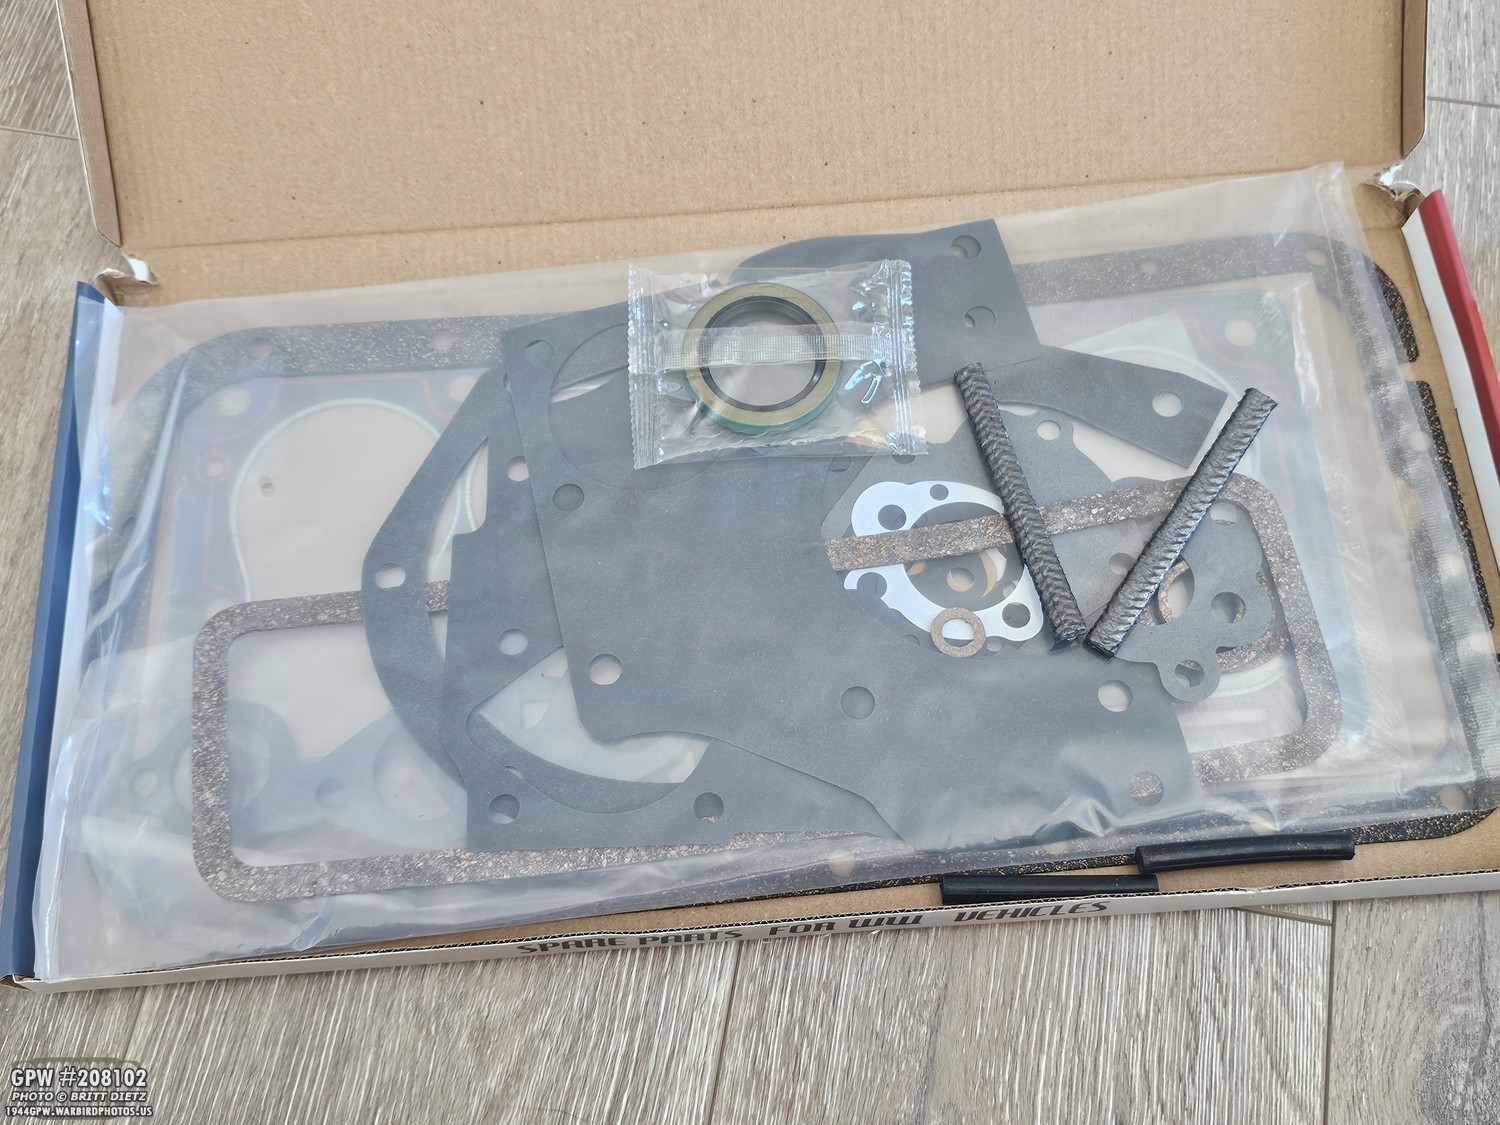
Inside is literally every single gasket and seal you need for anything on the engine and transmission/transfer case. And it’s the latest versions of them as well; many of them are double-lipped.
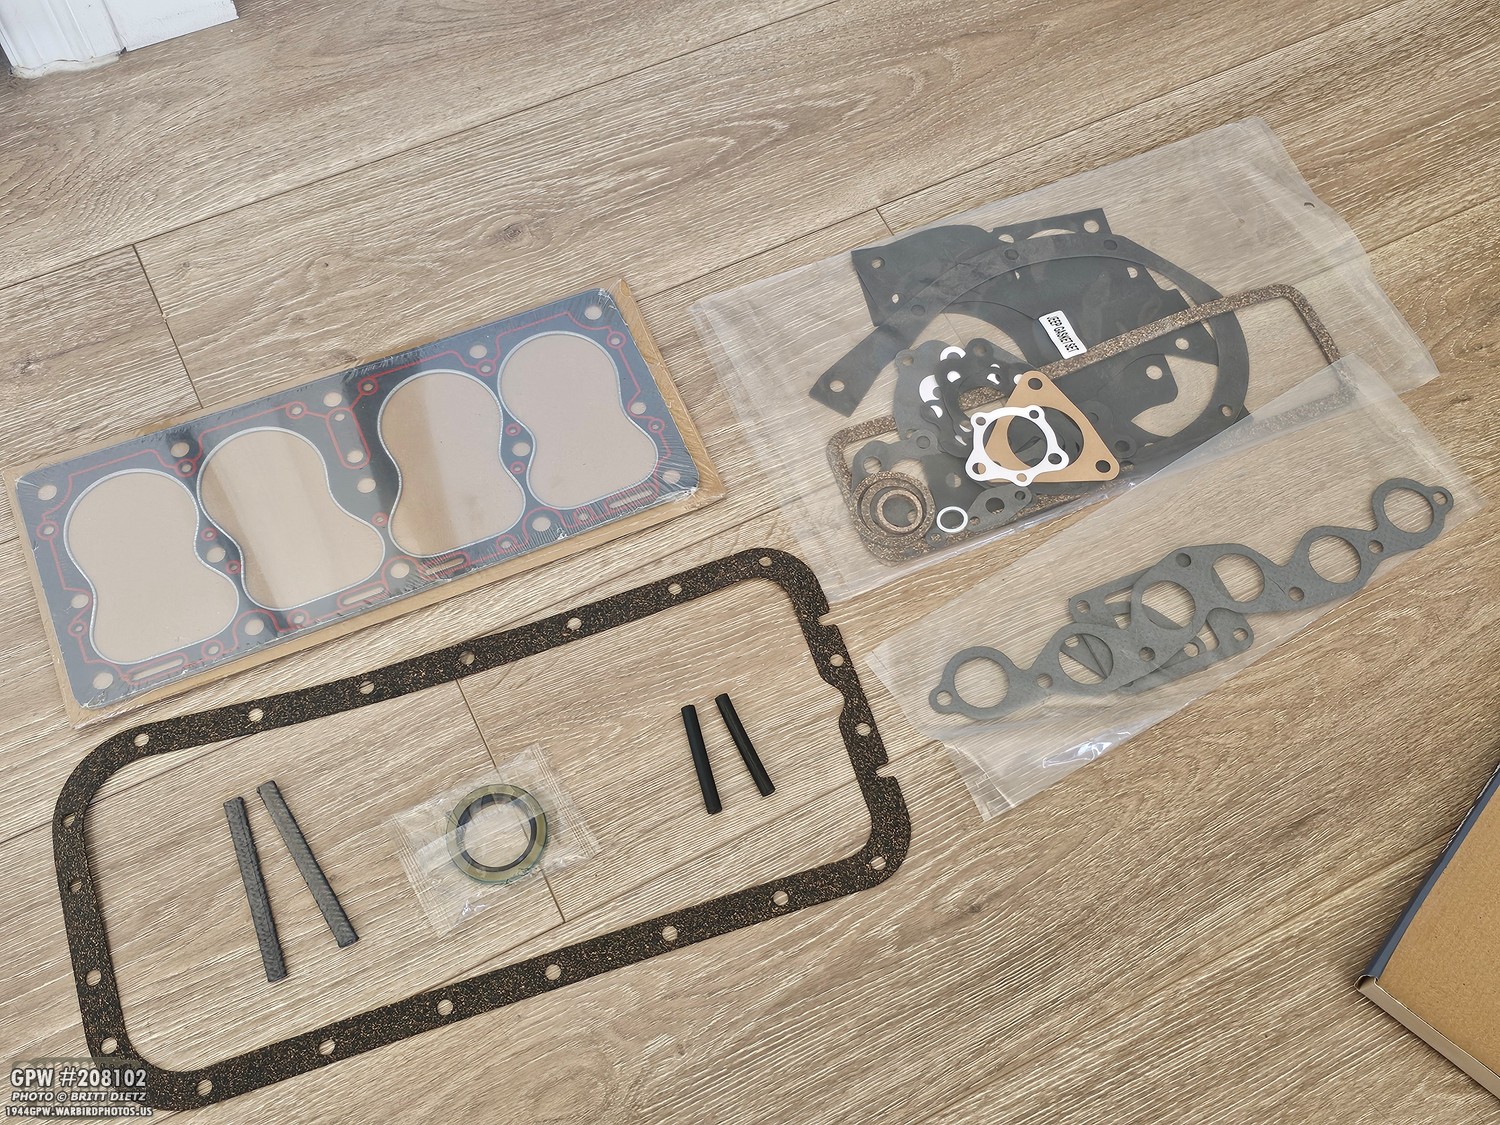
Here’s a look at everything you get. For only $84, it’s a steal. Trying to get all this separately would cost way more. I recommend picking one up just to have a spare of everything. But one of the biggest improvements is the brand new head gasket that JMP made. See those red lines on it?
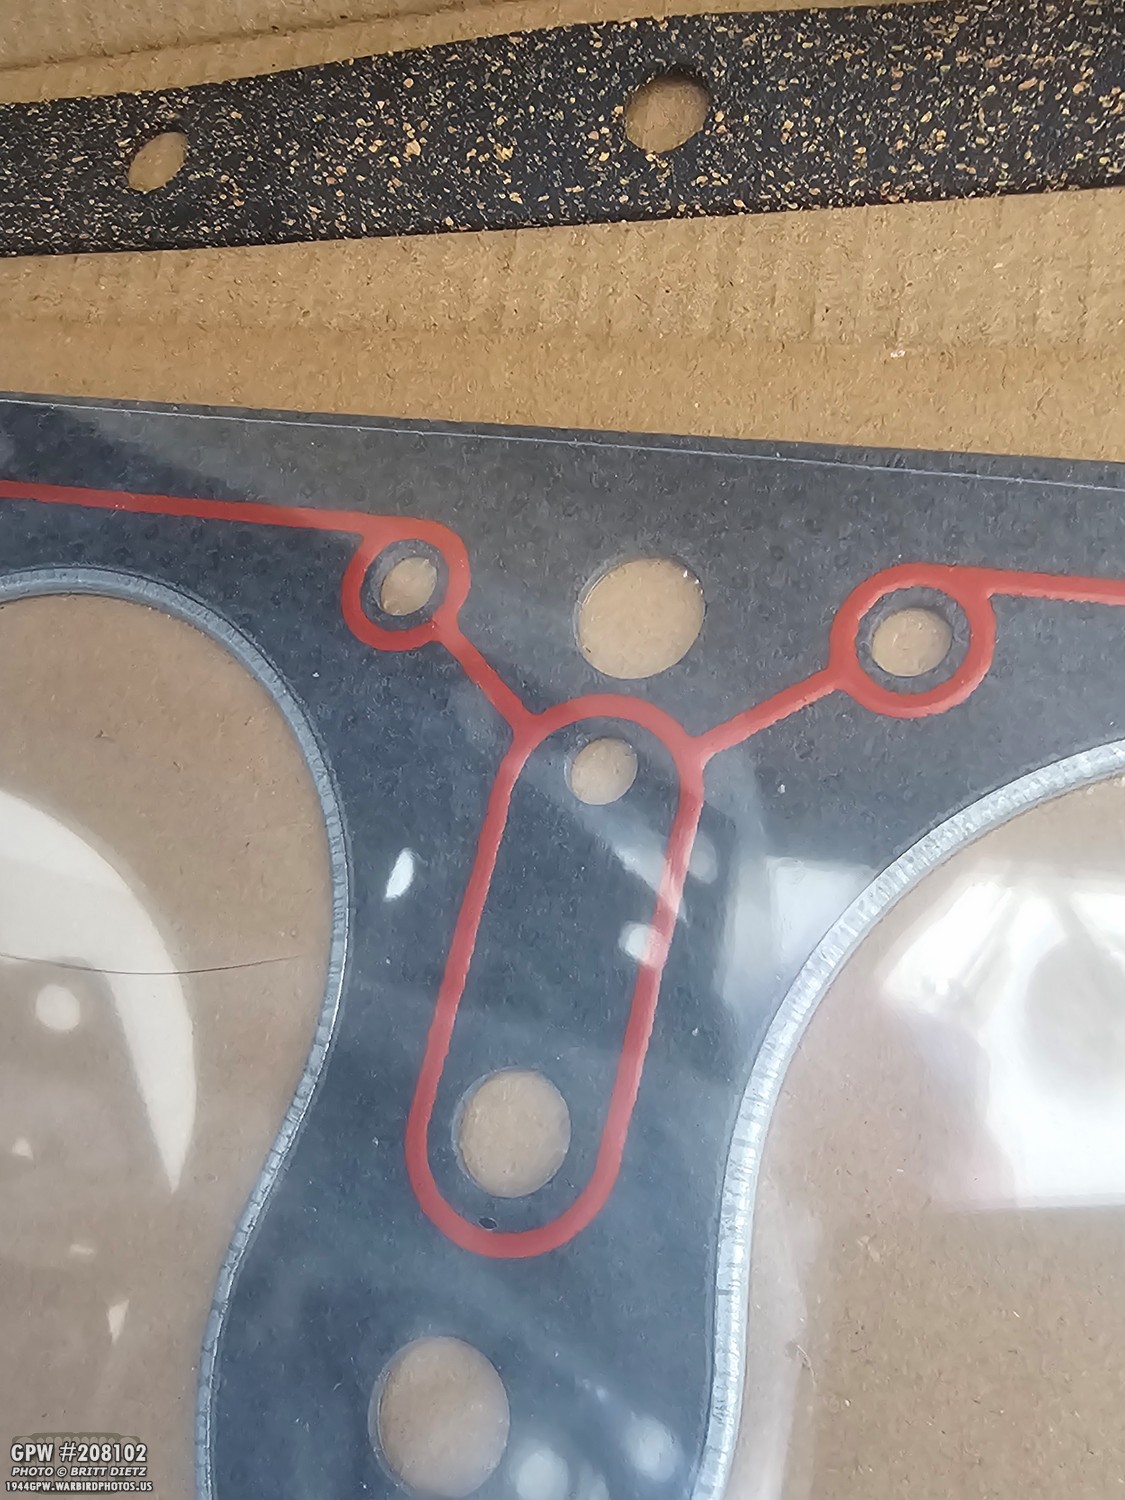
Those red lines are actually pre-lined precision RTV that will soften and melt into place once heated by the engine, sealing ALL the fluid holes on the block side. The other side of the gasket has a crushable metal surface. Pretty darn amazing. I would have tried it instead of the copper one had this been released when I had the head off! But next time!
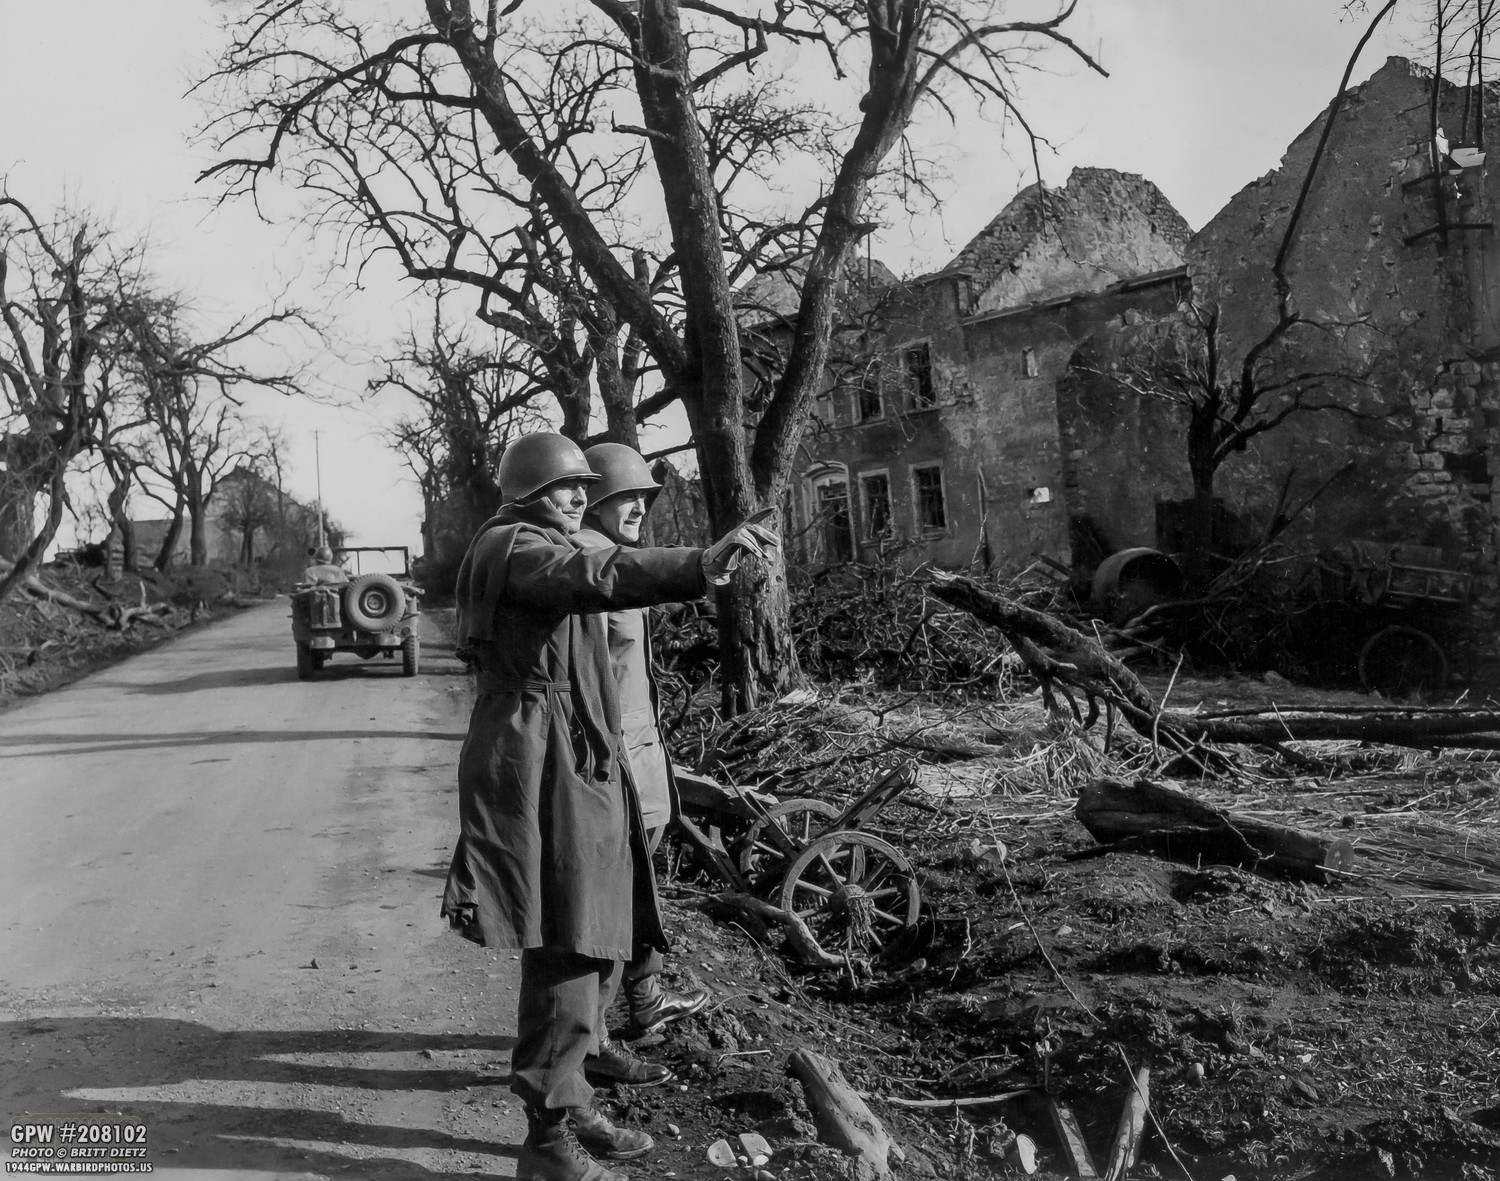
And now something fun to wrap up this update. I go to several flea markets and often visit antique stores throughout the year. When I’m there, I always search for WWII things and Jeep stuff. I also hunt through vintage photos to see if I can find Jeeps, and I always purchase them when I do. I also try to share those photos I find on this blog, because who knows… maybe it’s a photo of someone’s Jeep somewhere and they’ll have that PROOF of where their Jeep served. Here we see two officers surveying damage somewhere in Europe, with a Jeep and their driver in the distance. This photo is an official UIS Army photo from the 166th Signal Photographic Company (as stamped on the back).
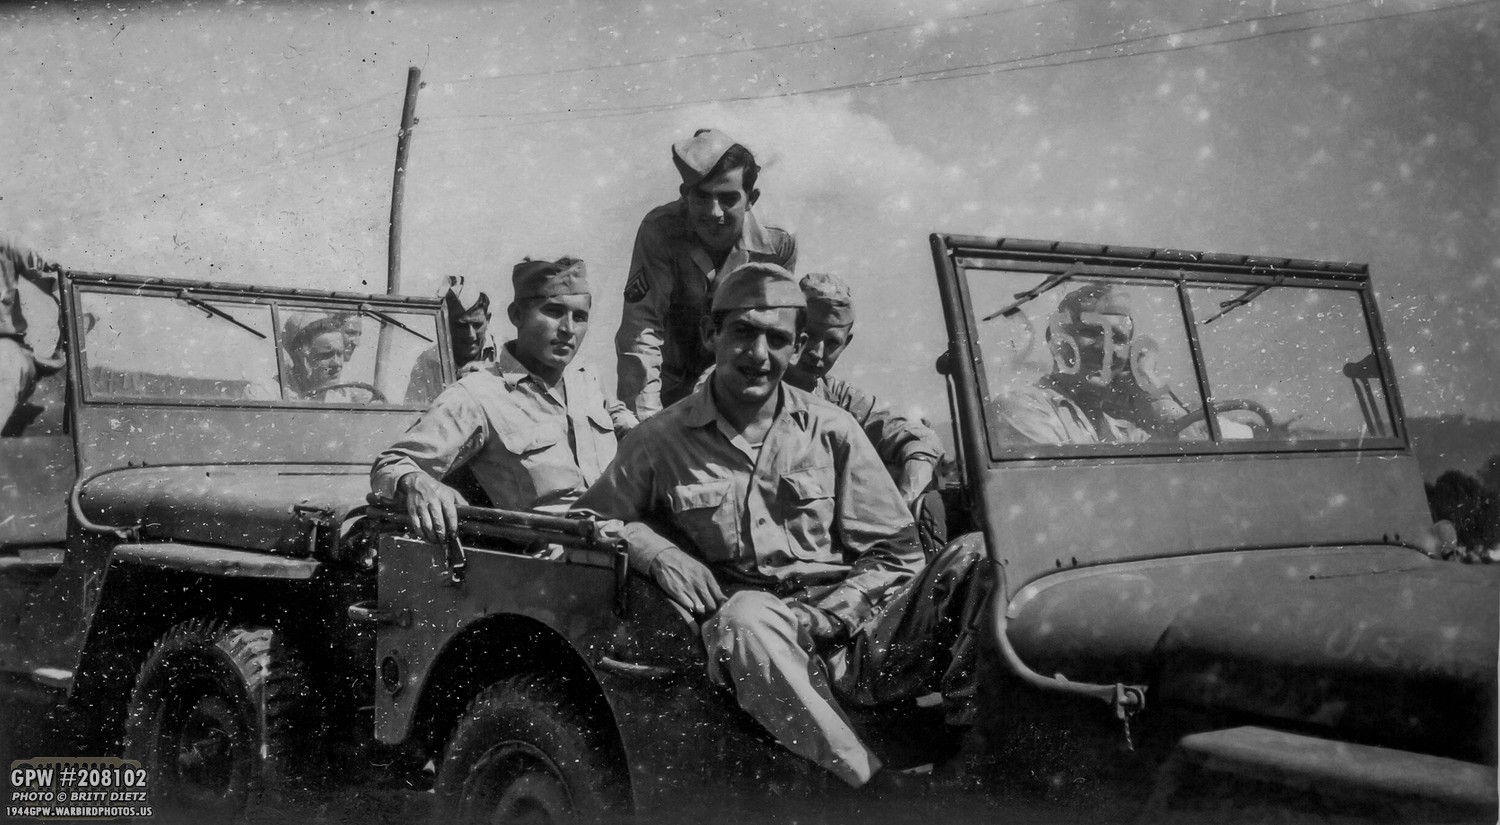
I started to try and clean up this photo, but it was going to take way too long, so parts still have white specs on them. Sadly, you can’t make out the hood numbers, but there’s what appears to be 25-T-C handwritten in the window of the front Jeep. I think this is Europe or the States.
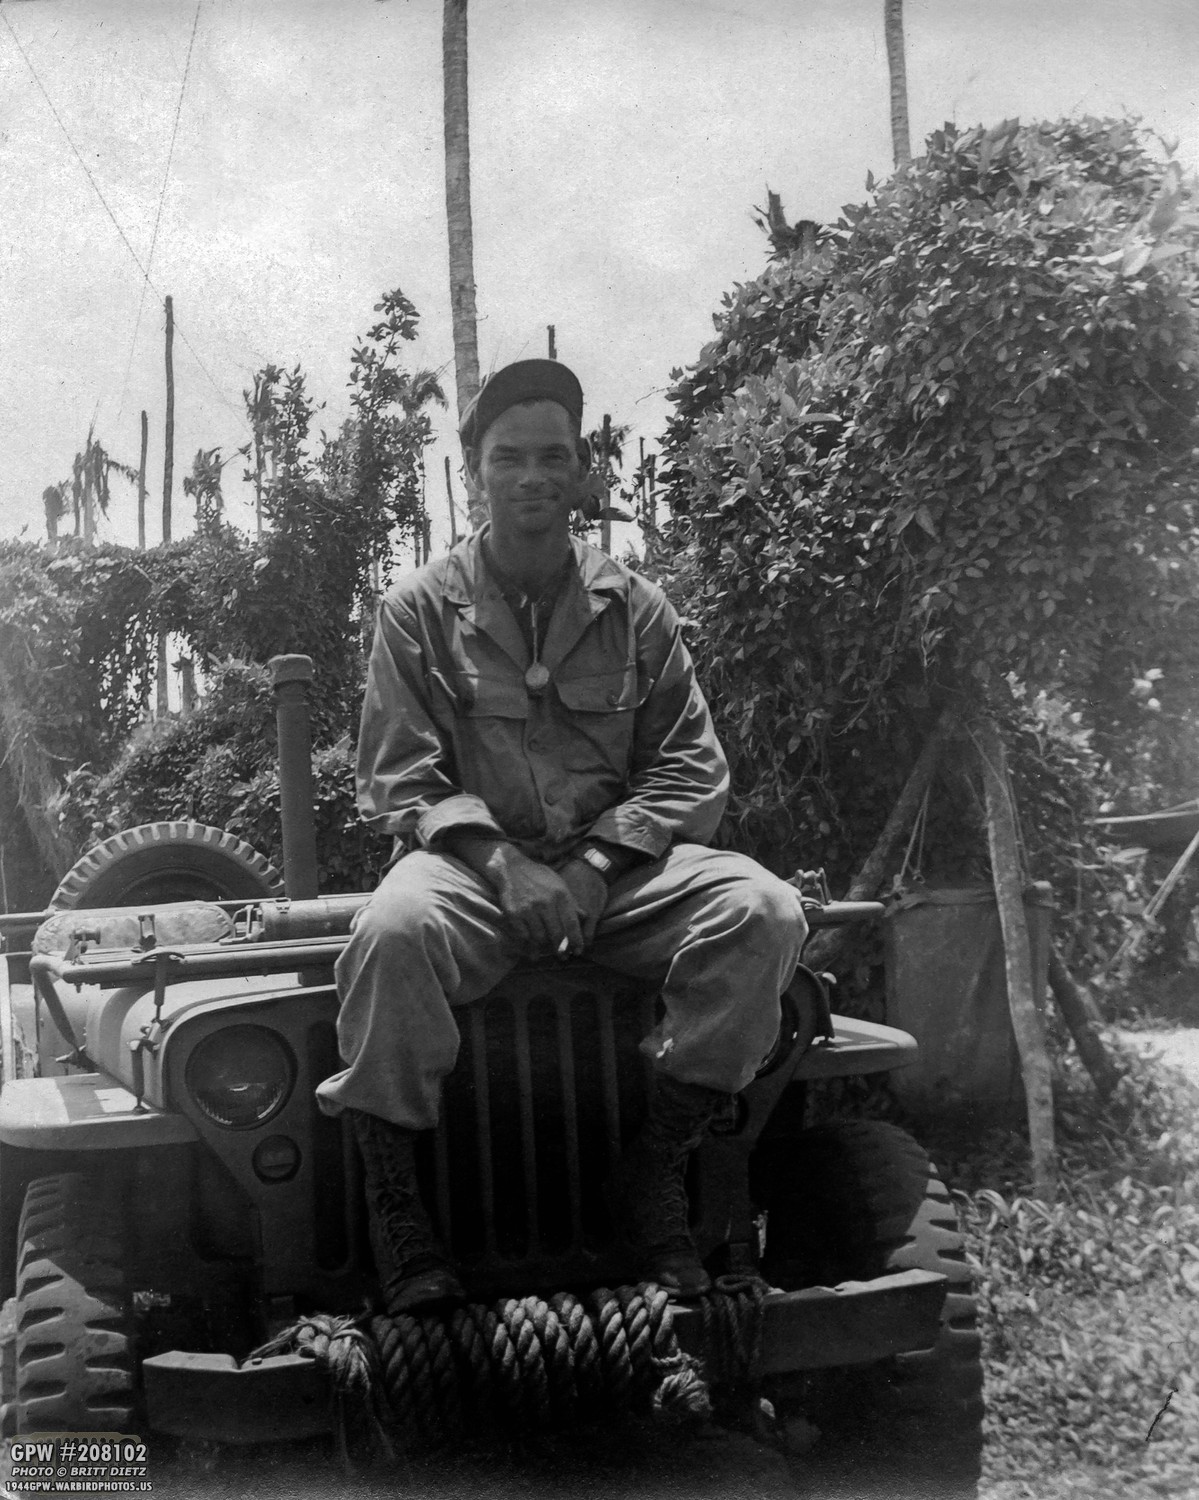
Here’s a chap with a cigarette sitting on the hood of a Jeep with a gun pedestal somewhere in the Pacific based on the trees. Note the rather bent front bumper. The fire extinguisher also appears to be mounted to the rear of the windshield where the gun rack would be. The headlights appear to be half painted, with only the lower half visible for minimal light.
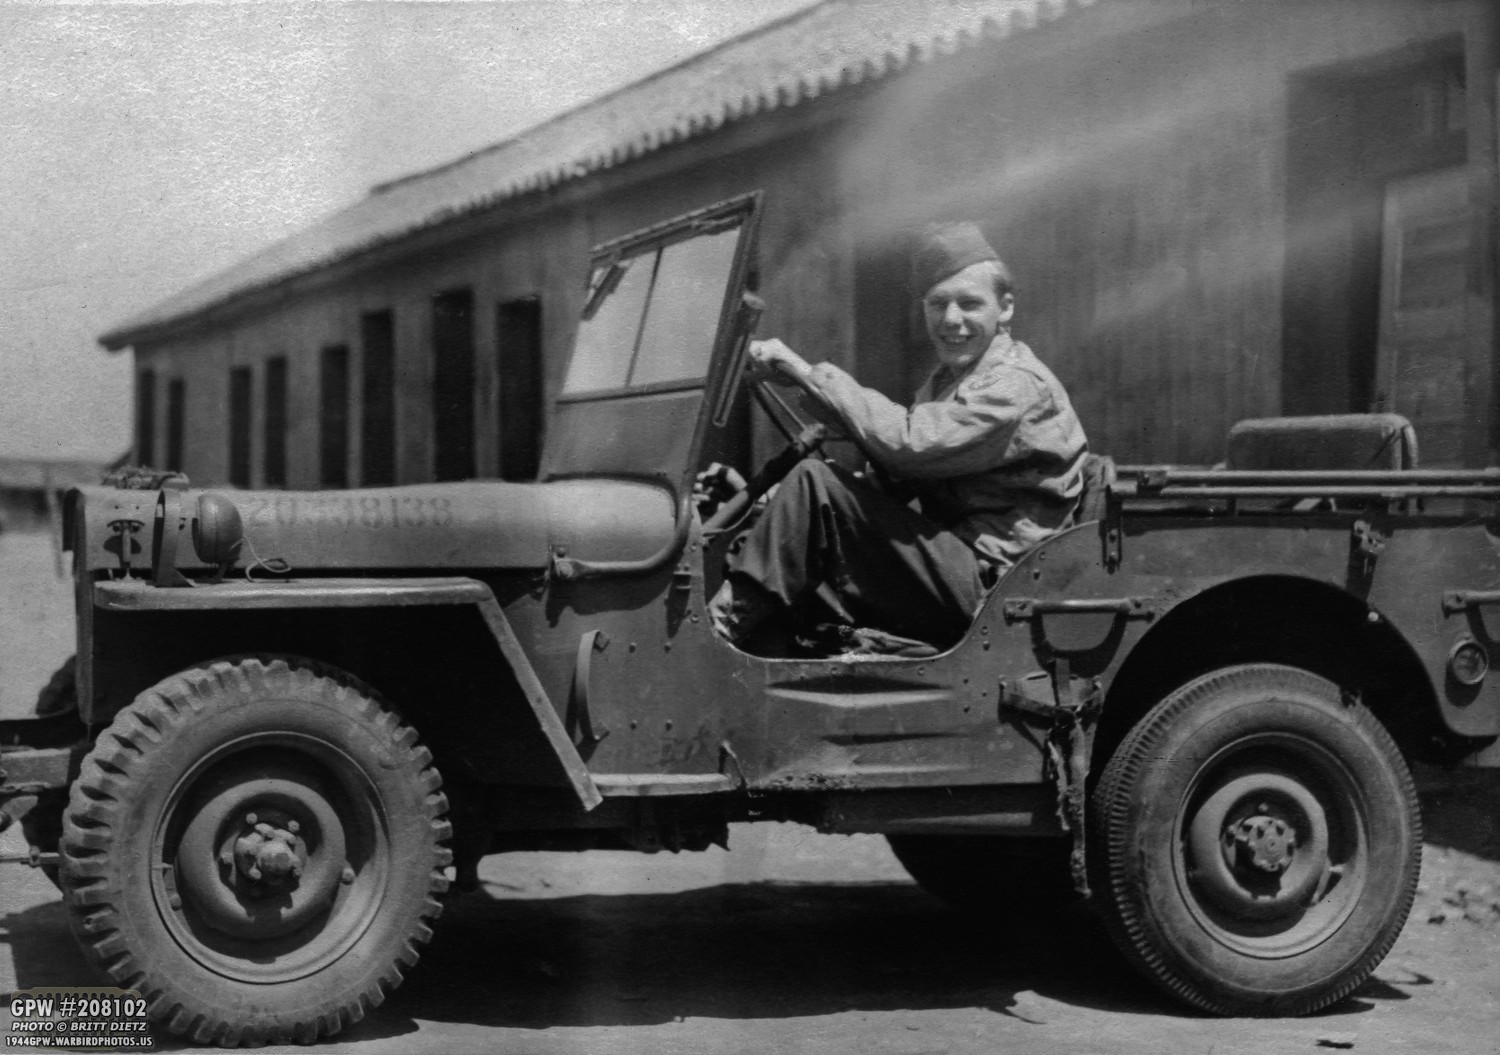
This fellow appears to be driving Jeep #20338138. It’s a GPW Jeep judging by the safety strap eyelet and the springs. It appears to be a US Army Air Force patch on his shoulder, so this might be an AAF Jeep. Note the two different tires, with the rear tire being a regular radial type tire. Also note the missing pioneer tools, but the straps are still there (very worn though). The windshield hold-down clamp is missing, and the fender blackout light electrical wire is crazy long.
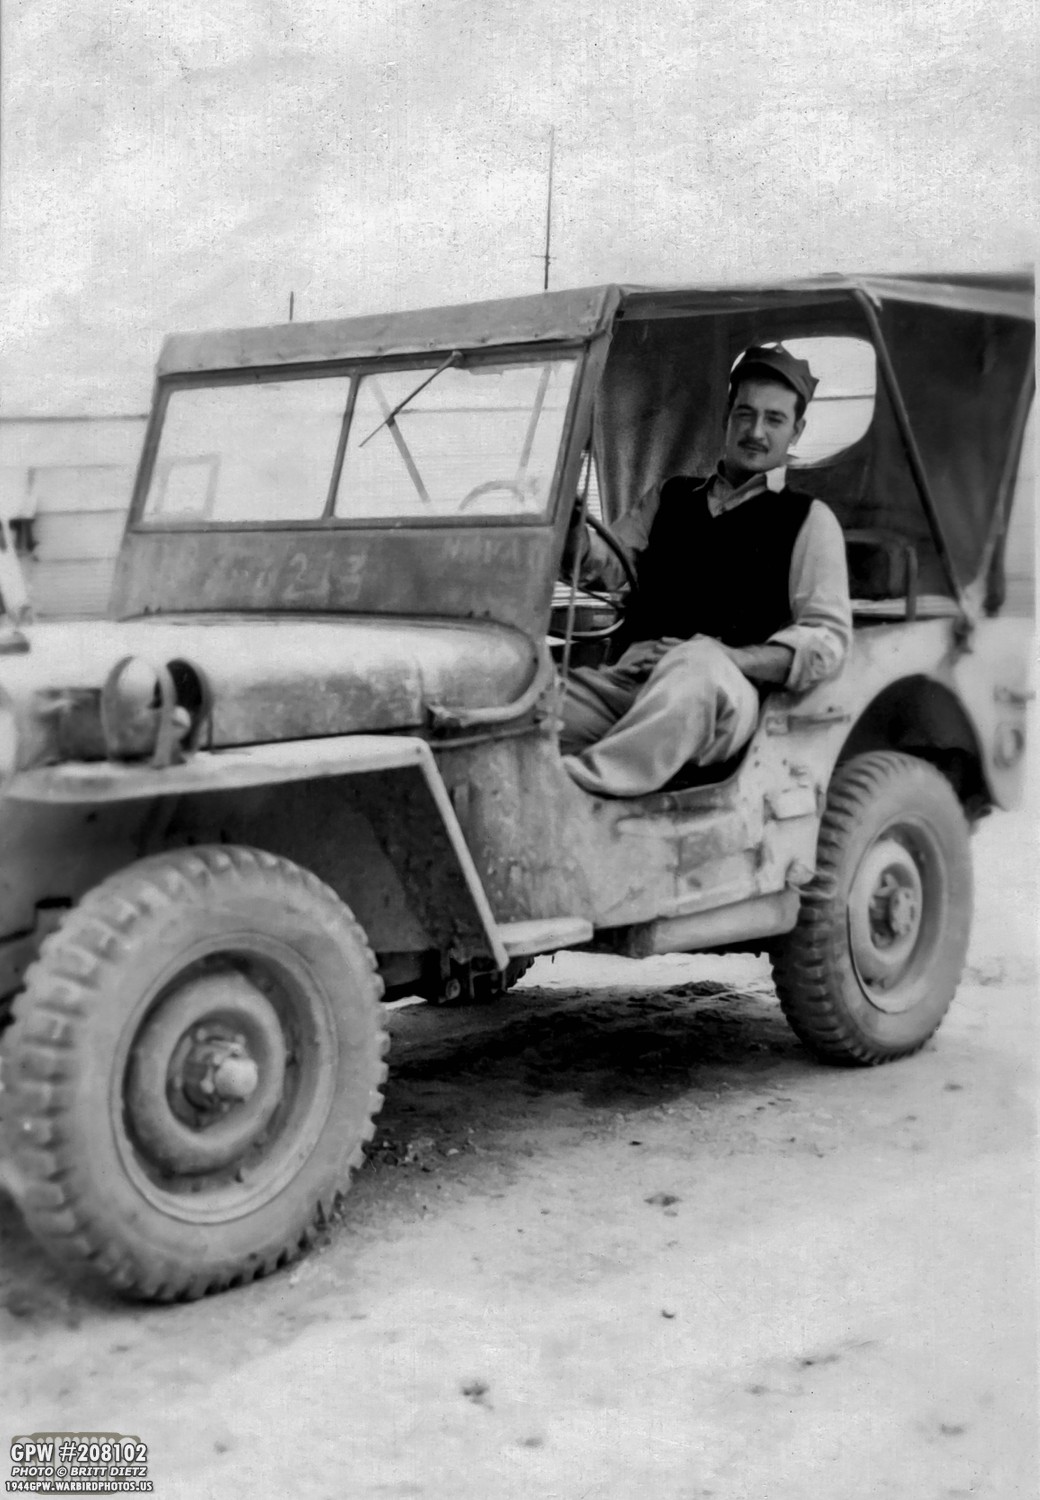
Another that you can’t make out the hood number, but the caption on the back of this one is handwritten with: “The fastest Jeep and driver on Okinawa!’ There are several things written on the lower windshield, but I can’t make them out. The windshield has been extended, perhaps to give more clearance with the top of the canvas top. It appears the bulb for the fender blackout light is dangling from the housing. I believe the tube running along the side of the windshield is for the vacuum-powered windshield wiper motors.
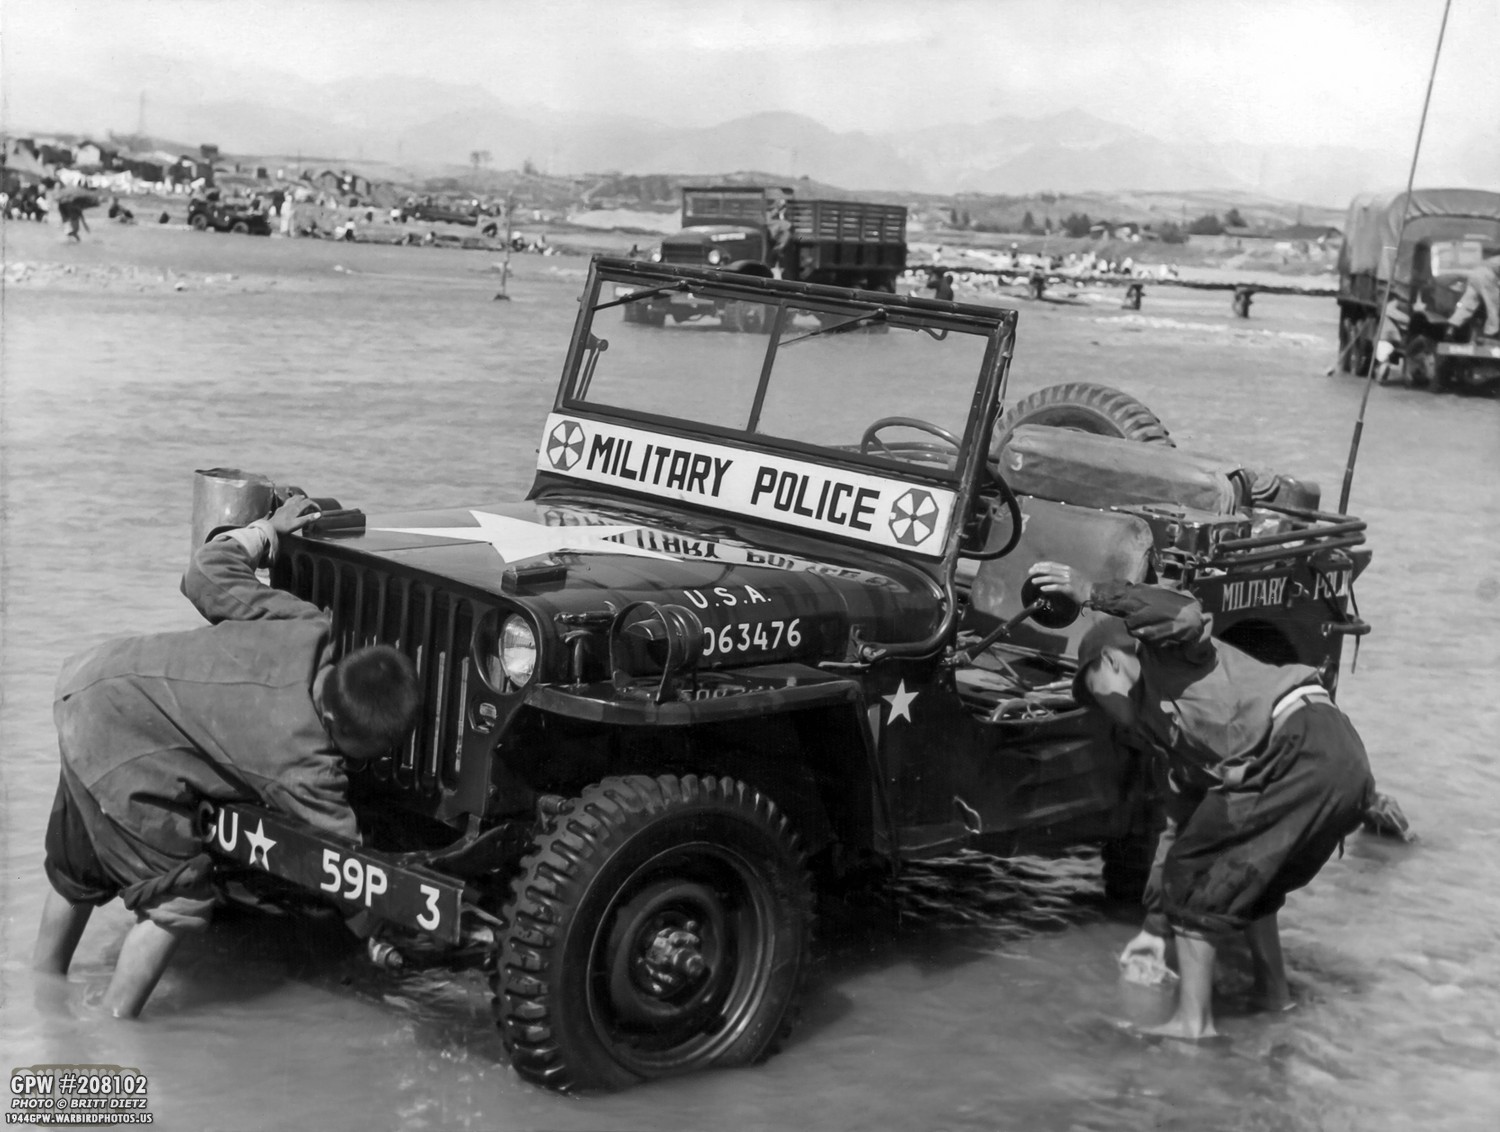
And now jumping to the Korean War, we have this Willys MB Jeep… It’s an Eighth Army Military Police Jeep with a darker paint job. It’s a radio Jeep, and I believe they are washing it in this shallow lake/river, giving it a glossy look (but that’s just water). It has a vacuum tube powering vacuum-powered windshield wipers as well. No Pioneer tools. Wish we could make out more of the hood numbers or the bumper identification, but from what I can decipher, it’s the 59th Military Police Company, Jeep #3.
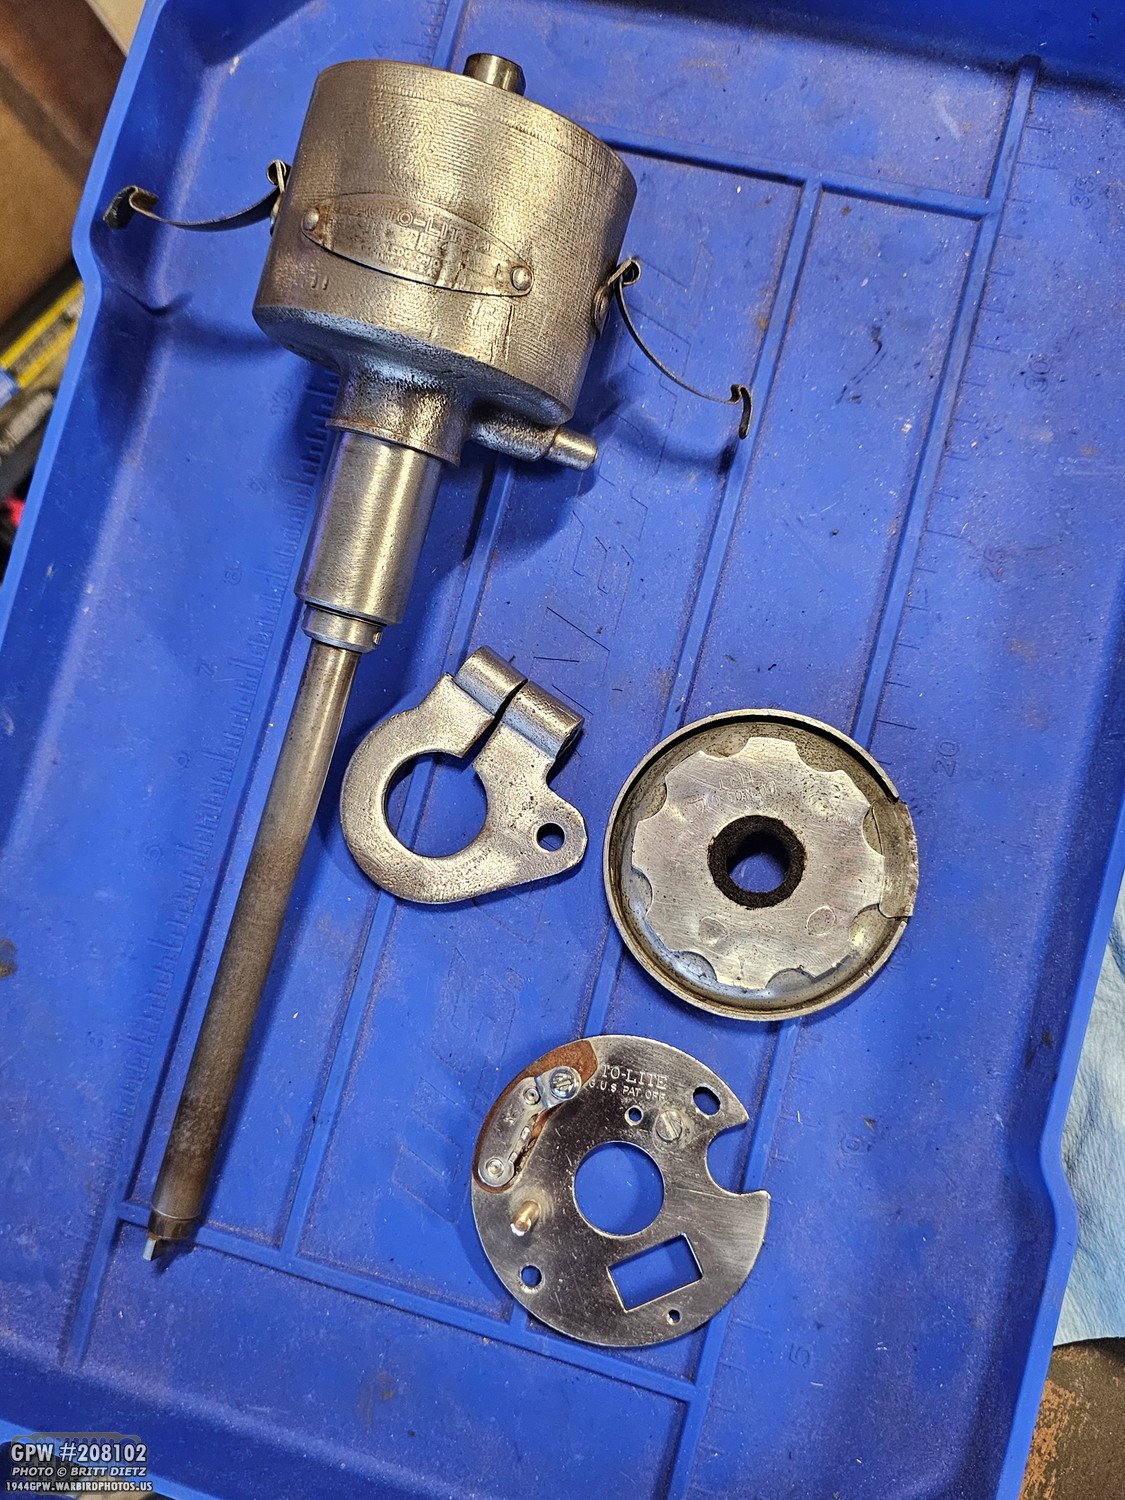
And I’m ending the update with this preview of the next update… as I restore my original distributor and rebuild it! Lots of work ahead…
Till the next update…
Till the next update…