 Jeep goes topless!
A week of more projects, mostly smaller things like replacing more bolts with F stamped ones. I also continue work on the fuel sender/gas gauge issues. I show how to reset Jeep circuit breakers, repaint the voltage regulator, some cool discoveries, and more! Plus some shots of the Jeep without the top!

Topless Jeep alert! This is the first time the Jeep has not had the canvas top since it’s been restored to drivable condition. More on this later!

If you’ve been following the last two weeks, my gas gauge hasn’t been working since I installed it last year. It was working before it was installed when tested. After a lot of testing, I discovered it was a bad fuel sender. Last week I put a replacement one in, and all seemed to be working well… until suddenly this week the need dropped to E while I was out driving. Hmmm…Then the needle went erratic, jumping to full and back to empty at random intervals.

I was able to pull up the driver’s seat cushion and get to the sender this time (when I reinstalled the seat, I somehow positioned it a bit better this time). So I was able to take out the sender without taking out the seat. The sender still worked. So I tested the continuity on the sender and the gauge, all good. So I turned my attention to the 10amp circuit breaker, which is a replacement as I got a bad one back when I was testing the gauge and sender last year (bad one pictured).

Since the first breaker I had was bad, I got a replacement that worked. So, I decided to test to see if this one blew. I ‘bypassed’ the breaker by putting a line from one tab on the sender to the other… sure enough, when I turned the ignition, the fuel gauge jumped back to 3/4 full. This told me it was a partially blown breaker (partially because of the erratic E to F needle, I think the Jeep vibrations were causing it to still contact).

Thinking that perhaps there’s a short or something with the Jeep that caused the breaker to bust, I ordered this button reset breaker (15amps) thinking maybe I could wire this hidden under the dash and, if something causes it to break again, I won’t need to keep getting new circuit breakers. But before I got this in the mail, I decided to take a closer look at the circuit breaker.

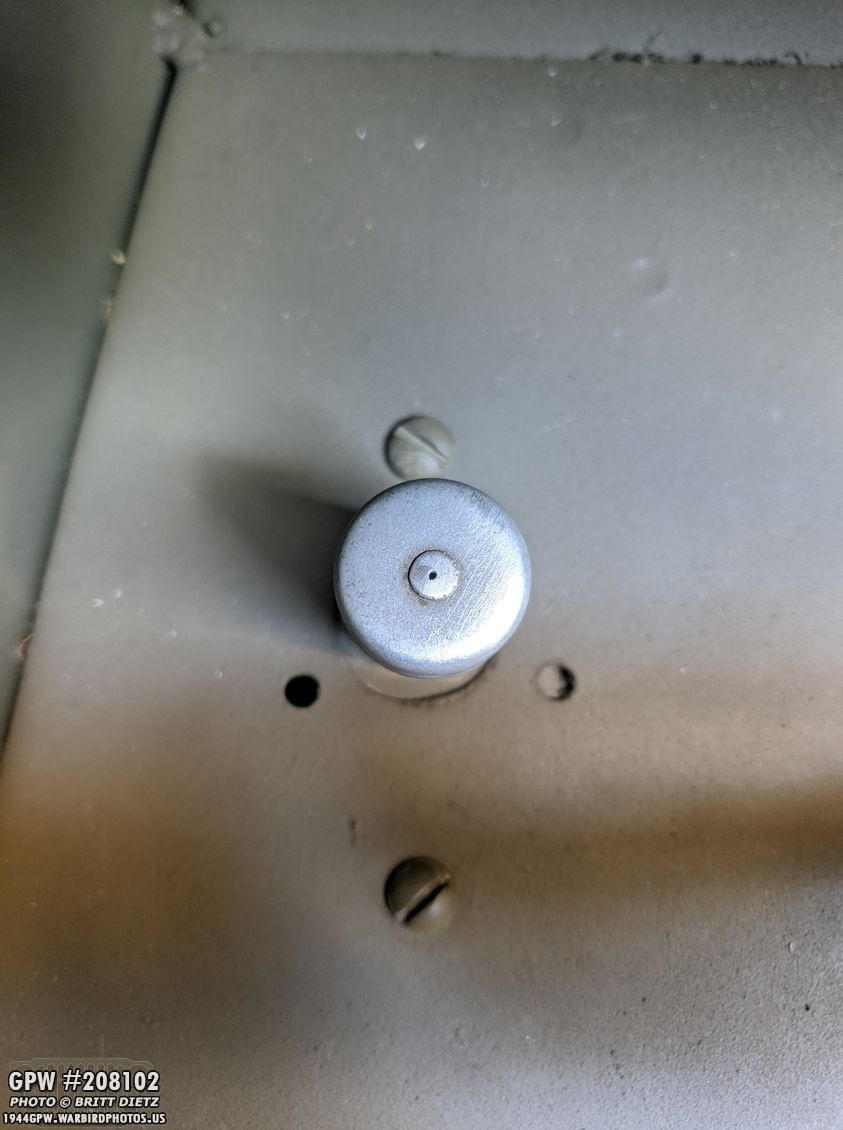
It’s a very simple design for these breakers, and something caught my eye earlier this week on a post about them on the G503 group on Facebook… someone mentioned they were reset-able. I replied with a question on how I could do that but got no reply. So that got me thinking, well, if this original busted one is dead already (I didn’t throw it away), why not play around with it? I was, at first, going to take it apart and I saw the nut on the bolt with the red painted on it. Look at the bottom photo closely before going to the next photo.

So, using small needle-nose pliers, I turned the nut counterclockwise… and I noticed that instead of unscrewing off the small bolt, it was spinning the bolt with it and on the other side, it was pulling in the large metal disk (see bottom of the previous photo of the inside). This got me to thinking… is that how it resets? It brings the large metal disk back into the contact with another metal contact re-establishing a circuit? So I turned the same nut on the breaker in my Jeep…

… And the breaker worked! The needle jumped to 3/4 full and stayed solid! My theory worked, turning that nut will essentially manually reset the breaker. It’s limited, however, as I’m sure I can reset it a few more times, but eventually, I won’t be able to turn that nut and bolt and I’ll have to replace it. But, that also means that my ‘bad’ breaker from last year wasn’t bad after all, and testing it I confirmed this with the nut being turned. So I have a backup breaker for if I eventually wear out this breaker! Of course, I will keep an eye on it and if it blows again any time soon, I’ll need to hunt for a short somewhere.
Moving on, last week I continued replacing various ‘easily seen’ bolts on the Jeep from blank heads to correct F stamped bolts.

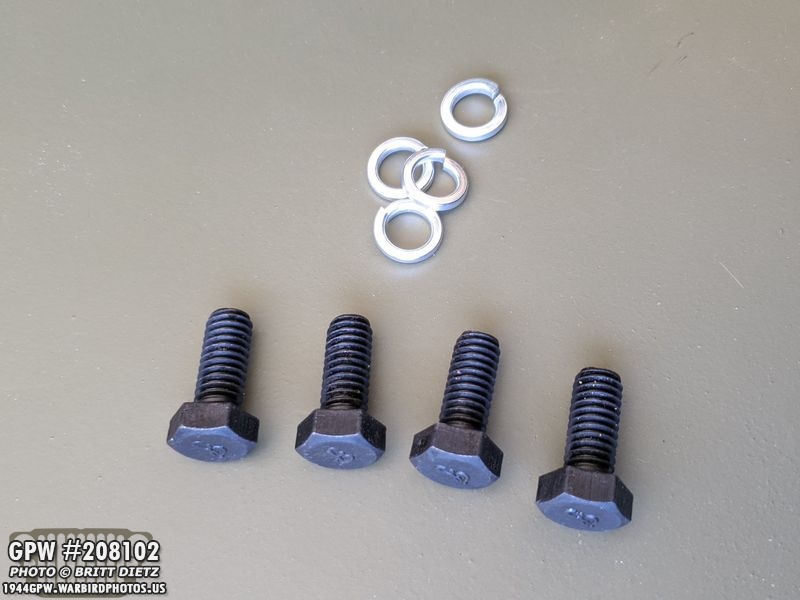
I got a set of bolts for the spare tire carrier on the back of the Jeep from Joes Motor Pool. This is the reason the canvas top is currently off the Jeep, I had to take it off the back on the Jeep in order to get to everything. I also had to take off the spare tire.
The spare tire had scuffed up the paint over the last year, and even though it’s not seen, I went ahead and fixed it up by sanding, re-priming, then OD Green painting. This is an original F stamped spare tire carrier from my Jeep.

I then replaced the four bolts with F stamped bolts. Much better! They won’t be easily seen by people, but you can still spot them even with the spare wheel on.

A better look at the F bolts.

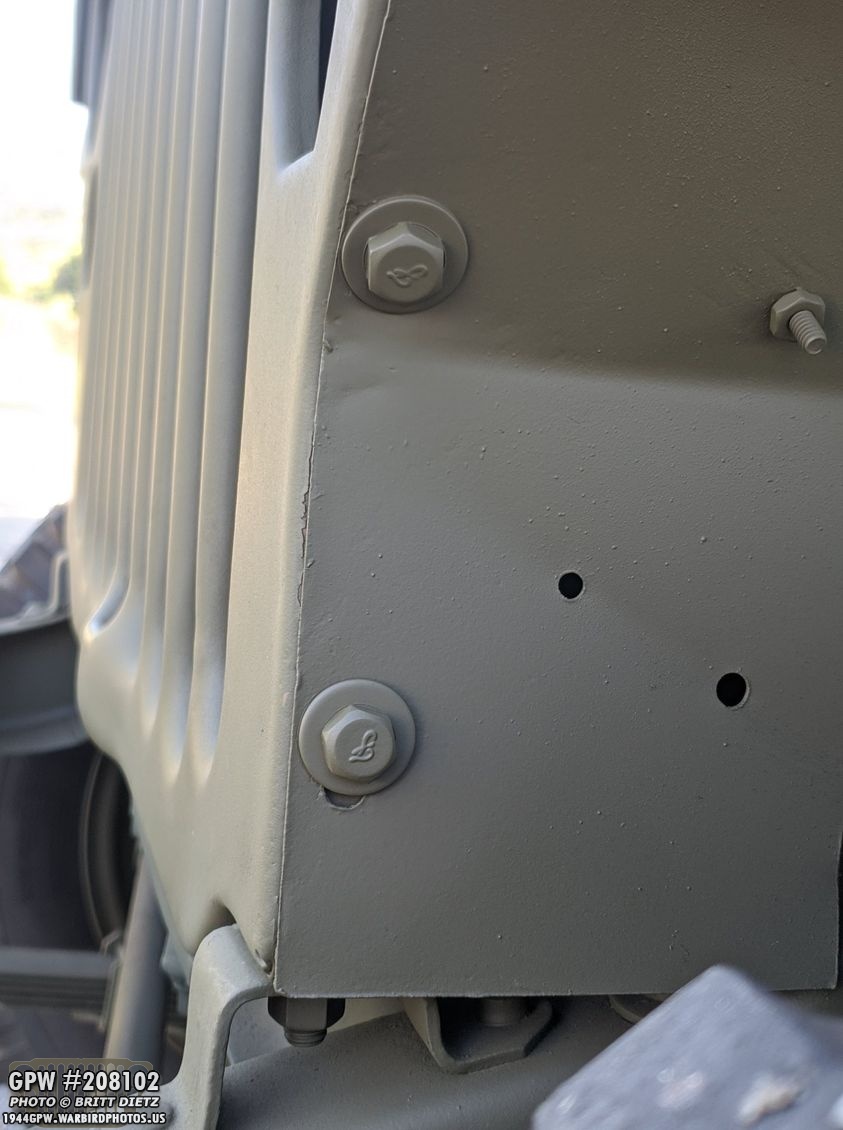
And you can see the other side where the F bolts came through to the inside of the Jeep. The top two and the bottom two are from the carrier. Note the bottom two actually go through the rear hat channel and the wood inside.

Side note, as I was taking off the top all the way off, I decided to snap a shot of how I had the top attached to the footman loops on the backside. This is the best way I’ve found to strap the straps to the footman loops via photos I’ve seen.

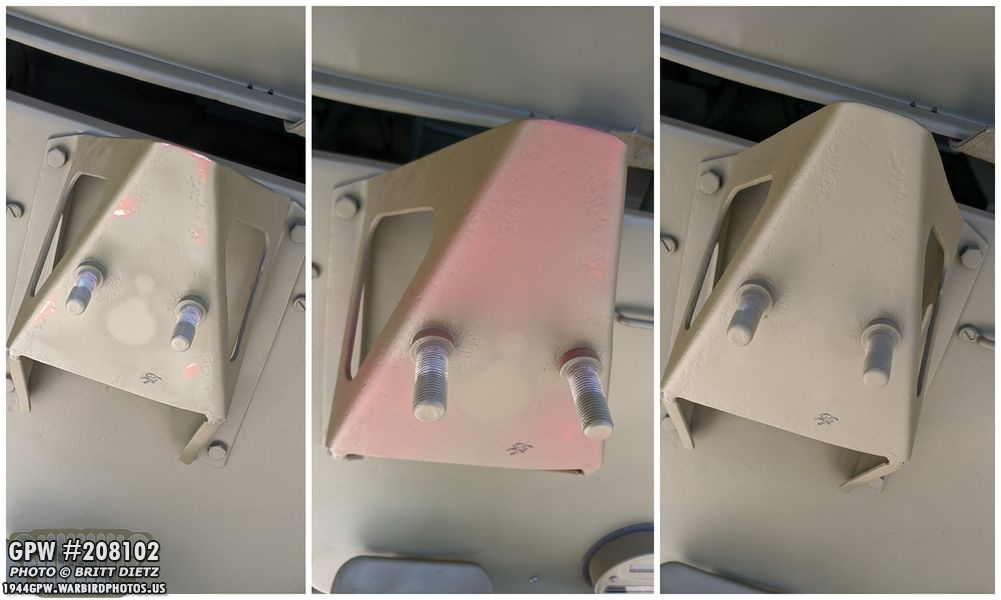
Next up, I finished putting F stamps on the footrests inside the Jeep. I had done the 2 bolts on each of the two footrests that go into the wheel well, this time I put the F stamped bolts that go into the capture nuts on the body tub floor. MB Jeeps don’t have capture nuts here and use a lock washer/nut on the other side. This shows the original, bolts added but unpainted, and painted bolts.

And here’s the footrest from the other side with nice painted F bolts.

I had some leftover 5/16 F bolts, so I replaced the two bolts that go into the capture nut on the firewall for the Horn bracket. The no-marking bolts, F bolts getting painted, then F bolts installed.

I was going through my box of leftover parts from the restoration last year looking for some items, and I discovered two original bolts that I had totally forgotten about! DOH! These both came off the air bath canister brackets to the firewall. It’s interesting to see they are two different variations, yet the same bolt.

Since I could easily get to one of the bolts that hold the air bath canister bracket to the firewall, I replaced it with one of the original ones. I then painted it up. It just happened to end up with the stamp upside-down (it is a capture nut in there, so no control of the orientation). If I have to take the air bath canister off in the future, I’ll put the other F bolt on one of the bolts.
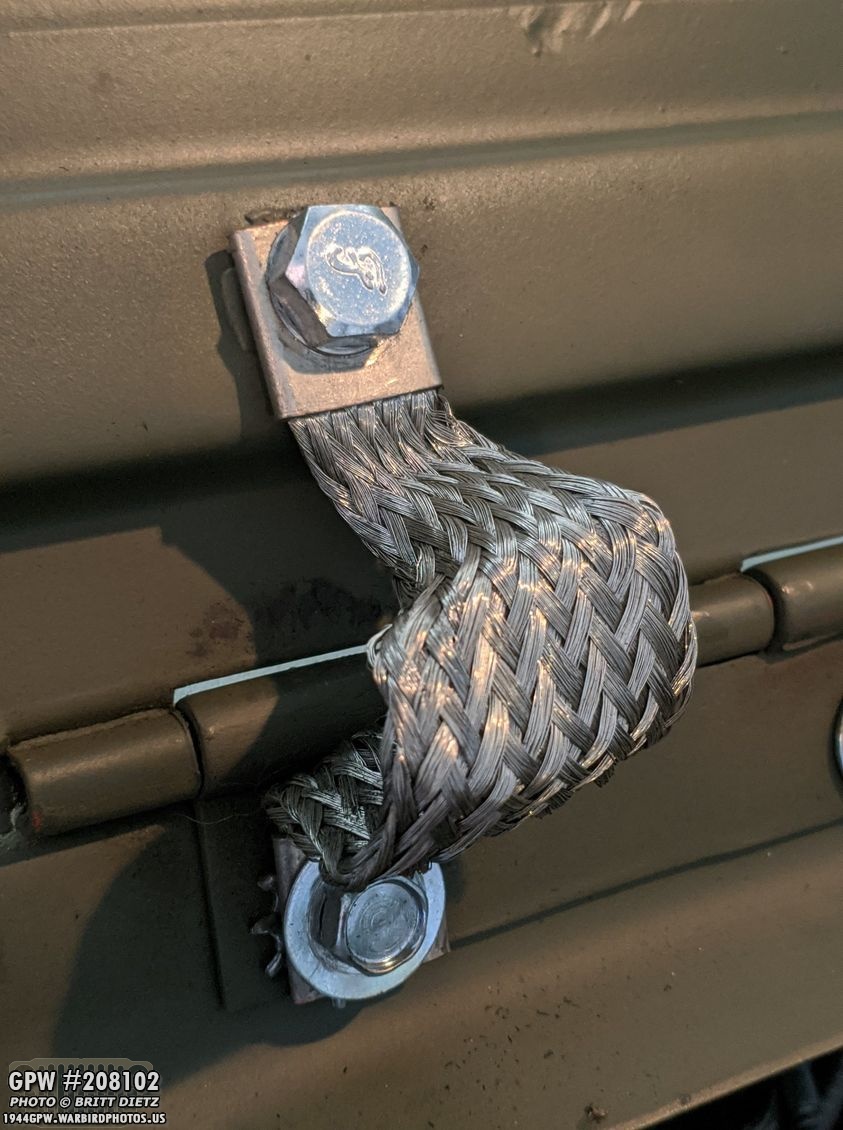
There’s been a lot of back and forth if the hood had F bolts going on the bond strap to hood bolt location, so I put them on there just because. I’m still debating if I want to paint these OD Green.
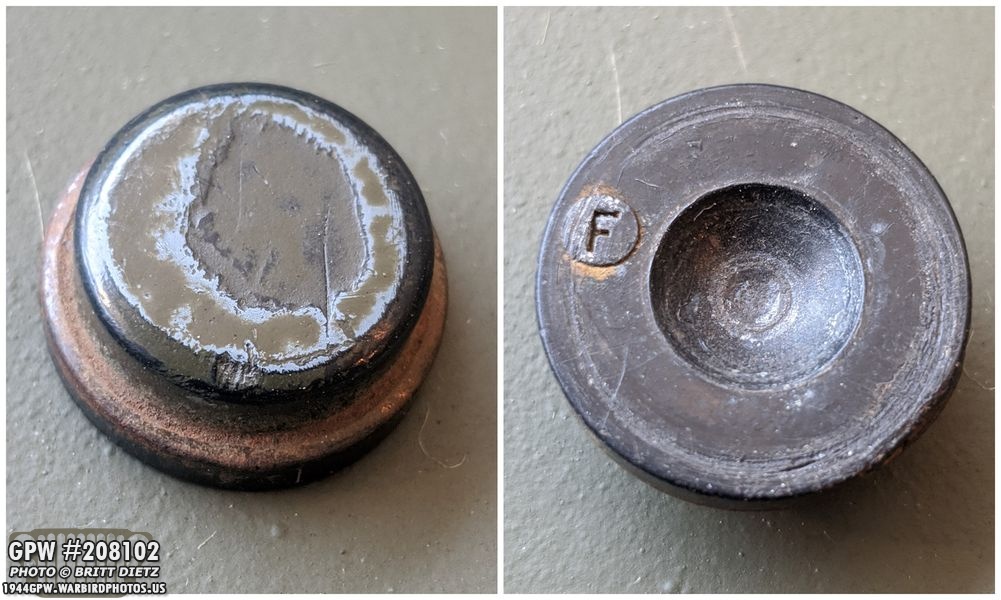
Also going through my bags of spare parts, I found this AMAZING part I’d forgotten about! This is the original horn button that was on my Jeep. At the time, I didn’t think anything of it and threw it into a bag with the other horn parts I replaced. Spotting it this time around, I realized it had original WW2 US Navy paint on it, and that made me realize this might be an original horn button. I flipped it over, and wouldn’t you know… an F stamp! WOW! I was shocked!

It’s interesting to note that the original horn button is much flatter than the new repro ones. I looked up some original wartime GPW photos, and the ones I could see the steering wheel clear enough seemed to have a more flat appearance like my button. I decided I wanted to replace the repro with the original!
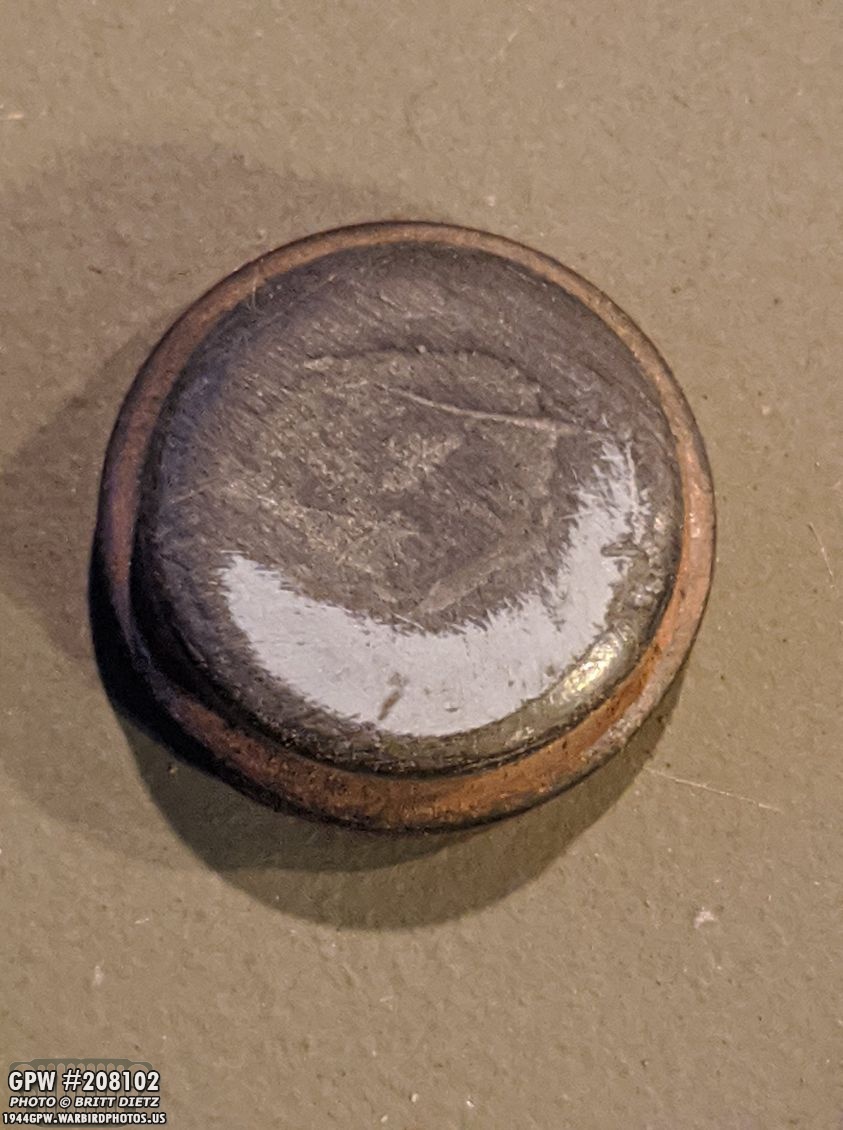
I started to sand the original button, and stopped to take a shot of the last bit of original Navy paint before it was all gone.

After smoothing out the scratches and dings as best I could, I cleaned it up then hit it with Black paint. After black I coated it with satin clear over-spray.

Now installed on my Jeep and works great! It’s awesome to add another original part back on my Jeep. Much like my original body tub that eventually, one day when it’s all fixed and done to where I like it, it’ll replace my repro body tub on right now.

I also found some more nuggets in that box of spare parts (don’t worry, I went through everything in the box 3 times looking for things missed) I discovered these two fun items. On the left is a C TR bolt, which I’m told is an early Willys MB Jeep style bolt, and on the right is an F stamped fuel line clip. I’ll eventually add that back on the Jeep.

As I was working on some things in the engine this week, I took a look at the voltage regulator and realized that I didn’t really like the paint job on it. The crackle paint on it just didn’t come out very well (shown here). I decided to give it another go. I took the cover off (the bottom actually came out better than the top lid) and gave it a quick rough scoring with a scotch pad to help the paint.

As I painted the lid, it was nice to see the pristine insides once again. This thing is so clean inside. It has a new cork gasket as the original was destroyed when opening it up, but now it’s preserved once again.

So after about 3 coats of paint, the end result is better. Still not as good as I’d like, but it’s better than it was.

Here’s a close up showing the texture a bit better.

Next step is to re-add the data tag that I never got around to adding back on after restoring it last year. I went to find the little tiny drive screws that hold the data tag on, but I couldn’t find them anywhere even after tearing the garage apart looking for them. UGH! Thankfully, Ron Fitzpatrick Jeep Parts came to my rescue and is sending me two correct drive screw replacements! Look for that installation next week!
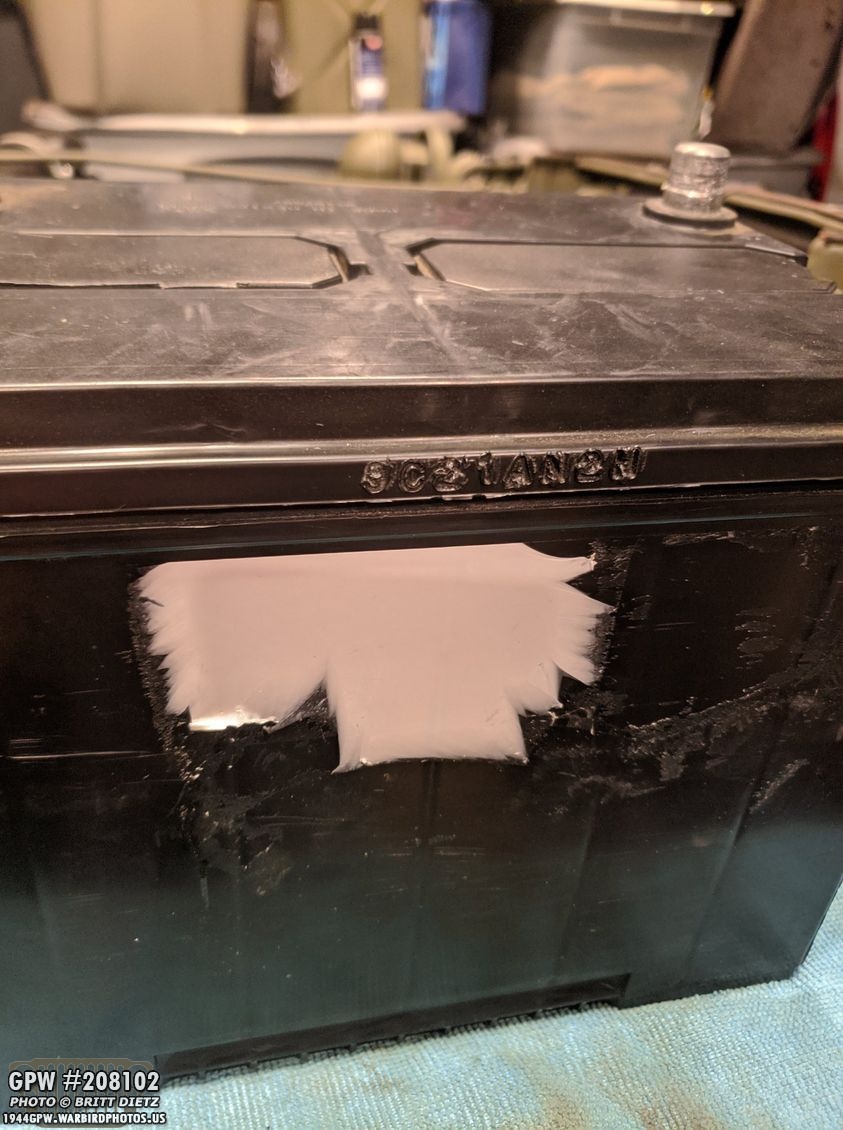
I also took the time with the voltage regulator lid off to take out my battery. It’s a Walmart Group 24 flat-top battery that I removed all the stickers and painted any markings on so it would appear closer to the accurate thing. This side of the battery, which is hidden against the fender, had an ugly spot of leftover sticky stuff from the label that didn’t want to come off.

After a lot of work and some goo-gone, I got it all off. I don’t mind the scratches as they can’t be seen in the engine body. One of these days I’ll get one of the correct Willard batteries. There is a company that makes the correct 6v style ones in 12 volts! Expensive though, so I’m not in any hurry.

Another item I pulled out of my box-o-parts was a switch that had, I thought at the time, was bad. I sent a replacement which is in the Jeep right now. Back in February of this year, my panel light switch broke, and I detailed in a post how I fixed it. So I decided to open this one up and see if it was the same issue.

After bending the three tabs back, the lid comes off. Just enough, it was the same issue. The brass contact with springs (blue and red arrows) came off the traveler (yellow arrow). The glue is not very good, and it’s easy for that to come off. How it works is when you pull the knob, that traveler moves the brass contact forward and it makes contact with the two copper plates (green arrow). That completes the circuit turning on the item. Push the knob and that traveler moves the brass contact away.

Here’s a close up look at the brass contact and the springs. After I shot this photo, I carefully took the spring that fell over and glued it back in place.

Then I put some glue on the traveler, which is foam, and pushed the brass contact (with the springs facing down) on it. The glue I’m using is extra strength, so it’s not going to come off again. Put the lid back on, bend those three tabs back, and it’s a perfectly good working switch again! I’ll keep this as an extra in case something bad happens to one of the others on the Jeep I can’t fix.

Moving on to the wartime axles, here you can see a shot of where they are currently in their restoration. Again, in short, I have post-war early CJ axles and rimes on my Jeep. I’m replacing them eventually with these two wartime (1943) GPW axles that I’m restoring. I’ve been concentrating on the front axle, the one in red oxide primer, as the rear axle needs some repair work to the housing.

This week I decided to work on repairing/replacing things on the bellcrank. Here’s the wartime bellcrank with primer on it. Last week I talked about how to drive out the two inner bearings. This week I got a repair kit to put new ones in. That’s a new bearing next to the bellcrank.

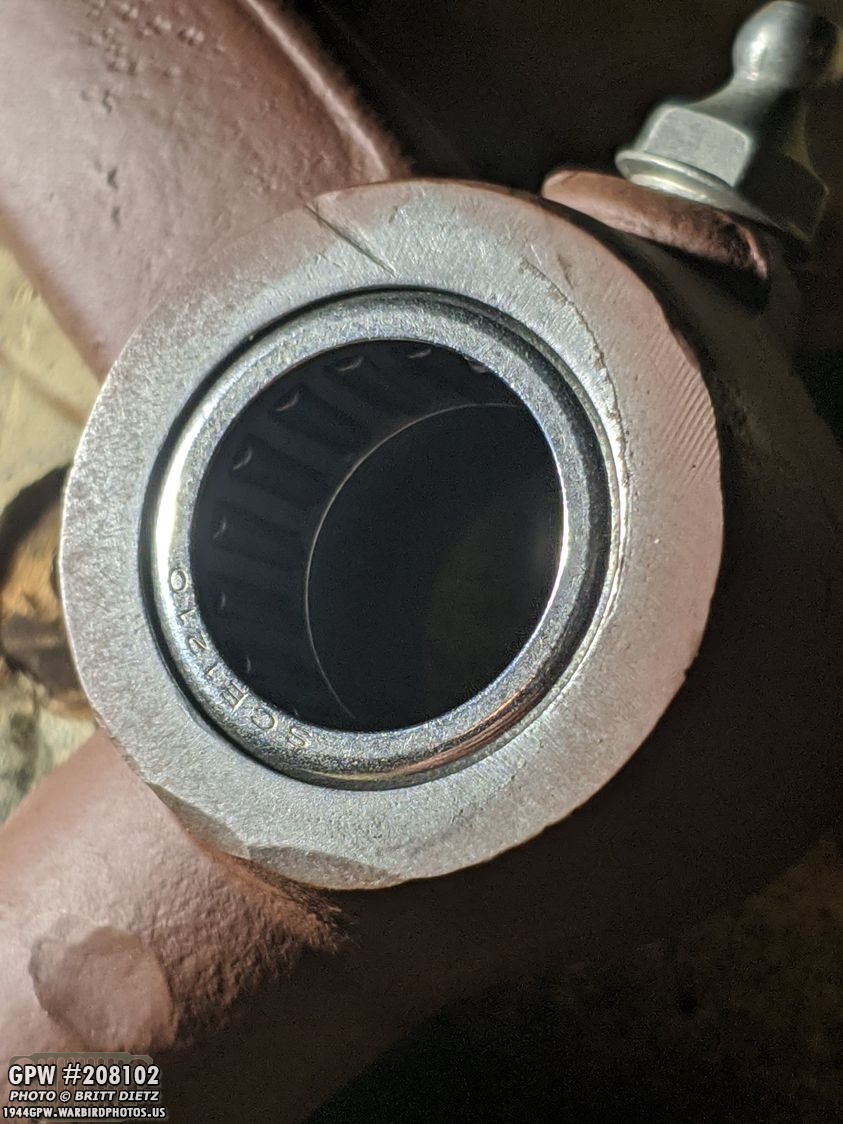
A close up look at the bearing, you can see the needle looking rollers inside. There are two of these that go into the bellcrank. One thing to make sure is that the larger side, with the maker’s marks, is on the outside always.
I was able to take my rubber hammer and drive in the bearings on both sides pretty easy. It was a nice snug fit, they went in without a lot of force. Once they are flush, I used a 17mm socket and hammered the bearing about 3/16 in further in order to put in the oil seals.

Here are both bearings (with a gap between them so the Zerk fitting can get the grease in there, you can’t see the gap, but it’s there) with the oil seals on top. Nice and flush! This is ready to be reinstalled.

I then turned my attention to the bellcrank shaft pin.
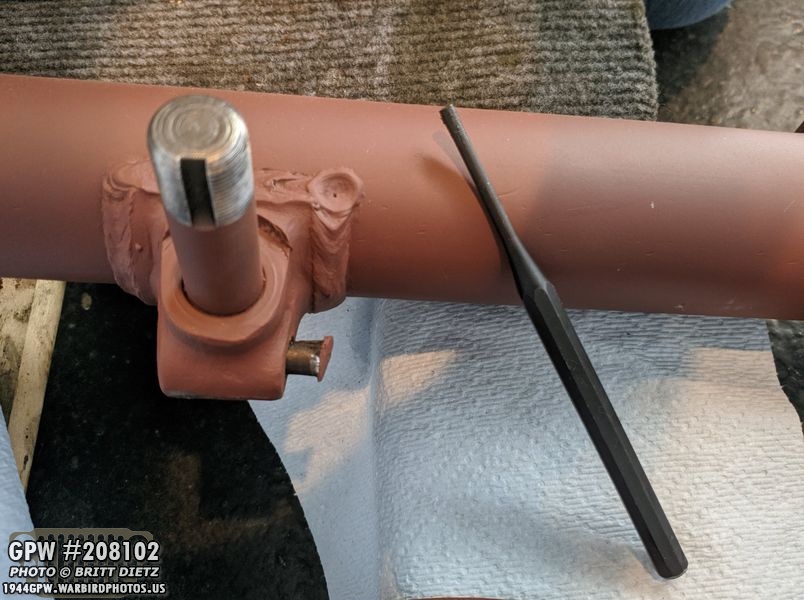
Taking a punch, I carefully drove out the tapered lock pin (you can see it almost all the way driven out here)

Here’s the tapered lock pin now out. It looks to be pretty mangled by whoever put it in the axle in the first place.

I was able to then tap out the main shaft pin. I’m lucky, there’s been plenty of people who’s restored engines and either had to drill out the tapered lock pin or drill out this shaft. Whew!

Here’s a look at the originals with the new replacement parts. There’s a lot of differences, and this will cause me issues in the next few photos. I got this set from ArmyJeepParts on eBay, since RFJP was out of them. It’s a nice kit (came with the bearings and oil seals for the bellcrank I just showed installing a few photos ago).

At first, I thought I might be able to re-use the original shaft pin, but after sandblasting and sanding, I noticed these markings and after consulting with Roger Smith on it, he said it’s best not to use this with those wear marks from the bearings.
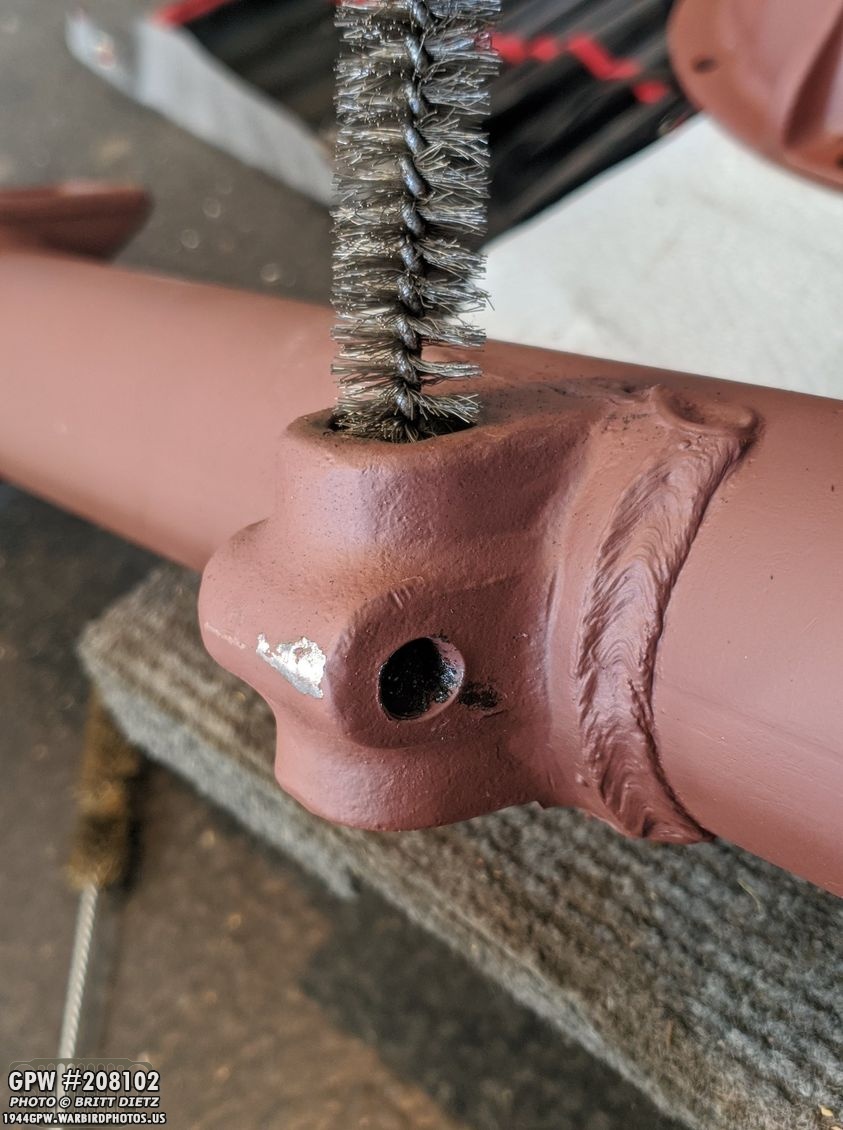
First thing I did was clean out both holes with pipe cleaners.

After inserting the new shaft pin and then inserting the tapered lock pin (shown here in both photos), that’s when I noticed the first issue. This lock pin seems to not be as thick as the original one. So, it almost drives back out the other side before it starts to ‘lock’ the shaft pin (right photo). At one point, I seemed to get it to lock, but then I realized it was going through rotated 45 degrees. Ugh.

So then I thought, I’ll just put the original lock pin in there… that didn’t work so well. It did not want to go back in, and the soft metal just mushroomed. So what to do now? Well… I’m going to make my own. Roger Smith told me how to make my own tapered lock pin, so that’ll be a project for this weekend. I’ll describe next week what all I did to make my own pin and how the results ended up!

Moving on, I hadn’t driven out the last bearing, oil seal, and rider in the front axle pinion area. After a bit of tapping with a punch, I was able to drive them out. Top left is the oil seal, top right is the bearing cup, and the bottom is the pinion drive slinger. The two risers and the shims I didn’t get a photo of as they were cleaning up in parts cleaner, so I’ll include them next week.

After cleaning up the pinion drive slinger (which has some punch marks on the other side), I found an F stamp!
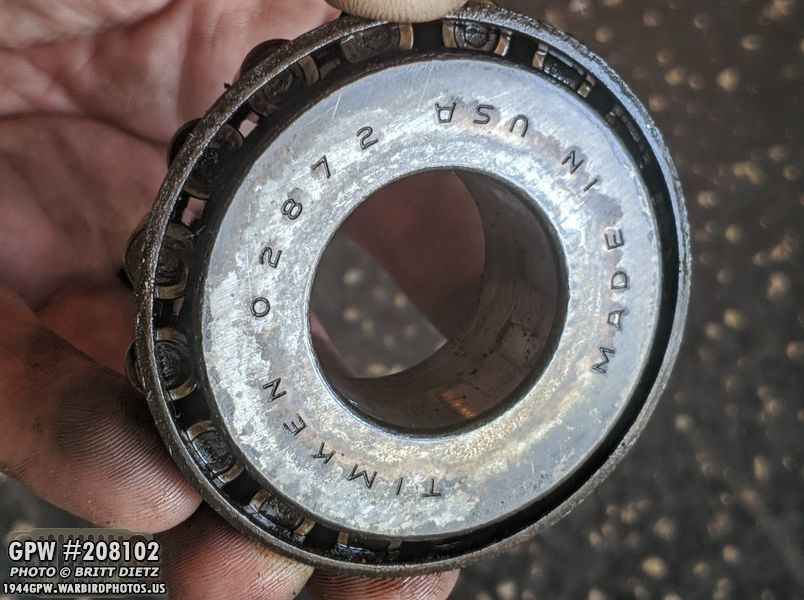
And here’s the TIMKEN markings on the bearing.
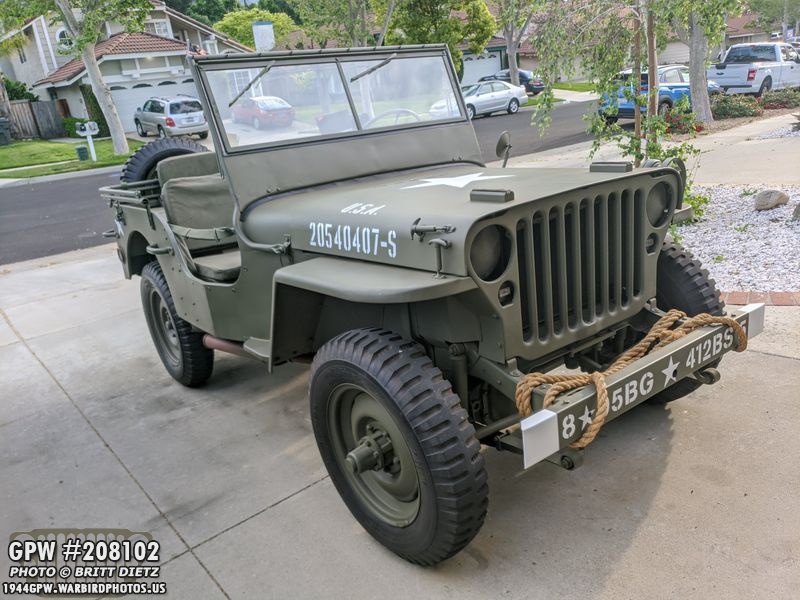
The rest of this update is going to focus on the ‘topless’ Jeep. As mentioned, since I had already unstrapped the rear of the canvas top from the back of the Jeep to work on the spare tire bracket bolt replacement, I thought to myself ‘you know, I’ve never driven my Jeep without the canvas top!’ So for the first time since I installed it last year, I took it all the way off and folded the top bows down!

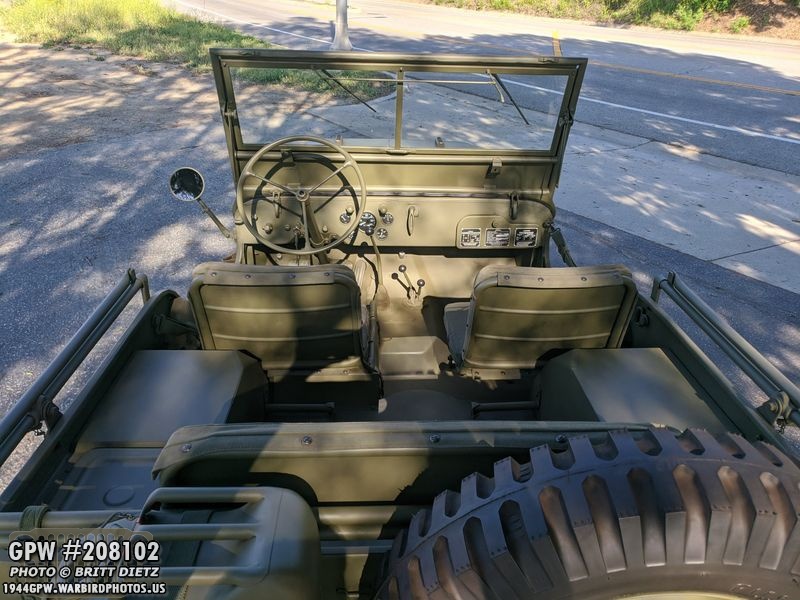
I’ve since taken the Jeep on several drives throughout the area with the top off. It’s a different experience for sure driving it this way. Funny enough, I’m tall so it’s almost easier for me to see things like street lights looking OVER the windshield!

Here’s a look at the Jeep at a park parking lot. Sure makes the Jeep look smaller without the top.

It’s been quite hot during the day, so that extra bit of air blowing at you has been nice! Note, I can’t wait to replace that rim with a combat rim hopefully in the next month or two.
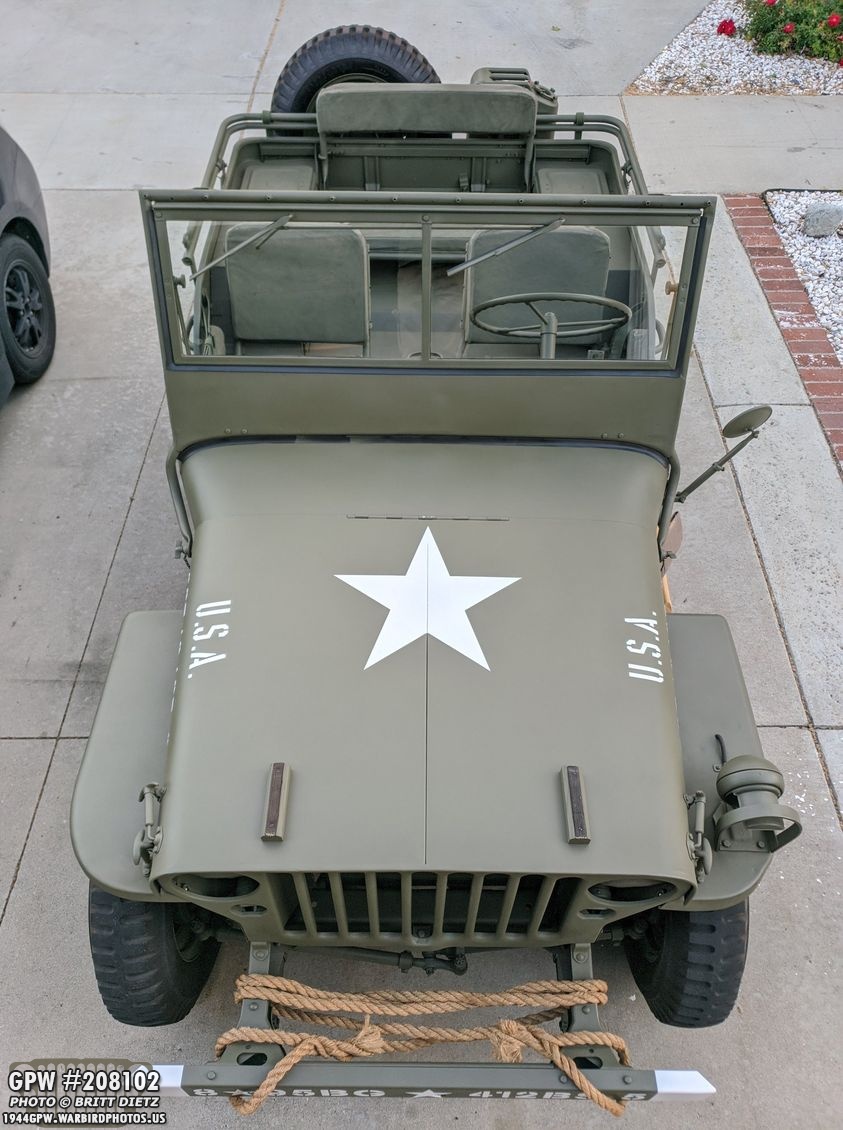
I thought it would be fun a nice way to document the topless Jeep by getting some ‘up high’ shots. This angle makes the Jeep look tiny in the back.
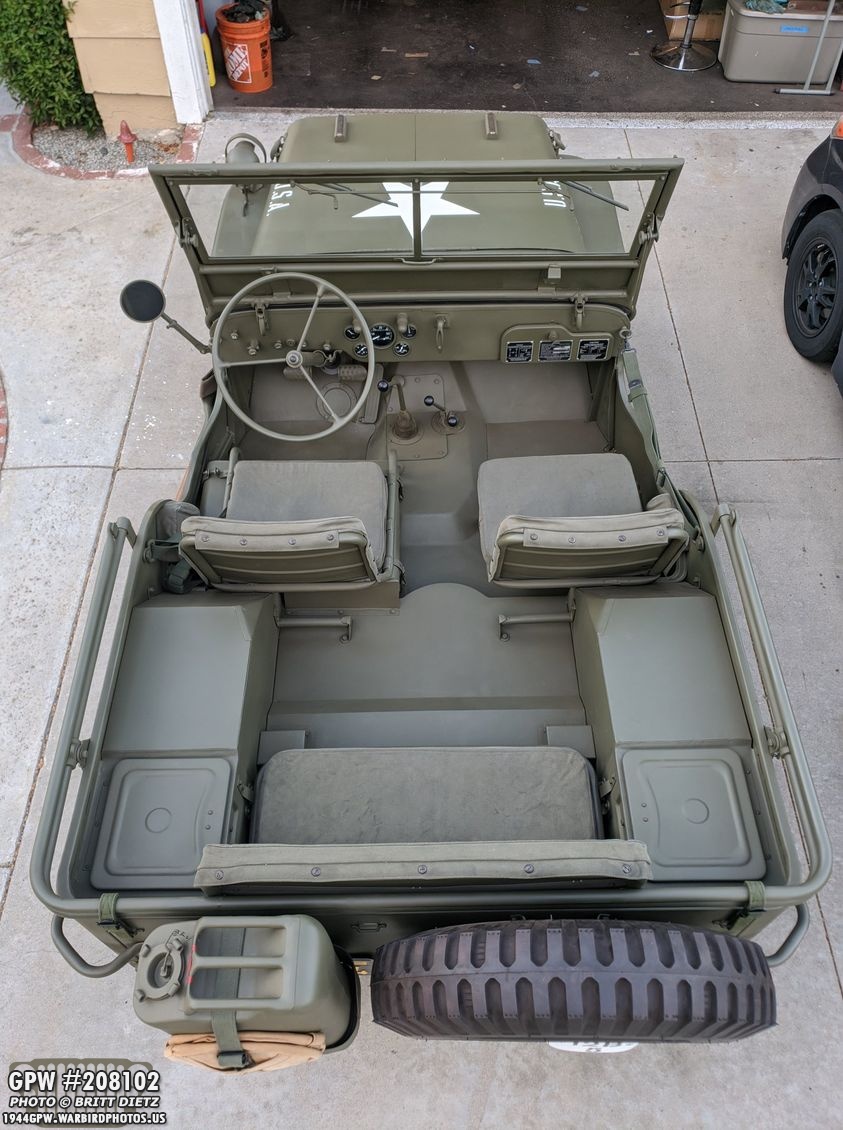
And this rather cool angle makes it look super roomy in the back and small in the front. Does show off the nice layout of the Jeep.

Here are a few shots from a local ‘scenic’ area that I’ve been taking the Jeep to for shots.
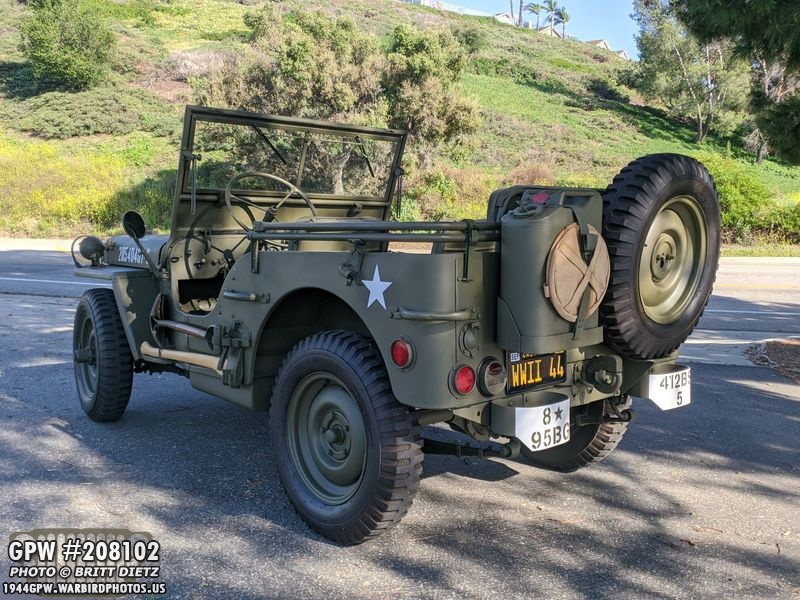
It does look nice. I think it looks more like your ‘iconic’ Jeep without the top.
It’s a heck of a lot easier to get shots like this without the top.

Here’s a look at the rear bumperettes. I’m happy at how well the ‘retro’ CA license plate looks.

And a look at the GPW pintle hook which I installed in last week’s update replacing the post-war M38 Jeep one that was on there.

Of course, the now incorrect hood numbers now that I have discovered the actual number on my original hood after wet sanding it. Remember, I’m looking for an original GPW hood which I hope to replace this repro one with… once that happens, then I’ll put the new correct numbers on there.

And for all those Jeep police who like to jump on the shovel covers, this one is for you! I love how this looks, even though it’s a fantasy item. Jeeps never had these in WW2, but I think they look awesome, they protect the paint on the side of the tub, and they stop vibrations of the shovel. Win-win to me.
Those F bolts on the fender to grill look great!

Looking inside, I’m happy with how the Jeep looks. There’s always things to do, however, and it’ll never be totally ‘done’. But it’s getting closer to ‘done-enough’.

I’m still hunting for a GPW hand crank. Anyone out there have one? They seem to be one of the hardest things to find. There’s plenty of places with repro ones, which I’m happy with, but they are ALL (yes all) out! On GPW Jeeps, they were painted black and are clipped to the back on this clip. That clip is mighty lonely without a crank!

Another shipment of items arrived yesterday (Thursday) from Ron Fitzpatrick Jeep Parts! Next week will include all these items and the projects I’ll be doing with them… so check back then!
One thing I will be working on is adding the ring and seal for my headlight dimmer switch, which has bothered me that there isn’t one for some time now.

Getting near the end of this post, I wanted to do some shout outs! First to Mario Maipid for this amazing coin! It celebrates the 75th anniversary of the last Jeep produced at the Lousiville FORD plant. My Jeep was built at that plant, and I just had to get this coin! Looks great Mario!
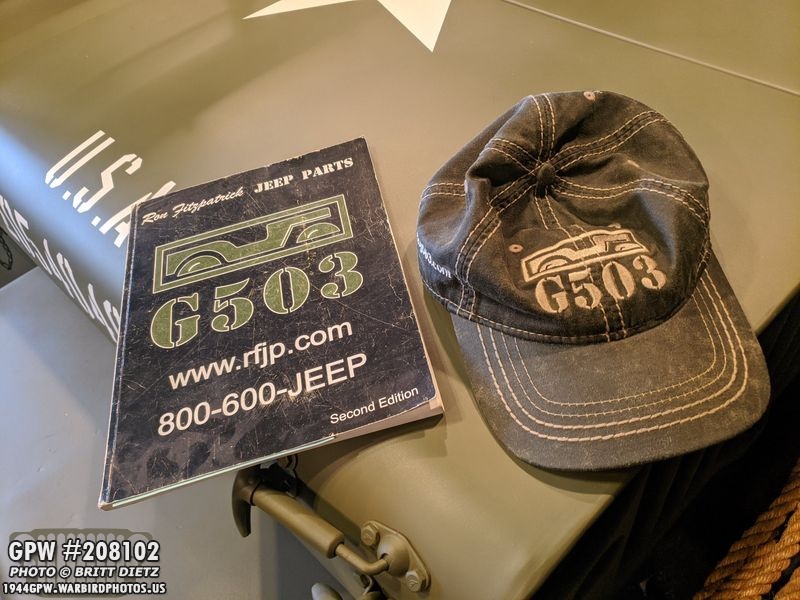
And, I know I shout them out a lot, but another shout out to Ron Fitzpatrick Jeep Parts! There’s a LOT of Jeep vendors out there, and I’ve purchased things from just about all of them at one point or another during this restoration. RFJP’s customer service, and Ron himself in particular, have been nothing but the best this entire restoration. I’ve spent a heck of a lot on his store, and the parts are always top-notch. It’s rare to get a defective part, but the times I have he’s sent me an instant replacement. Ron also runs the G503 message boards, which is one of the largest sources of Jeep info out there. One awesome benefit shopping with him is that he’ll send you the RFJP catalog, which is more like a diagram of EVERY single component on a WW2 Jeep! As you can see from my catalog, it’s been used a LOT during this restoration. So thanks RFJP for the great service!

And that’s it for this week’s update! Some more tweaks and projects on the Jeep to come next week. Sad to say, after I finish one of those projects the top will go back on the Jeep. I hope to do a quick canvas top folding tutorial and show how it is stored in the Jeep next week. Till then, stay safe out there!