 All about the Top Bows!
This week saw several more projects finished on the Jeep including the addition of footman loops on the top bows along with the top bow straps, the addition of the top bow storage straps under the passenger seat, a complete tutorial on how to fold the canvas top and also how to put a canvas top on a Jeep, more GPW axle work, and much more!
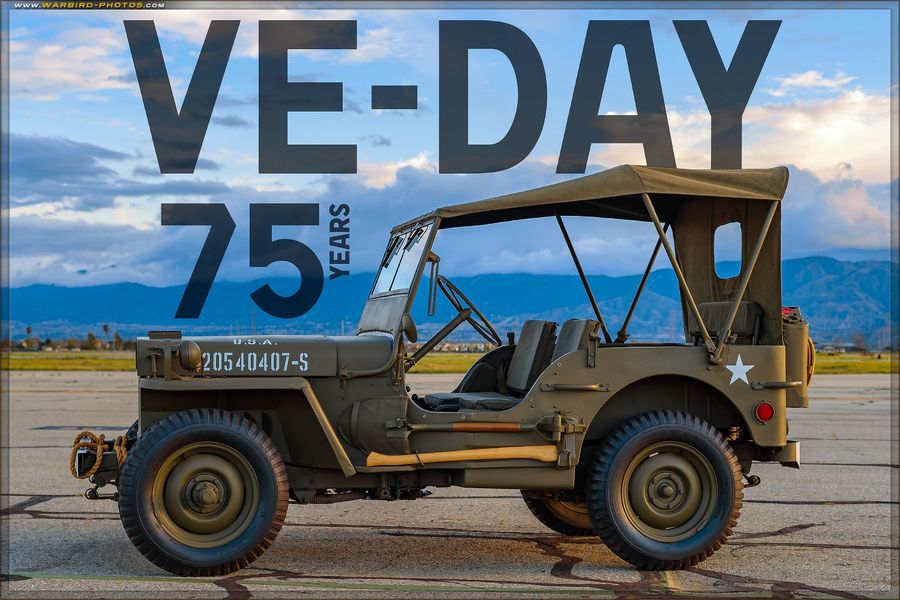
I have to begin this week’s update with a note about today, a special day in WW2 history. Today is the 75th anniversary of Victory in Europe Day, or ‘VE-Day’. VW Day was the official end of hostilities in Europe in 1945. I was fortunate enough to be in France during the 75th anniversary of D-Day last year in June, I wish I could have been there for VE-Day.

The canvas top is back on the Jeep! After a few weeks with it off as I awaited some parts to finish a project, the top is back on! It was fun having a topless Jeep for a little bit, but I do enjoy the shade from the top!

As mentioned last week, a new shipment came in from &Ron Fitzpatrick Jeep Parts! Starting from the paint can going clockwise… I got another 33070 OD Green spray paint can (you can never have enough, and I keep running out!), a canvas top storage strap set for under the passenger seat, two vibration suppression clips for the transfer case shifter handles (I have post-war slotted ones on there now, but I eventually plan on doing a transfer case and tranny rebuild, so I’ll replace the post-war slotted ones with these that go right on the shifter shaft), two dimmer switch floor rings (early and late war versions), 5 stem valve protectors, and two footman loops for the top bows.

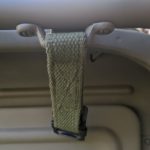
First project… Here is how I have had the top bows stowed in the down position. My top bows do not have the footman loops on them for this strap, so I had just been using the strap like this until I was able to get two footman loops.
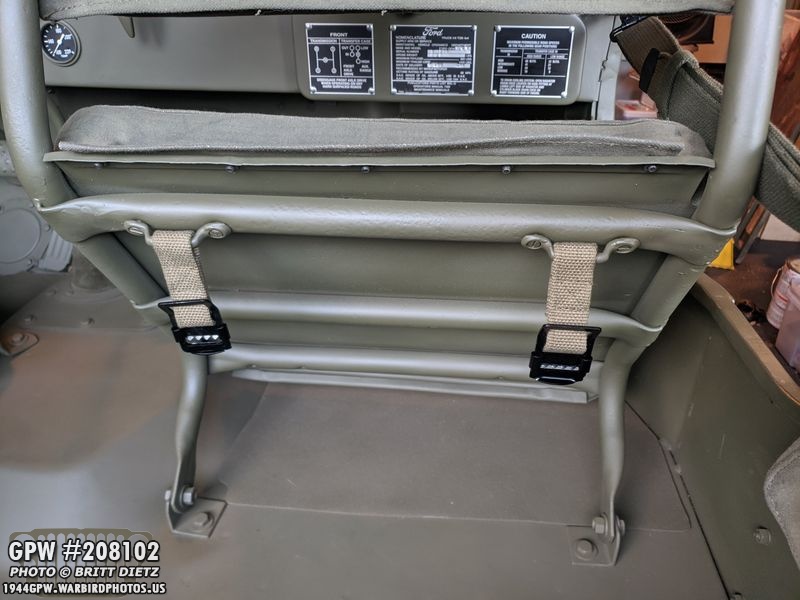
The footman loops go on the bottom (or rear) top bow, aligned with the far left and right footman loops on the back of the body tub (shown in the first photo). They align perfectly parallel with the horizon pointed towards the front of the Jeep (second photo)
I lined up the footman loops and marked the spots via sharpie. I made sure to measure several times to make sure it was lined up correctly. I found rotating the top (or forward) bow up and out of the way to help.

I then used a spring-loaded punch to get a nice pilot hole started for the drill.

And then I drilled both the holes slowly stepping up to different drill bit sizes till I reached 5/32. I then moved to the other side of the top bow and did the same steps (bottom photo).

The footman loops are actually put through the top bow straps via a loop on one side (as shown). Yes, that means in order to take the straps off you’d need to unscrew the footman loops.

For the screws, I used the same round head slotted screws that I would use for attaching the cushions to the seat frames. They are machine screws with the pointed end.

Here’s one side all installed!

And here’s a look showing how the strap looks when the footman loop is installed (the bottom left is the other end of the top bow). In a few photos, I’ll show an overall photo of where both of them are in one shot.

With both straps and footman loops installed, I went ahead and strapped down the top bows as they should be. Some people reverse the strap so that the longer end goes between the two top bows and down to the outside footman loop on the back of the body tub. They do that so it doesn’t rub against the body tub lip and cause paint to wear off (like mine would, you can see the strap rubbing against the top lip). This is, however, the proper way to strap the top bows down.

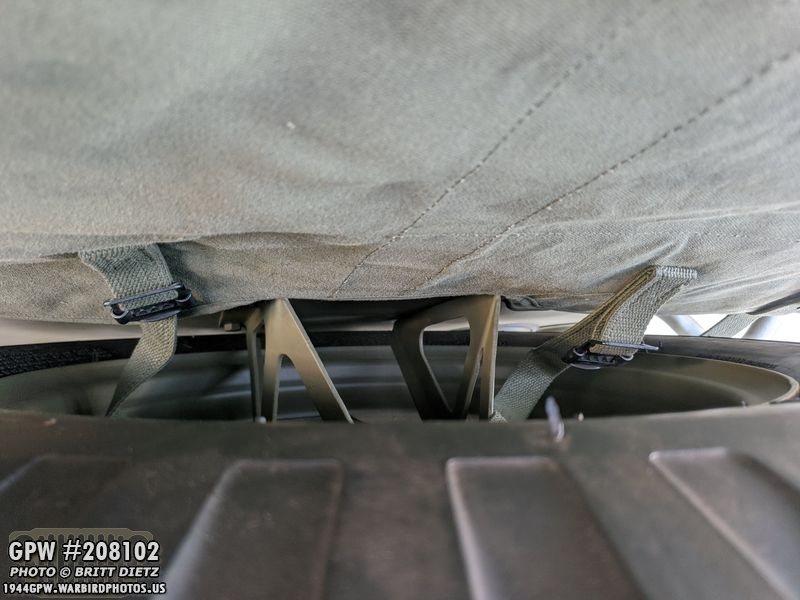
And here’s the overall shot showing both of the footman loops on the bottom (rear) top bow and the straps in the correct configuration.
Moving on to the last straps that are needed on my Jeep, the canvas top storage straps under the passenger seat. This is where the folded canvas top is stored when not in use. There has been a lot of debate if these straps are originally two long buckle straps, or two-part double straps. On G503, some people have claimed they had double straps on their original unrestored Jeeps… seeing as I couldn’t find single straps, I went with the double as they are easily available. Just like the top bow stowage straps I just did, these also require you take off the footman loops and slide them into the loop on the straps. This is the buckle side of each strap.
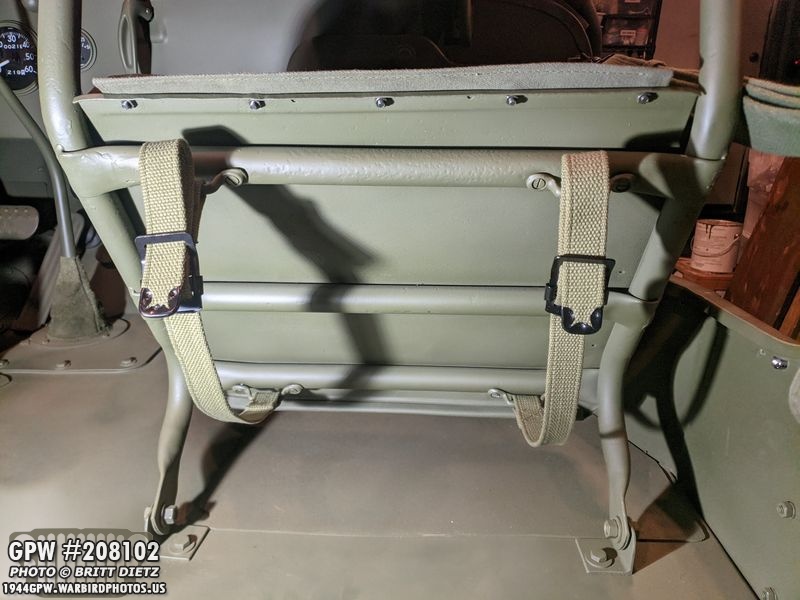
And then on the forward (bottom in this photo) footman loops I put the other half of each strap. The straps are then buckled like shown.

Here’s another look under the passenger seat when it is sitting back down. I wanted to make sure I didn’t make the straps too large so they hit the tub floor and rattle. I’ll come back to these straps in a little bit as I show how to add the canvas top.

I’ve had a few people ask me how to properly fold a canvas top and store it in the Jeep. Here’s a step by step how it’s down based on what I’ve read.1) Start with the top laying on the ‘roof’ side like this.

2) fold down the rear window side like so, and make sure the straps are all pulled straight.

3) Now, fold a quarter of the top from the right side to the left so it meets the middle. Make sure the straps stay straight as you do this.
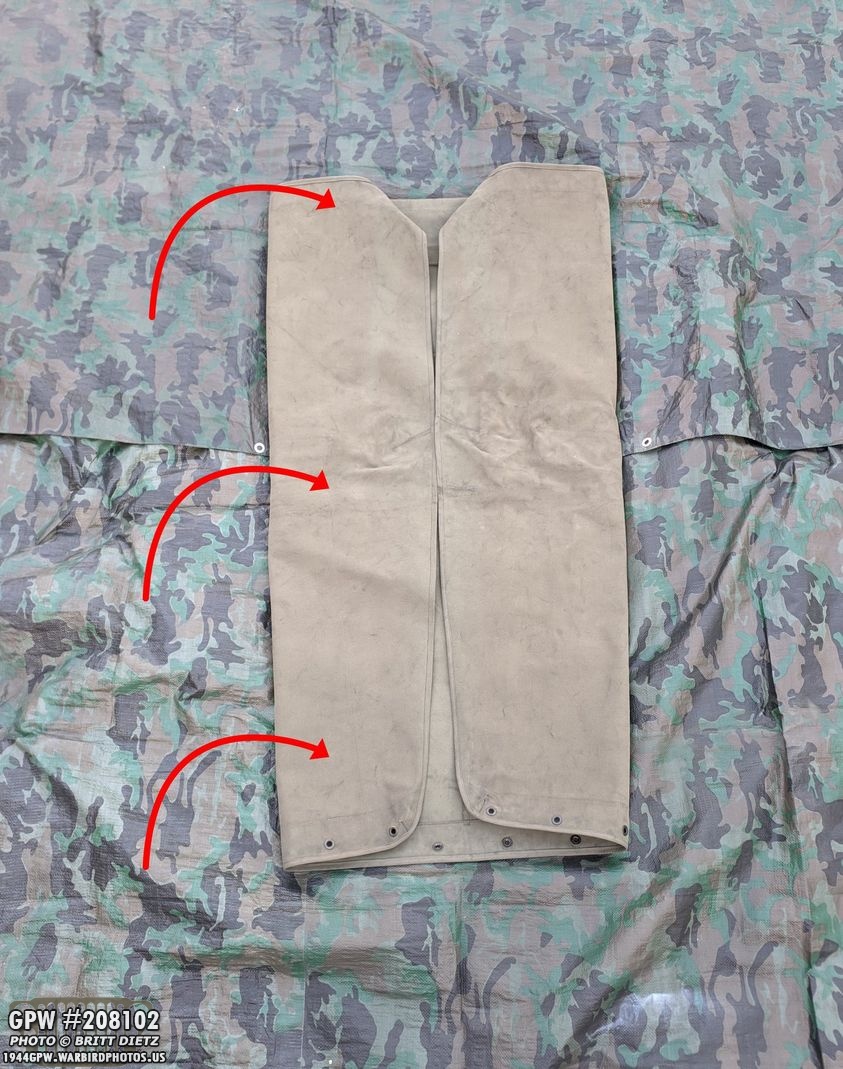
4) Do the same thing folding a quarter from the left to the right meeting at the middle. Keep those straps straight!

5) Now fold the right half over to the left half.
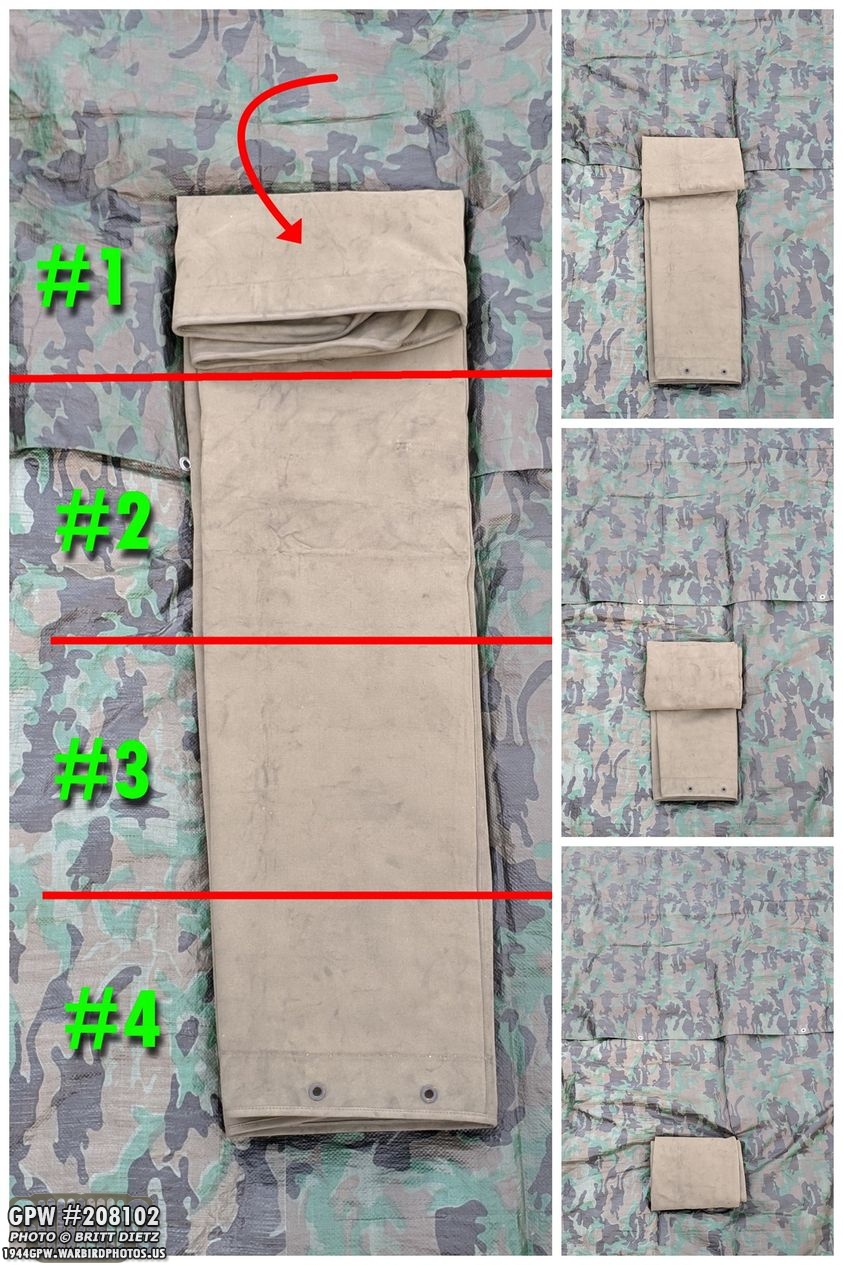
6) Final step is a 4 part step… start at the top and fold 1/4 (a quarter) down. Apply a bit of pressure to make sure each fold is as flat as you can get it. Then another quarter down (should hit the middle) with some more pressure. Then another quarter, and one final quarter. Add some more compression to make sure it’s flat and you should be left with a quarter-sized top that is now perfectly sized to fit under the passenger seat!
Here’s a GIF animation of the entire folding process.

Adding the folded canvas top under the seat is easy, for the two part straps like mine, I just made sure the longer straps were pulled straight and I put the folded top on top of them.

Then just pull up those two straps and put them through the buckles on the shorter buckle straps. Voila! A perfectly stored canvas top!

I was super happy to see that there was quite a bit of room under the top once I strapped it tight… no worrying about the seat not sitting down all the way! Plenty of room for a folded windshield canvas (I don’t have one).

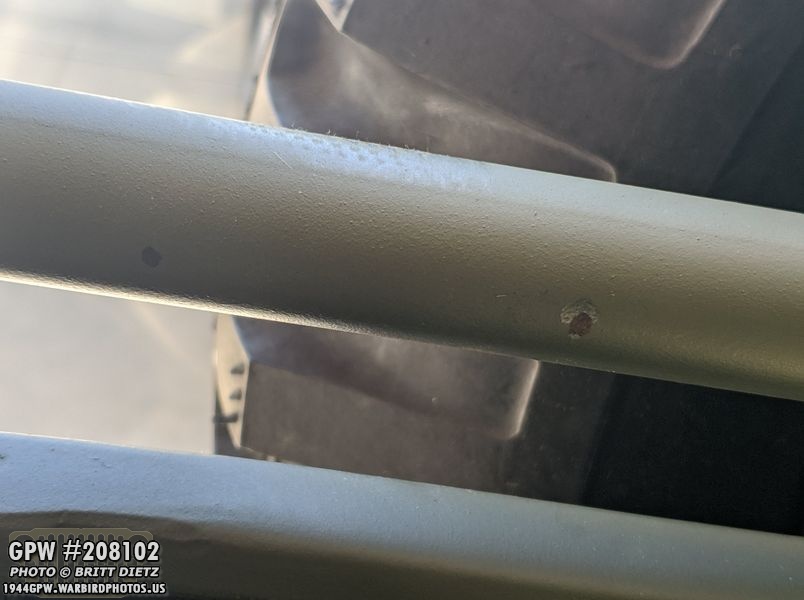
Next up was to put the canvas top back on my Jeep, and before I do that I wanted to touch up the paint on the top bows as they always get rather scratched up when putting them from the up position to the storage position. Even though I had help when I put them down and back up, it still scratched the paint on as they went through the top bow brackets. So I put some tarps down on the Jeep as it was a bit of a windy day.

I tried to make the straps on the top bows as small as possible to avoid getting any paint on them (I also covered them with a shop towel).

After sanding spots where the top bow brackets had dug into the top bows, I then hit those areas with the RFJP Red Barrier III Red Oxide primer.

At first I was going to use my air gun rather than the spray paint to touch up the paint. Why? Because with the air gun you get this nice texture to the Jeep that the spray paint doesn’t seem to really mimic (you can see that texture here). Since I had sanded the areas smooth on my top bows where there were paint issues, they needed that texture. Unfortunately, I found it’s been a LONG time since I’ve used my RAPCO 33070 paint in a can, and the little bit of paint I had left from last year was all clumpy, even after a lot of stirring. I had &Ron Fitzpatrick Jeep Parts 33070 in a can, but since I’d be painting a lot I didn’t know if it would match my RAPCO paint.

So, after a little bit I had an idea… it was HOT out, and the wind was blowing pretty good. What if I ‘mimicked’ the air gun with the Ron Fitzpatrick Jeep Parts 33070 spray paint by holding it further away and letting the wind take it? Meaning, it partially will dry by the time it hits the top bows. Turns out, that worked PERFECT. As you can see here, that texture matched perfectly! YAY for last-second ideas!

All painted and nicely textured! Waiting for them to dry. I also touched up the top bow brackets and some other little areas around the jeep that had a scratch or two.
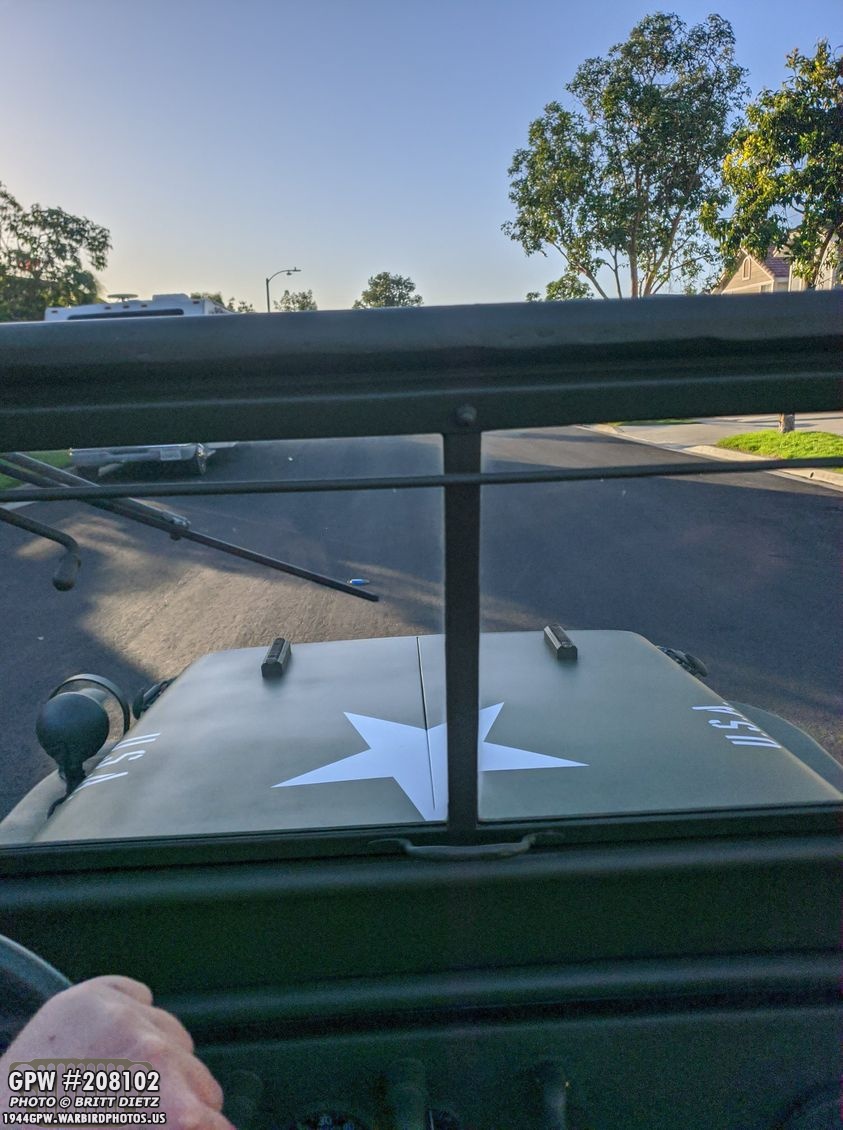
After they dried (didn’t take long in the heat, had I used the air gun it would have taken all day to dry, so another win for the spray paint), I took the Jeep on one last spin around the neighborhood with the top off! The top was stored under the passenger seat for this drive.

And one last look at the Jeep (the top bows are up ready for the canvas top to be added) before I put the top on! I will say, it does look weird with the top bows up without the top.

So while it’s really easy to figure out how to put the canvas top on, I figured I’d do a complete tutorial on all the steps it takes. 1) Start by making sure the rear (bottom) top bow end is placed in the rear top bow brackets (yellow arrow) and you have the forward (top) top bow extended away (blue arrow). Tighten the large wing nut (red arrow) to hold in place.

2) Now take the top and put it on the rear top bow as shown. It does help to have an extra person to fit it on.

3) Put the middle of the top ‘roof’ over the forward bow making sure the bow sits with the canvas flaps like shown.

4) And now fit the front of the canvas top with the grommets over all the capstan studs screwed into the top of the windshield as shown.
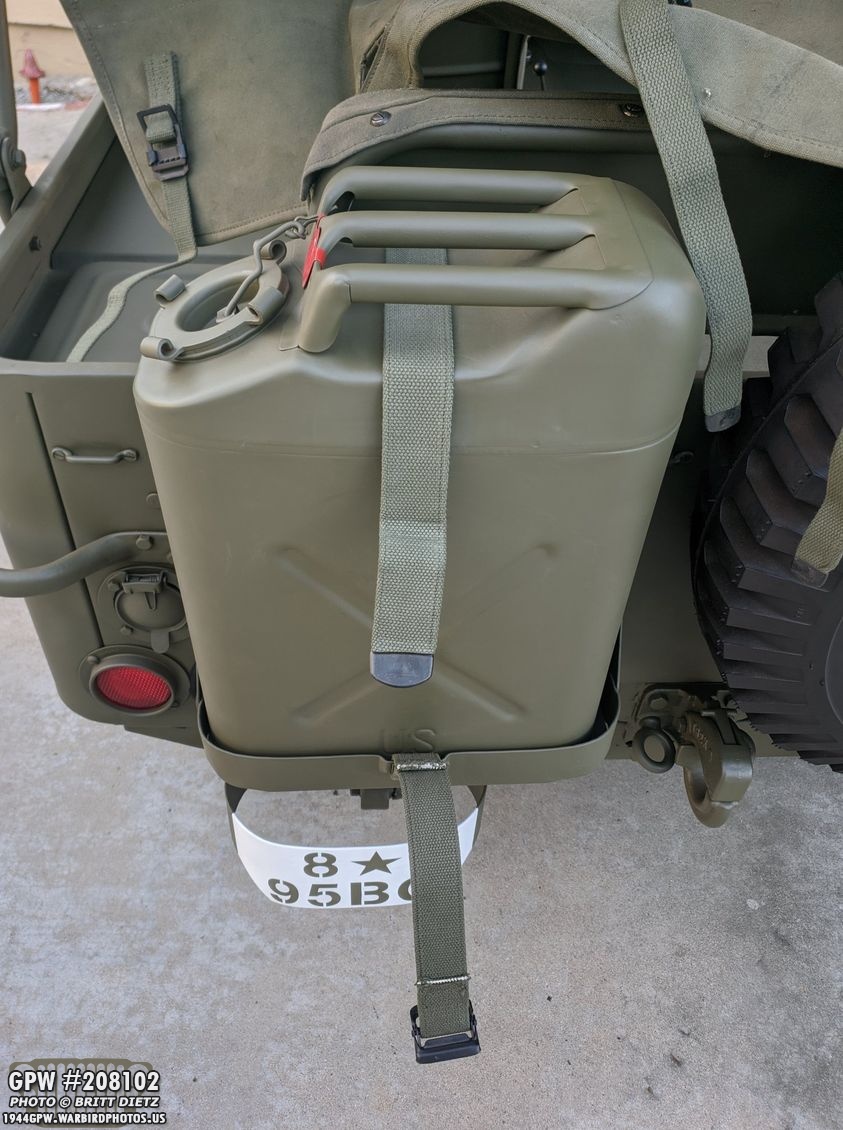
5) Going back to the backside, you will have to take the Jerry can off (if your Jeep is fitted with a Jerry can holder) as the strap for the Jerry can is part of strapping down the top.
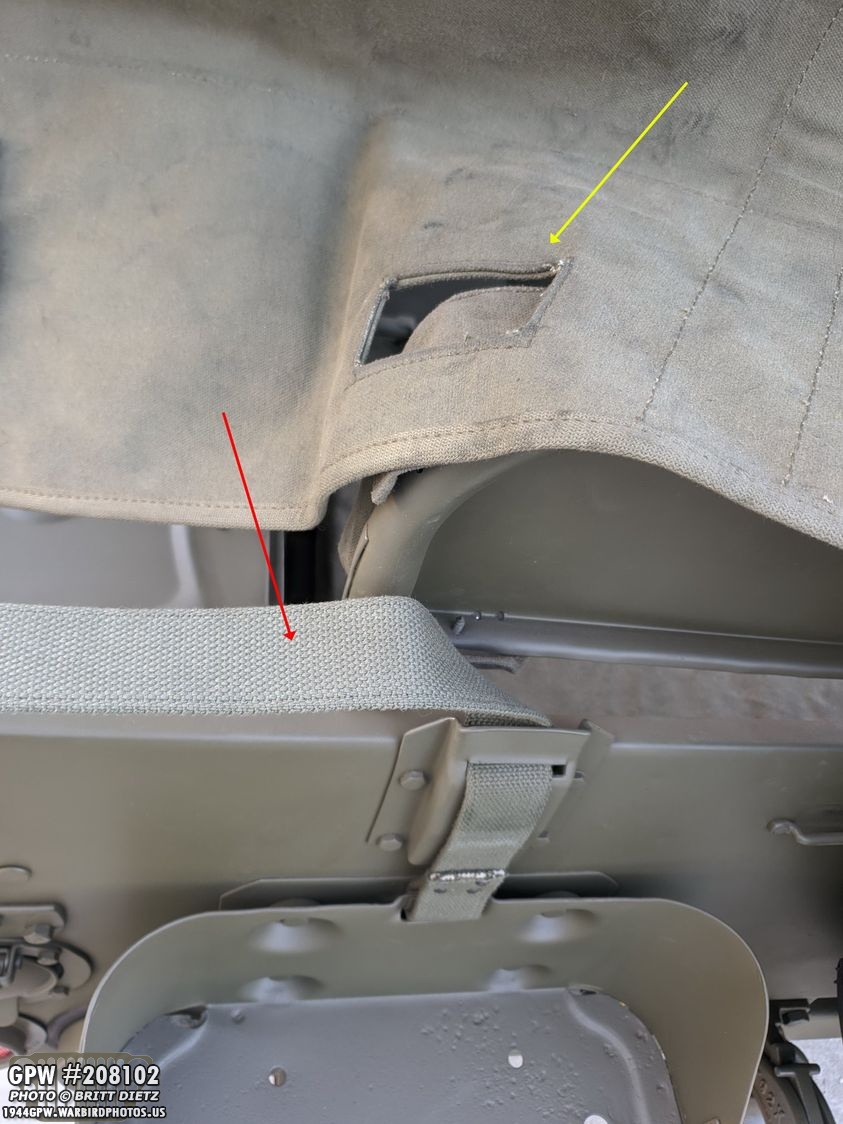
6) With the jerry can removed, you will need to put the top strap (red arrow) through the rectangular hole (yellow arrow) on the bottom of the canvas top.

Here you can see I’ve put the strap through the rectangular hole, which the top naturally now falls into place.

7) For all the straps on the bottom of the canvas top, here’s how I’ve found is the best way to attached and tighten them to the footman loops on the rear of the Jeep. From the first left photo… Take the strap and put it through the footman loop. Then bring it back up and put it through the ‘teeth’ of the buckle. Then pull it down which will tighten the strap (with the teeth holding it from coming back out). Bring it back up and pull it through the top of the buckle, and finally, I then bring it back and put it through a second time on the top of the buckle to prevent the strap from flapping.
The two straps behind the spare wheel are a bit tough to get to, but they are done the same way.

You might need to snake your hands behind the spare tire to get in there, but you should be able to reach both straps and put them through the footman loops the same way.

All of the straps (minus the jerry can strap) are locked tight! I try not to tighten them crazy tight (enough to be firm, but not enough to put too much stress on the top).

8) Going back to the Jerry can, put it back in the holder and then buckle it up. You’re finished with the backside! Now to go back inside the Jeep.

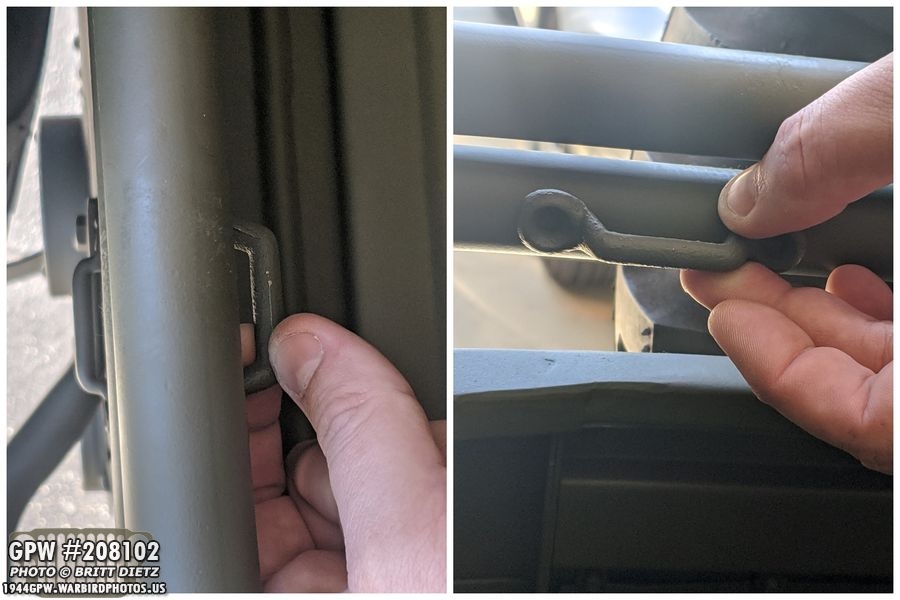
9) Now, take the flaps inside the Jeeps and bring them together putting the tabs through the slot on the other flap (they need to be horizontal to do that). Then rotate each of the tabs (as shown) vertically to lock the flaps holding on tight to the top bow.
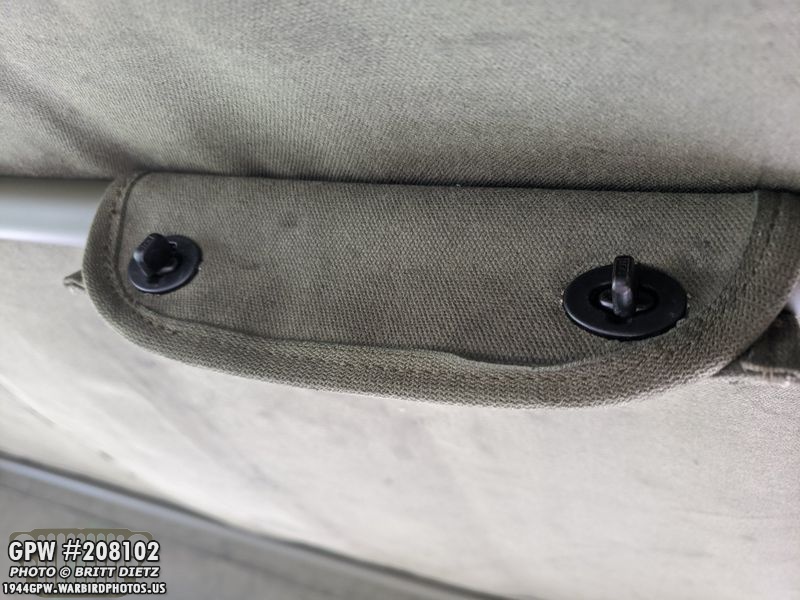
Here’s a close up look at one of the flaps with the tabs turned vertically locking them together.

And that’s it, the top is installed and on there nice and tight! Now, being someone who is 6’4″, when I’m driving around 35-40mph the top does slap the top of my head when it’s a little windy. I’ve been told that’s standard for anyone over 5’8″ pretty much. Even though the top is tight, it’s just the way it is.

And here’s how those two footman loops with the top bow stowage straps look with the top on. They just dangle there. And that’s your tutorials on everything Top Bows and Canvas Top!
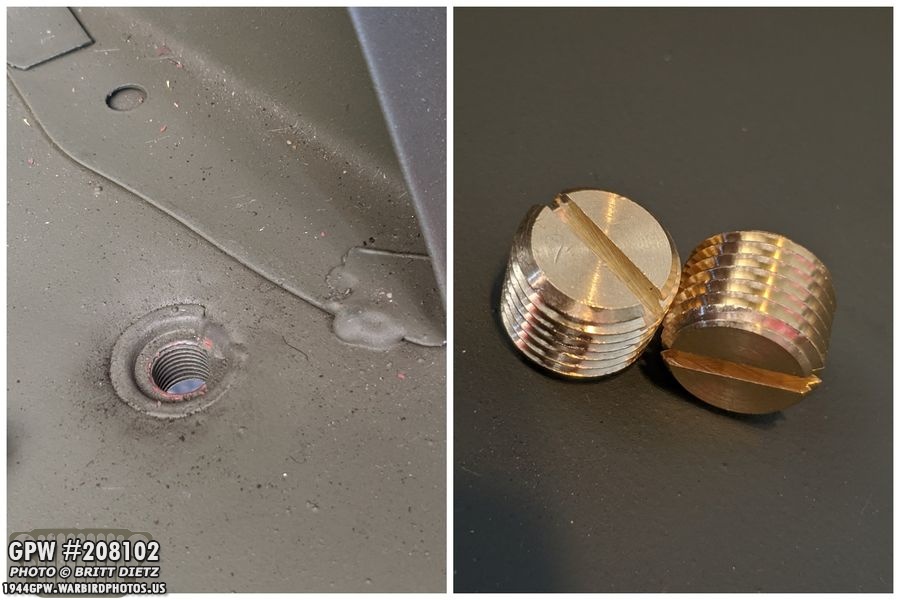
Moving on, another project I’ve been meaning to tackle is putting drain plugs the body tub drain holes. I researched online and found they are supposed to be 1/4NPT brass slotted drain plugs. So I ordered a pair via eBay. Left photo shows the drain hold and the right shows the two plugs… but I soon realized there was a problem… the plugs were way too big and the thread completely wrong. After doing some investigating, turns out the MD Juan tub has 7/16 NF 20 thread size. Whaaaa?

So, after a LOT of work, I shaved down the two brass plus I’d gotten (they were useless anyway) and used my tap and dye set to make them 7/16-20. Not pretty by any means, but it works.

Perfect fit in the drain holes. They don’t look the most pretty, I lack the tools to really make them look good trimmed down. But they work for now and once painted most won’t even notice them (especially with the OD Green floor mats over them). When I switch to my original tub when it is finished someday in the future, I have to put new capture nuts for the drain holes (the originals have rusted away) so I’ll make sure to get the proper 1/4npt size.
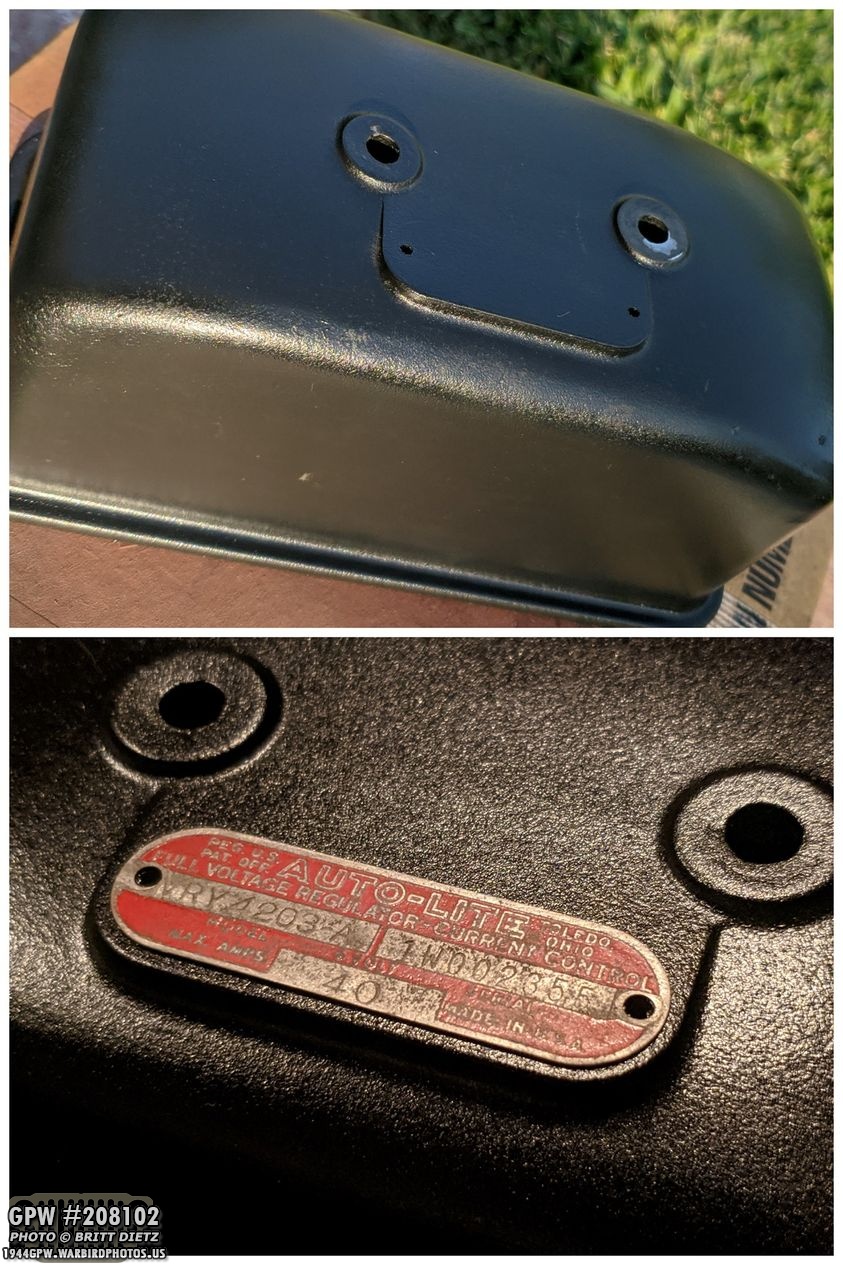
Last week, I redid the paint job on my voltage regulator. I wasn’t happy with the wrinkle finish, so I redid it with better results (top is before, bottom after). I went to finally go and put my original tag back on it when I realized I’d lost the two tiny drive screws somewhere in the garage. I tore apart the garage looking for them to no avail. DOH!
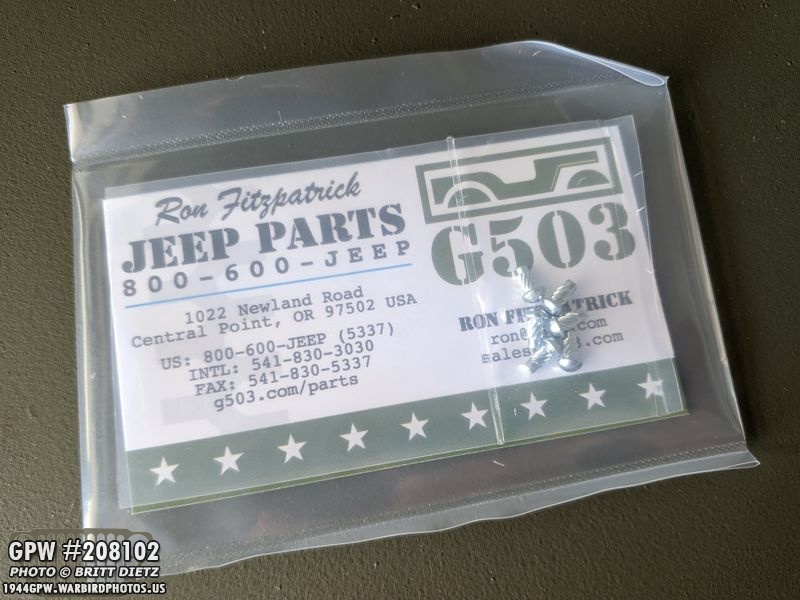
Enter &Ron Fitzpatrick Jeep Parts who graciously sent me a bunch of drive screws (shown here)! I only needed two, but I now have four spares for the future! Thanks Ron!

The drive screws are easy to install… just partially get them pushed in, then use a hammer to punch them down. PERFECT fit!
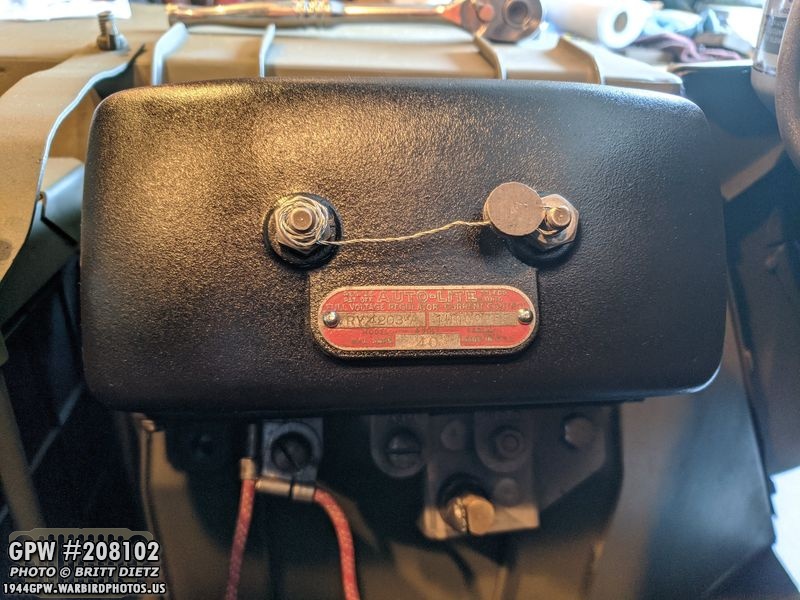
Now the voltage regulator’s restoration is pretty much complete! Eventually, I’ll take the regulator up to Roger Smith’s and have him crush the wax tamper seal the proper way. And for those wondering why it’s hooked up so weird, it’s a 6V regulator, and my Jeep is 12v. So, it’s mostly for show. I have it being used with just the power tab so it looks like something is hooked up to it. I might, one day, replace the guts with the modern 12v conversion and properly hook it up.

Another item I got from &Ron Fitzpatrick Jeep Parts is a set of rings for the headlight dimmer switch. Neither my original tub nor the MD Juan repro tub came with one. I didn’t know which one was for my Jeep, thankfully Ron sells both styles together a pair just in case. I also have rubber seals for both versions.

In the last photo, it might be tough to see the difference between the two, but when I put both rings on top of each other, you can clearly see there’s a big difference between the center hole size and the two smaller hole positions.

After figuring out which one of the rings lines up with my Jeep, I put the rubber seal then the ring on. The top screw (larger hole) on the ring is for the screw that actually screws into the dimmer switch. The bottom two screw holes (smaller ones) hold the ring and seal to the body tub. After install, I touched up the paint. Now I’m sure you’re asking… why is there a screw missing? Well, it turns out my dimmer switch blocks that third hole. This dimmer switch came with my Jeep, and I had thought it was original. At first I was just ‘whatever, at least the seal and ring are on there now’… but then it started to get to me.

Taking a look at the dimmer switch on the other side of the tub in the engine bay, you can see the hole is blocked partially (yellow arrow) by the switch. And there’s no way I can move the switch to make it fit. So that got me to thinking… maybe this isn’t an original WW2 style dimmer switch. Maybe that’s why there wasn’t a ring on my original tub with this switch.
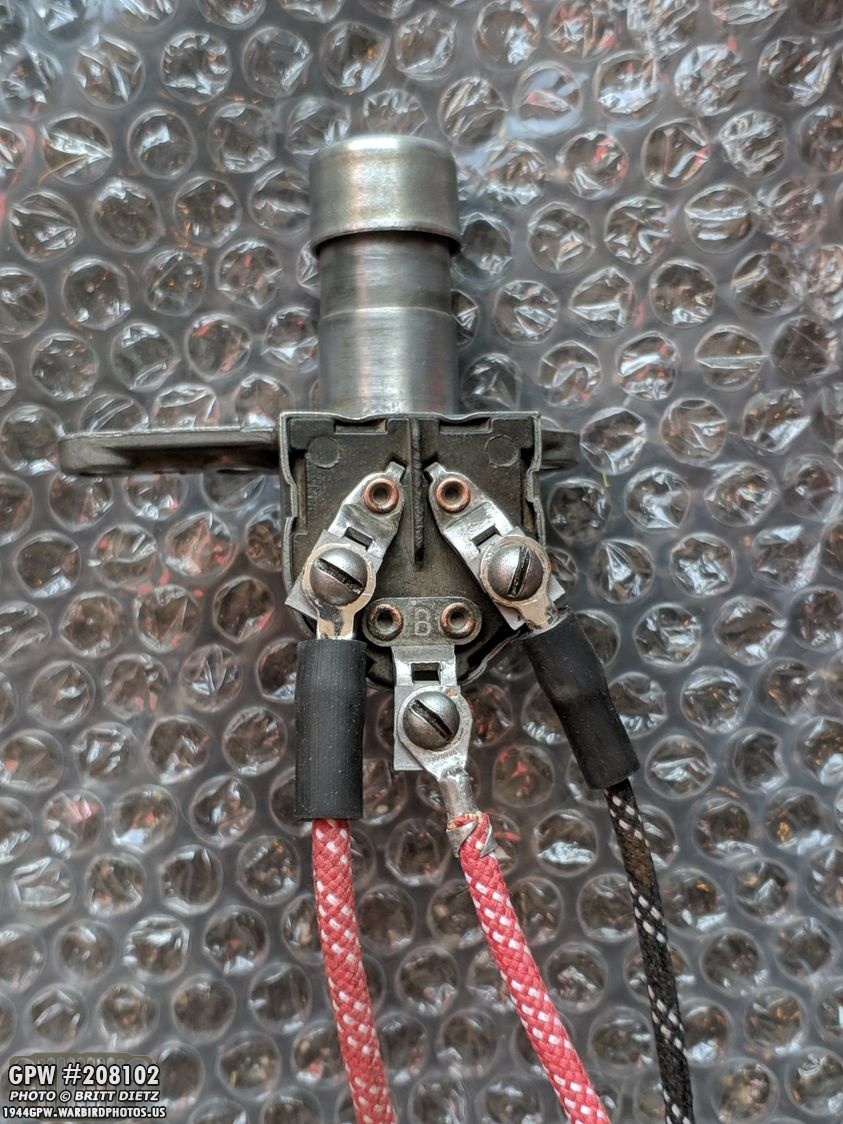
So I went back and found this old photo from last year when I was testing the switch during the main restoration. I went online and spent a lot of time researching dimmer switches. I found (and it was tough to find) that this is actually a post-war DJ-3A switch used on CJ Jeeps. Ironically, there are MANY eBay sellers that label reproductions of this very exact same dimmer as the WW2 style. Obviously, it doesn’t fit. So I looked around for the correct style dimmer switches, and the correct GPW style. The original GPW switches had a large rectangular plate that attaches to the body tub (and doesn’t get in the way of the screw holes) and the wire contacts are actually push in bullet types. Since the wire harness I got don’t have the push-in bullet type ends, I looked to see if anyone has a dimmer switch that has both the GPW rectangular plate and this style of screw contacts. &Ron Fitzpatrick Jeep Parts for the win again, they seem to have the only dimmer switch that is like the WW2 style out there, so I have that ordered and I’ll document the install next week when it arrives!

In prep for my eventually getting Combat Rims for my Jeep, I figured I’d save on shipping and got five valve stem protectors. As you can imagine, these protect the air valves on the tires. They came in the wrong shade of OD Green, so I scuffed them up and hit them with the 33070.

They look a bit silly, but I went ahead and put them on my current tires just for safekeeping. They screw in using the same thread on the stem as the cap.

Here’s a close-up. They don’t quite touch the rim on these post-war rims, but they should be nice and snug on the combat rims when I get them!
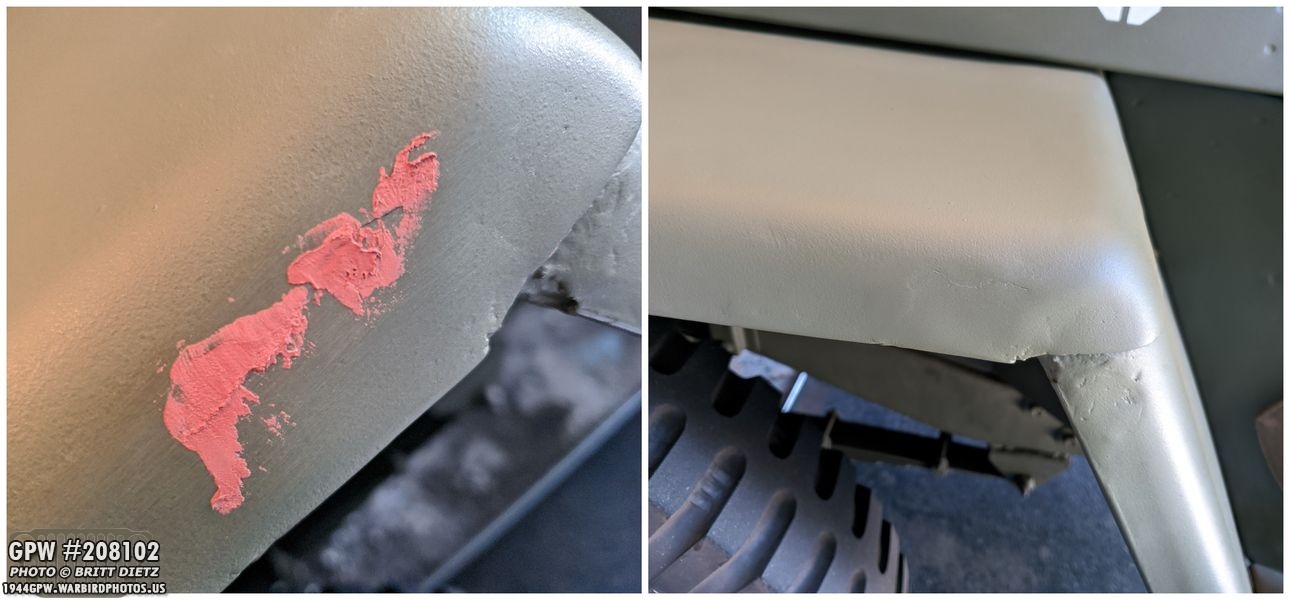
Another quick project… my original GPW fender on the driver’s side has a hole that was filled where it had rusted out. I smoothed it out and filled it with body filler at the time, but the other day I accidentally hit it with something and caused some of the body filler to chip. So I put some more body filler to hide the chip, sanded it, and repainted it. You can still see some of the line (sanded it a little too much) but it’s better than it was. One day I’ll repair that hole with some welding.

Last week I started work on replacing the bellcrank pin on my wartime GPW axles that I’m slowly restoring to replace the CJ axles that came with the Jeep. As mentioned, I got the original pin out (top left) without issues, but it had some scarring, so it needed replacing (middle photo). The new kit I got was a bit different (bottom left) and I found the lock pin wasn’t large enough to replace the original lock pin. So when I’d tap the lock pin in, it would come out the other side way too much (right photo).

I couldn’t reuse the original lock pin as it had pretty much been mangled. So I decided, at the suggestion of Roger Smith, to make my own lock pin.

I measured the original lock pin width to be 49/128 (.3860). I went to Home Depot and located their steel bars. found 3/8 was too small, and the next size 7/16 (.4360) was too large, but not by much. So I got a 36inch long bar. I started by a table sander and flap wheel on my angle grinder and slowly grounded away around the bar until it was about 49/128. I then started to make a tapered flat section.

Measuring the length of the pin, it needed to be slightly longer than the shaft on both sides so I could peen the ends to lock it in place. The blue lines are the shaft length while the red lines are how long the pin would be.
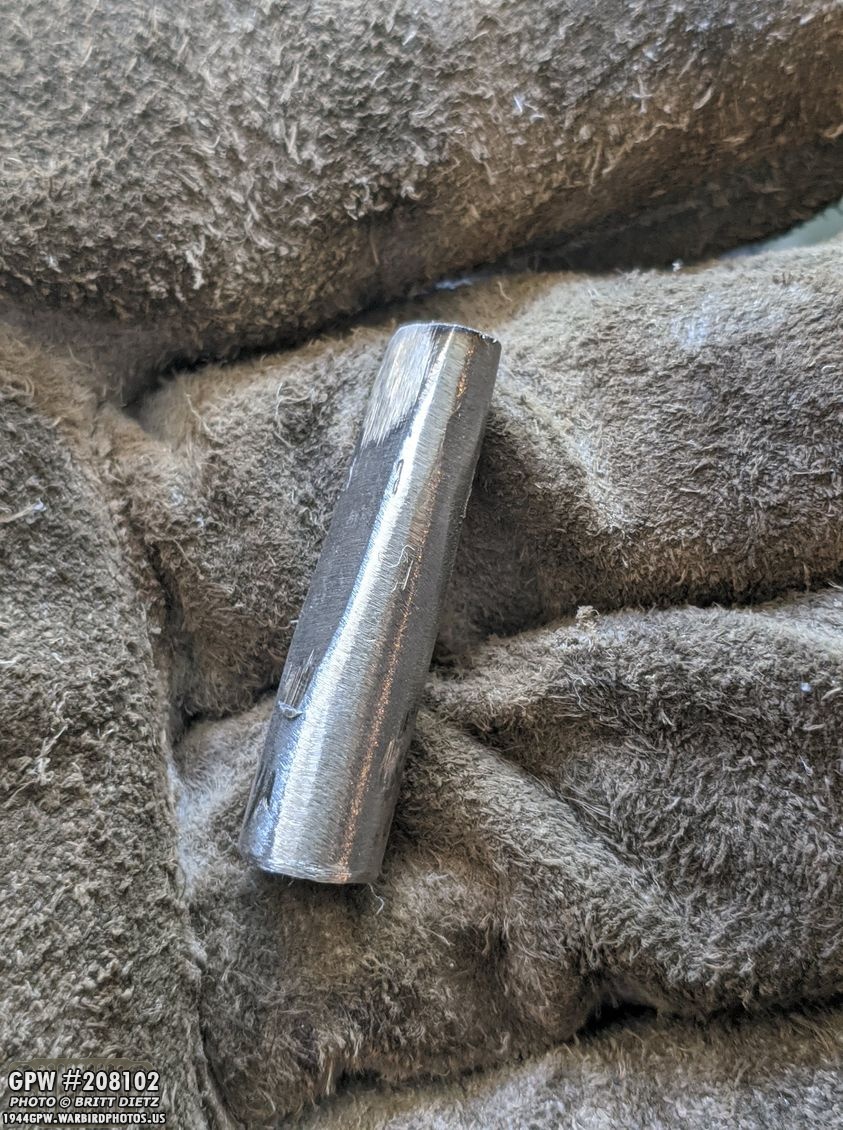
A new correctly sized lock pin made myself! I’m sure if I had a lathe this would have been a lot easier. Took two attempts to get it just right.

It’s a perfect fit in the shaft, and while you can’t see it, both sides have some of it sticking out (the left side sticks out a lot more as that’s the smaller tapered side, and I wanted to make sure I peen it really well on that side so the pin can’t back out)

Here’s a look at both sides with the pin locking in the bell crank pin.
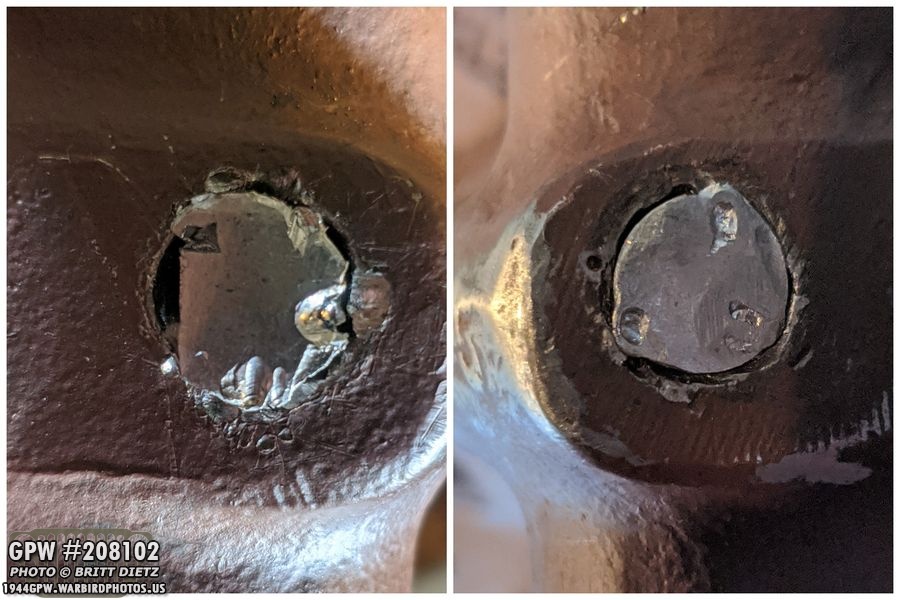
My peening skills are not good by any means, and the first few attempts did not work so well. But I ended up improvising and while it’s messy, it’s locked in there tightly and not going anywhere.
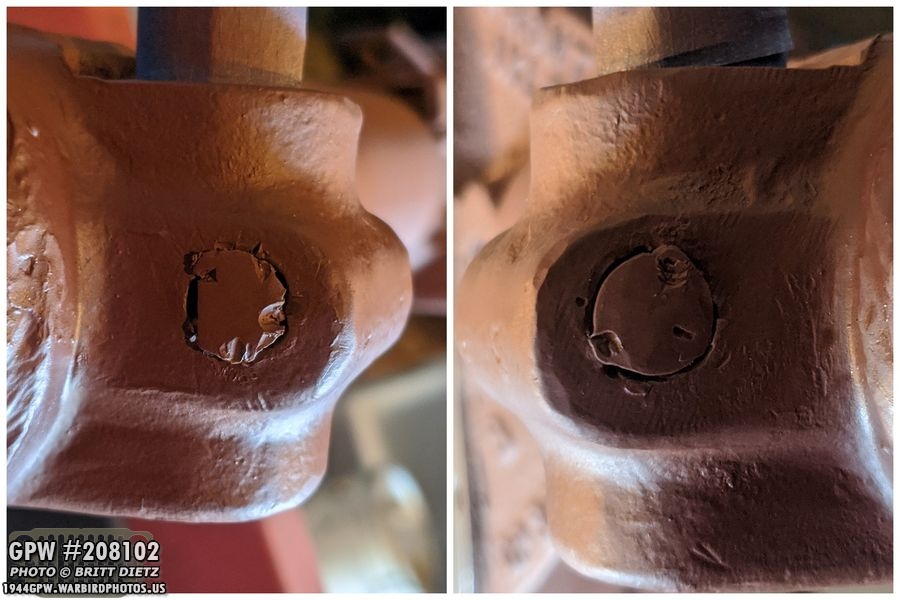
It’s not too bad once it’s painted, and I might take some body filler to clean it up a little bit.

But regardless, the pin worked great and now I have the bell crank pin done! Test fitting the bell crank, it’s a nice snug fit.

This past Wednesday I took the Jeep out for another spin now that the top is back on. Sure looks nice!
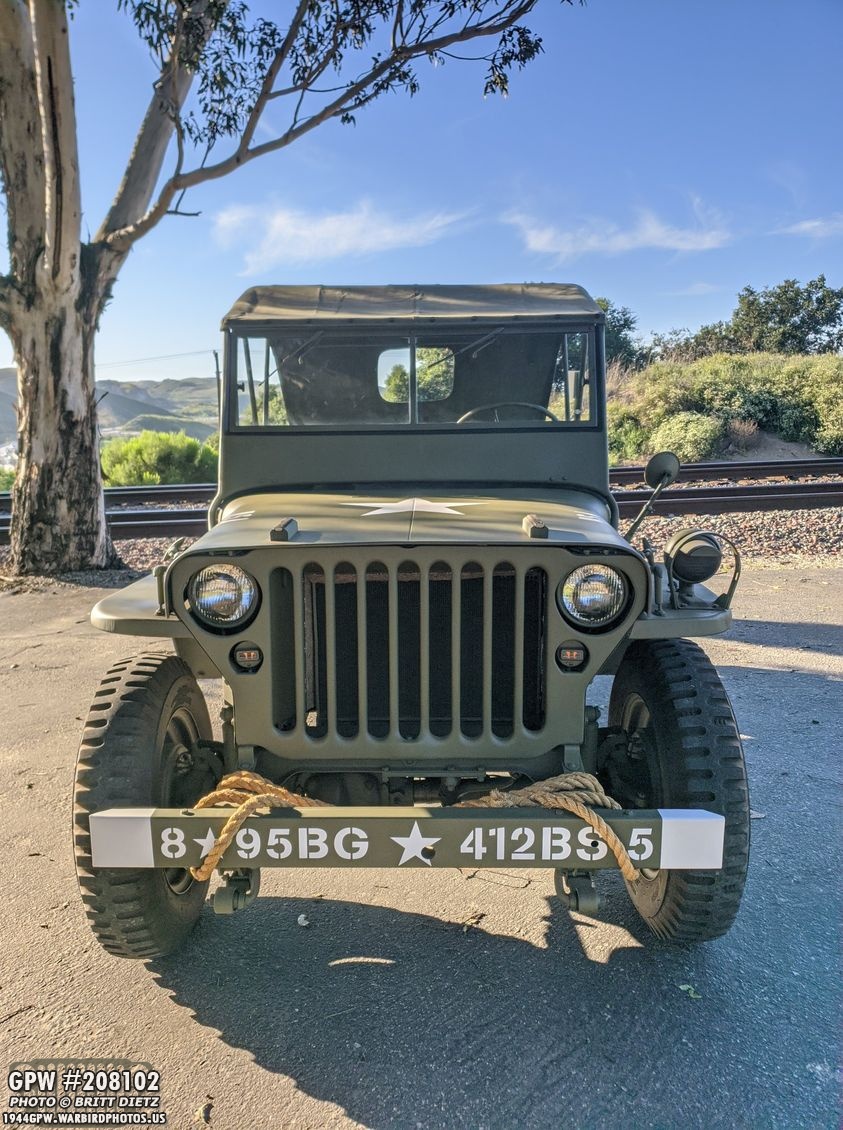
Front view, I have the small blackout marker lights on under the headlights. One of these days I should do some photos at night with just the blackout lights on.

And a look at the rear of the Jeep with the top on. You might notice that my canvas water bucket is not on the Jerry can strap at the moment… why is that? …
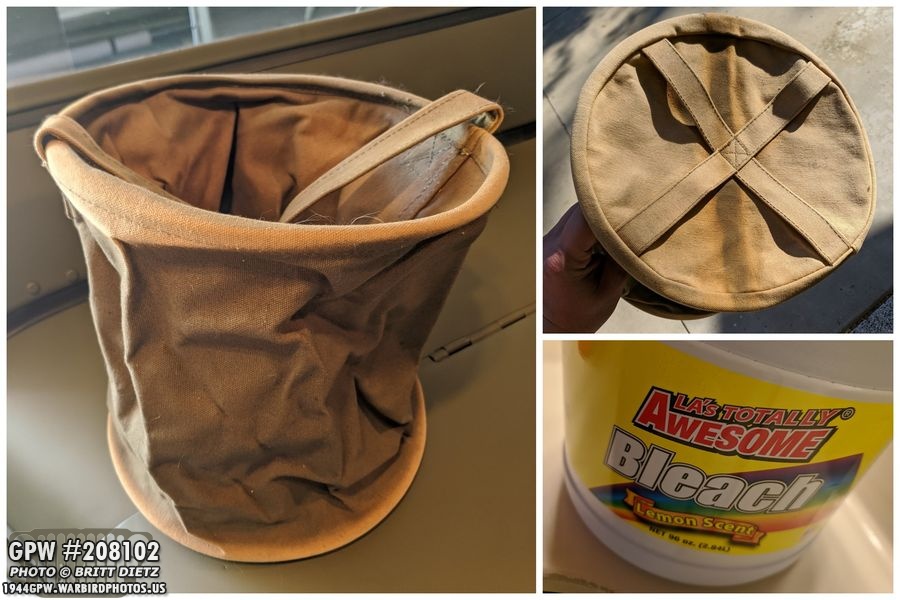
I’ve taken it off and begun the process of trying to restore the color to the VERY faded canvas. While the sides and inside of the bucket still are OD Green, the rest of it has seriously faded in the sun to a light khaki color. I’m going to attempt to bleach the entire bucket and dye it back to an OD Green color. I’ll have that entire process from start to finish next week!That’s it for this week, thanks for reading and I hope it helped others out there! Till next week!