 Electronic work, axle work, and canvas dying!
This week progress slowed a bit down on the Jeep, but still a lot of work done. I worked on replacing the dimmer switch, fixing the ammeter gauge, more wartime axle work, and dying my super faded canvas water bucket back to OD Green!
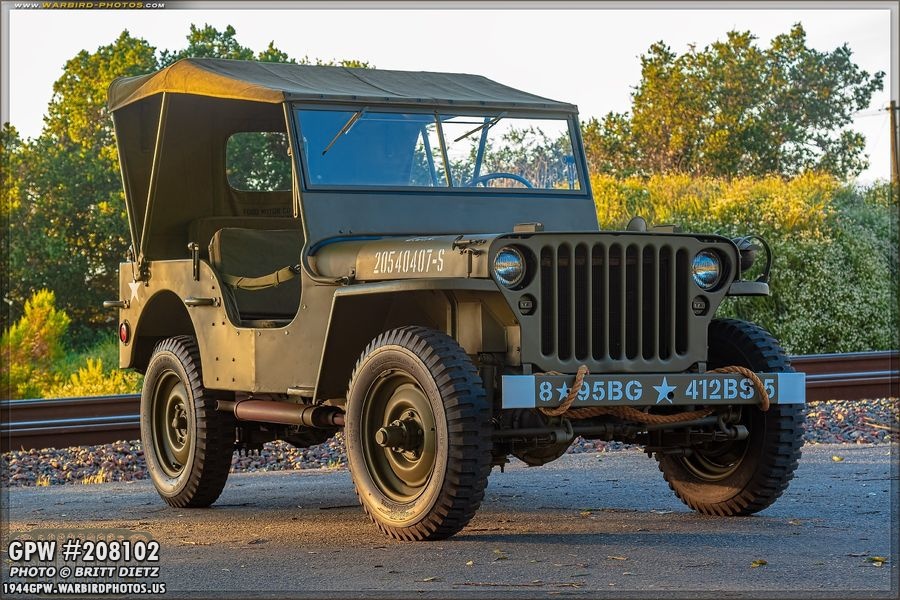
Kicking off this week’s post with a shot of the Jeep when I was out on V-E Day last Friday later afternoon. She looks good, and is still getting there with little steps each week!
In last week’s update, I was installing the floor dimmer switch ring and seal and realized that something wasn’t right because I couldn’t put a screw in one of the ring holes. Turns out, my dimmer switch was a DJ-3A switch, not a MB/GPW wartime style dimmer switch and the bulkiness of this switch partially covered one of the holes. The dimmer switch, for those who don’t know, is a foot push button that selects the high or low beams on the headlights.

A GPW style dimmer switch came in from Ron Fitzpatrick Jeep Parts (along with another spray can of 33070 OD Green).

There are several features different with this dimmer switch than the DJ-3A one (which I’ll compare in a few photos). The main difference, as seen here, is the large GPW dimmer switch style rectangular base and the slimmer main body. There should be no problem with anything blocking the screw holes.

On the actual wartime GPW dimmer switches, these three terminals were actually push socket types. The wires going to them were bullet style and were pushed into these sockets. Almost all of the wiring harnesses out there do not have the GPW style bullet wiring for this switch, so I’m glad this particular GPW dimmer has the screw-in terminals.
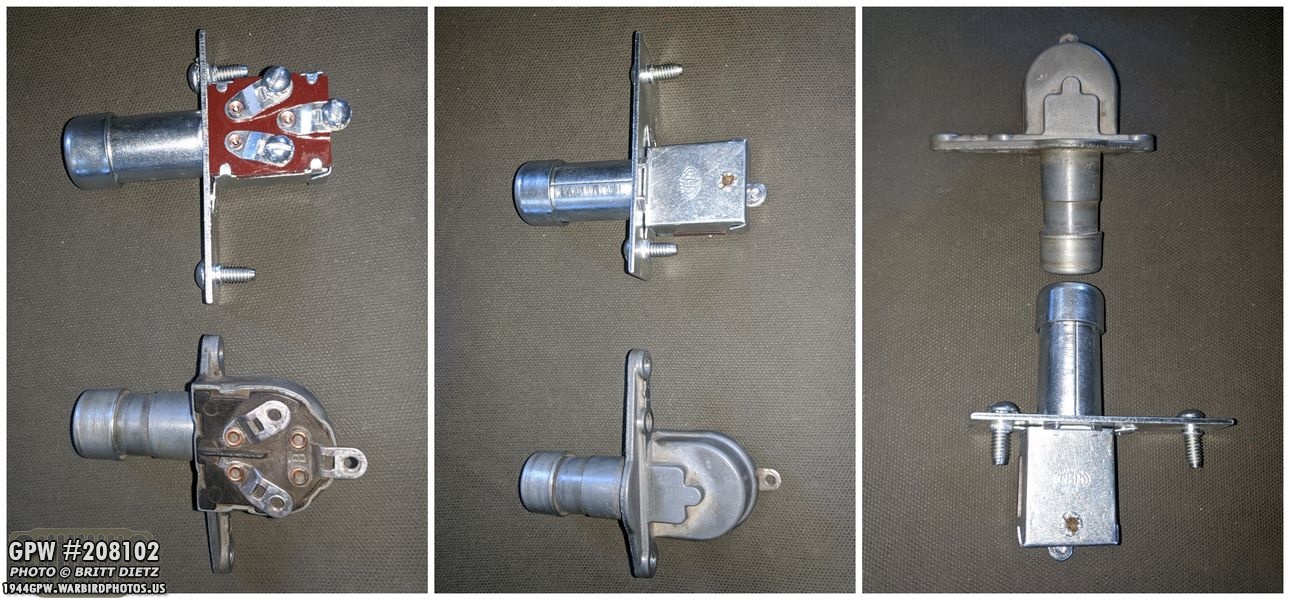
After removing the DJ-3A dimmer switch, you can clearly see the differences.

And here you can see the GPW rectangular style base.

After hooking up the wires to the new switch, here I’m pushing it into the main hole on the body tub.

And here it is pushed through. It looks like the hole on top doesn’t line up, but it does. The lower screw was loose at the time so the switch isn’t flush against the tub.

Now both the mounting screws (silver) have been added, and both the holes in the ring now have screws!
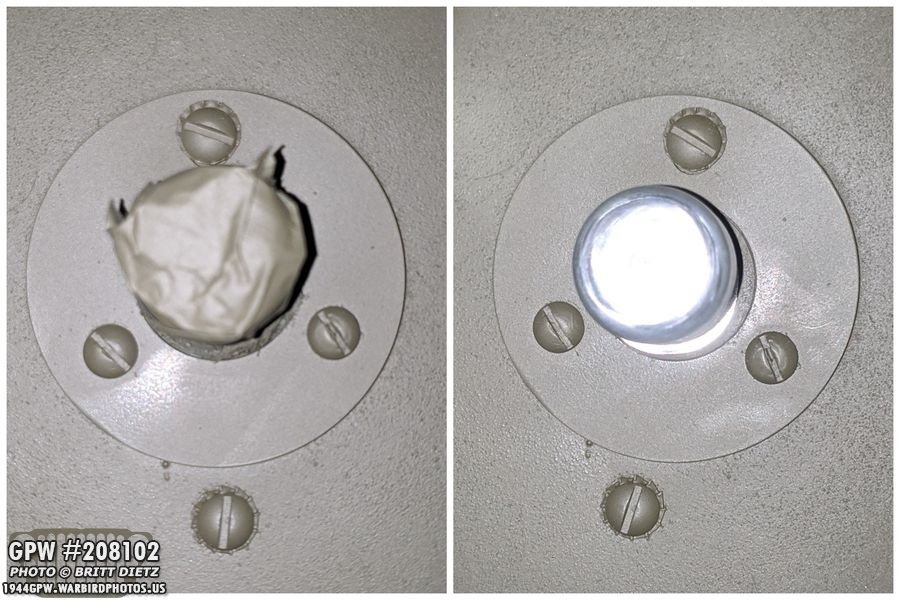
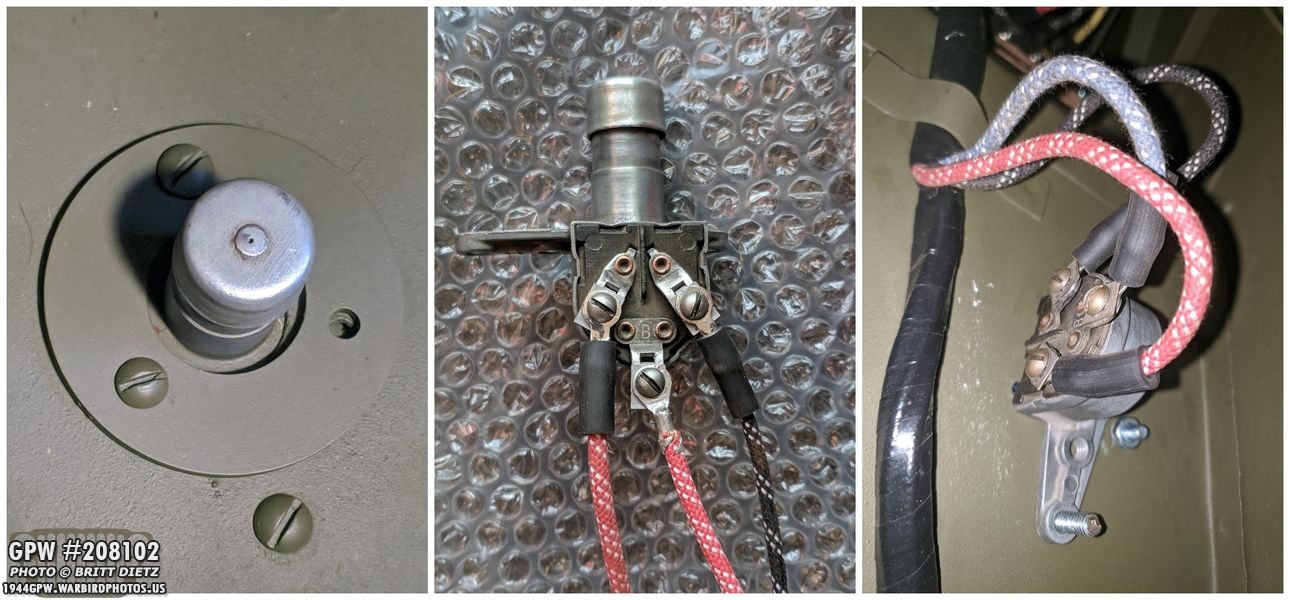
After masking the swtich and paint, it looks great! Glad to have another project finished and proper on the Jeep!

And here’s a look inside. I’ve been told the two ring screws should be tapered pointed end screws that do not need nuts, but I prefer this way as 1) no one will see this, and 2) it holds the ring on more secure.

Something that has been puzzling me since the main restoration of the Jeep last year has been my ammeter. This gauge on the dash measures the amperage that is being used by the Jeep. If it goes negative to the left, the battery is draining. If it goes positive to the right, it’s recharging. My gauge has NEVER moved from 0. It’s not a big deal as I know the system is charging the battery, but I decided it bothered me since I wanted all my gauges to work. So I started to research it.

Here’s a look at the backside of the gauge from inside the dash. You can see various wires going to the gauge on each terminal, and in the next photo I’ll break down what they are.

Now, before I explain what you’re seeing, I want to point out that this ended up being incorrect and part of the reason the gauge wasn’t working. This is how my gauge WAS wired. This actually follows the standard wiring diagrams for Jeeps out there, which is why it was done this way. Coming in on the left side (passenger) of the gauge I have the power wire that feeds power that comes from the battery (via the foot switch) to the gauge. From there it then sends some power over to the horn circuit breaker as the horn is always live on a Jeep with or without a running engine. On the other side of the gauge, we have three wires. One sends power over to the ignition switch. Another sends power to the push/pull light switch. And finally, the last wire comes from the alternator (remember, I have a 12v system, not 6v). I posted this graphic over on the G503 group and a long discussion ensued with many theories and ideas on how this should be wired and what could be causing my issue.

After no consensus on if my wiring was correct or not, I decided to take the ammeter out and manually test it to see if it’s just busted. Here you can see I tested the gauge by hooking up a single extra headlight bulb using my Jeep’s battery. So the power comes from the battery to the gauge, then from the gauge to the headlight, then from the headlight to the negative on the battery. As you can see, at least continuity works on the gauge, but no movement of the needle. It’s at 0 both times. There should be a draw enough to see some movement.
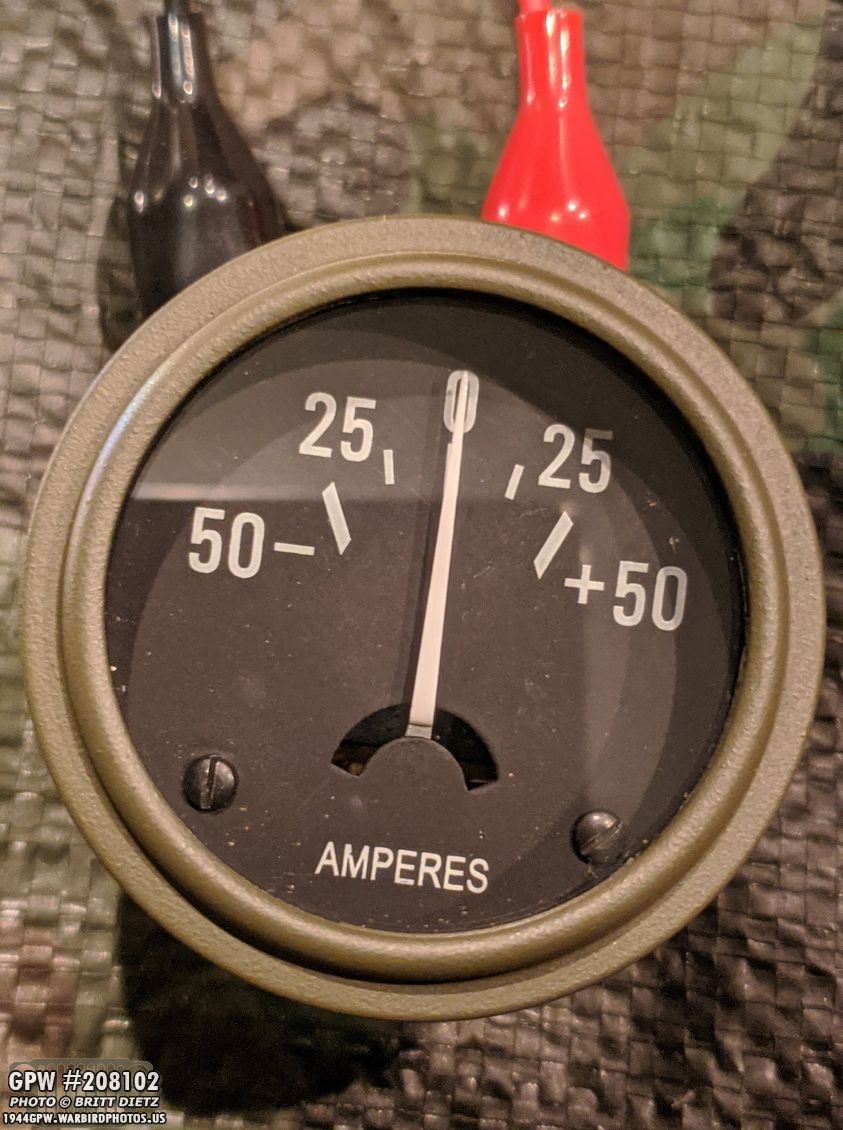
Here’s a look at how even with the headlight on (you can see the shine on the top left of the gauge), the needle still shows 0.

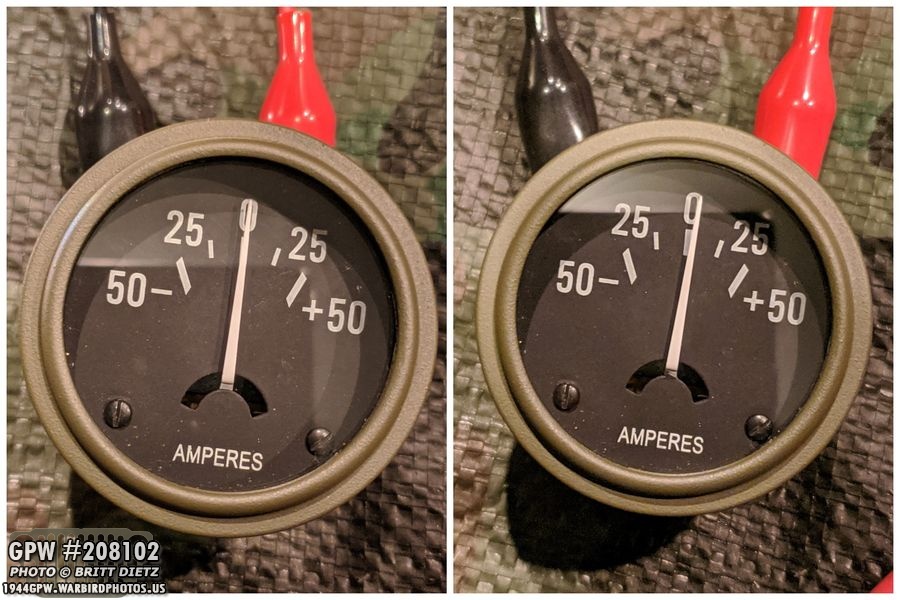
So I asked Mike (who I bought the Jeep from) if could remember that the original ammeter worked. He said he believed it did, so I hooked that up the exact same way… notice it’s on 0 in the first photo, and the needle is now slightly to the left, negative (meaning drain, as it should be). So that shows me this test should work. I guess I have a bad ammeter!

Here’s a closer look at the original ammeter before and after connecting the headlight. You might be asking, well, why not use the original gauge then? It needs a full restoration. The glass actually has rust spots (I don’t know how) on it on the outside and inside. The needle is also very loose and bounces with any slight movement. It’s beyond my ability to restore this gauge and I’d rather not damage it trying. It will be part of a display, along with the other gauges.
I then tried the new ammeter again, and it still didn’t appear to move… or did it? Each time I put the clips on the battery, I wasn’t watching the gauge as I had my eyes on the clip so I didn’t cause any sparks or damage the battery. But that got me to thinking… maybe I should have someone else watch the gauge as I clip the battery. So I had Crystal come out and she watched it as I did it.. and it DID move! It was so minimal that unless you were staring at it, you wouldn’t see it move. WHAA!? So, I added more things to the test like another headlight and made sure both headlights were on the highbeam… and I was able to see the needle had moved (pictured here)! But, it’s showing positive and it should be showing negative because it’s draining right? Turns out, this gauge has the terminals swapped from my original, so the input power needs to come in from the driver’s side.

So for this gauge, which I got from Kaiser Willys Auto Supply some time ago, needs to be set up like this. Basically the same setup as before, but the wires switched sides. The power comes in from the right via the foot starter, and the power goes out on the left. The alternator returns a charge back to the ammeter which then goes out through the input power wire and back to the battery to recharge. It was also suggested to check my ground for the ammeter so while it was out I resanded the lip on the dash hole for the gauge, and also made sure it was bare metal where the gauge hold down contacts the dash.

The moment of truth… I reinstalled the gauge, reversed the wiring order, and then reattached the battery to the system. I then turned on the headlights… and the needle moved into the negative! SUCCESS! While I don’t have a photo of it, today when driving the Jeep I noticed the needle go into the positive a little bit, meaning the system was charging the battery and the ammeter is fully functional! Really excited to now have ALL of my gauges working!

Before I move to the next project, I wanted to point out that the speedometer I have actually glows in the dark just like they did during WW2. The needle glows, and the indicator lines for 10 and 20mph glow. Pretty awesome. I believe the originals were radioactive, however, which allowed them to glow without sunlight. These are light-based glow in the dark for, well, obvious reasons.

Another item I’ve been needing for my wartime 1943 GPW axles I’ve been restoring to replace my CJ axles arrived… a new drag link! Because I have CJ axles, it has a CJ steering system which attaches to the frame. That will all be removed when the wartime axles go on, which then requires a wartime style drag link that connects the steering box to the steering system on the axle. I was in luck that Ron Fitzpatrick Jeep Parts had a take-off original GPW drag link on eBay for sale! I snatched that up as soon as I could and it arrived a few days later.

It has the original FORD stamping on it and is in pretty good shape, just needing a full cleaning and repainting.

It also came with the various parts inside the drag link to connect to the bell crank and pitman arm. To get them out (and clean the inside), I used the special socket I purchased and custom modified to unscrew drag link screws.

After cleaning and sandblasting, the internal parts are in excellent shape, nearly brand new. No new kit needed! Though, if I did need new parts, I could salvage the new kit I used in the CJ drag link to restore it.

And here’s a better look at the Ford stamping as I was sandblasting the link. In next week’s update, I’ll go through the full restoration and painting of the drag link as I wasn’t able to get to it much this week.

I also began work on cleaning up the rear axle shafts. The longer side looks to have been replaced with a generic axle shaft at one point. There’s no F stamp, but it looks pretty much exactly like the wartime style.

The only markings on it are these, which don’t bring up many results online. I thought about replacing this with a GPW one, but I don’t really see the need for now. It does technically have an F stamped on it… that counts right?
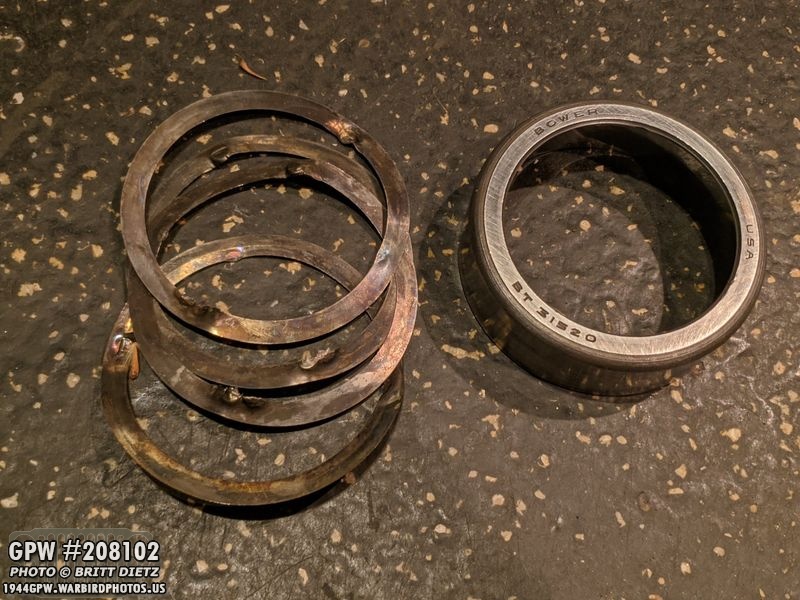
A little bit ago I punch out the final bearing racer from the front axle, the bearing that is mated with the pinion. There were 5 shims on it (I have replacement shims).

And a close up of the markings on the bearing racer. It’s a BOWER brand, not TIMKEN like many of the other bearings and racers I’ve found.

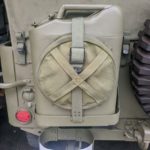
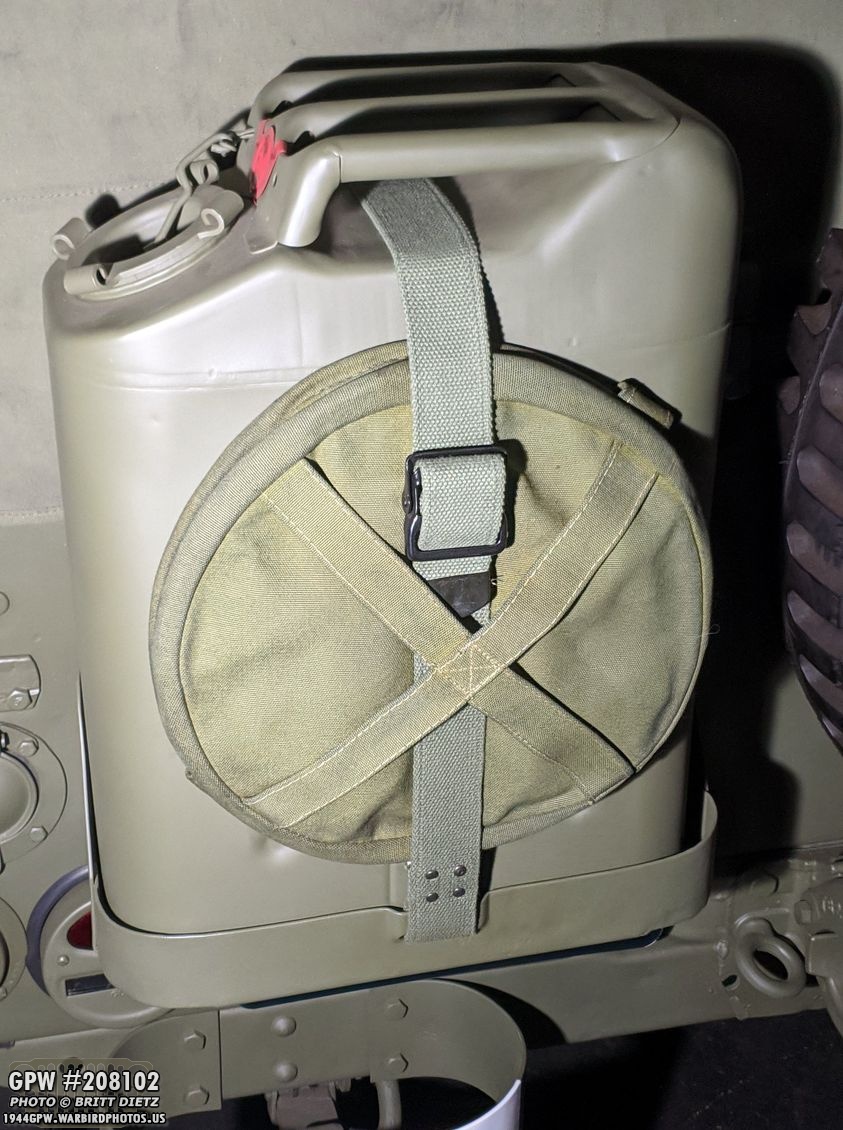
Moving on to the main event… when I got my Jeep, it came with a canvas water bucket as you can see attached to the strap on my jerry can. It was originally OD Green, but over who knows how many years in the sunshine, it had faded to a light khaki. That’s always bothered me, and I wanted to change that.
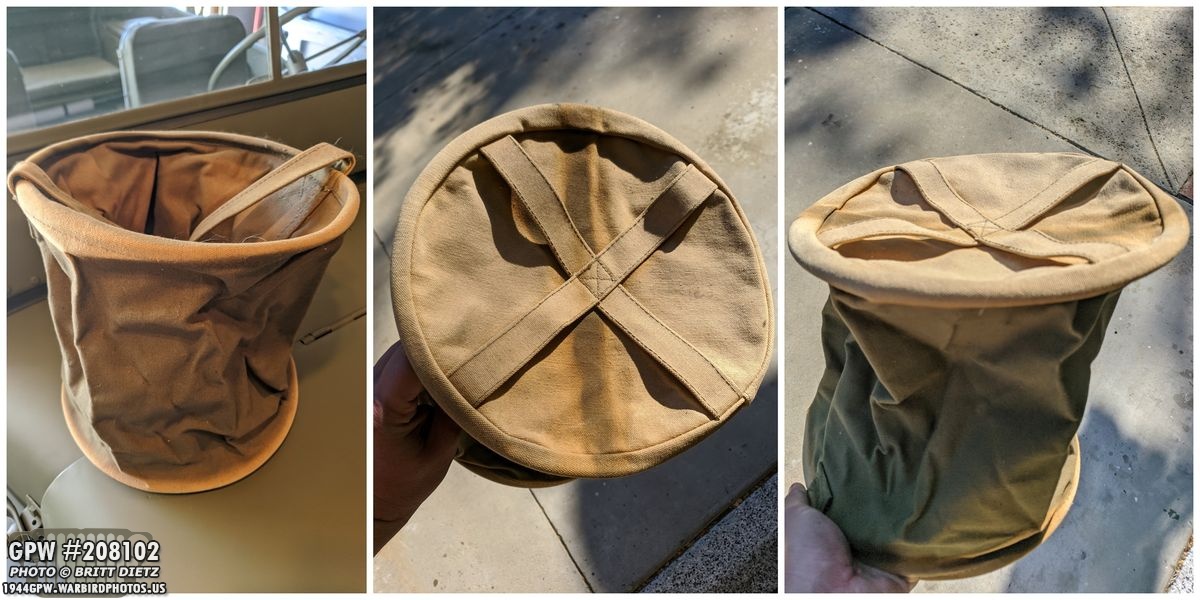
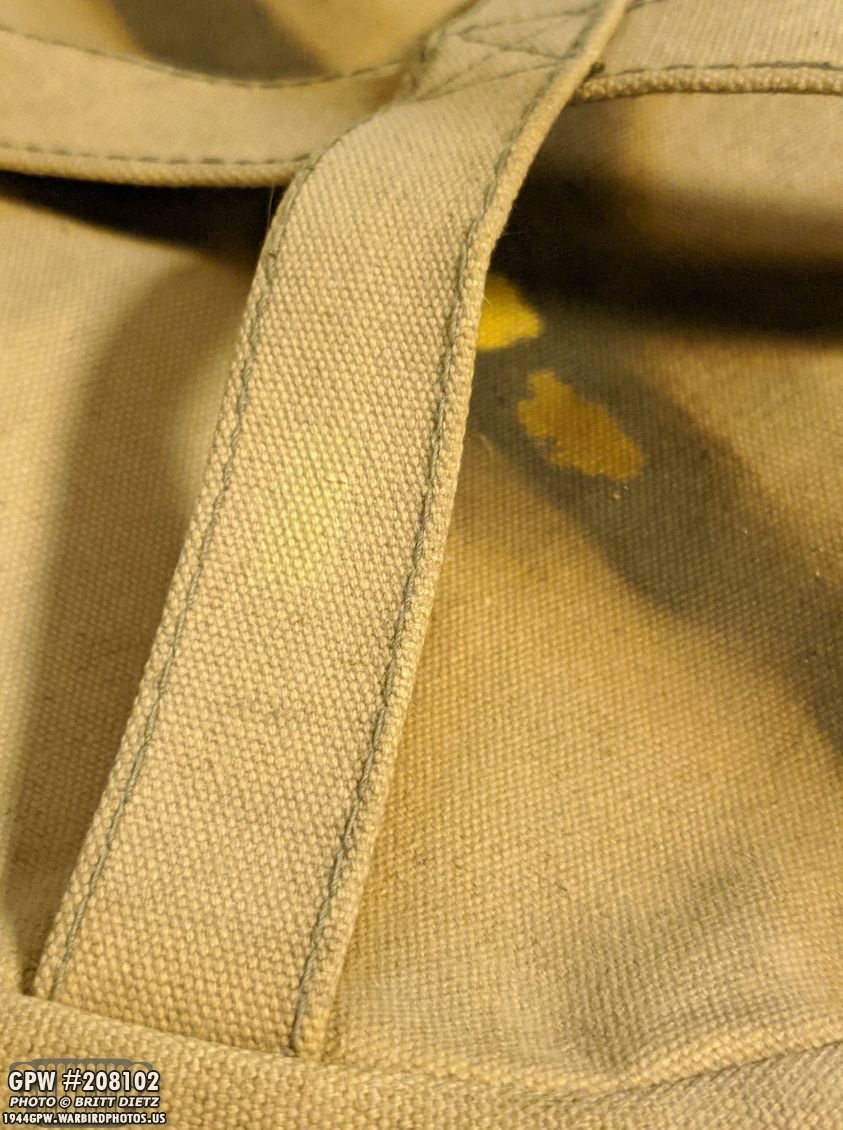
The canvas water bucket is normally crushed flat, but you can expand it out to make the bucket shown like this. The inside and inner area that is crushed was actually still mostly OD Green since the sun doesn’t hit it, but everything else was faded. In the middle photo, you can see some of the original green under where the jerry can strap goes holding it on.

After reading up on how to get color back in canvas, I decided to dye it. And many people said you should bleach the canvas to get it to more of an even tone. That will make it a good starting point to dye it… so we went out and got a gallon of this cheap bleach.

To see how the bleach would affect OD green areas and see what the end result would look like on canvas (and also have two test strips to test the formula of the dyes to get the right color), I had some old military canvas straps that I cut some little segments off of to test.

And that failed miserably. For some reason, this strap must have some sort of extra coating on it, as after an hour in diluted bleach, then almost a whole night in straight 100% bleach, this was how it turned out. So, without any other canvas to test, I decided there would be no testing, I’d have to just go for it!

With Crystal’s help, we set to test the green with diluted bleach and straight bleach with a q-tip. After about 10 minutes, here are the results. The almost yellow was from straight bleach, the darker mustard yellow was from diluted bleach.
We also tested to see on the faded area what it would look like if we bleached it as well.. and that made it slightly more yellow, but didn’t do much.

So I went ahead and used diluted bleach to ‘paint’ the areas that were OD Green. If I were to dye this with those areas still being OD Green, they could turn out black, so this was a necessity. As you can see, the bleach is very quickly turning the OD Green to a yellow.

After completing the process and washing the bleach off, I’m left with a bright yellow, almost the same color as a MAE WEST life jacket.

And here’s the top. I used a fine tip paintbrush to paint bleach onto the shadow areas from the straps that still had OD Green.

But we didn’t stop there… after it has dried, I decided to then bleach the entire thing, thinking maybe now that the previous OD Green areas are closer to the faded khaki that we could get them even closer. So I filled a giant tub with diluted bleach (9 to 1 ratio) and submerged it for a little while. This was the result. Closer, but still, that yellow was brighter and more vivid than the faded khaki.

And the inside along with the carrying strap was still a shade darker. The bleach didn’t seem to take that as well.

So I tried manually bleaching it again, being careful not to cause any harm to the fabric from the bleach scorching it. Still no change once it dried, so I figured that was as good as it was going to get. Time to dye it!

I went with RIT brand dye, and I used their website to come up with a formula that matches what the OD color should be. We started out with using a full bottle (8 oz) of GREEN APPLE (not shown here) along with 1/2 bottle DARK BROWN and 1/2 bottle DARK GREEN. In retrospect, I think, because it was already so yellow, I shouldn’t have used the GREEN APPLE and only used the DARK BROWN and DARK GREEN.

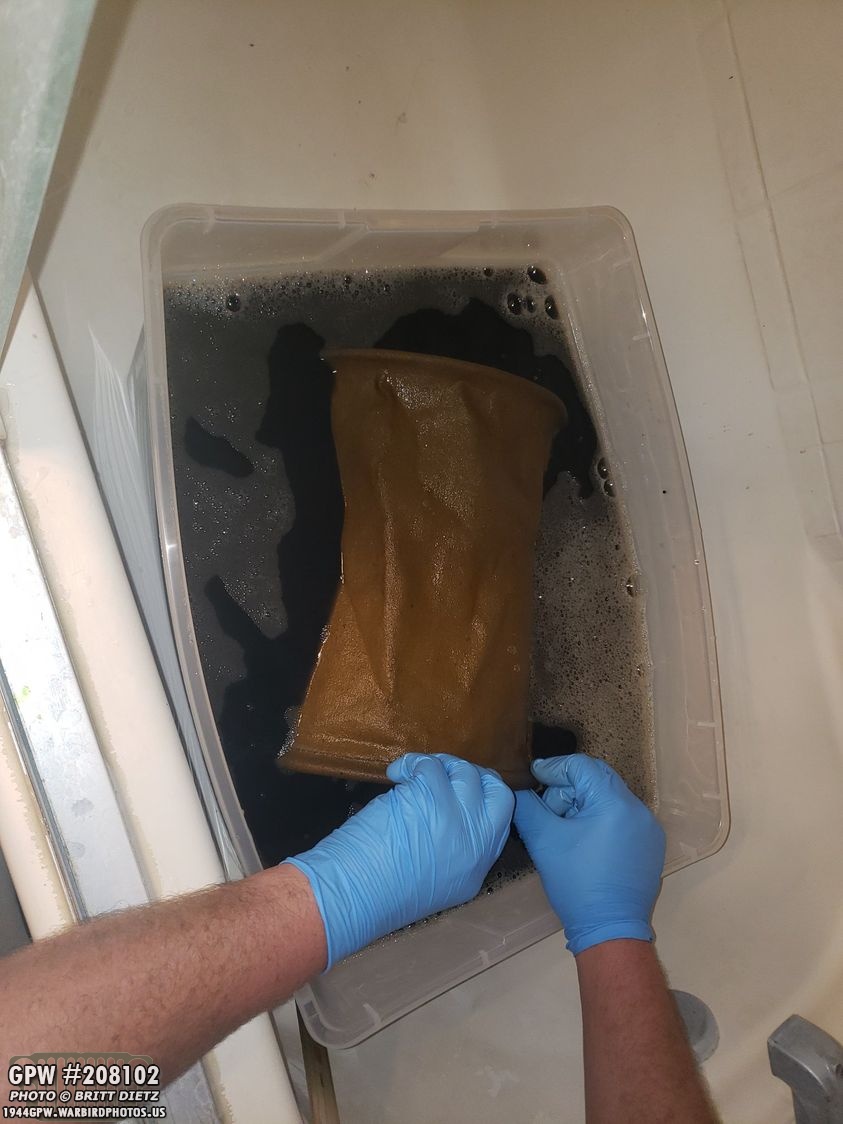
So we filled up a 14 gallon tub with 12 gallons of HOT water in the shower. We then mixed in the i bottle GREEN APPLE, 1/2 DARK BROWN, and 1/2 DARK GREEN. We also mixed in 1 cup of Epson Salt. Here’s one last look before going into the dye!

Since the tub wasn’t big enough to fully submerge the bucket, I had to keep it rotating. At first, it looked like the canvas was not taking the dye. We added the other 1/2 of the DARK GREEN (so now we’re up to 1 bottle green apple, 1 bottle dark green, 1/2 bottle dark brown).

It took a while, but it slowly started to change colors. I decided to keep rotating the canvas bucket in the tub for 45 minutes.
Getting more green, but still very yellow.

30 minutes in, it’s starting to look more green.

It started to look more OD Green, but still had some yellow tones to it. So I continued to keep it in there for the full 45 minutes.
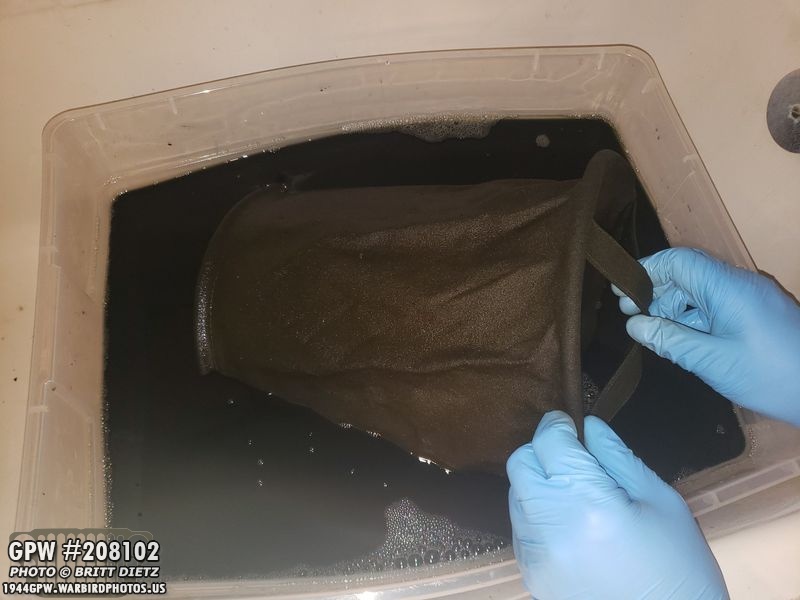
NOW it’s starting to look amazing!

That looks pretty darn OD Green! I was super excited. I then washed off the dye until the water was running off of it clear.

Here’s a look at it after rinsing. Looks AMAZING and one solid color. I was so excited, this was actually going to work!

It was one uniform color! If only it stayed this way…
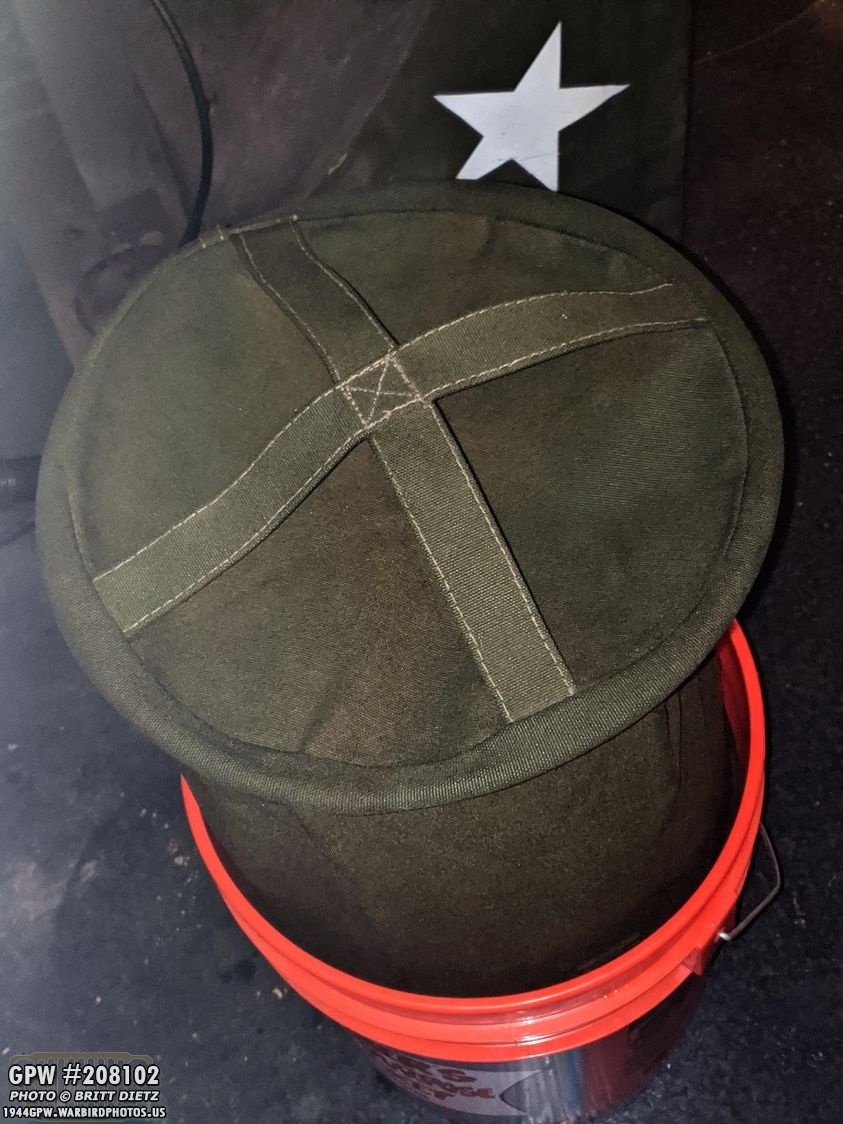
I took it outside to the garage and put it on top of a bucket so it could dry and drip excess water. Looking great at this point! Let’s just to the next day…

What happened?! After drying, it came out this bright green, and you can see the shadow areas. Sigh! I know when it’s wet it’ll look darker, but this is a pretty dramatic change. I was pretty bummed.

But, that means we can try again! So, I went out and bought another bottle of DARK GREEN. We did half a cup of that, and just a tiny touch of DARK BROWN. Hot water, 1 cup of Epson Salt, and away we go. Another 30 minutes of slowly rotating the bucket.

After drying, it came out partially OD Green, but a little faded, and a mustard OD green. This is after it had completely dried. I thought about it and if I wanted to go through the entire process of dying again (which is a big process each time)… but I realized that the straps will cover those mustard OD green areas and the sides would be hidden when crushed.
So I went ahead and attached it back onto the Jeep, snapped this shot, and decided I’d wait to see how it looks during the day.

Overall, it’s not bad. It’s still too yellow for my tastes, and I think that’s partially from the GREEN APPLE color we put in it. Had we done only DARK GREEN and DARK BROWN, I think it would have come out darker and less yellow. But it looks better than it did.

Especially when you compare it to the original khaki color it had faded to, it looks a ton better. So I’ll keep it as-is for now. If I stumble across a water bucket at a flea market that’s OD Green still and a good price, I might swap them out, but this works for now.

Back to the Jeep, here’s another look from the VE-Day photos. I wanted to get some nice side shots of the Jeep for future graphic projects.

And the other side. On the heels of the water bucket color bothering me, another eyesore for me, as you can clearly see here, is the axle handle. It did NOT take the stain nearly as nice as the shovel wood did, even though I sanded it thoroughly. I was at ACE Hardware the other day, and saw a different brand of stain so I figured, why no try again?

I didn’t get any photos, but I sanded it down REALLY good. If there was any coatings or things, I made sure I was down to the wood itself. I then took this rain, which was like a gel almost, and coated the entire handle as seen here. I waited about 4 minutes then wiped off the excess. It was better, but still it wasn’t taking the stain. UGH! So I waited a few hours then stained it AGAIN. Waited 5 minutes then wiped off the excess. Slightly darker, but not by much. UGH! I’m starting to wonder if the wood is completely soaked with something. So, after letting the second stain dry, I went and used the original stain I’d used last time and tried it…

That came out better. It made it super shiny, but it was darker. Not nearly as dark as the shovel, but lightyears better than the bright color it was. I’m going to clean it up once dry and stain it again with the original stainer. After that, I might hit it with a matte overcoat to make it less glossy from all the stains. Then, I’ll just accept it that the fourth staining (after 3 stainings the first time I did it last year!) it’s not going to go much darker. It’s better for sure, but I wish it took the stains better so it matches the darker color of the shovel. Look for more on this next week.

For comparison, here’s a look at how the axe looked before all these new stains. So it’s better for sure, but not dark. At any rate, this photo draws this week’s update to a close. Thanks for reading along, and I hope these updates help others restoring their Jeeps! Till next week!