 The Jeep goes public!
This week the Jeep made the first public appearance at an event in San Pedro, CA for the LA Air Raid of 1942! Then the next day the Jeep went to Old Towne Orange, CA for a mini-photoshoot in the area. Overall a great outing with lots of photos! Restoration wise, I was only able to get a little bit of sandblasting in and fixing a broken panel light switch.
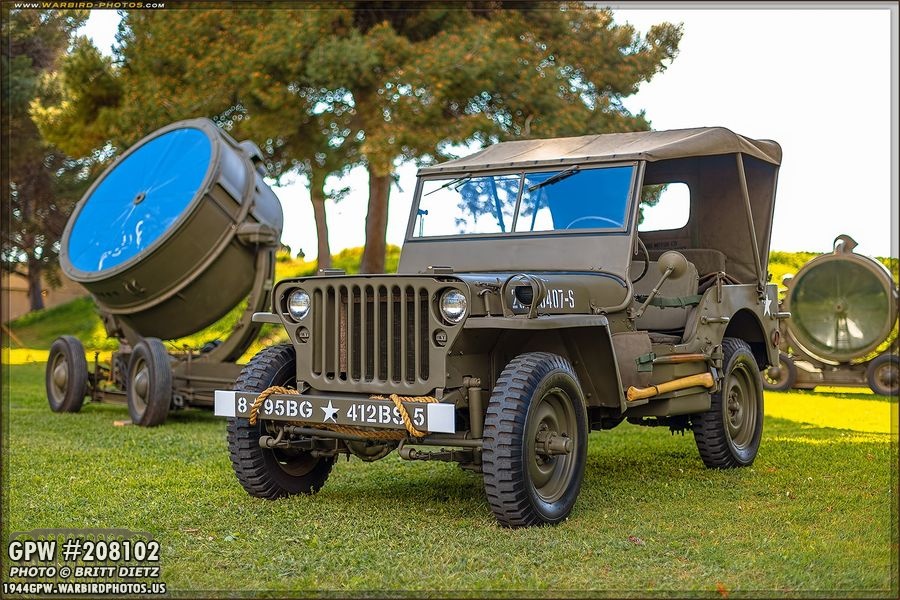
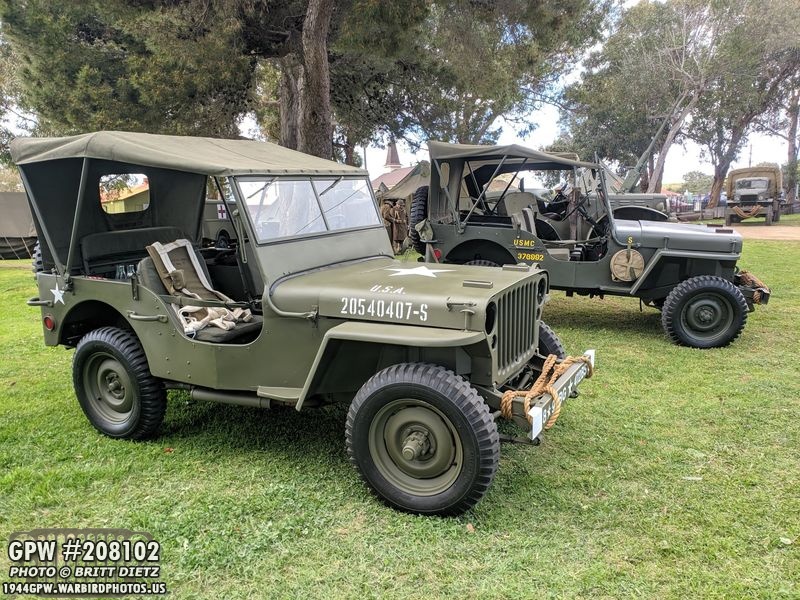
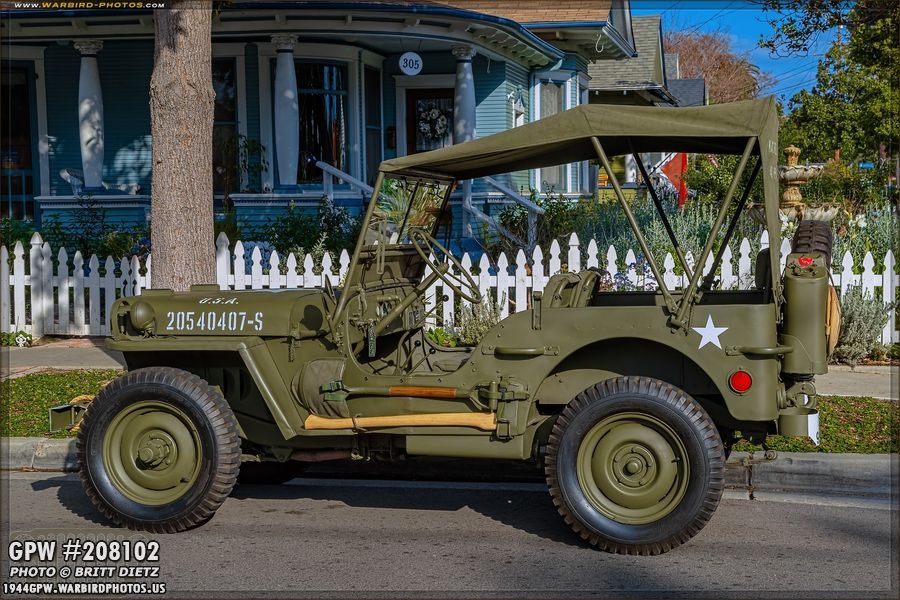
GPW #208102 reporting for duty at Fort MacArthur Museum for The Great Los Angeles Air Raid Of 1942! This was the very first public event the Jeep has been to since the frame-up restoration!Note – This update is photo-heavy from this event and a photo tour around Old Towne Orange. If you want to get to the axle work, you’ll have to skip ahead quite a bit.
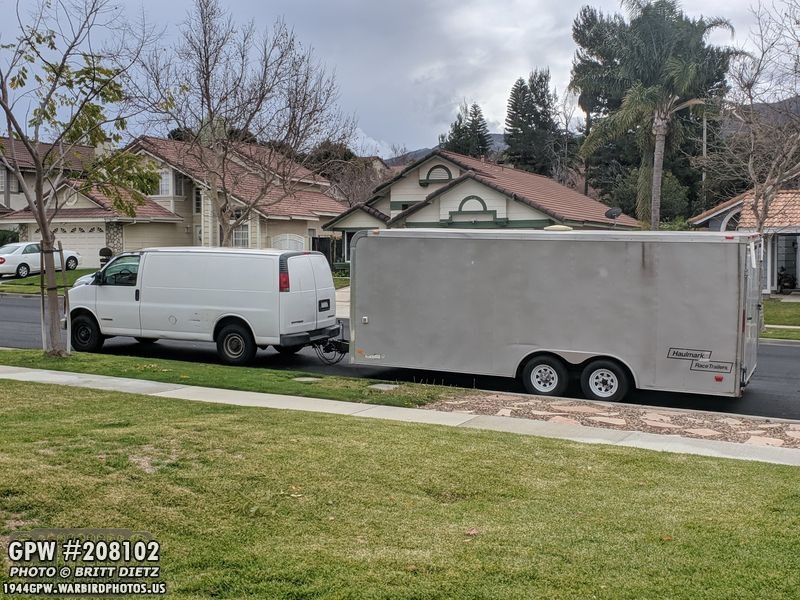
With San Pedro being quite a distance away, I couldn’t drive the 40-45mph jeep the distance required… not with all the SoCal freeways filled with people doing 75-80mph! So I looked to getting a truck and trailer to take it there. I lucked out and was able to borrow a van and a very large trailer for the Jeep. The Jeep would be driven in style!
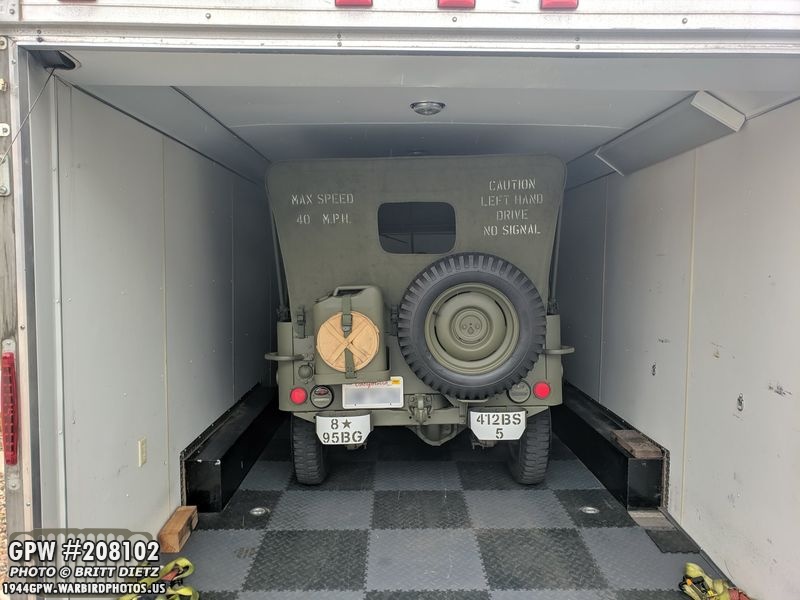
Because the trailer is enclosed, I didn’t even have to take down the canvas top and windshield (which you want to do as those windshields were not designed to go 65mph). It looks like a tight fit, but there was plenty of room in this large trailer.
After a not so fun drive through some rain and cars cutting off the van/trailer, I made it to Fort MacArthur Museum for The Great Los Angeles Air Raid Of 1942! What is the Air Raid you ask? In February 1942, the realities of the Second World War were beginning to become evident here in the California Southland, yet many community events continued on almost as if nothing had ever changed. The Great Los Angeles Air Raid Of 1942 is a fundraiser event for the Fort MacArthur Museum that takes you back in time to a thrillingly faithful recreation of a 1942 big band dance party, interrupted by the reality of war: The Air Raid! This event is a recreation of the actual Air Raid that took place in 1942 with military vehicles, 1940s civilian vehicles, most people coming in WW2 uniform/1940s outfits, searchlights, air raid sirens, and pyrotechnics.
Here’s a look at where I parked, next to a USMC Jeep. There were, in all, 6 Jeeps at the event. You can see three others to the right. Behind them is a M3 Scout Car. There were other scout trucks, ambulances, dodge troop transports, and lots more. In the middle up the pathway is the guard shack entrance to the event.

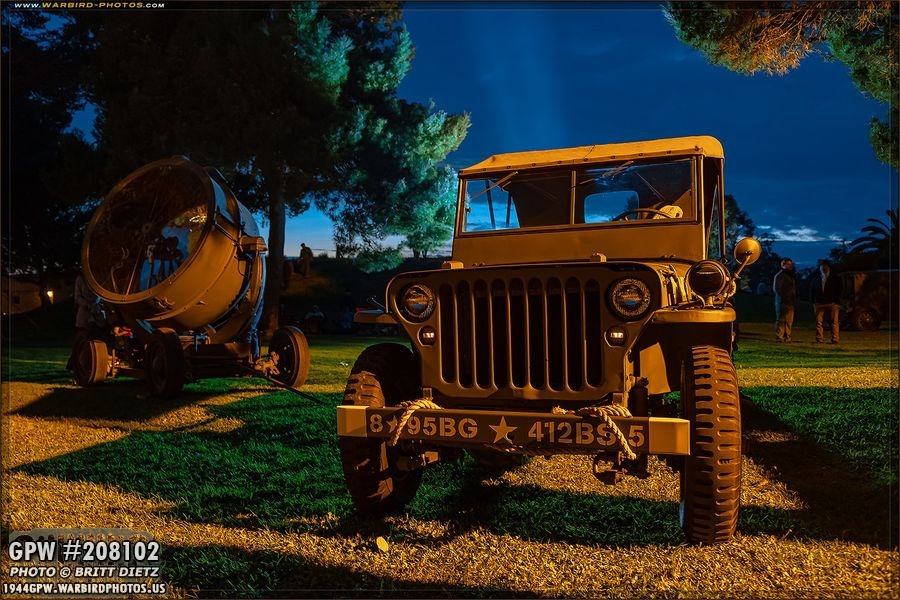
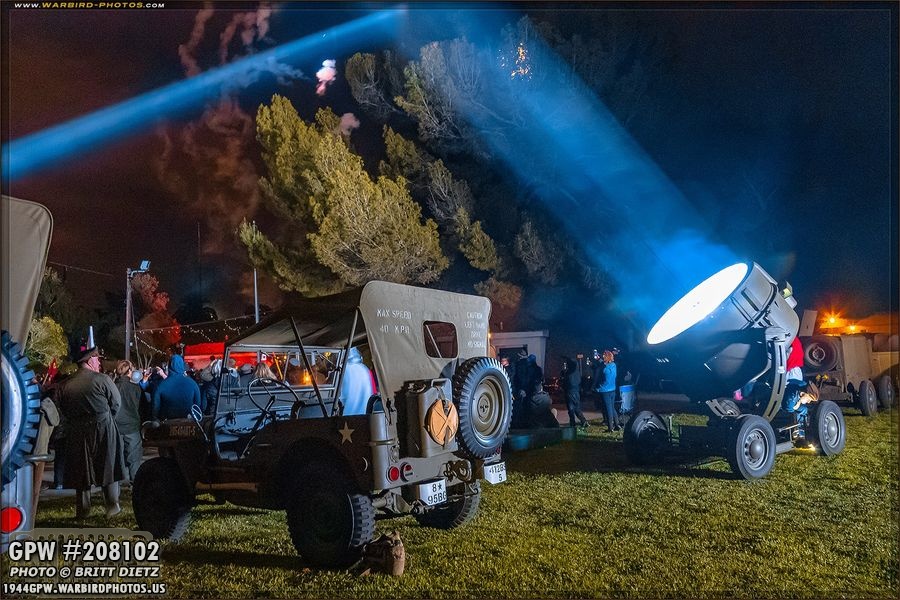
These massive authentic searchlights would be powered on later at night scanning the skies…

The the left, the 1940s civilian vehicles were parked. The concrete building behind them is one of several massive battery pits where huge guns would be paces protecting the coastline (which is on the other side of the hill)

I didn’t just bring the Jeep, but also brought some Army Air Force related items to display in the Jeep. In the front seat I had a AN6513 parachute harness with first air kit used by most bomber crews throughout the war. On the driver’s seat is a B-3 heavy jacket (worn by most bomber crews in early-mid war).
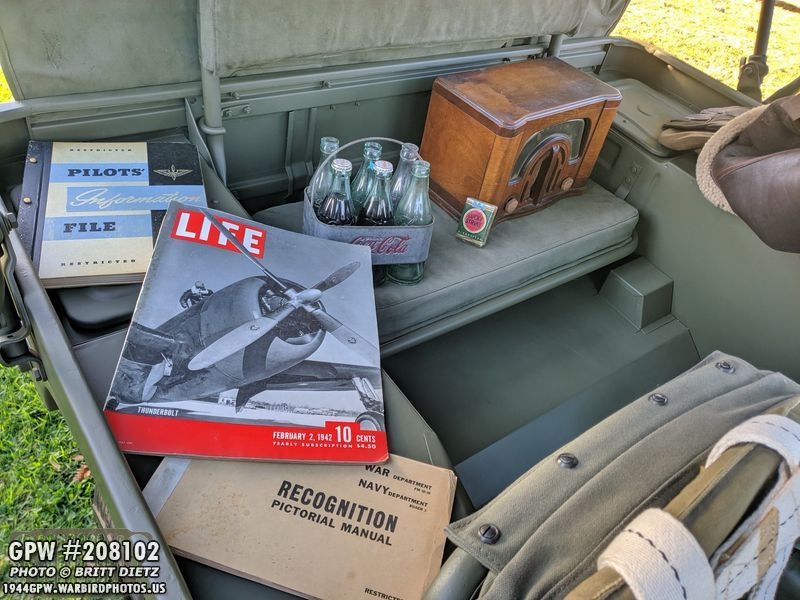
In the back, I had an original Pilot’s Information File, given to all pilots during WW2. A February 1942 dated LIFE magazine (since this event takes place in Feb of 1942), and a Recognition pictorial manual, which has 3-views of friendly and enemy aircraft. I also had an original 1940s Coca Cola hand carrier with WW2 dated coke bottles, a WW2 era Lucky Strike pack, and a 1941 Zenith radio that I had playing tunes and radio programs from 1942. The radio is original, but the insides have been replaced with a rechargeable Bluetooth system since the insides were too far gone to repair. The dials work for volume and radio turning and it lights up just like it would.

The event was a big success for the Jeep! Even before the gates open to the public, I had several people come bu to check it out. I spent most of the evening chatting with people answering many questions and showing them the little details on the Jeep.
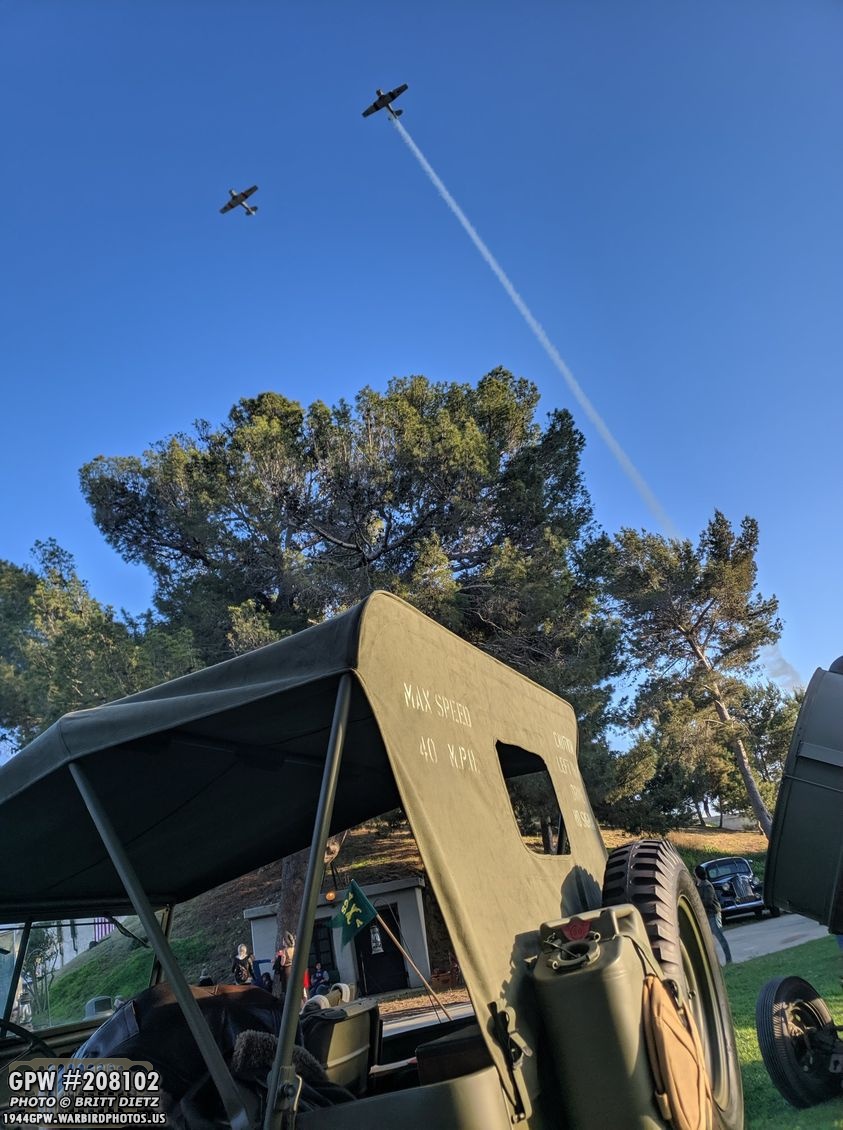
During the event, two WW2 era T-6 Texan trailers flew over Fort MacArthur Museum.

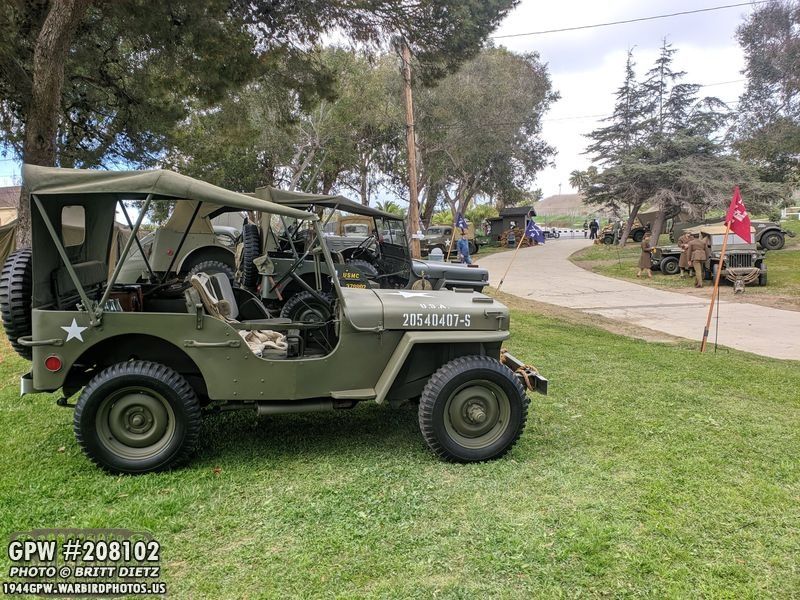
The Jeep in good company! It was nice to compare the Jeep with others. One major item I still need to do to my Jeep is put on combat rims, which the USMC Jeep next to mine has. Once I finish restoring the GPW axles, I’ll get combat rims.
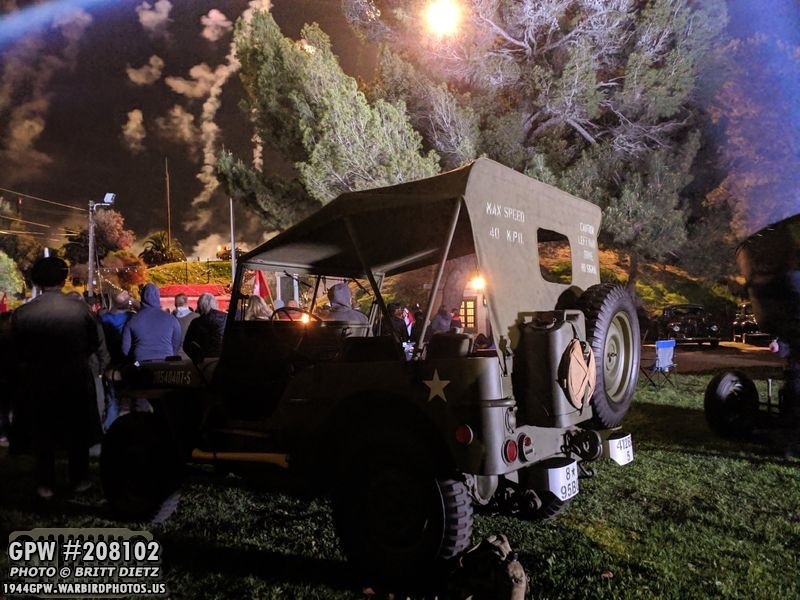
As night started to fall, the searchlights came on to scan the skies for enemy aircraft.

I tried to take as many photos as I could in between talking to people and people crowding around the Jeep to look at it.
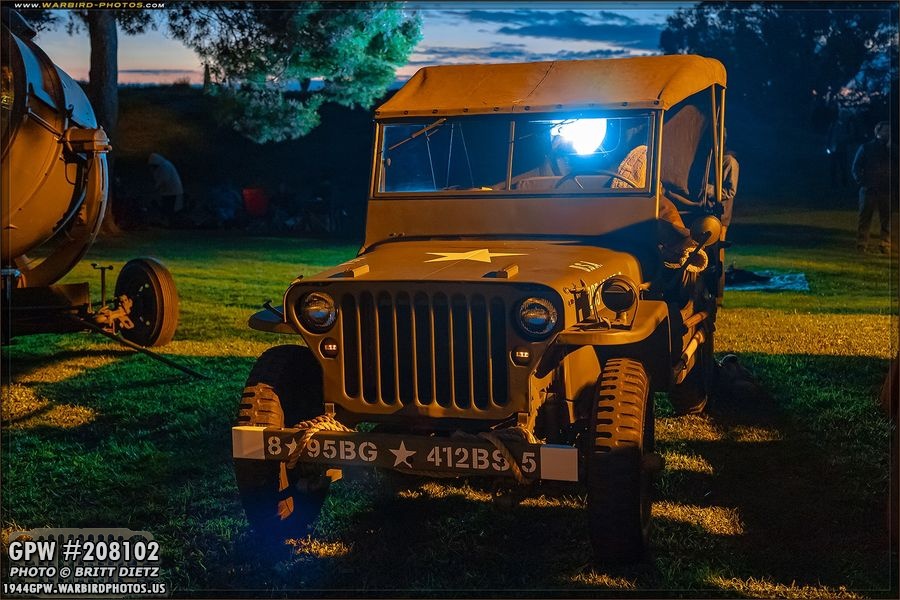
Here I’ve turned on the blackout lights under the headlights. Fitting, since we were technically under blackout conditions!
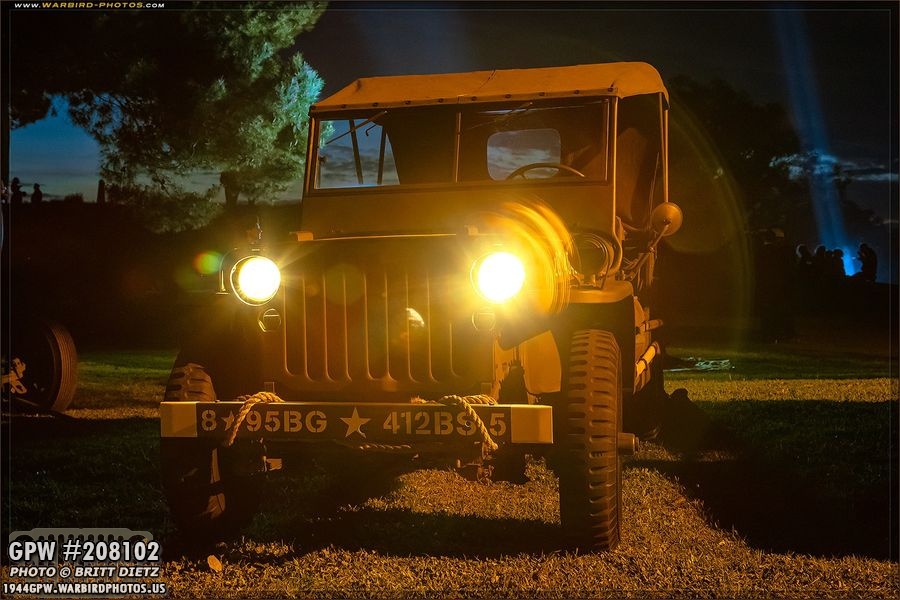
The project with taking photos of with the headlights on and it’s dark is the crazy lens flares, still, a fun photo.

One of the SIX searchlights they had going at different times of the evening!

As the night continued to fall, the live big band playing would be occasionally interrupted with news announcements of enemy aircraft spottings.

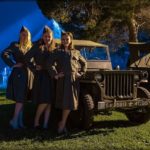
These three USMCWR (US Marine Corps Women’s Reserve) gals came by to pose with the Jeep. The large floodlights on the museum really do make the color balance on the DSLR go crazy. Here I’ve tried to see if I could color balance the actual colors on the jeep, and it almost worked but made the background turn blue.
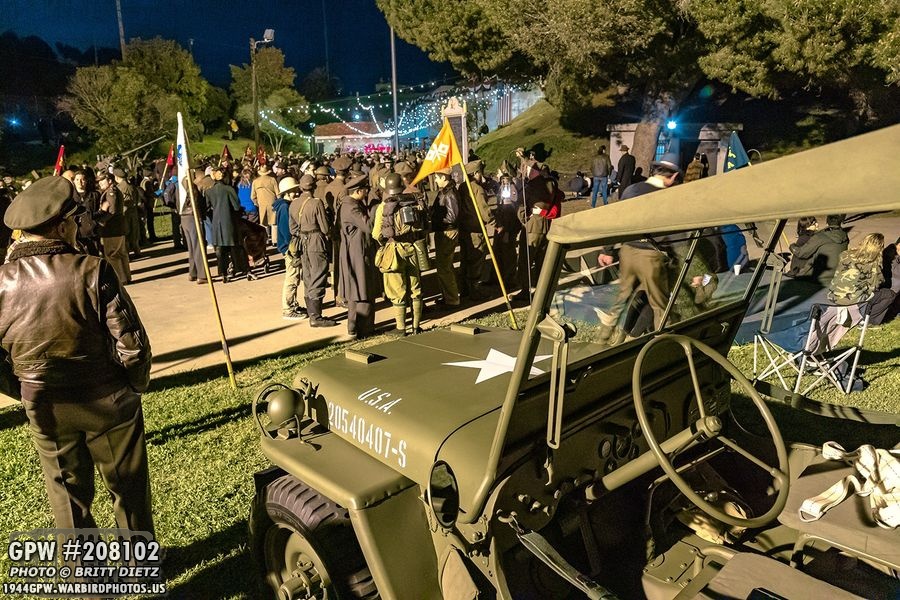
Here’s a look at the crowd, most in uniforms, at the event. Those hanging lights are over the dance floor with the live big band orchestra. This is shortly before the band was interrupted with the air raid (which I posted a view two days ago that you can go back and watch). Jeep had a front-row seat for everything!

Another searchlight scanning the skies.

Last light of the day… I have the blackout marker lights on under the headlights and the fender-mounted blackout drive light.

Enemy aircraft spotted! The two searchlights behind me are scanning…
The Air Raid begins! Hard to tell from this photo, but the ‘artillery fire’ is going off (and the machine guns off the M23 Scout Car just above the windshield)
The searchlight next to the Jeep turned on to scan the skies.

The Jeep glows red from the ‘artillery fire and flares’

In reality, it’s fireworks being set off to mimic artillery fire and flares. There are also quite a few people up on the top of the installation firing various WW2 weapons with blank ammunition.

It really does sound like a battle is taking place with loud explosions, small arms fire, large 50 cal machine gunfire, and the air raid sirens.
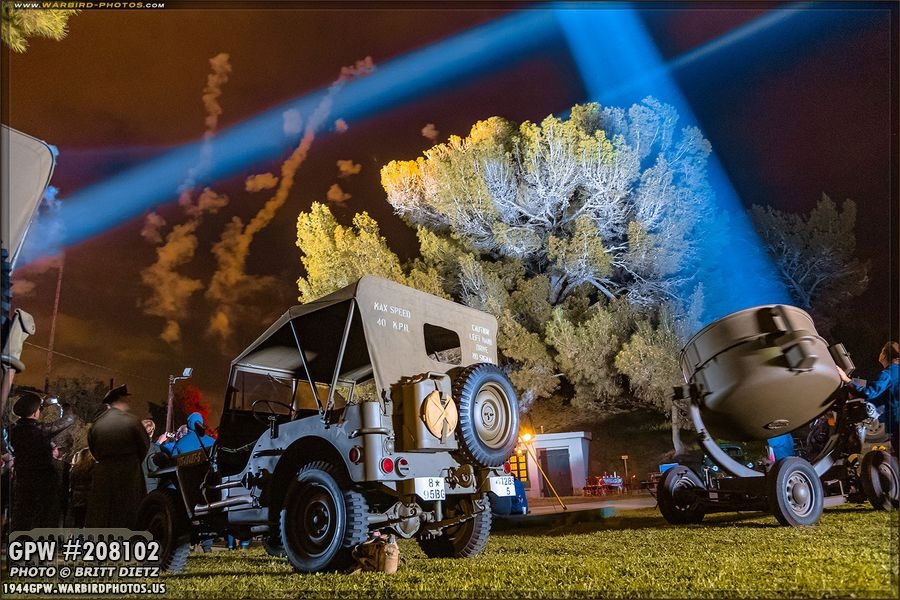
And the final photo from the event with the beams of four of the six searchlights scanning the skies. This is always an incredible event to attend, and even better with my Jeep being able to take part in it this year! I had a blast showing it off to everyone who attended.
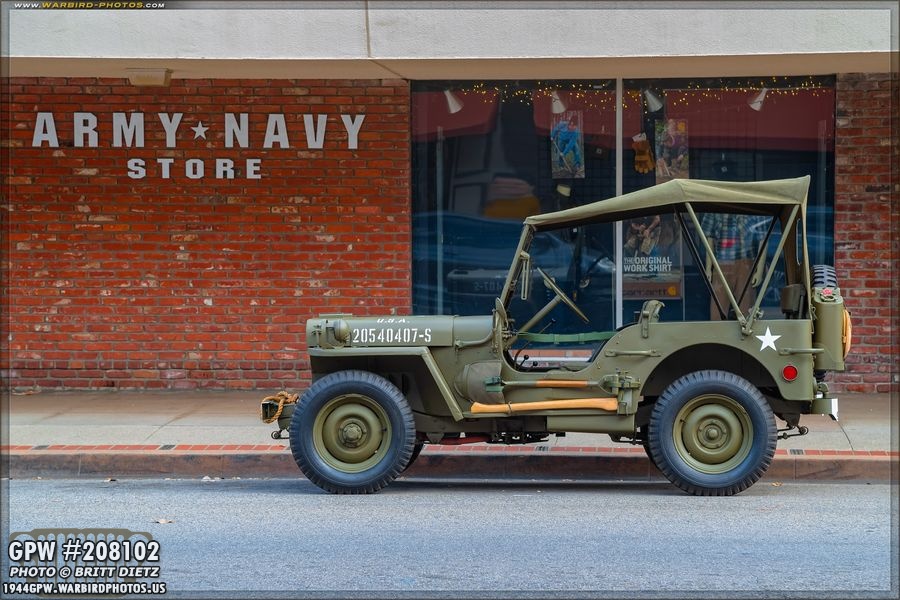
While I still had the van and trailer, I decided (the next day) to take the Jeep for a photo tour around @Old Town Orange Circle, Orange County CA. First stop (and total luck I was able to get this parking spot!) was the famous Army Navy Store in the Orange Circle. This store has been here since 1955! The Jeep sure attracted a lot of attention parked there. It may seem dead, but it took a while to get shots without anyone in them.

I then moved the Jeep over to a large warehouse that had a very vintage look with brick walls.

Love the vintage look in this area (normally a bus stop).

Make this black and white and it could look out of the 1940s! Love the vintage street lights.

As I was driving around the circle, I spotted this blank brick wall where there is a cleaners. Of course, had to do a little photoshop work!

I then took the Jeep over to the Ruby’s Diner for some photos out front of the 1930s/1940s train themed building. This is also the Orange Train Station.

And moved the jeep closer to the entrance of the Ruby’s Diner

When taking the Jeep back to the trailer, I drove around the houses, which are all very vintage 30s/40s (or much older!) houses. Took a few shots along the way.

This one almost looks out of a movie. I think it looks perfectly at home in front of a house like this!
And in front of another very vintage looking house. Had to get in as many photos as I could while the Jeep looks nice and clean!

And just before putting the Jeep into the trailer, I got some shots in front of this amazing cathedral!

Turn it black and white, and it could be parked somewhere in France!

After a good day of photo taking, it was back to the garage for this tired girl. She earned the rest after the full weekend! (and she’s wearing a Ron Fitzpatrick Jeep Parts hat). That ends the photo tour for the Jeep! Now on to the restoration…
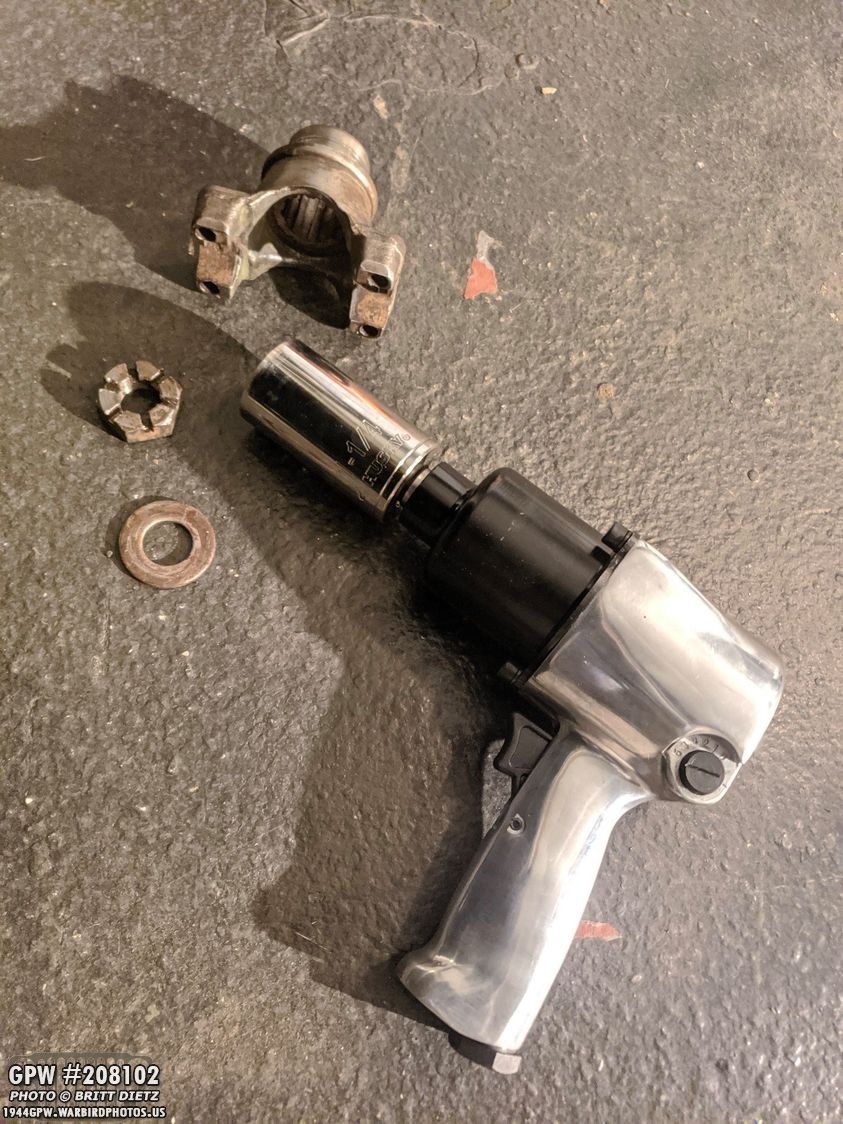
In my previous update, I was stuck on the front axle as I couldn’t get the yoke off. The nut that was holding it on wouldn’t budge even with a breaker bar. So I soaked it in PB blast for almost a week, and went to Harbor Freight Tools and bought this air-powered impact gun. Coupled with the 1 and 1/4 socket, it only took two squeezes of the trigger for that nut to come right off. I was then able to take off the yoke.
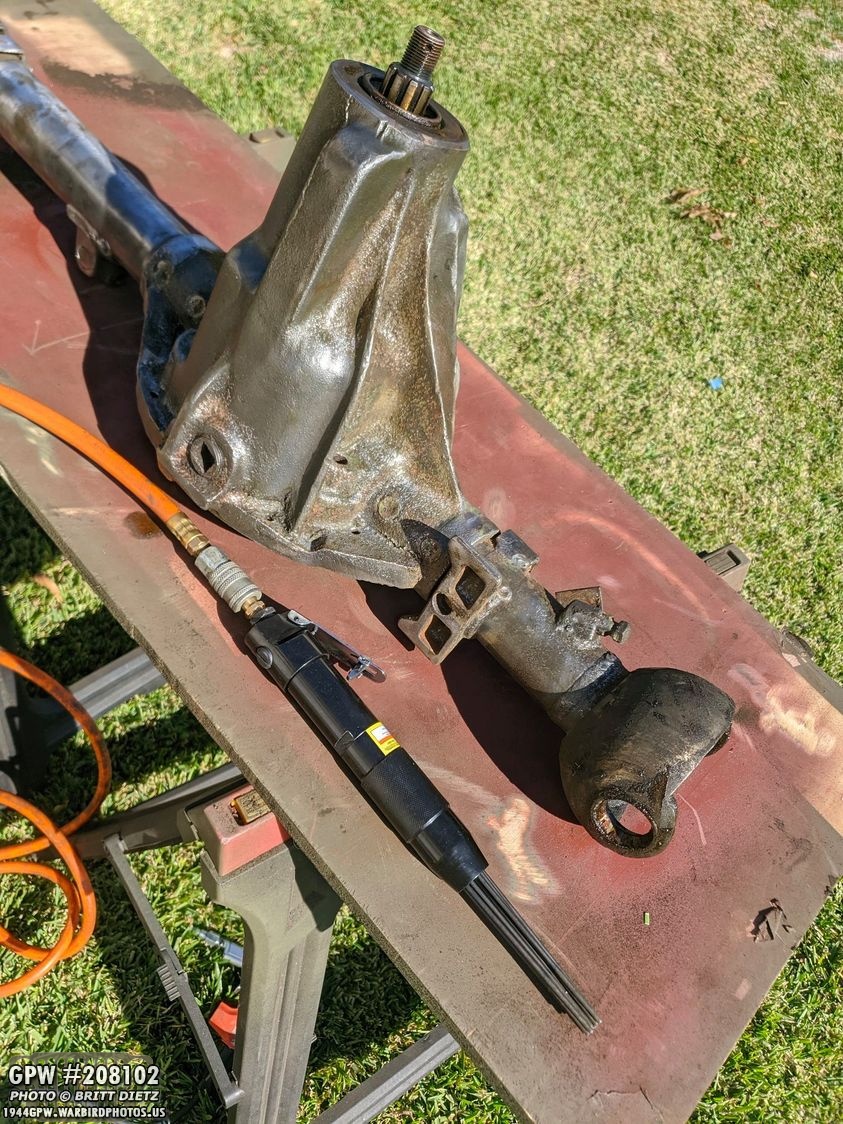
Another item I picked up, on the suggestion of Gary Stone, I went out and got an Air Needle Scaler to try help and remove the paint/rust in the little hard to reach areas that the wire wheel can’t get into. Worked great, and got most of everything cleaned off!
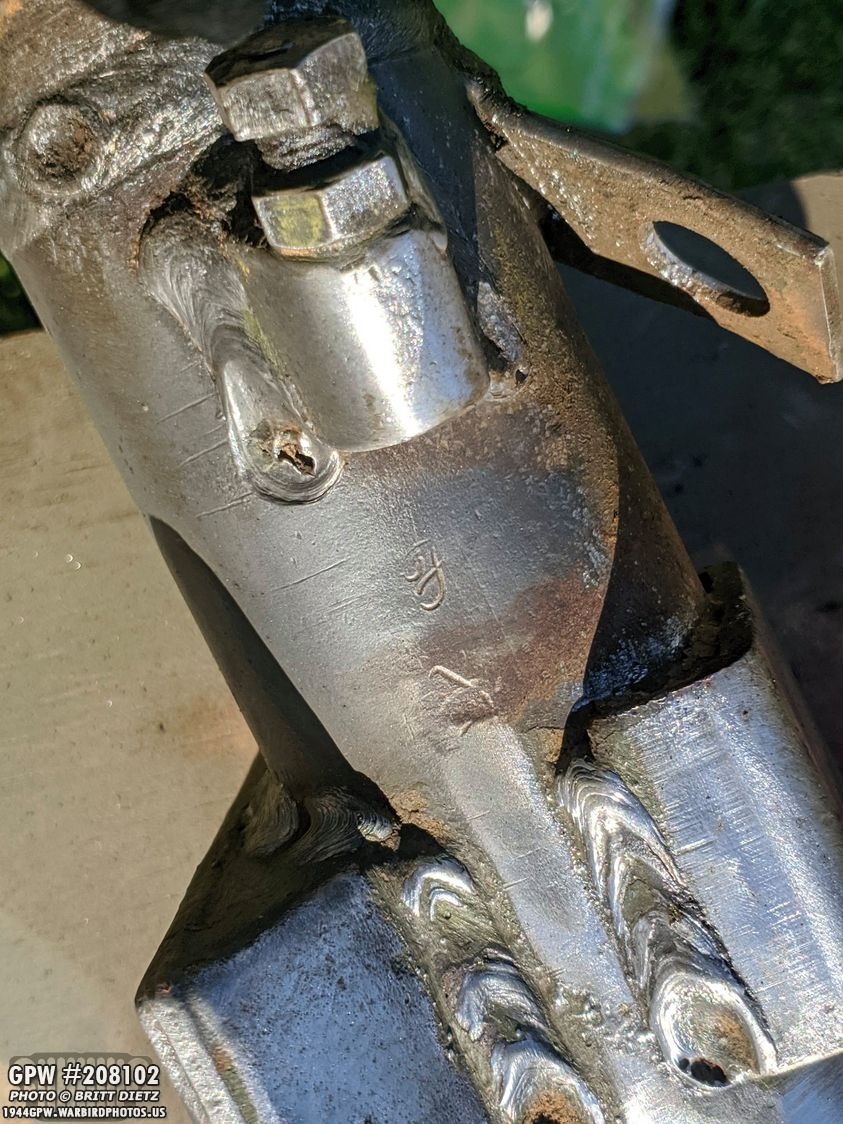
I discovered several new F stamps… including one on each side of the axle.

And the other side. These were covered with paint and I didn’t see them before.
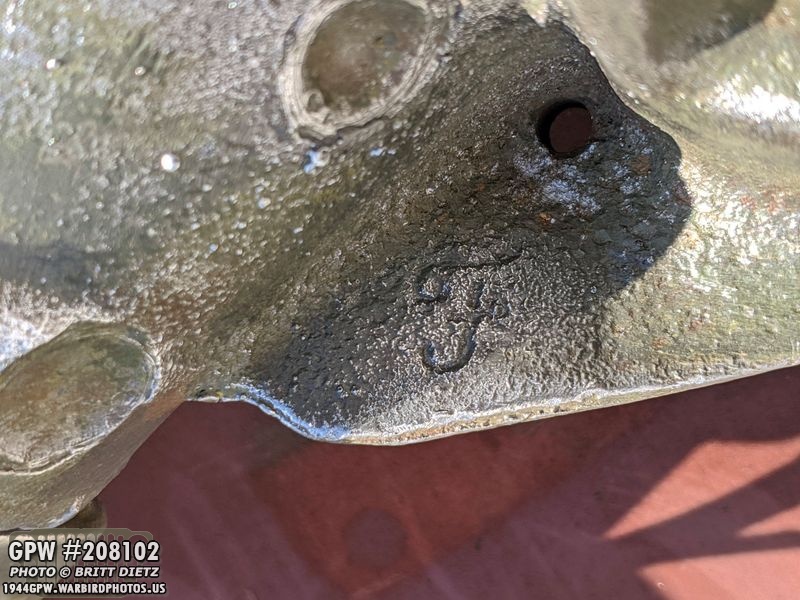
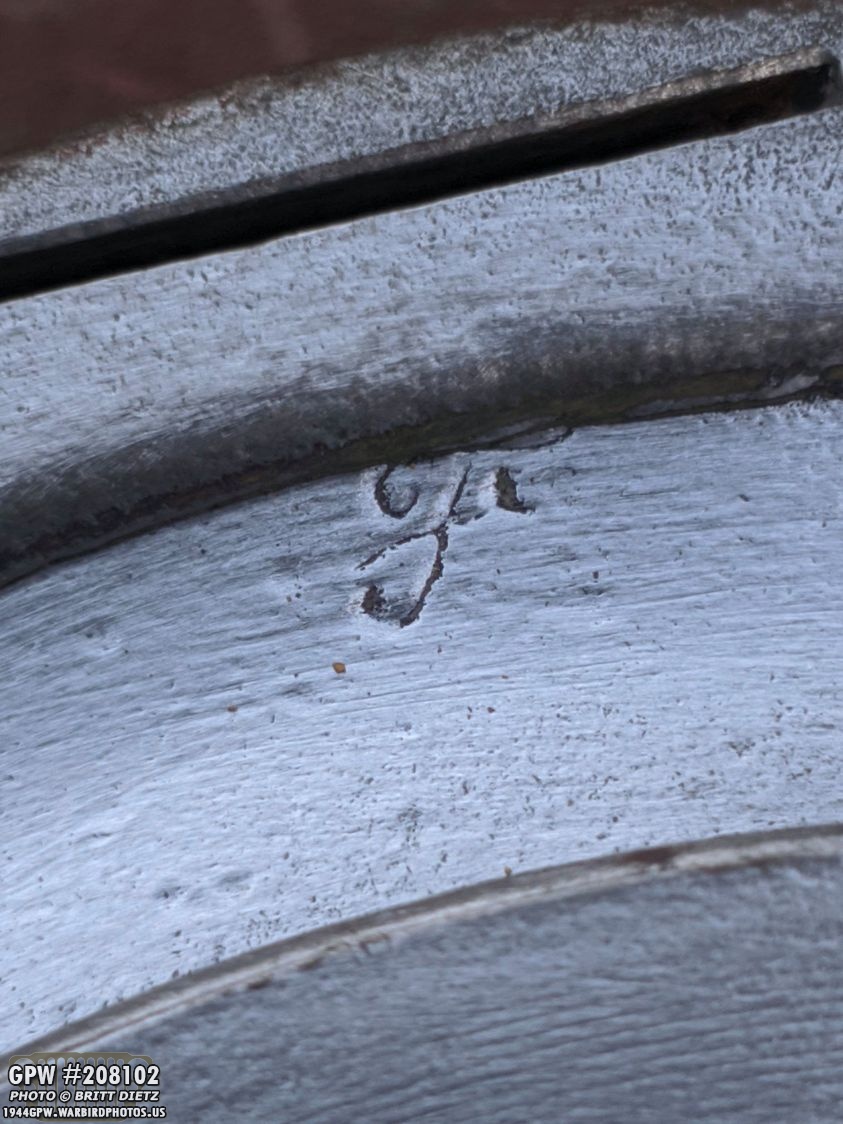
I was able to uncover the large F stamp on the lip of the main differential housing.

These welded on bolts had large F stamps…

And while I already knew about the brake line holder tab having an f stamp on the other side, I didn’t see one on this side until I started to clean it underneath.
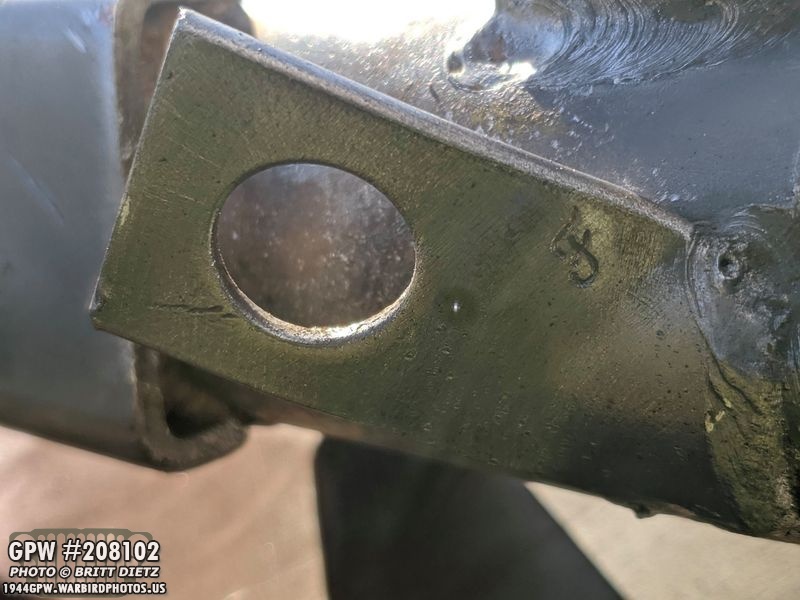
Here’s the easier to spot on one the other side.
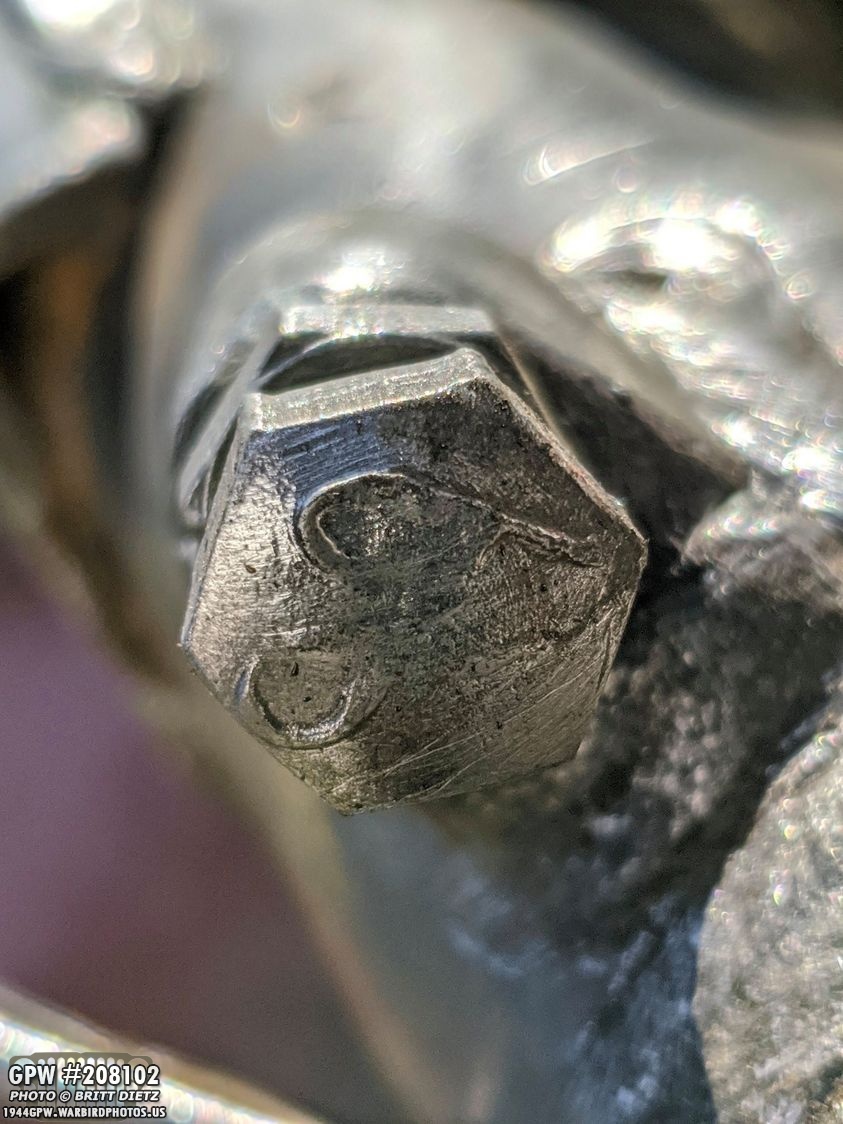
And here’s the welded on bolt on the other side, with an F slightly wearing away.

Inside the knuckle cup, I found an F stamp once I removed the inch-thick coating of grease.
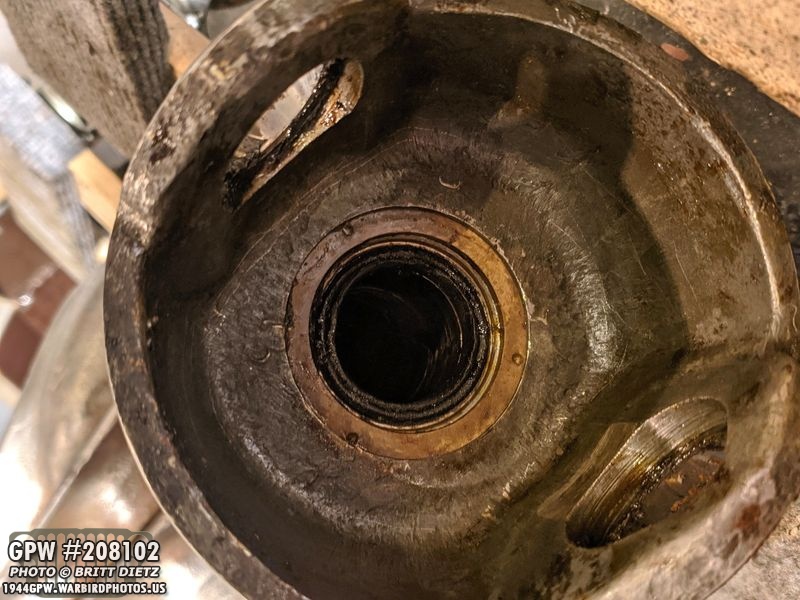
And this one is harder to see, but it’s there on the bottom, slightly south west angle.
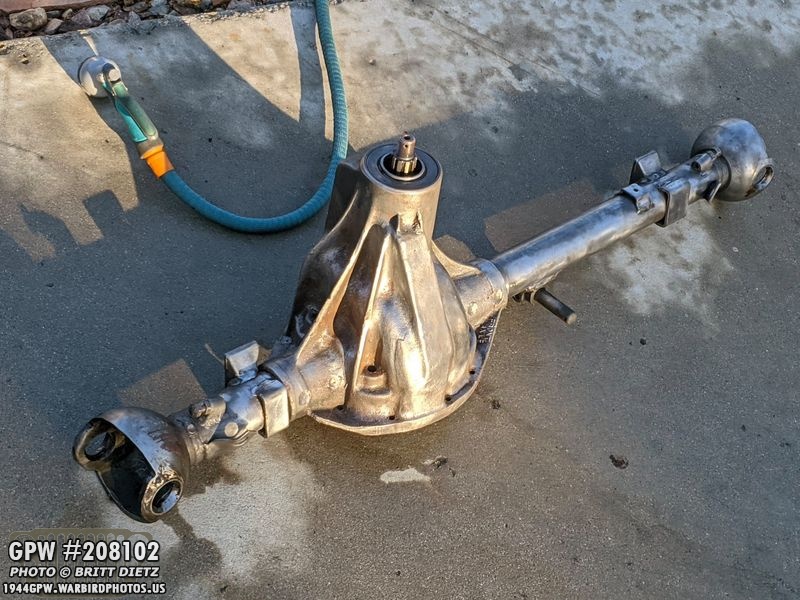
All in all, there are SO many F stamps on this front axle. Aside from the pinion, I have everything taken off of it and while it’s mostly one piece, the amount of F stamps makes you realize how many different pieces were welded/attached together. Can you take a guess at how many F stamps I found on this? Also, this shot shows after I power washed the axle and de-greased it. Just a bit more light rust to remove and it’s ready for cleaning and primer!

The answer: 12 F stamps! Whaaaa? Crazy right? Here’s a look at all the F stamps on the basic axle (NOT including all the parts I took off!). If you want to check your axle for F stamps, this cheat sheet will show you where at least one of them can be found!

Moving on, I started work cleaning the brake drums. I still have to remove the gobs of grease inside it, but it’s looking good so far. I also discovered where the F stamp (which I was worried wasn’t on there) is located.
It almost looks cut off, but it’s not where I thought it would be.
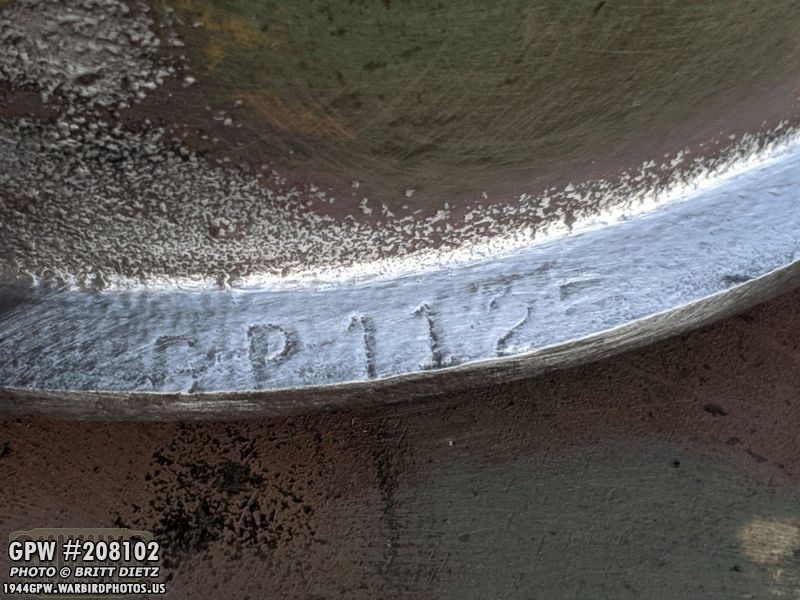
I also discovered the GP number (1125?)

And this 24566 number.

I spent some time Monday sandblasting more axle parts and cleaning them up. Here’s the yoke I finally got off from the front axle. Nice and clean!

And, of course, spotted an F stamp on the yoke. I feel like I should put together a massive chart showing where all the F stamps are on every part from these two axles.
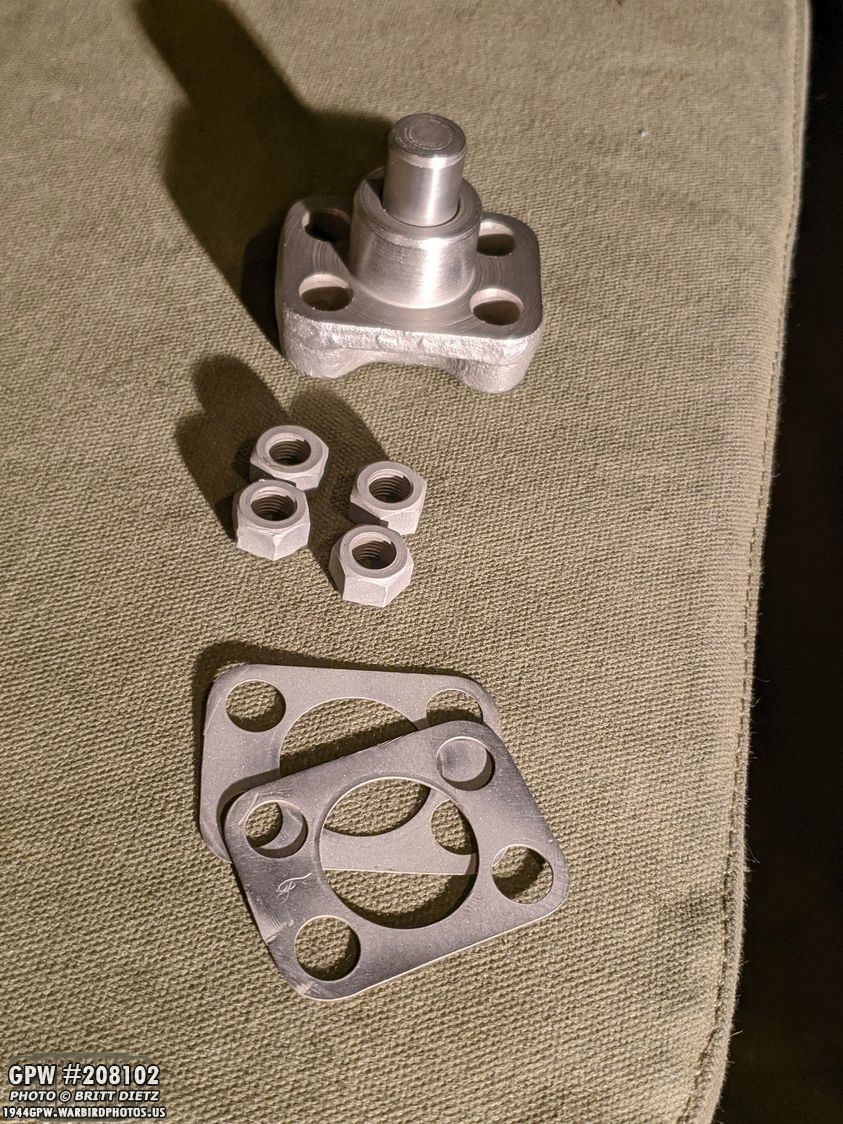
The lower king pin cap, nuts, and shims were also sand blasted.

Here’s the thicker shim with the F stamp.

And the king pin cap showing a large F stamp, a 3, and a F stamp on the king pin itself.
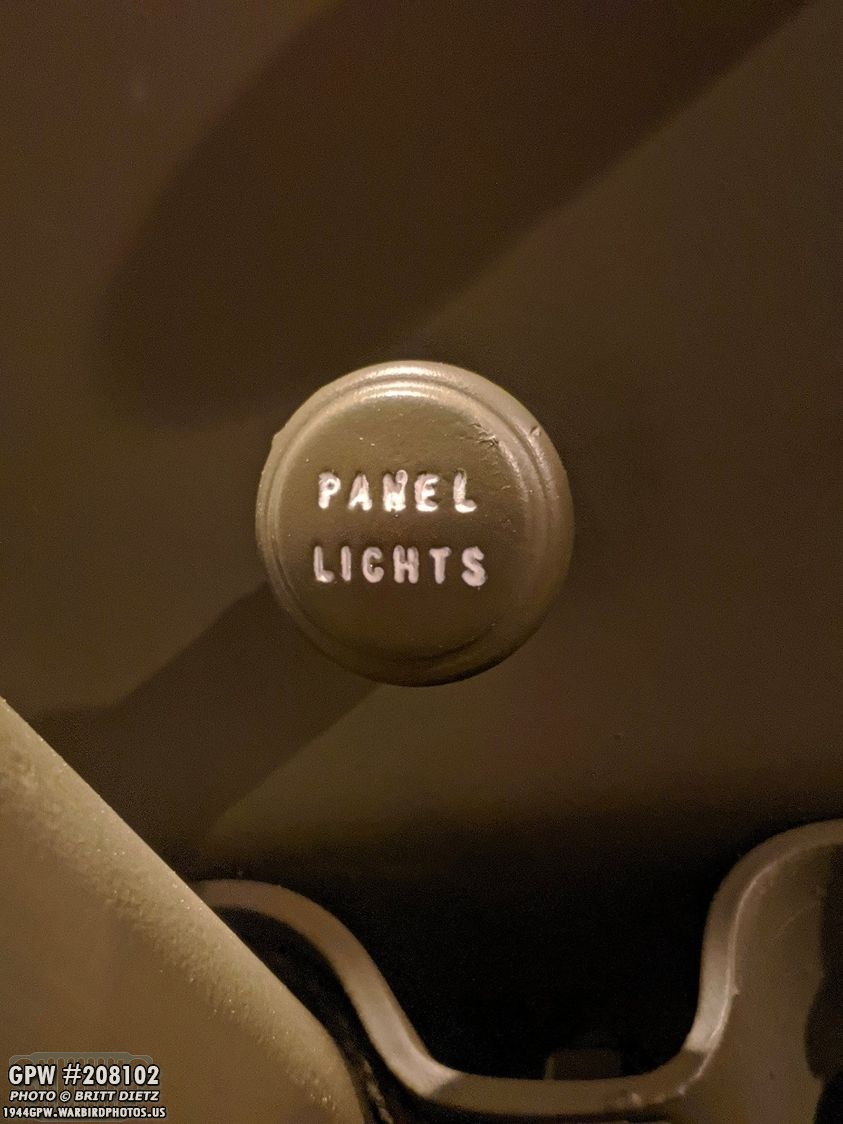
Finally, to wrap up this week’s update, I had an issue at the Air Raid later in the evening as I went to drive the Jeep back to the trailer. I pulled the Panel Lights switch, hear the click and saw the lights come on.. then suddenly they went off and the switch went complete loose. Pulling on the knob, there was no ‘click’ or resistance and the lights weren’t turning on. UGH! So a few days ago I decided (at the suggestion of Ron Fitzpatrick Jeep Parts) to take it apart and see how it works and if I could fix it myself.

It’s not easy getting to the switch and wires when it’s all hooked up. Your body needs to become a sort of liquid to be able to lay on the seats and maneuver your arms around the steering wheel, pedals, etc to get a screwdriver in there to get it apart.

Here’s a look at the switch with the knob unscrewed off. I knew I’d have to bend up those three metal tabs to get the cover off. I found a small screwdriver didn’t work to get under them to bring them up, but small pliers could pull them up.
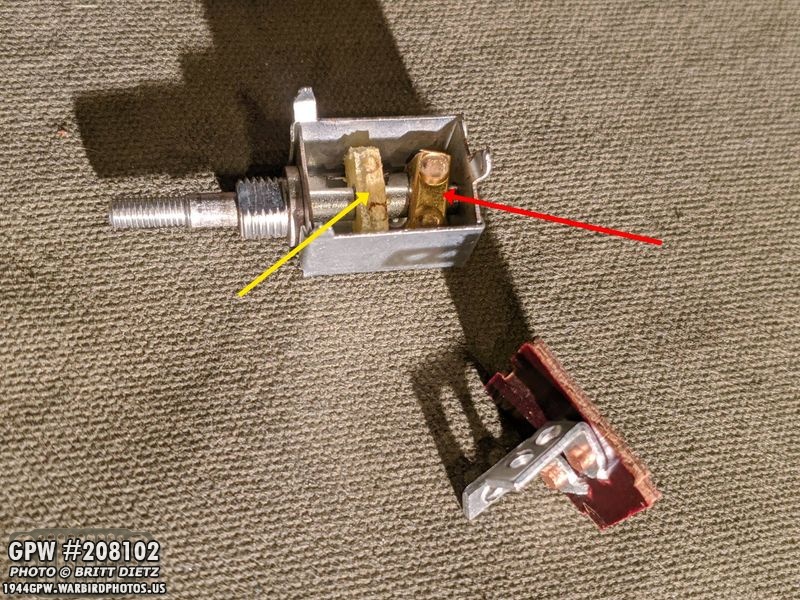
With the tabs bent outward, I was able to take the top lid off and I saw the issue right away. So the gold piece (red arrow) should be on top of the insulation block (yellow arrow) and had come off. When you pull on the knob, it moves that insulation block and gold piece across the two copper contacts on the top lid.
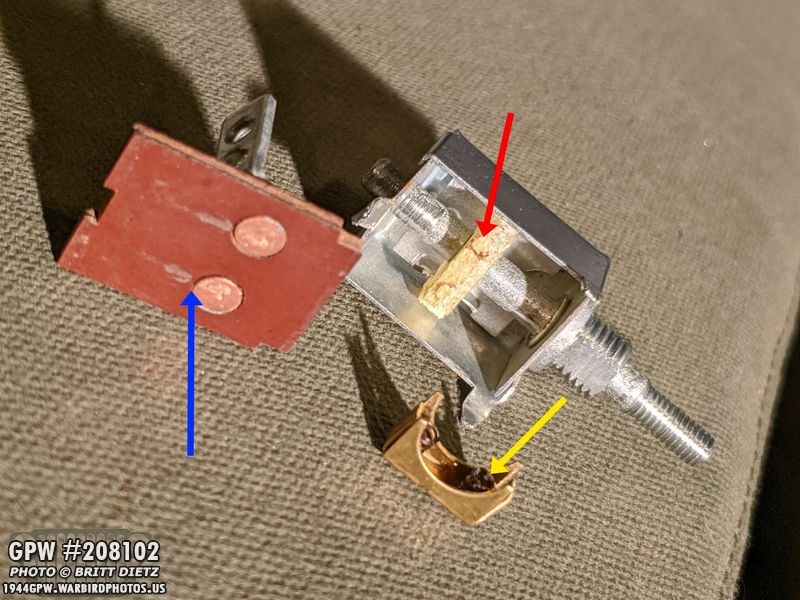
Here you can see everything better. Under that gold piece, there are two springs (yellow arrow). That is what pushes it to rub against the top lid. It should be glued to the insulation block (red arrow, you can see the marks where the springs should be attached). I think the glue was weak and after rubbing across the copper contacts (blue arrow) that have a little lip, it knocked off the gold piece. So I put some industrial glue on either side of the springs, put them into the gold part, then put that on top of the insulation block. Put the top lid back on and re-bent the metal tabs back down. Works perfectly now. So if anyone else has this issue, that’s how you fix it! So that’s it for this week’s long photo-filled update. Till next week and more work on the axles!