 Tire Pump, LED Brake Light Conversion, and more!
A full week of work since the last update, this week I was able to finish the tire pump restoration project and mount it to the rear seat on my Jeep. I also had my brake light burn out, so I decided to convert it to LED using the original lens! Finally, I sandblast some of the axle items I took off last week and begin to take apart my emergency brake. Finally, I have been prepping the Jeep for its first adventure coming this Saturday!

Getting the Jeep all prepped for the upcoming The Great Los Angeles Air Raid Of 1942 event this Saturday at Fort MacArthur Museum in San Pedro, CA! More on that later…

This is Part 3 of the WW2 tire pump restoration. So far I’ve gotten the pump restored and working, cleaned/repainted, and the wood sealed. Now it’s time to work on the mounting for it on the Jeep!

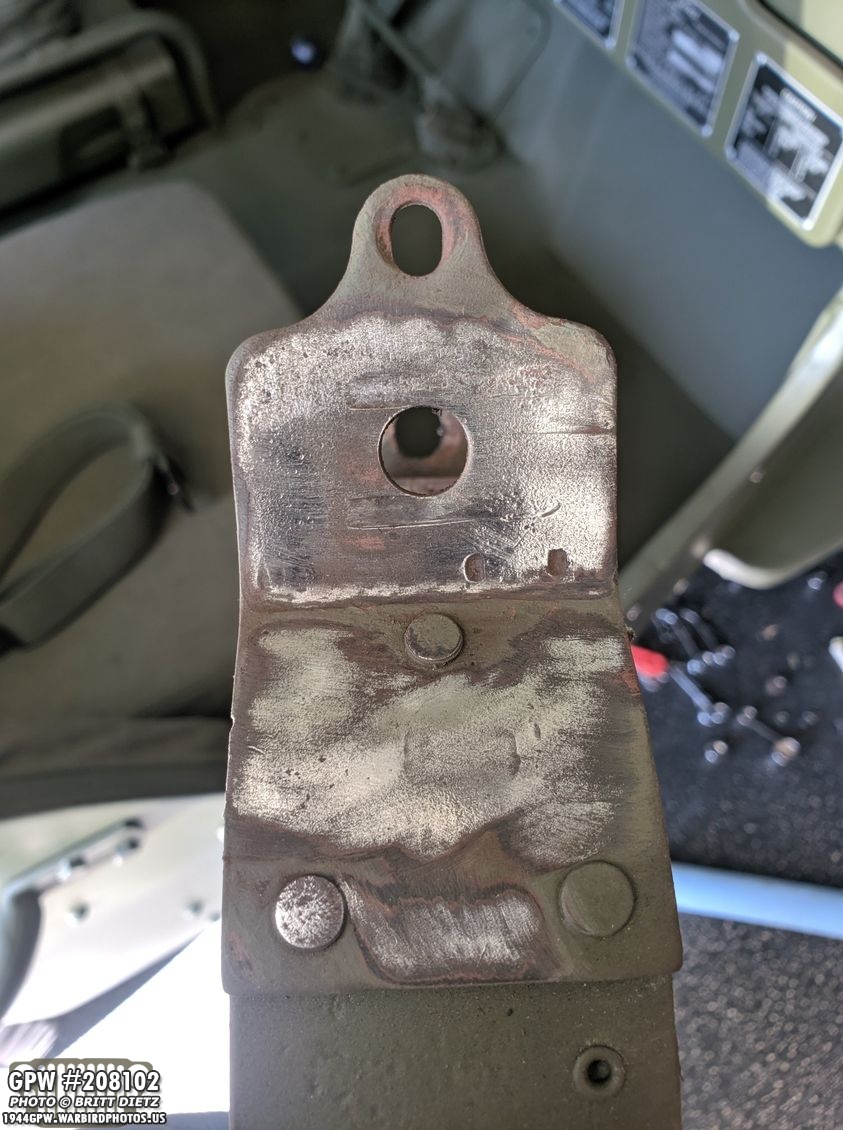
My rear seat is a GPW MB combo seat. The backrest is original GPW, but the seat pan is MB. As you can see here, there are marks showing that this pan originally did have the bracket and stud for the tire pump. The red arrow is where the bottom of the pump goes in a large bracket. You can see the marks where it was originally welded on. The yellow arrow is showing what’s left of the stud that has a clamp that holds the handle. The stud must have broken off or was cut, a long time ago.

Here’s a look at how the pump should mount with the brackets. The MB version is different than the GPW version. This is the MB way, where you have to extend the handle to get it to the clamp bracket. The GPW seat pan has the bottom bracket that holds the pump feet on the other side of that rib on the seat pan, thus bringing it closer to the clamp bracket and no need to extend the handle.

For the clamp bracket stud, I found this stud with matching thread at Home Depot and a wing nut. The idea is to weld that stud onto the spot where the original stud broke off. I wire wheeled the paint off around the area for welding.
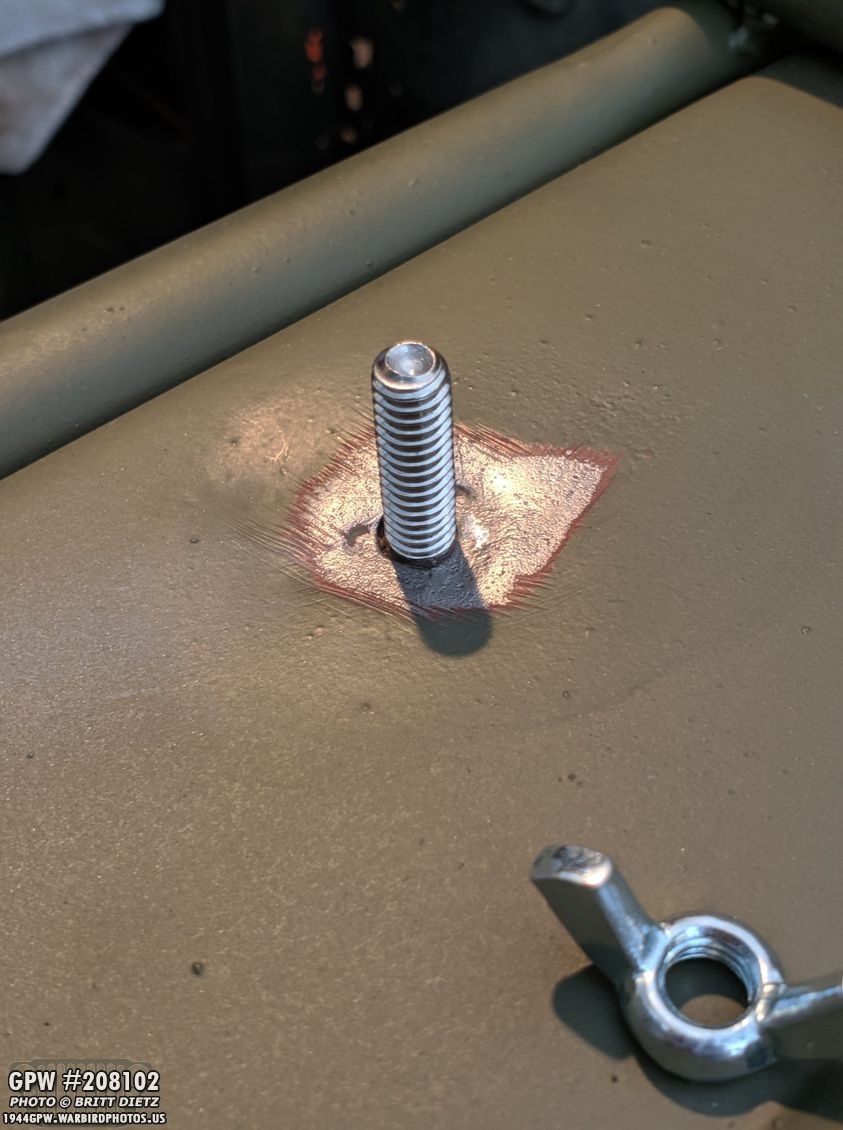
Sitting it on top, you can see how it should look once welded.

And here’s the other side with the large bracket that’s totally missing. You can see that indent where it used to be welded on. I could move the bracket over to be more like the GPW style, but since this is a MB seat pan, I’ll put it back where it was.
Seat needs to be removed from the Jeep, of course, and while it was out I took the time to clean out the area under the seat and touch up paint in some areas.

The clamp bracket and the foot bracket arrived from Ron Fitzpatrick Jeep Parts. Part of a large order I’ll show later in this update. The clamp came pre-primered since it doesn’t need welding. The three holes in the foot bracket are for welding to the seat.

Just a dry fitting to see how it’ll look with the clamp and foot brackets on.
The tab with the hole on the top of the foot bracket is for locking in the nozzle on the pump hose so it doesn’t flop around. You unscrew the tip from the nozzle, then put it through the hole on the bracket and screw it back in. That holds it secure.

Took the seat and the bracket/stud over to the Planes of Fame Air Museum motor pool for welding!

Here’s Paul welding the foot bracket on. Learned quite a bit more about welding from him as he put it on. Here he’s using a Lincoln MIG welder.

Then we moved inside to use a Miller TIG welder to put the stud on since it needed to be more precise.

Paul welding the stud. We left the wing nut on to help stabilize the stud.

All done! Just needing to clean up the welds and any splatter.

Here’s a look at the new stud welded on. Works perfectly!

And the foot bracket after cleaning up the weld/splatter with a flap wheel and Dremel.
I took the time to sand any scratches/marks on the rest of the seat pan that it got from welding, and it was time to primer!

Using Ron Fitzpatrick Jeep Parts Red Barrier III Red Oxide primer spray, dries so fast!

Just about an hour later, it was ready for 33070 OD Green also from Ron Fitzpatrick Jeep Parts which matches the original 33070 I sprayed on from RAPCO.

Since the welding caused the paint to burn on the other side of the pan, I also sanded that out and repainted this side. You can see the spot where the original bracket welds went through. This was not from our welding. I could have smoothed that out with the flap wheel, but it’s already thin metal and I didn’t want to cause any issues with the new welds.

Final coat on the backside. Looking like it was always there!

I also painted the clamp bracket with the 33070.

After it dried for two hours (it dries super fast as well), I went ahead and test fitted the pump. Perfectly secure!

And later that evening, I went ahead and re-mounted the seat back into the Jeep. After putting it in there, I thought for sure that once I rotate the seat down, the foot bracket tab that the nozzle goes through would hit the bottom floor of the body tub…

But, to my surprise, there was plenty of room! And here’s a good shot showing how the nozzle is screwed in through the hole on the tab of the bracket.

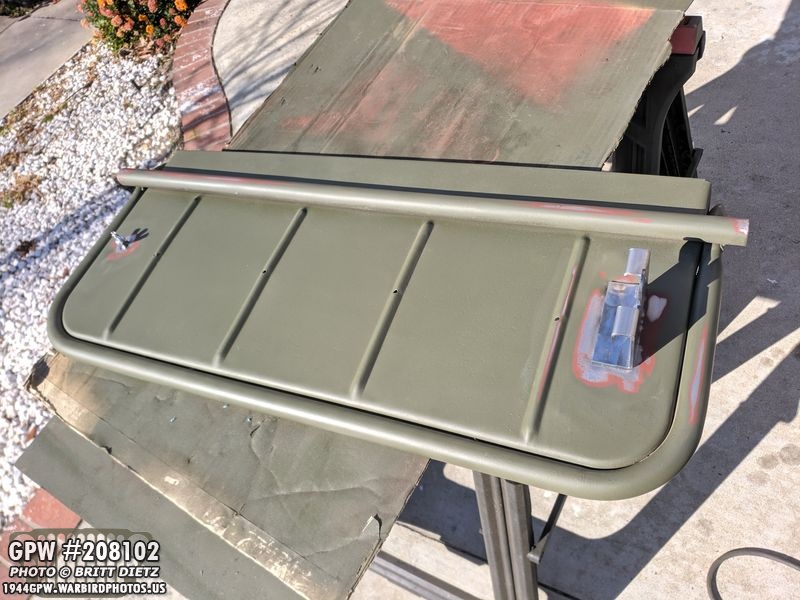
And here’s a look at the seat, you’d never know there’s a tire pump under there! Most jeeps probably don’t have one because you’d have to pull up the seat to even see it… but that’s one of those details I wanted for the Jeep. So with that, the Tire Pump project is COMPLETE!

As I was checking out the Jeep about a week ago, I noticed that my ‘always on’ brake light wasn’t working. On a Jeep, there’s only one brake light (yellow arrow) that is on the driver’s side under the Jerry Can holder. If I pushed the brake, the secondary light would come on, so it wasn’t a big deal since I don’t drive at night much. But then two days ago, I noticed that the secondary light had died as well, so I had no brake lights at all.

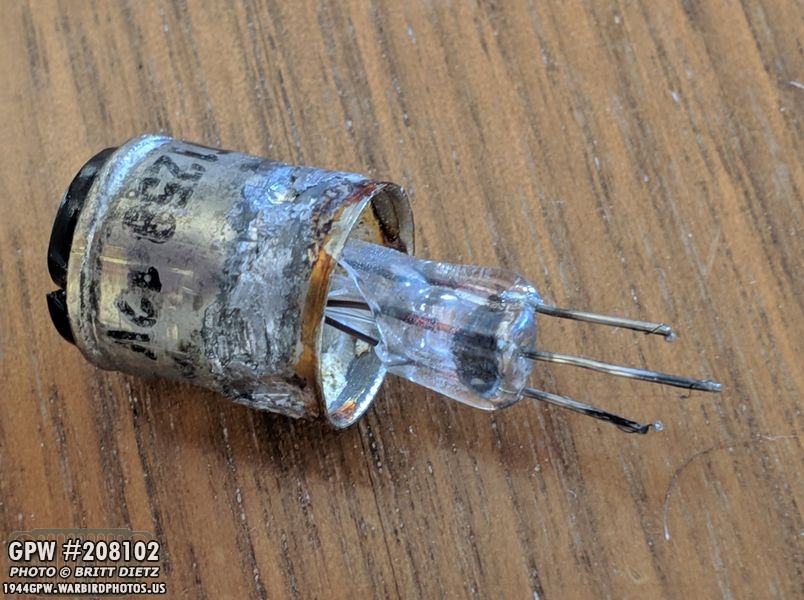
Here is the bulb removed from the tail light housing. It is an original 12-volt one from WW2 based on the markings. While 12-volt replacements can be found online, they are expensive and not super common compared to 6v. So I decided to convert the light to LED reusing the housing. I thought it would be a tough project, but it actually was very easy. To remove the original bulb, I took a small screwdriver and carefully (with the red lens against my chest) hammered the screwdriver tip around the bulb breaking the solder (red arrow).

I was then able to pull out the bulb after shattering the glass (which I just shook out until it was all removed). Here’s a look at the housing (with the red lens perfectly intact) and what was left of the bulb.

Looking inside the housing, you can see the red lens. It was a nice clean break of the bulb.
So, for replacements, I scoured the internet to try to find something that 1) wasn’t any longer than the original bulb, 2) was dual action so you can have two brightnesses for always-on and when the brake is pressed, 3) was the same width or as close to it as possible, and 4) was red as I’ve heard that if you use a white bulb, some of the brightness will be absorbed by the red lens. I looked for red brake light LED bulbs with a 1157 socket.

Here’s a look at that light all taken apart. The 1943 dated 12v blackout light is on the far left. The two parts of the housing are on the right.

I ended up finding these AUXLIGHT led lights on amazon. They are almost the EXACT same size as the original bulb, actually a bit shorter when you factor in the original bulb’s height with the glass, and came in a two-pack with red and dual-action (only around $15!). I’ll post a link to them in the comments. Keep in mind these are 12 VOLT! There are plenty of 6-volt versions out there like these, but these are 12-volt versions.

There were two problems that I needed to fix that I discovered right away. First, there was a lip on the new bulb that was just slightly larger than the original hole (shown here with the red arrow). So I took my Dremel with a grinding wheel and opened the hole up about 3/16 of an inch until I could put the bulb through the hole without it catching.

The other issue was the little nipple tabs on the bulb. One was in the correct lower spot (shown here), but the one on the other side was too high and didn’t line up to lock into place. So I took the grinding wheel and carefully removed it (see next photo).

The red arrow shows the tab I took off compared to the spare LED bulb.
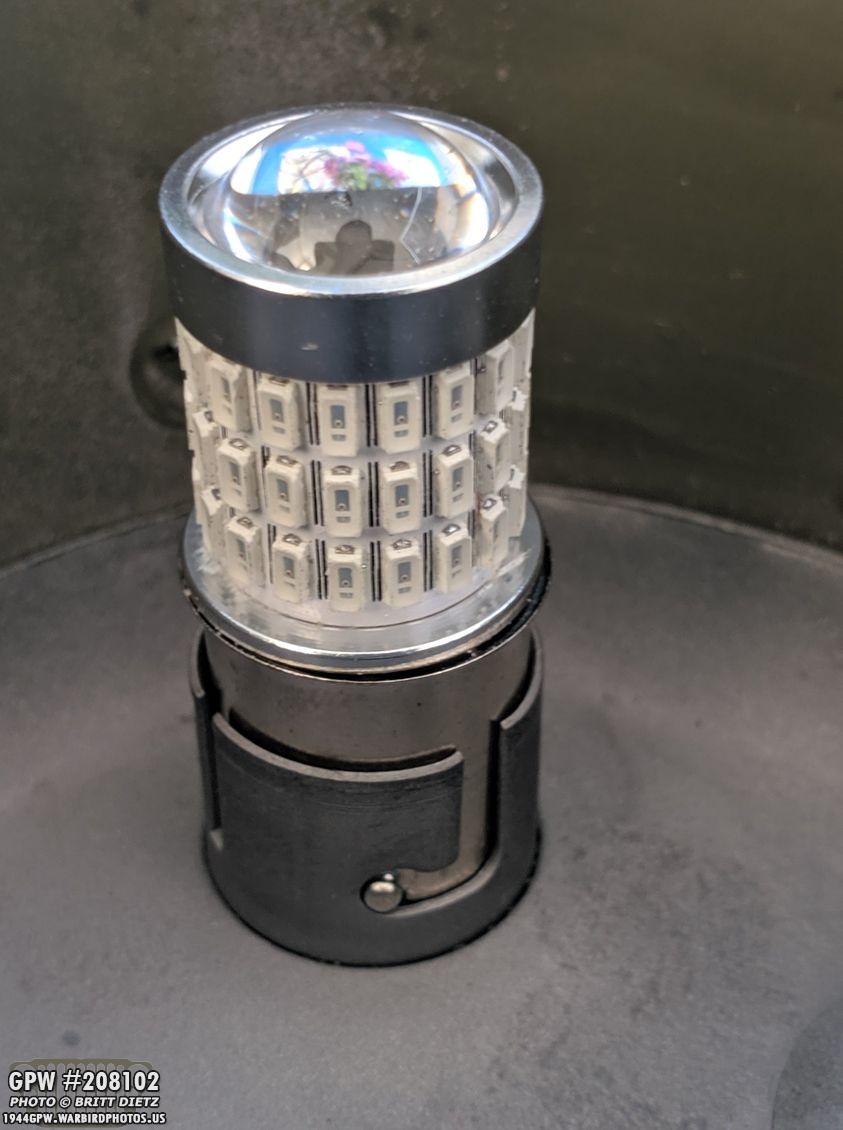
With the tab gone, I was able to lock the bulb into the socket. It’s a nice snug fit, it’s not going anywhere even with only one tab!

Looking on the other side, the contacts line up exactly where they need to be in relation to the wire harness connector. The two connections are for that dual-action I mentioned, where one lights up the always-on LEDs, the other lights the side LEDs for a brighter brake when the brake is pressed.

Only other step is to put the housing on over the bulb, which was a perfect fit since I had grinded the hole open more (you can see the grinding wheel on my Dremel in the top right).

I did a quick and dirty test run only hand tightening the screws… and once I turned on the lights… SUCCESS! A nice BRIGHT brake light using the original housing! No need to hunt and buy another NOS bulb that will surely burn out. These LED bulbs are rated for 100,000 hours, and I have a spare if it does burn out! Plus they have a 1-year warranty.

It’s incredibly hard to photograph the light in the two different modes, but you can see here the left is the ‘always on’ light, and right is after I had someone hit the brake. The camera likes to try and adjust for the brighter light, so I can’t really show how much brighter it is. One thing to note – When you put the LED bulb in, it’s easy to get it in the wrong way since it goes in two ways. If you hit the brake and nothing happens, just take the bulb out and rotate it 180 degrees in the socket. It will work perfect then! So that’s it, now I have a working LED brake light that’ll last 100,000 hours. When the other lights burn out, on the Jeep, I may end up replacing them with LEDs like this.

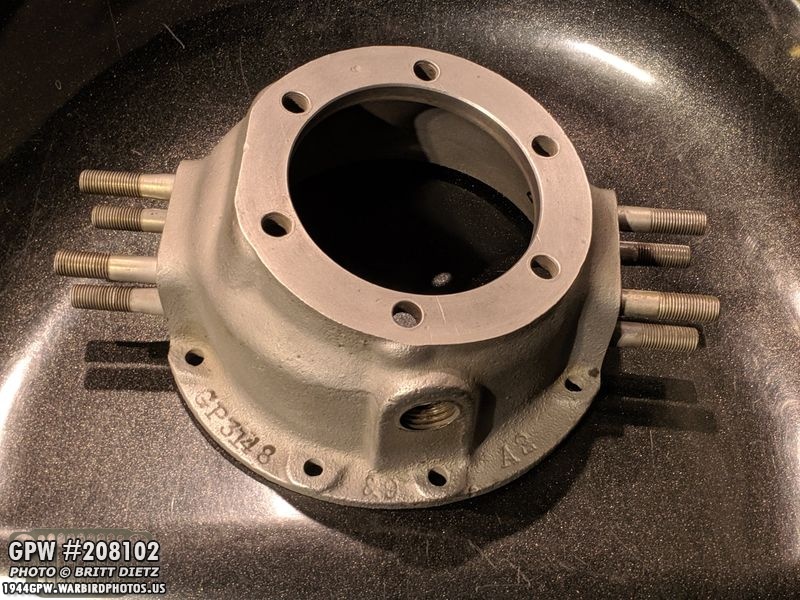
As mentioned earlier, I got a LARGE shipment from Ron Fitzpatrick Jeep Parts. To save on shipping, I ordered all the axle/brake items I’m going to need for the restoration of the wartime GPW axles. This included a complete brake repair kit, all the various hardware that needed replacement, new gaskets, even new F stamped bolts to replace a couple of ones that were missing (had to make them match the others!). The tire pump brackets, which I installed, were also part of this shipment.

Ron Fitzpatrick Jeep Parts even made sure to send F marked brake shoes! No one will see them since they will be inclosed and probably won’t need replacing in my life since the Jeep isn’t a daily driver.

I didn’t have much time to work on the axles this week, but I did get some cleaning in! To help with the sandblasting on the knuckles, I decided to wire wheel what I could first since they were caked with grime. On the left is after wire wheeling, on the right is before.
It was a big help, and the sandblasting went a lot easier and faster. Here’s one of the knuckles after being totally cleaned. Looks so nice!
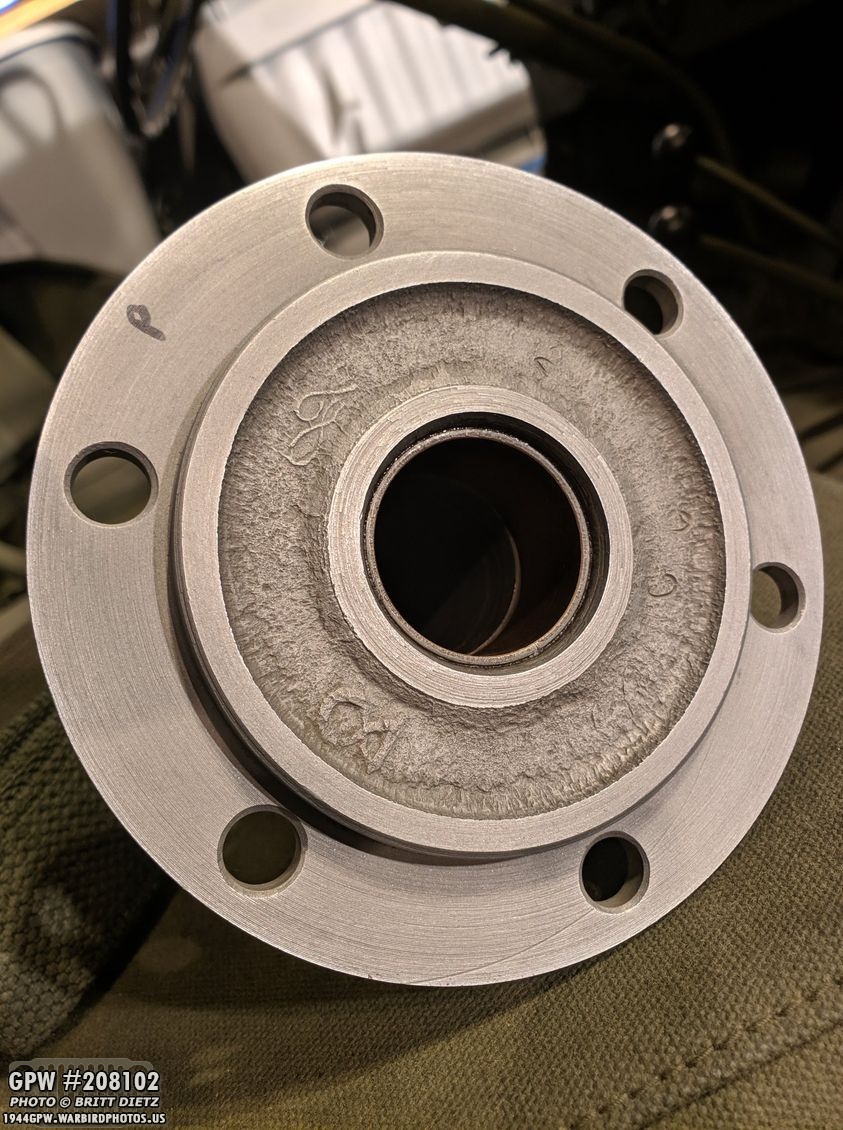
I also sandblasted the passenger spindle (the P is on there to keep track which came from which side). You can make out the F stamp a lot better now.

Looks nearly brand new minus some of the slight marking on the tip from where someone, in the past, tried to get the spindle nuts off with a chisel.
Here’s the passenger steering arm all cleaned up looking brand new. You can see the F stamp on the king pin clear as day.

In that bright highlight where the light reflected, you can just make out the F stamp and a 10 that’s almost worn away.
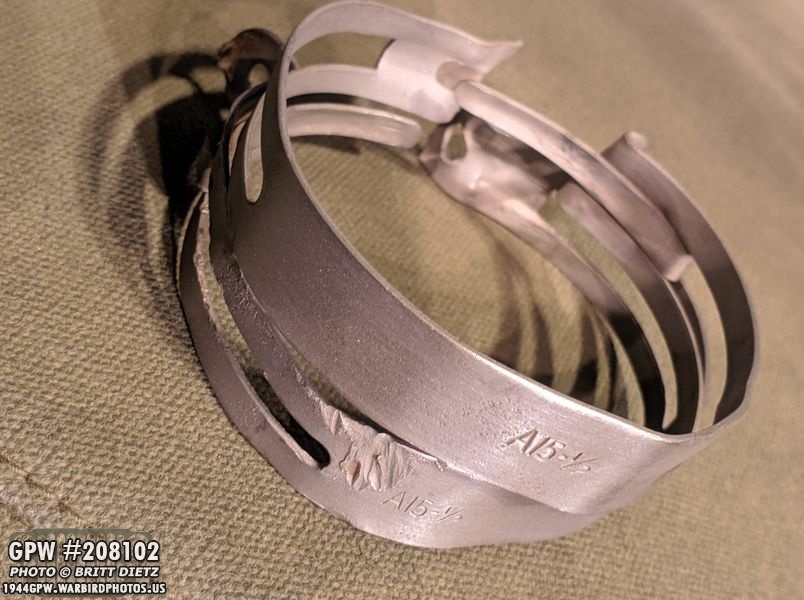
I cleaned up the two original clips that hold the metal brake line onto the front axle. Even though the bottom one has some damage, I was able to pound it back into shape and I’ll still be able to reuse both of them.
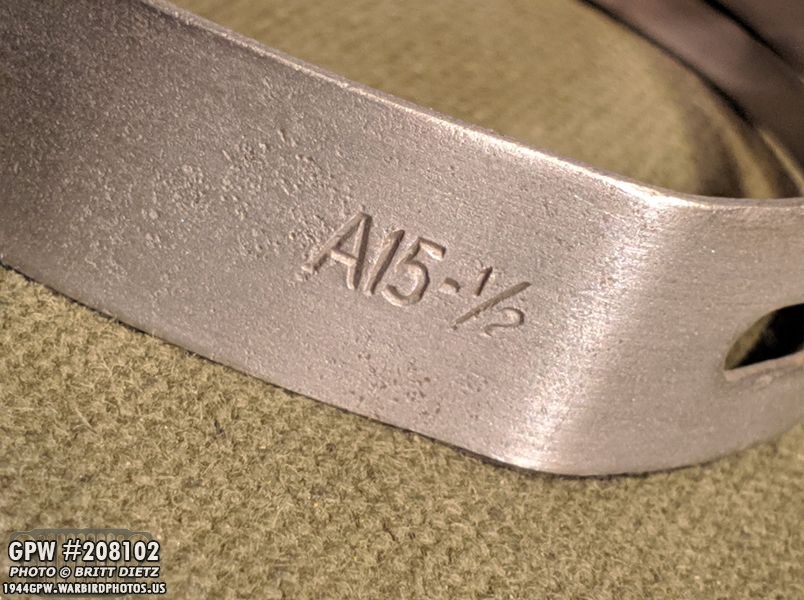
They appear to be original clips, with A15 -1/2 on them.

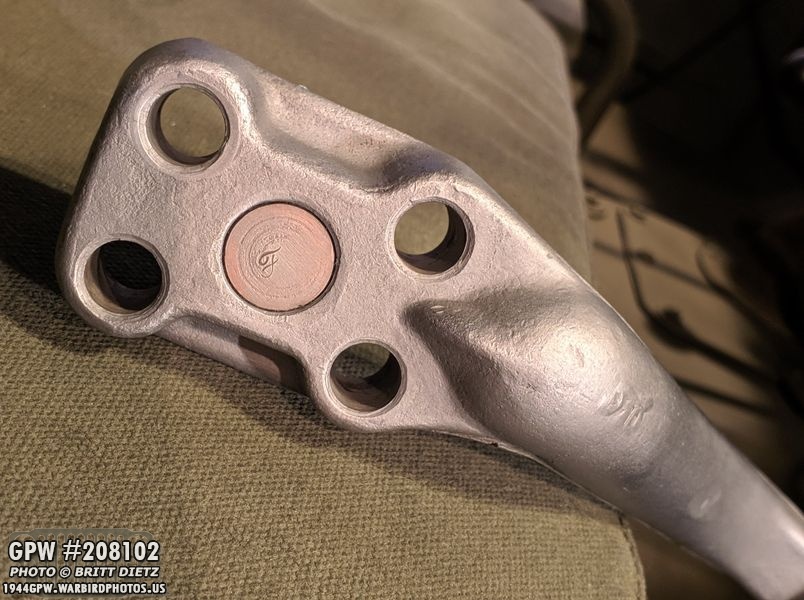
I took the passenger king pin cap and started to clean it revealing not only an F stamp on the king pin, but a large well hidden under paint F stamp on the cap itself.

I also was able to get the drain plug out of the knuckle, which I wasn’t sure was going to budge. But after the wire wheeling and sandblasting, it came right out no hassle!

And in prepping the front axle cover for sandblasting, I also wire wheeled it. Next week I’ll sandblast it clean and attempt to remove the drain plug.

The last thing I sandblasted was the brake bolts, shoe anchor pin plate, and shoe anchor pin cams. They are a little beat up, but totally still usable!

So, as mentioned, I’m taking the Jeep out for the first public event this coming Saturday at the Fort MacArthur Museum’s The Great Los Angeles Air Raid Of 1942 event. That meant cleaning the Jeep, touching up some paint spots, and getting her some fuel (shown here).

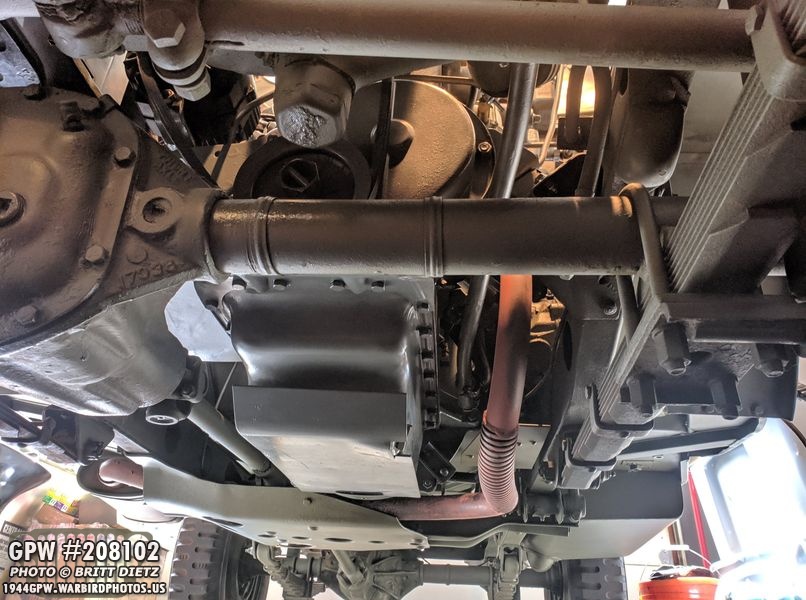
That also meant inspecting/cleaning the engine bay. Using my compressor and air gun, I blew out all the leaves, dirt, dust, etc.
The shine on the tires was fading…

So I re-polished them. I doesn’t look like it from this shot since it’s reflecting things, but they look nice and polished.

I also have had an issue with the repro hood hinge scratching itself every time I open/close the hood. I took my Dremel with a thin cutting wheel and carefully tried to cut any parts of the hood that were jagged around the hinge. I then sanded the scratches.

Here I hit it with red oxide primer. I then sanded it again after this (since I realized some spots still weren’t smooth) and hit it with 33070 OD Green. I forgot to take photos doing those two things, but it ended up coming out nice. It still scratches a little bit when I open the hood, but a LOT less. Eventually, I want to get another original GPW hood to replace this repro one. (and as a reminder, my original hood was too warped and rusted to try and restore).
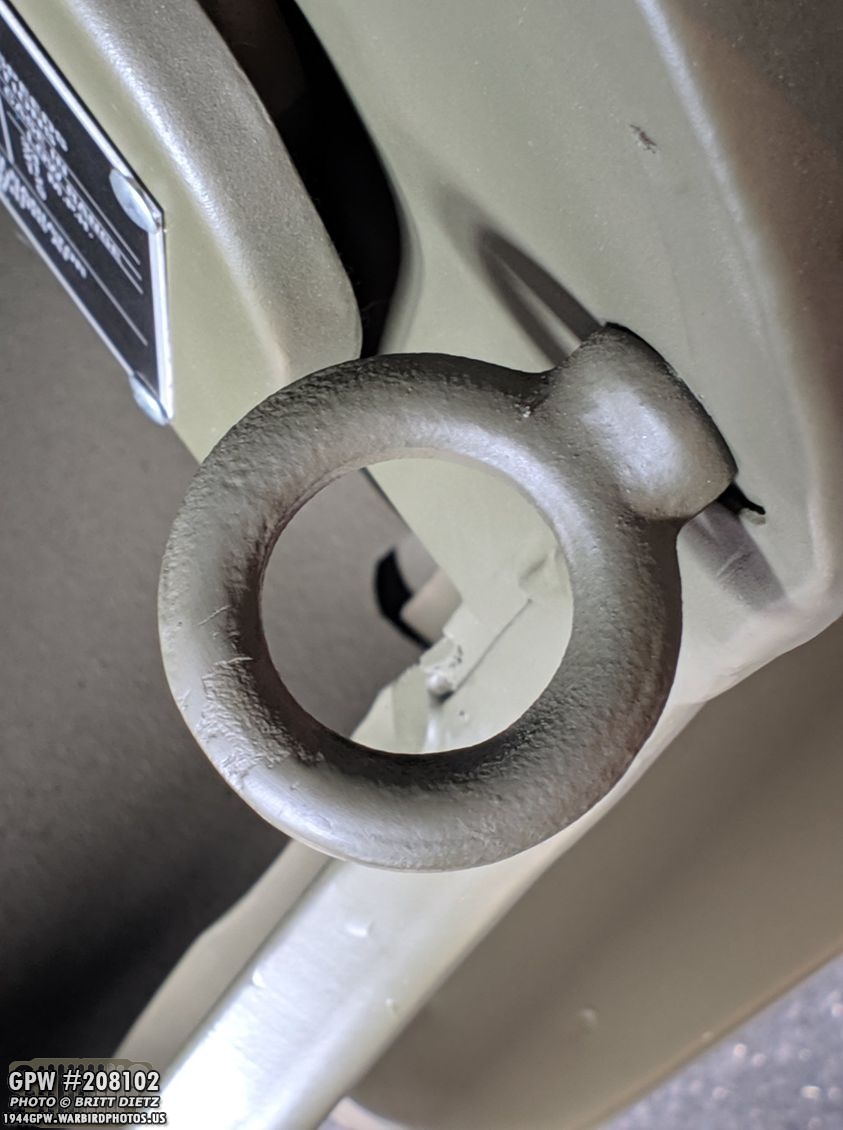
I also touched up the safety strap eyelet. The paint won’t last long on this taking on and off the safety strap, but it was getting pretty bad before, so it’ll look nice for now.
I also went under the jeep and touched up any paint scuffed by rocks and cleaned any fluid leaks.

Another issue that I noticed is that my horn randomly stopped working. After checking the circuit breaker to make sure it hadn’t tripped, and checking the horn to make sure it still works hooking it directly to the battery, I was told to check the horn wire soldering to the brass ring in the steering column. After removing the horn and the oil can/holder, I opened the little horn contact brush part and sure enough, the wire (yellow arrow) had come un-soldered from the brass (red arrow). Apparently, this is very common, and it makes me think this design could have been a heck of a lot better.

Taking my solder iron, I spent a few hours trying to get it soldered. It’s NOT easy, as you have to lean over the fender, snake you hand between the carb/manifold and reach down with the soldering iron and solder wire to that little open area where the yellow arrow points.

It just didn’t want to solder, even after cleaning the contacts over and over again with rubbing alcohol. After the 20th attempt, I finally got them to join. I don’t think it’s a strong bond, though, and I feel it’ll break again in not too long. So once it does, I’ll probably think about taking out the steering wheel, outer steering column, and maybe even the steering box with the inner steering rod so I can properly re-solder it from a table vs leaned over in the jeep with little space. Here is everything put back together and re-hooked up.

The last thing I decided to look at, unintentionally, was my emergency hand brake. I don’t use it at all, as putting the jeep into gear is a nice parking brake that works. But it’s another item I wanted working just for that safety in case I do have to park on a steep hill sometime. Here’s a look at the external e-brake system. I was told by the person who sold me the Jeep that someone had driven the Jeep with the brake engaged, so it no longer worked.
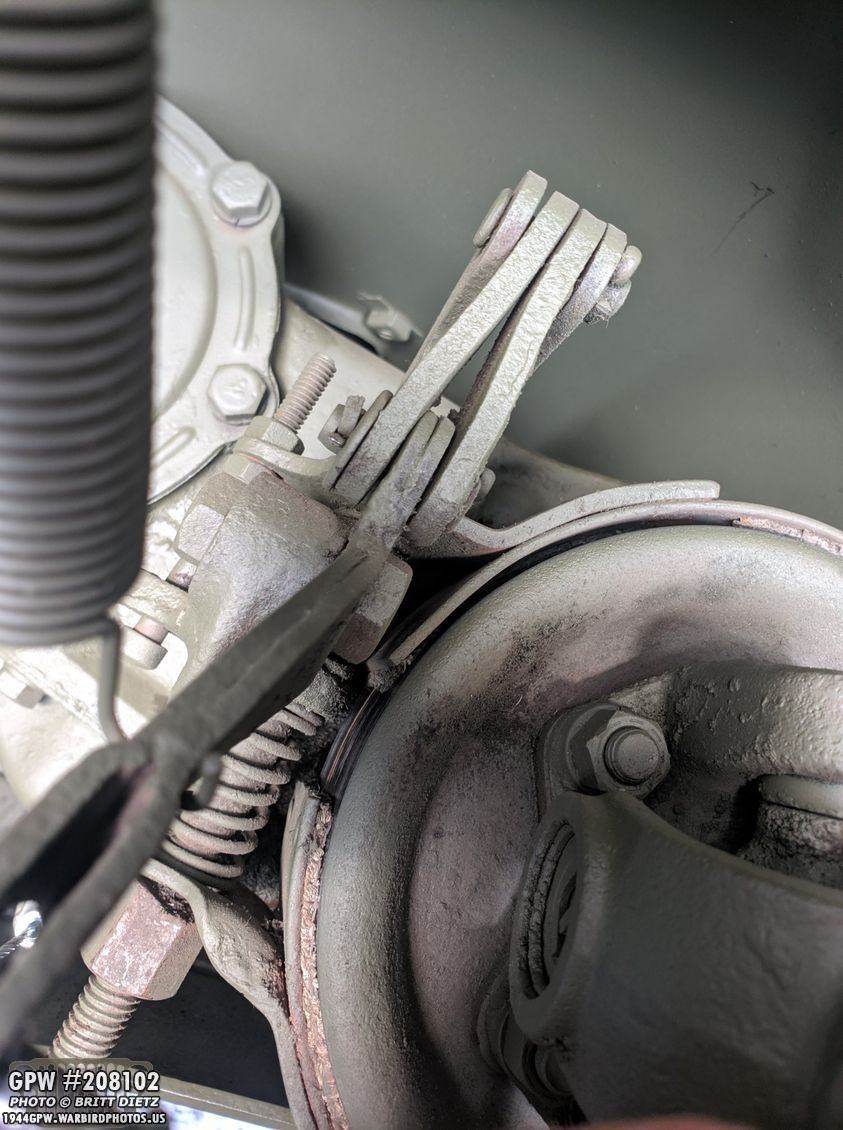
Looking closer at it, I could see that the lining might have some issues, so I decided to take it apart and give it a good cleaning and replace whatever is needed to make it work again.

It took a bit of work getting the outer band off, but once off I realized the lining was indeed in bad shape.
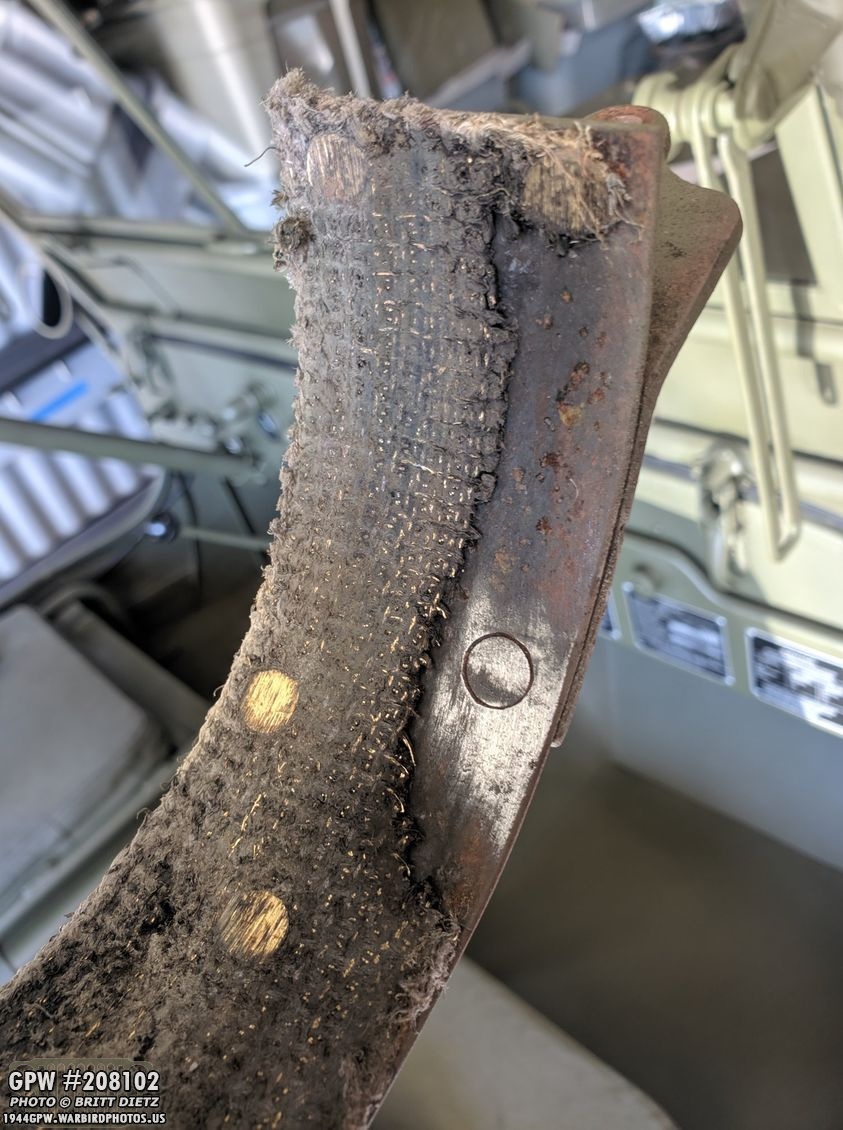
Like missing sections of it bad shape.
I tried looking for any F stamps, which should be on this tab, and I couldn’t find any.

There was this pitted and worn out patent date, 6/23/1925 and part number 1543647. From what info I’ve been able to find, at least one person claims this is an original type of e-brake band and they found the same thing on their GPW. So it’s possible it is original.
Here’s a look at the brake drum, which I’ll replace. It’s got some good scarring in it and was accidentally damaged. I’ll order a new brake drum next week.
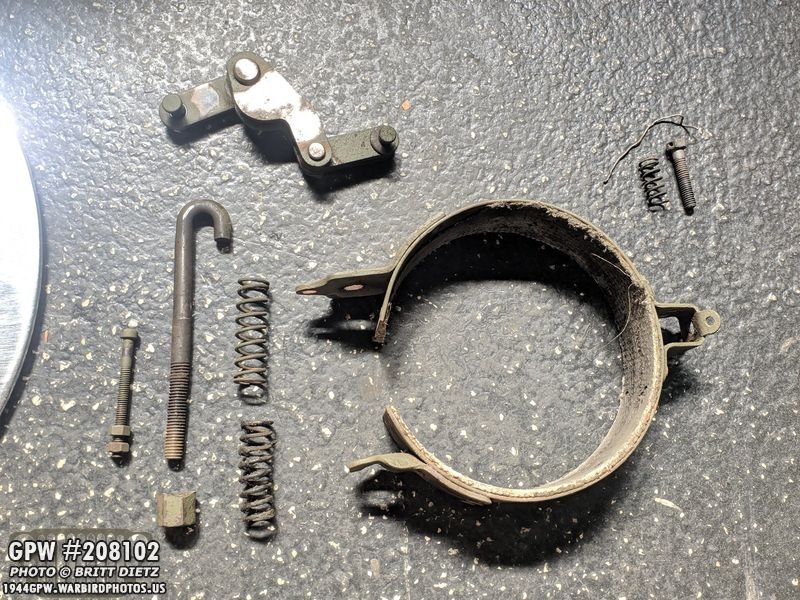
Here’s a look at all the parts I took off. I’ll clean them all up, repaint them, straighten out that J hook that has a slight bend to it, replace all the cotter pins, and my friend Roger said he’ll re-line my e-brake band saving me over $70+ for a new one! Once all that is done, reinstalled and adjusted… I should have a working e-brake. Look for more work on this project in the next coming updates.

The last two photos here for this week’s update, the first being the first thing my Jeep has appeared in! One of my photos of the Jeep was used to make this ‘line art’ on this flyer. Nice to see my Jeep already appearing on artwork!

And finally, I had a little helper again as I worked on the Jeep this week. This look is either ‘why am I in here?’ or ‘why is there no food in this jeep?’ That’s it for this week! If all goes well, I’ll have a lot of photos to share of the Jeep at Fort MacArthur Museum this Saturday for next week’s update! Till then!