 More Axle work and a look at what’s left
This week was a bit slow again, and I only got to work on the rear axle disassembling it more checking it out. I discover several Ford F marks, and see what condition the brakes are in. At the end of the post after some shots of the Jeep while out driving, I break down what’s left to do on the Jeep till I can say I’m pretty much ‘done’. While the overall restoration is finished, there’s still plenty left to do!

It’s tough finding a spot to take photos without houses or buildings around where the Jeep is based within short driving distance but found a new spot that works pretty well. More on that later.
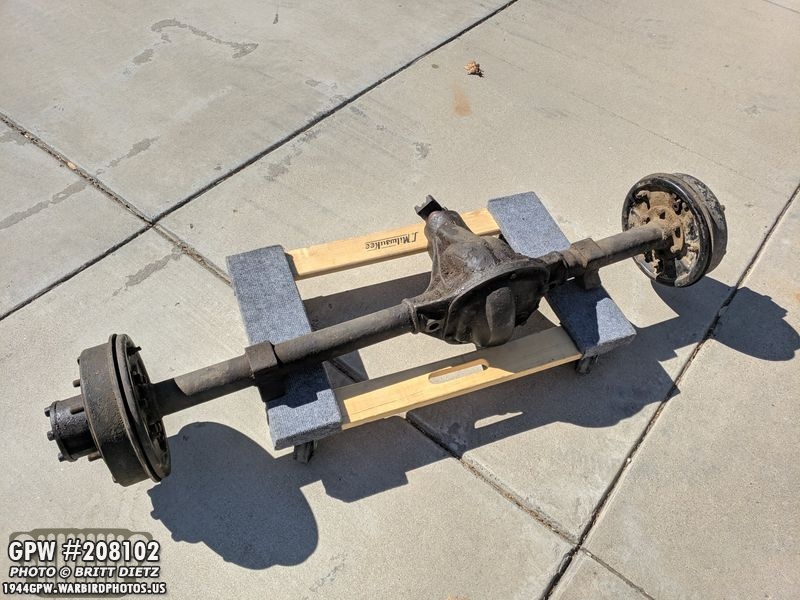
For those that haven’t been following along the last few updates, my Jeep is pretty much done with the main restoration. There are many projects still left to do, however, such as replacing the CJ (Civilian Jeep – Post-War) axles with original wartime axles I got for free from a fellow G503 member in Irvine, CA. I was told originally that they were MB axles…

But after doing some wire wheeling, I was delighted to find both the front and rear axles were actually Ford GPW axles, perfect for my GPW! Sadly, as I began work on taking apart the rear axle first, I found that the spider gears had exploded at some point, and it required a full carrier replacement, which I was able to locate a Ford GPW carrier on eBay which is now in the rear axle.
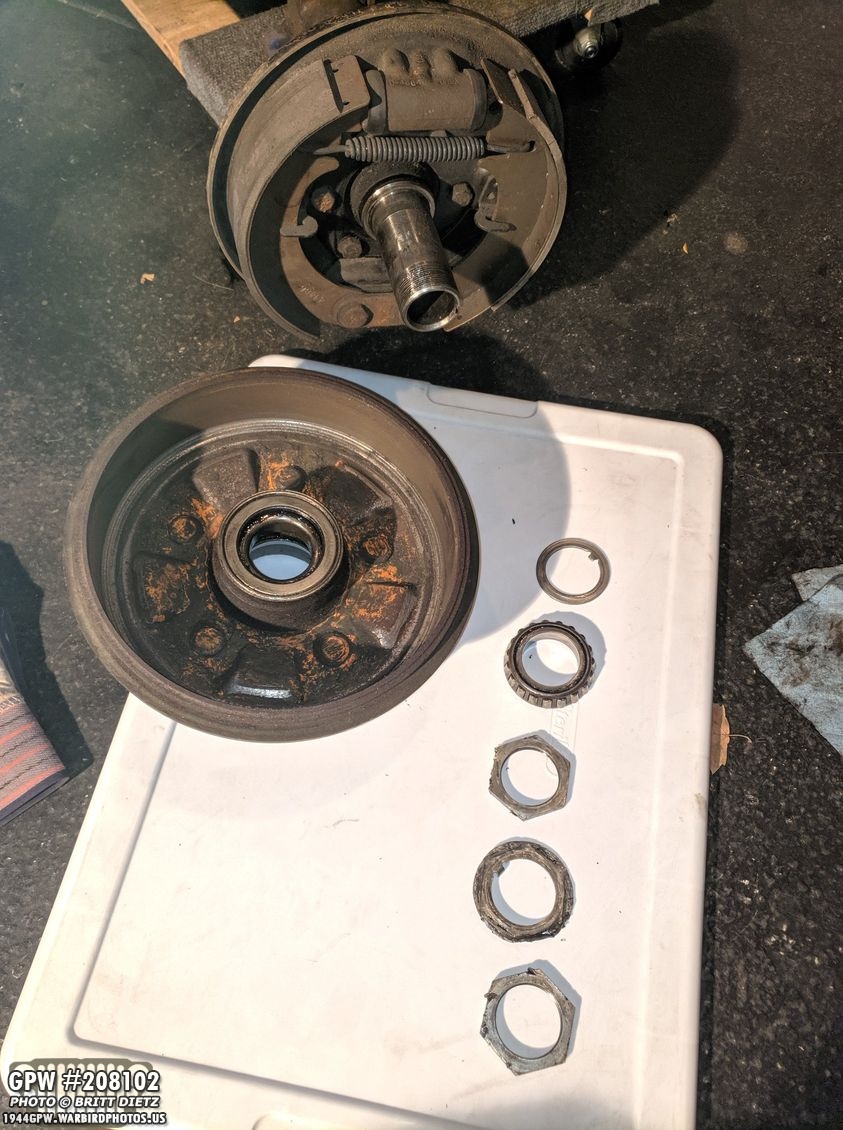
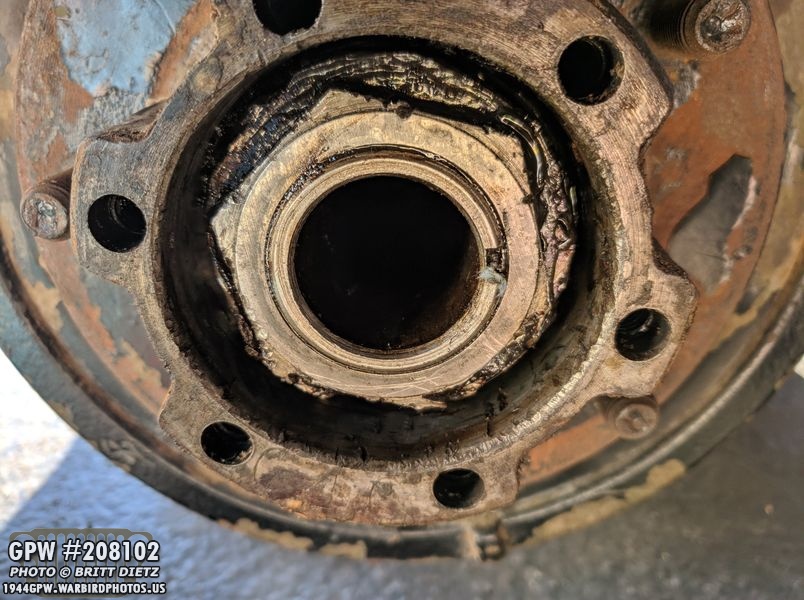
In last week’s update, I started to take apart the wheel/brakes on the rear axle, starting with the passenger side first. Here I’ve removed all the nuts/washers and the first bearing to then be able to take off the brake drum.

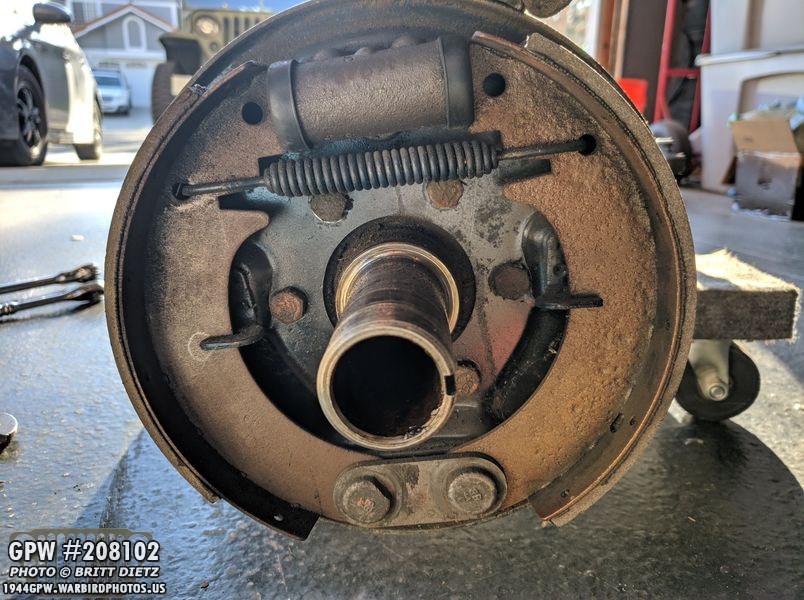
Here’s another look at that side’s brake setup. It appears mostly original, but it’s also possible they were placed at some point in WW2 or just after.
I removed all the various items on that brake after a bit of work. I’ll be replacing the brake pads and the cylinder… even if they are original, better to be safe than driving with bad brakes! The rest of the items I’ll keep as they are in good shape and appear original.
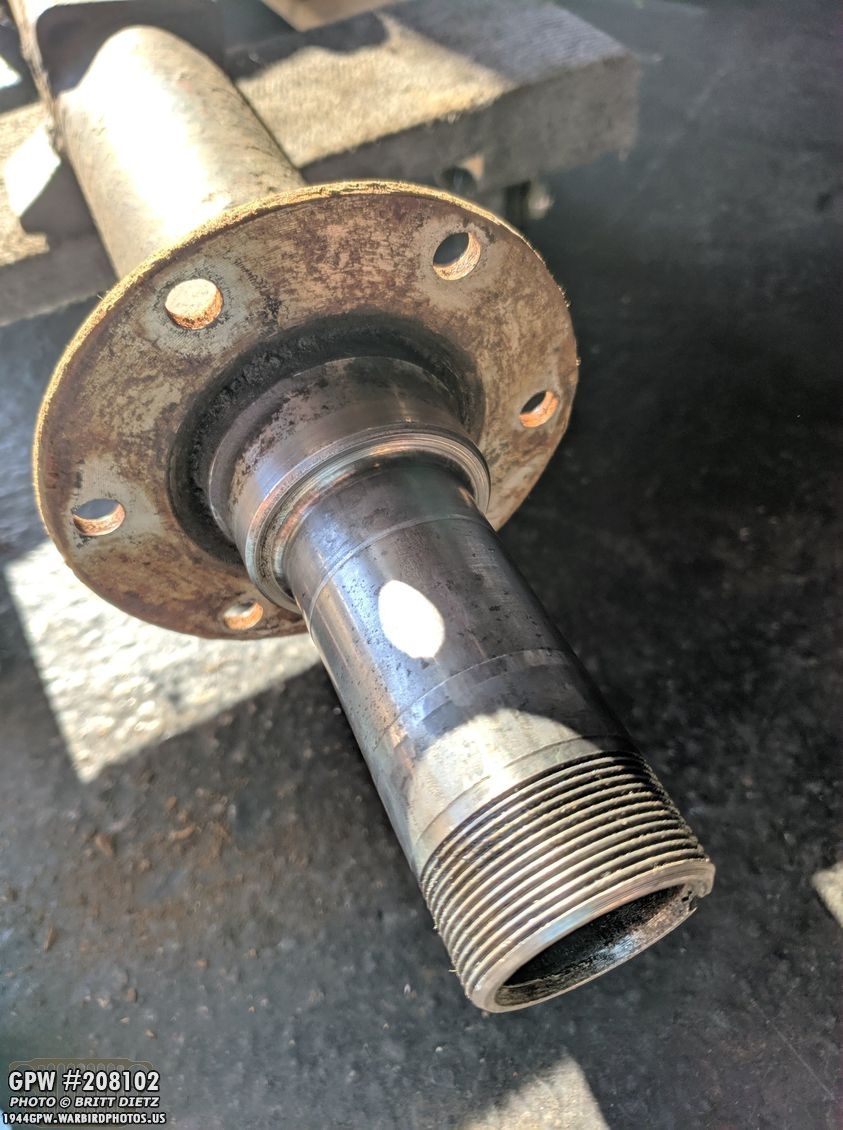
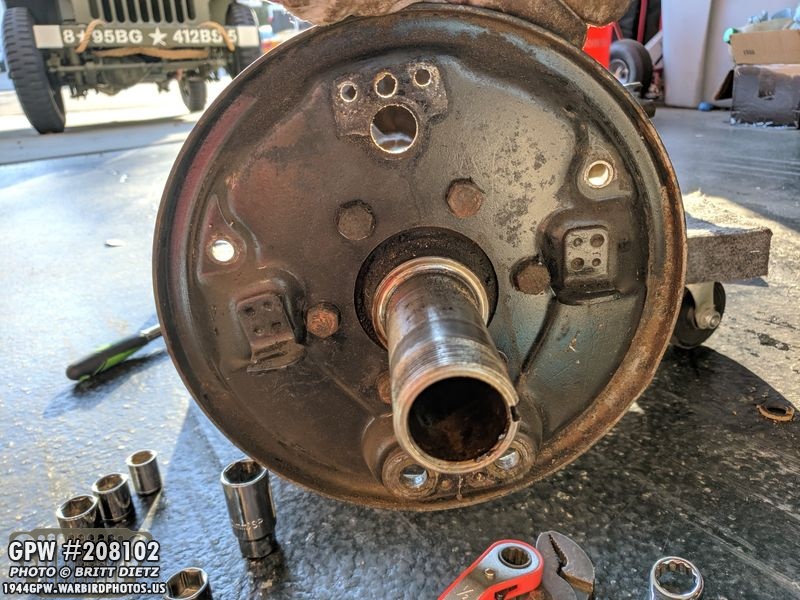
After taking the backing plate off, this is what is left, which is as much as I can take off this end.

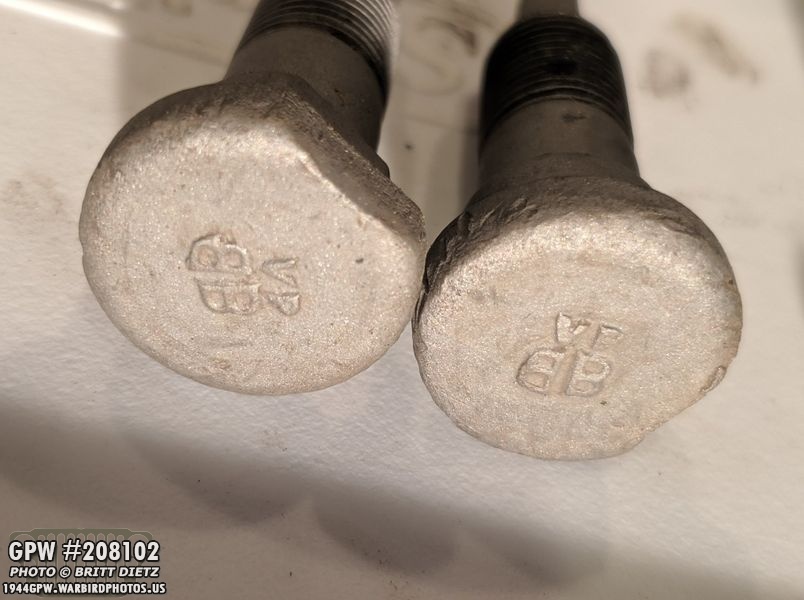
Here is the backing plate with all the original F stamped Ford bolts holding it to the axle. Time to switch to the other side and see how things look!
The other side, the driver’s side, had the same issue with the locking nuts. They had gorged chisel marks in them where, at some point, someone didn’t have a correct socket for these and carved marks so they could use a screwdriver or chisel to unscrew them. I’ll have to replace all these nuts and washers on both sides because of this. There are no F stamps on any of them, so I’m not sure if they are original or not.
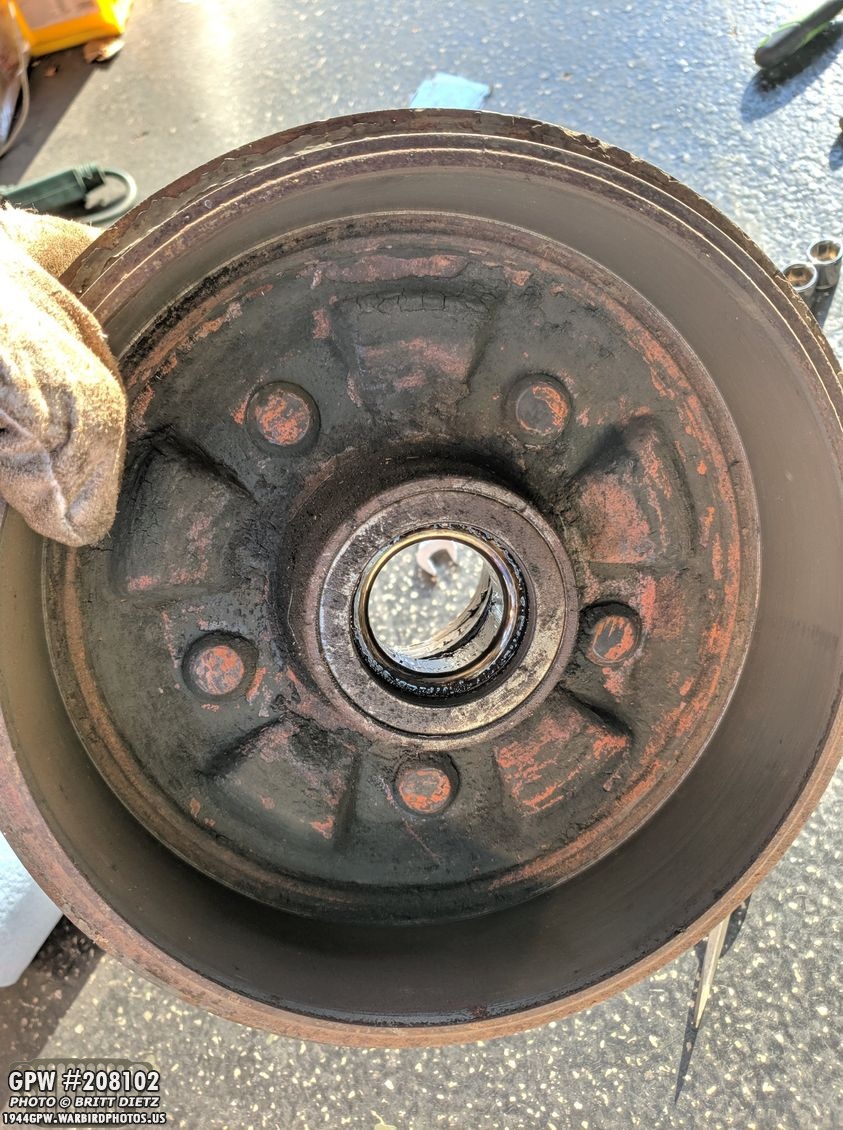
Once the two large nuts, two washers, and the bearing were removed, I was able to pull off the drum and take a peek inside. It looks about the same as the other side. The drum itself looks in really good shape, with no scarring on the inside surface where the brake pads contact.

I was able to find the Ford F stamp on both of the drums, which was pretty neat to find!

To give you an idea where it is located on the drum, I wire wheeled it clean. It is in about the same spot on both drums.
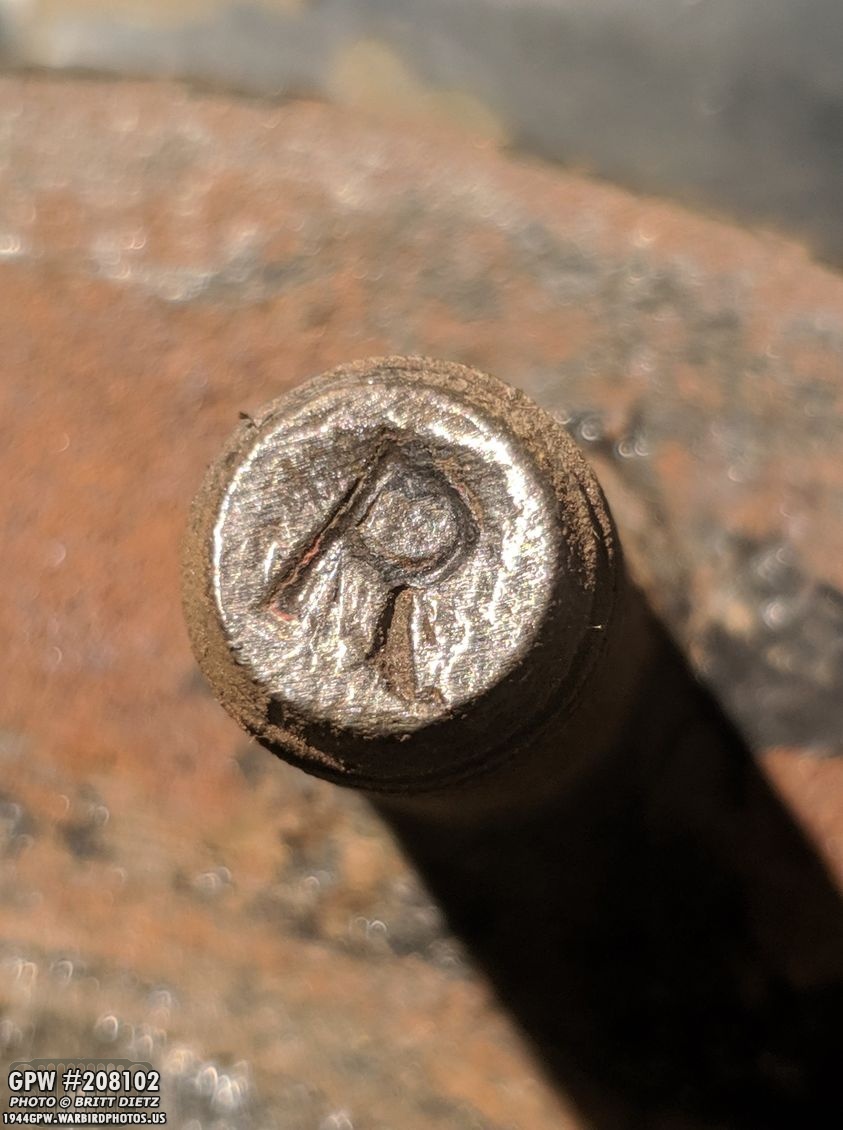
One interesting note on the drums is that the studs for connecting the wheels are marked L (left-hand thread) which is normal… but the Right side has R marked studs, which seems unusual. Since the drum is F stamped, and these studs look original, that’s an interesting find!
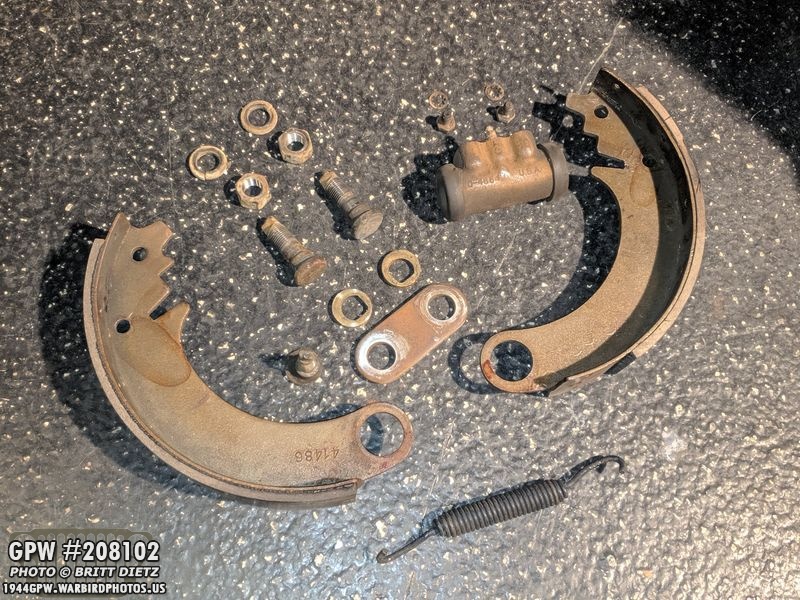
Here’s a look at the brake setup for the driver’s side. Looks pretty clean overall, but the brake pad on the right has major pitting.

Here’s a look at the driver’s side cylinder and the markings, which are different than the passenger side.

After removing the cylinder, the other side says MADE IN USA with SP, while the passenger side one has ‘WARNER LOCKHEED’. So two different cylinders. (and as a reminder, I’m going through the REAR axle)

Here’s another look at the front of the cylinder on the driver’s side, which has EIS, a 3, and 537. I’ll do some research on the markings and see what I can figure out. These will be replaced regardless as a precaution.

I did notice a faint stamping of 1694 something.

And the rubber end which has some markings. There is a 45, which makes me wonder if that’s 1945? But the other side has 54… so could be just a part number.

Removing the bolts that hold the two brake pads to the main plate, both have BB… which could be Bendix Bolt.

Here’s the two driver’s side brake pads. You can see the right one is super pitted. It is the only one not to have any markings at all of all the brake pads on the rear axle.
I used some sandpaper to show it better, but the other three brake pads have this Bendix stamped into them.

There’s also this faint BFP and PH1 on all three of the brake pads that have markings.
All items removed, now to remove the backing plate! This one has original F stamped Ford bolts as well.

Here’s a look at one of those F stamped bolts. They are large!

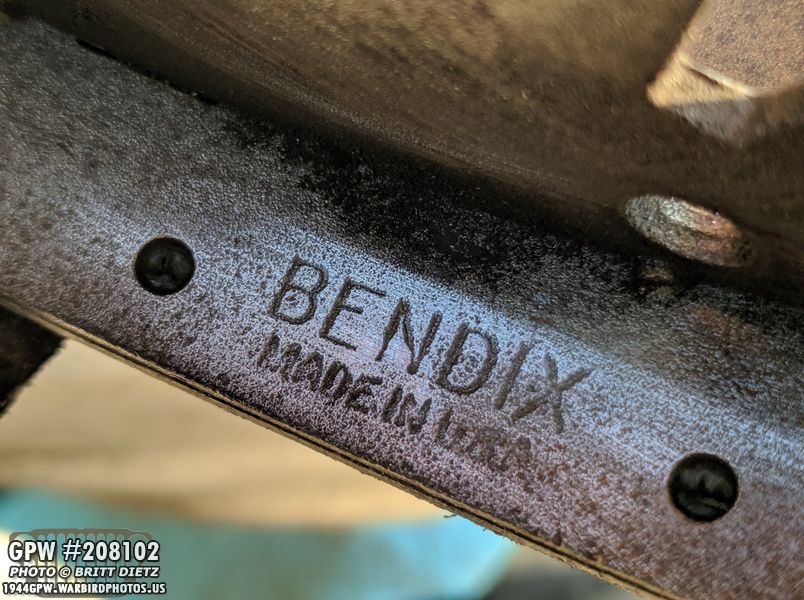
On the backing plate, I wire wheeled an area with some markings. Looks like it’s a Bendix backing plate. I was told Bendix made a lot of brake parts during WW2, so all the Bendix parts could be original wartime. Judging by the paint and grime, it wouldn’t surprise me.

With the backing plate removed, both sides of the rear axle brakes are completely taken apart!

Next up, I removed the differential yoke and nut. The nut looks really clean as I sandblasted it after removing it. It was caked with grime.
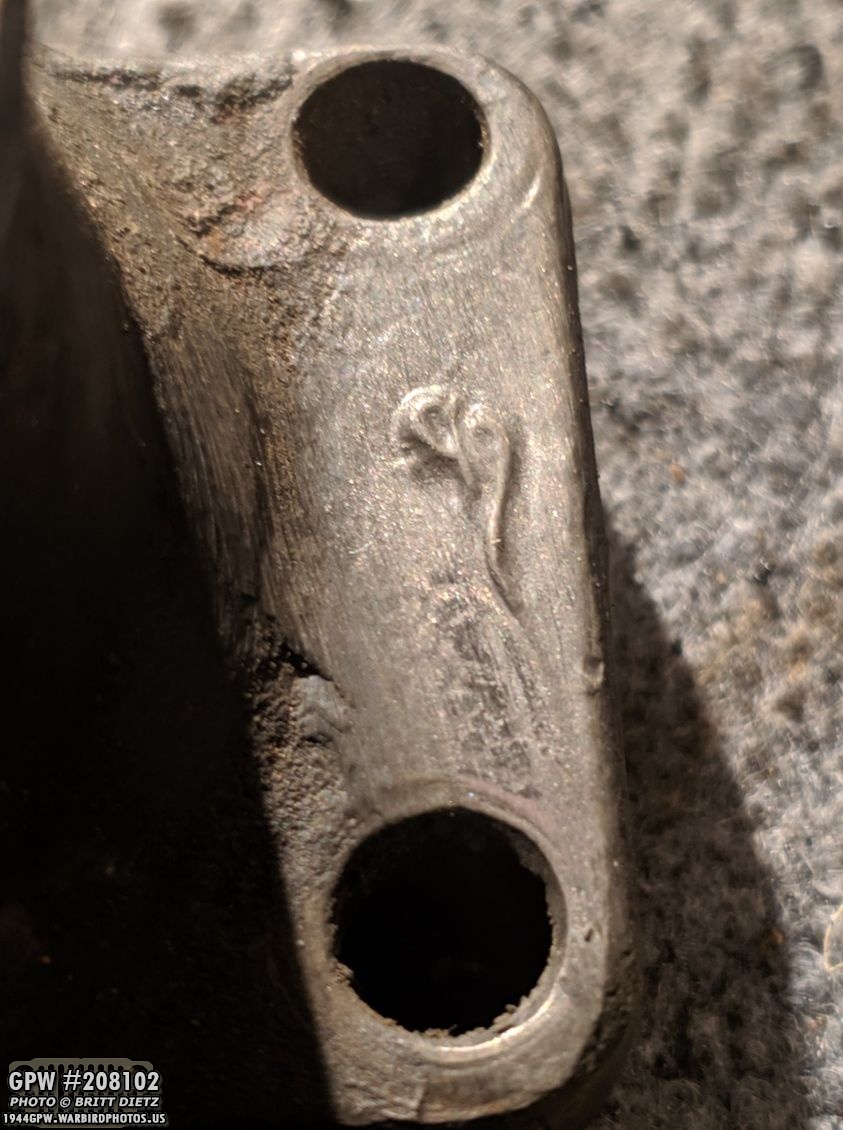
And to my joy, I found a F Ford stamp on the Differential yoke!

Here is the Differential yoke, the washer, and nut.

Next week I’ll remove the pinion gear assembly (shown here) and that should complete the complete disassembly of the rear axle! I’ll then start to clean the various items, get the housing, plates, and drums sandblasted, and start to put it back together.

I decided to sand blast the passenger side brake parts, and they cleaned up really nice!
Here’s a look at the two plate/brake pad bolts with the BB and possibly VP? Still thinking it’s Bendix Bolts.

And here are the 6 F Ford stamped bolts that hold the backing plate to the axle. All in good shape. I’ll go through each bolt and use my tap/die set to clean the threads and make them like new.

I was asked, the other day, what is on my Jeep’s keyring. I have the standard gold H700 key which turns on the Jeep, a Willys Jeep ‘remove before flight’ style tag that I got in Normandy, France for the 75th anniversary of D-Day and a laser-cut mini grill made from the frame of a junked Jeep from someone in Australia. Came with a short history on the Jeep frame it came from (the frame was beyond repair according to the owner).
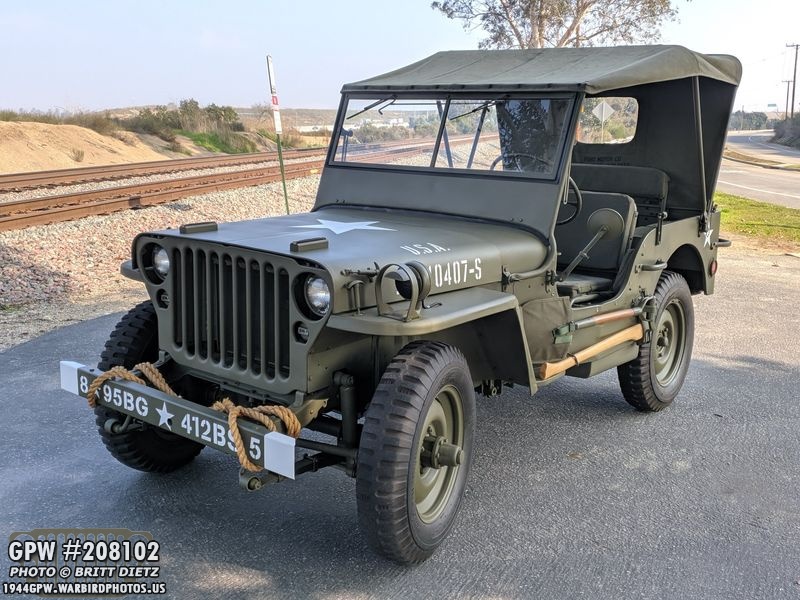
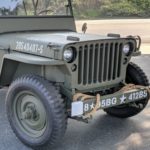
As mentioned in the first photo, living in high-density suburbia, it’s tough to find areas not too far away to get nice shots of the Jeep without a house/building/etc. I decided to try and a new path the other day, and went down this not as much used road. I found this nice little spot I could pull in to which offers more scenery and no houses!

The train tracks add a little bit and give it a more vintage feel (ignore the modern freeway in the distance!)
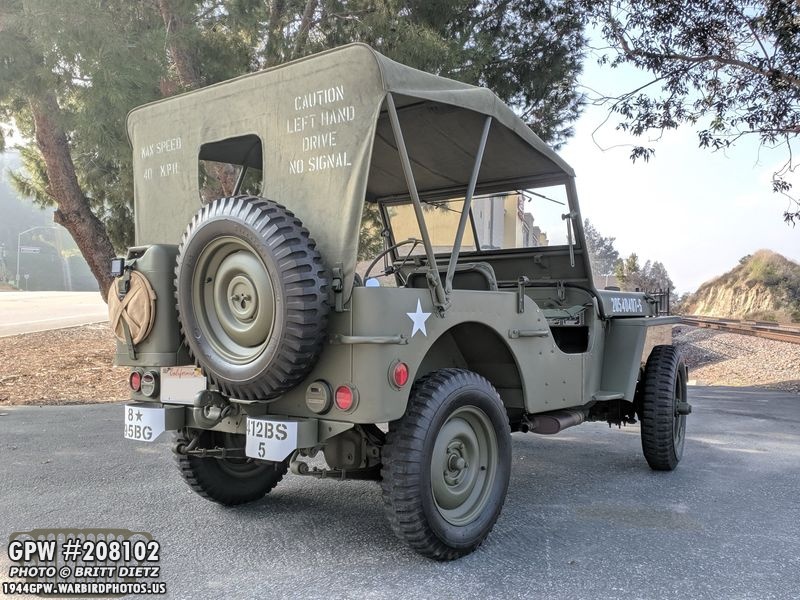
It would be neat to see a vintage train go by on the tracks with my Jeep parked here! Sadly, the line is only used for freight and occasional metrolink trains.

But still makes for a nice place to take photos like this. I might drive down to this road more often when taking photos!
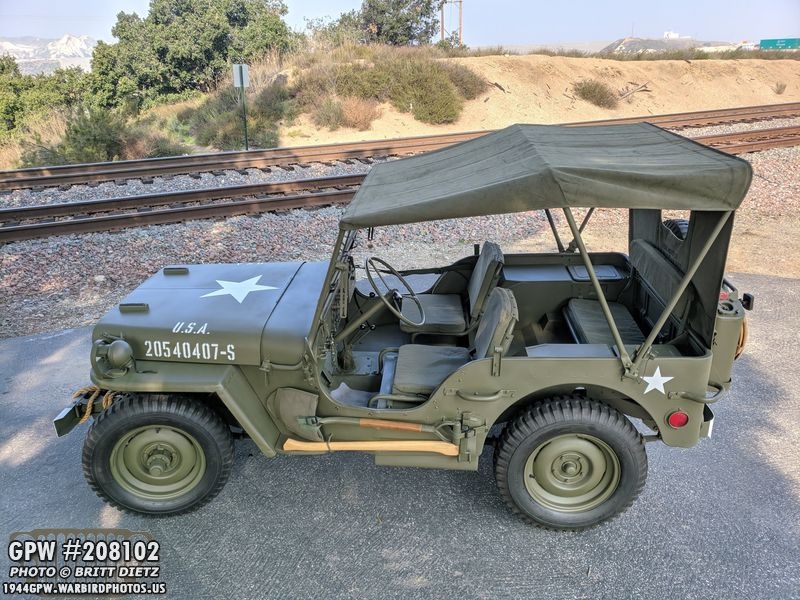
Shooting from a higher angle (holding the phone up high) actually makes the Jeep look like a toy! This could be a little 1/18 scale model on an asphalt table if I didn’t know any better!
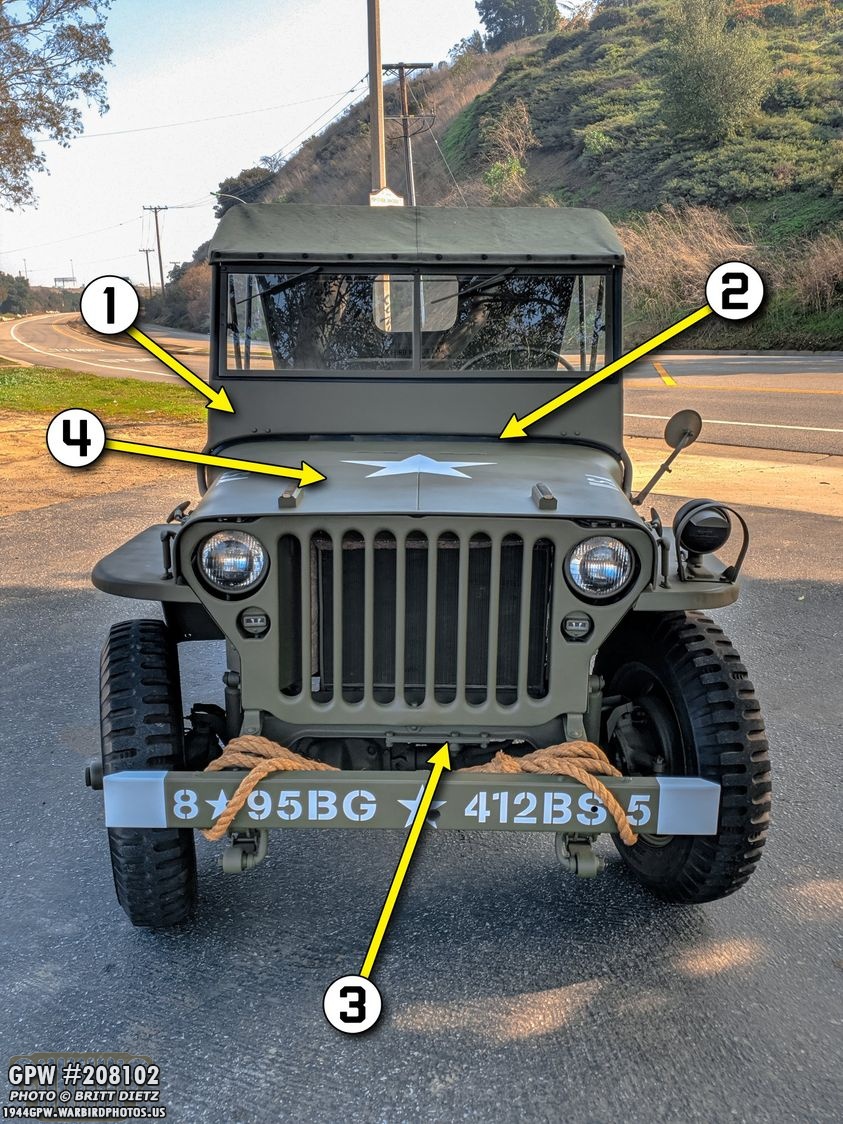
So, you might be asking… if the restoration is done, what else is there to do? Actually, a lot. But the rest of the things are changes that come later now that the Jeep is driving and at a spot that nothing needs to be done that would hinder driving it any further. So the next few images I’m breaking down what’s left…
1) Add pinup artwork on the windshield. Using my favorite George Petty artwork with a special name for the Jeep.
2) Replace the windshield to cowl rubber weatherseal. The one on there is slightly warped, and as such there’s a slight gap. Also, I accidentally hit it with some overspray, so I’ll eventually replace that. No rush.
3) Currently, the Jeep has CJ (Civilian Jeep) post-war axles, and as such the steering is also CJ from the drag link to the axle wheels. The CJ steering connects to the bottom of the cross member rather than the axle itself. The wartime GPW front axle I got has the steering all there, so when I replace the axles the steering will be replaced as well.
4) The hood is not a GPW hood, as my GPW hood was in such bad shape, it couldn’t be repaired. So I’ll eventually find an original GPW hood, restore it, and put it on my Jeep.
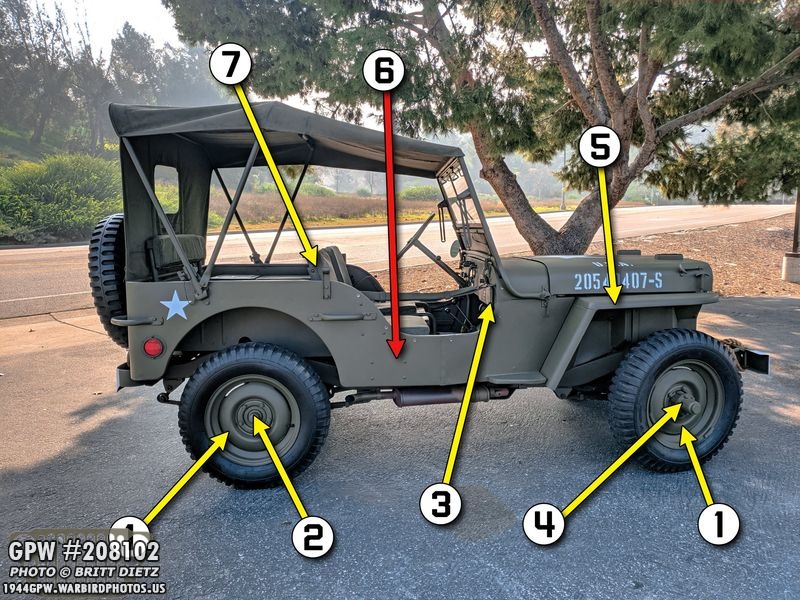
1) Replace the Civilian rims with combat rims on all wheels.
2) Replace the rear CJ axle with the correct wartime GPW axle once it is completely restored.
3) Add the first aid kit (which I have complete with much of the original components inside!) with a brack underneath the dash. Trying to figure out if my original tub had that or not. I don’t see any holes.
4) Replace the front CJ axle with the correct wartime GPW axle once it is completely restored.
5) I’m currently using a reproduction left fender as my original GPW left fender needs some extensive welding repair work. I’ll get that fixed up eventually and replace the repo with the original.
6) THE BIGGEST JOB… replace the reproduction MD Juan body tub with my original 1944 GPW composite tub after a few years of welding work. There’s a LOT of major cancerous rust damage, and I need to learn to weld well before I even attempt to try and fix it. This is a long-term project that won’t be done anytime soon… but it will eventually! The repro tub is on there so I can enjoy my Jeep in the meantime.
7) Fix the passenger seat, which has a 3 inch hole in the backplate. The back support tube also has a 2 inch hole. Both just need to be welded, smoothed, and painted. For now, the seat cushion hides all this.

1) Replace the Civilian rims with combat rims on all wheels.
2) Replace the front CJ axle with the correct wartime GPW axle once it is completely restored.
3) Replace the axe with a better one. This one was cheap… so a) it barely fits (and needed some work to get it to fit) and b) I can’t stain it any further darker than that. After sanding it really good and trying to stain it 5 times, that’s as dark as I could get it. So I’ll just get a different one.
4) Replace the rear CJ axle with the correct wartime GPW axle once it is completely restored.
5) Make a custom J bracket to hold the driver’s side rear seat backrest to the back of the Jeep. MD Juan didn’t measure the studs perfectly, so they are off and will require a custom modified J hook. The other side fits just fine.
6) Add a GPW hand crank to the rear of the Jeep. I have the bracket in place, just need the crank! Working on getting one, but most places are sold out.
7) Add a tire pump under the rear seat pan. I need to repair the two studs that are supposed to hold the two brackets that in turn hold the tire pump. The studs are mostly broken off, so I need to cut off what’s left, then readd new studs so I can put the brackets, and then the tire pump, on there.

1) I would eventually like a wartime jerry can. The Jerry can I have is from the 70s, but is the same style as the WW2 ones. I scour flea markets for them, and I’m sure I’ll eventually find one. I’d really like a 1944 one, but I’ll take any time during WW2 at this point.
2) Replace the Civilian rim on the spare tire with a combat rim.
3) Replace the rear axle with the wartime GPW one I’m working on.
4) Replace the post-war pintle hook with a GPW one. I’m okay with it being repro, the real ones are tough to find and often very expensive. The repro ones are nearly identical in every way.
5) I ordered a custom license plate from the DMV, which I’ll reveal at a different time. I got the black with yellow lettering ‘legacy’ plate which will look better on the Jeep. Again, the plate is attached to the Jeep via a rubber-coated very strong magnet. It doesn’t hurt the paint, and easy to remove!
6) I want to try and see about converting my tail brake light to LED. That is the ONLY brake light on the Jeep, and getting it a bit brighter (and lasting longer) would go a long way in a world of distracted driving.
7) My canvas water bucket has seen better days, it actually used to be OD Green but has faded to khaki! I’m on the lookout for wartime water buckets that are green, especially a 1944 one if I can find one!
8) You might ask, what is this device? It’s a little LED ‘blinker’ light that’s for a bicycle. It quickly clips to the jerry can strap and provides a quick way to have a left and right turn signal. It can also flash red to get people’s attention. It’s Bluetooth connected to a little switch that I velcroed to the steering wheel, also easy and quick to remove. I want to get a slightly larger version that is a bit easier to see as I fear for my Jeep getting rear ended by someone not paying attention to my tiny little brake light (#6) under the jerry can!

So that’s it for this week! I actually passed the 100 mile mark on the Jeep (this was just before the last drive I did where I put another 2 miles on it) which is pretty cool. Happy to be driving it! So till next week, here’s to a productive week of more work on the axles!