 More Axle work, a tire pump, and more!
Looks like for the next few weeks I’m only going to be able to work on some weekend days and Mondays as weekdays have gotten busy! But even then, still got a lot of work done taking apart the axles this week. Follow along as I take apart various items on the front axle and hunt for Ford F stamps! Also prepping for a tire pump headed my way and a nice flea market find!

A quick look at the Jeep this week pulled out while working on the axles. She’s running really good at the moment, just need more time to drive her!

If you’ve been following along, last week I mostly finished taking apart the rear wartime GPW axle. I still need to remove the pinion, but otherwise, it’s ready for cleaning/sandblasting. The rear and front axles were given to me by a generous G503 member who didn’t want them in his garage anymore. They turned out to be Ford GPW axles, which I’m doing a complete restoration on to replace the CJ post-war axles currently on my Jeep.

So with that, I decided to switch gears and get to work on the front axle.
First step is to remove the tie rods, tue rid tubes, and the steering system attached to the front axle. I went to Harbor Freight Tools and got a nifty Tie Rod Separator.

Sadly, I forgot to take photos removing the tie rods and the tubes with the separator tool. But basically, you first remove the cotter pin and unscrew the nut on the tie rod. Then you place the separator tool between the tie rod and the steering knuckle arm, like shown. You then take a hammer and slowly hammer it in, which separates the tie rod from the arm. Works very well!

Now we have the two tie rod tubes, with the tie rods at the ends, the bell crank, and the driver’s side steering knuckle arm.

Here’s a look at the axle without the steering attached. Lots of tools to help me out. I also have the front cover open letting the last of the horribly smelly hypoid oil draining out.

With the steering removed, I decided to now focus on the wheel drums and brakes. First step was to remove the outer cap, which took a bit of force from a screwdriver and even that tie rod separator!

Always nice to see a Ford F stamp under all the paint!

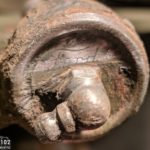
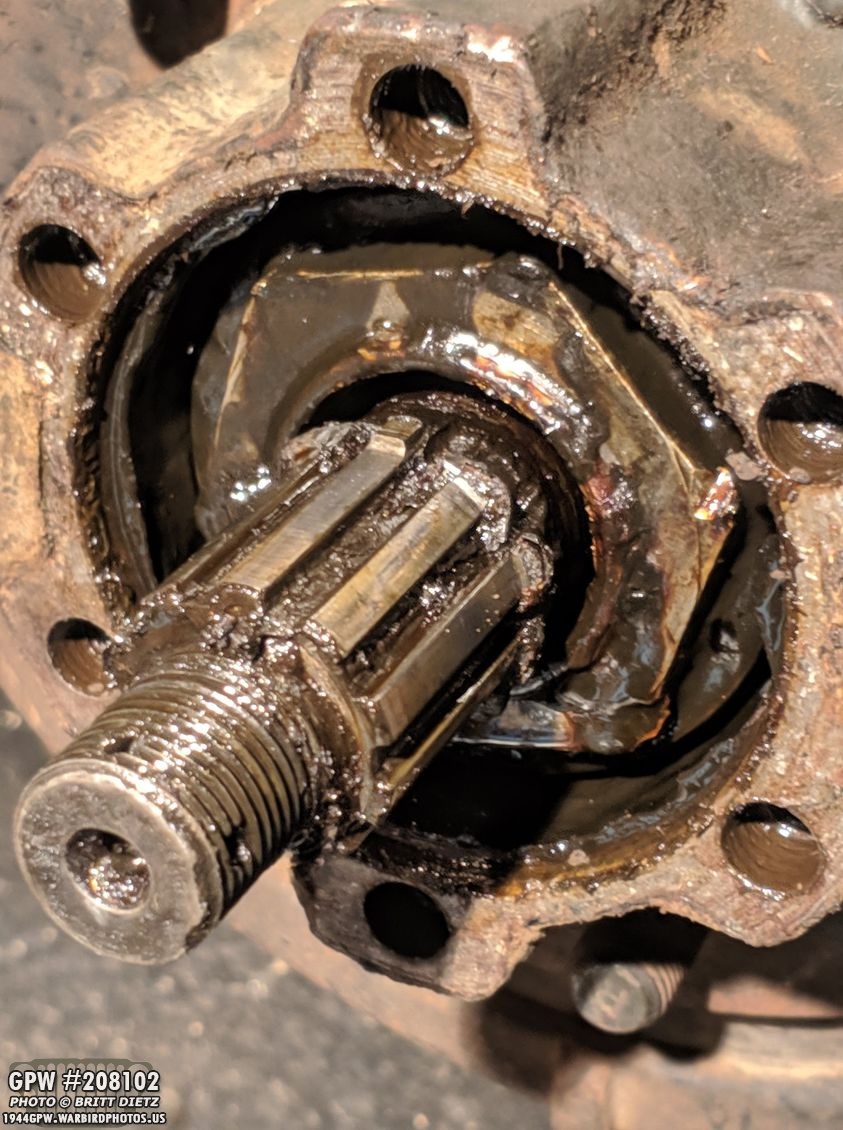
With the outer cup removed, I was then able to undo the cotter pin going through the nut, then unscrew the nut off with the washer. That frees up the drive flange to come off.

Here is the flange removed, grease and all! Probably an F stamp on there, let’s see once I clean it up!
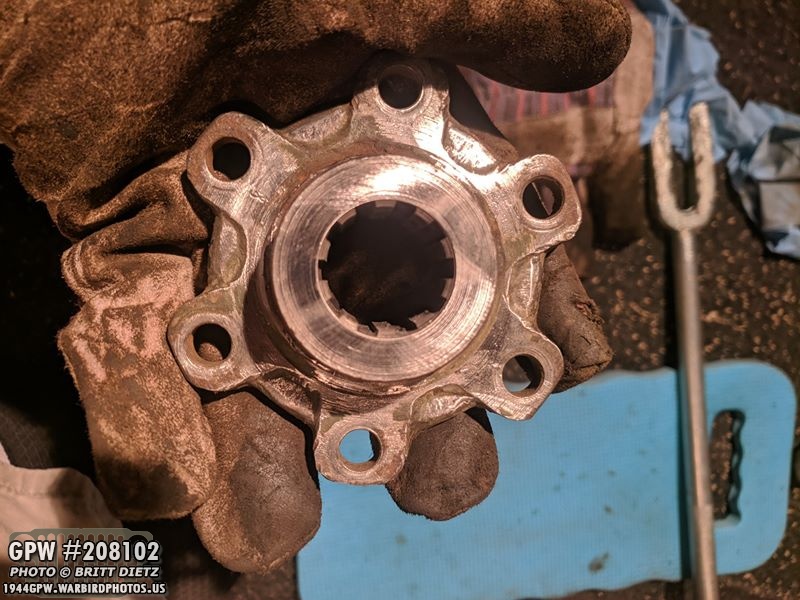
A look at the backside, lots of grease to clean.
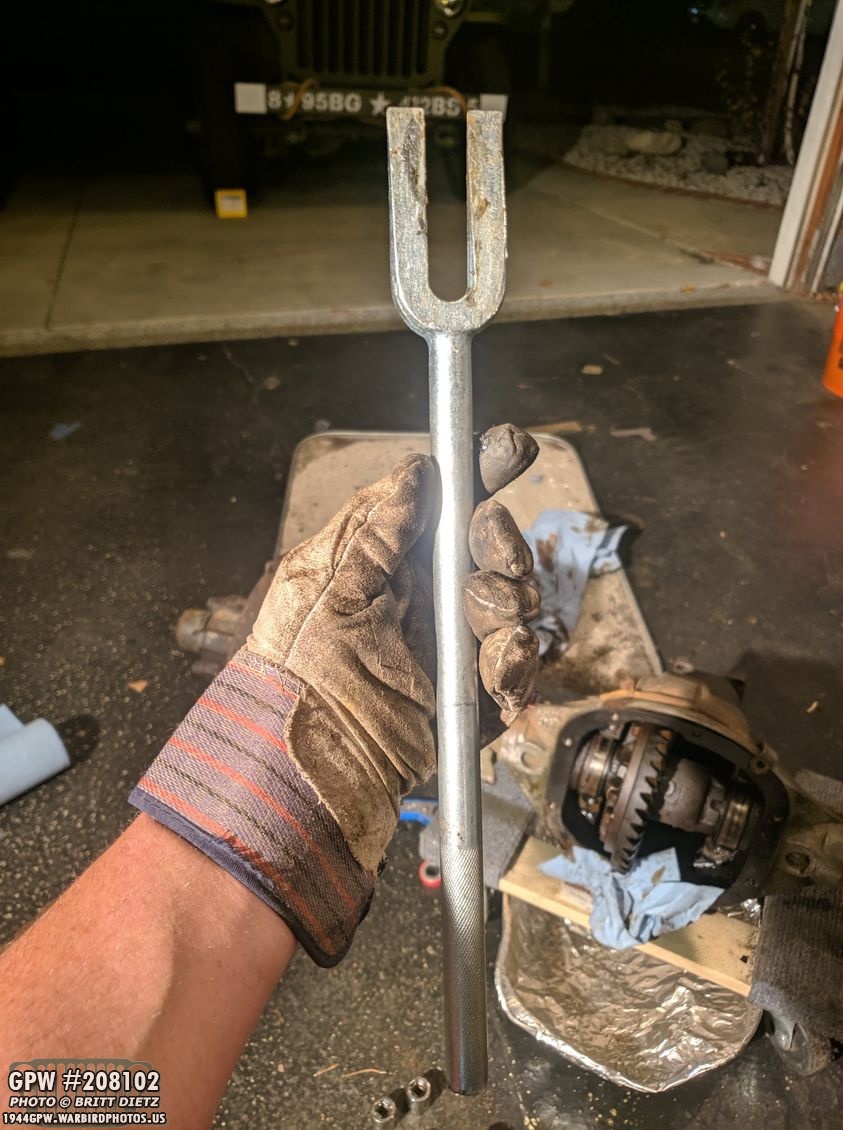
I ended up stopping with the brake disassembly here, as I couldn’t get the wheel bearing nut out. It was damaged, like the rear axles ones, from someone using a screwdriver or chisel to put it on. With the other ones on the rear axle, I was able to use some of those chisel marks and turn the nut. But this one only had marks for screwing it on. I’m replacing all these nuts anyway, but I couldn’t get this one to budge… so I’d need a special tool…
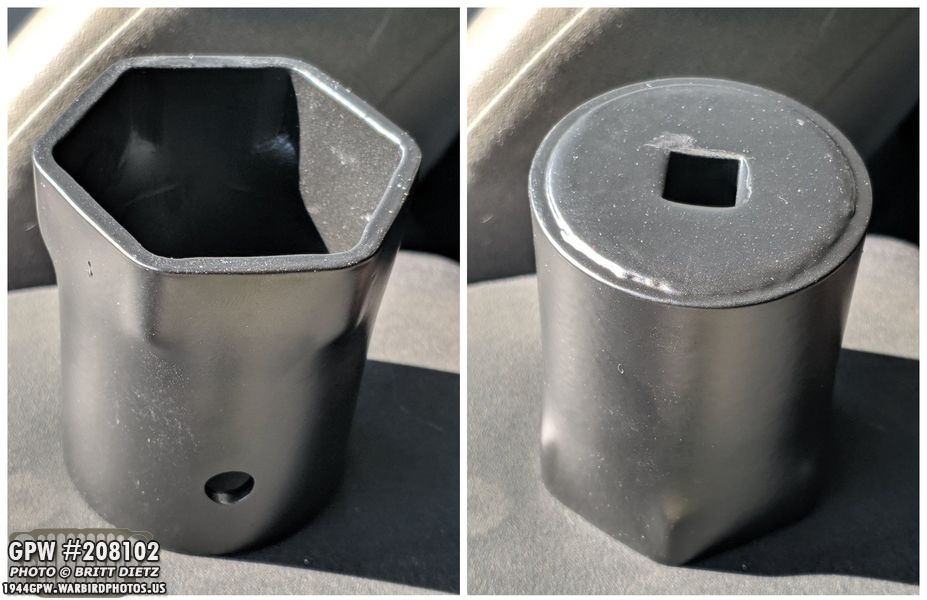
And that special tool, from Ron Fitzpatrick Jeep Parts, arrived yesterday. It’s a special socket made just for removing those nuts from the axles. This way I can easily unscrew them (using socket wrench) and when I get the new ones to not ‘carve’ notches into them to tighten them back on. Since this tool arrived Thursday, I’ll be able to continue on the axles this weekend. I’ll be sure to take photos of the tool in action.
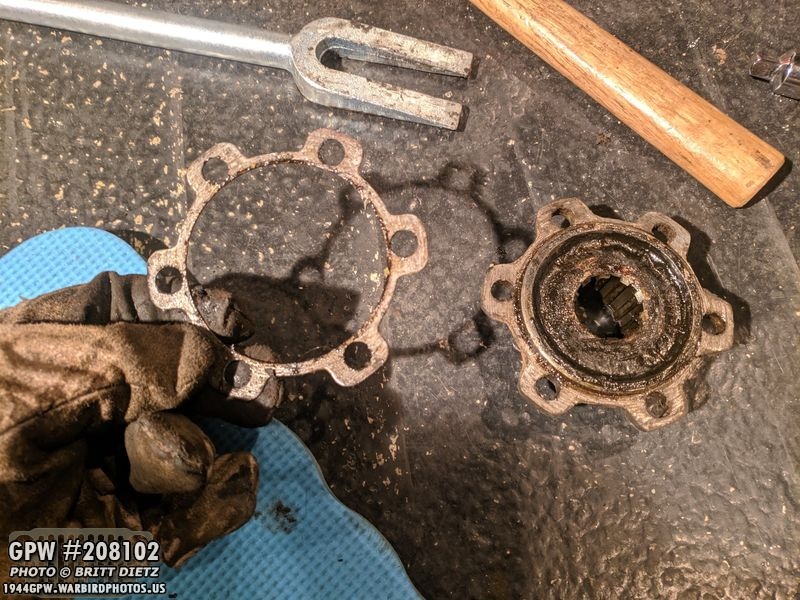
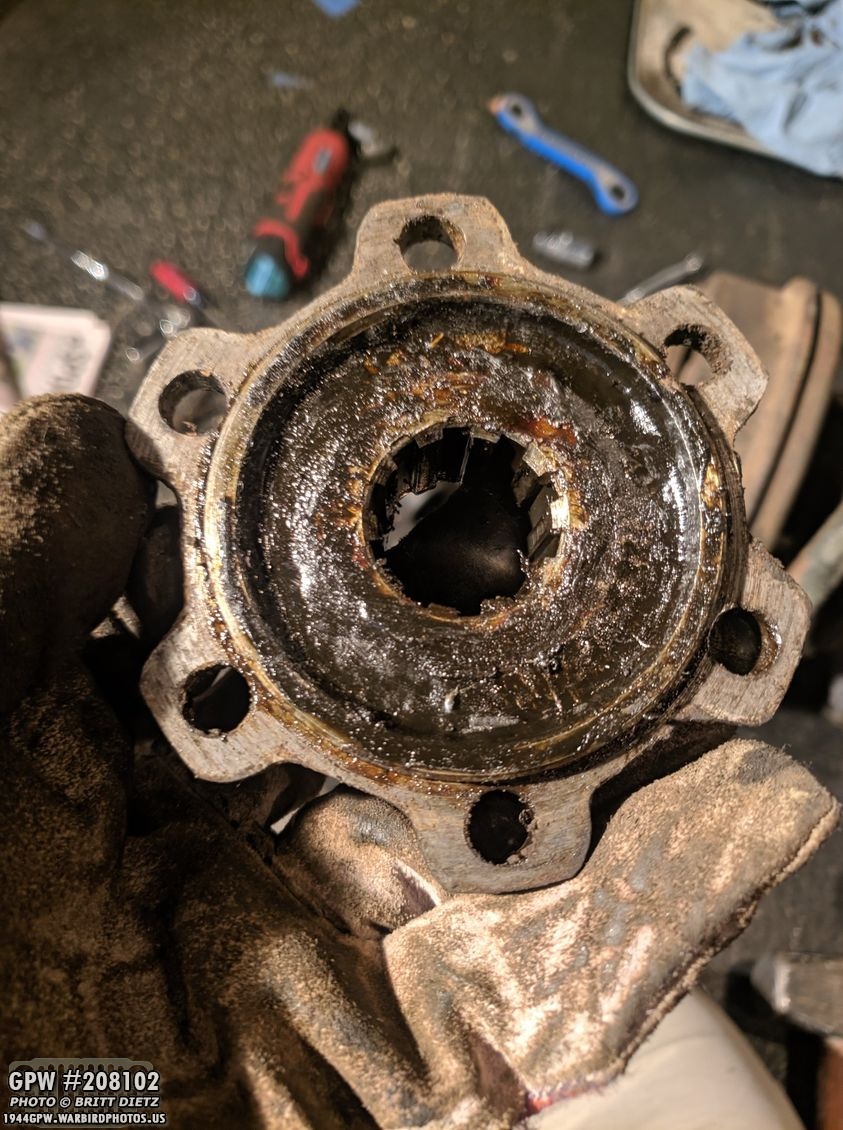
Anyway, since I couldn’t get that nut off at the time without the socket, I decided to work on the other side of the front axle getting it taken apart down to the flange like the other side. This side has what appears to be a single shim. It’s not a gasket, as it’s metal.

I wanted to also note that one way to clean greasy parts quickly is to dunk them into gasoline! The bottom flange I dunked into a bucket of gasoline while the top is one I just removed from the other side of the axle. What a difference! And the bottom one was only in the fuel for about 30 minutes!
Next step was to take both flanges and start hunting for Ford F stamps to verify it’s original to the axle. Can you see the F stamp on here?

There it is, on one of the ears! Pretty tiny one.

On to the other flange… this one is much easier to spot!

Also on one of the ears. Awesome, both flanges are original!

Here’s one of the flanges after I wire wheeled the thicker paint off, but before I finished the cleaning with sandblasting.

One cool thing I discovered is on that flange shim, there was an F stamp! Can you see it here?

Pretty awesome to find it on this!

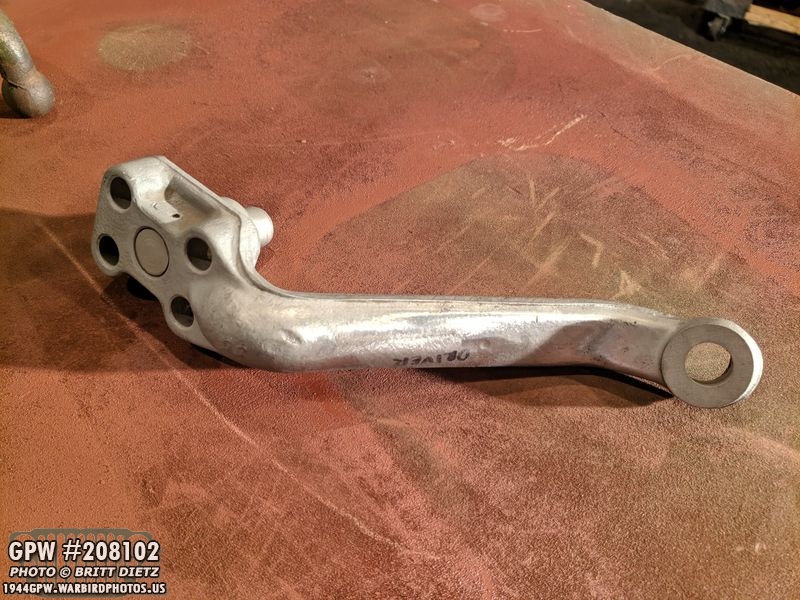
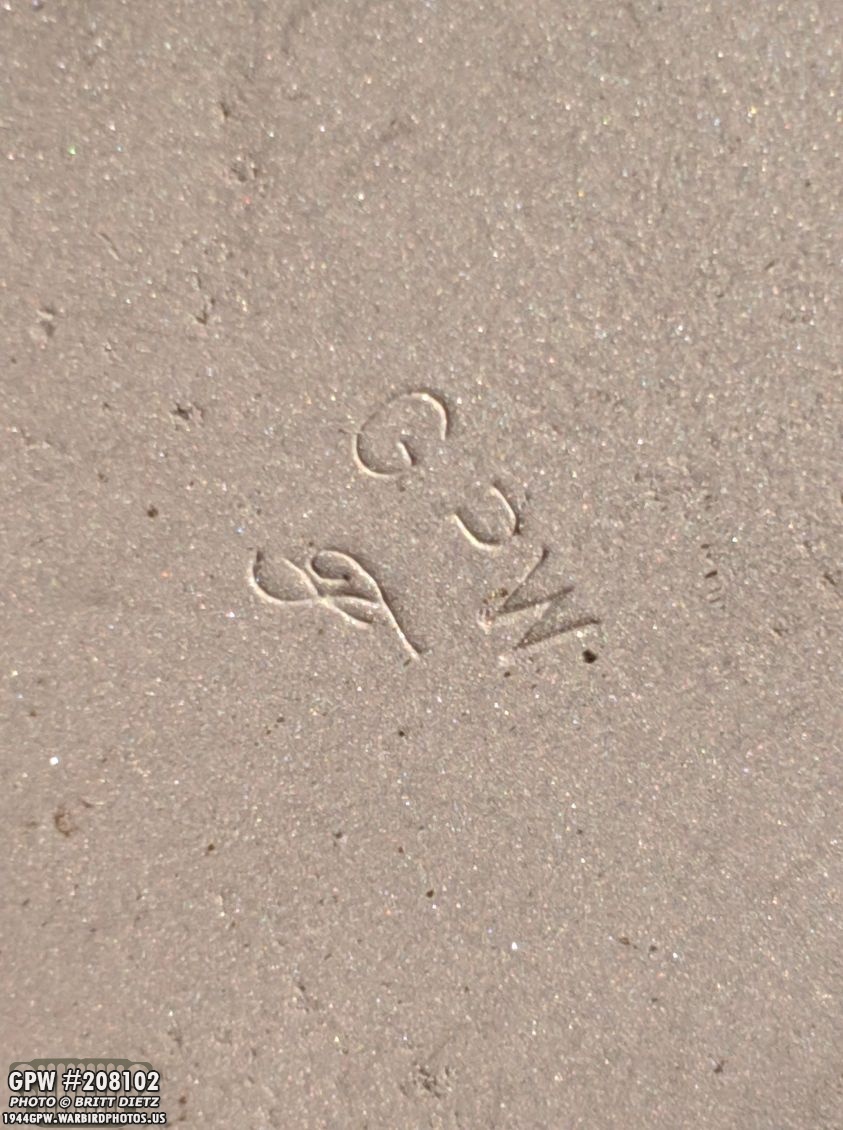
On the driver’s side of the front axle, I removed the main steering knuckle arm. After taking some paint off, I discovered a worn, but still visible F stamp with a number 5. One useful tool, I’ve been using the http://jeepdraw.com/GROUP_10_FRONT_AXLE.htm on Jeep draw to give me a general idea of where I might find F stamps.
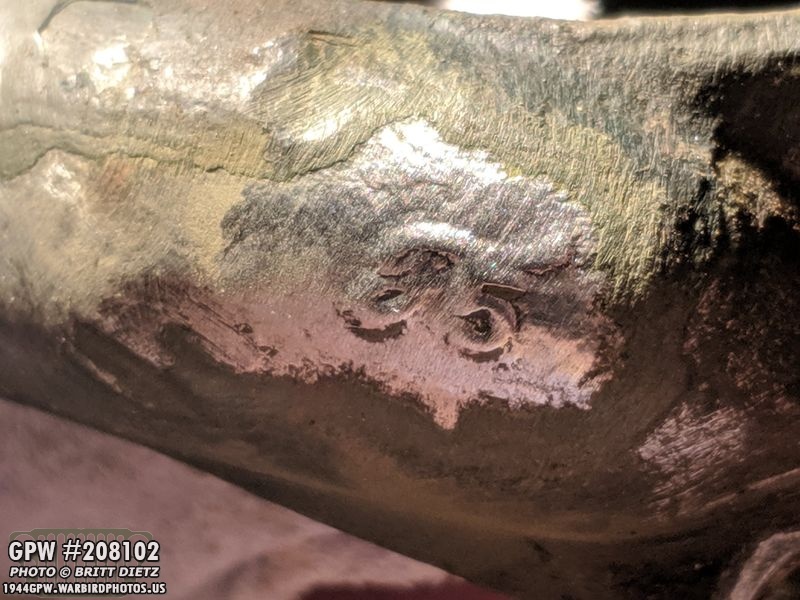
Close up of that F stamp and the number 5 on the driver’s side steering knuckle arm.

I also noticed a partial F stamp on the pivot bolt in the steering knuckle arm!
Next, I looked at the main bellcrank. Sadly, no F stamp, but based on the numbers it is the earlier design for the bellcrank. It’s possible these ones don’t have F stamps. They ended up redesigning these bellcranks not long after these axles were made to strengthen them. If it had the later one, it would have a GPW number on it. I’ll continue to clean this up this weekend just in case.
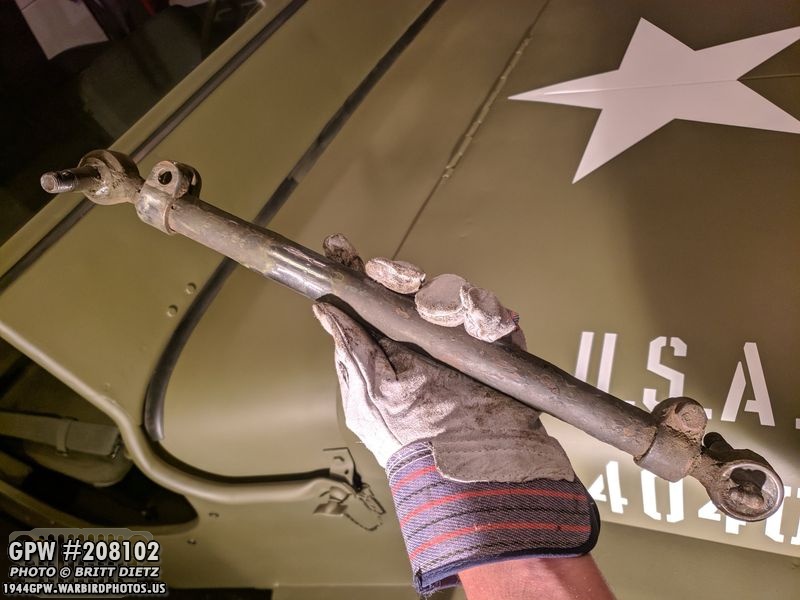
I decided to then check the tie rods and tubes to look for any more Ford marks. Using the page on jeepdraw.com…

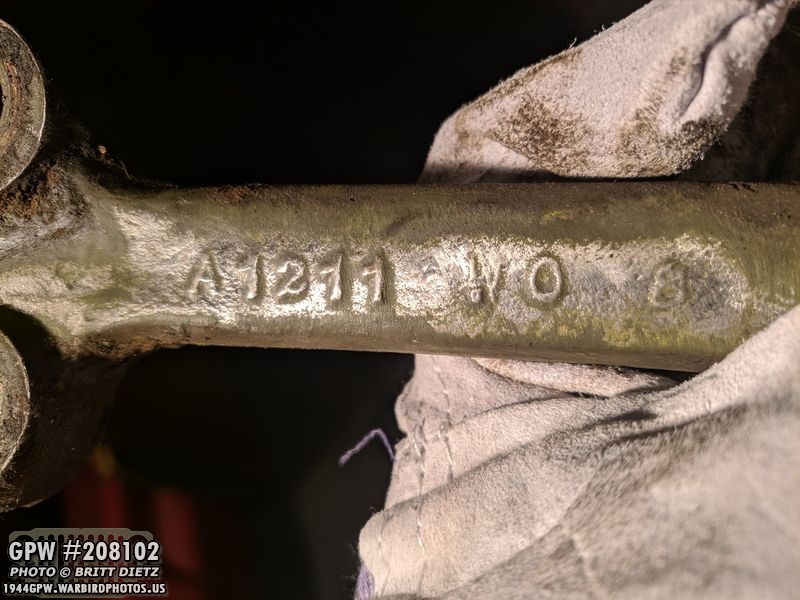
I uncovered a cool Ford U.S.A. mark on the tube!
The first tie rod also has a nice Ford script on it! That’s under a lot of paint, dried grease, and grime.

Before I start to remove the paint from the inner tie rods that connect to the bell crank, I made sure to document the wartime red paint that was on there. Wish I didn’t have to remove it!
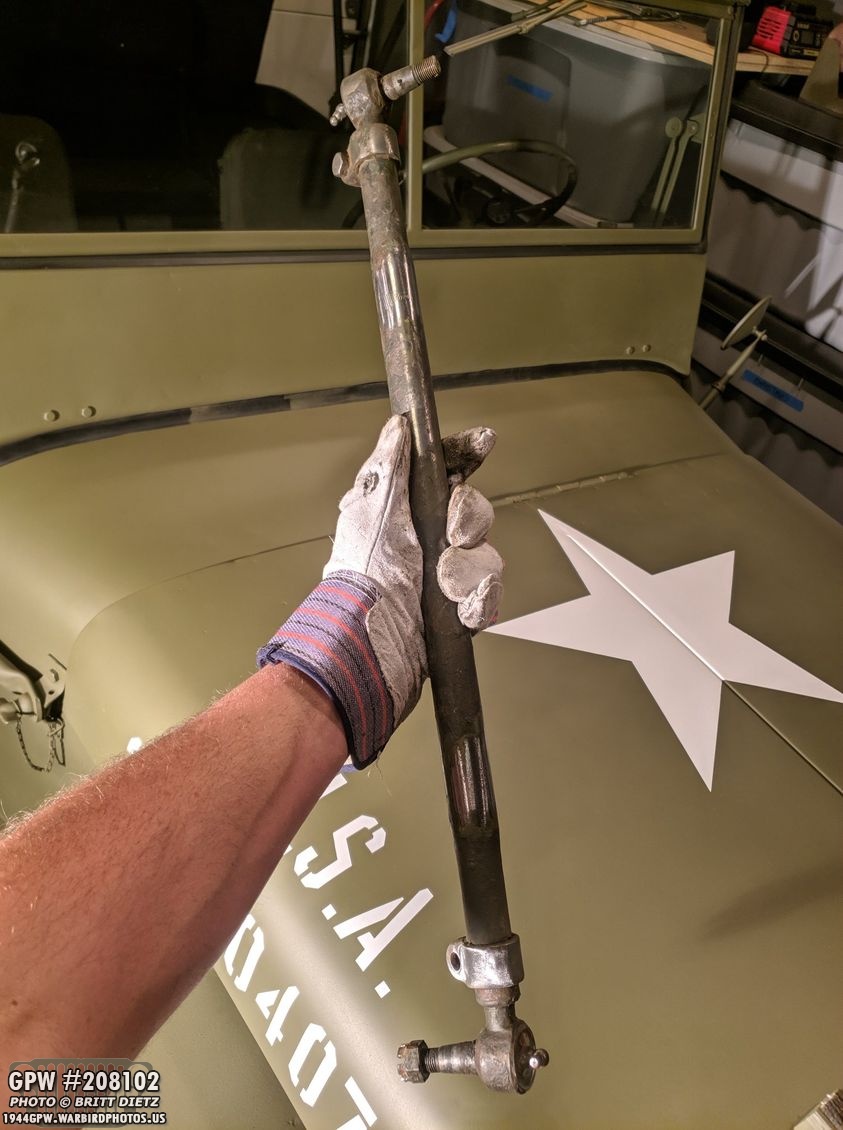
Here’s the other tie rods and tub on the longer side… as you can see, I’ve already starting to wire wheel the areas where the Ford stamp should be.

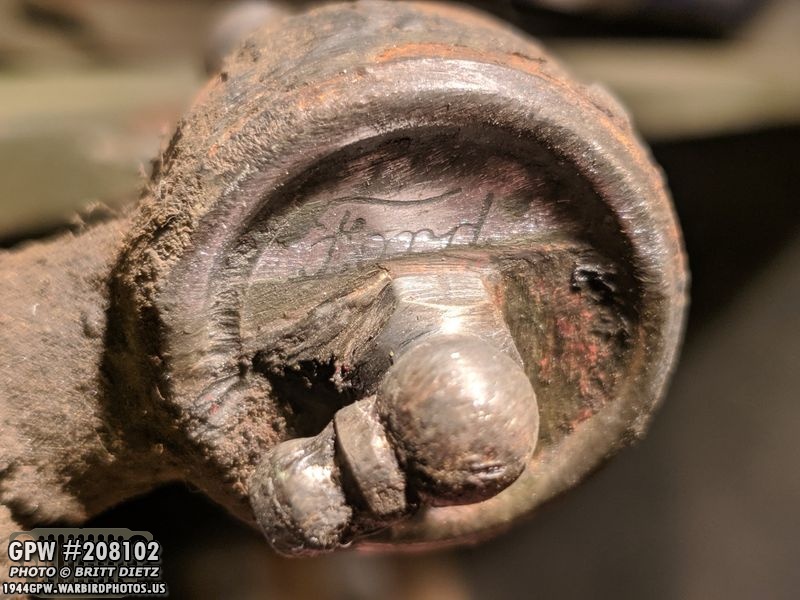
And sure enough, jackpot!

And sure enough, the tie rod has a Ford stamp!

At first I thought these other tie rods didn’t have Ford stamps, but I realized a few days later after doing some research that the Ford stamp is actually under the Zerk fitting nozzle, which I wouldn’t get my wire wheel into. So I’m confident this also has a ford stamp based on the USA and C markings.

To finish up the day, I went to my trusty Harbor Freight Tools sandblaster and got to work on several parts from both axles.
Here’s the driver’s side steering knuckle arm all sandblasted. While it’s pretty easy to figure which side is which based on the curve, to make it easier I just wrote driver. It’ll be painted over anyway.

And another look at that pivot bolt in there with the partial F stamp. It’s pretty amazing to see 99% of these two axles being correct complete GPW wartime parts.

I cleaned up some of the thickest paint on the bellcrank that I could to help out the sandblaster. I did discover something neat…

The zerk fitting seems to have some red paint around it on the bell crank as well! Since that paint is wartime, that means there was red around this one as well! Pretty neat! Remember, this was applied in the field, not at the factory.

Here is the rear axle yoke, which I removed in the last update from last week. Looks almost new all sandblasted! Easy to see the F stamp on this one.

Here is the front axle’s driver’s side brake line shield and the nuts/lock washers for it. This goes on top of the steering knuckle arm. It’s hard to see the GPW F stamp so advance ahead…
Here’s the lovely stamp in that shield.

And here are the 6 brake plate to axle bolts from one side of the rear axle with beautiful large F stamps in them all sandblasted and cleaned up.

Cleaning up the one set of the axle flange bolts, I noticed that only two of the bolts have F stamps. So I’ll replace the rest of them with F stamped ones just to match.

I’ve already sandblasted the driver’s side brake parts for the rear axle, so I did the same to the passenger side. Sadly, I might have to replace the two brake adjustment screws as their ends are pretty mangled. They’ll work, but they look terrible.

And the driver’s side flange, cover cup, nut, washer and 4 F stamped bolts (it was missing 2) all sandblasted. Again, I’ll get two F stamped bolts to join these other four.
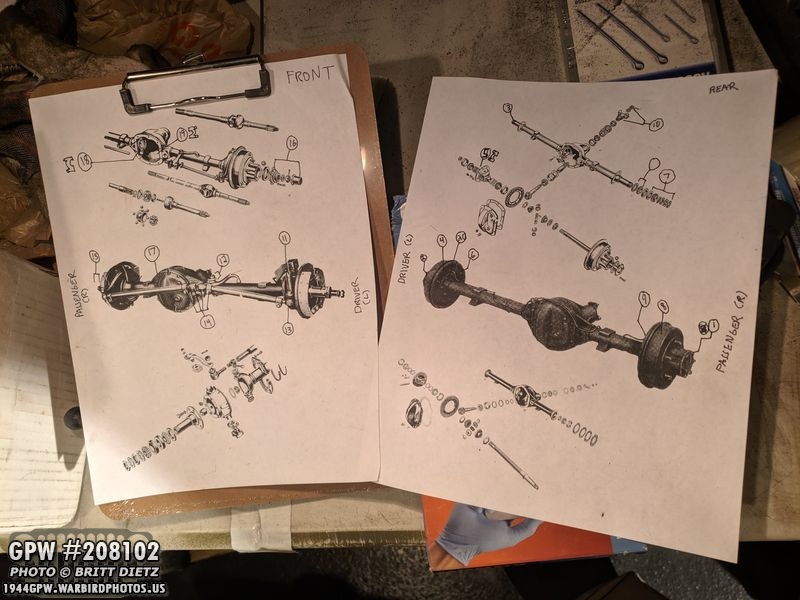
SO for those wondering how I keep track of all the parts, I have two diagram pages… one for the front axle (L) and one for the rear axle (R). These have exploded diagrams and overall photos. I put the parts (in like groups) into clear bags, which I mark if they are from the front or rear axle, driver or passenger side, then give them a sequential number. I then mark on my sheets where those parts came from. Through the entire process, these parts will stay together from cleaning to re-painting.
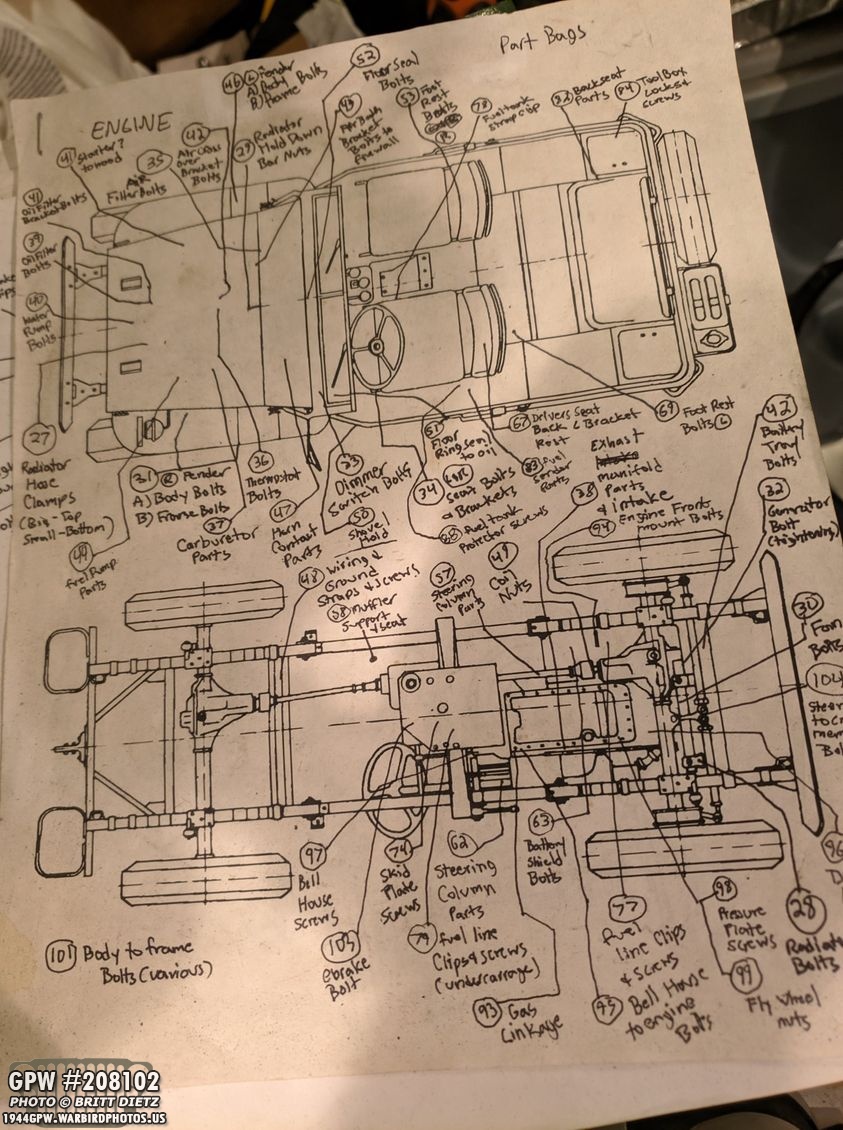
This system worked well with the Jeep’s restoration. Here’s a look at one of the 5 pages of bolt bag identifications I had when restoring the Jeep. I had a BIN full of bags of bolts with numbers. I think I got up to 150 bags!

Shifting gears, while at a huge flea market over the week, I found this wonderful condition wartime water can! I’ve been on the lookout for jerry cans that are wartime dated to replace my post-war one on the Jeep. But this lovely gem was there and only was $20! Inside most of the liner is still there and only minimal rusting. I won’t be putting it on the Jeep, but it’s nice to have a wartime water can! Go to the next image for the markings…

On top of the water can it has US, MONARCH, a W (for water), and a date of 1945! Pretty cool!
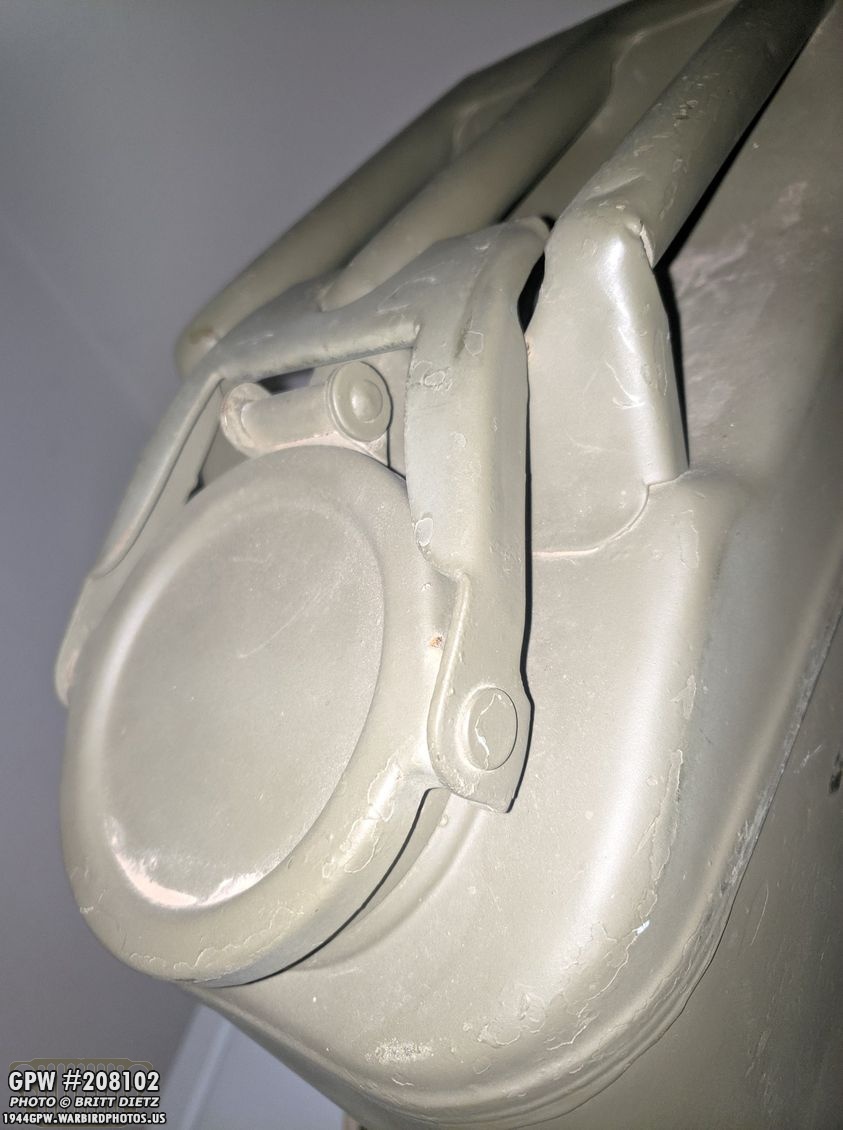
The biggest feature difference between the jerry can and the water can is the locking top, instead of the screw-on cap that a gas carrying jerry can has.

And another awesome score was this eBay purchase of a wartime ORD/Walker tire pump! It needs a full restoration including a new hose and nozzle, but it’ll be a great addition to my Jeep! How does it attach to the Jeep? Under the rear seat actually! There are supposed to be two brackets on there that hold it to the seat. Let’s check the jeep for these brackets.

Sadly, my rear seat is missing both. Here’s two photos showing the pump handle bolt that should have a threaded stud that the bracket screws onto with a wing nut. The left photo is the top of the seat pan, which shows the large head of the weld stud bolt. It’s 5/16-18 and 1 inch long. Sadly, on the bottom of the seat, which is the right image, you can see that the stud has snapped off some time ago. So I will have to either drill out that weld stud bolt and replace it, much as I did with the trailer socket bolt studs or just weld in a new stud.

The other side of the seat is where the large bracket that holds the bottom of the tire pump to the seat. Again, on the left we have the stop of the seat pan which shows some marks of where that large bracket was welded on. On the bottom of the seat (right image) where the bracket was actually welded, you can see it’s missing but it was for sure there at some point. This will be easier to fix as I can just get the bracket and weld that onto the seat in this exact same spot. That’s something I will get to once I restore the tire pump and acquire the two brackets.
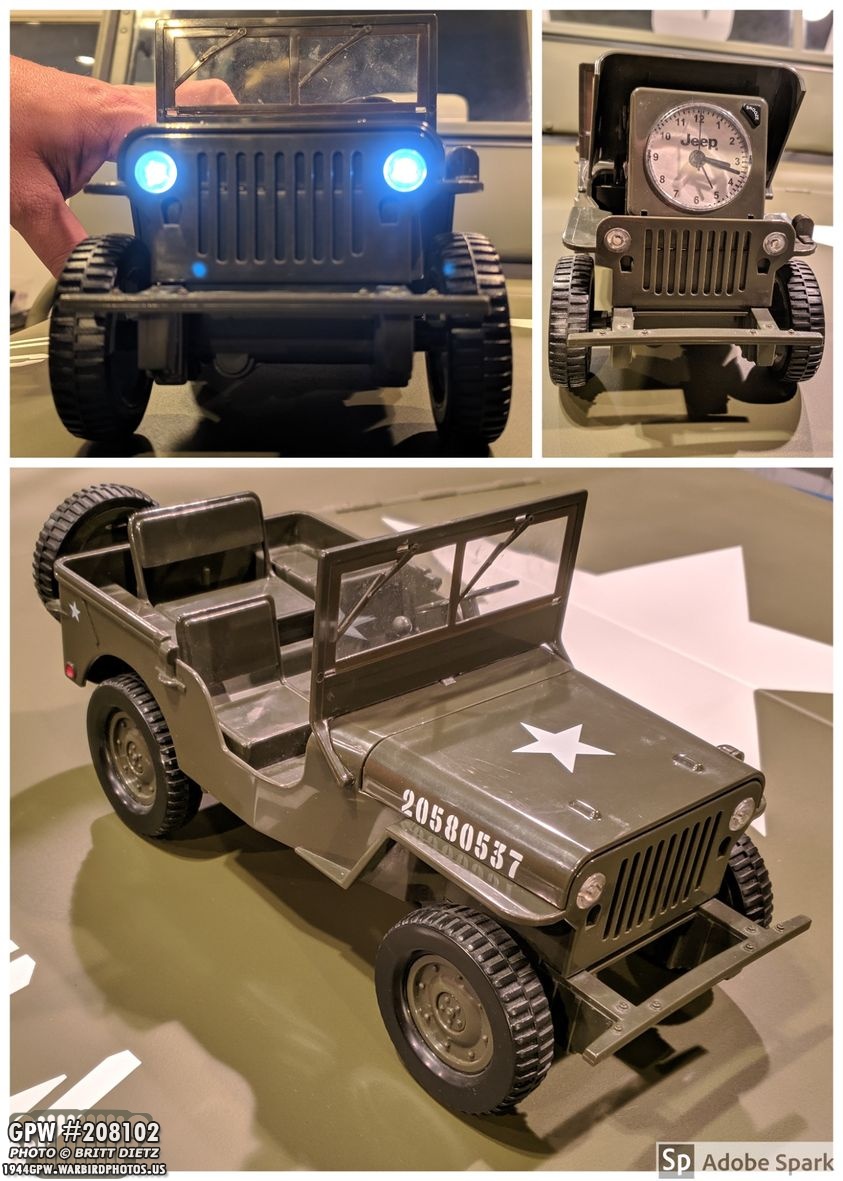
To wrap up this week’s update, another fun thing I found at the flea market was this Jeep clock/alarm clock. It wasn’t working when I got it, so I opened it up and messed with the wiring until it started working. The hood opens up to reveal a clock with an alarm. When the alarm goes off, the Jeep plays revelry. If you push on the horn, it honks, and if you pull the shifter the headlights come on (not sure why for that). Fun little Jeep! That’s all for now, there probably won’t be a big update for next week, but we’ll see what this weekend holds!