 Little Projects and more Axle work
This past week was a little slow with Jeep work, but managed to get in some work on finishing the installation of the trailer socket, adding a filter to the oil filter, and continuing work disassembling the GPW axles.

It was a nice week to drive the Jeep! As many of the Jeep forums/groups say ‘Drive them Jeeps!’ It never gets old driving one of these pieces of history. I feel I’ve gotten the hang of manual transmission as well, which makes it that much more enjoyable!

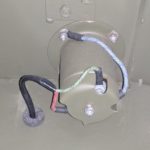
Recapping from last week, I started work on drilling the holes and getting ‘as close as possible’ special bolts to install the trailer socket shield. Pictured here is a shot of the trailer socket (from a while ago, before I had replaced the rubber seal with a proper felt one). The cover goes over this to protect the wires and socket itself from things thrown in the toolbox.
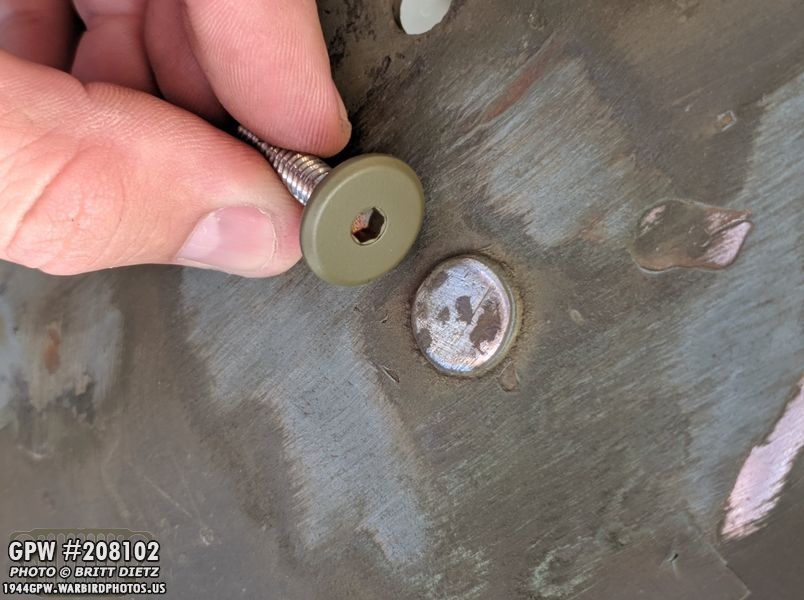
Referring back to my original tub, I found a bolt that was just about the same size as the original. It’s a bit larger, but close enough as I couldn’t find anyone who sells this particular bolt. I planned on filling in the hex socket.

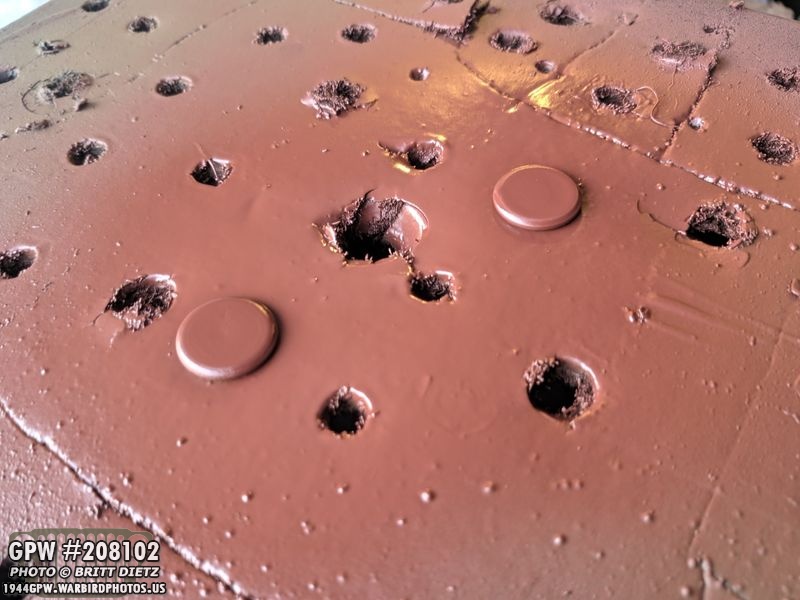
And I did that by filling it with a few layers of bondo.

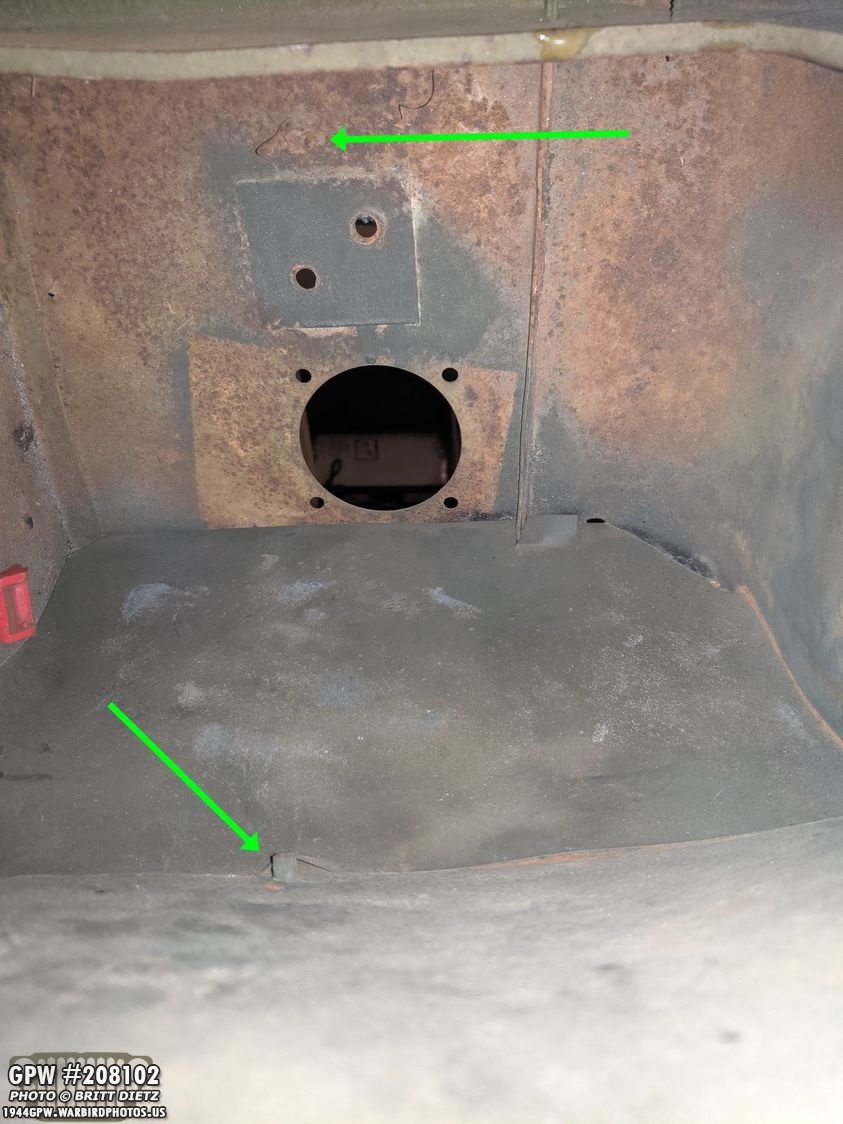
Using the schematics and instructions from the All American Wonder book, volume 2, I drilled my hole for the bolt in the back of the tub. Sadly, MD Juan’s measurements were off yet again, so that made the hole off. DOH! The upper hole is where it needed to be while the lower hole is where it should be. I will fill that hole.
Here, both the back and lower bolts have their hex sockets filled and are getting painted.

And to give you an idea of where they come in, here’s a shot in the toolbox showing the two bolts as I test fitted them with the wing nuts.
Here’s a look at where they are in the original tub. The bottom stud is only about 1/2 there, the rest was snapped off some time long ago. The upper one, however, is full there and has the original wing nut!

Here’s a look at the original wing nut! While I’d love to try and use this when I restore the tub, I think it’s just too rusted and will probably need to be cut off. But I will try to save it!

Back to the new tub, here’s the bolt put into the tub. I used a JB Weld super strong glue to hold it in, with up to 4,000 psi strength. I tightened the wing nuts on the inside so that the bolts were tight against the tub giving a super-strong bond. Here I’m about to paint the area with OD green after doing some sanding. The lower hole that I drilled was filled with JB Weld steel and sanded down.

And now painted with the first coat of OD Green (used the air sprayer to get a matching texture). It is still wet in this photo. I sprayed around the area so it blends.

And once more… here’s a look inside before I add the trailer socket shield…

And now after with the trailer socket shield installed.

After hitting it with a 33070 spray paint from Ron Fitzpatrick Jeep Parts to blend it, here’s the final dry product. Not bad!

Another little project that I started work on was adding the bracket for the hand crank on the rear of the tub. The stud was already there, but I needed to add this bracket. It is held down with a wing nut.

Here’s the wing nut before I began painting it. I’ll show the finished product next week. I hope to get a GPW hand crank soon to add to it!

The other side of the hand crank tool is nestled between the back of the tub and this little L bracket on the floor. There is nothing holding it there since the main bracket holds it tight. This just keeps it in place. At first, I thought there was something that was supposed to hold it down here like another bracket…

But looking again at my original tub, the bracket is there but nothing that looks like it could have a hold-down bracket attached. Now I just need the crank!
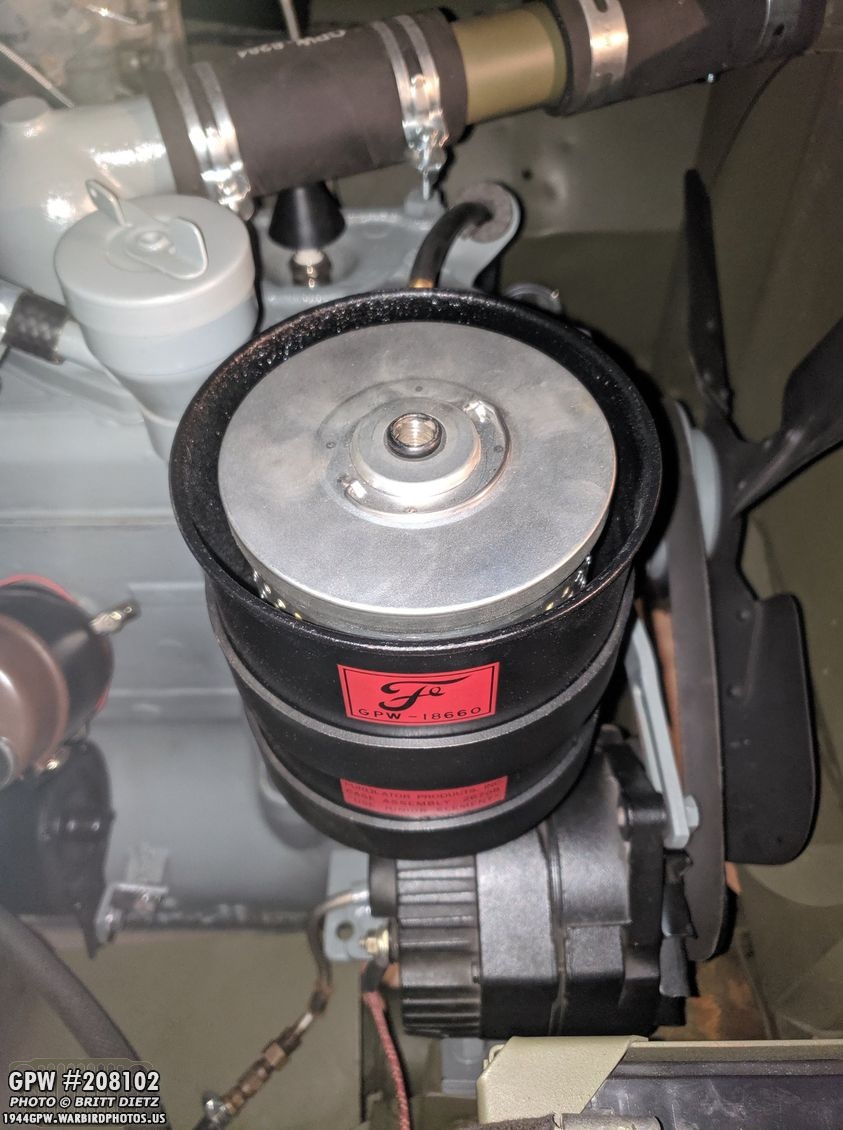
As I was moving some boxes around in the garage, I went into my spare Jeep supplies and took out the filter I had gotten for the oil filter last year. It’s more for looks since the filter is bypassed (lots of reasons why I did that), but it’s good to have in there in case the bypass fails.
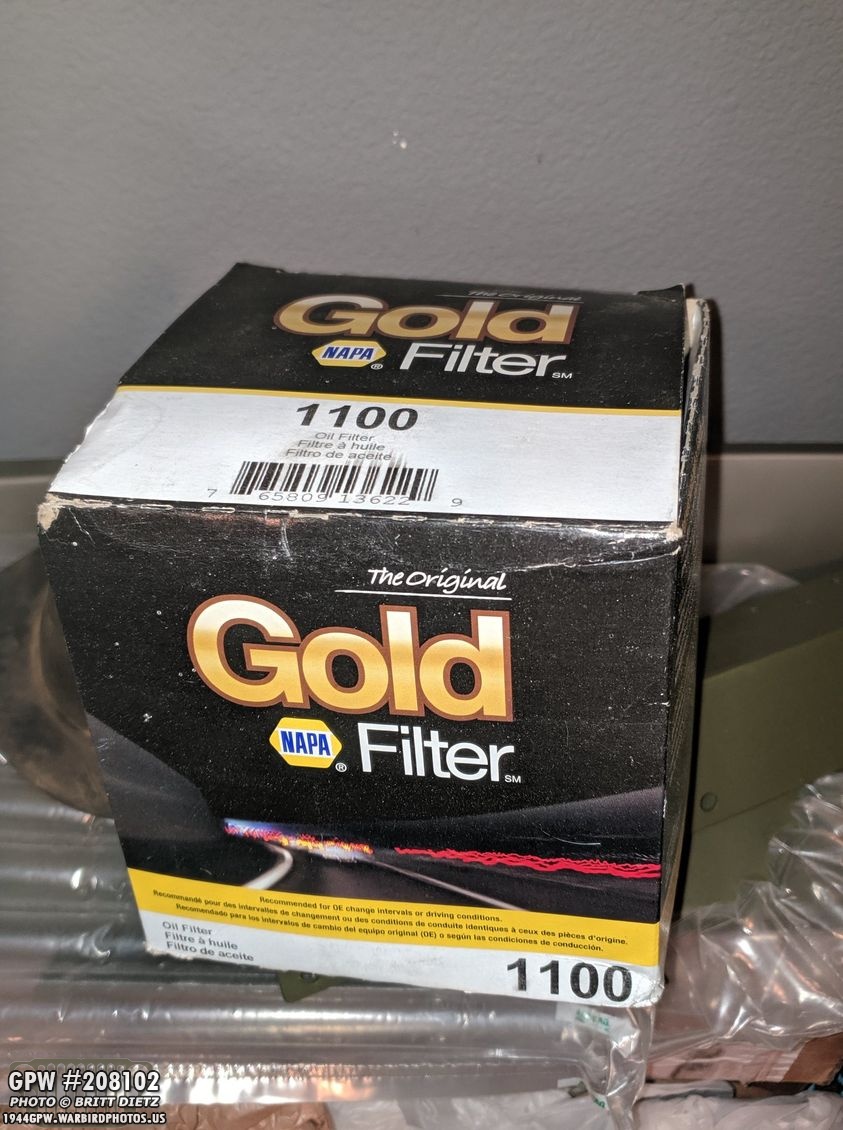
For those wondering what filter I used, I used the NAPA Gold 1100 filter per suggestions on the G503 forums.
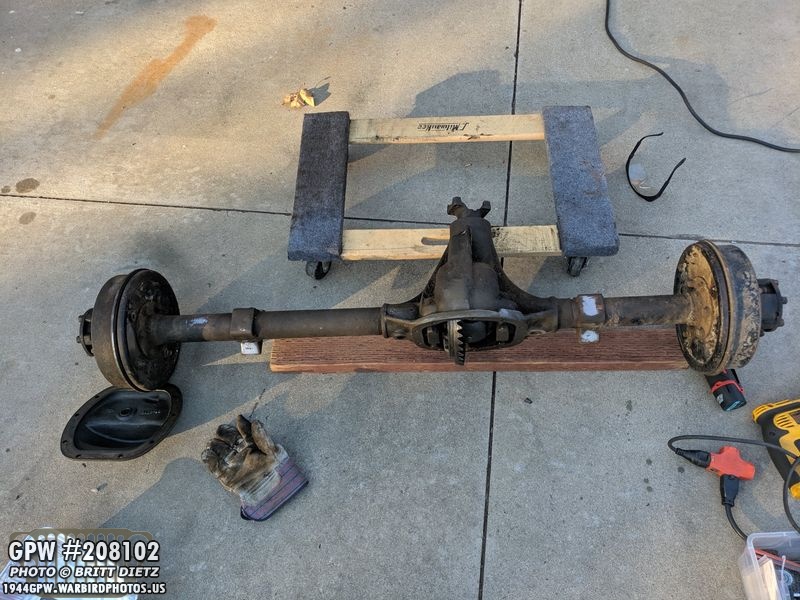
Now, back to working on the axles! It’s been a while since I’ve worked on the axles themselves, and I wanted to continue the disassembly to see what shape everything is in. For those who are new, I picked up two free GPW wartime axles a few months ago from another Jeep owner who wanted them out of his garage. It was perfect for me, as my axles on the Jeep are currently CJ2 postwar ones. I’ll fix these axles up and replace the CJ ones with the GPW ones.

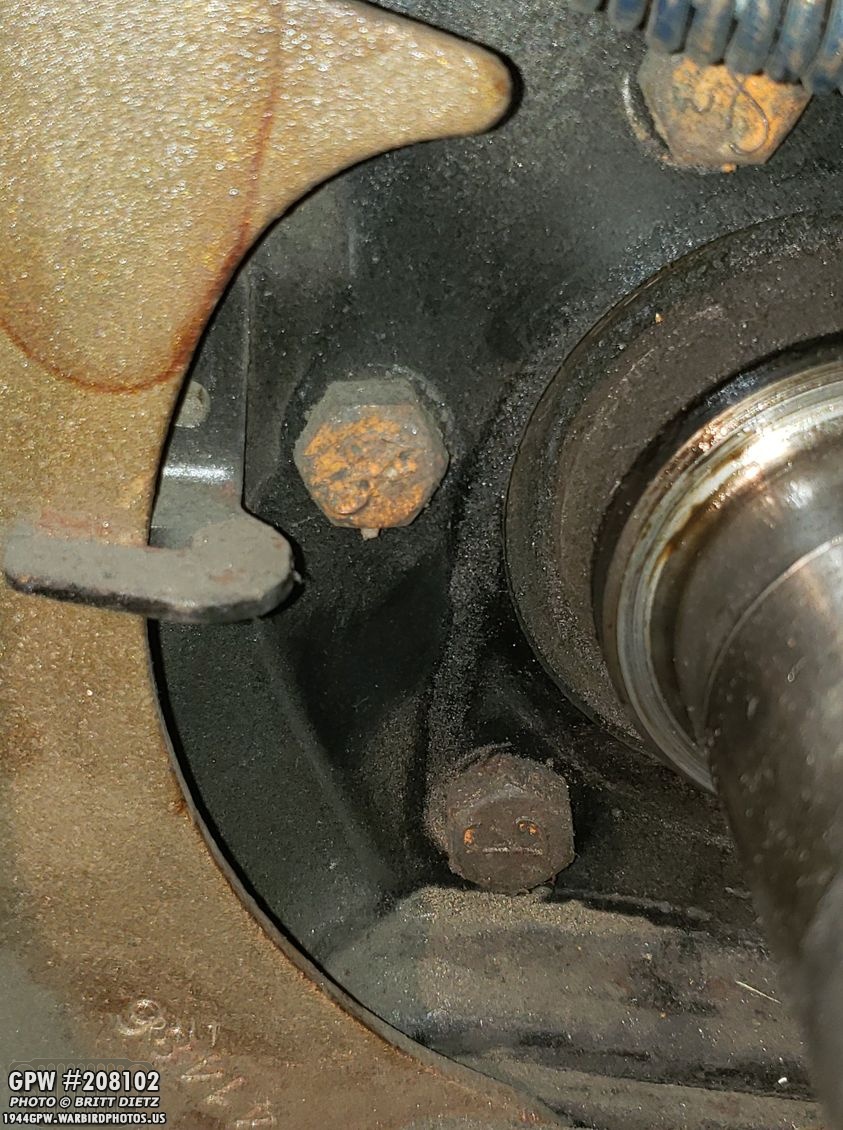
I went to work on the rear axles pulling the main drum so I could see the condition the brake pads and drum are in. It took a while as I don’t think these have been opened in some time. They have, however, been opened at some point as evidenced by the next photo…

The first nut holding the drum has several engraved marks where someone used a screwdriver, or something, to break free the nut. You can see them in the nut at the bottom. This, in turn, damaged the washer underneath and there’s more marks on the second nut. I’ll have to replace those with new ones.
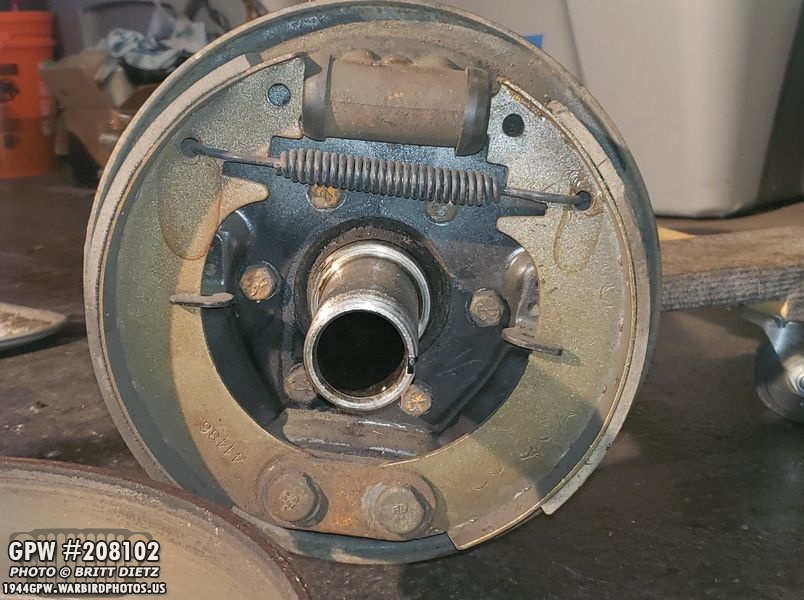
Here’s a look inside the main brake assembly. Not too bad overall, though a bit rusted and dusty. I will measure the pads and see how bad/good of a shape they are in. I still plan on replacing them with new ones. Better to be safe than sorry when it comes to brakes.
You can see more large Ford F stamped bolts holding the disc to the axle. Pretty awesome! But, those look like they haven’t moved in 75+ years, so they will be a paint to break free.
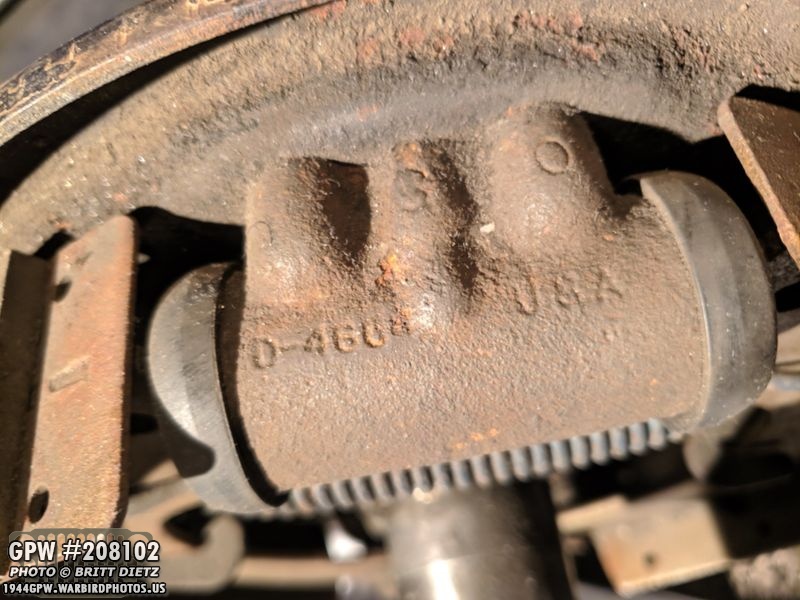
Looking at the brake cylinder, you can see some writing under the rust and brake dust. Looks like D-4608 maybe? And GO on the top.

Took a bit of time, but I managed to get all the brake parts removed! Everything was in pretty good shape, just needed the breaker bolt to remove them!
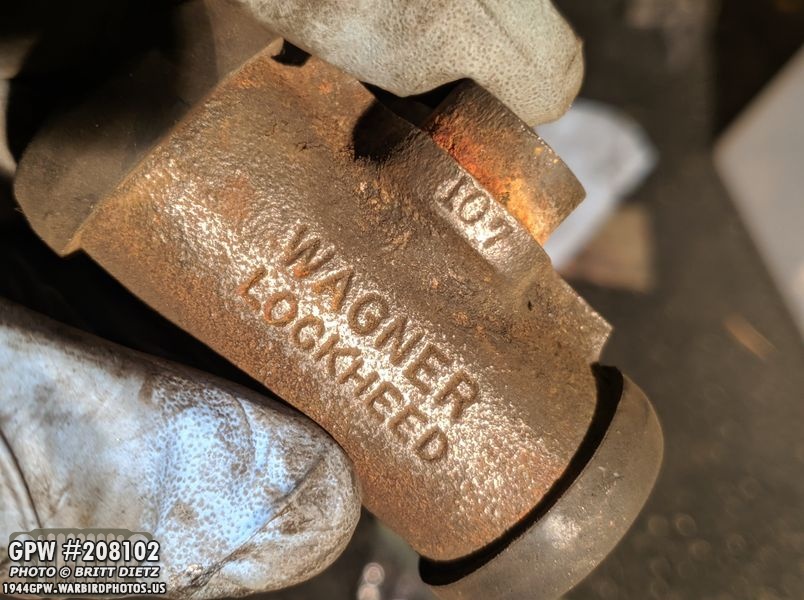
And a neat surprise was finding WAGNER LOCKHEED on the back of the cylinder! I know these are older style cylinders, but I need to do more research on them to see if it’s wartime or if this was replaced post-war.

Here’s a look at one of the rubber ends on the cylinder showing all sorts of great info. Something I will be researching more this weekend!

I also put the new carrier assembly (last week I talked about how I had to replace this assembly as the original one had apparently blown up and destroyed the gears. Got a new GPW one via eBay) inside the rear axle and it seems to be working great now. More testing will need to happen though.

And the final three photos are more shots of the Jeep from the recent drive to the local park. Sure looks nice with the markings all finished! Still need to put the name of the Jeep and the pinup on the windshield, however.

Back quarter, you can see that trailer socket shield bolt above the trailer socket here.

And the other back quarter. That’s it for this week’s short update! Hopefully this weekend I can get some more axle work done, start to clean up the various items and get to the other brake assembly on the rear axle and assess it’s condition. Till next time!