 Fire Extinguishers, more Combat Rims, etc.
After last week’s big Combat Rim installation tutorial, this week went by a lot slower. I completed the rest of the combat rims (and I have a few extra notes to mention about them), worked on a post-war Fire Extinguisher, continued the ongoing chronicles of the GPW axles restoration, some ‘artsy’ shots of the Jeep, and more.

A bit of an artsy photo to kick off this week’s post. Almost makes the Jeep look like a toy! More photos like this later in the post.

Before I get into this week’s update, some quick updates on what the Jeep did this week. On a solemn note, I took the Jeep out to the city with a large American flag to show support for a fallen Marine. PFC Bryan Baltierra lost his life recently when the amphibious assault vehicle with 15 Marines and one sailor inside rapidly sank on July 30th. Eight Marines total lost their lives along with the one sailor. PFC Baltierra was being brought home and had a large procession, so the call went out for people to line the streets with American flags. And a LOT of people showed up with American flags, US Marine Corps flags, signs, etc. It was wonderful to see. A fitting tribute to the fallen soldier.

One thing I forgot to mention was back on August 14th, the 75th anniversary of VJ-Day (Victory in Japan), I took the Jeep out with my 1941 Zenith radio playing broadcasts from August 14th, 1945 with the announcement of the Japanese surrender. I also had with me a Los Angeles Times Newspaper with the news of the surrender.

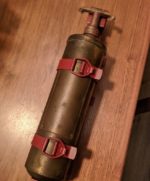
One of the big projects for this week was a fire extinguisher. I’ve had three extinguishers in the garage, the left Pyrene one is not mine and while it is a wartime extinguisher, there’s debate if they were used on Jeeps. The right two are Fire Extinguishers I’ve had for a year now. After doing some research, I was sad to learn they are both post-war. But, the middle one, missing the data plate, could be used as a ‘wartime’ look-alike with some work until I can find a correct one.

Here’s a look at that post-war one (which I’ll explain why it’s post-war in a few images) in the fire extinguisher bracket I got a few weeks ago (and I posted the entire painting and installation two updates ago).

And of course, a photo showing the bracket installed under the dash to the left of the clutch pedal.

First step was to clean up the extinguisher and give it a coat of OD Green. I went with the same 33070 s my Jeep. Again, this Extinguisher is just a place holder until I can get the correct wartime style one. So, what makes this post war? Well, right off the bat, the indented area where the data plate/decal goes is the smaller 2-5/8 x 5 1/16 size. The correct wartime style should be 3×6. That’s just one of the quick give-aways…
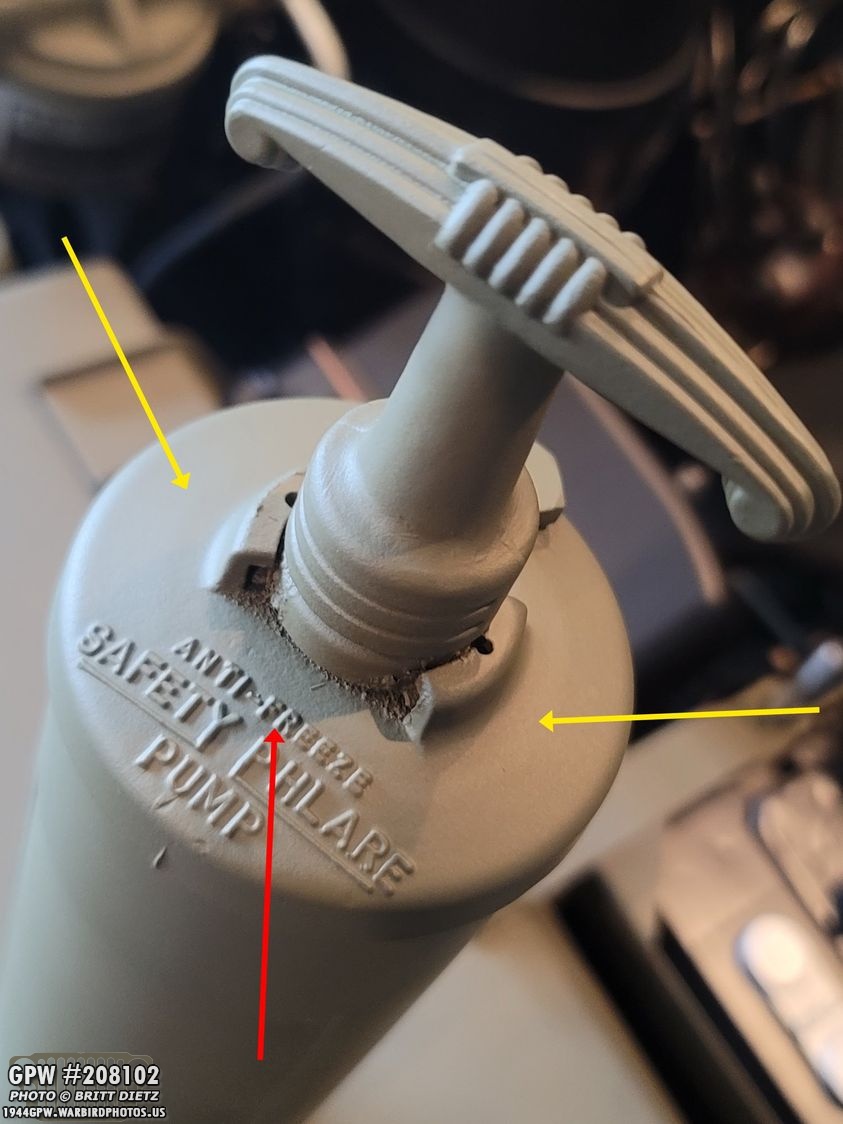
Looking at the top, here’s the other give-aways. There should be ribs going out from the center and down the side where the yellow arrows point. That’s a real quick way to see if one of these is wartime. Also, this one says ‘ANTI-FREEZE’ which, in the photos I’ve seen of wartime ones, they don’t have.

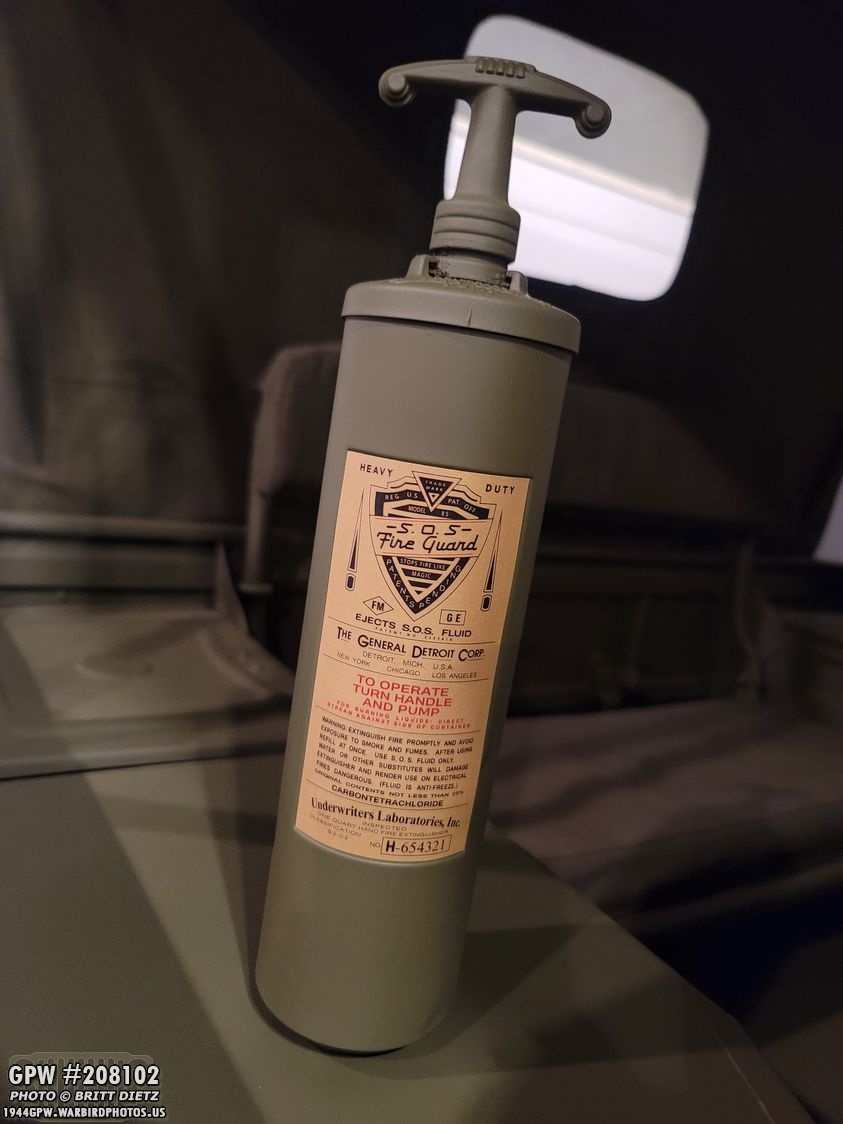
Originally, all fire extinguishers had brass plates, like the brass extinguisher itself. I was able to get ahold of two brass plates. This one here, an SOS Fire Guard, is the correct WW2 style (other than it being a 1 1/2 QT when Jeep ones were 1 QT). The SOS brand seems to be the most common on Jeeps, so I wanted to go that direction. Around 1942 sometime, they needed the brass and switched from brass data plates to decals. It was the same design as the brass plates, just in decal form.

So I scanned my brass plate into photoshop and painstakingly recreated it down to the same fonts and spacing while making any modifications to the wartime style (including the 1 QT). You can purchase these reproduction labels, but they all seem to have come from the same source and have the incorrect 1 1/2 QT listed and many have the wrong fonts. So I made my own as close as I could get it. Each letter is correctly spaced to the plate, every line and shape the same. It was a lot of work, but worth it. Sorry for the watermark, I’ve had some of my designs/images lifted.

I then went and found some gold sheen cardstock, which I had the labels printed to the 3×6 size (bottom) for when I find the correct Model 85 wartime extinguisher… and also the smaller 2-5/8 x 5-1/16 size (top) for my ‘makeshift’ extinguisher.

Here’s a good look showing the difference in size between the labels. Again, it’s easy to tell the wartime style with the larger label. I also tried to shoot this with a little bit of flash so you can see the gold sheen.

After cutting out the smaller label, I used Elmer’s Craft spray glue to hit the backside. Voila, instant decal!
And here it is installed on the extinguisher! Sure looks mighty good, even if it’s technically incorrect. But it’ll work perfectly for now. I’m still on the lookout for a correct extinguisher, and I’m sure I’ll procure one sometime soon.

And another close up with flash showing the sheen. Really happy how these came out! I think I’ll spray a coat of satin over the entire extinguisher. Not only will it protect the decal, but it’ll also give the entire extinguisher a slightly darker appearance and that slight satin sheen as well, which I’ve read is what many of them originally looked like.

And now on to a sort-of ‘part 2’ on the combat rim and tire installation! If you missed last week’s post, you can read the entire thing here: https://www.facebook.com/1944gpw/posts/785414365532081 I did 2 tires/rims last week (spare tire and one of the mains), so I had three more to do this week.

Now that I had two of them on my belt, it was a bit quicker to do the last three… but they still took around 40 minutes to an hour when you could the time taken to modify the flaps, prep everything including the combat rim bolt nuts, install everything in the whole process, pump it up, sand down any scratches, and touch up the paint.
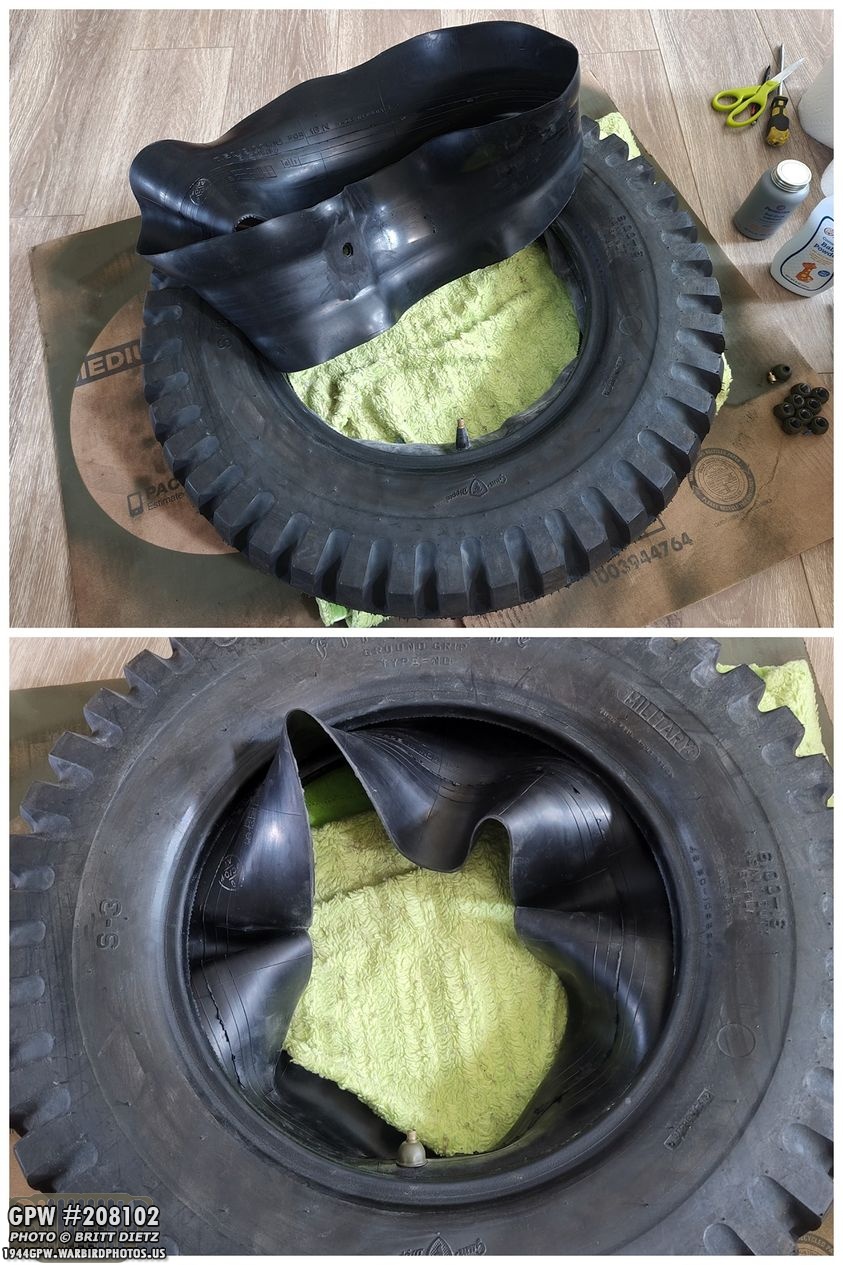
One thing last week I forgot to get a photo of (but mentioned) was that since my tires are new and the flaps are new, they don’t want to play well with each other since they are both quite stiff. Top shows the flap before I put it on. So, what I found worked was instead of trying to get the flap to go in a U shape around the inner tube as I was tucking it in, it was easier to get one half of the flap tucked in, flip the tire over, then do the other half. The bottom photo shows one half tucked in and the tire flipped.
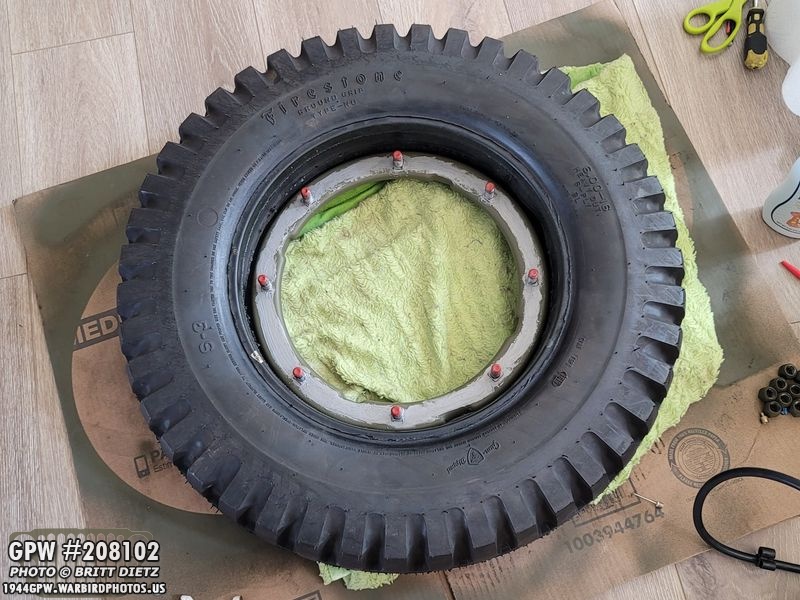
Here’s another photo I forgot to show, after you install the first half of the rim (with the bolts and the Permatex anti-seize paste) and flip over the tire to join the other side. I always tried to make sure the flap was nice and even all the way around the rim at this point so the two rims would come together easier with the flap interfering.

And here’s a look at the other half with another light coat of the permatex anti-seize paste. That stuff is nasty, and a bit of a warning… IT CAN GET EVERYWHERE. It doesn’t like to rub off things very well, so be wary about where you put your fingers or you’ll have quite the mess to clean up. I didn’t care much for this part of the installation for that reason.
Here’s a look at two of the remaining three finished. The Schrader valve caps installed after the touch-up paint had dried. With the temps in Southern California hovering around 100+ degrees, and these taking a lot of work and time, I could only do two a day even when doing it inside the house.

And here’s a look at the final one that I finished the next day with the touch-up paint drying. I hadn’t replaced the modern valve cap (which I put on when painting) with the Schrader one.

And a look at the final tire all finished. They sure do look great, and can’t wait to put these on the Jeep! The last thing I’ll do to these is to take some tire shine and rub the side walls (NOT the treads, that can be dangerous) to clean them up a bit.

Here’s the three I did this week! They won’t be installed on the Jeep until I finish the GPW axle restoration. So they’ll be sitting in the garage for a few weeks, sadly! At least the spare tire with the combat rim is back on the Jeep!

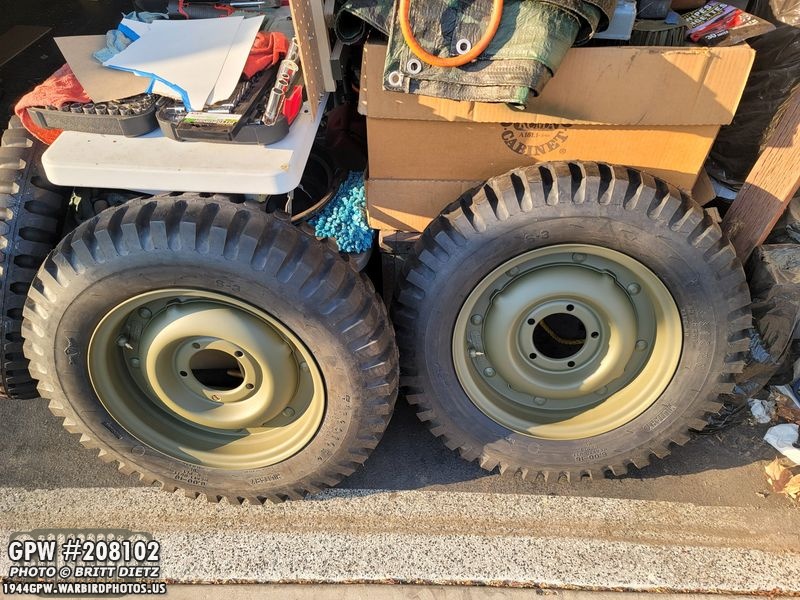
For those that want to know what the difference between a combat rim and a solid rim is… here’s a shot of both of them. The left is the solid rim (post-war CJ Kaiser Rim) with a knock-off brand NDT tire and the right is the new wartime correct Firestone NDT tire with the combat rim. The combat rim is a split rim, meaning it’s two pieces. It’s held together by those eight large bolts. It has a flap which protects the inner tub from being pinched due to the two halves coming together. The post-war solid rim just has a tube inside and the rim is one piece. The idea of the combat rim is that any solider could change a tire/tube without needing special tire tools.
And speaking of those GPW axles, as mentioned over and over (sorry for those who’ve heard this a million times now), my Jeep has CJ (Civilian Jeep) post-war axles. I was given two wartime GPW axles from 1943 that I’ve been doing a very long slow restoration. Once complete, they will be swapped with the CJ axles.

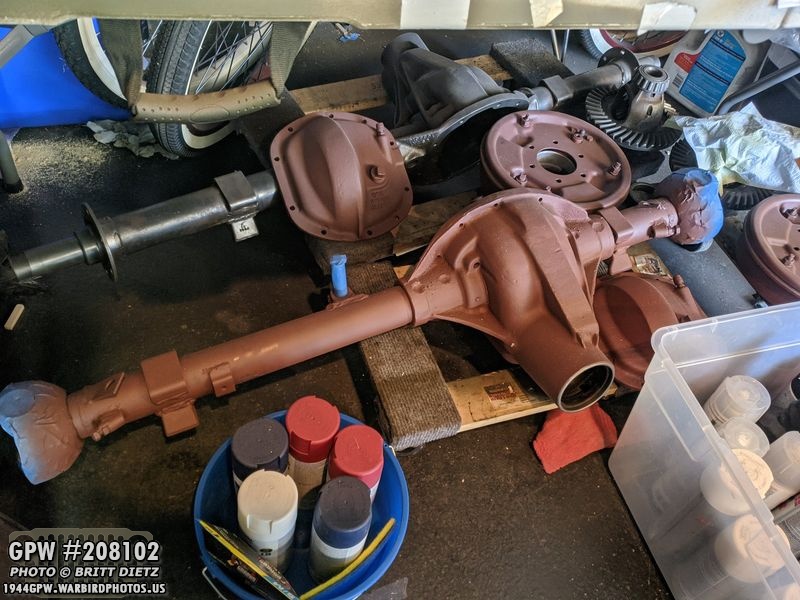
If you’ve been following along, I discovered, when taking apart the rear axle, that there had been a spider gear explosion at some point and cause significant damage to the axle. That included the carrier, the ring and pinion, and the housing. The carrier has been since replaced with another GPW carrier with great inner gears (shown here), and I’m going to have the housing re-brazed to be like new. What I’ve been hunting for is a ring and pinion, which has been a daunting task. I got, what I finally thought was correct, a ring and pinion set last week. So I went to work taking off the bad ring from the carrier. (look at those wonderful original F bolts!)

I removed all the bolts and the bolt lock brackets (not sure what they are called?). They are missing some tabs, so I’m going to attempt to fix/add some back on.

Here’s a look at those with the F stamps. Two are on the top, two are underneath.

So here’s a look at the ring and carrier that came in the set this week… and at the time I was so happy to finally have a set as I’ve been halted on my axle restoration until I get the set. So I used my impact air gun and got all the bolts free and the ring off. I want to add the ring to my good GPW carrier I have.

At the time, I didn’t really think anything of this ring and pinion set as the auction on ebay said it was take-off from a MB and would fit right into a GPW/MB. I should have really looked closer… can you spot what’s wrong?
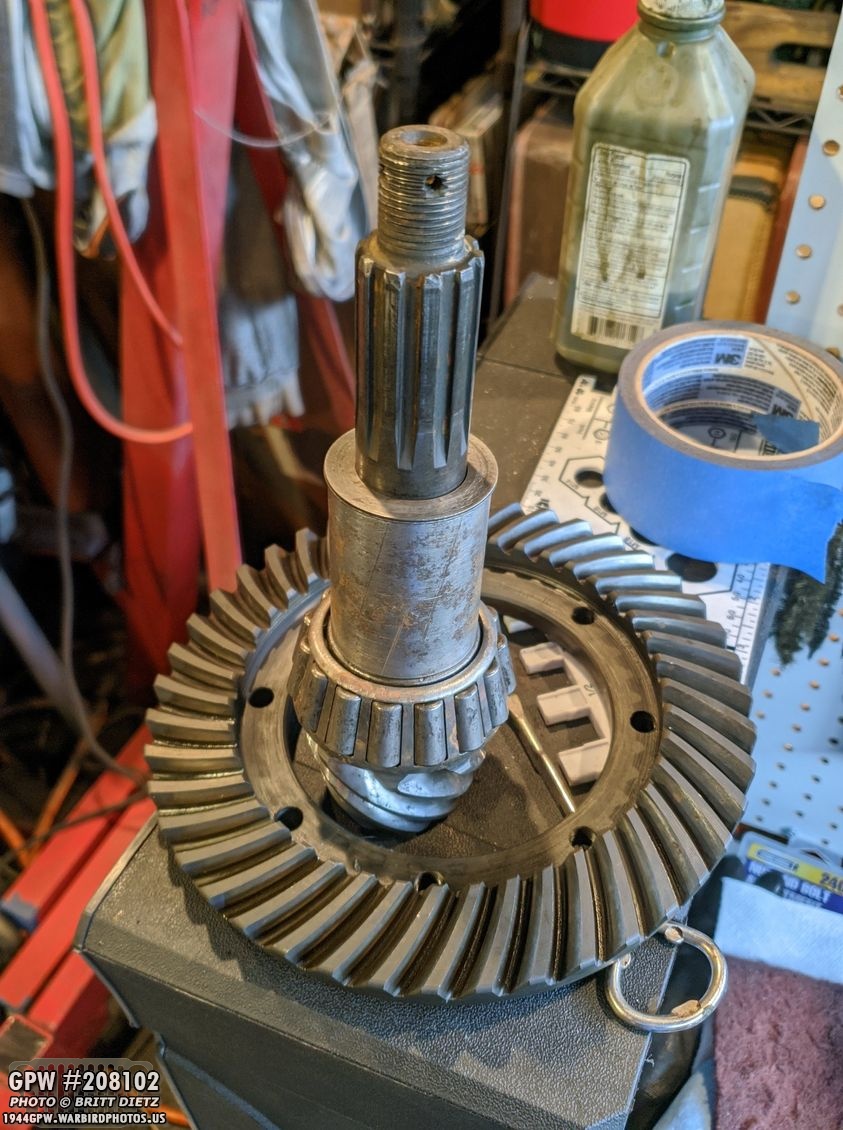
After I cleaned them up, I noticed something was off… so I took my damaged GPW ring (not shown) and counted the teeth… 39. Okay. I counted the ring on the new set I got… 43. WHAT?! Turns out, this is a post-war CJ set! UGGGGGH. I was rather upset. Thankfully, the seller was super cool and just refunded me everything saying he honestly didn’t know. This was the 3rd attempt at getting a ring and pinion to use, so I just finally said to heck with it and spent a lot more money and got a wartime NOS set which should be here next week. Sigh.

Moving on, as I was cleaning up some things on my workbench this week, I realized I still had some original MB style bolts and put together a look at (what I believe) to be the three main and most commonly seen bolt heads on Willys Jeeps. 1) EC – This was used on Willys Jeeps, especially mid-late war. 2) F – The infamous Ford F bolts used on GPWs. As the war went on towards the end, GPWs used less F stamped bolts, but they were still there. 3) C/TR – I’ve been told this is a common bolt to find on early MB Jeeps including Slat Grills.

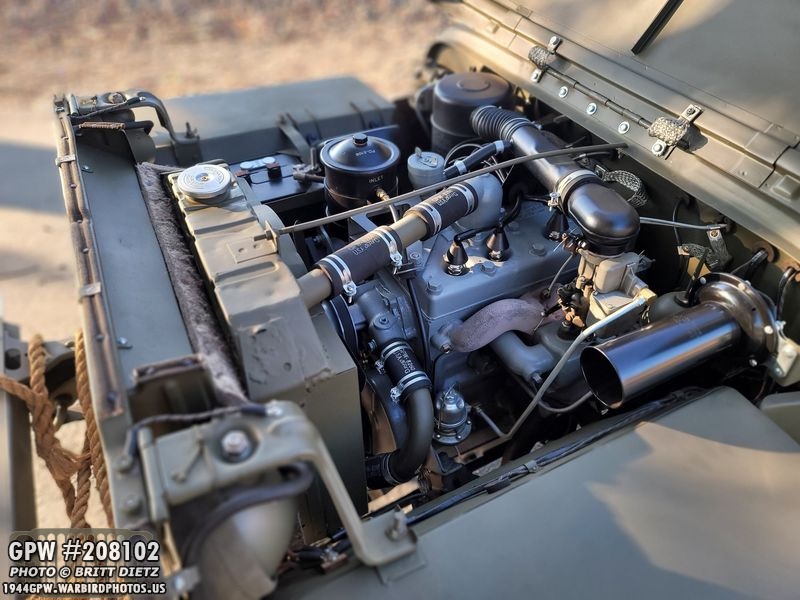
I was able to drive the Jeep a few times this week, including once at dusk. As mentioned, it’s been so hot, it’s tough to keep the Jeep cool, especially with all the hills in my area where the engine works a little harder. The last few times I’ve driven it, the engine temp has stayed between 180 and 190 when it’s working hard, and hovers at 175-180 when taking it easy. So driving in the early evening helps when the temps cool down a bit.

With the hot temps and the engine running a bit hot, I’ve been keeping a close eye on the engine itself. Since I did the head replacement last month and the entire coolant system flush in June/July, I wanted to make sure that everything is still holding up well. I have noticed a very slight seepage of coolant from the thermostat elbow (yellow arrow area). It might just be that the bolts need re-torquing, which I’ll do this weekend. Might not be a bad idea to re-torque the head bolts/nuts even though it hasn’t been 500 miles yet.
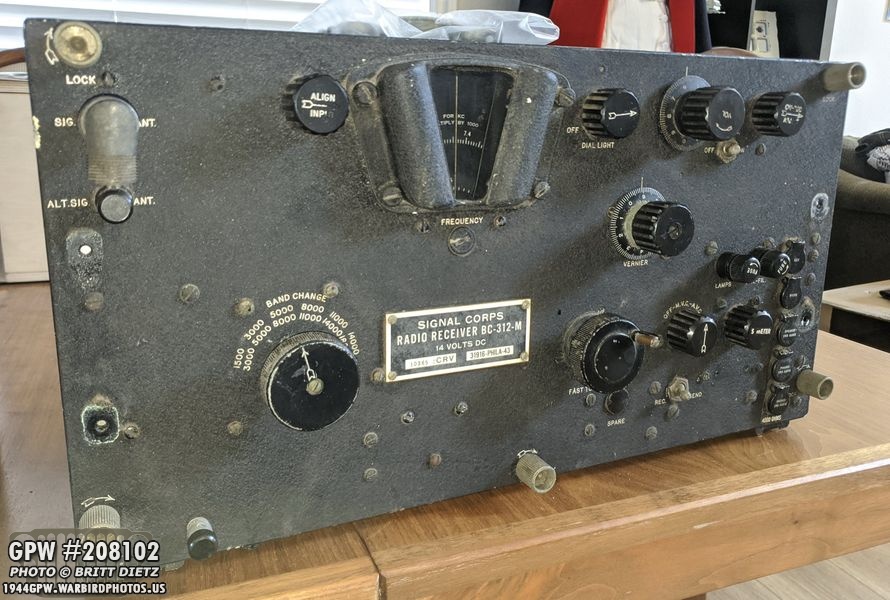
At the local flea market, I found this lovely gem that everyone was passing up. Got it for a steal and brought the incredibly heavy 1943 radio receiver home. The model number is BC-312-M, which from what research I’ve done is a model used in WW2 vehicles, including Jeeps! It’s in great shape, and everything seems to function. I’m going to clean it up (already took the handles off in this shot to clean them) and see if I can’t figure out how to give it some power and try to get it working.

And for the rest of this post, I was testing the camera on my new Samsung Note 20 Ultra phone (crazy cool things you can do with it), so I was shooting some random shots this entire week. One of the neat things you can do is take an existing photo and ‘apply’ that style to a photo you take. So I took some actual wartime photos and applied them as ‘filters’ to see how taking shots of my Jeep would turn out. I think, being that these are unedited, they came out pretty cool looking.

It does mimic the black and white rendering in the same style of the wartime photos pretty well. The sky has that darker tint to it, and the highlights are blown out with the shadows a bit under-contrast.

I might even through some of these into photoshop to ‘degrade’ the quality further and give it even more of a wartime look.

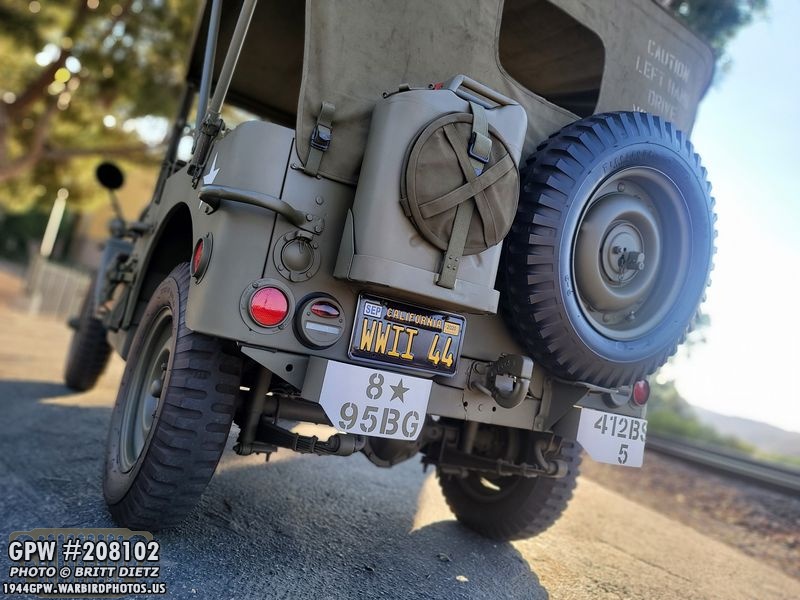
I took another wartime photo, this one a color photo, and applied that as a filter and shot this. It did a great job capturing that vintage Kodachrome looking washed out with more red in the shadows look. (ignore the modern car to the left).
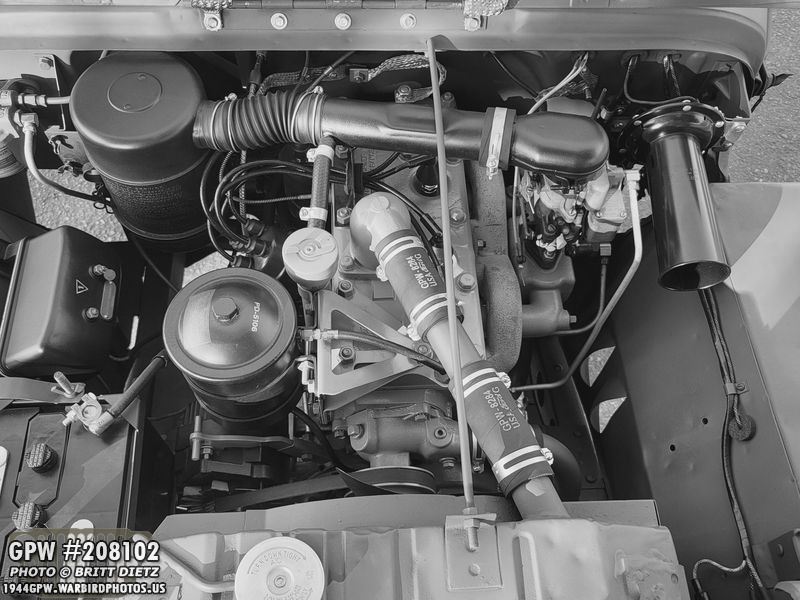
I tried to snap a shot of the engine bay to see if it would have that same sort of look you often see in the books (using a wartime shot of a Jeep engine), but it still looks too ‘clean’. I think one of the big differences was the onboard flash they used on their photos vs here I’m just using natural light.
It also has a nice shallow depth of field look (‘live focus’) which I used as the main image for this post. Here’s another look. It’s almost a tilt-shift look with a shallow depth of field that gives the impression of ti being a toy.
And to end this week’s update, here’s the last of the artsy shots. This one came out pretty cool with that shallow depth of field focus. So that’s it for this week! With the FINAL arrival of a ring and pinion I can actually use, I hope to get moving on the axles soon! Till next week…