 Ring & Pinion journey, Fire Extinguisher Decal, looking for more history, etc!
This week I finally saw the light of the end of the tunnel trying to acquire a ring and pinion set… which revealed a great surprise! I then attempted to find some more history on my Jeep via the body tub, more work on the Fire Extinguisher decal, and finally finding a wartime jerry can for the Jeep!

Jeep in black and white! Using one of the WW2 filters I discussed last week with the new Note 20 Ultra. Came out pretty good looking. Let’s get on with the update!

The next few images are going to be a recap as I take you through my journey to find a ring and pinion. The story begins when I got two 1943 GPW axles to replace the post-war CJ axles. I’ve been doing, since December of last year, a very slow restoration on these axles taking them all apart. The front axle was in great shape, but the rear (shown here), had a big problem…

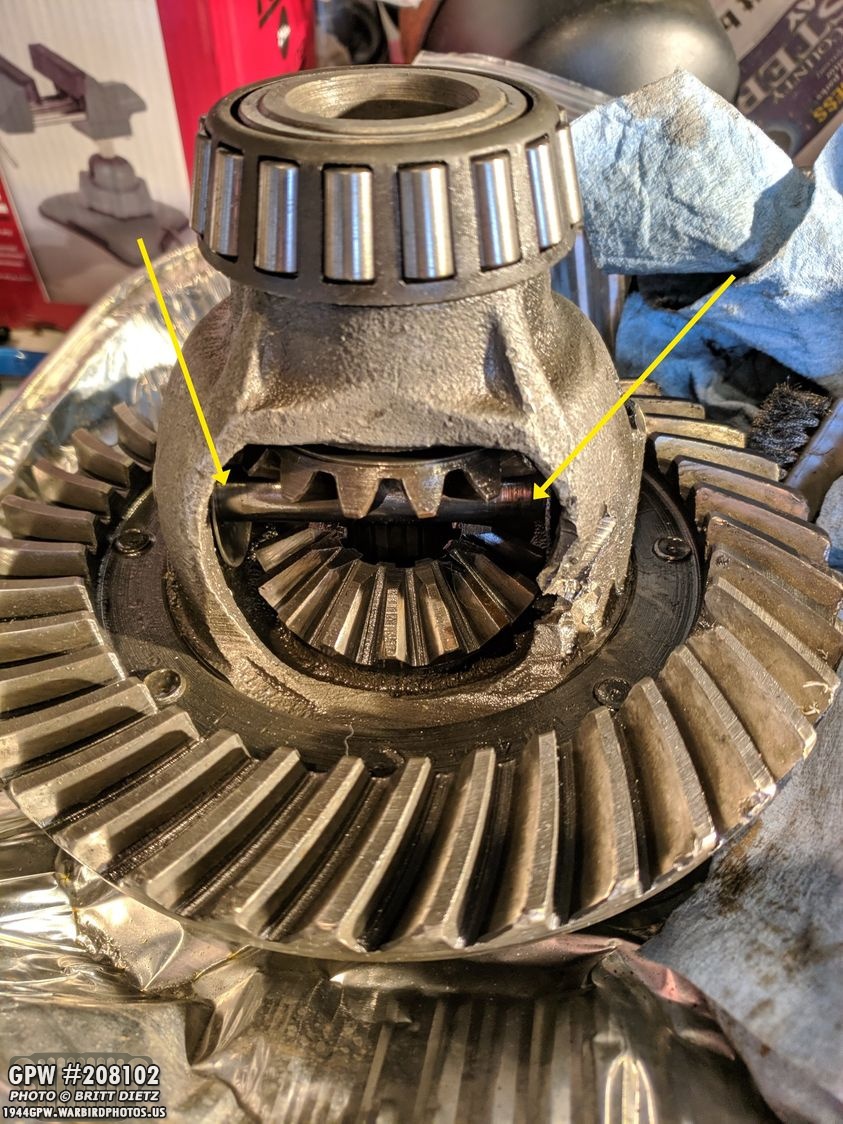
At some point in the rear axle’s life, there was a violent spider gear explosion. It destroyed the two spider gears, sent debris all over damaging the carrier (red), other gears (red), and pinion (yellow arrow).

Here’s a look at some of the debris. You can see some of the damage on the ring as well on the top middle. It also damaged the housing causing a small crack. The crack will be brazed and be as good as new soon.
Here’s a look at the whole carrier with the damage and the missing spider gears (yellow arrows). Basically, everything in this photo will need to be replaced.

Thankfully, someone on eBay had a spare GPW carrier with all the gears, so I bought that up. I wasn’t even looking for a GPW one specifically but got lucky. The top is the damaged one, the bottom is the GPW one from eBay.
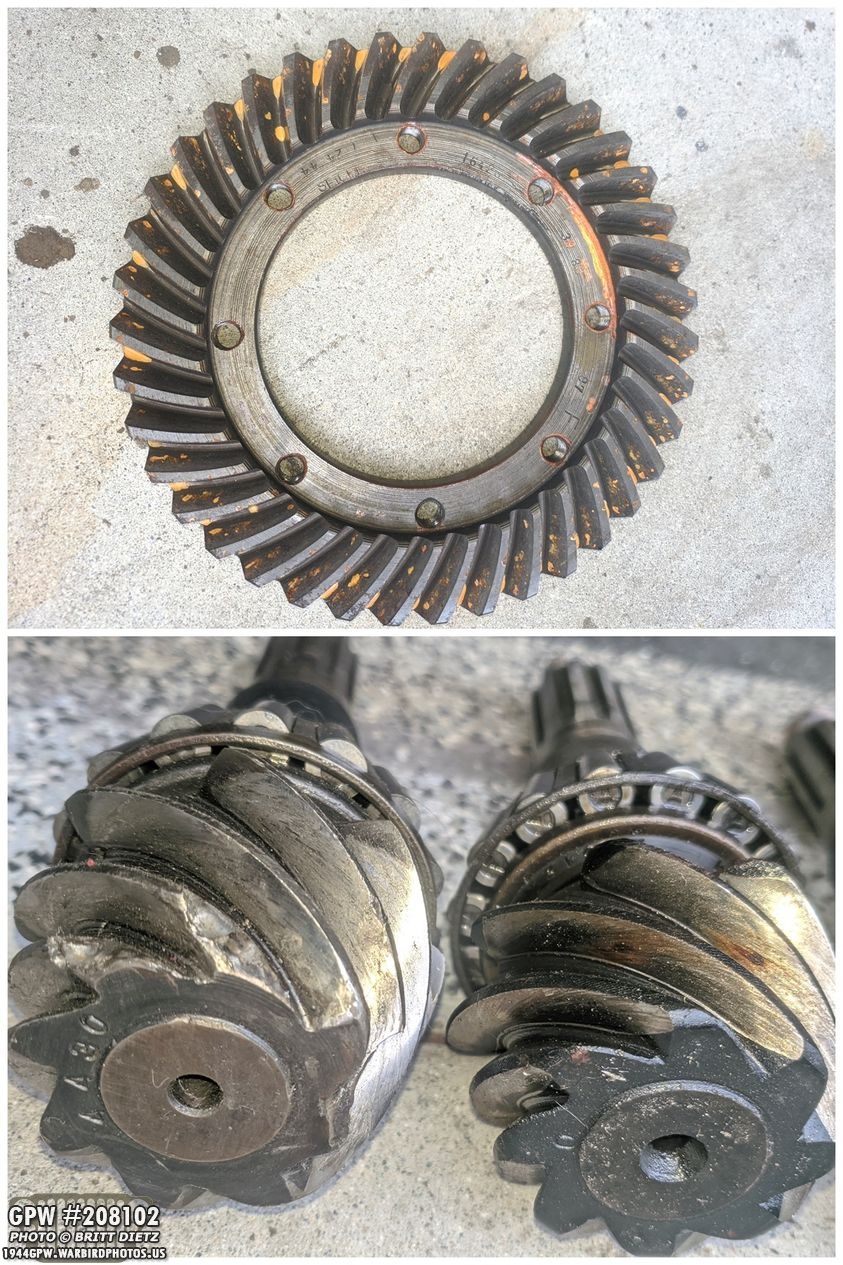
Now I needed a ring and pinion. Unfortunately, you need a set that was made together, as they are machined to match. So you can’t mix and match them. A friend had a spare that he took out of his rear axle and gave them to me. Unfortunately, the reason he replaced them was that he accidentally ran the Jeep without oil in the rear axle, and caused some heat damage to the ring and pinion. So I couldn’t use them, sadly. The bottom photo shows the original damaged one on the left, and the heat damaged one on the right.

This takes me to a few weeks ago, I’d been searching for a ring and pinion set on the internet. It was actually tough to find, there are no quality repros (just OMIX, which I don’t trust at all), and other venders wanted a ton for a set. I then spotted a listing on eBay, and I bought what was listed as a GPW/MB take-off carrier with ring and pinion. It appeared to be MB with minimal markings, so I started to take it apart…

After cleaning the ring and pinion, it started to occur to me that something just didn’t look right. I took my original damaged GPW ring and counted the teeth… 39. Then I counted the teeth on this ring… 43. Uh oh.

Turns out, this set was from a post-war CJ, just like the axles on my Jeep right now. UGH. Thankfully, the seller was really cool and fully refunded me the money and said to keep the set and do whatever I wanted with them. I was quite frustrated at this point that I kept running into walls with this darn ring and pinion set.
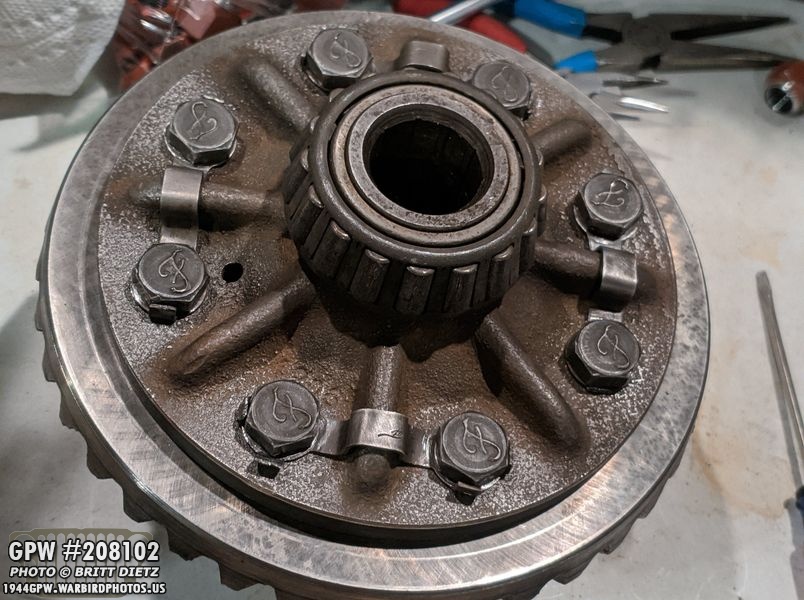
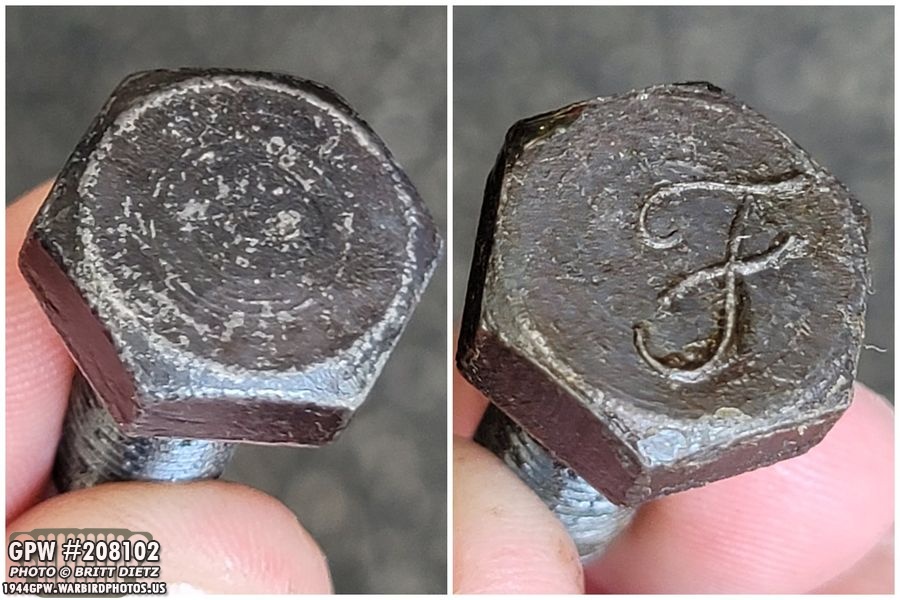
In the meantime, I decided to go ahead and take apart the GPW carrier I had gotten earlier this year on eBay to replace the damaged one. It had a ring on it, which I can’t use because it didn’t come with the pinion. So I started to work removing the F stamped bolts.
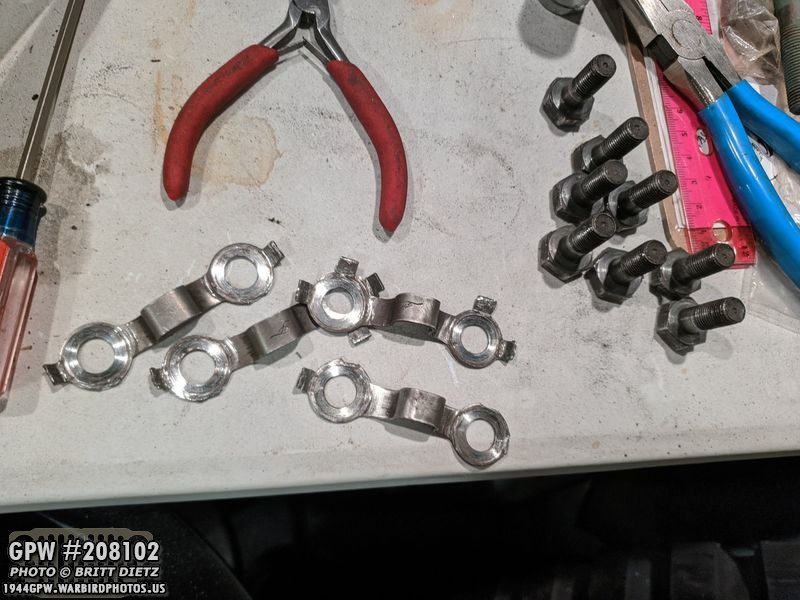
Here’s all the F bolts and the lock straps off, which I posted about last week. As you can see from the lock straps, some of the tabs are missing/broken.
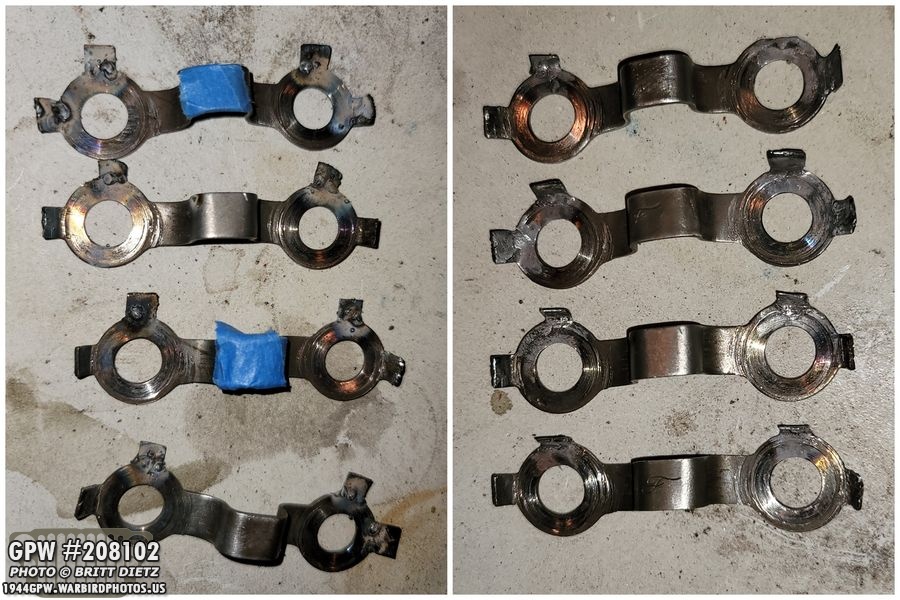
So I decided to attempt to weld new tabs on to the ones missing, and repair other tabs. Using the welder, I carefully added the missing tabs (left photo) and then ground down the welds (right photo). It worked perfect! The tape on the left image was there to protect the F stamps while welding. I was excited to have repaired the original lock straps vs having to get new ones.

Moving on, so last week I finally broke down and bought what was listed as a NOS ring and pinion set from a reputable seller on eBay. It was pretty pricey, but at this point I’m tired of all these delays. This was guaranteed to work on GPW/MB jeeps. I had no idea what year it was from or who made it (but it was listed as American made NOS). Here’s how it arrived, in the original box. Pretty cool.

Opening the box, I found my chicken dinner! Kidding, here’s the see all wrapped in original wax paper! That’s pretty awesome. This is something they did for spare parts during the war. This made me excited to see what I have! It’s like one of those toys you buy that you don’t know what’s inside. I was expecting something unmarked and by some random company. So, I took the first item and started to unwrap the wax…

It was the lock straps. Guess I didn’t need to fix my ones after all… but wait, what is that marking?! Do my eyes deceive me?

NOS GPW F stamped lock straps!! This ring and pinion set just got a lot more exciting! On to the next wax package…
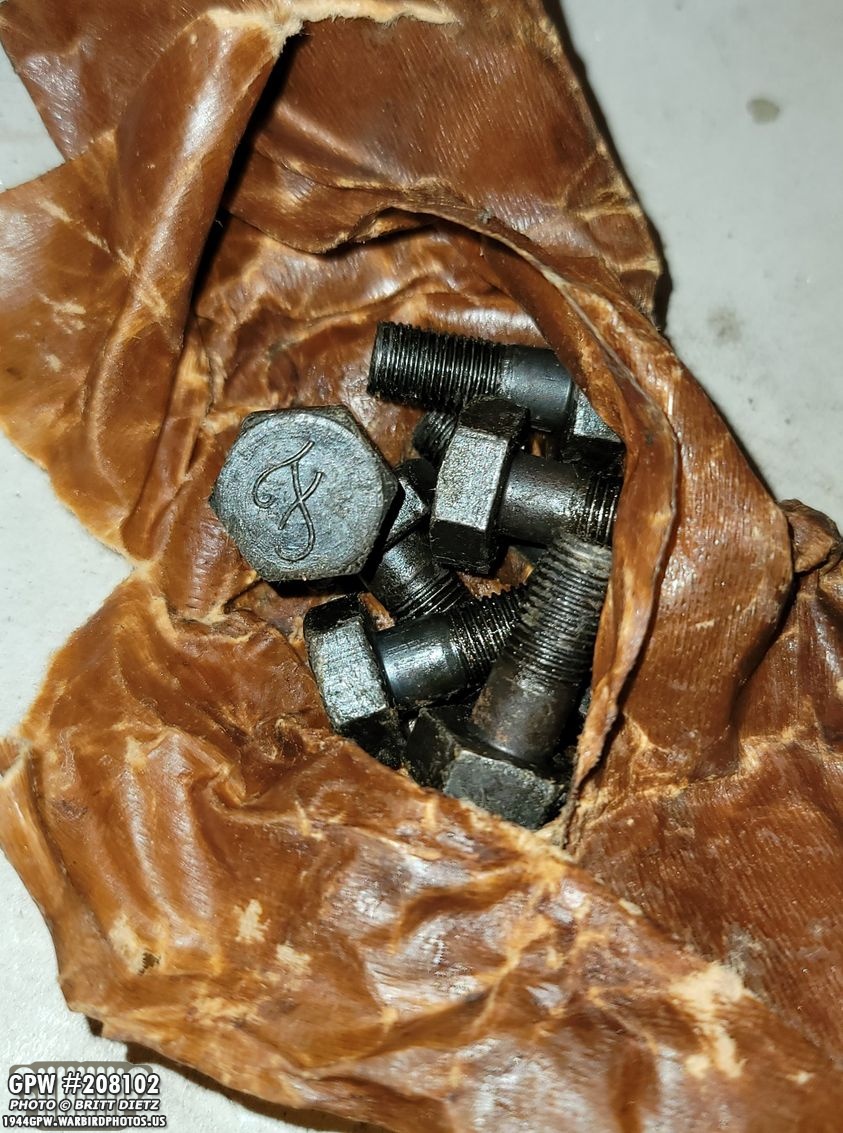
The carrier bolts are all F marked! Ahhhh! Super score!

Naturally, I was super excited. Do I have a complete GPW NOS ring and pinion spare set? Time for the real test… the ring!

Not only was it very stuck to the wax paper, but it was covered with Cosmoline. It’s a wax-like petroleum-based corrosion inhibitor used to protect military items in storage. The cosmoline was really thick, so I had to take a rag and do a bit of scrubbing to see if there were any markings. And the result…

JACKPOT! A GPW ring! Not only a GPW ring, but a December 22, 1944 ring! Here’s the markings I could find:1) The 12/22/44 date! Perfect for my 1944 Jeep!2) 416 – Hand etched, maybe the worker’s number?3) A J with a nice F stamp. There’s a small nick in the ring next to the F stamp, which must have come from the factory. 4) F245) GPW4270

Now on to the pinion, which I was pretty sure was going to be GPW because would have been made with the ring. It was also heavily coated with cosmoline and that wax paper just refused to let go.

Sure enough, a FORD stamp! Can’t believe my luck getting a nice wartime NOS Ford GPW ring and pinion set!
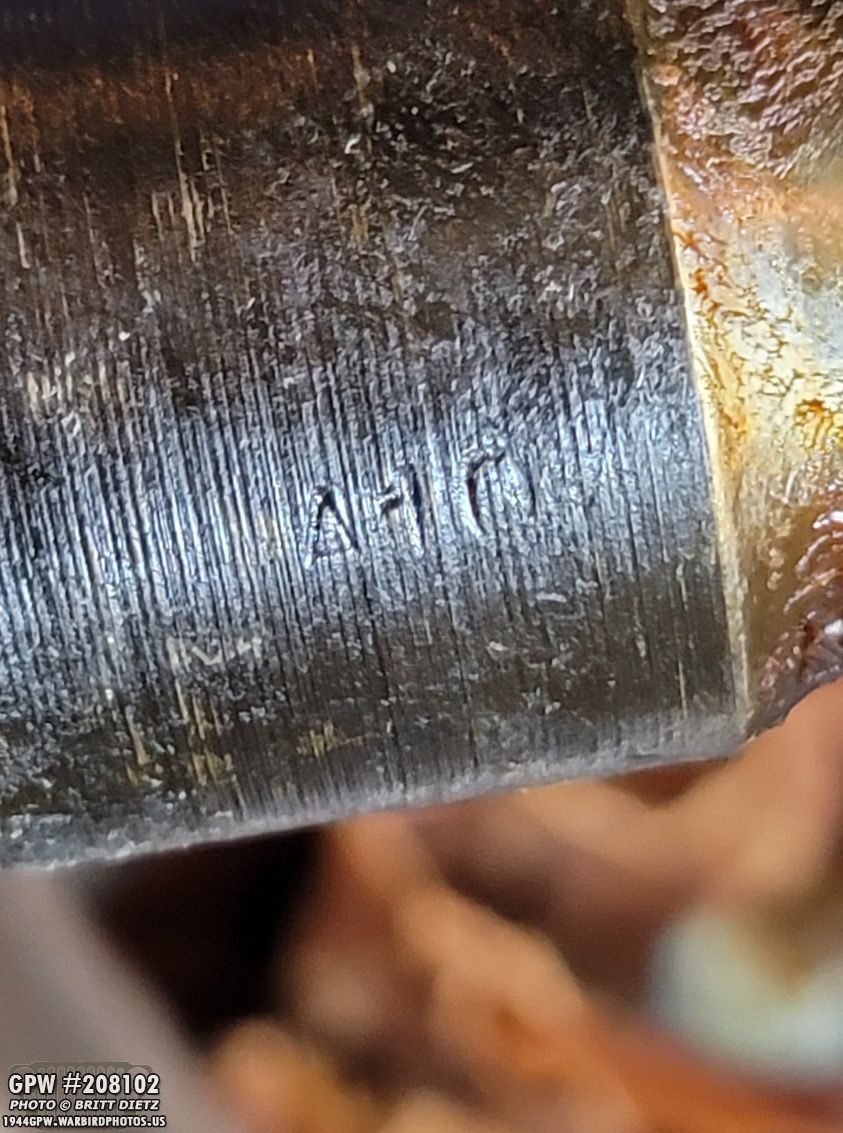
Another marking on the pinion… maybe A10?

Next step is to clean up the ring and pinion, but I needed to get the rest of the wax paper and as much of the cosmoline off. A putty knife worked perfect, it peeled it off nice and neatly.

Still a lot of cosmoline on the ring, so it will need further deep cleaning.

And that’s where the ‘bucket I gasoline’ comes into play again! A good 24-48 dip in the gasoline will soften up the cosmoline and remove the wax paper remnants. So the ring and pinion are enjoying a fuel bath till Saturday.

The final item in the set was a crown nut for the pinion. No markings, which is expected as they never had F stamps.
While checking out all the bolts that came with the set getting them and the crown nut to soak in some parts cleaner to get any wax off, I noticed one of the 8 bolts wasn’t F stamped like the other 7. Very weird, not sure if there’s some reason for this. And that ends this long ring/pinion journey for this week! Look next week as I get everything cleaned up and put together!
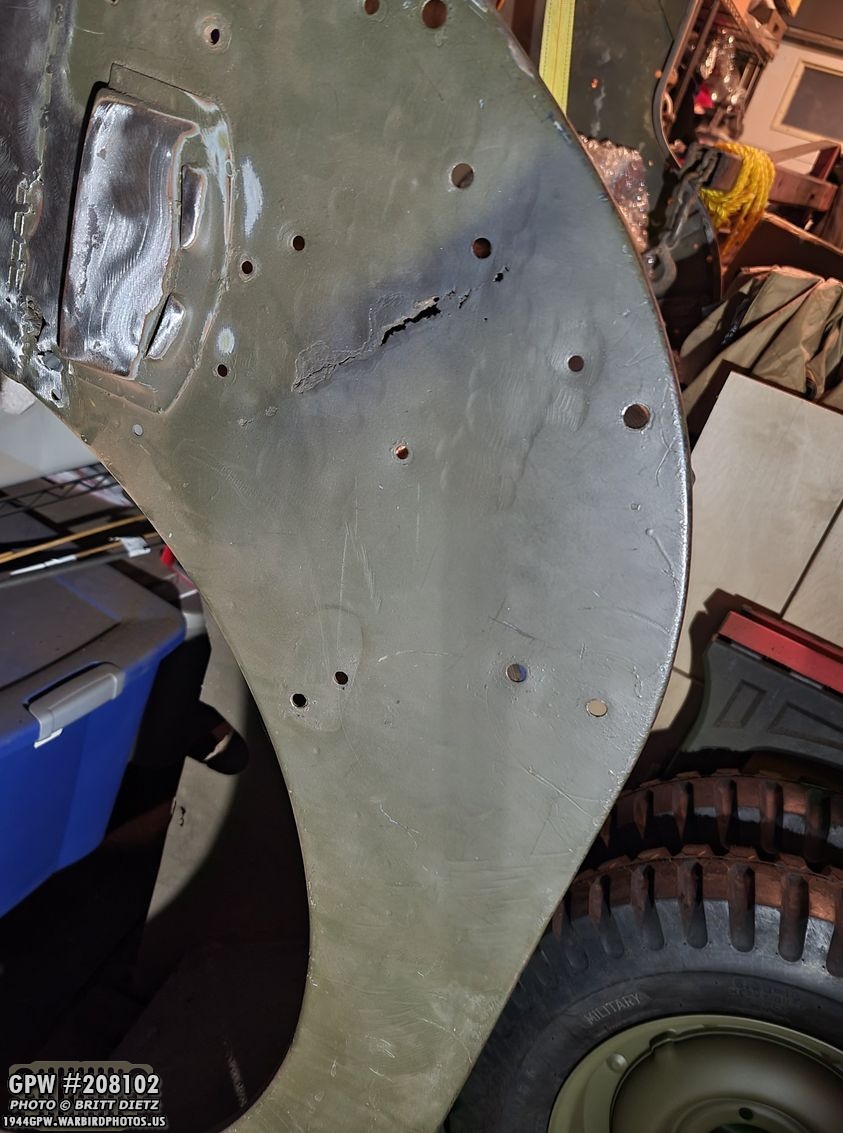
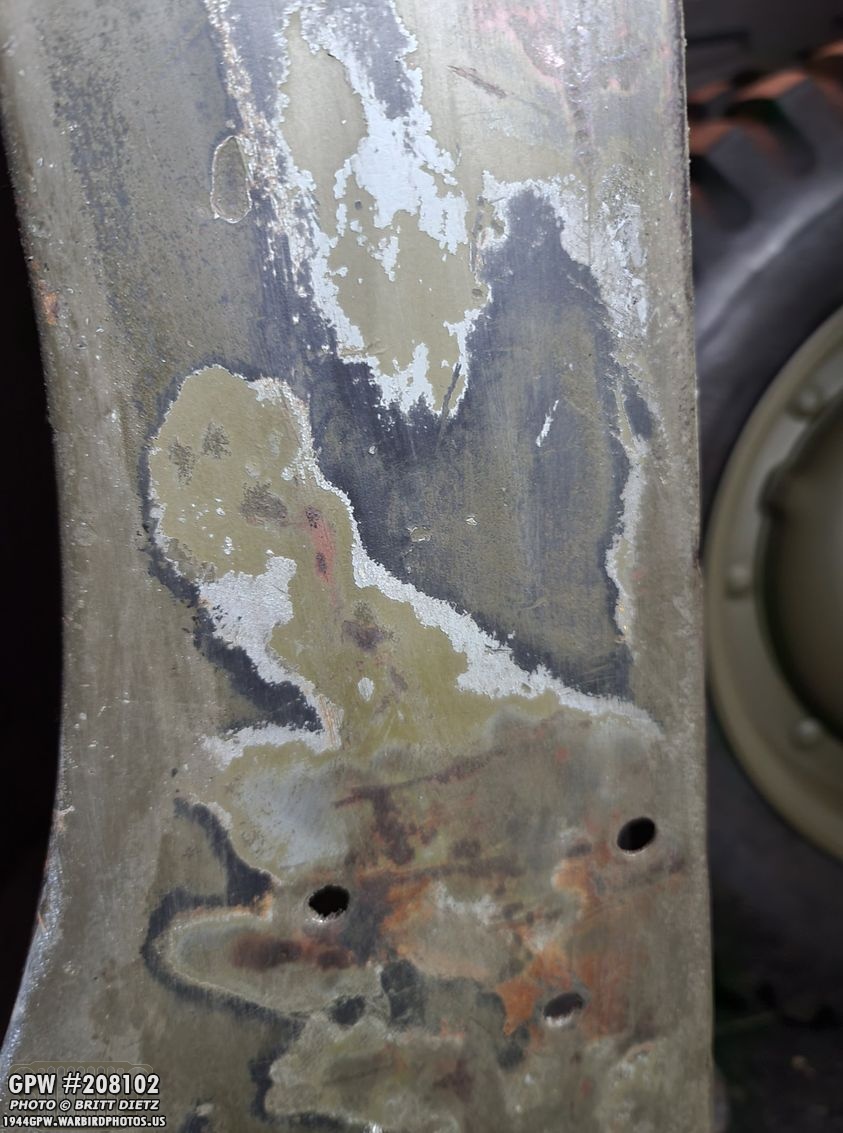
Next project, I wanted to see if I could find any more history of the Jeep’s service in the US Navy. I’ve seen some photos of USN Jeeps with serial numbers on the side of the body tub near the handles, over the wheel wells, or near the rear of the tub where the star is. So I decided to do another wet sanding to go through the various layers of paint to see what I have on the original tub (which is awaiting a full long-term welding repair)
It didn’t take long to start to see the original USN Grey color. It looks like only two layers of paint were placed over it, a black (primer?) and one coat of OD Green.

Not seeing any markings, sadly, around the handle holes. In some areas I was starting to see the factory OD Green and the original factory red primer. :-/

Here’s a closer look. No markings whatsoever. I should be able to see something if it was there.
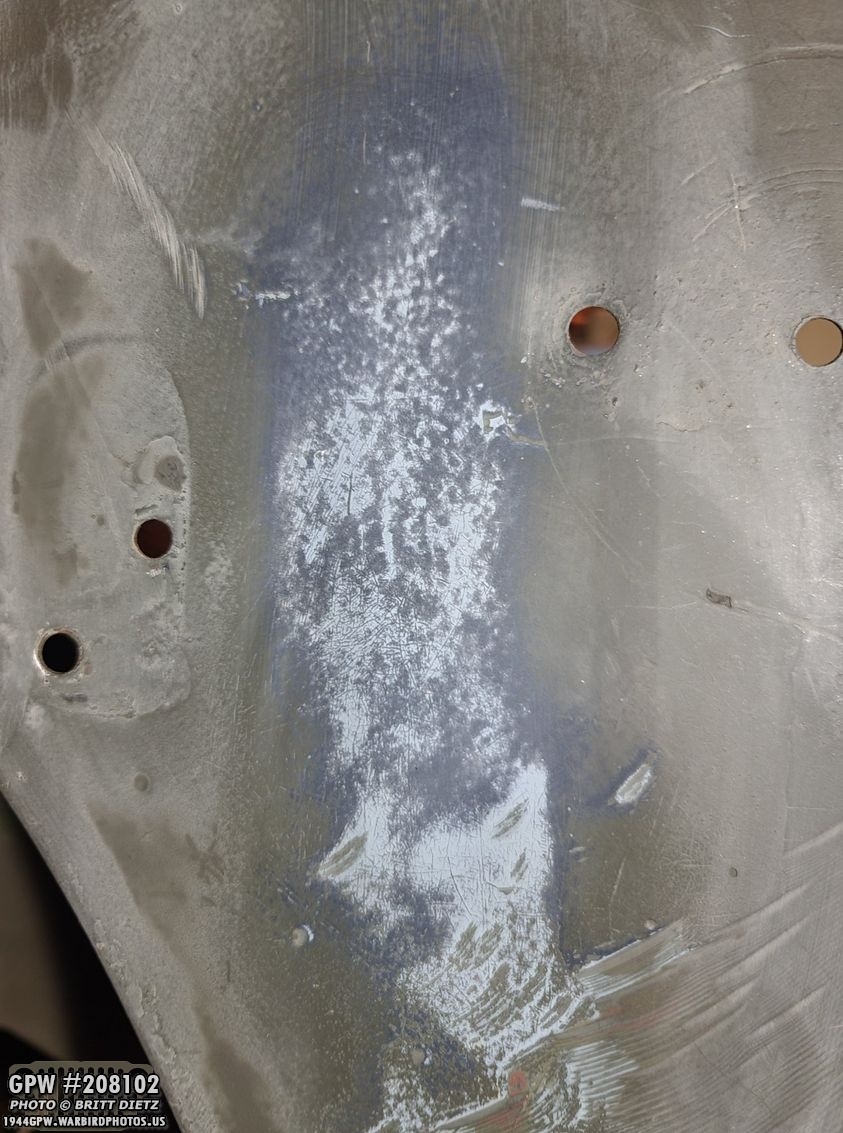
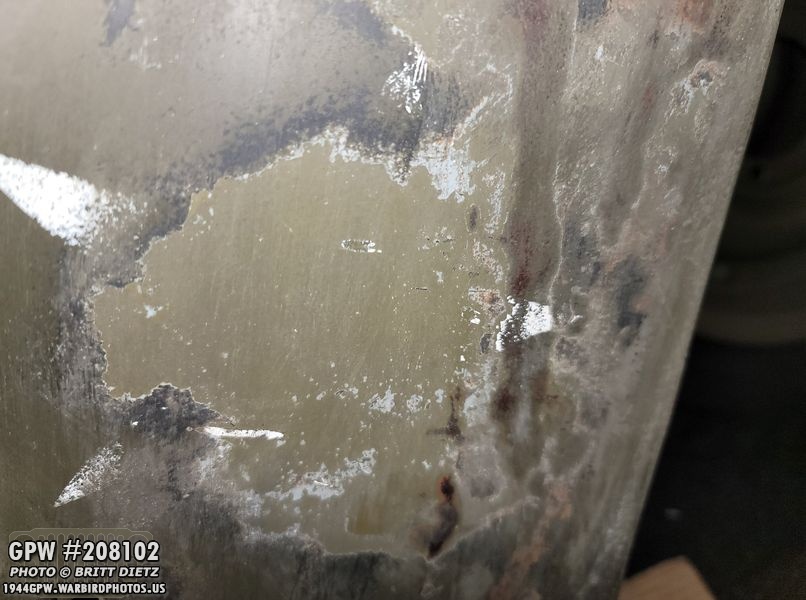
Further down above the wheel well, I ran into this interesting pattern under the paint. I couldn’t quite explain why it looks like this under the paint. It’s like a wire wheel with OD Green paint.

You can really see it better once I wipe it all down water. You can see the original factory red primer, the 33070 factory OD Green, then the USN grey other that.
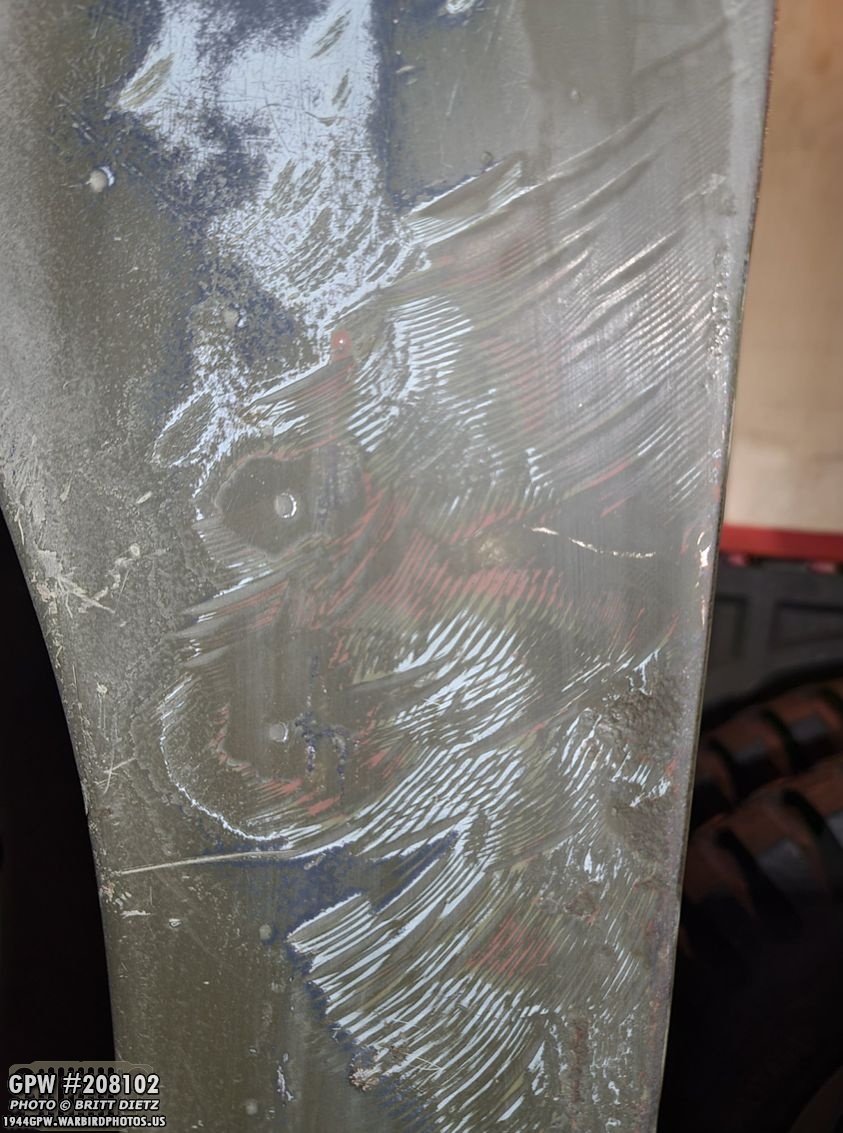
Continuing down the side of the tub towards the rear top bow bracket holes, still no sign of every having any markings.

It wasn’t long before I was starting to get original metal, so it looks I struck out on this, unlike the awesome find of the original hood number on the hood a few months ago.

Another look at all the different paint layers.
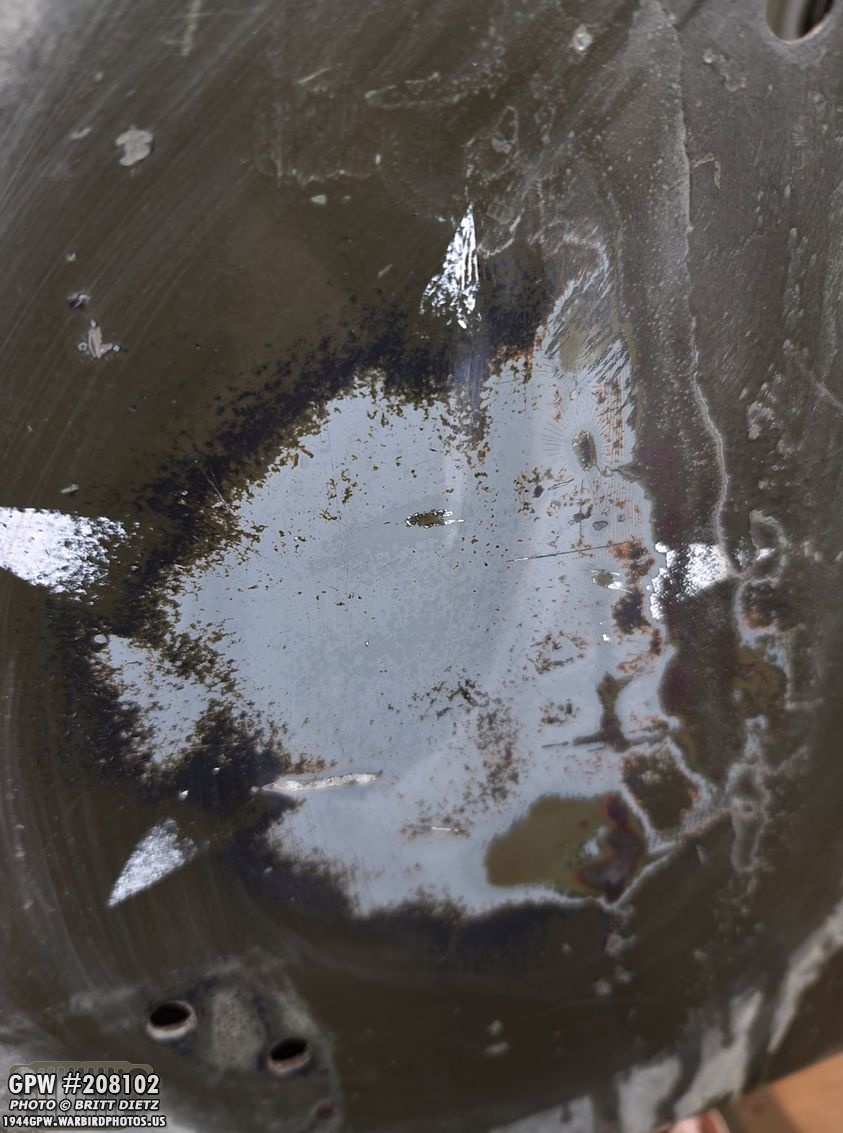
I then went and tackled the rear star to see if there was a black star underneath, sadly… no star at all.
Here I’ve gone beyond the USN grey and this is the factory OD Green. Nothing, bummer!

So, looking at it overall, I struck out. Looks like when it was in the US Navy, the tub was painted grey without markings.

I could continue to sand this area, but I’m sure there’s nothing there. I’ll have to check the dash, rear outer wall of the tub, and perhaps the passenger side of the tub in the same area just in case.

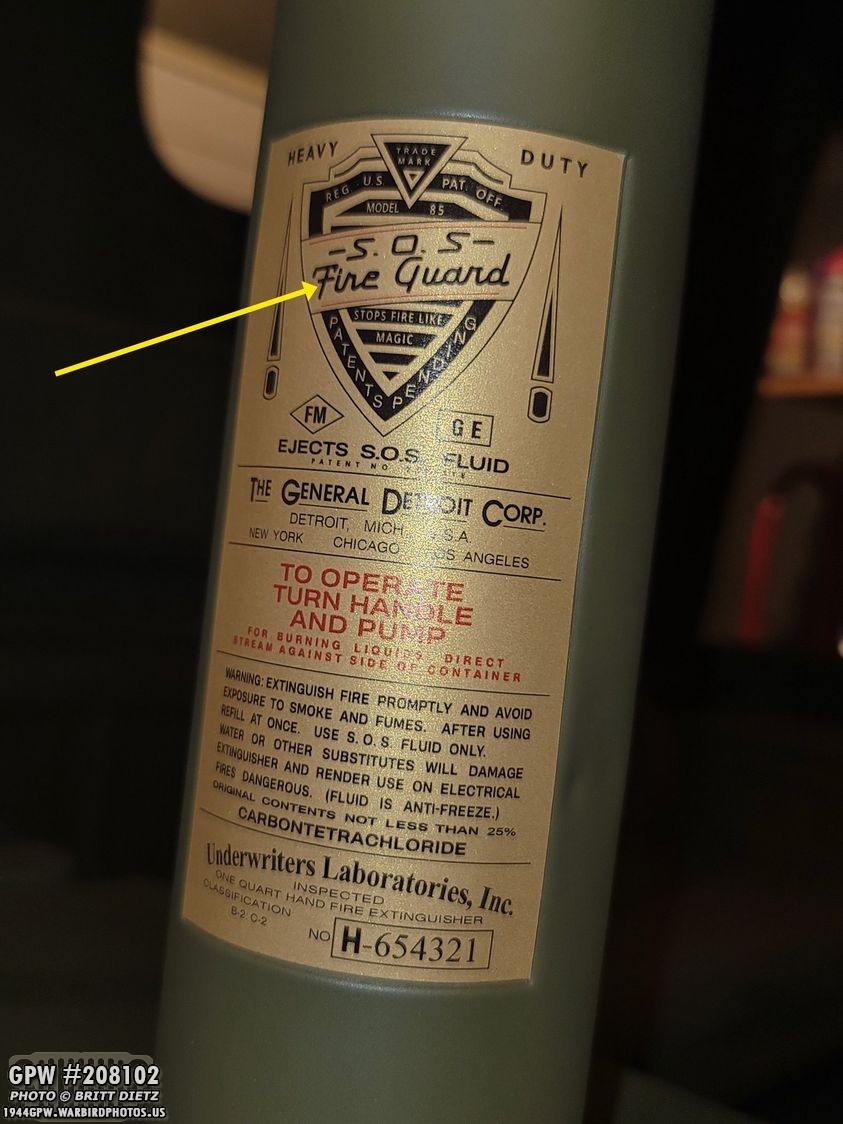
Last week, I talked about how I hand made my own Fire Extinguisher decals since the repro ones you see right now are close, but incorrect. I used an original SOS Fire Guard brass plate to make an accurate decal. The fonts and layout are 95-97% exact as I could make them.
I had them printed on a gold sheen cardstock and made an extra decal slightly smaller for my post-war fire extinguisher (until I get a wartime model 85 one). I used spray glue to attach it. But two problems ended up happening the next day… because it was cardstock, it came unglued. I also realized I forgot to make the SOS Fire Guard logo red. Doh! So I removed this label off.

And then I went and found some vinyl sticker paper with the same gold sheen. Had them printed on that, which is perfect as no glue will be required, and it’s thinner so should conform to the fire extinguisher better.
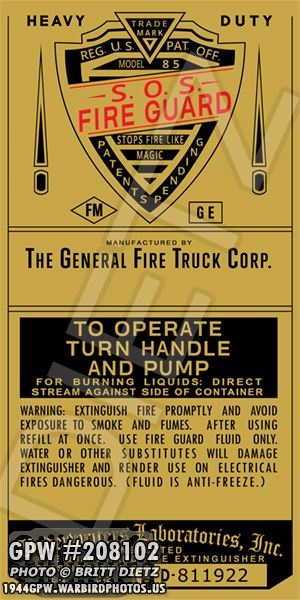
I’ll be covering the application of the vinyl in next week’s update. Also, I wanted to show another Fire Extinguisher decal I’m working on at the request of someone. This is the Willys MB version from the General Fire Truck Corp! It’s about 75% done.

Another great find this past week was (finally) a wartime jerry can that I could use on my Jeep! This is my sixth Jerry can. On my Jeep right now is one from the 50s with the same WW2 style. I acquired an early Jerry can from 1941 last month, but I wanted something closer to my 1944 Jeep.
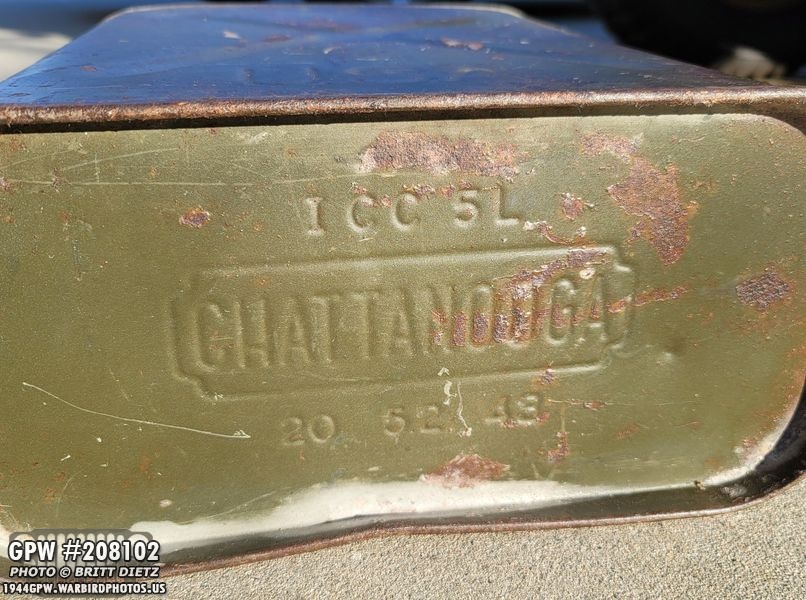
It’s a 1943 can! That’s perfect for the Jeep, and now that I have 5 other Jerry cans, I can stop looking. Ha ha. It was made by Chattanooga. • ICC-5L = Interstate Commerce Commission 5 (5 = The manufacturing specs the can needed to be made by).• 20 = 20 gauge thickness of the metal on the can.• 5.2 = Capacity of the can in US gallons.• 43 = 1943 I’ve read that Jerry Cans from 1944 are harder to find as fewer were made. So this is perfect.

A look at the top cap. Looks pretty good overall, some surface rust, but that’s original wartime paint there.

No markings that I could see under the cap, but it appears perhaps the original rubber weather seal is there.

Looking inside, it looks pretty good! I’ll probably use some muriatic acid and clean the inside out.

Starting to wire wheel the paint, I decided to take some quick shots of the paint since that’s original WW2 paint there. The top one is without flash showing the red oxide primer underneath. The bottom is with the flash showing the true OD Green color. I know some might be sad to see this paint go, but I want a nicely painted jerry can vs one with rust and patina.

A little wire wheeling and it was easy to see the markings on the bottom.
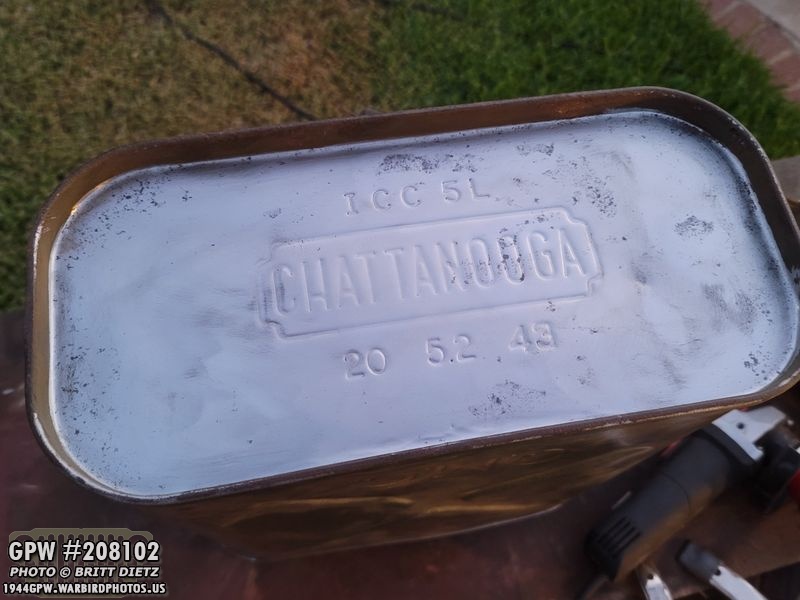
Bottom finished! A little bit of surface rust, but I’ll cover that with red-oxide primer which will stop the rust.

Took a lot of work, but one side is stripped of the paint. Pretty nice metal there.

Yesterday morning I started work on the other side and got about this far before the heat starting to get to me (SoCal is having a 100+ degree heat wave). So I’ll continue removing the paint through the weekend.

I wanted to also mention that I still was working on the new tires and combat rims this week, finishing them up with some ArmorAll tire spray for the side walls to get them a nice new look!

With the heat wave, I’ve been carefully continuing to watch the engine temps as I’m driving (this photo is when I was just starting to drive the Jeep out of the driveway, so the temp hadn’t gone up yet). I’m happy to see all the gauges working! Fuel, Oil Pressure, Speedometer, AMPs, and the temp.

Last week I mentioned that I was having slight weepage from the thermostat elbow and the side of the head gasket. Just a tiny tiny weepage. So I took some time this week to re-torque all the head bolts/nuts and the bolts on the thermostat elbow, just in case.
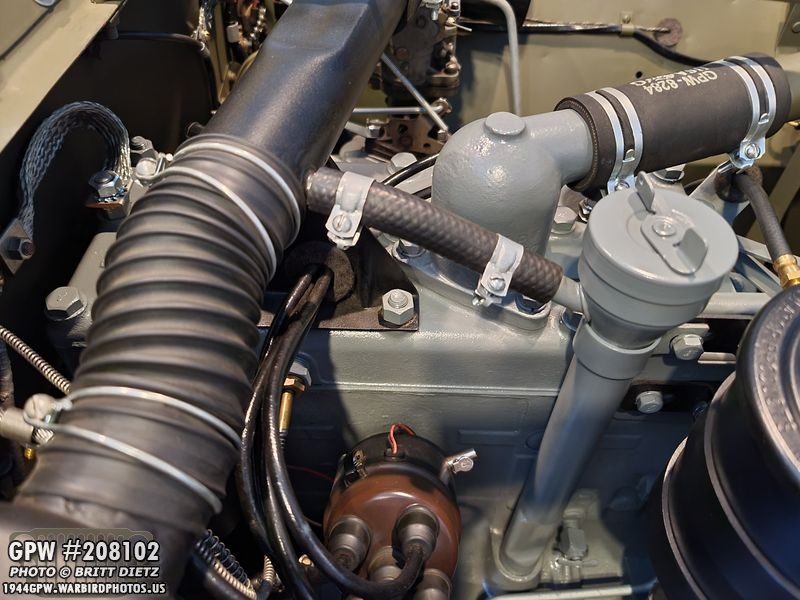
And that seems to have worked! After that, I took the Jeep out for a drive, and when I got back I noticed NO weepage! Woohoo!

And that’s it for this week’s update! Next week will have some exciting projects as there’s a mail call with some new items arriving today! Plus, once I get the ring and pinion cleaned, it’s still to get them back into the axles!Till next week…