 Fire extinguisher, new wheels, F Bolts, and more!
This week an uptick with work on the Jeep! From getting a fire extinguisher bracket to four new firestone military tires for the Jeep! Also some more axle work was done (and some good news), replaced some more non-wartime bolts with F bolts, and more work testing out Voltage Regulator inspector stamps!

After the slow update last week, it was great to get some more work done on the Jeep! Even though it’s not as much as it used to be, I’m getting closer to having some large projects coming soon!

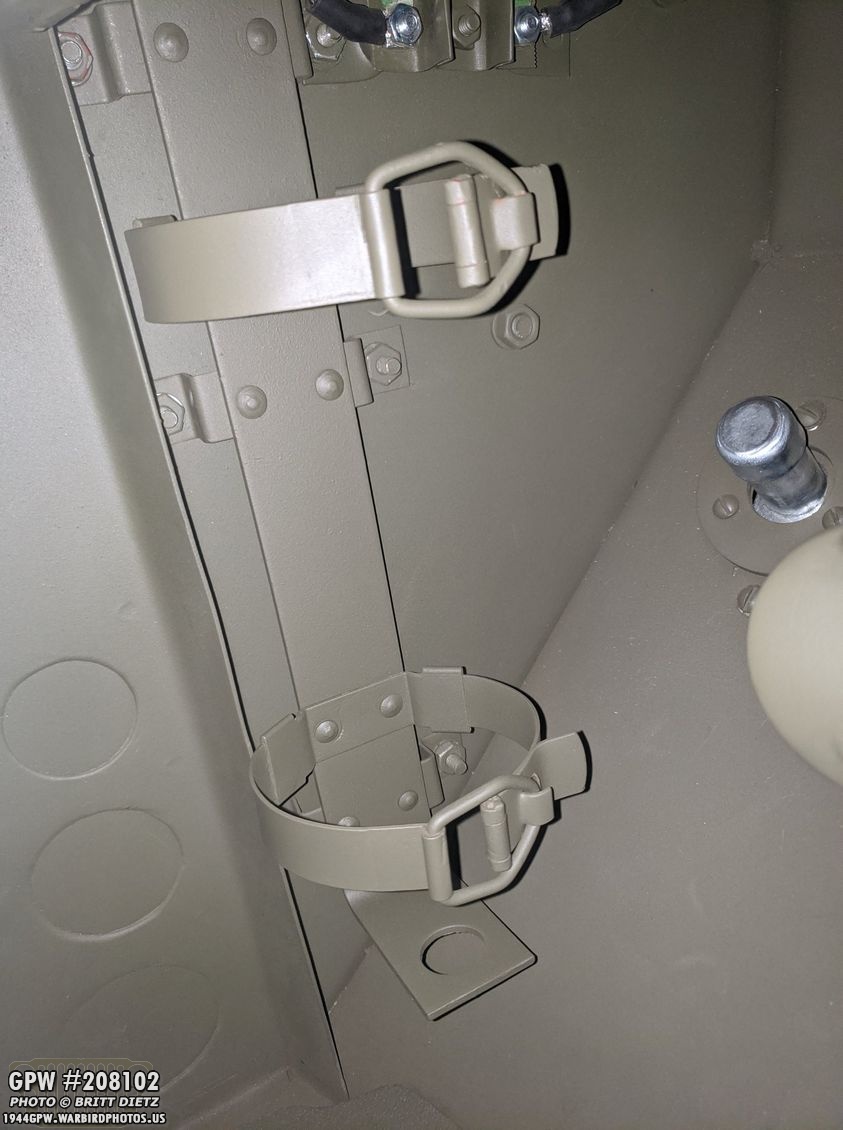
One thing I got this week is a Fire Extinguisher bracket! This is the later war style with two straps and no ‘cup’ at the bottom. I’d been holding off on a bracket and extinguisher as I’ve been told that if you have larger shoes, such as myself, that it can be a pain. Why?

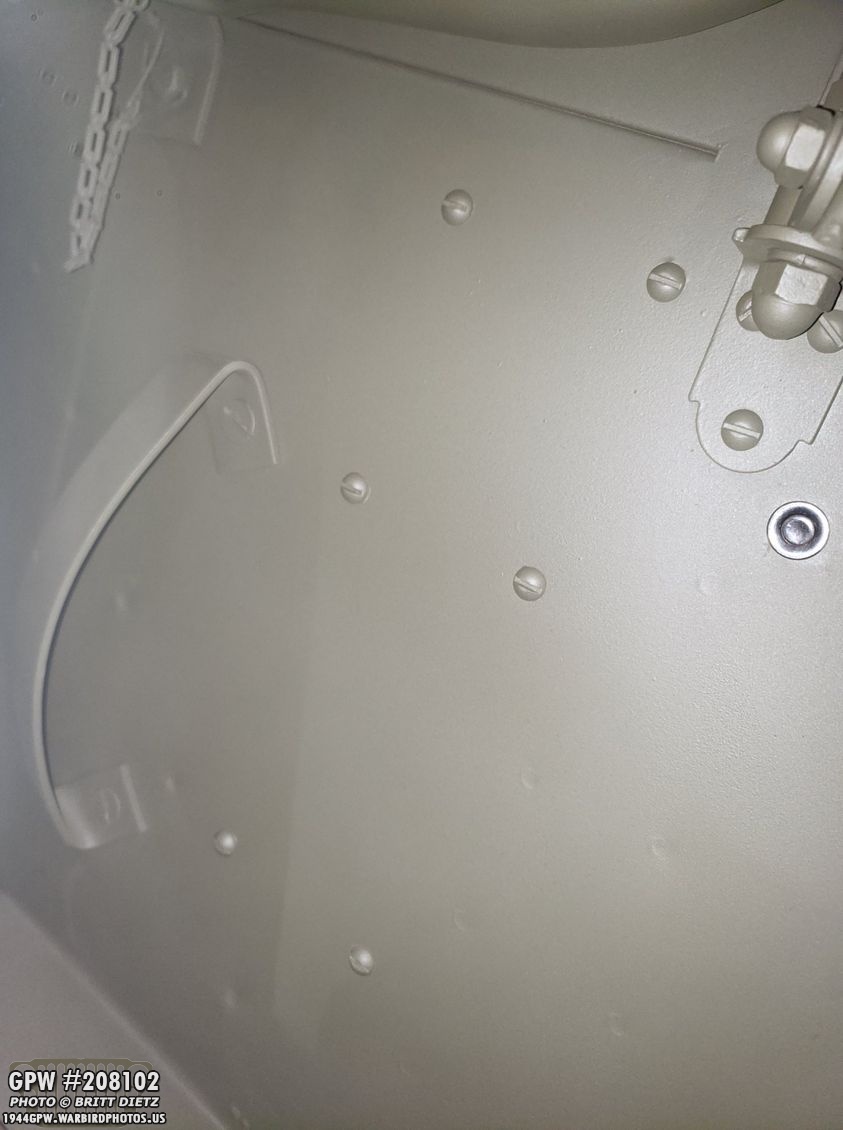
Because the bracket and the extinguisher goes under the dash on the driver’s side to the left of the clutch pedal. If you move your foot to the left after using the clutch, you’ll hit the extinguisher and the bracket. You can see the screws and nuts on the sidewall where the bracket would go. That green item with the wires is a WW2 NOS 12v to 6v resistor for the fender blackout right.

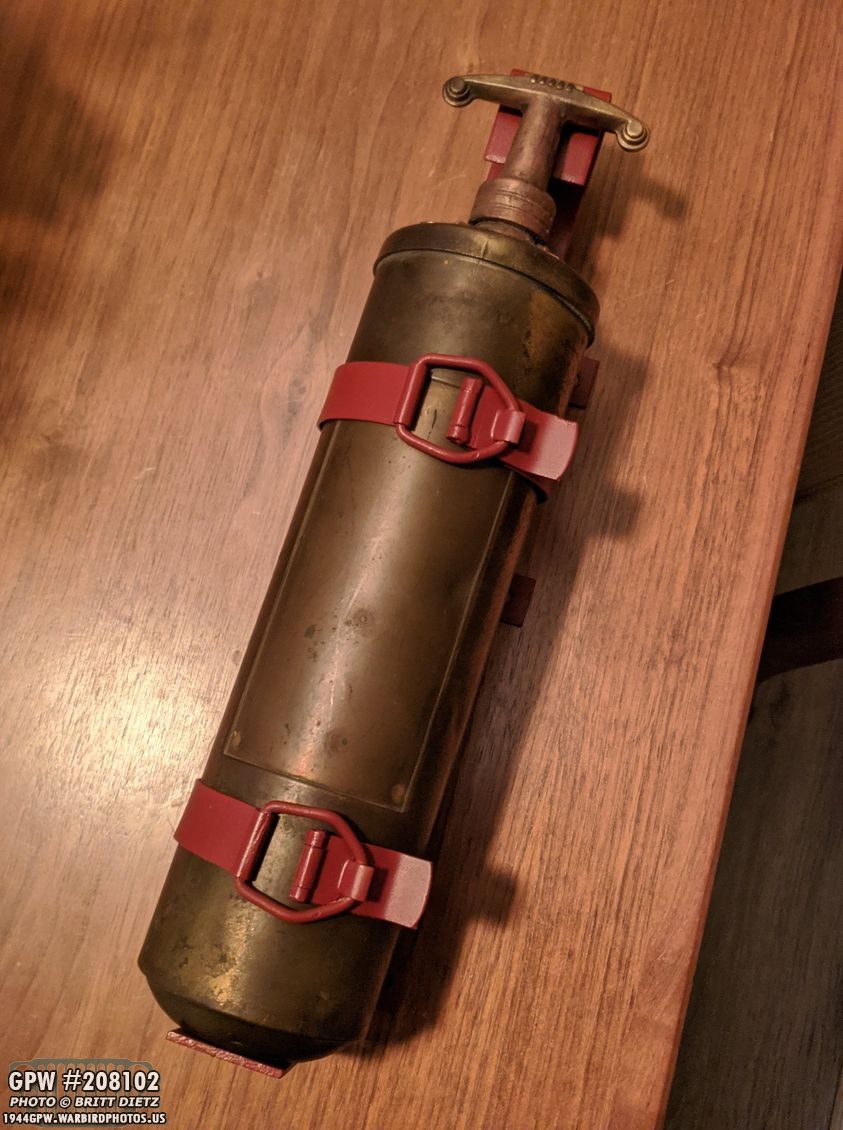
To test the extinguisher bracket, I had three fire extinguishers to test. The middle and right extinguishers are post-war extinguishers while the left Pyrene is a wartime one. That being said, the Pyrene is a topic of debate as there’s no documented evidence of them being used on Jeeps. Most people use them anyway. I’m trying to track down a SOS extinguisher to use on mine.

So I took the Pyrene just for testing to make sure it straps down tightly.

But, I encountered a problem… I couldn’t get the strap to lock down. The metal on the clip is so thin, it bends really easy. No matter how much I tried, I could not get it to lock down. Ugh! I thought I might have a faulty bracket.

I finally figured it out, the tabs where the straps connect to the bracket were bent too much in a V shape. I ended up manually bending them out to a bit less than 45 degrees, which made the strap more of a round shape.
That worked, and I was able to carefully get the straps to latch down. Whew! Now it was time to paint!

I first used a scotch pad to scuff up the primer on the bracket and cleaned it.

And then 2 coats of 33070 OD Green spray paint from &Ron Fitzpatrick Jeep Parts.

To install, first thing I did was remove the 6 screws and nuts on the side of the body tub.

I then carefully placed the extinguisher bracket against the wall on the diver’s inside wall lining up the holes as best as I could. I then reinserted the screws (after sanding the paint off the heads). It took a bit of effort, but it 99% lined up.
After tightening the nuts on the reverse side, it was pretty much installed!
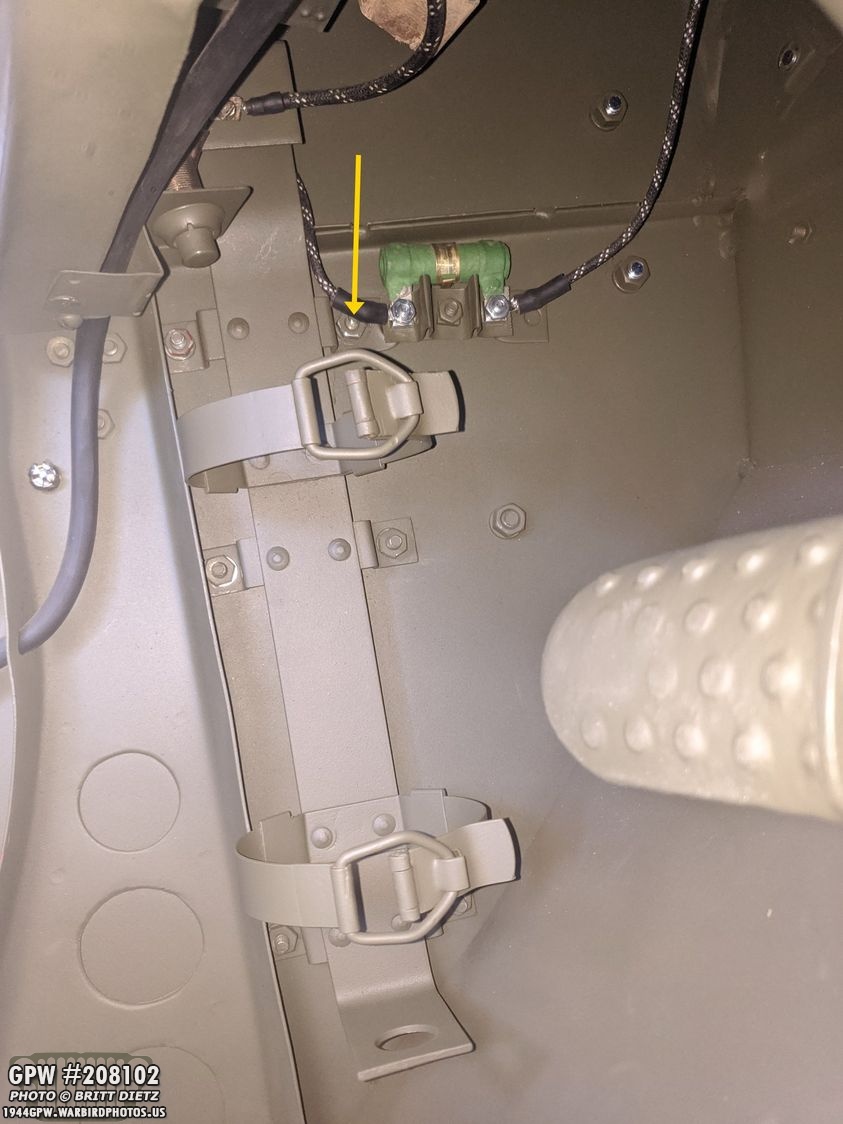
And I was able to still use one of the screws to hold the side of the terminal for the 12v to 6v resistor. So win on that! But… there is a problem…

I have a custom wired push starter button under the dash (blue arrow). Where I placed it, at the time, I wasn’t expecting to put a fire extinguisher in for the shoe issue mentioned earlier. So it turns out, where I put it, it is snug up against the top of the extinguisher bracket (yellow arrow).

So, I’m going to have to move the push button switch over between the push-pull switch and the choke.
Here’s a look at the other side once I touched up the paint on the screws. (the weird light and shadows are from the work light).

So it’s installed, which is great. Another good detail for the Jeep! Once I move the push button switch, then get a correct SOS extinguisher, I’ll put it in. And the good news is that I drove around a bit after it was installed, and I found that I move my foot backward from the clutch instead of the left. So that’s good!
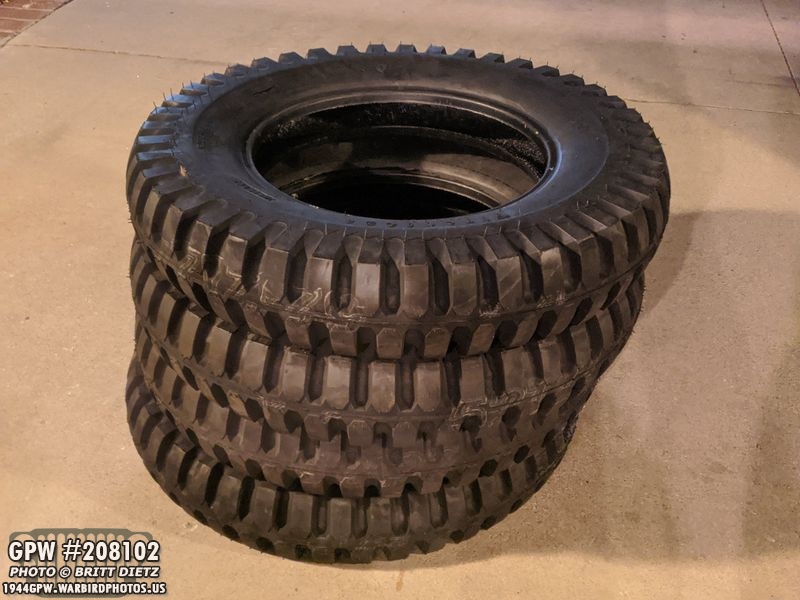
Switching gears, something excited in the ongoing replacement of the CJ axles and rims… I got four new Firestone tires to replace the off-brand ‘Specialty Tires of America’ ones I have now. And to also match the single Firestone tire I have on my spare tire! These are brand new tires that are made the exact way as they did in WW2.
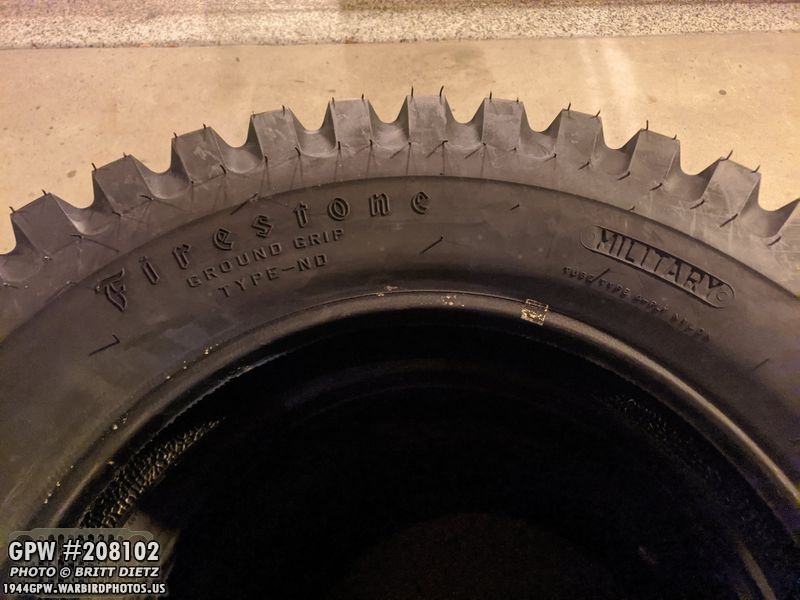
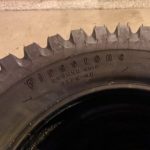
Here’s a look at the Firestone logo on the tires. These are correct wartime/military markings. Pretty cool they are still being made by a company called Coker Tire Company.
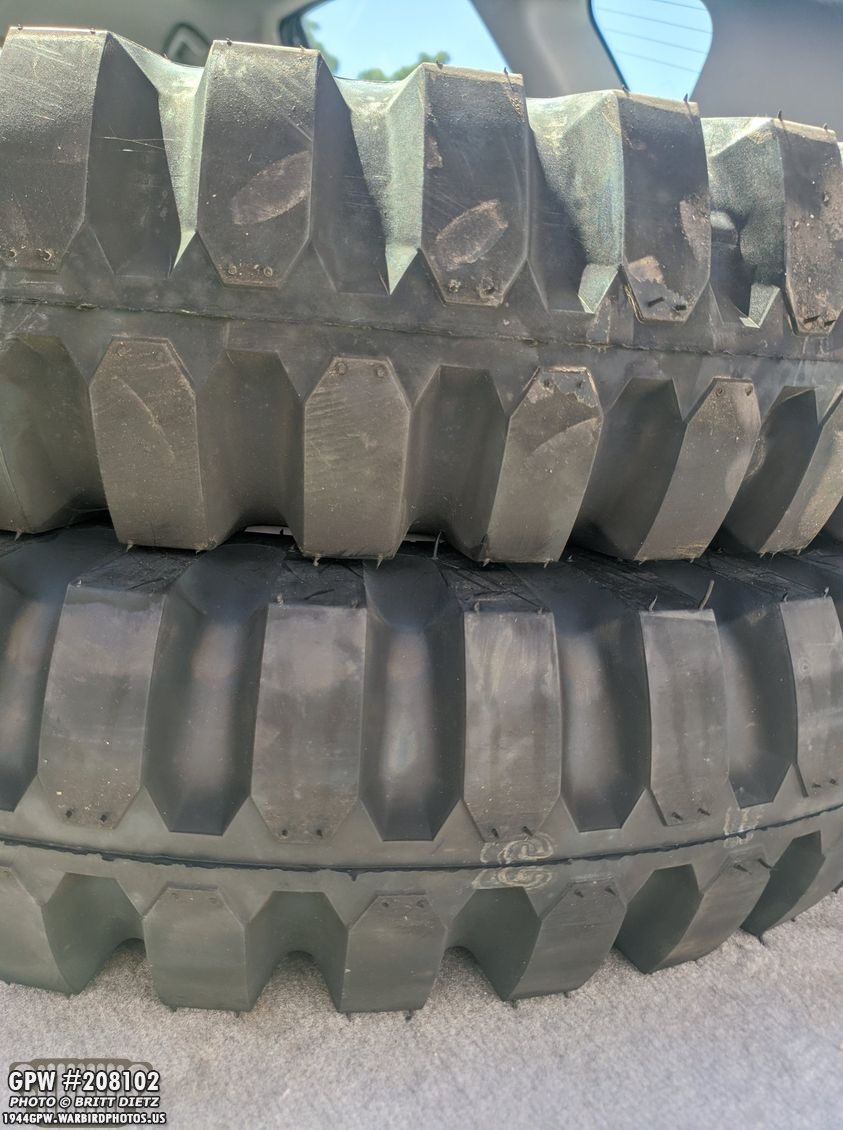
One thing I found interesting is that these new tires are the v2.0 of the Firestone tire. They have raised treads, which apparently is more accurate to the Firestone Tire I’ve heard.

To compare, on the left is my v1.0 Firestone tire that’s my spare tire… and on the right is the new v2.0 Firestone tire. You can see a difference in the raised tread.

For those curious which ones to get, the Coker Tire Company makes several types of Firestone NDT (Non-Directional Tire). The correct one for the WW2 Jeep is a 600-16 tube type Firestone tire.

I also got 5 tubes (TR-15 style with the offset valve) and 5 flaps for the tires. Just need to get Combat Rims (soon!) and that will be one massive hurdle finished!
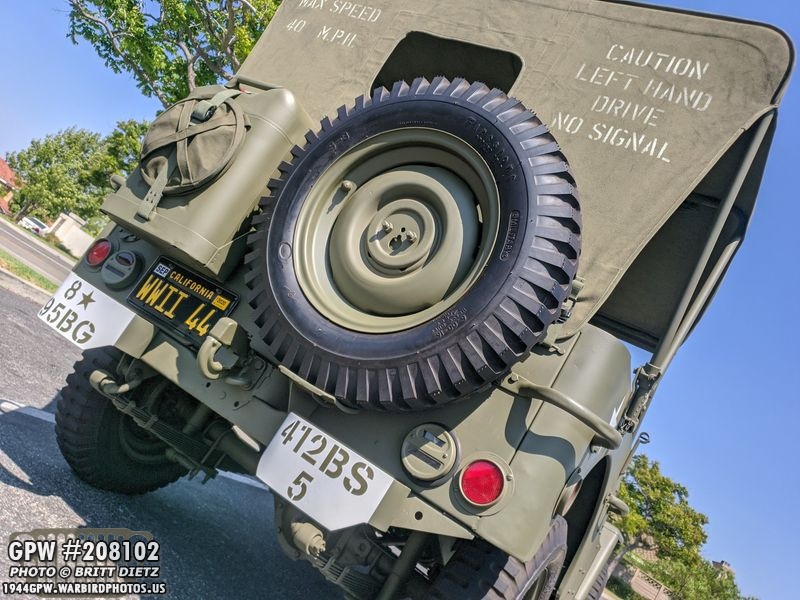
Here’s a look at the spare tire, with the Firestone tire. I’ll have to take the tire to a tire place and have them remove the rim. It does bother me that it’s the 1.0 version of the Firestone tire vs the four others that will be 2.0…. but at $144 per tire, I’m not sure if bothers me THAT much.
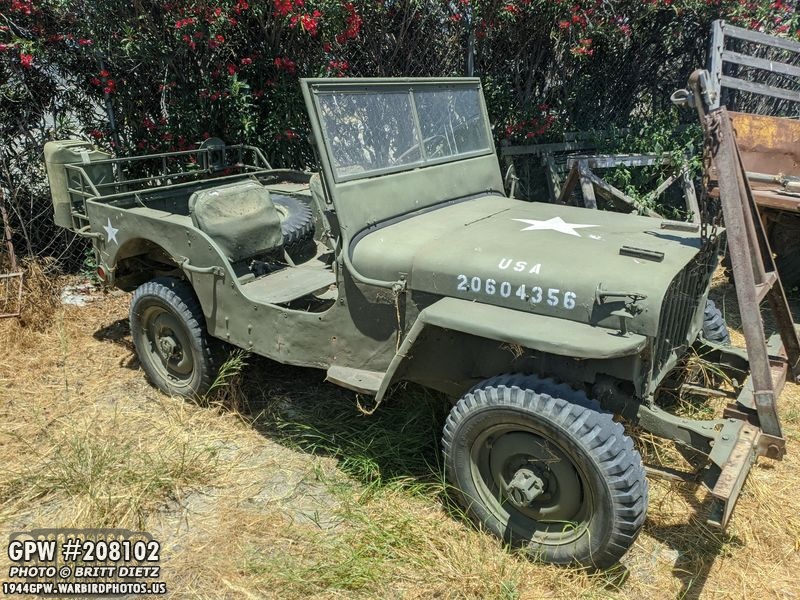
Speaking of axles and tires, last week I was looking through photos of my friend’s Jeep (which sits out at a museum), and I was looking at photos I took of his tires and rims. His Jeep is a motopool Jeep that has parts from both MB and GPW Jeeps.

On his rear driver’s side axle, I noticed something I hadn’t noticed before. Do you see it?
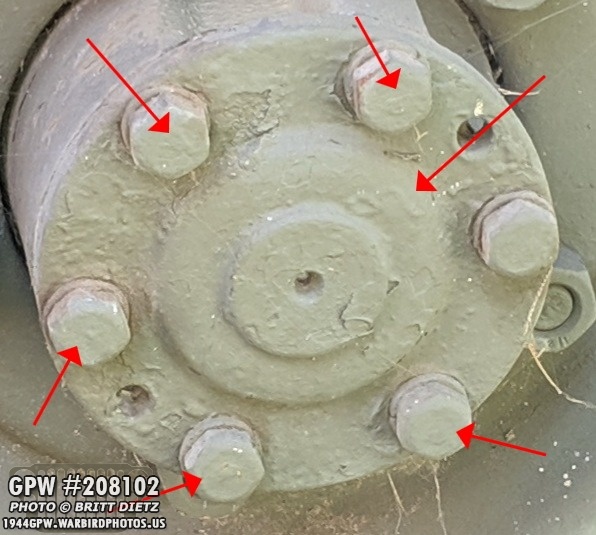
Here’s a zoom in… yes, those are F stamps! It’s a F stamped axle shaft and F stamped axle bolts!

So I asked my friend if he wouldn’t mind if I swapped axle shafts since my rear driver’s side axle shaft was an MB, while the other one is GPW. He said yes, so we went out to the museum and swapped them out. Pretty easy process. I brought it home and gave it a good degreasing.

He also left me swap the F stamped axle bolts with my non-F stamped ones. It was a perfect swap. Now all my bolts are original F stamped ones. His bolts are a little worn! This is after I degreased them and sandblasted them.
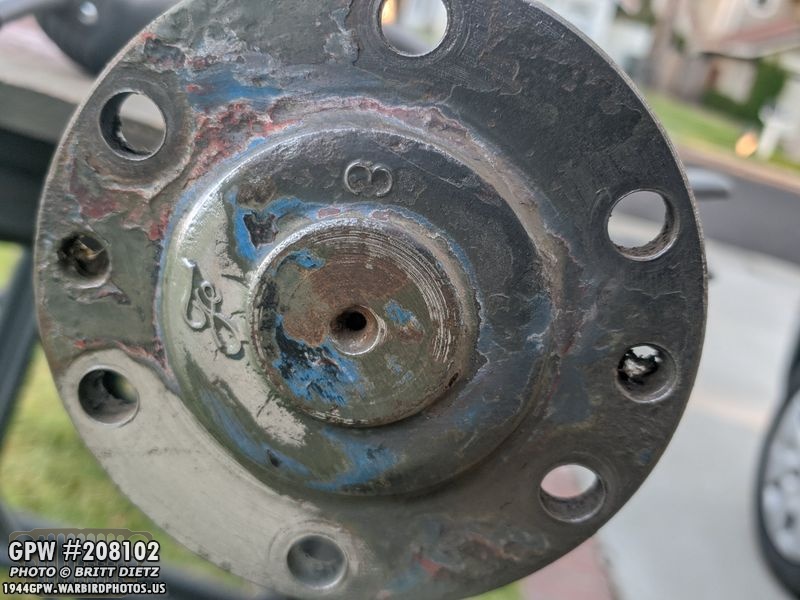
Back to the axle shaft, I started to wire wheel all the layers of paint off. The F stamp is coming into view now!

All cleaned! A little bit f pitting, but otherwise ready for painting.

Here’s a look at the short shaft that was on the 1943 axles (right) and the longer shaft from my friend’s Jeep (left). Glad to have both of the rear axle shafts all GPW ones! All of my main axle parts are now GPW, which is great.

Speaking of the axles, it’s been a while since I’ve done anything with them, but that’s changing soon. So, as I always recap for those that are new, my Jeep has CJ axles and rims (that came with my Jeep), and I’ve been slowly restoring a pair of 1943 GPW axles that I got for free from a fellow G503 member. Top shows the rear axle before I started work on it, and the bottom shows the rear axle when I was starting to go through it but before I started on the front axle.
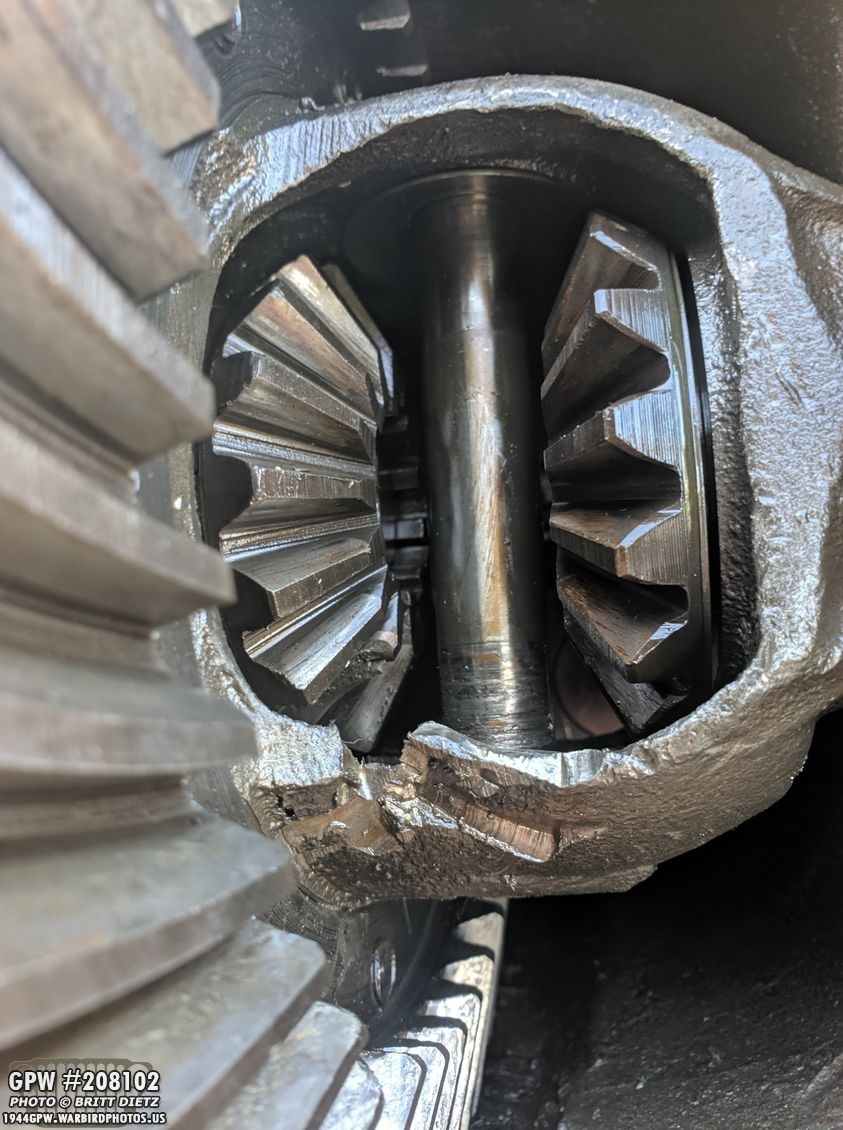
Also as a recap, the rear axle, I discovered, had a spide gear explosion at one point and damaged several things. Here’s the carrier which was damaged. I have since gotten a NOS carrier and all the gears.

I also discovered it damaged the housing (which I will be having brazed to fix it) and it also damaged the pinion making it unusable. I’ve been on a hunt for a ring and pinion to replace the damaged pair, but it’s been tough finding.
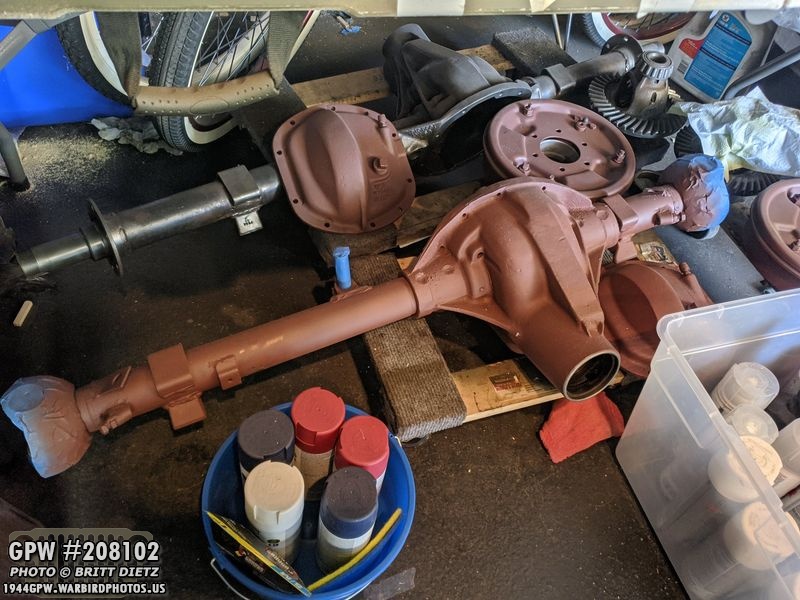
Looking at the axles right now how they look, in a paused state waiting for the rear axle’s ring and pinion (so I can set both pinions in both axles at the same time)… but good news is that I acquired a take-off set in great condition! It should be here next week. Once I get that, I can get started on getting these rebuilt!
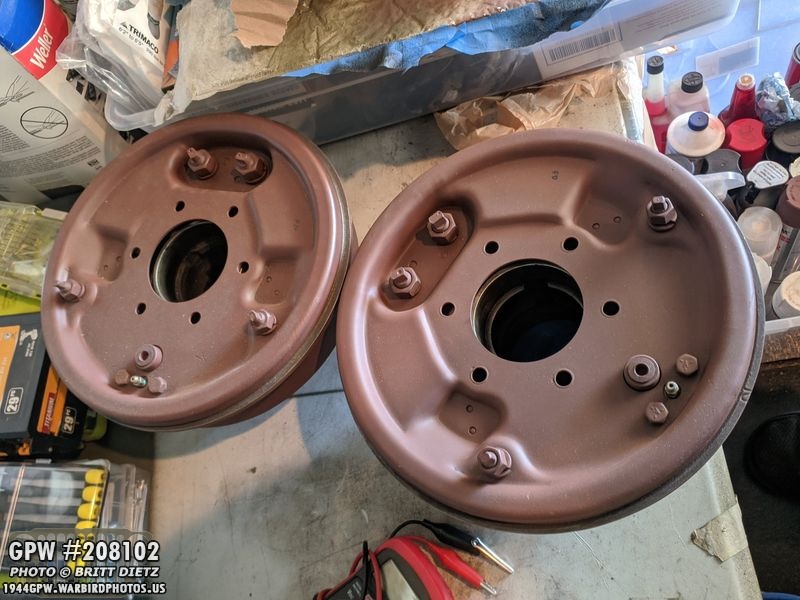
The drums and brake plates are all finished, waiting install so I can adjust them.

Most of the various parts I took off the two axles have been cleaned up and (if needed) primed with Red Oxide awaiting reinstall.

I realized I hadn’t painted the other knuckle, so I took some painter’s tape and masked off the various surfaces.

All primed! It’ll go on the shelf now with all the other parts awaiting reinstall! I’m happy that the notion of getting these axles finished and then replacing the CJ ones is getting closer and closer!
A few updates ago, I talked about how I wanted to replace the bolts on my oil filter brackets to oil filter engine bracket. They came with my Jeep, and I never bothered to replace them.

I had some spare F stamped bolts (originals) the replace those with! This is before I cleaned the left two.

After sandblasting and cleaning, I hit the heads with the VHT Ford Engine Gray.

The easiest one to replace is the bottom left bracket. I did that one first. Needs some paint touch up.

The right two were the next easiest to replace, but required me to unscrew the screw bolts as they are a bit too long and block the bolts from coming out.

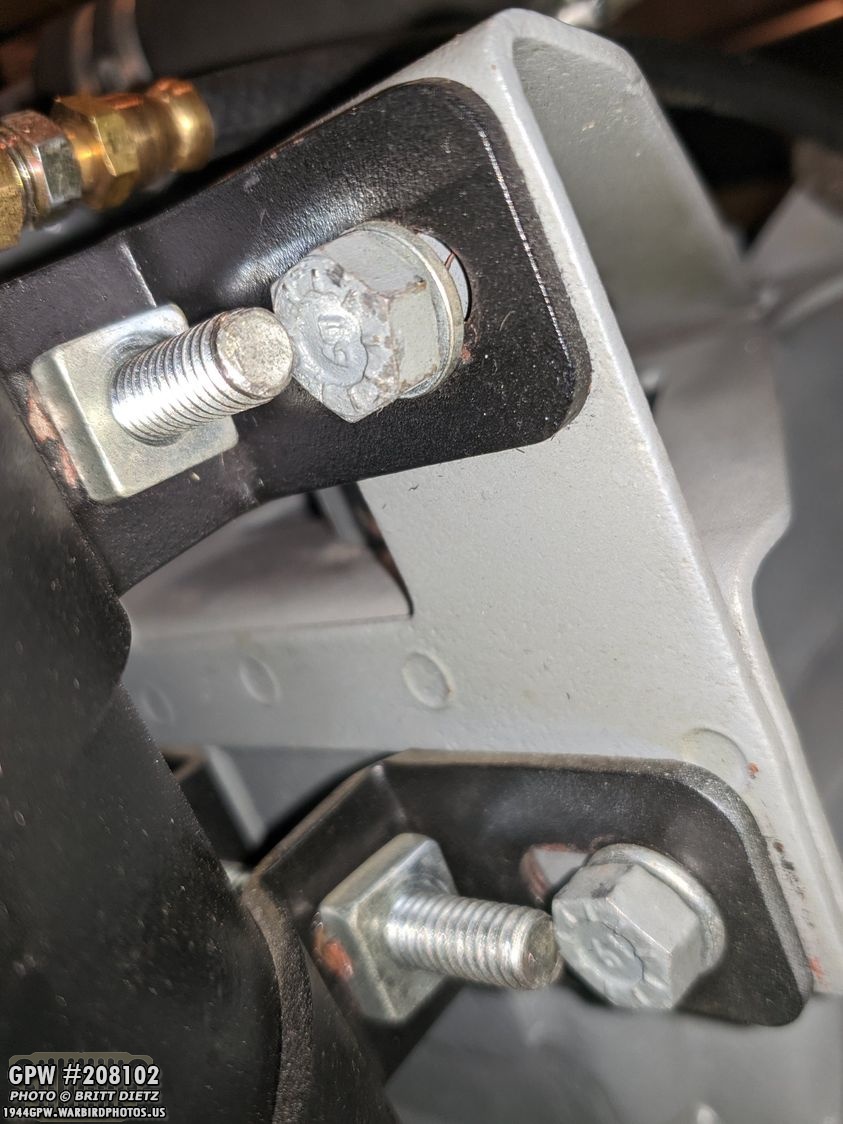
The hardest to replace is the bolt that holds the top left bracket to the top left engine bracket bolt, but also the clip for the dip stick tube. The clip is tough to close, so pushing it hard enough to get the bolt to catch but also keeping the screw hole aligned with everything is a pain. Took my girlfriend’s help to finally get it.

So now all done! four more F bolts on the engine!

Last few weeks I’ve been trying to perfect the custom inspector stamps I made for the voltage regulator. I’ve been experimenting with different dyes, paints, etc to find what looks the best. I’ve tried acrylic paints, model paints, stamp pads, etc. All have varied results, and all of them had something not quite right. So you can see these two vivid stamps, I found something new.
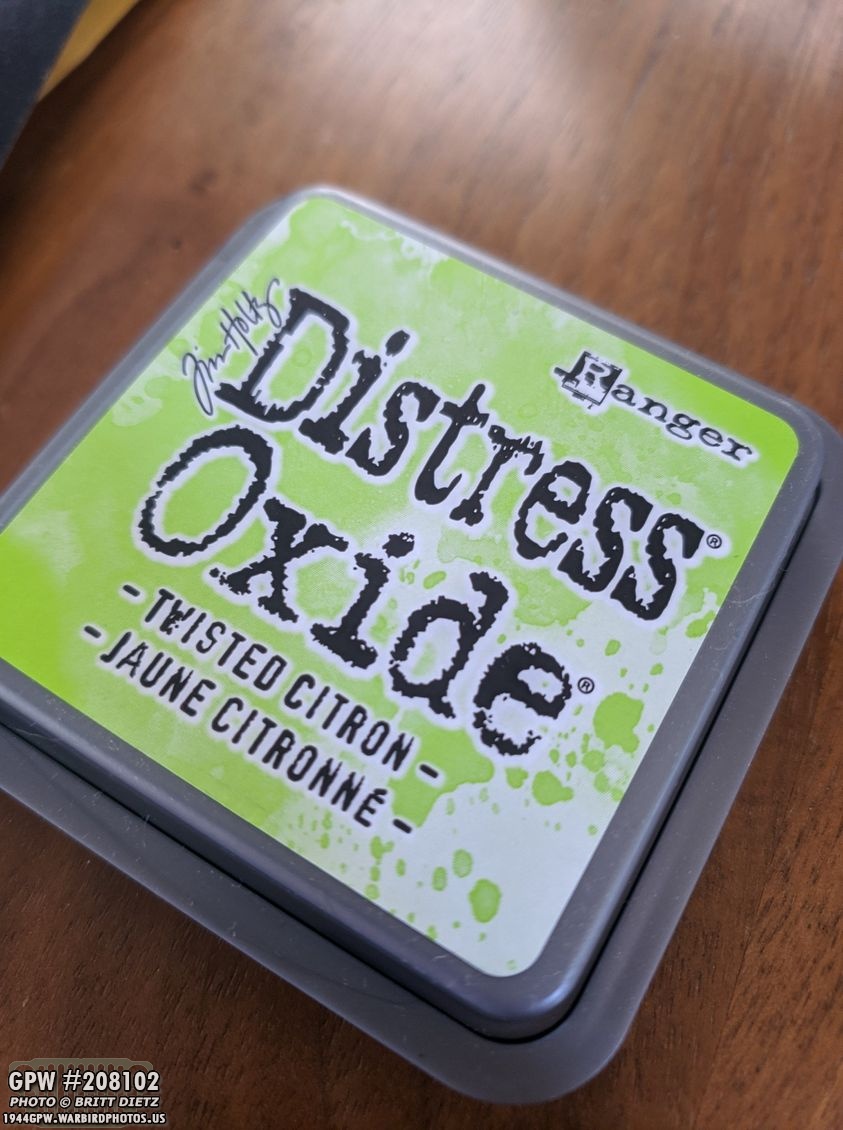
I decided to try this ‘Distressed Oxide’ stamp pad, which is an infusion of pigment and dye. I figured it was worth the effort.
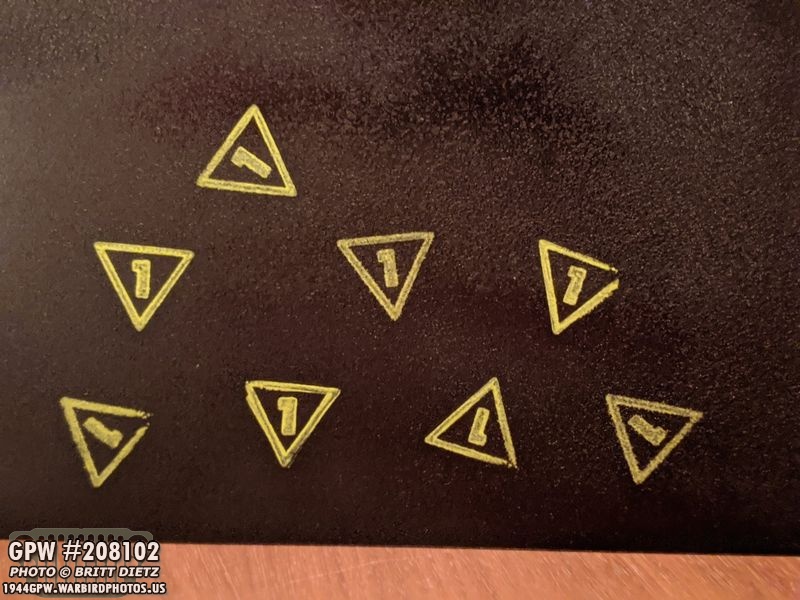
Here’s a few more stamps. Overall, it’s a perfect stamp. It’s vivid in color, doesn’t fade, isn’t runny, and looks the part. But the problem… it doesn’t dry on my test piece of metal painted with the same wrinkle paint as th e regulator. UGH. I’m pretty sure it’s the dye not drying, but even after sitting it in the hot sun. After 5 hours, I found, however, that I could spray it with a matte clear overcoat which sealed the stamp in and dried it. So I’m thinking of doing that.

Jeep wise, she’s been running well this week. Still not coolant or oil leaks from the engine, which is great!

And that’s it for this week’s update! Glad to have some things to update about! Next week I have a special guest coming over to the house and I’ll be taking the Jeep out to the Air Museum this weekend as well for some photos! I’ll also be taking looking at the ring and pinion when it arrives. So that’s it… till next week!