 Corsair, Voltage Regulator, Tires, and another Jeep!
This week saw quite a bit of Jeep related things… I took the Jeep out to the Air Museum and got some shots with a Corsair, I continued research on the Firestone Tires, finally stamped my Voltage Regulator, and helped to save a friend’s Jeep from rusting worse!

Two Navy vehicles together… But it’s an Army Jeep?! Well, my Jeep was actually a USN Jeep during WW2. When I got it, it was marked up as an army 82nd AB Jeep. I changed it to an Army Air Force Jeep as I’m around more AAF warbirds and this is my first Jeep, which I like the Army look. The aircraft here is the oldest F4U Corsair still flying… a F4U-1A Corsair. More on this later…

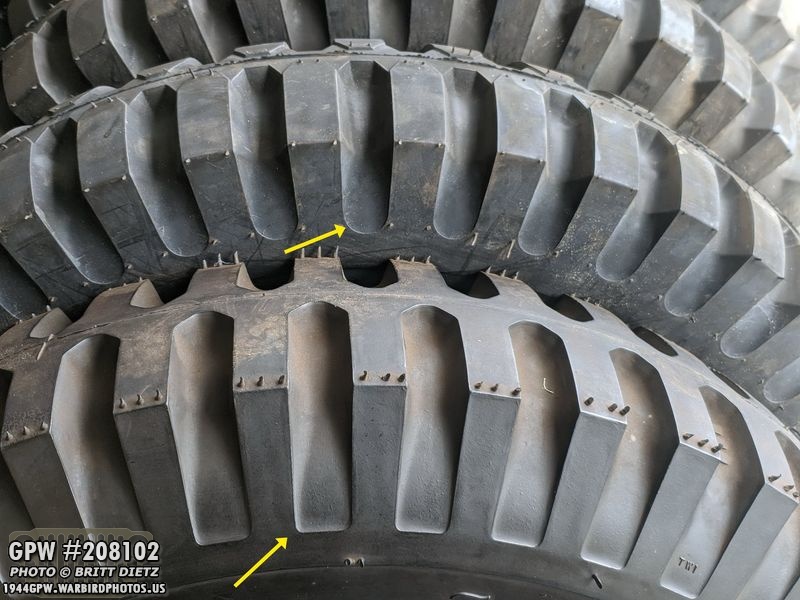
In the last update, I talked about how I got four new Firestone tires to replace the generic tires I have on the Jeep right now. These Firestone tires are the new 2.0 tires, which are nearly perfect WW2 replicas compared to the v1.0 ones. The tires are made by the @[46500852991:274:Coker Tire Company]. I took off my spare tire from the Jeep, which has the v1.0 design and sat it next to the new ones. Here’s a look at the difference between the new 2.0 (left) and 1.0 (right). You can see two major changes… the tread is raised (yellow arrow) and there’s a shape difference in the shoulder grooves (red arrow).
And here’s the difference between the sidewalls of the tires. The new 2.0 style (top) has more of a rounded shape (yellow arrow) on the shoulder grooves vs the 1.0 squared style. These 2.0 tires are a massive improvement and are identical to the WW2 style. I know some people might be saying ‘but, no one has that raised tread on their tires, it’s wrong!’…
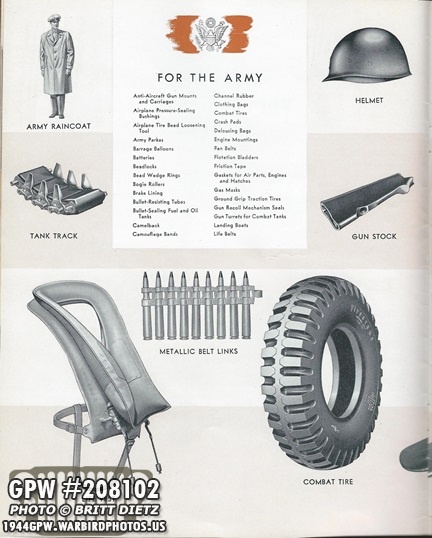
Here’s a look at an original wartime catalog of products Firestone made for the war. Look at the ‘combat Tire,’ it has the same raised treads and the angular top/circular bottom shoulder grooves. The new version is an excellent reproduction!
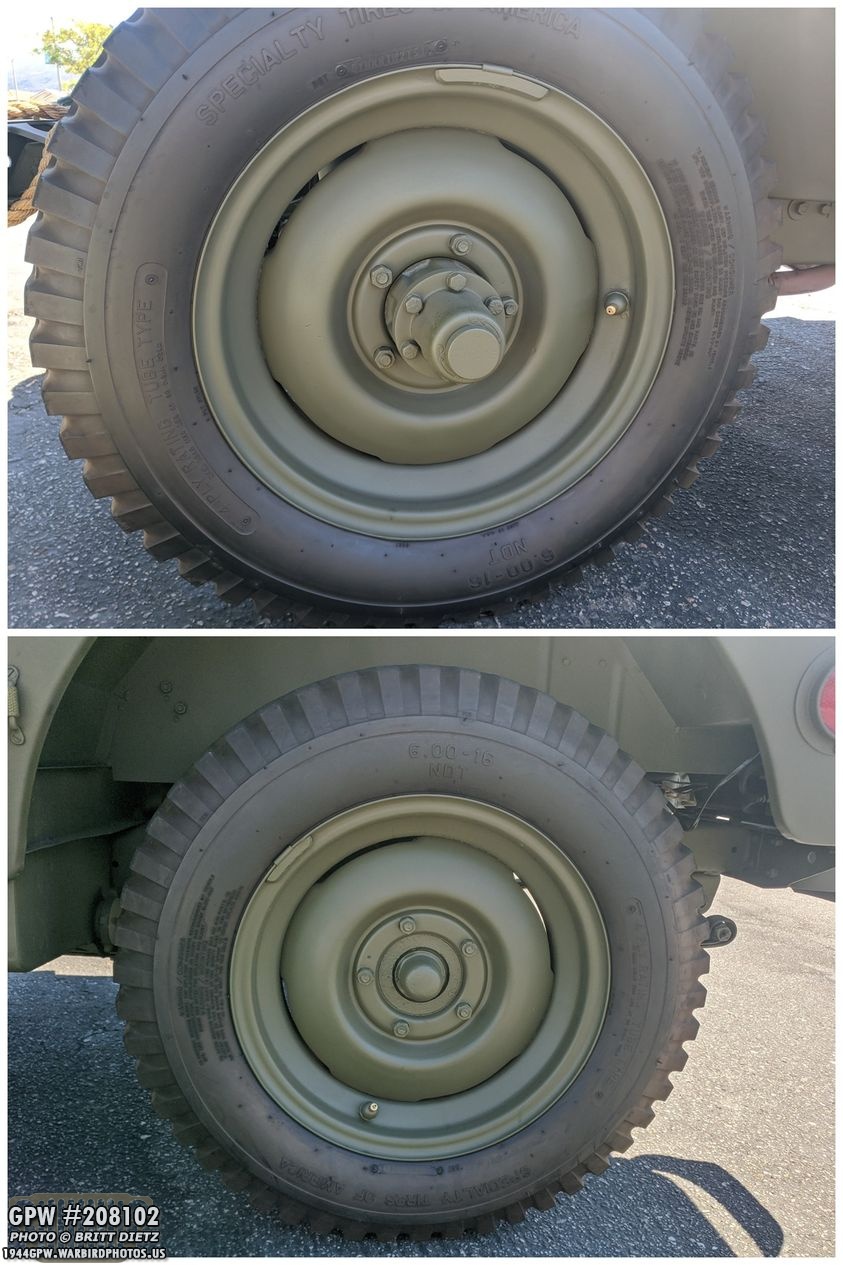
As mentioned many times in these updates, I have post-war CJ rims and axles on the Jeep currently, which I plan to replace with 1943 GPW axles currently undergoing restoration along with combat rims (arriving tomorrow!) and the new Firestone tires. When all is replaced, it should really take the Jeep to the next level.

The spare tire, shown here before I took it off, has the v1.0 Firestone tire. I thought about replacing it with a 2.0 one as the difference in the tires might bother me, but I’m not sure it’s a $144+ enough bother for me to purchase another tire. Maybe someday in the future. So for now, I took this to an @[283032171829567:274:America’s Tire] store that is going to take the rim/tube out so I can use the tire on the new combat rims.

If you’ve been following along the last few weeks, you’ve seen me testing various different stamps and inks for a wartime accurate inspector stamp on my Voltage Regulator. It’s been a long process with lots of test stamps. After trying to make a stencil didn’t work, I went and made my own inspector’s stamp (shown here) that’s a perfect match to one of the various WW2 styles. I talked recently about finding the Distress Oxide ‘Twisted Citron’ stamp pad that matched the vibrance and color of the stamps.

I’ve been putting off stamping the actual regulator for a few weeks now, mostly because I was a bit afraid of stamping it thinking I’d only get one shot at it. I decided to do some final test stamps on my test piece of metal and finally sit down and stamp the darn thing!

And here’s one of the first attempts! What? I thought you only had one shot? Well, I lucked out. I found that if I didn’t like it, I could quickly wipe it off with a wet paper towel, and it all came off without leaving a mark. Whew! I ended up doing a bunch of stamps on the regulator case until I got one I liked.

So here’s what I ended up sticking with, maybe stamp #17 in the sequence? I didn’t want it to be perfect, as it was just an inspector’s stamp and I was spending WAY more time on it than anyone in the factory would have! But, this stamp at least was all there, with good edges and the 1 turned out pretty crisp. It’s easy to get a partial stamp if you’re not careful.
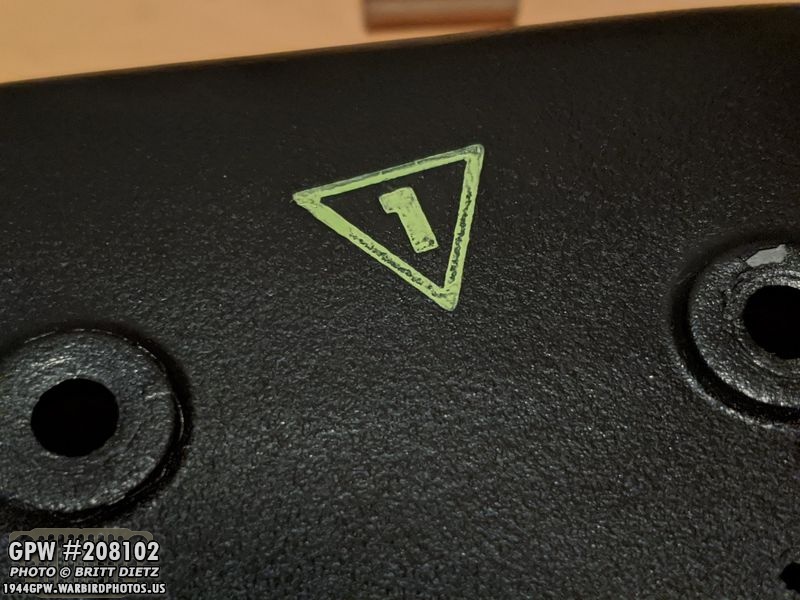
Here’s a close up of the final stamp. I think it came out pretty good. And yes… I noticed the section of the wrinkled paint that came off on the right there. I ended up carefully spraying some back on after this photo was taken.

After I let the stamp dry for several hours, I sprayed the entire thing with matte overspray to lock it in, since the ink from this stamp doesn’t fully dry as it’s a mix of dye and pigment. Thankfully, the matte overspray locks it in well and it won’t smear once that dries!

I then put the data plate back on with the rivet screws. This is the original dataplate that I restored. This is an early January 1942 voltage regulator.1 = January W = 1942.
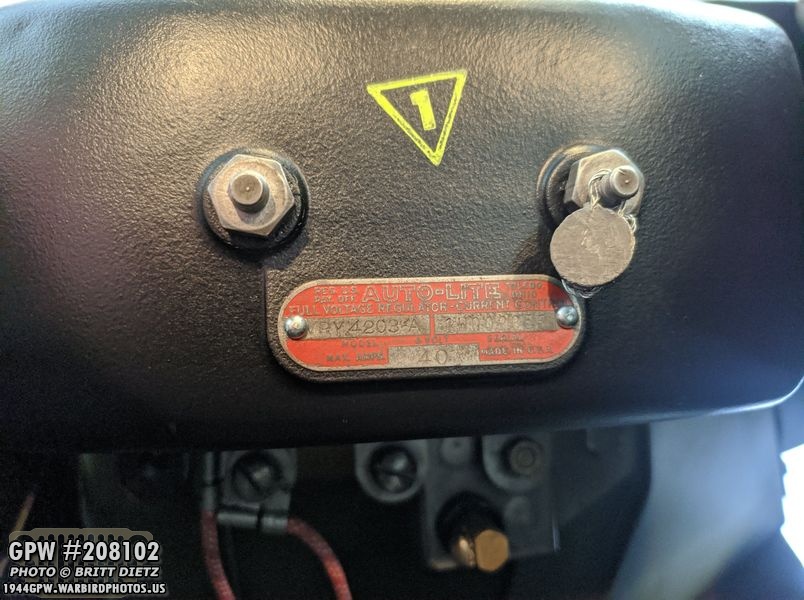
After a quick cleaning, here it is installed back on the Jeep! That stamp looks good! I’ll be soon getting a crimper with ‘AL’ on it in the next few weeks to borrow, so I’ll use it to crush the lead seal you see on the right post as they would have during WW2. (It allowed the operator to see if the Regulator had been opened as that lead seal would need to be broken in order to take the cover off).
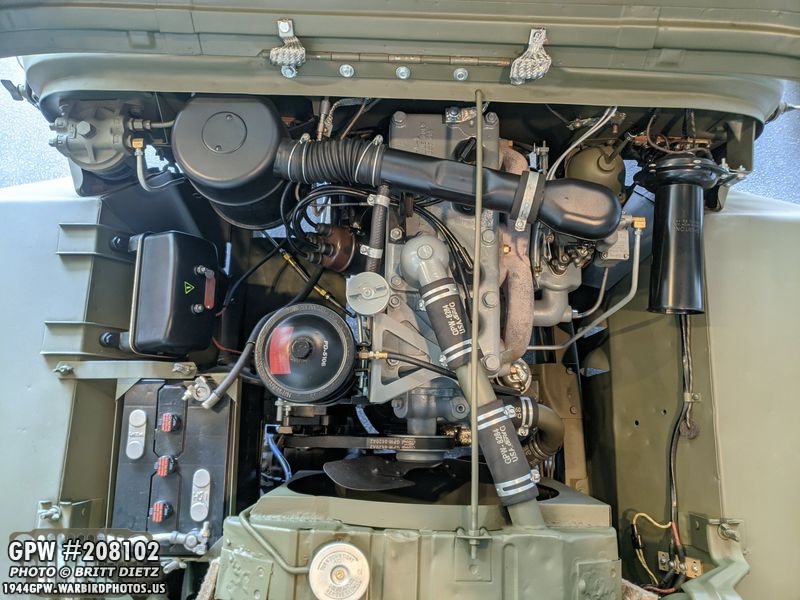
And here’s an overhead view of the engine bay with the regulator and the stamp!

That completes the three stamps that are often overlooked on Jeep restorations! The Voltage Regulator inspector’s stamp, the PD number on the lid of the Pur0lator oil filter, and the INLET stamp above the inlet oil filter port. Glad to finally have that Voltage Regulator stamp over with!

So the large project for this past week was helping a friend out with his Jeep! Due to several reasons, he hasn’t been able to keep his Jeep in a garage. Instead, it’s been sitting on display outside at the @[23688958789:274:Planes of Fame Air Museum] in Chino, CA. (this is the same Jeep last week that I swapped the axle shafts with).

As you can see, his Jeep has been there a long while. IT’s become a home for spiders! It’s slowly rotting away, so I talked with him about bringing it over to my house for us to do some preventative work on to stop the rusting and fix some things.

So we went over to the museum last Friday during one of the hotter weekends of the year (doh!), and got to work pulling her out of the weeds. She needs a lot of love. She’s technically a runner, and with a battery you could start her up and drive her.
And you may be thinking, that’s not the same Jeep. Actually, it is! We pulled it out of the weeds and brought it over to the wash rack at the museum where they wash the warbird aircraft. We gave the Jeep an hour long bath. Just like that, she’s starting to look better. We thought we got most of the spiders out, but sadly, most of them just hid in the nooks and crannies of the Jeep.
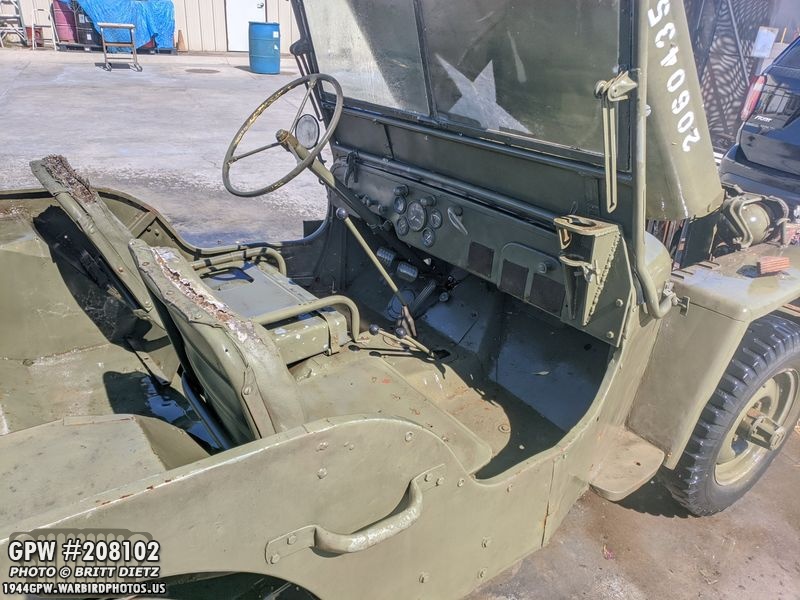
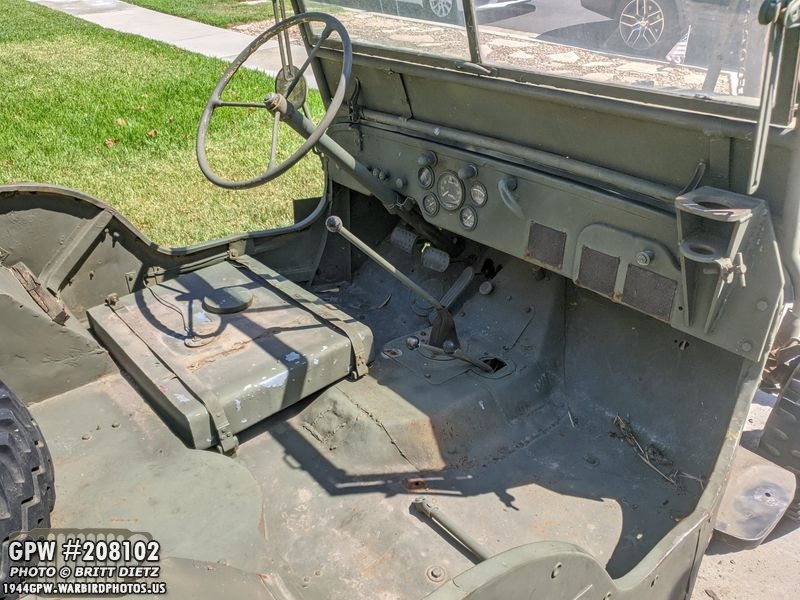
Here’s a look inside. The Jeep was modified with a T-90 transmission, so the transmission hump was modified and raised. At the time, the owner thought it was an early war MB motorpool Jeep. The dataplates, he thought, weren’t original to the Jeep at all.
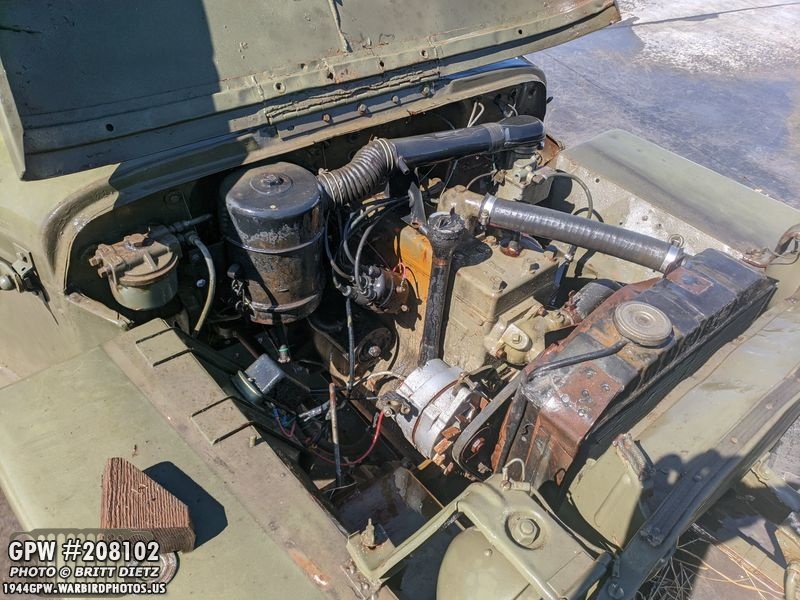
We carefully washed out the engine bay, and what a difference that made alone. The Jeep really needs a frame up restoration like my Jeep, but that’s not in the cards for this moment. At least we could clean her up and stop some of the rust.

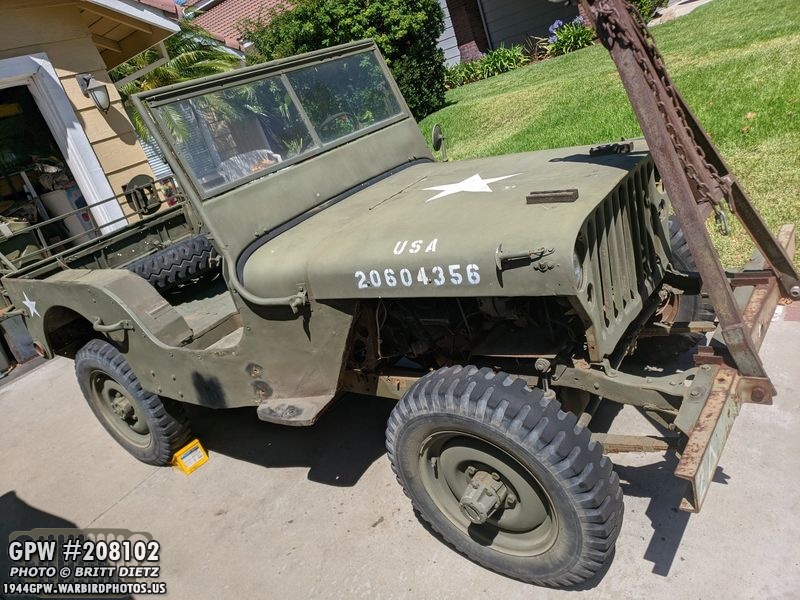
And here’s the Jeep in the driveway of the house not long after, with work starting already clearing paint in some of the worst rust areas to see just how bad it is. My Jeep sits in the garage. That’s the owner there working on the Jeep. For those wondering what’s on the front bumper, that’s a custom made tow bumper that fits over the standard Jeep bumper.

The next day, Saturday, we took my Jeep out to the museum for the flight of the Corsair (that photo at the beginning and later in this update), so once we got back I backed my Jeep up to get some shots of them together. We had removed the passenger fender on his Jeep already to do some work at this point.

I’m sure my neighbors were thinking ‘Oh no, he has another one now…’

And a look at the backs. He has a custom made Bussel rack attached.

So we got to work, and spent most of Saturday and Sunday working hard on the Jeep. As you can see, we took the hood off as well to get some work done on it. We sprayed rust converting black spray on many areas of the Jeep to stop the rusting, and anywhere the wire wheeled metal we hit with Red Primer.

Taking a look at his engine, it has a date code of February 19th. It was made towards the end of the shift that day (the clock). It appears this style of clock appeared on engines from 1945-1946… so this block could be a wartime or post-war engine. The head is a wartime MB head for sure.
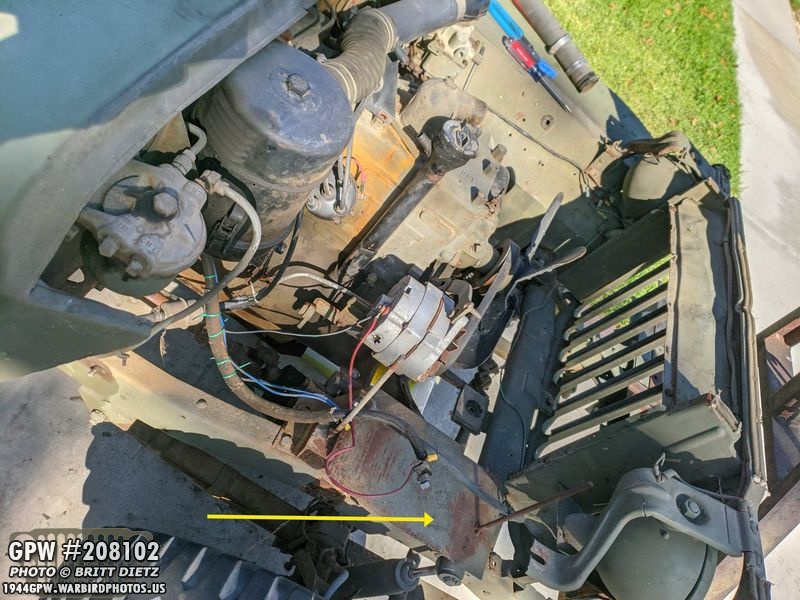
We took out the seats, and ended up taking out the fuel tank as well so we could get into the fuel sump, that was suffering from very bad cancerous rust. We hit that with rust converting spray (wish I’d taken a photo, it was all black when we were done!) to stop the rusting. We also fixed up the fuel tank (and discovered some minor leaks on the top). We also cleaned out the Jeep of any leaves and debris.
The history of this Jeep is a bit crazy, as the person who had it before my friend said when he bought it, it had a large chevy engine in it. That meant a lot of customization and ‘bubba’ work to his Jeep to get that special engine to fit. That included installing a custom welded on battery tray, which in turn caused that person to then cut a big chunk out of the passenger fender and causing a lot of what end up being major repair work at some point when this Jeep is restored.

We took the radiator out as it was starting to have a lot of rust, and while it was out, I took a look at the forward cross-member. It’s the MB style tube cross-member (vs a Ford GPW U shape like my Jeep). This is one of the main reasons my friend and the previous owner always thought this was a MB frame. If you know your Jeeps, you’re probably seeing a ton of issues with everything in this shot.

One thing we did do is a complete restoration of the radiator. Looks incredible now. I also helped him flush it out, so it’s nice and clean, freshly painted, and all rust stopped! I had him also use a satin clear coat to help protect what we did. I fixed up the radiator cap so it looks brand new. But one thing bothered me… the radiator is not centered to the grill. In fact, it’s an inch too far to the driver’s side, meaning the fan shroud had to be bent in order for the fan not to strike it. That got me thinking…

I started to study his Jeep.. the frame, the tub, fenders, etc. Looking back at the rear of the frame, I noticed the GPW style rear shock bracket with a large F stamp. It looked riveted and welded on from the factory… hmm. So I thought, let’s check, just for fun, for a GPW frame number. Imagine my surprise when I sanded the area by the engine mount on the frame and found a GPW frame number of 39114!!! GPW is before the number, but it’s worn down a bit.

And those data plates that he thought were just random plates thrown on? Look at the number… it’s a match! This is a June 13, 1942 Ford GPW Jeep frame built in the Louisville, KY plant (just like my Jeep!). His was built 2 years and 13 days before mine.

So, next up was the ID the tub… sure enough, markings on the driver’s side toe board. It’s a GPW tub for sure, with the correct GPW style toe board. Sure enough, there’s a tub serial! 3595 and the rest, sadly, was removed at some point. It’s probably five numbers, 3595*. That would make it a composite tub as it has the Willys style round glove box latch indents (among other things). That would make this an April 1944 ACMII tub, from what research I was able to find. Obviously, the original 1942 tub was replaced with this 1944 tub at some point.
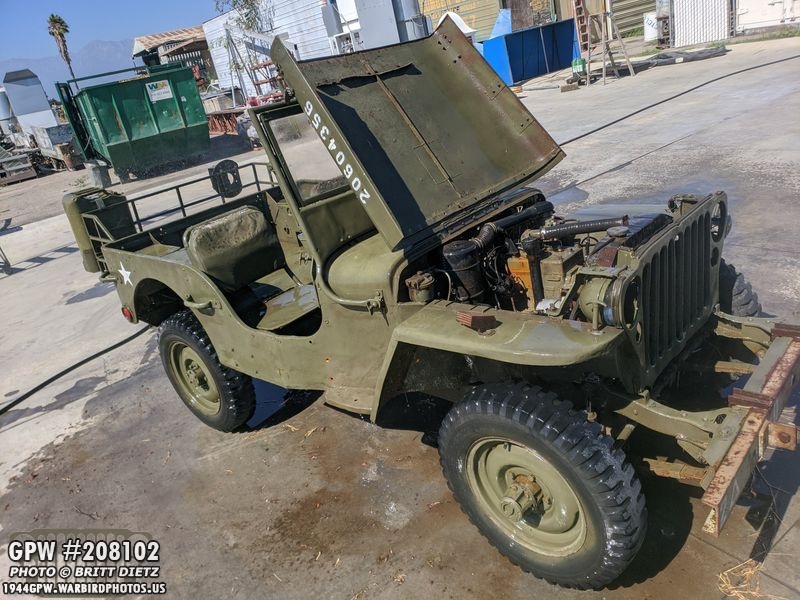
We worked so much on the Jeep, sadly, I didn’t get any shots of it when we took it back, so here’s another shot as we were just starting work on it. We got most of the rust-covered up, and the entire Jeep cleaned up as best as could. Sunday evening we took it back to the museum where it’ll sit for a while again, but at least it’s protected from further rusting. At some point, hopefully, he will be able to start a full frame-up restoration on it!

Back to my Jeep, as mentioned on Saturday I drove my Jeep out to the @[23688958789:274:Planes of Fame Air Museum] for their ‘Live Demonstration’ of the F4U-1A Corsair. It’s about a 13.5 mile drive from the house, so not too bad. I’m trying to take the Jeep out there as often as I can due to…

Warbirds! One of the wonderful things volunteering at the museum for the last 19 years is having a gate card, which means I can pull the Jeep around onto the airport and take some shots with the warbirds! Since the May airshow was canceled due to the pandemic, I haven’t had a lot of chances to shoot the Jeep with the warbirds, so I take any chance I can get!

My ultimate goal is to get a photo of the Jeep with a B-17 at some point. Till then, I’ll keep shooting the Jeep with whatever I can!

As this update finishes, I wanted to do another look at the Jeep as I really hope I’ll soon have those new axles, rims, and tires on! Then it’ll be really time for a nice photoshoot with the Jeep!

So that’s it for this week. Next week I hope to start work on the Combat Rims getting the flaps, tubes, and tires installed. I also hope to continue work on rebuilding the 1943 GPW axles. Till next week!