 Axles, Mirrors, Jerry Cans, oh my!
Work continues on the axles, which I got last week… revealing some bad news in a startling discovery. But, on the bright side of things, a few other projects that have been needing work are done!

A nice day to take the jeep out for a drive yesterday morning (Thursday) to the local park again. Can’t wait to get some white markings on her, that’ll really complete the look.
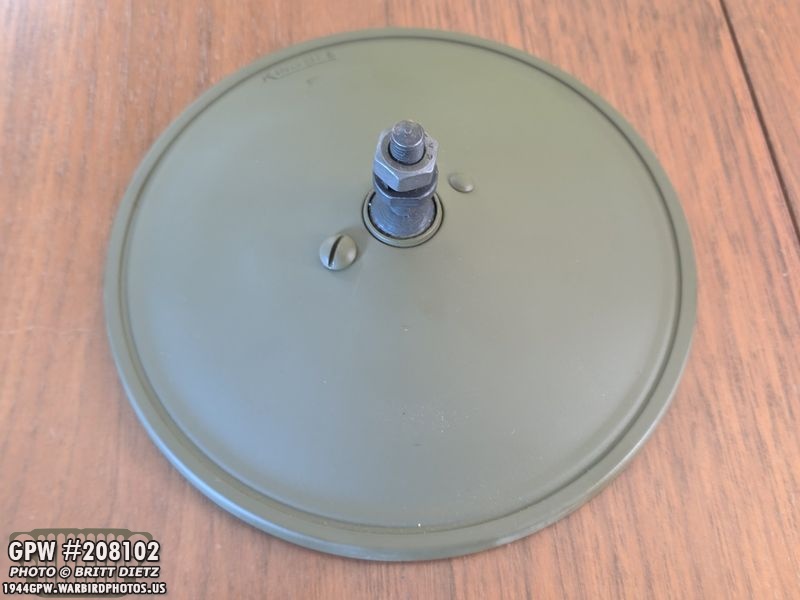
One major issue I’d had when driving was with the mirror. The mirror would not tighten no matter how hard I tightened everything. That meant that when I’d drive the Jeep, the mirror would slowly point downwards with the vibrations. I got very annoyed with this and decided to just get a new mirror head. This one arrived from Peter Debella Jeep Parts and is a perfect museum-quality GPW F stamped replica.

It is the correct Kingbee style with the F. Can’t get much more perfect than this, other than getting an original!

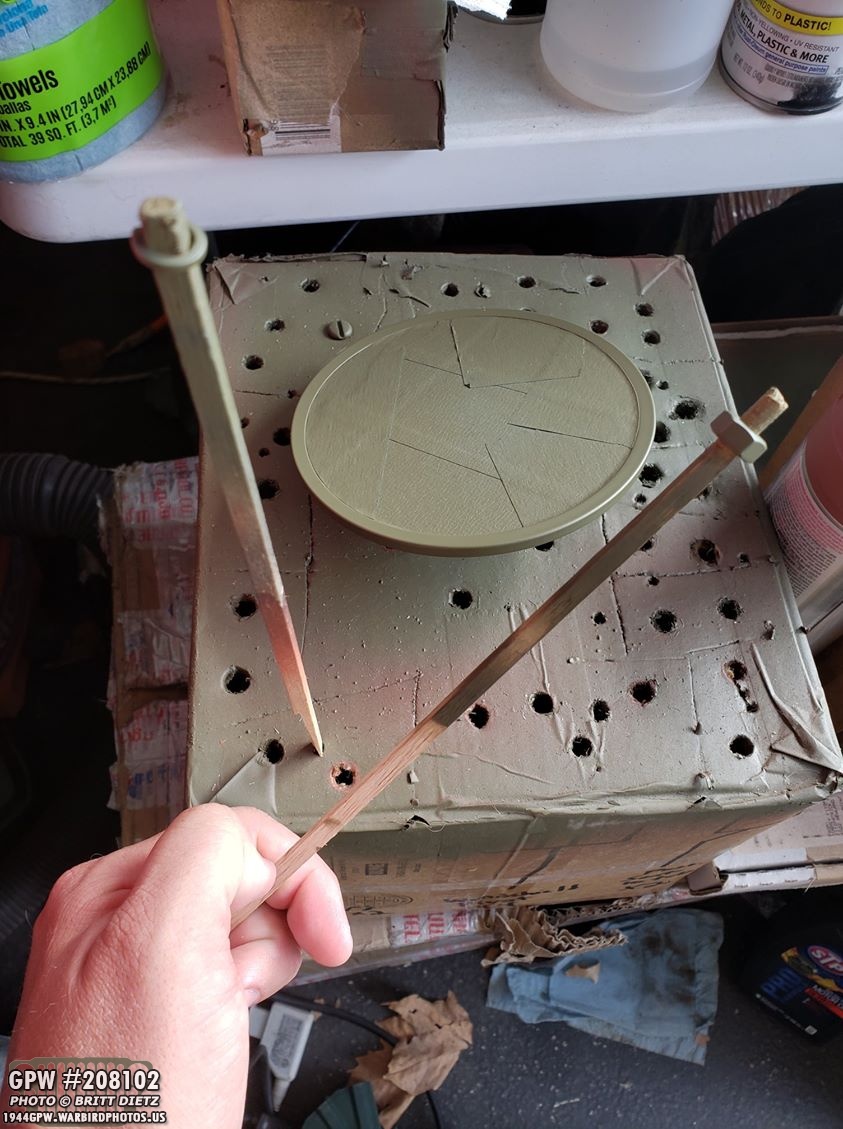
But it was painted in a different OD than my Jeep, so I went to work to paint it. I used photoshop to make a perfect circle the size of the glass in the mirror, and then using blue painters tape on wax paper, I used the print out to cut the circle. I would now have a perfect template of blue tape to mask the mirror.

Here’s the final masking, ready for paint!
Here I’ve painted the mirror and the lock washer/nut in the correct 33070 color for my Jeep. Ron Fitzpatrick Jeep Parts 33070 spray cans are prefect for small projects like this.

A little while later after drying, it was a perfect fit on the Jeep! Nice and tight, staying into position! One other thing I really like about this is that the mirror glass is tinted slightly, just like the originals, so the glare (and headlights at night) are dimmed. A perfect addition to the Jeep!
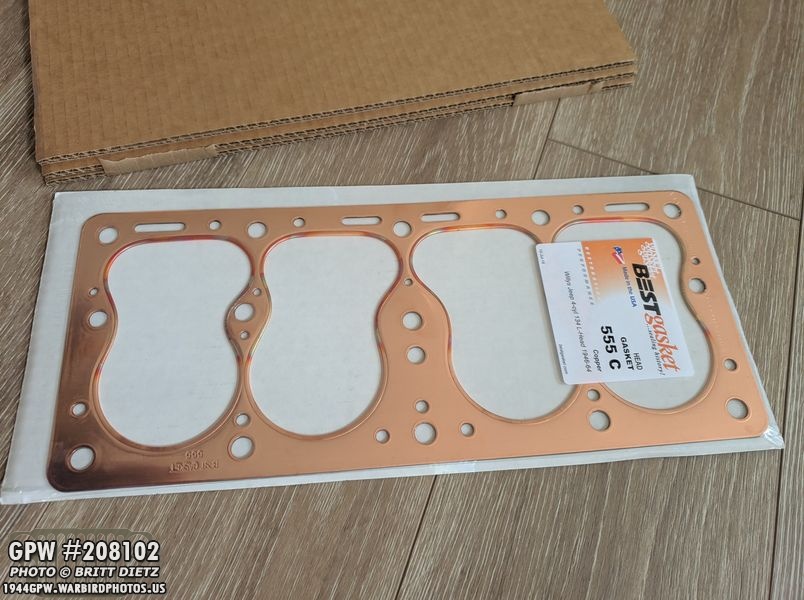
I’ve been chasing several coolant leaks in the engine block head the last month since driving the Jeep. I’ve tried to use some permatex seals to patch up the areas, but they keep forming. After getting fed up with constantly cleaning the engine after each drive, I decided to go ahead and replace the head gasket. I opted for the more expensive, and nicer, copper head gasket from Ron Fitzpatrick Jeep Parts. This will be my project for this weekend, so I’ll document everything as it is installed.

And I’d like to give another shout out to Ron Fitzpatrick and Ron Fitzpatrick Jeep Parts, who always does a great job packaging all their orders. The copper head gasket was packaged between many layers of thick cardboard sheets. Kept the gasket nice and flat!

In this order I also got two spray cans of Barrier III red oxide. Since Kylon decided to stop making their Red Oxide spray (I miss that stuff), I’ve been using a Rust-Oleum metal primer spray that is pretty much the same color as the red oxide, for my primer on the projects the last few months. But I wanted to give this red oxide a try on the axles (and any small projects between now and then) once they are ready for paint.

Another project I started was restoring another Jerry Can. This jerry can is closer to the WW2 style, which curled grips on the cap (not shown). The cap is not interchangeable with the jerry can I have on the jeep right now, so this entire can will be restored. Look for the entire progress on this, start to finish, next week!
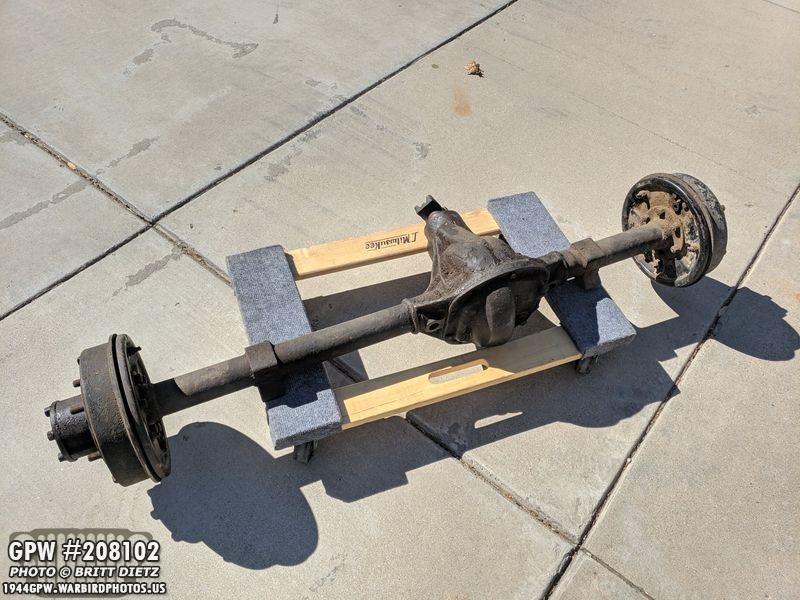
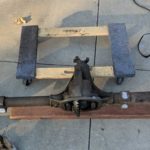
Now on to the axles… if you haven’t been keeping up with the latest updates, I got two wartime axles from a fellow G503 (jeep forum) member for free who was local. This is the rear axle once I got it home. My Jeep currently has post-war early CJ axles and steering. I will be replacing that with these wartime ones eventually.

And the next day, I discovered what I thought was MB (willys) axles were in fact actually GPW (ford) axles! All the F marks were hidden under many layers of grime! I couldn’t be more excited and lucky that I had a pair of wartime GPW axles for my GPW jeep!
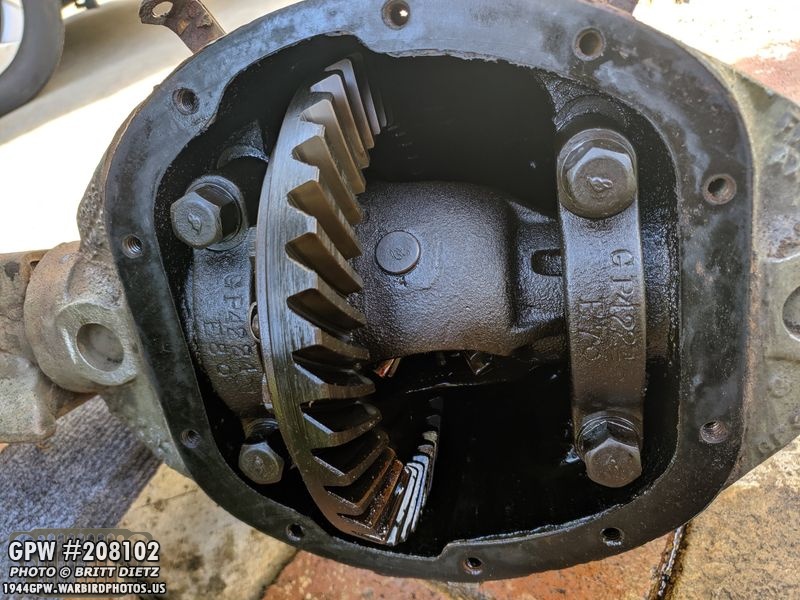
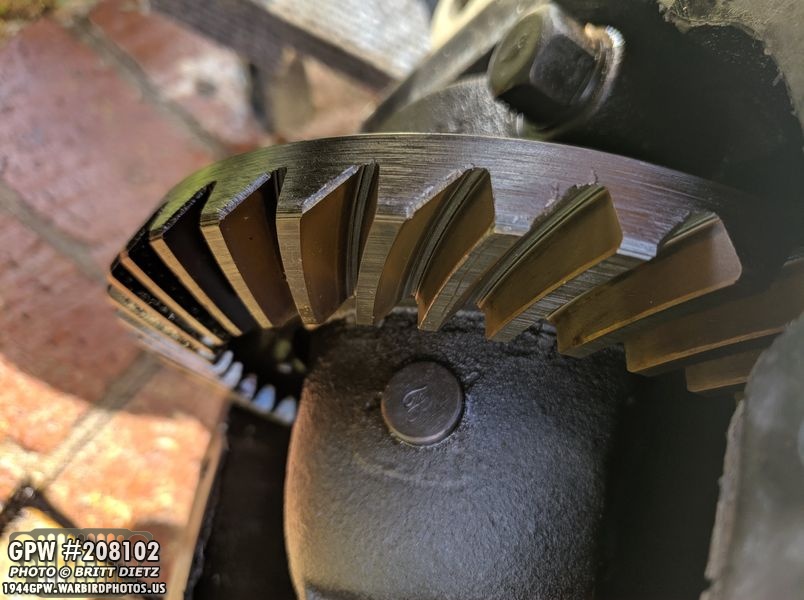
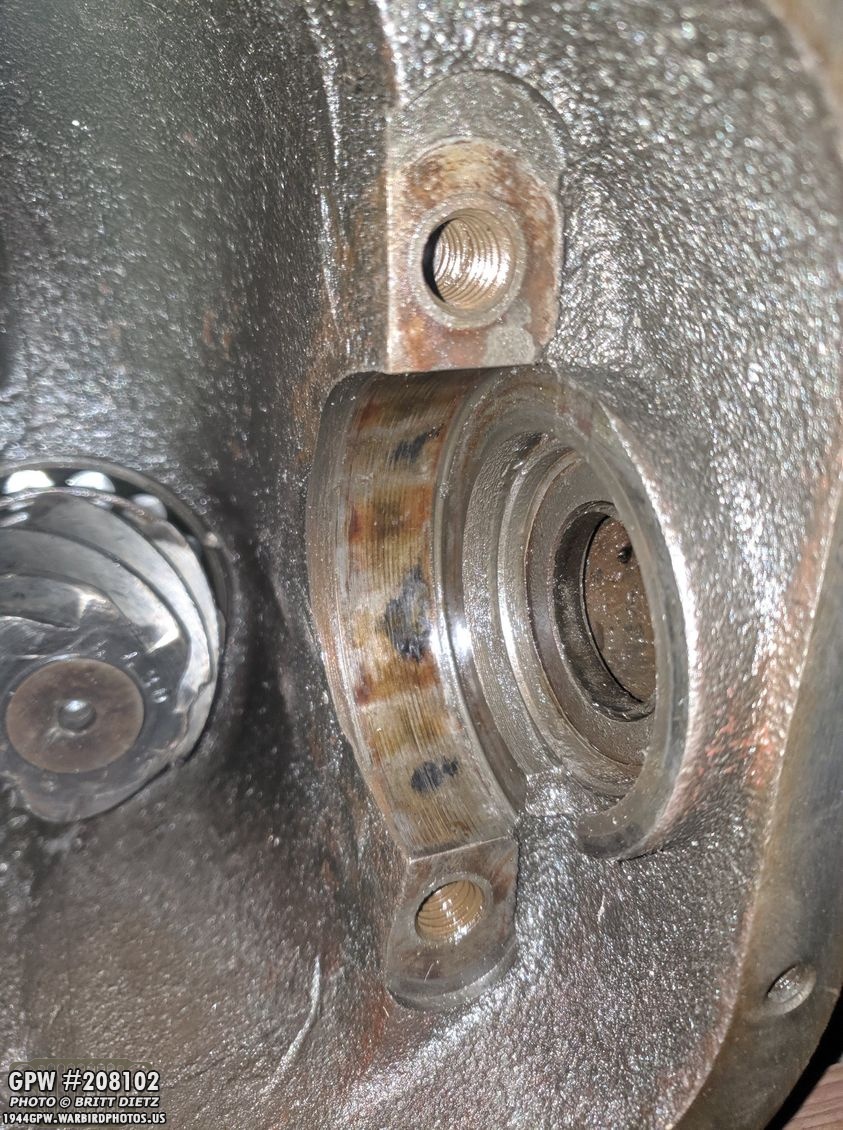
On Monday this week, I started the inspection process by first starting to disassemble the front axle and the steering on it. After removing the cover (which I thought was empty of oil since the rear one was… not so much! Whoops) I got a great look at the gears and a plethora of F stamps!

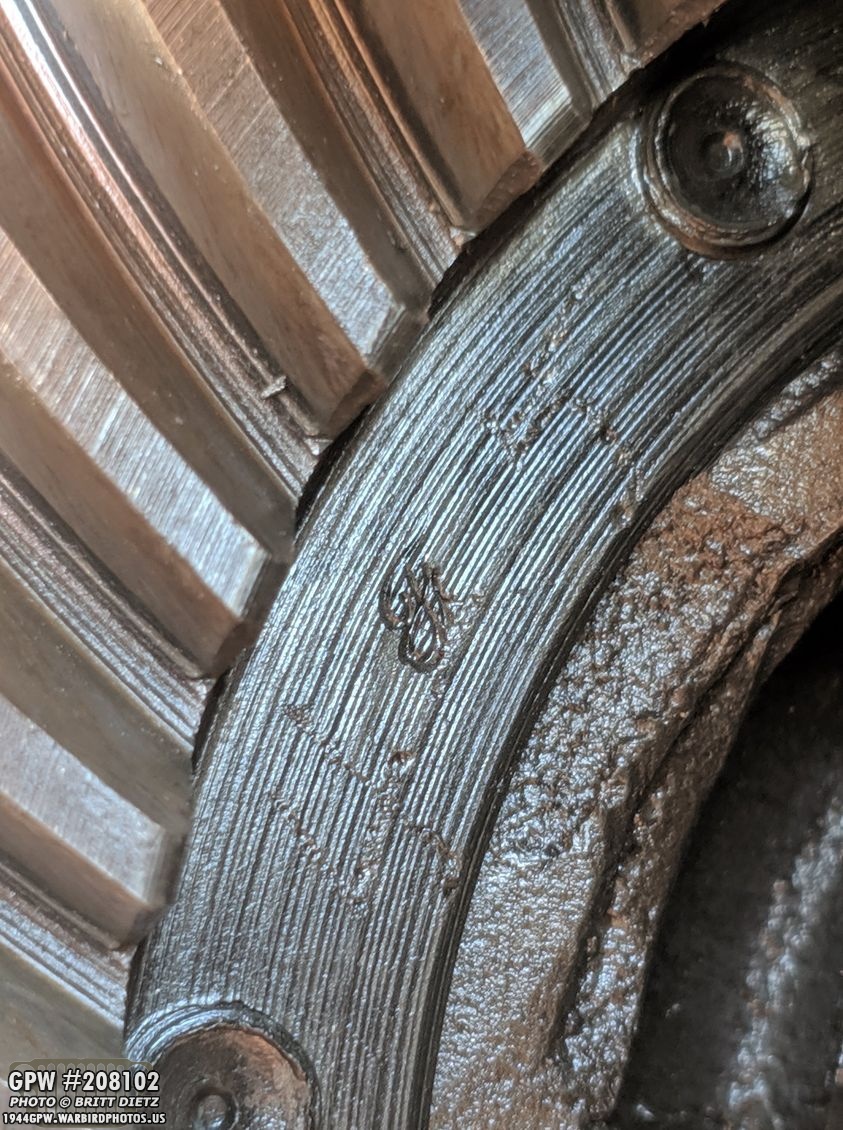
There are 5 f stamps in this photo, and a GP model number. Pretty awesome to see everything original!
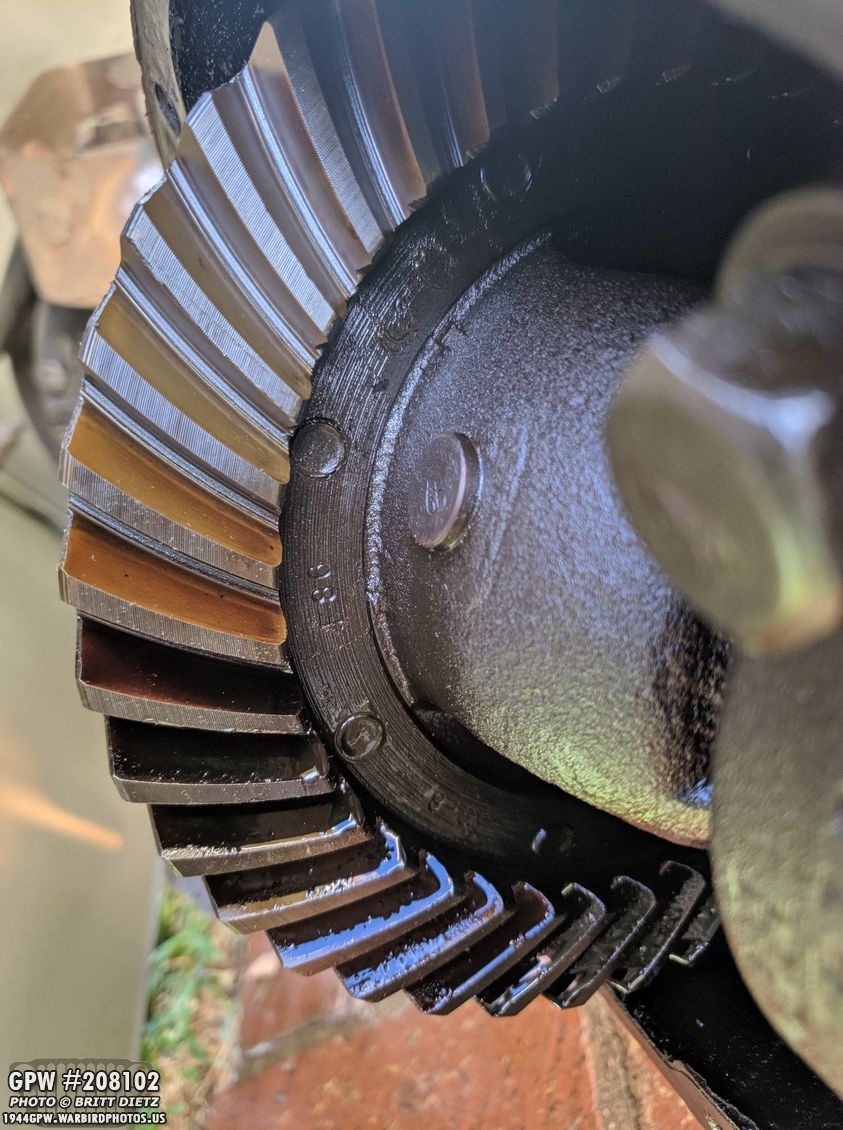
The main gear looked in pretty good shape with not a lot of wear, with lots of Ford markings on the gear itself. This axle seems to be in good shape overall.
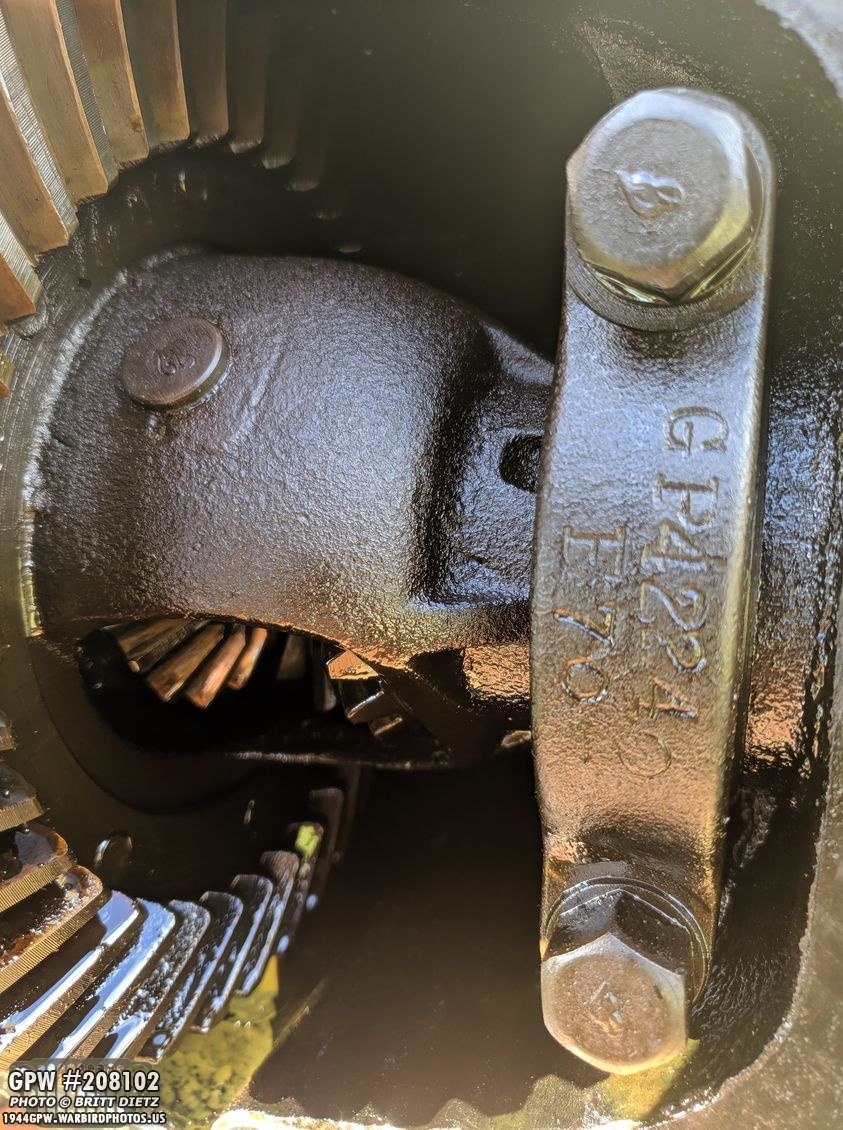
And the other bearing cap also had nice Ford markings.
Looking at the main gear again, there’s some slight wear, but not bad overall.

And another look at the original Lock strap with two f stamped bolts.
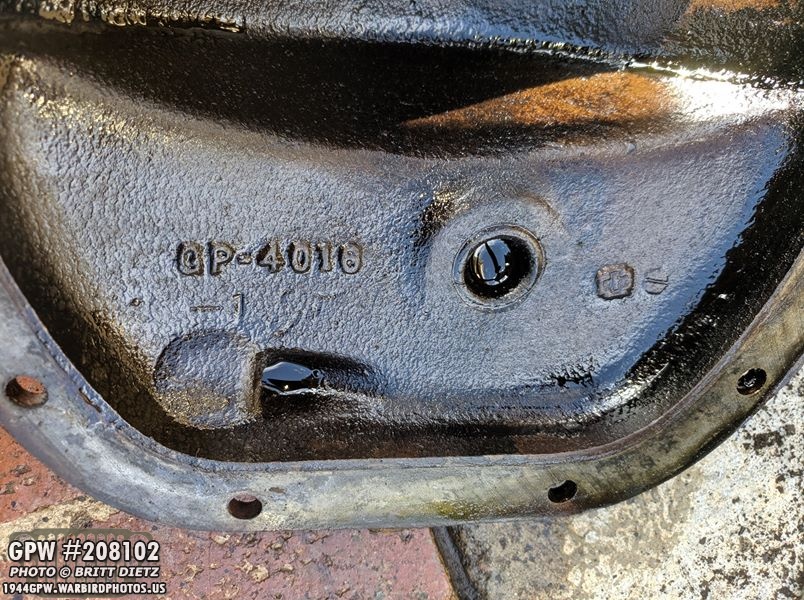
The inside of the cover has the ford GP stamp, and a large F stamp just barely visible under it. (look under the 01).
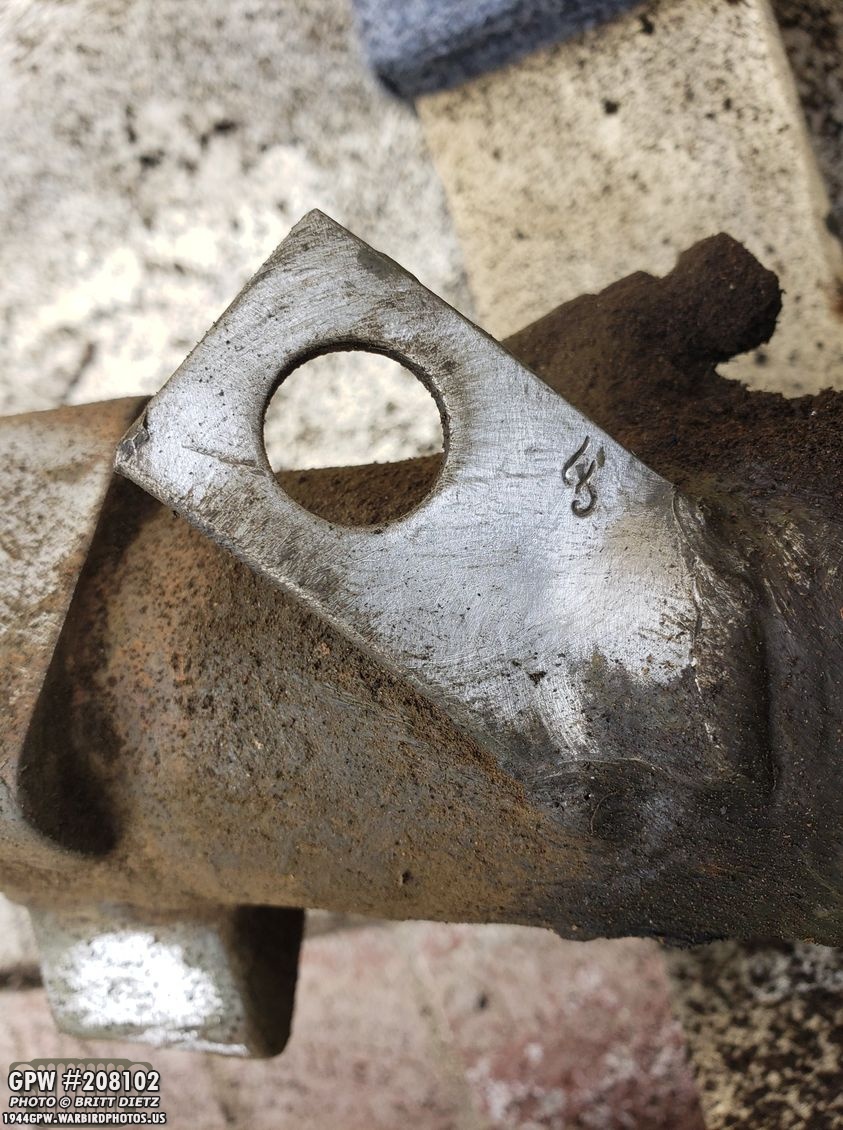
It’s amazing where you find the little F stamps while cleaning things up. Here’s one on the brake line holder tab.

Starting to take apart the steering, here is the shaft with the bell brank. On the post-war CJ jeeps, this was mounted to the cross member instead of on the axle. I’ve taken the cotter pin, nut, washer, and dust shield off. The shaft actually looks in great condition.

Here’s the type of caked-on thick grime I’m dealing with… this is one of the arms on the axle that connects to the tie rods.
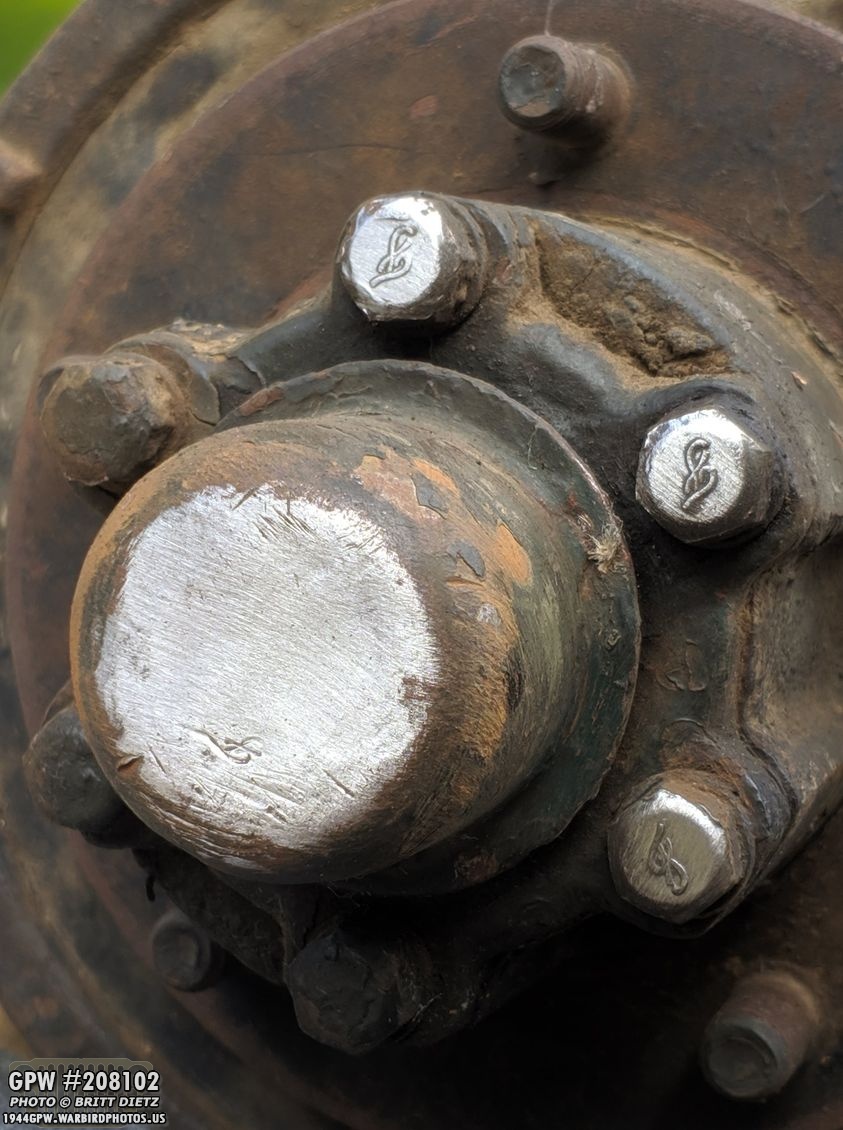
I did find that the main hub on the front axles have F stamps, as do all the 6 bolts holding down the flange/hub.

Work then shifted to the rear axle… and this is where I got the bad news. I removed the cover, which the inside was clean of any oil (I had a pan underneath just in case).

Again, the cover had the correct Ford GP number and a nice F stamp.
I also spotted a double stamped F on the main gear. And it looks like hand-etched numbers and letters, which is pretty awesome to see.
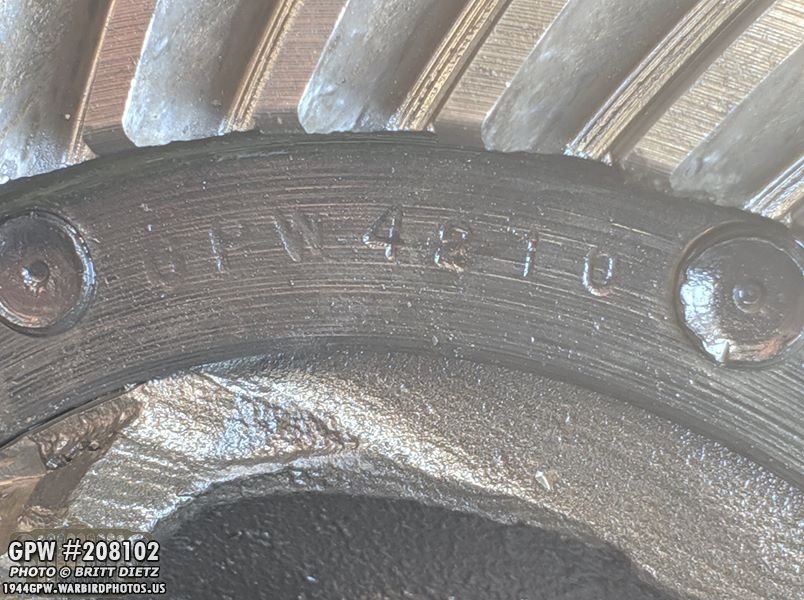
And a GPW number on the main gear.

But, upon looking at the carrier, differential, and spider gear… I noticed some serious issues. Can you spot them?
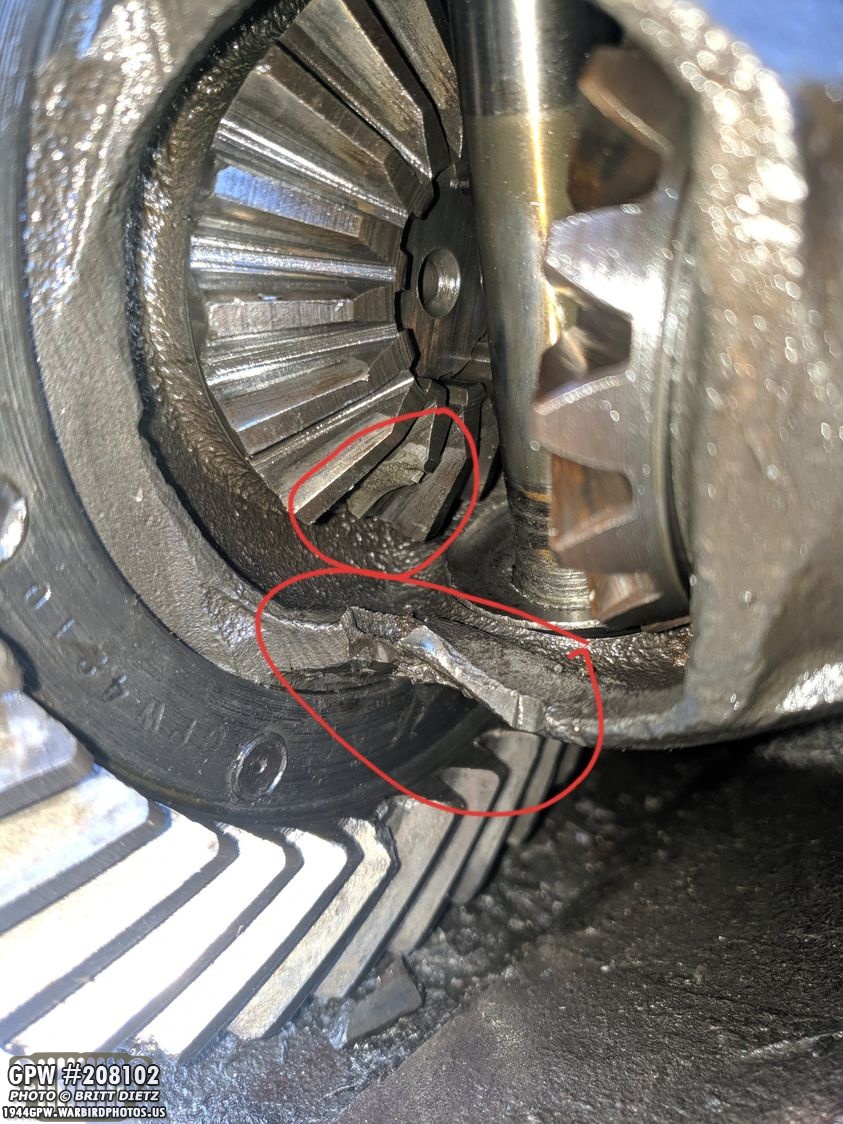
It appears that the two spider gears exploded at some point, causing major damage to the carrier housing, destroying a tooth on one of the differential gears, and showering the housing with pieces of spider gear (which are totally gone).

There was metal debris in the housing, such as this part of the differential gear tooth that broke off.
Thankfully, there was no damage to the bearing cap.

I took out the whole differential, carrier housing, etc. Most of this will need to be replaced. The carrier housing, the differential gears, and the missing spider gears. Overall, it won’t be cheap but it is repairable and I did get the axles for free. Let’s check out the rest of the rear axle…
The housing seems to be in great shape otherwise. Here’s where the main axle rod comes into the carrier housing.

And the other side. You can see some of the damage on the bottom of the housing (bottom right corner).

the bottom of the housing has the only real damage outside of the carrier housing. It’s torn up a bit at the bottom (bottom center), but it appears still to be usable. I’ll take the axle and have it dipped to look for cracks. If cracks are found, then I’ll need to get another rear axle, sadly, and I’ll only be able to use this one for parts. Aside from that, everything else looks okay, just needs replacement.
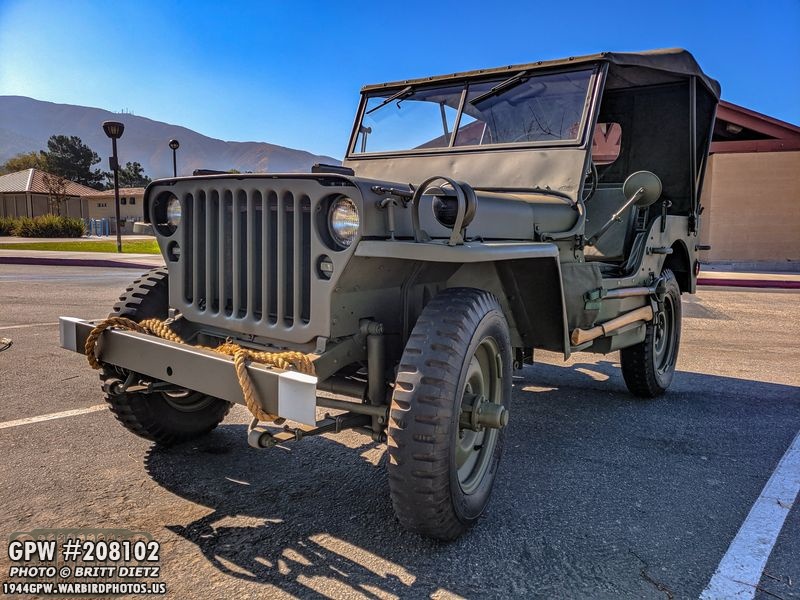
So, with that unfortunate surprise out of the way, let’s get back to the Jeep. Here’s another look from Thursday’s drive to the park. There’s still a list of things I need to do still to get her even closer to being finished, but that list is small and I’m slowly getting through it all.
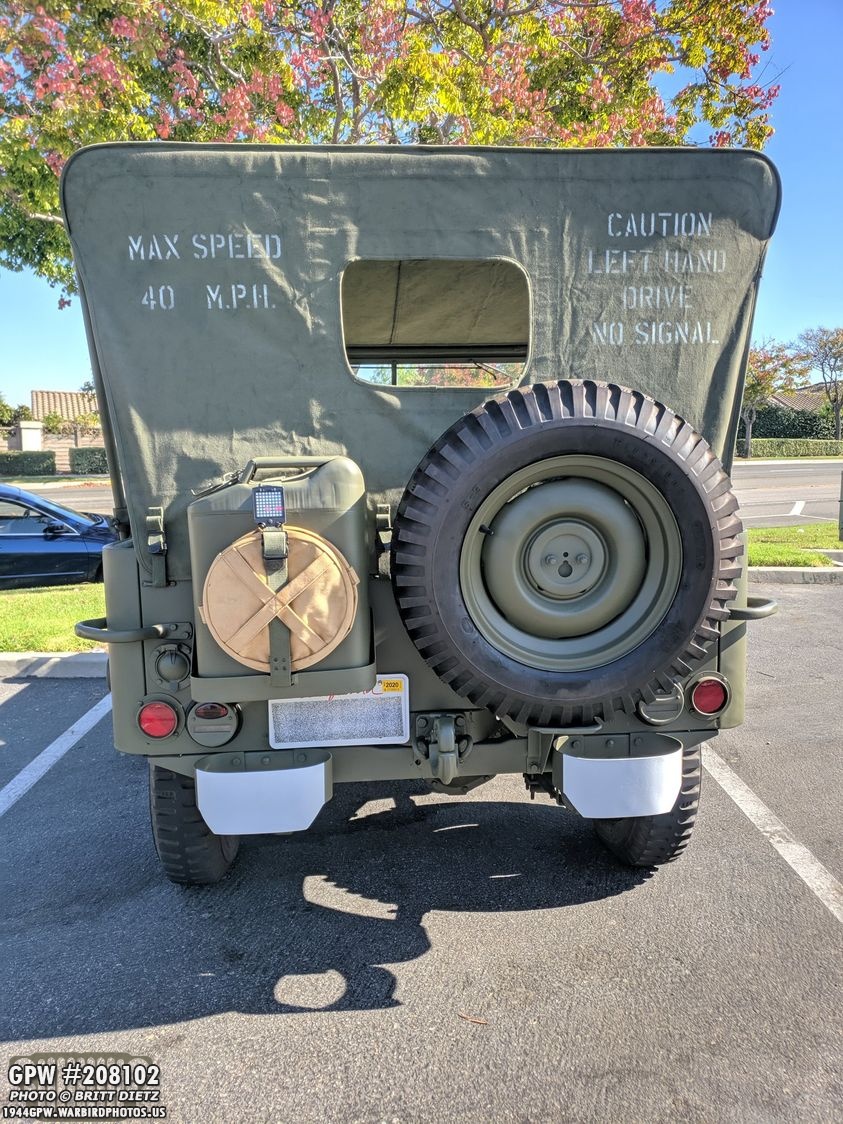
Finally, to end this week’s update, I’ll end with a photo of the rear end of the Jeep (license plate has been scrambled in photoshop). The canvas top still has some wrinkles in it, but they’ll probably get better over time. I still need to replace the sun-bleached canvas water container with a wartime green one, but this one works for now. Till next week… lots of work to be done over the weekend!