 Air Cleaner Restoration, Fuel Gauge Calibration, Early Fire Extinguisher, & More!
This week’s update is full of some great goodies. First, I continue work on a friend’s post-war air cleaner restoration for his Jeep. Then I get to work getting the fuel gauge to read the right fuel level. I stumbled across a nice flea market find (early Fire Extinguisher for Jeeps), and a look at some projects/events in the works for the Jeep!

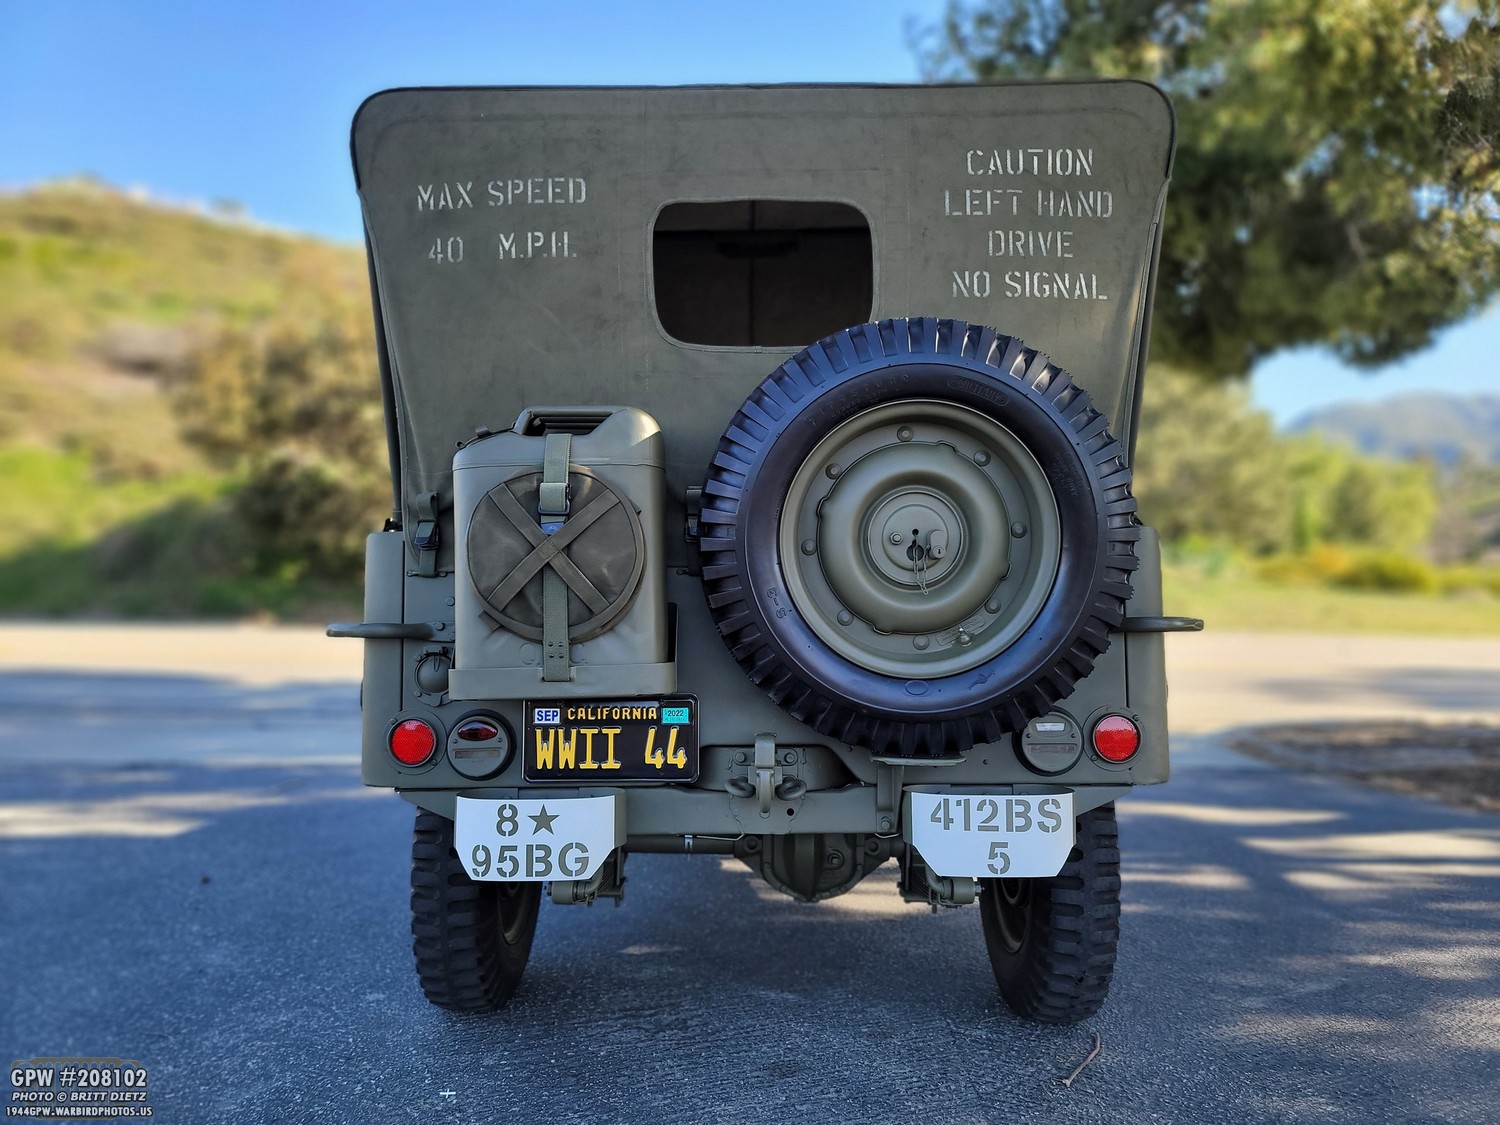
1944 GPW #208102 in all her glory! It’s been a busy Memorial Day week as I work on sporadic projects for the Jeep and looking forward to some upcoming events! So let’s dive in.
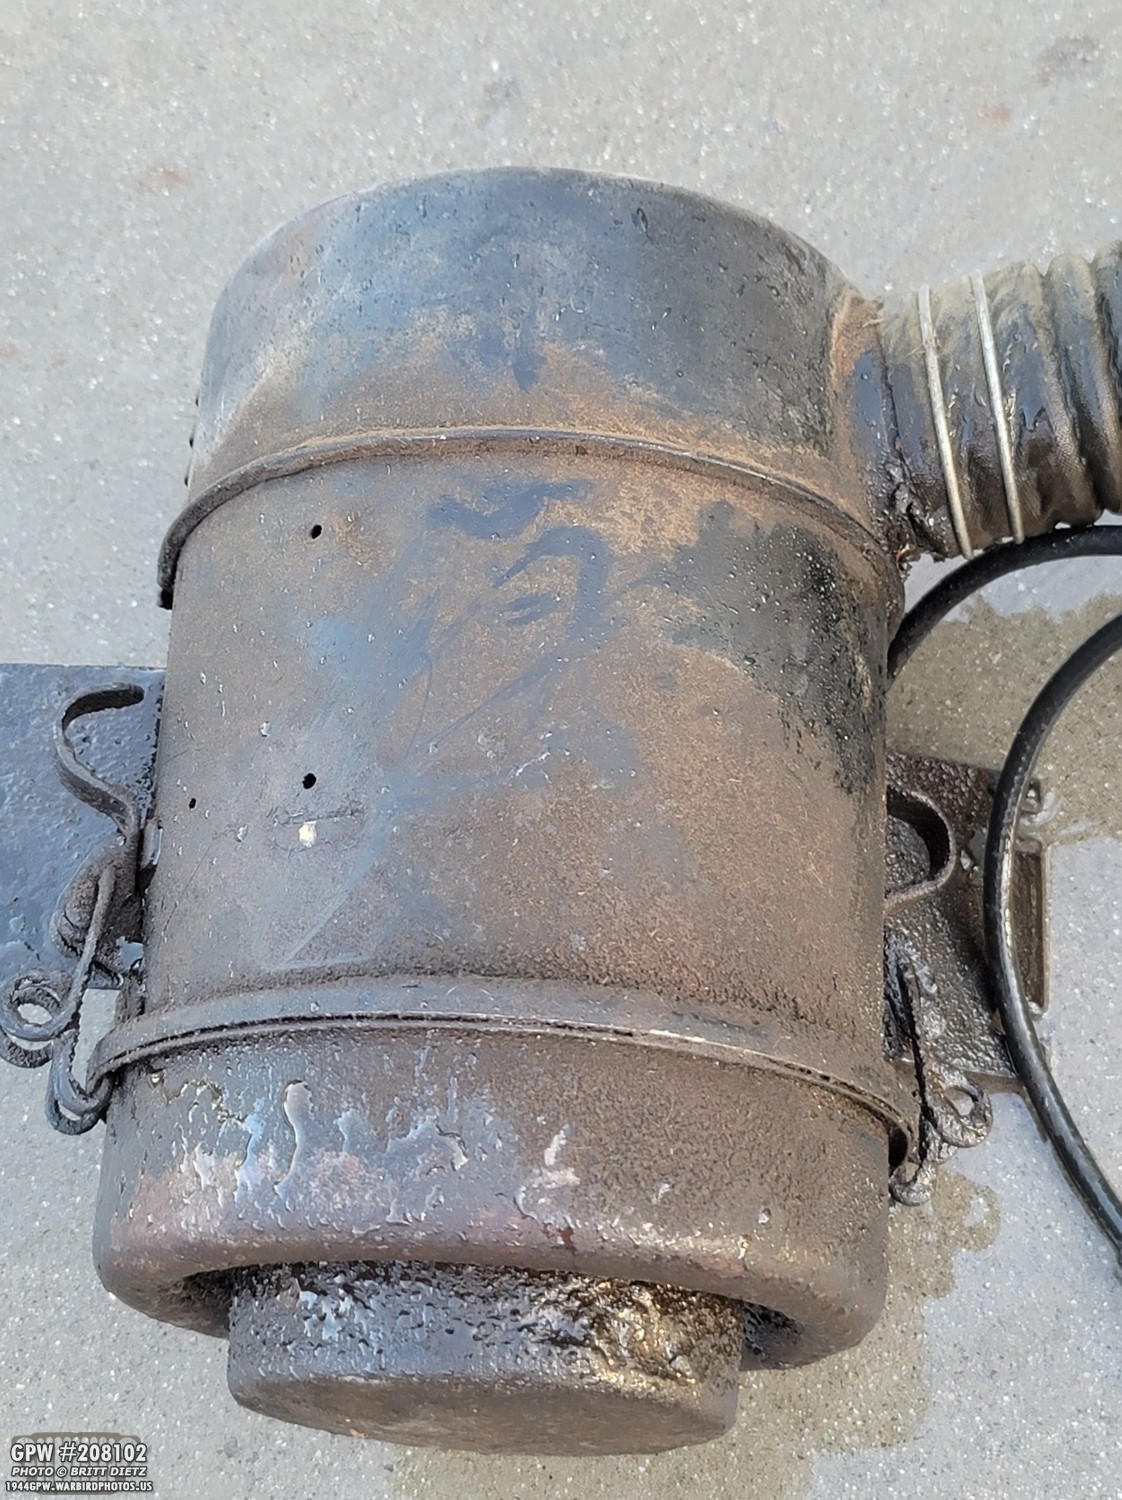
As mentioned in the last update, I’ve been helping a friend out by taking pieces off of his motorpool GPW Jeep and restoring them to give myself another project to work on. One of the recent things I grabbed was his air cleaner, shown here right after I gave it a little bath. It was pretty nasty. After some research, I figured out it’s an early post-war canister.

Not to mention it was heavily bubba’d with the whole back backet pulled off, holes drilled all over, and it actually using wood screws to attach it to the canister! In the last update, I started to weld the bracket leaving some of the holes to use for welding it back onto the canister.
Putting the bracket back on the canister, I tried to match up the same angle as my actual wartime air cleaner on my Jeep. Note that it’s skewed so the wing on the left is closer to the canister clips than the right.

Once in a spot where I liked it, I then took a pencil and marked the holes I left in order to weld it.

Because, once I weld the bracket back on, I would not be able to get paint on the bare metal behind the bracket (but water could get in there), I primed everything. Here’s the marks from the pencil. They lined up with the original mount points on the canister.

I then took a small vertical wire wheel attachment and cleaned those areas to the bare metal for welding.

All welded!

And now all smoothed out. It’s not going anywhere. I could have fixed the large notch cut out of the bottom of the bracket, but this side is not seen so I didn’t think it was worth the time.
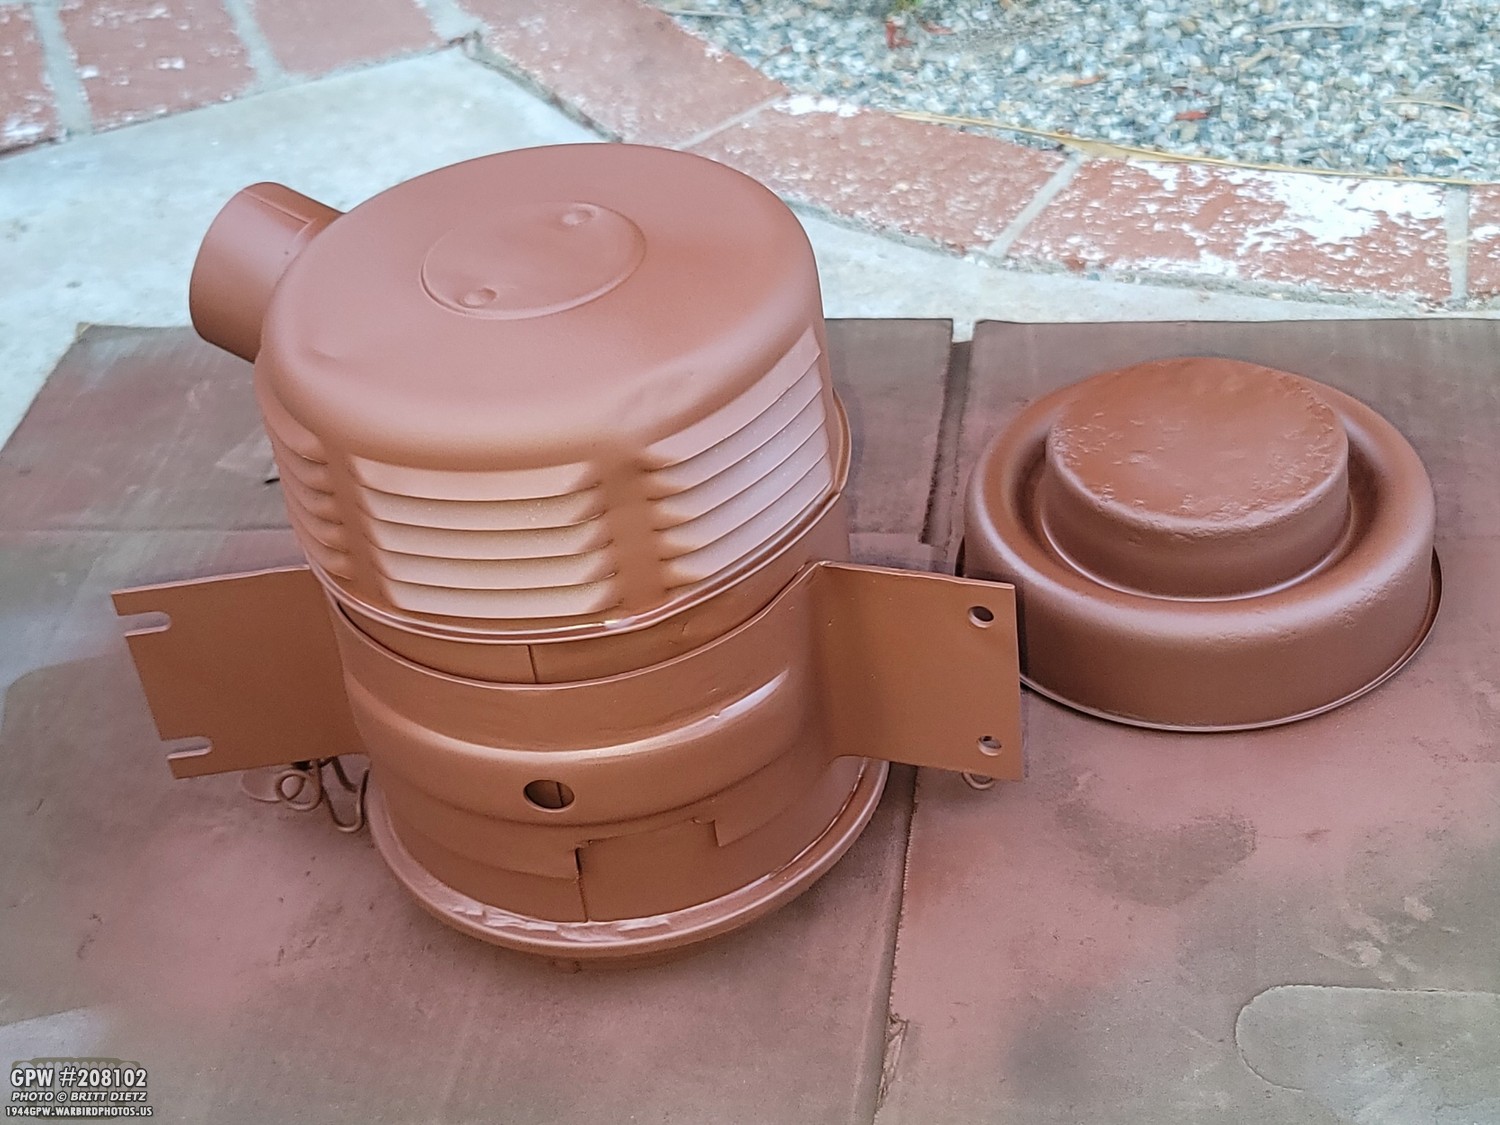
Primed and ready for black paint!

I showed in last update how this canister had some weird large nut brazed to the top of the canister, which appeared to be some sort of vent (but also let water get inside the canister). After grinding down the nut flush, welding it shut, filling the cracks with bondo, and sanding it out, it looks like nothing was ever changed on the top!

First pass at black. It’s more of a satin black, but it’s already looking nice.

After two coats of black, I then added a satin overcoat to protect it and make it easier to clean. It looks nearly brand new now!
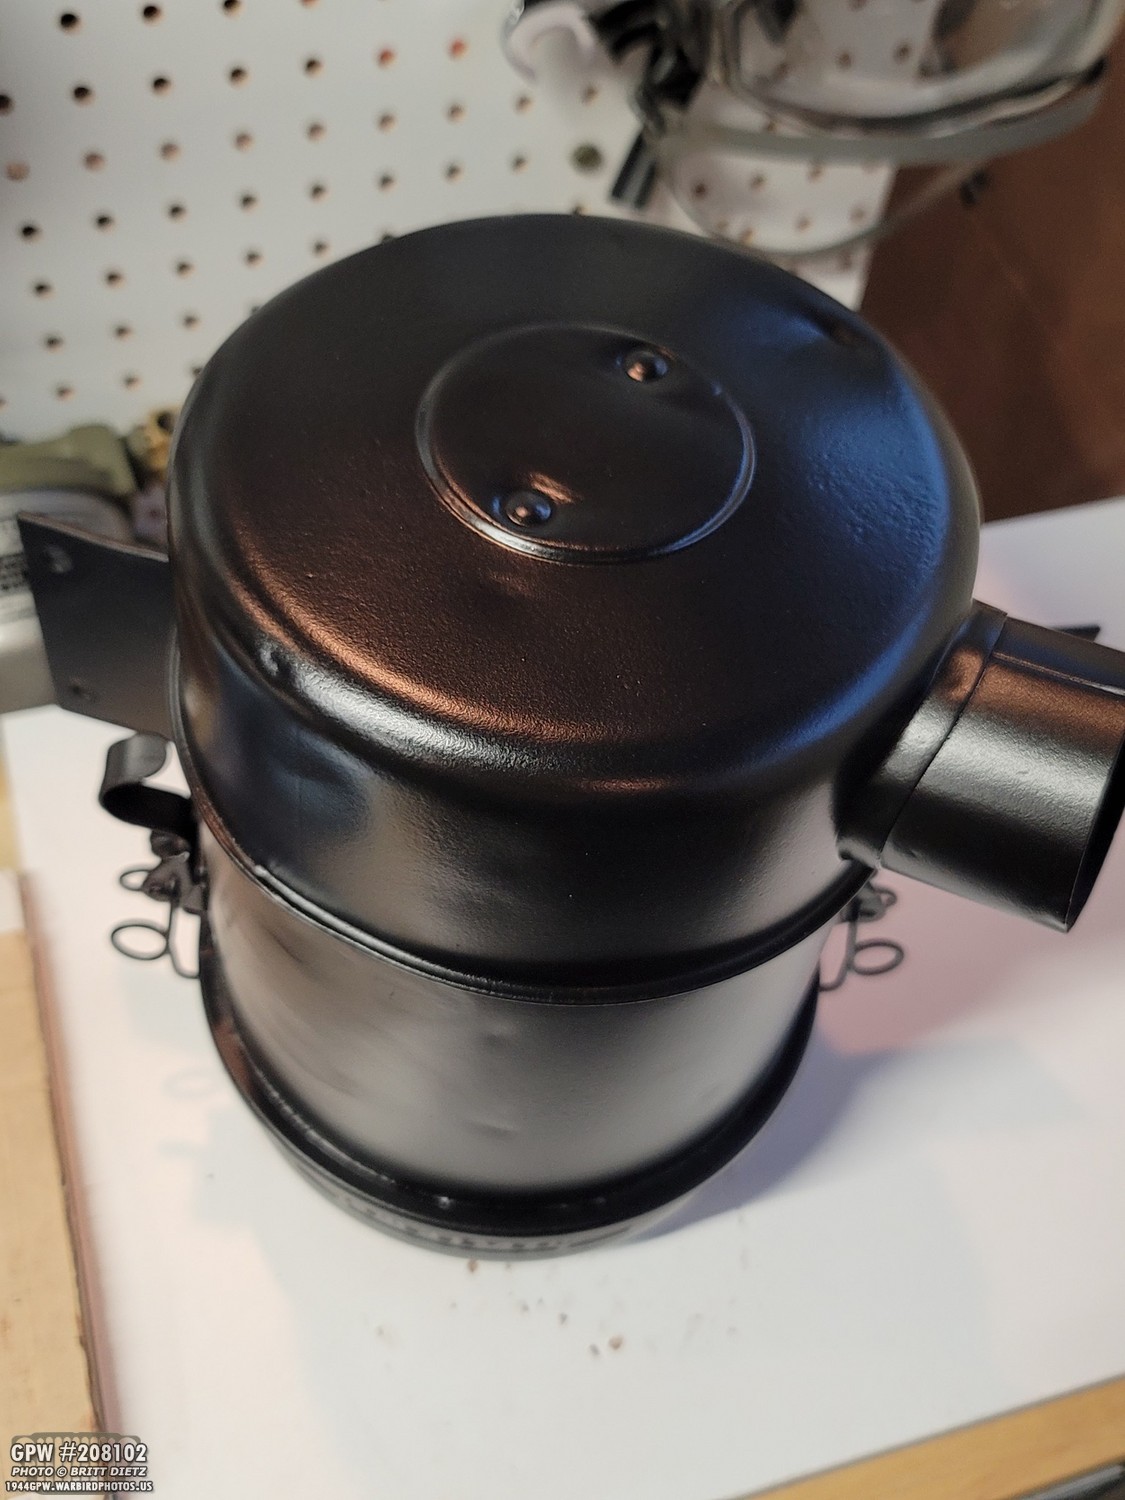
Here’s another look at the top.

Switching to the bottom cup, in the last update I showed how it was a nasty water/oil/crud mix. I cleaned it out and discovered someone had shoved a Folgers coffee can from the 1970s in there to stop the cup from leaking. After a mult-day cleaning, I then found out why… LOTS of holes in the metal.

Attempting to weld it would have been a disaster with the thin pitted metal. So, I cleaned it all up then used JB Weld Steel to seal up the holes.

I then, for added protection, added a coating of Red Kote fuel tank liner.

All dry! This thing will not leak again in my lifetime. BUT, we’re going to use a modern dry filter in there anyway. This was more for future owners of this Jeep who might want to switch back to oil.

Primed, painted, and clear coat sealed!

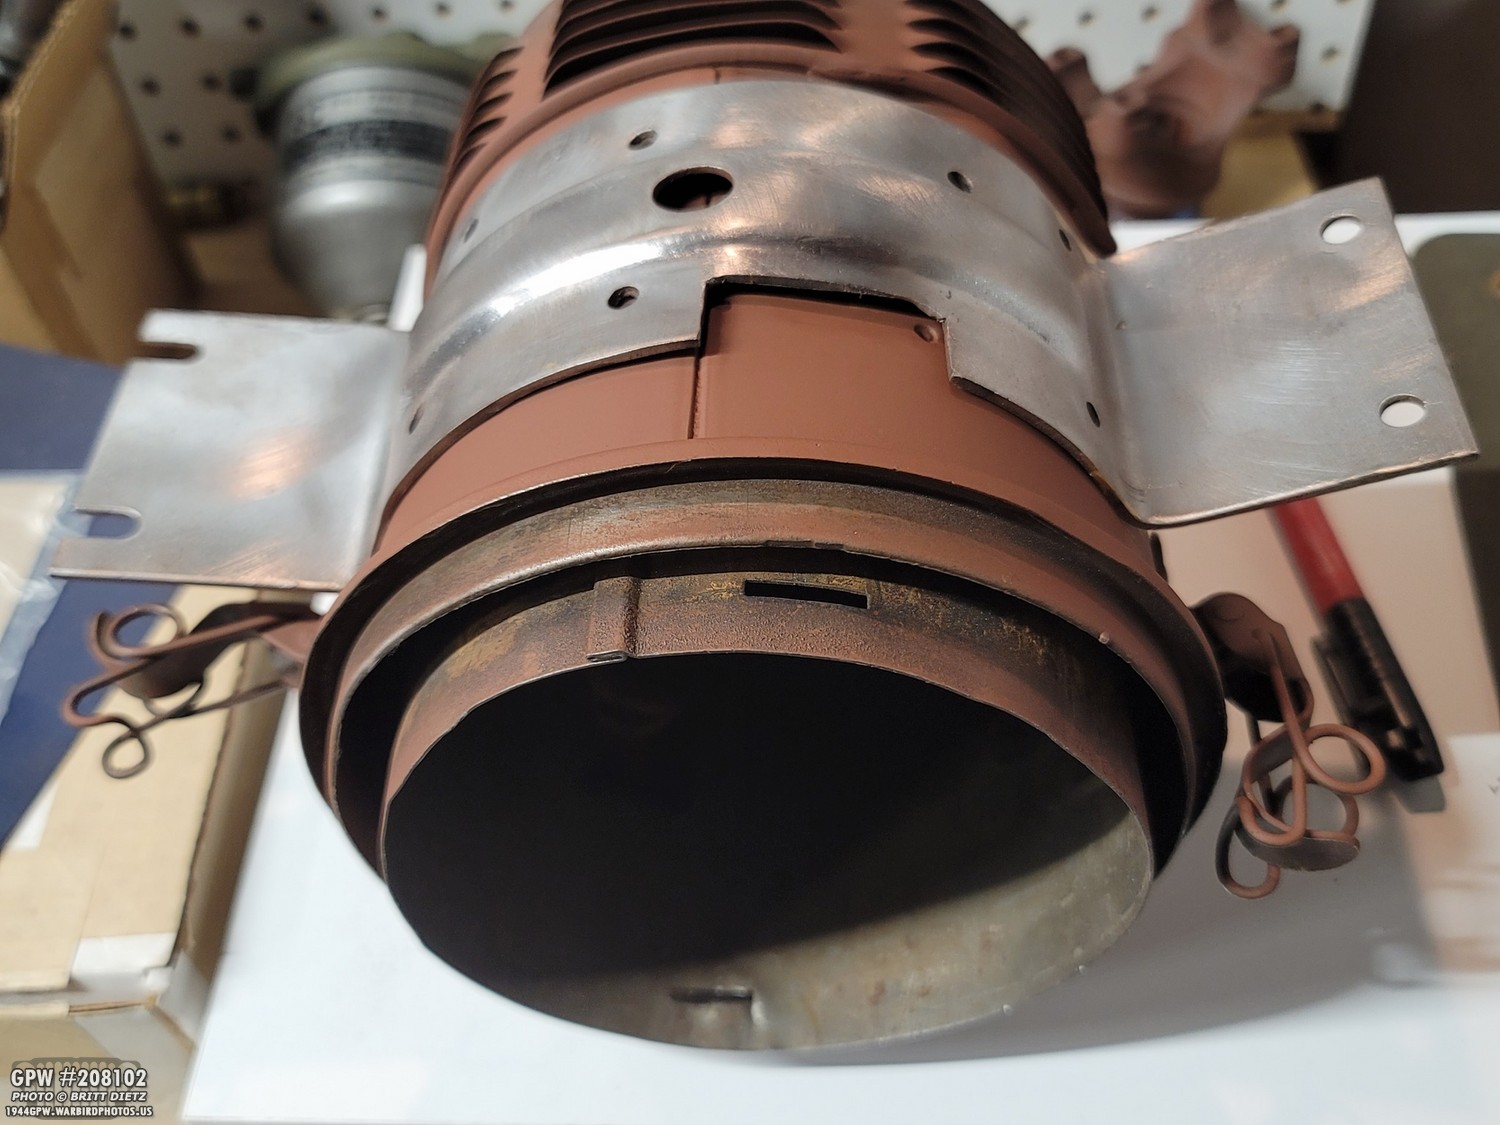
Here’s the finished product after drying! Just needs the dry filter, and it’s ready for attachment. You can see there are three sets of vents on the canister. I originally thought this might be a rare early air cleaner, but it turns out this one is indeed post-war. My friend wanted to still use it as, aside from the three vents and a double H stamp on the bottom of the cup instead of a single H stamp (wartime), it looks the same as a wartime one. No point in spending a $200 for a wartime one.

One other touch to add will be a decal for the front. We’ll get that on Ron Fitzpatrick Jeep Parts.

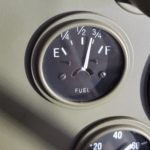
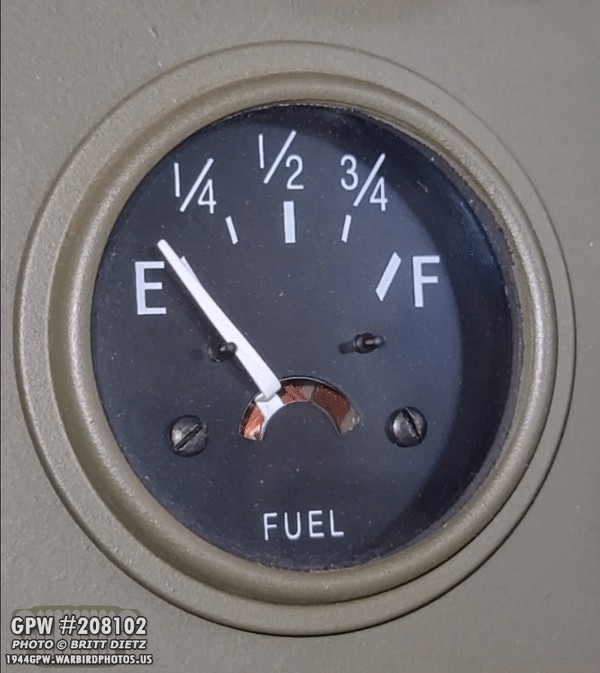
A few updates back, I solved the issue with my fuel gauge always reading empty. Turns out, for the second time, my brass float sank in the fuel. On a whim, I Red Koted the fuel float, and that actually worked for many weeks! But, I knew the fuel level the gauge was saying wasn’t anything close to what I actually had. Here, it shows almost 3/4 full, but I knew I was less than halfway. So I decided to try and get the gauge to be closer.

Looking down at the fuel tank, here’s the level I had. The standard Jeep tank can hold 15 gallons of gas. So, before I could really go further, I need to figure out how much I had and how I can find some sort of marker to aim for when calibrating the fuel level.

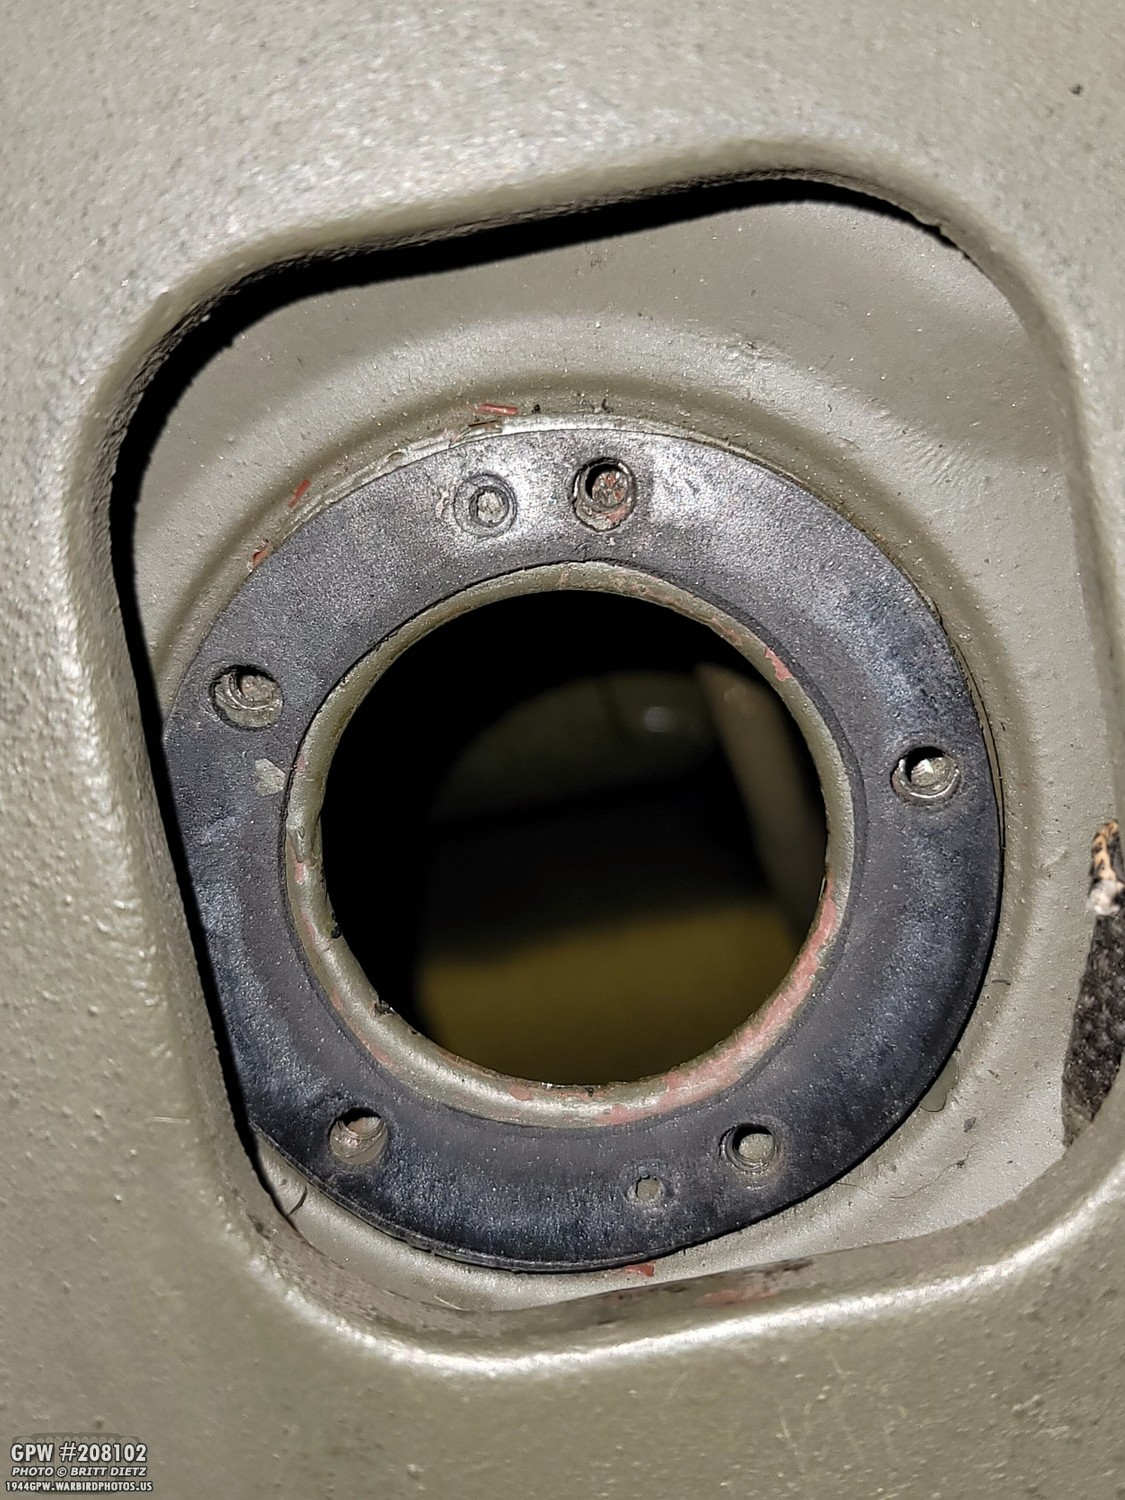
Removing the fuel filter in the tank, I could see down into the sump area of the tank and figure out exactly where the fuel level was. As you can see, the fuel line is right at the curve where the bottom sump area goes into the larger overall area of the tank. This would mean I have about 5 gallons in the tank, or roughly 1/3. That bottom sump area holds 5 gallons.

As mentioned before, the way the fuel gauge displays the fuel level is by measuring a resistance that is changed as a long arm is raised and lowered. On the end of the arm is either a brass, cork, or plastic float that should keep it on the top of the gas. As the gas is lowered from use, the arm will fall. The change in resistance on the sender will be read by the fuel gauge, and the needle moves. Obviously the more the arm is moved up, the more fuel it reads. Moved down, less fuel. It’s common for the floats to spring a leak and fill with fuel causing them to sink, which will result in an always empty reading.

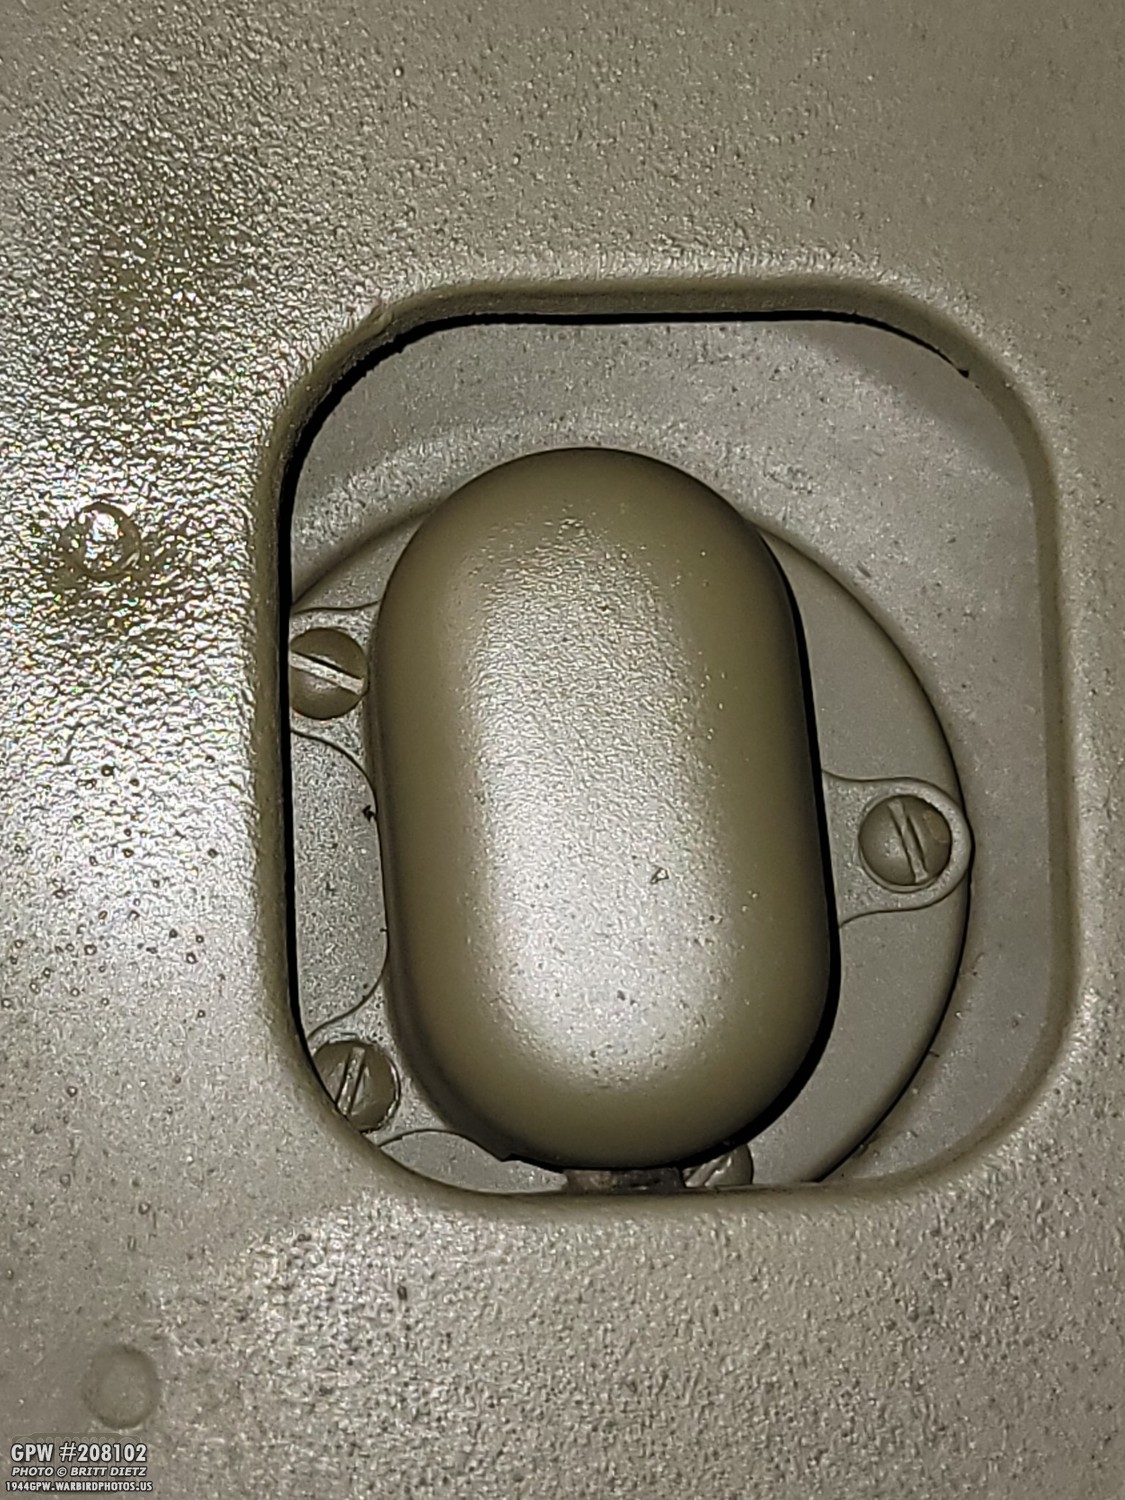
Now that I had an idea where the fuel level was, it was time to take out the sender. One thing I thought was helpful to show, it can be tricky trying to get the float end out of the small hole, and it’ll seem like it will not come out. To get it to come out, pull out the sender just like the direction shown, and you’ll find the float will come right out.

With the sender out, the question now becomes, how do you adjust the sender to show the proper fuel level, providing the float is not sinking? Well, you will have to bend the arm. There are two bend points you can use. Here’s the first one, where the arm turns to the longest run. You can bend right at that turn to make the float higher or lower.

The second bend point, depending on what repro sender you have, is around here. You can see that this sender bends up slightly already. I can either bend it more there or make that bend more straight. So how do you know which way to bend it?
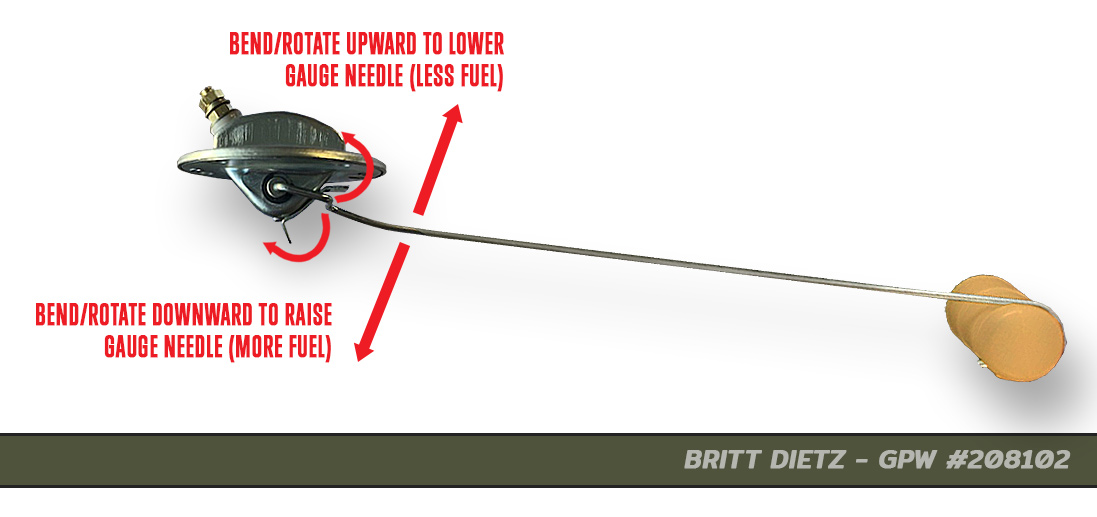
The general idea is that if you bend the arm up so the float is higher (from either of the two points I just talked about), then that will make the gauge read LESS fuel. So if you find you are showing too much fuel, you’ll want to bend it up more. If you are showing too little fuel, you will need to bend it down so it reads MORE fuel.

It’s hard to figure out where 1/3 is on the gauge since the marks are set to Empty, 1/4, 1/2, 3/4, and Full. So I added a little more than two gallons to make the total just above 7 gallons. That should make it roughly half full (perhaps a little below half). So that’s what I’d shoot for, bending the arm so that it shows just under 1/2. You can see the higher fuel line after adding the extra 2 gallons here.

And you’ll want to put the fuel filter back in as well since that will slightly change the fuel level as well.

So, after the first bend attempt (raising it up so that it shows LESS fuel since I have about 1/2 in it, but it originally said close to 3/4). So it’s getting closer. This is a lot of trial and error, bending the arm, putting the sender back in and screwing it down, turn on ignition and see the fuel level. If it’s wrong, turn off ignition, remove sender, and start over.

After about 3 attempts and not getting where I wanted, I decided to test the range of this repro sender to see where I would need to rotate the arm to get FULL and where to get EMPTY. So I took it out of the tank, rigged a ground line, hooked it up, and moved the arm manually and watched the fuel gauge move. Turns out, a full tank is NOT with the arm all the way up. In fact, it’s about 1/4 of an inch from the top when it reads full. Hmm. So I had a thought, what if I try to bend the arm so ‘full’ would read with that gap I discovered.

So I moved the arm to where the float was more lined up with the sender, but making sure I left that 1/4 inch gap between the top lip of the sender and the arm.
And I wanted to note, this darn rubber gasket for the sender was a PAIN in the you know what as it liked to move when screwing down the sender. So, I added a little bit of glue to the backside and glued it down. That was a massive help so it wouldn’t move. And if I need to replace it someday, it’s easy to pull off.

So it was time for the moment of truth… did my thought process of aligning ‘full’ with that gap I discovered work? Turned on the ignition after getting it screwed down… and SUCCESS! Just a little under 1/2!
With it working great, I went ahead and screwed all the screws on the sender and put the cover on. I then touched up the paint.

I think went for a drive. What I didn’t realize at the time, but I see clearly in this photo… look down at the fuel gauge… what do you see? Yup, it’s showing empty.
I noticed it as I pulled into the garage. It was showing empty and not moving. WHAT?!?! It was just working! All the hard work down the drain. So, I immediately pulled out the sender to see what’s going on.
Turns out, taking out and putting in the float several times over and over as I was trying to get the arm bend the right way must have cause the brass float to spring another leak, as it had filled up with fuel and sank. DOH! But no fear, I had a new plastic one I had bought from Kaiser Willys Auto Supply ready to go! So I swapped them out.

I hooked it all back up again and flipped it on… crossing fingers, and it worked again! So far, about one week later it’s still working. This new plastic float is said to be designed to withstand the modern fuels, even California’s very corrosive fuels (remember, I have a ‘bucket O fuel’ in my garage I use to soak parts in to clean them!). So now that it’s back to working, I’ll report in a future update on how it’s going, and if the fuel level is accurate or still needs fine tuning.
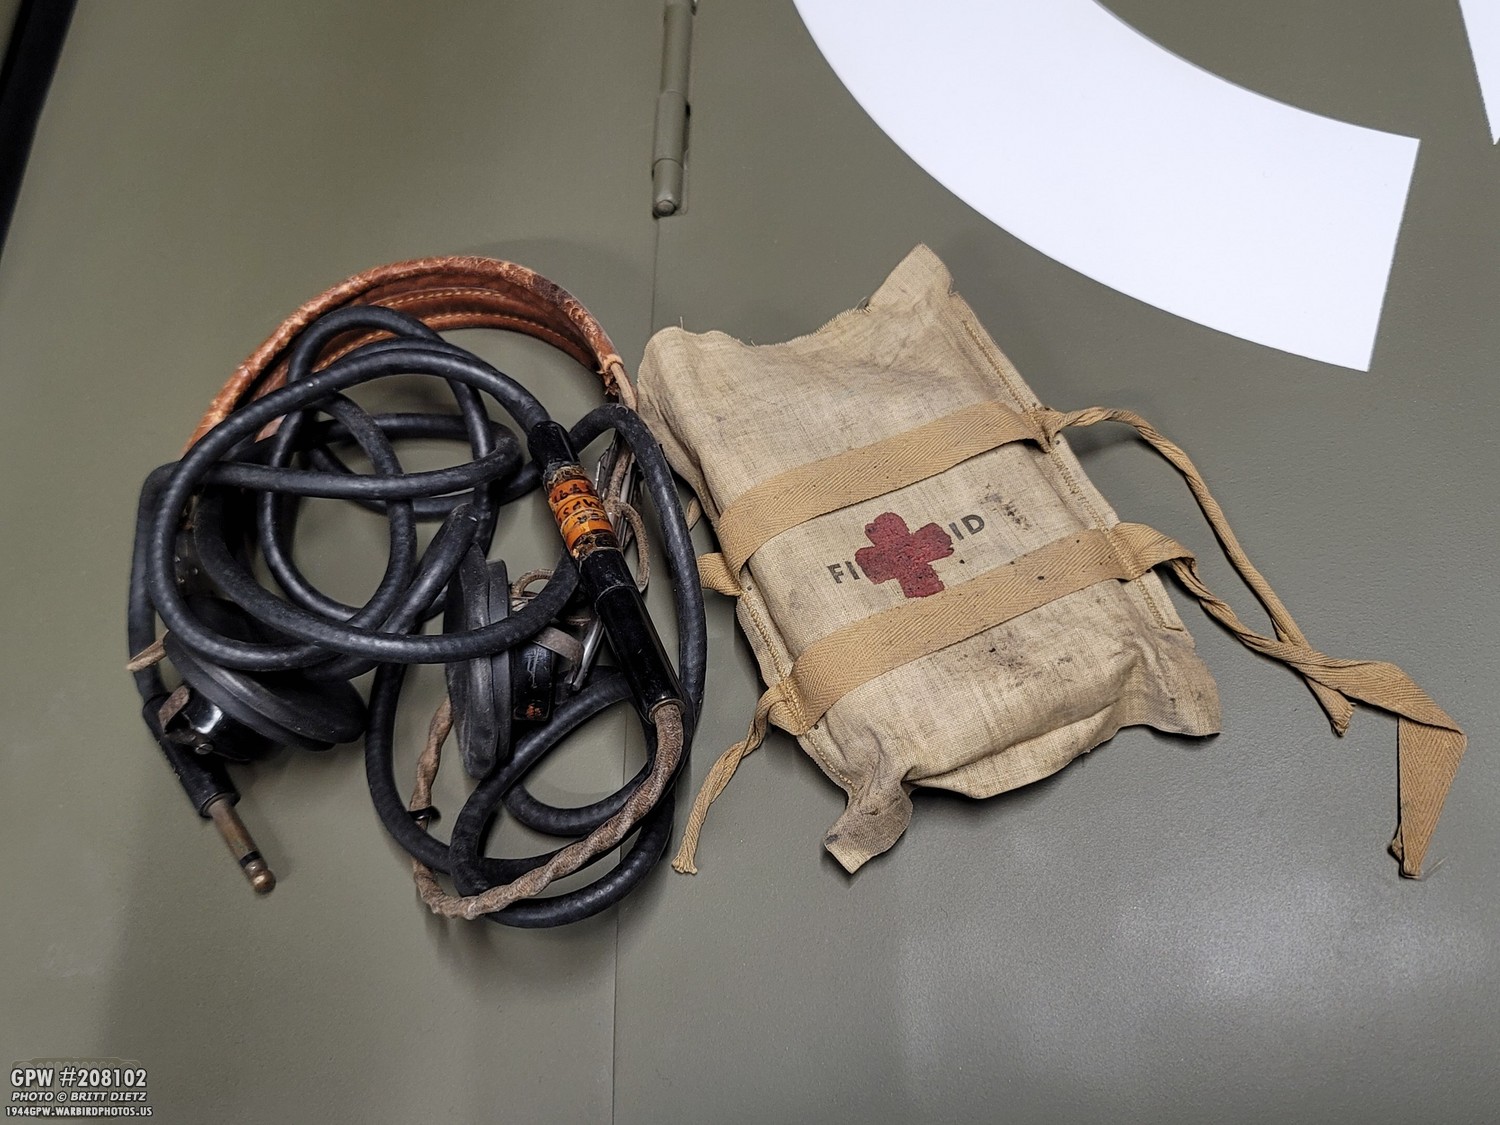
Moving on, last weekend (5/30) I went to a local flea market and picked up some interesting WW2 items. I got these two original items (headphones with harder-to-find extension cord) and an opened but original second pattern first aid kit. The first aid kit had two of the original medical items inside too, which was neat.

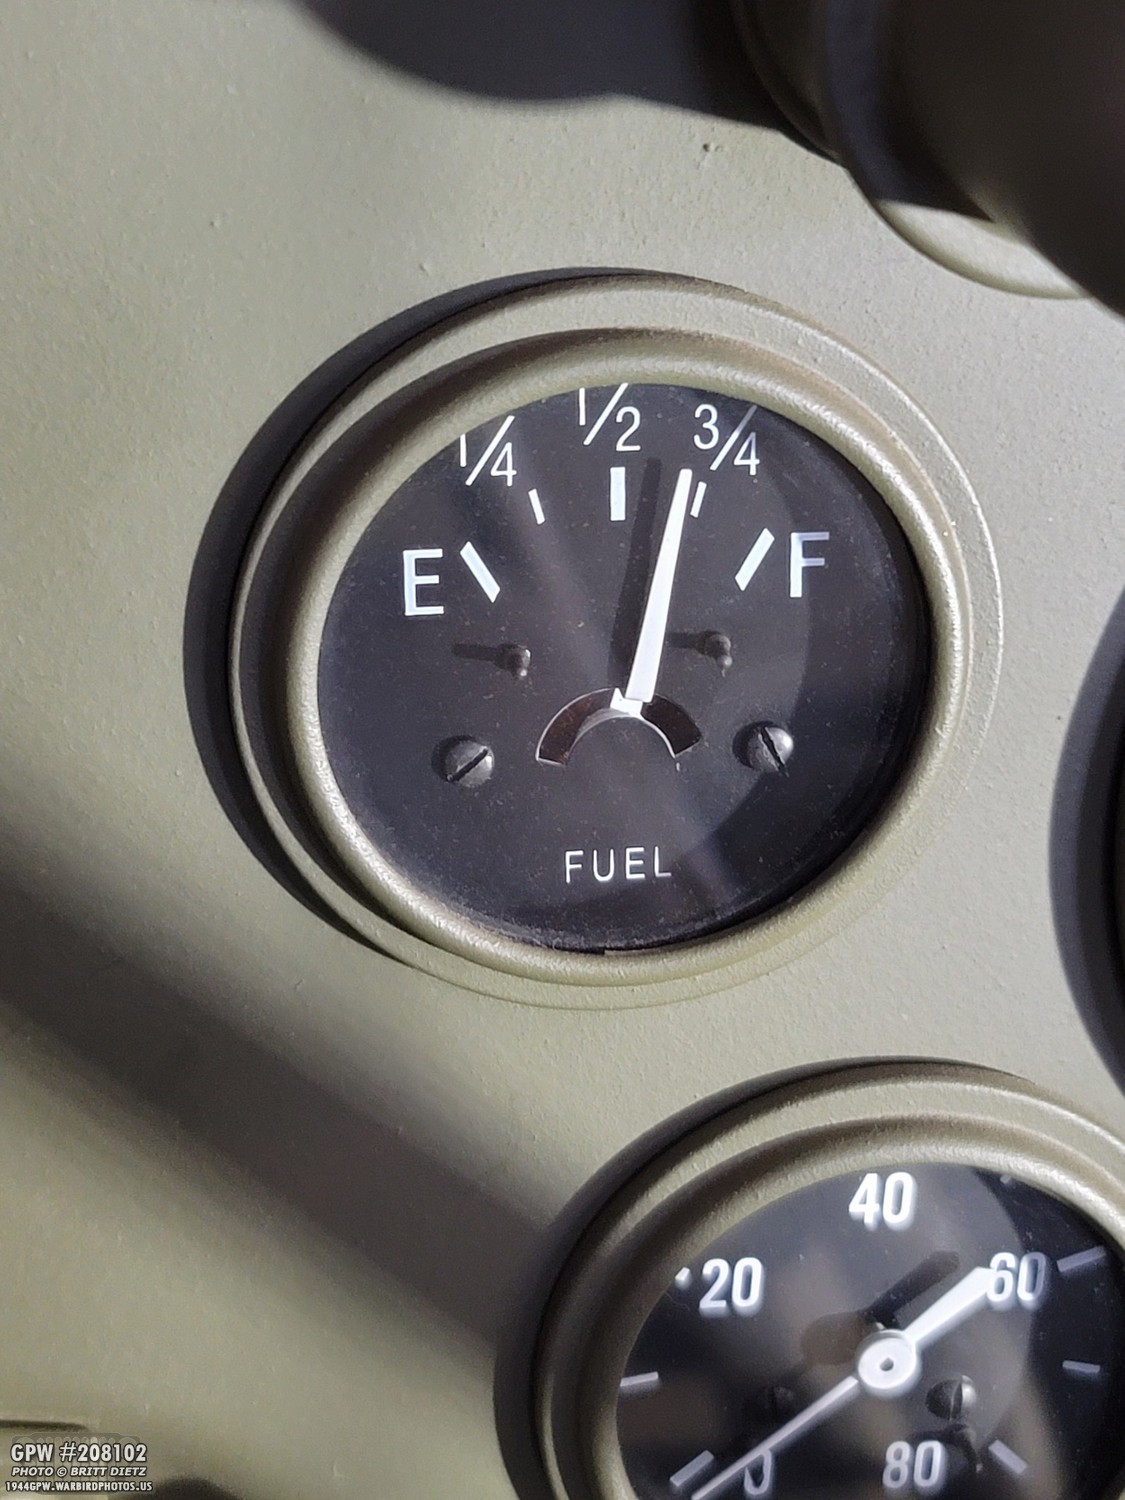
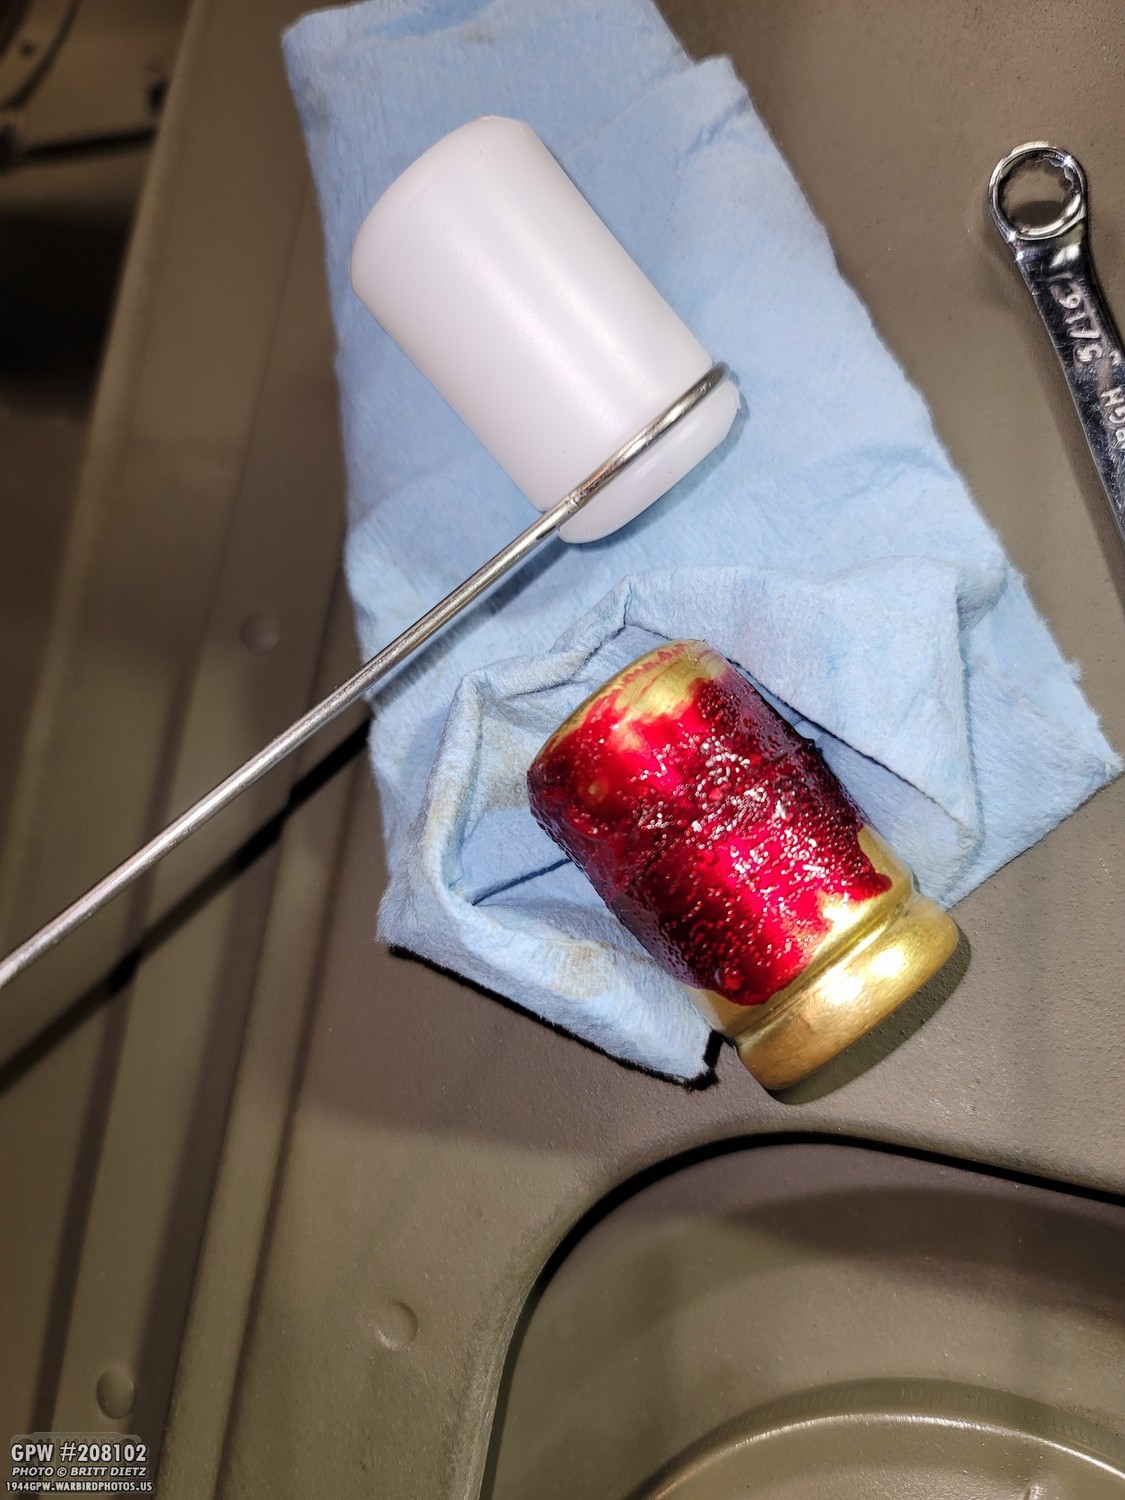
I also found this gem, which I got for $20. It is an original wartime EARLY SOS Fire Guard fire extinguisher!
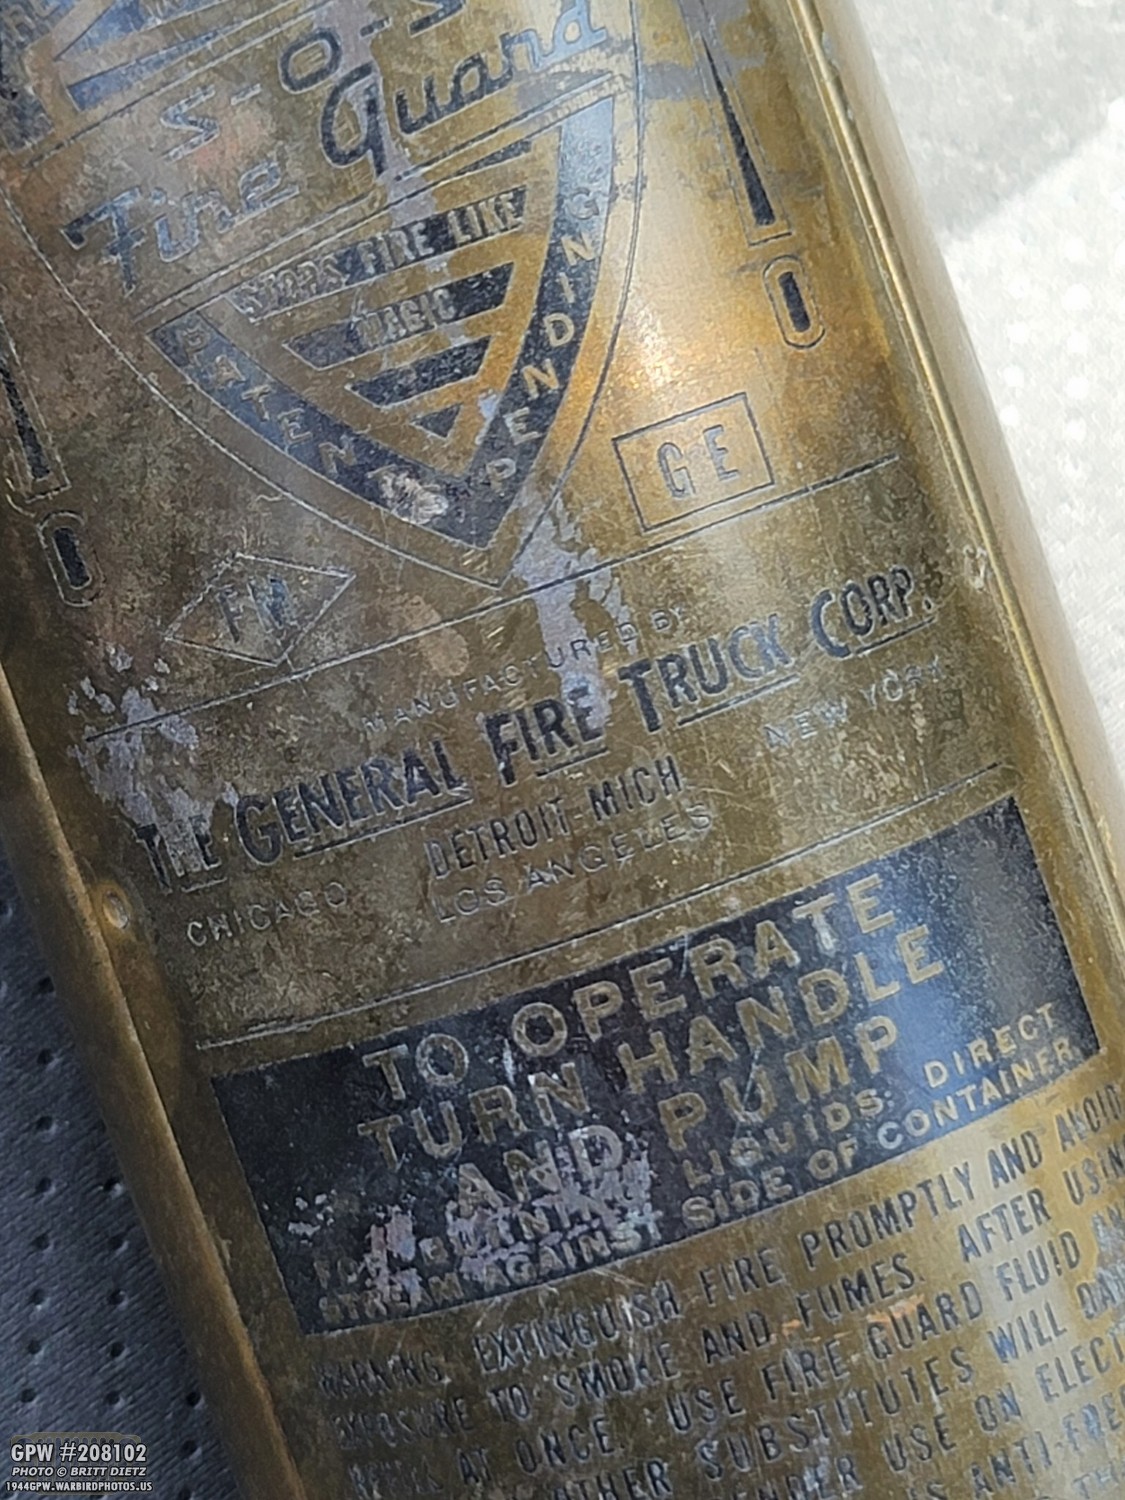
It is the rare General Fire Truck Corp version used on early Jeeps including slat grills and script jeeps.

And even cooler is a 1941 dated stamp on the bottom right.

It has all the tell-tale signs of being an extinguisher that would have been used on Jeeps during the war. I already have an extinguisher on my Jeep that’s more the mid-late style which I restored and put a perfectly replicated decal that I made. I go in-depth on the restoration of that extinguisher in previous updates.
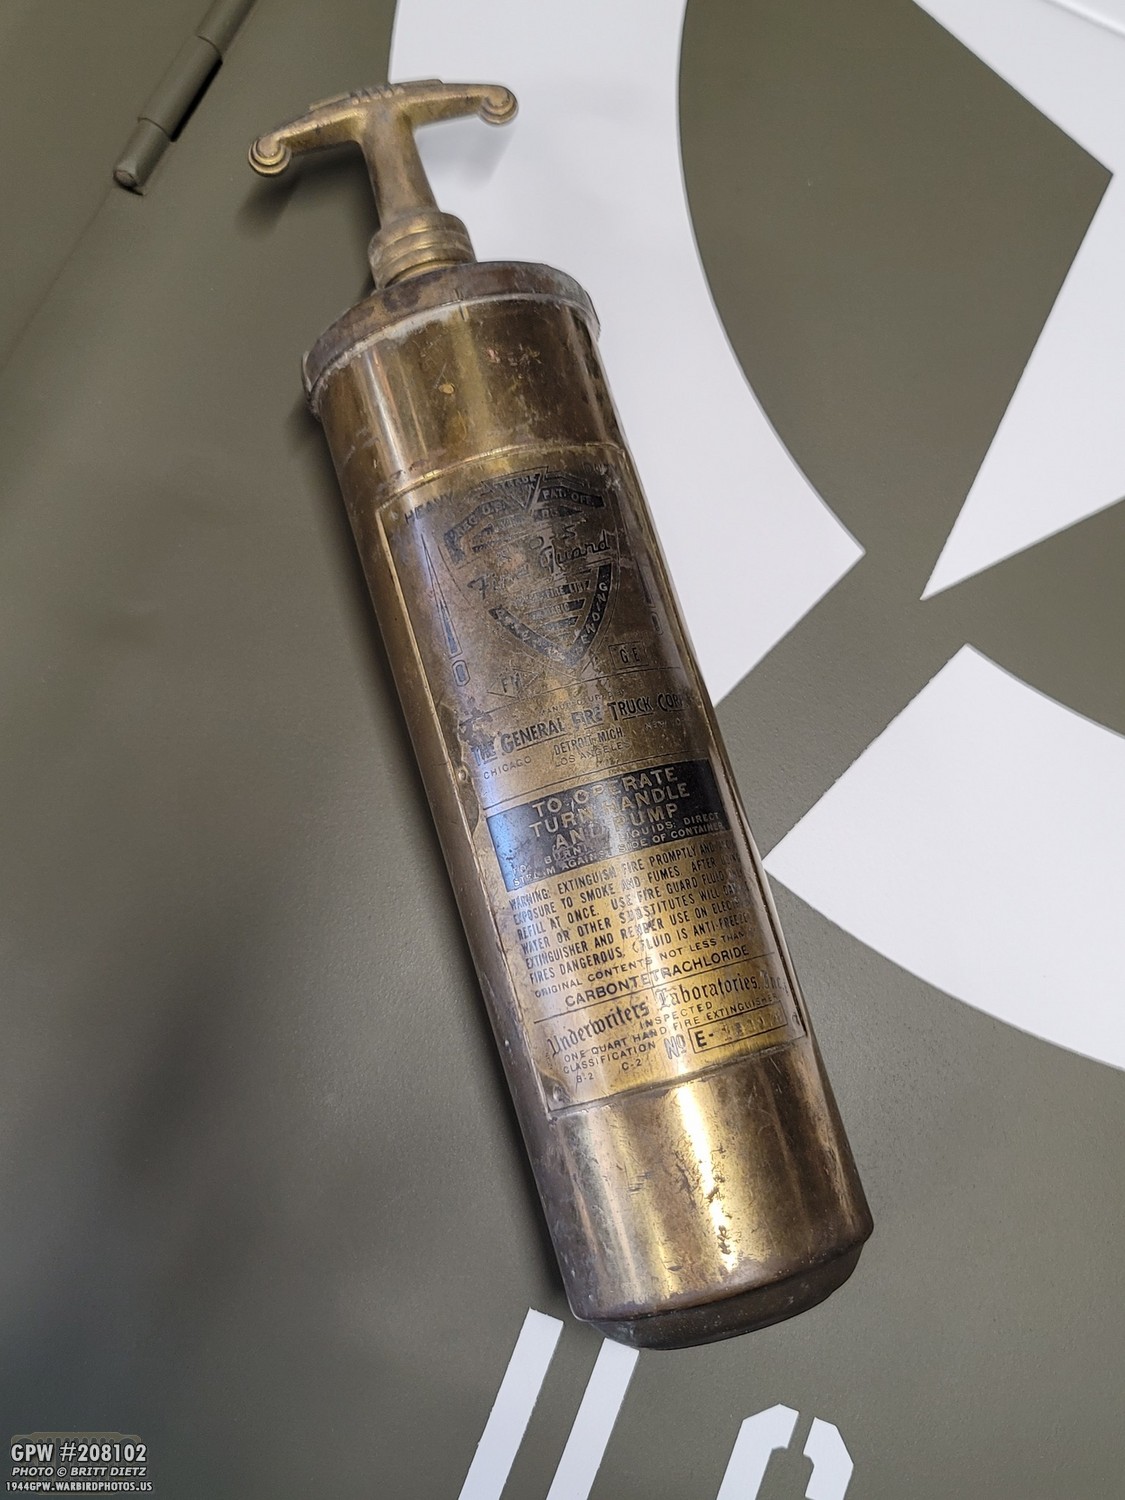
Here’s the extinguisher after giving it a quick bath to remove the dirt and dust.

I thought long and hard about what I wanted to do with this extinguisher, especially since it’s rare. I could clean it up and sell it, or use it as a wall art piece.

I pulled out my other SOS Fire Guard extinguisher, which is the mid-late war style with the decal rather than the brass plate. Here’s a look at them both. The particular decal version was used probably on a wartime firefighting vehicle given the red paint vs OD.
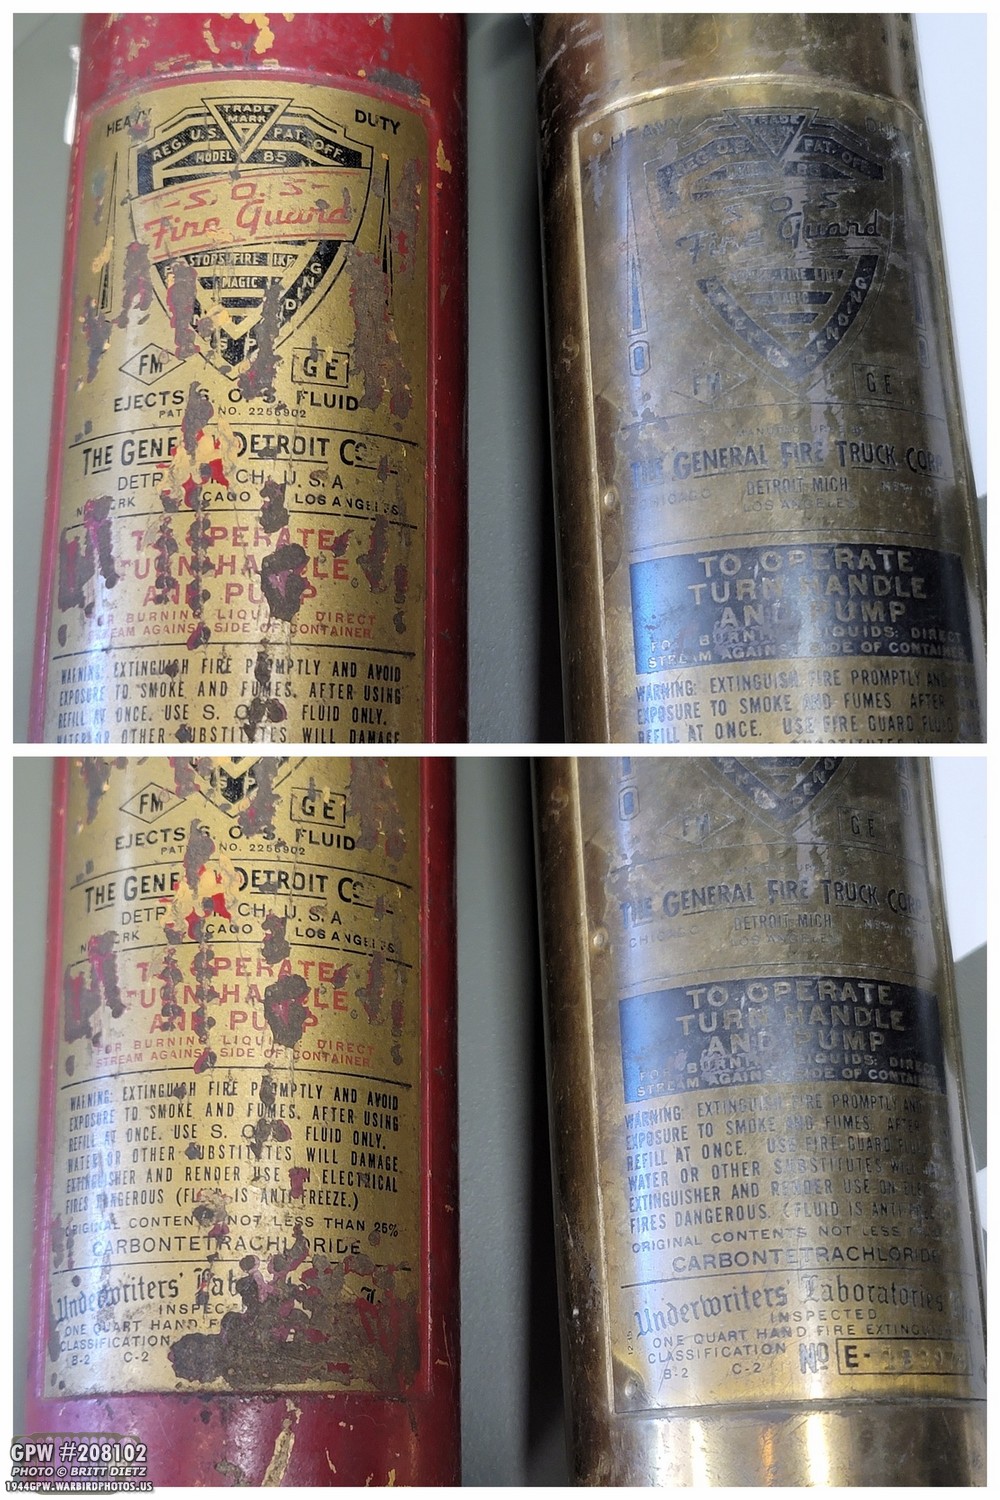
Here’s a look at the decal vs brass plate.
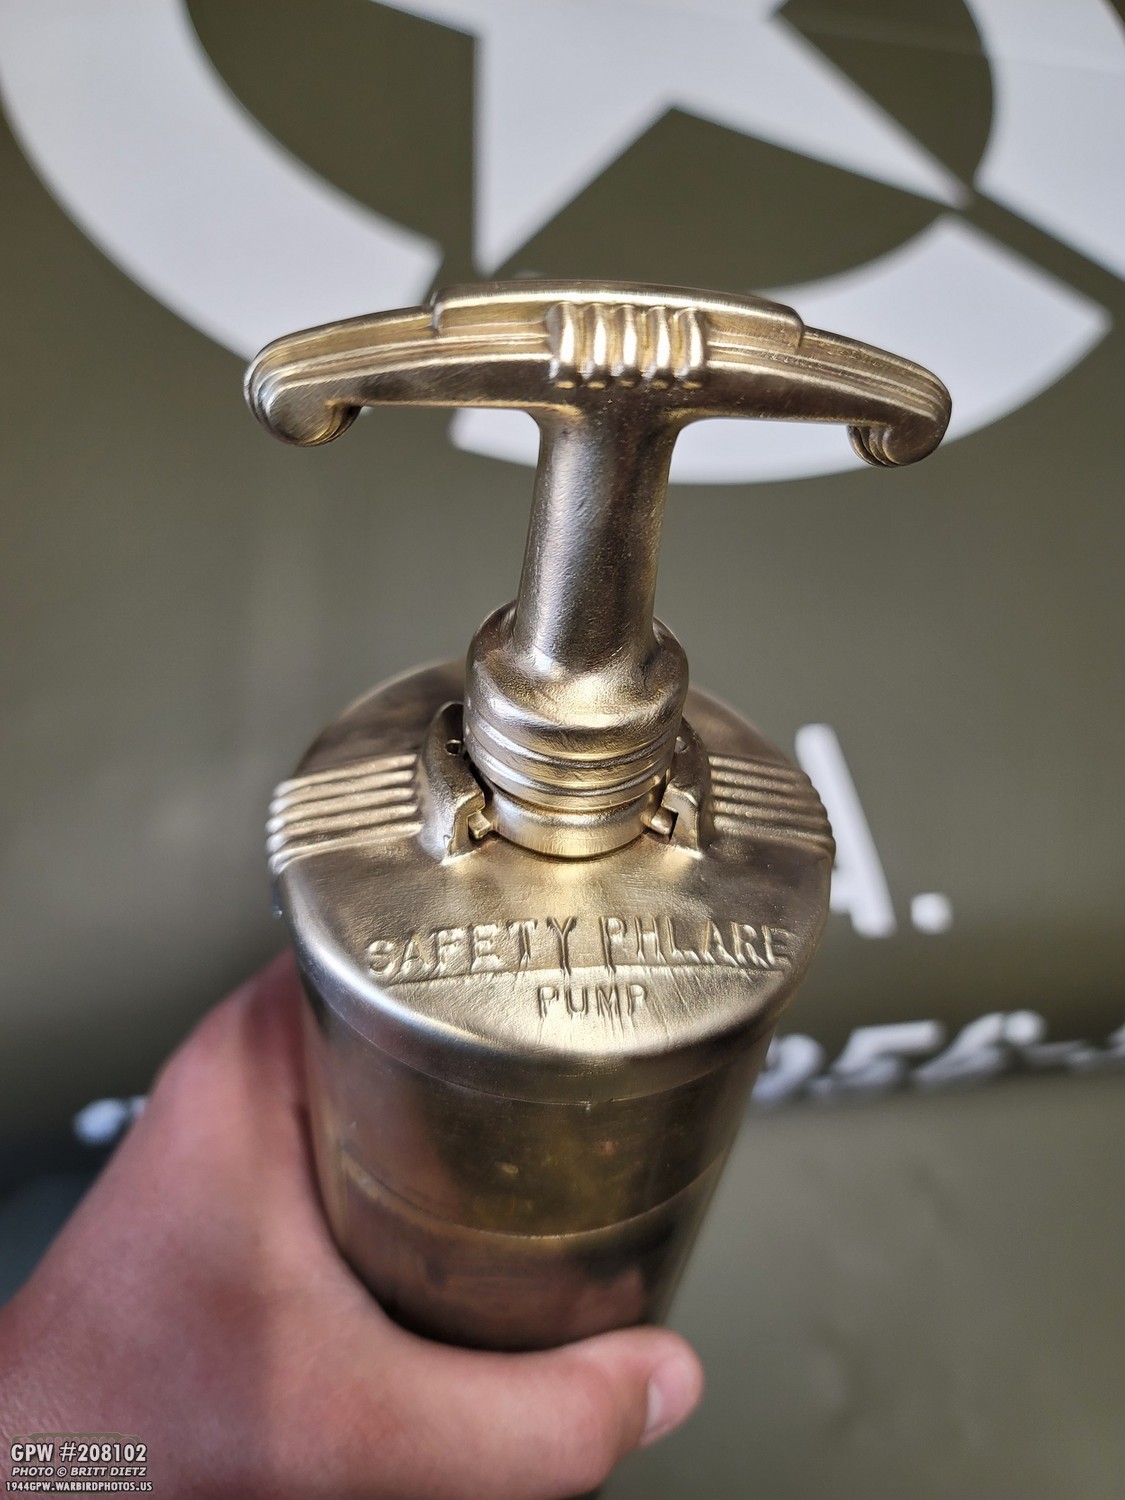
I decided, after some thought, to clean it up. so I started to clean up the handle.
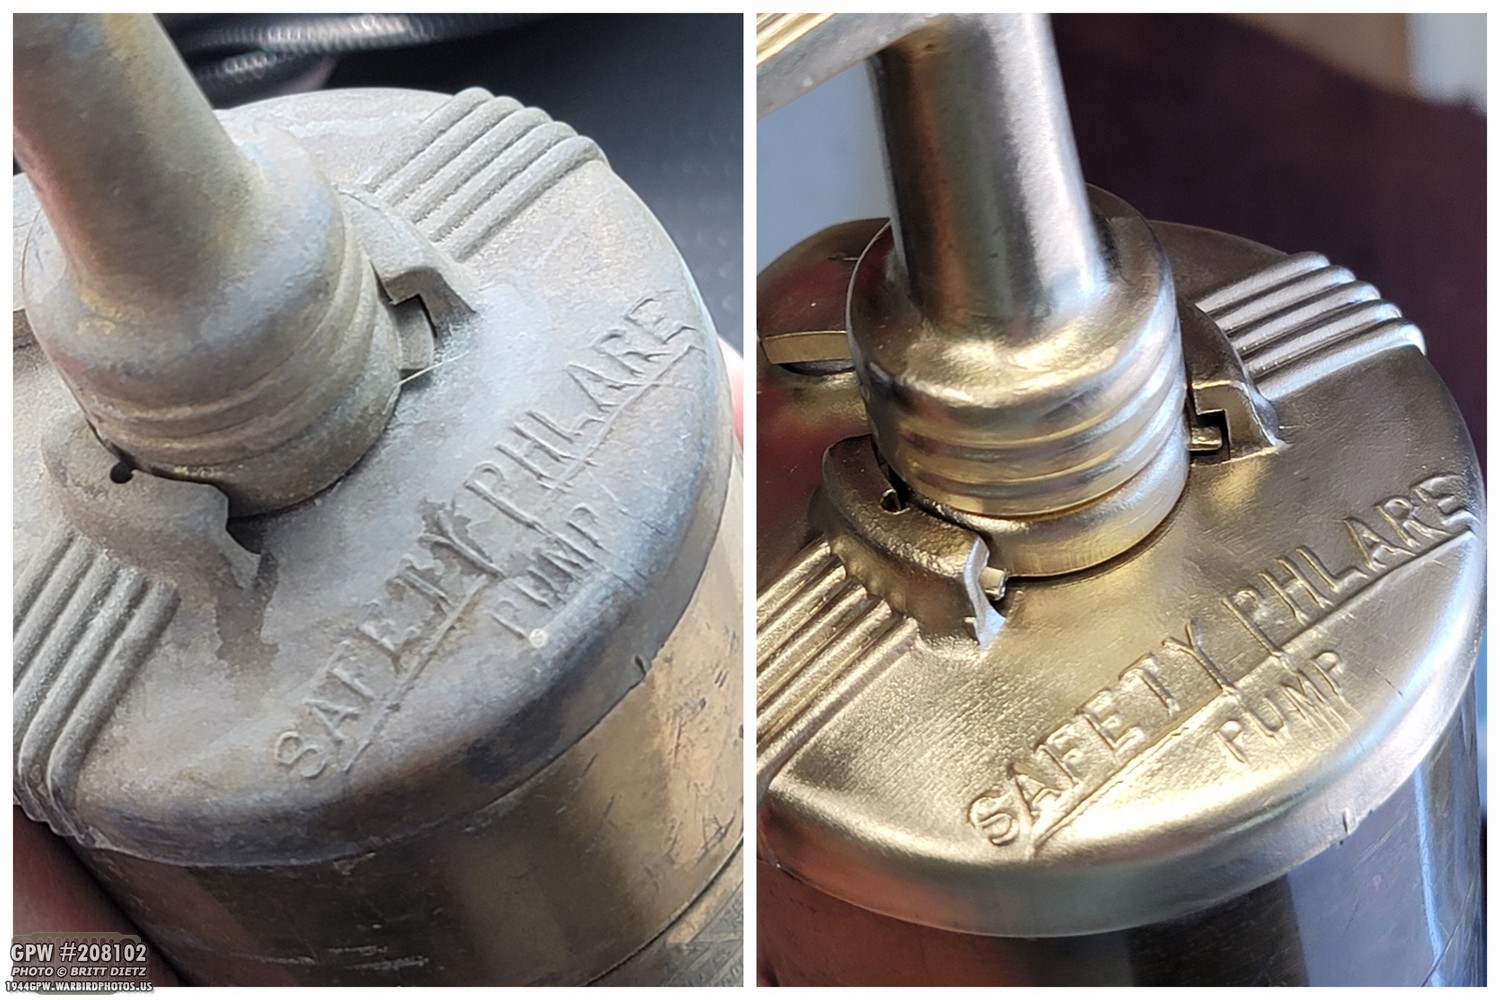
After about 20 minutes of work, what a difference!
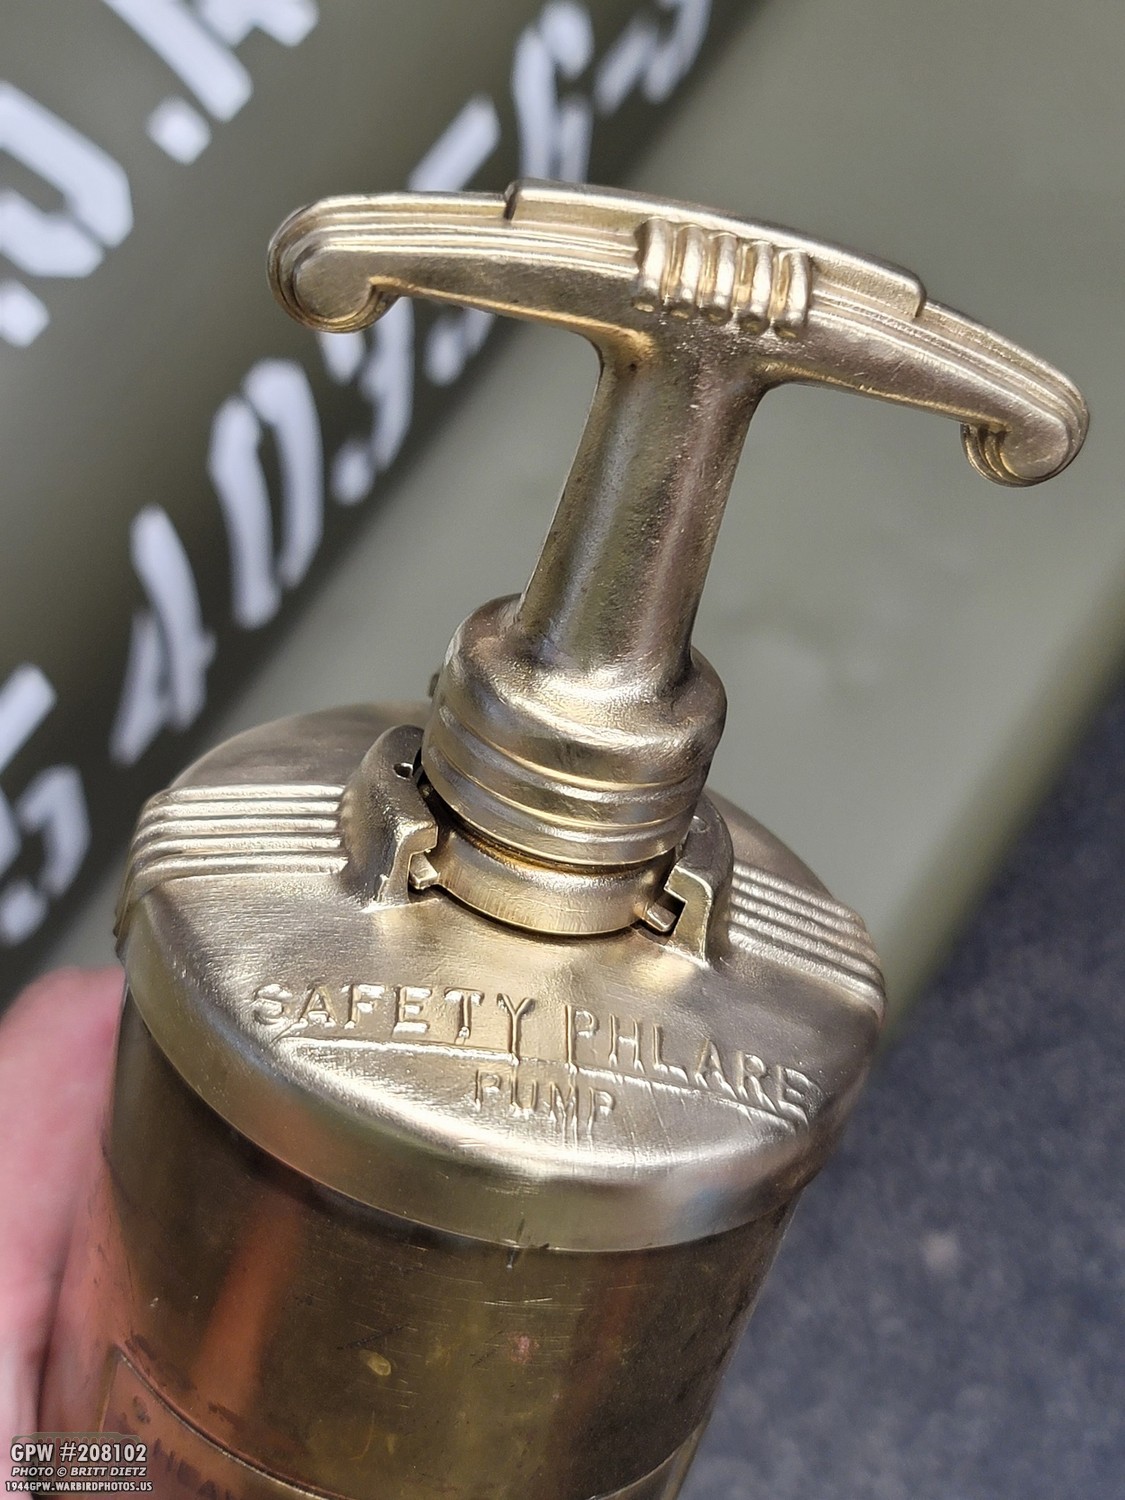
It’s really starting to look nice!
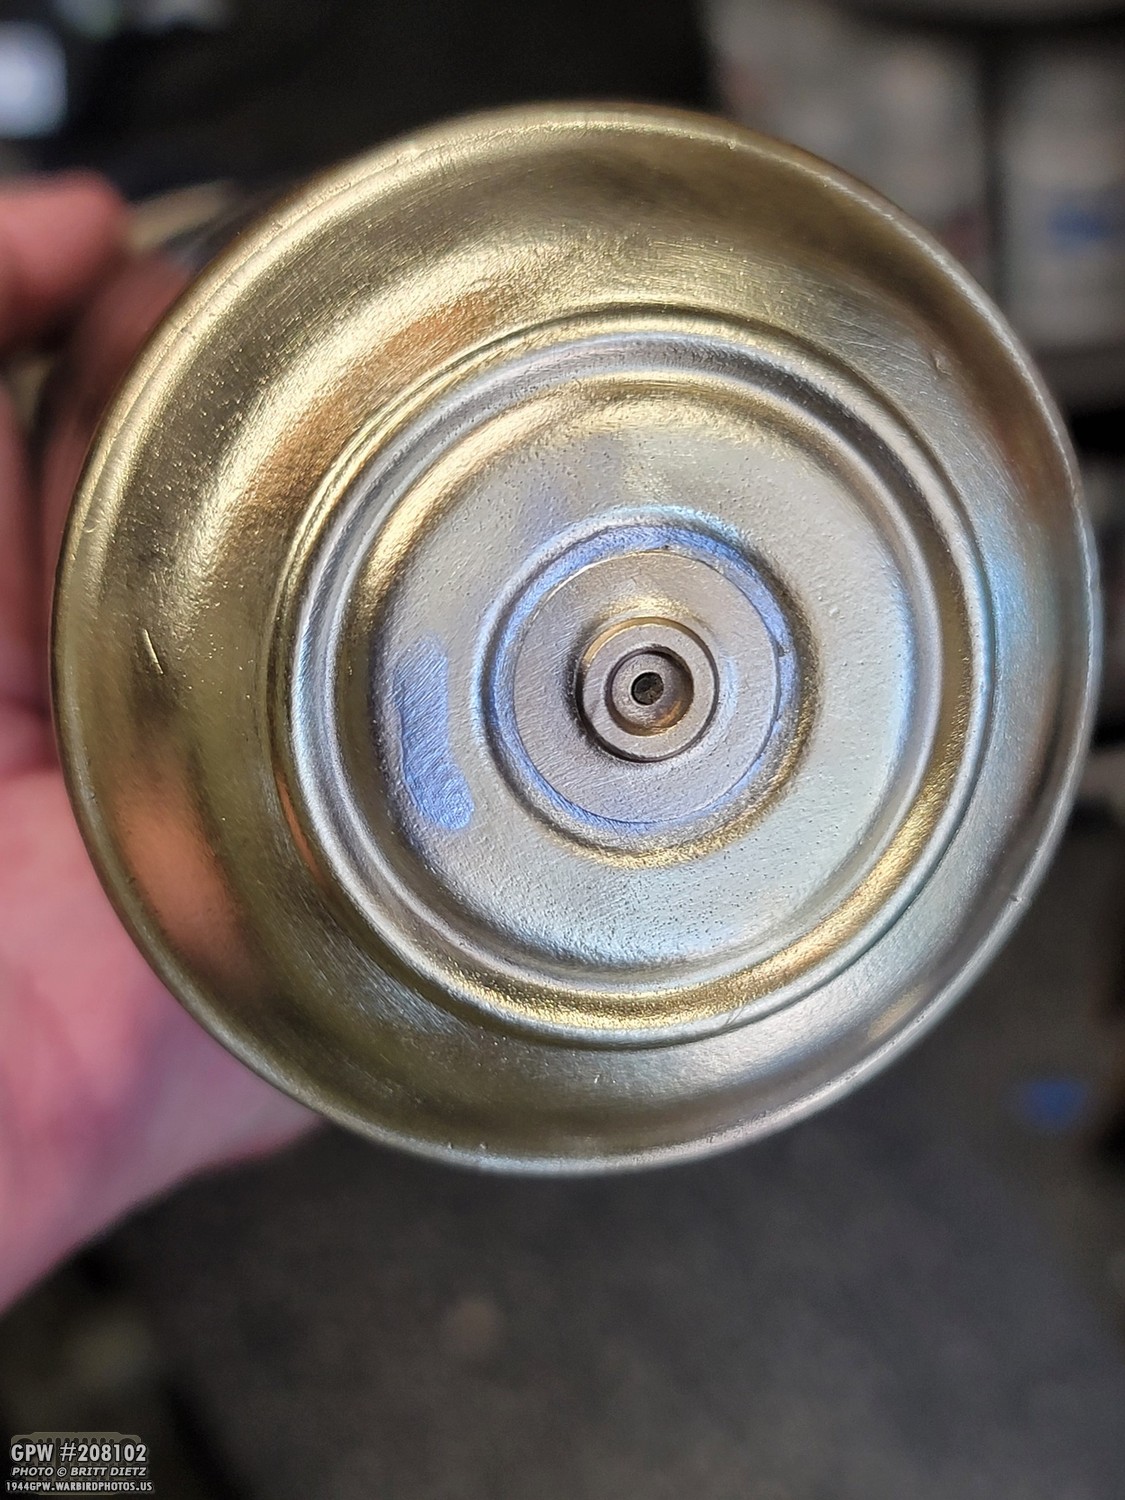
I also worked on the bottom. It’s also coming out really nice.
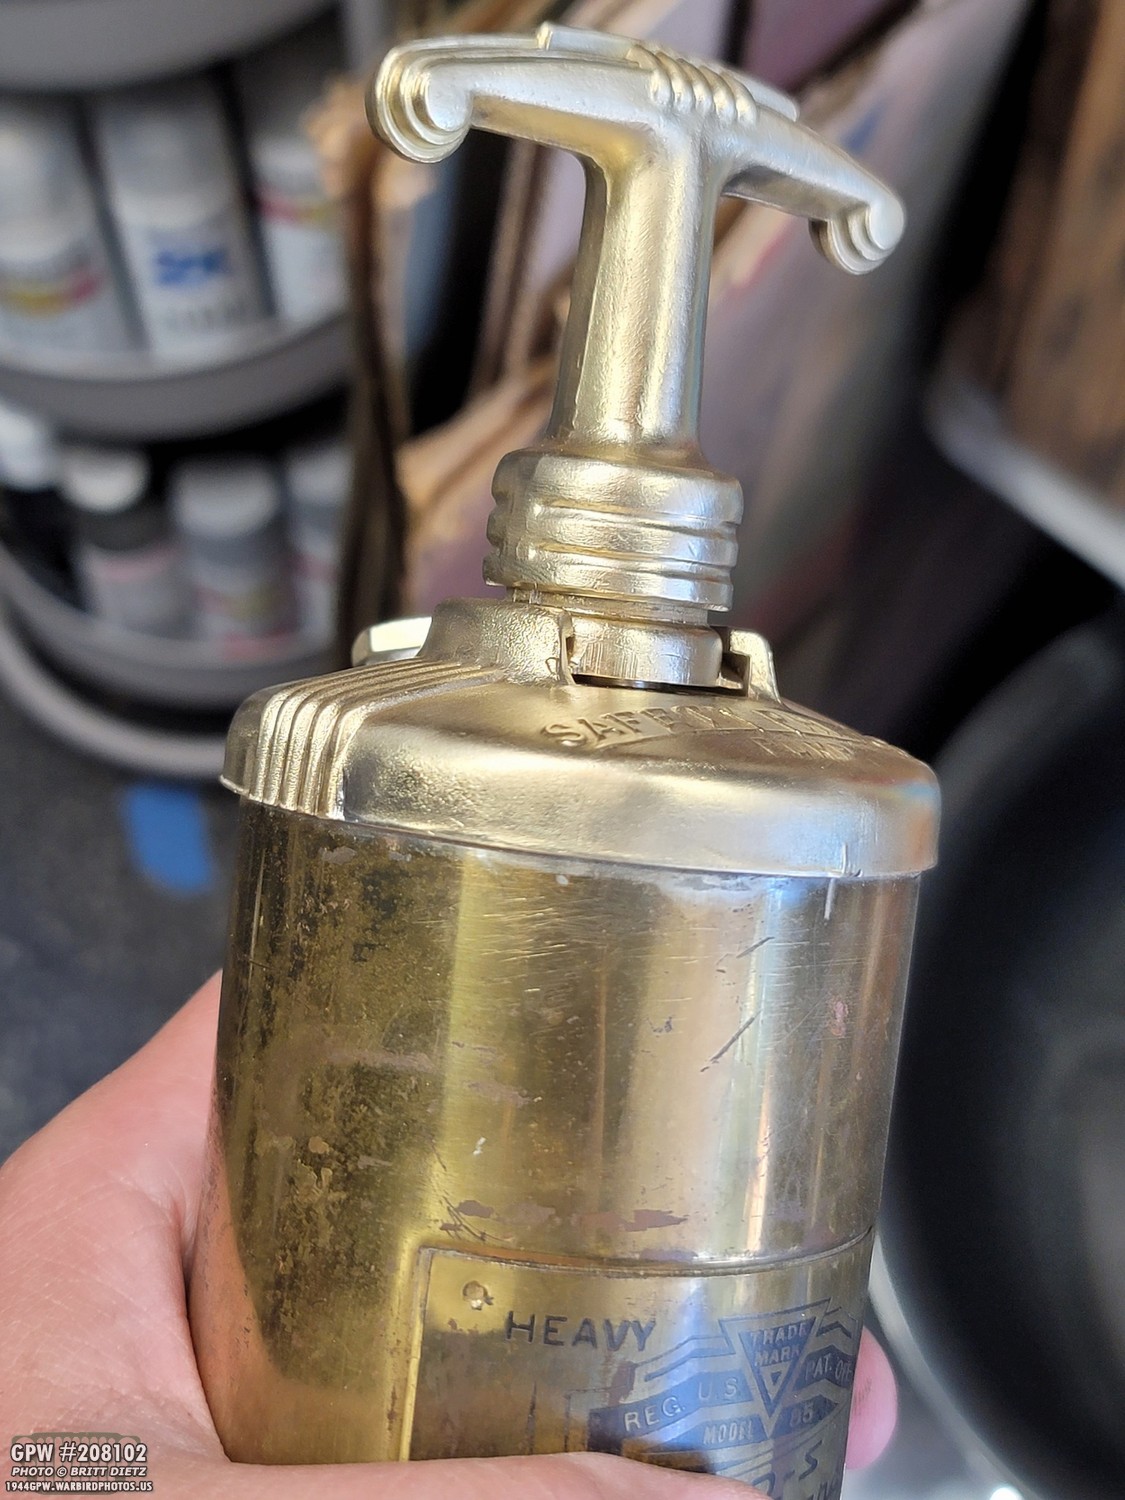
I then decided that I wanted to polish it to have a mirror finish, as it would have. But I didn’t want to touch the main canister until I knew for sure how it would turn out.

I started using my Dremel with a buffing wheel and some buffing compound, and while it was very slow going, I started to see it working. But it would take forever. So I have since purchased a bench grinder (I never had one!) with some 8-inch buffing wheels and new compound. Once I get some free time next, I’ll work on getting that to a mirror finish. More to come in future updates!

As I start to bring this update to a close (there’s still more to go through, so keep on reading!), I first wanted to pay a little tribute to Memorial Day. While I was only able to do a quick drive around the neighborhood instead of doing a photoshoot with the Jeep somewhere, it was still nice to get her out and take her for a drive on that somber day.

I wanted to do a quick update on my push/pull hang tags. I’ve sourced smaller eyelets that are closer to the size of the original ones. That, along with the updated stamp I made (which is an exact replica of the original) makes this the most accurate and near-identical to the original tag I can make. I hope to offer them up for those who want them soon. If you’re interested, let me know!
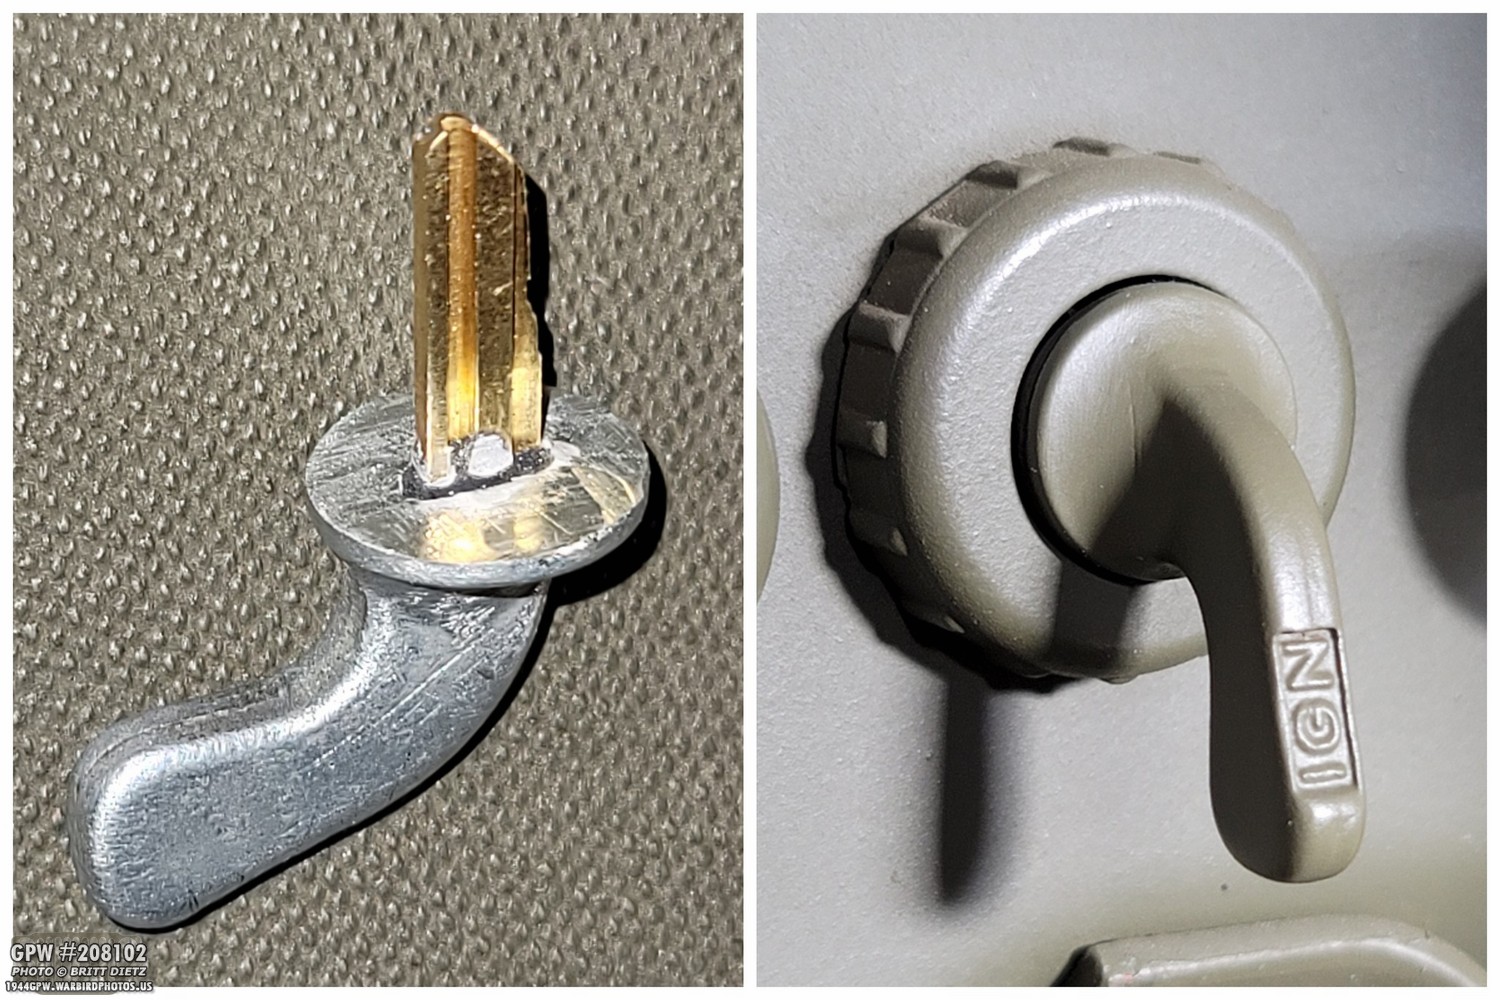
Another upcoming project I’ve mentioned is the little key hole ‘fake’ ignition knob that will make a Jeep look like it has the correct turn ignition switch instead of a keyed one (great for when the Jeep is one display, can it can’t be turned to turn on the Jeep as the H-700 key has been sanded down so it can’t move the tumblers). I’ve sent my final version (these are all the initial tests that I photographed) to a friend who’s going to help me make a mold to produce these in a very strong plastic or tougher material. I hope to have an update next month about these!
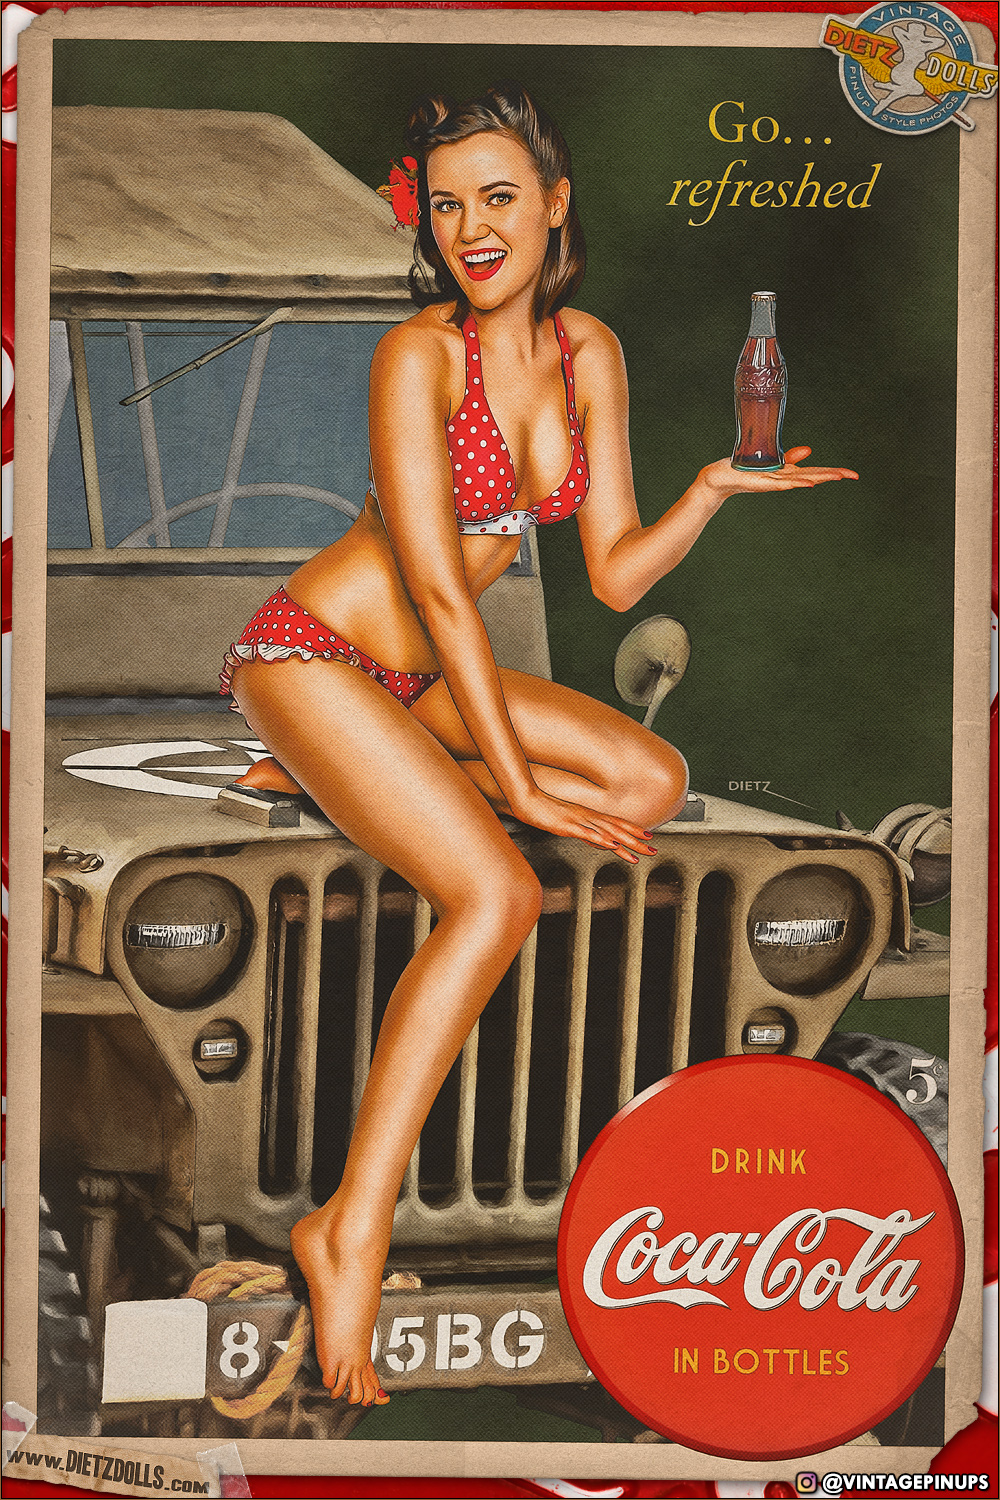
Hopefully, this was worth the sticking around on the update! I haven’t shared these too much on these updates, but along with being an aviation photographer I also shoot 1940s pinups. I take photos of real models in a studio, and using various post-processing techniques I’ve developed myself (photomanipulation, digital painting, layer composition, blending, etc) I put these pinups together that are made to look like they came out of magazines from the 1940s. I’ve started to use my Jeep in several of these pinups, like here with this model and a wartime Coca-Cola advertisement style.

Here’s one loosely based on a 1940s art piece. The original has a gal on a Jeep but she has AAF style wings.

My Jeep again, this time with a Sherman Tank as well. I went for a more ‘roughly painted’ look for everything but the model.
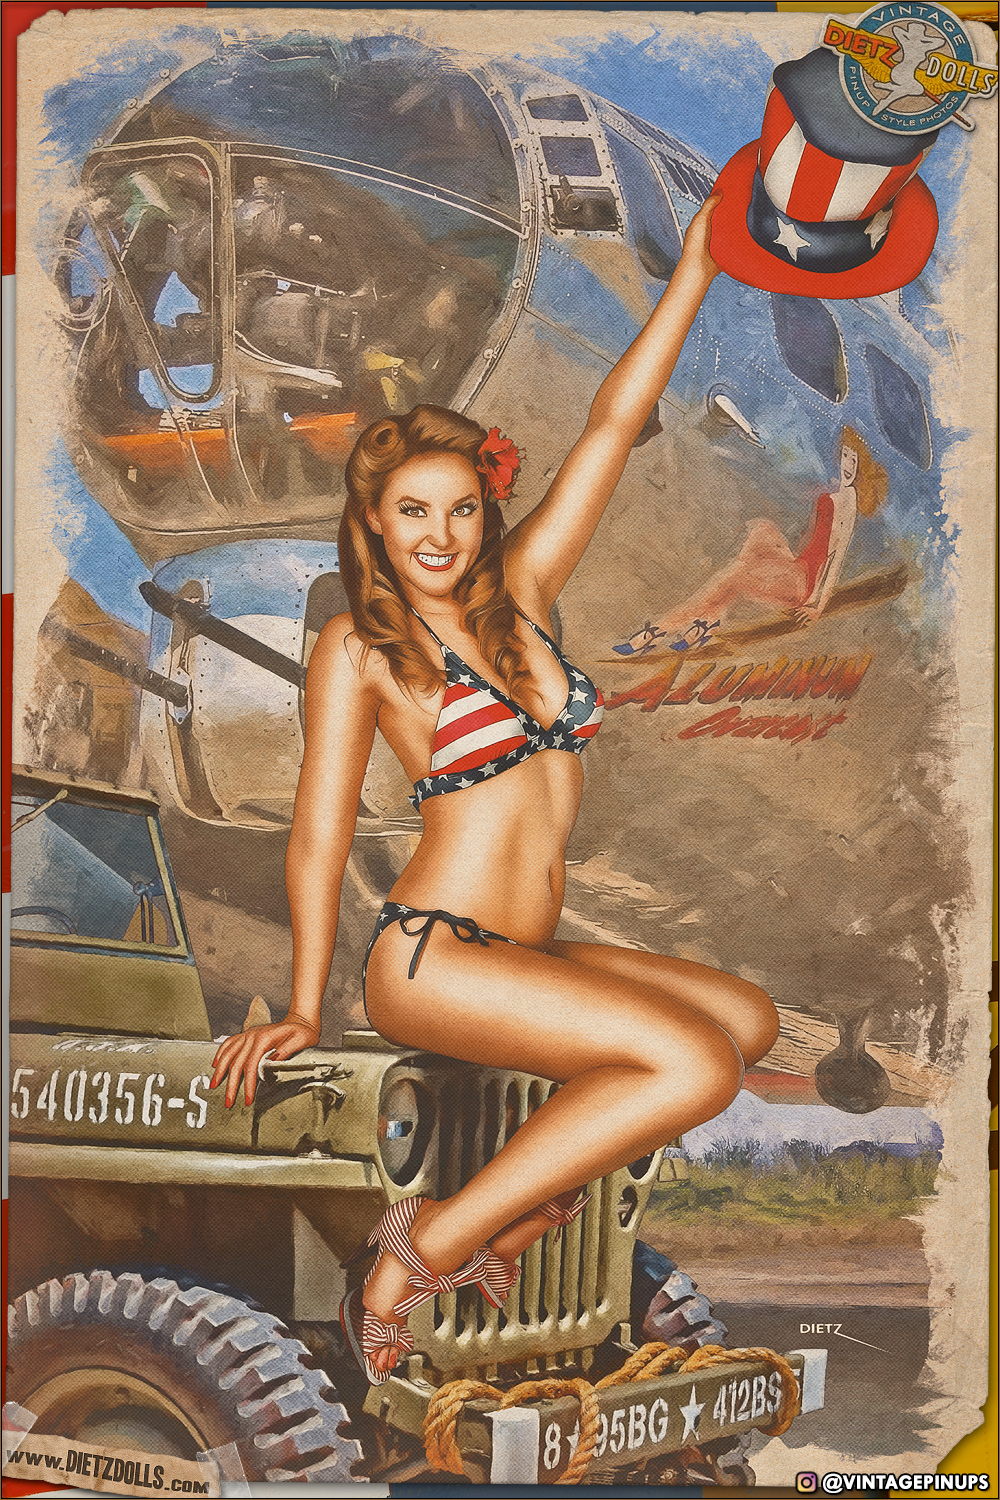
And another one with the same previous model (from a different shoot, though) and a B-17G Flying Fortress ‘Aluminum Overcast’ which I shot a few years back. I hope to use my Jeep ever so often in these pinup shoots as a nice prop!

In an upcoming special update I want to do, I plan on taking the Jeep out to Chino Airport and driving all around the airport to find remnants of the 918th Bomb Group at Archbury. Why does that sound familiar? That’s the fictional Bomb group from the 1960s TV series Twelve O’Clock High which was filmed at the airport. There are some things that still remain, and (sadly), some things lost to time. These large trees on the left here can be seen often in the background behind the B-17 shots when it would taxi in after a mission. Look for that sometime in the future!

I wanted to promote a huge upcoming event I’m helping to put on at Chino Airport, specifically at the Planes of Fame Air Museum! It is called ‘Wheels, Tracks and Wings’ on June 18th, 2022 and it will feature military vehicles, a Sherman Tank, and LOTS of P-51 Mustangs! I will have my Jeep there, and I’m trying to get as many people who own WW2 military vehicles (especially Jeeps!) to come to the event! If you own a vehicle and would like to come (you can photograph your vehicle with a P-51 Mustang!) you can fill out the registration form here (it’s all free to attend with your vehicle!): https://forms.gle/TZDUGuS7GzhBiLKf9
If you know of someone with a military vehicle in SoCal, please let them know about this event!

And a fun little Jeep related tidbit, I was spending some time with out of town friends at the Disneyland Resort two weeks ago, and while eating at Flo’s V-8 Cafe in Car’s Land (at Disney California Adventure Park), I noticed this fun Cars themed record album titled ‘Jeep Date’ featuring Sarge!
And that’s a wrap for this week’s update! I’ll be at Flabob airport this Sunday (6/5) for their Grand Encampment event featuring reenactors from all different spans of history. If you’re there, find the Jeep/me Sunday and say hello!
Till the next update…