 New fuel lines, leaks, custom stencils for my First Aid Kit, and Oil Filter stamps!
This week was half frustrating, half fun! But it was expensive… After last week’s fuel leak, I got a set of new fuel lines and had to chase yet another leak. Then I started work on custom stencils for my first aid kit which came out awesome, and stencils to do stamping on the GPW oil filter. I also continue work on restorting various items and get some new canvas items for the Jeep!

After a week of the Jeep being down due to the fuel leaks, she’s back up and running again! It’s been a multi-week process getting what should have been a simple project completed. But good to be able to take her out on the road again!

As a recap… I had noticed about two weeks ago that my fan belt wasn’t tight and was well beyond the 1/2 inch give tolerance. In order to make the alternator tighter which in turn will tighten the belt, I needed to get the correct style generator arm. There was a custom-made arm that came with the Jeep when I got it and it was at the limit it could lean out the alternator. While replacing the arm (first photo), I noticed the steel fuel lines were not bent how they were supposed to be (second photo), so I cleaned them up again and re-bent them to the correct shape… either the cleaning or the bending caused the pitting in the line to finally breakthrough, and the line itself started leaking a lot of fuel (third photo).

Thankfully, &Ron Fitzpatrick Jeep Parts had a new fuel line kit in stock, so I plopped down the $140 (got another spray can of Red Oxide primer as well) and got a brand new steel kit. Here are all the lines and brass fittings in the kit. I was eventually going to replace all the fuel lines on my Jeep as I think at least two of them were original WW2 lines, so this was just sooner than expected.

While replacing the lines, I went ahead and also got a new PCV valve for the Jeep on eBay. I’ve heard that valves can cause some engine chatter, and since I couldn’t get my one apart to clean it, I just opted for a new one. Plus this one is coated in black, as it should be for the GPW. Here’s a shot of the new one taken apart.

Here’s a look at the new one (top) with the old one (bottom).

And here’s the PCV valve installed on the manifold. This valve returns warm fuel vapor from the engine back into the manifold. This helps remove the vapor and also heat the engine quicker.
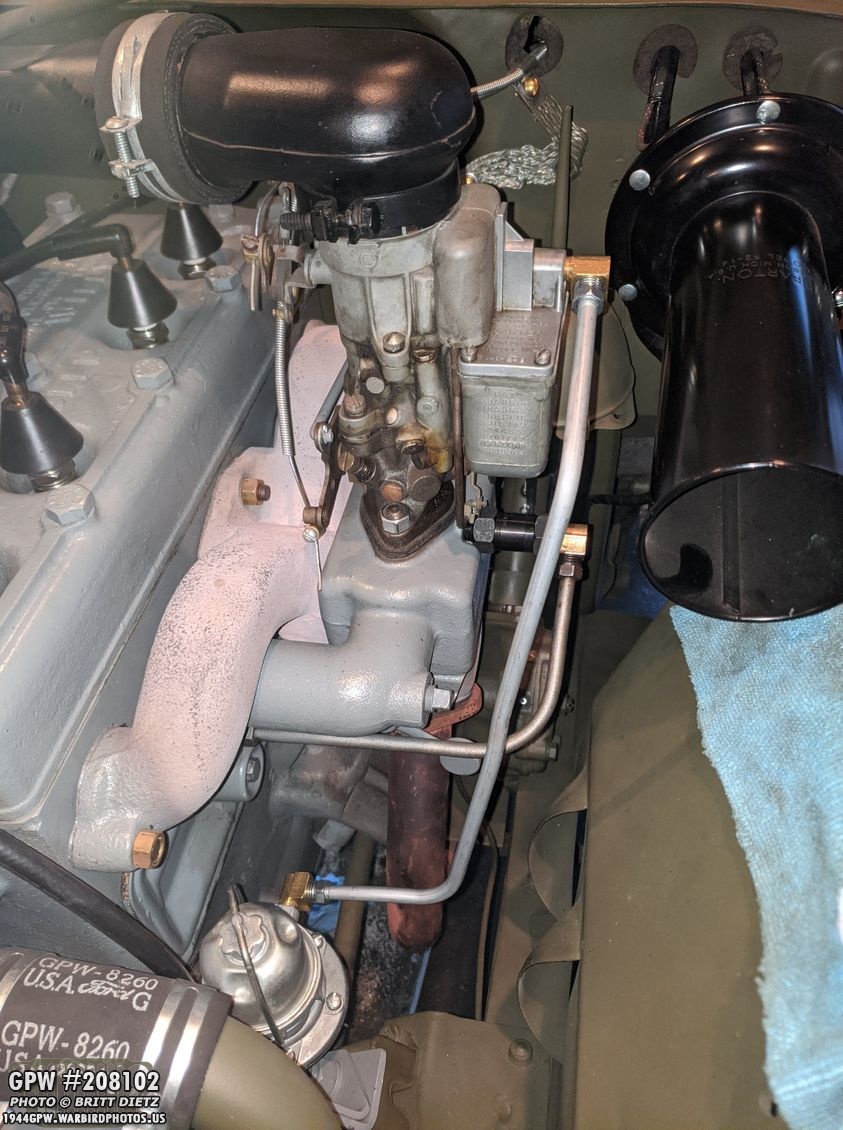
First fuel line I replaced was the fuel pump to the carb. I used a mix of my original brass fittings and new ones. Some of the lines needed slight bending to fit.

For the flex line next to the starter, many people, including myself, put an inline fuel filter (modern style) as the firewall mounted fuel filter doesn’t really do much. In the top photo, you can see how I have that wired. When I was taking it apart to replace the steel lines on either side, I broke one of the nozzles on the filter (doh!) so for now, I have the flex line that came with the kit on there until I can get a new filter. Technically, the bottom photo is how it’s supposed to look. I still like the inline filter, aside from filtering the fuel, it also is a good way to make sure fuel is flowing.

After replacing the fuel filter to flex line and the flex line to fuel pump lines, it was time to prime the system! The fuel system on a Jeep is not injected but pumped. And because it’s an enclosed pressurized system, brand new lines need some fuel to get the flow going. Once you get fuel in the lines, you can manually pump the fuel pump until you hear the fuel flow. To make priming easier for me, I used some hose I had and a funnel and put it on the steel line that goes from the fuel filter. I have a screw clamp holding the hose to the steel line so it doesn’t leak fuel into the engine.

Everything seemed to be good, but once I pumped the line and started the engine, the Jeep died after a few seconds and wouldn’t catch with further attempts to start it. After a lot of troubleshooting, once I realized it was a fuel problem (no fuel getting to the carb), I began to prime the system with more fuel… and then I discovered the problem. The brass elbow on the inlet side of the fuel pump didn’t mesh well with the new steel line, and fuel was dumping out in the area between the line and the nut. That also was causing an air leak, so no fuel was being pumped. Ugh! There could be two causes… 1) The brass fitting has an issue (this was an original fitting), or 2) the line has an issue. I found I could jiggle the line even though the nut was tight in the brass fitting.

In order to get that brass fitting off to try and see if it’s the problem, I had to take the entire fuel pump off, shown here. That meant I also needed a new fuel pump gasket, which thankfully I had a few spares.
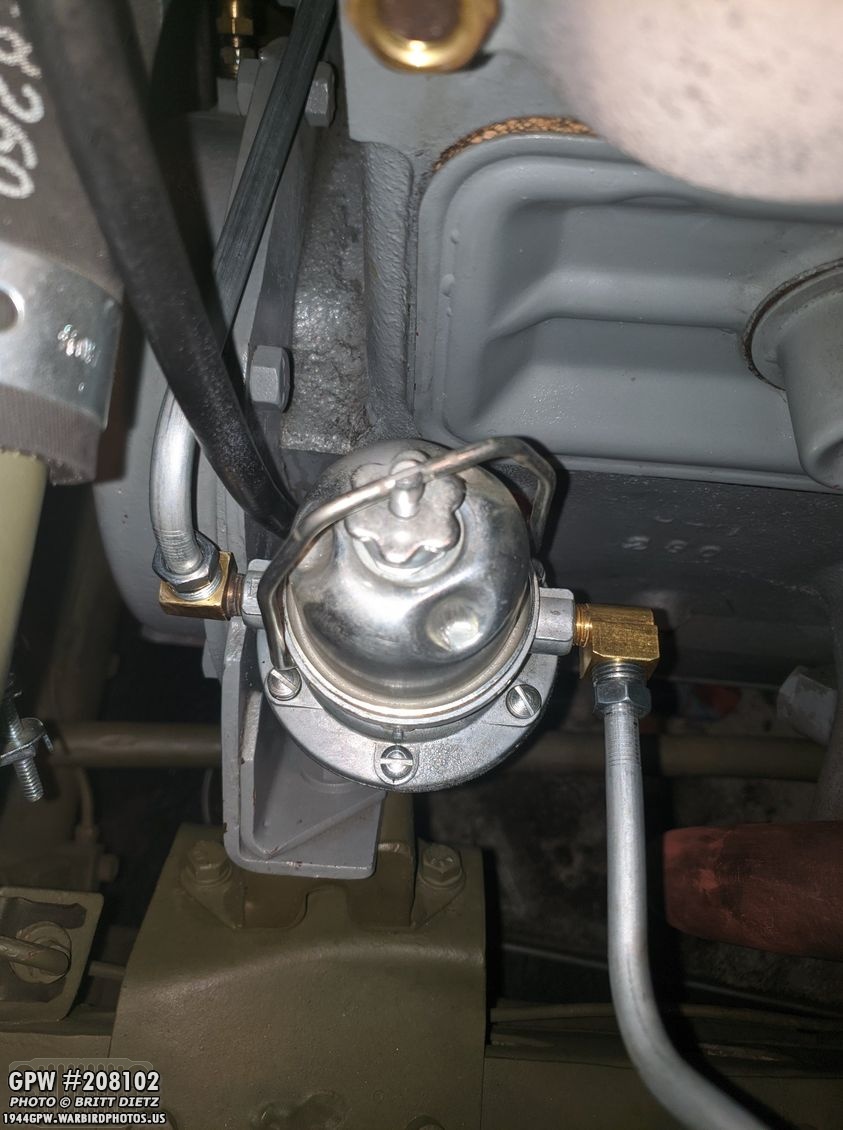
With the fuel pump off, I tried another brass elbow on the line (to see if it was a good fit), and it seemed to lock to the new line better. So I went ahead and put the elbow fitting back on the pump and put the pump back on. The line screwed in MUCH tighter this time and sealed itself really well.

With the line tight, before I could test the Jeep again, I needed to get the clip holding the fuel line back on the generator arm bolt. This is no easy task, especially now with the new fuel line completely blocking the ability to get my fingers in there. It may look spacious in this photo, but I can only get one finger in there. There needs to be a nut there, or the Jeep vibrations could cause the generator arm to fall out. That could be very bad.
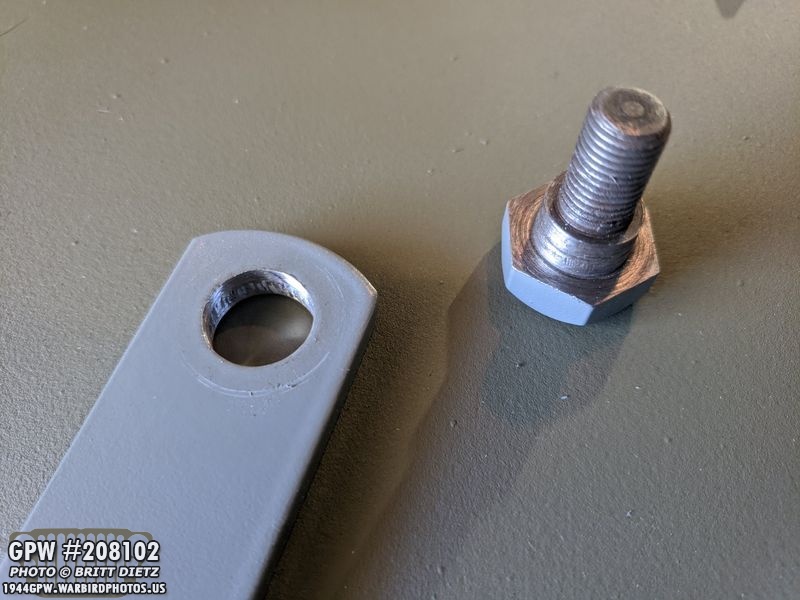
One issue is that the pivot bolt that goes into the generator arm was so tight that I couldn’t spin it before. So with my old fuel line, it was bent in a way I could get two fingers in there and carefully spin the nut on the bolt. But now with no room, I needed to spin the bolt from the head side. So I took my Dremel and a sandpaper tip and carefully opened up the bolt hole until I could spin the bolt freely in there.

Since I still needed to get the nut in that small area and can only get one finger in there, Roger suggested I use some painters tape and my 9/16 wrench to hold the nut to the end of the bolt and then spin the bolt till it catches. The first attempt (first photo) didn’t work as the bulbous fuel line clip was blocking the nut from touching the end of the bolt, so I added more layers of tape until the nut was sticking out of the wrench slightly. This actually worked after the 5th attempt! It was frustrating to say the least.

Once I was able to catch the nut on the bolt, I could then pull away the wrench which would let go of the nut and manually screw in the bolt while holding one finger on the nut to keep it from spinning. It’s now nice and tight!!
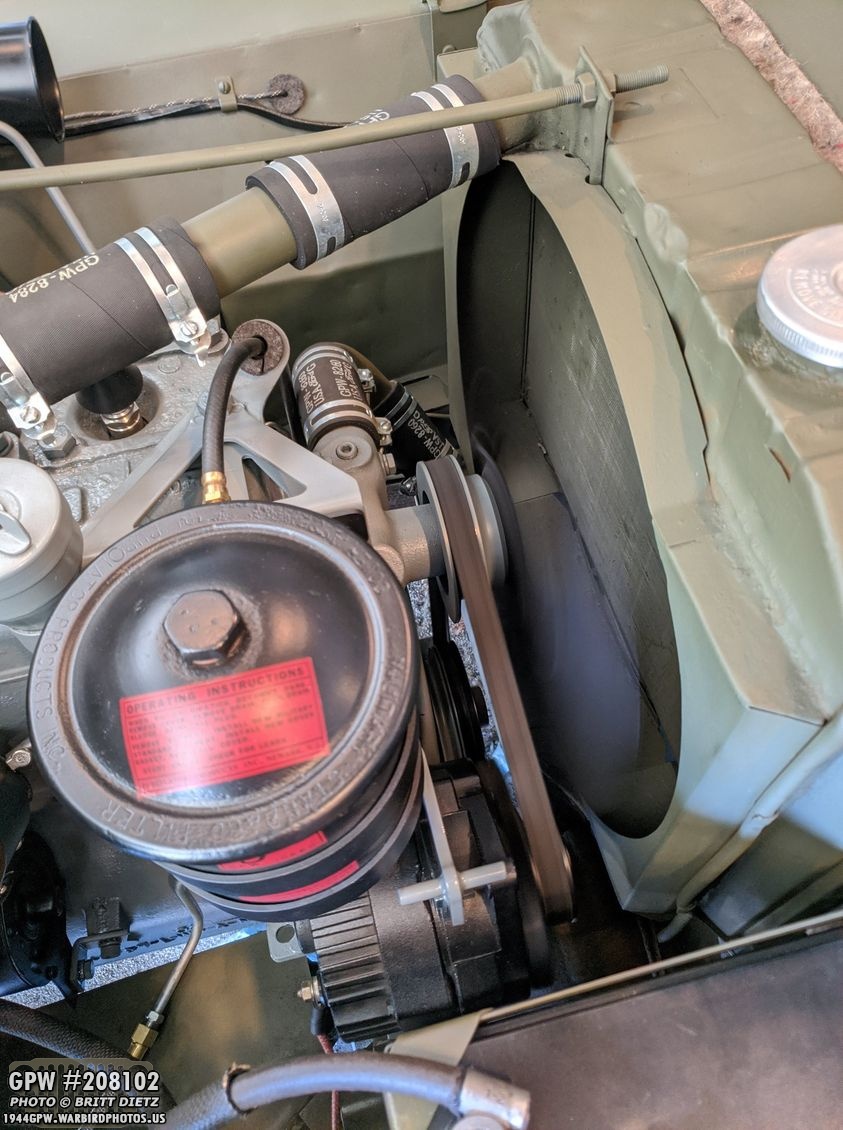
With that all locked up, it was time to run the Jeep and hope I’d fixed all the fuel leaks… so I went and started her up… SUCCESS! No fuel leaks, nice and tight fan belt, and a very secure alternator with a correct style generator arm! YAY! Time for a spin…

I took the Jeep around for about 15 minutes and parked at the local park to check for any fuel leaks along the way. All dry! But, I noticed the radiator overflow relief tube was spewing out coolant… it was pretty hot out at around 89 degrees, but the engine temp wasn’t going much over 180. After consulting with Roger, he thinks there might be a lot of sediment in the cooling system (as the leaking coolant was a greenish-brown color), so I’ll be going through the process of flushing my coolant system next week. Look for that in the next update.
So here’s how it all looks now, with new lines going from the fuel filter to the flex line, flex line to the fuel pump…

And from the fuel pump to the carb. The main fuel line that goes from the fuel tank to the fuel filter I’ll replace another day as that’s a much more involved process and I’ll need to drain the fuel tank. But that line will eventually get replaced as well at some point, and I have the new line waiting till then!

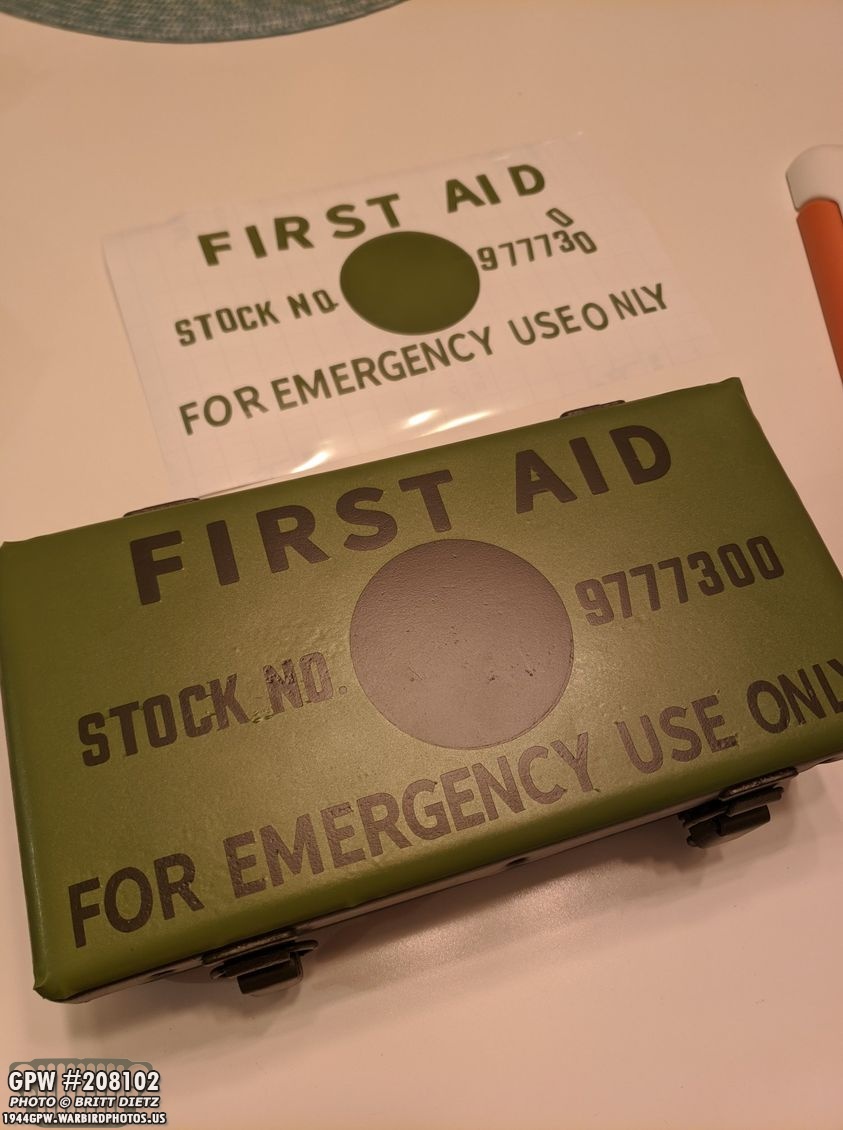
A few weeks ago, I started restoring my First Aid Kit I received from Mike, who I bought the Jeep from. This is how it looked, with the markings long gone and rusted.
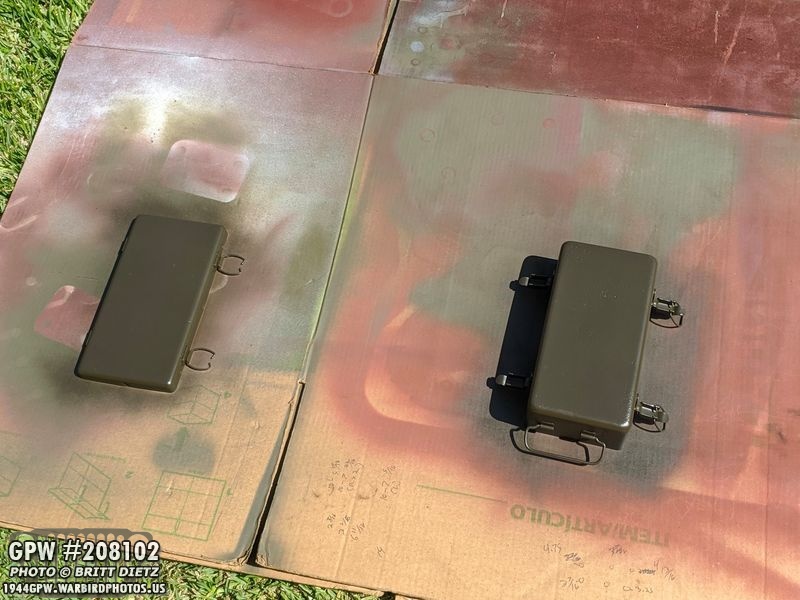
I went through the process of sandblasting, cleaning, and repainting the kit to look like brand new. I also added the correct style inside cover instructions. Next up was adding the markings on the cover.
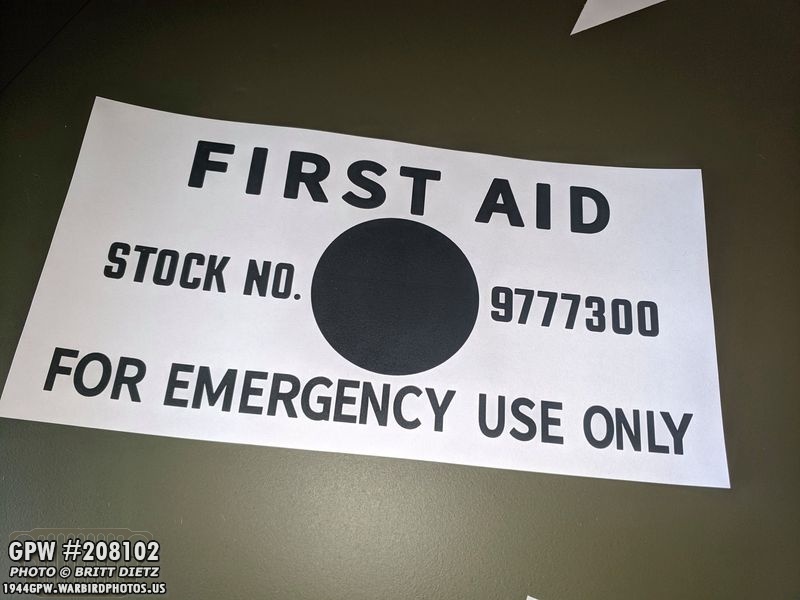
I carefully researched and found the correct fonts for each part of the markings, getting almost perfect matches (or at least 98% close). I then used high res photos online to make an exact stencil in Photoshop. Here’s a print out with it exactly sized how the white lettering should be.

My original idea was to use my print out, put a layer of painter’s tape on wax paper and cut out the letters by hand with an Exacto knife and make my own stencil. That didn’t work out so well, and when I tested just this much, it looked terrible. I sanded down the markings and repainted it after this. So, what to do now? Freehand it?
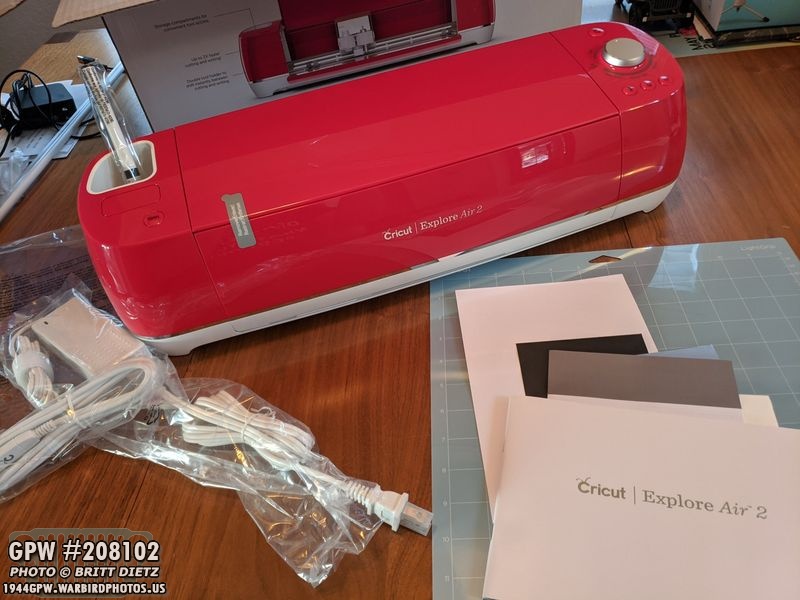
That’s when I explored the idea of making my own stencils. And flash forward to last weekend, I bought a Cricut Explore Air 2! This lovely machine is like a miniature (affordable) vinyl cutter. With this, I could make my own stencils for just about ANYTHING (well, at least up to 12 inches wide).
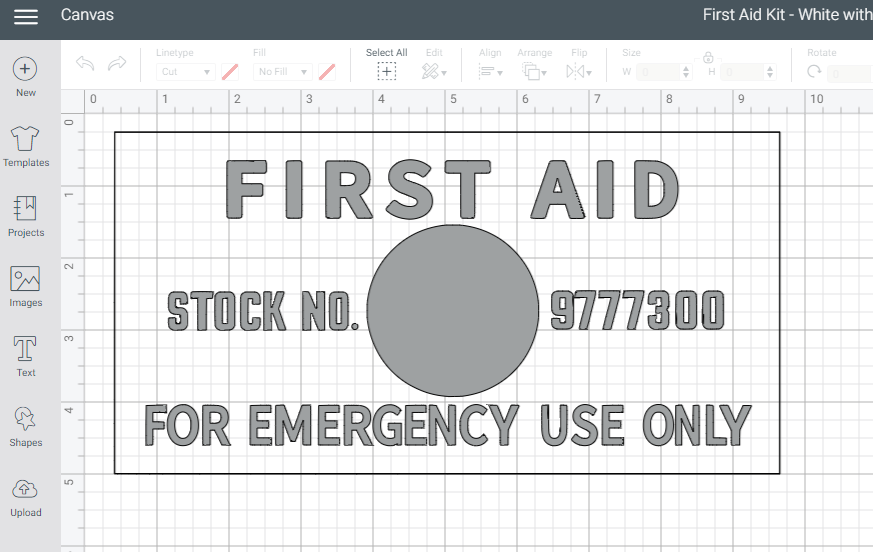
So I took my photoshop template I’d already made, and converted it for the Circuit software for it to cut out.

The first thing I did was try some card stock to see how precise it could cut. I was amazed, it looked super sharp. After this test, I realized this might work perfectly. So I got some vinyl removable sticky paper.

Here’s the cut on the vinyl paper, perfect!

Next step, I peeled off the vinyl and put it on the cover. As you can see, though, there’s a bit of work. Any letters that have inside cuts (IE R, A, D, O, 9, 0, etc) I needed to take those inside areas and manually line them up and add them to the cover.
It took a little while, but I got all the inside parts added. It is ready for paint!
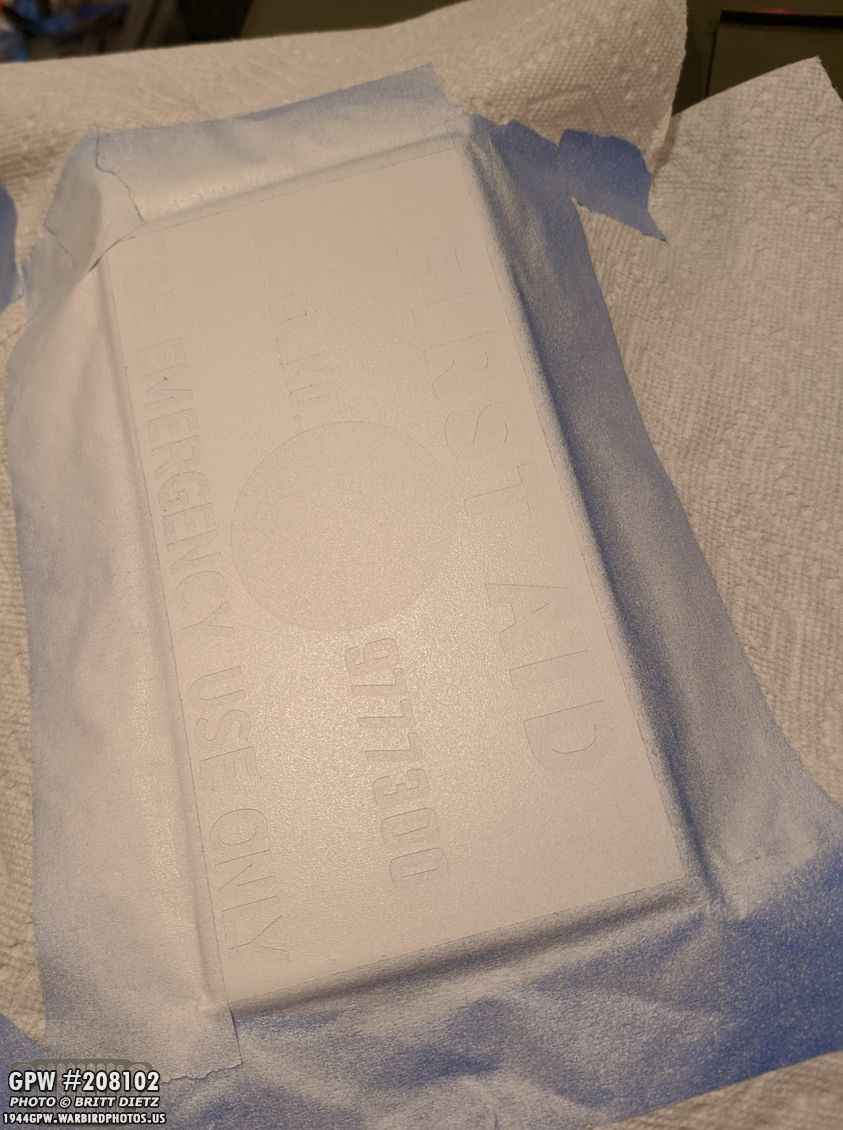
After adding some masks (that white paint gets everywhere), I sprayed two coats of Rustoleum professional series white paint.
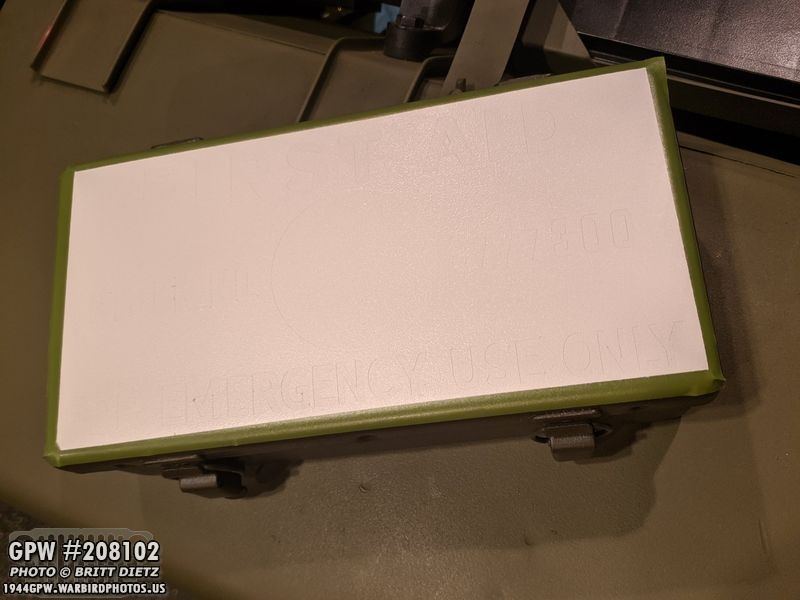
Peeling off the masked edges, all that’s left is to peel off the vinyl stencil!

Peeling off the stencil revealed NICE straight lines with no fuz! But, as you can see, there’s two issues. 1) I still need to now remove all those inner pieces such on the R, A, D, etc. And 2) some of the vinyl from the main stencil broke off in the small crevice areas, so I’d have to manually remove them as well.

Using an exacto knife again, I carefully removed everything and I’m left with this perfect stenciling! I recommend waiting a little bit for it to try before trying to remove those inner stencil parts like on the R, A , D, etc. That helps to get them off easier, otherwise you risk smearing the paint.
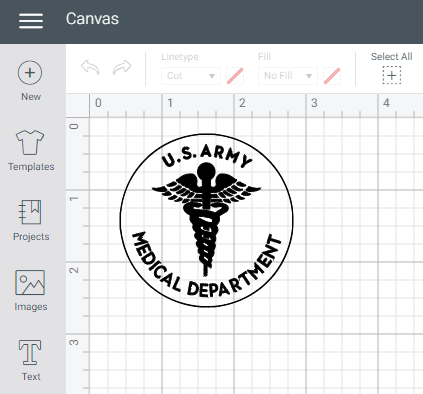
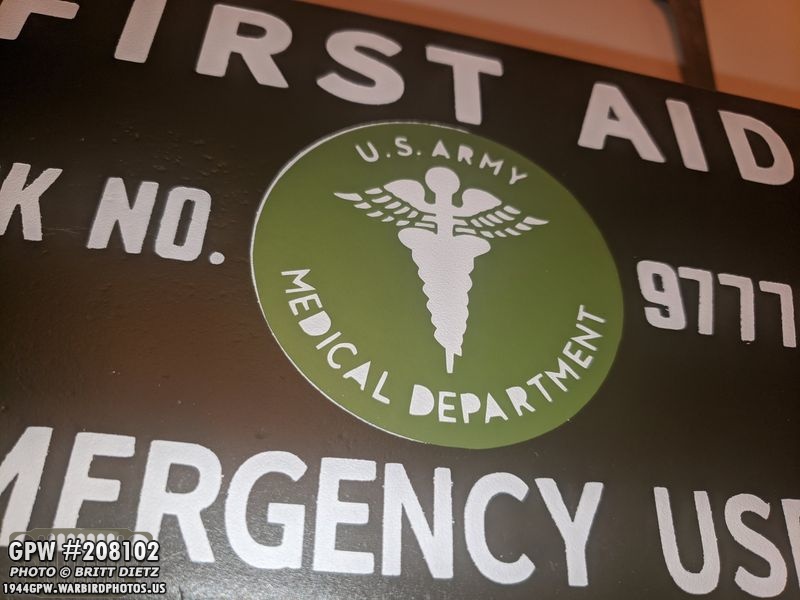
I then went and custom made the stencil for the inner red stamped US ARMY MEDICAL DEPARTMENT with the medical logo. I carefully research the fonts for these and found what I’d call a 95% match. I hand traced the medical logo in photoshop from several photos of first aid kits I had. Here’s the stencil after moving it from photoshop to the Cricut studio program.

And another perfect cut by the Cricut! I was amazed how precise it could cut all those tiny letters.
I added the main stencil to the kit cover (this is the next day after the white had dried). I still need to add the inner stencil parts to the letters like last time, and also the inner areas of the medical symbol. You might be saying, ‘hey, it’s not lined up on the circle, what gives?’ I found in all my photos that 90% of the red stamping on this part of the kits isn’t perfectly centered, so I decided to follow that look.

The slow process of adding the inner lettering parts. You can see the R on my red-handled exacto knife.

Here’s a close look. These letters are TINY… and the inner parts are even smaller. That’s the end of the blade of my knife on the first photo. The second photo shows me taking the D with the inner part still attached over to the D in medical. I then lay both down on the F, but only press on the inner part, that way I can lift the D back out. I can then use my knife to carefully move around the inner part to make sure it’s straight.

All inner parts of the lettering and medical symbol have been added!

I went a bit overboard with the masking, but after all the work I’ve done, I didn’t want some red overspray to mess it up.
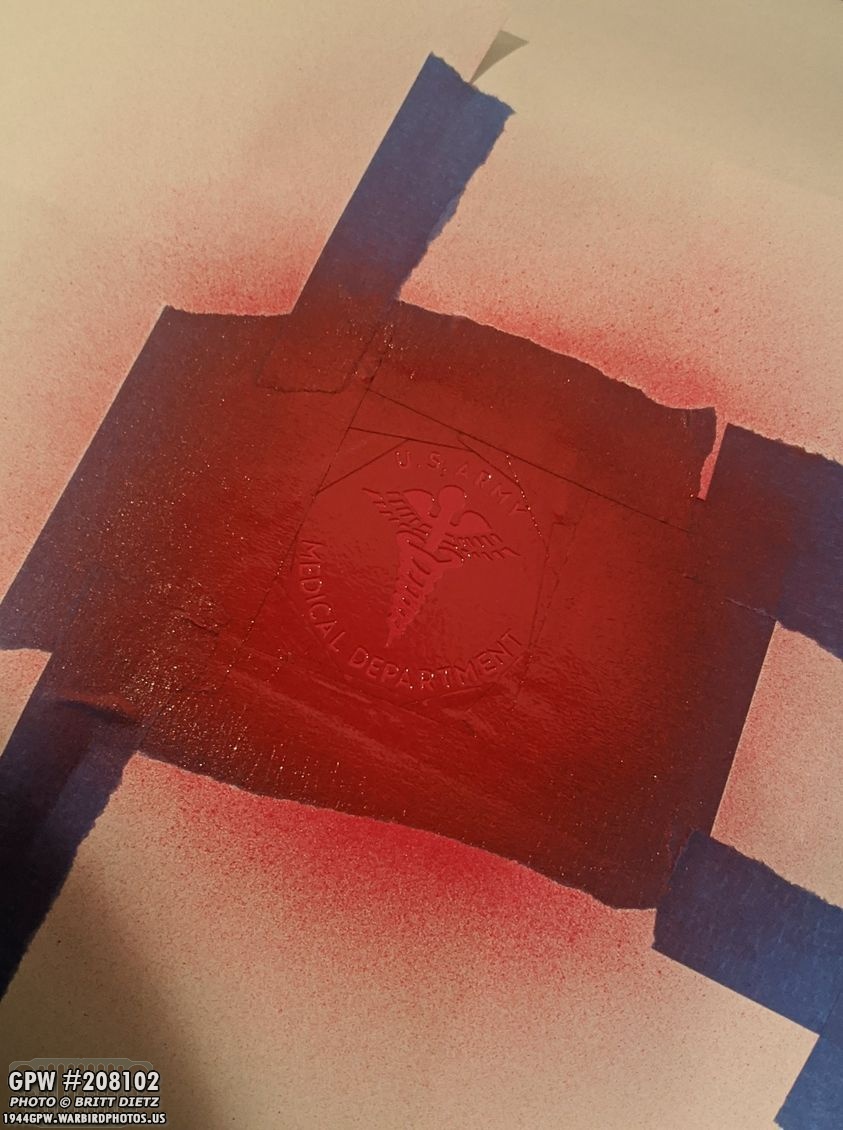
I used farm tractor red, as in most photos I’ve seen of the kits the red is quite vivid. So, before it was dry I peeled off the masking and main stencil… then after drying I took off all the inner sections from the letters. And the result?…

PERFECT! I’m so happy with how this came out. It looks pretty darn amazing considering, and I think it could fool some people thinking it’s original (minus how great of shape it’s in). This gets me super excited about all the possibilities with this Cricut machine! And that led to a second project, which I’ll get to in a sec.

Before we move on, here’s a look inside the first aid kit. Under the cover is the correct instruction sheet I printed and added a few weeks ago to look exactly like it should. The contents of the kit is a miss-mash of wartime and postwar items. All the items are in each box, but most don’t belong in a Jeep kit. Perhaps one day I’ll track down original contents (or at least original boxes) and get it totally correct.

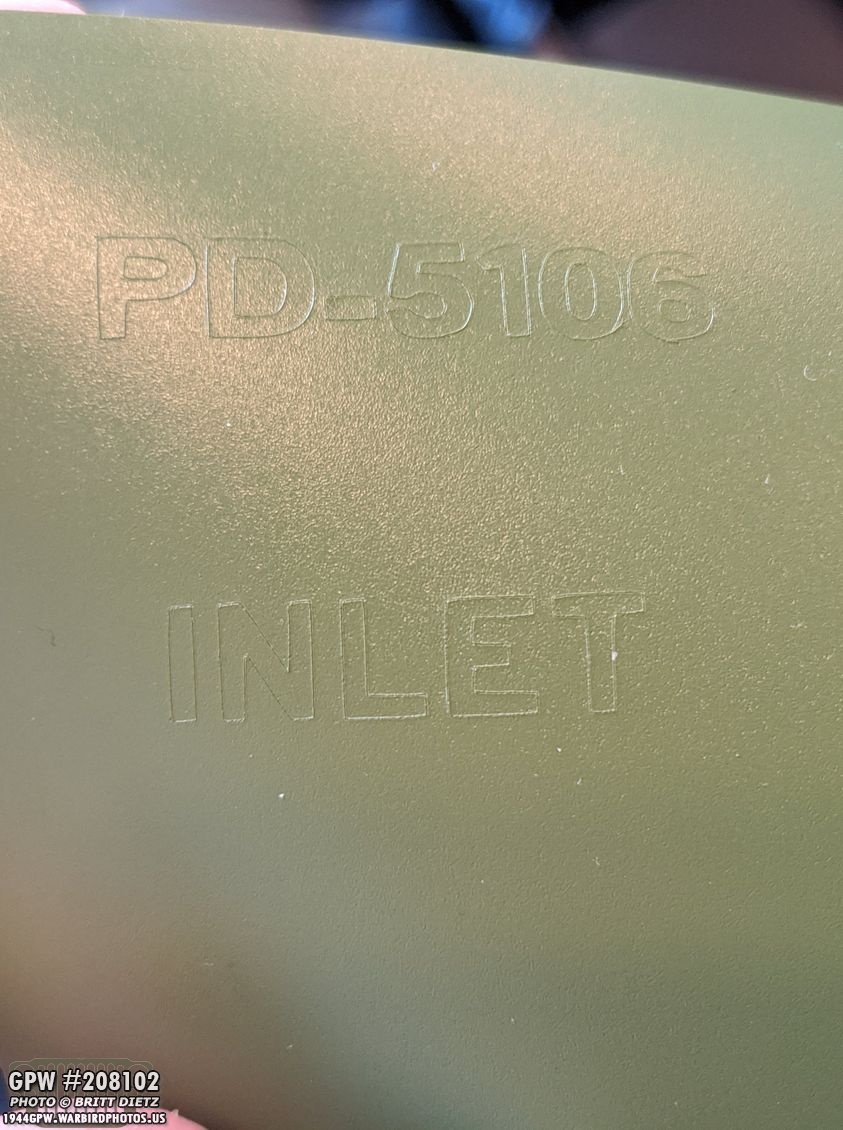
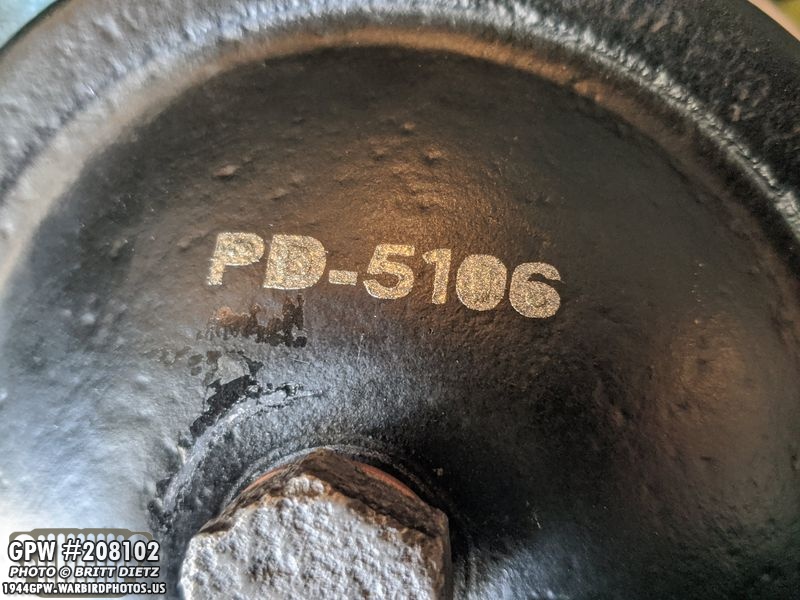
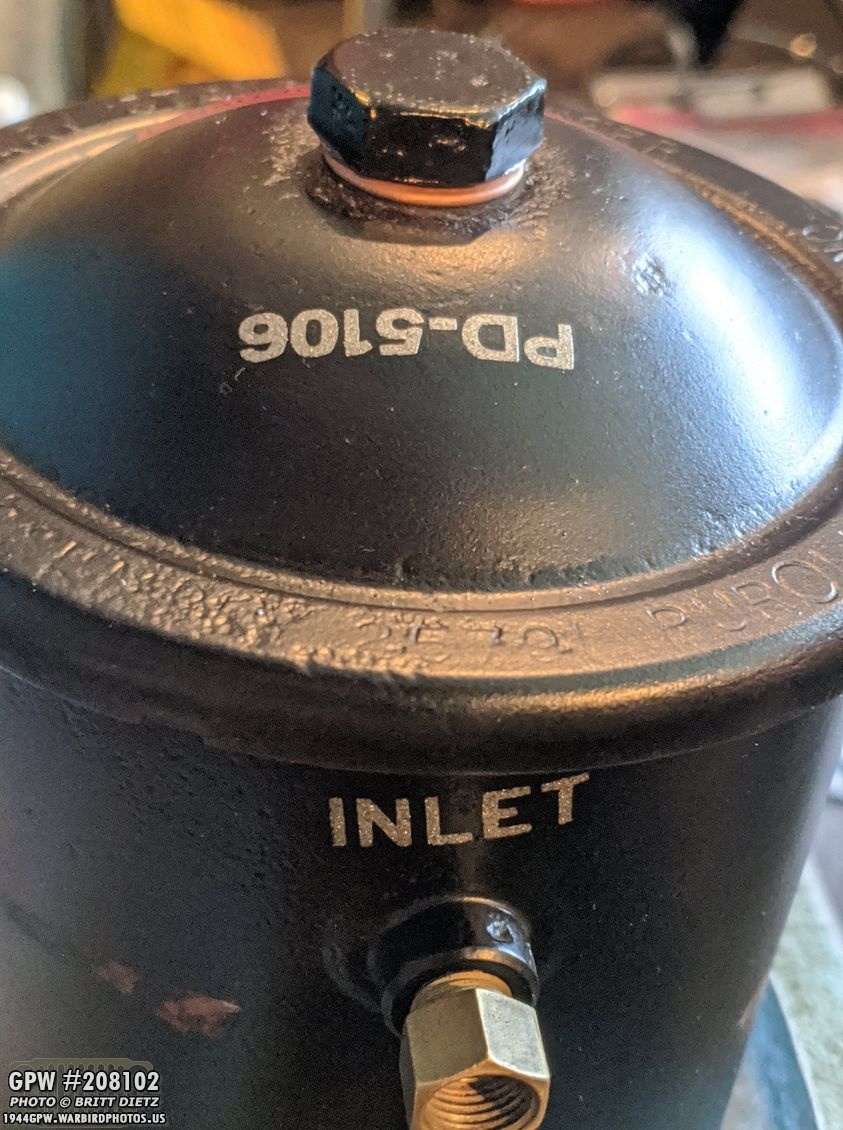
With the success of my first aid kit, I decided to try another project with the Cricut. GPW Jeeps had PurOlator oil filters on them, and aside from having the three red water decals, most also had stamping on the cover (shown here) and also above where the fuel line comes to the right side (not shown from this angle) in this wartime photo. It should read PD-5106 on the cover, and INLET above the inlet oil line port.
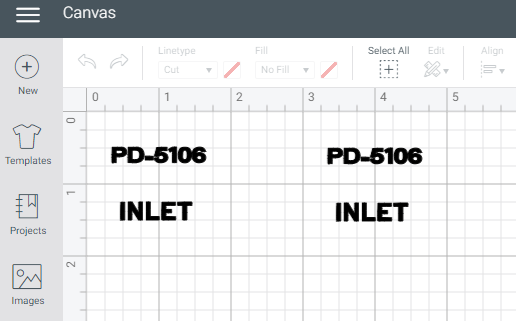
Once again, I researched the fonts and sizes of these stamps and made stencils in photoshop. I decided to make two of them, since I wasn’t sure, at the time, how I was going to do them.
Once again, a perfect cut from the Cricut!
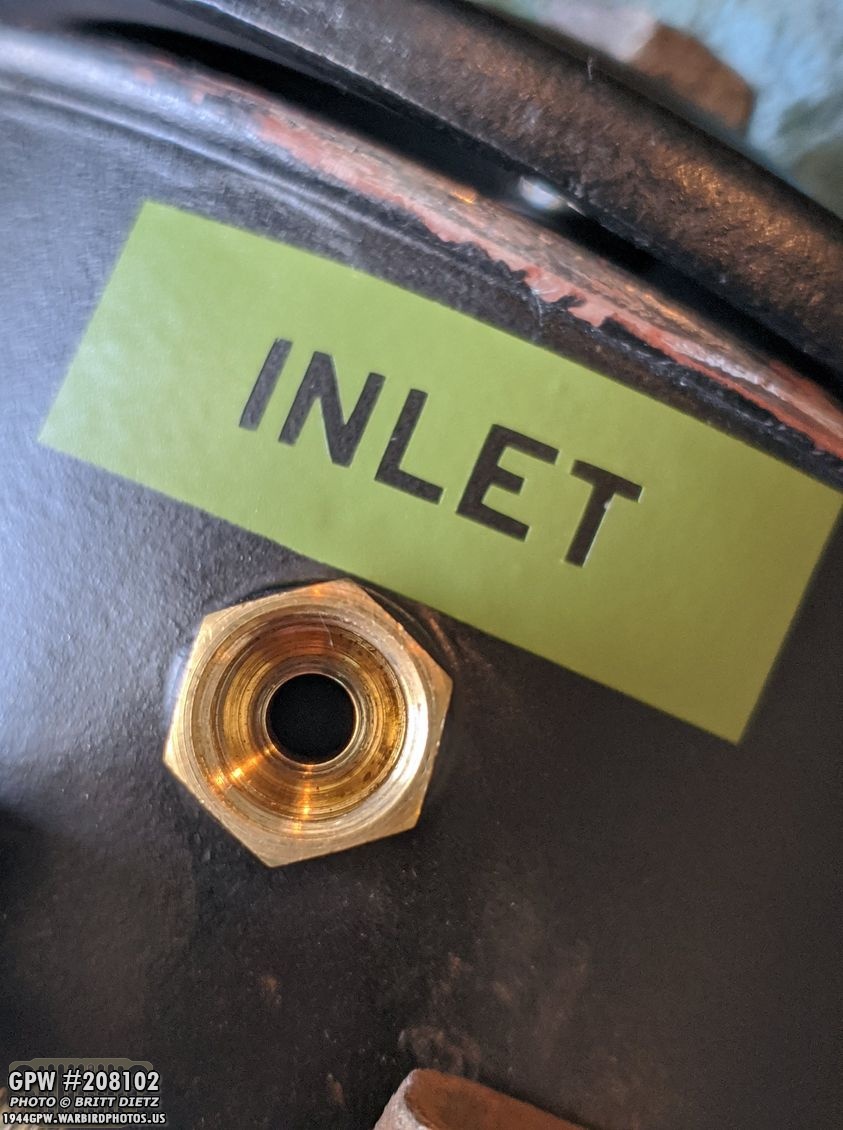
I wanted to test the first ones on an oil filter that I had been using on my Jeep that was incorrect. Since it was already painted the same as the filter currently on my Jeep, it would be a perfect test. Here I’ve added the first INLET stencil. I wanted it tilted as these were normally stamped on the filters and all over the place.

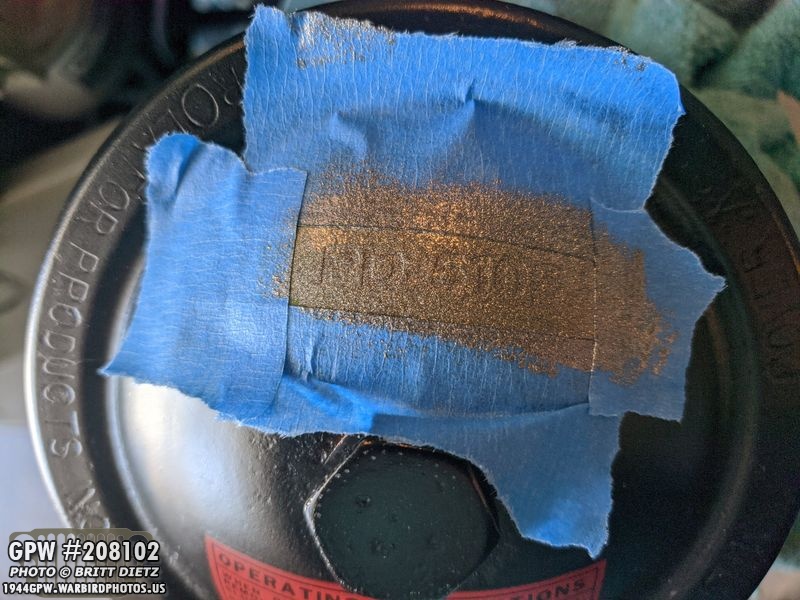
In photos of the original stampings, they used a silverish paint that had a slight texture look to it. I found this flat antique nickel was a perfect match.

I ended up spraying a piece of paper with the paint then taking a piece of foam to stamp the stencil. I stamped it a few times quickly to make sure I got everything.

Peeling it off, PERFECT! I couldn’t believe how well this came out.

Moving on to the top, the stencil is put on then I added the inside stencil parts for the P, D, 0, and 6 manually from the vinyl positioning them till they were prefect.

Same method of stamping with the foam.
Another perfect stencil! I waited a bit for the paint to dry, again, so I could remove the inner sections.

Once off, it looked great! So my test on the oil filter I’m not using was a success. I felt confident to move on to the real thing.

Here’s a look at both of the test ones.

Now time to do it on the real thing. I was a little nervous, of course, as I didn’t want to mess this up! First I had to get the filter out as it would be a huge pain to try and do this with it on the engine.

I just loosened up the clamps and slid it out. That was it’ll be easier to put back in when I’m done.

First up, the INLET! Let’s get started…

Stencil applied and mask added.

I forgot to take a photo of it painted, but I used the same method with the foam. I was relieved to see if was another great stenciling! Perfect, looks stamped!

Moving on to the top, I repeated the process. This time I folded one side of the stencil so it’d be easier to get off the lid. Didn’t want to be scratching it with my fingernail trying to get it to come up.
As the last three times, I stamped it with the paint on the piece of foam.
Looks great so far! I waited about a half-hour before I started to remove the insides of the letters.

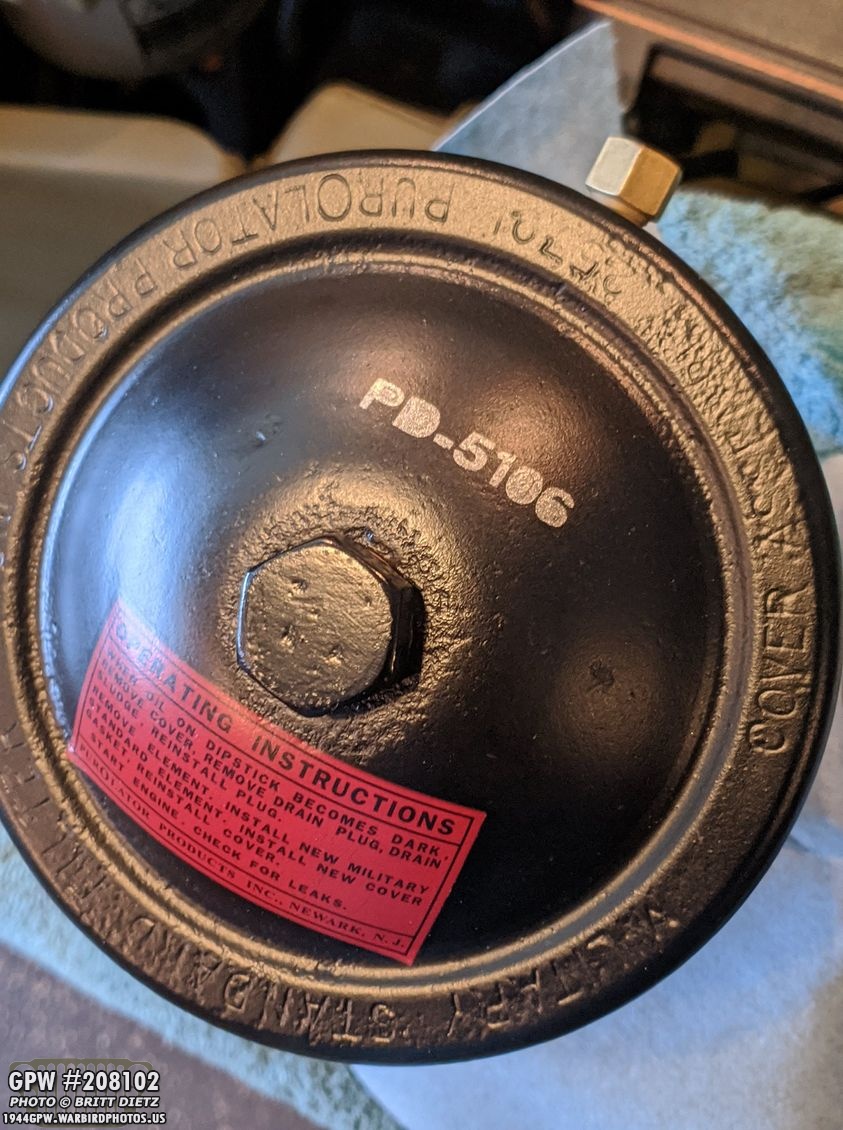
And perfect! Looks great! (note, the P looks a bit weird, but that’s just an illusion of the light reflection, see next photo)
Here’s both the stamps on the filter. I thought about scuffing them up a little bit with a scotch pad, but I think they look great.

Before and after, I’m super happy how it turned out. Another little detail often ignored with these GPW oil filters. I love adding these little details where I can!

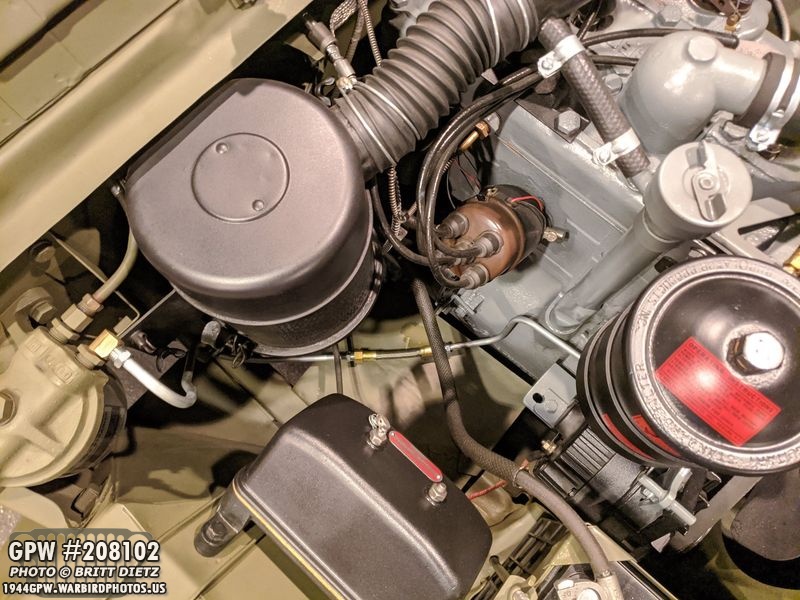
And here’s the engine as of yesterday morning with the new fuel lines, correct generator arm, and the stamping on the oil filter. I can’t wait to do more things with the Cricut machine and add more of these fine details!
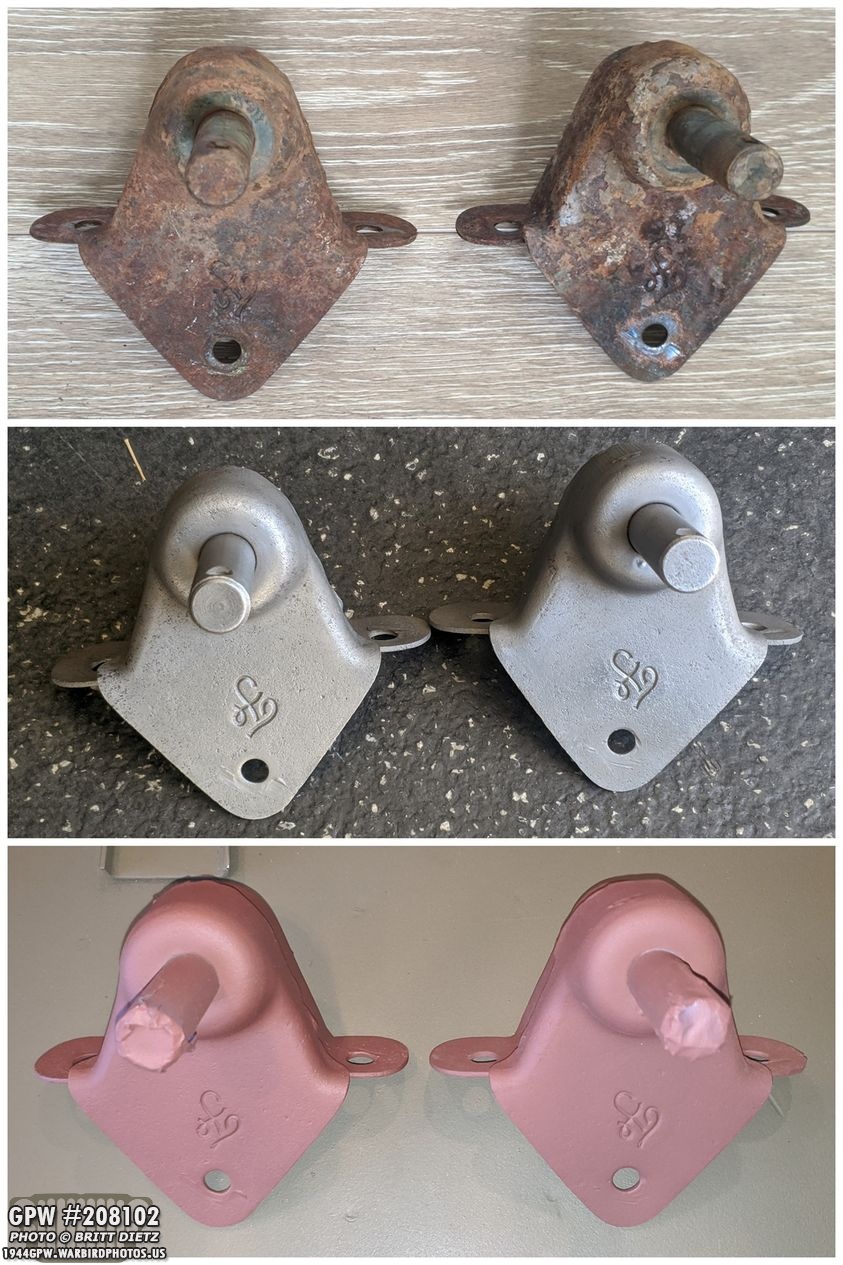
Last week I got a bunch of take off items from another Jeep owner, included with the group was two shock brackets for the rear of my Jeep, which are missing. They came looking seriously rusted, but after soaking in rust remover, sandblasting, and red oxide primer, they look nearly new!
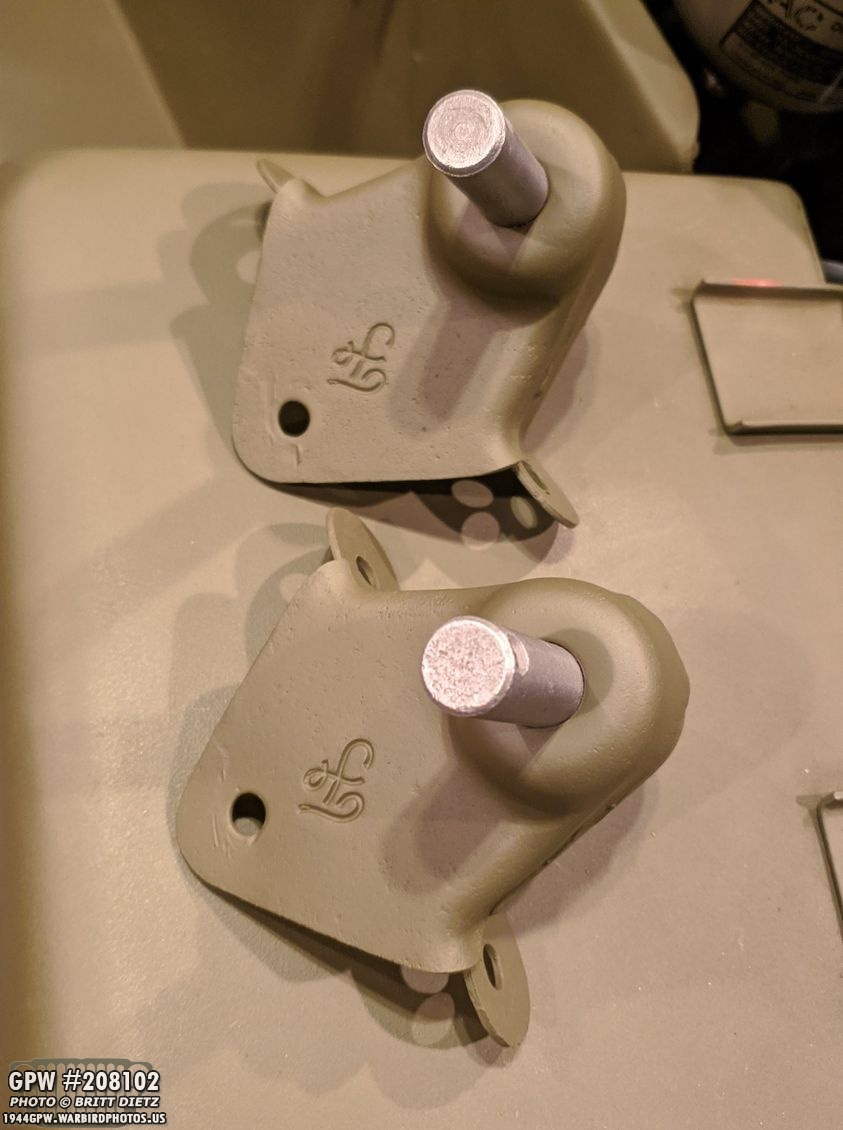
And to finish them off, I hit them with 33070 OD Green! They are ready to go on my Jeep! Sadly, that will have to wait till I get the wartime GPW axles finished, as when I replace the axles I’ll put these shock brackets on.
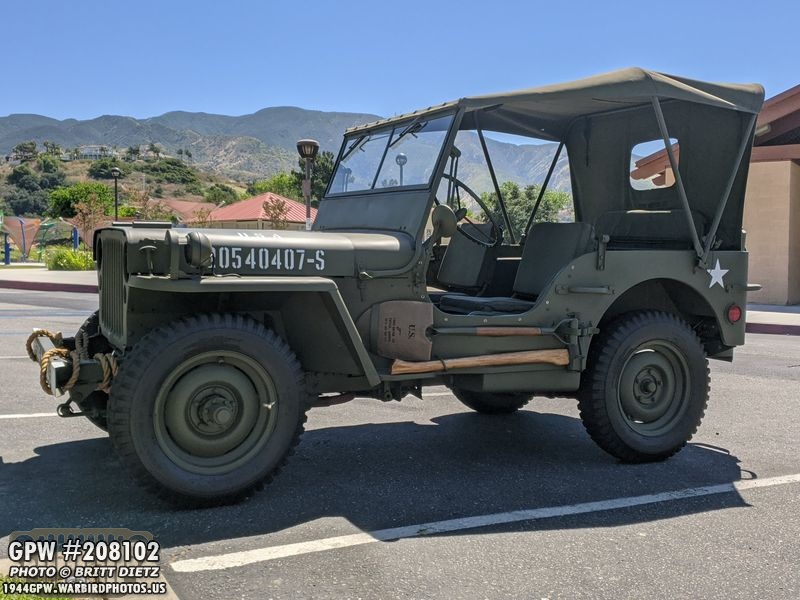
Last week I also talked about how I’d stained my ax handle several times with two different stains (one of them almost being black) and it only slightly taking the stain. I gave up and put the ax back on saying how it looks better, but still not as dark as the shovel. Here’s a look in the daylight at them, and you can still see how much darker the shovel is.
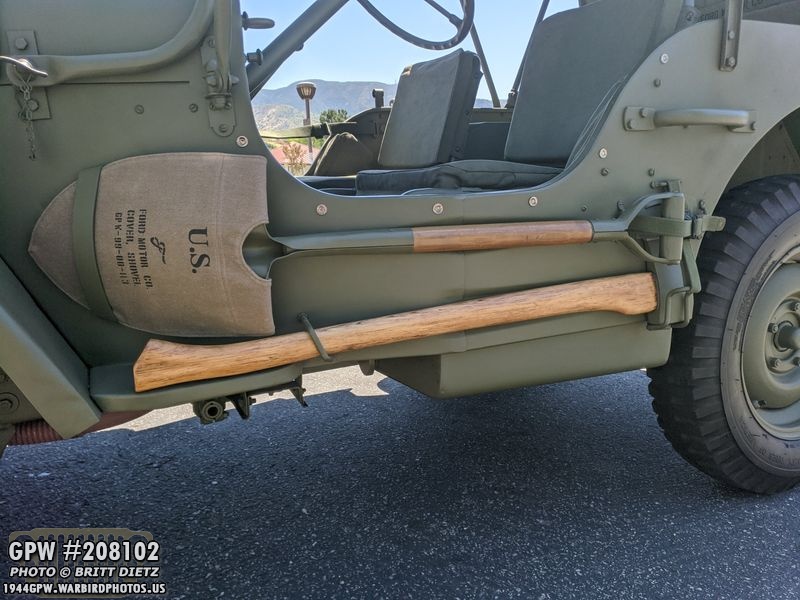
What I might try to do is actually sand the shovel handle, instead, and see if I can make that a bit lighter at this point. Obviously, these pieces of wood are very different from each other as the shovel took the first stain I did and the boiled linseed oil while the ax, even after sanding it thoroughly, did not.

Another shipment of items came in this week, this time from Beachwood Canvas Works. I got a canvas mirror cover, which actually arrived incorrect. This should have had GPW markings with an F stamp, something I hope to be rectified soon (awaiting a reply from them about sending the wrong thing). I opted for the darker canvas to match the rest of the canvas on my Jeep, and it matches very well. Once I get the correct GPW version, this will be a nice detail for the Jeep.

Also in that shipment from Beachwood Canvas Works was a new set of headlight covers, this time stamped with GPW and MB markings. I love the look of stamping on the canvas items.

The only problem, I realized (my fault), is that once you fit the headlight cover on the headlight (like shown), the only way you can see the stamping is lifting the headlight up via the swivel bracket. Oh well, it still looks awesome to me! I might end up cutting a slit in the other canvas headlight set I have to mimic blackout lights.

Another item that came this week is another in my growing collection of Jeep books. This time John Farley’s very popular The Standardised War-Time Jeep volume 2! This book is about to go out of print, and what’s left is what’s left from what I’ve seen online. So I ordered directly from him in the UK, and he sent one over signed! This book chronicles month by month every contract, change, and update that was done to both the MB and GPW Jeeps for the entire war. It also goes over every change to the Jeep engine throughout the war in detail. There are hundreds of amazing large-sized photos. Very worth a purchase!

That’s it for this week! I’ll be starting the radiator/coolant system flush this weekend which will hopefully help the engine cool faster. I hope to continue more work on the wartime axles getting them closer to being able to replace the CJ axles on the Jeep now. Till next week!