 More fake Rivets, radioactive spark plugs, and a GPW project
This was a bit of a slower week with only some smaller projects. After last week’s success with the fake rivets on the passenger seat, I decided to tackle the rear seat in the same way with even better results. I also found some correct ‘radioactive’ spark plugs for the Jeep! Finally, I tackle a project that asks, what if Ford was producing GPW Jeeps during a pandemic?

It’s been another hot week out here in SoCal, so I haven’t been driving the Jeep a ton. Hoping for cooler weather in the next few weeks so I can take her out more!

One milestone I did do this week is procuring a tank of Argon/Co2 gas for my welder! Looking to continue my welding practice as I continue to slowly inch closer to starting the very tedious repair of my original body tub!

(Excuse the sloppy welds, still practicing)… the difference between flux core, which I was using until I acquired the gas, and the gas MIG welding is night and day. Already super happy about the much cleaner welds!

So last week, I documented how I needed to change the hex bolts/nuts on the passenger seat to L bracket to rivets. (I also changed out the bracket itself with a correct GPW one)
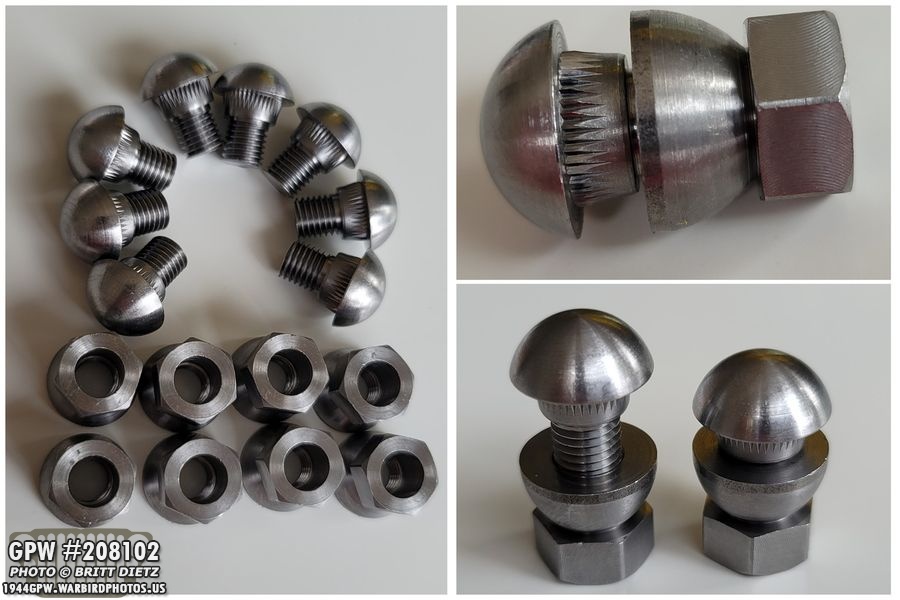
I went out and bought these imitation rivets, which has a nut on one side that breaks off with a certain amount of torque from the rachet to leave two rivet heads.

It took some work (and learning how to/not to use these bolts), but I eventually got it. I then used my angle grinder to ground one side down flat to mimic a squished side fo the rivet, and then welded the bolt and what was left of the rivet head on the other side to, essentially, make a real ‘sort of’ rivet. After painting, the result looked fantastic.

I wanted to do the same thing to my rear seat, which is not riveted and instead also held to get with a hex bolt and an acorn nut. Now, I want to point out that I do have a GPW top backrest and a MB bottom pan. Both are original. I thought about waiting to find a correct GPW bottom pan, but it honestly doesn’t bother me. Really, the only difference is in the way the pan is attached to the frame. Plus, I’ve done welding work to re-add the air pump brackets. So I decided I’m going to leave the two of them together.

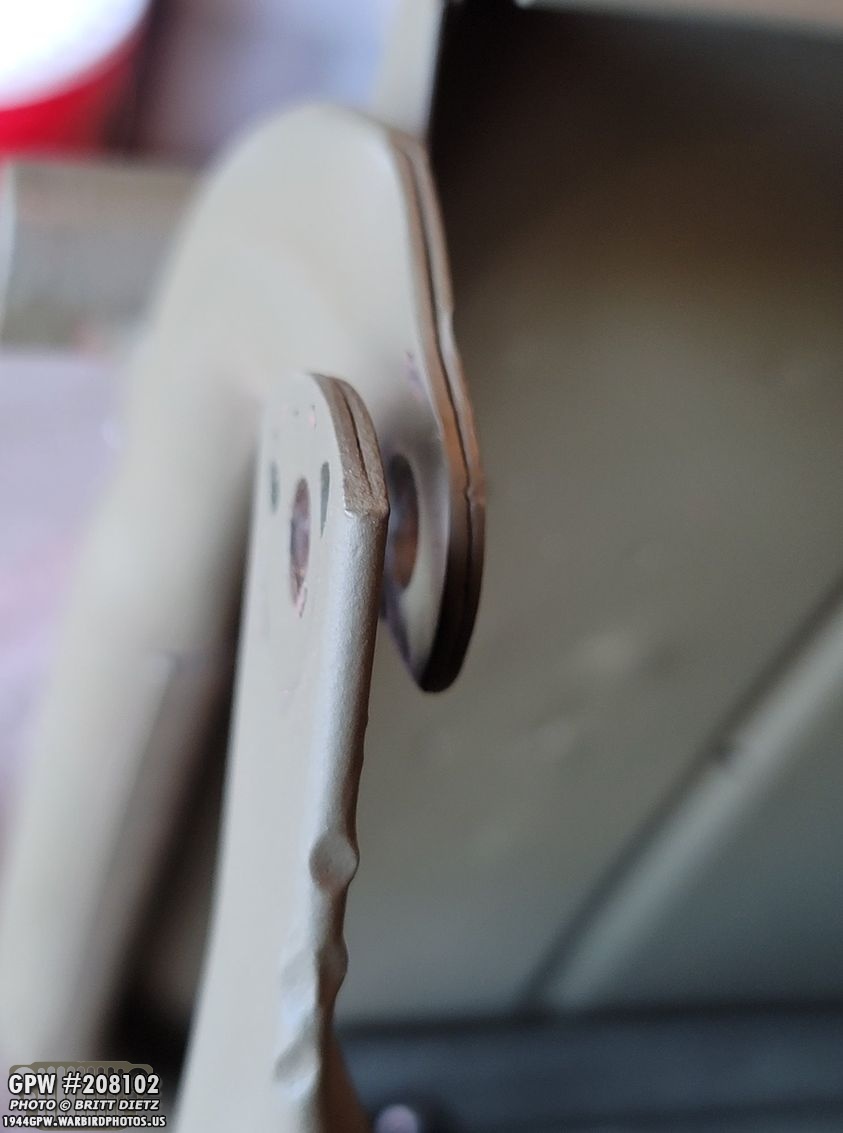
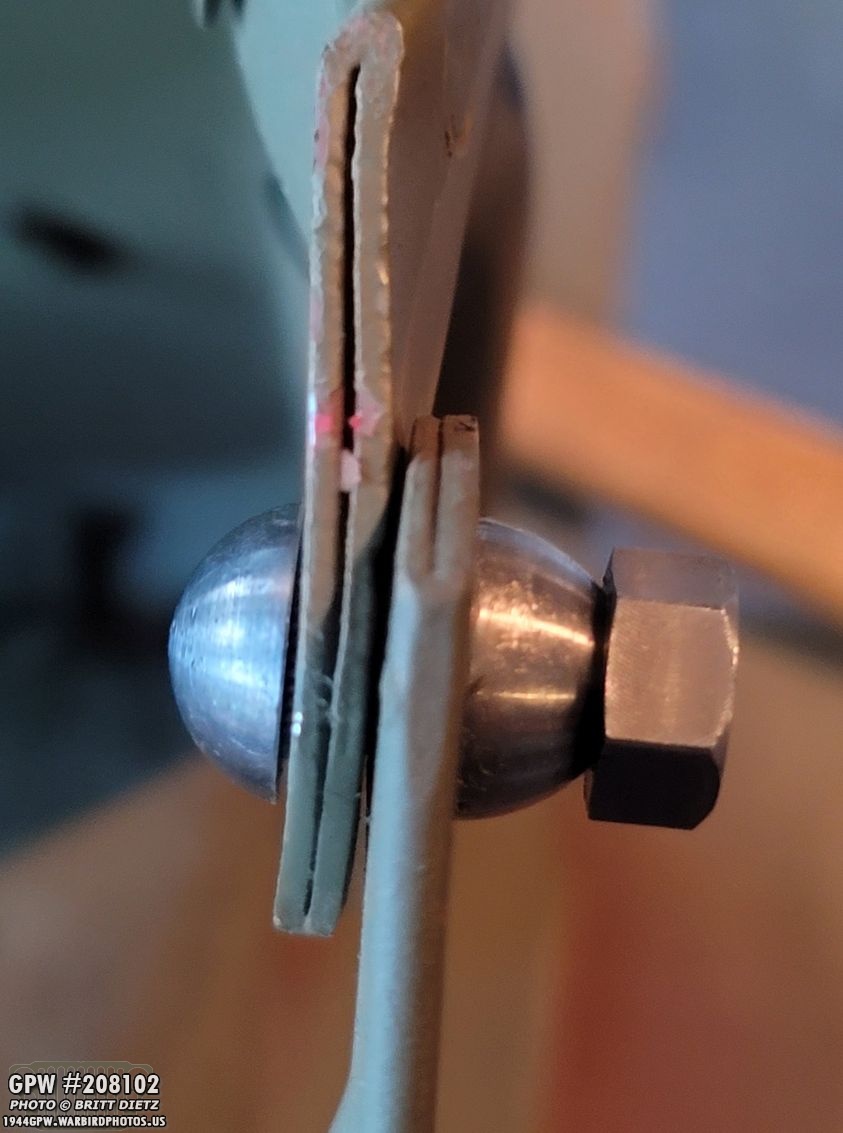
Here’s a close up look at what was on the rear seat. Hex bolt, washer, bottom arm of seat, washer, top arm of seat, washer, and acorn nut. Pretty messy.

After removing the seat, I got a good look at the Ford hand crank that I installed a month ago. It’s a good photo to demonstrate how it’s stored in the Jeep.

Naturally, the rear seat will always scuff up the hold-down springs and the resting bracket. There’s also some missing paint front where the hold-down bracket for the swivel of the seat meets the wheelhouse. I’ll sand those down and repaint them. Yes, they will get scratched again after I put the seat back in, but at least you won’t see them.
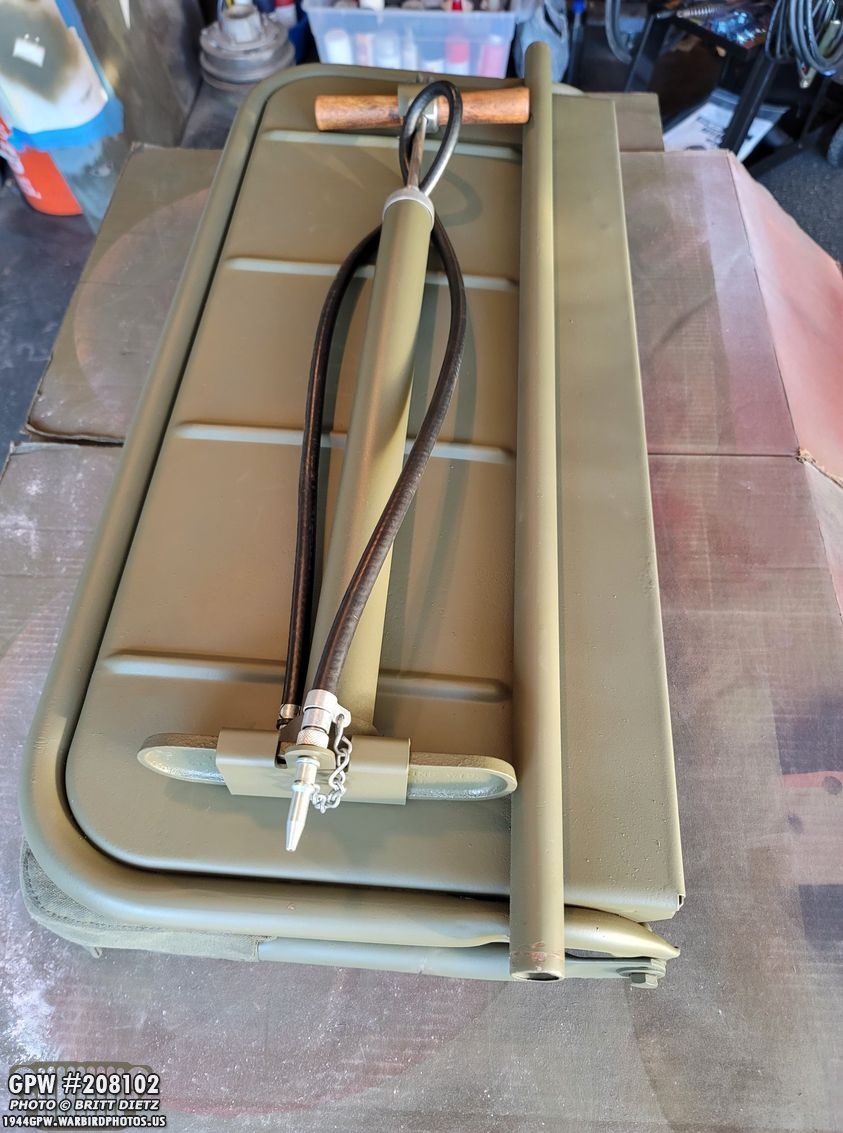
Taking the seat over to the table, I wanted to get a quick shot to show the ORD tire pump I restored earlier this year. I don’t get to see it that much since the rear seat is usually down!
Getting started… next step is to remove the hex bolt, washers, and acorn nut. Either the MB pan or the GPW top arms are slightly bent, so they don’t rest against each other by default. This is something I’ll have to deal with in a few.

As with the passenger seat, the fake rivet bolts don’t quite fit into the hole. So, I’ll have to take my Dremel to enlarge the hole just a bit to get the teeth you see under the rivet head to be able to be driven in with a hammer.
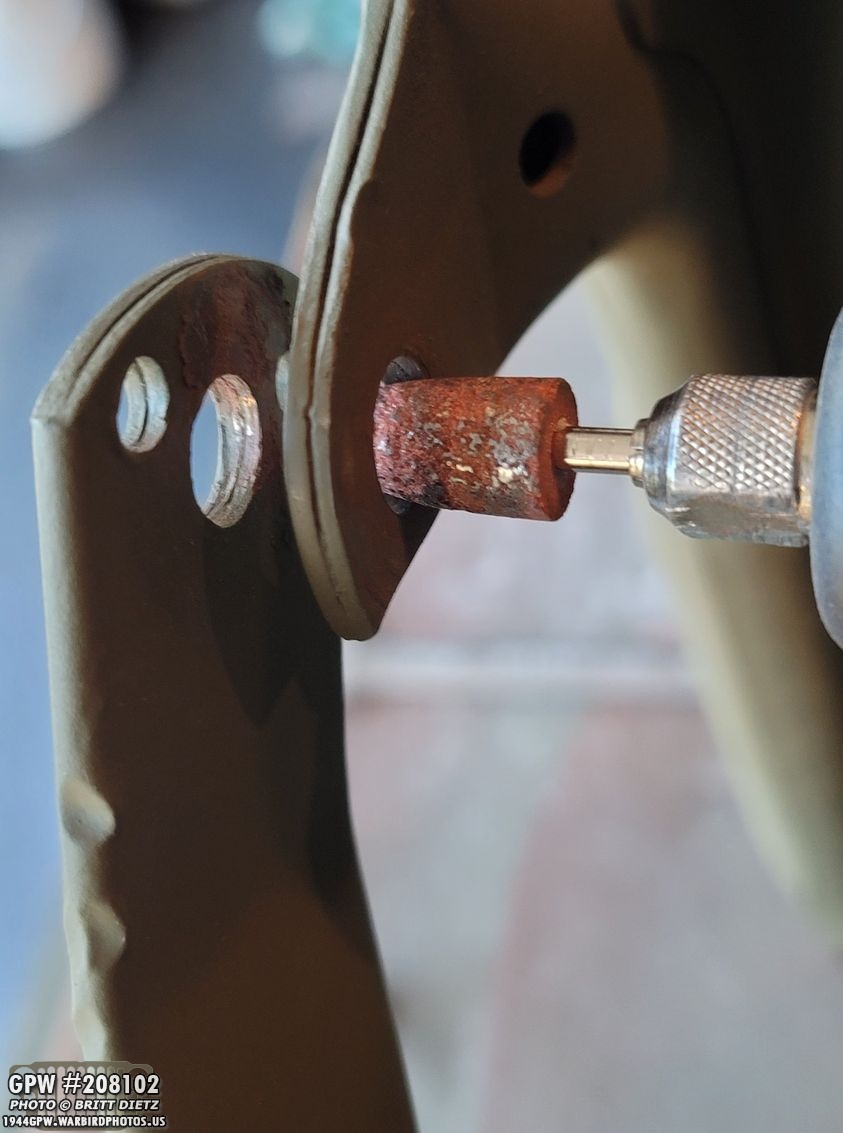
Here’s the Dremel with the grinding attachment I’m using. It’s just a little bit of grinding, then test fitting, little more, then test fitting. You DO NOT want to do too much, as if those teeth can’t grip, you’ll never be able to tighten the other side with the nut. And you only need to enlarge ONE of the holes (which is the bottom pan arm hole, as the rivet head needs to be on the inside).

After I got the hole big enough that the rivet almost entirely can be driven in, I then had to take a clamp and carefully bring the top and bottom arms together in order to have enough thread coming through to start the other side of the fake rivet. After getting about 4 threads worth by hand, I can then move on to the rachet.

I was then able to take off the clamp and put on the rachet. Here I’m about to start tightening it with the 1/2 socket…
And after it got tight enough, that nut sheers off as shown here (which I forgot to show last week). It’s a bit of a surprise when it happens, so be prepared for it to sometimes shoot across the room.
Before I did anything else, I moved on to the other side and did the same steps. Here’s just before I started tightening it.
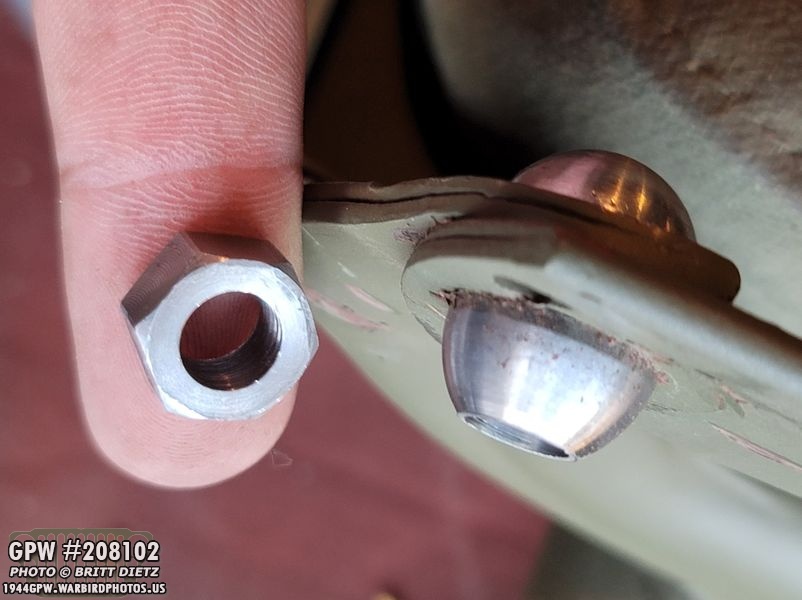
And here’s that side after the nut has sheered off. As you can see, you are left with this hole on that side where the nut came off. You could fill the hole with bondo and make it round, or you can grind it down till it’s nice and thin to mimic that squeezed rivet look.
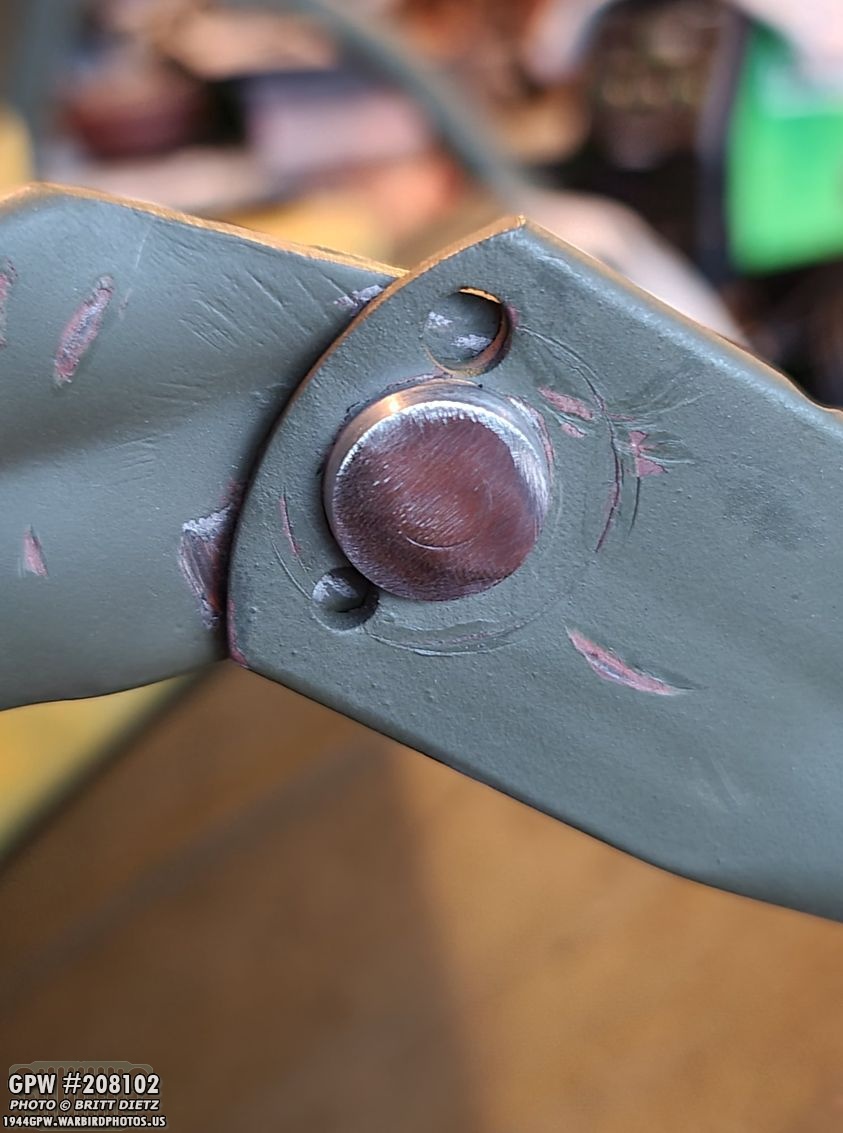
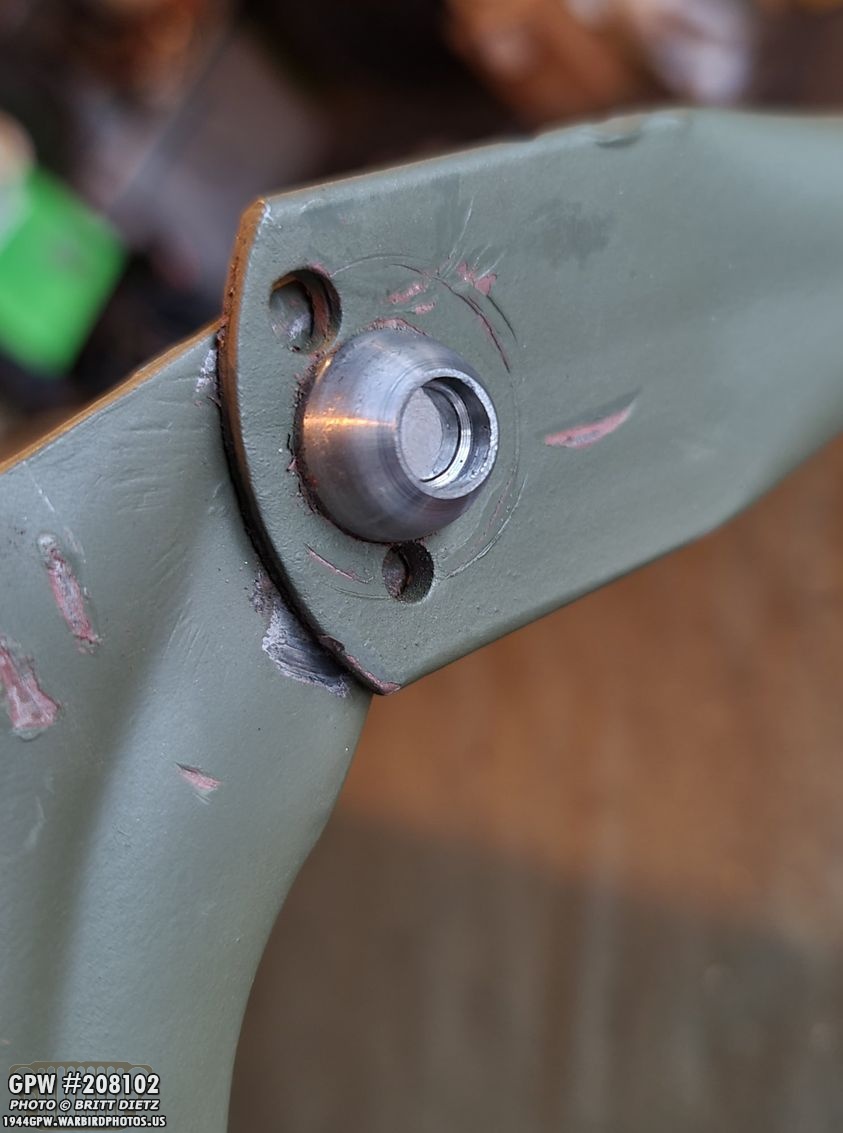
Which is what I did again like the passenger seat. These ones I went a little more ground down. You can see the faint circle in the middle where the bolt from the other side is threaded. Now, since I ground down so much, including the bolt, there are not many threads that the bolt is screwed into, that’s where some welding comes in!

But before I get to the welding, I ground down the other side as well. Here’s a look at both sides. I have these reversed on accident… the left image is actually the right side, and the right image is the left side of the seat. The rivet heads should face each other.
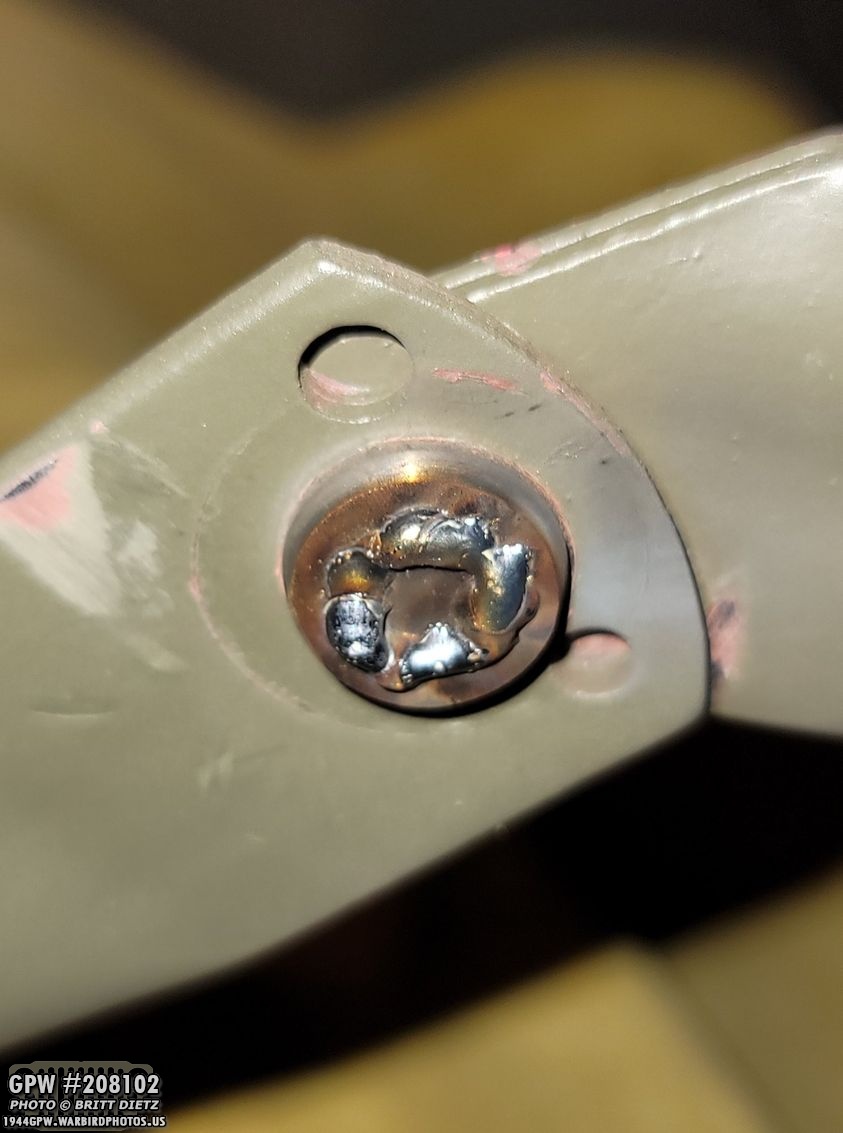
And with the gas now in place with my welding, it’s a much nicer, cleaner weld! You just need a ring around where the bolt is threaded in.

After cleaning up the weld, it’s a nice solid piece! That’s not coming unscrewed!

Here’s the weld on the other side….
And cleaned up nice and smooth! I also took the time to sand all the nicks in the paint that happened during this process.
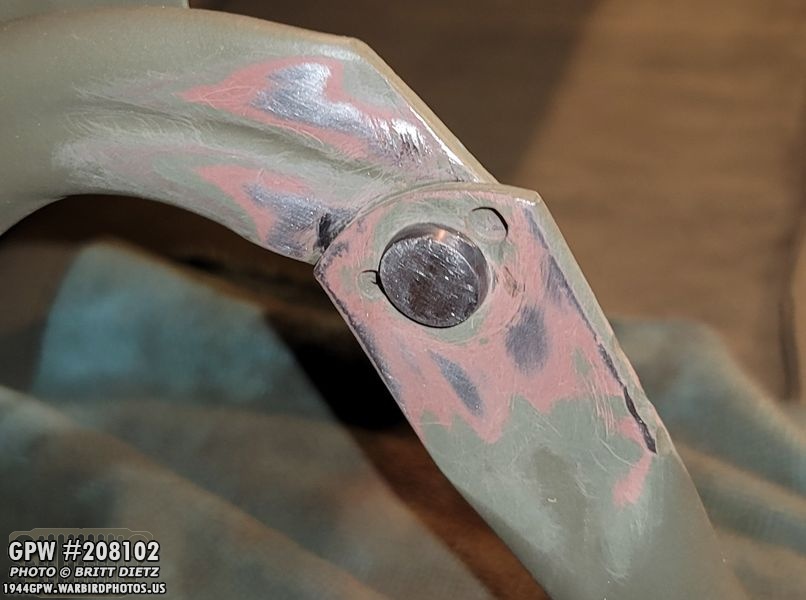
After priming and painting, it looks even better than the passenger ones I did!

And here’s the other side! Really happy how these came out.
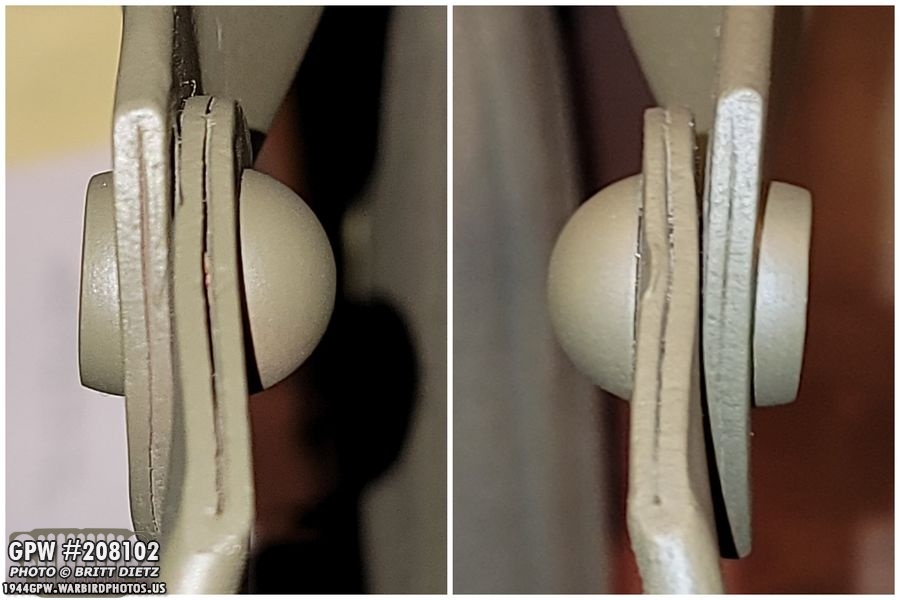
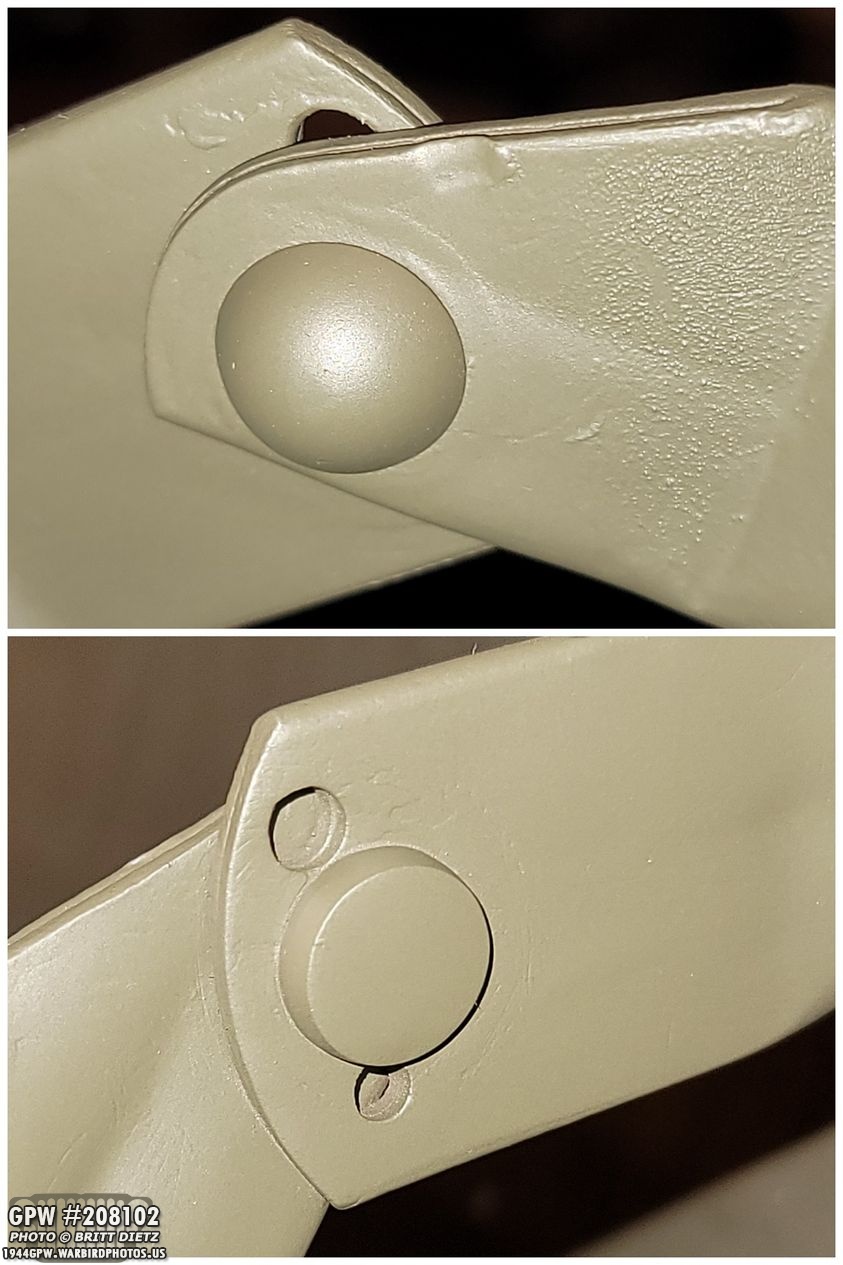
And with them all finished and painted, here’s a profile look at both of them (correctly this time with the rivet heads pointed at each other). They are a bit on the tight side, so they do slightly scratch the paint when you fold down the top of the seat, but they are not too tight that I can’t move them!

The next day, after the paint I touched up in the Jeep and some other touch-ups on the seat were dry, I put the rear seat back in the Jeep. You can see the rivet heads facing each other in this shot.

And one final time… they look pretty darn good!

And the other (Driver’s) side. So overall, these ‘fake rivets’ worked well for the seats if anyone is looking to do the same. I will be using these again in the nearish future when I do my axle change from the CJ to GPW axles. My rear shock brackets are missing from the frame, so I have some take-off brackets I’ve restored that I’ll use some of three of these rivets on each.

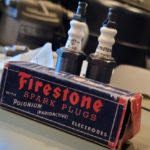
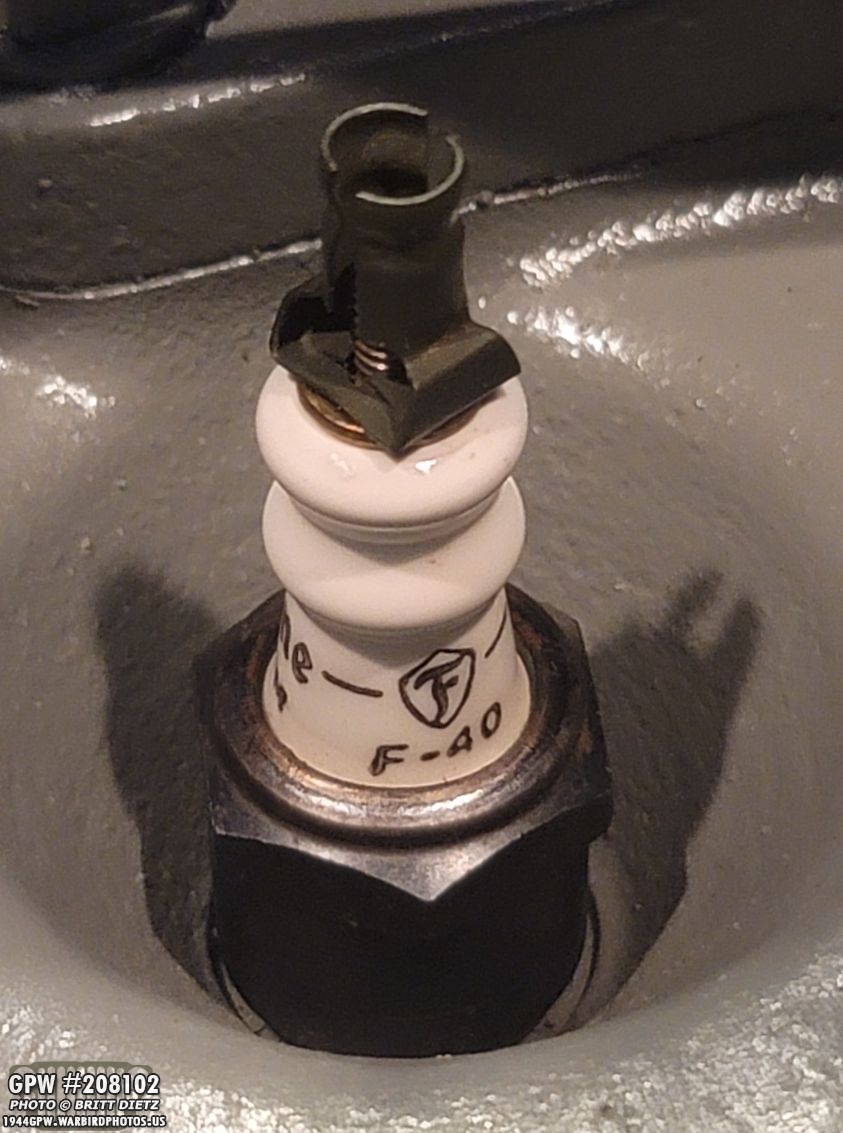
Moving on to another fun detail I managed to stumble across this past week… at a local flea market (always on the lookout for Jeep related things), I found some original NOS Firestone F-40 spark plugs! They are wrapped in their original wax paper (I’ll show what’s on those in a few) and a cardboard protector for the threads. They were sealed in their original boxes. And yes, they are/were radioactive!
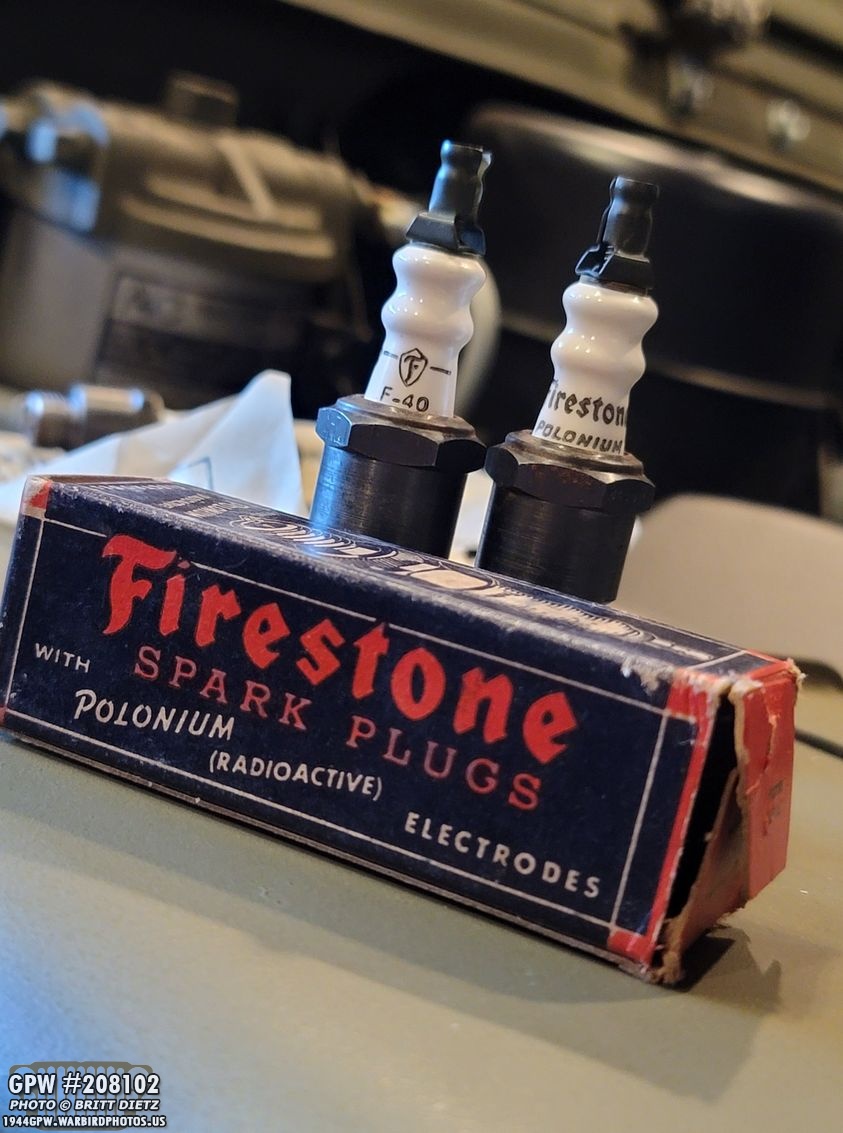
The F-40 spark plugs were used on Jeeps during WW2 along with Champions and Autolites. These spark plugs have radioactive Polonium electrodes in them. The idea was that the polonium would conduct electricity better causing a better spark. Now, you might be asking ‘Are they still radioactive?’ Probably not, and if they are, it’s so minimal it’s nothing. The Polonium has a half-life of 138 days. I believe these are about 78 years old, which means they have had 206+ half-lives. After just 7 half-lives, it would be 1/128th as radioactive as it started.

I believe these were made in 1942 based on the wax wrappers, which list a Oldsmobile Six from 1941-1942.

The one odd thing is the terminal nut, shown here removed, which isn’t your standard style nut. At first, I thought these were just protectors, but I couldn’t find any other nuts in the packaging.
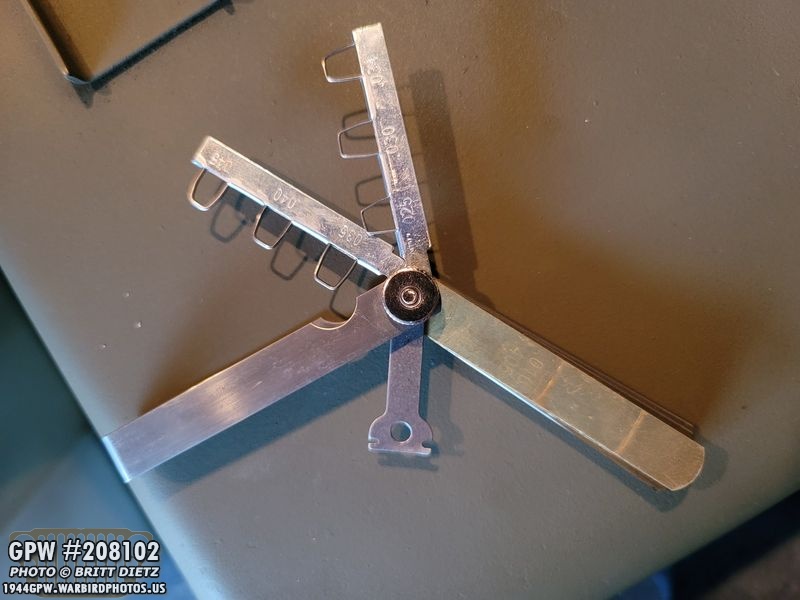
The plugs were set with a gap of .040, and for L134 engines on Jeeps, it needs to be .030. So I went and got my trusty feeler gauge which has special tools for measuring and setting the gap on spark plugs.
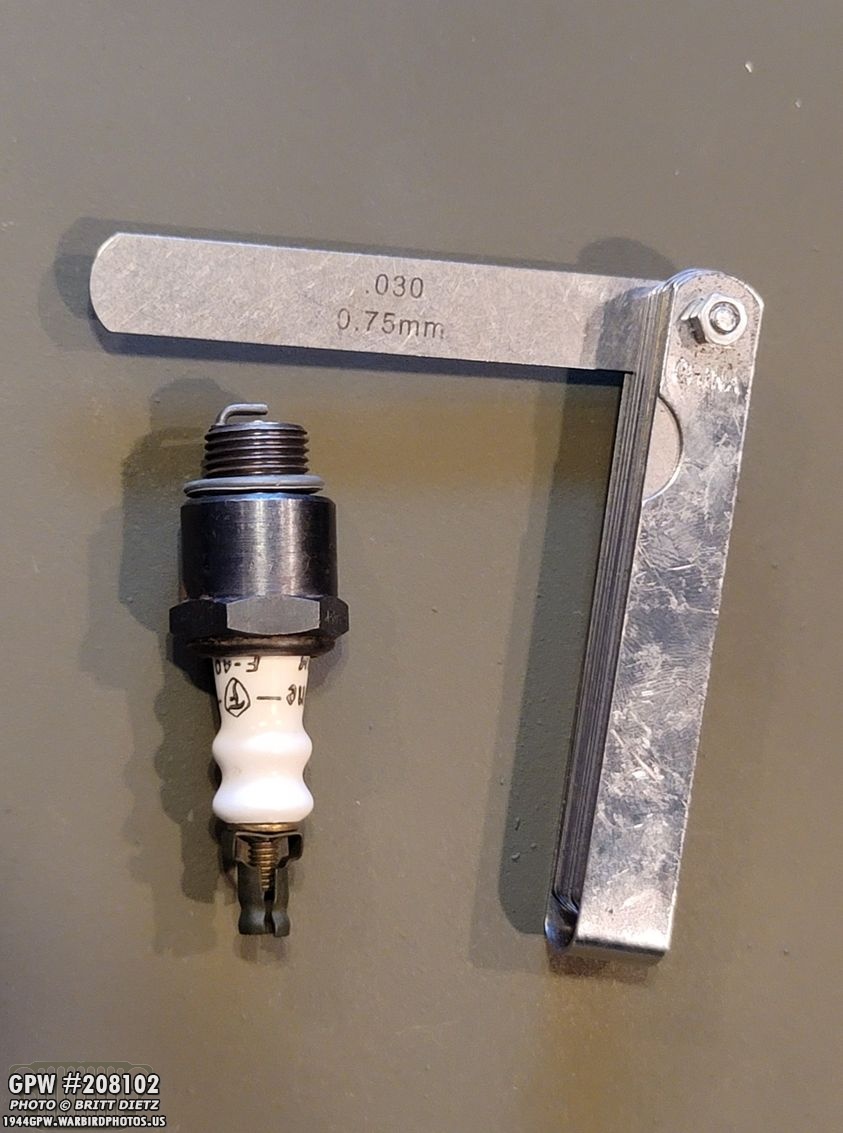
I pulled out the .030 size, and measured between the electrodes. Sure enough, they were .040. So I’ll need to push the electrode arm inward.

Here you can see the feeler gauge in between the electrodes. It’s exactly .030 now. I carefully pushed the spark plug on concrete ground against the electrode arm giving little bits of pressure pushing it inwards up towards the other electrode. I then remeasured. If it was too much, I used a tool on the feeler gauge to bend it back out slightly. Not enough, I pushed it against the concrete again. You want to be really careful, as that arm can snap or crack making these essentially useless.
After all of them were gapped, I decided to give them a go in the engine to see how they perform. 78 year old spark plugs, who knew what to expect?

One thing I found that helped with this type of terminal nuts was to take small pliers and slightly bend out the gap between the two sides. That made them snap and hold better with the distributor wires.
Here’s two of the ones I got installed. I was a bit nervous, not that something would go wrong, but that they just wouldn’t work.
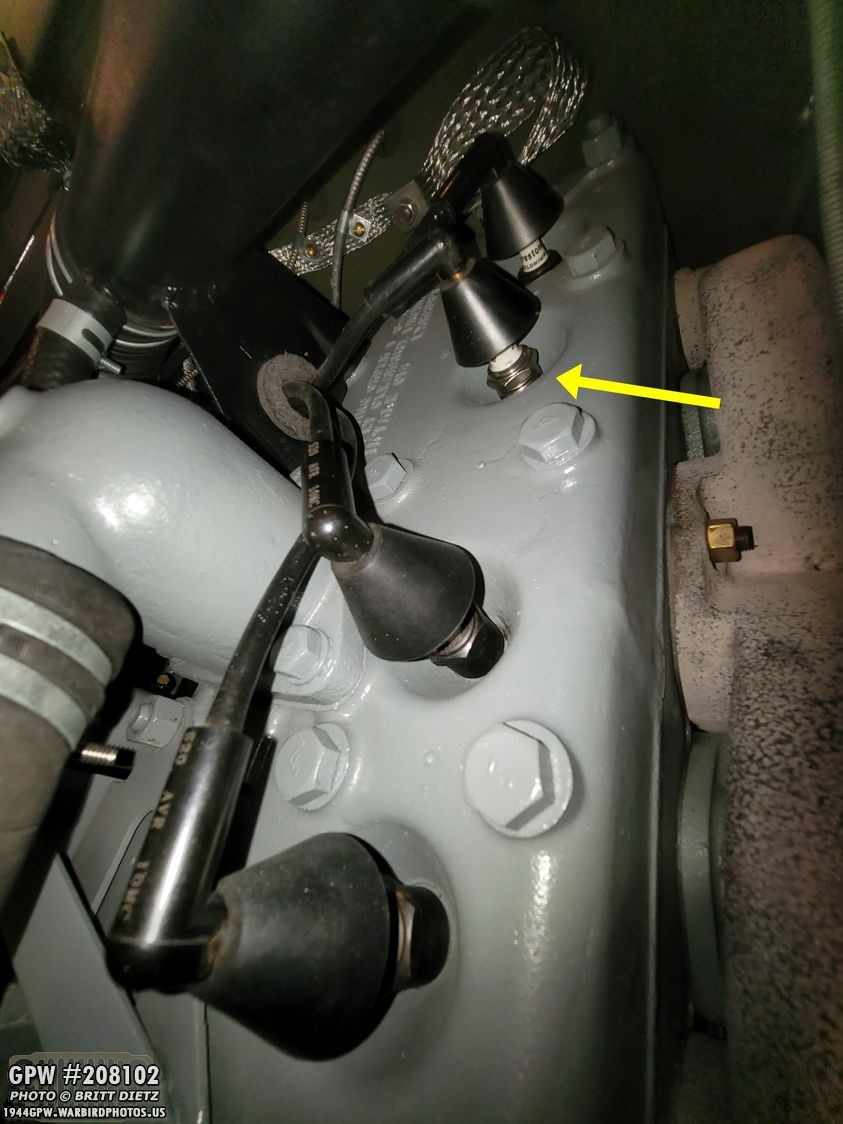
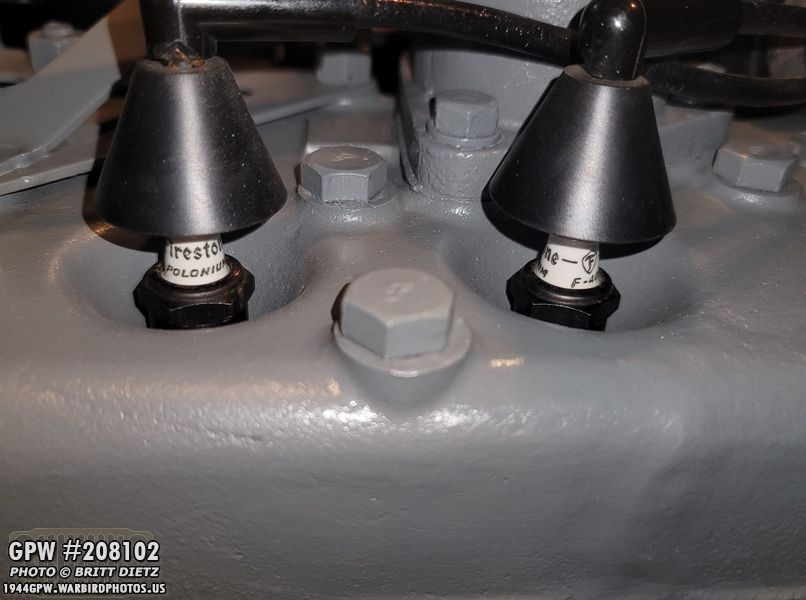
I installed three of them into the Jeep in the 1, 2, and 4 spots. The Jeep engine fires 1, 2, 4, 3… and at the time I had only three to test so I left the #3 spot with the modern autolite plug. Next month, I’m looking to be getting a few more of the F-40 plugs from the same seller, so I’ll replace this one when I have more.

After everything was double-checked… it was the moment of truth. I went over, turned on the ignition (so far so good)… then hit the starter… and the Jeep jumped to life right away without any studders! I let it continue idling for a bit to listen to it, and it purred really nice! It actually sounded a bit better than before with a little less putt putt!

So, I closed up the hood, hopped into the Jeep and went for a drive. Flawless, and I swear the engine is running better with a bit more power to it. Super excited to have these extra detail in the Jeep, and what looks like possible BETTER performance! I’m hoping to get enough extras of these spark plugs to have an additional set in case any go out, and some left over for some people who want them.
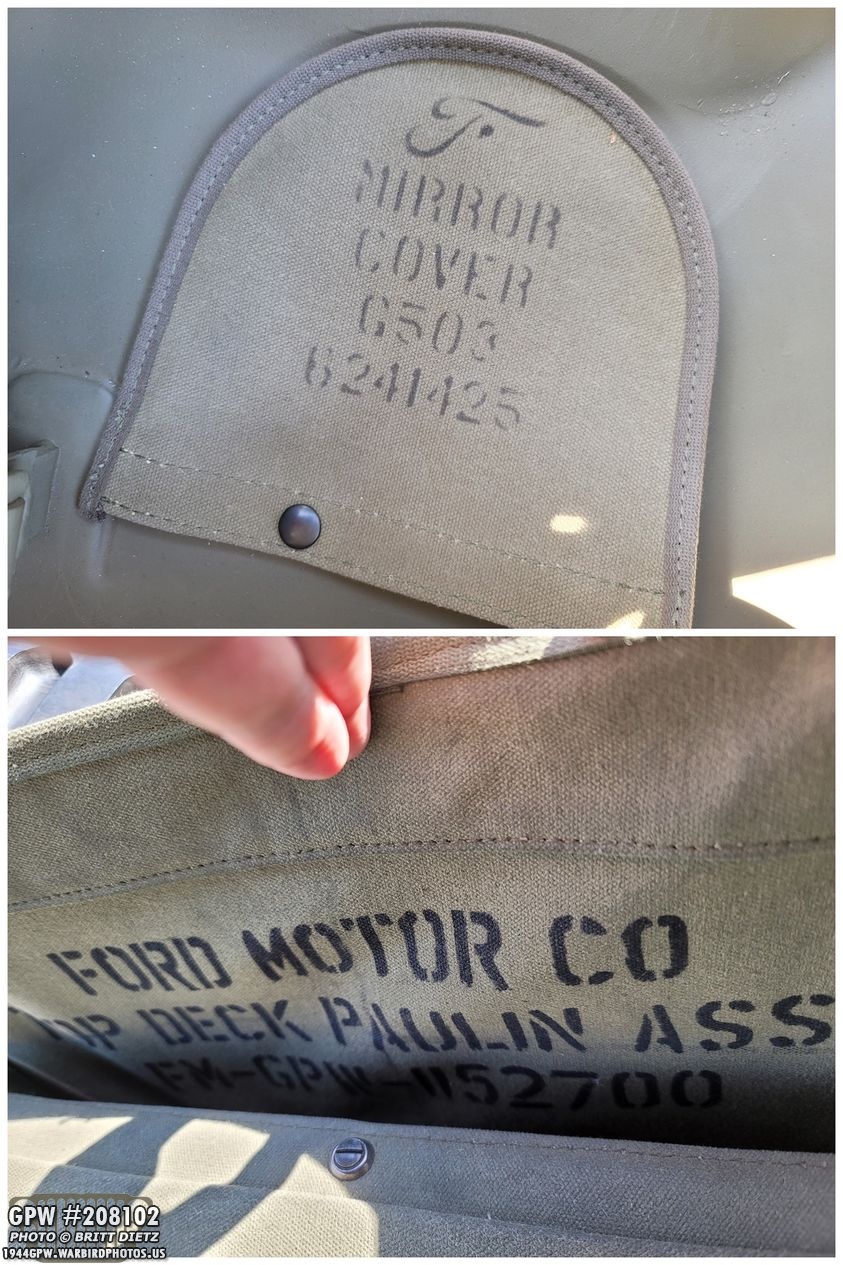
My next project, that I’ve been slowly working on for the last few weeks, deals with the ‘what if’ question of if Ford was producing GPW Jeeps during a pandemic? What’s that you say? Well, I had an idea for some face masks… what would Ford do if they produced them during WW2? I kept looking at the mirror cover and the canvas top with how they were stamped which gave me an idea…

As I was searching for some canvas looking fabric from Joann’s, I lucked out and found a few yards of this perfectly colored canvas looking material. It was originally for furniture covering and was all they had left. Unfortunately, this was the only Joann’s that had this material, so what I got is all I have now.

So I popped into Photoshop and made myself a template for stamping with what I thought Ford might do. I found a stencil font that matched much of the stenciling I’ve seen, and hand made the stenciled F mark. I even tried to mimic the standard GPW part number. I couldn’t find any GPW part numbers with 2020, so I figured I’d use that. I then used my Cricut to make a stencil with vinyl.
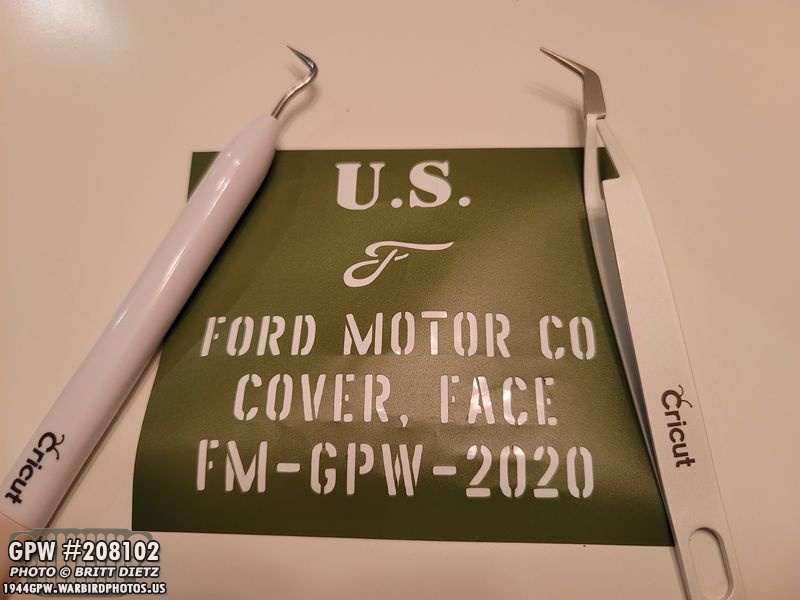
Using the weeding tools, I removed the inside letters…

And decided to try on some test pieces of the fabric. Note, the color of the fabric shifts a lot in these photos since it was a phone and these are not color corrected. Just know they do indeed look like perfect canvas color. Here’s the vinyl stencil on the test fabric.

I experimented with different ways to ink the fabric, looking to see what makes too sharp of letters, what bleeds, etc.

Here’s a look at that all turned out. I liked the COVER, FACE the best of all of them, as it wasn’t too sharp and wasn’t too much of a bleed.

I then went and got some OD Green elastic which matched the color of some straps on the Jeep.

Thankfully, I have someone in the family who can actually sew and make something, as I certainly can’t! My mother put together three masks for me to try out using the fabric. I opted to not have any stitching seams vertically down the nose as that would make the stencil not stick well. Once I got the three completed masks, I made some more stencils with the Cricut with the correct size for the mask and the design tweaked a bit.

Stencil on!

Marked up!

End result! Looks pretty darn good if you ask me!

Overall look how it turned out! Since the material is a bit thick, I probably won’t wear this all the time VS my normal cloth masks, but this will be perfect when driving the Jeep, at events, etc! I hope it gives some people a chuckle when they see it.
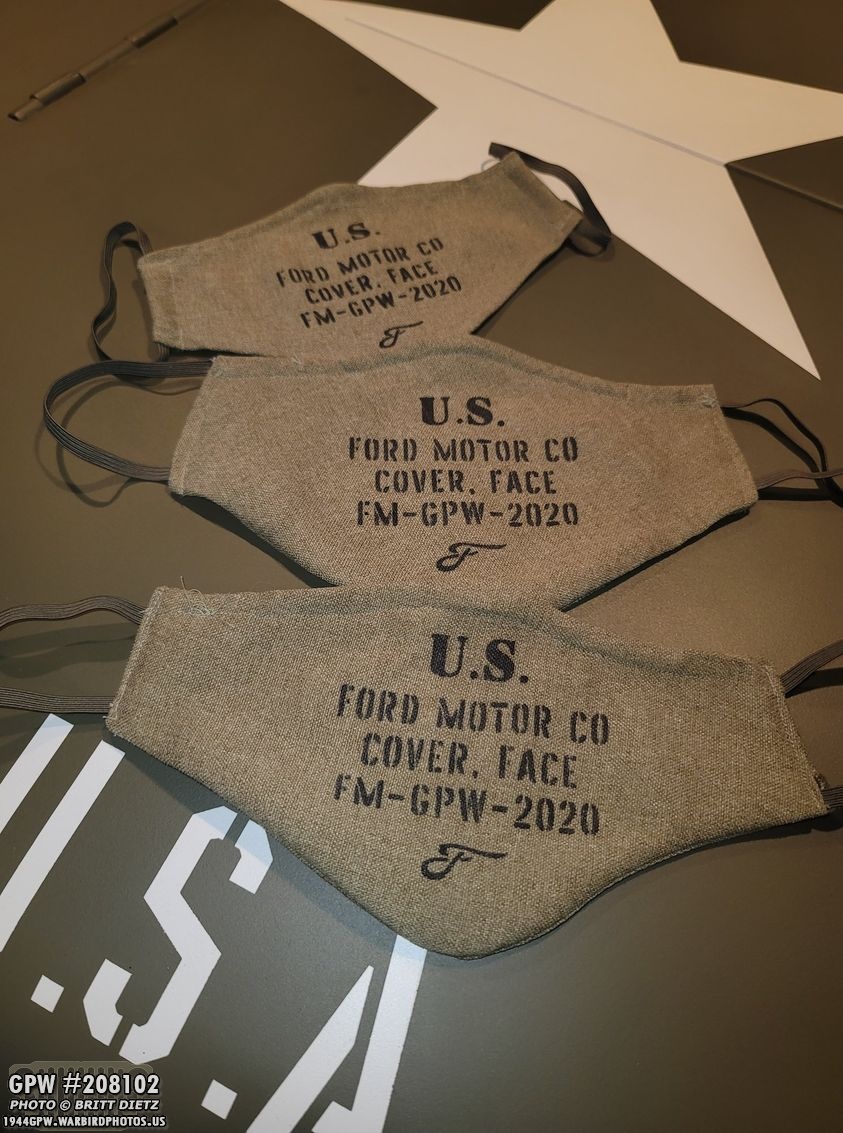
Here’s the three of them all stamped! I might do a limited run of these for those who are interested. Since I’m limited on how much of this furniture fabric I have, I can’t make too many more. I do plan on taking a trip out to Los Angeles to some of the fabric stores in the next future to look for other fabrics that mimic the canvas look like this. If I can find more, I might have several of these produced for those who might want them. If you’re interested, let me know!

Wrapping up this week’s update, the next two week’s might be rather slow as there’s not much to do on the Jeep at the moment. Once October hits, things will jump into high gear as I finish the restoration of the GPW axles and begin the process of switching out the CJ post-war ones. Next week I have a special project involving what I’m going to name the Jeep and some ‘nose art’.

So that’s it for this week! Hope you enjoyed this update.Till next week…