 HALFWAY POINT!

This past week has seen a lot of work, and I’m finally reaching the HALFWAY point of this restoration with the (finally) painting of the frame! There’s a lot of extra work including electrical checks, final engine painting, and the return of major parts from sandblasting!

The painted frame! More on that in a few…

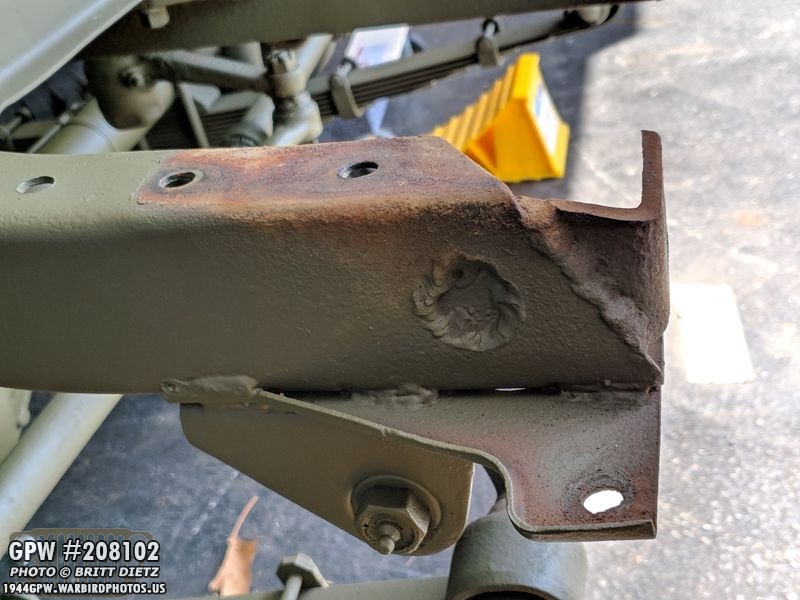
Started to pre-work on more electronics for the Jeep, including the headlight swivel bracket and how it connects to the grill. This was a test to see that the paint I sanded off from the headlight to the bracket was giving a good ground return via the grill.

Here’s a look at the sanding I did on that bracket so that the headlight assembly could return the ground and make a circuit to light the headlights.

Next up, some more painting including touching up and finishing the side mirror arm, the push button starter switch, and various screws for the tail lights and marker lights.

Final coat of Ford Engine Gray was added to the engine to touch up the front pulley and crank nut after they were added back on the Jeep.

Next up, I’ve been patiently waiting for a day where I can pull out the frame and FINALLY paint it. That would mark the halfway point of the restoration, as I’d start putting things back ON the jeep instead of taking them off! The winds died down a tad one of the days allowing me to do some final touch-ups of red oxide primer.

And I was able to hit the transmission and part of the frame with some OD Green to test out how it looks before it got windy again… can’t wait to get it all painted!

I was able to paint a lot of parts needing painting, however, as I was able to block the wind and use the spray gun. The new tail lights have been painted along with the repro marker lights.

I was able to get some more paint on the steering wheel bottom and the bottom of the spare tire bracket.

It took about a week, but FINALLY, the wind was light enough I could hit the entire frame with paint!! The first step was to remove the wheels and put the frame on stands… using the engine hoist to lift up the frame and remove the wheels. The wheels were incredibly difficult to get off and took a lot of work.

One last look before getting painted…

Here we go…

BOOM! OD Green! It’s amazing how fresh paint can totally change the look of something. Frame and axles look nearly brand new.

Another look from the other side.

Also did another coat on the steering wheel, tail lights, marker lights, and the steering wheel horn button nut.

Rather than put the wheels back on and roll it back into the garage only to take it back out and remove the wheels again the next day, I went to @[314647228668334:274:Harbor Freight] and purchased four 1,000 pound capacity mover’s dollies. I then lowered the frame and axles down so essentially the dollies became the wheels. Worked really well, though it takes two people to make sure it rolls straight.

Here it is with the first coat tucked into the garage until the next day…
Day 2 of the frame painting, I was finally able to remove the front bumper (that is incorrect). I noticed that someone had added L shaped brackets on the end of the frame for this incorrect bumper. The frame should end on that diagonal line… so I’ll have to cut that off.

Rather than removing the entire L bracket (as you can see clearly here), I’ll just cut it at the diagonal line. As I was told ‘The frame can be pretty weak in this area, so extra metal can be better for it’
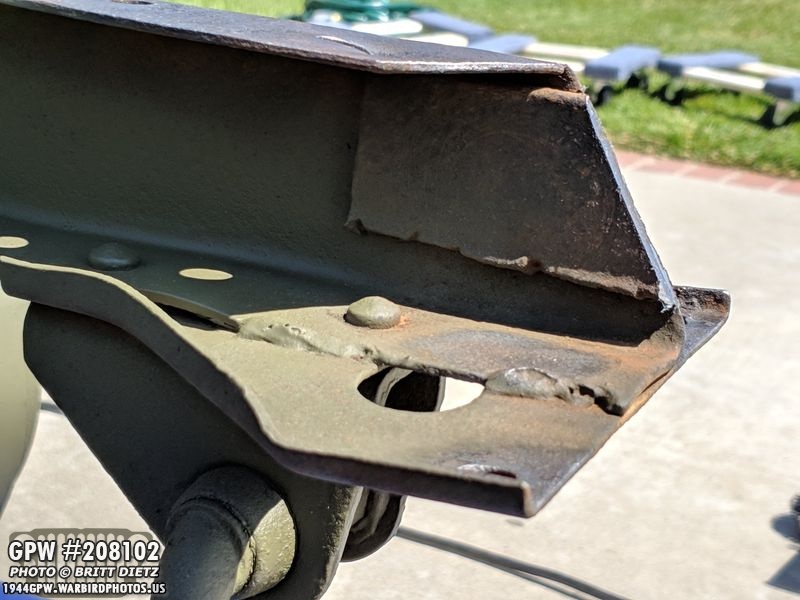
Took out the angle grinder and a grinding disk, and went to work! Not too bad considering I have very little grinding time.

Here’s the pieces of the L brackets that were removed.

All primed with red oxide! I’ll add correct top gussets (already ordered) and eventually the correct bumper.

Time to get to painting the second coat!

Second coat applied! I’m debating if I want to add a third coat this coming weekend (which means both coats would have had a whole week to dry).
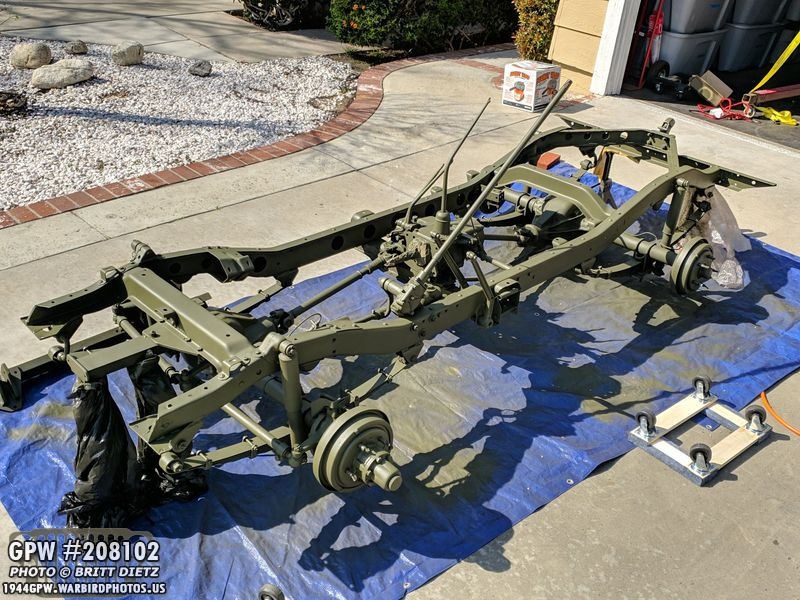
Looks mighty pretty. This marks the halfway point of the project! Once I decide if I’m going to do a third coat or not, I can then focus on the wheel hubs. Once they are removed of paint, primered, and repainted, then I can put the wheels back on and start re-adding things like the engine!

Marker Lights are all dried and put back together! They will be stored until time to reinstall on the finished grill.
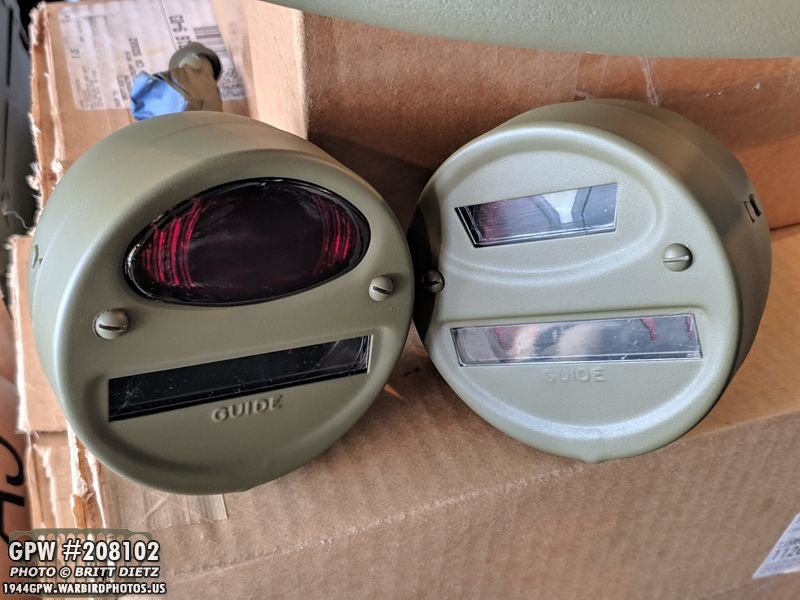
Trail Lights have been put back together after painting and are ready for installation (which won’t be for a long while)

Looking at the back of the tail lights, they came out great!
I decided I needed to spend an evening working on testing all the electrical components of the Jeep that I could to see if I needed to order replacements. First up was the dimmer switch. This switch, which sits low on the firewall is a foot switch you can press that switches the headlights between high and low beams.

Using the 12 volt battery for the Jeep and wiring one of the headlights up to the switch, it worked perfect!

Next up, I needed to test the dashboard lights with the new wiring harness. They work!

Here’s how the light will look when the dashboard light covers are added. I might paint the inside of the cover white to make it even brighter (it can be hard to see the light at night)
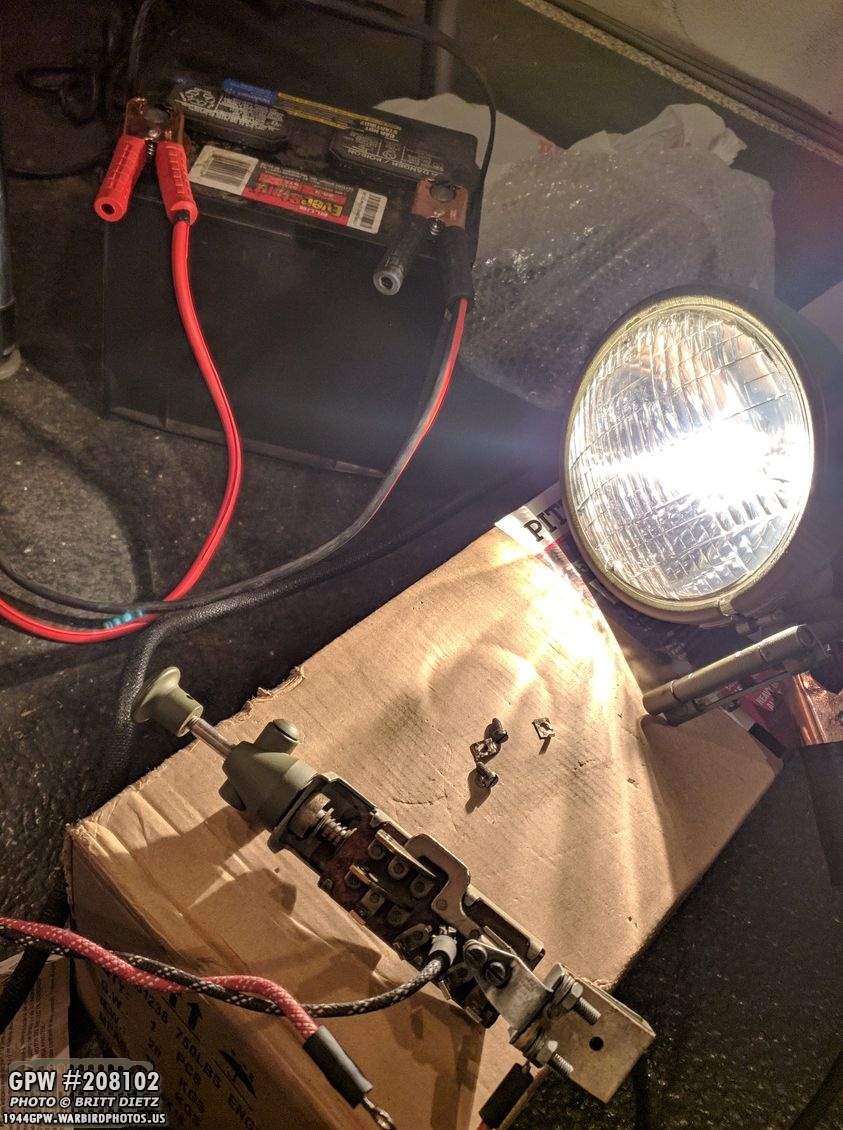
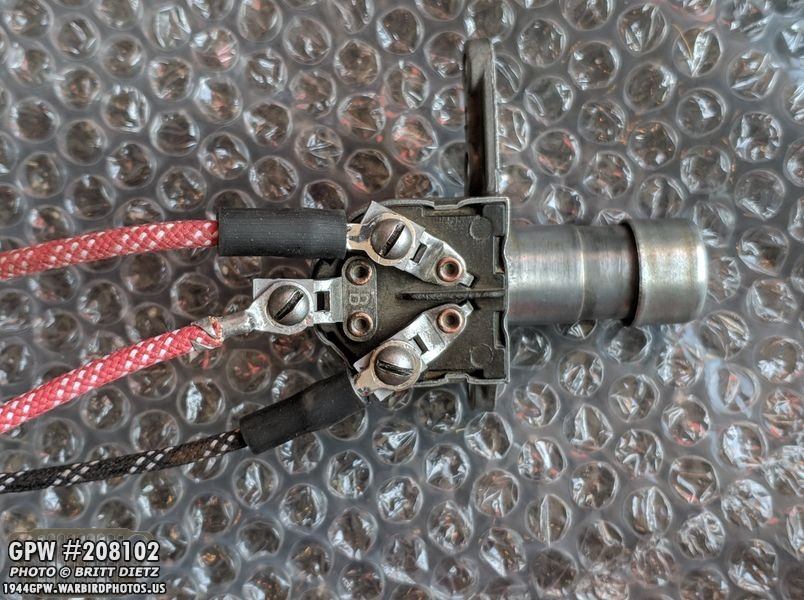
One item I had forgotten to test was the push/pull switch. This new old stock switch I got from Greece came with a circuit breaker and all the screws for all the terminals. I had to replace the LIGHTS knob on the end (it originally had no writing) but I realized I’d never tested it. It could very well not work (oops). So I hooked up one of the headlights as a test and ran the battery through it, it works!
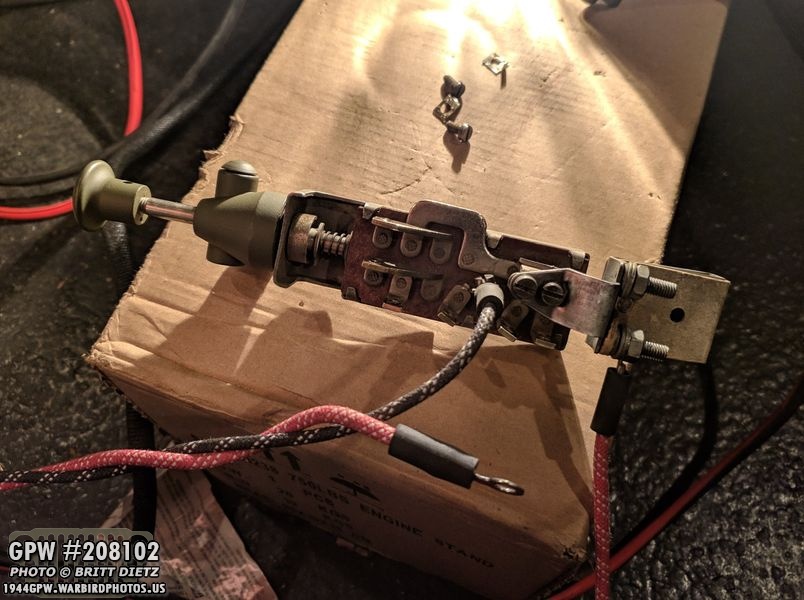
A close up look at the switch. Each one of those ports will have a wire attached to it going to something on the Jeep. Here the headlight (black wire) is attached to actually where the headlight wires will end up going. The red wire is hooked up to the circuit breaker, this is where power comes IN from the battery. At first, the switch didn’t work and I got really worried.

Turns out, the connector on the circuit breaker where the power is fed through two metal parts that touch was rusty, preventing a good electrical flow. After bending out some of the metal and getting a wire wheel in there, it cleaned up nice and worked great! (yellow shows where the circuit breaker parts meet eachother).
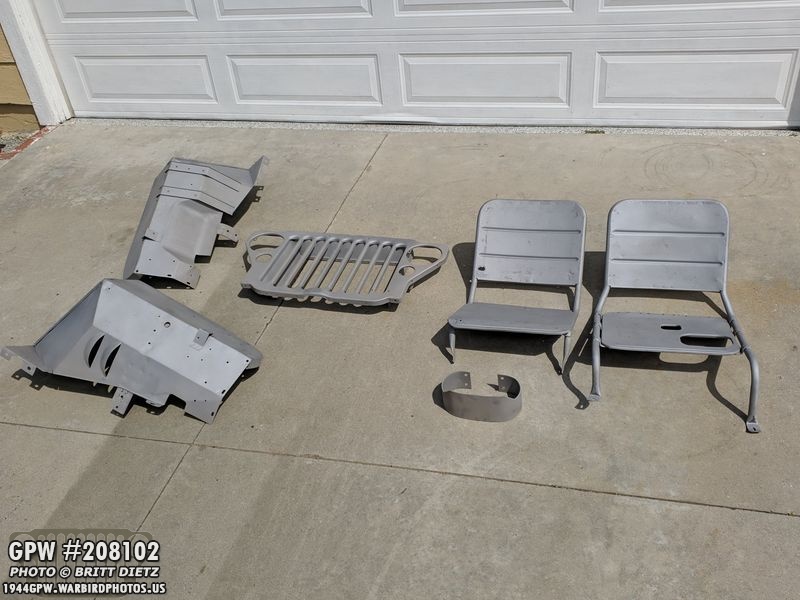
And some other big news, a bunch of the large parts made it back Thursday (3/28) from the local sandblaster in way way less time than they quoted me! The grill, both fenders, the two front seats, and the last bumperette looking nearly new!

And it revealed some F stamps… the two backwards F stamps that are easy to see are from the two seats, the harder to see one is from the drivers (left) side fender.

Sadly, the sandblasting also revealed some bad rust damage on the fenders that I will have to address this coming weekend. But more on that in the next update next week!
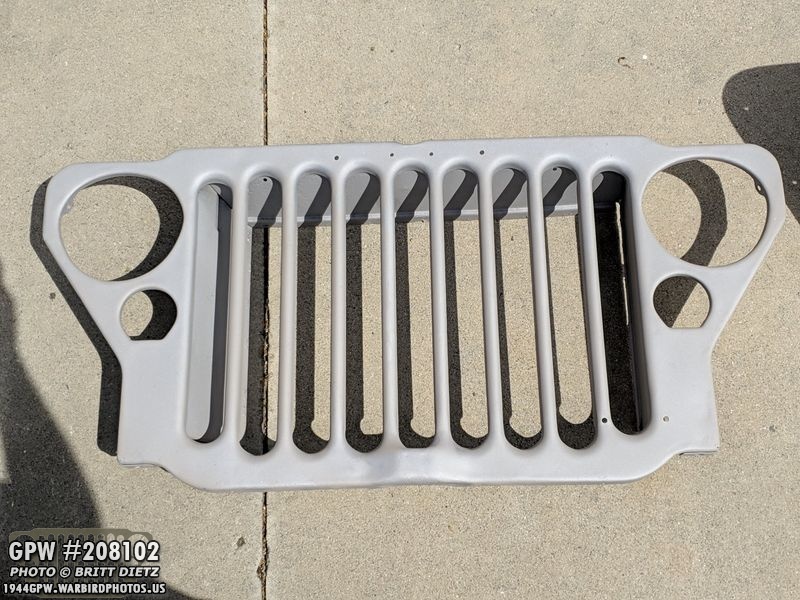
Here’s a look at the grill, which came out the best from all the items I had sandblasted. Those holes at the top and bottom right will have to be filled, however.

The driver’s seat was in great shape, but the passenger seat will need some welding patching.

And I was surprised to see some original wood inside one of the fender channels! During WW2, many of the hat channels throughout the jeep had wood in them for stability, which was also a major cause of them often rusting out after the war because of moisture in the wood.That’s it for now, see you next update!