 Fender Work Begins, Jeep History, and more!
Now that the holidays have passed, I have been able to get a start on my next big project which is repairing the original passenger fender! This is part one of what will be several parts during the repair and install. I also found some new history on my Jeep! Plus I started a new side project!

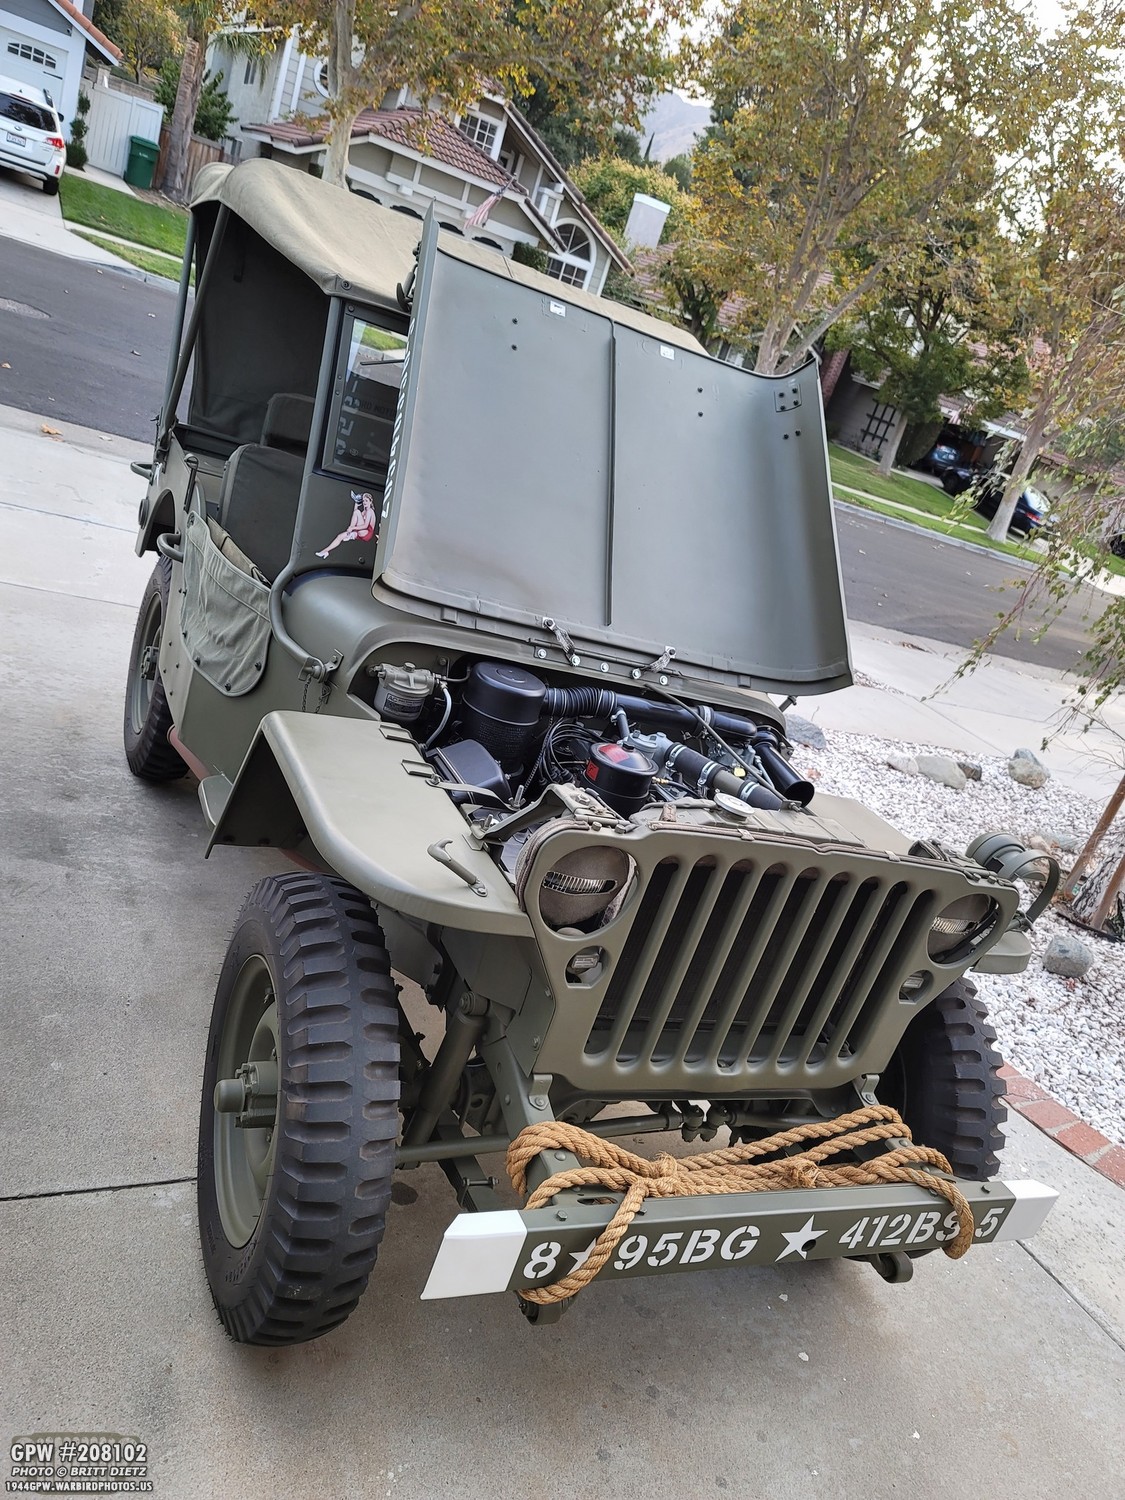
Throwback image from last year when I took the Jeep out to the Planes of Fame Air Museum for their December event. A P-51D Mustang sits behind the Jeep. See that passenger side fender? That’s my first major Jeep project of the year! So let’s dive in…

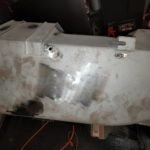
But, we’re not going to talk about that fender in the previous photo, that’s a MD Juan replica that’s been on the Jeep until I felt ready to tackle this. This is my original GPW passenger fender that’s been sitting in the garage patiently awaiting some TLC. I had it sand blasted in 2019 with the rest of the major part of the Jeep, but the cancerous rust was pretty severe in spots.

In a recent update, I posted how I finally took out the fender and started to map out what needed to be fixed, removed, filled, etc. Yes, there are a LOT of way worse Jeep fenders out there, but for someone who’s just getting into welding and metal repair, it’s still a pretty big project.

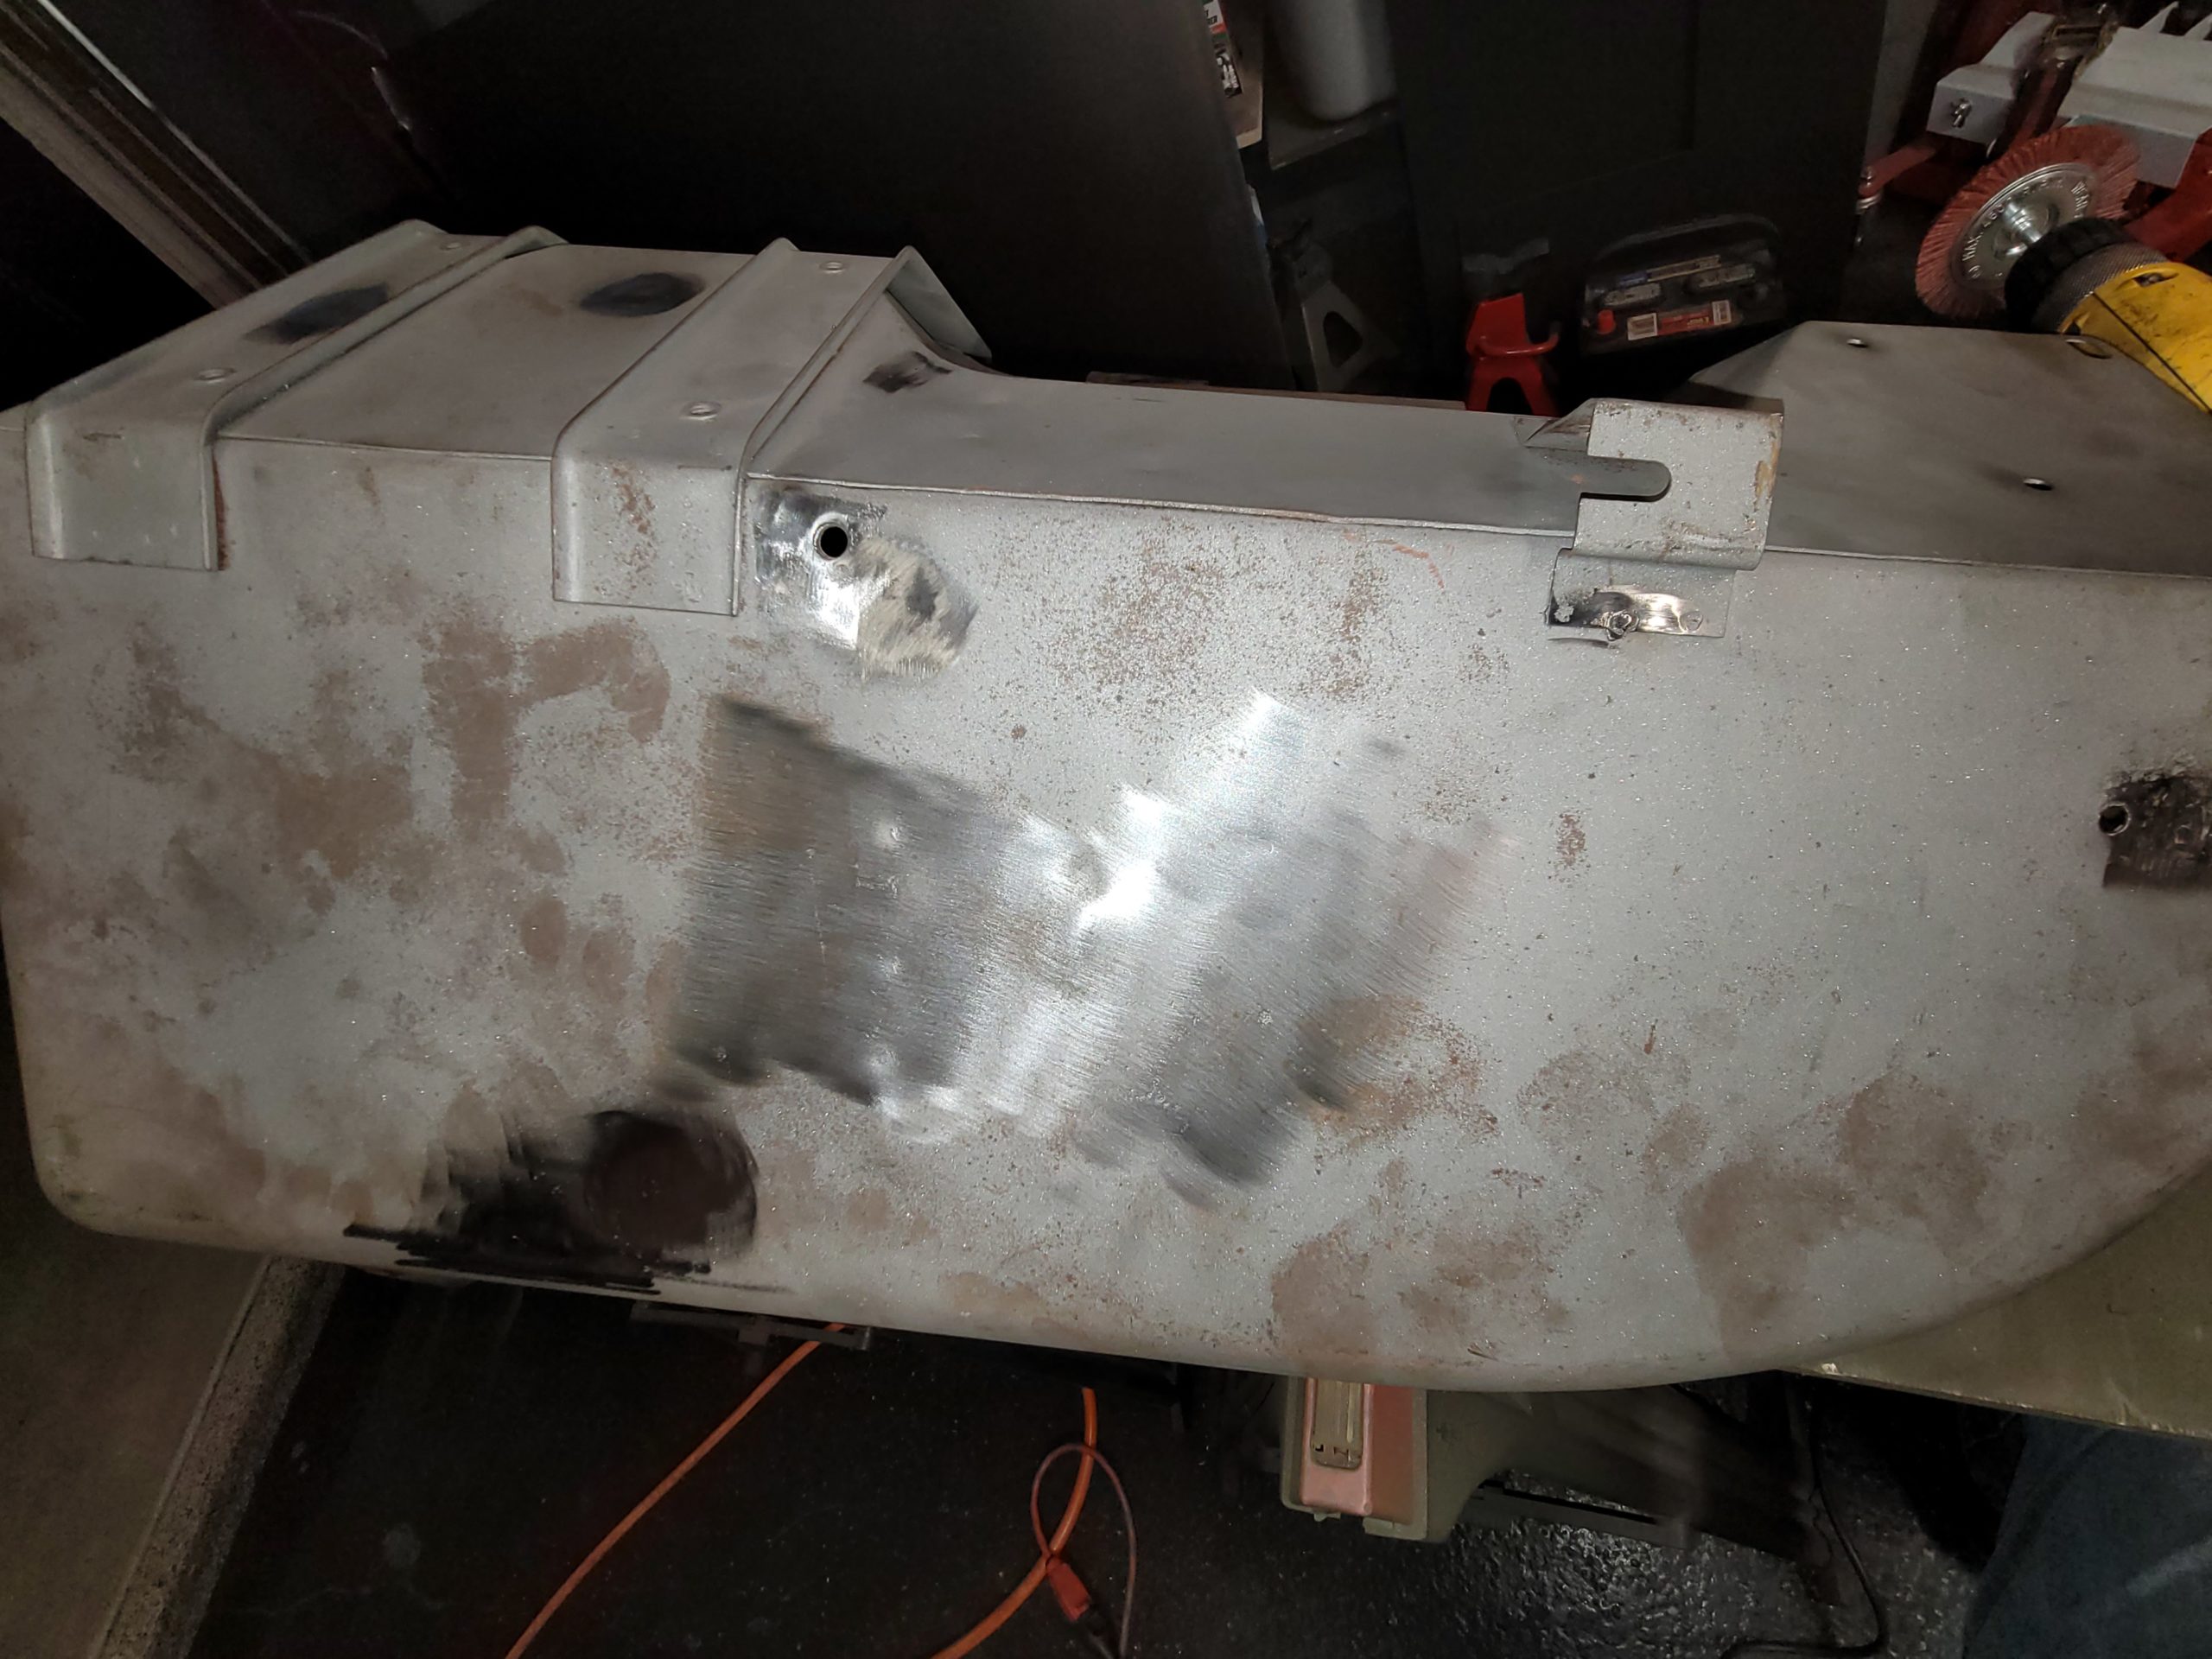
One area that I decided NOT to tackle was the corner. It’s been filled with a bondo like substance that will NOT wire wheel, sandblast, or really grind. Whatever this stuff is, it’s as tough as the metal. Because it would be a lot of work to try and get this curved area cut out (especially with the reinforced area behind it), I’m just going to bondo it smooth.
I did, however, want to remove the gob of whatever this stuff is that was squeezed out the back. It took a hammer and a chisel to just break this little bit off. That’s tough stuff!
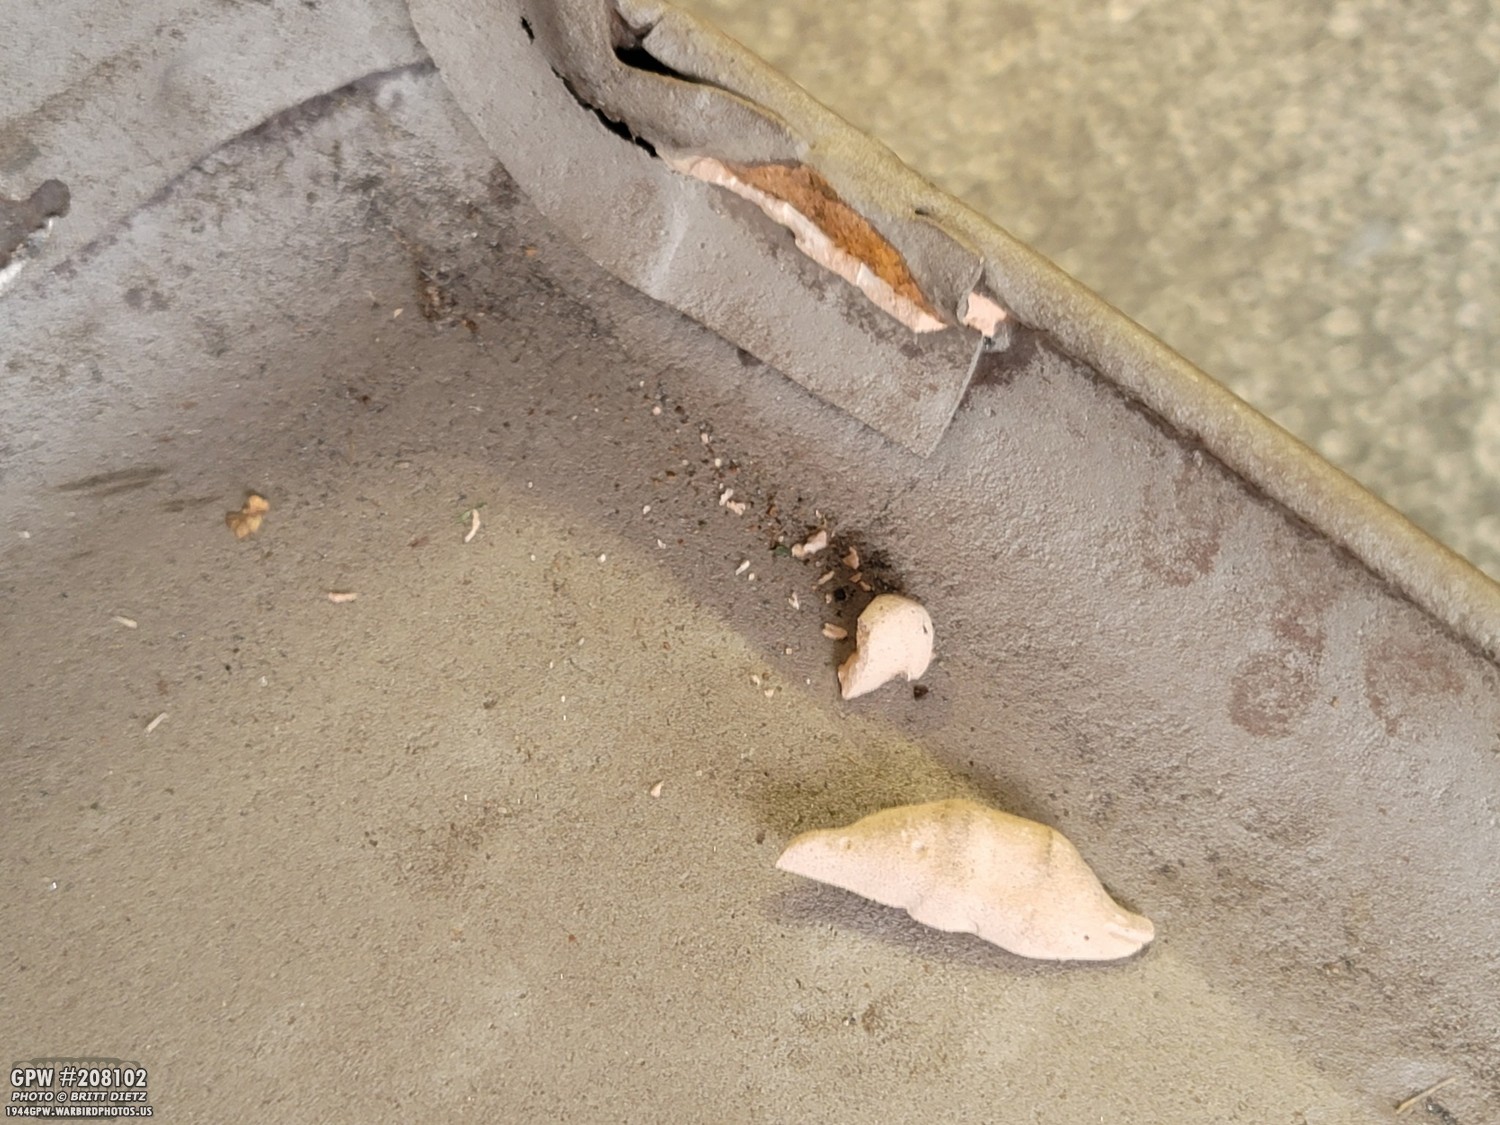
Next, I needed to take inventory of what holes need to be filled. Here are all the holes in the fender currently. At first, I thought I might need to remove ALL these holes. After consulting online photos and my friend Roger, we discovered something interesting…
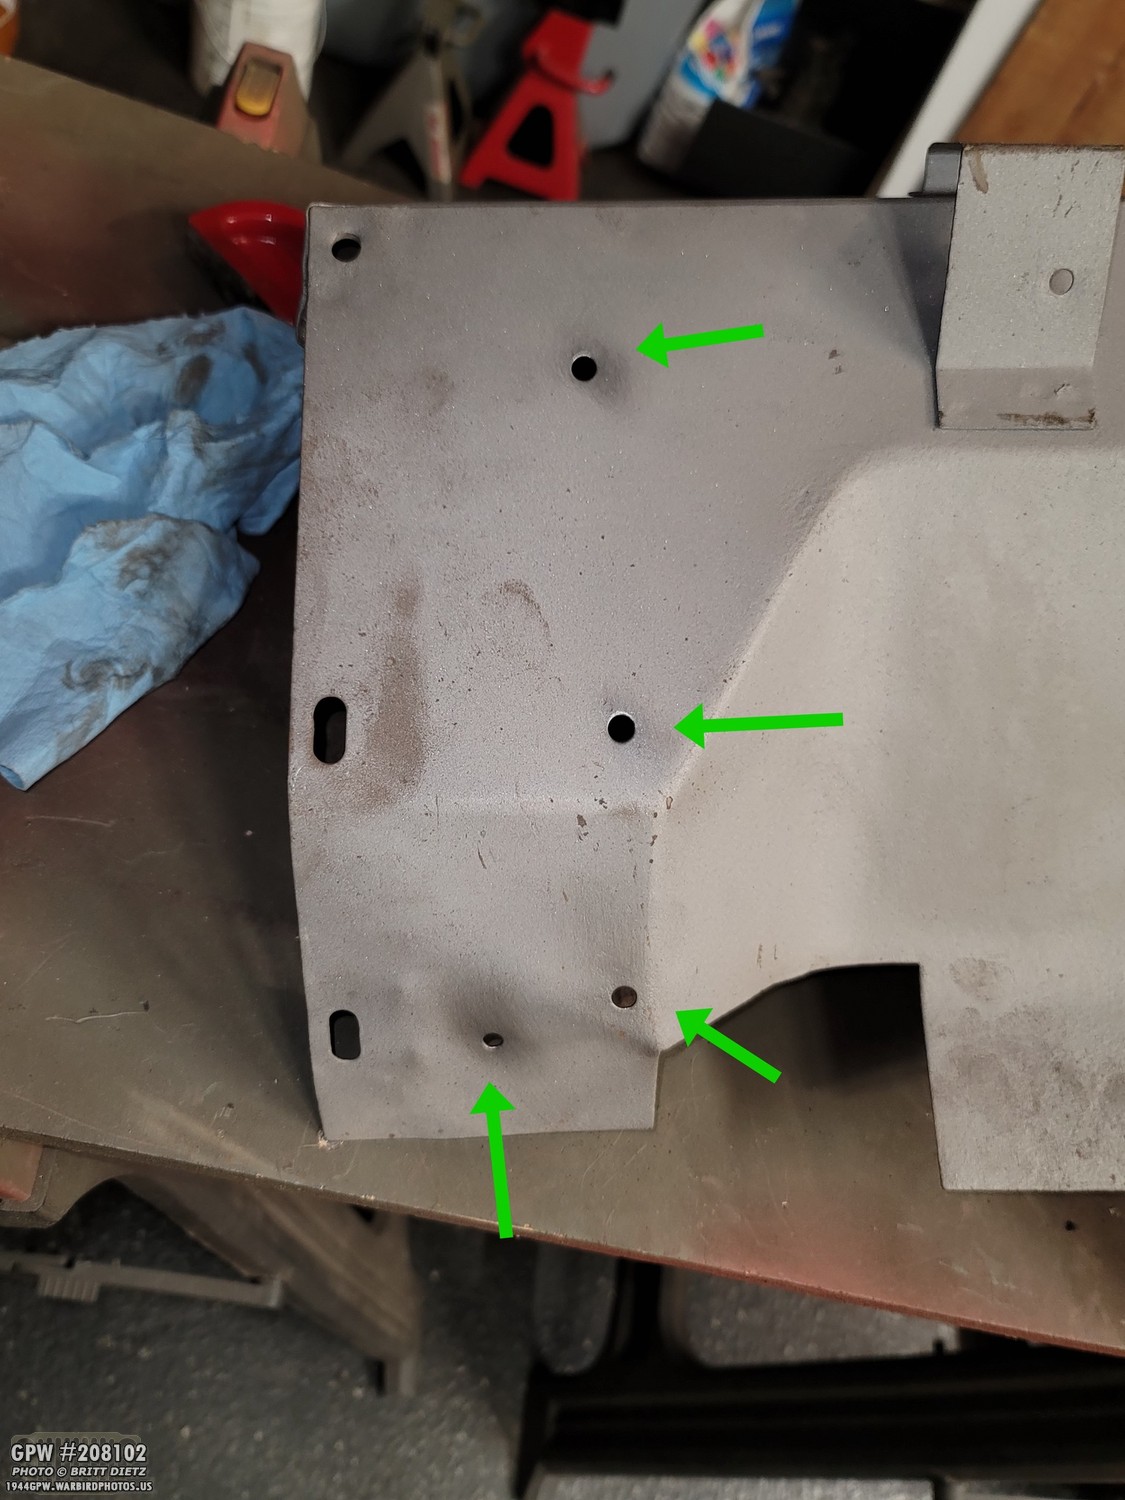
Turns out, these holes are actually the same holes you’d find on an early Slat Grill Jeep for the air deflector. I started to wonder if this fender actually was original to my 1944 GPW, and maybe I had a Slat Grill fender that was put on sometime in the 70+ years. So, I went to check the driver’s side fender.
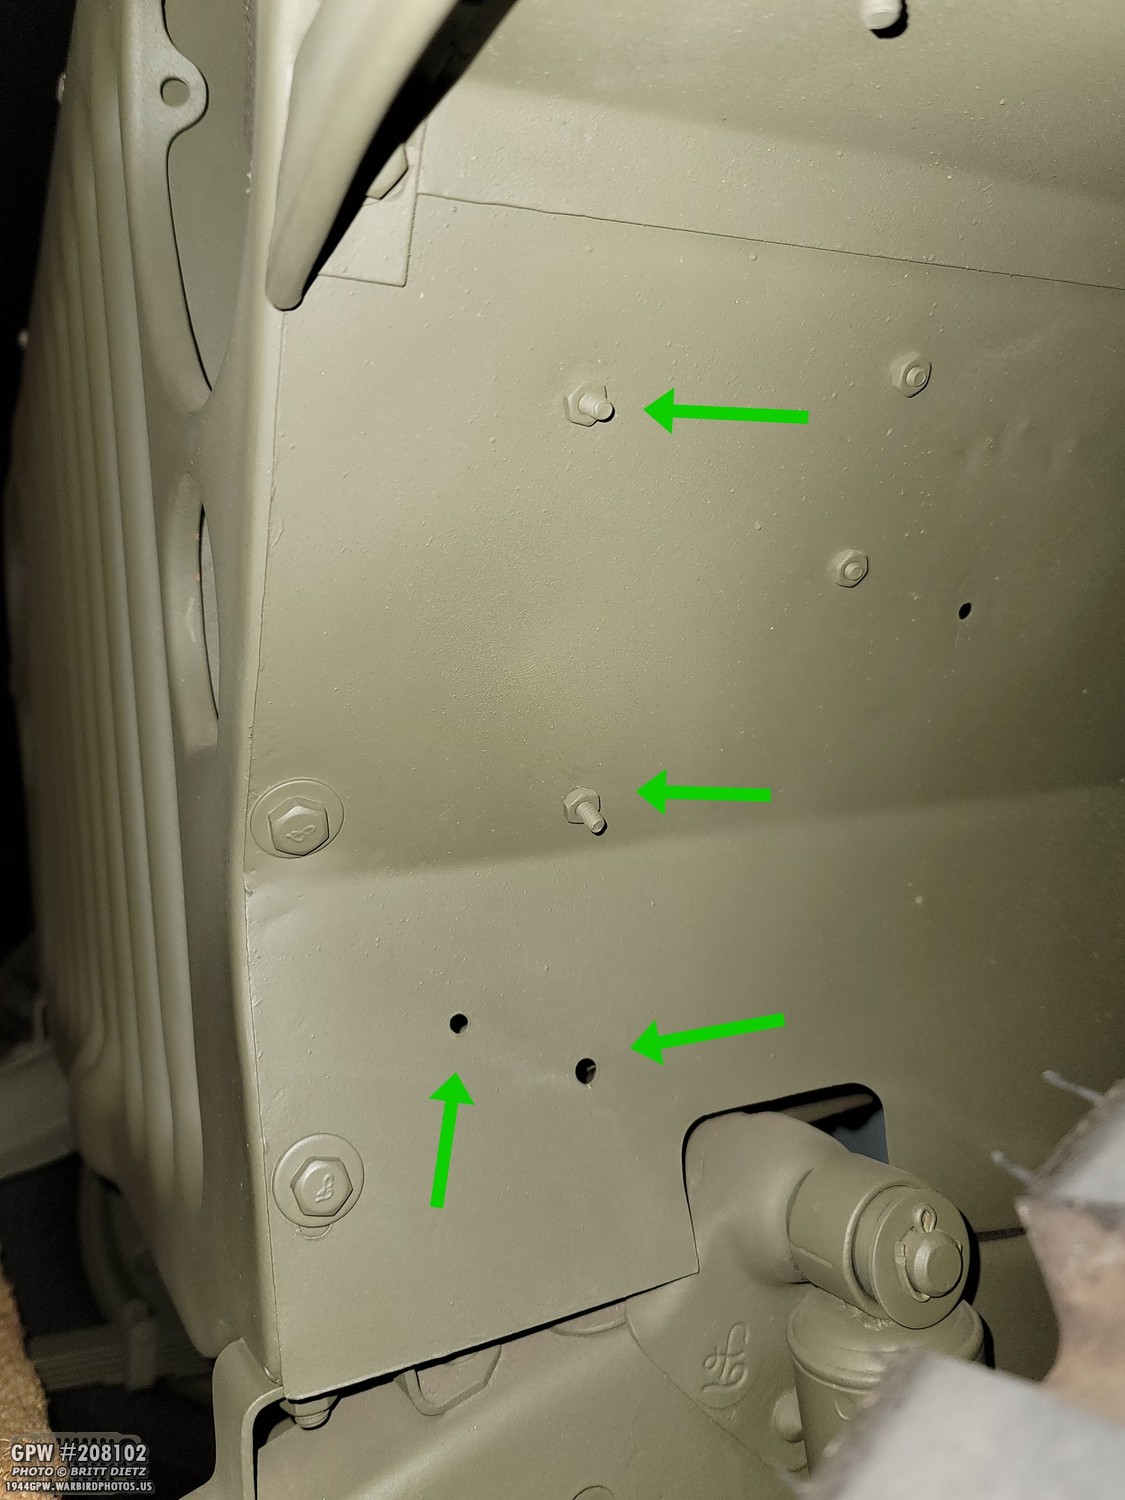
The driver’s side fender has them too! And, turns out, I was using two of the holes (which is proper for a GPW) for the wiring clips for the headlights and marker lights. This fender IS original to my Jeep (has a F stamp and everything), so it means it’s a matching set. Our theory is that Ford did not change the fender dies, and just repurposed the holes for the wiring harness on the driver’s side.

So that leaves these five holes. The two holes under the voltage regulator are not standard, so those will need to be filled. Same with the top two holes on the read of the fender, which were drilled to put the solenoid sometime post-WW2 when the Jeep was converted to 12v. The bottom hole (green arrow) is a standard hole that is used on Jeeps for a fuel line clip, from what I’m told.

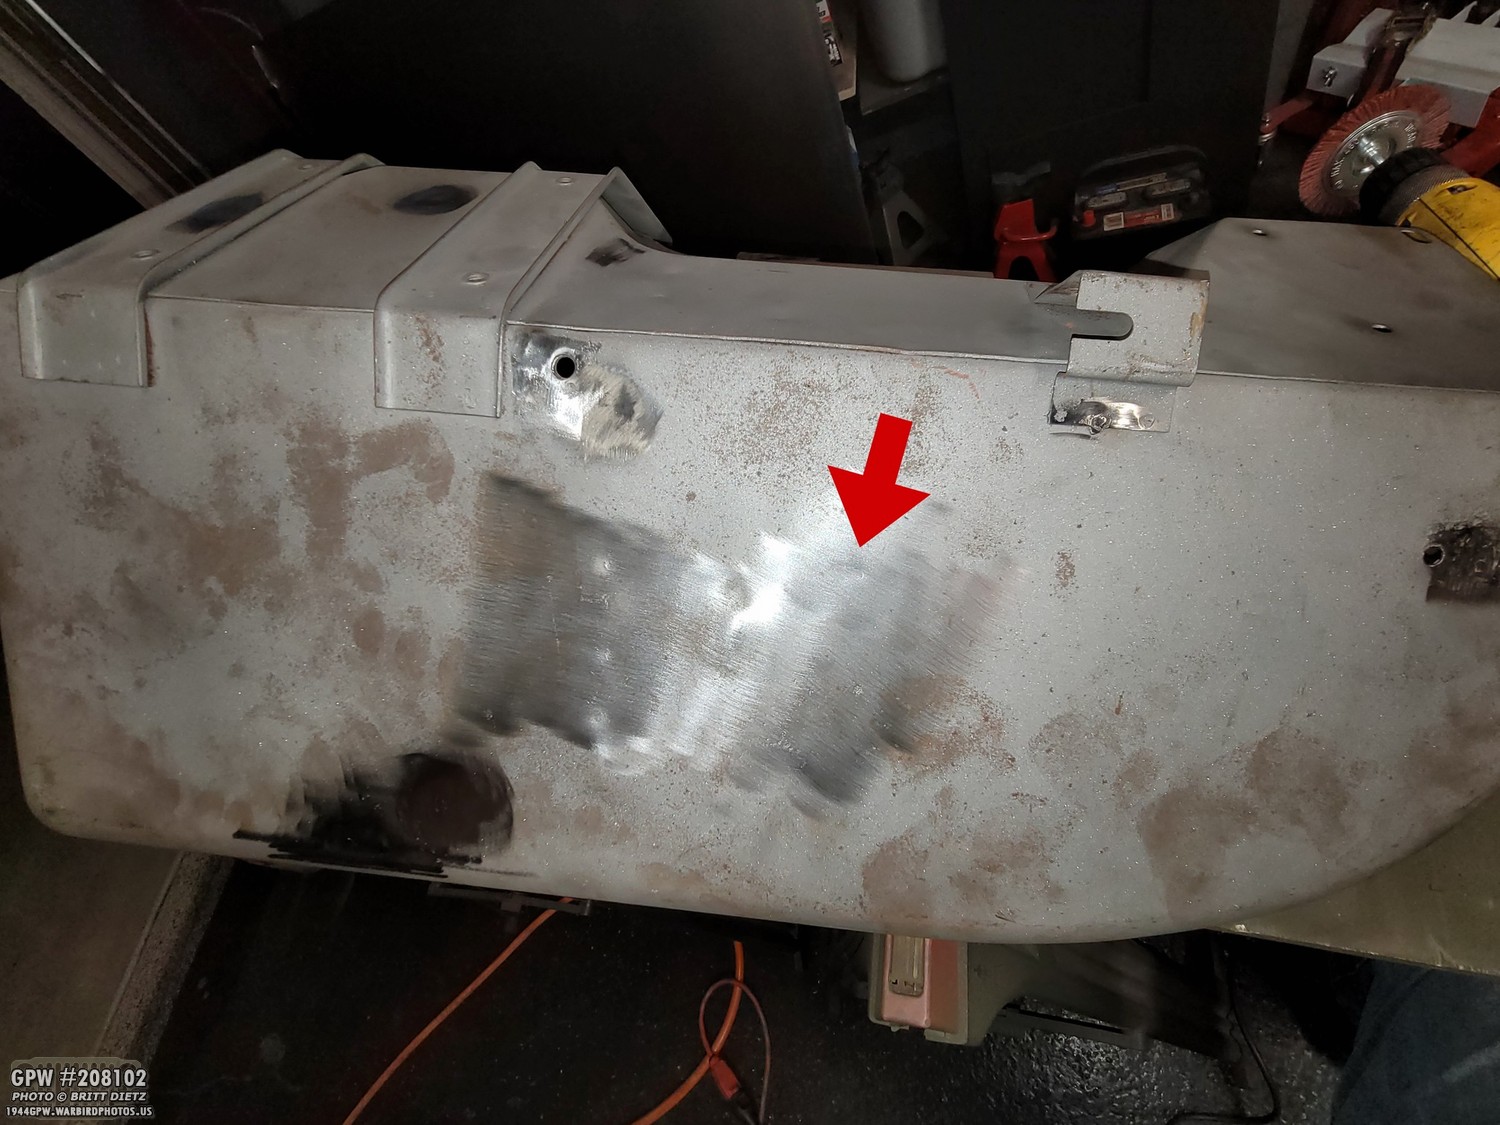
There were lots of other spots that needed some welding and/or smoothing out. Here are two spots where it looks like something dinged into the fender. I’ll add some metal and smooth it down.

So, I got right into it! First up was filling the holes. I used a copper plate behind the holes to help keep from blowing out the metal. These were quick and easy.

On the top of the fender, I filled some micro holes from pitting on the underside.

After grinding the welds flat, the holes are gone!

And on top, no more pin holes!
There was another pin hole on the side of the fender where the battery is. I filled that and ground it down. You can see some of the pitting in that area. On the main support bracket (bottom) there were some cracks. I welded those cracks shut and smoothed it out.

A look inside the fender. I welded both sides when filling any of the holes and smoothed them out.

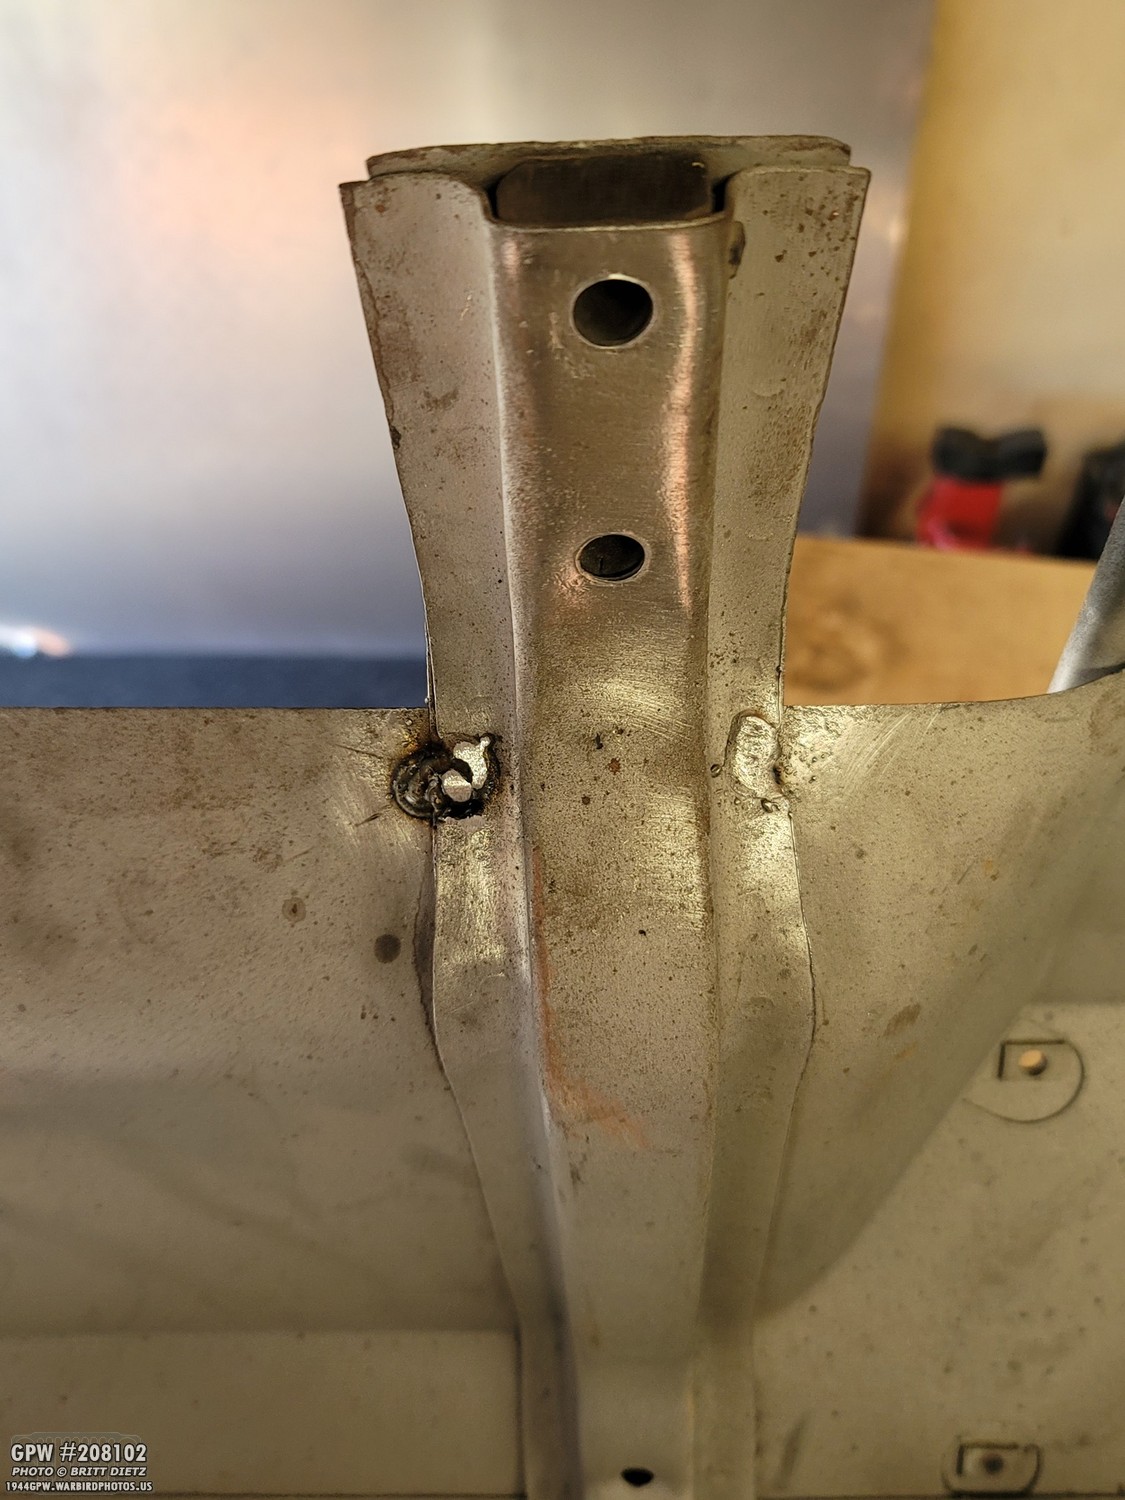
The original weld bolt that was welded into the fender for the battery hold down support strap wing nut (that’s a mouth full) had snapped off the threads well before I got the Jeep. I managed to cut out the broken bolt and ground down the weld so it is a flat surface on the underside of the fender. I’ll put a new bolt in there and weld it on (more on this later).
After the first evening of welding, before I cleaned up and called it a night, I decided to take my nylon wire wheel and clean up some of the sandblasted metal that had some minor surface rust from the nearly 2 years it’s been sitting in the garage. As I was lightly wire wheeling, I noticed something… can you guess what it is?
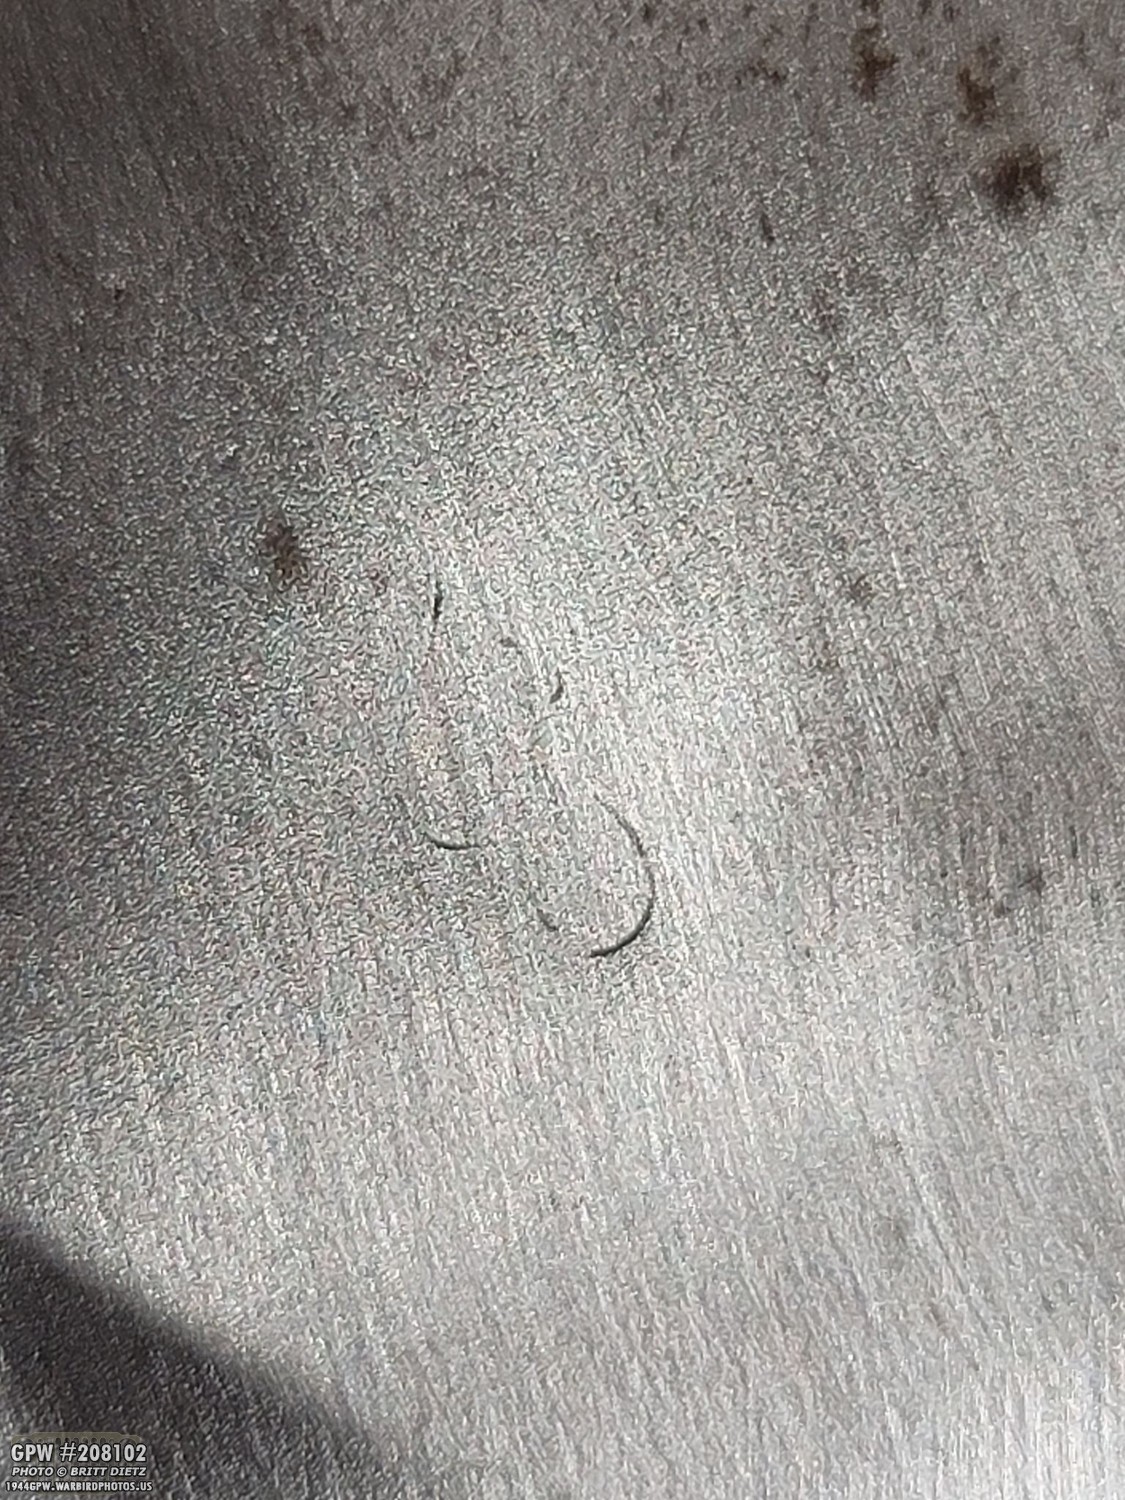
If you guess an F stamp, you’re right! It’s faint, but it’s unmistakably an F stamp! That means both my fenders are indeed F stamped! This was super exciting to find. Sadly, it’s so faint that I think, once it’s primed several layers and painted OD Green several layers, you won’t be able to see it. But I have the photos to prove it. Also to note, this is probably the very last original F stamp I’ll find on my journey with this Jeep since this is one of the last things left to work on that could have one. So I was overjoyed to find this, ut also a little sad. It’s so fun finding them!
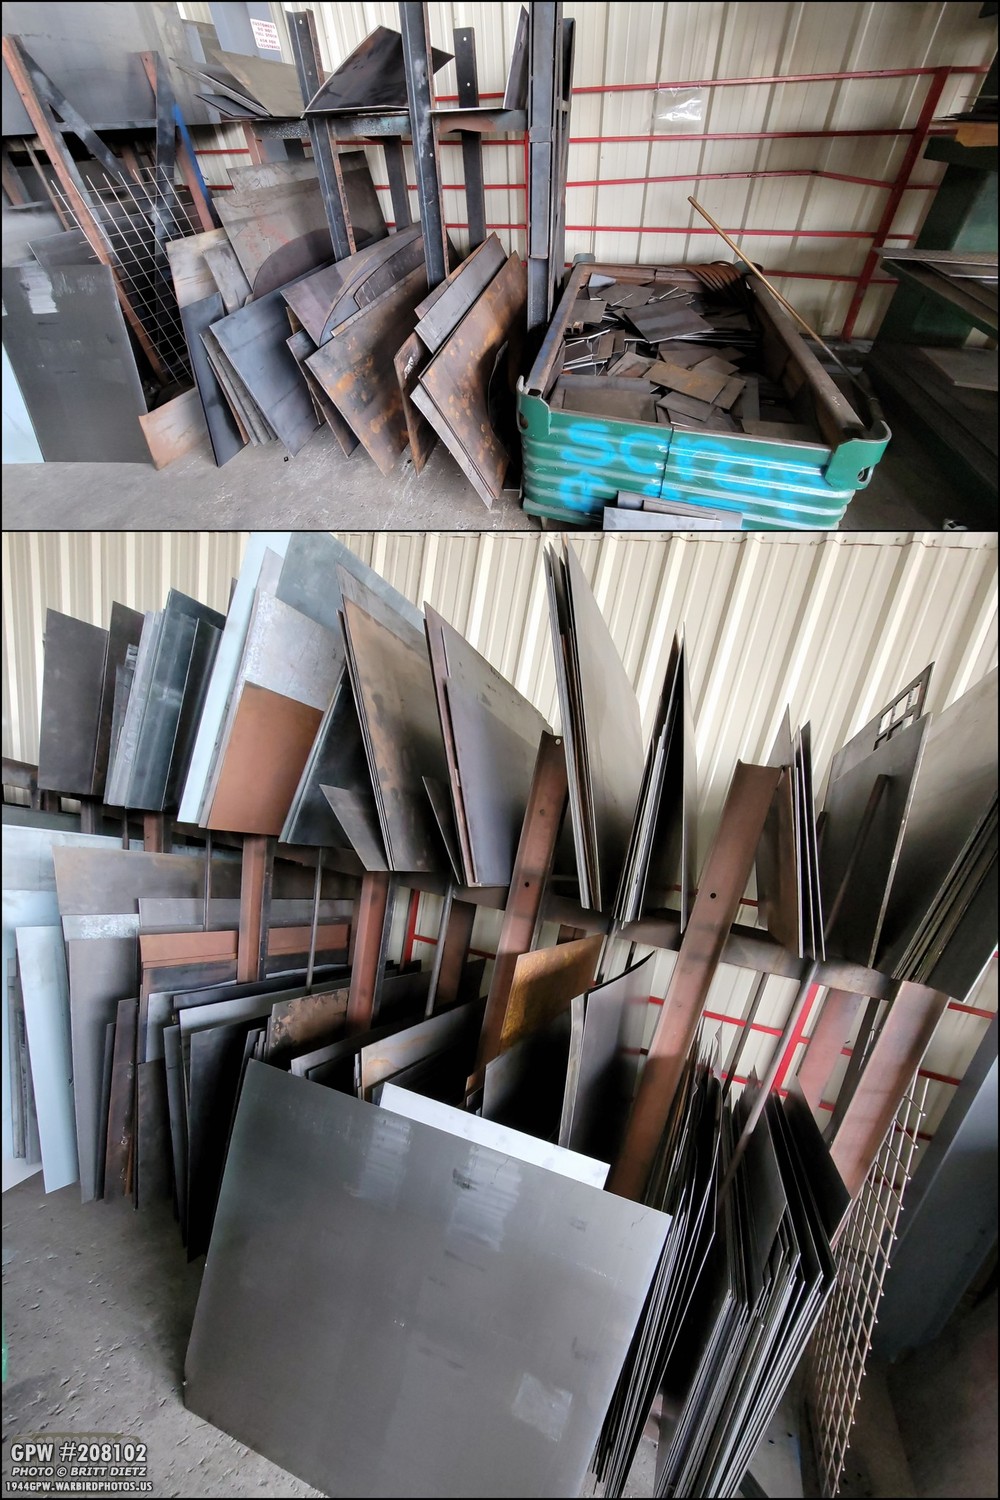
The next day I visited a local metal shop to find some scrap pieces of 18 gauge metal for the fender. While they had a great selection and good prices, their scrap section was just a mess with nothing labeled and every type of size/gauge all mixed together. I had to use calipers to find something 18 gauge.

But, I found a large sheet of it! I’m always amazed at how much I can put into my Prius. So many times people will say ‘Nope, won’t fit!’ and I prove them wrong!

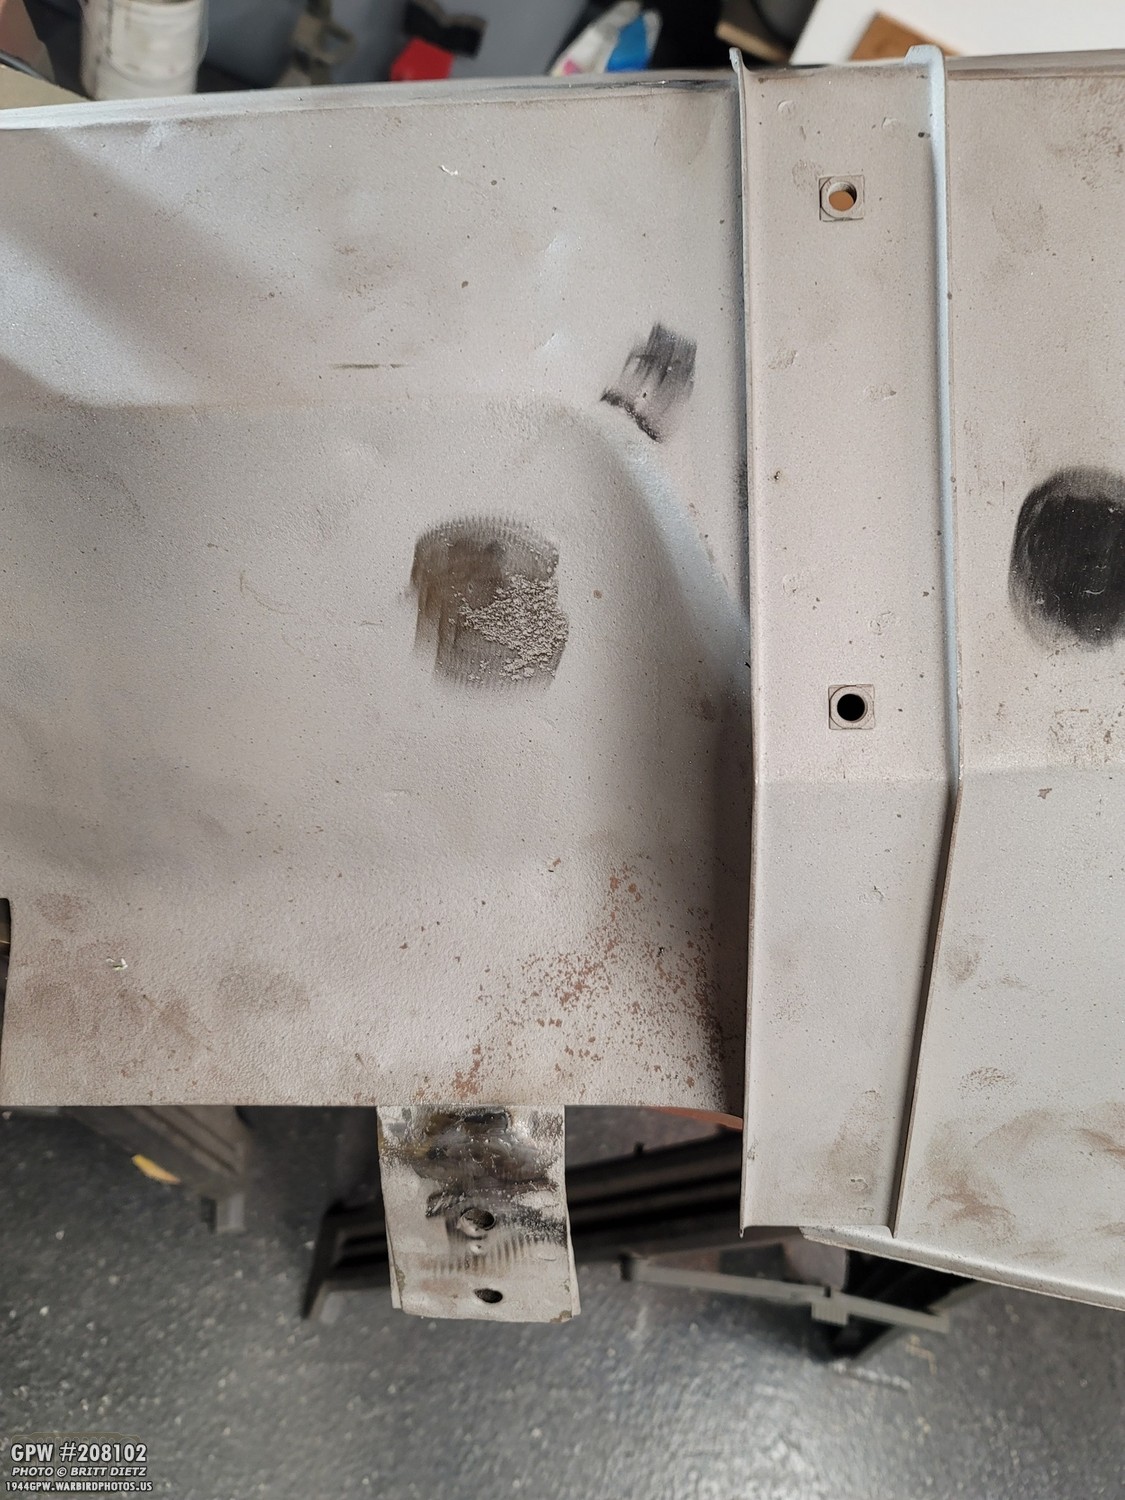
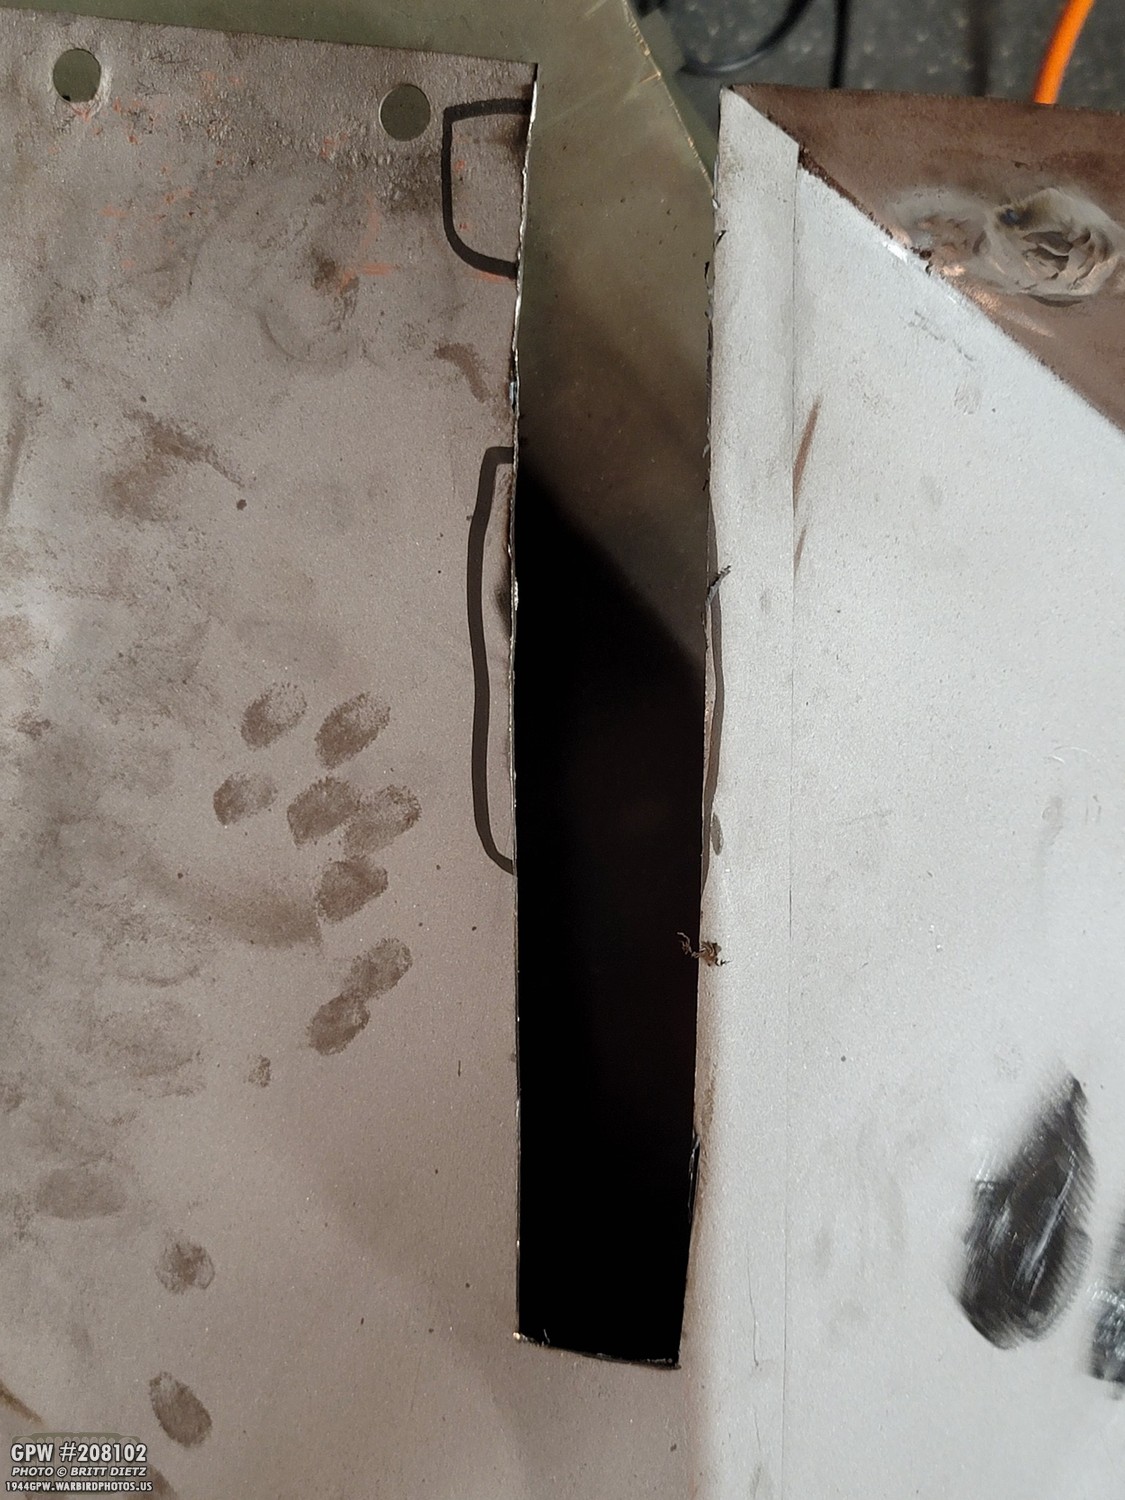
So, the plan was to cut out this section of the fender (where it bolts to the body tub) where there’s cancerous rust. This is where two layers of metal are overlapped, and moisture often gets in between the layers causing major cancerous rust, like in this case. Thankfully, the rust only went to just beyond the second bolt hole. I didn’t need to replace the entire strip.

Here’s a look on the other side where the rust ate through.
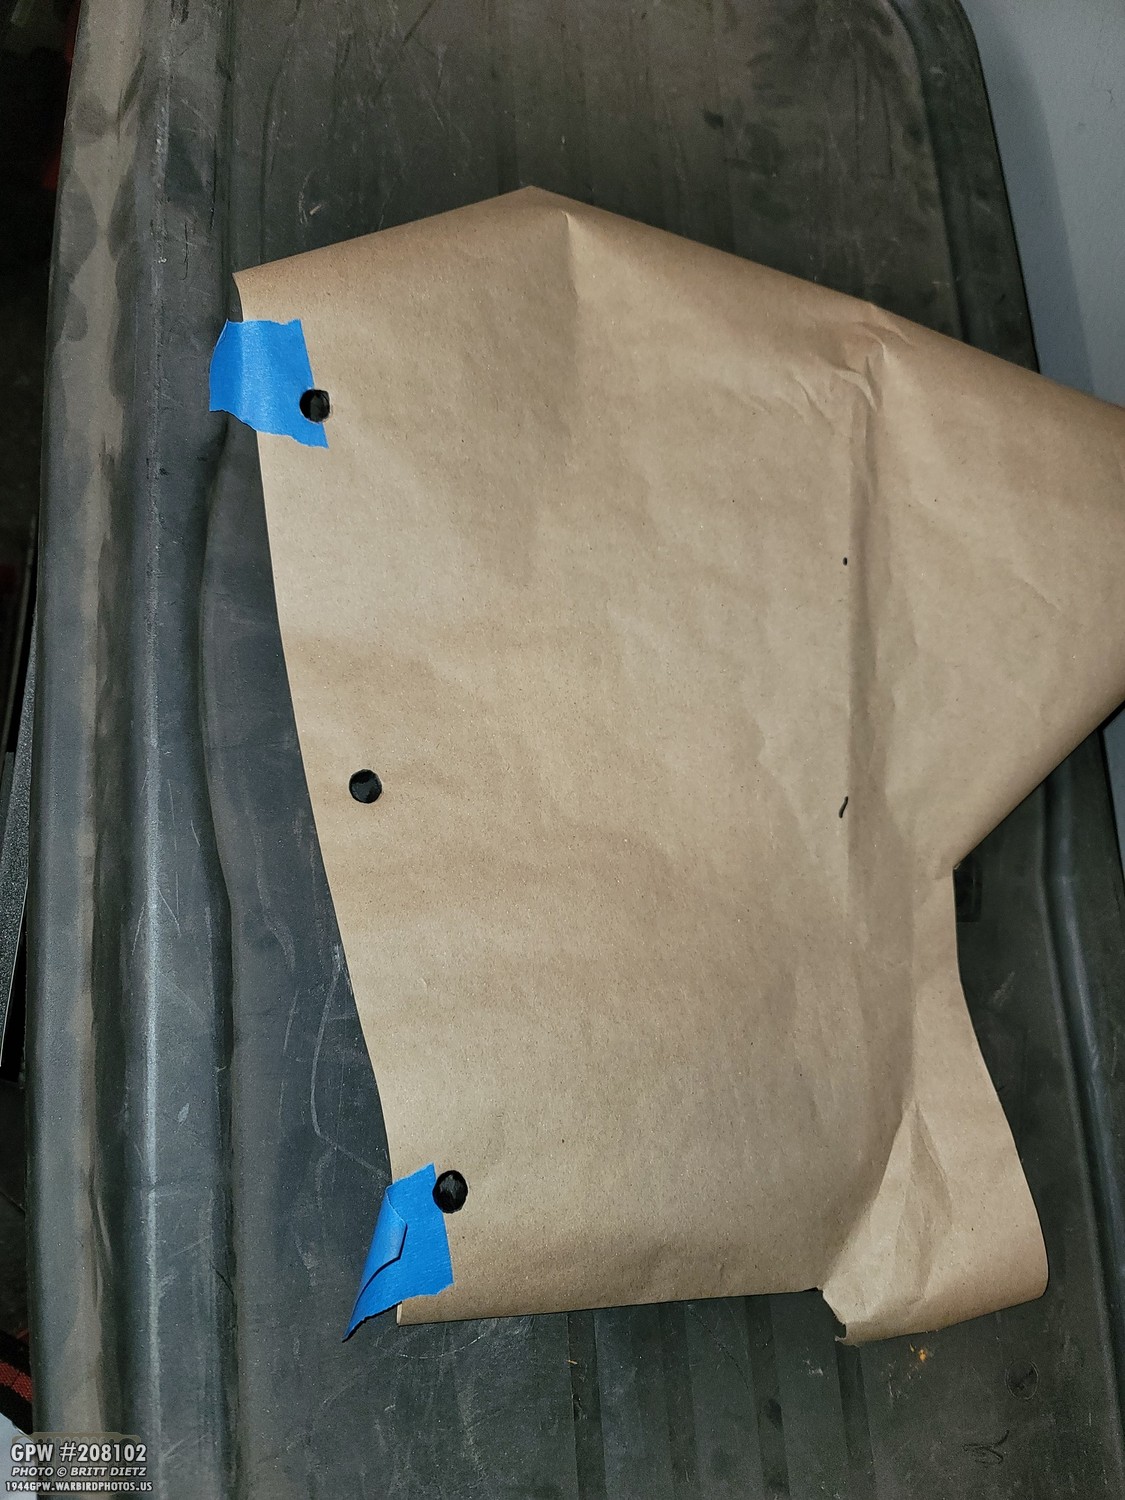
To make sure could redrill the two mount holes I’d be cutting out, I used some butcher paper and punched out where the three holes were. I’ll line this back up with the top hole and the bottom edge of the fender to mark and drill the bottom two holes.
I tell you, it was painful to take a cutting wheel to the original fender! Not just because I’m cutting out original WW2 metal, but also because I didn’t want to mess up. I took it slow and used a thin cutting disc with an angle grinder. Here’s the result.

And here’s the cut-out section. I’ll keep this to help make a pattern from that sheet of metal I bought. I’ll end up making two pieces, welding each one in one at a time so they overlap. I also will need to replicate the curved edge at the bottom on this side.

And here’s the other side. I also plan on keeping this as it’ll be a good conversation piece I can display with the Jeep at times to show how 77+ years can do bad things to a Jeep.

After cleaning up the edges a bit from jagged fragments, it’s ready for clean sheet metal!

As you can see from the bottom of the cut, the metal is good there. No cancerous rust in between the layers there.
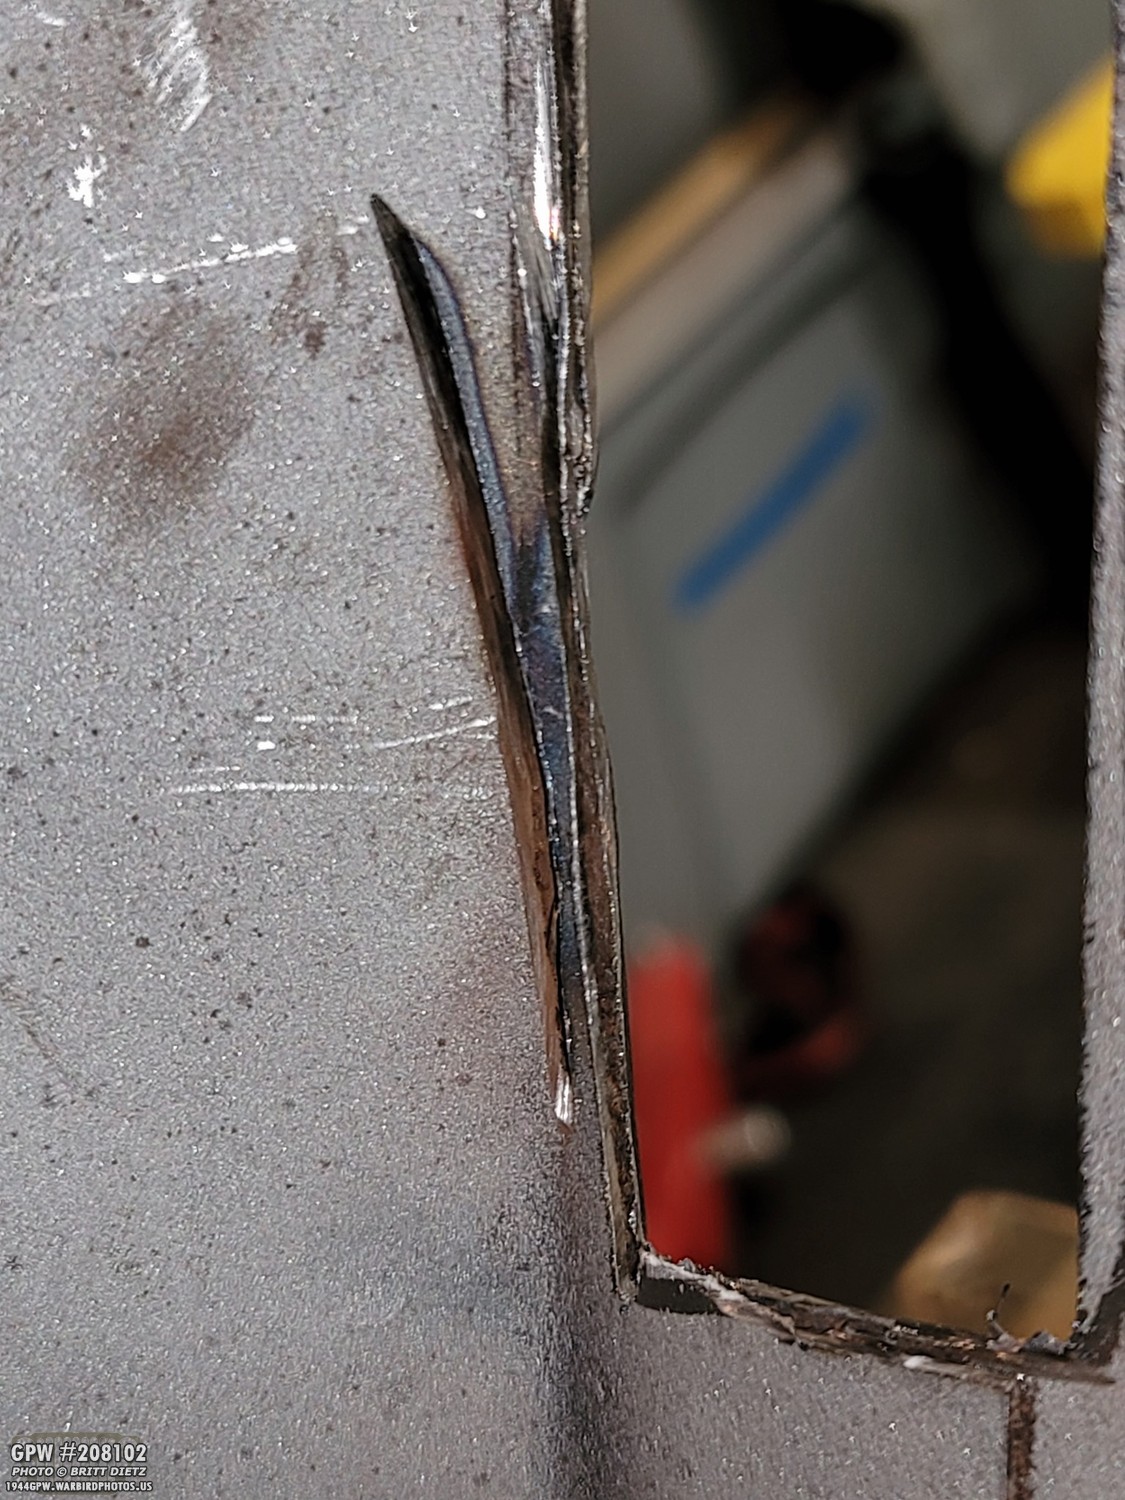
I did have an ‘oops’ moment where the cutting wheel slipped as I was pulling it out of the metal. I guess, if that’s the worst oops I’ll have, that’s not bad. It’s only a superficial cut that I’ll weld close.

Taking that fragment I cut out, I outlined the shape on the new sheet metal.
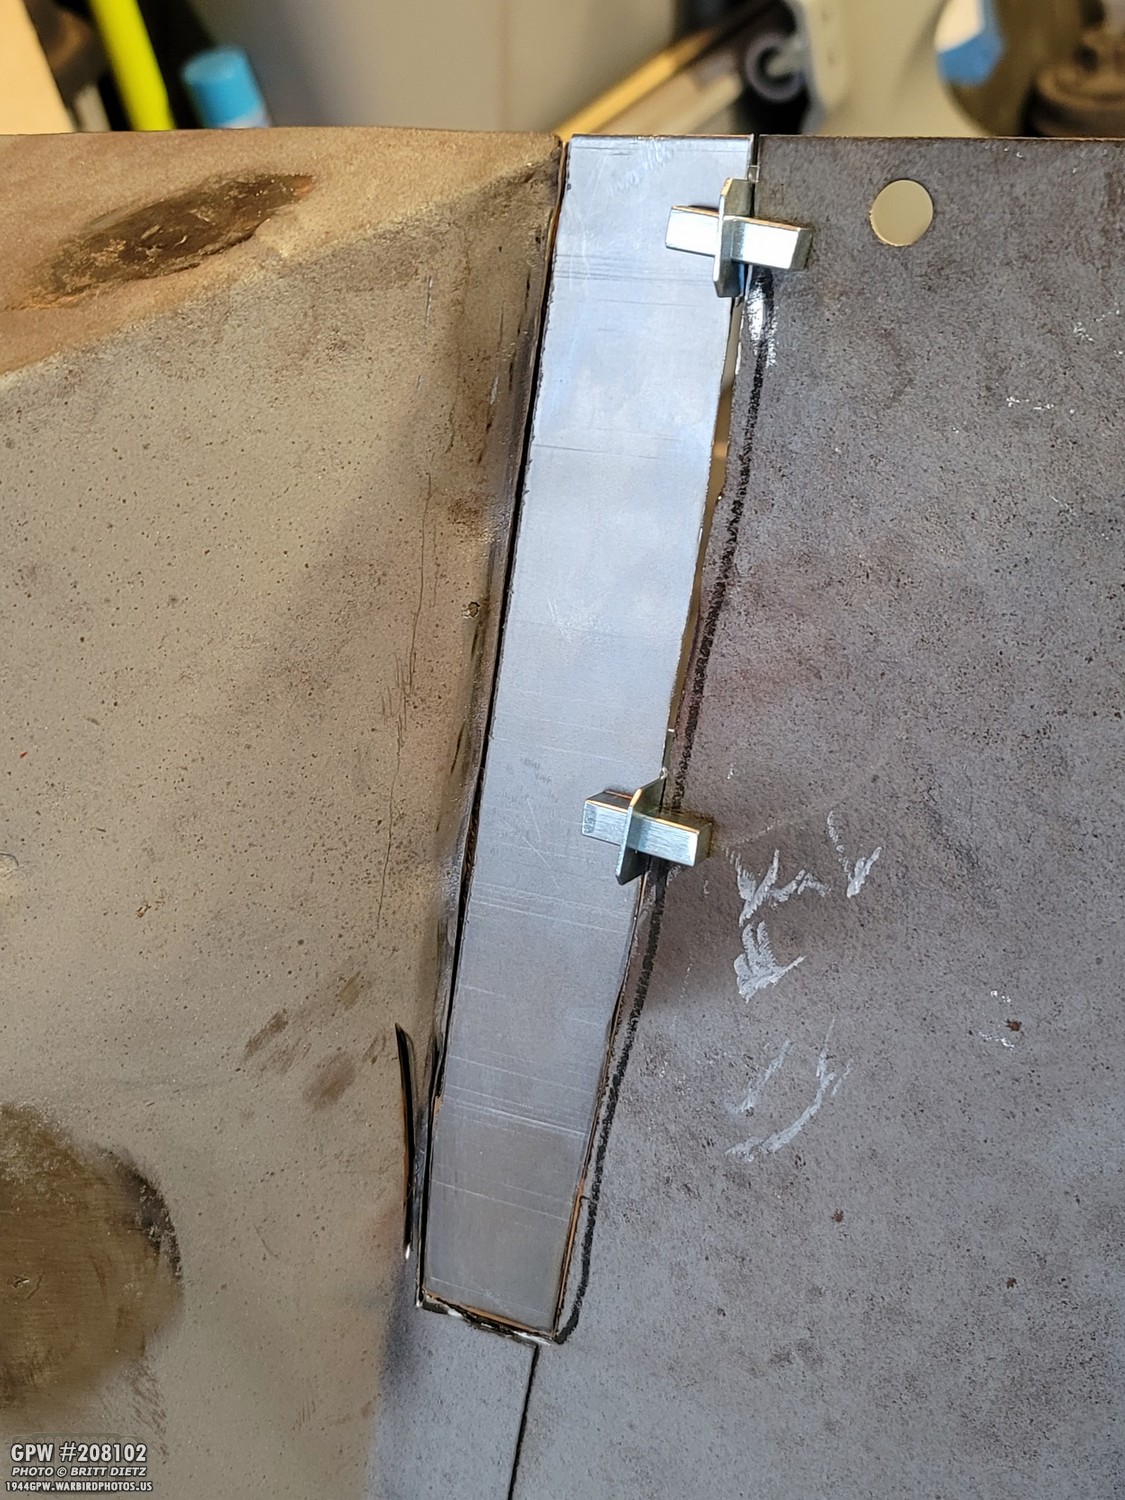
After cutting it out, I fitted it and it was as close as I was going to get! I used some butt weld clamps to hold it in place as I tac welded it.

A few zaps here and there and it’s in place!
There’s a bit of a gap on one side where I had to clean the edge, but that should be no issue to fill in.

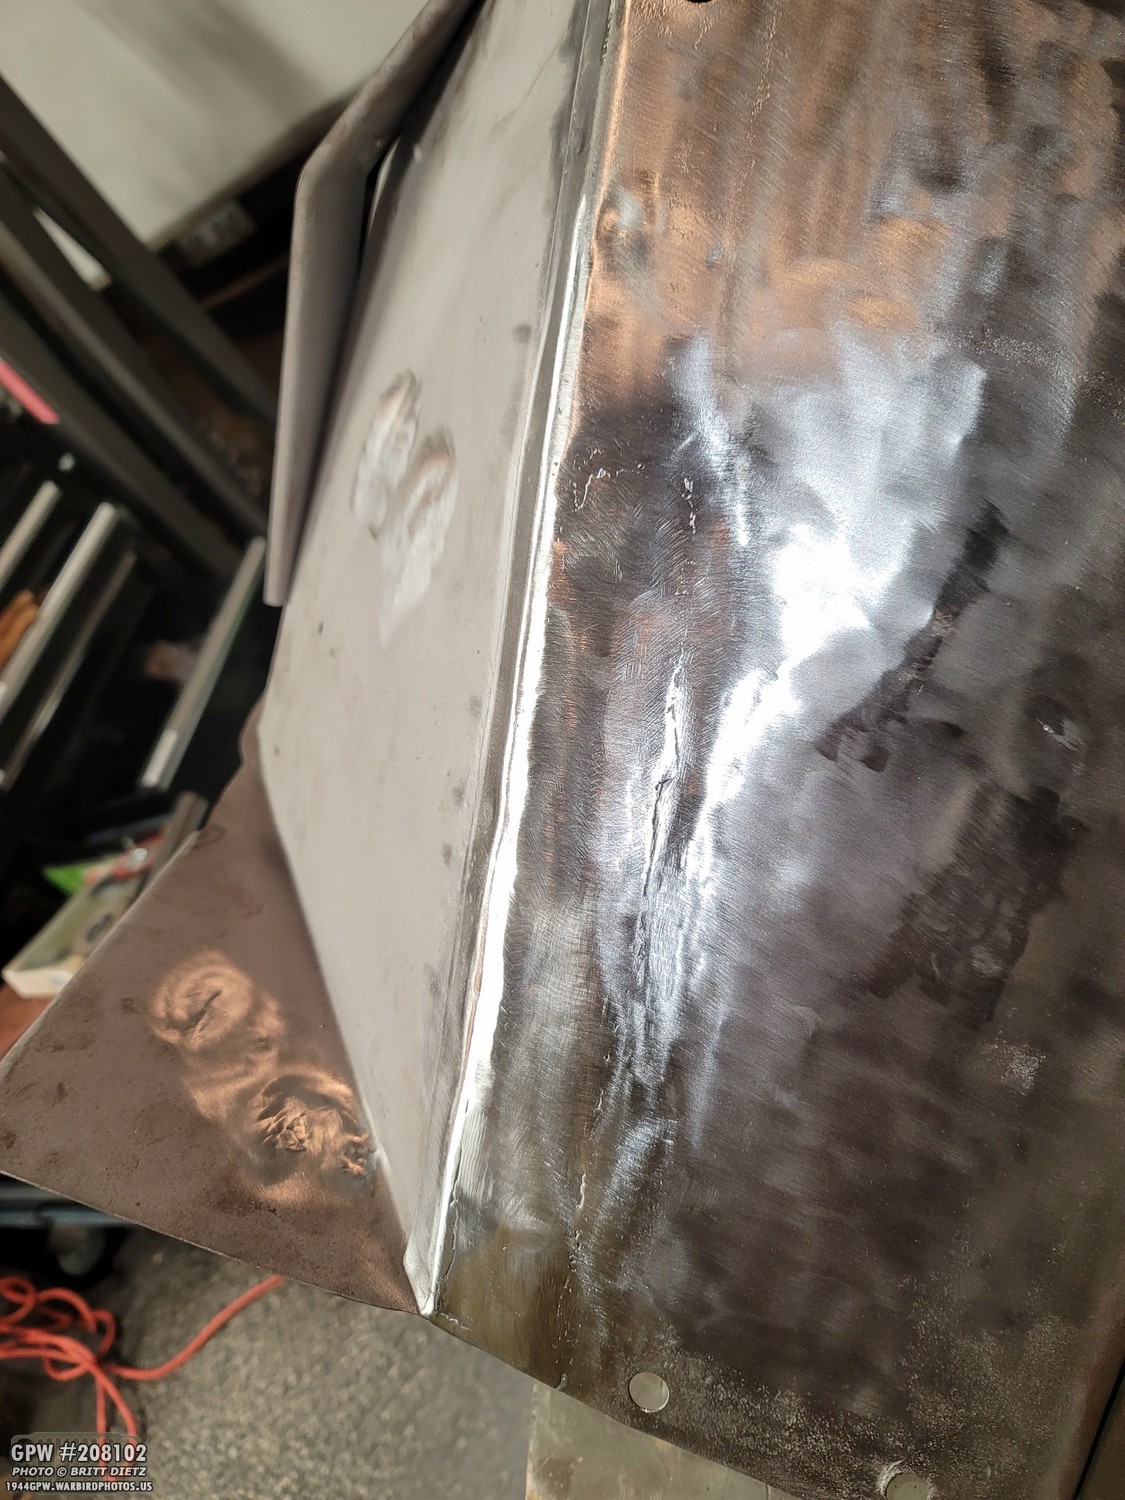
Starting to weld. I started with the outside layer first, since that needed to be welded on both sides of the piece, and both outside and inside of the fender. The second piece that will go over this will only need to be welded on one side. The new metal and the WW2 metal didn’t seem to play nicely in some areas, so my welding isn’t the best. To make sure the metal did not warp, I also took things slowly, and jumped around the piece instead of going in a straight line.
Here’s the finished weld from the outside. This took a bit. I paused ever so often to let things cool down.

Starting to flap wheel grind the welds down. Looking pretty good. Remember, the other flap will go over this piece, so there are two edges that won’t be flush. If you’re wondering what that crack is to the bottom left next to the body tub step to fender mounting hole, I’ll get to that in a few.
Looking at the other side, it’s a solid piece of metal again! There’s some more smoothing I’ll need to do.

Almost looks like never cut out the metal and put a new one in!
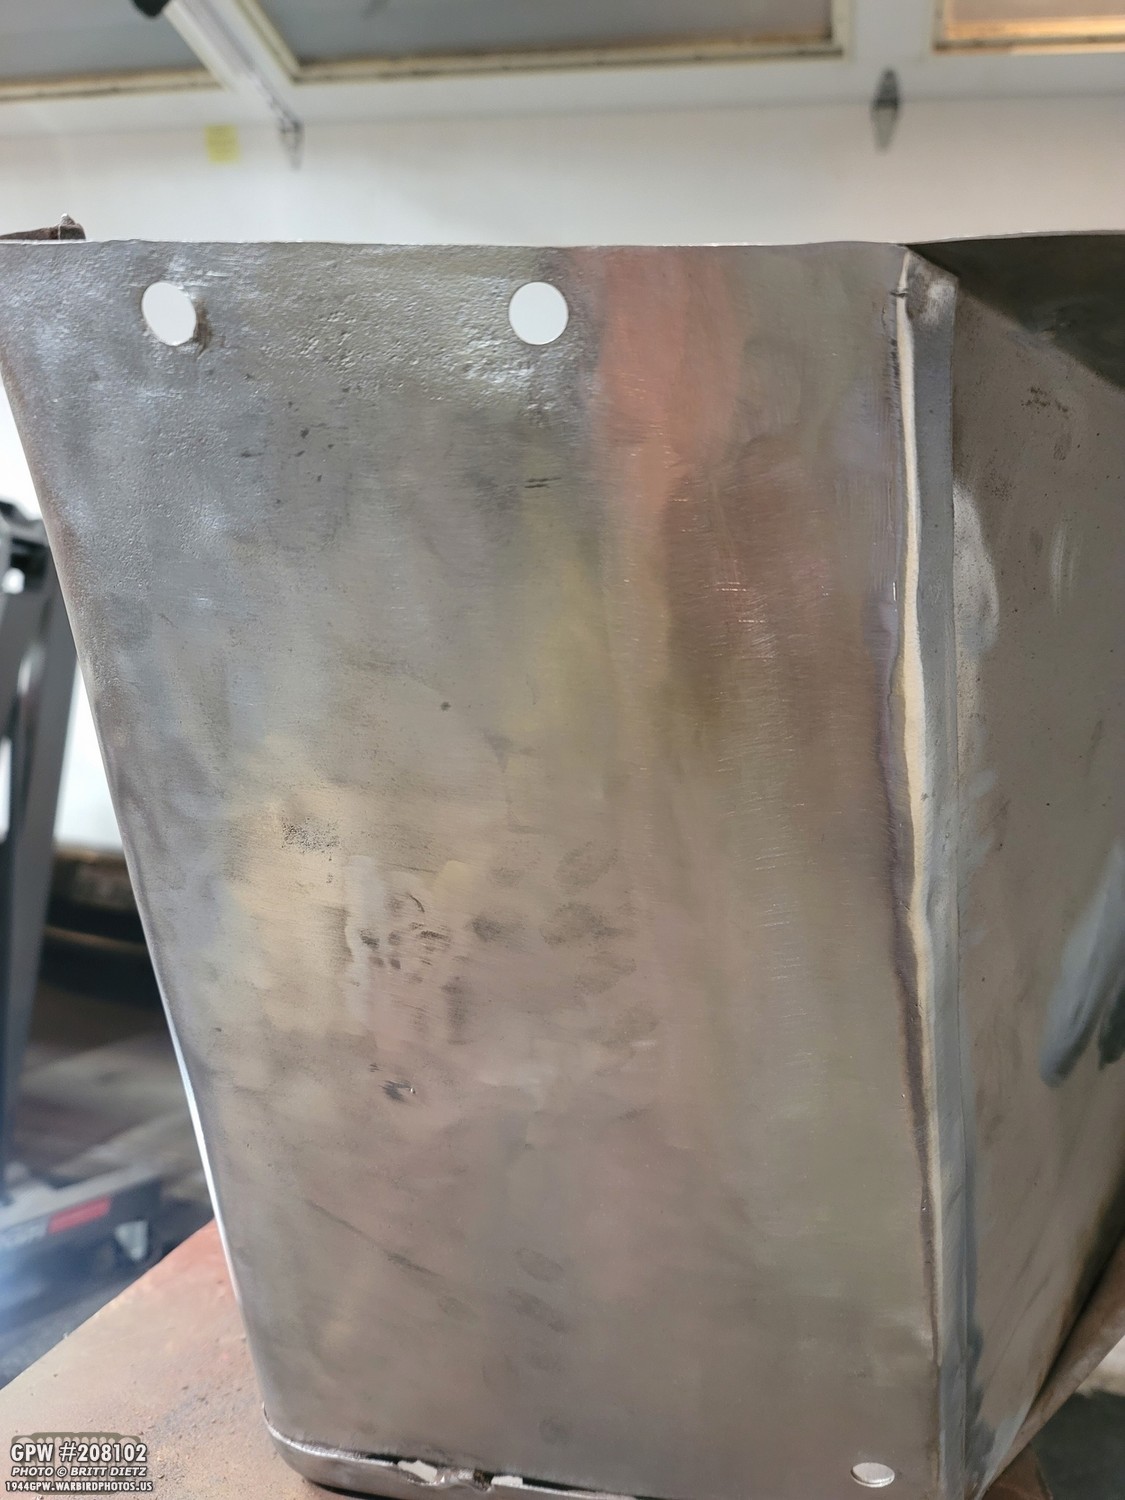
Success!

As for the warping, I took everything slow so it wouldn’t overheat. Here’s a look inside, the only warping is really what was already warped.

Looking straight down, that’s about as straight as it was before I started. I think it’s in good shape!
As mentioned earlier, that ‘crack’ looking area to the bottom left next to the body tub step mounting hole, is where the pitting in the metal made it thinner than the new metal. So I’ll just use bondo to smooth that out, I’d rather not try and grind that down to match.

With the first piece done, next is the second layer flap! To check for alignment and shape, I used a piece of thin cardboard to made the shade and the curve at the top corner. I also marked three holes where I’ll drill to weld down that side of the flap (which is how it was actually done).
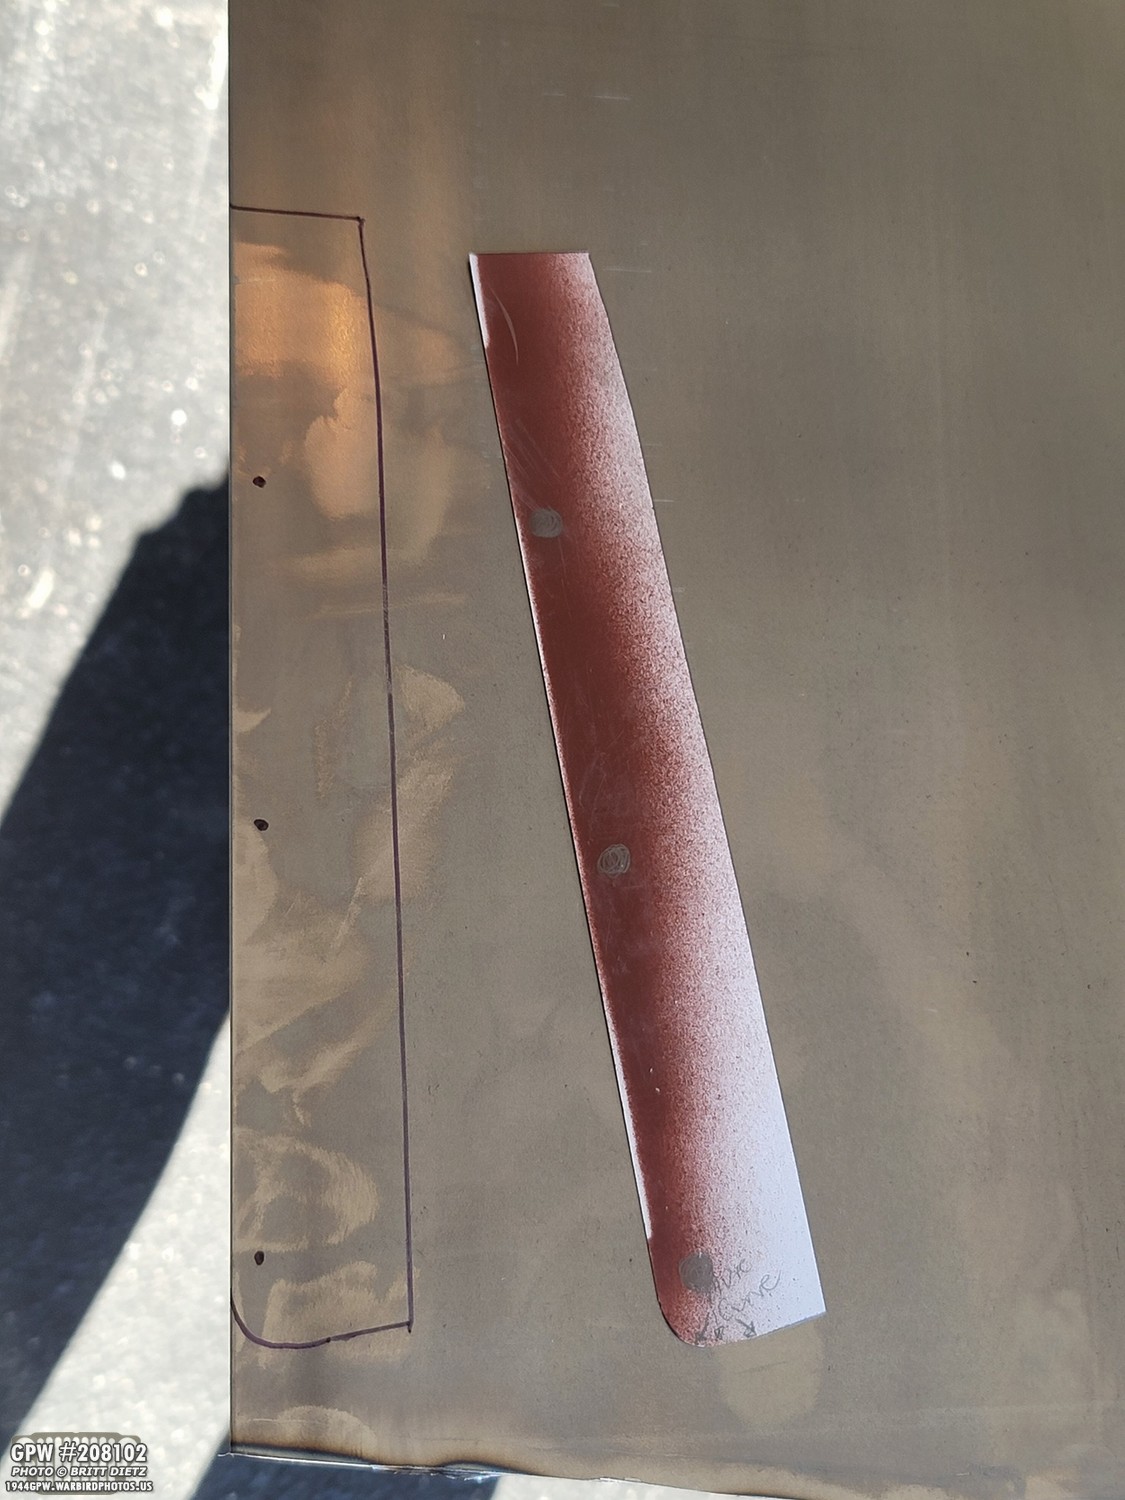
I took that cardboard shape and transferred it to the sheet metal.

Here’s the cut piece. I just use my angle grinder with the thin cutting wheel to cut these out by hand.
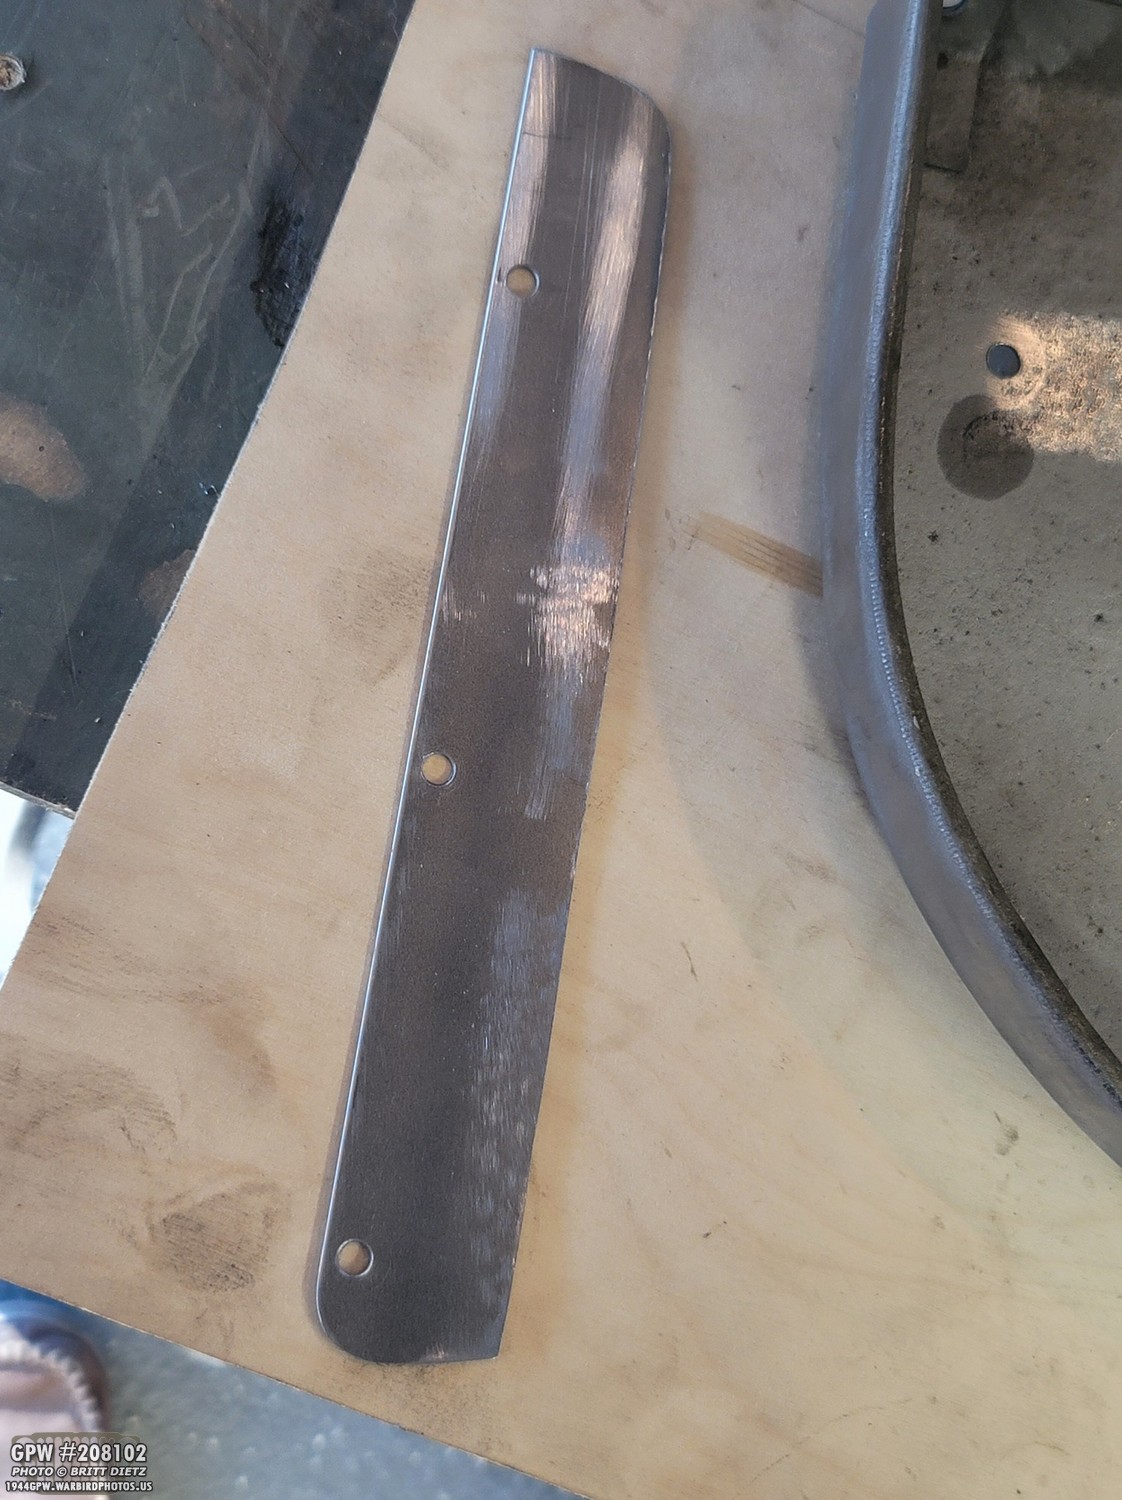
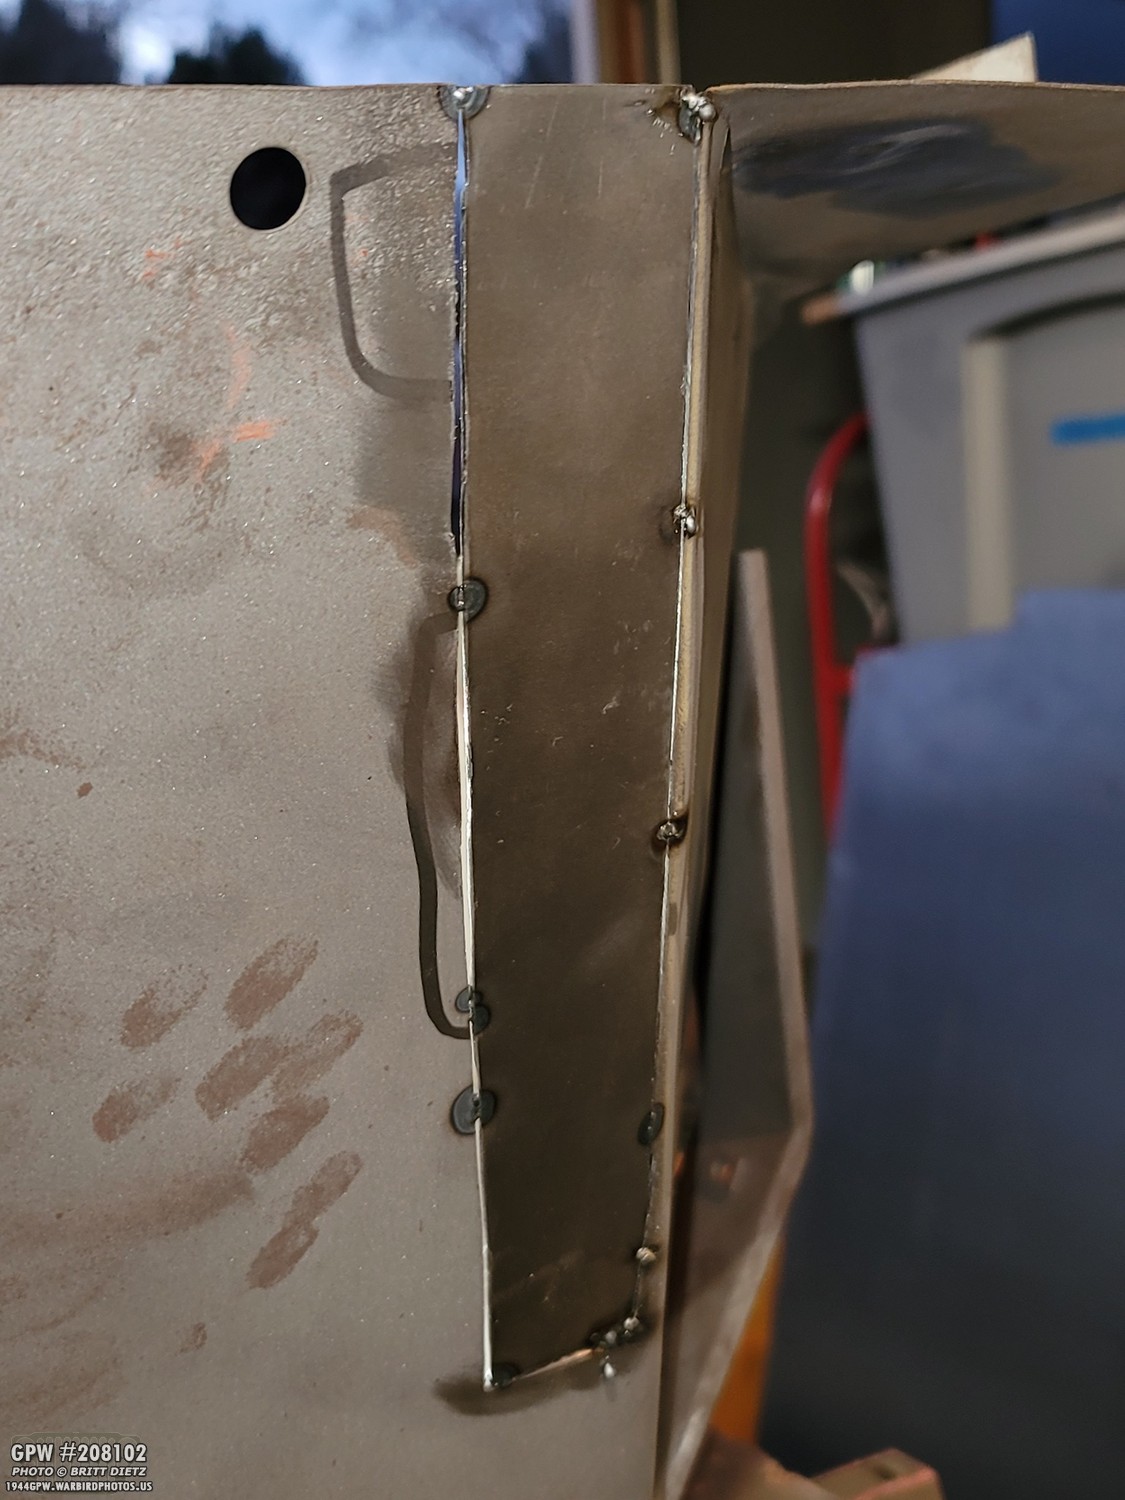
And here is the finished flap piece with the curved edge (bottom) and the three holes for button welding. The curved edge you see at the top right is where I had to tack weld the first piece I put in, and I wouldn’t get a grinder in to smooth that down, so I had to curve this flap to go around it.
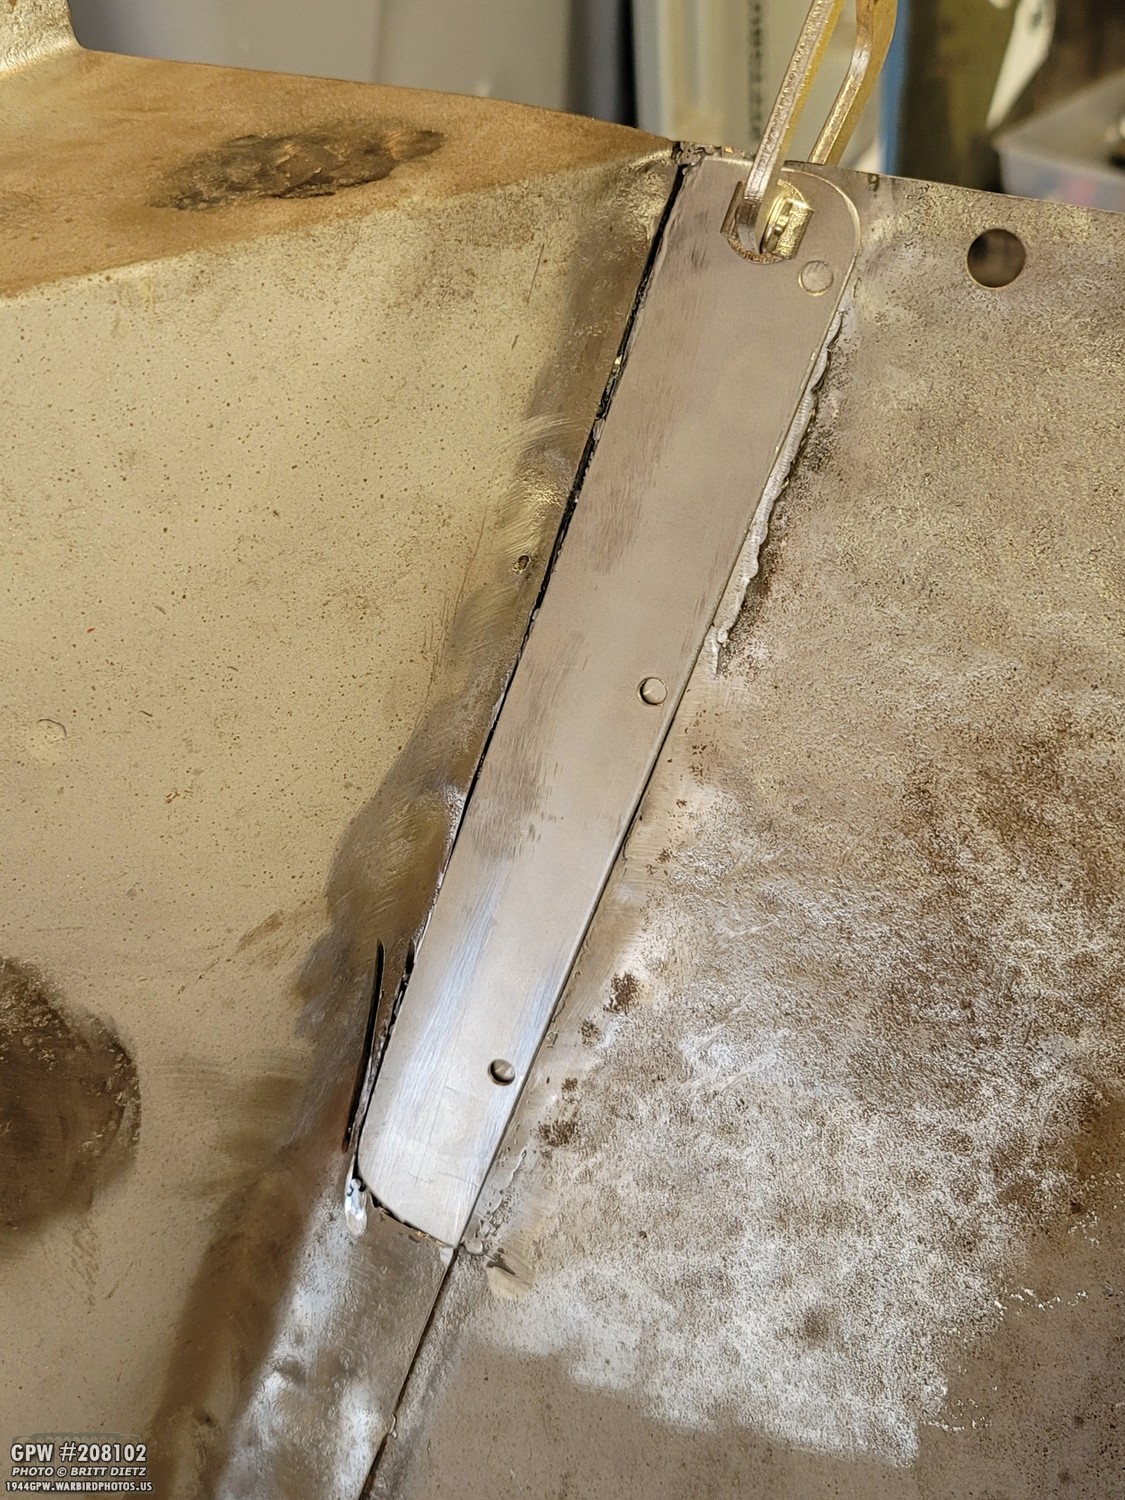
Here’s a test fit. PERFECT fit! The line from the original flap lines up perfect! Time to tack weld it in place…
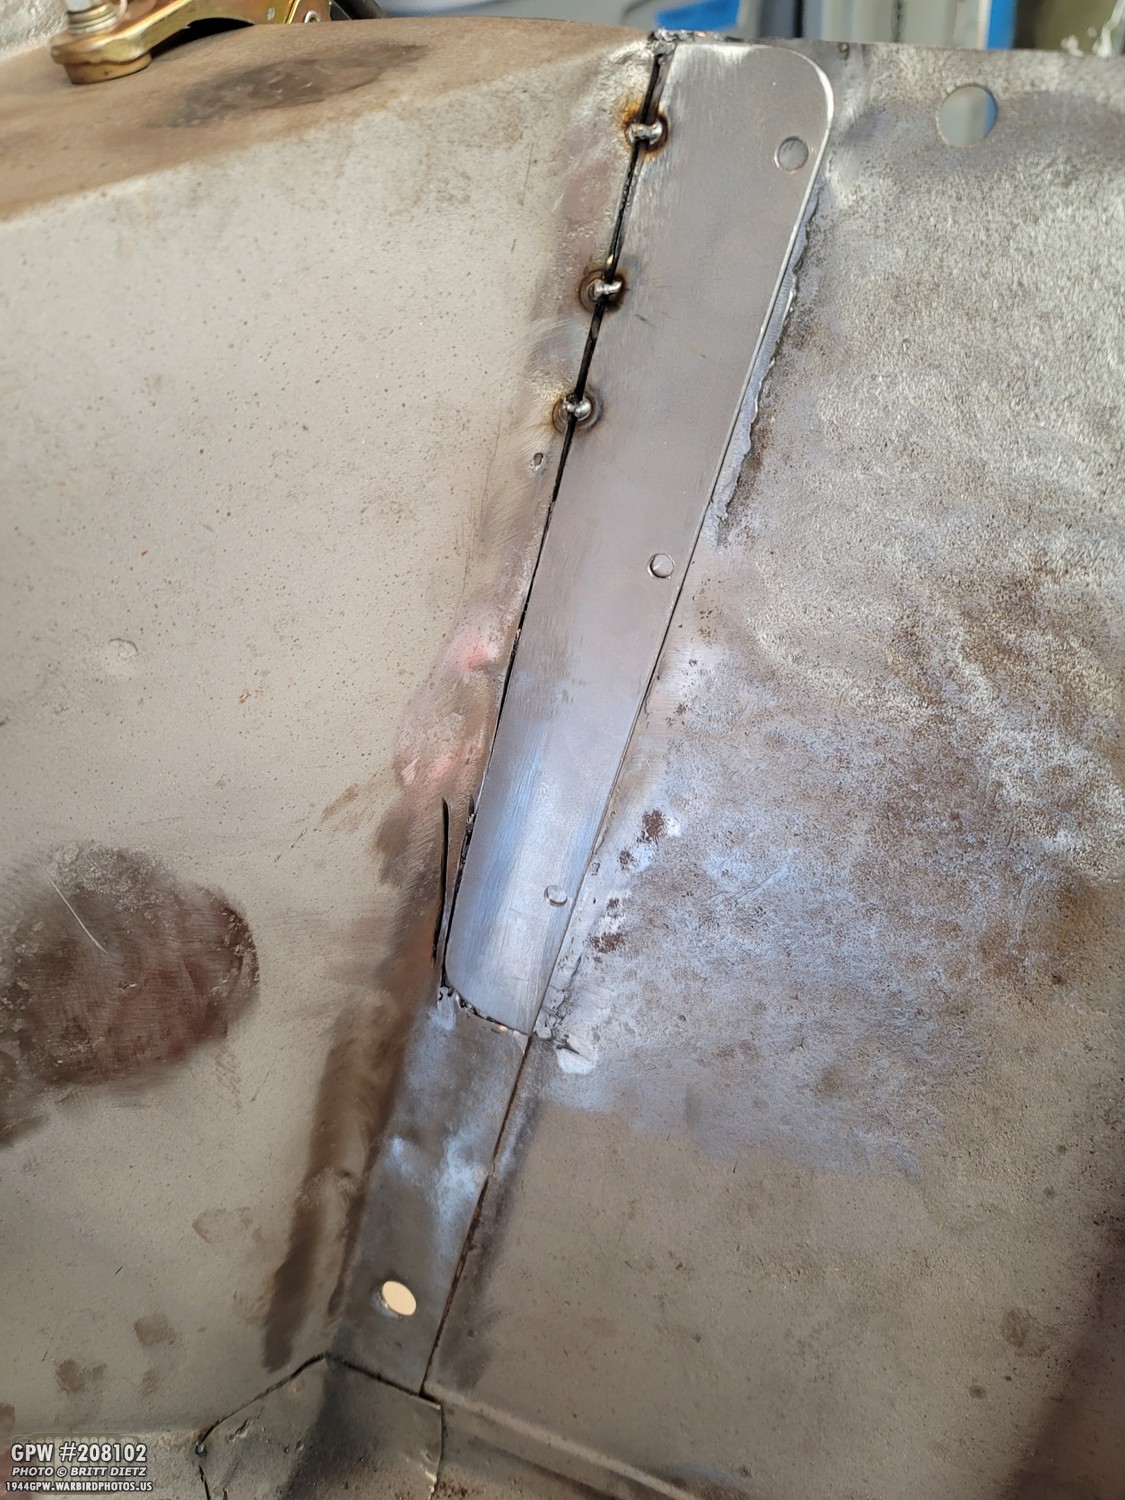
Locked in place! It was at this point that I realized that my welder had ran out of gas… on a Sunday when nothing was open. Doh! So this was as far as I would get until the next day.
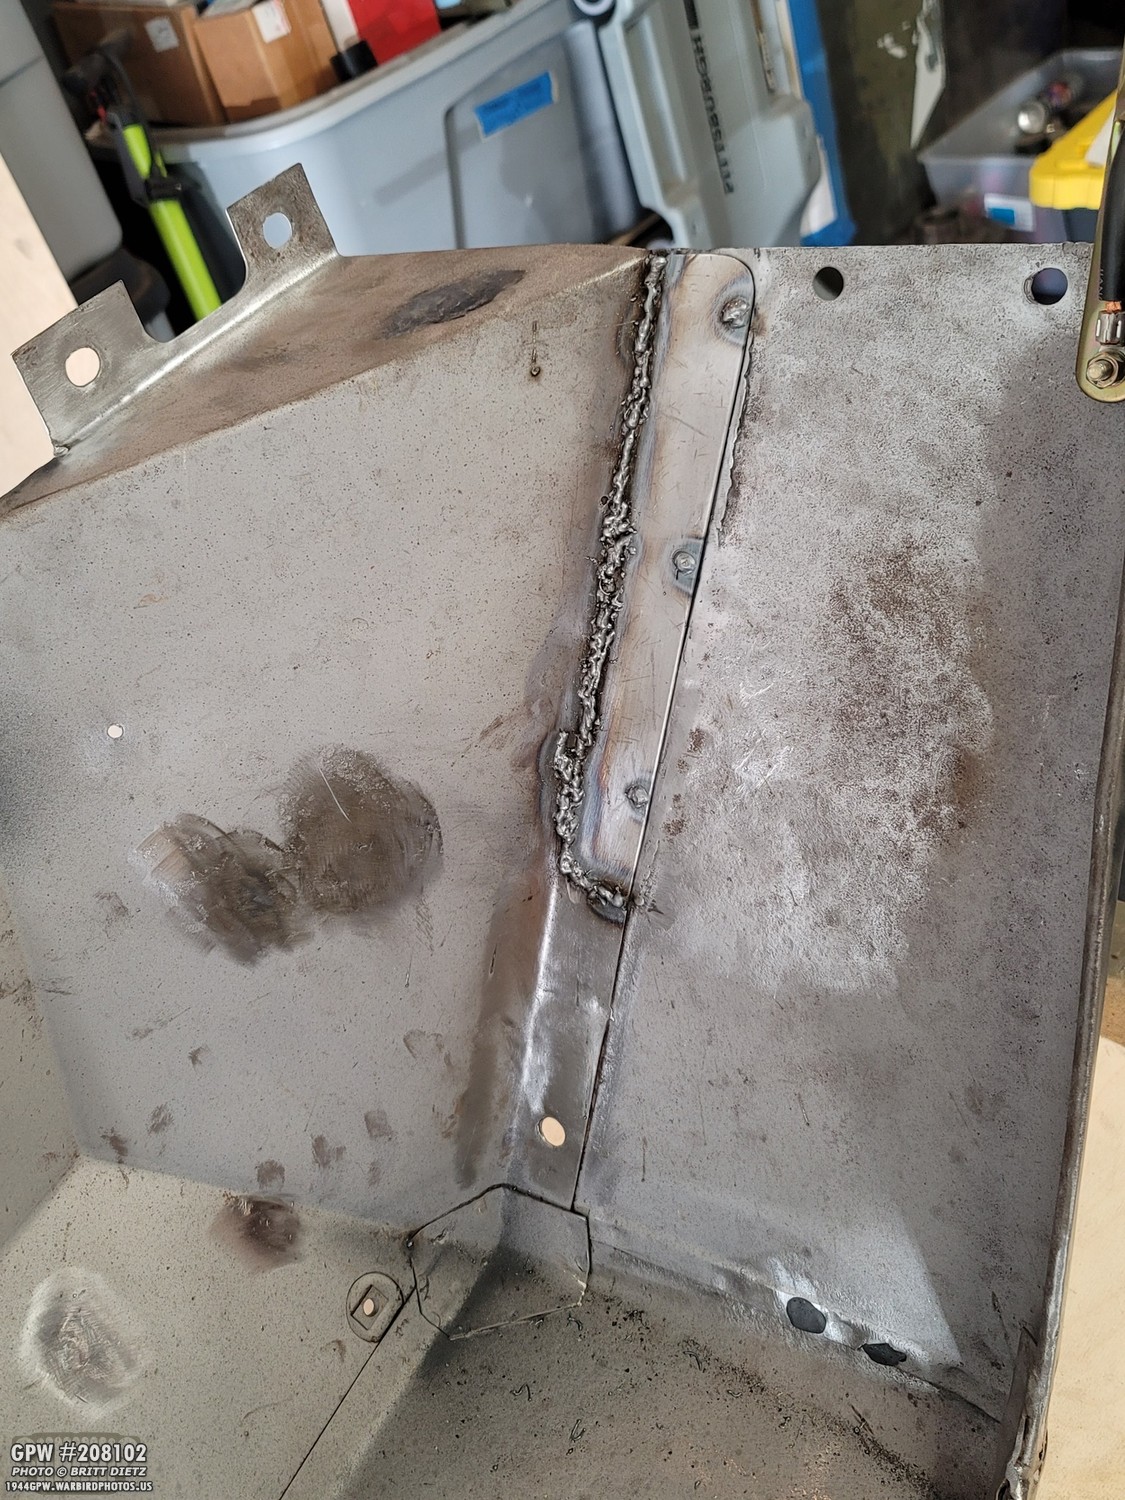
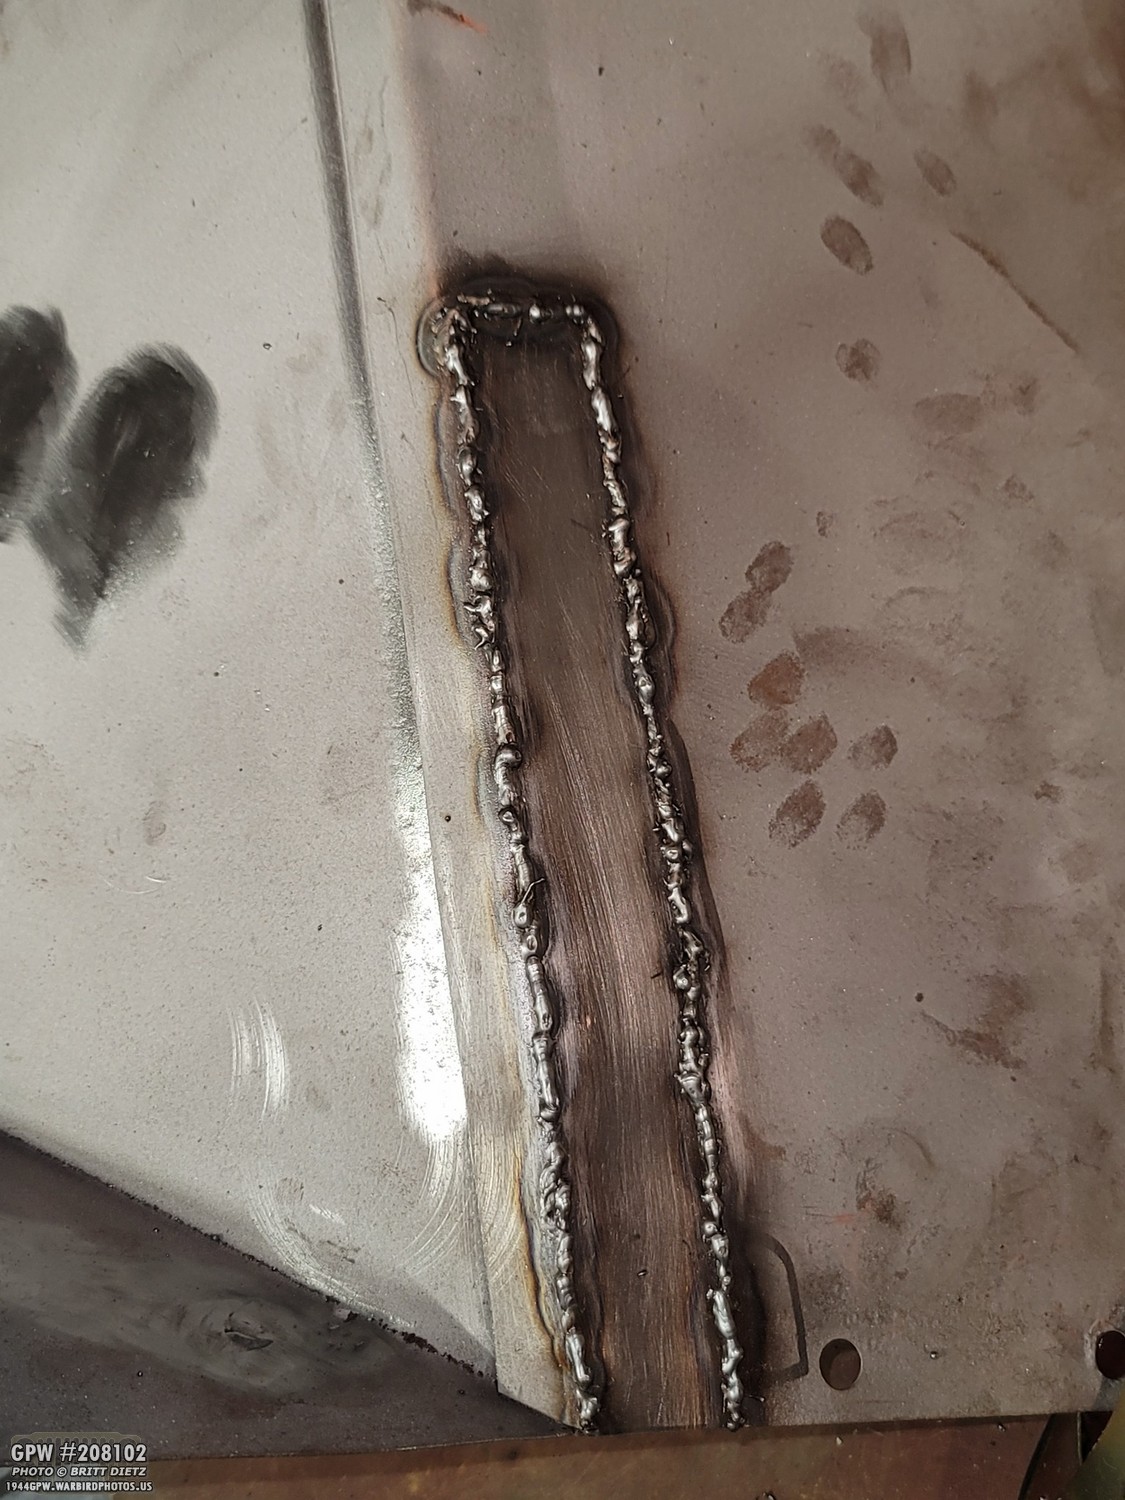
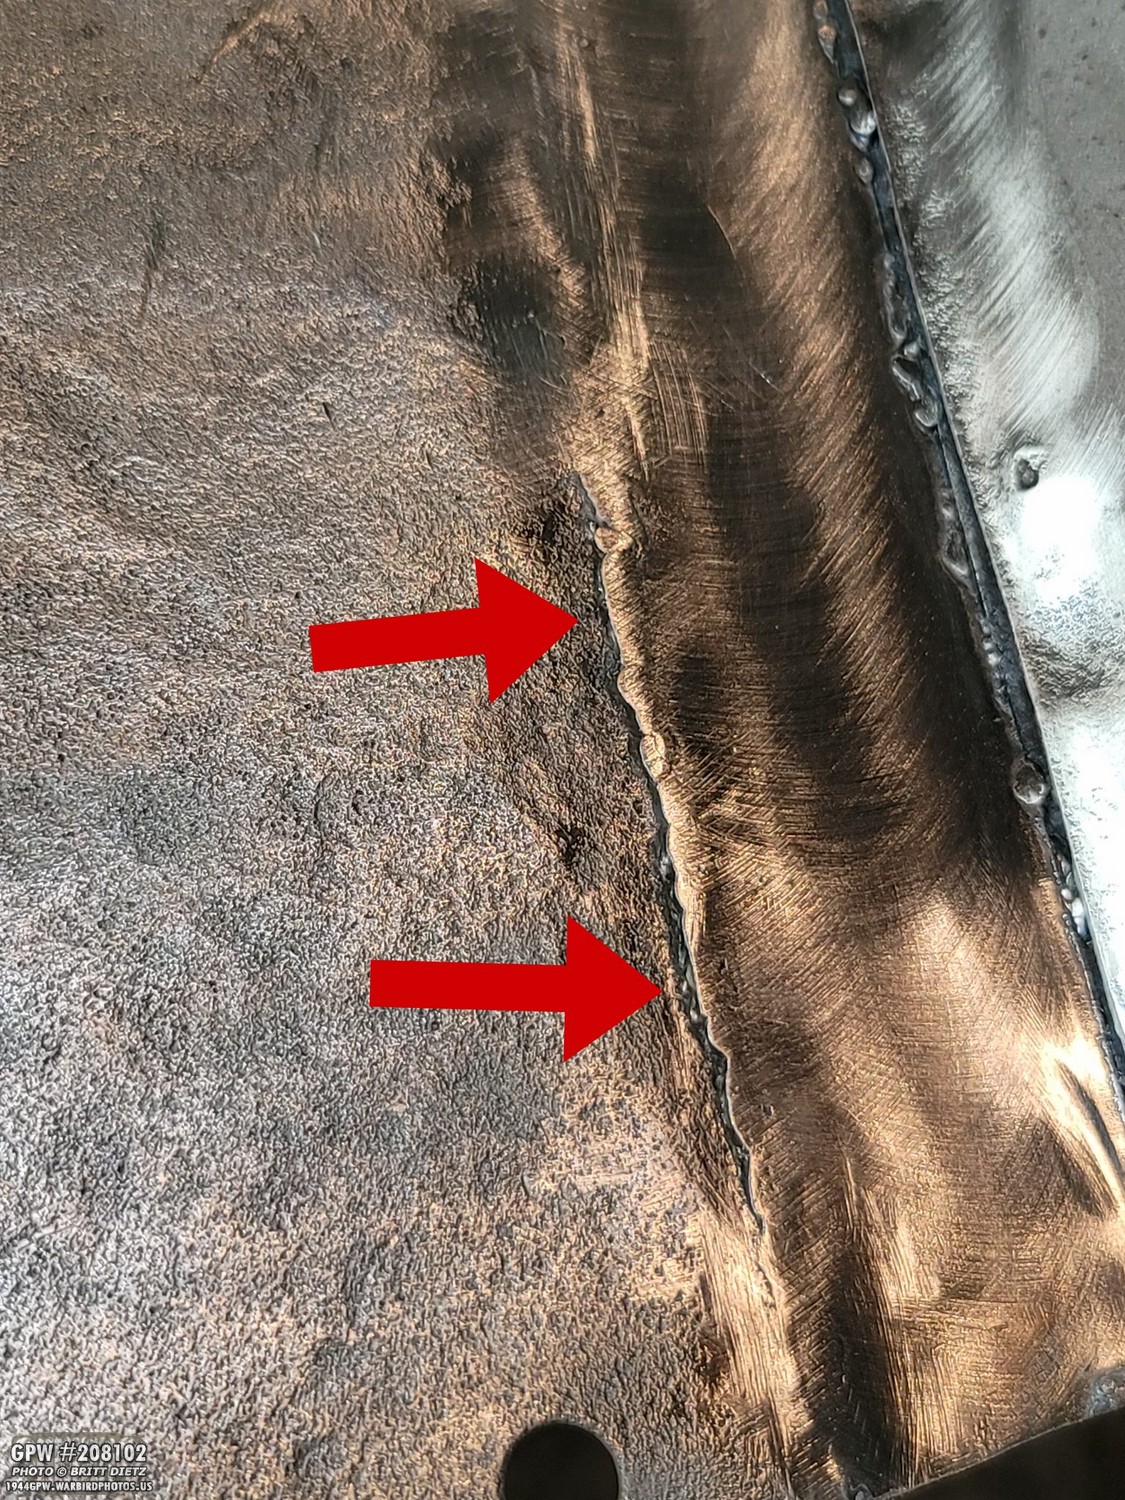
On to the next day, with a new canister of Argon/Co2 gas, I dove right in. Let me say I’m NOT happy with this weld at all. It could/should have been better. But, the original metal fought me the entire way. Even at the lowest voltage setting on the welder and slower wire speed, the original metal was blowing out. It was frustrating. So that, along with having to move around to different spots to make sure things didn’t get too hot and warp, I basically had to tack weld the entire thing. It was a pain. I then button welded the three holes.

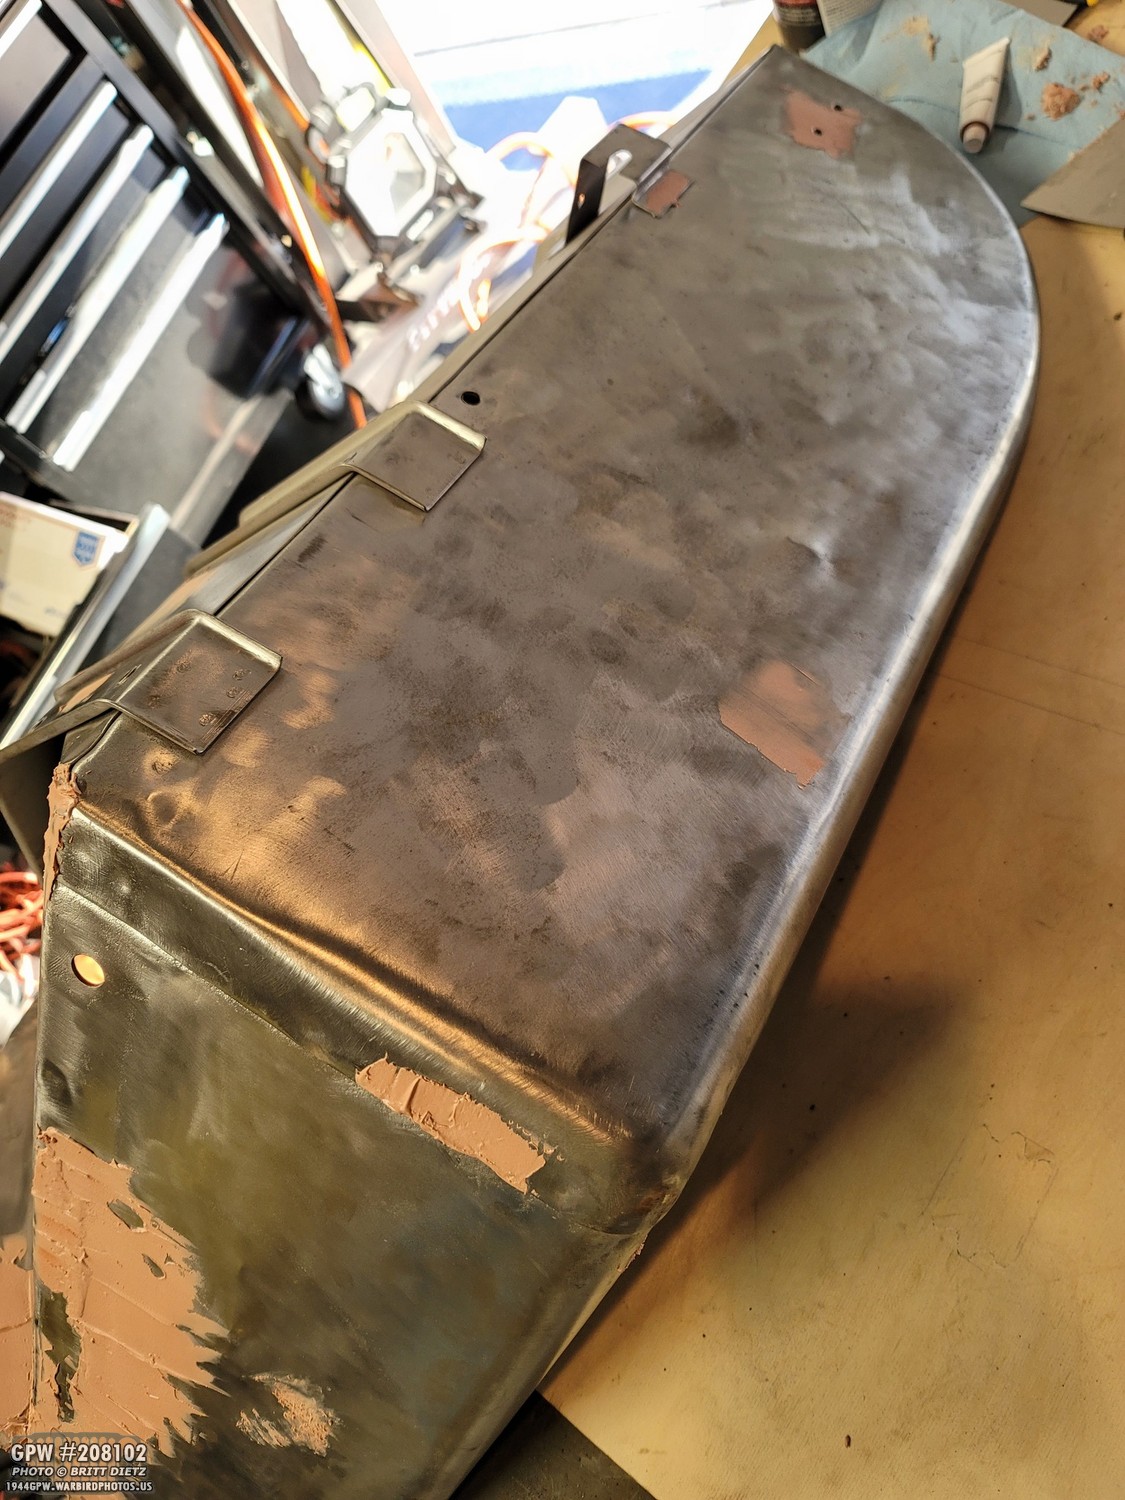
But, at least it ground down nicely! Starting to really come together.
Before putting away the welder for the night, I fixed the welding on the support bracket as it had broken away from the fender wall behind it. I hit the left side here and reattached it.

On the reverse side, I had drilled two holes and button welded those so the support bracket is now once again attached to the fender wall. This was after I smoothed out the welds.

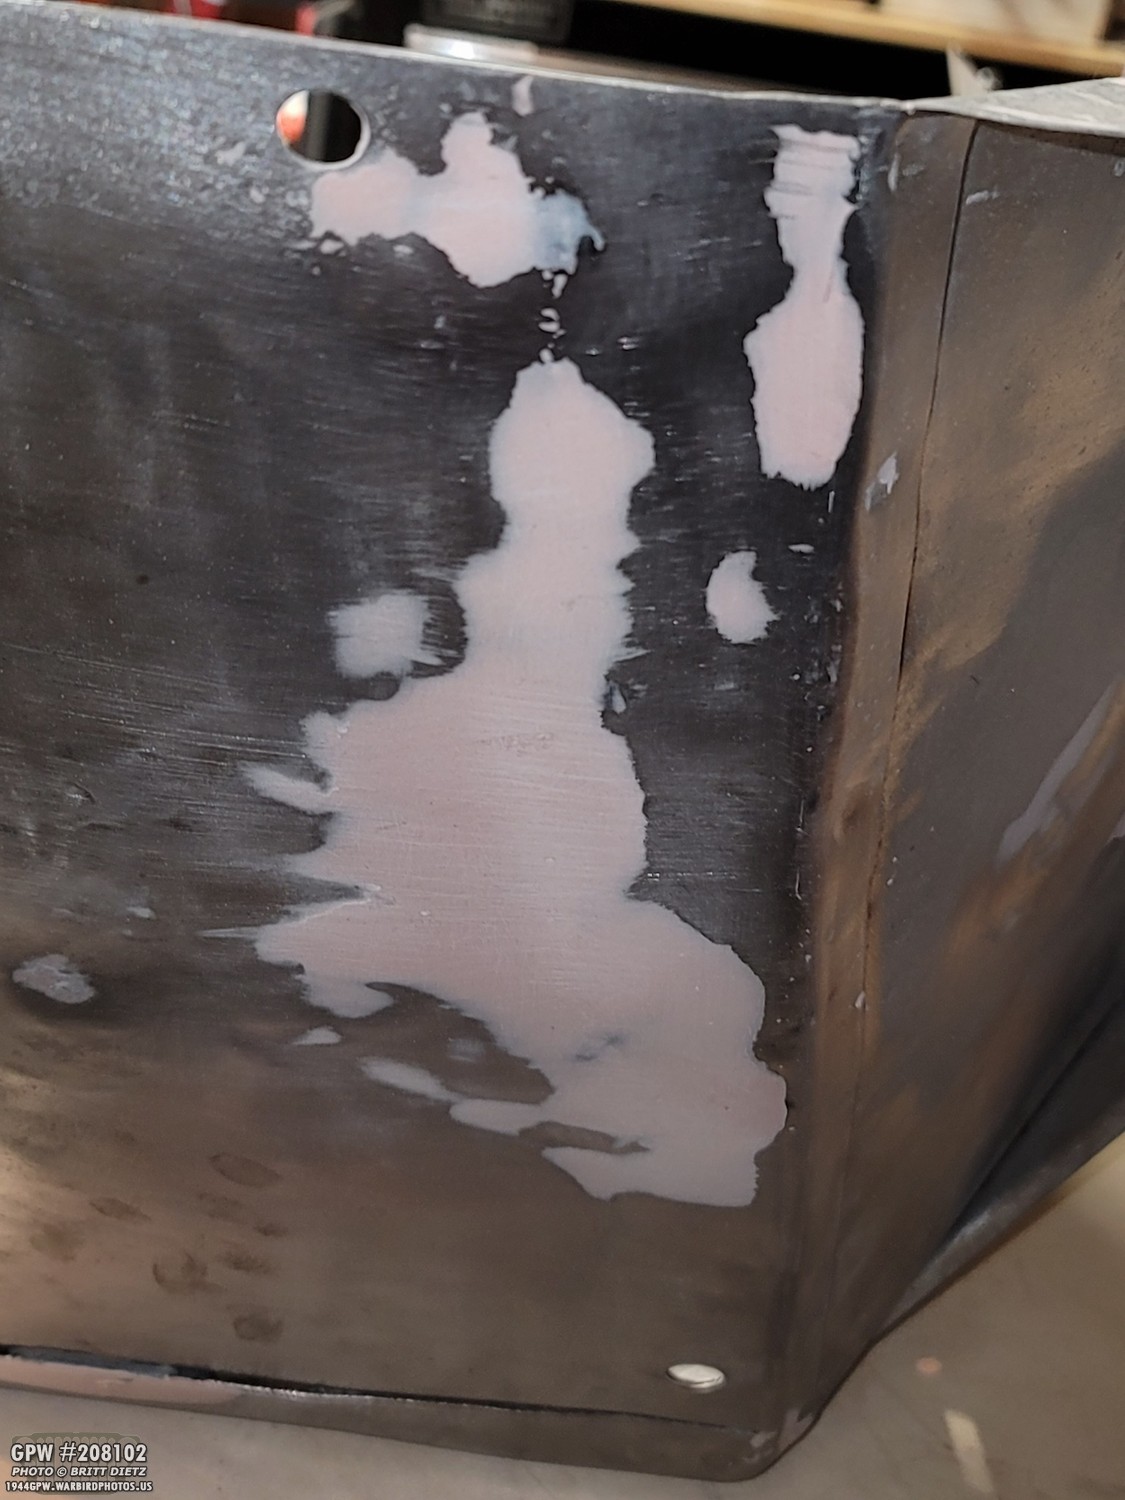
Now it was time for bondo! I went a little overboard filling smaller micro holes and cracks. That’s the perfectionist in me.

And a look on the other side. Note, this is after I added the bondo, it will be a lot less once it’s sanded smooth.
Couple spots on top.

And a few spots inside.

To fill any leftover holes, little imperfections in the welding, etc I put it a little thicker on the inside flap.

Lots of sanding.
Lots and lots of sanding. But, it’s starting to be less bondo.

After I was pretty sure it was nice and smooth, I cleaned up the fender, blew out the dust. I hit it with a bit of Red Oxide Primer to see how it looks. It’s still wet in this photo, but sure looks pretty good!
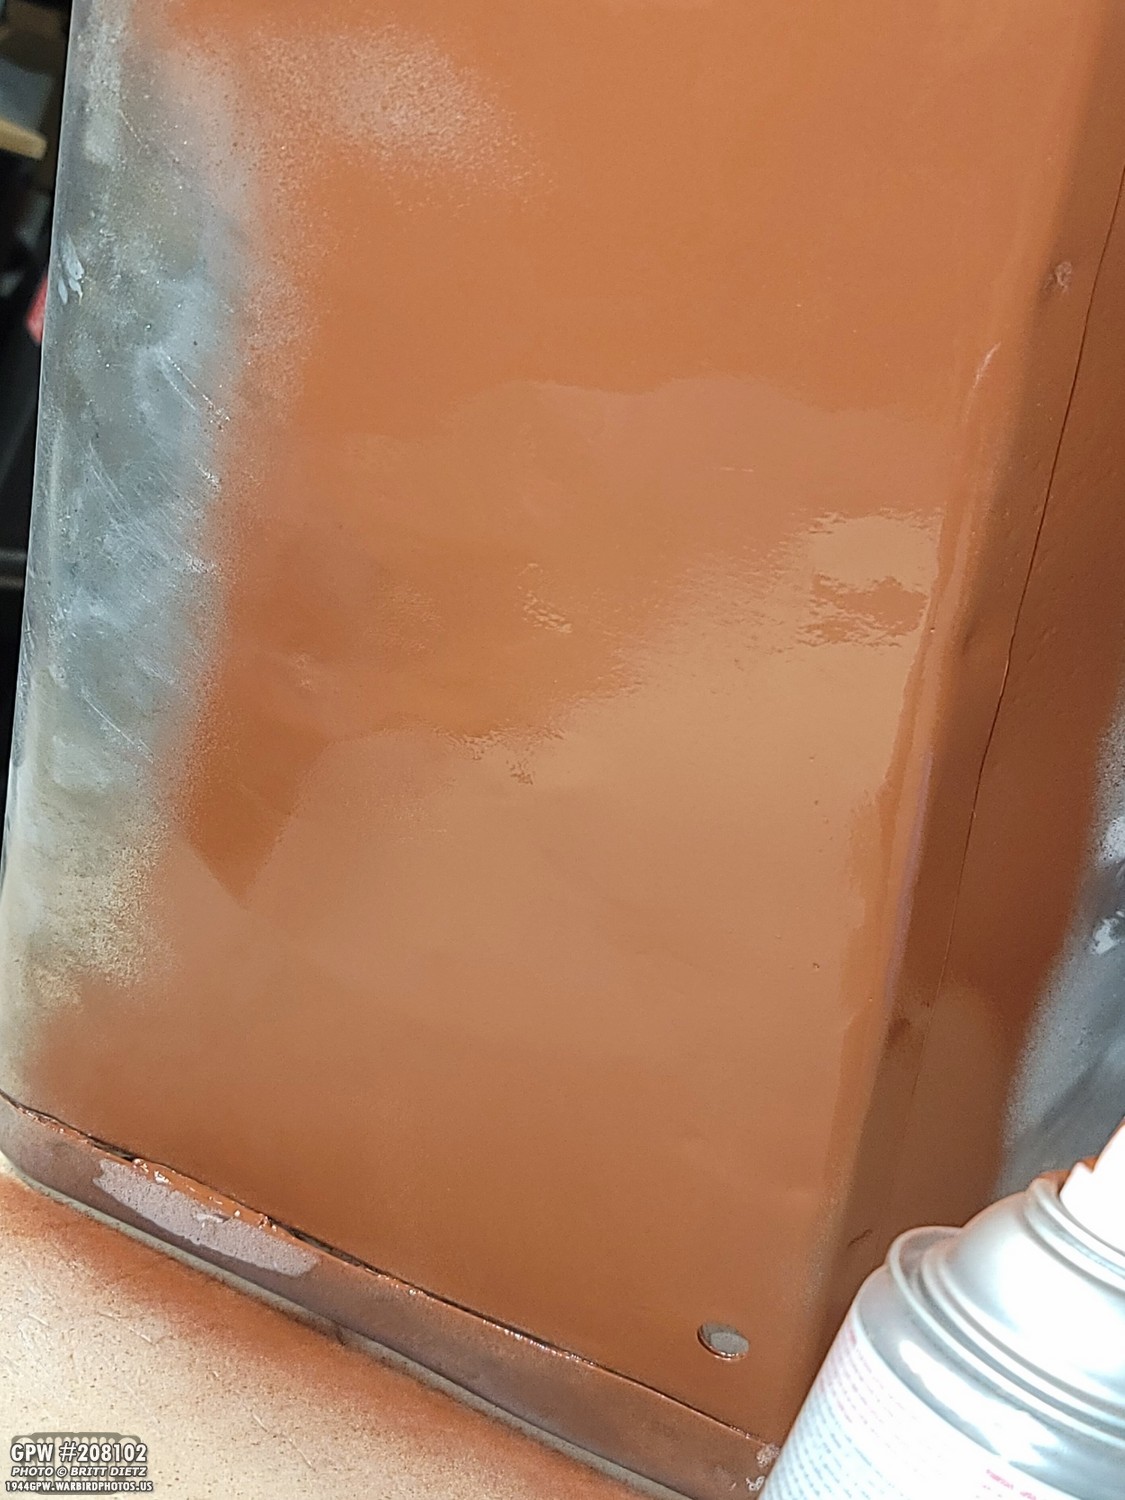
And on the outside!

After it dried a bit (it will need several coats of primer) I checked how it looked. Pretty darn good if I say so! Just need to drill the two holes!

And on the outside. There’s a few spots I need to sand a little better with the bondo (hitting it with primer brings out all the imperfections). But otherwise, I think that was a success! This coming weekend I’ll be sanding some more, fixing a few other things on the fender, and (I hope) start to paint it!
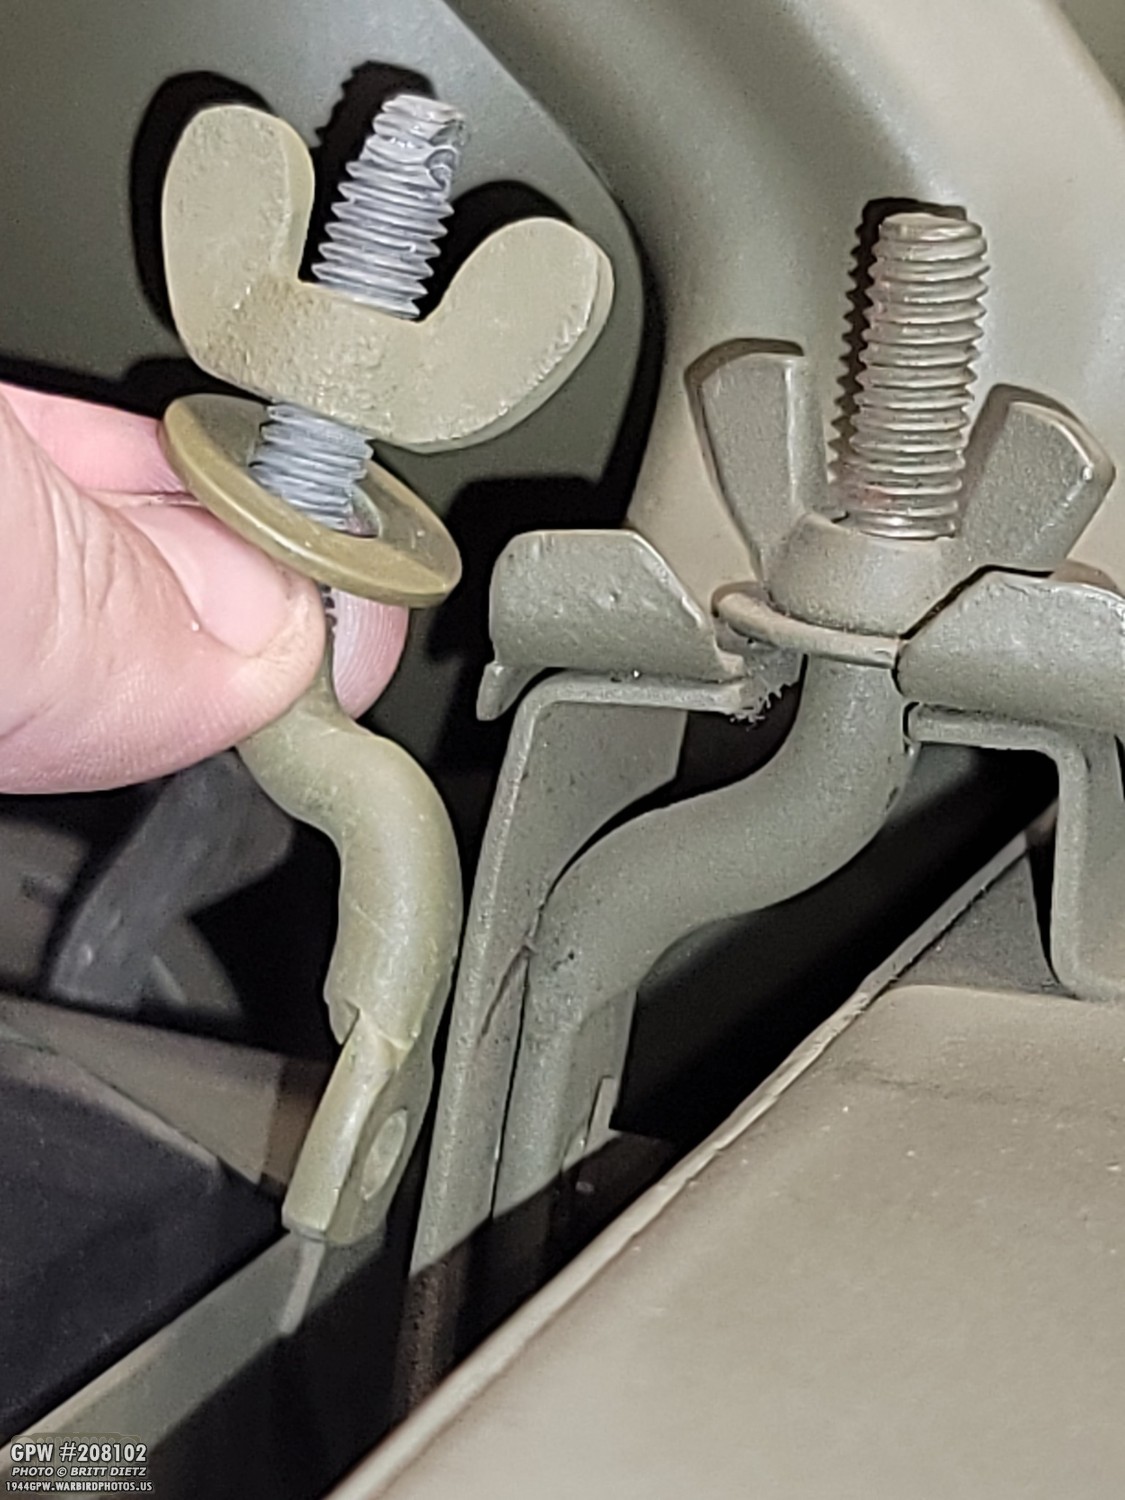
One thing I needed to order was a new headlight bracket hold down pivot bolt and wingnut. I got one from Walck’s 4WD, but once it arrived I realized it doesn’t match the ones I have. The wingnut was different, and…

… the bolt itself was different. After looking it up online, I found that there’s an early and a late version of this bolt and wingnut on Jeeps. Walck’s 4WD sells the early version only. Whoops!
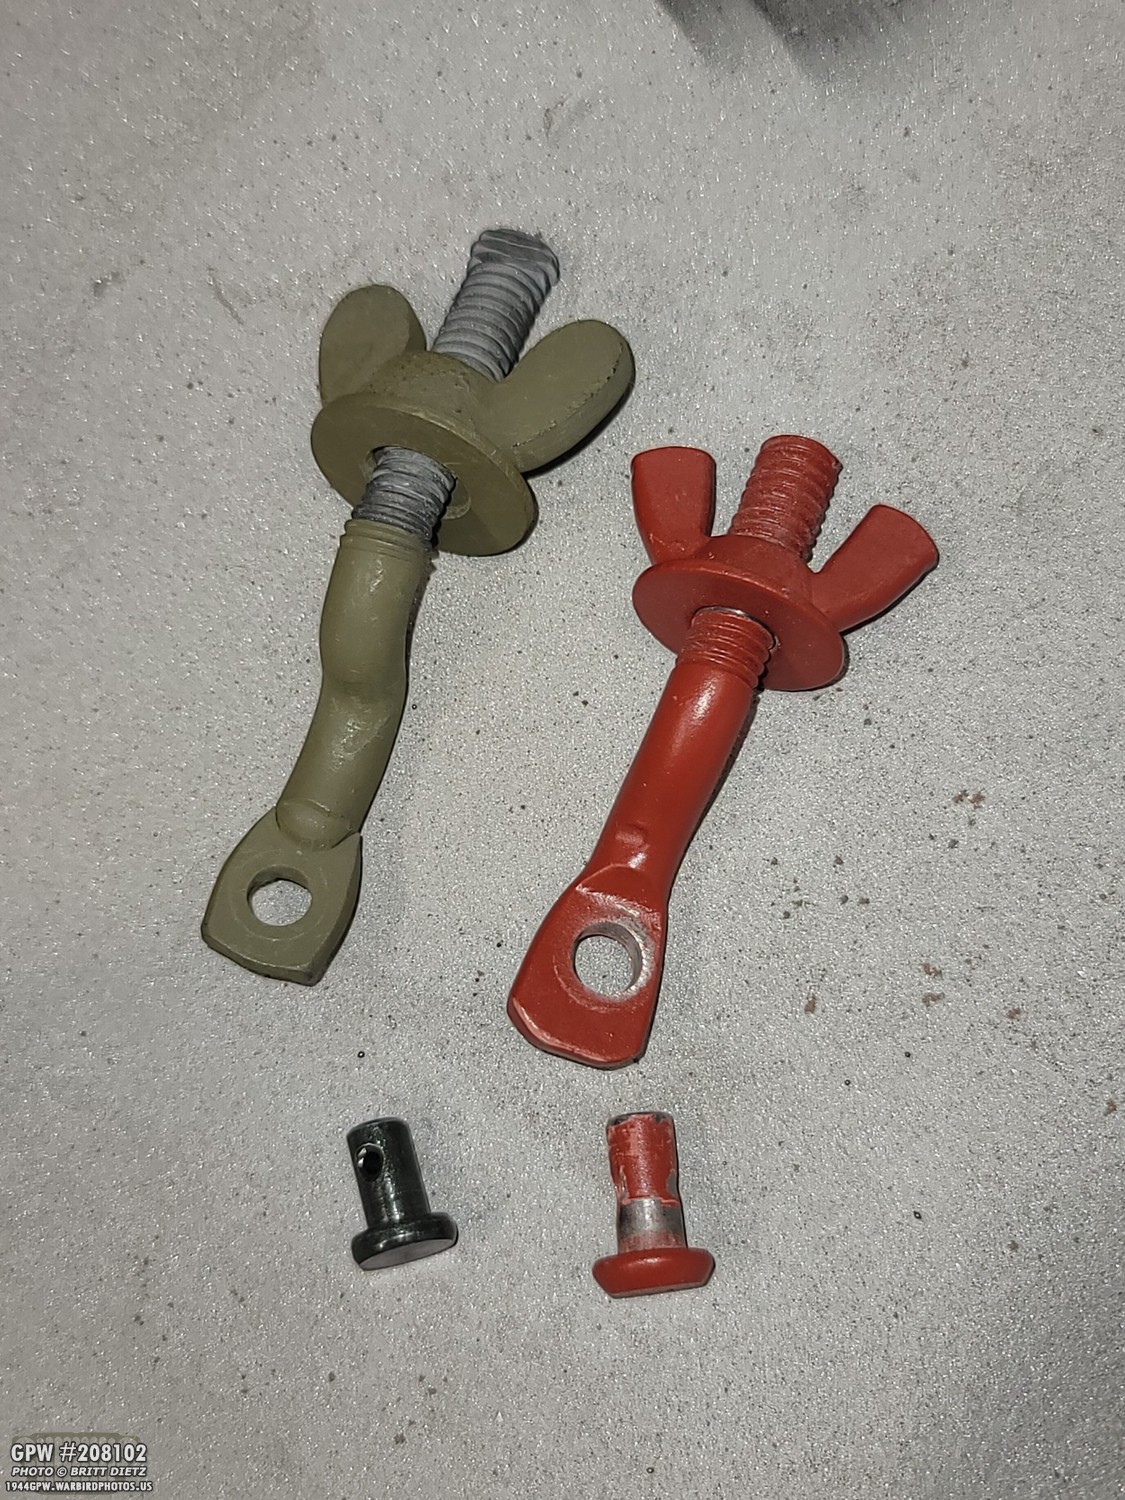
So I went onto ebay and found a later version (which is correct for my Jeep) that matches the one on my driver’s side fender. Here’s a look at the early type (left) and later type (right).

Perfect fit! Right before I start painting the fender, I’ll install it with a cotter pin.

Moving on to some amazing Jeep history! So, let’s go back to when I first got the Jeep. This was the number painted on the hood. I knew this was not a normal Jeep hood number at the time, so I passed it off as something the previous owners did for their own reasons.

During my 2020 wet sanding of the hood to locate the original factory numbers, I uncovered some US Navy numbers (but only partials) that appeared to be 2–439. I had thought that the second number was more like an 8. And it occurred to me that they might have thought it was an 0, and that’s why 208439 was on the hood. But I never had confirmation of this.

As a reminder, my Jeep was purchased US Navy surplus after the war by a framer in Riverside, CA. After 60 years, it was purchased by a reenactor family who did the initial quick restoration to get it running and looking nice. They were the ones that put this number on. The Jeep went to someone else after them, and then to me. I was able to chat with one of the original reenactors, and got some insight! That number painted on the hood was the Us Navy they found when they got the Jeep. It was clear as day on the Jeep even 60 years later. So that means the Jeep, for sure, carried a US Navy number of 208489! I’m currently doing some studies into this number to try and get any information on where it might have been during the war.

And, while most of the images of how the Jeep looked when they got it from the farmer, the same person was able to find this incredible photo of when they first got the Jeep from the him! This is the only photo I now have showing how it looked in the farmer’s field. Quite a lot of rust, but it appears to have the original Navy gray color still on it. I do wish the photo showed the hood, but it sounds like the US Navy numbers were on it! So another wonderful look into the Jeep’s history.
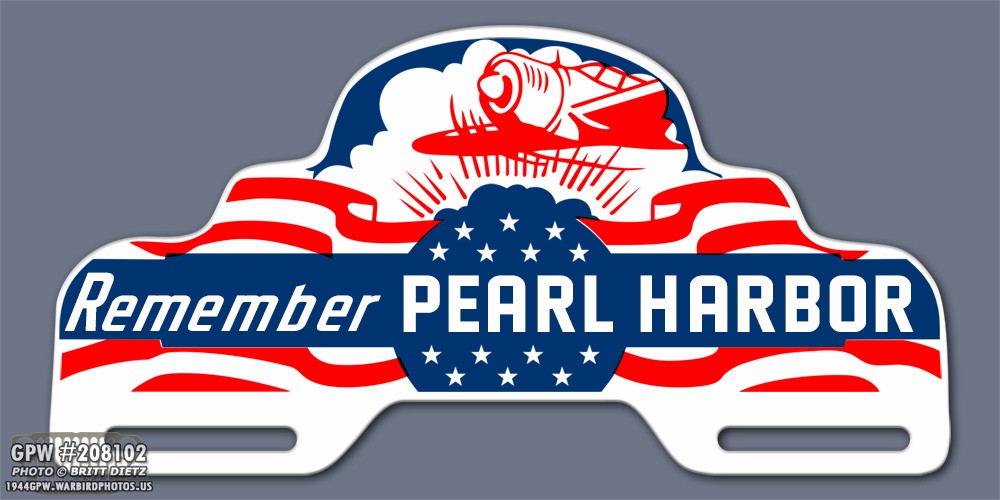
Since I can’t just have one project to work on, I started another one this month. I saw an original WW2 license plate topper on eBay the other day that looked like this. I thought it was really cool, but it was crazy expensive. So I thought to myself… my not make one myself? So I replicated it in photoshop (what you see here) where I could separate the different colors and the otherall shape. I could use my Cricut machine to cut out the different colors as stencils.

So I went to work first trying to find the right colors. I found a pretty good blue, but one thing the blue needed to have was a reflective overcoat to it. So I found (after much searching) a reflective clear overspray. So here’s my tests. I first sprayed the glossy blue on this scrap metal. I then sprayed the reflective overcoat over it all. The first strip I then sprayed a matte overcoat, the second has no overcoat, the third has a glossy overcoat, and the fourth is a satin overcoat.

All the overcoats still allowed the reflective overcoat to shine through. So I’ll make a decision on which one to use this weekend.

Using the same sheet metal for the fender, I cut out a rough shape of the topper, and then used a flap wheel to smooth it out. I then drilled holes on either side of the mounting slot, and I’ll next take the cutting wheel to connect the holes this weekend. Stay tuned for the rest of this next update!

As I wrap up this update, I wanted to mention that two people reached out to me over the last few weeks to get some of my exact replica push/pull hang tags! I’ve started to make some more of them, so if anyone else is interested in getting one from your Jeep, let me know. I have ‘new’ (left) and ‘aged’ (right) ones.
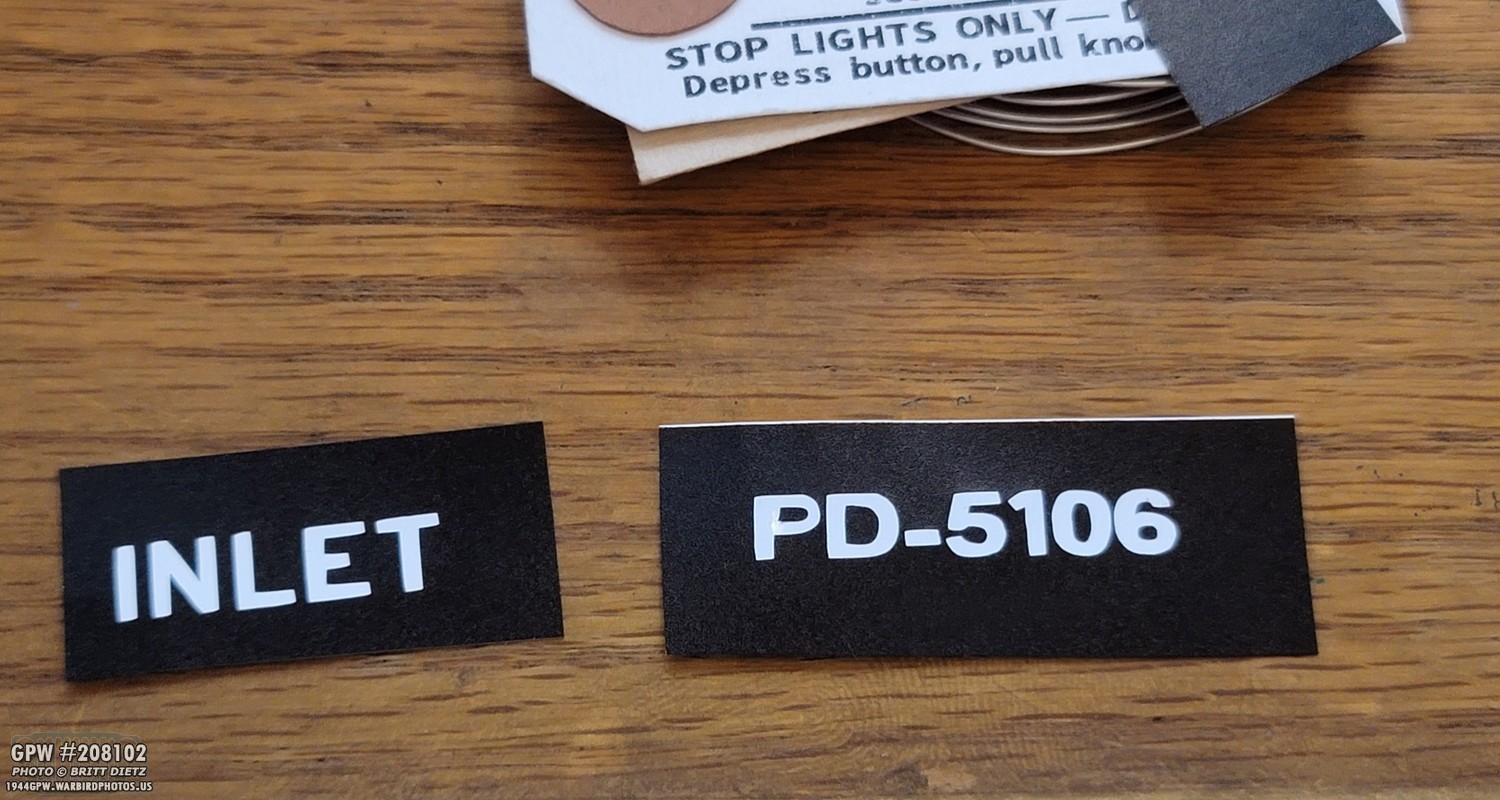
I was also asked if I will make stencils like I’ve done for my Jeep. Yes! Someone also ordered these two stencils for the GPW Oil Filter.
So that’s about it for this week. I look forward to finishing the original passenger fender and swapping out the reproduction fender with the original. It’s another step to having all major parts of the Jeep original to it!
So that’s it for this week. I should have another update next Friday with what I did on the fender this coming weekend and monday.
Till next week…