 4×4 Jeep for Christmas, Ignition Switch, and Jeep Toys!
A bit of a different update for these past few weeks… First, a special project for Christmas as I redo a 4×4 ‘Jeep’ ride-on vehicle for my nephew, then finishing the ignition switch knob project! And a recap of some Jeep-related items I got for Christmas.

Thi month was a bit slow for the Jeep. No events, and a lot of rain! But in between the storms that hit SoCal, I managed to get the Jeep out to do a little Christmas photoshoot (which I posted on Christmas Day). Here’s some alternate angles of the shoot shot with my phone (colors are not as vivid as the DSLR).

Using spare Christmas lights we weren’t using on the house, I made a festive Jeep! The wreath on the grill I actually keep on the Jeep through the Christmas season as I drive it around. Always gets some smiles!

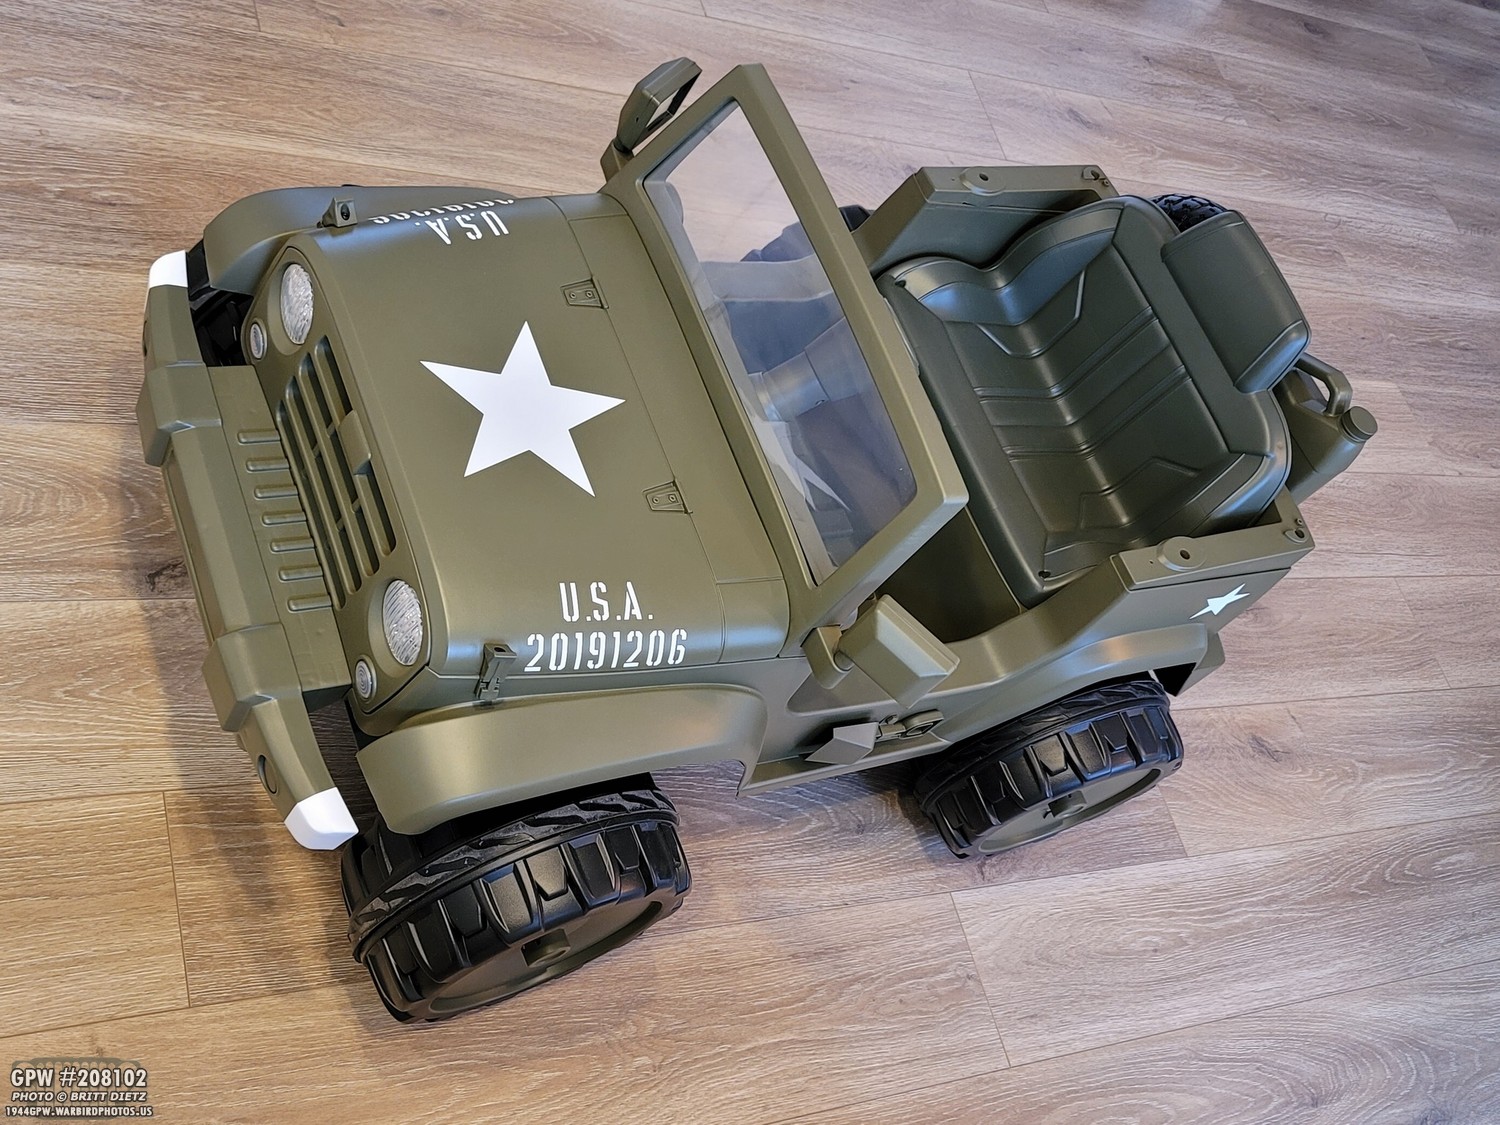
So let’s get into the major ‘restoration’ project of the Christmas season. For Christmas, My girlfriend and I decided to surprise my nephew (who is just over two) with one of the ride on 4×4 vehicles. We thought it would be really fun to find one that looks like a Jeep and I’d redo it to look like my Jeep! We lucked out and found this one on Amazon for a good deal on Cyber Monday. It’s not a perfect ‘jeep’, but is close enough. Here’s how it looked when we got it and pulled it out of the box.

I recognized right away this would be a big project. To really get it done right, I’d need to take it all apart and sand everything before painting.

The body tub would need to be taken completely apart, including the electronics. Everything would need to be sanded so the paint would stick.

This ‘jeep’ is powered by this 6-volt battery (rechargeable) in the engine bay.

The wiring harness runs under the body tub in a channel protected by some black covers.

Here’s everything taken apart aside from the dash. That took a bit of work to get out without breaking it. It contained the entire wiring harness.

First up was the hood. I sanded it with a mix of 200 and 400 grit sandpaper by hand. I knew it was ready when it was no longer shiny and instead a dull matte.

I masked off the headlight lenses (they wires were glued in, so I couldn’t remove them) and the lower ‘marker light’ builb. I then hit it with primer after sanding. I do wish the grill was more WW2 Jeep style, this is more the M151 style than MB/GPW… but it’s close enough.

I used this primer, which is the same color as the red oxide primer I used from Ron Fitzpatrick Jeep Parts. It’s made for all sorts of materials, including plastic. It goes on pretty thick, which was nice. It stands up to the 2x ultracover claim!

As each part was sanded, I immediately primed it. I was in a race against the weather as the storms were coming. I had limited time to get everything painted with sunlight/cloudy days without rain.

By far the hardest part to sand was the body tub. After we finally got the dash off, it was just the one-piece body tub. This took most of a day to hand sand! Since this would take the brunt of the beating (with the bumpers), I wanted to make sure the paint would adhere the best.

Before and after the first coat of primer! Took two rattle cans of primer to get it all laid down.

Looking at the dash, I removed all the decals and masked off the steering internals and the two main switches.

I taped up the wiring harness on the other side to get it out of the way and avoid getting paint on it.

After 24 hours of drying, I then used a scotch pad to lightly sand the primer in prep for 33070 OD Green. I used the same 33070 I use on my Jeep, the gallon form from Ron Fitzpatrick Jeep Parts with a spray gun. Paired with the Xylene thinner, it really is an amazing paint. It adhered to the primer very well.

It took two days to paint the body tub and an additional day to dry before I could handle it. It was tough to paint with all the little nooks and crannys. I was also running up to the wall, the storms would be starting the next day!

Everything was coated with 2.5 layers of 33070 OD Green to ensure a nice thick coat over the primer. After they had dried for 24 hours, everything then was sprayed with 3 coats of clear matte protective paint.

For the wheels, I ditched the ‘bling’ hubcaps, and just went plain. I painted the inner part OD Green, which I think looks a ton better than using the hubcaps. I made a circle template with my Cricut and removable vinyl.

To replicate the bumperettes, the rectangular raised areas of the rear bumper I painted white (it will be an AAF Jeep, after all!). After the white dried, the bumper received three coats of the clear matte protective paint.

With the tub fully dry and then 3 coats of protective matte dry, it was time to start putting it together! First up, the front steering system and the first wheel.

I then returned the dash and started to rewire the Jeep.

Here’s a look at the dash with the tape removed. The switches look great against the OD Green. The white square on the left is the indicator to where the charger port for the battery is under the dash.

As all this was going on, I switched over to the hood and got a large star, the hood USA and numbers cut out of removable vinyl with the Cricut machine. I used the same fonts as my Jeep’s hood numbers. For the numbers, I used his birthday (since it started with a 20, it works!). After masking, I sprayed the white paint on everything.

Here’s the Jeep, just a few days away from Christmas starting to take shape again. The rear compartment I didn’t completely paint as the seat will be screwed down on top of it and you won’t see inside. All four wheels are on. It sent nights next to my Jeep in the dry garage as the heavy storms persisted outside.

Rewiring was a bit fun. Just like my Jeep, the wiring was my favorite part!

Now the seat and steering wheel have been installed. The seat was hit with a different shade of OD Green (Hunter Green I think) to make it look different than the rest.
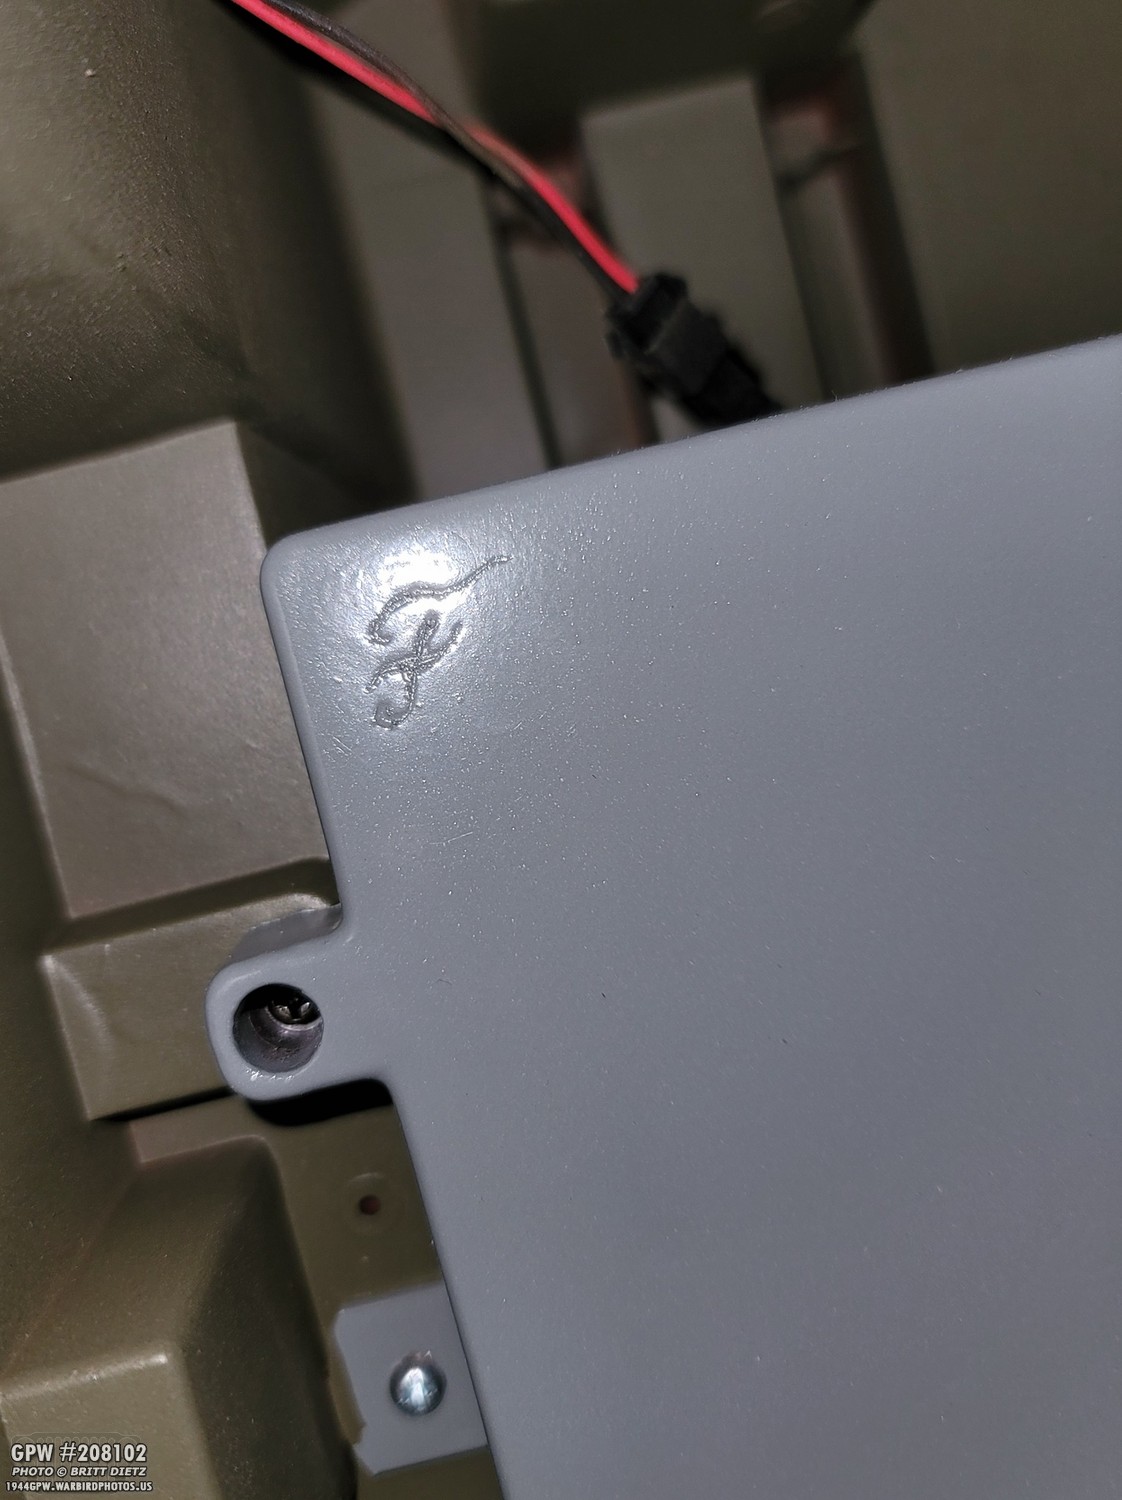
Knowing that someone in my family would joke ‘Where’s the F-Stamp?’, I took my Dremel and made an F stamp in the battery cover. And yes, I used Ford Engine Gray to paint the battery covers, same paint as I used to paint my Jeep’s engine.

Here’s a look at the main battery cover in the Ford Engine Grey.

We had a quick pause between storms, so I was able to open the garage to finish up more on the Jeep. The deadline was just about 3 days till Christmas! The windshield is installed now, and the front bumper is attached. I painted the tips of the front bumper in white just like my AAF Jeep. My Jeep is covered in plastic as I was doing some of the spray paint touch-ups in the garage.

We decided to go the extra mile with this mini jeep to make it look more ‘Jeep’. This included adding a spare tire. While I couldn’t find a large plastic tire like the tires on it, we went t Harbor Freight Tools and picked up a small 8 inch tire, which I primed and painted the hub in OD Green.

Another object I added was a ‘Jerry Can’ and holder. The holder was a quick wood project, and the ‘Jerry Can’ was an empty EvapoRust canister. Both were primed and painted.

Here’s the jerry can holder. The recessed holes are to attach to the rear of the Jeep.

Here’s both the Jerry Can/Holder and the spare tire mounted to the back of the Jeep. I think that really adds an extra Jeep look to it!
One last item I added was this little toy shovel on the side with a custom bracket I made. Had I had more time, I would have made custom F stamps for the bolts. After this, I painted the bracket OD Green, then put the clear matte protective spray on the shovel and bracket.

To cover the ends of the axles on the wheels where the retainer nut is, there were these caps that snap into the hubcaps. Since I’m not using the hubcaps, and I wanted to cover the nuts, I belt sanded the little tabs on the bottom of the caps and then used JB Weld epoxy glue to glue the caps onto the nuts. Much better!

I then added stars to the rear of the body tub. Not much time left!

I added a custom printed GPW data plate to the dash with some fun changes. This was printed on printable vinyl and then cutout and sealed.

And here we go, a day away from giving the Jeep to my nephew, here’s the finished product!

It turned out really well, but it was a heck of a lot of work to do.

There are some things I would have done differently if I had more time, to make it match my Jeep even more. But at some point you have to stop before you go really crazy!

The additions to the rear really add to the Jeep look.

The hood numbers and the star really add a lot as well. And yes, that hood clip really does hold the hood down.

I originally thought about doing a star with a broken circle (invasion star) like my Jeep, but it would end up being tiny. So the singular star was a much better choice.

Here’s the front with the headlights on. It does bother me that it’s not a Jeep grill, but it’s not a trophy exact mini replica! It’s a riding toy.

I think the wheels are a big improvement, I’m glad I decided not to use the hubcaps.

I would have liked to add front bumper markings, but it would have been difficult with it not being flat.

One other thing I wanted to do, but ran out of time (and needed a better printer) was to put photos of my Jeep’s speedometer and maybe fuel gauge in the two gauge spots.

Here’s a look at the final shovel. We tried to find a small toy ax, but just days before Christmas (and toys like that out of season), we couldn’t find anything.

To mount the spare tire on the back of the Jeep, I had to drill a large hole and use a really long bolt to secure it. I even thought about using one of my spare Schrader screw-type valve caps, but that has a sharp edge.

And here’s my nephew taking the ‘Mini Jeep’ out for a spin. He loved riding it back and forth! I’m sure he’ll get used to steering in no time.
I would have liked to get photos of the Mini Jeep with my Jeep, but the rain just didn’t want to let up for that to happen. Oh well, at least I finished it on time and he liked it! Mission accomplished!

Moving to the next project, this one is actually for my Jeep. In the last update I talked about how I got a non-working Dodge (we think) ignition switch from my friend Roger. I took it apart and removed the knob. I then took a spare H700 Key, ground down the cuts on the key so it can’t be turned, and then used a very strong epoxy glue (by JB Weld) to glue it into a slot I carved out of the back of the knob base. It was a perfect fit into the keyed ignition switch I have.

Now to the rest of the project, I primed and painted the knob.

And here it is, all finished! It fits perfectly into the key slot (as it should since it’s for a H700 key), and when I have the Jeep on display, I’ll have this in the switch to make it look like it should with a switch for the ignition. I just take that out and insert my key to actually start it. Perfect!

I’m sure many of you got some fun Jeep items for Christmas! I had two fun ones from my brother that I thought I’d share. First up, this fun Willys MB Jeep from COBI! It’s basically legos. They have a whole line of really detailed WW2 vehicles and aircraft.

Here’s all the parts as I started to put it together, a fun quick build.

I’m pretty amazed at the detail, for a lego style vehicle.

Even combat rims, NDT tires, and correct hubs.
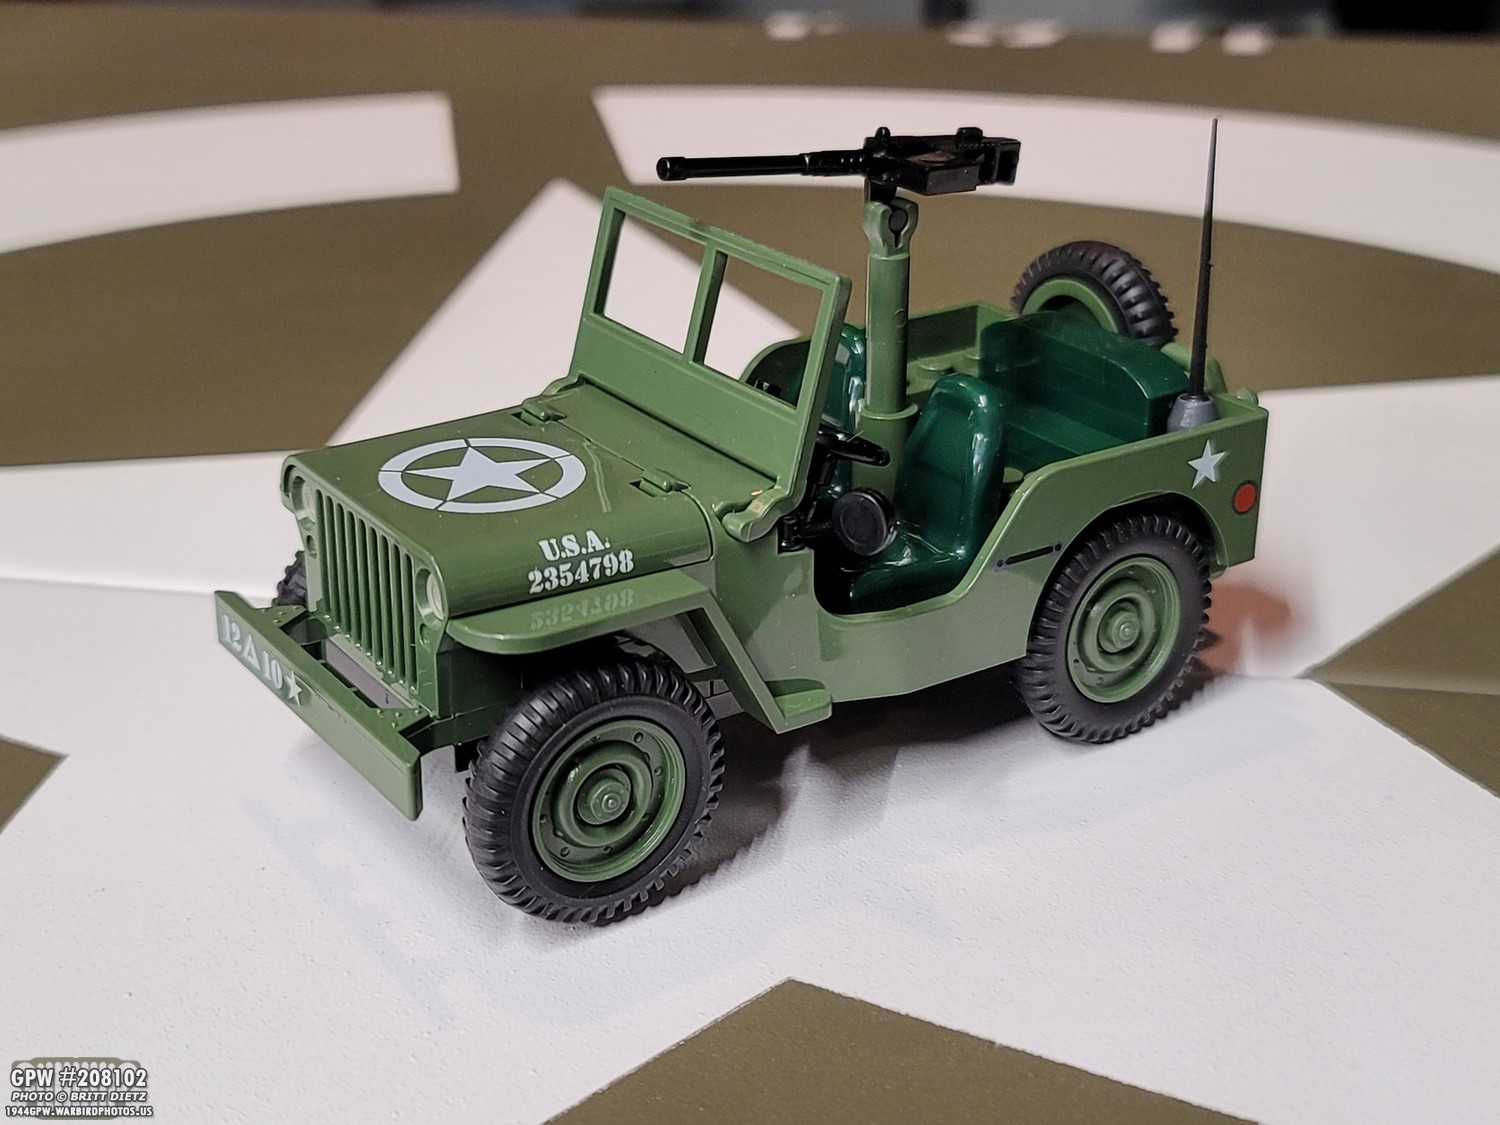
Here’s the finished product! A bit more green than it should be, but I’m really impressed.

The windshield comes down, the headlights glow in the dark.

Even the engine has a surprising amount of detail, considering. Air cleaner, crossover tube, horn, oil filter, and the rest printed on a ‘engine head’.

The dash dials are there, and at least one shifter cane.

Side mirror, and some great decals. Even a .50 on top!
There’s a jerry can on back, and they even attempted to make the correct style driver’s stop light. The bumperettes are flat, but they are there. Overall, a fun little build with surprisingly great detail!

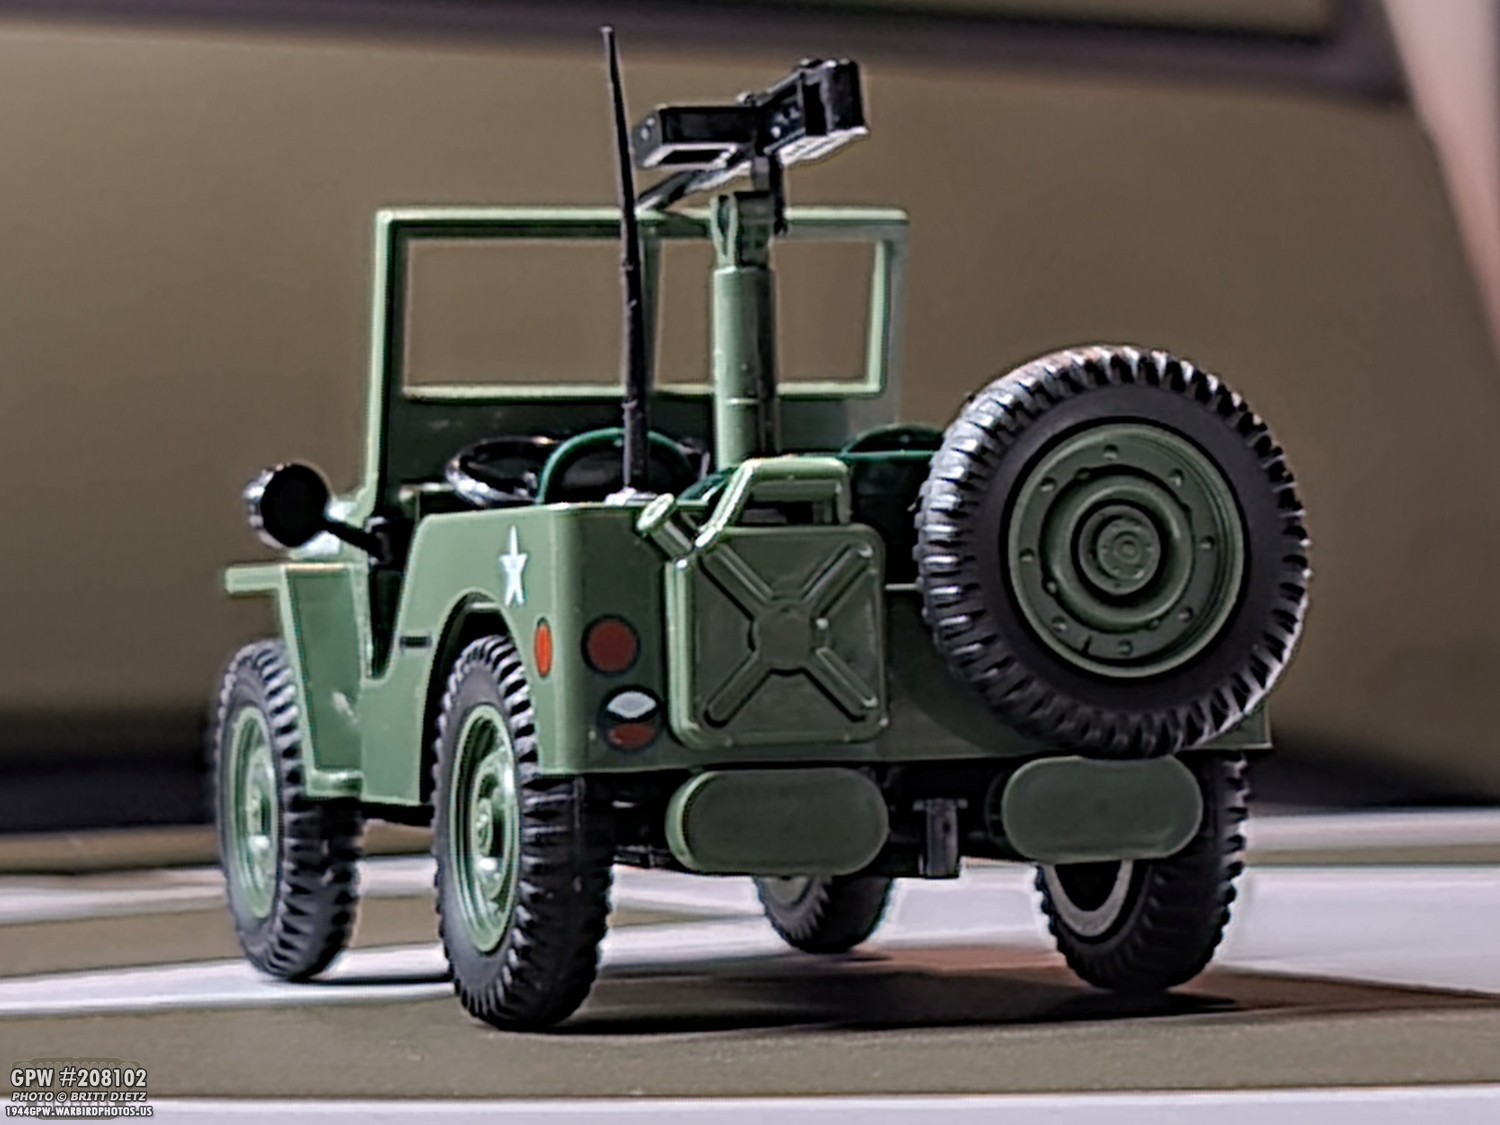
I also got this really incredible diecast 1/18 Navy Jeep. I’ve wanted one of these as this is how my Jeep looked during the war (it served in the USN either in California or Hawaii). So this is a great piece to have to represent what my Jeep was like. Let’s dive into the really amazing details on this.

From the pioneer tools and the straps to the half-door sockets, correct wheel hubs on front/rear, fender blackout light, top bows, etc… this thing is really detailed!

Willys data plates, shipping plate, emergency brake handle, dash gauges, panel lights, correct shifters, it’s really incredible.

If my Jeep wasn’t my first Jeep, I would have restored it back to look like this. But, since it was my first Jeep and I’ve always wanted one in USAAF markings, I went with that.

The engine bay on this thing is really incredible! Battery, voltage regulator, oil filter, air cleaner, fuel filter, radiator, horn, air cleaner, crossover tubes, thermostat, manifolds, carb, etc etc etc.

I decided to take out the other Jeep I have in 1/18 scale that I custom repainted about a year ago (which I chronicled on here) to compare. They are from different companies. That Jeep has a top and is a GPW unlike the Navy Jeep which is MB.

A look at the two engines. The Navy one has more detail overall. I custom painted the left one to look like my Jeep.

It’s interesting what details each maker decided to go with, and those they did not. IE, the Navy Jeep has a much more detailed jerry can and holder, but the GPW Jeep has a hold-down strap. The GPW omits any brake lights and trailer socket but has a much better spare tire plate.

Underneath, both have a lot of detail, but the Navy Jeep wins overall with a better engine, axle differentials, and skid plate. It’s interesting that the GPW has a late internal parking break, but the Navy jeep has the earlier external.

The GPW has the correct style shocks, hood blocks, marker lights. The Navy Jeep has better hood details, hood catches, and fender light.

It’s a nice contrast to have both Jeeps. I might figure out some way to bring these to some events to have as visual aids when talking about MB vs GPW Jeeps.

Two toy Jeeps stacked on a real Jeep!

And since I always end these posts on a shot of the ‘rear’, here’s the two rears of the two diecast toys to finish this update. It’s a bit different than usual but still fun. Hopefully, 2022 brings some more events and adventures for the Jeep! Look for the start of restoration work on my original passenger fender (for the real thing) starting in the next update!
Till then…