 December 7th event, Ammo Crate Radio upgrades, Ignition Switch, etc!
I took the Jeep out to a Pearl Harbor event at the Planes of Fame Air Museum, where I tried a new amp board for my Ammo Crate radio and added some new upgrades. I took a NOS ignition switch for a special project, some new accessories for the Jeep, and more!
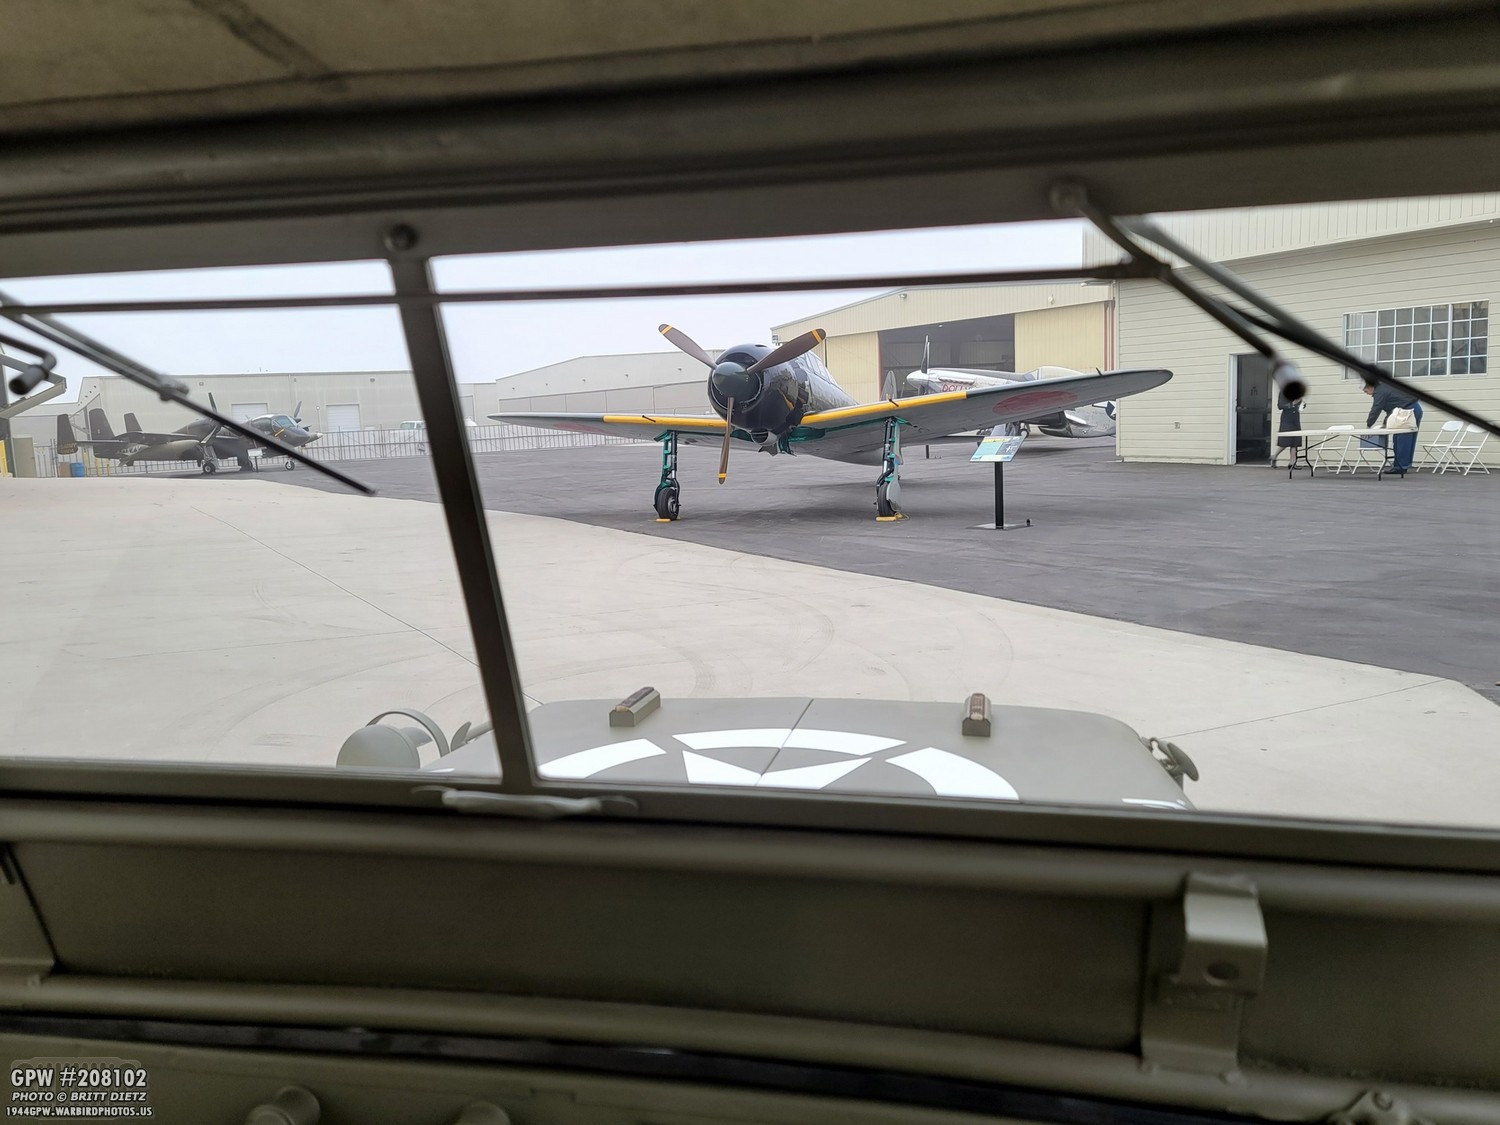
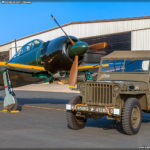
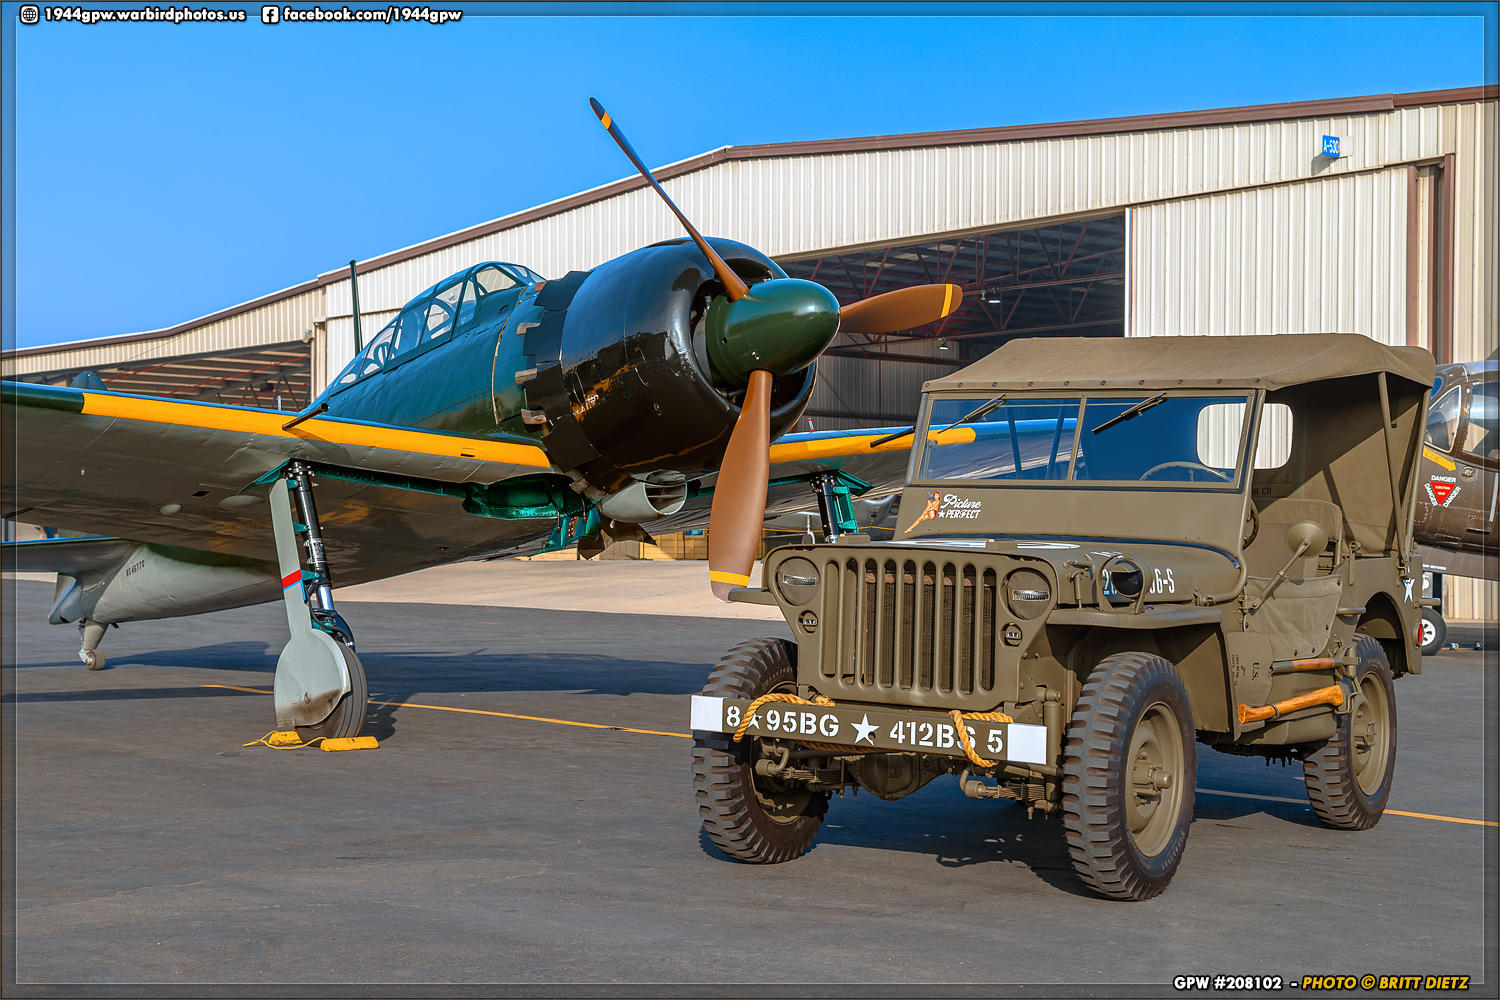
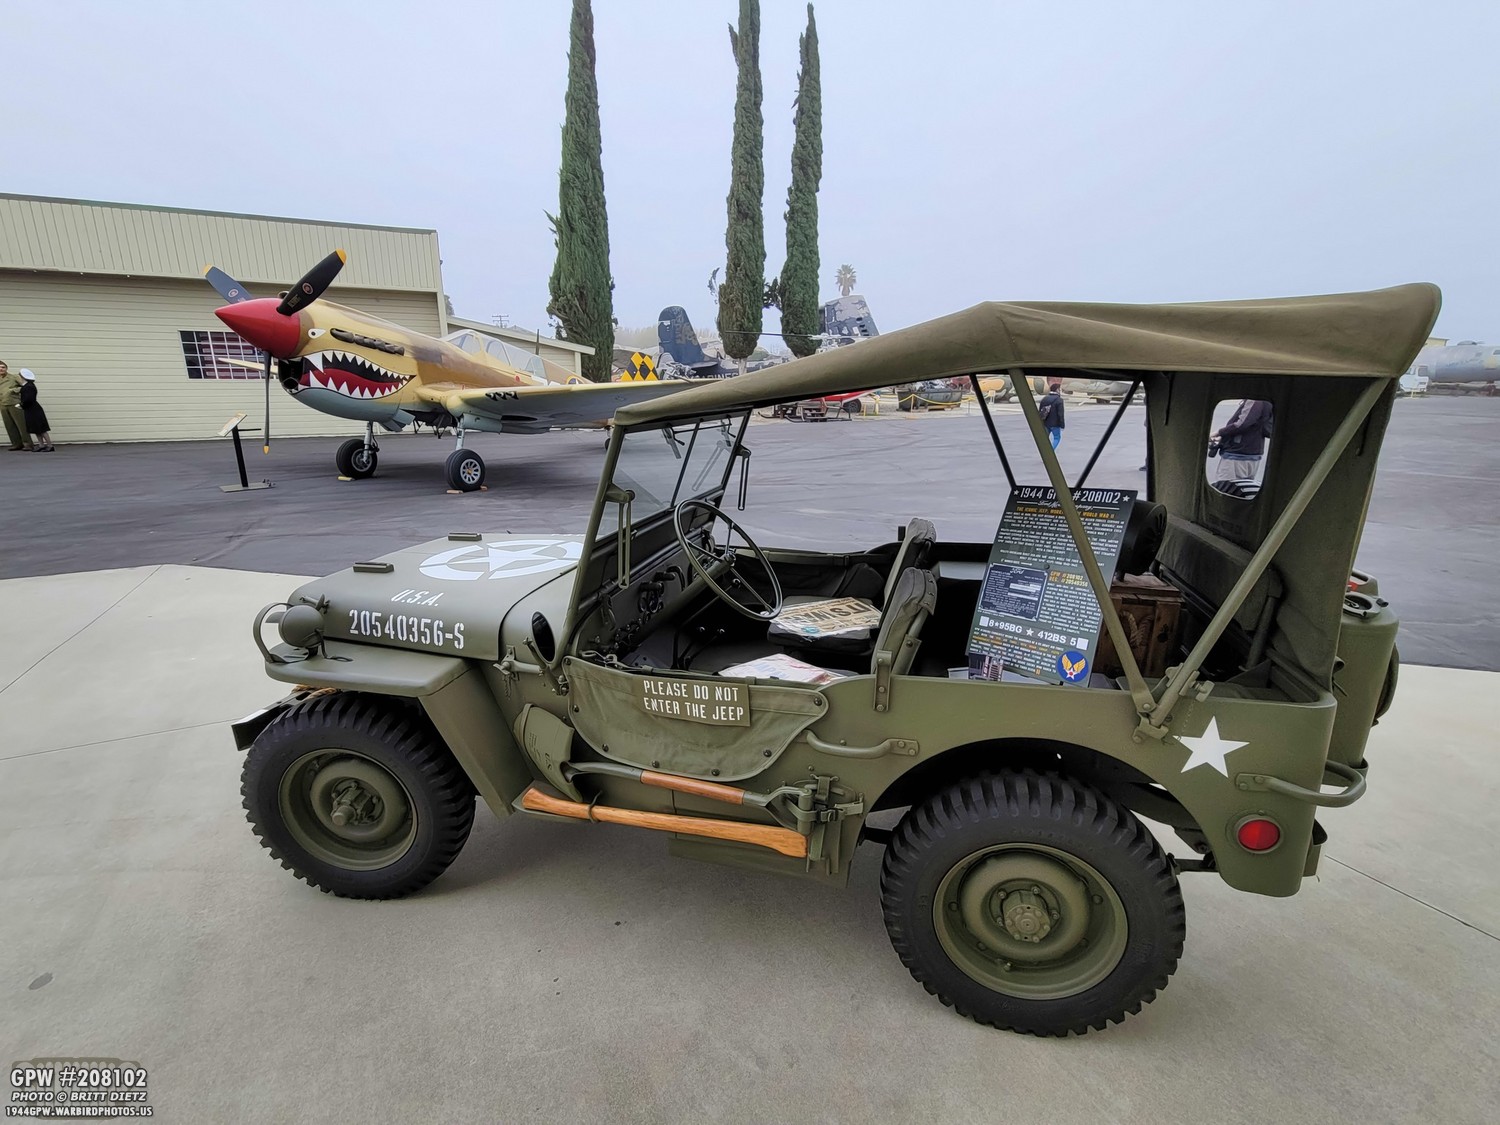
Let’s jump right in! As I pulled into the Planes of Fame Air Museum courtyard in the Jeep, I immediately saw the ‘target’ for the day… a very rare Mitsubishi A6M5 Zero (only one with the original engine that flies! in the world!). Pretty cool to see out my windshield. The event was Pearl Harbor: 80 years later and was held on December 4th.
It’d been a few events since I’d last brought out my Jeep, and I wanted to get some photos with the Zero. I also wanted to have it on display as I knew there’d be a lot of people at the event and they’d enjoy seeing the Jeep and some ‘extras’ I brought in honor of Pearl Harbor.

Here are some of the extras I brought with the Jeep this time to showcase. Not much, but pretty significant for the event. I’ll touch on the ammo crate radio on the backseat later, but I had it playing 1941 music with actual interruptions of Pearl Harbor headlines and announcements.
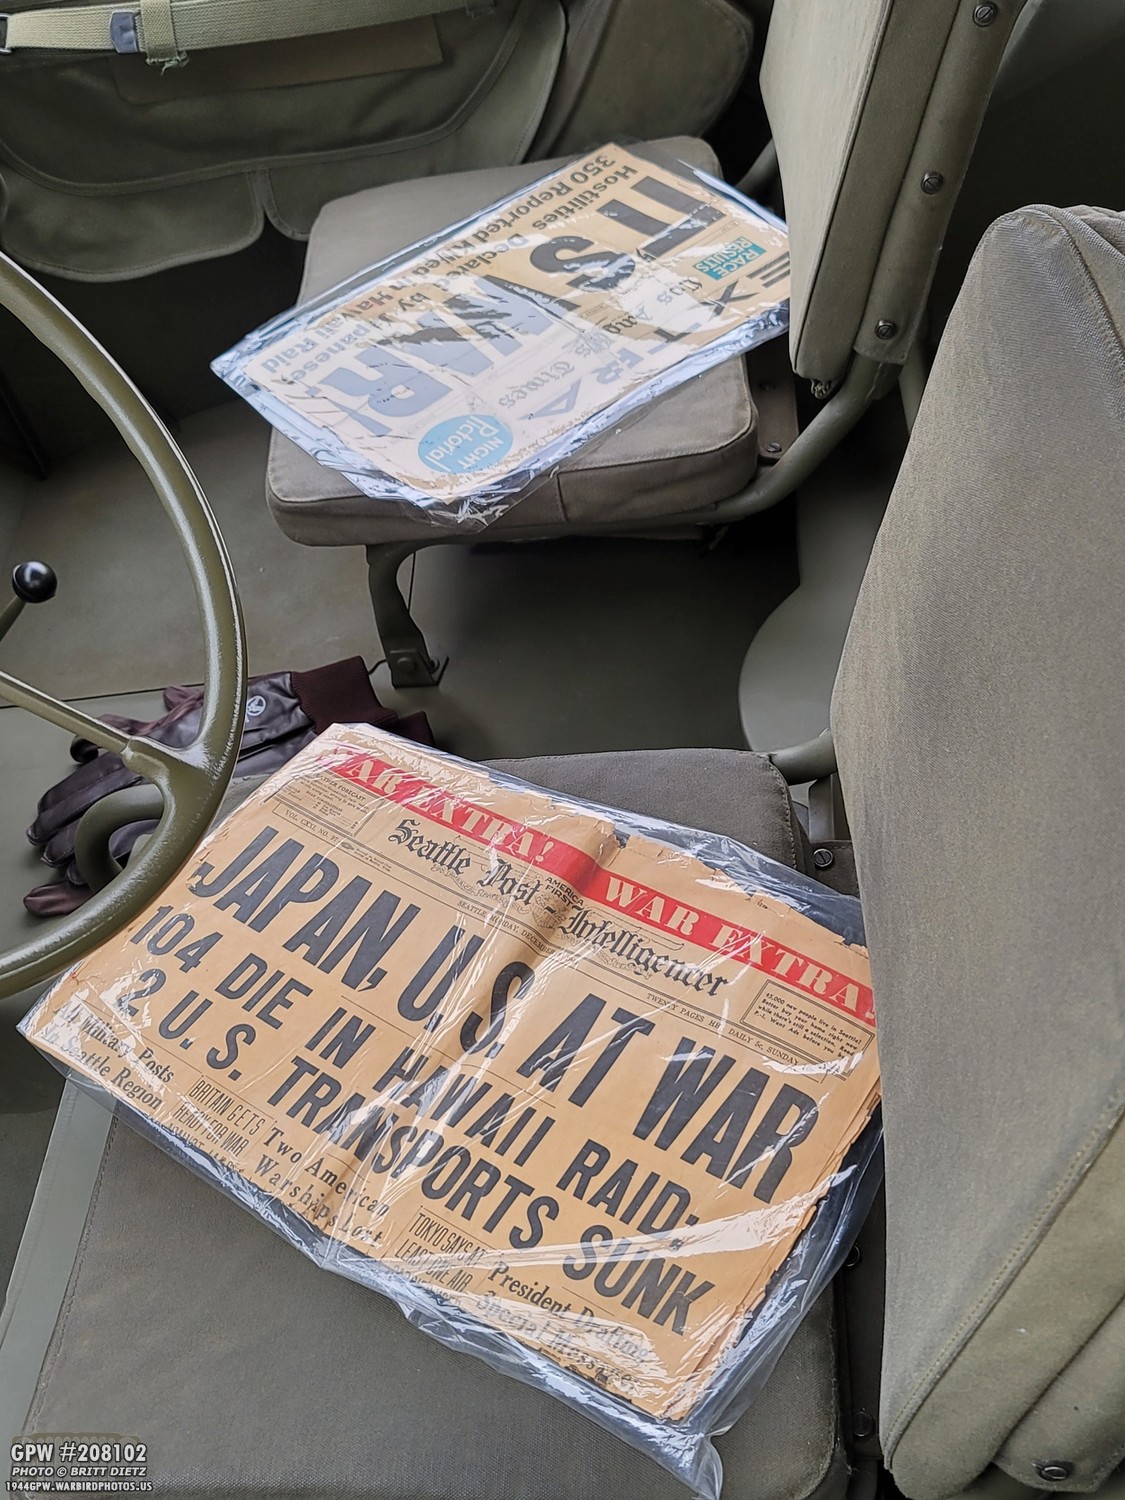
The two newspapers are original LA Times and Seattle Post papers from December 7/8, 1941 announcing the attack on Hawaii and the announcement of war.
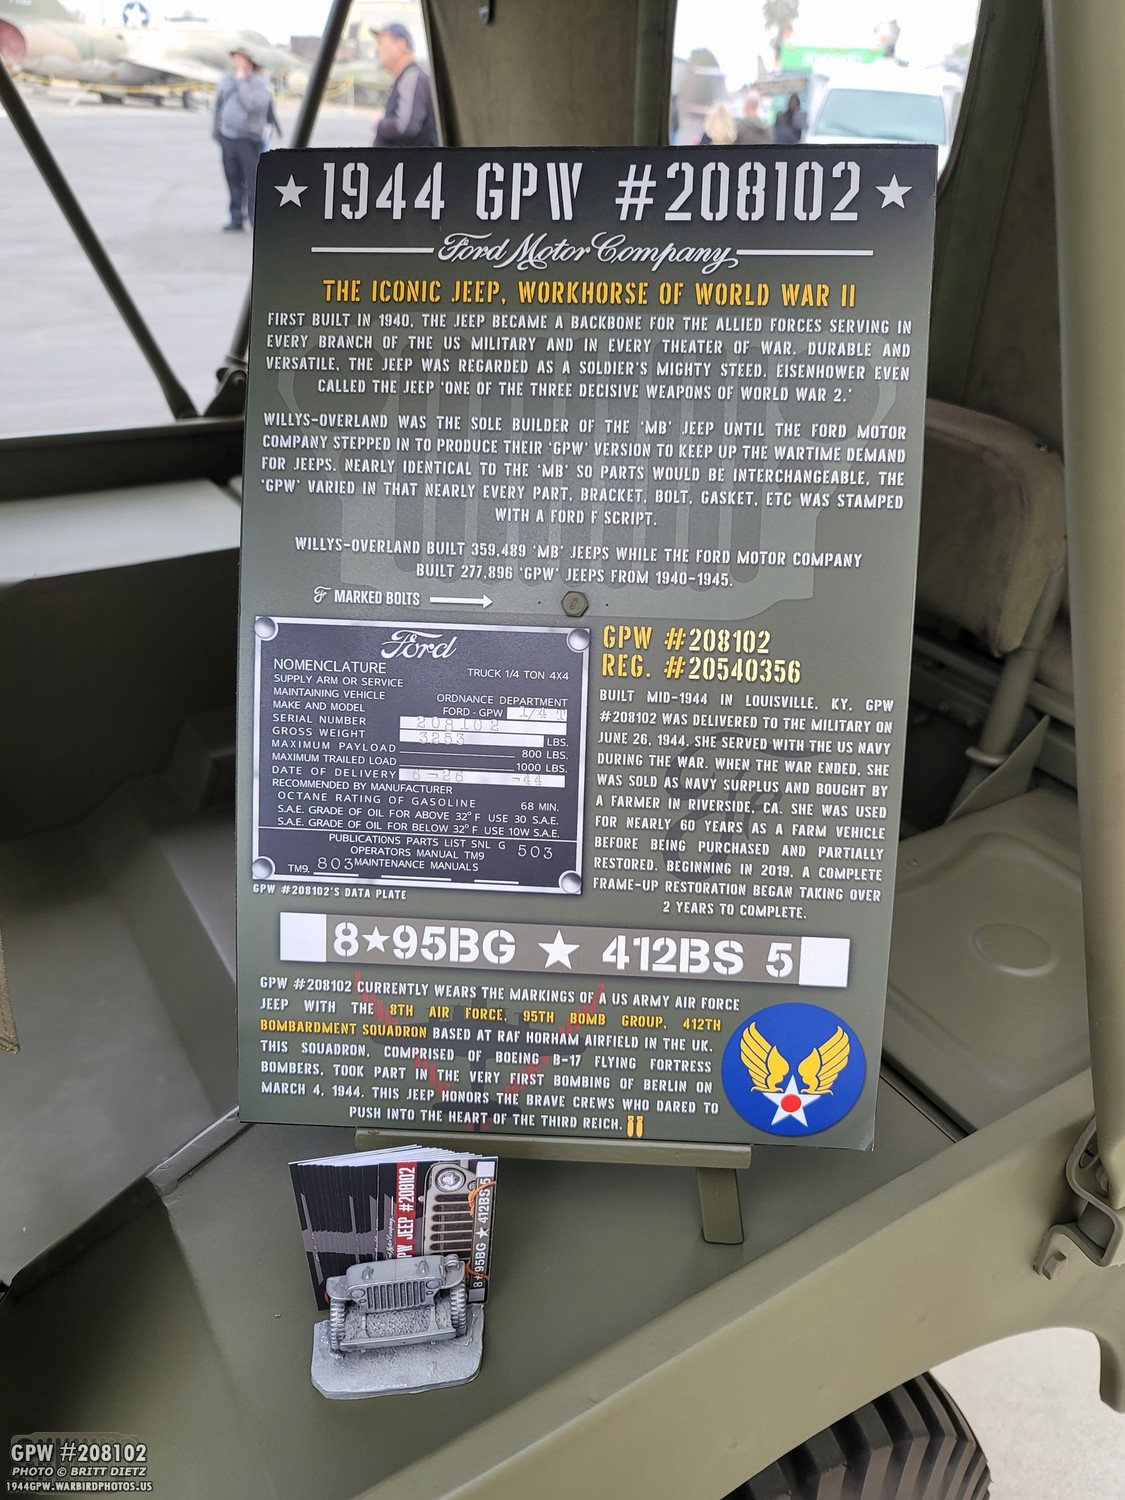
I also had my large info sign shrunk down and mounted 12×18 size on a small stand that I painted 33070 OD Green like the Jeep. I also had brand new business cards for the Jeep that have the Jeep’s basic information and links to this Facebook page and the website blog. I also finally used my Jeep business card holder!
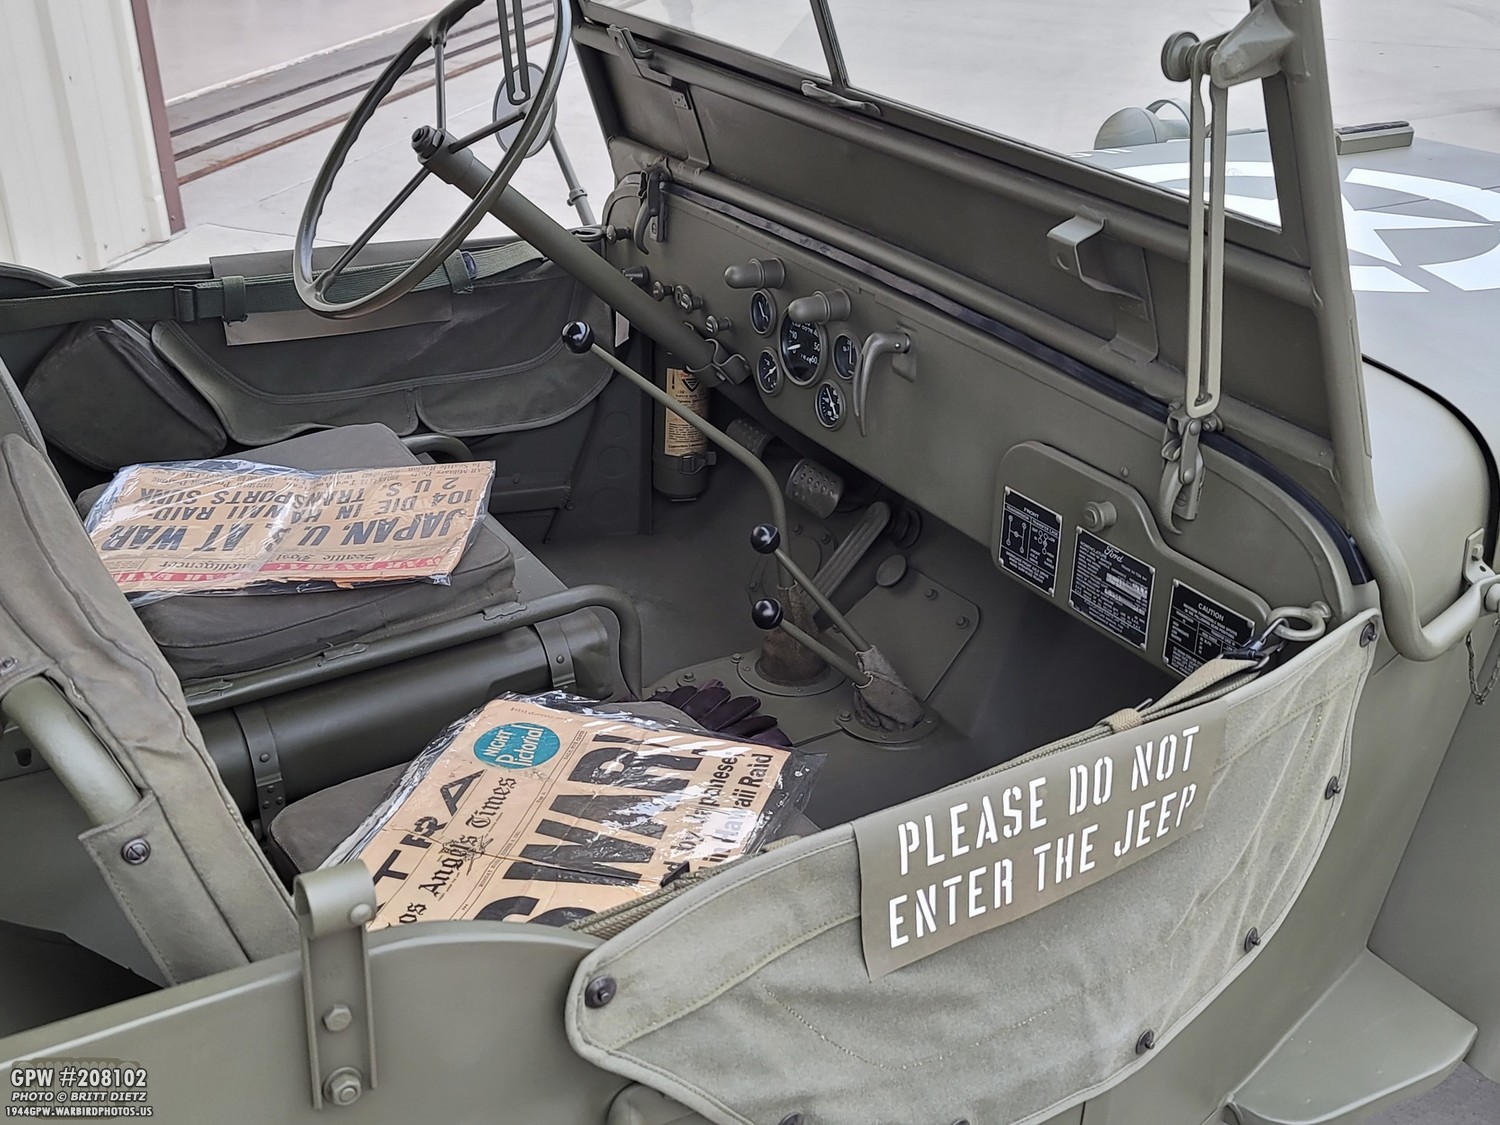
The canvas half doors and the safety straps are a great way to keep people from messing with the Jeep when it is on display. I also have my magnetic signs that I can attach to the half doors that should keep people from messing with things.

My Jeep was in good company! Along with the Zero, the museum’s P-40N Warhawk was nearby. The Jeep was one of the first things people saw when they came out of the hangar.
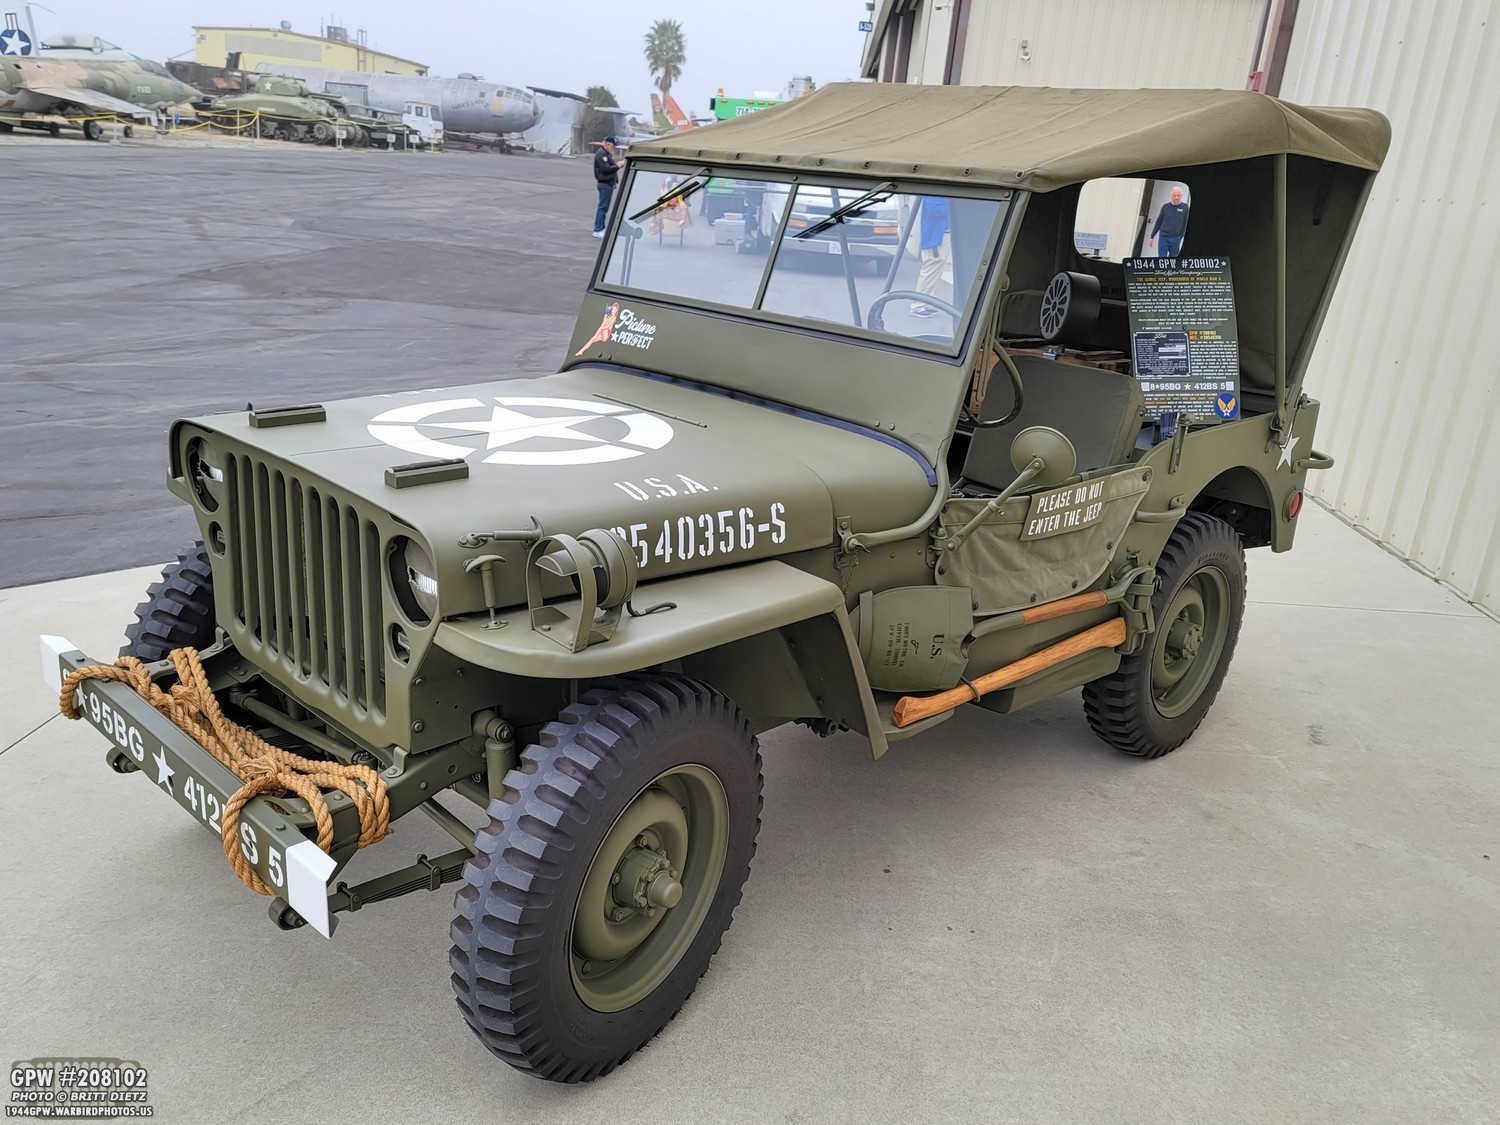
Here’s a look at the Jeep overall. These photos are all from before the event started, thus the lack of crowds. I had some great conversations about the Jeep with many guests throughout the day. Lots of great questions and stories.
I think one of the biggest things people are surprised about is that I drove it to the event rather than trailering it! I only live about 20 minutes by side streets from the museum, so it is easy to just drive it to the events and then back home. The new windshield pinup was a big hit as well.

After the event ended and the crowds mostly left, before heading home I took some time to get some photos of the Jeep with various aircraft out including this P-51D Mustang known as ‘Spam Can/Dolly’.

Next to that Mustang is another, a P-51D Mustang known as ‘Wee Willy II’.
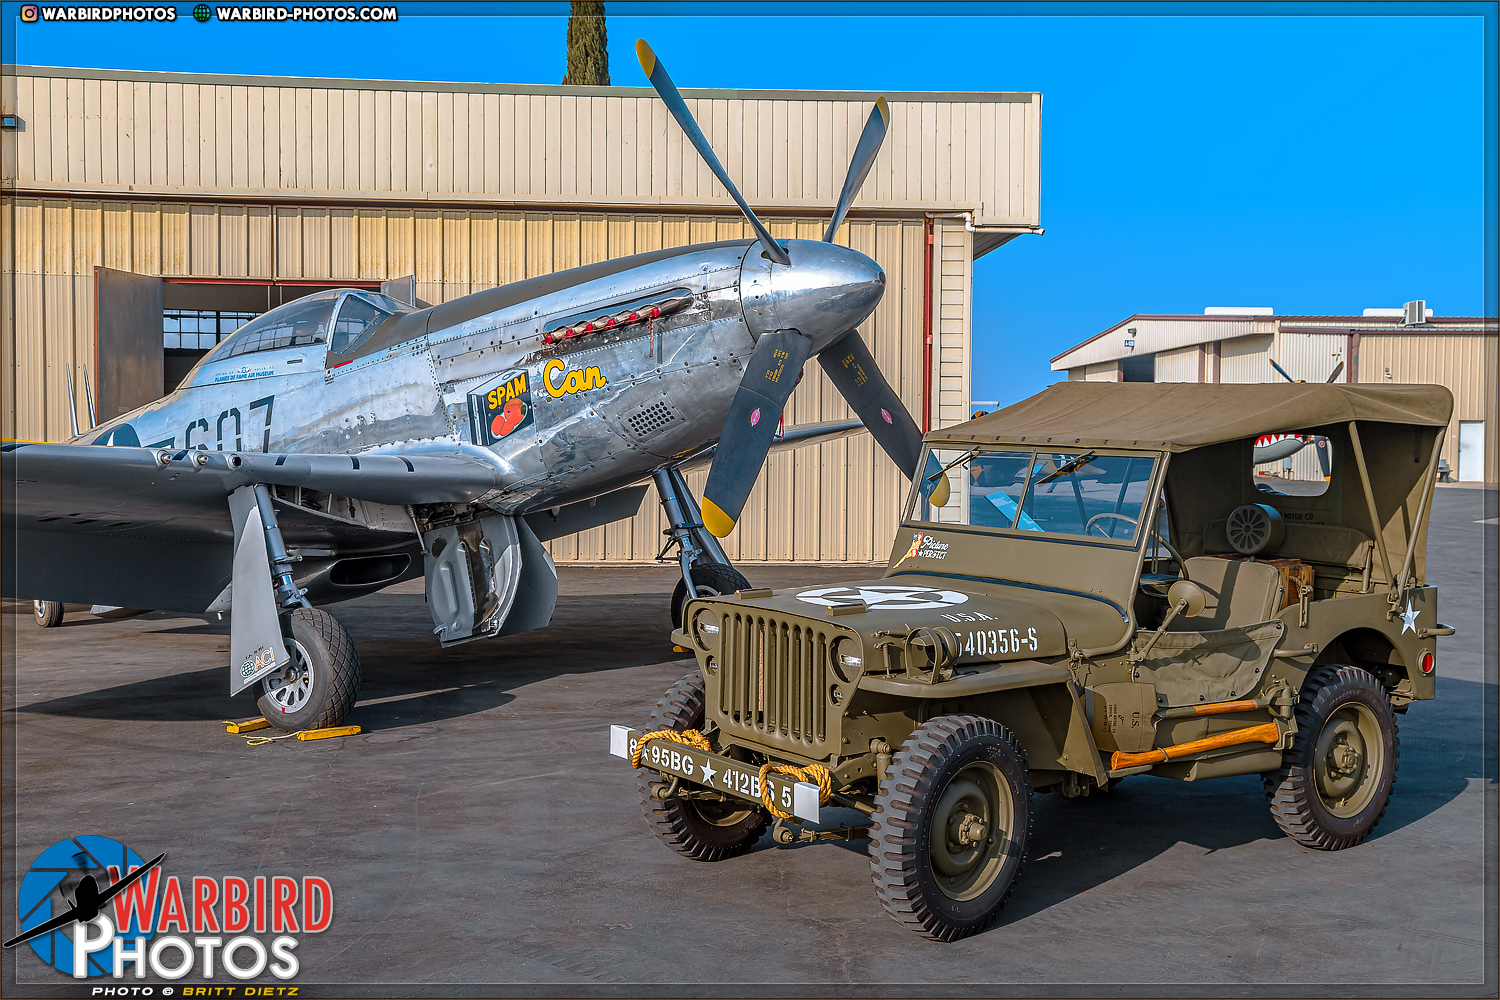
As a huge fan of Mustangs, I was glad to finally get some shots with both of these. Slowly checking off more aircraft that the Jeep has posed with!

This Mustang is a bit of a Frankenstein of various Mustangs including the Red Baron racer that crashed. I flew once in the backseat of this Mustang, what a ride!

This Mustang served post-war with various groups. It was the 40th (of 200) P-51D-30 variant built in Dallas, Texas and delivered into service on July 26, 1945. It went immediately into storage at Kelly Field, San Antonio, Texas. In late 1947 it was assigned to the 31st Fighter Group (Turner Air Force Base, Albany, GA), serving with the Strategic Air Command until that unit transitioned to jet aircraft. From March 1949 until December 1956, the aircraft served with Air National Guard units in Tennessee, Vermont, and West Virginia.

And before heading out, I had to get photos with the star of the day, the A6M5 Zero. She flew during the flight demo over the museum.

On June 18, 1944, U.S. Marines captured Asilito Airfield with a number of intact Zero fighters. A dozen of these intact Zeros were shipped to NAS North Island, San Diego, California, USA for evaluation. Four Zeros were restored to flight, two went to the Army Air Force and two were retained by the Navy.
The Museum’s Zero No 61-120 was ferried to NAS Patuxent River, Maryland on August 23, 1944 and subsequently flown by about 25 different USN, USMC, Royal Navy and civilian fighter and test pilots, including Charles A. Lindbergh. The aircraft was ferried back to San Diego on January 11, 1945, where frontline combat pilots were also given a chance to check out the Zero. Altogether, Zero No 61-120 logged over 190hr of flight time in the USA before being declared surplus after the war. In 1950, it was acquired by the Museum. It was restored to flight in 1978 and again in 2016. It has made several goodwill trips back to Japan. Still powered by its original Nakajima Sakae engine, it is currently the only authentic A6M flying. Movie and TV appearances include the film Pearl Harbor.

Now, let’s get back to the ammo crate radio. Since I originally built it, I’ve looked into adding some improvements. I got a new amp board which allows for a MicroSD card which I loaded with 1941 music and broadcasts from December 7, 1941 with broadcast interruptions, live reports from the attack, etc.

Let’s recap the radio and how I made it. For the full tutorial on how it was built, you can read about it here: https://www.1944gpw.warbirdphotos.us/blog/ammo-crate-radio-gpw-display-sign-flea-market-finds/.

This is how it used to look inside. A very simple setup… a mono amp board with Bluetooth was fed power from a rechargeable 12v powerbank. The 1945 intercom speaker mounted on top of the box has two cords that go down to the board, connected with wire nuts. Problem is, I have to beam the music from my phone. If I need to use my phone to make calls, take photos, etc it stops playing. So I wanted something that would just play and not rely on my phone.
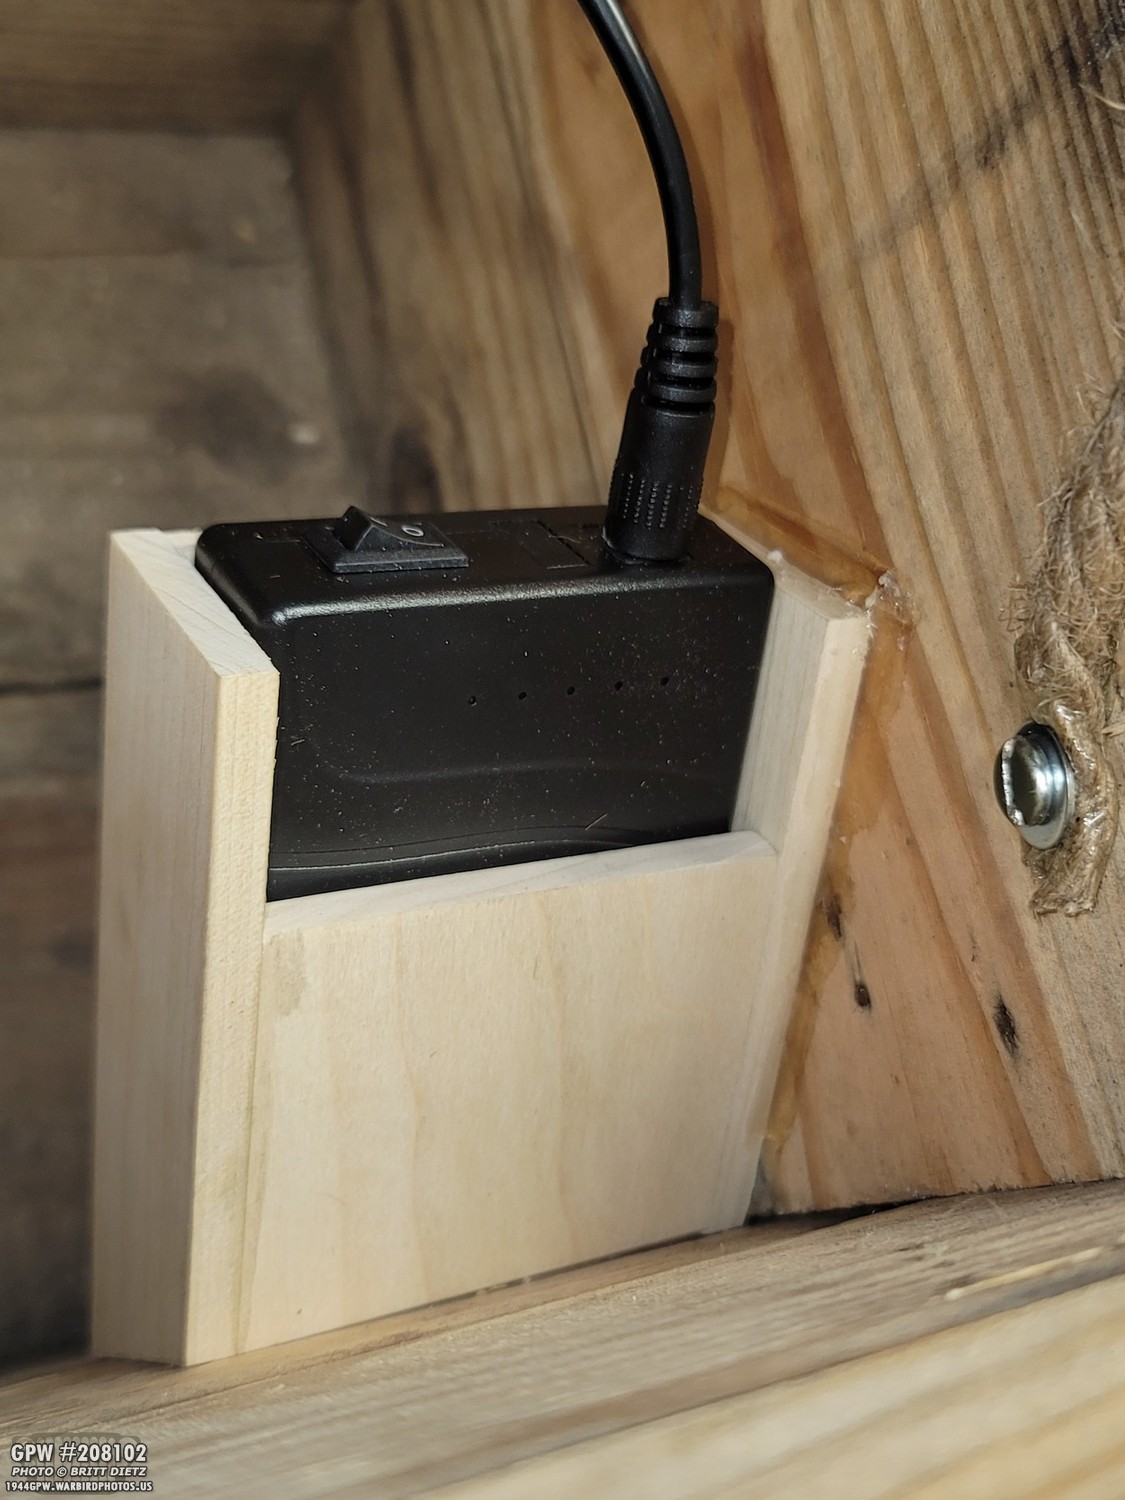
I will say the amp boards use so little power that this 12v powerbank can last literally for 8 hours without even one of the 6 lights showing the levels going out. I’m sure it would last several days at this rate!
So here’s a look at the mono Bluetooth amp board that I had bought. It was simple, so worked great for most things with the Bluetooth 5.0.

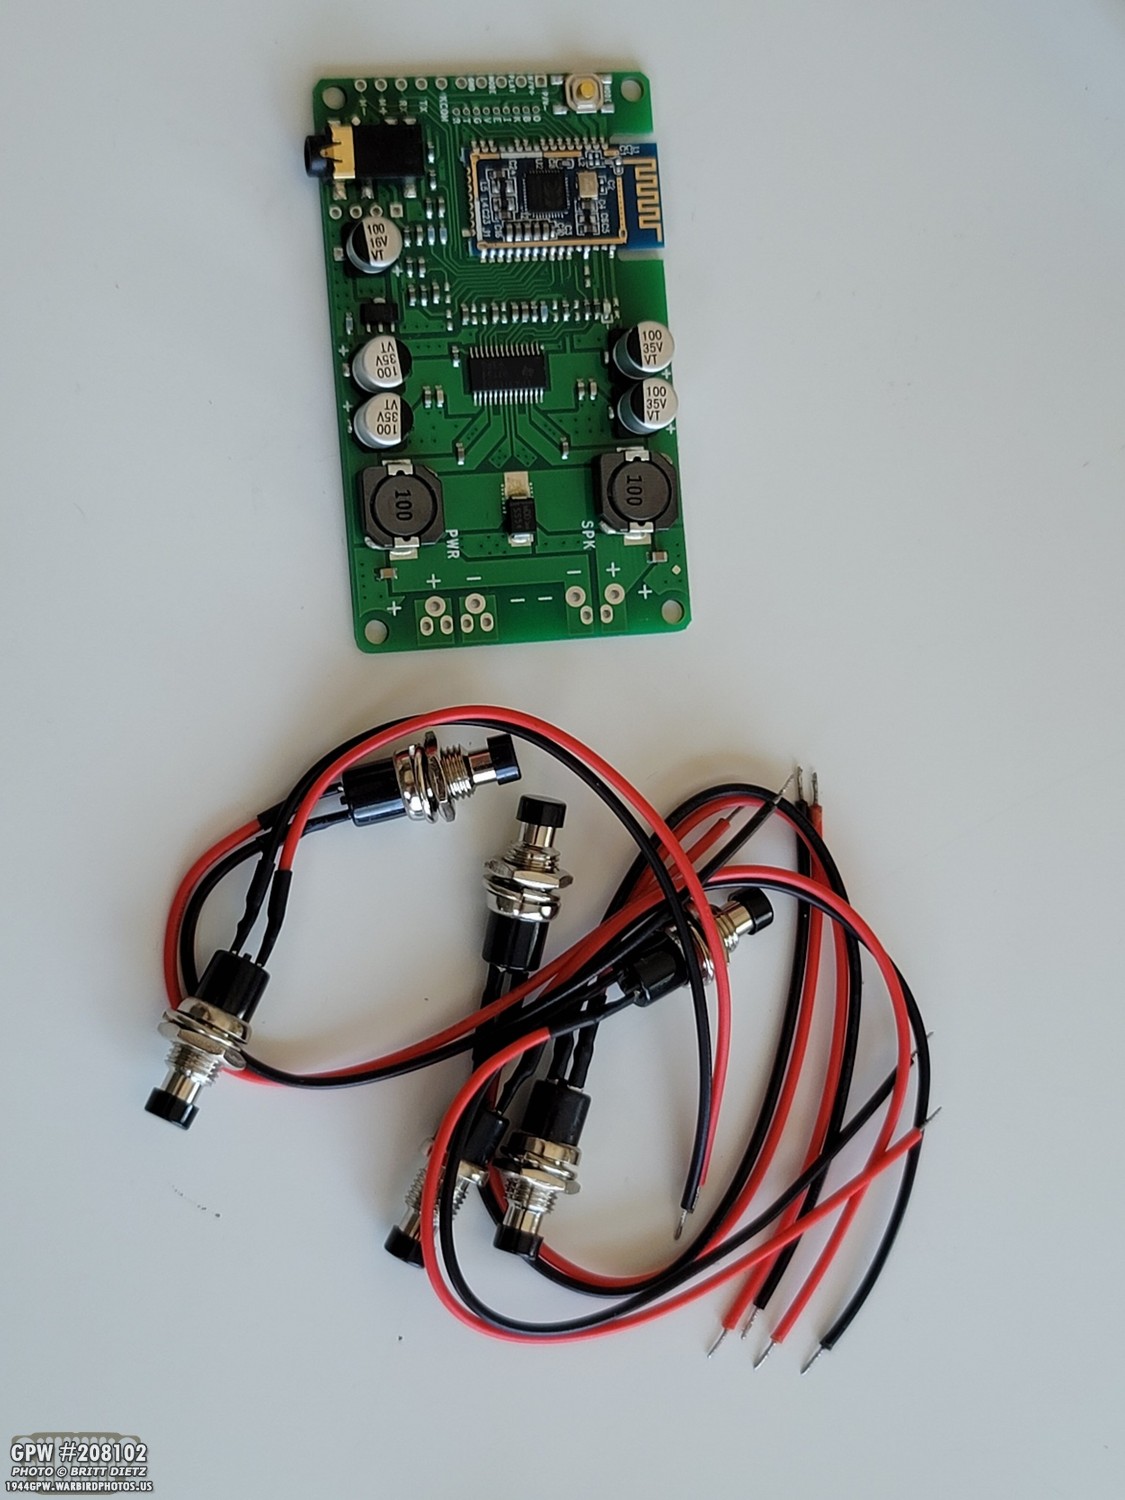
When I originally was building the radio, I also ordered this amp board, which has a nice face and LOTS of options. It came much later than the other board, which is why I didn’t use it. But, one thing it did have was a MicroSD card
(called a TF card). It also has Bluetooth, but it’s a older version that isn’t as high quality. This also has many other options and also runs off the same 12v battery pack.

During the event, it was just sitting loose at the bottom of the crate, but a few days later I decided to make it a part of the radio. So, like the other amp, I built a simple stand for it to connect it to the bottom of the crate.

Once of the biggest hassle was that to switch between the amp boards, I had to re twist the wires and use the wire nuts and electrical tape to switch the speaker. It was a pain.

That’s when I realized I could use these quick-disconnect connectors to make things a lot easier! So I stripped the wires, crimped on the terminals, and soldered the ends. I then used some heat shrink wrap to make the connectors look nice.

I used some white tape to mark the neutral side on each pair.
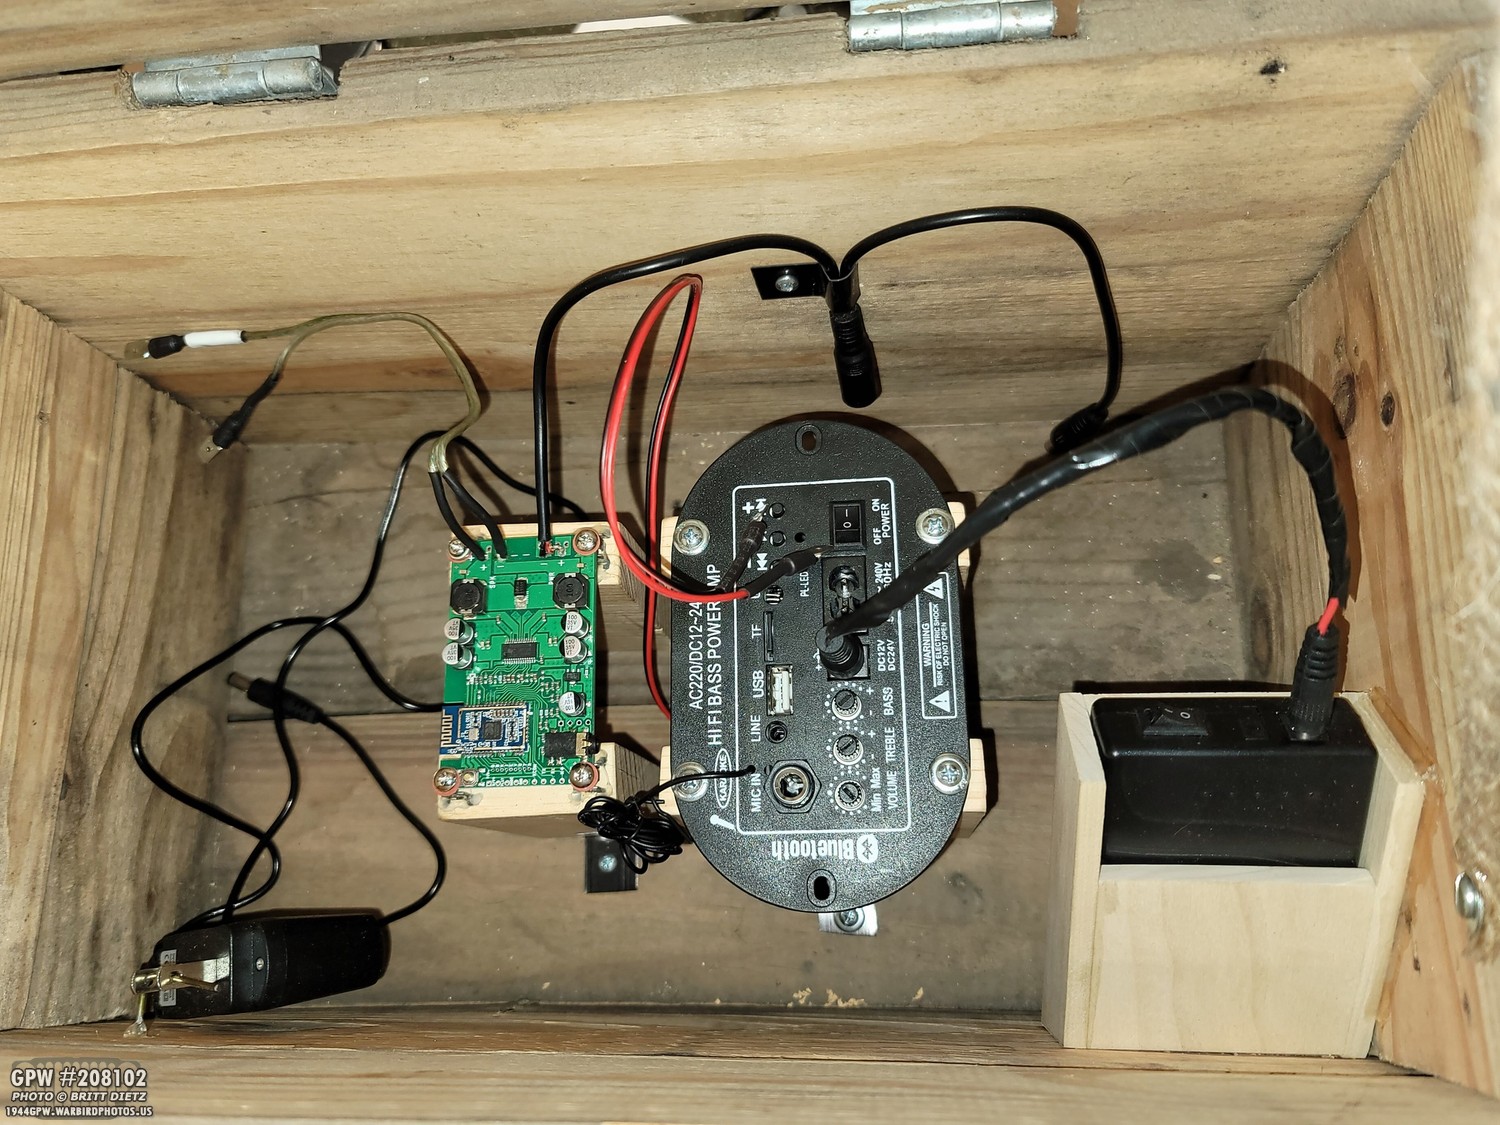
So here’s the setup now, it’s MUCH easier to switch the amp board connections to the speaker wires. The goldish wires to the upper right are the Bluetooth-only amb board speaker wires, the red and black in the center are the new multi amp board connectors. I then just have to switch the power plugs.

Here’s how the quick-disconnect terminals look connected to the opposite ones on the speaker wires. This makes things so much easier.

So I can use either one of the two amp boards. If I want to use a USB thumb drive or MicroSD card loaded with music, I’ll use the right multi board. If I just want bluetooth, I’ll use the left board.
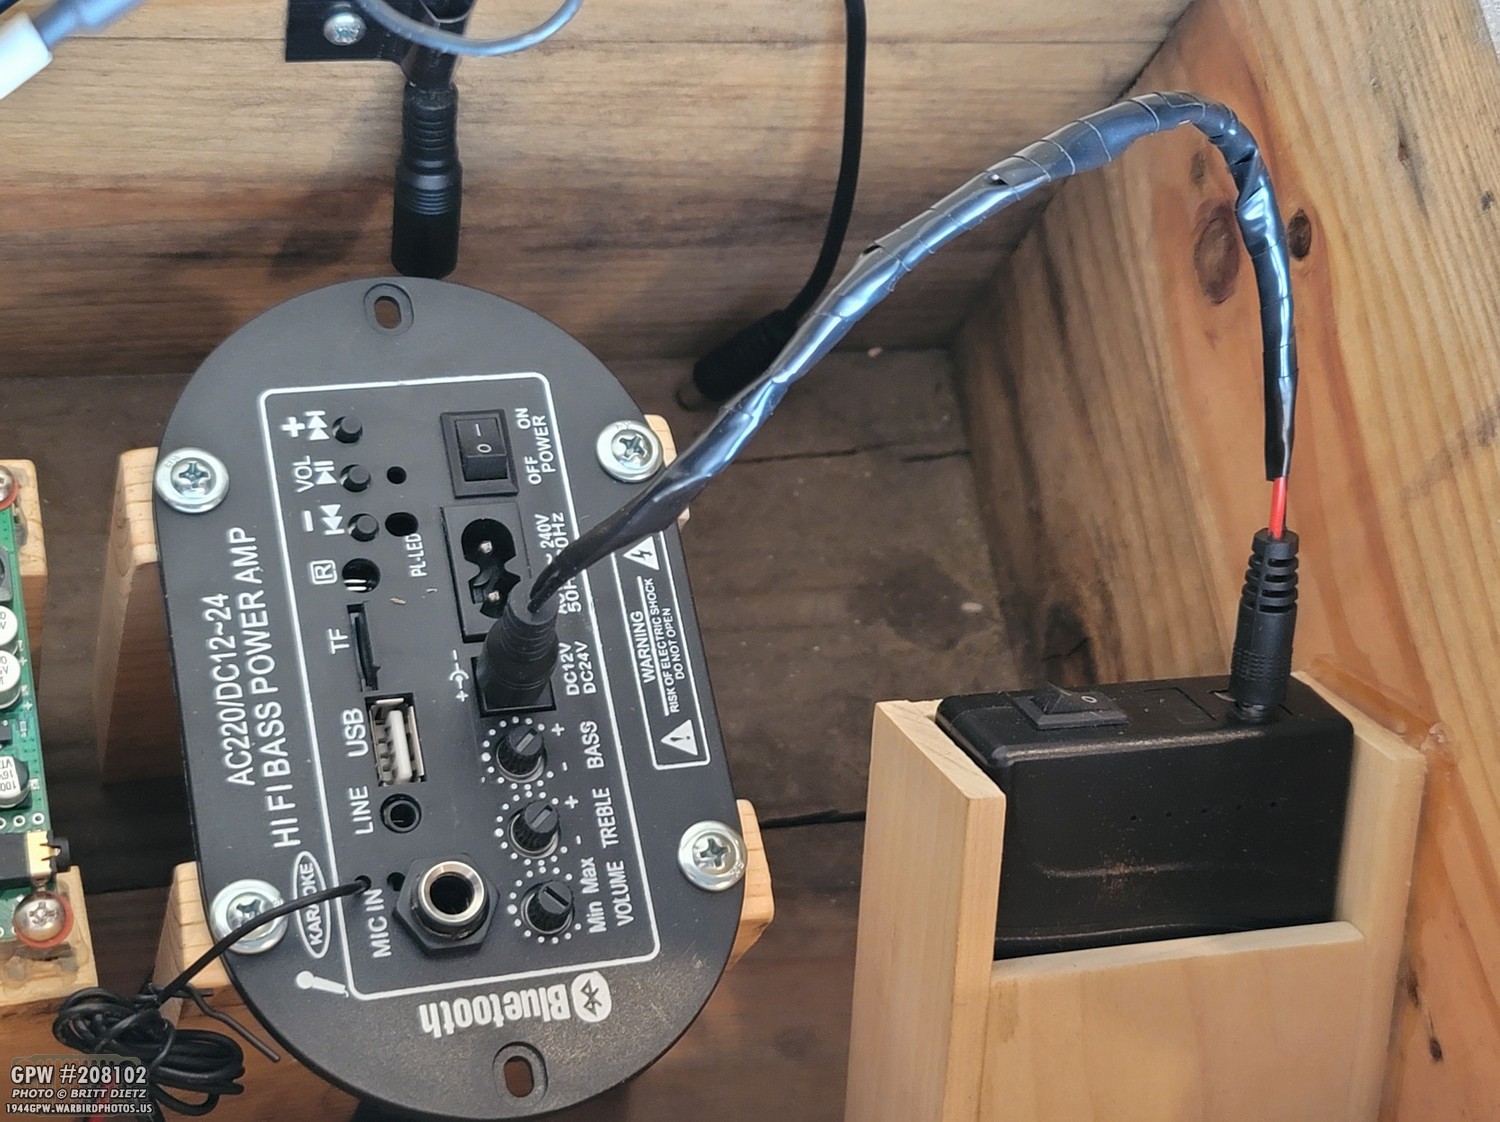
And here’s a look at the power cable. I wrapped it in electrical tape as I had forgotten to put a heat shrink tube on it before I soldered it together. Whoops. Not as pretty, but it works. The other power cord for other amp board is in the back.
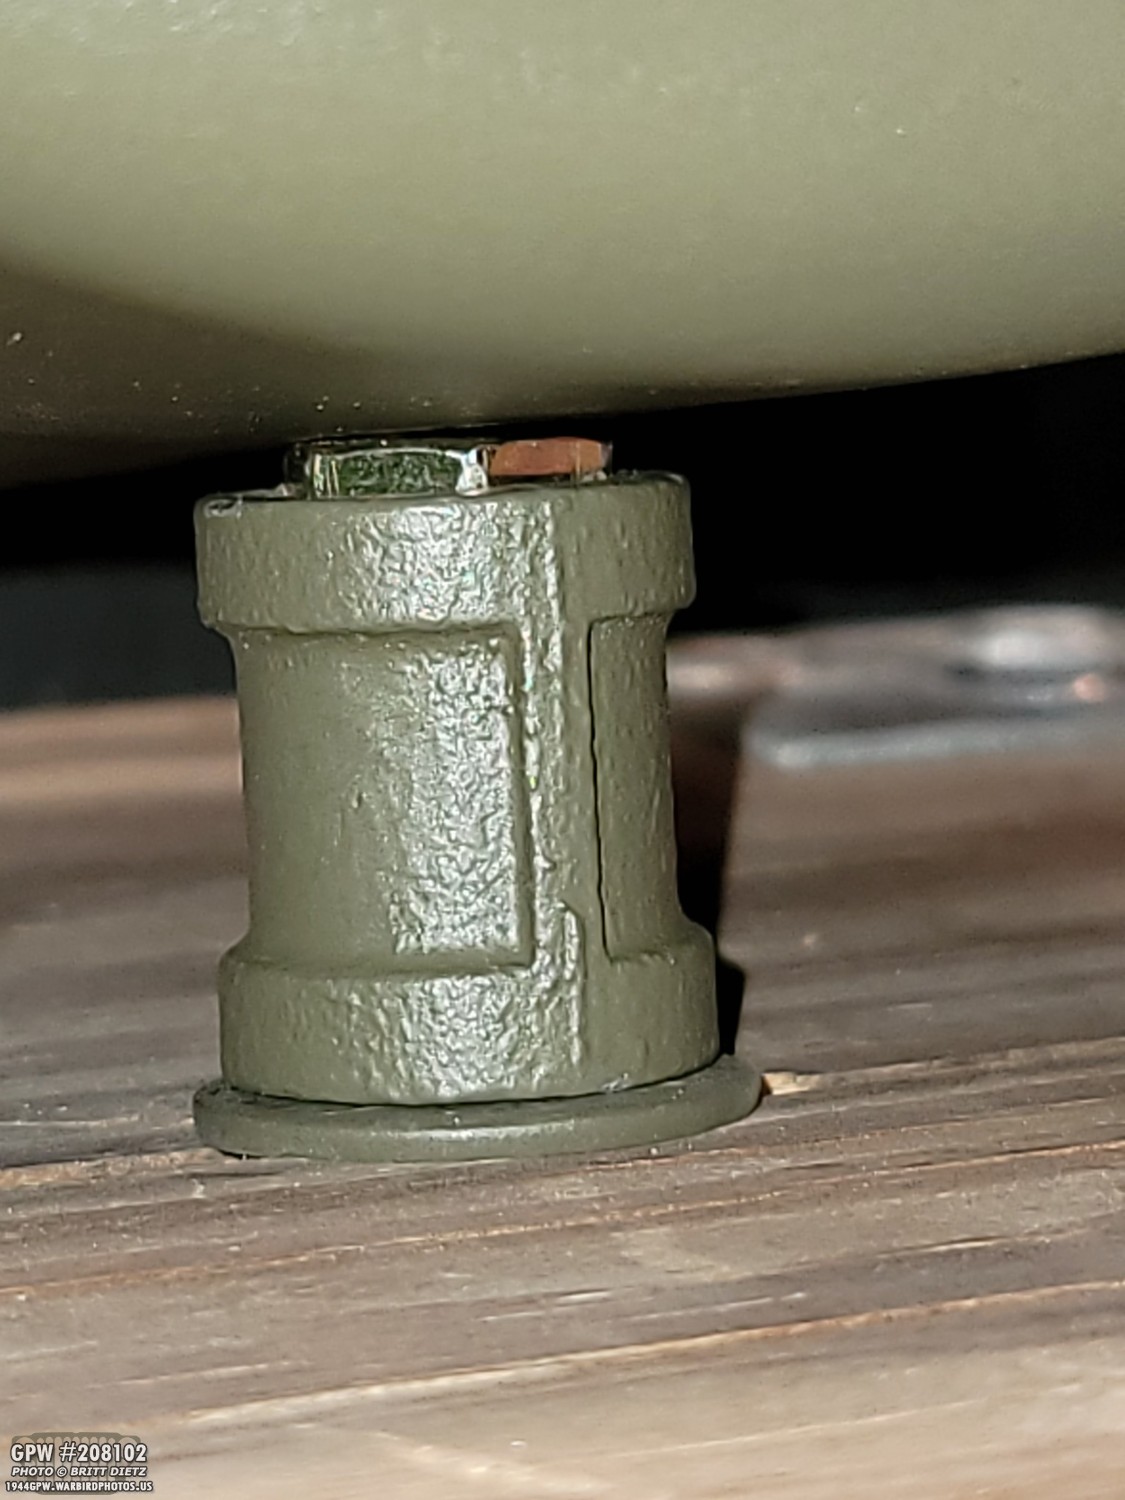
One last thing I did was to add a washer under the metal connector that’s under the speaker going to the top of the crate. I also added an additional thin washer to help stabilize the speaker. It was wobbling around a lot when it was in the backseat of the Jeep as I was driving, so I realized I needed to beef up the supports before something broke.
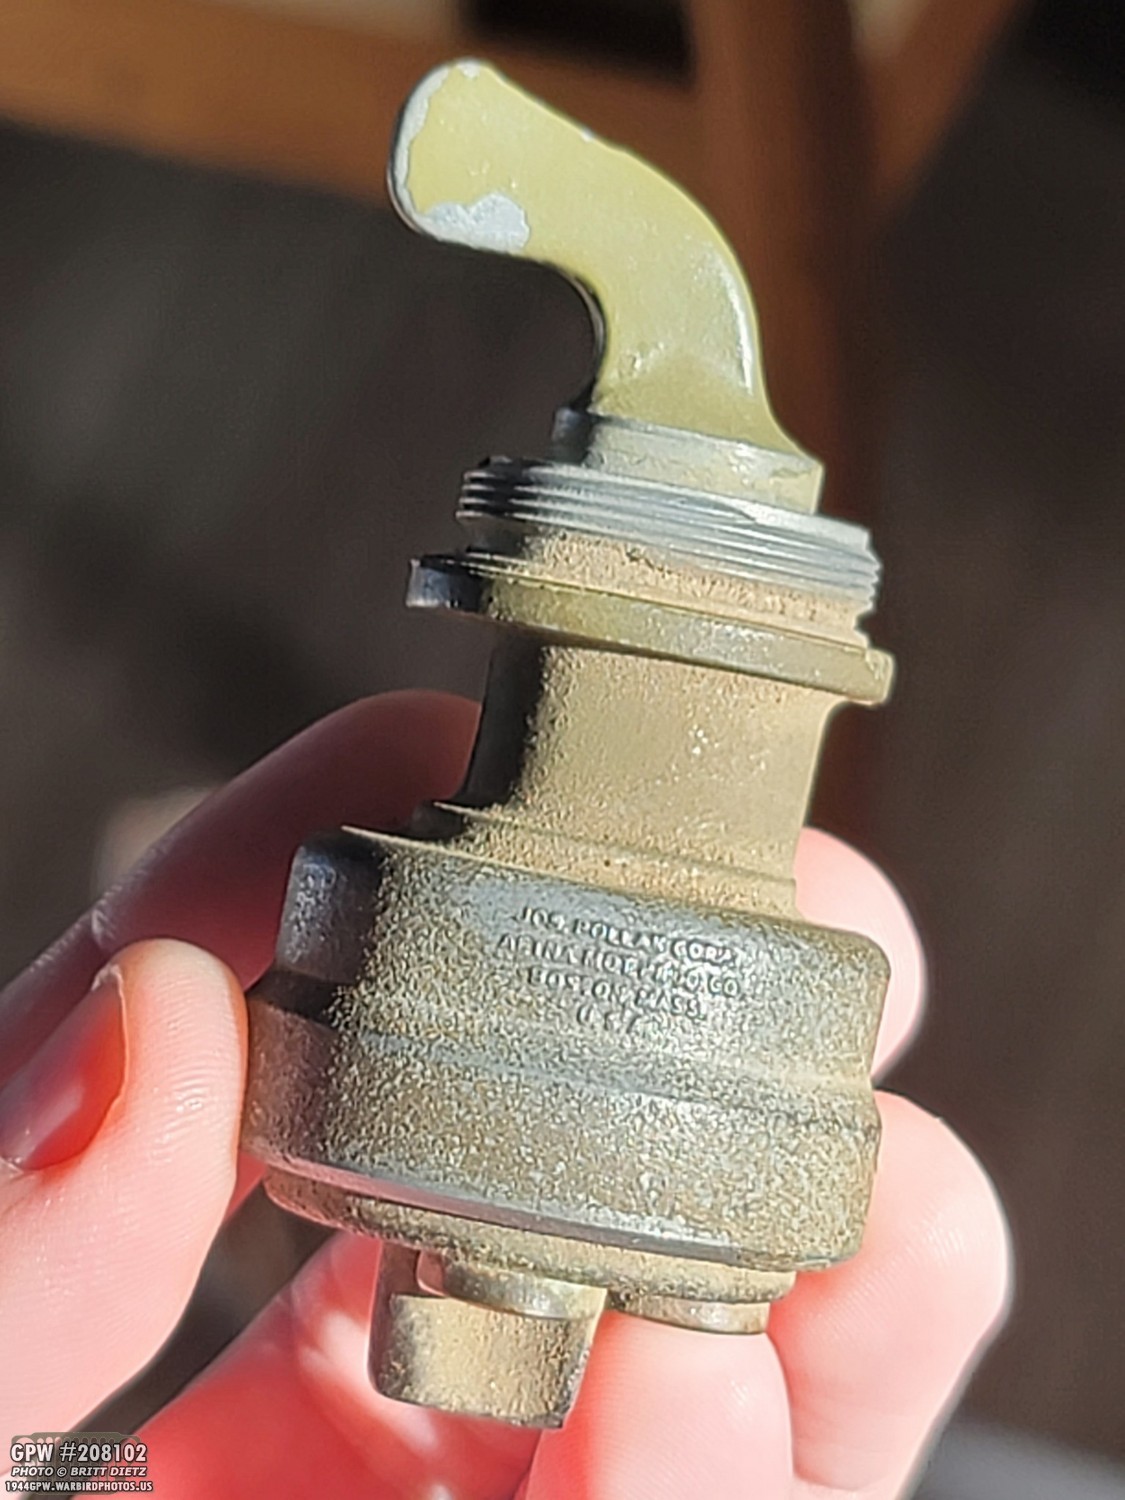
My friend Roger Smith sent me a NOS ignition switch which arrived yesterday. He told me he had a spare from a dodge and found one that looked like the GPW ignition switch. I had wanted one (and was going to use a repro) as I had a neat idea to make the ignition switch on my Jeep look like this when it’s parked on display (currently it uses a key switch like most restored Jeeps).
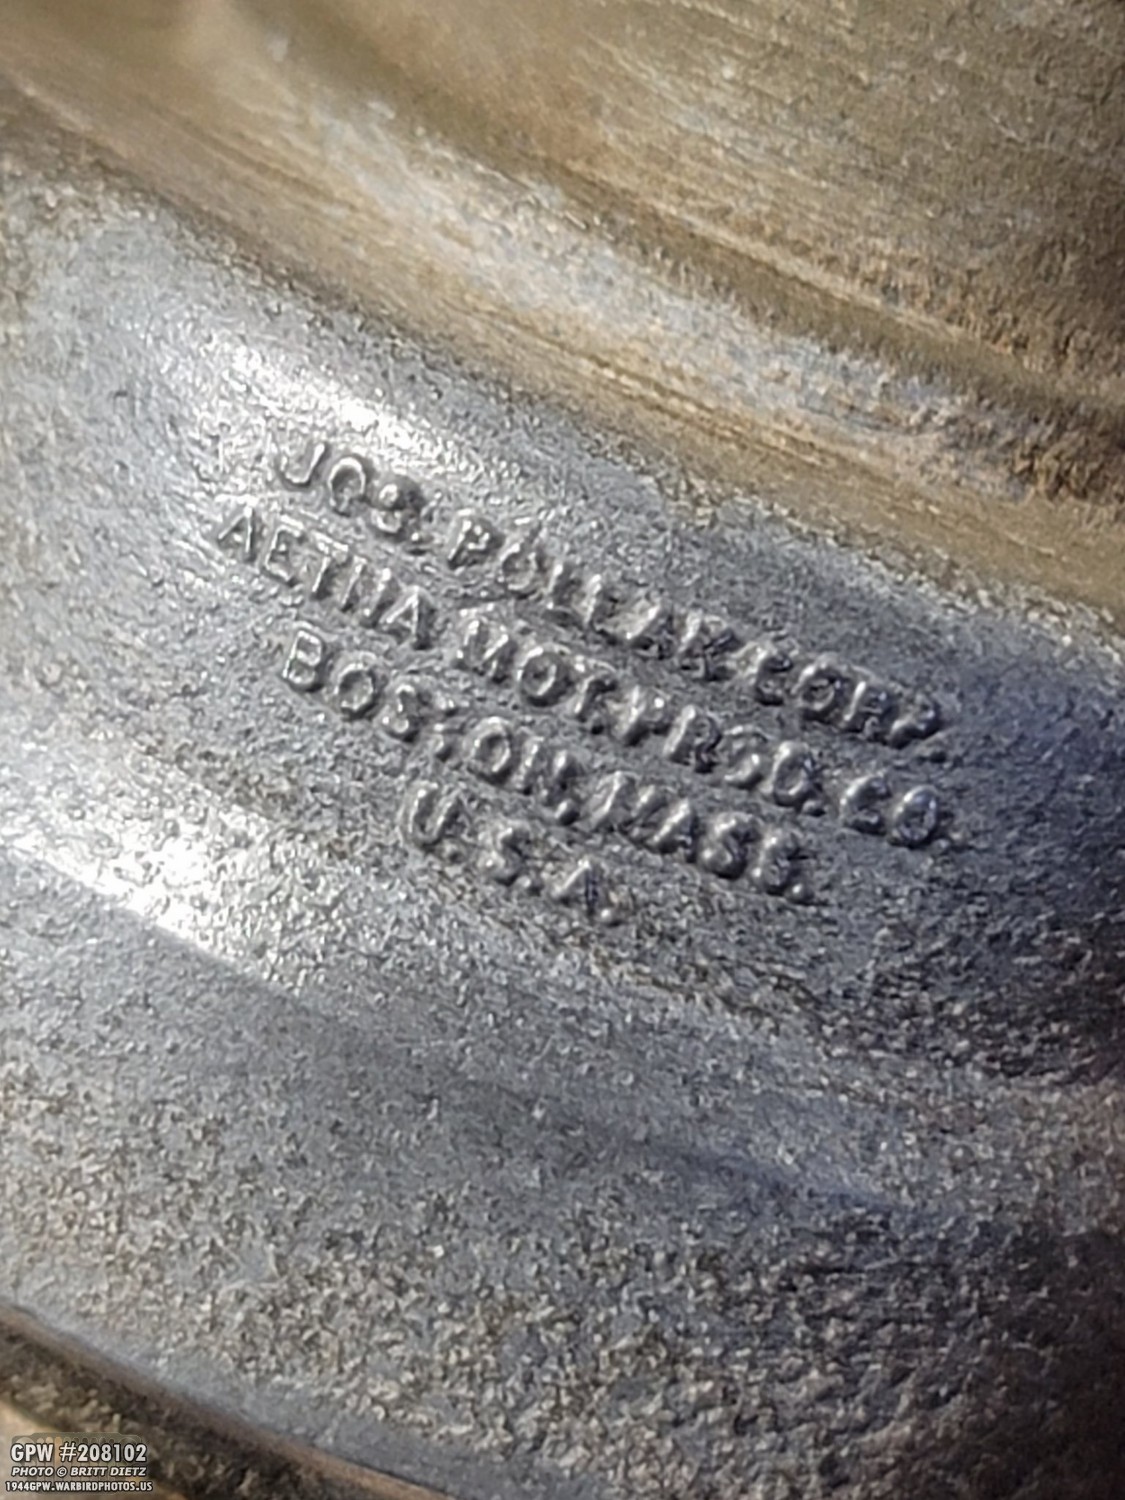
Doing some research into the markings on this NOS switch, I couldn’t find ANY information on it, which is rare. Usually I can find something. It’s not a Jeep switch for sure, Roger is pretty sure it’s from a Dodge, but I can’t find any references to this company other than the fact it still exists and still makes ignition switches.

The switch lever (Jeeps post-1942 had levers instead of keys as in the midst of war, a GI didn’t have time to fumble for keys to get in a Jeep and go when in immediate danger.). The end of this switch looks exactly like the Ford GPW knobs.

There was actually a big difference between the Willys MB and Ford GPW ignition switch knob levers.
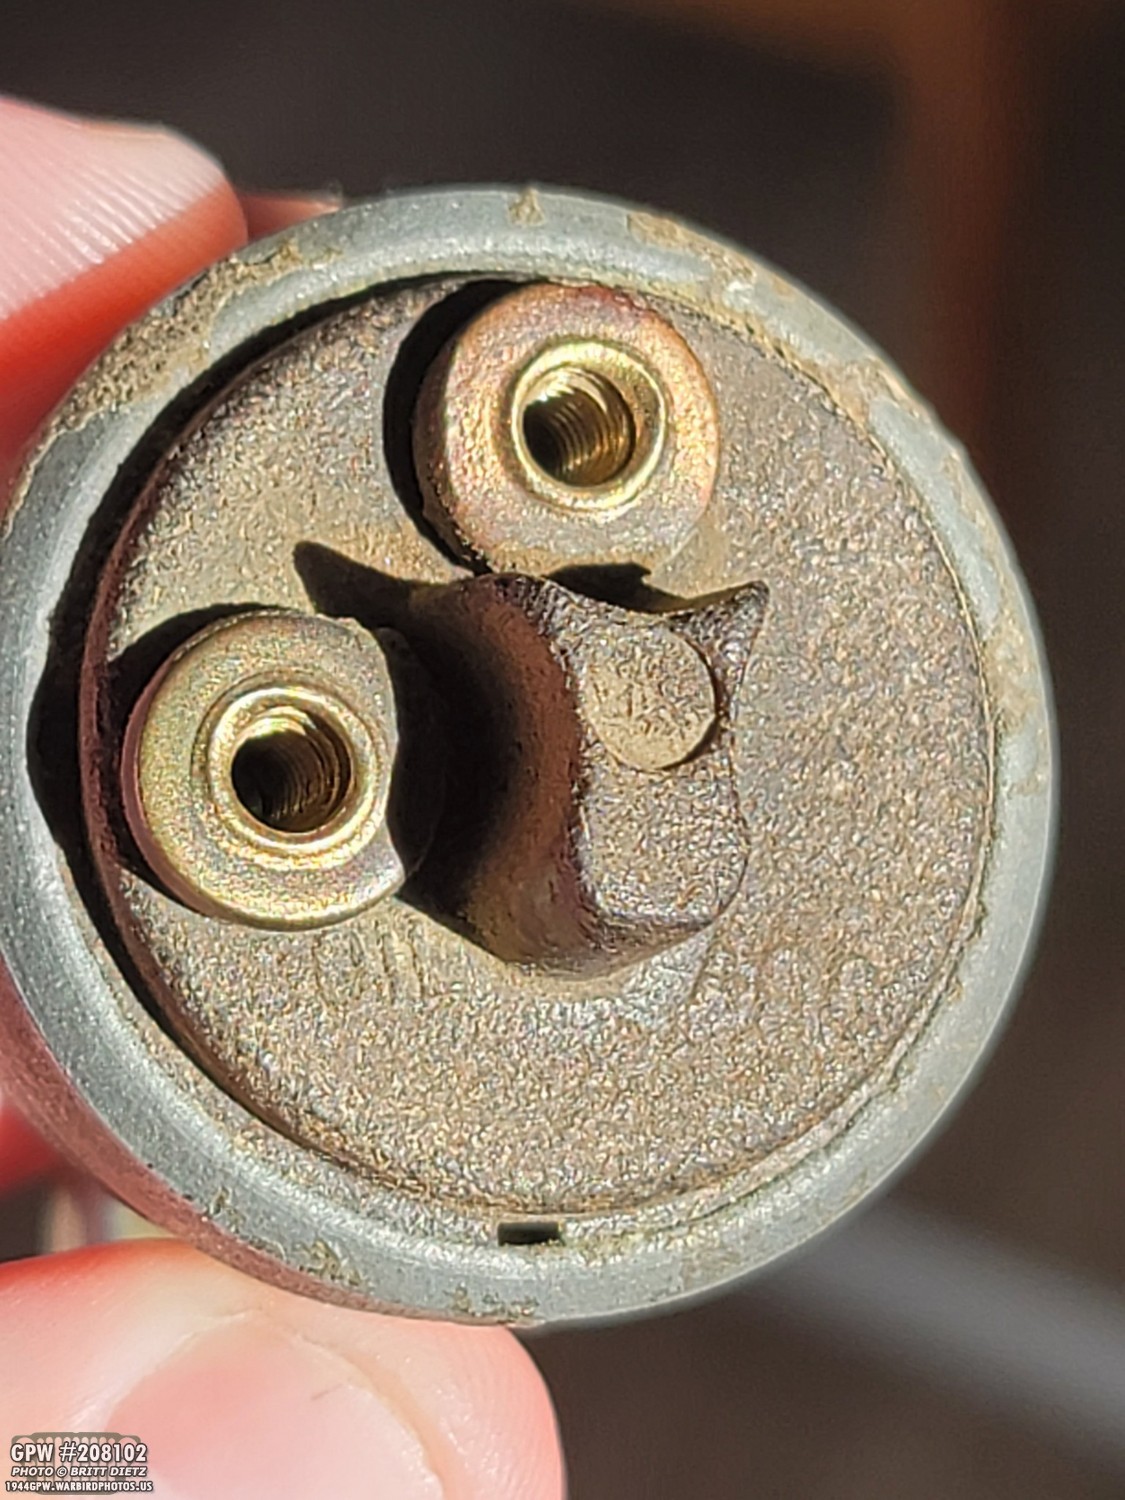
Now, I want to forewarn all who are reading this update that I will be, unfortunately, destroying this switch. Roger knew about it when he sent it to me. But, I tested the terminal slots in the back with a multimeter, and I found the switch was busted, it didn’t have continuity when switching either way. There’s no real way to repair this one (I tried to open it without destroying it), so it’s a dead.

If it was working, I might have been tempted to actually install it, as the GPW bezel fits perfectly on the switch. But, the problem would be, anyone can turn on the switch activating the coil. After the coil is sitting there running without the engine going for a few minutes, that could be a massive ‘explosive’ disaster. I could install a hidden cutoff switch somewhere in the line, but that’s just a lot more work.

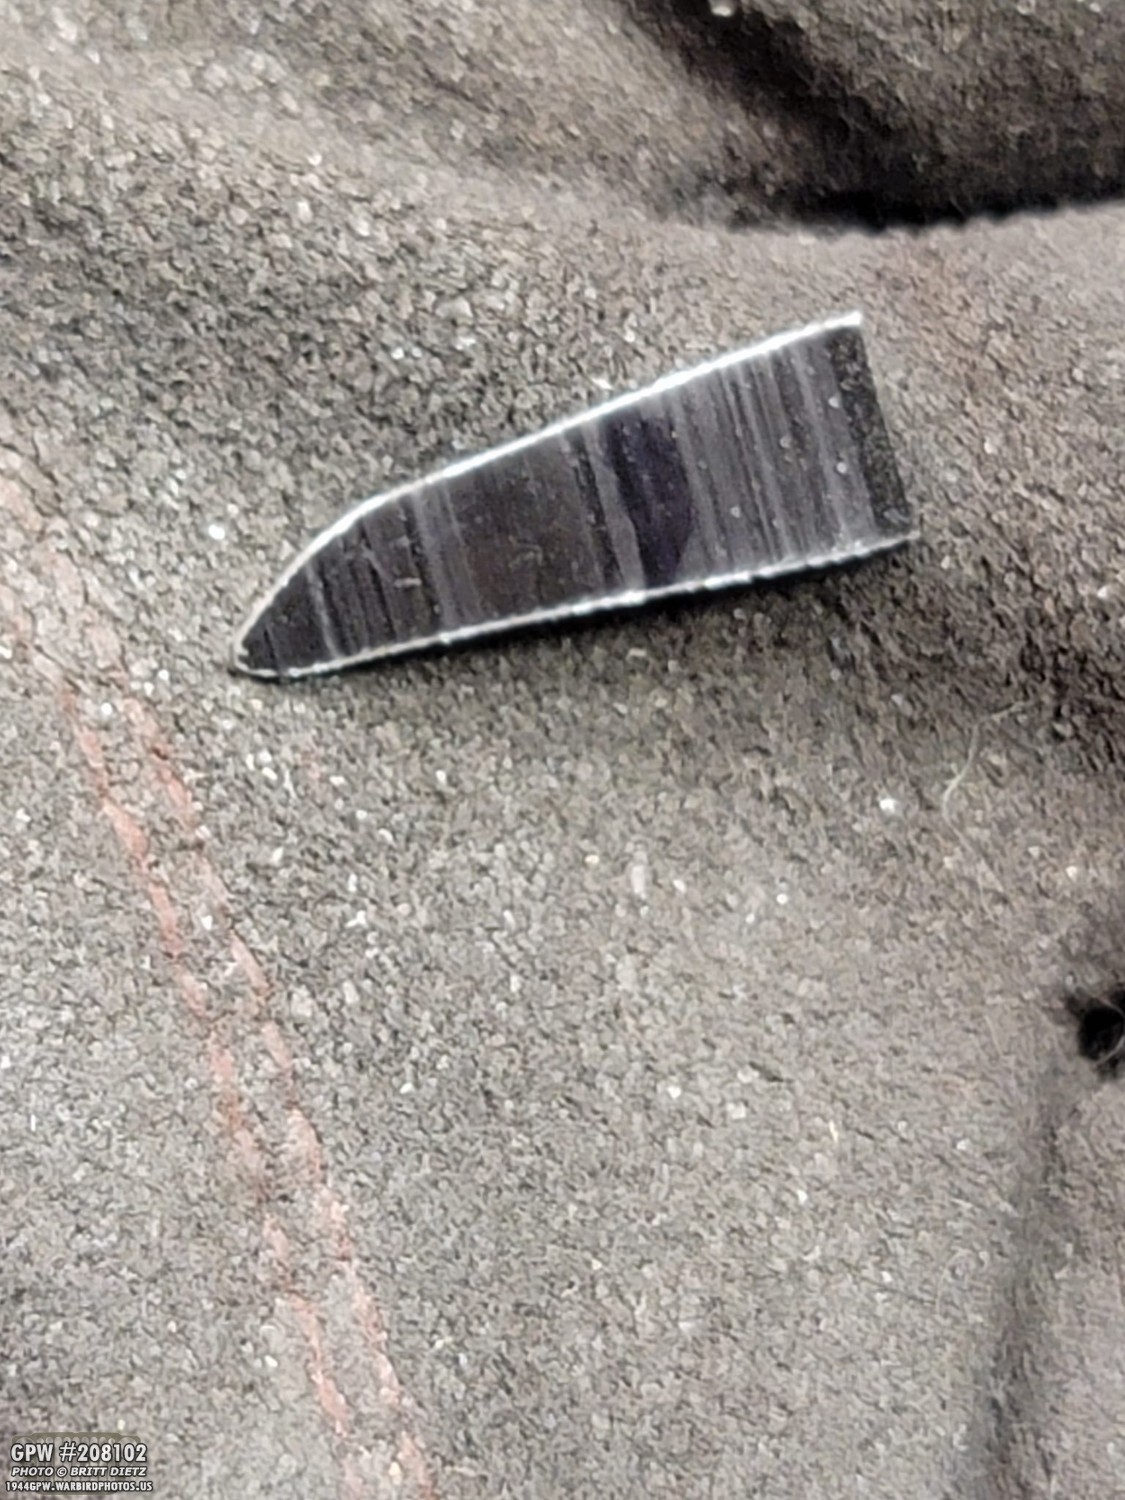
So, I had to cut apart the switch, and I managed to get out and cut down the end lever knob. I used an angle grinder with a cut-off wheel, a flap wheel, and a belt sander to get it to this.

On the backside, I used a bunch to start punching some holes in a line. The idea would be that I’d be sticking something inside that slot that would be make that would then stick into the keyed ignition switch. This would make it appear that the ignition switch is actually a lever one, but if turned, nothing will happen.
I originally toyed with using a piece of metal like this, but it wasn’t working well when I inserted it into the key switch.

So, I took a spare H700 key (the key that starts the Jeep) and cut off the end. I sanded down the notches that allow the key to turn the tumblers causing the ignition to be turned on. On the lever knob, I used a Dremel to make a nice deep slot.

I initially was going to solder them together since the key is brass and the knob steel, but that didn’t work.
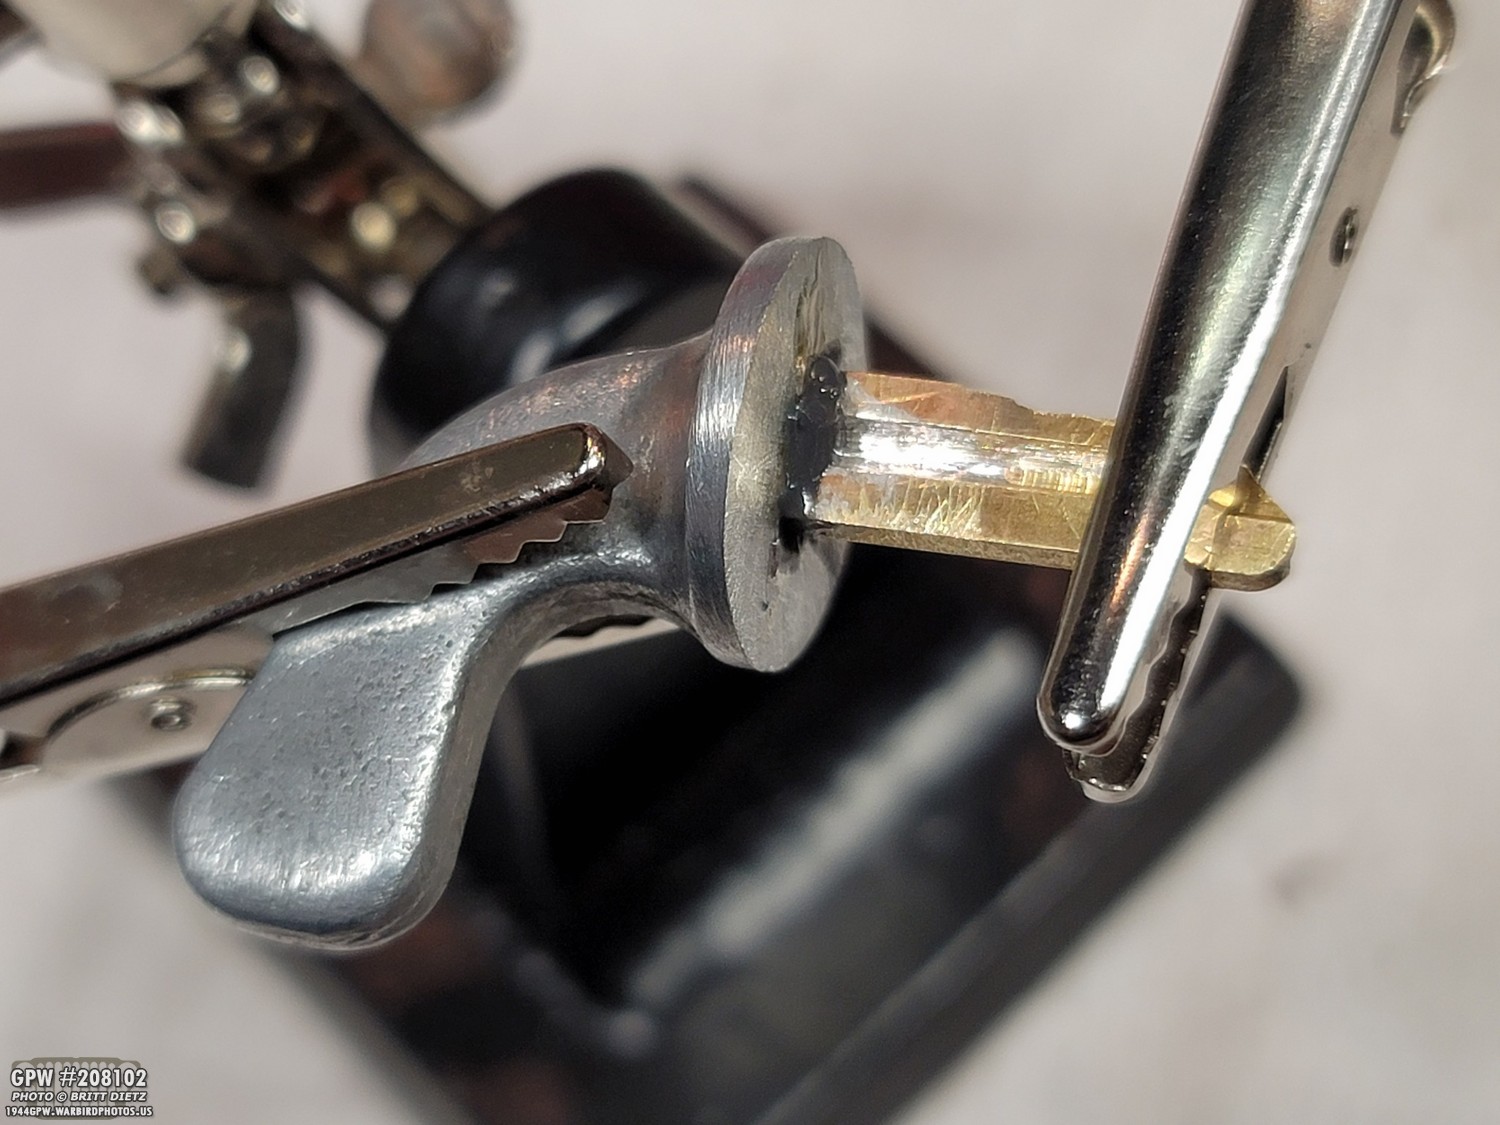
So I ended up using a two part epoxy JB weld super glue that I really pooled into the slot and stuck the key in. I used these clips to keep pressure on the key into the slot.
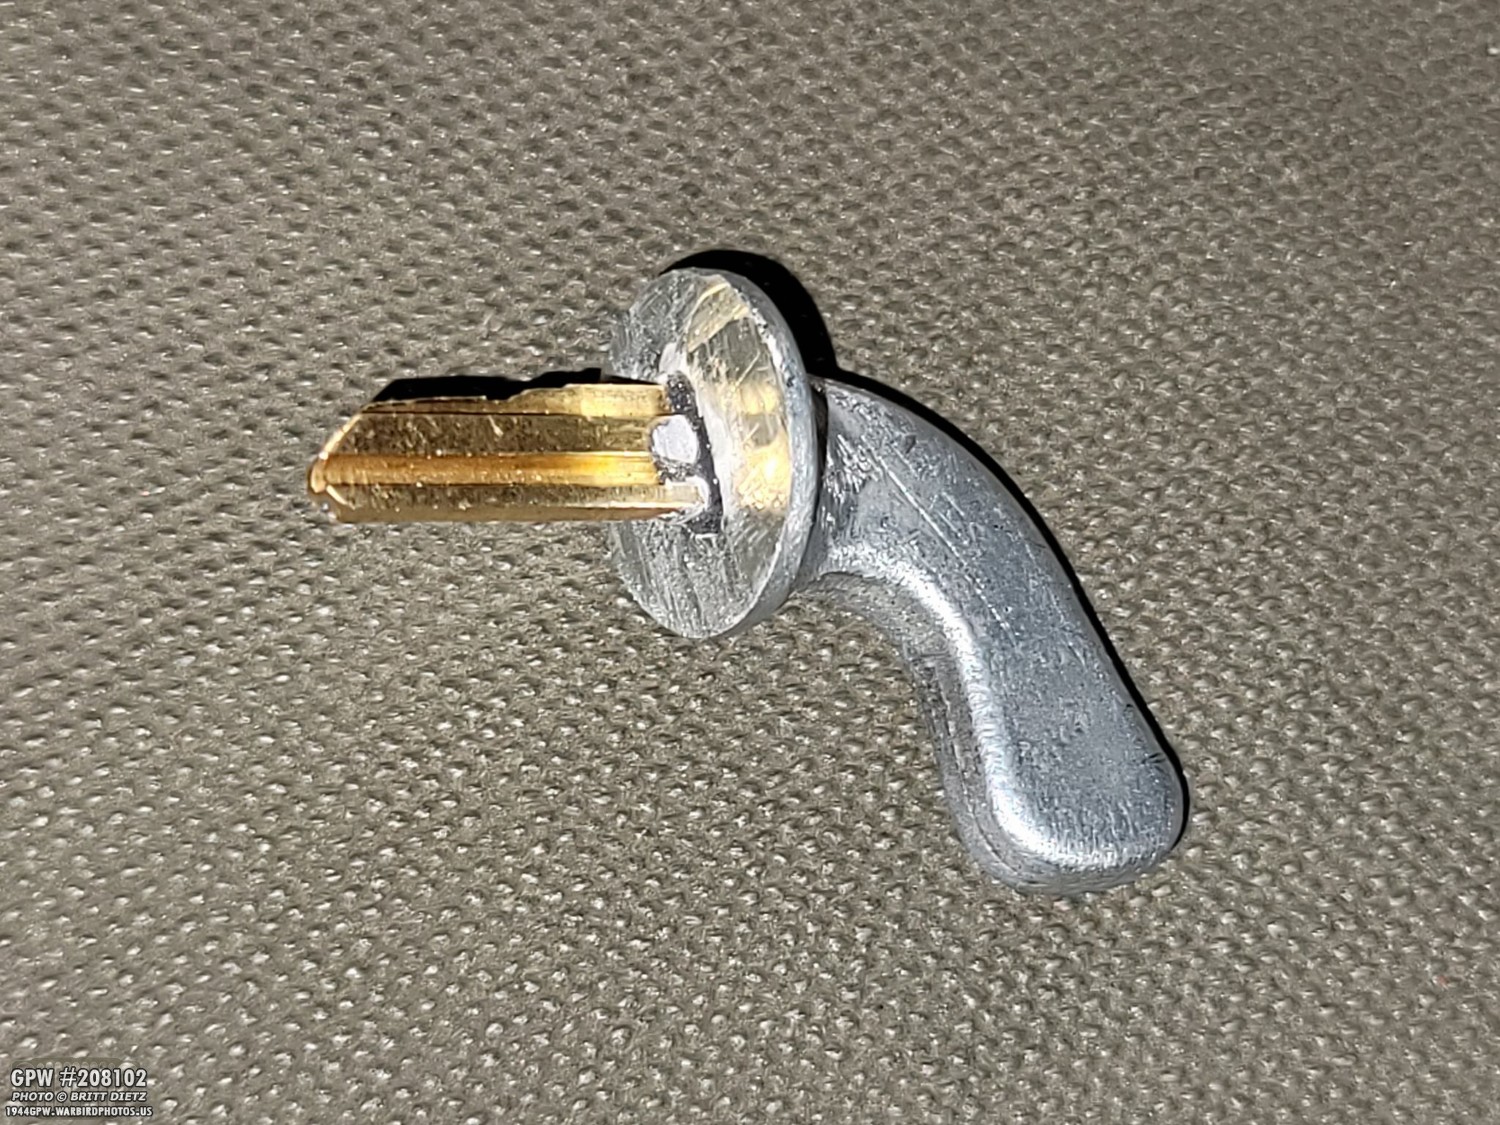
A few hours later, the key was nice and glued in! Really tight and solid. I used a file to remove the excess glue. Now for the real test… does it still fit in the key hole?

It does, and it stays put! When turning the knob, it does not turn on the ignition/coil! Success! Now, once I park the Jeep at events, I’ll put this in to make the Jeep look like it’s a lever knob!

So now I’ll paint it. First up, Red Oxide primer! That’s currently drying as I type this, so I’ll have to show how it all turned out in the next update!

Another project that was finished involved this automobile mini fire extinguisher I got (ironically) last Christmas. It’s a perfect fire extinguisher to keep with the Jeep just in case of a fire.
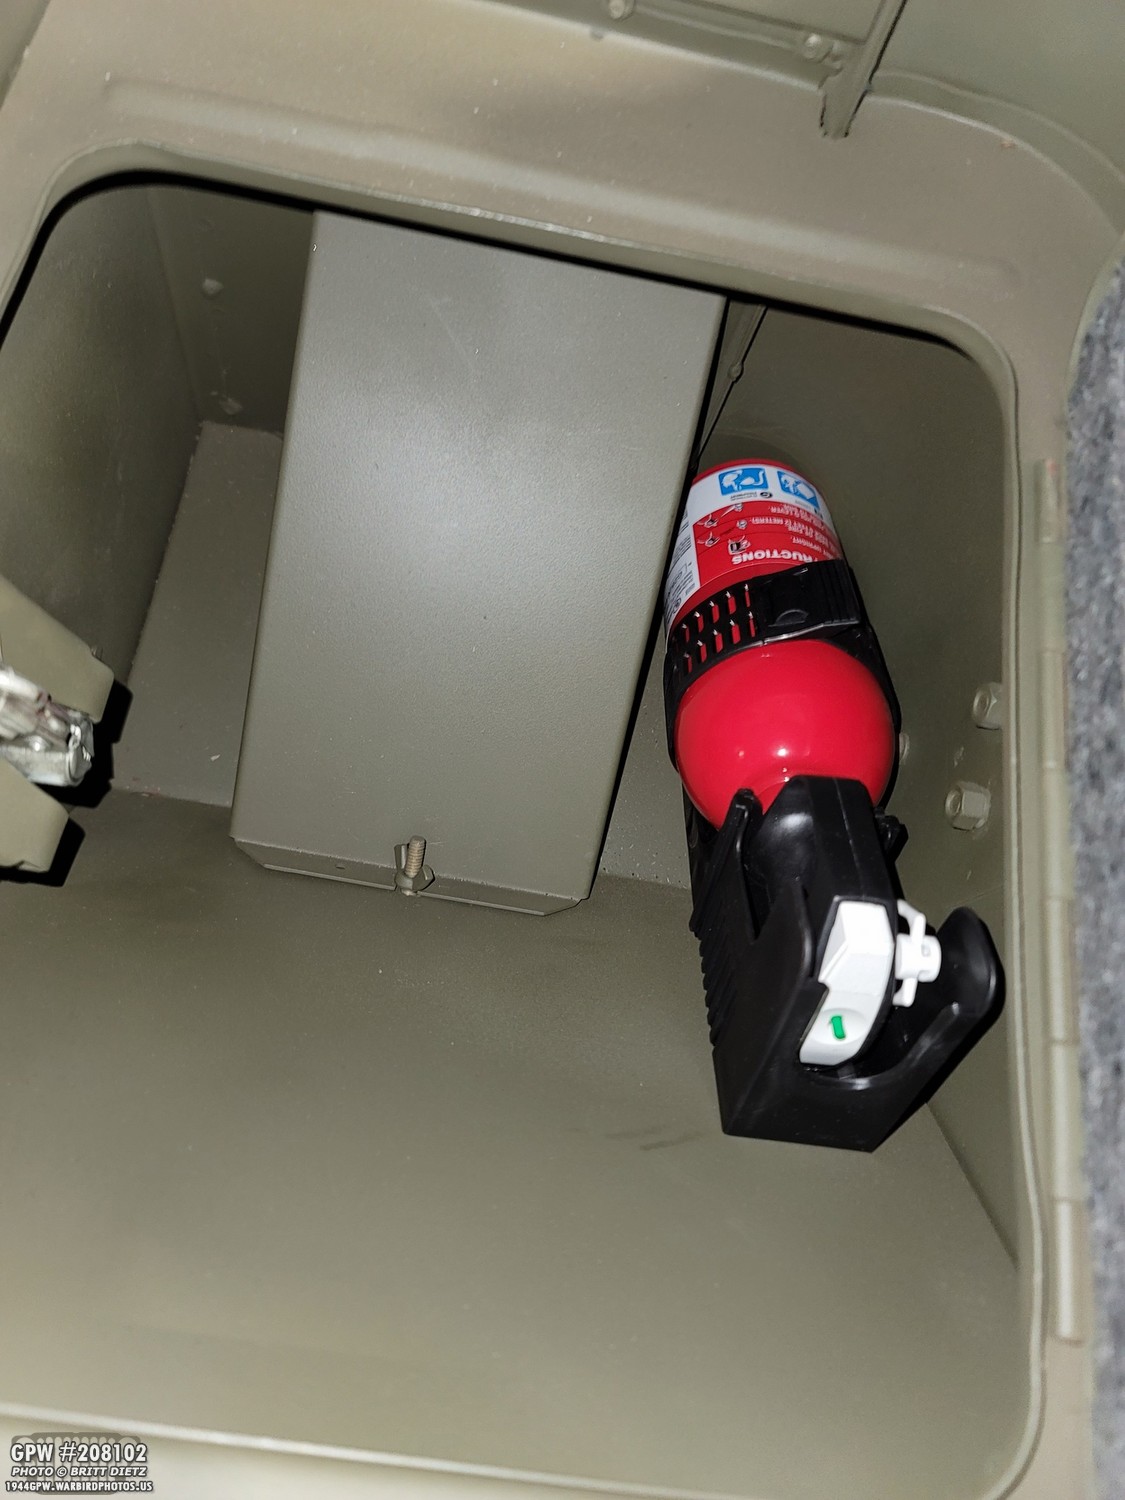
It fits PERFECTLY in the rear toolbox next to the trailer socket shield. The problem is, I didn’t want it rolling around in the tool box scuffing up everything.

Thankfully, my mom is a wizard with sewing, and using some OD Green fabric I found, so made this nice pull string case for it.
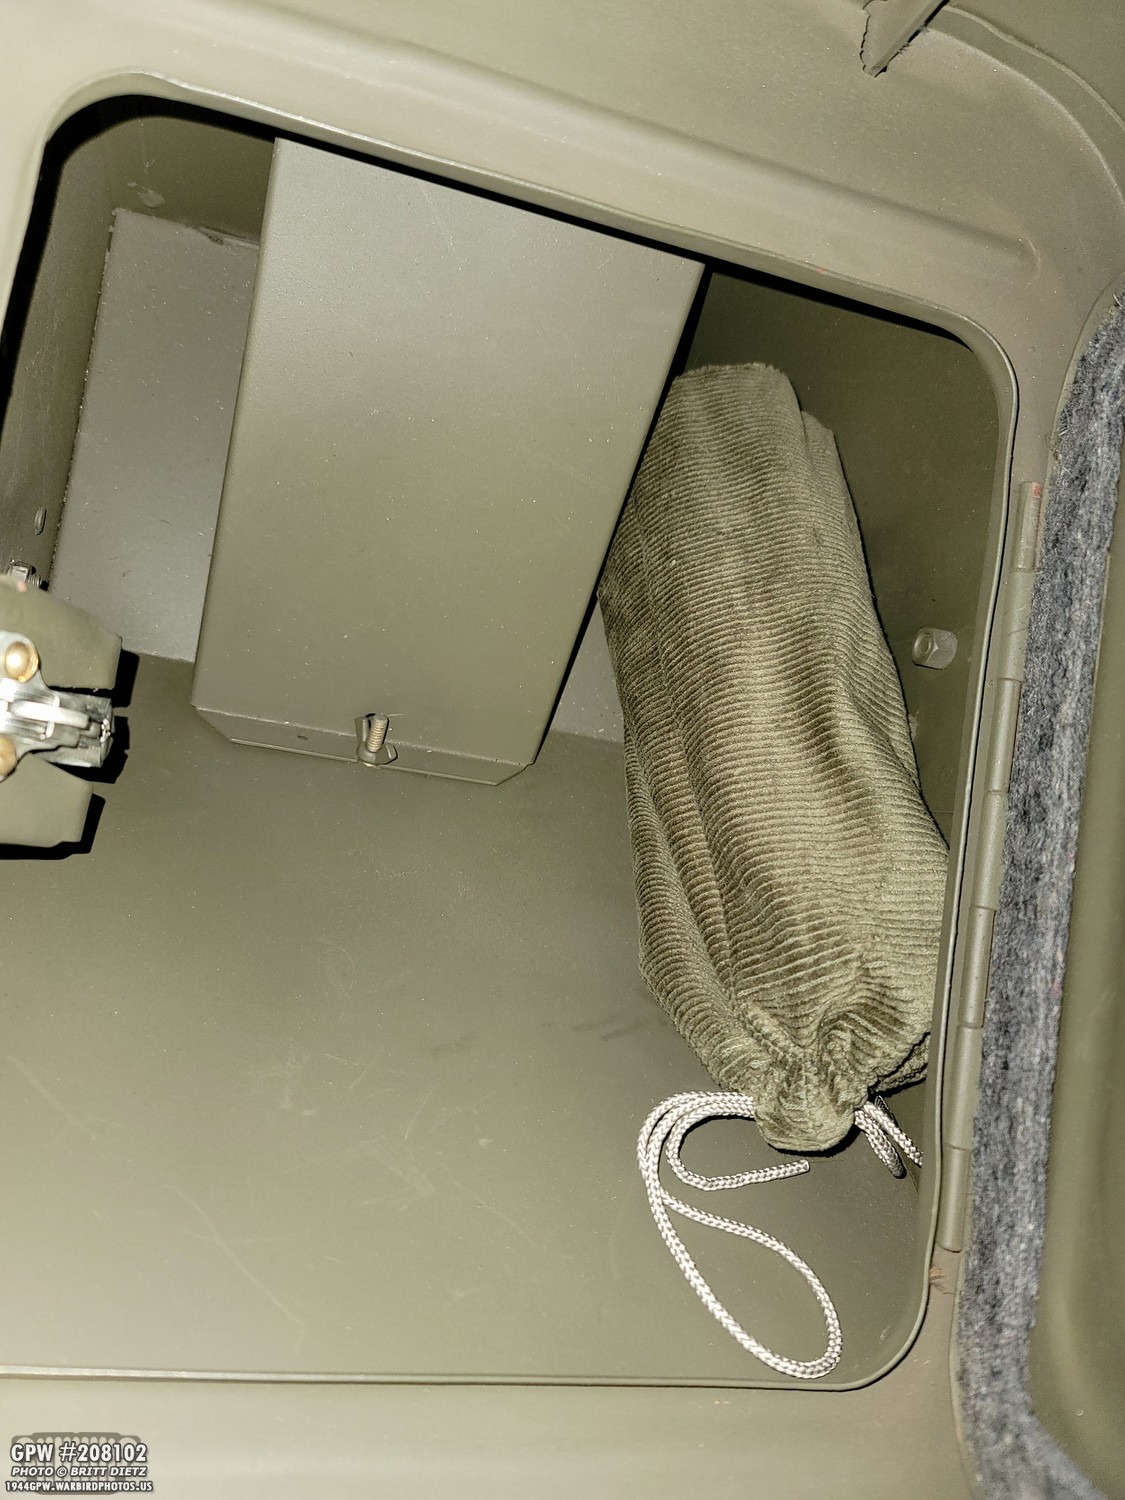
Now it fits perfect, looks more the part, and won’t scratch up the tool box. Win! And it won’t take that much more time than without the cover on it. I’m happy to have a real extinguisher with the Jeep just in case.

Let’s more one to some things I got these last few weeks. First up, I won an original TM9-803 Technical Manual for the Jeeps dated February 1944 on eBay! I’ve been wanting one of these for a while now, and I finally found one for a great price, which I bought right away!

It joins my slowly growing collection of original Jeep manuals!

While in Los Angeles last weekend, I visited a military surplus store on Hollywood Blvd. In there, I found this repro Jeep cap. I’ve always wanted one, and it was a good price, so I figured… why not? Something to make my Jeep driving a little more authentic, mainly when it’s cold out!
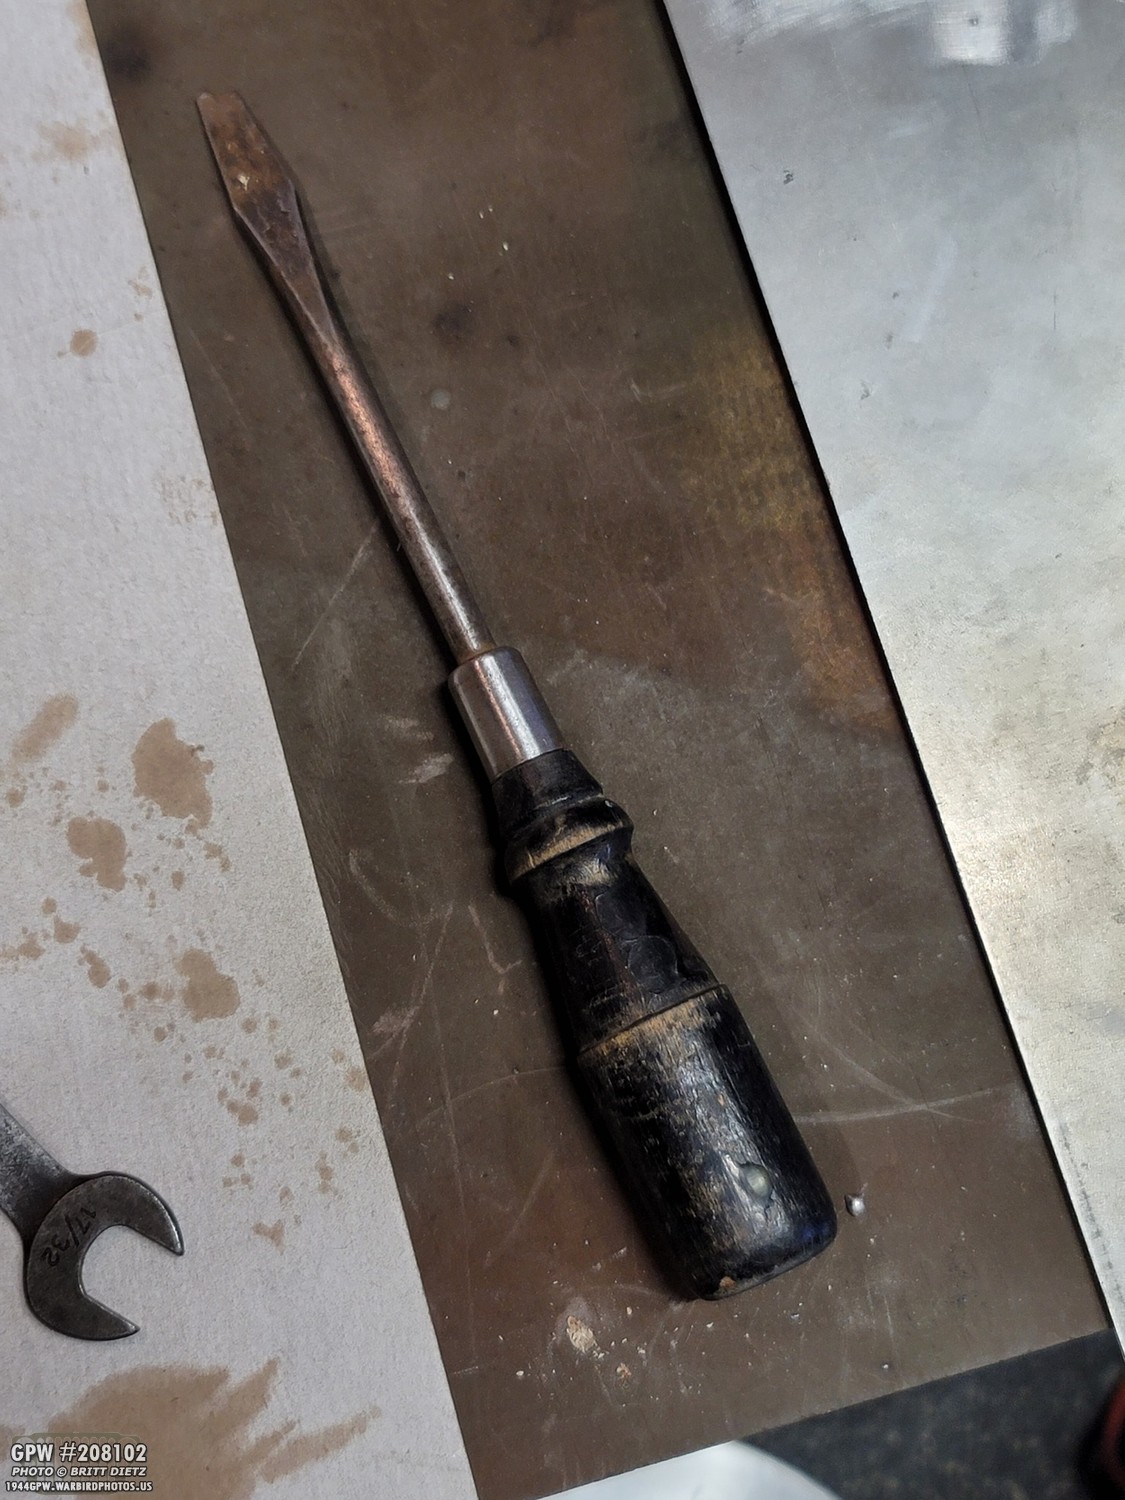
While going through the garage the other day, I ran across some old tools I’ve had for a long time now. They were my great grandfather’s tools that I inherited. I’ve never really given them a second thought, but figured it would be interesting to see what they are, if they are old or not. He served in the USAAF during WW2, so I figured maybe they could be WW2? First up was this screwdriver. I tried to figure out what it might be, with little success. It appears to possibly be a Model T or Model A Ford screwdriver, but…
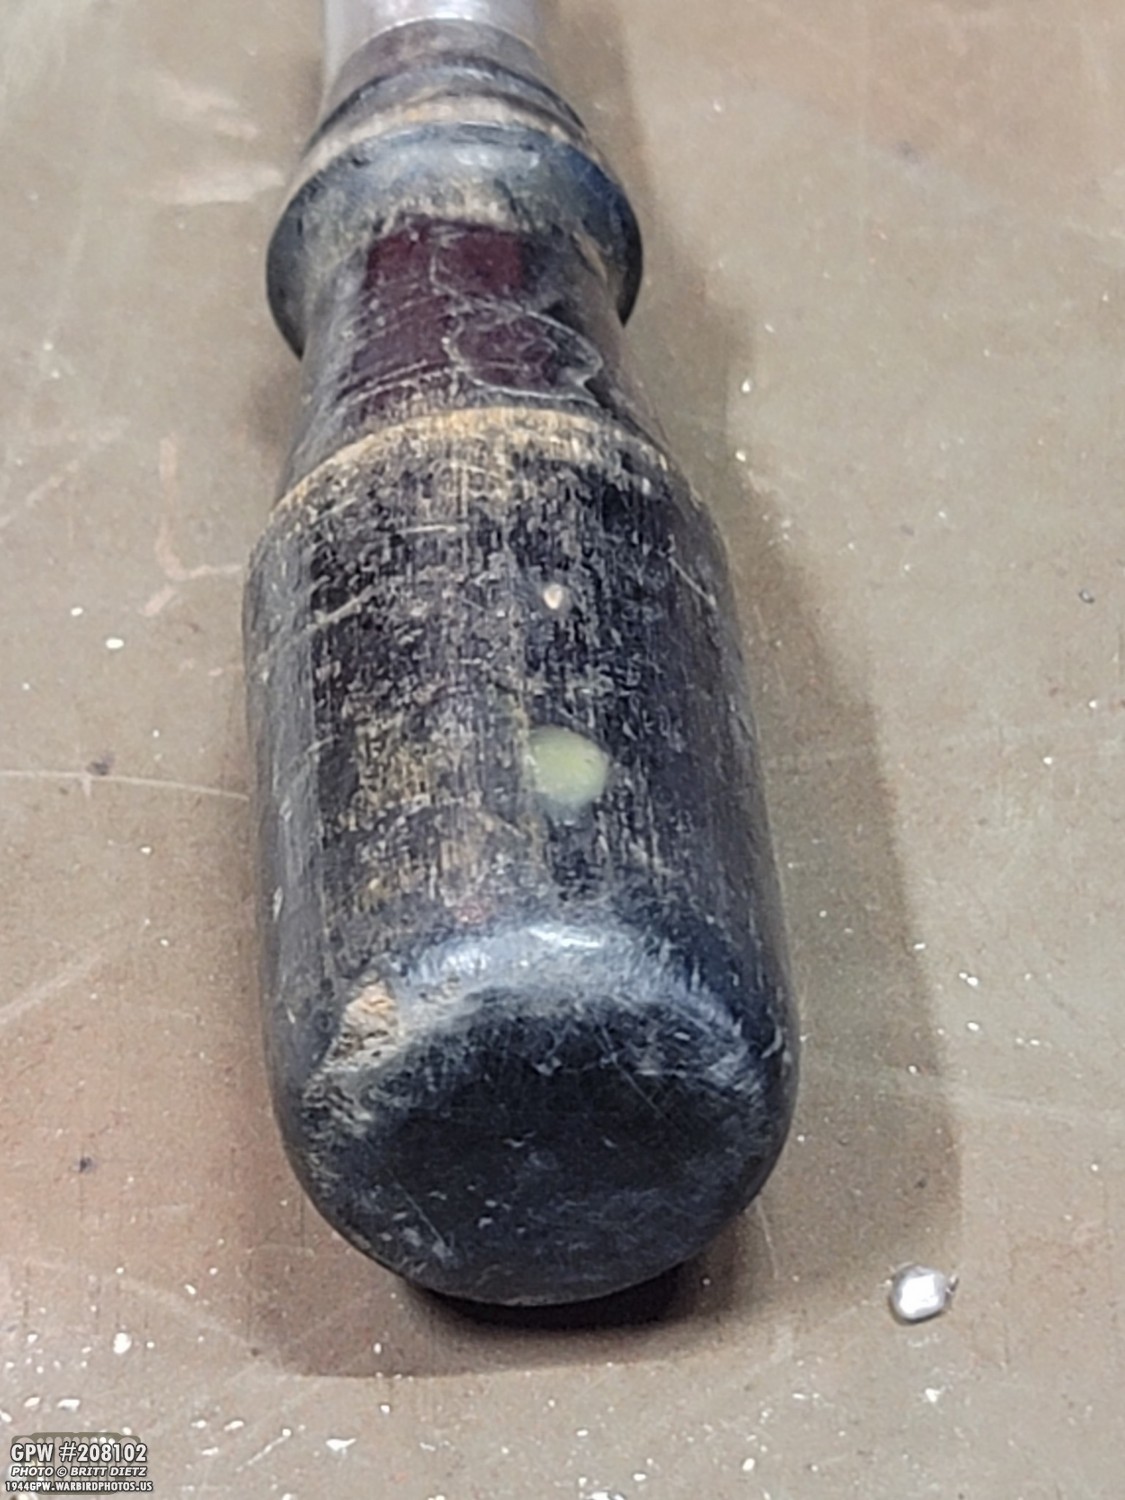
Most of those screw drivers have the main shaft going all the way through the wood and coming out the bottom. This doesn’t. So I don’t know. It looks like the Model T and A style, but there’s no markings and without the shaft going all the way through, I’m not sure.
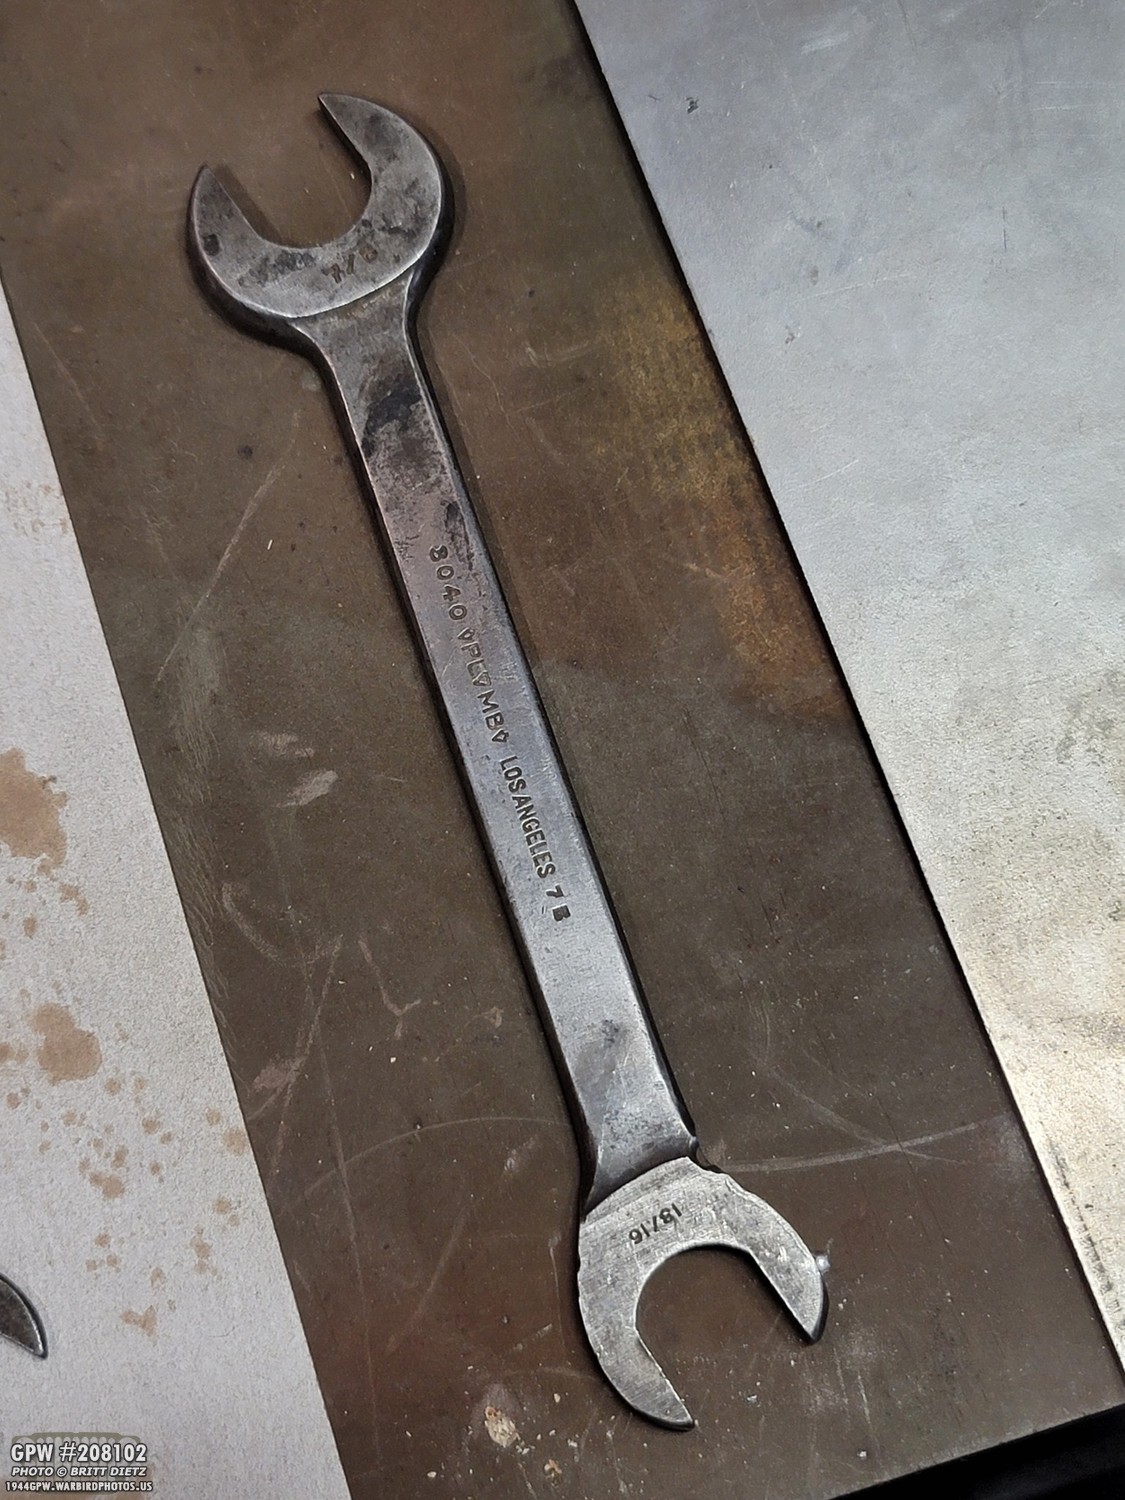
That being said, one of the wrenches was easy to look up! This PLVMB (now PLUMB) looked pretty old and has a long strand of markings.

This PLVMB has a date code of 7B. That is 1937 according to what charts I’ve found online for the Los Angeles series. Pretty cool

This wrench looks pretty old as well, but is so generic, I have no idea what it is.

Now, this rachet screwdriver was a bit tough to look up. I had to really look for info on it.
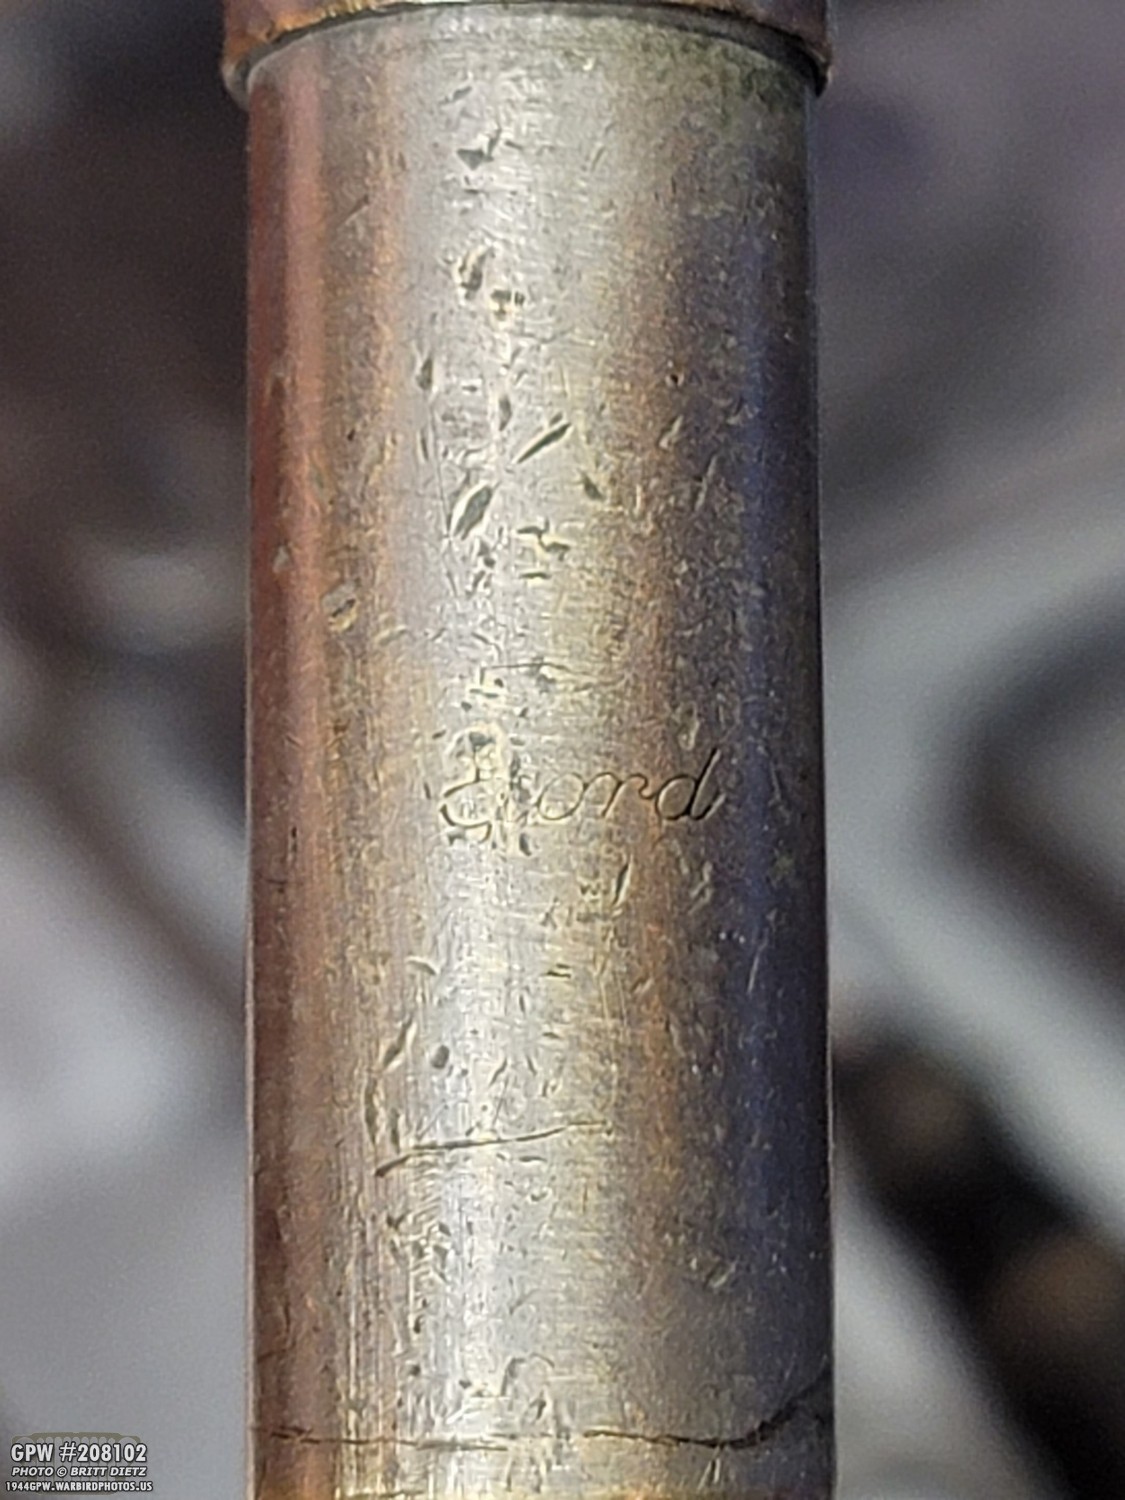
One thing I quickly found was this awesome Ford stamp on it! No, this isn’t for a Jeep (sadly), but probably for a ford vehicle in the 30s/40s.

Looking at the markings elsewhere, it appears to be a North Bros Yankee 30. It’s really hard to see the writing.
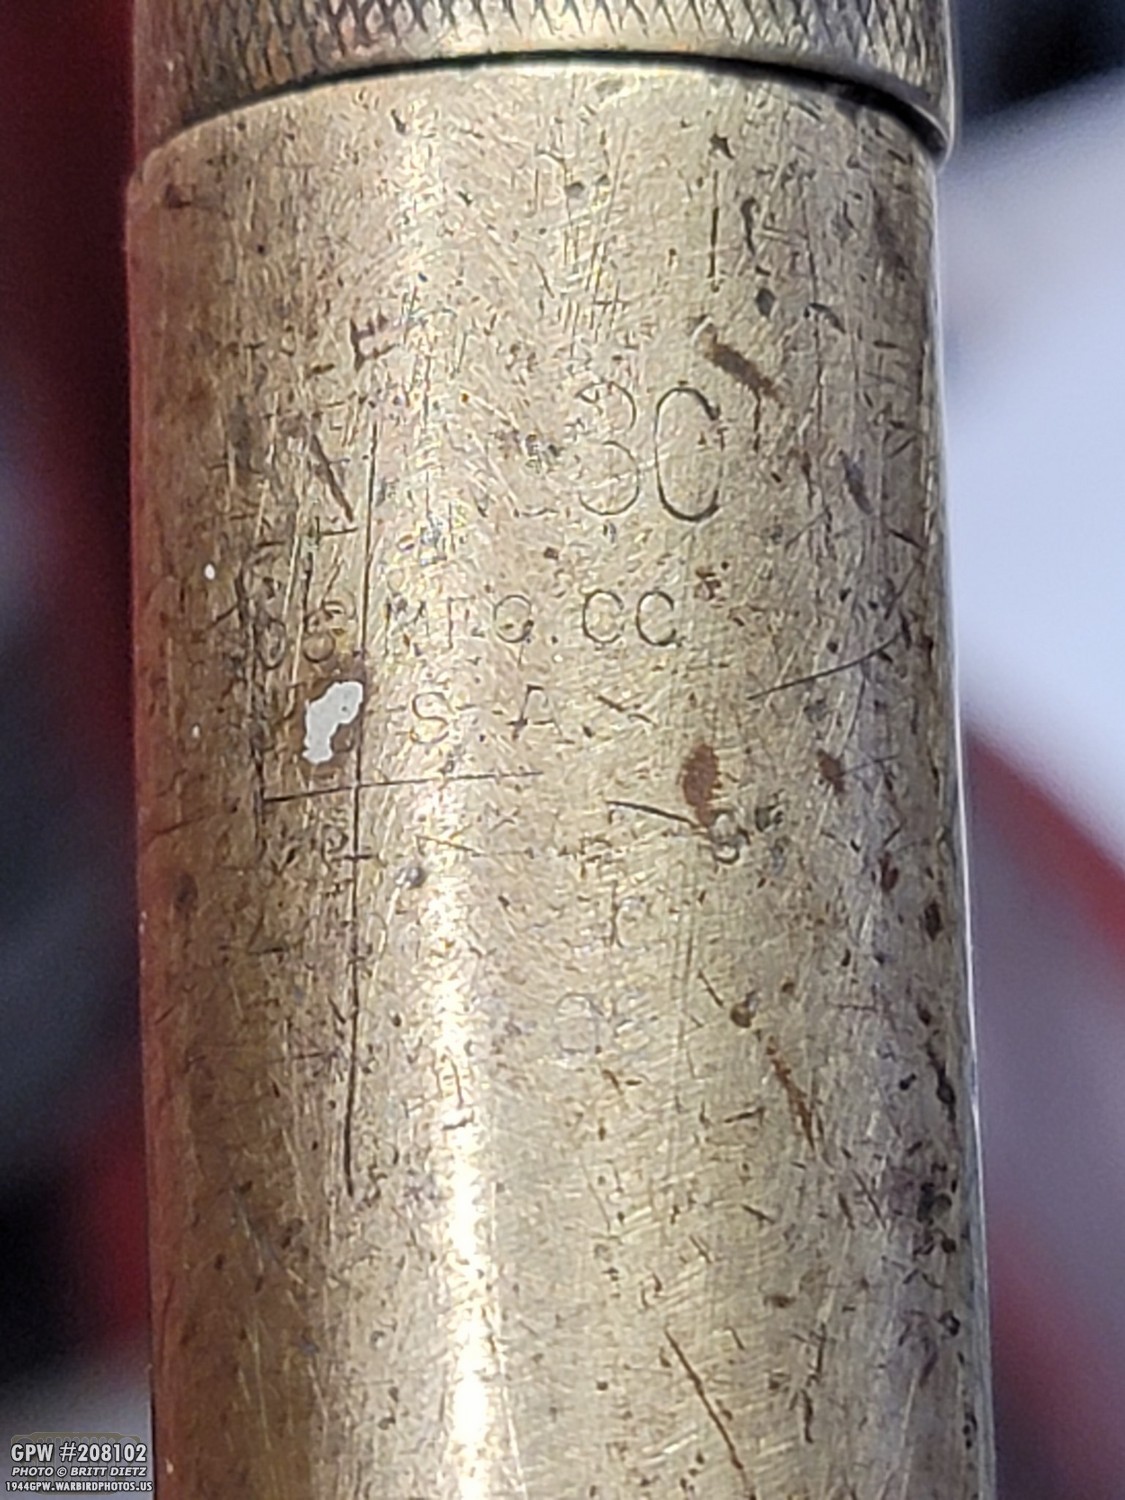
Here you can see the 30. I still can’t exactly place the date, but still pretty nice to have!
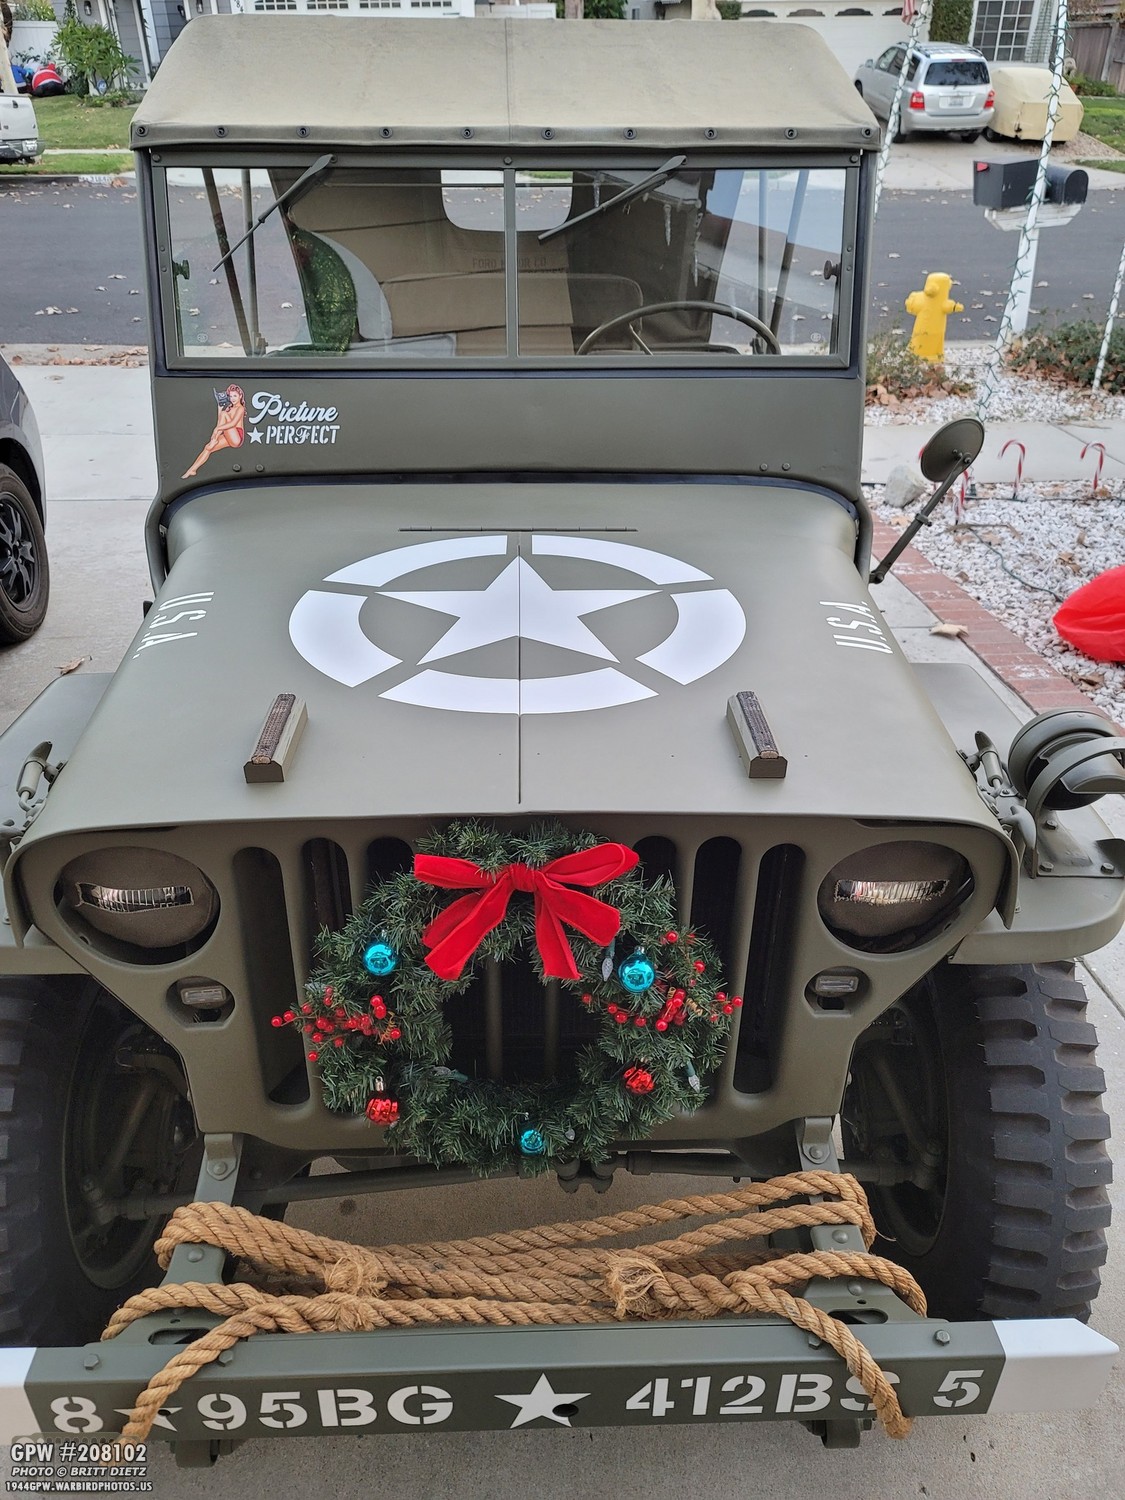
Wrapping up the update, I finally put the Christmas wreath back on the Jeep for Christmas time. I always think that add a nice bit of Christmas cheer when added to Jeeps. And it was also on the Jeep when the December cover for Military Vehicles Magazine was shot!

So that’s it for this update! Look for another one after Christmas with a special Christmas ‘Jeep’ project that I think many of you will enjoy reading!
So have a Merry Christmas! Till the next update…
1 thought on “December 7th event, Ammo Crate Radio, & Ignition Switch!”
Comments are closed.