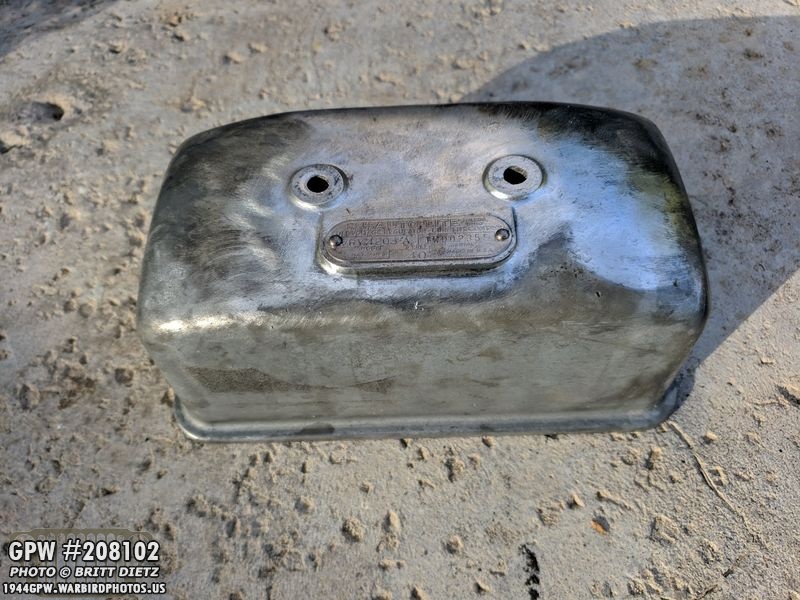
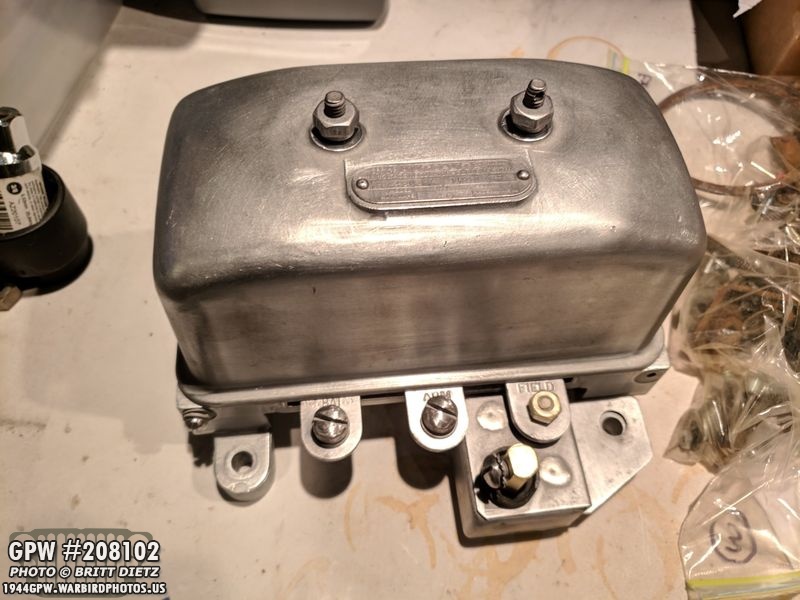
The voltage regulator as it arrived from eBay. This is a ‘take off’ regulator, meaning it was taken off a Jeep that was undergoing restoration and sold. No restoration has been done with it. Not only will it need to be cleaned on the outside, but I will need to give it a black ‘wrinkle’ paint job finish. Let’s open it up and hope the inside isn’t really bad…
That cork gasket REALLY did its job! 70+ years later, the inside looks almost brand new! It’s amazing how well the inside was sealed up compared to the outside! This will probably work just like it would have 70 years ago!
A look at the backside. All the wires are in perfect shape!
The wire coils are like new!
Here’s the regulator electronics by itself. This will allow me to clean/paint the base easier.
Here’s the base. You can see the stuck on cork gasket that kept out the dust, dirt, grime, and water. Amazing! I’ll purchase a new repro cord gasket that is perfectly made to fit.
Here’s the cover after a quick wire wheeling and sanding. Down to the metal now, but I’ll still hit it with the sand blaster to really clean it up the rest of the way. I wanted to save the red paint on the data plate tag, but that had some rust so I decided to remove it all (and also so I could figure out what year this regulator is…)
So it’s an early regulator (-A) and it’s dated 1W, which is January of 1940 according to the Auto-Lite chart I found online for dating these regulators. Pretty amazing that the inside was so perfect considering its 79 years old!
Used a small wire wheel to clean the three terminal ports. Now you can see the engraved writing (couldn’t see it before)
Removed all the cork that was still left (took a while, that was really on there good!) on the base.
Wire wheeling the bottom. This is the only spot I’ve seen some of the original black ‘wrinkle paint’ that the whole regulator should be painted with.
I removed the terminal screws and the filter for the regulator. I’ll hit all these with sandblasting and some sanding…
BOOM! After sandblasting and sanding, it’s looking almost entirely new! That filter cleaned up really nice as well.
Cover sandblasted and sanded to a shiny finish. I put it all back together to see how it looks, so much different than the first photo in this update when it arrived!
Now cleaned, you can really make out everything on the tag. I might try and fill in the red back on the tag.
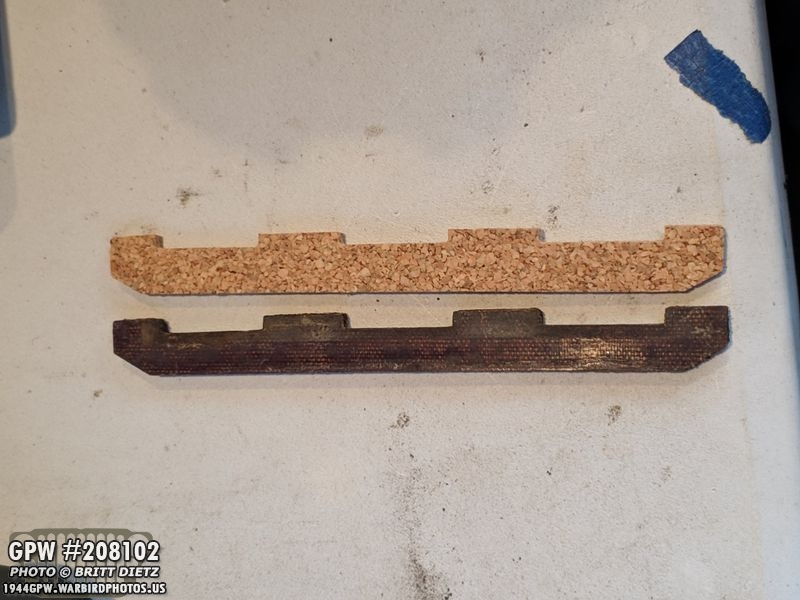
Reproduction cork gasket arrived from RFJP! Also (not pictured) the special black wrinkle finish paint arrived as well. I have to wait till a warm day to paint it on. Once that’s done and cured, I can put these gaskets back in and seal up the regulator!
Here’s a look at the original terminal gasket (which since it’s an early regulator it’s made of some sort of particle board like wood). The repro gaskets are cork as the later regulators had, so in the essence of time (and no one makes the wood style gaskets) I’ll use the cork ones.
Went to ACE Hardware and picked up some mounting bolts in the correct thread and length to mount the voltage regulator on the currently unrestored passenger side fender, so I decided to do a test fitting… and it mounts perfectly! I’ll grind off the top markings on the bolts so they are smooth. Next time the regulator will be mounted here will be when it and the fender are totally finished!
Moving on… the oil pan is finished with the final Ford Engine Gray paint! It’s ready to be reinstalled with the new gasket. More on that in the next update.
Another step before I could reinstall the oil pan was to hit the heads of the all the screws that hold it to the engine. They will get ford engine gray once they are screwed in.
Finished priming the spare tire bracket with red oxide.
Finished painting the 12v one-wire modern Delco Alternator to make it not stand out as much among the WW2/1940s items in the engine. Most 12v Jeeps have this type of Alternator.
Finished painting the new emergency brake handle. I ended up buying a reproduction F stamped handle and cord assembly because the one on the Jeep was in pretty rough shape.
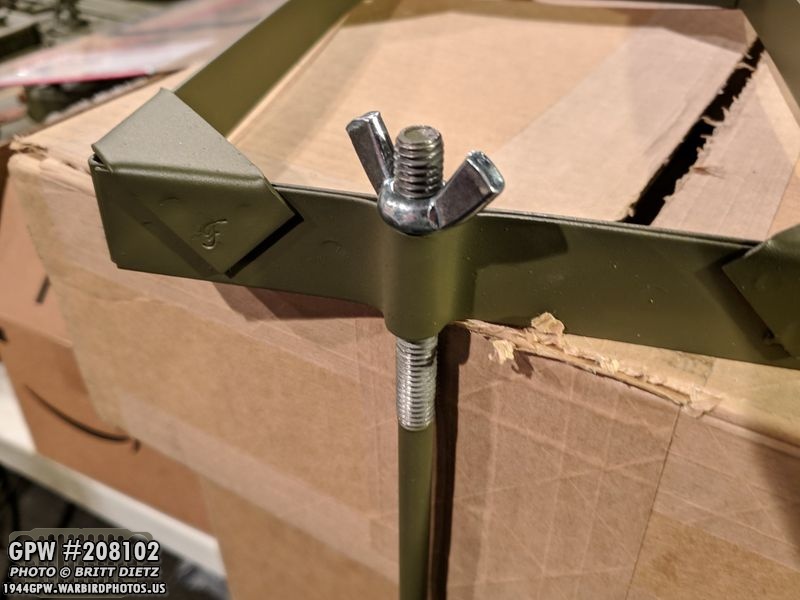
One thing that had been bothering me was the missing wingnuts on the battery hold down J bolts. Taking one of the bolts to Lowes, I found the perfect wingnut that matches the WW2 style. Here it is with what was on the Jeep originally, just a nut.
Testing it out on the reproduction battery hold down frame (the Jeep was missing this all together), and it’s perfect! Now to paint it…
Hitting them with red oxide paint, next up will be the OD Green!
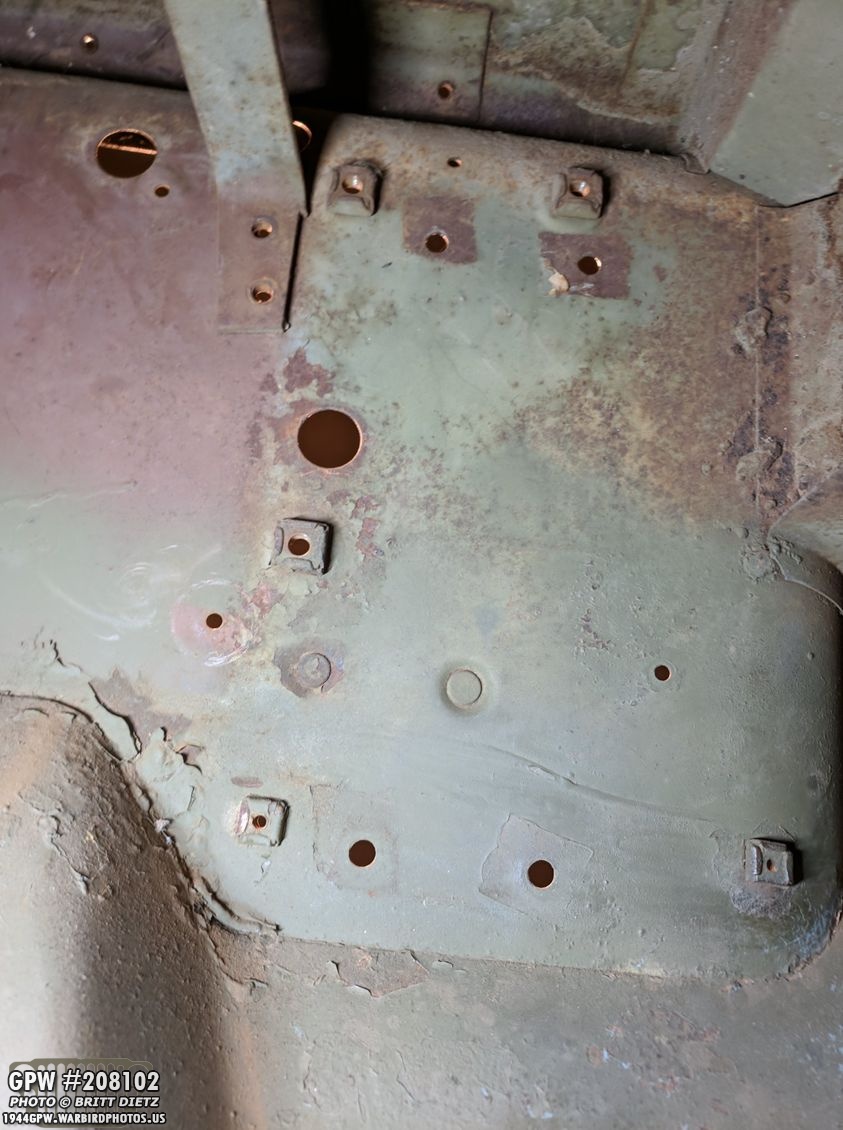
Another thing missing from the Jeep is a Filterette. Many jeeps were fitting with all sorts of various filters/ground bond straps/etc to help stop radio interference from the electronics in the Jeep. Think of how if you hold your cell phone up to a speaker, you can hear that beeping feedback sound. This is a shot under the passenger’s side of the dashboard towards the firewall showing several holes that would either have things bolted on them or feed wires into the engine. There are four large screw holes (top two with rusted brown squares around them and the bottom two that don’t) that originally housed a large filter here. You don’t need these filterettes (as they were called) anymore, but the wiring harness I bought expects one to be there. So what to do other than making my own wires to bypass this filter (which I don’t want to do) and they cost upwards of $200 on ebay?
You make your own! Instead of it being a filter, it’s going to be a junction in a box so I can connect the correct wires. I started with a smallish sized Tupperware container that I took a drimmel and sander to to remove the lips and ‘made in china’ writing.
After purchasing a 3 post junction, I’ll be turning this tupperware container into a mini version of the filter that will be painted OD green and mounted to 2 of those 4 holes with this junction, and the wires, inside. No need to modify any wires and it’ll somewhat look more like it should. Maybe eventually I’ll find a real filterette that I can replace this custom made one with.
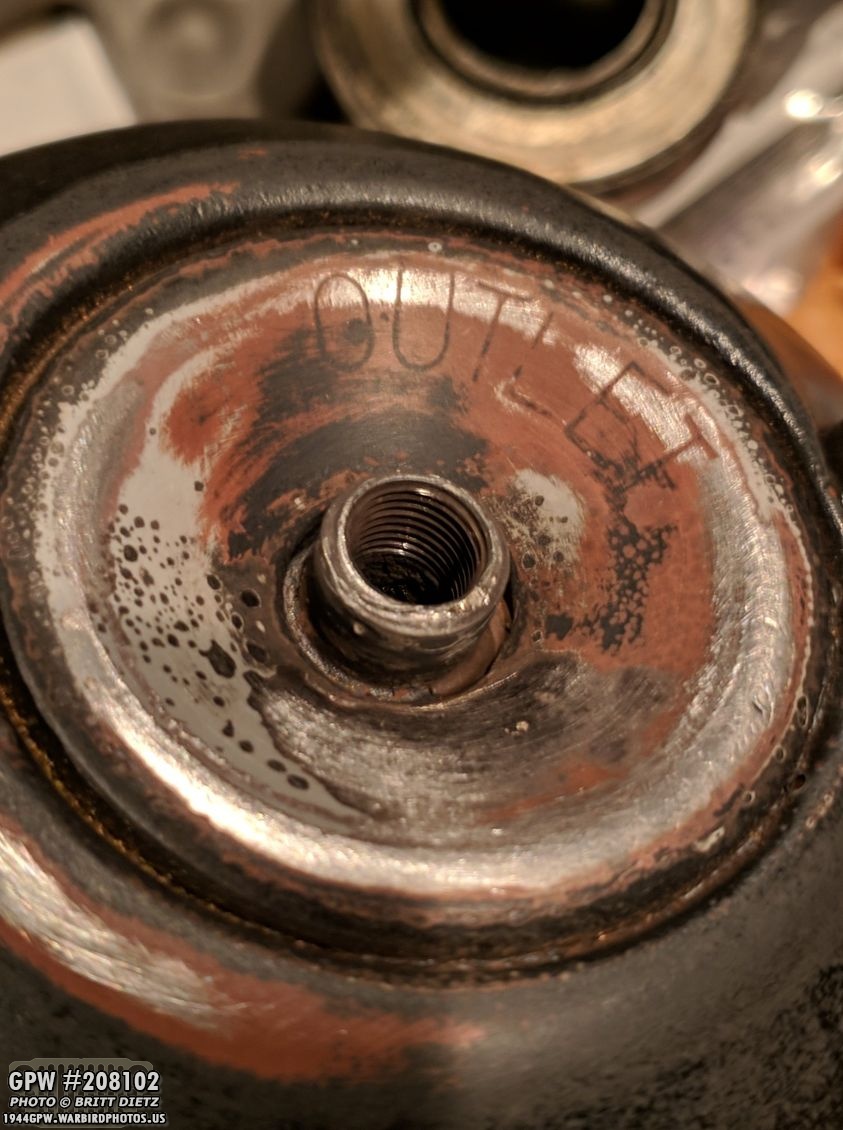
Going back a few updates ago, I hit a snag on my oil filter for the Jeep where I couldn’t get the brass male-male fitting out from the bottom (this is the outlet). I mangled the fitting trying to get it out, and even drilled a hole to try and use a screwdriver as a wheel to get it out… it was stuck. I was worried this oil filter would be unusable…
But a handheld torch burner came to the rescue! I was told to ‘melt’ the brass out by hitting it with a torch. After heating it up for around 10 minutes, it let go and I was able to twist it out without any damage to the oil filter container!
Here’s a look at that fitting… I really did a number to it.
Woohoo! Now just to sand it down and repaint it with primer and the black.
I decided to do a dry run of the filter on the engine to make sure it all lines up. Remember, my Jeep came with an incorrect post-war oil filter. This oil filter (and brackets) are take-off ones from eBay. Put it all together and it all fits great including the new oil lines!
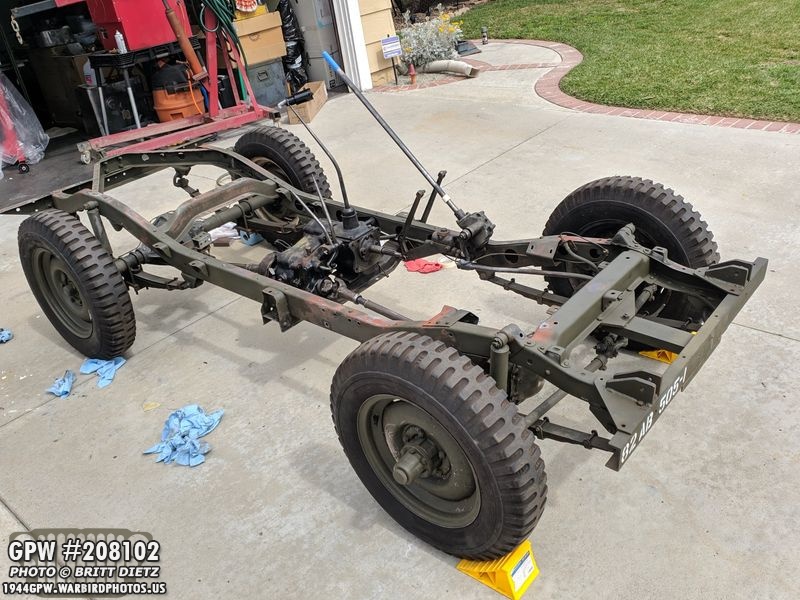
Next up, there was a day where it was a bit less windy (and no rain for once!) so I could do some prep work to the frame. After wire wheel cleaning it a few weeks ago, it needed to be hand cleaned and then hit with some red oxide primer where the metal was showing. These shots are after the manual cleaning with rubbing alcohol but before painting primer…
Another angle after the manual cleaning with rubbing alcohol but before painting primer…
Another angle after the manual cleaning with rubbing alcohol but before painting primer…
And BAM! Primered! I didn’t need to hit everything with the primer as a lot of the frame/axles/steering already had good paint on it. I actually probably hit more than I needed to, but it allowed me to finish out all the red oxide spray cans I had that still had a little bit left in them.
Another look at the primered frame.
Another look at the primered frame. Now just to wait for a calm sunny day to hit it with the OD Green!
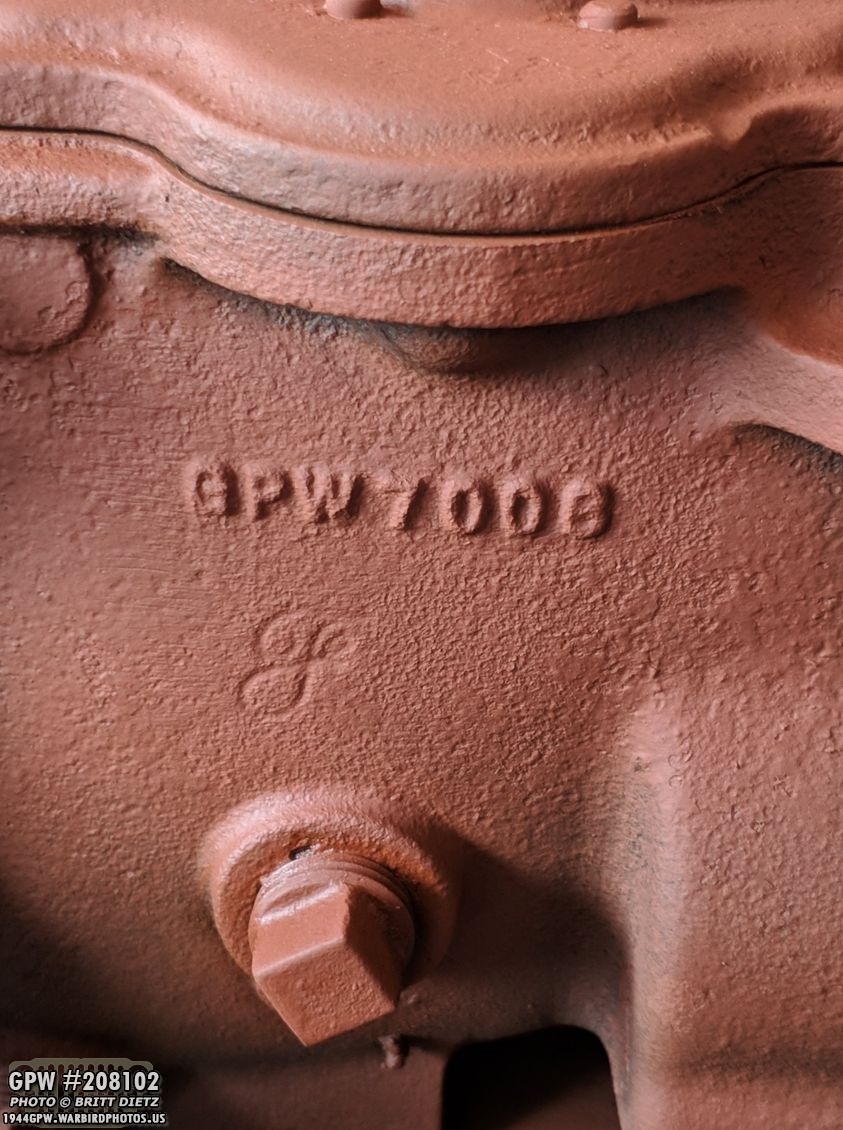
A nice look at the original Ford (GPW) transmission with the F stamp. Red oxide primer brings out the details.
Another look at the steering box and master brake cylinder for the Jeep all primered and ready for OD Green paint! Now we wait for that non-windy and sunny day…
