 Valve Work and first Markings!
After last week’s not-so-good adjustment of the valves, I tackled it again this past week to much better results. Also, another milestone as the very first USAAF markings have been applied to the Jeep! Plus a walk around of the Jeep and what markings still need to be added.

A quick look at the Jeep as of December 9th from the passenger side after a drive.

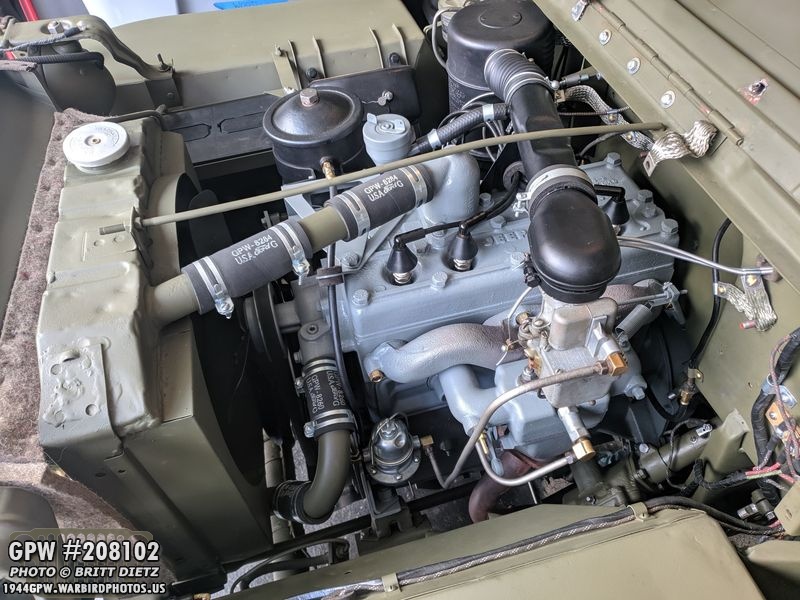
For those who’ve been following along as week’s update, I adjusted the valves of the engine for the first time… and it didn’t go as planned. When I put the engine back together, it sounded terrible and I had several issues getting the Jeep to run right. I decided to give it another go. Here’s before I started to remove the manifolds for the second time.

Here I’ve removed the manifolds again, and I’ve disconnected the carburetor and air horn. I also removed the horn. That gives me plenty of space to work without removing the fender.

This time I got fancy, and I used a security camera so I could watch the valves raise and lower via my phone as I was under the Jeep cranking the engine. Worked out pretty well.
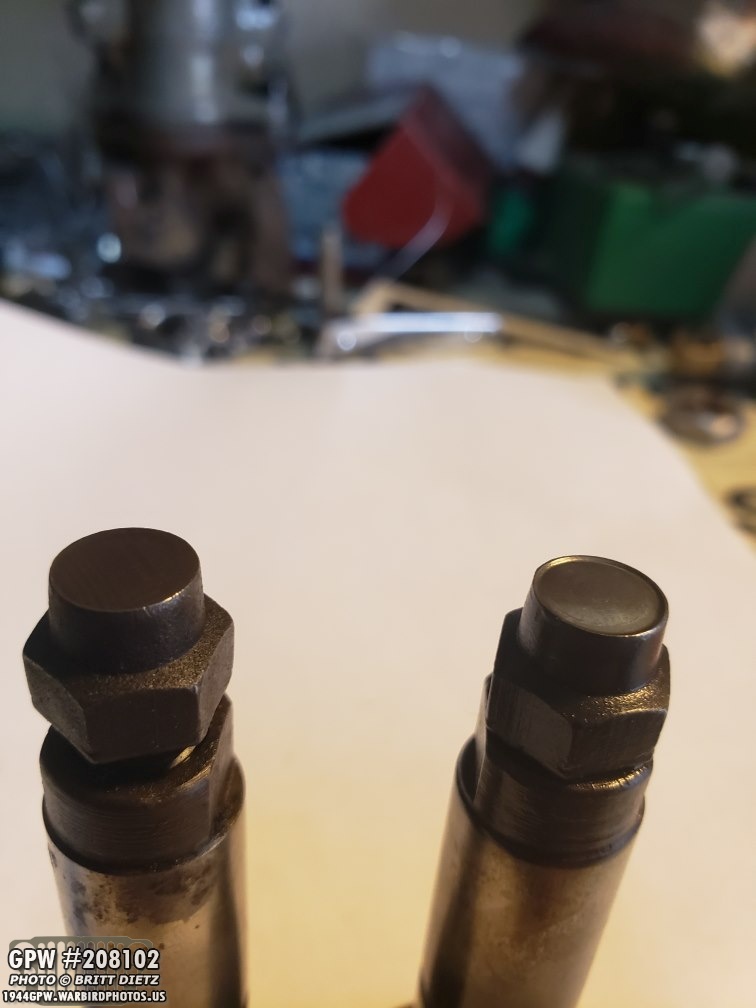
One thing I was told by Roger was to check the top of the tappets on the valves. He sent over this photo to show me a good and bad worn surface to the tappets. The left is a good tappet with a nice smooth surface. The right is a tappet that’s been heavily worn and now had a lip around the edge. That can give you a false positive when using a feeler gauge since the valve is actually going into the recessed area. After checking a few of the valves, mine are more like the left than right thankfully!

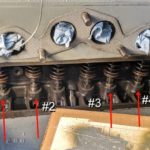
I was told by Tom to try a different way of checking the valves. Using the feeler gauge at .014 again, instead of waiting for each valve to hit the highest stroke and doing the 9 method (9-valve that you watched go to top=valve to adjust), he said I should watch the intake on the #1 cylinder set (the first red arrow) until it goes all the way down and doesn’t move. Then turn one-quarter turn more. Adjust both valves for #1 to .014. Then, since the firing order is 1,3,4,2… you go to cylinder #3 set. Watch the intake (3rd arrow) to go down to lowest, turn quarter turn more and adjust both. Do #4 cylinder, then #2. Gets it done a lot faster! And sure enough, almost all the valves needed at least slight adjustment.
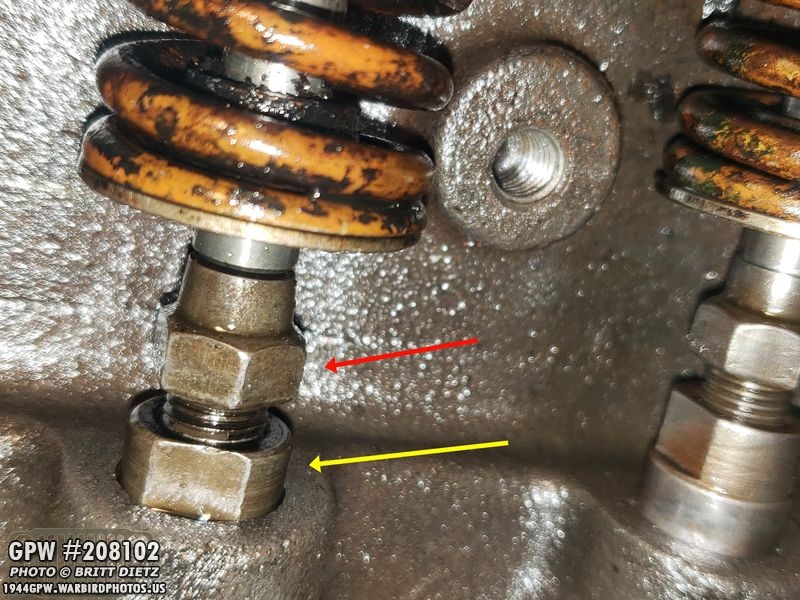
And I thought this time I’d show a close up of one of the valves. You adjust them by putting wrenches on both the bottom (yellow) and the top nut (which is the tappet, red arrow). When you turn the top tappet (red) counter-clockwise, you’re raising the tappet and reducing the space to the valve above. Clockwise lowers it, making more space.
After adjusting them twice with the two at a time method, I put it all back together once again, making sure to torque the manifold brass nuts in steps (10 pounds foot pressure, 20, then 30). Time to fire it up and take it out for a test ride. But, I need to adjust the distributor first. When the Jeep was giving me issues after the last valve adjustment, I tried to adjust the distributor just in case something got out of wack. Doing so didn’t make any difference, but I feared the timing might be off slightly from my adjustments.

And naturally, as I was ready to push out the Jeep and start it up outside the garage, it started raining. Since I need to keep the hood open to listen to the engine, adjust the distributor, and make sure I put it all back together right, I couldn’t pull it out of the garage. DOH! It took a bit, but the rain finally let up a bit.

SUCCESS! While the Jeep still seems to have some clatter from the engine (could still be the valves or just a noisy engine), after adjusting the distributor and letting it warm-up, I was able to drive it over to the gas station to fill the tank up (getting somewhat low). I’m going to have a friend, Tom, who knows Jeeps in and out swing by soon and listen to the engine in person and see if there’s anything more I can do to make it have less clatter. But at least it drives again!

With the success of the engine, for now, I turned my sights to another project I’ve been waiting to start until we had better weather here in CA… the markings! With my stencils I got a few weeks ago from Military Stencils By Axholme Signs in the UK, I decided to start with the bumperettes. I took the first one off and masked off the green. I gave it a good scratch pad sanding to partially remove the white paint that was yellowing. I’d made the mistake of using this paint and, just like replacing the white on the front bumper tips, I wanted to use the pro-white paint I got that was more durable, yellowing resistant, and thicker. Here I’ve painted two coats of the new white on.

And the other bumperette has been masked and sanded ready for white (note the blue painter’s tape hasn’t been hit with white paint yet)

Here’s a look at some of the stencils. They’ve been laying under several books to get them nice and flat. The bumperette stencils are the two above the bottom stars.

Test fitting the stencil on the bumperette to make sure it fits. It’s pretty close to the edge, but fits well!
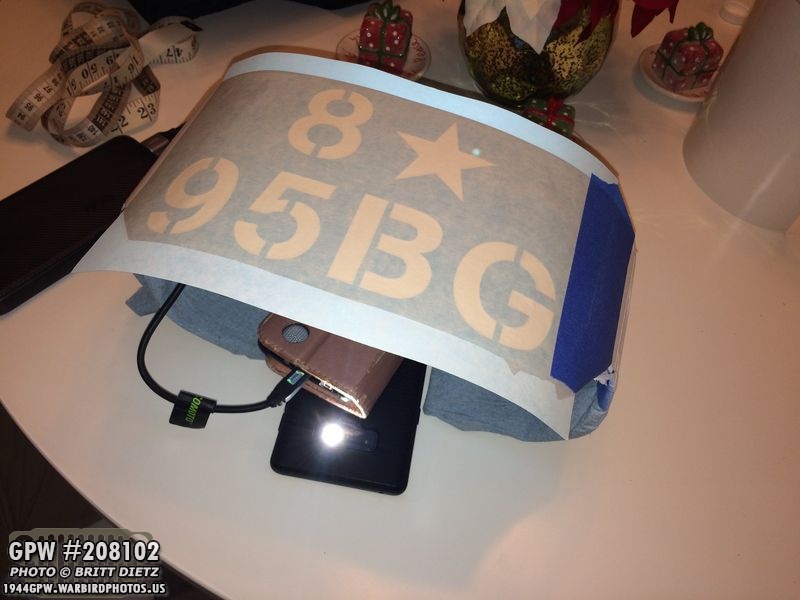
Application time! I figured I’d chronicle the process. I took two phones and I turned on their flashlights pointed up directly under the top and bottom edge of the bumperette. That light showed me exactly where the edges are so I could line up the stencil as perfect as possible. Once I was happy with the alignment, I put painters tape on one side to hold it in place.

I wasn’t able to photograph the actual process of removing the back layer, laying down the stencil, and removing the top layer only because I needed both hands (and that of my girlfriend’s) to make sure it went on perfect. It starts by lifting it up using the painter’s tap holding it down like a henge. I then started to slowly remove the backing as my girlfriend used this plastic pan scraper (Bed Bath and Beyond) to slowly squeeze down the stencil as we went along getting all the air bubbles out and making sure it was flat.
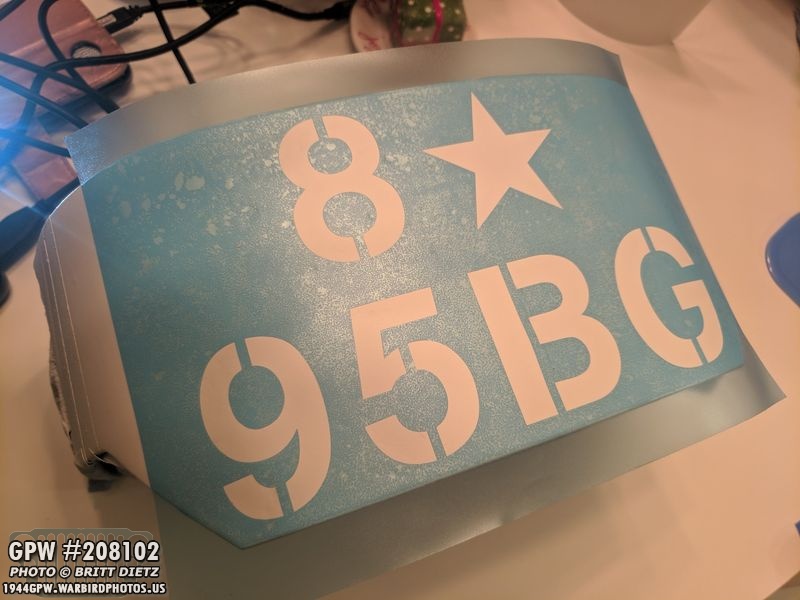
After then carefully removing the top layer this is what you’re left with. The middle layer which has the cut out letters/numbers. It’s not incredibly sticky so it doesn’t pull off the paint when taking it off, but it’s sticky enough. At this point, I manually pushed out air bubbles and made sure all the edges around the letters and numbers were as stuck down as they could be.

It may look like a lot of air bubbles, but actually, this is because I’m using my original bumperettes. They have pitting on the metal, so it is not a super flat surface, unfortunately. But as long as the edges are down good, that’s all that matters.

Both bumperettes are done with stencils applied! It’s a bit nerve-racking since you only get one shot, but it’s not incredibly difficult to put them on. One thing the instructions that came with the stencils said was to not keep the stencil on for too long, so I decided to go ahead and do the paint for them the same evening.

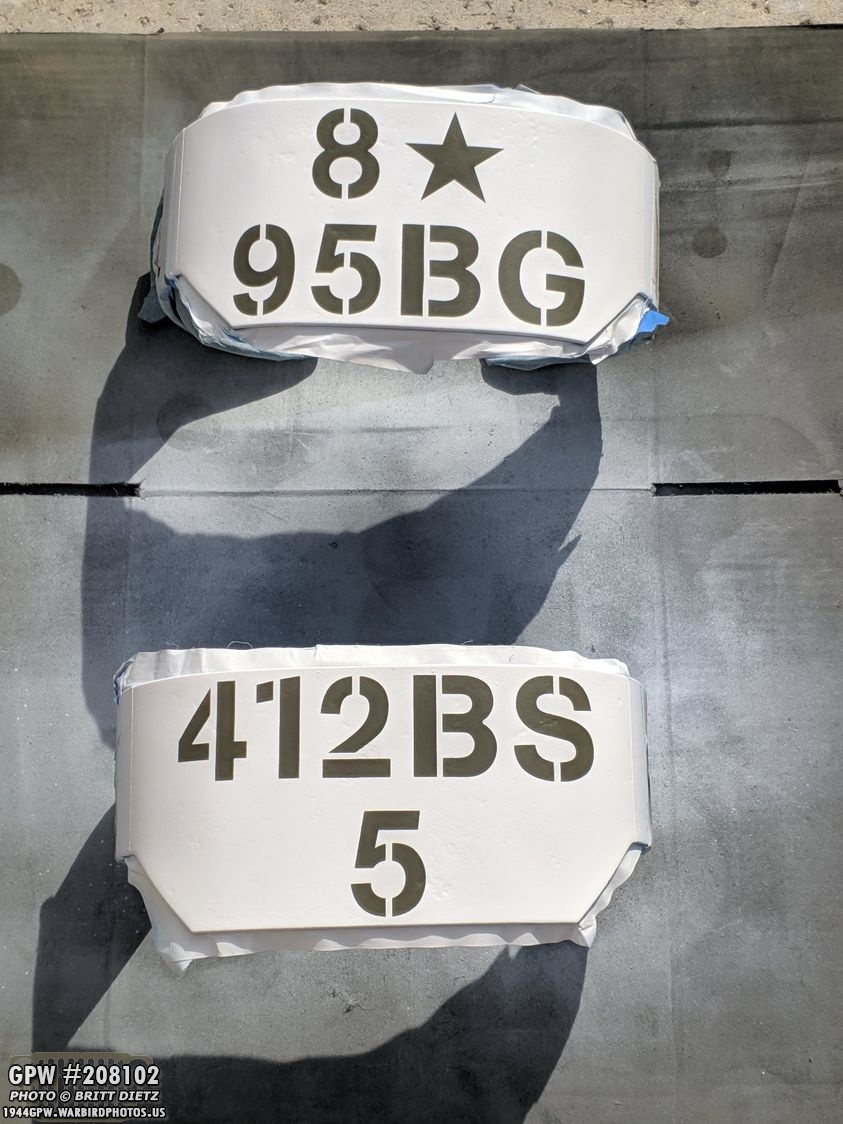
I ended up putting two light-ish coats of OD Green paint on them. I know, you might be thinking… ‘wait, aren’t they upsidedown and the wrong order of colors? Shouldn’t it be white lettering on OD Green?’ Well, this Jeep is going to be an Army Air Force Jeep. As such, most AAF Jeeps had upsidedown bumperettes that had white painted on them with OD Green lettering.

Here’s a close up of the OD Green on the stencil. I waited till it was almost dry to the touch before adding the second layer. This spray 33070 OD Green from Ron Fitzpatrick Jeep Parts dries really quick! After it was dry to the touch, I went ahead and removed the stencil which was super nerve-racking. The result…

It came out GREAT! There’s only two little spots that there was a pitting right on the edge (on the right side of the star, and the bottom middle of the 9) that allowed some OD Green to get out, but it’s pretty darn good. I can manually touch up the white for those two spots. Technically in WW2 these often had overspray as they didn’t care even a fraction of a perfect paint job as we do today when restoring these. Slap on a stencil or paint it by hand and go on to the next Jeep.

I then removed the next stencil. That one had more pitting, so the 2 had several spots that had some OD Green come through… but again, I can manually fix these spots with white paint. All that’s left, after fixing the spots, is to put a clear matte protective coat over both the white and the lettering to protect it.
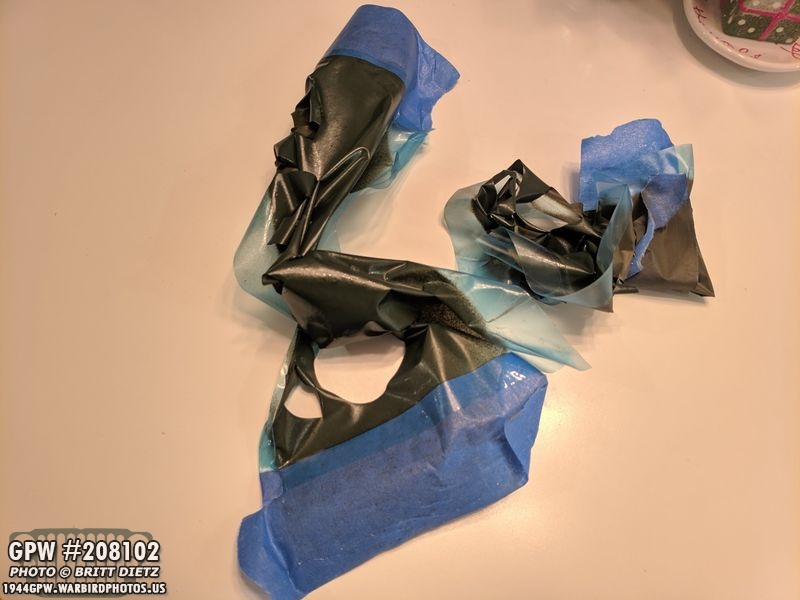
And this is why the stencils are one-time-use. Peeling them off, being careful to not take the paint off the lettering, means mashing it up.

Here the bumperettes have two light coats of clear matte overspray (they are still wet from the fresh paint, thus the shine). This overspray, which I also put on the white front bumper tips resist yellowing as well as the white, protects from UV light, and protects the paint underneath. It also cleans dirt and grease much easier in my testing!
Once both dried, and this matte overspray dries fast, it was time to remove all the masking!

I forgot to take a photo of them without the masking, but after the final matte coat dried, I went ahead and installed both of them back onto the Jeep! They look great and really give the Jeep that extra something.

Here’s another look. So, what does it mean you say? Read in order it is 8th Air Force (8 Star), 95th Bomb Group (95BG), 412th Bombardment Squadron (412BS, could also be 412SQ, but BS was more common), and Jeep #5. Why 5? My favorite number so went with that. Next question… why the 95th BG and 412 BS?
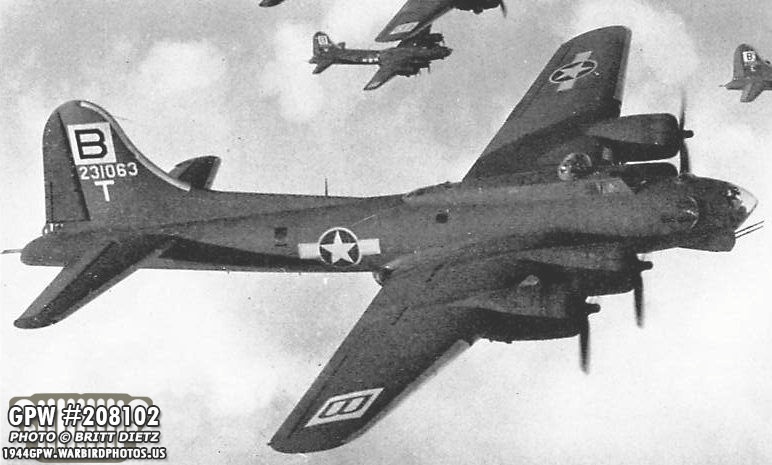
Naturally, I wanted to do an Army Air Force Jeep because I’m around aviation a lot. I hope to take the Jeep to some airshows, so it’ll fit right in. I’m a huge B-17 fan, so picking a bombardment group was the next step. The 95th BG was chosen, actually, because of one mission on March 4th of 1944 (ironically before my Jeep was built). They were one of the few squadrons to hit Berlin in a daylight raid for the first time… but they don’t get much credit. The 412th took part in this raid as pathfinders for the mission. The brief story goes, the large bomber force was approaching Berlin and the weather got worse. Mixed with confusion over fake German messages making it sound like they had recall orders to return back, much of the bomber force turned around and headed back for home. But 31 B-17s of the 95thBG and 100thBG decided it was fake and they were going to go for it anyway. They hit Berlin with minimal fighter escort (most had turned back as well) losing 5 bombers. While it was technically the first strike on Berlin by the USAAF, March 6th is considered the first strike because the entire force was able to attack. This photo is a 95th BG 412BS B-17G.

In my extensive (and I mean EXTENSIVE) research on Jeeps in the USAAF (hard to find many good photos of AAF Jeeps), this is the ONLY photo I’ve found from the 412th BS that shows a Jeep from the squadron. This is the 412th Commanding Officer Harry Griffin Mumford. I’ve used this photo, which really doesn’t help much other than the font for the hood serial number (which is pretty standard for AAF Jeeps). Some times in AAF service, as in this photo, Jeeps had their shovel, axe, jerry can and holder, and spare tires removed for ease of crew members able to pile on the Jeep. I’m keeping them on just for the visual aspect.
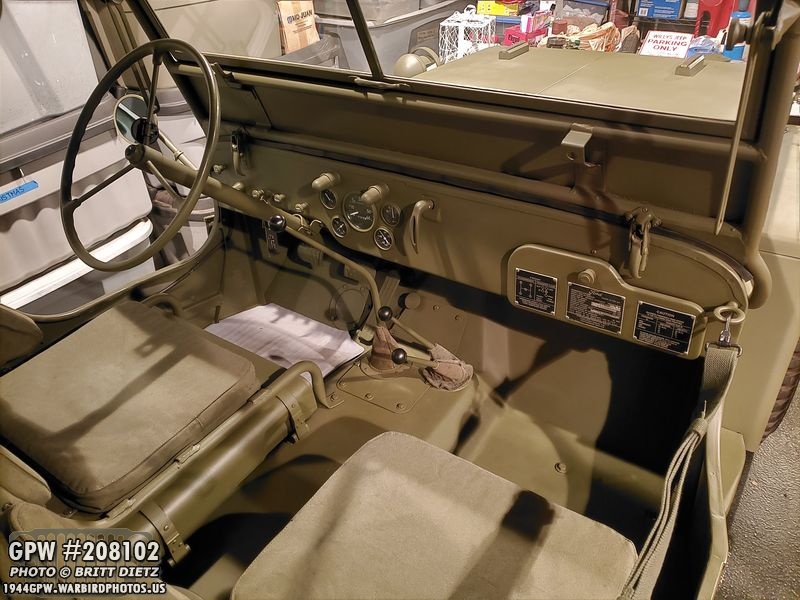
Now that you know why I picked these particular markings, let’s get back to the Jeep! Here’s a look at inside the Jeep as of 12/9. I still need to re-add the ring around the transfer case shift levers. I also need to replace the floor mat with an OD Green one. Just helps to keep the Jeep clean. Trying to keep it as clean as I can until I can do a professional photoshoot with it once I completely finish the restoration.

I decided to get some photos of the Jeep from various angles, as I do time to time. Not just as historical documentation for the Jeep, but also so I can digitally place markings in photoshop to aid in applying them, which I hope to continue with soon.

Driver’s side view. I always like this side view of the Jeep. One note, I realized after I drove it last weekend after it had rained, it splashed sand and dirty water all over the Jeep. It took about an hour to clean it all off. Doh!

And a look at the passenger side. It looks plain without the axe and shovel.

Looking at what markings are left to be applied… the large national insignia star (red arrow), the USA and serial numbers (blue), and the front bumper lettering (yellow) which is the same as the bumperettes, but all on one line and with an extra star.

I will eventually have the name of my Jeep and a George Petty pinup here on the windshield.

Finally, I have a smaller star to add to the rear of the Jeep above the rear handle on both sides (red arrow). Another project I want to do is take the axe off (green arrow) and try to restain it a few more times to get it to match the darker shade on the shovel better. This might include a heavy sanding since the previous stainings didn’t seem to take.

A project that I’m saving for next week as it’s just getting started is I received a new oil filter. This is a used take-off filter, original WW2. The one I have on the Jeep now either has the wrong lid or the wrong canister as the lid will not close completely. This new one does (YAY!) but requires a full restoration, which is something I really enjoy doing.

Switching away from the Jeep, something Christmasy I wanted to share was this ornament that I got in Bayeux, France during the 75th anniversary of D-Day earlier this year in June. I was able to hang it on display with the tree! It depicts the paratrooper drop at St Mere Eglise.

And, of course, here it is with a 1943 Ford GPW Jeep ornament that was released in 2018 by Hallmark.

Finally, to finish this week’s post, I wanted to share a shirt I got in! Those of you who have followed along and read my excitement to finding F stamps on the Jeep (or those that own GPWs) will enjoy this shirt. It has my Jeep’s serial (208102) and date of birth (6/26/1944). That’s it for this week! Till next week…