 Repro Tub is here!
As mentioned in the previous quick update, the new MD Juan reproduction tub kit has arrived! With it comes some interesting discoveries, some good news, and some bad news. Plus, it brings a few headaches. This update I’ll compare the new repro tub with the original GPW tub and contrast the challenges I have ahead! Plus some other small projects I’ve done over the past week!

The MD Juan crate is loaded onto a uhaul truck to take it home! Thanks to Tom Goodhope for the assist with his truck for towing! It took a bit of work getting the awkward crate into the trailer (there’s a cheap wooden pallet that’s attached to the bottom of the crate in the middle)

The crate has arrived at the house! Ready for unload and dismantle to fit it all in the garage. Thankfully I cleared up a bunch of room.
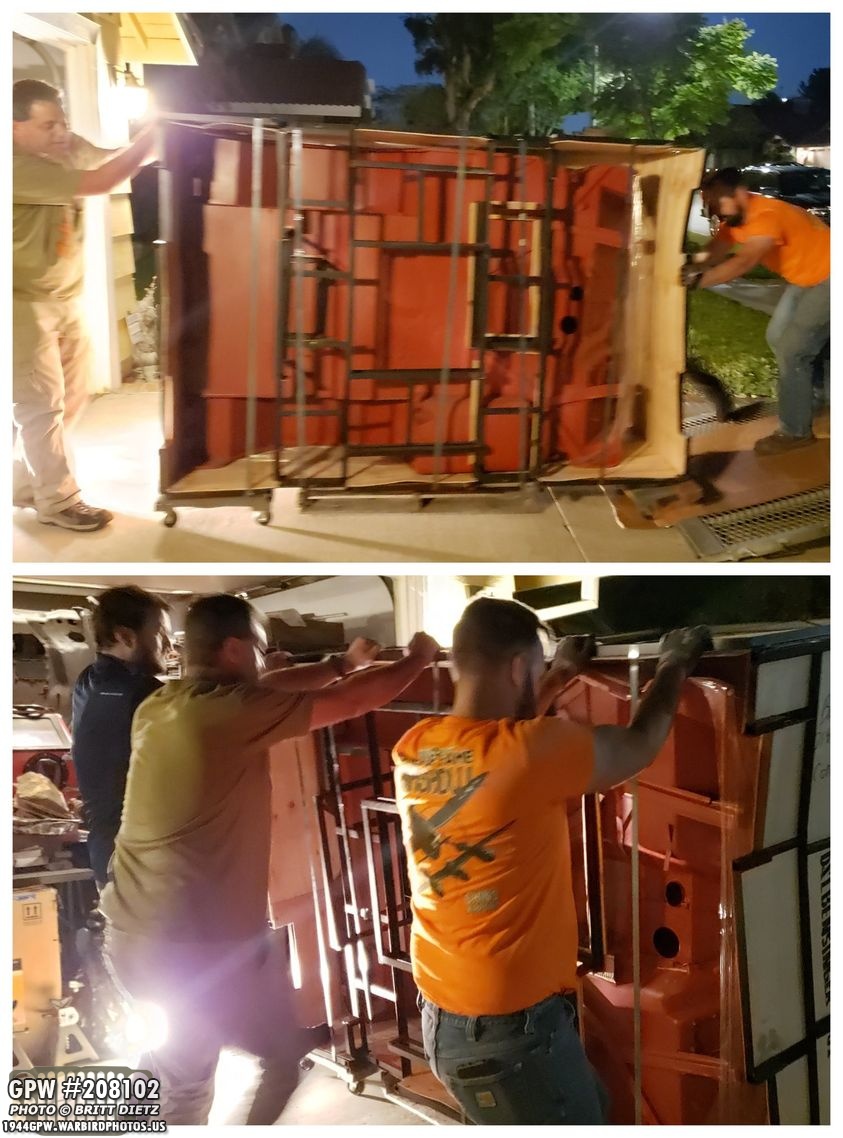
Tom and I, along with my neighbor Nick, got the crate off the trailer a lot easier than we had to go through getting it on (thanks to some large dollies). Once it was off the trailer, we turned it over to sit flat (the bottom shot) and started to dismantle the entire crate and unpack everything.
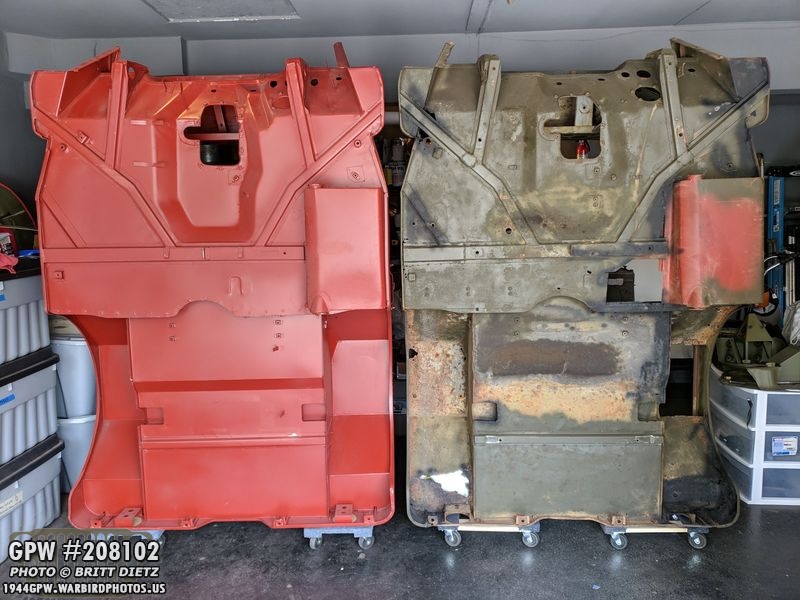
Here’s a look at the differences between the MD Juan reproduction tub (mid-series GPW) and my 1944 GPW’s original tub. The fuel sump on the original was replaced at some point. And I’ve hit the original with some anti-rust black spray paint in the worst rusted areas. Here’s the bottom of the two tubs compared side by side.
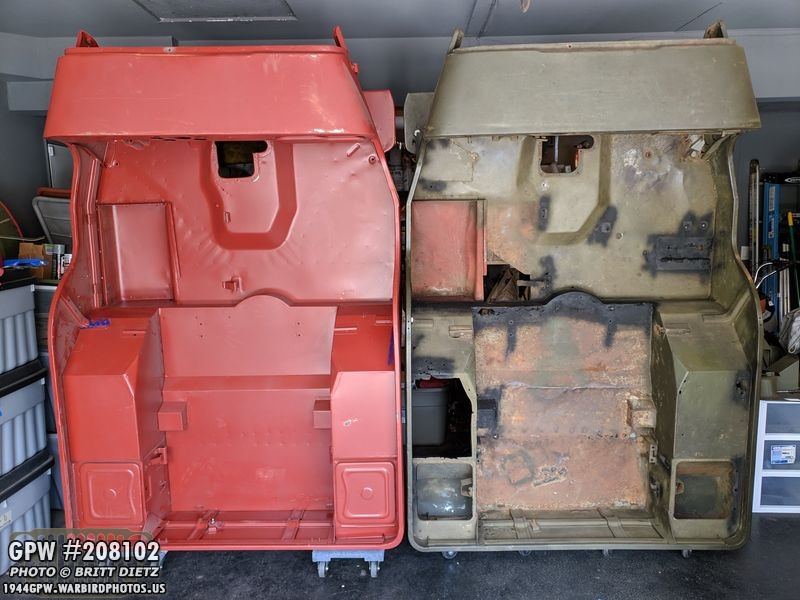
Here’s the inside of the tubs compared. There are notable differences I’ll get into in a bit…

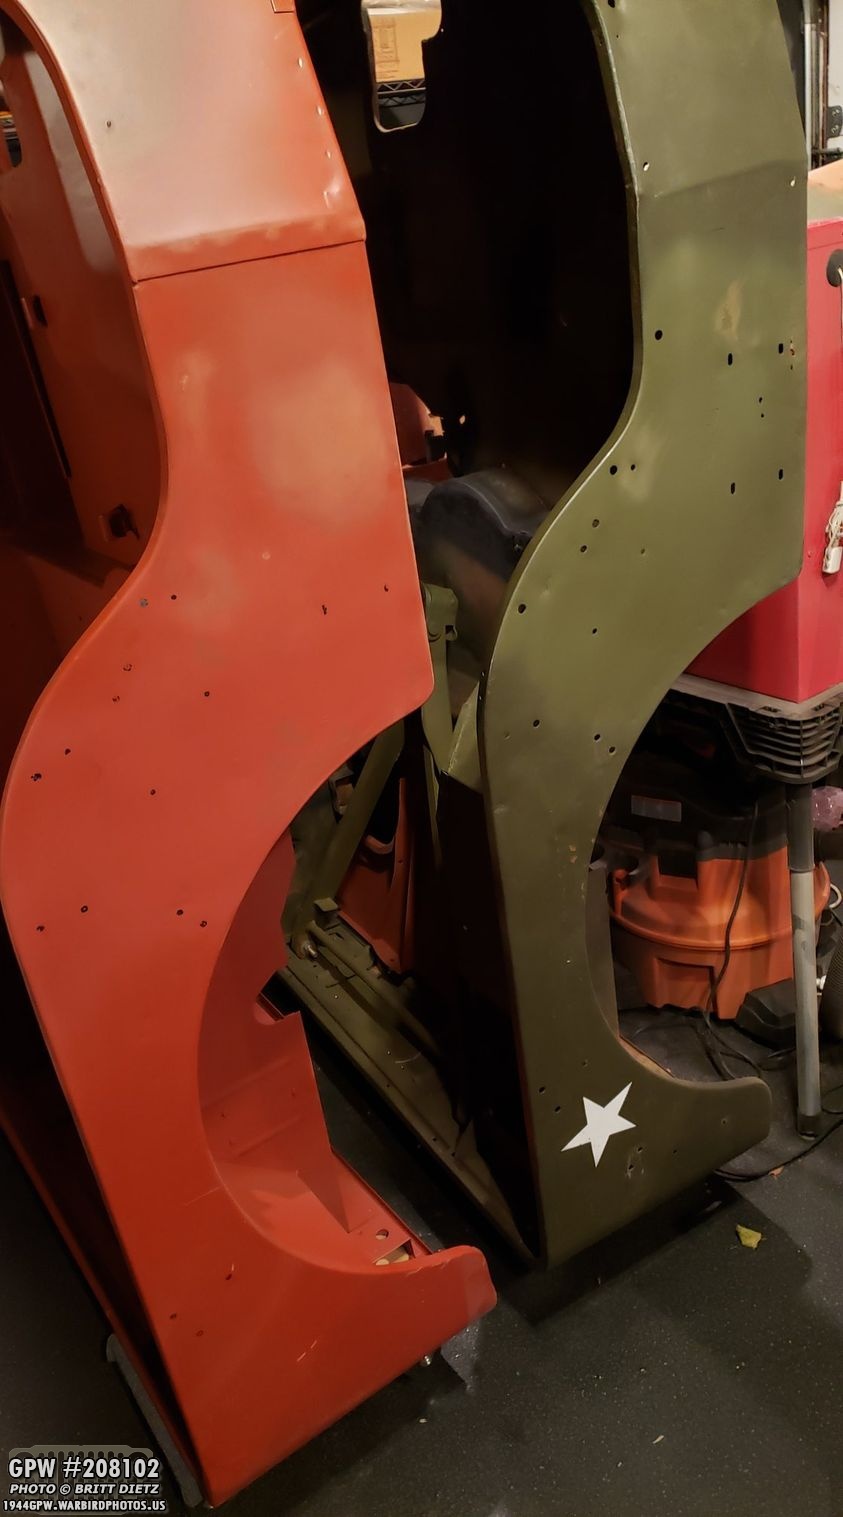
Here’s the driver’s side of the two tubs. You can see, some of the hardware/holes are already there, but many of the holes (mirror, half door sockets, forward axe bracket, top bow brackets, handles, crash pads, and reflectors) will have to be drilled. I was surprised at all the accessories that the kit from D&L Bensinger Military Vehicle Parts came with. They offer a lot that’s included with the MD Juan crate.

Here’s a comparison of the passenger’s side, where ALL holes will need to be drilled. That’s going to take some time. It did make me realize that the passenger side was repaired at some point on my original tub, you can see that difference where the ‘crease’ between the top and bottom parts of the side of the Jeep meet.

Here’s a look at the dash, thankfully everything was pre-drilled! Pretty darn close on both of them!

A look at the glove box section, again really close. And the repro tub came with a glove box door.

A look inside the dash, the emergency brake bracket and the circuit breaker bracket. Quite a bit of overspray on the new tub with the primer, but I don’t really need to fix it since it’s inside. I might attempt to sand it a little.
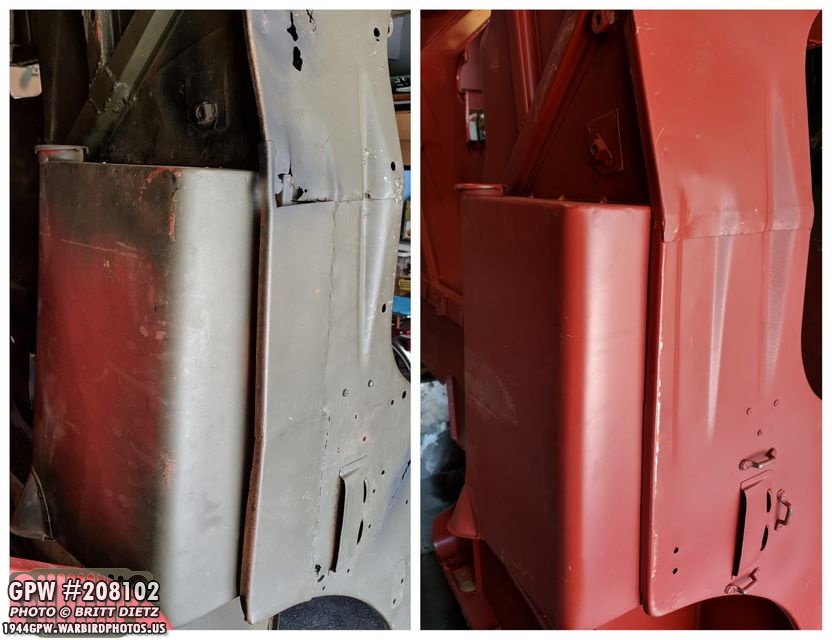
a look at the two fuel sumps and pioneer tool side panels. My original tub was fitted with an incorrect bottom corner panel, which is very evident here. It was neat they added the little footman loops around the axle blade cover.

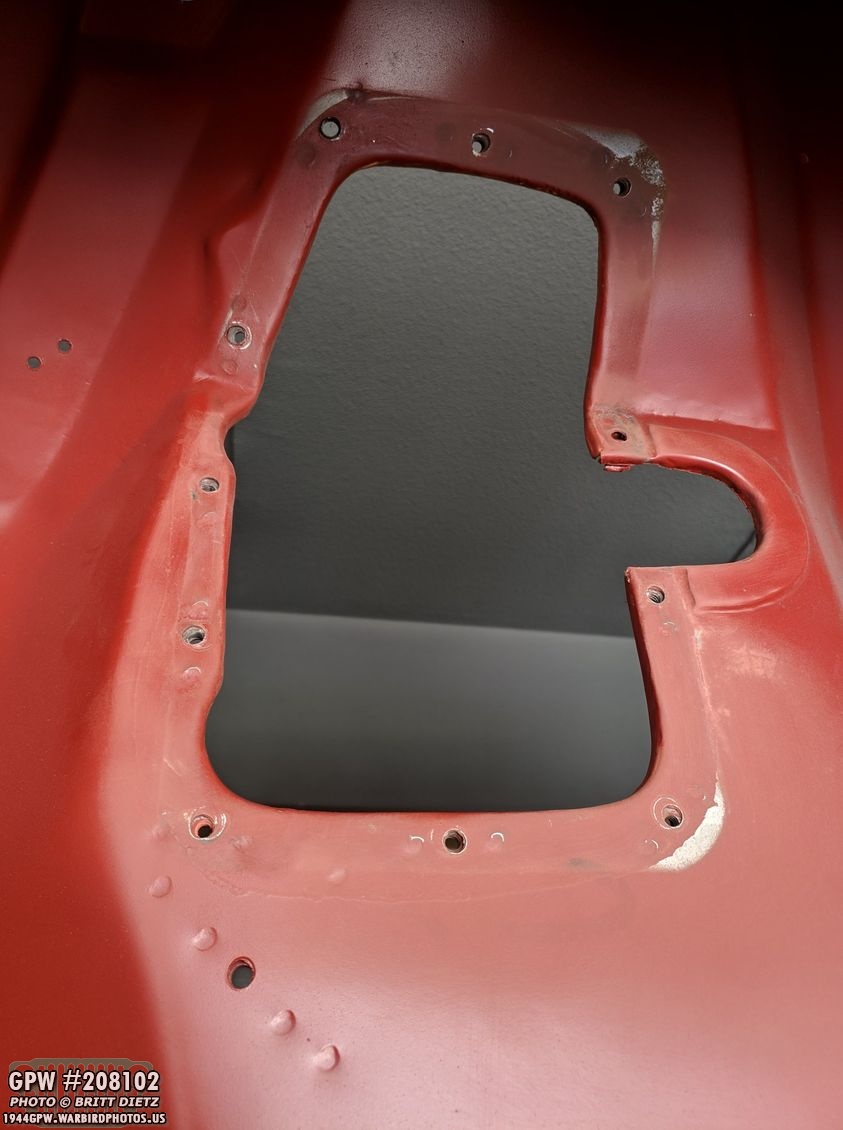
Here’s where I noticed my first difference… and it turns out it’s actually my original tub that’s technically wrong! This is the support and spring system for the rear seat of the Jeep and also that recessed area is where the button to open the toolboxes is located. Ford GPW Jeeps are supposed to have the triangular spring bracket and a rectangular recessed area for the glove box button. My original tub, turns out, is a ‘composite tub’ done later in the war where Ford used some Willys designs… like the glove box circular recessed area and a box spring bracket. So, I guess, a win for the MD Juan tub being true to the Ford style!

A look at the inside of the tool boxes. Again, my original tub had the Willys style for attaching the tool box button/lock. Also you can see I’ll need to drill the holes for the trailer socket, but the main large socket hole is already removed. The rear of the MD Juan tub also has all the holes for the footman loops to attach the canvas top drilled already, so yay on that!

Another major difference is the fuel tank ‘support/rest’ bracket. This helps keep the fuel tank in place under the driver’s seat. On the back of the bracket (looks like a slide) is a clip for the fuel tank hold down straps. On the original tub, it’s really long while on the repro tub it’s short. This may be another composite tub thing. You can see the large section missing out of the original tub.
One area that I was a little disappointed in was the primer quality control on the transmission cover. The cover and all the screws were included (it’s been taken off to check everything), but as you can see, the primer wasn’t painted everywhere, so there was a little rust (perhaps from the boat ride over) on the metal areas. Nothing that some sanding/wire wheeling won’t fix, but it could have been avoided with better primer painting.

Speaking of that cover, here’s another instance where there’s a difference. Painted in OD Green is my original transmission cover while the res is the new reproduction one. You can see there are major differences here. The main hole for the shifter is way different and the screw holes don’t line up. I may just use the reproduction one because it lines up with the repro tub the best (though my original one will probably work once screwed in). Once we get the repro tub on the original frame to check everything, then I’ll be able to check and see which one fits best.

Another thing on the new tub that will require some work is the electrical spot welding marks. Nothing a little spot filler won’t fix.
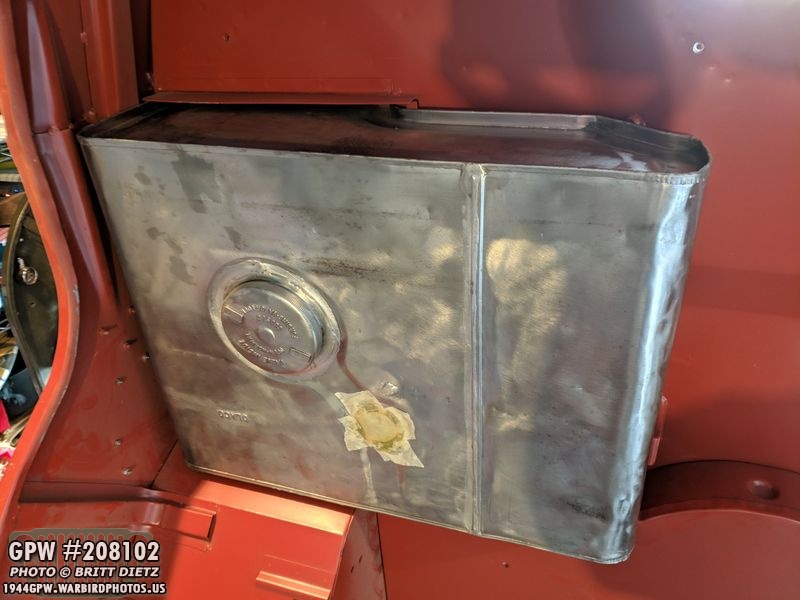
One thing many people complained about with the older MD Juan repro tubs is that the fuel tanks don’t fit. My original OLACO fuel tank fit nice and perfectly! Yay! I will, however, have to drill the hole for the fuel lines under the body to connect to the tank.
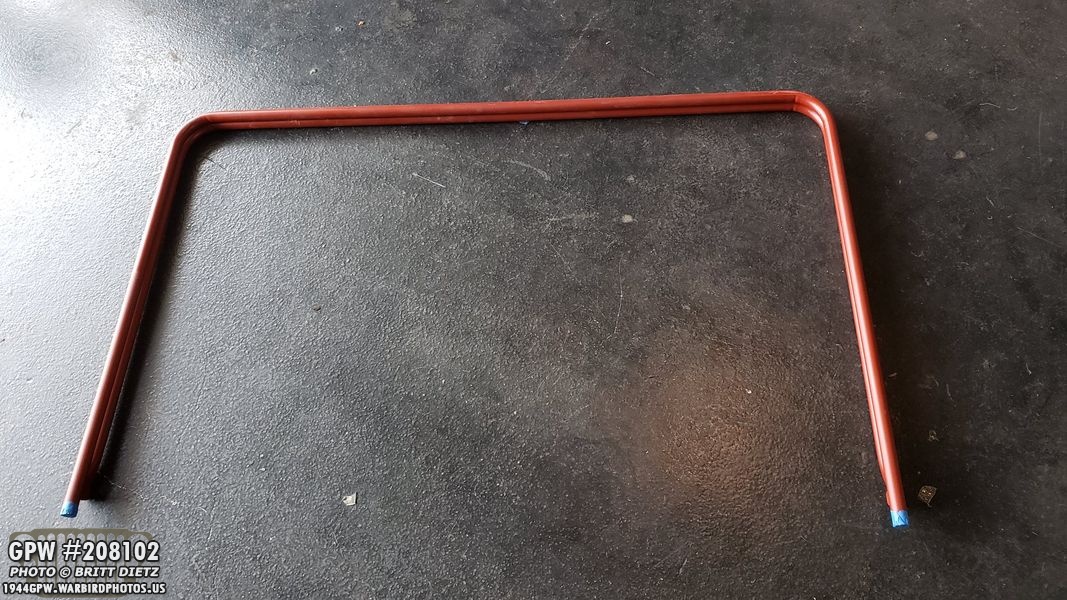
One of the main reasons I purchased the tub kit instead of the tub only (and from D&L Bensinger Military Vehicle Parts instead of anywhere else) is because of the top bows that came with the set. These top bows can be expensive not even factoring the shipping costs. They are large and cumbersome, plus they can’t be broken down for shipping. These are the bows that hold up the canvas top of the jeep. Happy to have them!

The kit came with a lot of extras, more so than I realized. Aside from the top bows, it came with an almost complete windshield (just missing the glass), left and right fenders, grill, and hood (not shown). They were all inside the body tub packed nicely.

The D&L Bensinger Military Vehicle Parts version of the kit came with more extras. Sadly, I have purchased almost everything in this kit over the last few months (doh! Hindsight is 20/20 though…) so I’ll end up selling off or trading much of the items I don’t need. Included was 2x hood windshield braces, 2x safety strap clips and bolts, 2x top bow brackets & hardware, 4x handles (middle & rear each side), shovel head bracket, two floor O-rings for the tub, and the rear axe hold down bracket. What I was able to use was the front axle handle hold down bracket that I hadn’t gotten yet.

I already got a reproduction glove box door from Mike when I bought the Jeep from him. The original door is unrestored with the original data plates! He and I both wanted to preserve that and put on a repro door with repro data plates. The one he gave me I had sanded, primered, and painted OD Green and it was ready to go… but it turns out the hole in that one isn’t large enough for the push button. BUT, the MD Juan door that came with the new tub it’s a perfect fit! So I’ll be using that door instead. But, you can see there’s some imperfections on the bottom…
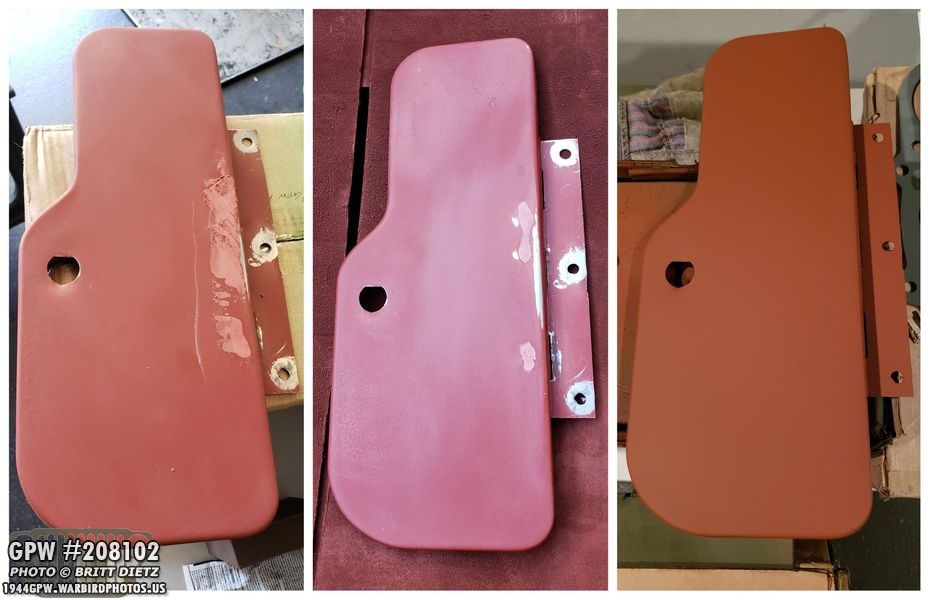
The MD Juan door had some issues with the welding and not the best job with the primer (they painted it when it was already attached to the tub). So I added some spot filler, sanded the entire door on all sides smooth, and painted it with my primer. Much better! Just needs OD Green!

One of the additional items I ordered with the crate (if you remember from my last update, I brought it home early) was a new GPW front bumper! Here it is test fitted with the correct mounting hardware (also that came with the kit). This is the first time this Jeep has had the correct top gussets and front bumper in probably a long, long time. Looks awesome!
I even splurged and got repro F stamped hardware for the front bumper because it will be so visible.

During one slower evening, I put together the entire horn bracket system to test how everything fits. It all fits really well! The green bracket will install on the firewall of the tub. Took a bit of research to figure out exactly how it all comes together.

Another item that came with the MD Juan D&L Bensinger Military Vehicle Parts kit was the windshield to dash mounting hardware. My hardware was bent a bit out of shape, so I decided to use these. I needed the dash mounted hooks for the new tub anyway, because they are impossible (without cutting) to get off my original tub. Here they are getting some primer.

More items that came with the kit getting primer… the brackets to connect the tub to the frame in front, the tire pump hold down cupped bracket, the windshield to dash hardware, and the front bumper bolts all getting more primer.
These two tubes go around the long bolts for the front bumper to protect the bolts. The bolts at top are the glove box door mounting bolts. All getting primer.
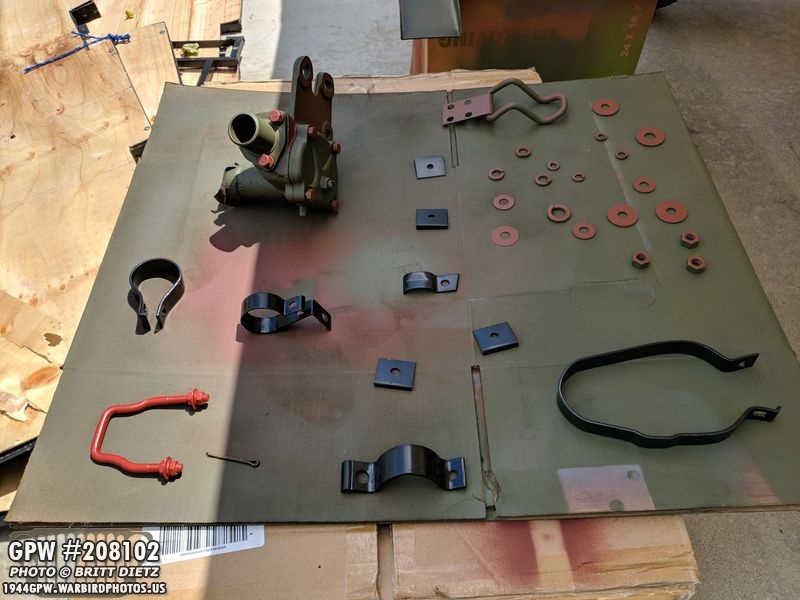
Next day, I had a little bit of sunshine and was able to (after setting up the canopy to block the wind) hit some things with OD Green on the spray gun. Here’s an assortment of items from the steering box, rear axe hold down bracket, hardware for the steering box, the new muffler clamp kit (black items), and the front axle hold down U bracket before being painted.

All painted with a first coat of OD Green. Some items only need one coat, but the steering box will need another coat.

I also took the time to paint the front fender, and both fuel tank hold down straps. The bottom strap has the welting and rivets installed, it just needed some green touch up where the rivet heads are.

That front bumper sure looks nice painted! It’ll need another coat before I start to apply Army Air Force markings on it. And the steering box looks like some sort of Ford made movie camera!

I also touched up the frame with some more paint. After that dried, I used armorall foam spray and cleaned up all the tires. They look good now!
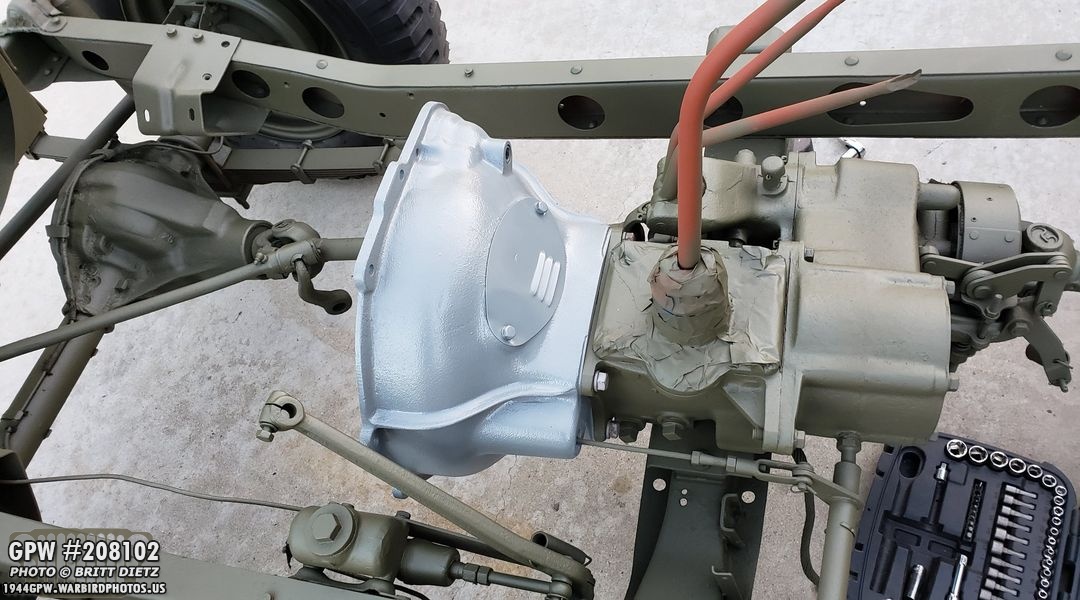
Remounting the engine to the frame step #1… reinstall the bell housing! With my girlfriend’s help, we carefully reinstalled it back on the transmission. Wasn’t an easy reinstall and took a little bit to get it flush on there. Note – the shifter and other levels are painted in red oxide primer again because we scratched them up pretty good while trying to put the repro tub on the frame to test fit. We encountered some issues with the brake and clutch pedal arms, and that caused the tub to rub against the levers and really scratch the paint off.
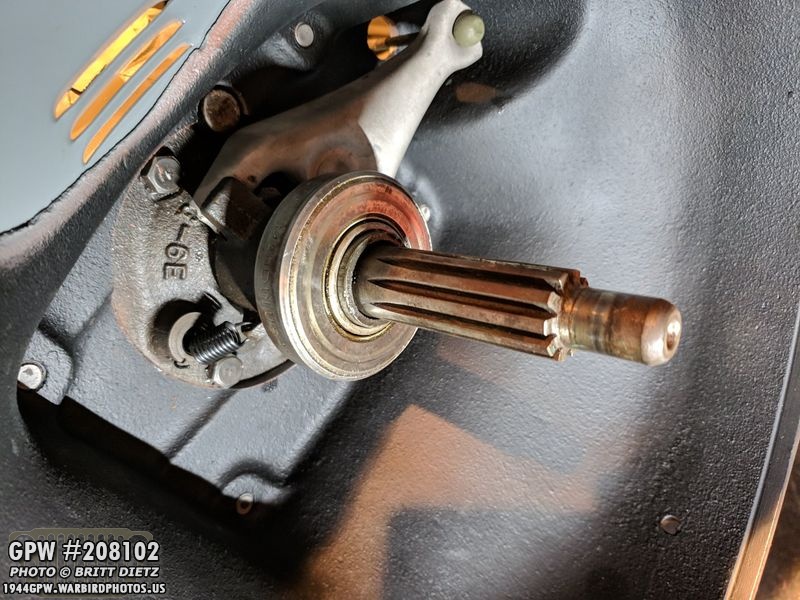
Once the bell housing was installed, it was time to reinstall the clutch release bearing carrier, Clutch fork release lever, and the Clutch release bearing carrier spring (which was a pain in the you-know-what to install). Added some grease to help lube up a few areas, and it’s ready to go! Next step for the engine, hopefully this weekend, will be taking it off the engine mount, reinstalling the flywheel, clutch, and pressure plate, then putting it back on the frame!
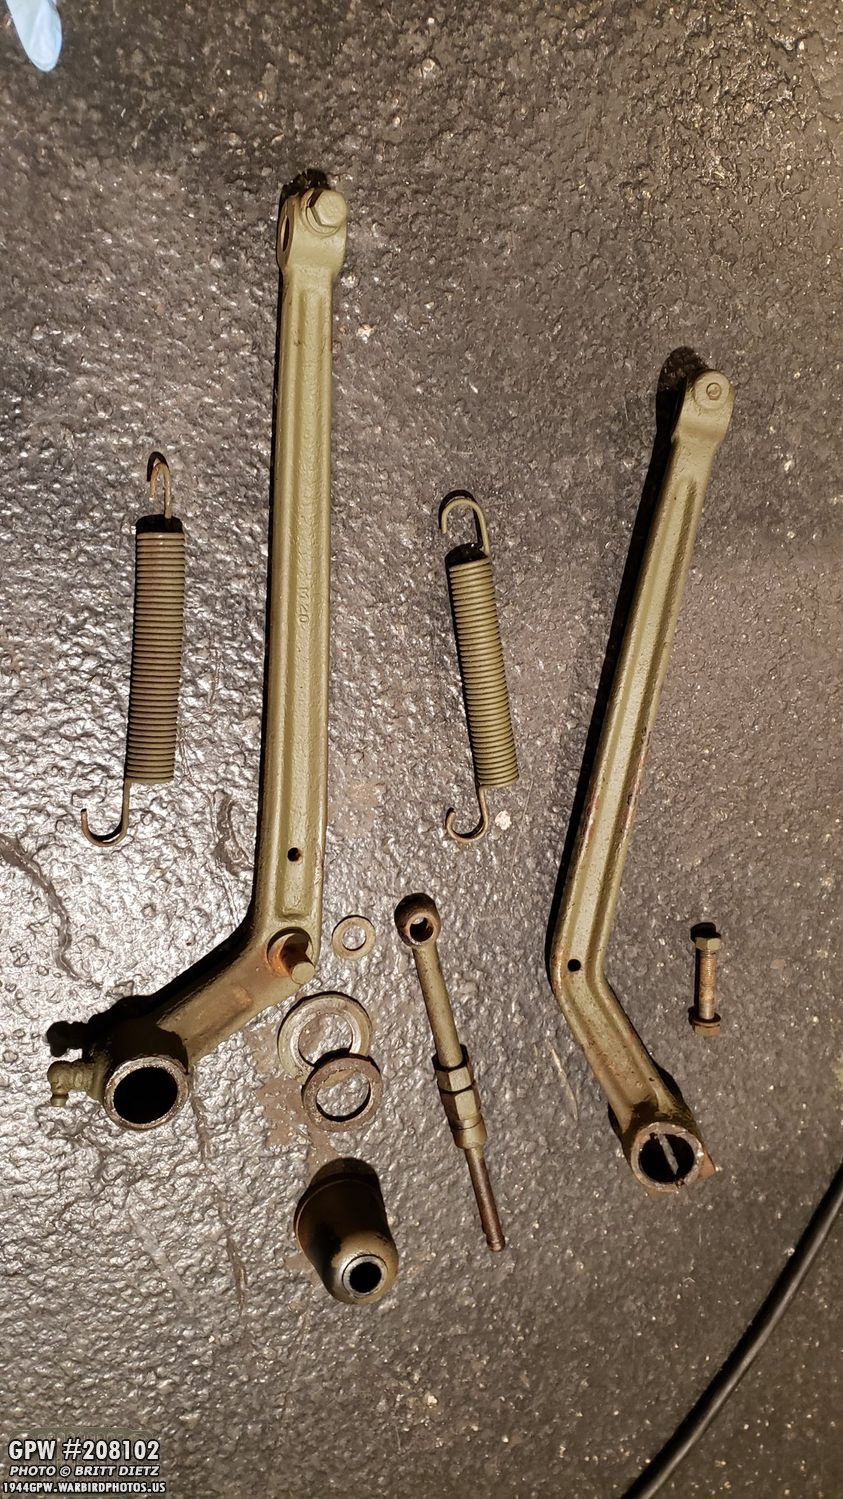
To help ease the next time we attempt to put the tub back on the frame for a test fit, I went ahead and removed the two arms for the clutch and brake. It was a bit of work, and broke two of the cotter pins in the process (no big deal). Here’s the entire system after removing it all.
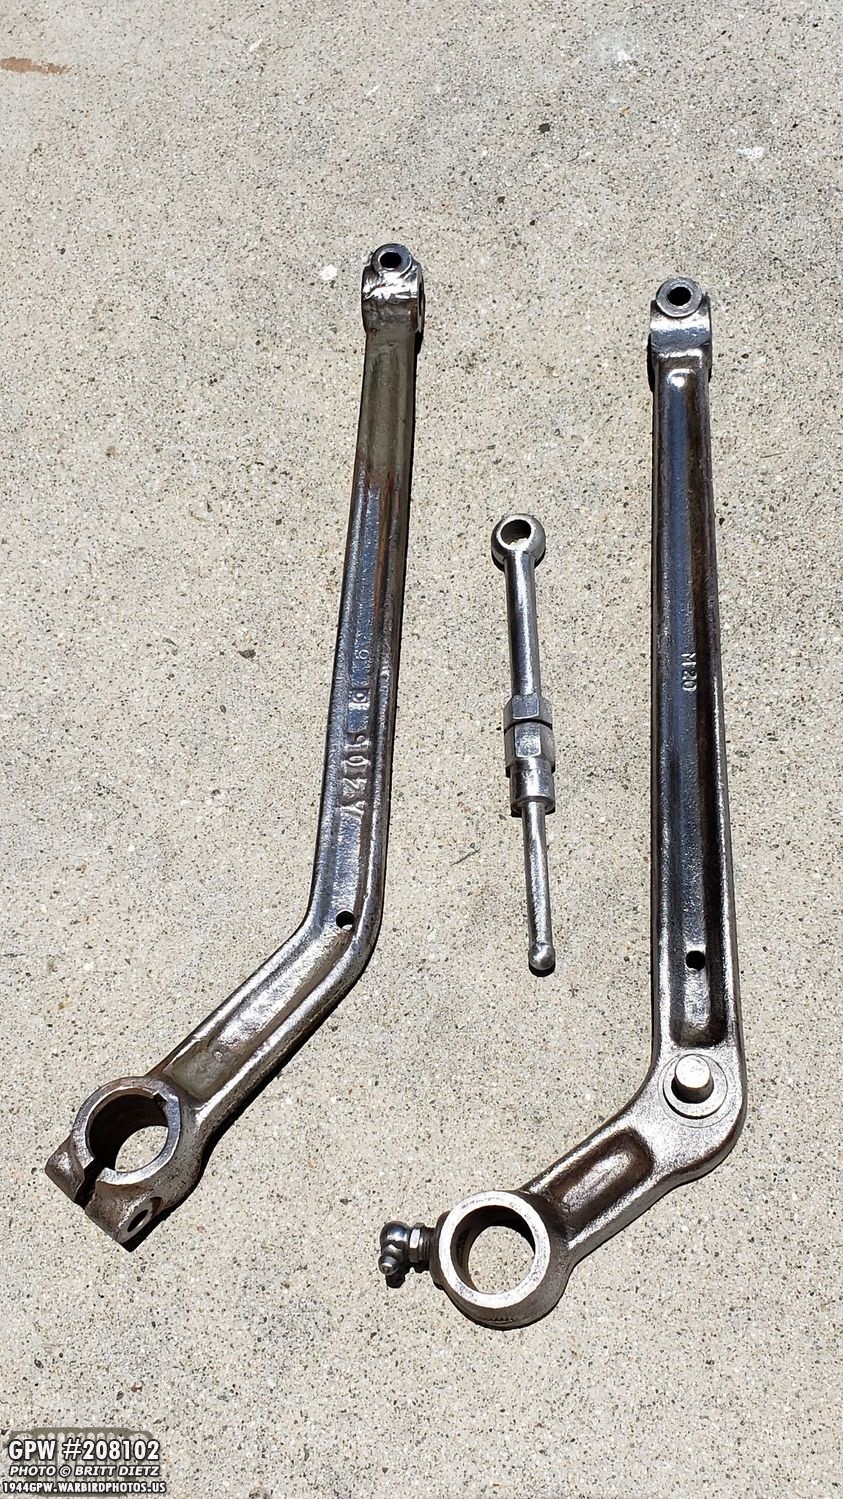
The brake arm has been completely wire wheeled along with the Master cylinder push rod. Still working on the clutch arm. I’ll prime both of these and paint them to look fresh while they are off.

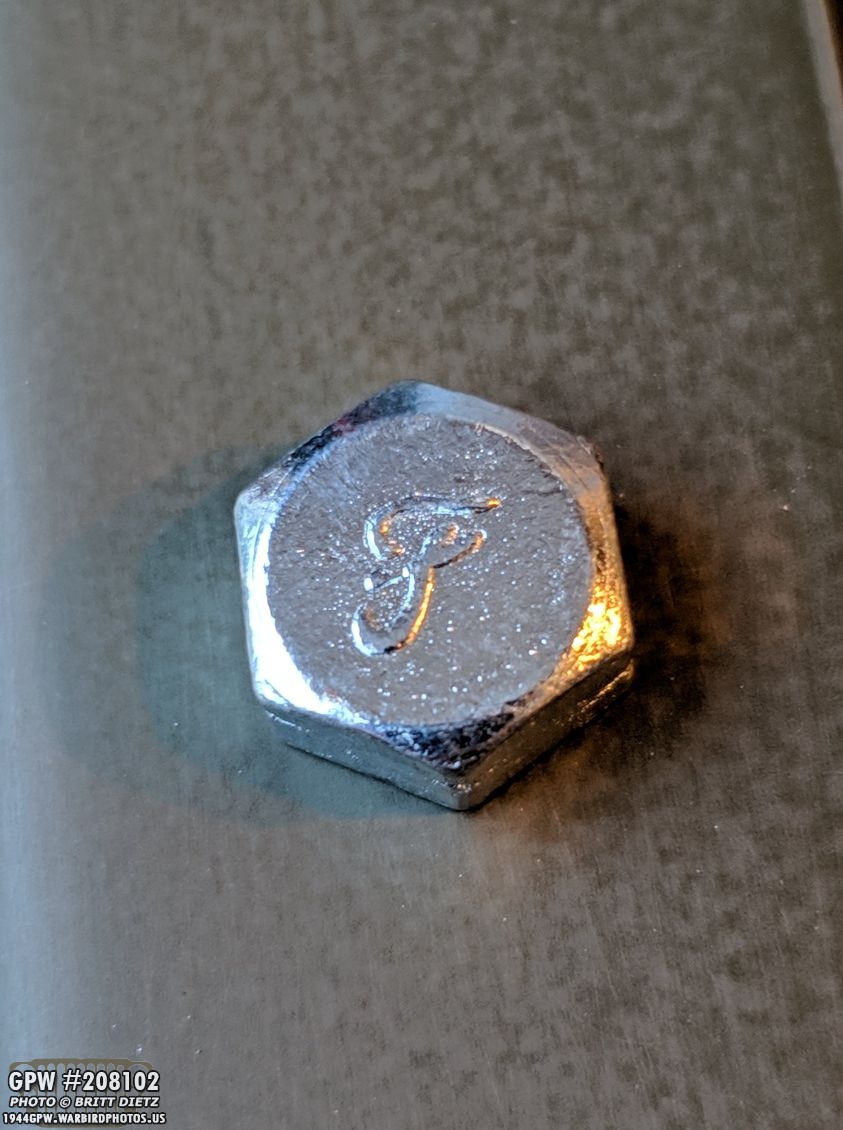
Wire wheeling the brake arm allowed me to get a nice shot of the original GPW number and F stamp.

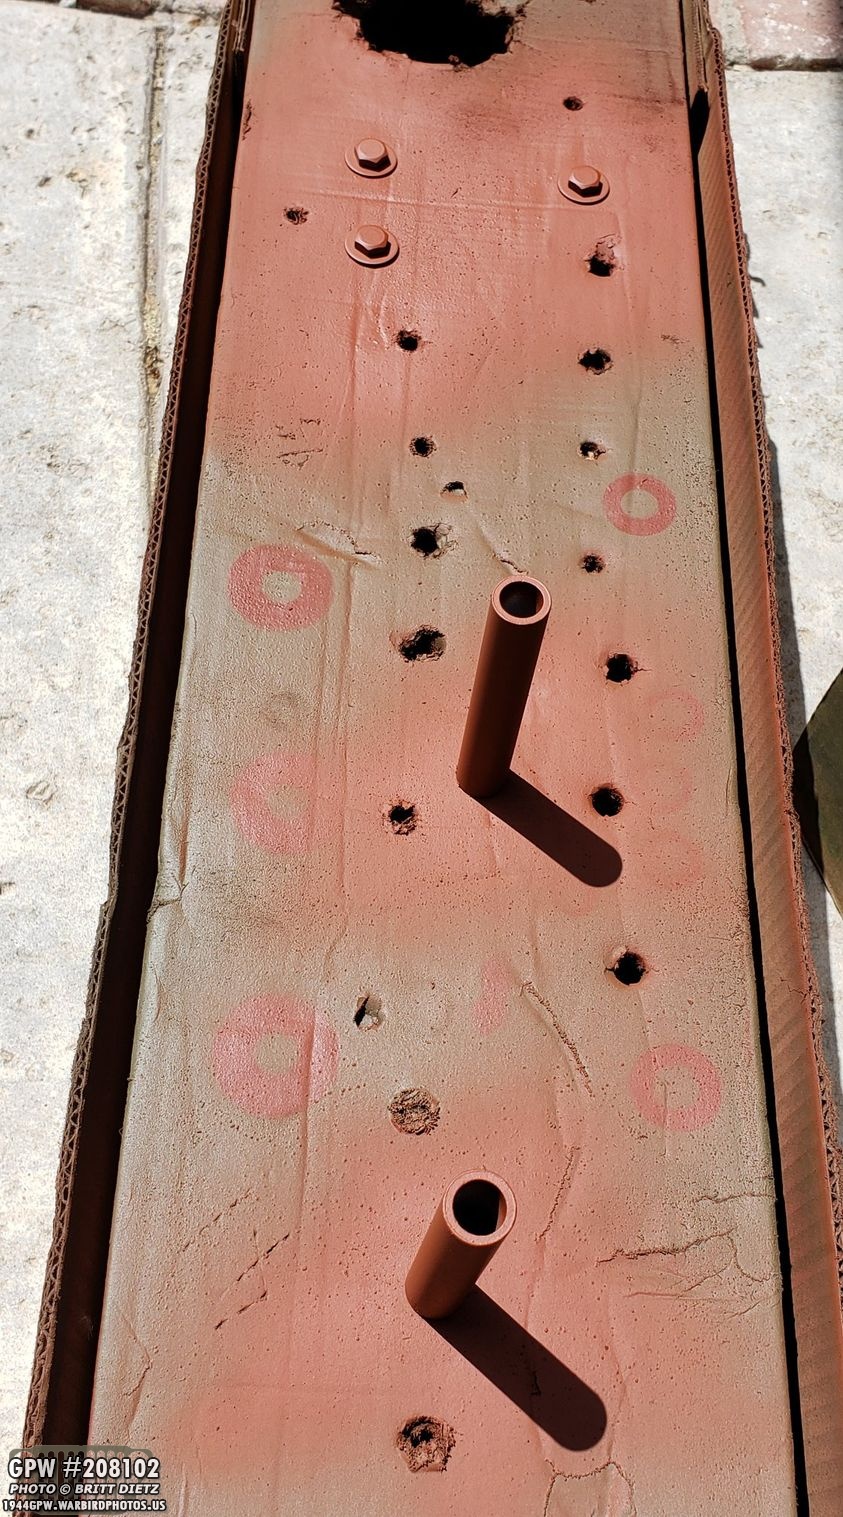
I started the process of drilling the many many holes that are needed on the new tub. My first thought was to use butcher paper and mark all the holes and panel lines, then move the paper over to the new tub, line it up perfectly, and mark all the holes as a starting point before manually measuring. This worked well in principle, but only if you have two tubs that are perfectly the same. Turns out, there’s a lot of slight differences in sizes on the new and original tubs. In some spots, it is perfect in both tubs, but in others, there can be up to a .25 inch difference. So this will complicate things trying to line up holes on both tubs.
This is after marking the holes on the new tub using the butcher paper. It may look like it all lines up perfectly, but it’s not close at all. This is going to be a major headache for the next week as I attempt to get all these holes lined up. And this is just for the passenger side! It’s going to be a process, and as they say… measure twice, drill once! Till next time!