 Flushing the Coolant System Part 2, TRS Shackles, and Coca Cola project!
This week’s update features Part 2 of a complete flush of the coolant system on the Jeep and the results, fitting bushings into the Torque Reaction Spring shackles, adding some more F bolts to the Jeep, adding the correct style valve caps to the tires, battery enhancements, and Part 1 of building a Coca Cola crate! Whew!

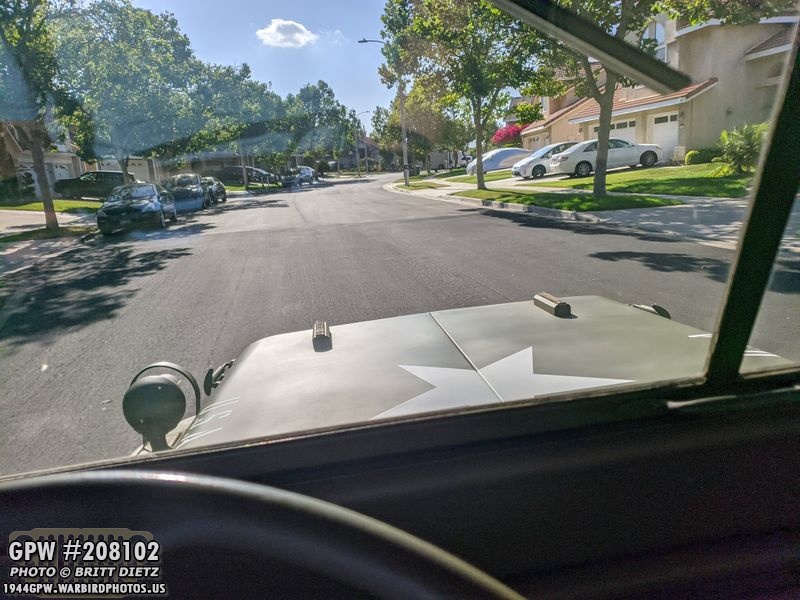
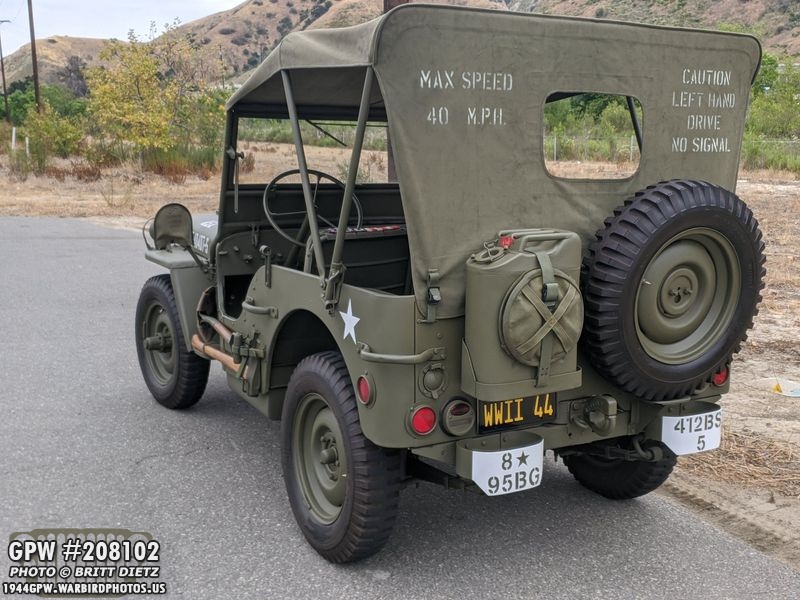
A low shot of the Jeep from June 6th last week! Makes the Jeep sure look mighty!
So last week, I started a full flush of the coolant system because I was constantly getting overflows from the radiator overflow tube, and the stuff coming out was staining the paint brown. So, I 1) drained everything out of the radiator and block 2) filled it back up with water, 3) ran the engine for 10 minutes, drained it again, 4) then I put the flush liquid in along with water to top it off.

I then set out over the next few days to drive 3-6 hours worth of time around the neighborhood. That’s where I left off last week. I continued to drive Friday morning for another 25 minutes. The idea is that while driving, the flush liquid is going through the system and breaking up all the crud and sediment that’s built up.

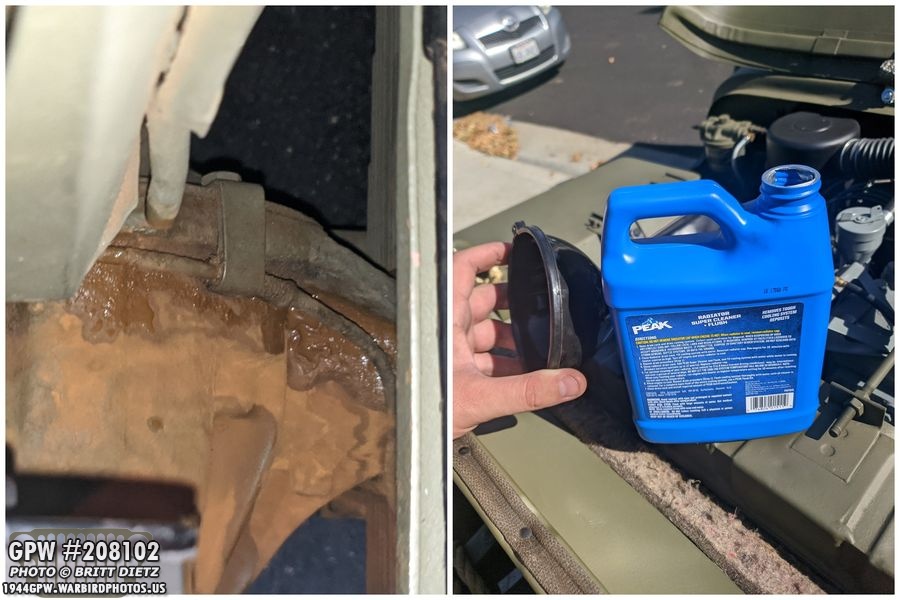
As a reminder from last week, during the multi-day drive I opened the radiator between one of the days after the engine had cooled, and was met with this grossness. The flush was doing its job breaking up all the gunk.

So Saturday morning, I did a final drive for around 20 minutes before it was time to start draining the entire system.

After the engine had cooled down, I opened up the radiator to see, still gunked up. Now time to drain!

After opening up heaven’s gate (aka the engine block), here’s what was coming out. Not as thick as I thought it would be, but certainly not clear as it went in!

In order to do a full flush, you need to get into the engine block, which you can only do by removing the thermostat. So first to go was the cross over tube. I plugged the first two spark plug holes with shop towels to absorb any water that might get on them.
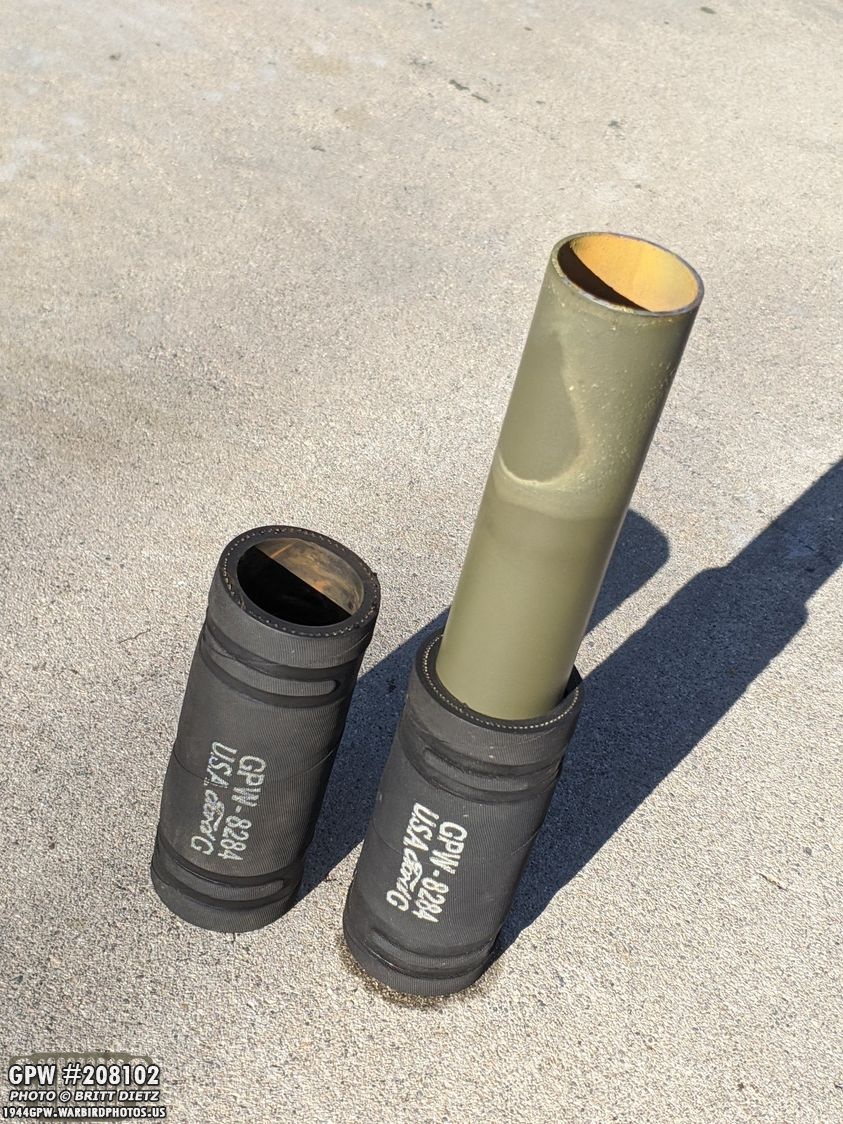
While the tubes were off, I gave them a good cleaning as they also had some build up from the sediment in the system.

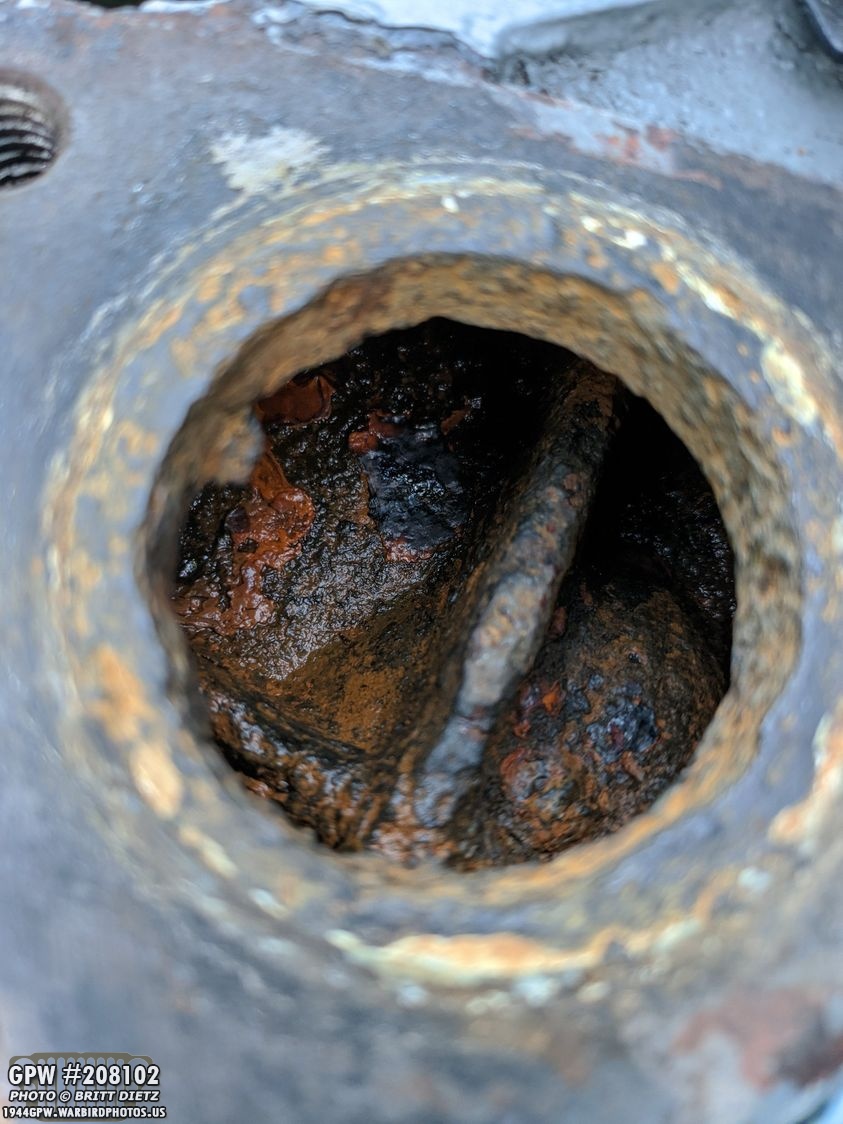
After removing the thermostat elbow, here’s what I saw… on the left is inside the elbow (which I cleaned out thoroughly) and then inside the block.
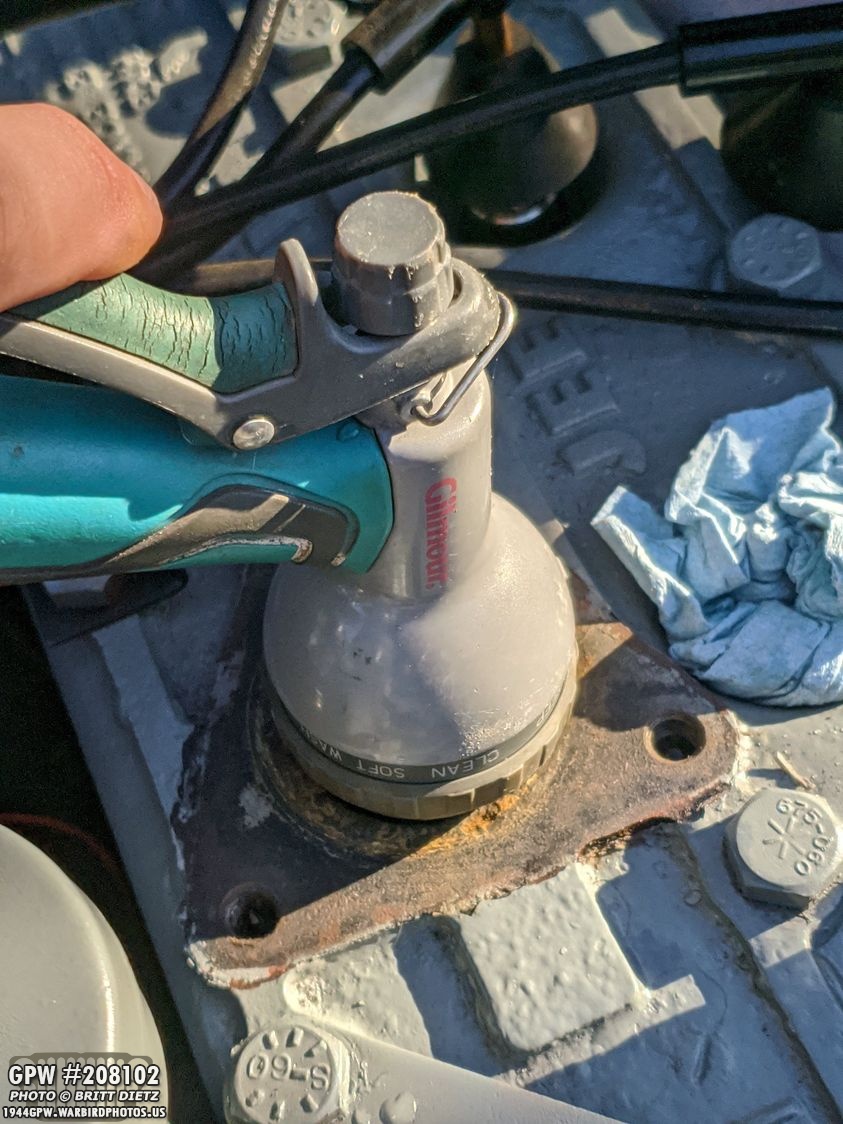
How do you flush out the block? Just like this. Put the hose into where the thermostat elbow was… but for drainage, you need to remove the cross over tube that goes from the water pump to the radiator… and I didn’t want to get all this stuff all over my engine bay, so I had an idea…

Last week I mentioned I bought this 2 inch tubing, which with a clip fit perfectly on the water pump. I got it about 5 feet long so I could run it under the Jeep to get the gunk away from the engine.

Here’s how it looks under the jeep with the tube (held in place with coolant jugs). With the hose spraying into the block directly, it was flushing throughout the block and coming out of the water pump and through the tube to the driveway. Once you start to see clear water coming out of the tube, the system is pretty flushed.
Now, looking back into the block, looks much better! Looks pretty clean, or as clean as I could get it after 10 minutes of flushing.

With the block flushed, it was suggested I put water back into the system and run it to make sure it was all flushed. So, I put some quick RTV gasket maker on the thermostat and just put it back on for the time being. After I do the next flush, I’ll remove the gasket (I have new ones ready) and redo it all properly.

Now the block has been flushed, it was time to get to the radiator… to flush that easier, I took out the radiator. First time it’s been out of the Jeep since the restoration last year!
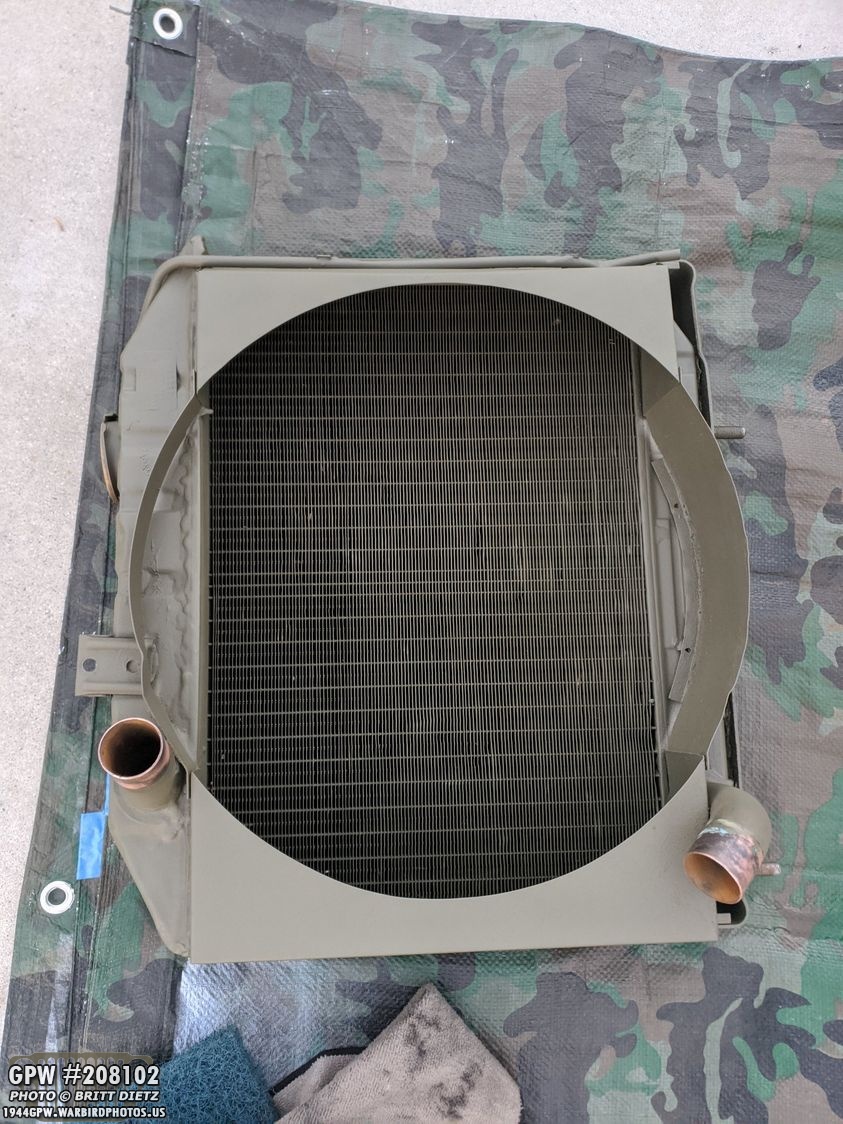
With the radiator out, I was able to put the hose into all three of the openings… the input tube, output tube, and the radiator cap port. I could also turn the radiator upsidedown to assist getting all the debris and crud out. A lot of brown build up came out, and I continued using the hose in all the ports until I was only getting clear water coming out. After it was dry, I hit a few areas with touch up 33070 OD Green paint.

Side note, it was kinda neat to see the engine through the grill, so had to snap a shot.

With the radiator flushed and the block flushed, I put everything back together as night fell. Since I’ll be taking this all apart again soon after one more run with water, I didn’t tighten things super tight (other than the cross over tube clips so it doesn’t leak).
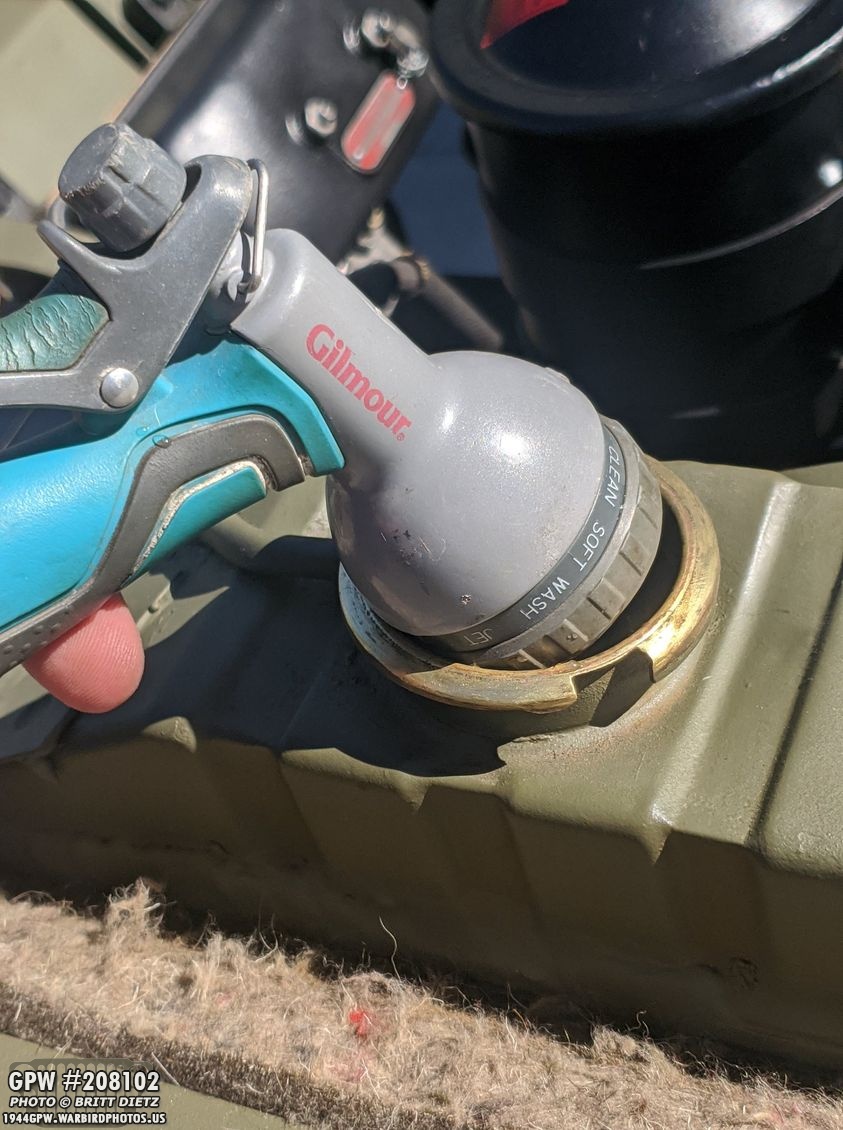
The next day, I filled the system with clean water.
I then took the Jeep for a spin for around 15 minutes to get the water circulating through the system. After getting back to the house, I let the engine cool down and it was time to look at the radiator cap and see how the flush did… moment of truth!

Success! Only water on the radiator cap and in the radiator itself! Compare that with the bottom when it was in the middle of the flush. I’m going to call this one a complete success!

To double-check, I drained the block of the water to see how it looked, and I’d say it was about 90-95% clear water! That’s as clean as I’m going to get it! I’m satisfied that I have a clean engine!
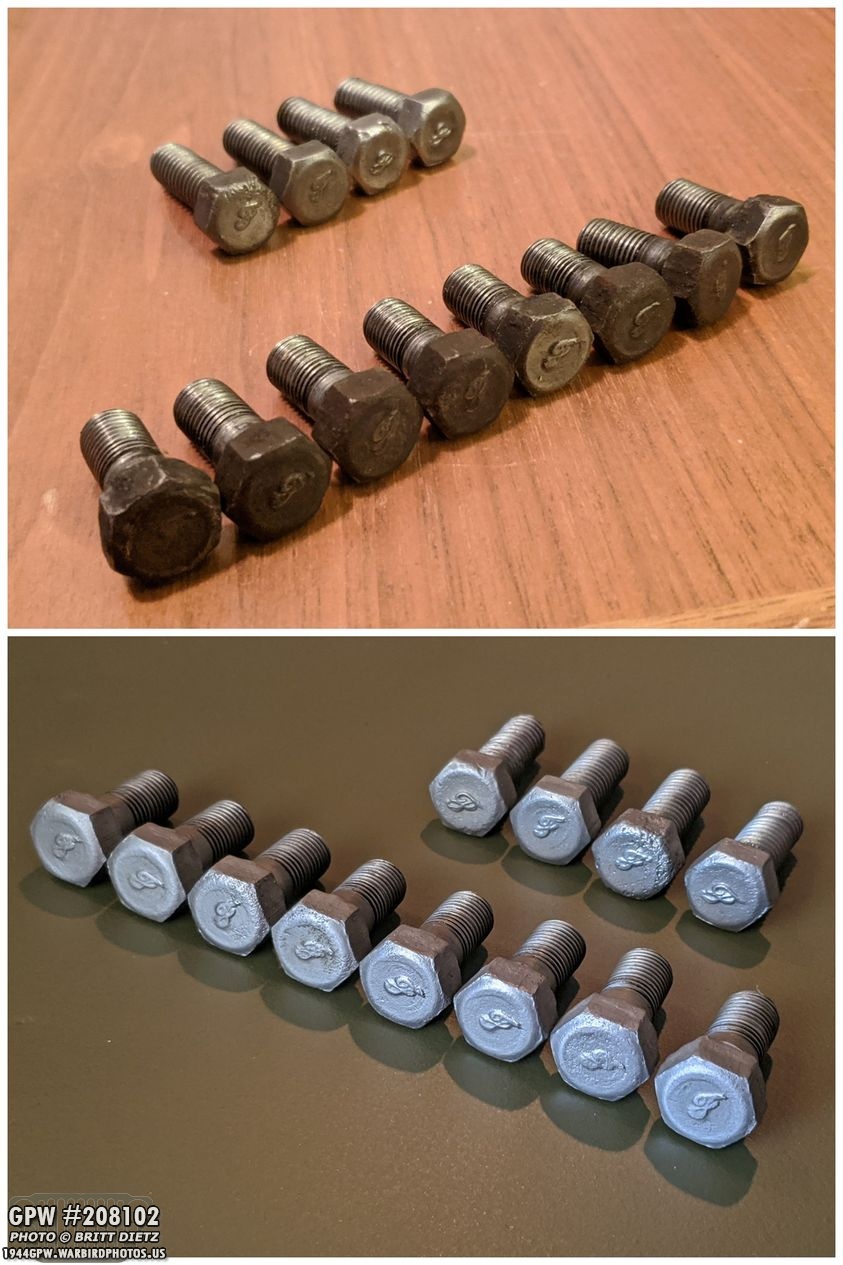
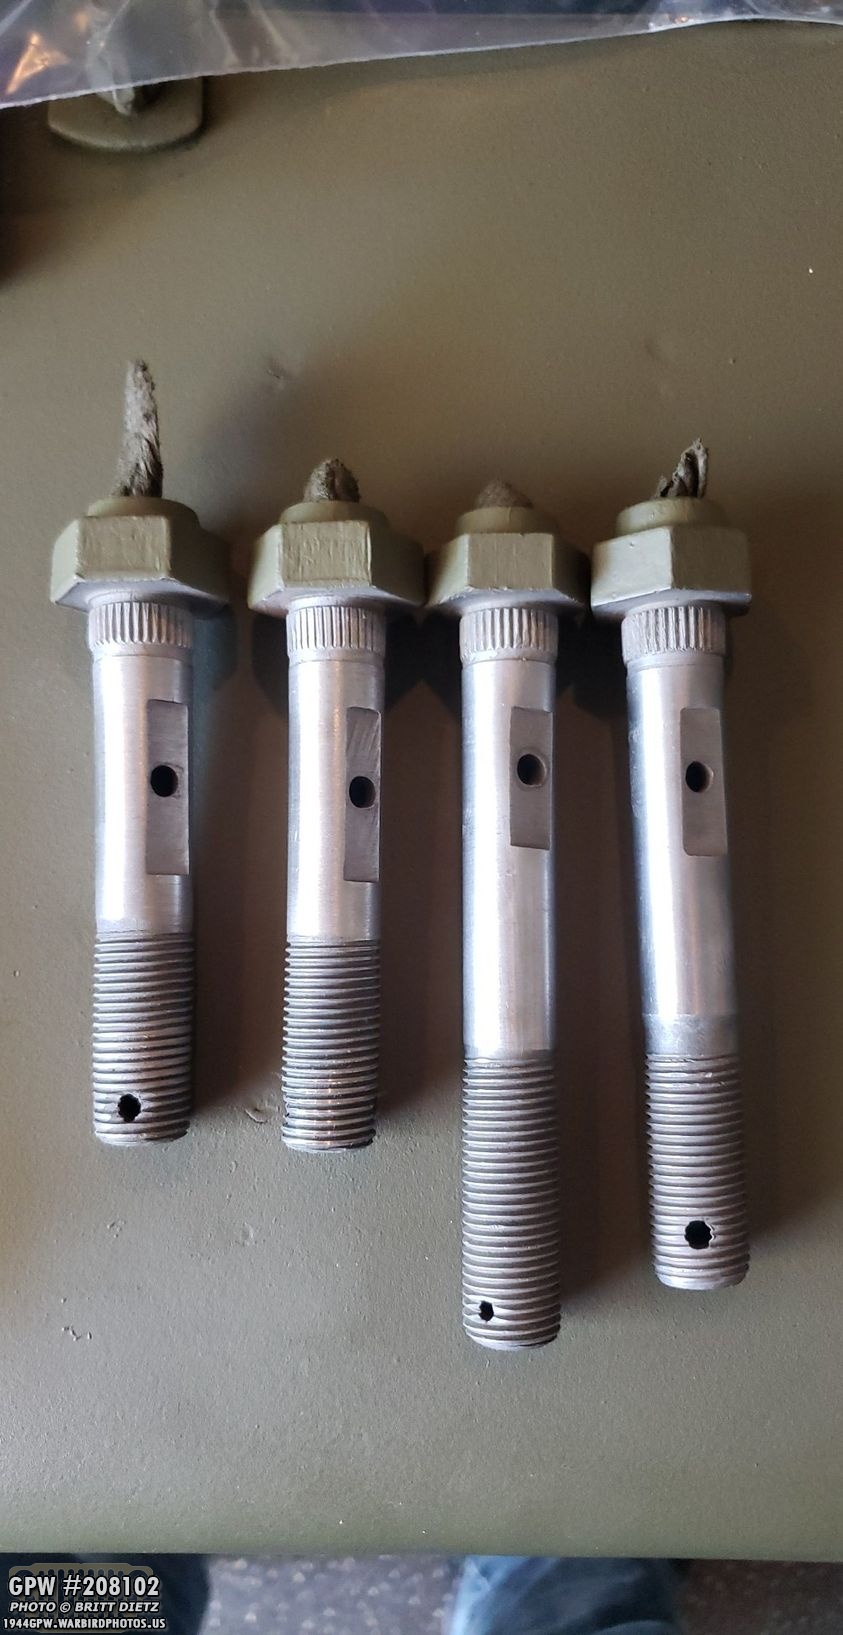
Before I put the thermostat back on more long term, I wanted to change out the bolts on it to F marked bolts. Roger sent me a bag of original F bolts for me to use. The longer 4 are for the thermostat (you only need 3), and the rest of the bolts are 3/8 ones for the bumperettes. Here the two photos show how I got them (top) and after sandblasting and cleaning (bottom).

I then primed all the bolt heads.

Here’s the four bolts for the thermostat all painted with Ford Engine Gray. They are ready for install (which will be this weekend)
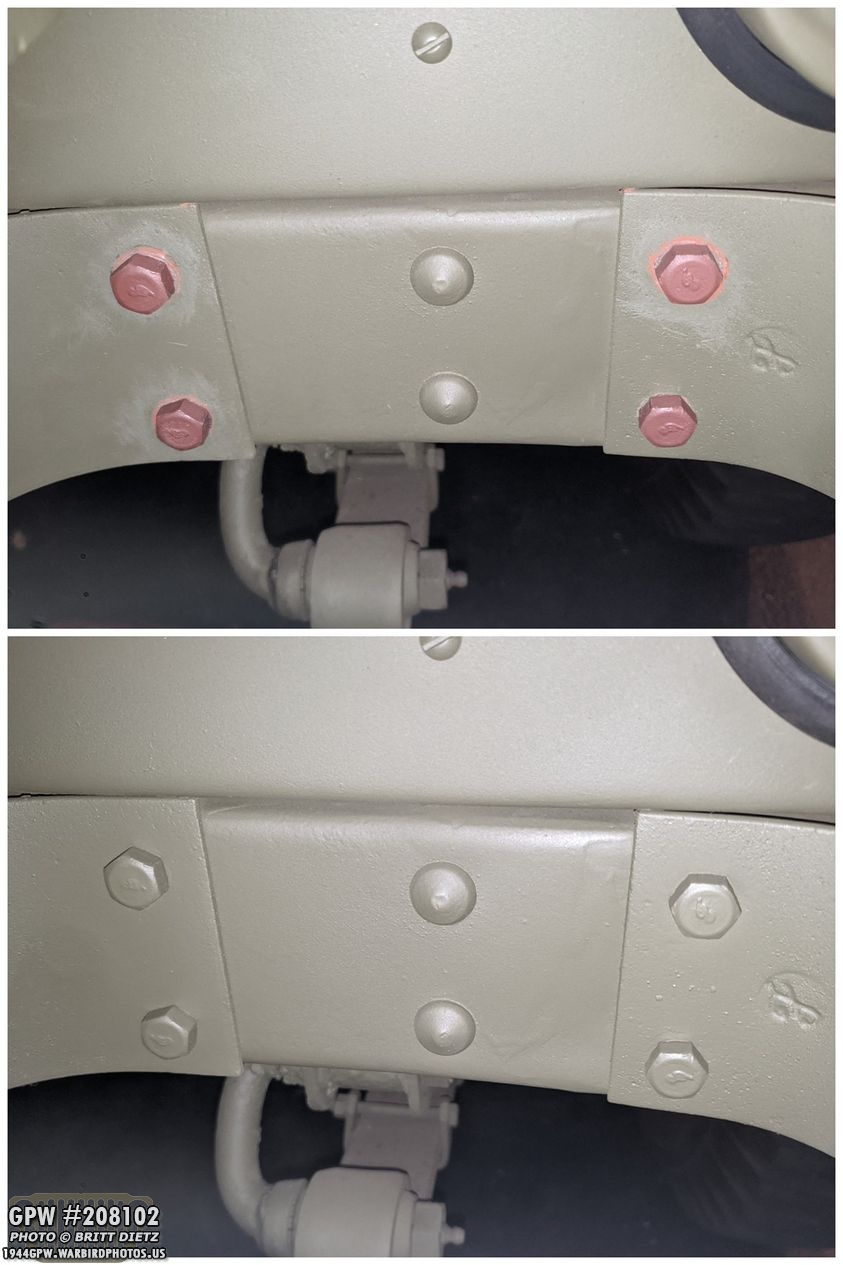
I went ahead and put the 3/8 bolts on the rear bumper holding the bumperettes. I had modern bolts that I had sanded off the head markings, these original F stamped ones look much better. After install, I painted them OD Green.

And on to the driver’s side, I forgot to take a photo of them being installed, so here’s straight to the ‘after’ once all the bolts were installed.
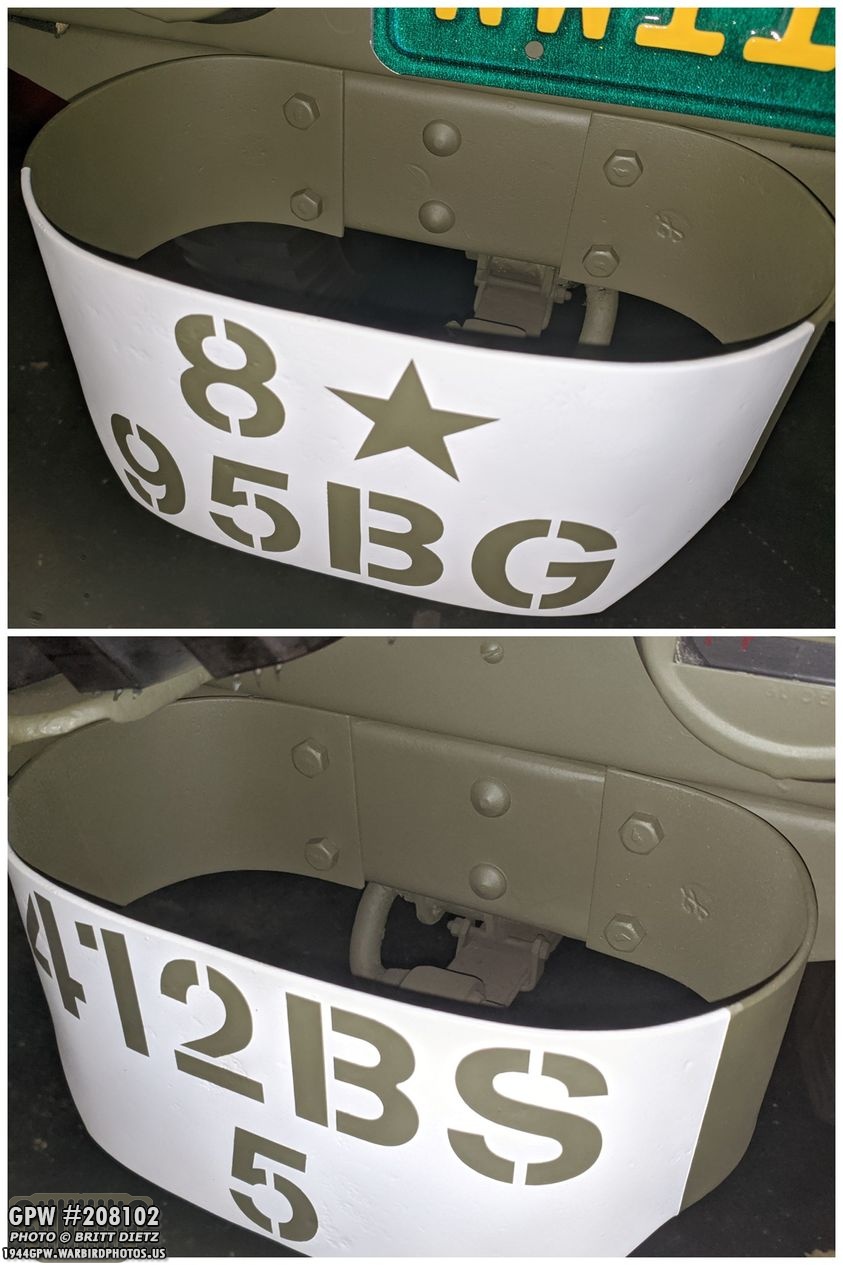
And here’s a look at both the bumperettes with the F bolts installed! Super happy to have them on there. There’s been a bit of debate if GPWs had F stamped bolts for the bumperettes or not. The general consensus is that they did have them.
Moving on to another fine detail, up till this week I’ve had your standard plastic modern caps for the valves on my tires. (Yes, I don’t have combat rims yet, those are coming soon)

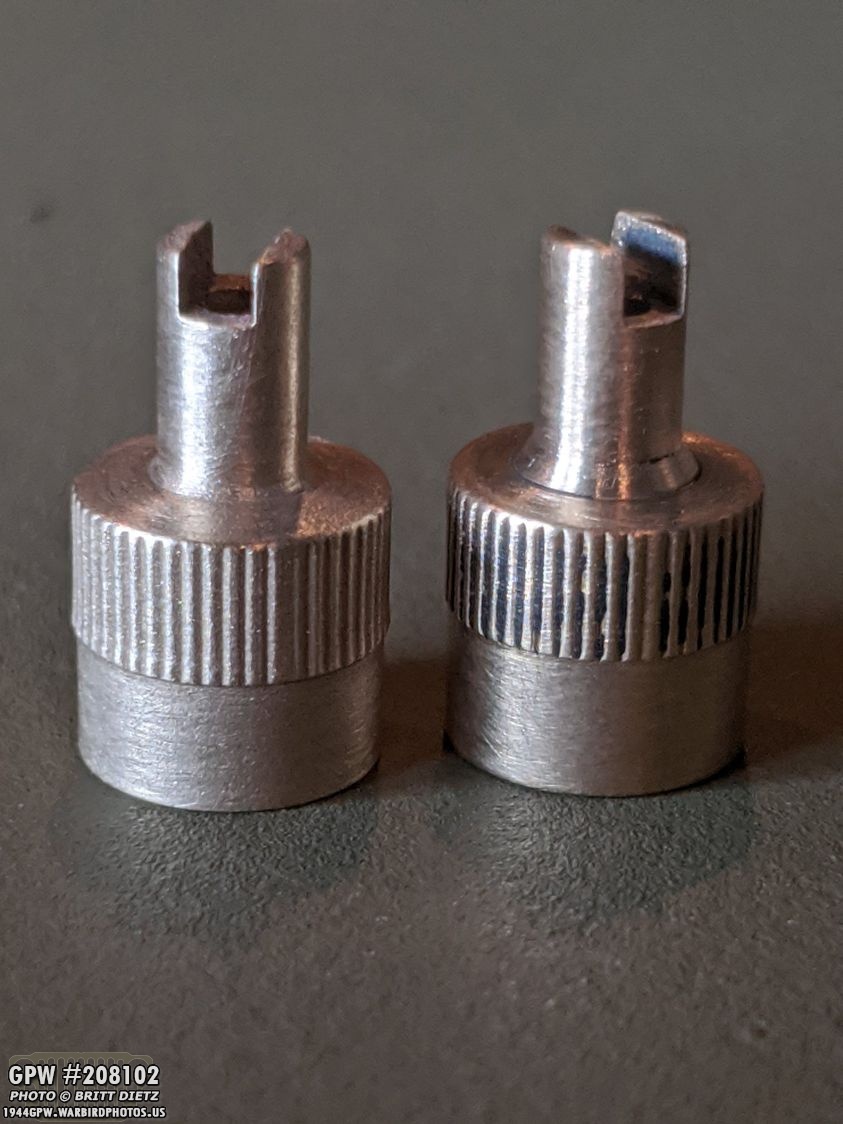
But what should be on the tires are metal valve caps, one of four styles as shown from a TM manual from WW2. Most people use modern plastic ones, but I wanted correct metal ones. I went with the top left on the four, the Schrader valve cap, also called screwdriver slot valve covers. These are the style used on Jeeps.
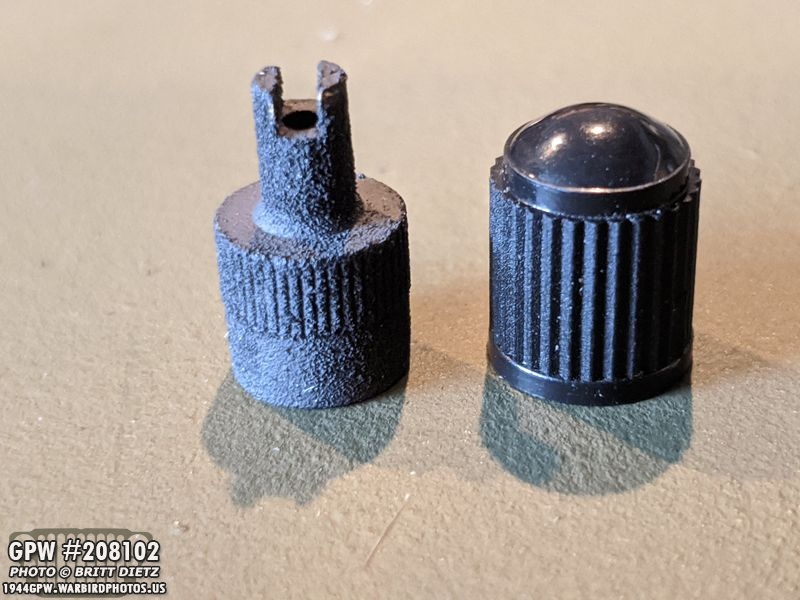
The set I got off ebay came parkerized, or covered with a protective coating. Here’s a look at one compared to the modern plastic cap.

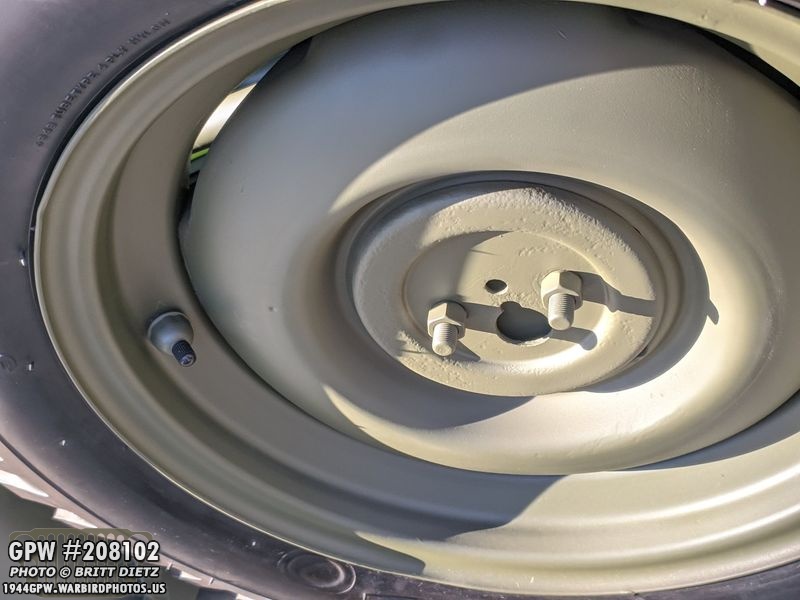
I installed one of the caps as is on one of the valves, which currently have valve protectors on them (which looks a bit weird since these are no combat rims). But, it just didn’t look right.

Since I got 6 of them and only needed 5, I removed the paint from one. I liked that look, but I needed to do more research to see how they are supposed to look. Surprisingly, there’s a lot of questions about how they should be, but not a lot of definitive information on G503.

So I went into my Jeep archives and looked at the thousands of photos of Jeeps I took when at the Jeep meet last year in France after the 75th anniversary of D-Day. I heavily documented ALL the Jeeps I saw that entire week. I’d say 90% of the Jeeps had modern plastic black caps, but the other 10% had these screwdriver type valves. I found that it was all over the place with how these caps were finished. Some were black, some were painted OD Green. But it seemed the majority were unpainted.
What made me finally decide to remove the parkerization and make them the natural brass was looking at a few Jeep books and seeing a few wartime Jeep photos with these valves clearly unpainted and shining in the light. So I went ahead and cleaned each one up.

I like how they look unpainted. And once I have combat rims on the Jeep, I think these will be a perfect detail. Another one of those little details that make the Jeep just that much more perfect!

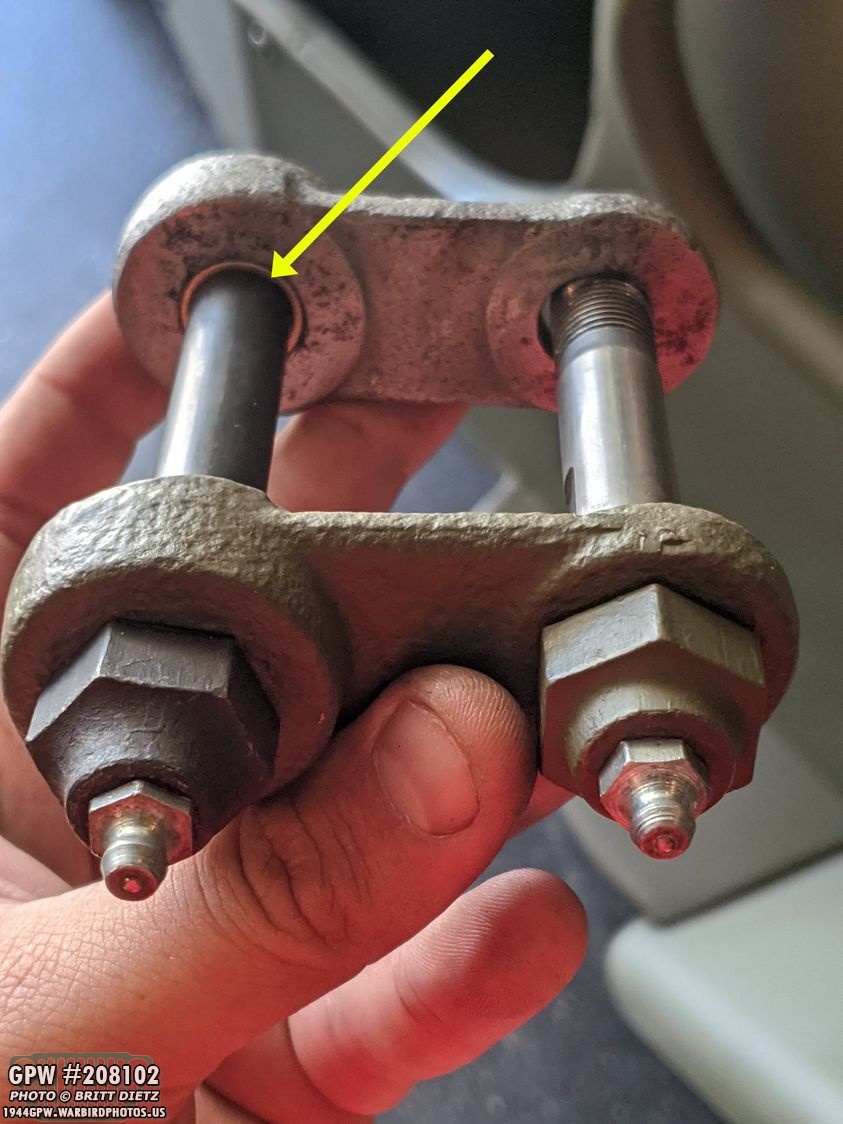
Last week I started work on the Torque Reaction Spring items I got from a fellow G503 member that are take-off items from another Jeep. The main focus was on the two shackles, which took a bit of work driving out the VERY worn sleeve bearings (left) and then figuring out what ones I needed to replace them with. I ordered the larger sized bearing from McMaster-Carr and was waiting on the inner shackle bearing to arrive this week.
Roger noticed, as we talked on the phone, that I was missing the longer bolt that goes into the shackles. These were the bolts that came with the set, and while I had the smaller bolt for the shackles (right bolt), the other three were for the springs. Oops!
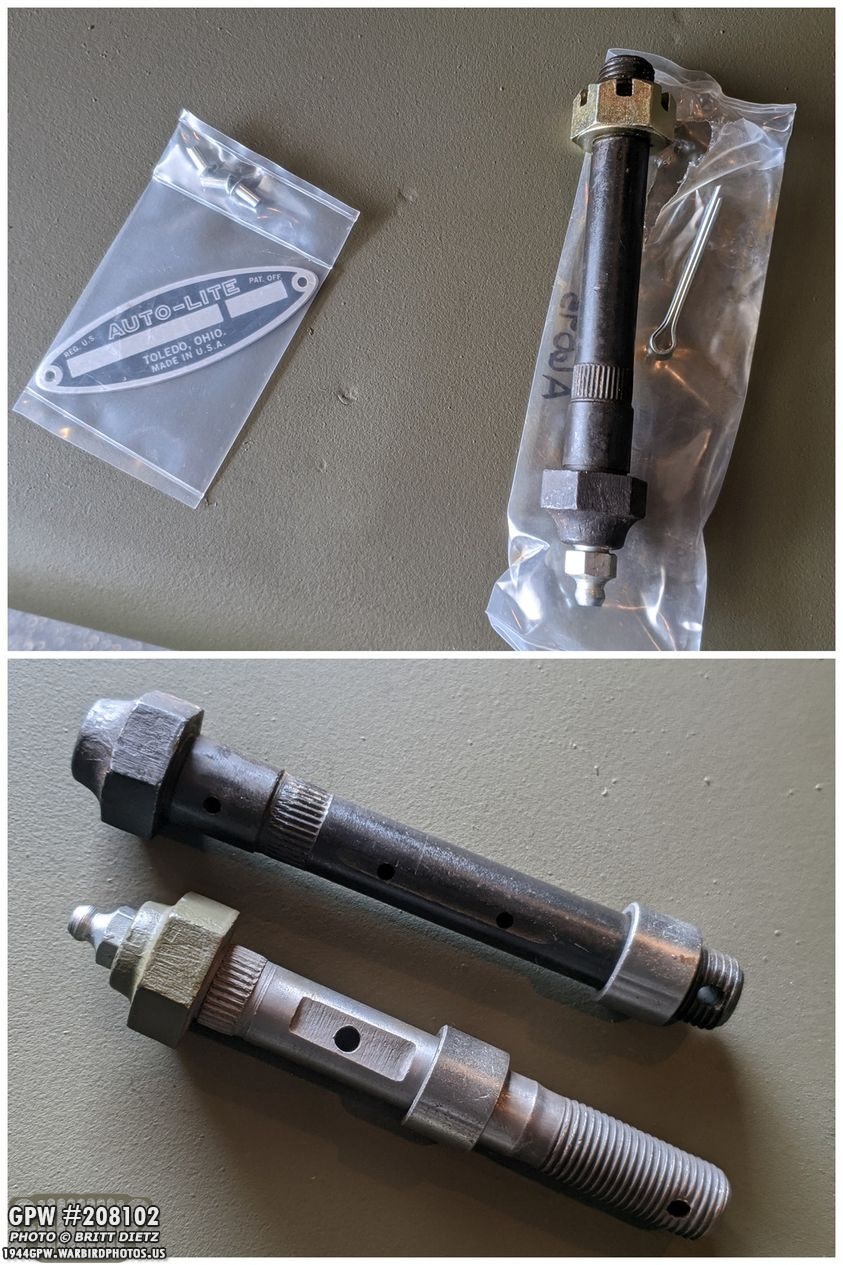
Thankfully, Ron Fitzpatrick Jeep Parts had the long bolt in their store. That arrived a few days later along with a new dataplate that I’ll eventually put on my starter to replace the very worn one on there now. The bottom photo shows the long and short bolts with the bearings on them.
As I waited for that other correctly sized sleeve bearing, I mocked up how the shackles would connect to the torque reaction spring iteself, as shown here.

And on Tuesday, the other bearing arrived from McMaster-Carr. Perfect fit in the shackle! But, it wasn’t all perfect…
Turns out, for some reason the long bolt from Ron Fitzpatrick Jeep Parts was a hair larger than it should be. The bolt would not slide through the bearing. Ugh oh! It stopped at the start of the threads.
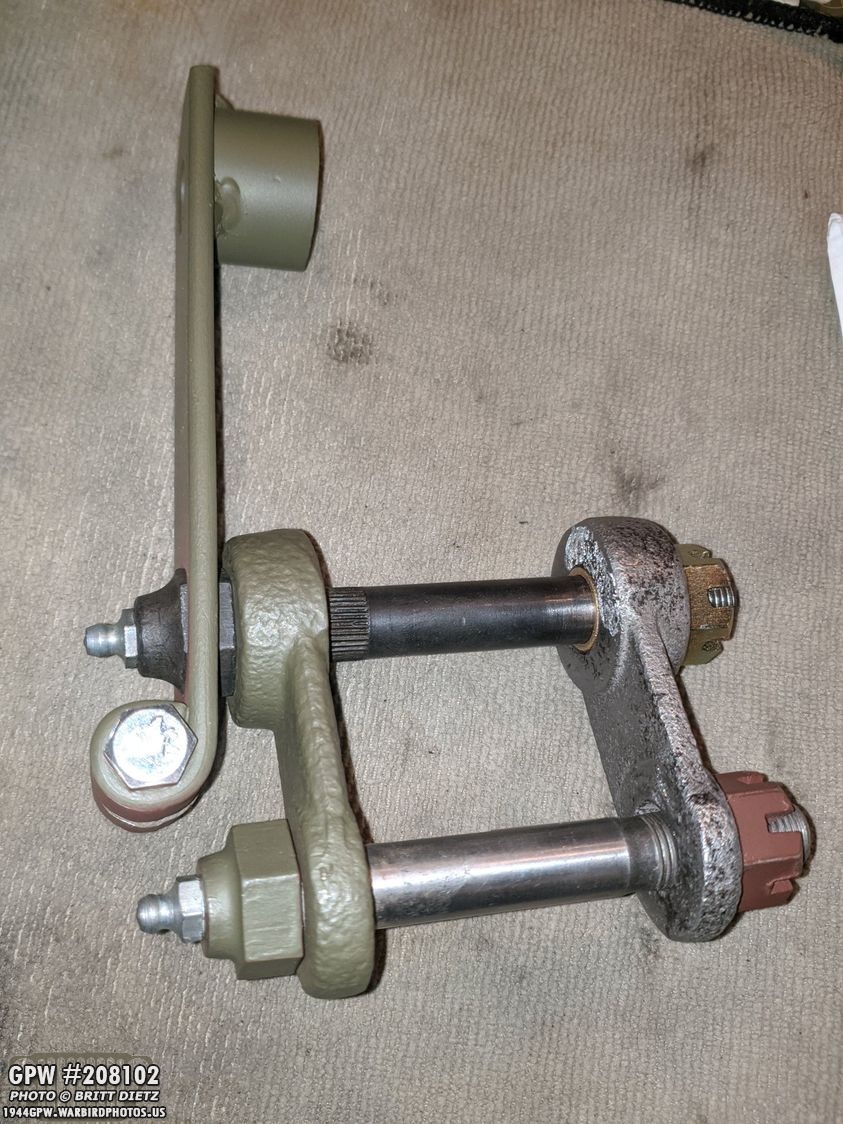
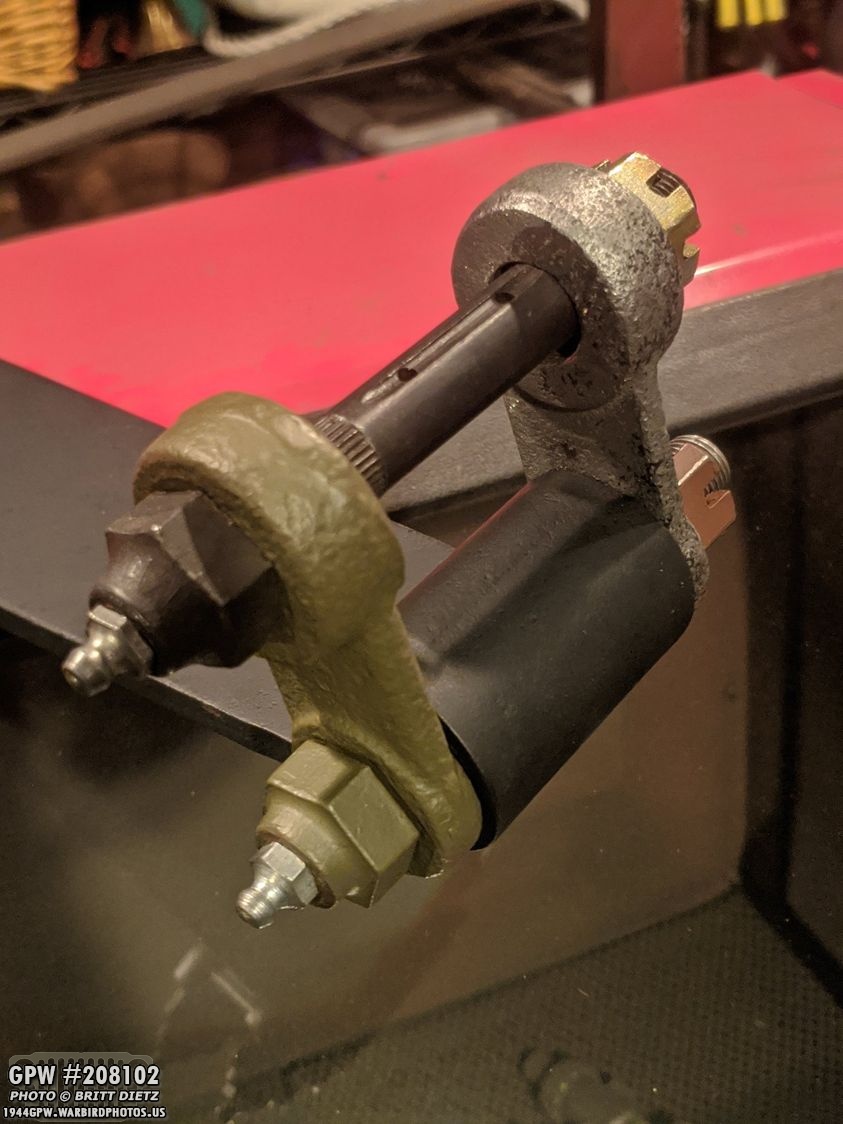
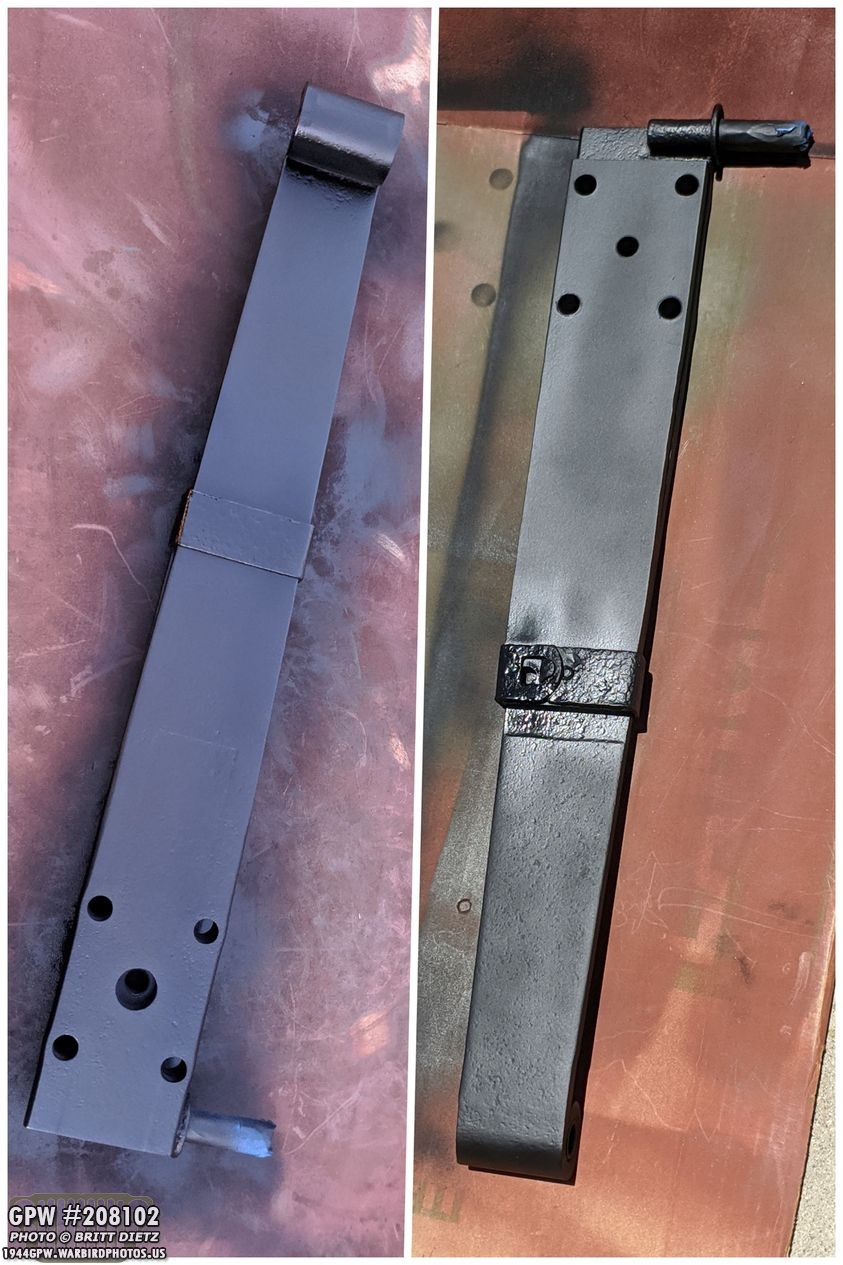
But after removing some paint from the long bolt and slightly opening the bearing, the bolt slid through nice and snug! Here’s how the setup will look (minus the springs)
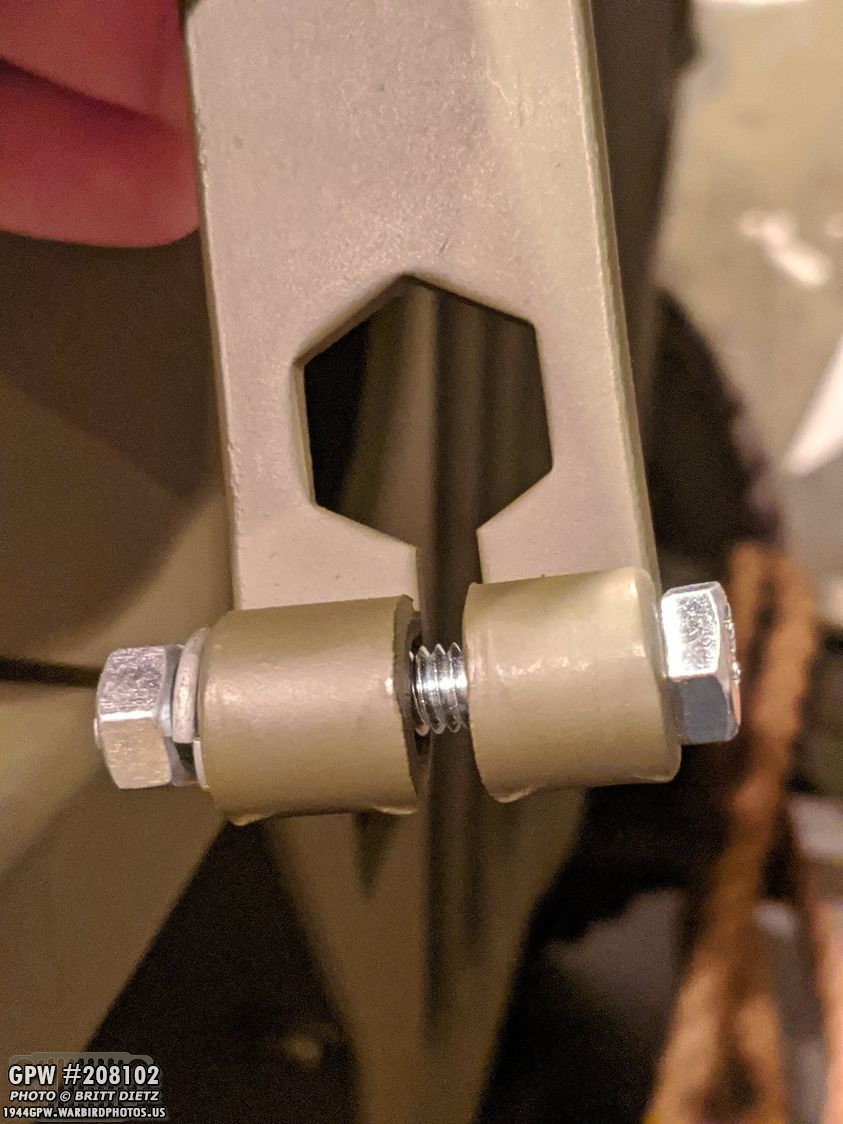
My lock bracket was missing the bolt that tightens it on the head of the long bolt, so I went to Home Depot and got a 5/16 x 2 inch bolt which was a perfect fit with the nut and lock washer. After painting, this will be ready to install once I swap out the axles in the next few months.
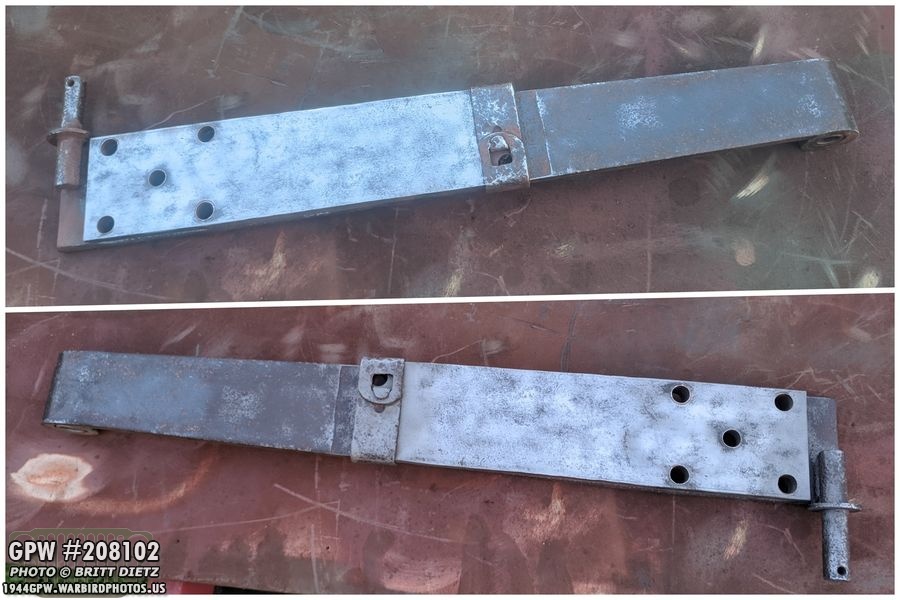
As for the spring, I took some time this week to attempt to clean it up. Some areas cleaned great, but other areas had some rust and pitting that I couldn’t get cleaned. Here’s after using a wire wheel and abrasive wheel.
After sandblasting wasn’t cleaning it much, I gave up and decided to hit it with a base coat of rust converting spray. Should be fine now. I’ll hit it with Red Oxide primer tomorrow then OD Green later this weekend.

Last week I got a shipment from Beachwood Canvas Works with stamped headlight covers and a mirror cover. Sadly, I got the wrong cover (it wasn’t F stamped), so they sent me a replacement with the correct stamping.
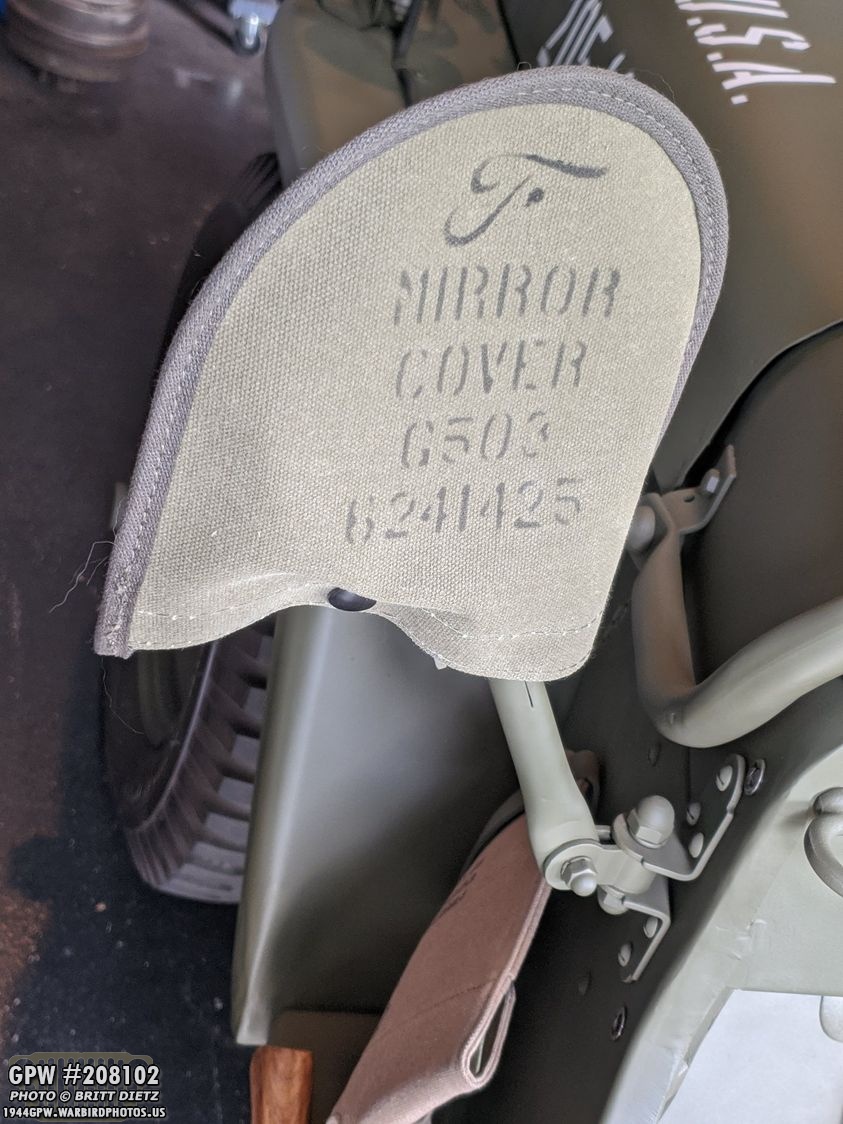
Looks GREAT on the Jeep! Check another canvas item off the list.

Another fun detail item I got was this set of resin molded vent caps, bridge caps, and fill caps from Roblenzz on the G503 forums. He makes molds of the original Willard batteries that you can fit modern 6 volt optima batteries into to make them look original. Sadly, there’s not a 12v battery that can fit in one, so I’ve just had a flat top group 24 battery that I removed all the markings and stickers to make it just a plain battery. I bought this set of caps from him to make the battery look a bit more like a Willard one…

Here’s a preview of what it’ll look like, after I paint these caps, and affix them to the battery. It’s not totally correct, but it’ll look ‘closer’ to a correct battery and adds just a little bit more detail.

I started painting the connector caps silver, but after I shot this I decided to fill some of the areas that have pits on the right cap. Once I sand the filler and make it round, I’ll repaint them and they will be ready for installation on the battery! The fill caps I need to get ‘sunburst gloss’ Testors paint and paint the top lettering.

Moving on to the final project this week, and part 1 of what will be an ongoing project for this week, next week, and maybe the week after… I teased last week that I was going to build a WW2 Coca Cola crate from scratch and as close as possible to the ones shown in this photo, which is one of only two photos I’ve been able to find of these crates. It’s a bit of an undertaking for sure recreating one from just this photo.
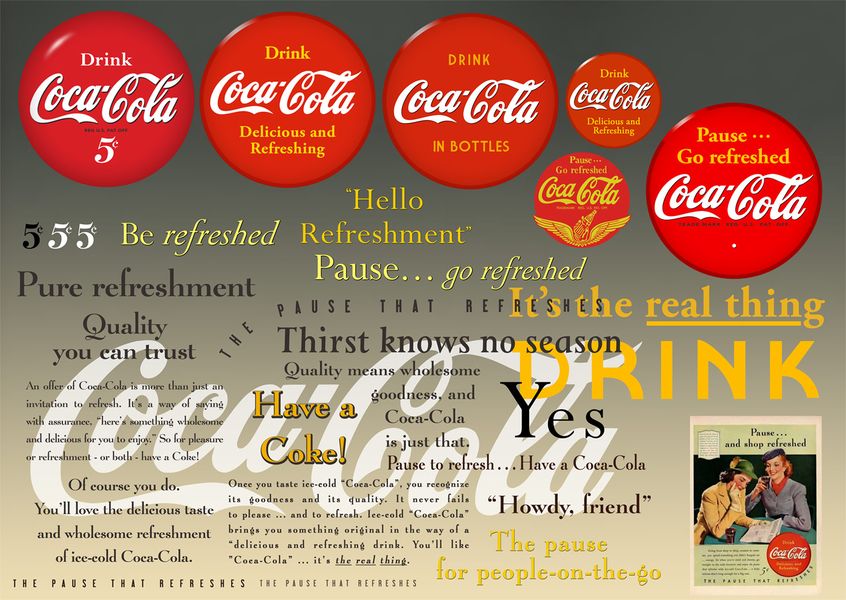
As mentioned, the reason I’m making one from scratch rather than purchasing one from a few of the people who sell them online, while they are nice crates, they have many issues with the stamping. I’ve been researching Coca Cola history during WW2, mainly the logo styles, fonts, colors, etc over the last few years. This here is a sample of some of the recreations and heavily researched Coca Cola things I have in a massive photoshop template file.

Using that wartime photo and a low res shot of solders pulling out cokes from a crate (top right photo), here’s my recreation in photoshop on the left. I tried to match the fonts withing 90-95% of everything, and tried to research and decipher the stamping from a not-so-highres image.

I decided to go ahead and print out stencils for one side of the crate using my Cricut Explore Air 2 machine. Before going forward, I wanted to talk about research I did to figure out what the coded stamping at the bottom means. It’s actually an overseas coded address. MIIY – Four Letters that represent a coded Location/45 – This is possibly a 2 digit date to be delivered, so April of 1945. QMSIV – Quartermaster Service 4. Other crates could also have ORDII for Ordinance Service II. PF72 – This represents two letters and two numbers representing who the shipment was for. Now, I’m recreating these exactly as they were stamped in the photo, mostly because I need the TM manual on overseas coded marking which I couldn’t find anywhere in the depths of the internet.
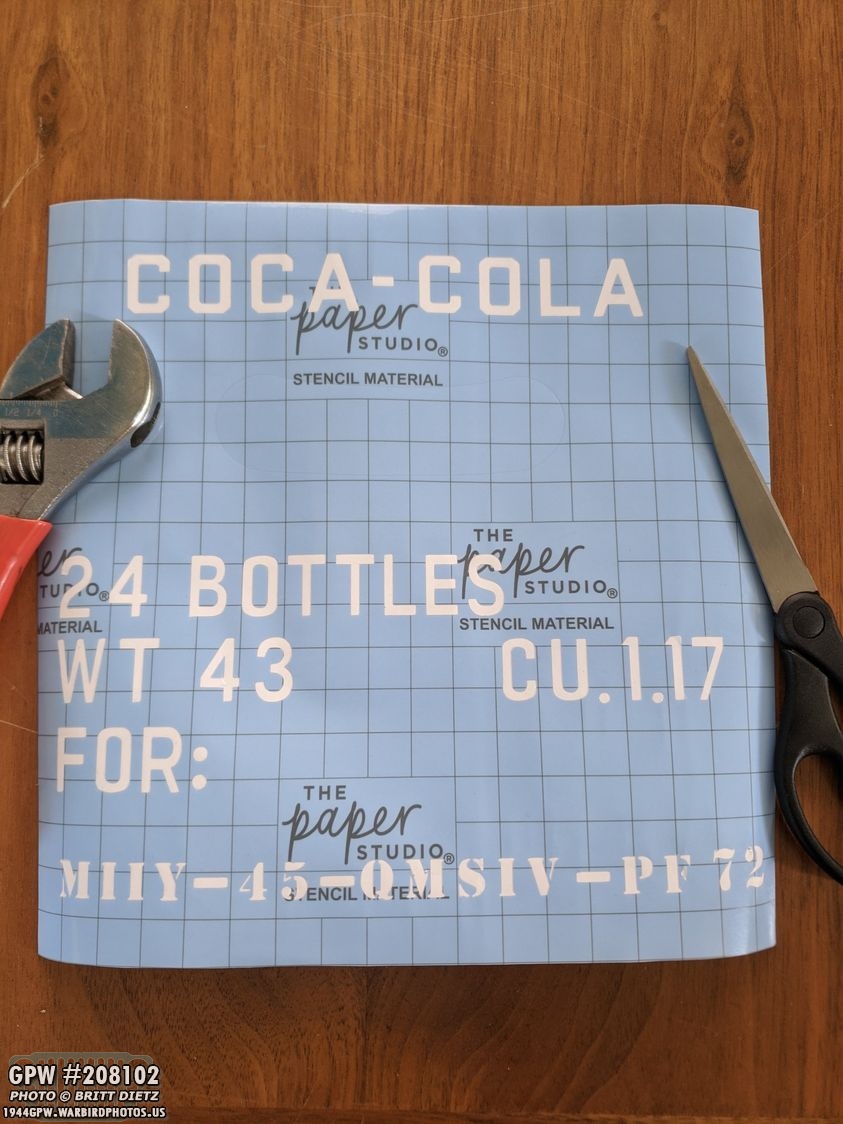
Here’s the stencil after cutting on the Cricut machine on the new stencil material vinyl. I’m trying a new method I learned online to make it easier to transfer the stencil so you don’t have to manually move over the inner parts of letters like O, A, B, etc. Here I’ve removed all the letters (called negative shapes).

I went out to Home Depot and Lowes to try and find solid wood based on the sizes I made, but I found it’s tough to find. Each piece of the crate is a different size, thickness, etc. All I could find to start was the parts for the sides of the crate with the handholds. Here I’ve measured both walls.

After looking at photos (and a bit of common sense), I figured that the height of the crate (not including the bottom floor or the top cover) was probably just slightly taller than the cokes themselves (a 1944 civilian coke shown here). So I made them just slightly bigger, as I figured that any larger and the cokes could move around if the crates are subject to bumps. You want the cokes to be somewhat secure.

I cut out the unique handhold shape with the cricut machine and used that to mark and cut the handholds. They didn’t turn out as good as I hoped, but good enough for now.
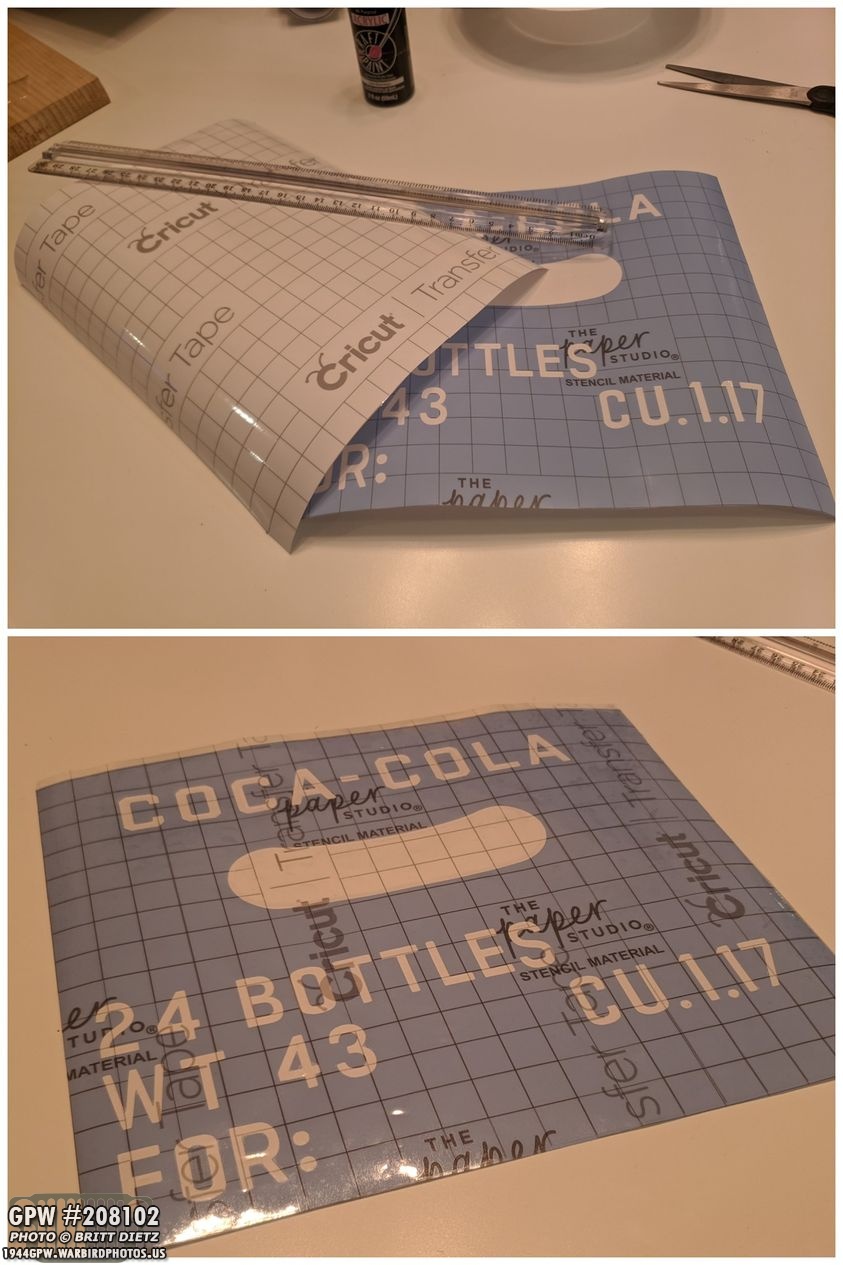
the next step for the stencils I learned to make things easier was to use transfer tape and place that over the top of the stencil. The idea is that when I peel the white backing from the stencil, the inner parts of the letters will go with it.
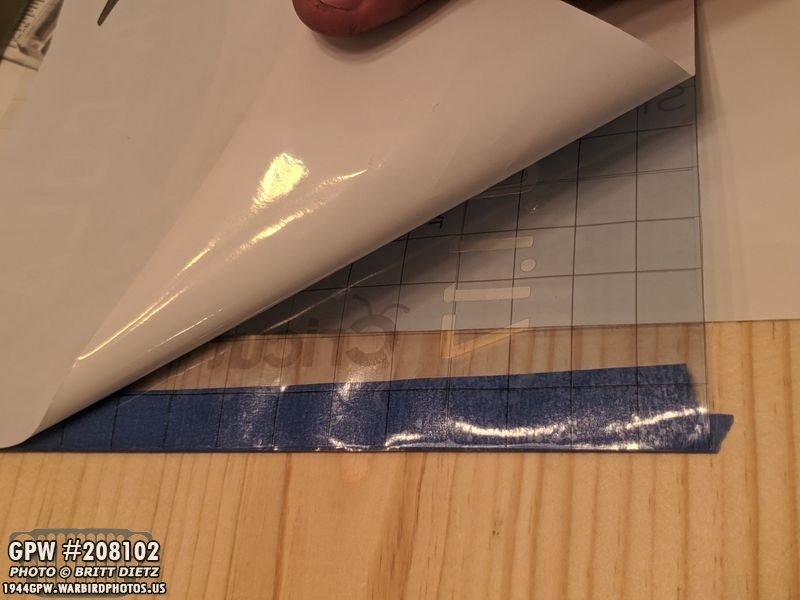
Here I’m peeling off the white backing, and as I thought, all the inner parts of the letters (not shown, forgot to take a shot) went with the stencil and transfer tape.

You can see on this shot, as I laid the stencil onto the wood, that the inner parts of the letter are with it.
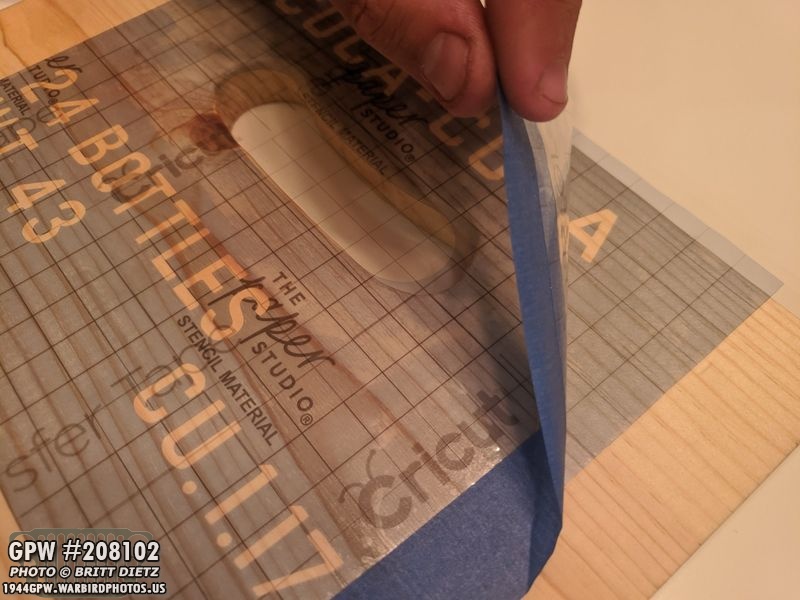
With the stencil pressed onto the wood, I could then take off the transfer tape, which leaves the stencil and the inner parts stuck to the wood, but now the letters are ready for painting.
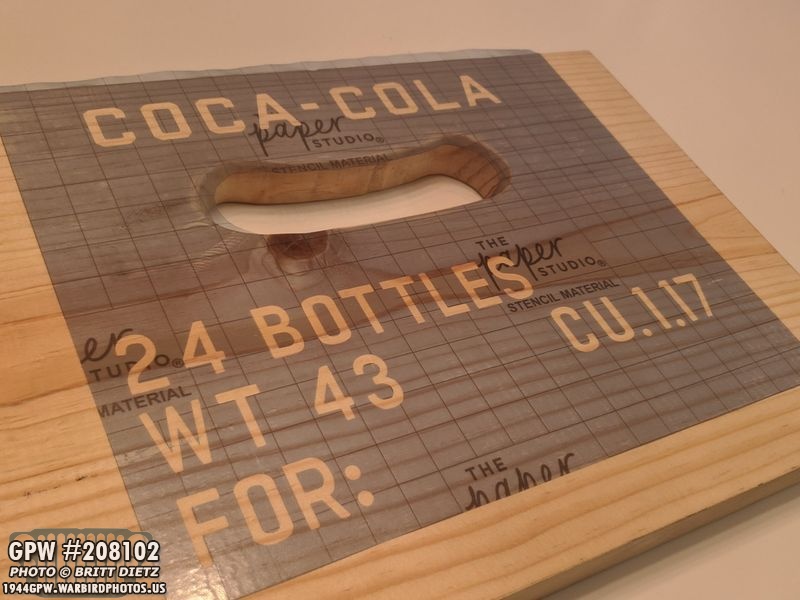
I was able to use the second I removed for the handhold marking as a way to line up the stencil. Here it is, ready for paint!
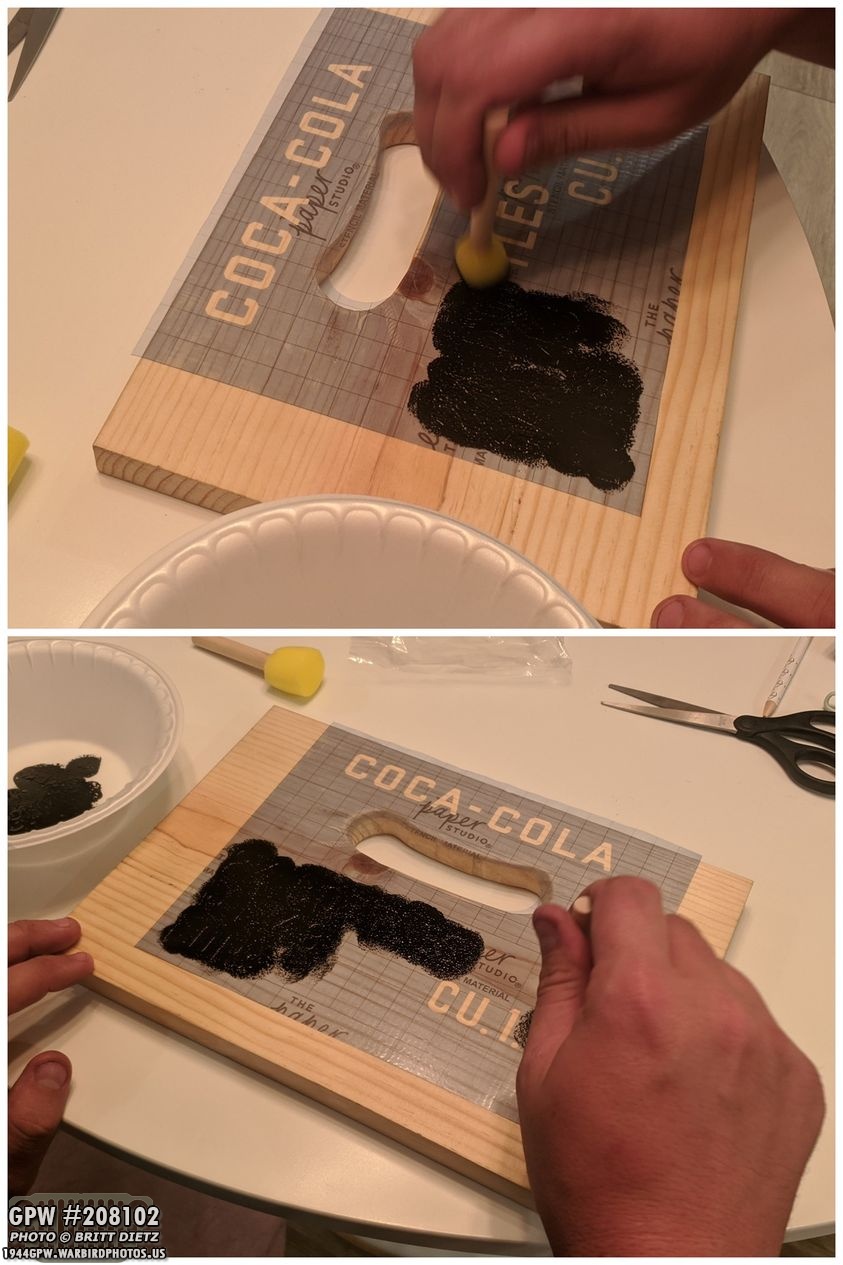
I used black acrylic paint with a flat sponge brush tapping it down on the stencil.

Took about 10 minutes to dry, which allowed me to see any areas I missed and rehit them with paint.

After that was dry, it was time to peel it up! Look GREAT so far, only a little issue with the W where there was a bit of a divet.

Some of the stencil ripped taking it off, and I also needed to remove the inner parts of the letters. So I used the fine pointed weeder to get it all off.

Final product, looks pretty darn good!
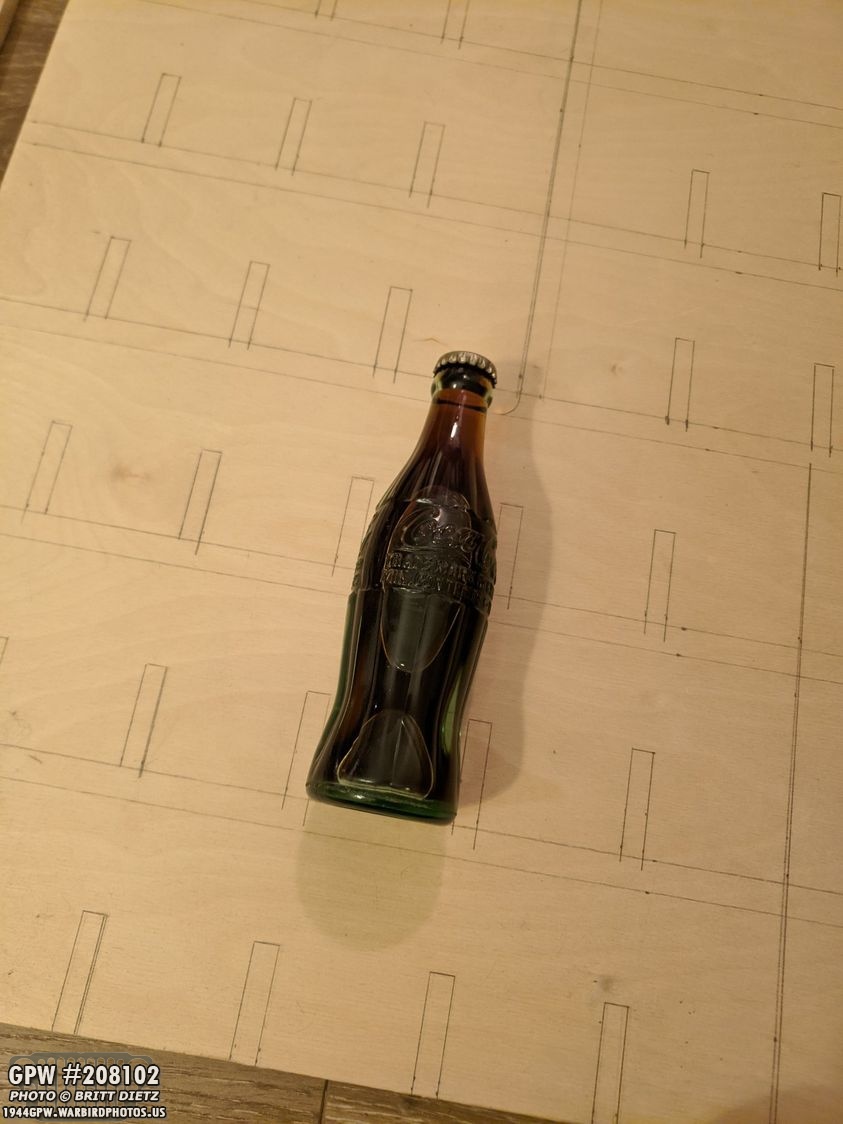
I shifted focus on the rest of the crate, and after searching I just couldn’t find the same type of solid pine or Birch in the sizes I needed. So I reluctantly opted for Birch plywood from Ganahl Lumber Company. Here I’ve measured and marked all the interlocking dividers between the cokes. Coke for reference.
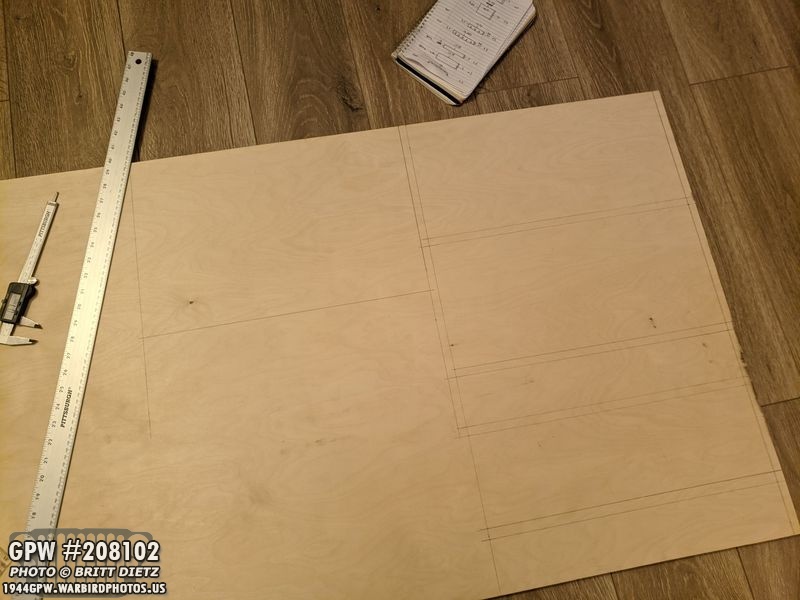
I then measured the sidewalls, the three bottom floor panels, and the lid.

Then to the chop saw to cut all the wood! I don’t have a table saw, so I had to be a bit creative cutting the longer pieces.

For the interlocking dividers, I used a jigsaw to cut the straight lines…

And then a wood chisel to knock out the pieces.
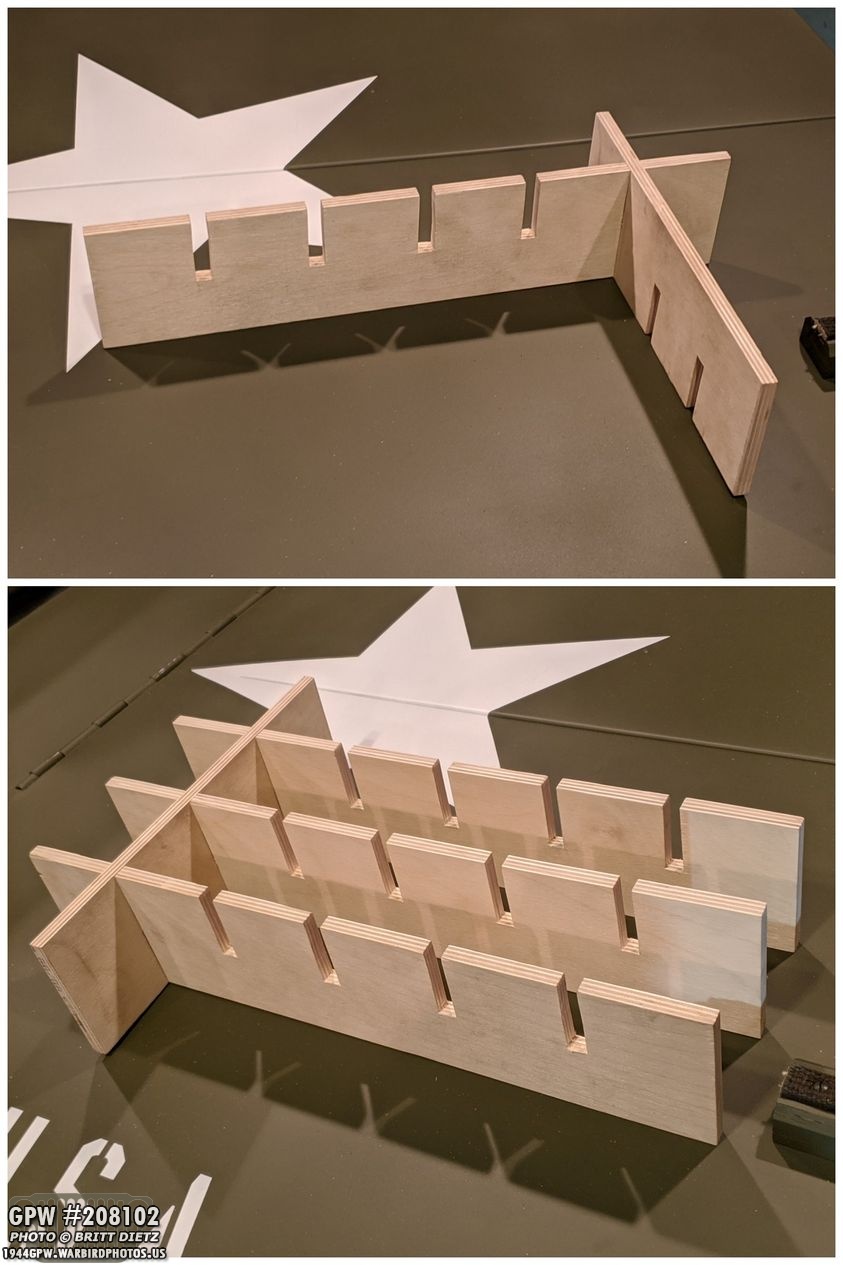
Slowly I kept adding more dividers. Nice tight fits!

Dividers finished! They are nice and tightly joined together without any glue. Here I’ve put the floor boards and the side walls loosely together to see how it’ll look. That’s where I’ve gotten so far. Next week I’m going to do more stenciling and starting to put the entire thing together. I have metal banding coming to attached it all next week.
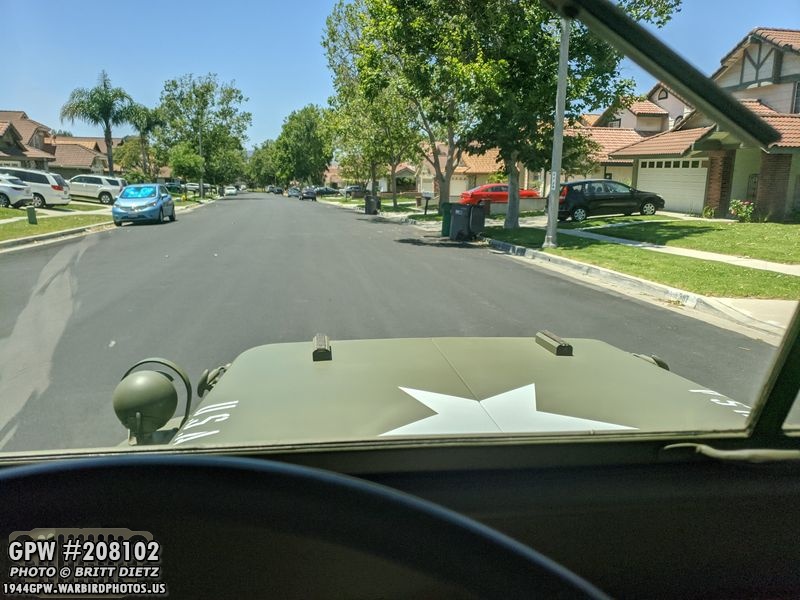
And that leads us to Thursday morning as I took the Jeep out for a quick drive since it’d been a few days. A final cap for a long productive week!
And that brings us to the end of this week’s long update! Lots more coming next week, and some fun upcoming projects in the next few weeks as I continue to improve the Jeep! Thanks for following along.Till next week!