 E-Brake and Axle restoration continues!
This week was a bit slow, but lots of little things done including the continued restoration of the original e-brake system, lots of sandblasting, and painting/putting back together the very first part of the wartime axles!
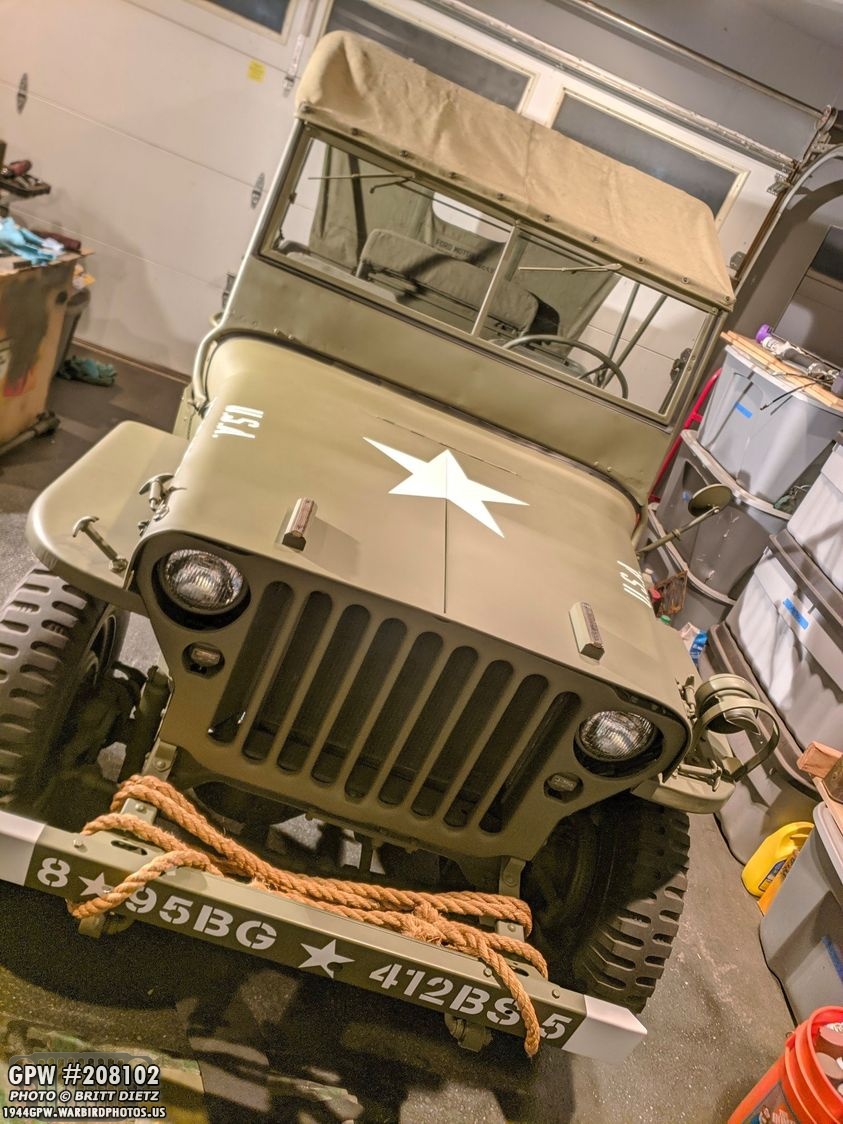
The Jeep is staying home and keeping up with social distancing with other Jeeps! Actually, she’s down at the moment still with the rear propeller shaft removed. I did take the time this week to fire her up in neutral and let her idle for a bit to get fuel/coolant/oil moving through the lines. Hopefully by this time next week she’ll be back together enough to take her on a drive again!

For the last two-three updates, I’ve been slowly restoring the original external emergency brake (e-brake) system. The drum was damaged and the outer band lining was almost totally worn away. This is before I started taking it apart. I didn’t restore this when doing the frame up restoration.
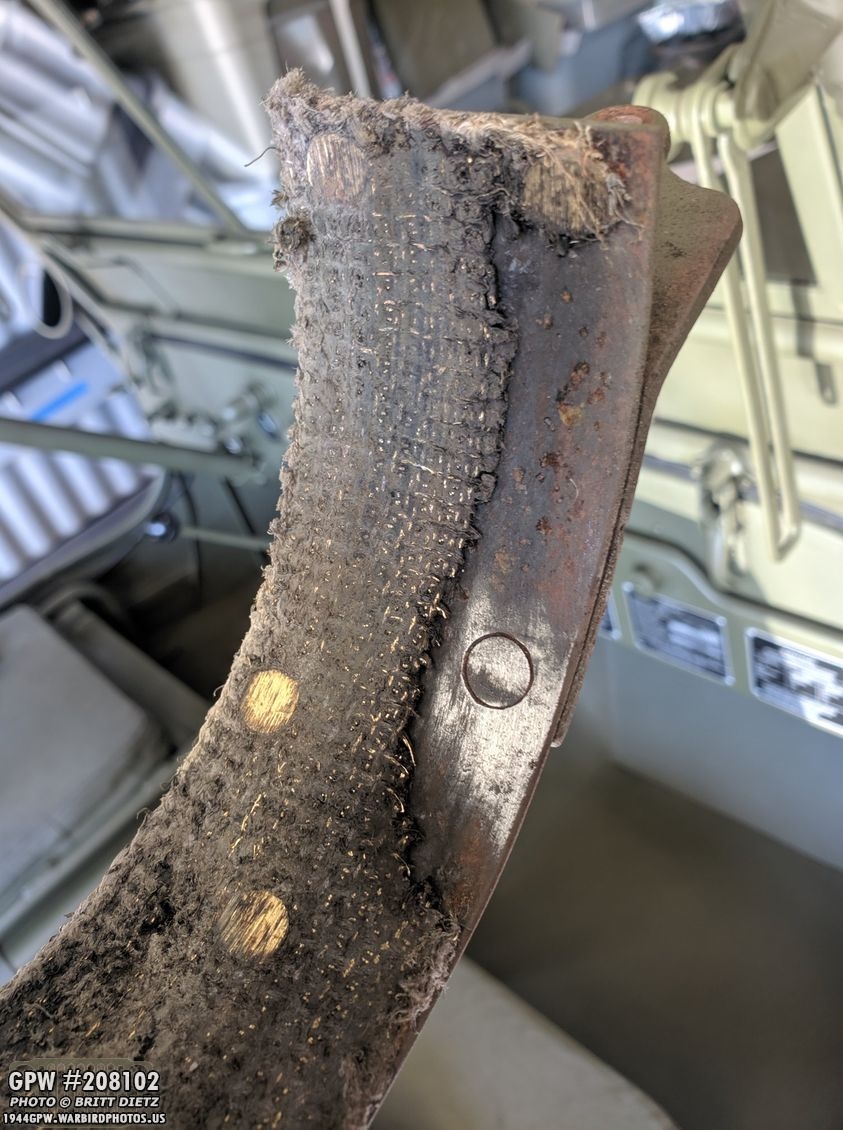
Here’s a look at how bad and worn the lining on the outer band was. The lining was so low, in fact, that the rivet heads were wearing down the drum and carving into it.

But, thanks to Roger, the outer band is re-lined and ready to go! He graciously put new lining on, re-riveted it, and painted it up for me! Looks good as new now!
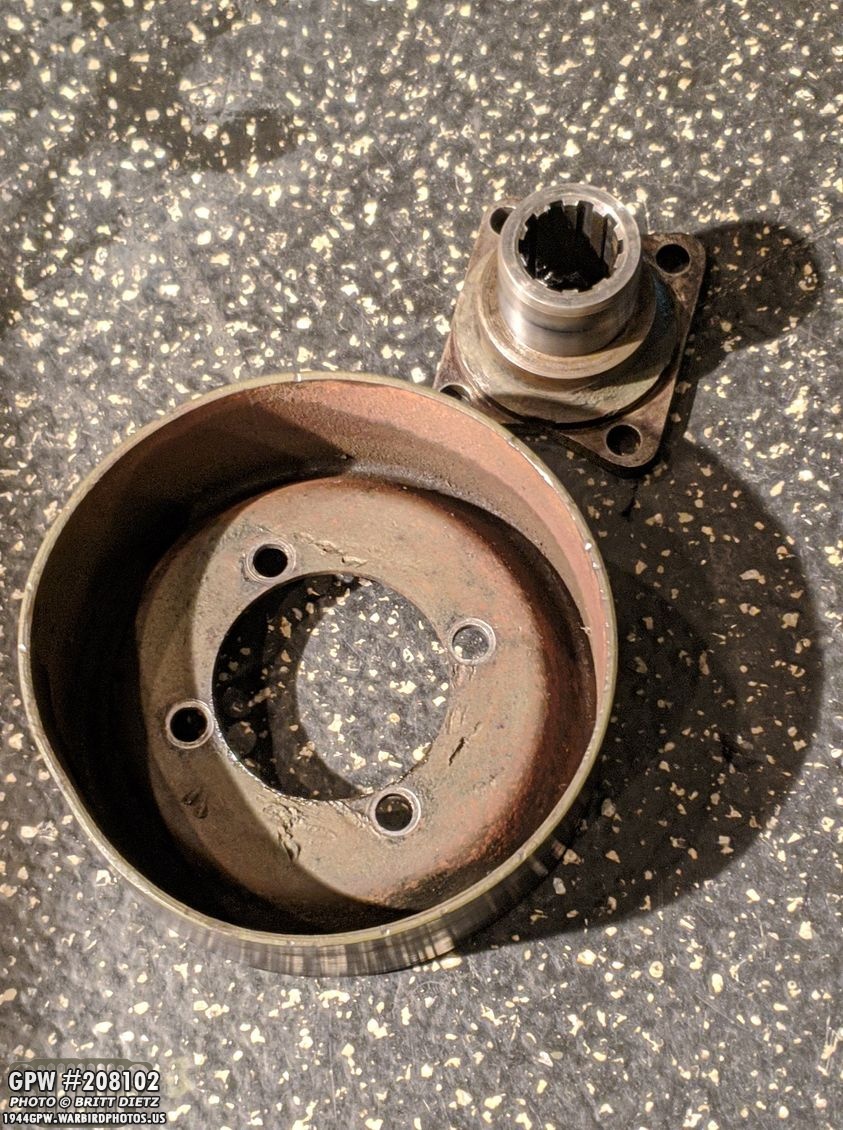
Here’s a look at the old drum and the inner yoke once I took them off from last week’s update.

This week I sandblasted the inner yoke nice and clean.

Sadly, no F stamps to be found on this yoke, nor any sort of markings at all.
Next step was to paint the yoke, which I carefully masked the surfaces that should not get any paint. I also primed the yoke nut, washer, and the final part of the e-brake linkage I hadn’t painted yet. Plus, I painted the heads of all the bolts/pins.

After the OD Green paint, it was time to install the yoke into the new drum I got from Ron Fitzpatrick Jeep Parts!

Fits perfectly, nice and snug in the repro drum (which I painted in the last update). I used the original non-WW2 bolts that were in there. I thought about grinding the markings on the heads off, but you’re really not going to see these bolts unless you look REALLY hard for them. So it wasn’t really worth the effort.

And the other side all torqued down and the bolts painted! The drum is ready to be reinstalled!
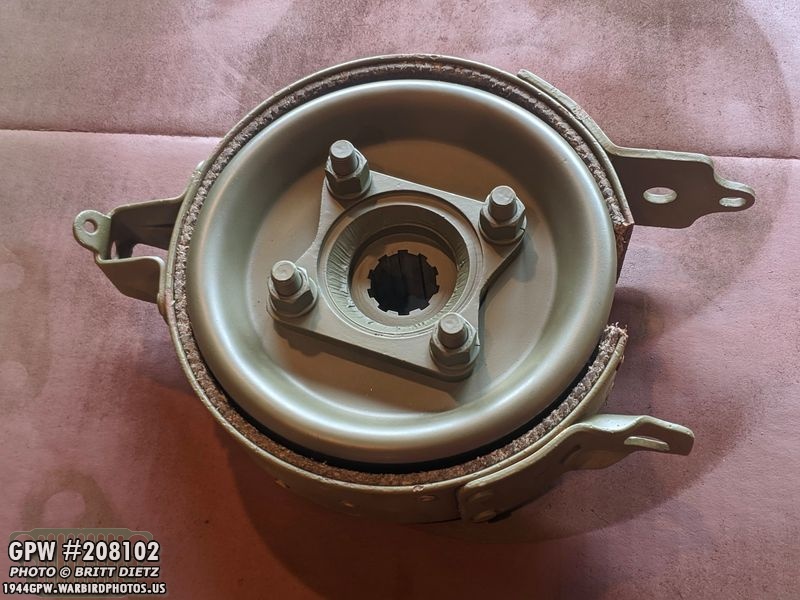
I put the restored band on the drum to check the fitting and fits great. The e-brake works by that outer band clamping down on the inner drum (like a reverse brake on the axle) via a wire pulled via a handle on the dash. That causes the drum to stop spinning the rear propeller shaft and the transfer case.

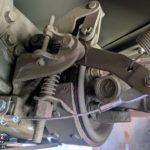
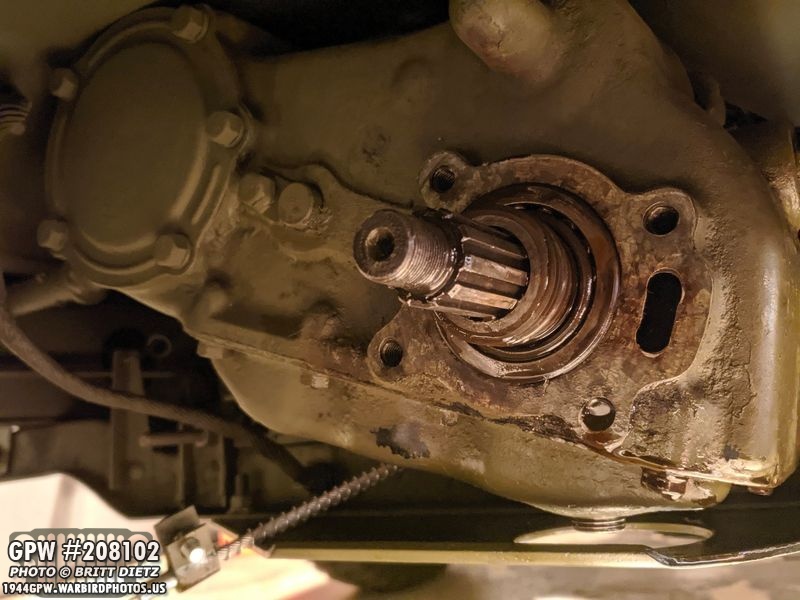
In last week’s update, when I removed the drum and yoke, it caused all the oil in the transfer case to spill out. I decided to get a new oil seal (yellow arrow), as I always had a few oil leaks on the transfer/transmission cases. Now’s a good time to check all the drain plugs, clean them up, clean/replace the oil seal, and attempt (at least) to get some of the leaks to stop or slow.

Taking out that darn oil seal proved to be a huge challenge… as the oil seal remover tool just kept cutting through the thin metal rather than grabbing the seal. It got really mangled really quick.
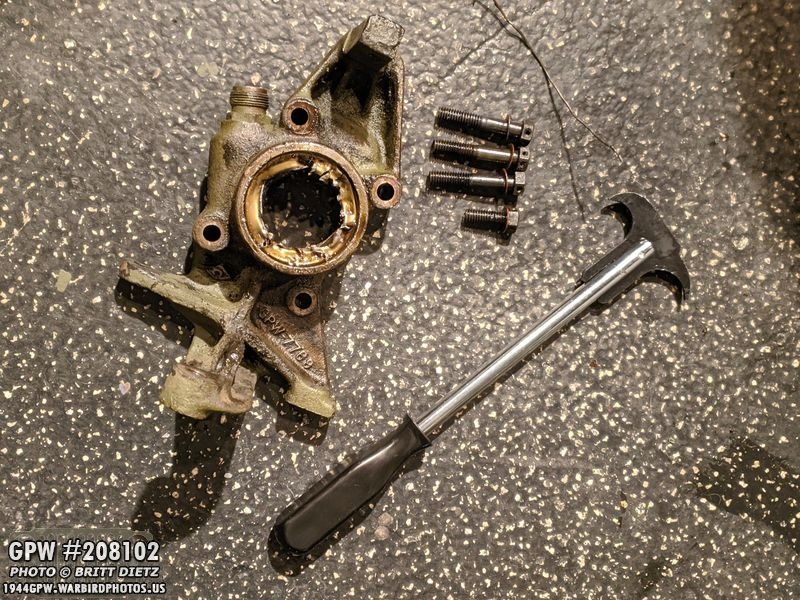
So I decided to just take the four bolts with safety wire off and remove the entire transfercase rear output shaft housing assembly. Pictured is also the oil seal remover tool that was failing.

Using a screwdriver, it was easy to then tap out the seal from the inside. I should have just done this from the beginning!

I got a new double lip oil seal from Ron Fitzpatrick Jeep Parts, which I will be installing in there.

Dry fitting it on the assembly, it should go in there nice and tight! But, before I do that, I decided, since I have the assembly off the transfer case, I might as well clean it up and repaint it as well.
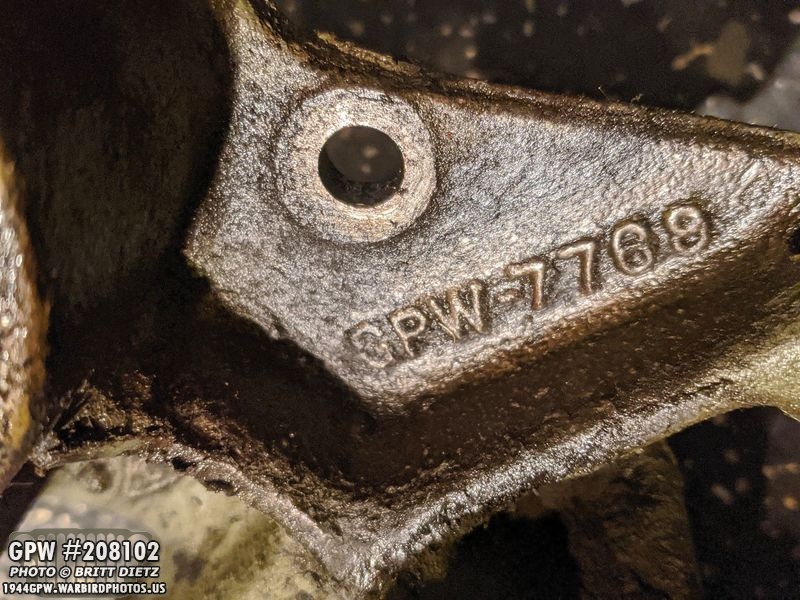
That means a dip in the ‘bucket o’ fuel’ for a day to remove the oil and soften up the paint/grime. I’ll then sandblast it clean before repainting. I did find this GPW part number, which means it is original to the Jeep. I couldn’t find an F stamp, but once sandblasted, maybe I will.
Looking back at the transfer case, here’s what is left. I’ll clean up the surface really nice before re-mating everything. Eventually, I will be taking out the transmission and transfer case for a full rebuild, and then I’ll clean/restore everything else. But for now, this is as far as I’m going taking it apart.

I dropped the four bolts that came off the transfercase rear output shaft housing assembly and the safety wire (that goes through all 4 of the bolt heads) in parts cleaner as they were covered with oil.

One thing to note, each of the four bolts have a copper washer, which is used to act as an oil seal for the bolts.

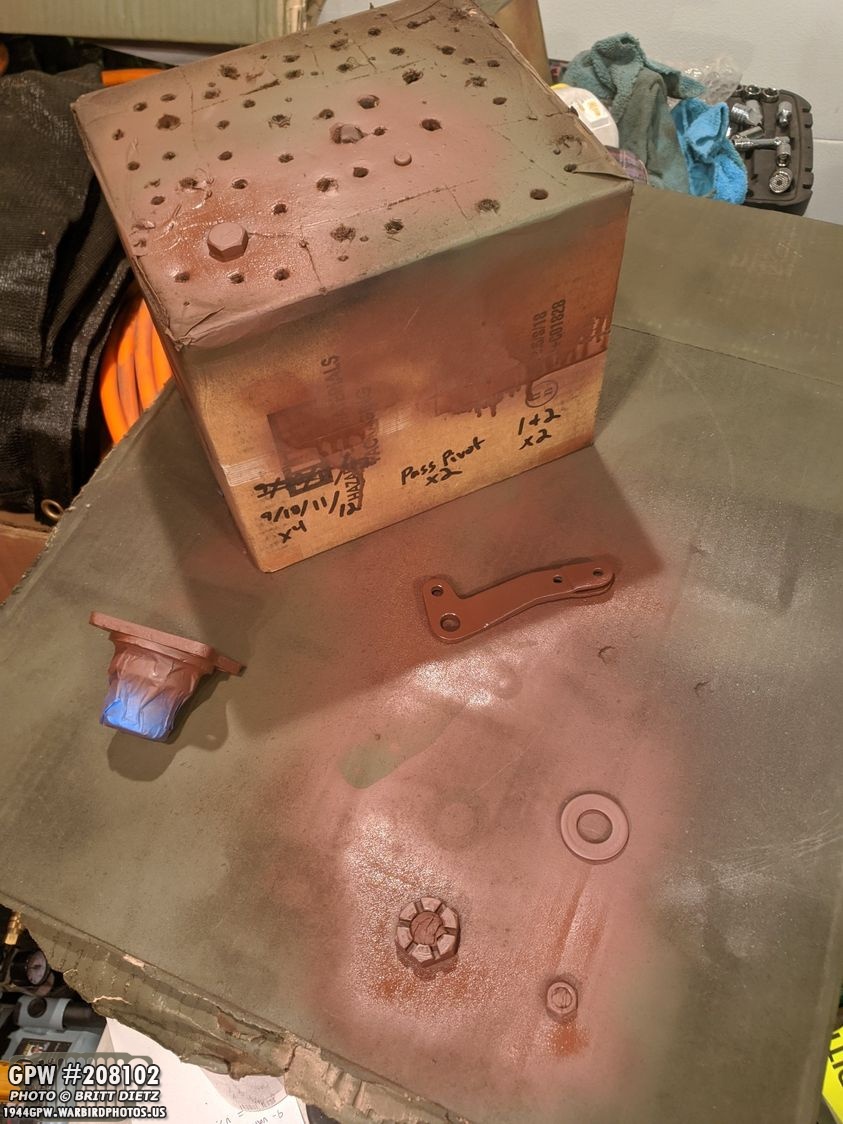
I finished sandblasting/repainting all the parts for the e-brake linkage now, so they are ready for reassembly when everything else is done.
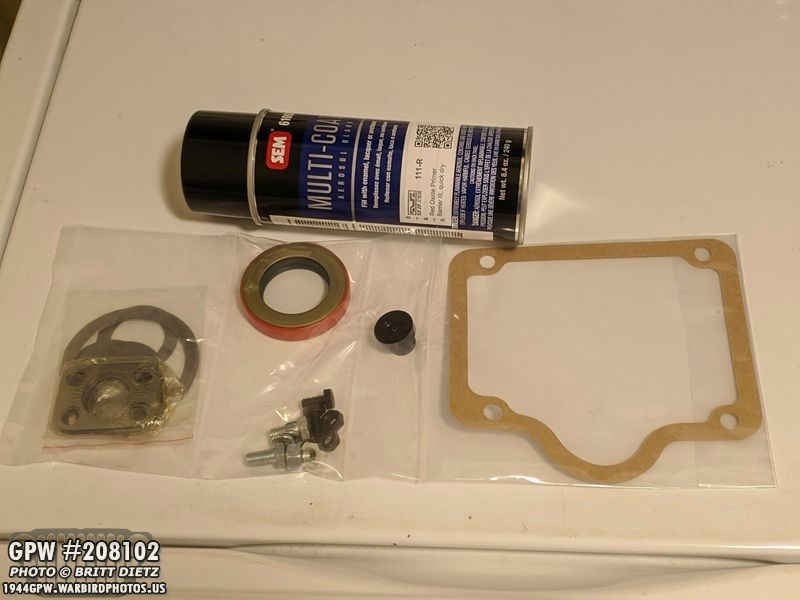
Speaking of Ron Fitzpatrick Jeep Parts, along with the oil seal (pictured here before I removed it from the packaging), I also ordered some metal shims for the king pin cap/steering bracket on the axles to replace the warped ones that came off (they come in a big bundle). I also got shims for the pinions, a gasket for the transmission box cover (the one I had on there is failing), another can of Red Oxide primer, and some F marked bolts to replace non-F bolts on the top bow brackets.

Other things I sandblasted this week is the front axle flange on the driver’s side along with the shim.
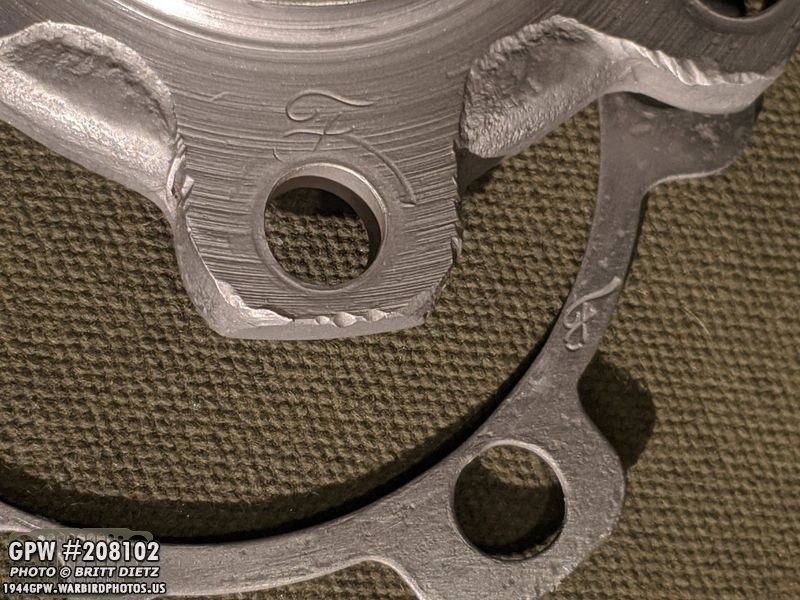
Both the flange and the shim are F-marked.

I had to order two F marked bolts from Ron Fitzpatrick Jeep Parts as two of them were just regular bolts while the rest were original F marked ones (I wanted them to match!). The cap was also sandblasted along with the nut and washer. The cap has an F mark as well.
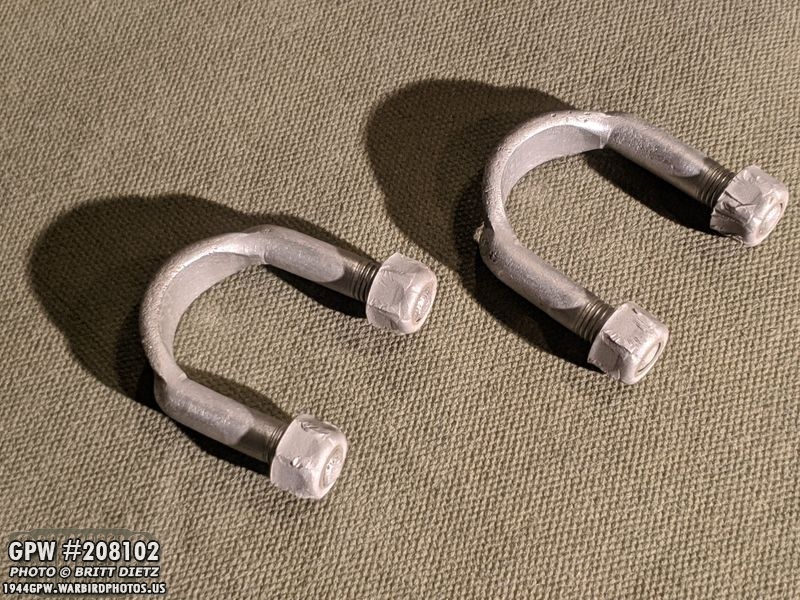
I also sandblasted the two U-bolts for the rear propeller shaft to rear axle differential.

Speaking of replacement bolts, it’s pretty easy to tell which ones are the originals, and which two are the repros. Sadly, the F wasn’t a perfect match, but it’s good enough, At least they all have F marks!

One the other hand, all the original F marked passenger side flange bolts were there and I sandblasted them nice and clean.
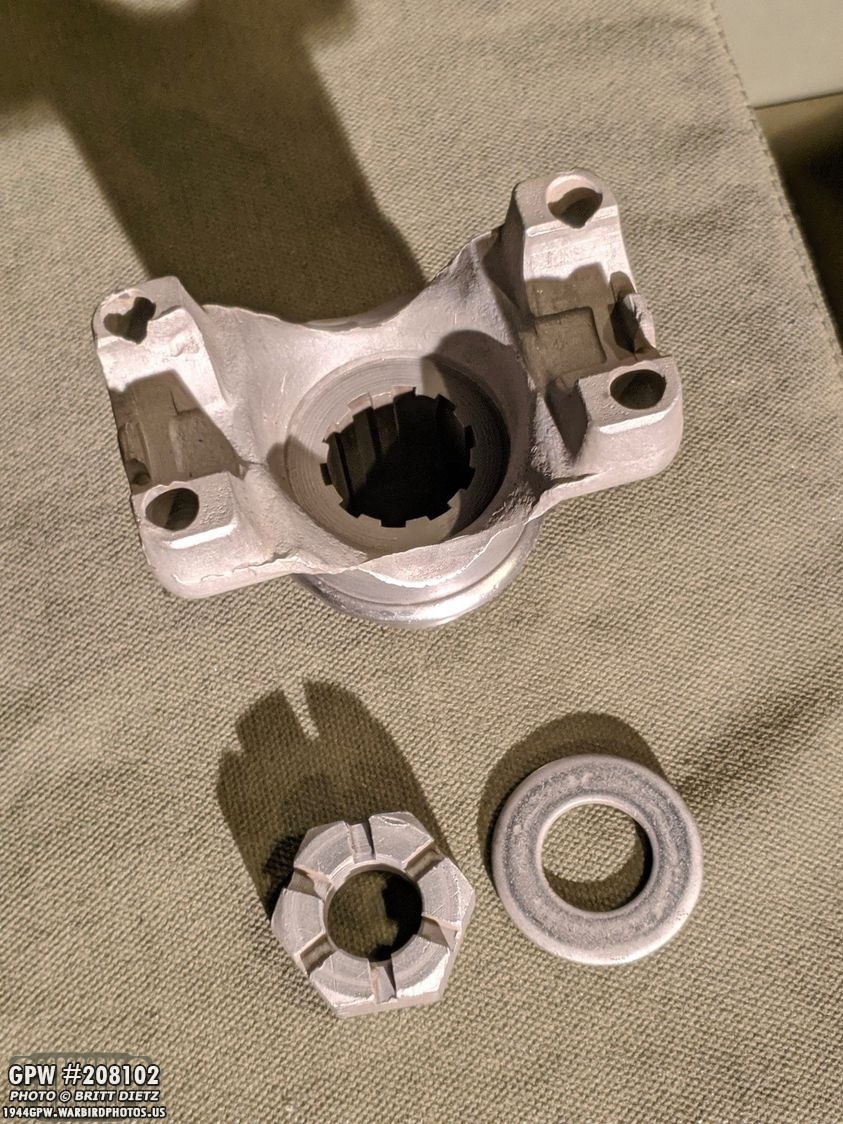
I sandblasted the front yoke, nut, and washer…

Which yielded a nice F stamp on the yoke.

I’ve been trying to figure out the best way to restore the knuckle retainers on the front axle. The felt wasn’t too bad, but would be replaced. Rather than get a whole new kit, I wanted to figure out how to restore these original ones.

Looking online, I realized that the retainer can be split into a top and bottom very carefully with a tiny screwdriver. Lot of oil/grime inside. There was a super-thin paper? gasket and the felt piece.

Cleaning it up a bit, here’s what’s left of the paper gasket (it was stuck on there good) and the felt part. Looking online, not many vendors sell the felt/rubber parts for the originals. Most vendors have new kits that are probably more efficient, but not like these originals. So I’m on a quest to figure out where I can get replacements for the rubber/felt.
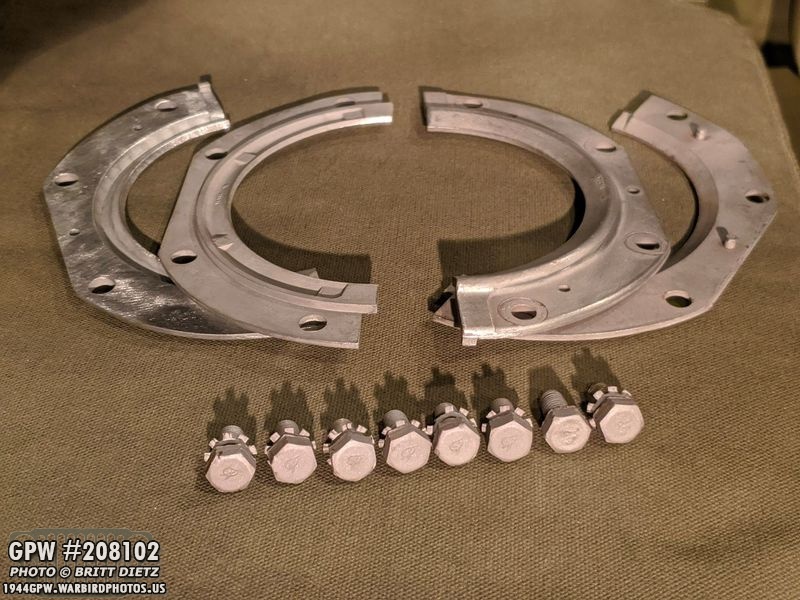
In the meantime, I opened up the other knuckle retainer for the passenger side, and cleaned them both via sandblasting. I also cleaned up the 8 F stamped bolts that go with them.

Better look at those original F stamp bolts for the knuckle retainer.

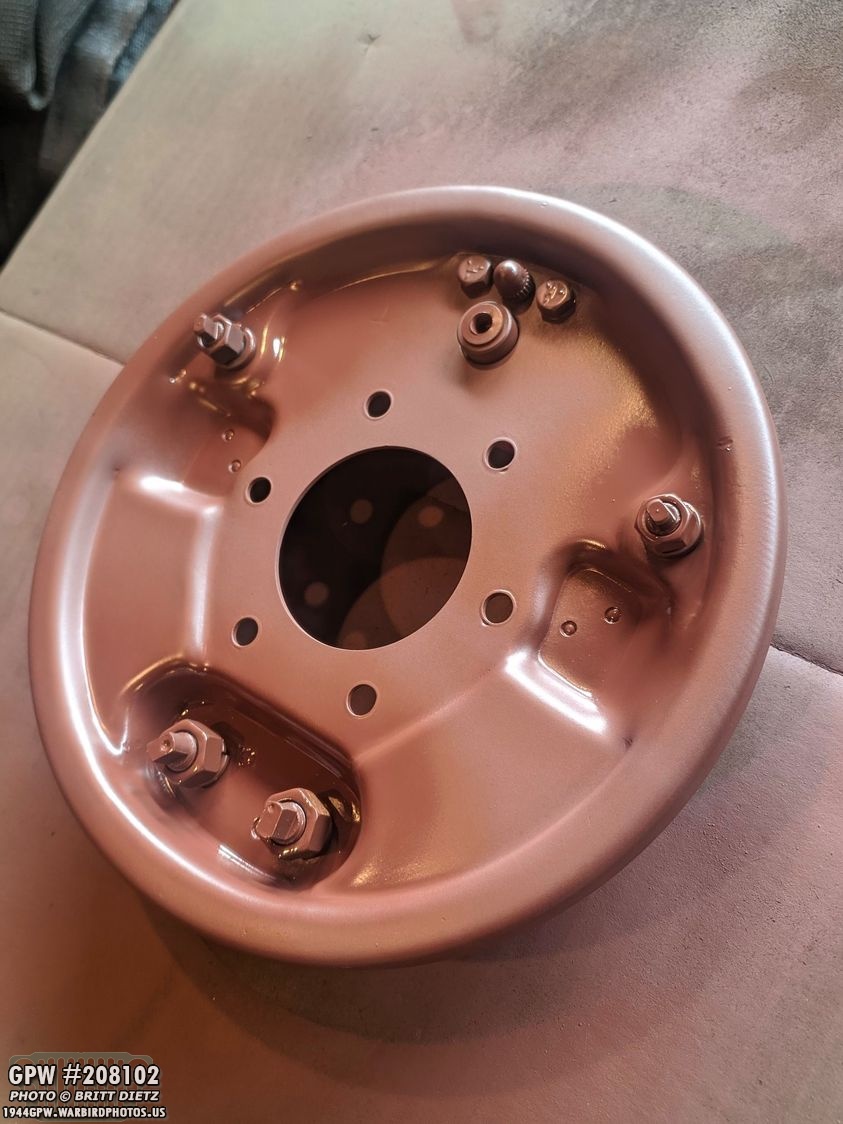
For the last few months, all I’ve been doing is taking axle parts apart and cleaning them. It is finally time to start painting and putting some of the parts BACK together! I decided to complete the first brake assembly, this one for the front axle on the driver’s side. I sandblasted and wire wheeled the backing plate as clean as I could get it. I left a little of the original wartime red oxide on the inside lip as it wasn’t going to be seen. I then cleaned the entire thing to get it ready for paint.

Painting the inside with Ron Fitzpatrick Jeep Parts Red Barrier III Red Oxide! Two coats total.

And the outside painted, two coats as well! Ready for reinstall! As they did during WW2, I’m not painting the inside OD Green and I’m waiting to paint OD green until the entire axle is reassembled. So things will stay red oxide for now.

Brake shoe anchor pin plate painted!

This particular plate was missing all the hardware and brake shoes when I opened it. Only the master cylinder was there. So, with all new parts from Ron Fitzpatrick Jeep Parts, I started work assembling!

I was able to use the original screws for the master cylinder, and once installed I put one of the brake bleeder nozzle caps on, left the cap in the master cylinder, and painted them with Red Oxide.
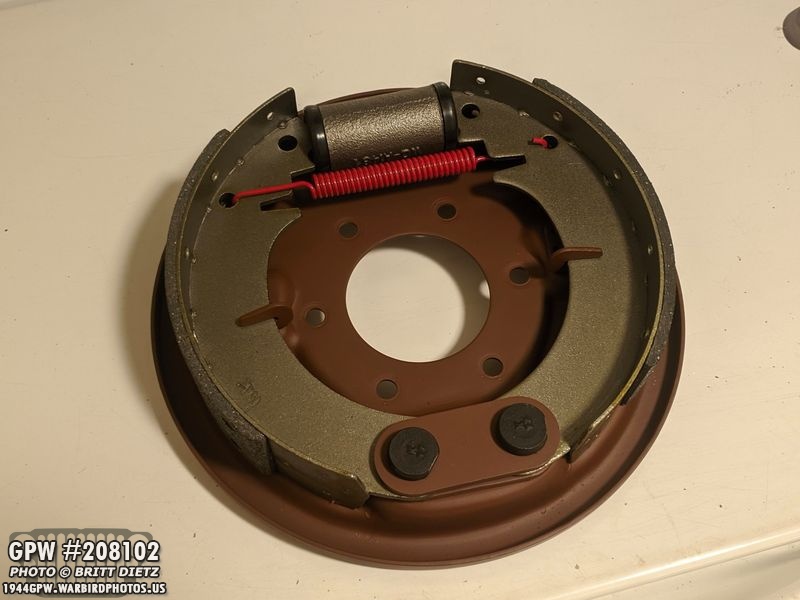
And voila! The first completed brake assembly for the wartime GPW axles! They will need to be adjusted, of course, once the drum is put back on. But it feels nice to have something completed! And a side note, the brake shoes are F stamped!
With all the parts on, I touched up the paint on the bolts that were sticking out. They were already coated black, but I wanted some extra protection with the red oxide as this is the outside of the brake plate.
And that’s it for this week! Looks like California is being forced to stay home for the next few weeks, so I’ll have a LOT of time coming up for the Jeep. Should have a lot more done by the update next week… and hopefully a driveable Jeep again once I finish the e-brake system. Till then…