 Axle painting and Jeep Hood History!
This week more work was done to the front wartime axle including painting, disassembling the steering rods, etc. Then it started to rain in SoCal, so I shifted my focus to something I’ve been meaning to do for a while… wet sand the hood to find if there were any original markings from WW2 on the Jeep! This yielded some amazing and surprising results on the Jeep’s history. But, I need some help to decipher the numbers! This is a big update!
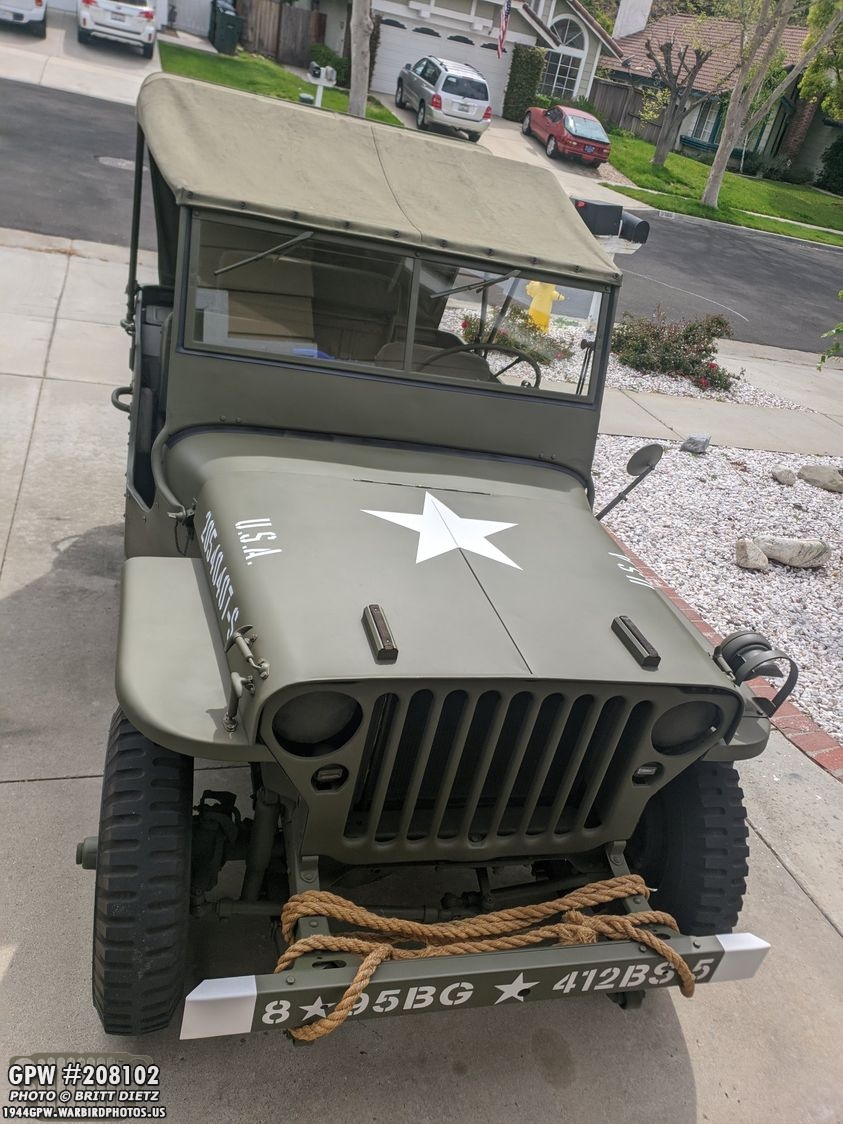
Looking at the Jeep now, a lot of new history revealed from the hood numbers! Look for that after the update on the axles.
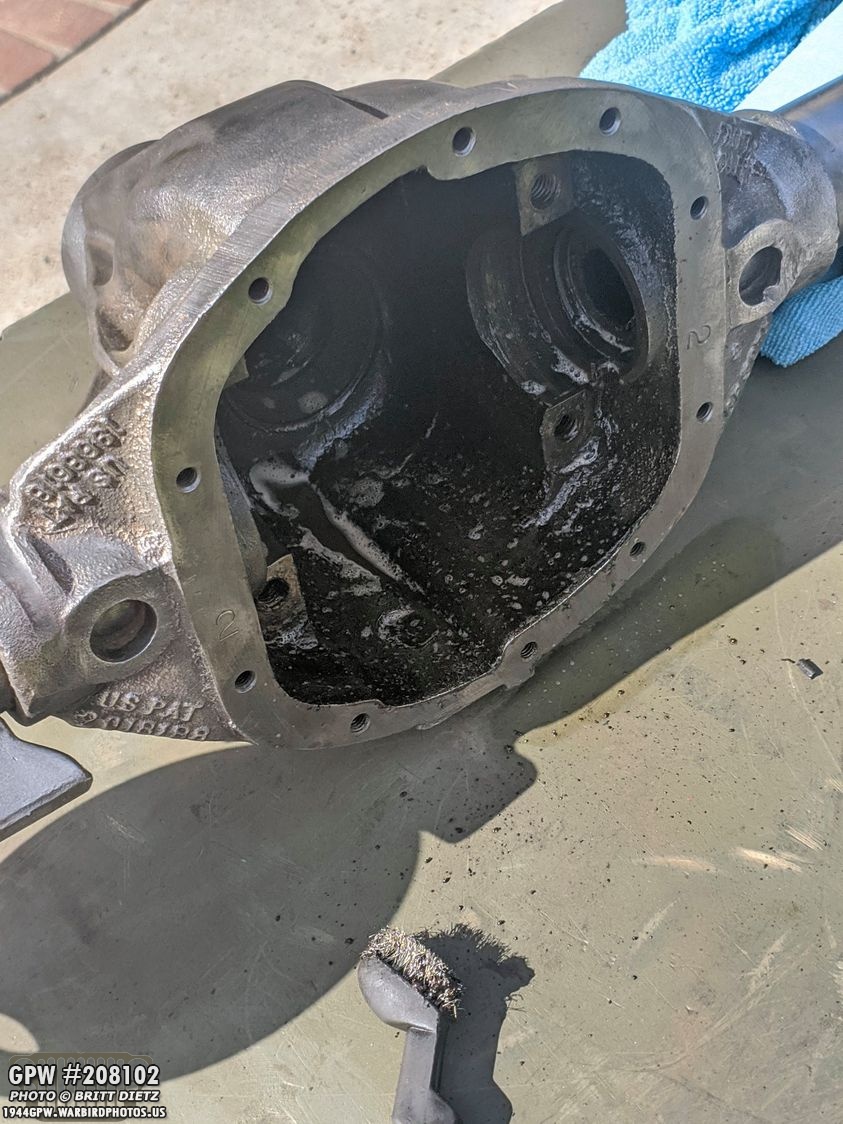
Before painting the front axle, I decided to clean out the main differential housing with some degreaser. Even though it will not be painted and get oil in there again, I wanted to clean some of the older oil out.

Same with the ball cups on the ends of the axle, a little bit of degreaser made them nice and clean.

Ready for painting! Last time this metal will see the light of day for, who knows, another 75 years!
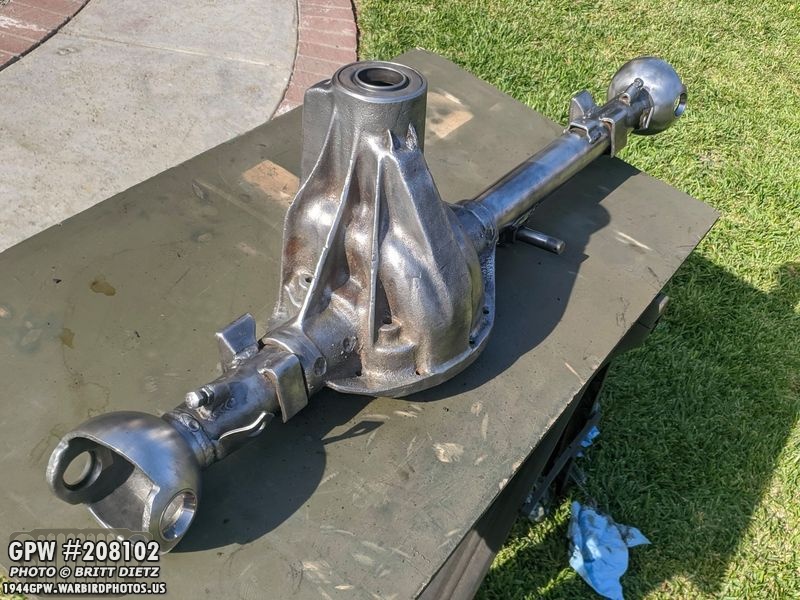
There is still some light paint remnants in areas, but it’s minimal and was hard to reach with the wire wheels.

First thing I did was put some rust converting spray on some of the areas that had started to get some rust and was difficult to get completely clean such as the brackets that sit on the leaf springs. That’ll add an additional coating of protection.
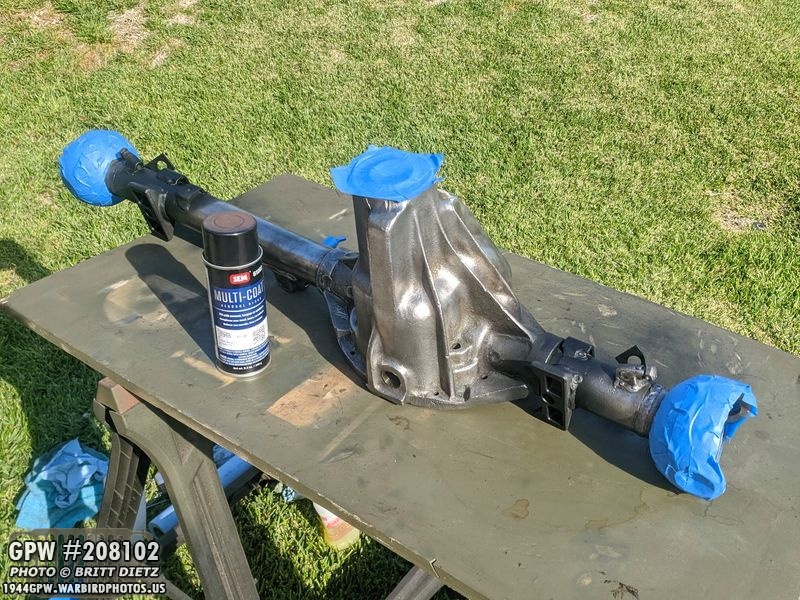
After that, I masked off the areas to keep metal and got out the &Ron Fitzpatrick Jeep Parts Red Oxide Barrier III primer.

Half way there… probably would have been quicker with a air gun, but I don’t have a gallon of the Red Oxide.

All done! Took about half the can after doing a second coat. Looks nice!

I was careful to not get any paint inside the housing nor on the surface that mates with the housing cover.
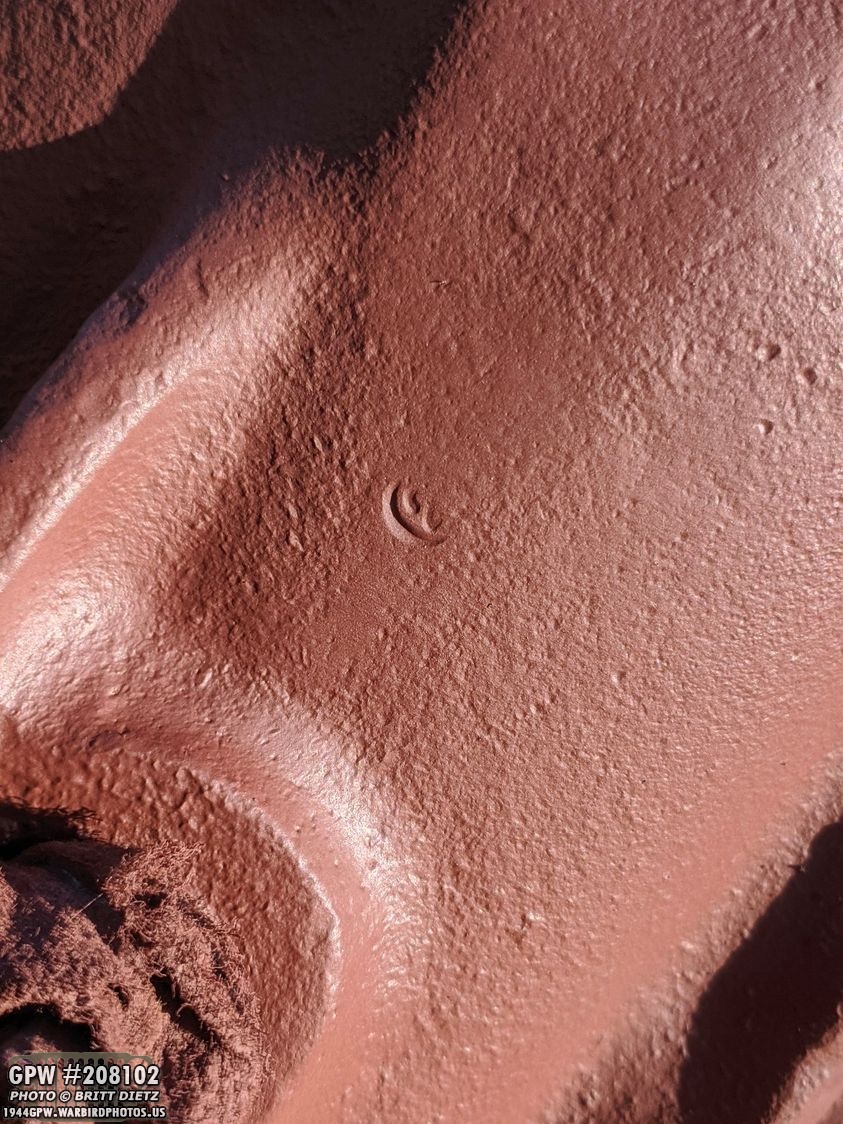
Funny enough, I discovered this little 2 stamped on the housing next to the drain plug that I hadn’t seen before.
The Red Oxide really makes the various F stamps pop!
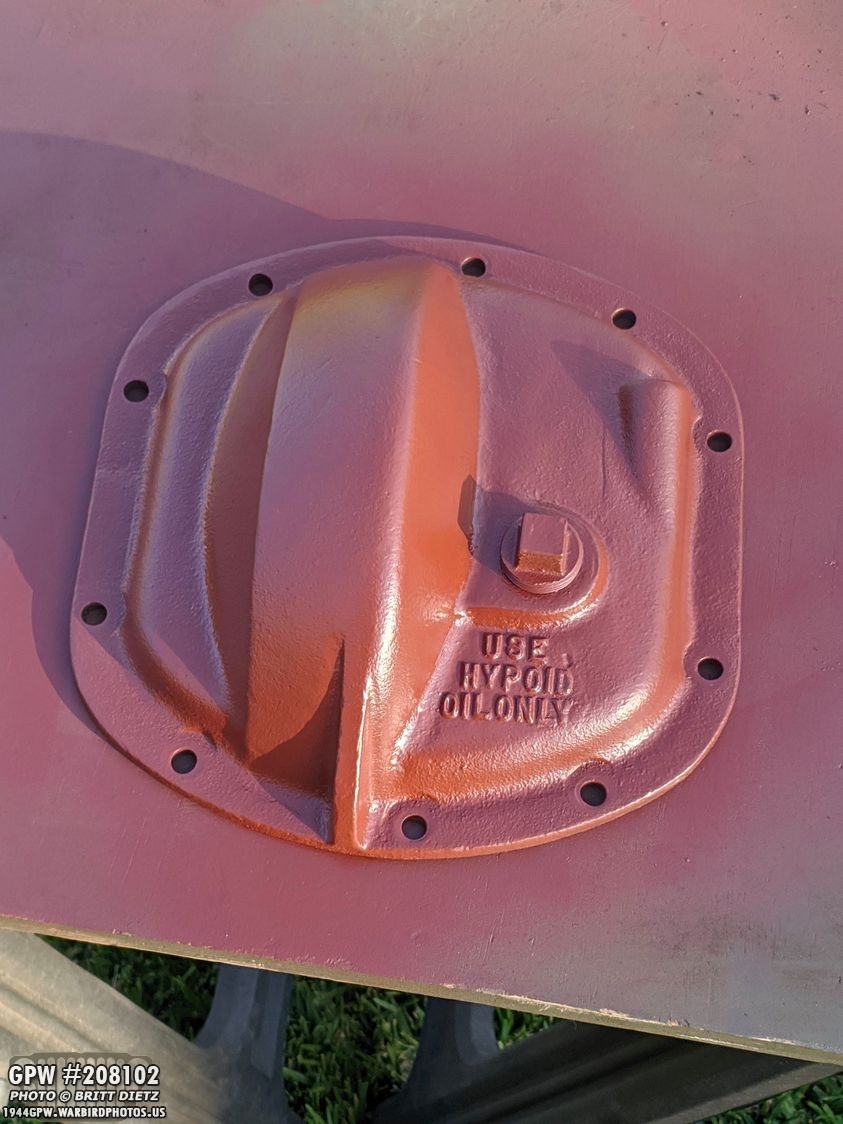
After the axle, I painted the housing cover.
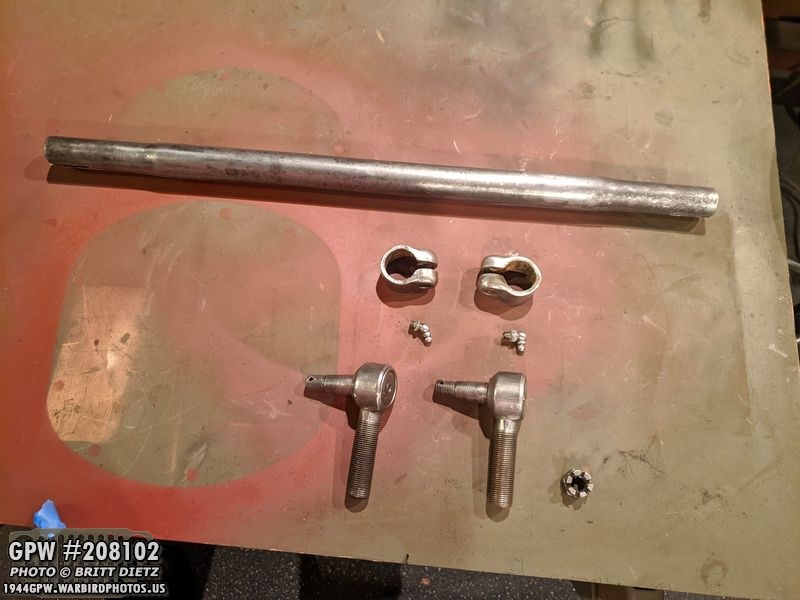
I forgot to take a photo of the before, but one thing that I’ve been working on for the last 2 weeks was trying to get the tie rod ends off the steering arm. They seemed impossible to get off… I soaked them in fuel for 2 days, soaked them in PB Blast for 2 days, used heat, clamps, the vice, etc and they would budge. Finally, with brute force, heat, and WD40 I was able to get them off. It was NOT easy for sure, these things have been in there a long time. You can see the two tie rods at the bottom and how many threads there are. They just didn’t want to let go.

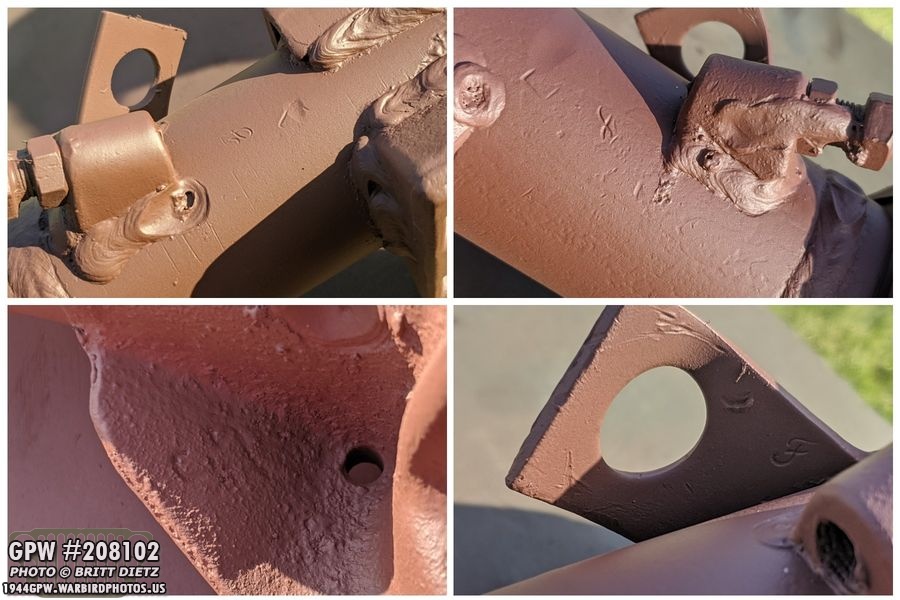
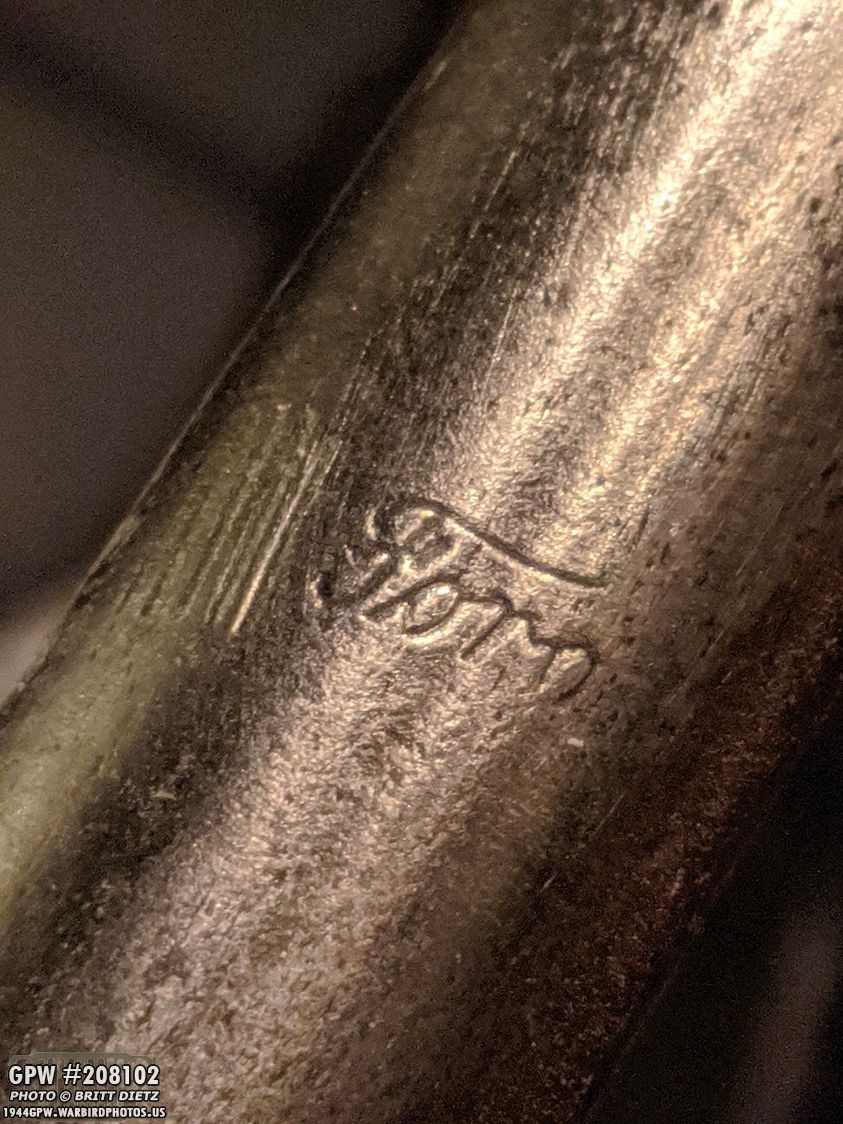
Here’s a close up of one of the FORD tie rods markings. The hole is where the grease fitting screws into.

Sadly, one of the FORD tie rods has a large crack, so I’ll be getting a replacement.
Here’s a look at the steering arm with the Ford stamp.
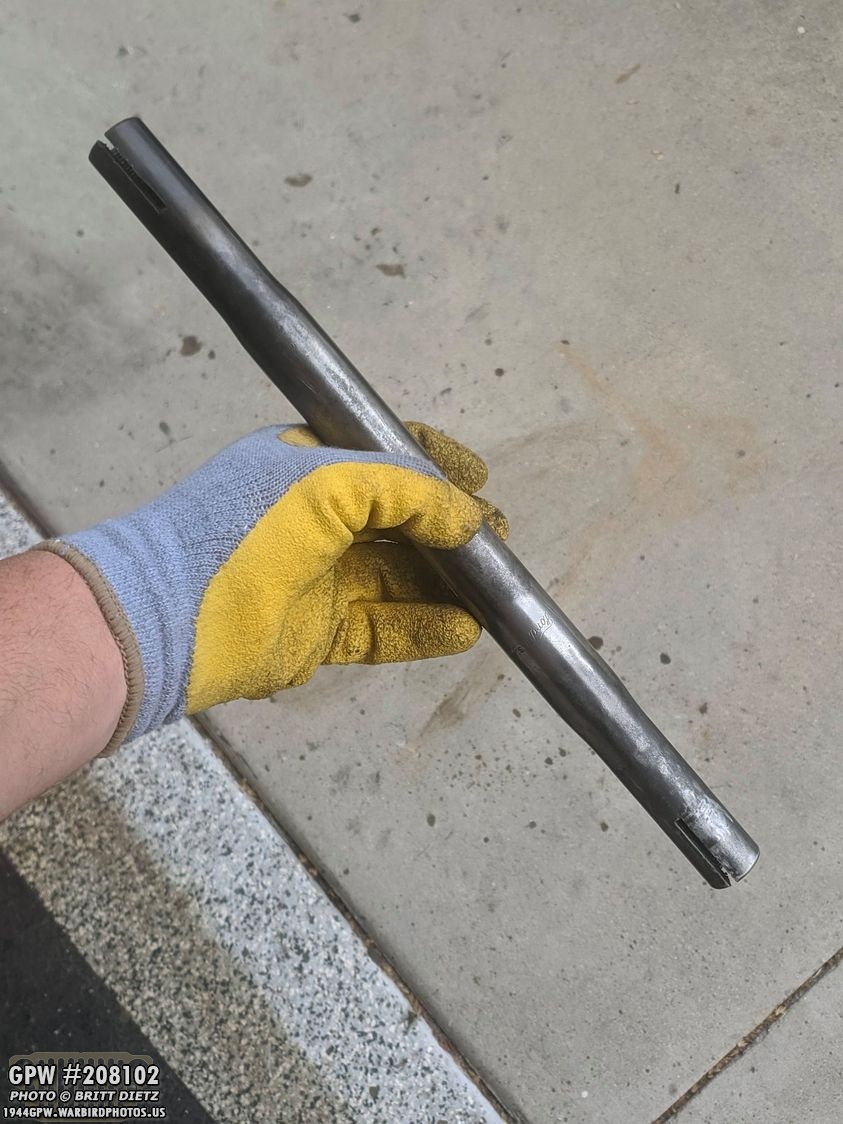
The small steering rod (shown here) was even more difficult to get the tie rods off. It took almost an entire afternoon to get them free and took multiple gos of heat, WD40, PB Blast, and a vice. They finally came free.

Here’s a look at all the parts for the small and long steering rods.

I discovered that I had 3 FORD tie rods and one MB tie rod (the Willys Tie Rods had TP). Since I’m replacing the one FORD Rod, I’ll get two to replace the TP so they are all Ford.

All four of the grease fittings. Interesting that the top left is from the Willys TP rod. The other three should be the same, but one of the Ford ones had an angled fitting. I’ll replace all these with new fittings as they are pretty gunked up.

And here’s the four clamps for the steering rods after sandblasting. No F stamps or markings on them. Also one of the Tie Rod crown nuts.
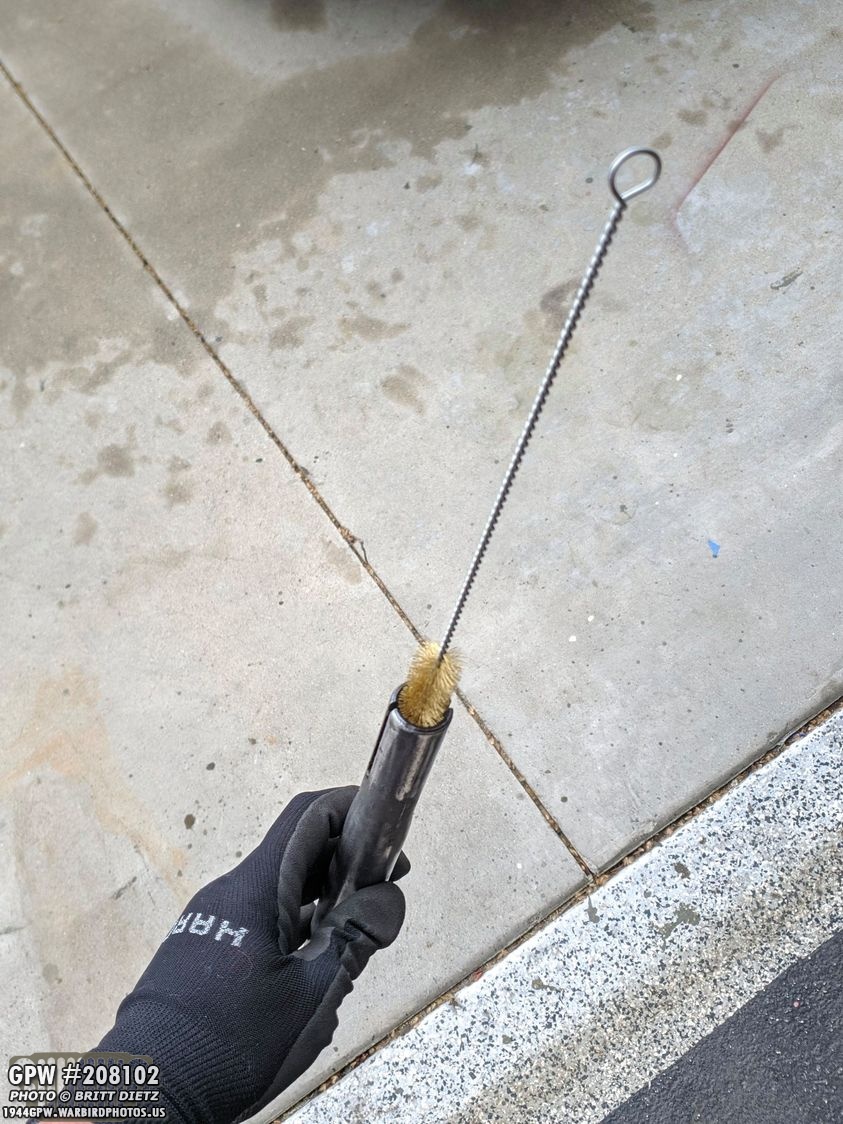
With the tie rods removed, I was able to use metal brush pipe cleaners and clean both the steering rod interiors.

Moving my attention to the bell crank, I needed to get the two bearings out. I used the videos from G503 by Scott Schiller on youtube and used a 17mm bit to carefully hammer out the bearings.
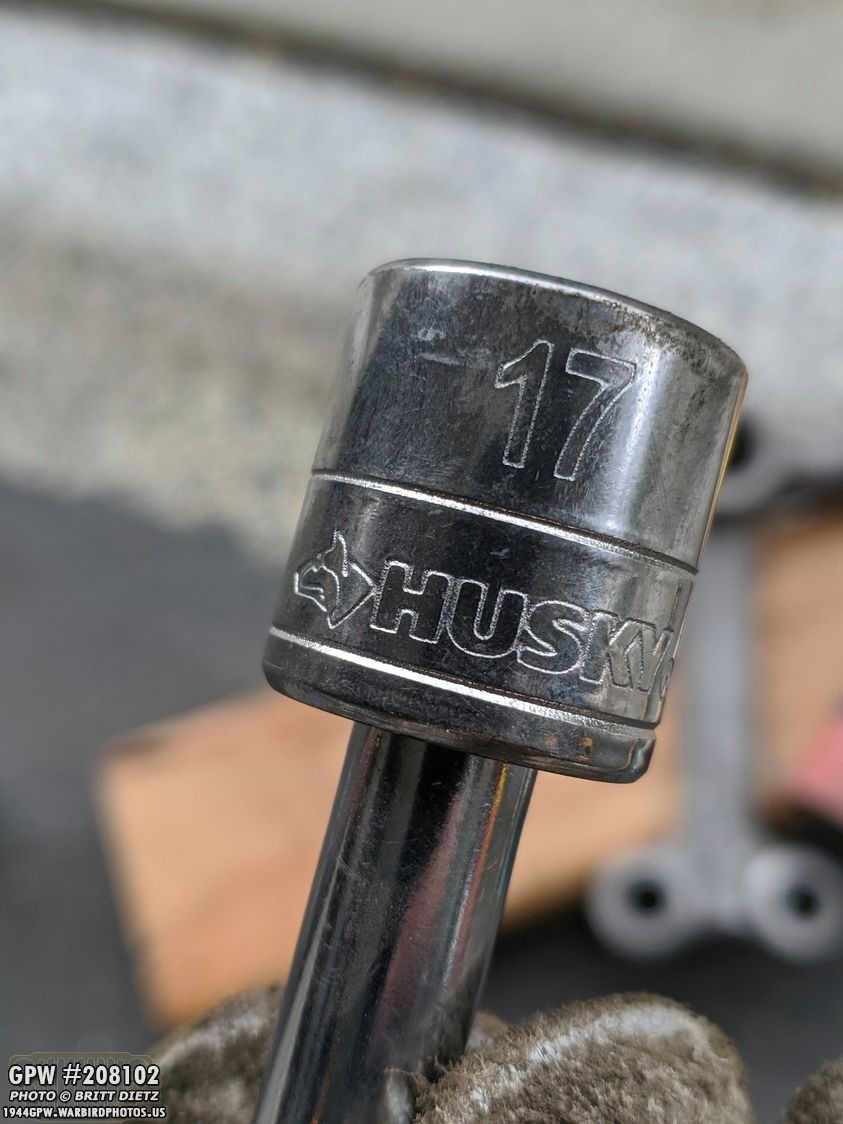
I didn’t have a deep socket 17mm, so I just attached an extender to the end and was able to hammer both bearings out.

While the bearings are original and in good shape, they have a lot of debris in them that I couldn’t get rid of even after several cleanings, so I’ll be replacing them with new ones.

I also unscrewed the grease fitting from the bellcrank. After cleaning, this one cleaned up nice and can be reused.
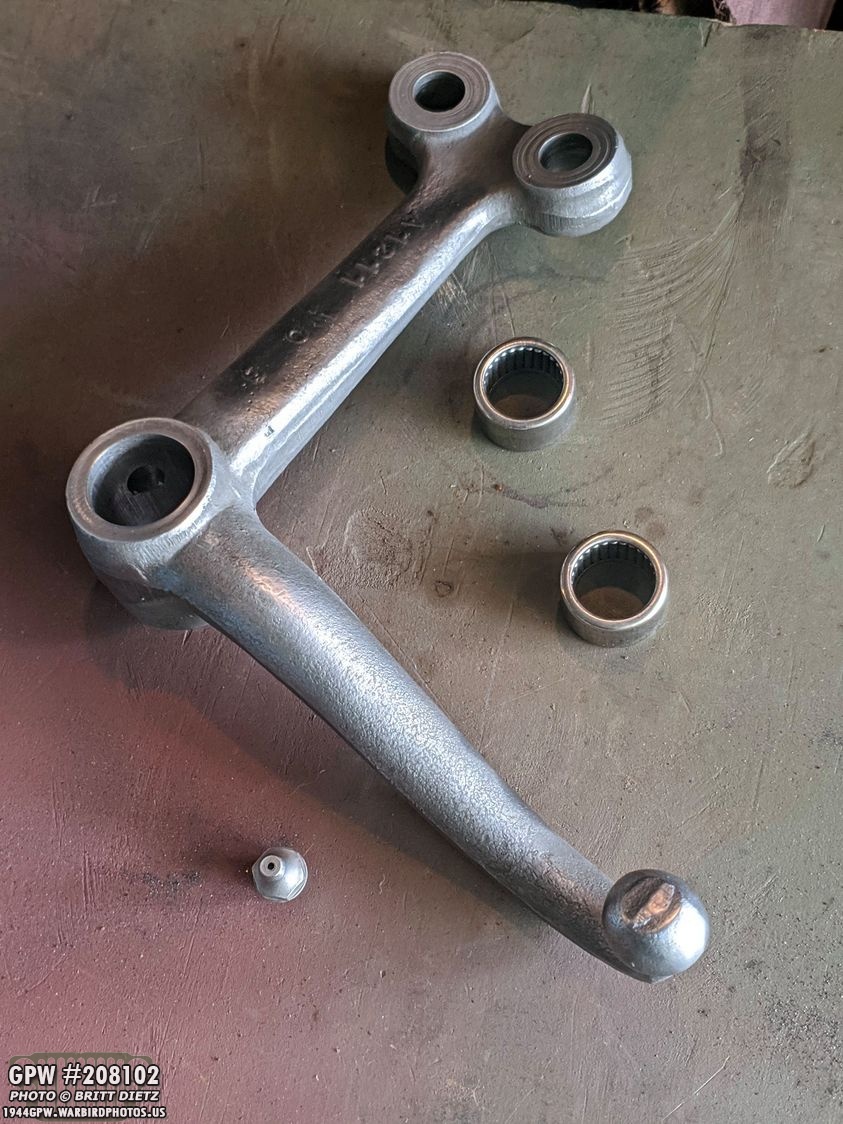
Here are all the parts to the bellcrank.
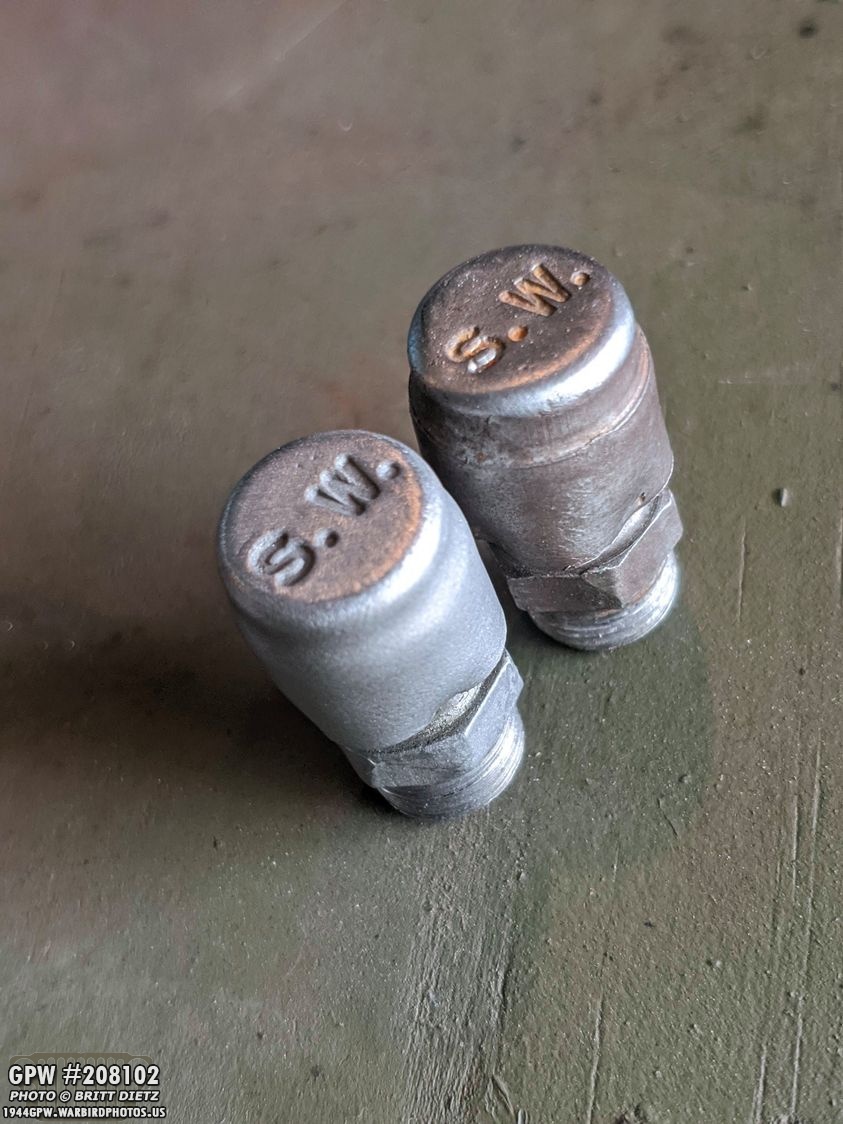
I cleaned up the two vent caps for the differential housing covers as well.
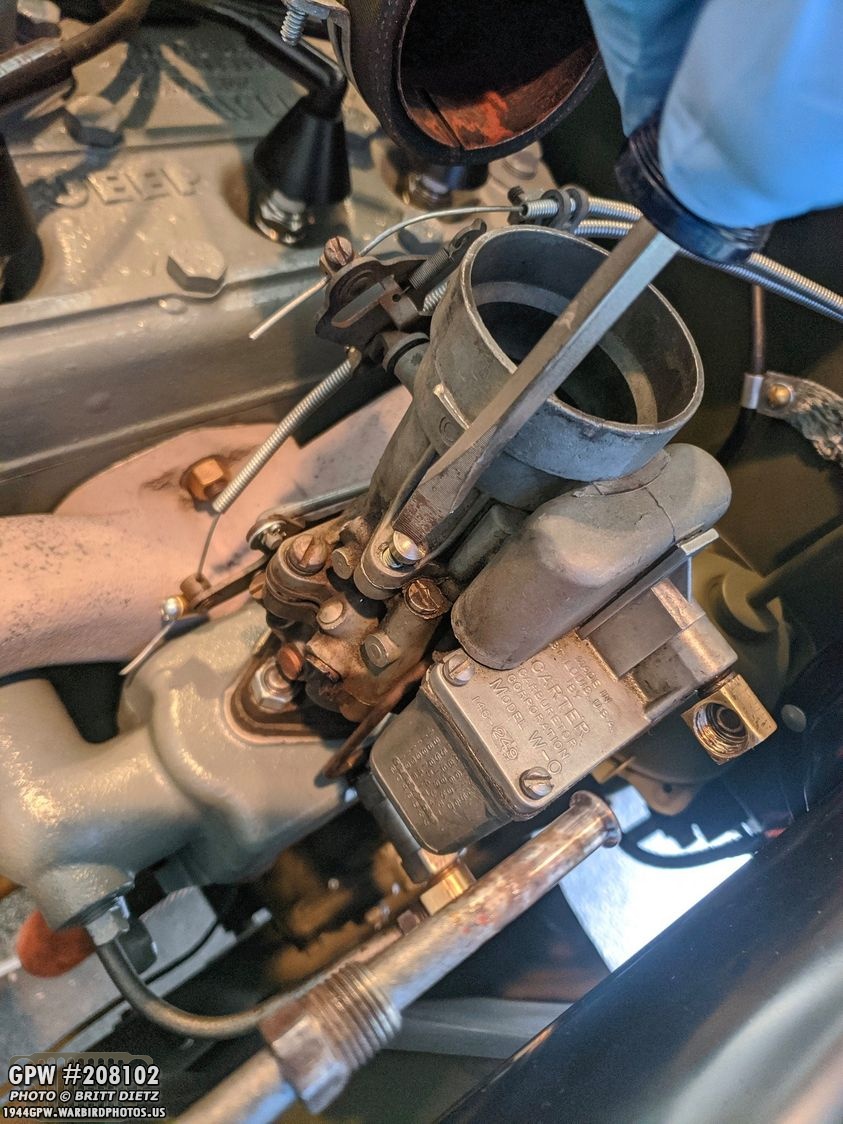
When I drove my Jeep last month to Chino Airport, I had an issue with the carb and the metering rod coming loose. It caused the engine to sputter. So Steve helped me fix it, but it needed to be remetered. To do this, first unscrew the carb cover.

Rotate that aside. You don’t need to go any further than this.

If you have one of these tools (there’s two types of metering rod adjustment tools, this is the one I have) you can use that to meter it. In this case, I decided to show how to adjust the metering rod without a tool.

This is the most important part. I had read on G503 a way to adjust the metering rod without the tool, and could be even more accurate as it accounts for wear. Before I took apart my carb I ran the engine for a little at idle. I gave it some gas and let it go back to idle for a bit before shutting it off. After opening up the carb cover, you look at this setup. The metering rod is that gold ? looking part. It is lifted up and down when the small pin (with a hair pin clip) travels upwards (red arrow). If you look, you’ll see a small gap between the pin and the inside of the rod (the distance between the two yellow arrows). When you push the throttle very slightly, there should be no delay between when the pin rises and when it catches the rod and moves it up. If there is a delay, it will cause the engine to sputter. So you loosen the nut holding the pin (see next photo) and make sure the rod is full down. Then move the pin upwards till it will catch the rod immediately and move it up without interfering with the rod gong back all the way down.

Once you find that sweet spot, you can tighten the nut on the back holding the rod in that position. That should get you metered pretty well without a tool.

Another thing I noticed with my carb was that the two parts here had separated a bit causing them to slip slightly. You can see the gap there. I pushed them together so they engaged, and that made it a lot better.

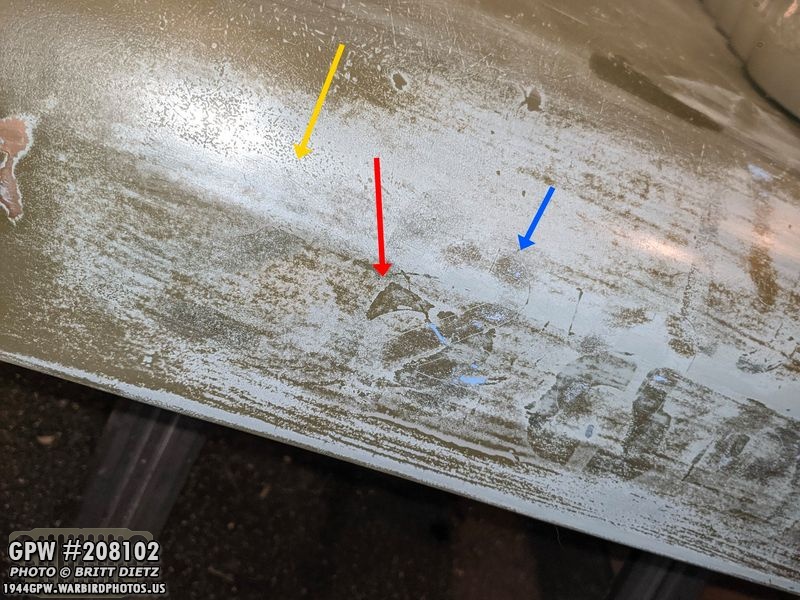
Now on to the best part of this update… the Hood! It’s like digging for fossils, but instead Jeep History! To begin, let me explain that I’m not using my original hood. I have a repro on the Jeep right now until I can find another GPW hood (anyone have one they want to part with?). Aside from the channel being well beyond repair inside the hood with it rusting out several sections on the hood (red and yellow arrows) there’s a terrible sag in the hood that would be incredibly difficult to remove. Too many people sitting on the hood over the years (blue arrow). It’s gotten so bad that the hood makes contact with the radiator protector rod and almost hits the oil filter/air bath. So the hood will be a wall decoration.

In late 2018, I tried to recover markings from the Hood using the paint stripper method, which is to lightly put on paint stripper and quickly brush it off. That didn’t work out so well and caused a mess. I was able to make out some markings, like the USN and a 9.
Additionally, I was able to find some yellow markings but, at the time, I couldn’t make them out. The paint stripper worked a little too well, and I think now that’s because I let it sit too long.

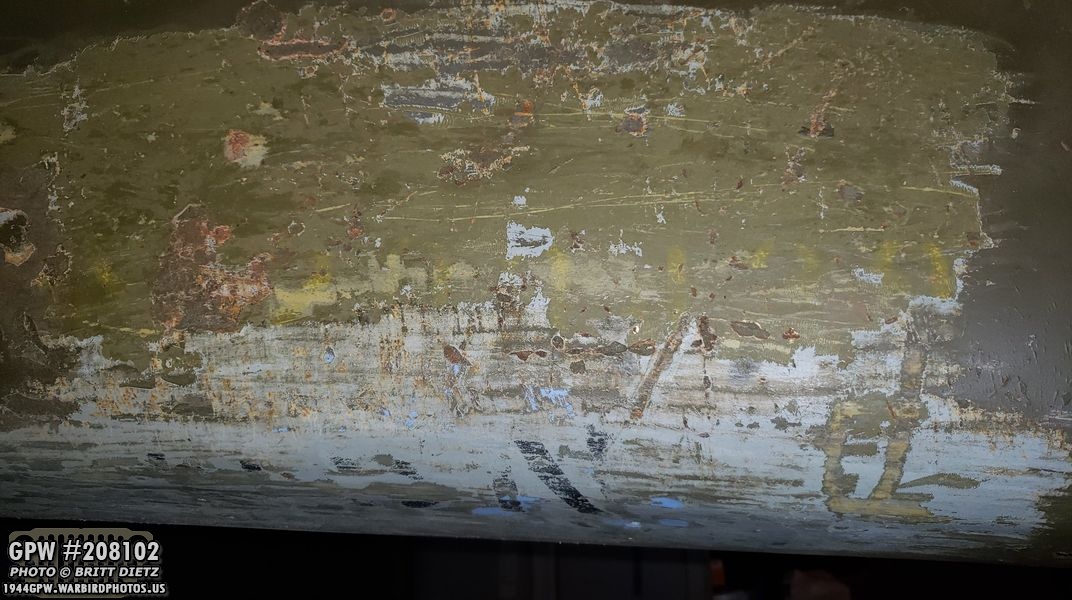
What I was able to find was multiple layers of paint. From what I could find, it went… 1) Red Oxide Primer2) a lighter 33070-like OD Green (bottom right image)3) a darker OD Green (bottom right image)4) Light Navy Gray (top right image)5) Dark Navy Gray (top right image)6) 1-2 layers of modern OD Green paint on top

So, with the left side messed up, I made the mistake of just cleaning it to the metal. I should have kept what I had and tried to see if I could make it better. The idea was I was going to repaint this with OD Green, put a star and markings on it, and hang it up on the wall. But I wanted to try another method on the other side to try and recover the numbers. As I’d seen before, there is something to discover. So the hood has sat in the garage for one and a half years waiting.
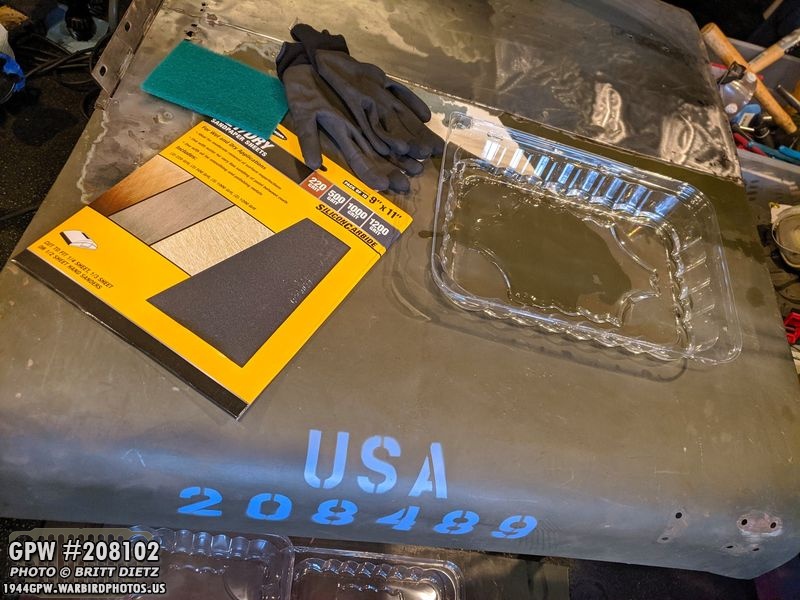
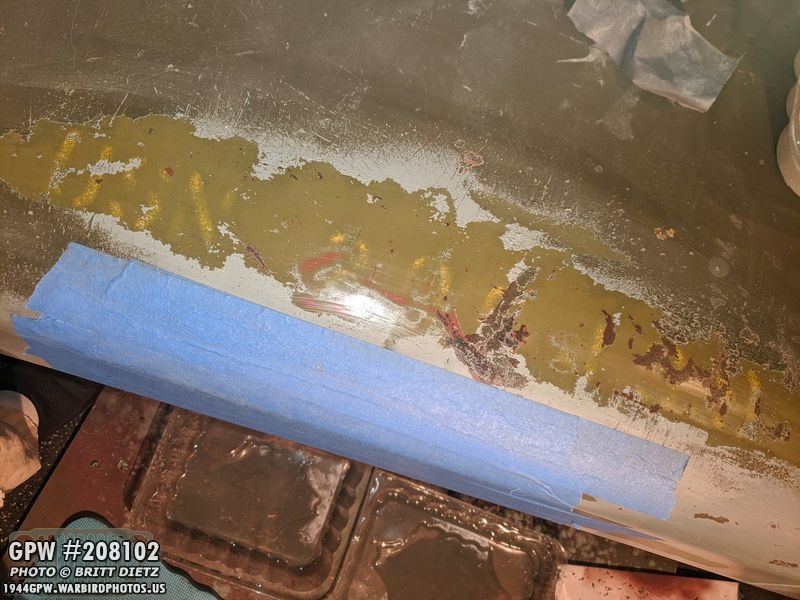
With the rain spoiling my axle work, I decided that it was a perfect time to try and wet sand the other half. Materials used were a pair of gloves, wet/dry sandpaper, a tray of water, and a sponge. Also helps to have lots of rags/towels.

The two grits I’ll be using are 220 to start getting down to where I can start to see something, then 500 for the finer details.

Side note (and jumping ahead a little), I thought by using some trays to catch the drips of wet sanded paint would save the floor from a mess… that didn’t work so well. So make sure you can make a mess on the floor.
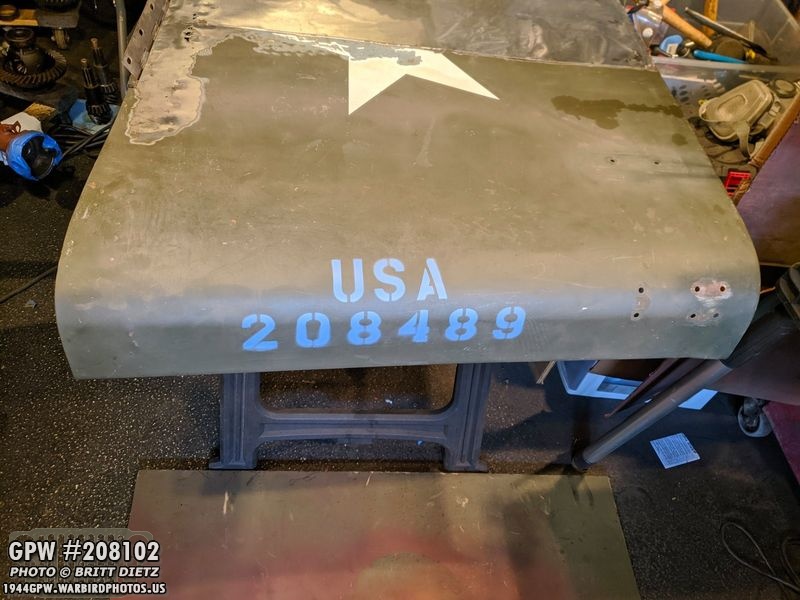
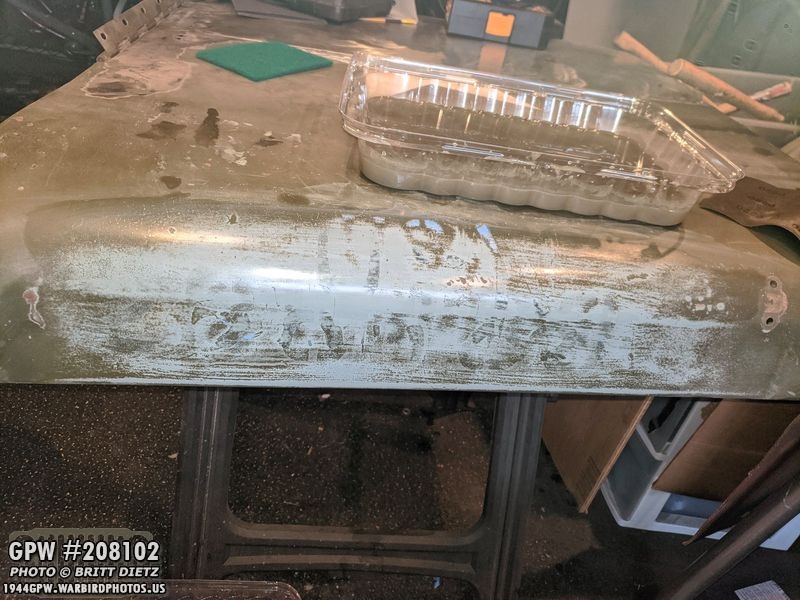
One last look at the hood before we get started. The previous owner had said he didn’t know where those who restored the Jeep got that number. It was too short to be a US Army Number, so I ignored it but wanted to document it.

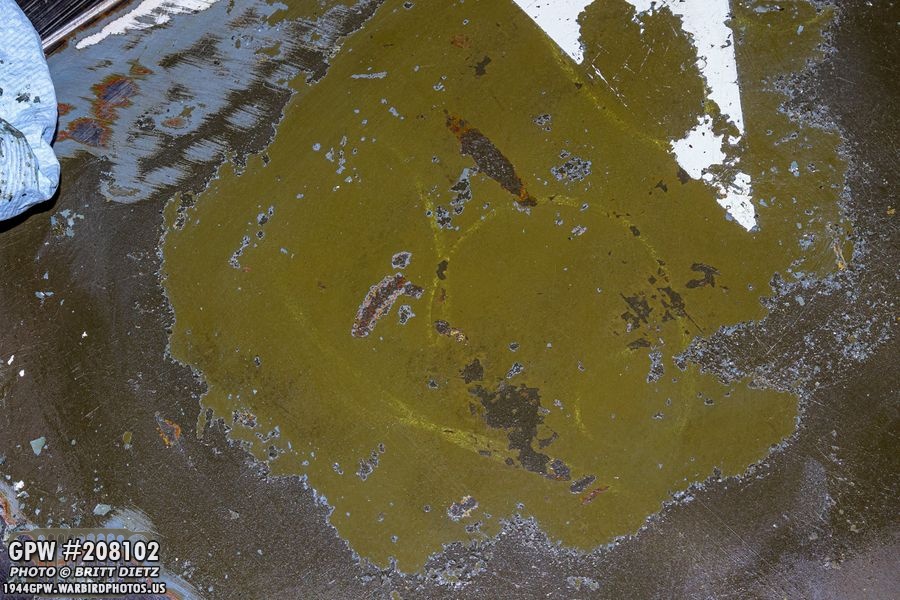
Starting with the 220 git you can already start to see the US Navy paint coming through and the hint of some black markings.

Starting to see more numbers coming through! One thing to note throughout this entire process, the modern markings that were added they used a knife or something to carve the outline into the hood… so you’ll see those outlines throughout all the photos even though they are long sanded off sadly. Anyway, so far we can’t really make much out of this yet.

Now making some progress, but still can’t make much out. Maybe a 4 in the middle and a 8 or 0 on the left? Also, you can start to see USN appear above the numbers.
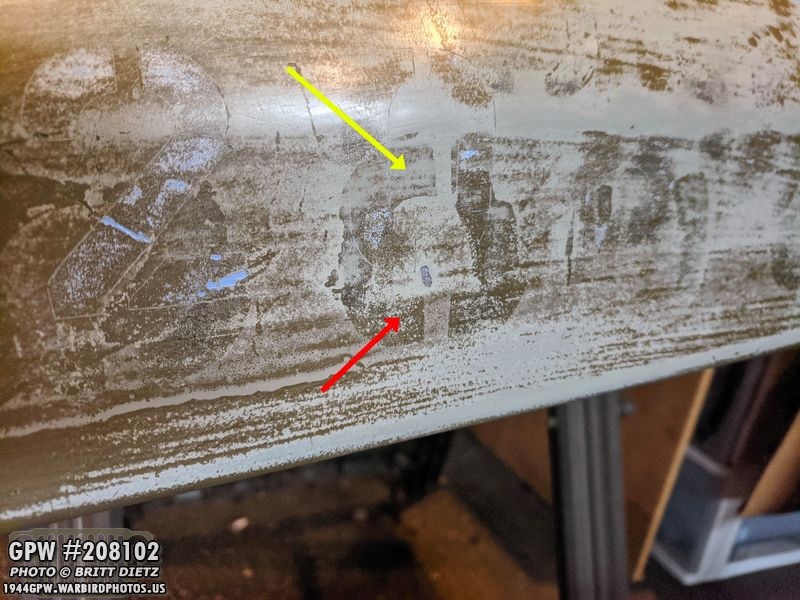
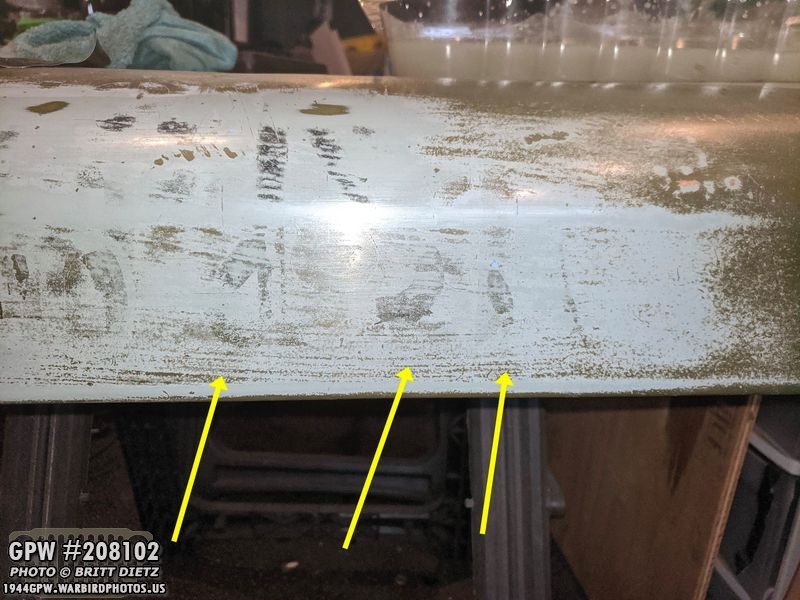
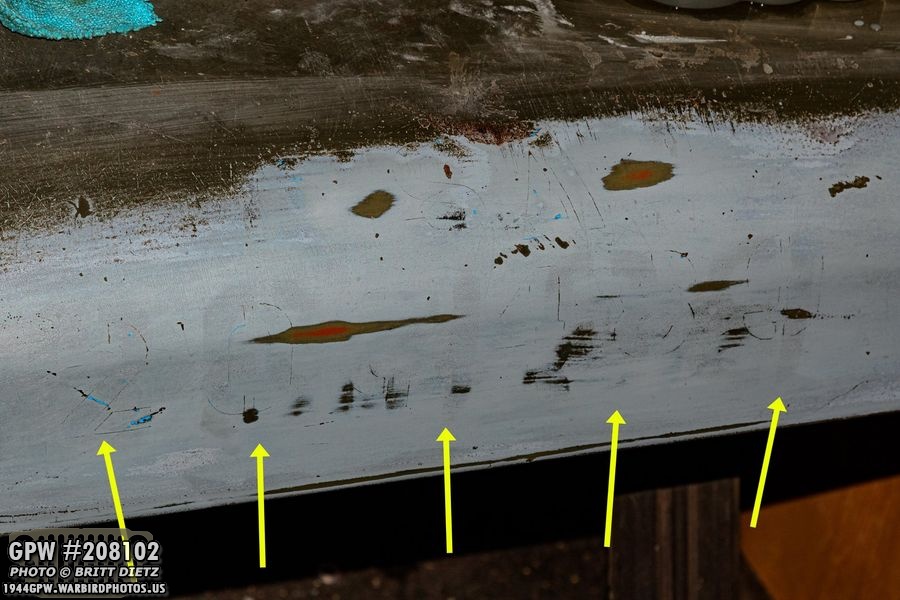
One thing that took me a while to realize is that there are two sets of navy numbers on the hood in different locations. One high with about 2 inches between the edge of the hood and the bottom of the numbers (red arrow) and one that was placed super low with the bottom of the numbers on the good edge (yellow arrow shows the top). It makes things a bit confusing.Note, you can see what I meant about the modern markings, in this case a 2 on the left, still showing up even though it’s being sanded away.
So right away, I can start to make out three sets of numbers that begin with 2. The blue arrow shows the modern marking outline that remains from that knife that was used. The red shows the clear as day 2 top from the numbers that are lined on the very bottom of the hood. And the yellow arrow shows the faint large 2 that sits about 2 inches from the edge of the hood.
The USN is very clear now on top, but those numbers below it blend in and are hard to make out. You can also see how dirty with paint the water tray on top of the hood is from dipping my sand paper in.

Here’s a look at the USN on top. You can still see the USA from the modern markings.

Trying to decipher the numbers that go to the edge of the hood, it looks like 2, 0 or 8, 0 or 8, 4
And here’s the 4 again, what looks like a 3, and I know the last partial is 9 because we saw the 9 from the other side when I used the paint stripper.

So that would be either:200439288439208439280439
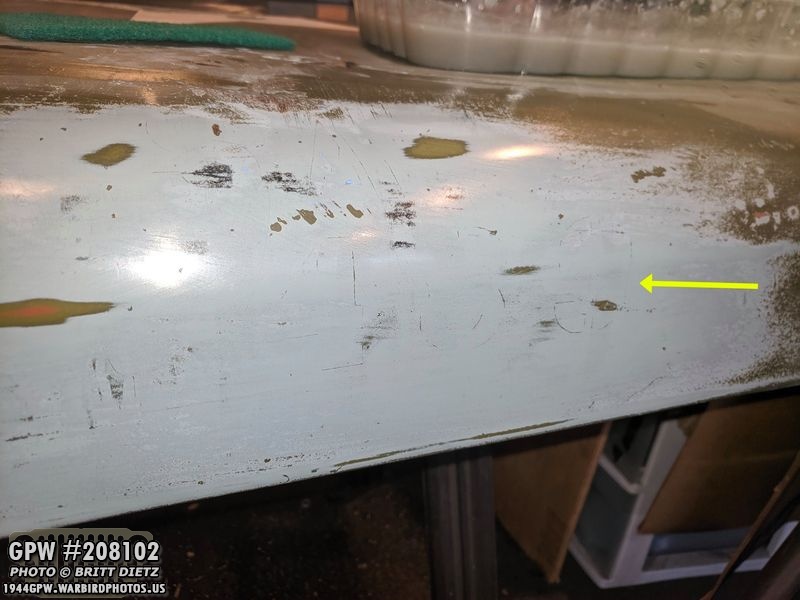
Sanding further, you can see a ghost 9 here (NOT the outline, again, that was from the modern markings). If you can’t see the ghost 9, squint your eyes. It’s for sure ending with a 9. This is from the numbers that are placed higher (see next photo).
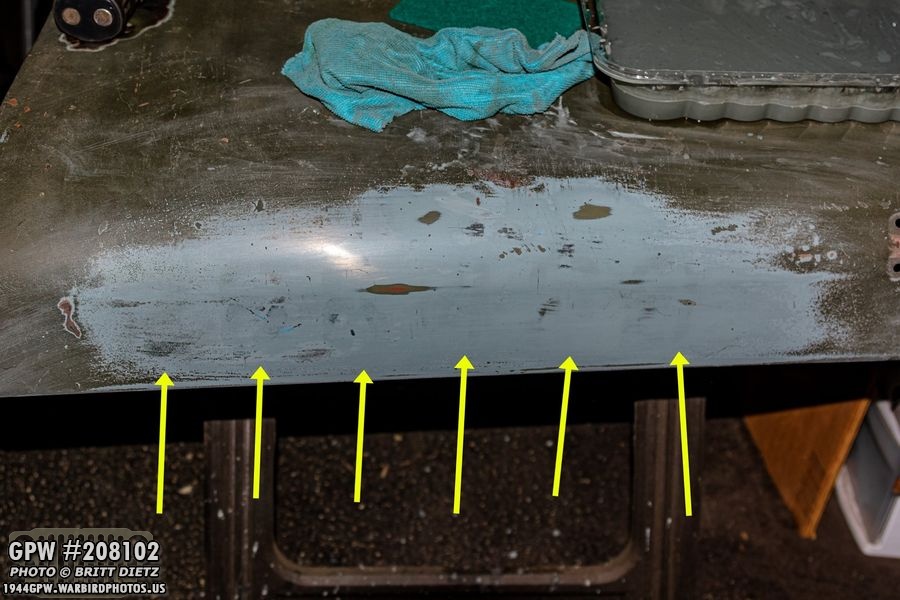
Here’s a look at the numbers that are higher, placed 2 inches above the bottom of the hood. Again it’s 2, maybe 8?, 0 or 8, 4, 2, and 9.

Here’s two angles showing those higher up ones. The lower ones are almost sanded away now. I think for sure it’s 2–439. It’s those two numbers between 2 and 4 that I can’t make out.
The 2 isn’t shown here, but there’s the two next numbers (0s or 8s) then 4, 3, and 9.
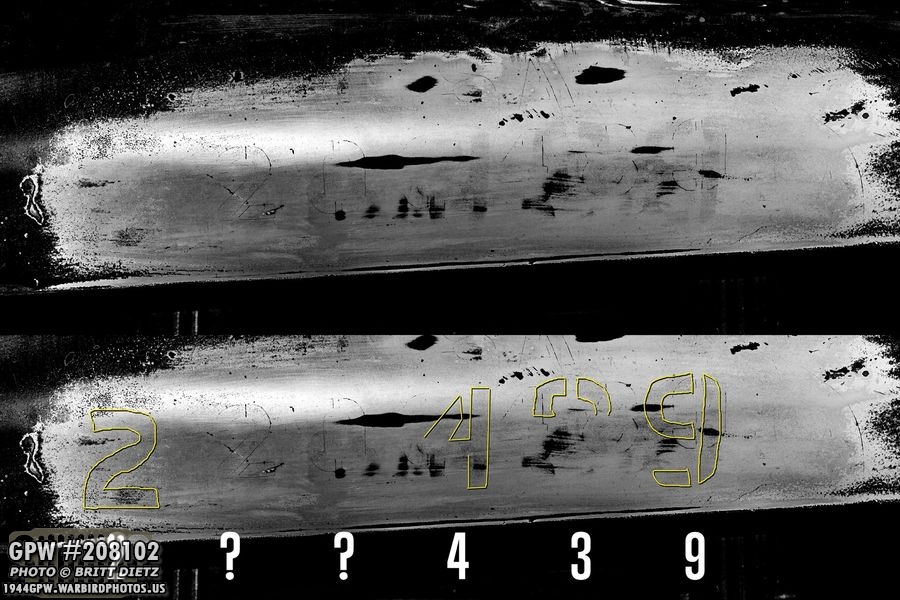
Here’s the image enhanced. Again, it’s too hard to make out that second two numbers. The outlines of the modern numbers don’t help! But I’m confident it’s 2–439. I decided I had enough photos of this to investigate, and any more sanding was removing anything left, so I decided to continue going down to the factory paint…
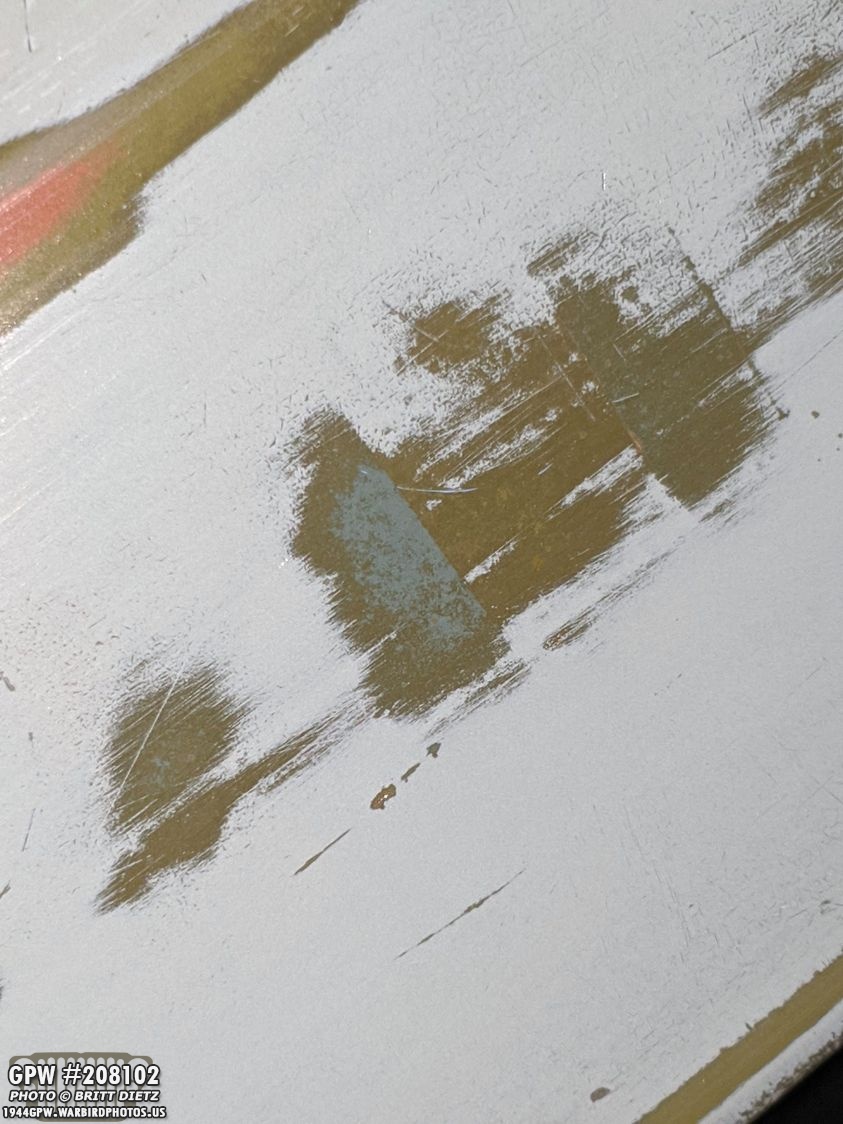
What’s this?! Under the first layer of green… BLUE!!!

Carefully and slowly sanding.. the original factory number comes into view!!!

BOOM! The original 1944 Ford factory number clear as day! I couldn’t believe how well it came out! Now, I’m sure you’re saying ‘that’s not the same as the other numbers!’ That’s correct, this is the factory number for the Jeep. If the Jeep went to the US Army, it would keep this number which would be painted in white once the Army got it. But the Navy/Marines had their own system and would cover this number up and use their own.

I’m sure you’re also saying, wait… isn’t your Jeep already marked with a hood number on the repro hood? That’s correct. I used an online hood number generator which gets you ‘close’ to your original number. It gave me 20540407, which amazingly, is only 51 away from 20540356! Will I be remarking the hood with the new numbers? Yes and no… I won’t remove the numbers I have on the repro hood, but because I’ll eventually be replacing the repro hood with another original GPW one… then I’ll put these numbers on there.
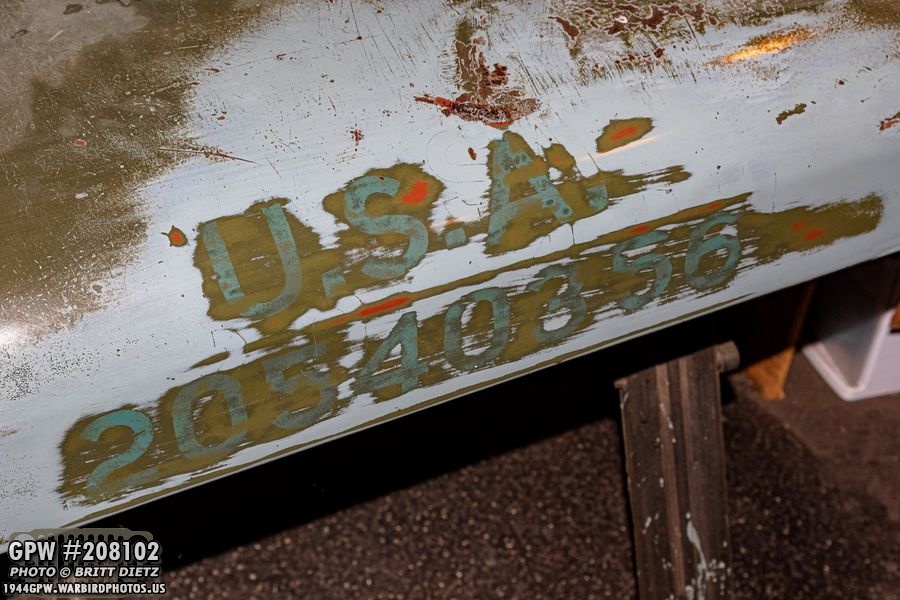
I continued to sand upwards and found the matching U.S.A. for the factory numbers! So awesome. Even though I’ll be repainting the hood, I will be keeping these original numbers on there and painting around them. So awesome to have this bit of history! But, we’re not done yet.

On the other side when I used the paint stripper, you saw earlier in this post that I had discovered what looked like USMC numbers in yellow around this location.

Starting to sand, sure enough… yellow!

I quickly discovered these yellow markings were sanding off super easy as I was trying to uncover them… yikes. But I remember, when I used the paint stripper I got to them easier. So I thought, what if I spray the stripper on there and remove it off within a few seconds?
Masking off the factory numbers so I wouldn’t hit those, the quick method of paint stripper worked perfectly! Sadly, there is some underlying rust that damaged the numbers so it’s incomplete. And to my surprise, I found USN before the numbers. This is on the same layer as the factory blue numbers.

Aside from the clear as day USN, it looks like it might be the same numbers as the navy layer… 2, 0?, 8/0?, 439!

Another look at the whole thing… USN 2 (8, 0?) (0, 8?) 439.

Now, looking at everything BUT the blue factory numbers, here’s what we have. I believe the modern markings that were added to the Jeep (top image) were close… I think those numbers were from what they could make out of the Navy number. They thought it was 208489. I know the last three numbers are 439. So perhaps it is 208439? The rest of the images are:
2) The lower black markings that go to the edge
3) The higher black markings that are 2 inches up
4) The other side markings that go to the edge
5) The yellow markings
6) The other side yellow markings.What are your thoughts?
Finally, another amazing surprise that’s still in development… I was looking at the middle of the hood for any stars, and while I found no stars on any of the layers, I found what looks like something handwritten (women’s handwriting?) on the hood! I will be spending the weekend trying to uncover what was written… a cool piece of history on the Jeep! That looks like a B!

So that’s it for now. Next week I’m going to restore my original First Aid kit for the Jeep. It needs a full restoration and markings. It has most of the original items inside it, which I’ll go through next week. Till next week!