 Adding Glass Stencils, Axle work, and a Jeep model!
This week didn’t see as much done as last week, and had it’s share of ups and downs with the axles, but still much done! I added the Ford Safety Glass markings to my windshield glass (full tutorial), continues working on the axles and drums, and then took a day to restore a ‘different’ kind of Jeep!
I put the headlight covers back on the Jeep. I do like the look with them added. I might end up getting a second set so I can cut out a slit in them for ‘blackout’ headlights.
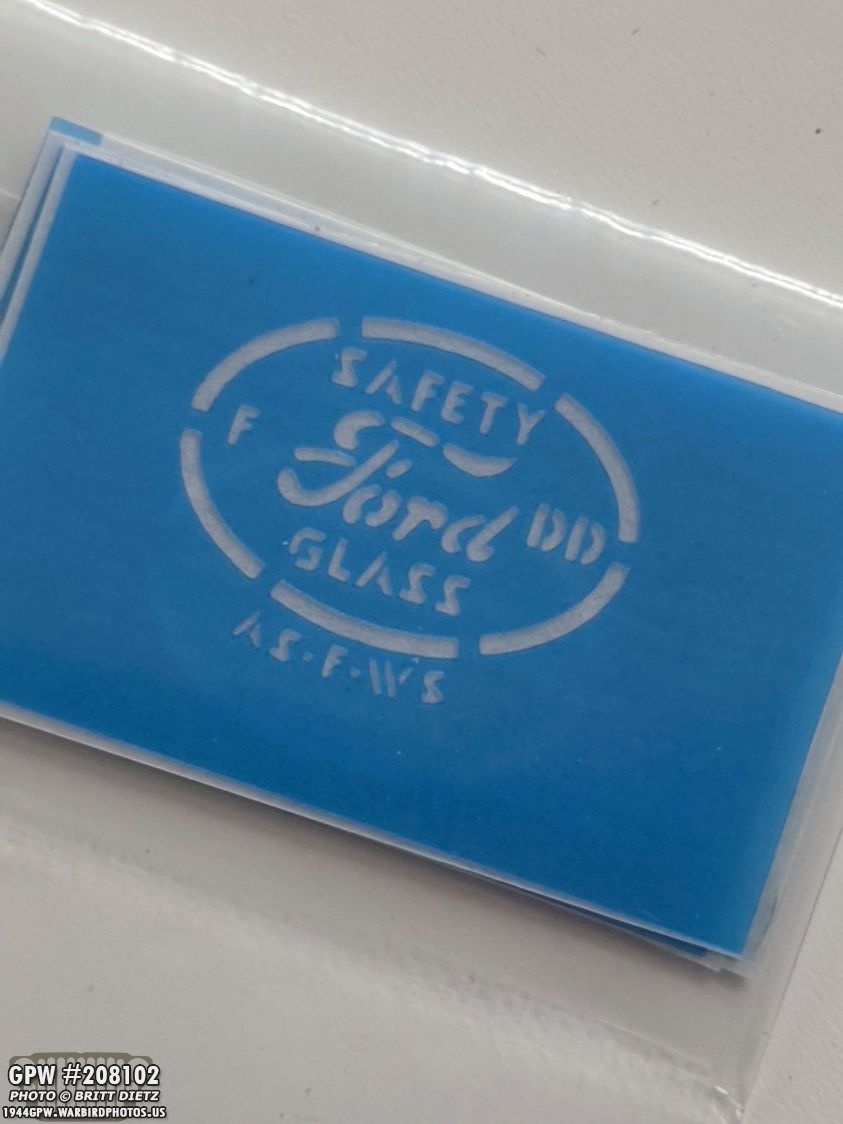
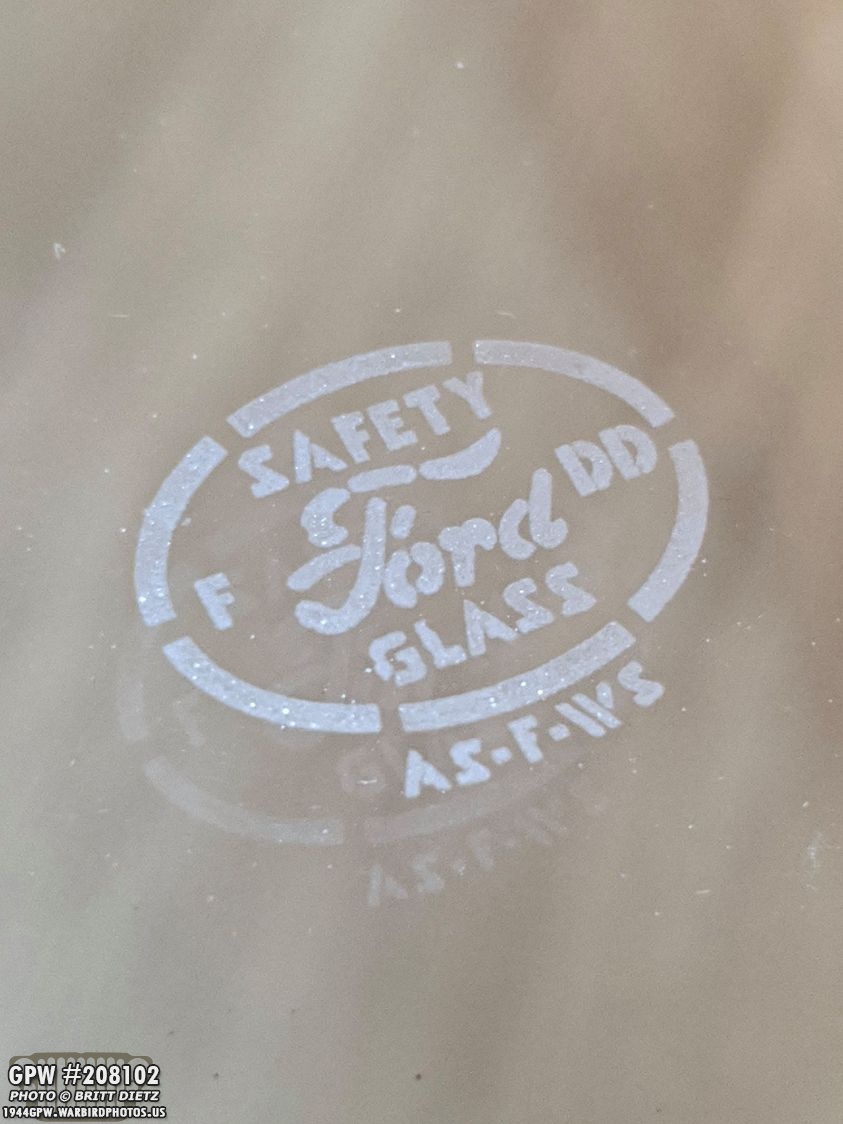
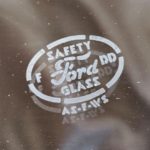
One little detail (that many don’t bother with) that I wanted since seeing one in person when I was looking at Jeeps in Normandy, France last year was the Ford safety glass etched logo. These small logos were on the windshield glass of Ford GPW Jeeps since Ford made the glass in-house. They were coded with a month and year. Finding these kits are a bit tough, especially with the month and date code you might need. I found Ron Fitzpatrick Jeep Parts has them (not sure on the supply) if you call them up. I lucked out as they had June 1944 (F=6, DD=44)! Here’s the stencil when it arrives in a little package.
With most stores being closed because of the stay-at-home order, I was limited on where I could get etching cream. The Ron Fitzpatrick Jeep Parts instructions recommend Armour Etch, so I wanted to get that brand (it is the most popular as well). I was able to do a curbside pickup at Joann’s Fabrics, thankfully, thus why this update is a day late!
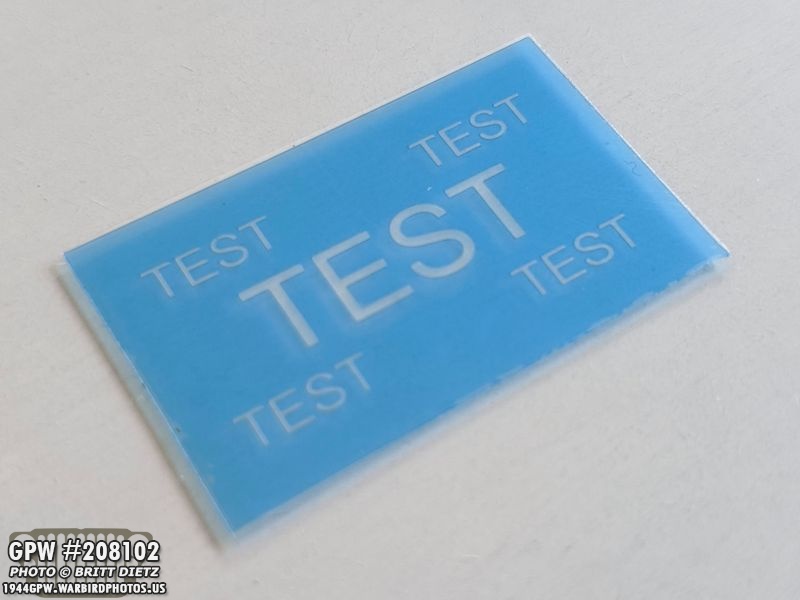
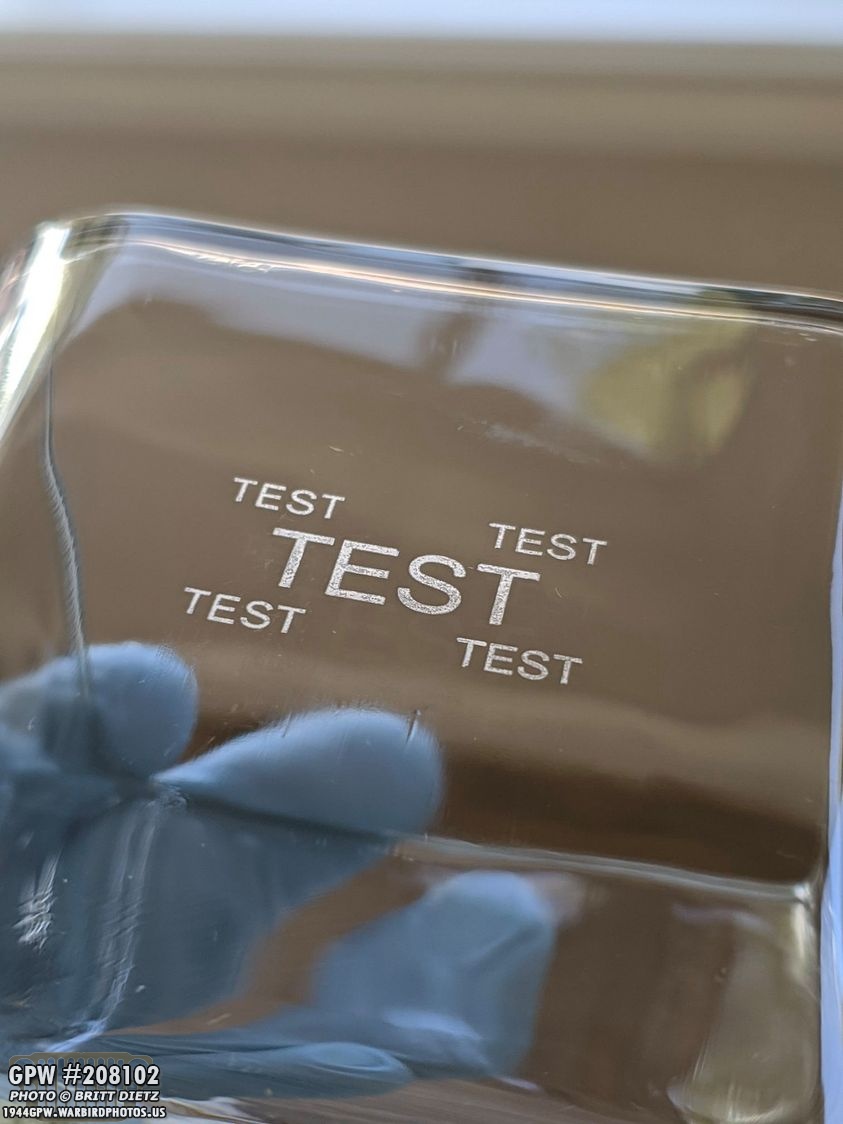
The stencil kit from Ron Fitzpatrick Jeep Parts comes with two TEST stencils for you to test on. I wanted to make sure I didn’t ruin my windshield, so I decided to get some glass and test the etching cream out on the glass. I’ll go through both tests I did before I get to actually marking my windshield glass. I highly recommend testing it to see the best method.
Here’s all the materials you’ll need… Gloves (the etch cream is acid after all), small paintbrush, RFJP instructions, the etching cream, the test stencils, painter’s tape, paper towels, and two pieces of glass. I went to the dollar store and got a glass picture frame (thinner glass) and a drinking glass with thicker glass. Not shown, have Windex to clean the glass!
After cleaning the picture frame glass with Windex, I just peeled off the backing and stuck it down without aligning it, since it’s just a test. At first, the instructions say to use a credit card or squeegee (pictured, same one I used for applying the marking stencils on my Jeep!) but I found this started to distort the stencil. So I opted to use the stencil backing I peeled off and pushed from the inside of the stencil outward to get a good stick and remove air bubbles.
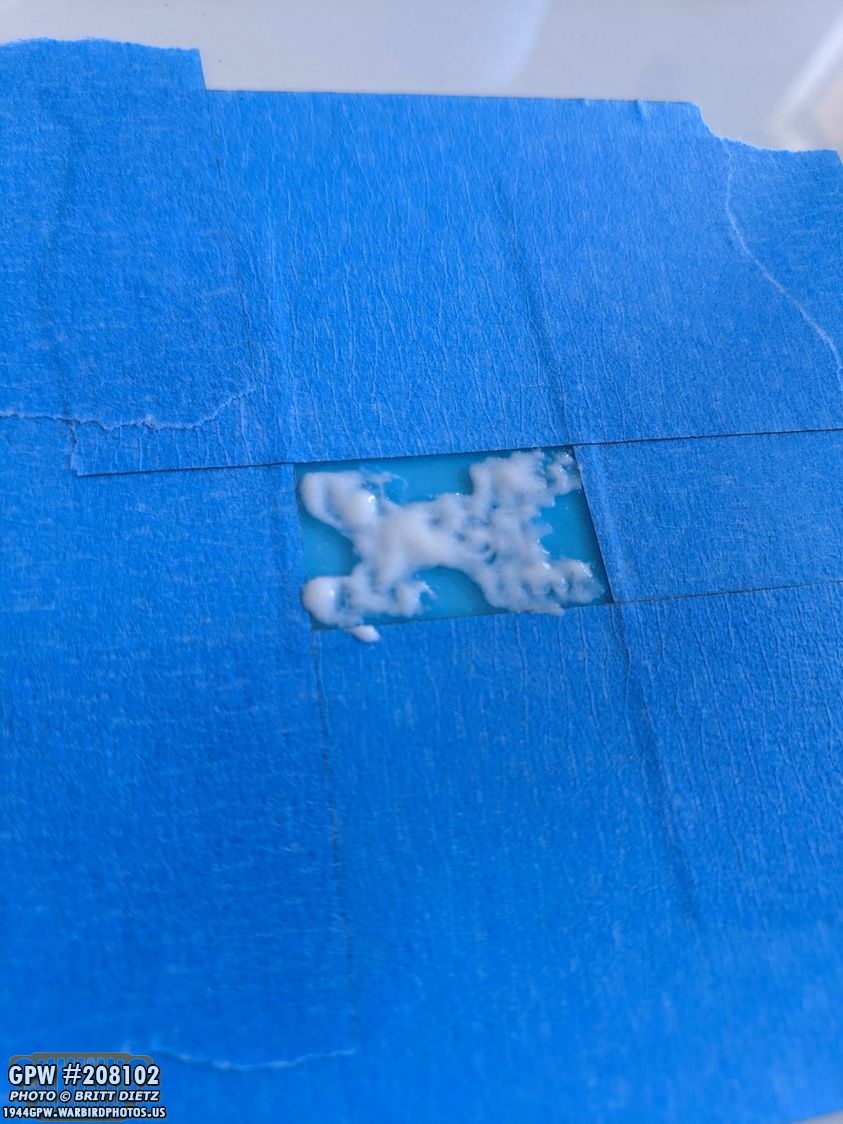
After pressing down on it really really good (make sure it’s REALLY on there) I masked off the surrounding area. Make sure the painter’s tape is pressed really good onto the edges of the stencil so no cream can get through.
My first attempt was to just glob the etching cream on without brushing it. This was one method mentioned online. I made sure everything was covered, then covered it again. After that I let it sit for 2 minutes.
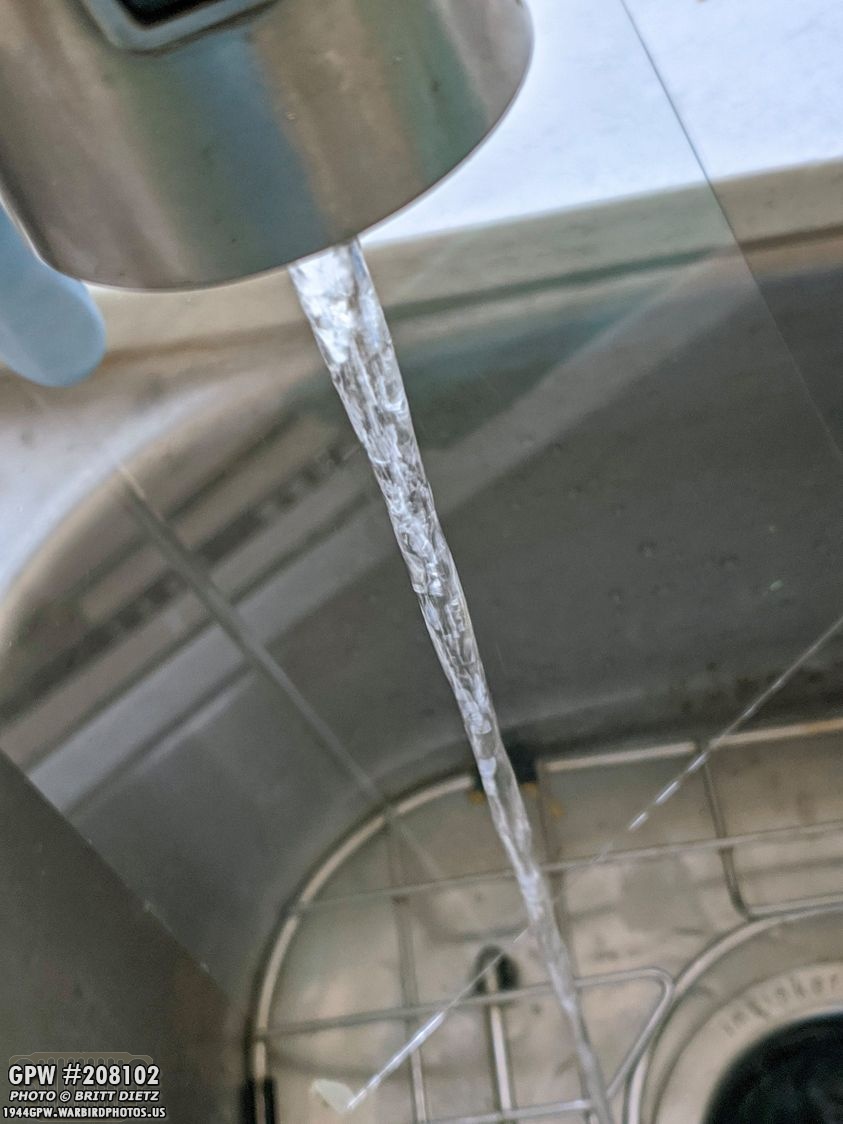
Next, rinse it off really good with water and use the brush to clean off any residue cream. You can see little bits of cream that will sit in the little grooves of the letters, so the brush helps remove it all. After that you can peel off the painter’s tape which will also remove the stencil which I’ve just done and am now giving it a final rinse. The etching may not show up (like it doesn’t here) but that’s because it’s still wet. Take a paper towel and dry it off…
And TADA! A really nice etching! (note, the little marks are little fibers left by the paper towel)
Here’s a look at the whole piece of picture frame glass with the etching. Nice and clean!
Next up, I wanted to try the thicker glass of the drinking glass and also change up the cream application method.
I saw another tutorial that said to ‘brush’ on the cream and continually brush it in all different directions over every part so that the cream ‘gets into all the little spaces’. After brushing it diagonally both directions, horizontally, and vertically I left it to sit for 2 minutes.
After the water rinse and drying, here’s the final result. It looks good, BUT it’s not as crisp as the first test. Flip to the next image to see why…
Here are both pieces of glass to compare. The picture frame glass is sitting on top of the drinking glass. So the top left is the drinking glass (which I just did) and the bottom right is the picture frame glass (first one I did). The picture frame glass is much more solid while the drinking glass looks blotchy. I think it’s because of spreading the cream via brushing doesn’t leave a uniform amount on the stencil VS globbing it on thick makes sure the cream is covering everything. So, with that in mind it was time to start on the windshield!
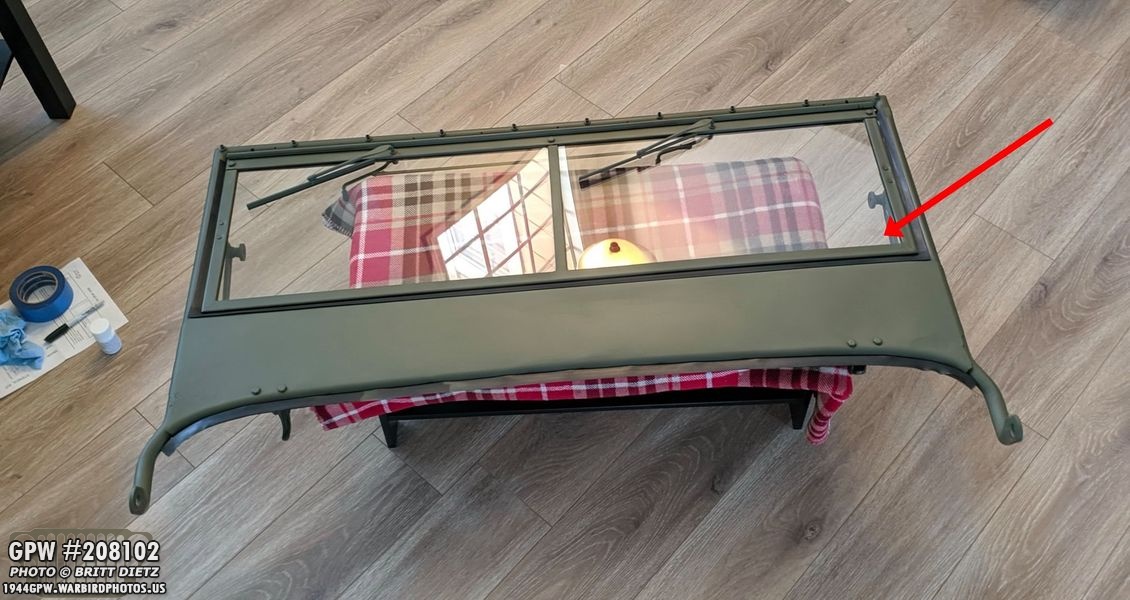
First step, taking off the windshield from the Jeep! I’ll be doing the outside of the windshield (the front). using the instructions that the Ron Fitzpatrick Jeep Parts stencils came with, a Jeep book I have, and online research I went with the standard accepted way of the placement which is the bottom right corner on the outside for the driver’s side. (Red arrow)
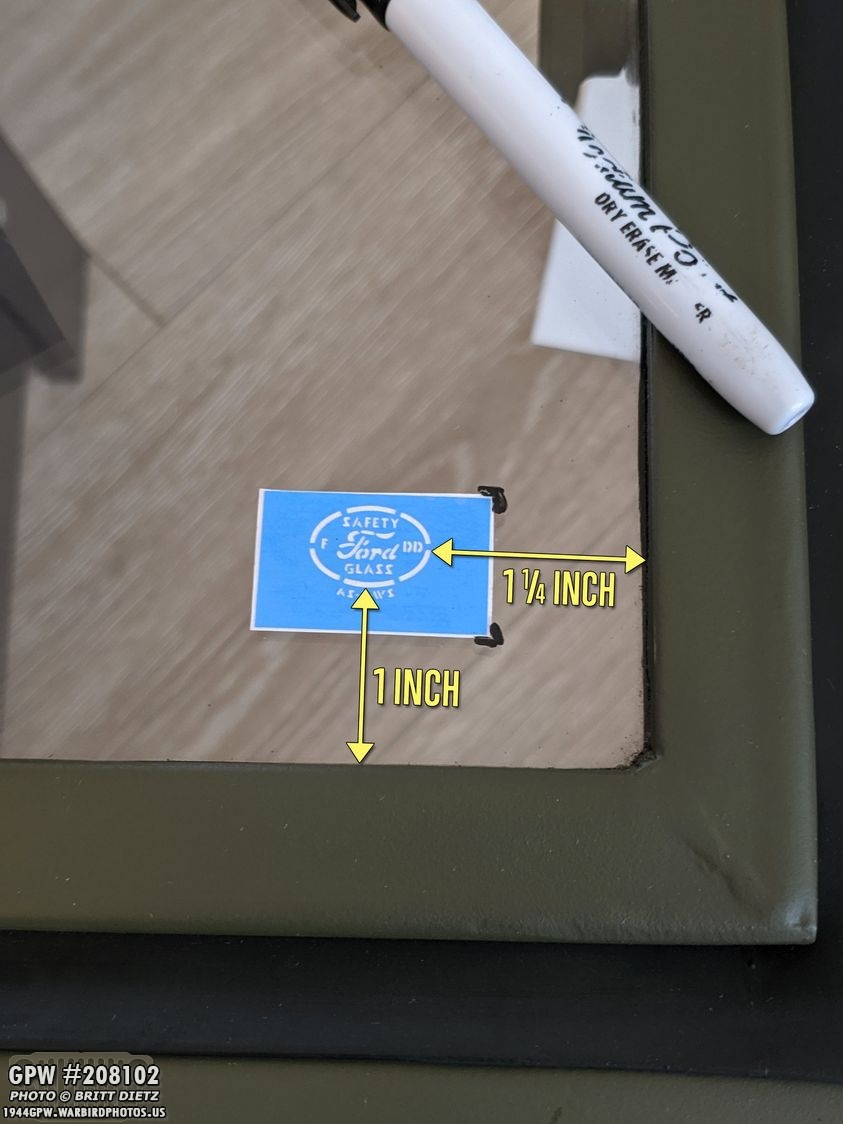
The first thing to do after cleaning the glass with Windex really good is to measure the decal placement. I’ve already measured the corners of the stencil here… but there’s a specific spot the logo needs to go (see next image)
The out oval for the logo needs to be 1.25 inches from the right, and 1 inch from the bottom. This seems to be the universal measurement location for the logo. Once I got it lined up, I used a dry erase marker to mark the corners of the stencil.
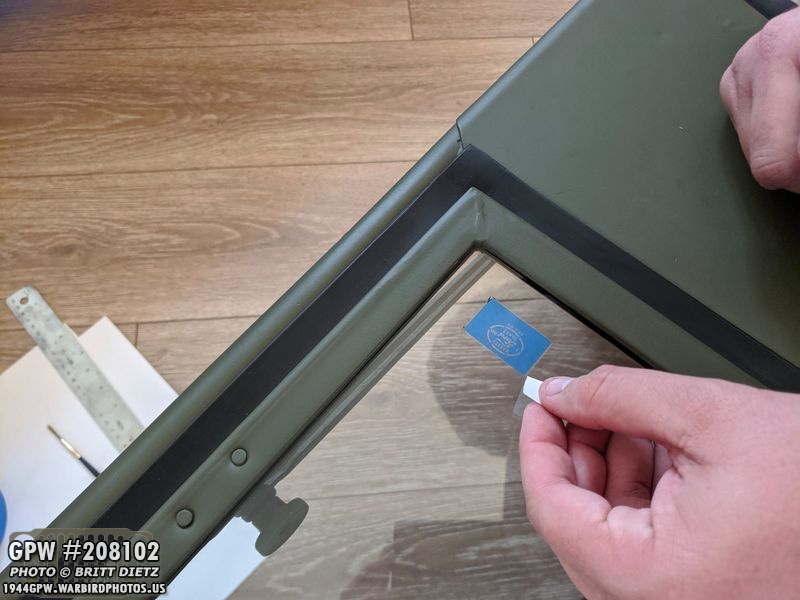
Now, I peeled away the backing from the stencil. Try not to touch the sticky side. (excuse the paint on the fingers!)
Using my corner guides, I carefully put the stencil down on the glass. This is a bit nerve-racking.
All stuck on and lines up well! WHEW! Now I took the backing I just pulled off and started to push on the stencil working from the center outward. I then used a paper towel to also push on it in slow spiral motions.
Getting the top protective cover off is a bit of a pain. Even though it overhangs the stencil, it wants to peel up the stencil with it.
Finally got a corner separated and was able to use the backing to slowly peel the cover off.
I then used the cover I just pulled off to once again push down on the stencil in case it started to pull up anywhere. I also used the backing and a paper towel to push again. Don’t want to leave anything to chance.
Then it’s masking time! I might have done a bit of overkill for such a little spot, but I didn’t want to risk anything, even the cream getting on the glass/frame as I wash it off afterwards. Again, make SURE the painter’s tape is pushed well onto the stencil.
Here’s another look at the placement all masked.
And for the etch cream I did the same method I did on the first test, which was to gob it on twice. Cover it good, then cover it again. After that I let it sit for 2 minutes.
Because I needed both hands to hold the windshield and my girlfriend to run the garden hose and brush the stubborn etch cream out of the stencil, I didn’t get any photos of that part. But here it is after being cleaned and the major drips dried off. The good news is the moisture from the hose makes the painter’s tape easy to come off.
Peeling away the painter’s tape which takes the stencil along with it (one time use)! The moment of truth…
And immediatly after peeling it up, this is what I see! At first, you might be like, that looks terrible! But, the glass is still wet, so let’s dry it off and see what it looks like with something dark behind it…
It’s still a little wet, but it looks great! I’ve angled the camera so the etching picks up the light making it look white. That’s just reflected light. And the second ‘ghost’ marking is because it’s double-paned safety glass. I’m happy with it! (and the specks are microparticles left from the paper towel)
For the other piece of glass, you flip the windshield over so you’re seeing the INSIDE or back of the windshield. Again, it will be in the bottom right corner (red arrow).
Same as before, 1 inch from the bottom, 1.25 inch from the right. Peeled the backing, stuck it down, pushed it down with the backing and other items, pulled off the cover carefully, pushed it down again, put the etch cream on in gobs, let it sit for 2 minutes, rinsed it off and used the brush to get it clean while rinsing…
After drying it fully this time, a perfect etching!
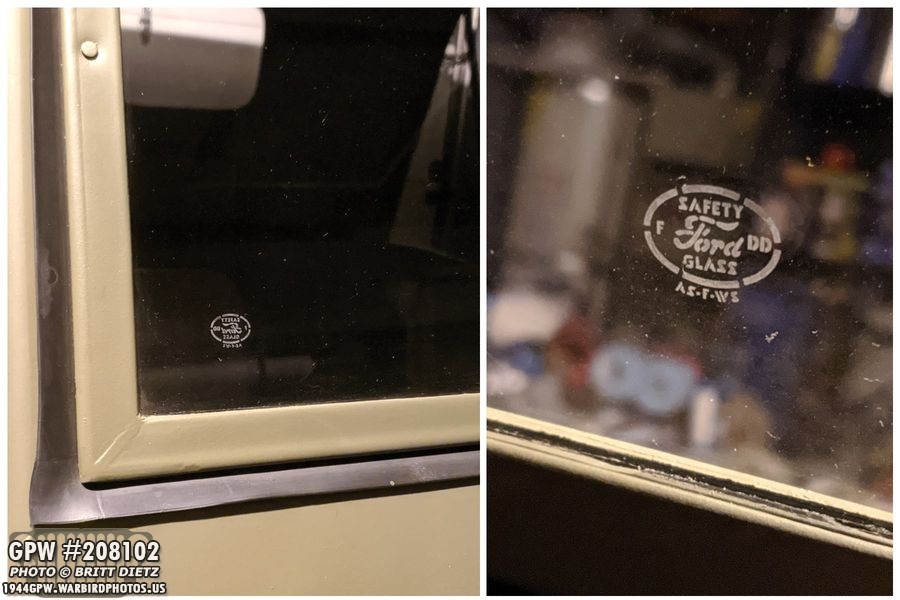
After reinstalling the windshield back on the Jeep, it’s not immediately easy to see the logos! Without a dark background behind them, you can’t really see them well (yellow arrows).
Move over a little with the darker background, and you can instantly see them.
For the passenger side, you should be able to read the logo if you’re sitting in the passenger seat looking forward (right photo). But from the outside looking in it’ll be backwards (left photo).
For the driver’s side if you are sitting in the driver’s seat it will appear backwards (bottom photo). From outside the Jeep looking in it will appear forward (top photo).And that’s it! Another small detail added to the Jeep that gives it just that much extra authenticity!
Moving on to the ongoing restoration of the wartime GPW axles… short summary: My Jeep has post-war CJ axles that I want to replace. I got two free 1943ish wartime GPW axles that I’ve been doing a complete restoration on to replace the CJ axles/steering. This is a shot of the rear axle (the problem axle) when I got it.
And as a reminder, here’s what the front axle (the pristine but dirty axle) looked like when I got it.
Over the last few weeks, I’ve been taking them apart and documenting every part (so many F stamps!). Now I’m getting closer to putting them back together. Here’s the front axle getting some last bits of cleaning with the wire wheel, nylon wire wheel, and sanding. It’s just about read for red oxide primer paint, but I need to clean the grease out of the ball joint housing.
Thankfully, I was able to submerge both sides in my ‘bucket-o-fuel’ that eats away at the grease. After letting both sides sit in there for about 3 hours, the grease wiped away clean! I think this housing is ready for some reassembly next week!
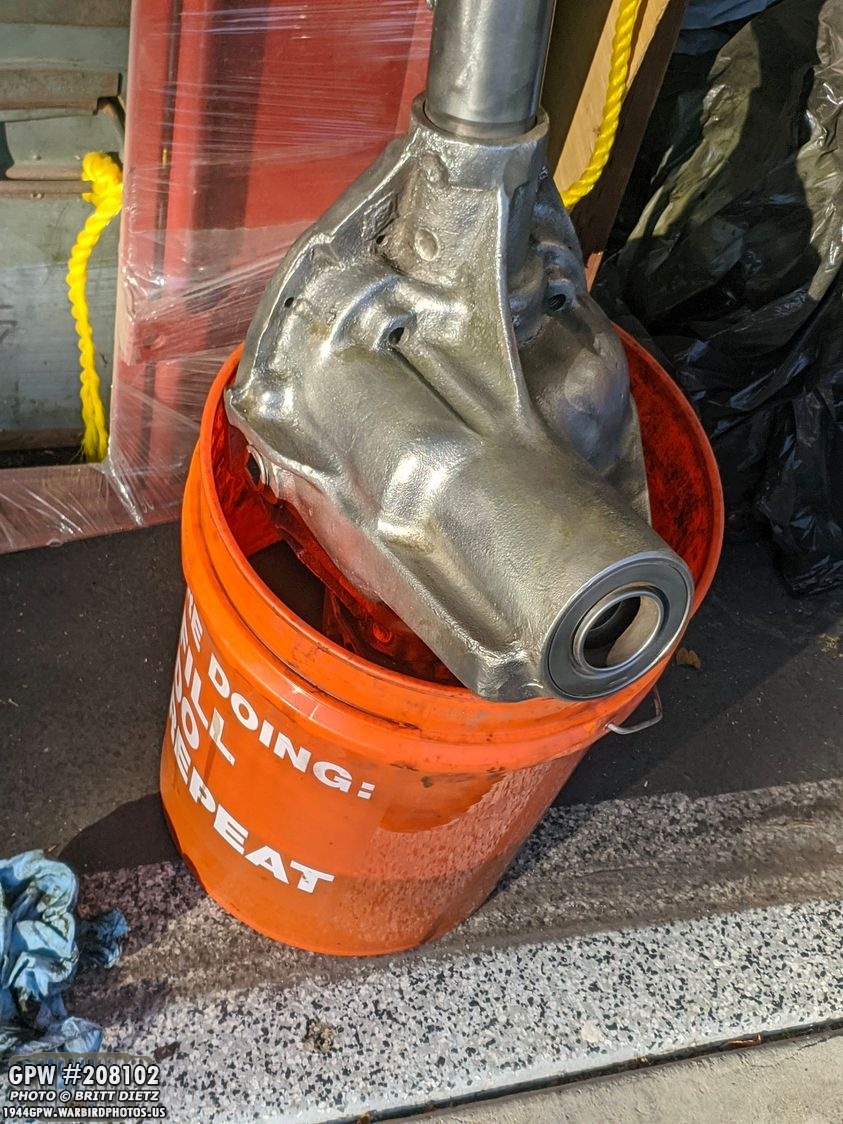
The rear axle, however, has been a pain. Aside from finding out that the carrier had exploded at some point causing damage, I found out the pinion (which this photo is before I took it out) was damaged as well. I got a new GPW carrier replacement via eBay but am still looking for a new pinion and sleeve. In the meantime, I was cleaning it getting ride of 75+ years of dirt, grime, oil, grease, etc.
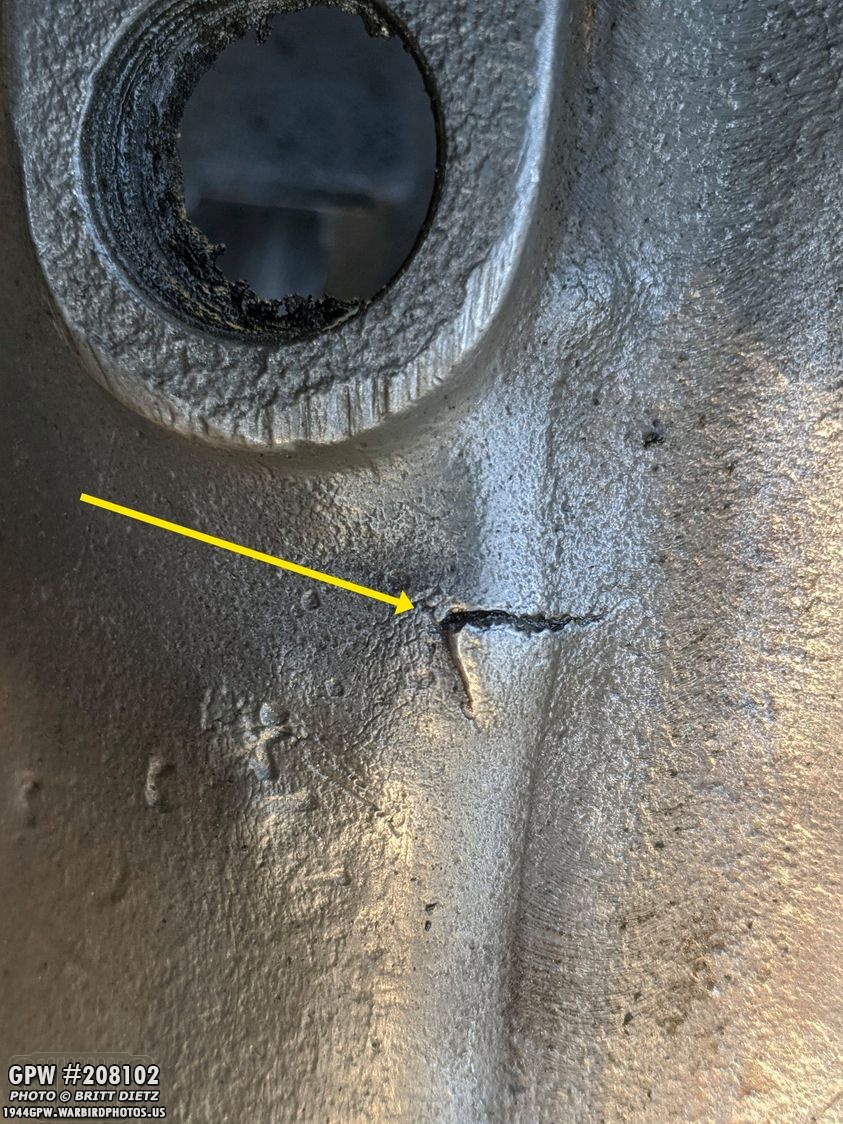
On the bottom of the housing, after I removed about a quarter-inch of dirt, paint, and grim I noticed this. A crack. UGGGGGH! The force that carrier and the spider gears exploded caused quite an impact.
Looking inside at the same spot, you can see all the damage. (the hole is the bottom drain hole).
The good news I have a friend who can blaze it for me with some torches, and it’ll make that crack good as new. I went ahead and took my ball-peen hammer and flattened that crack. Might be some time before I’m able to head over to his place to have it done, but I can at least get the rest of the axle cleaned up. I swear this axle is nothing but issues.
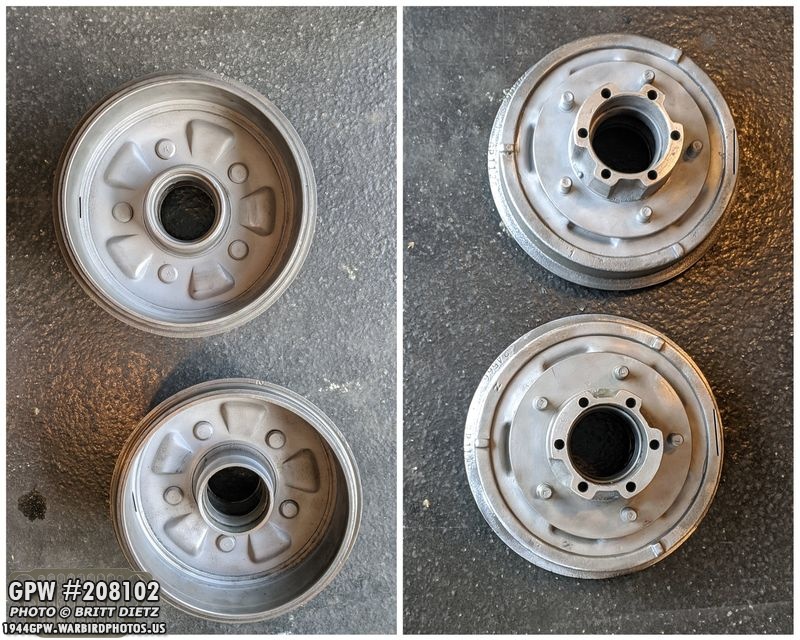
Moving on, I also continued to clean up things like the differential housing covers and the four axle drums. I found it helped to use a wire wheel to get most of the stubborn paint and grime off, then use the sandblaster to get all the little nooks that the wire wheel can’t reach.
Here’s the cover after sandblasting the rest of it clean.
And now painted with red oxide primer from Ron Fitzpatrick Jeep Parts! Looks good as new!
I finished cleaning the two front axle drums, which both have an F mark and the drum lining looks pretty good.
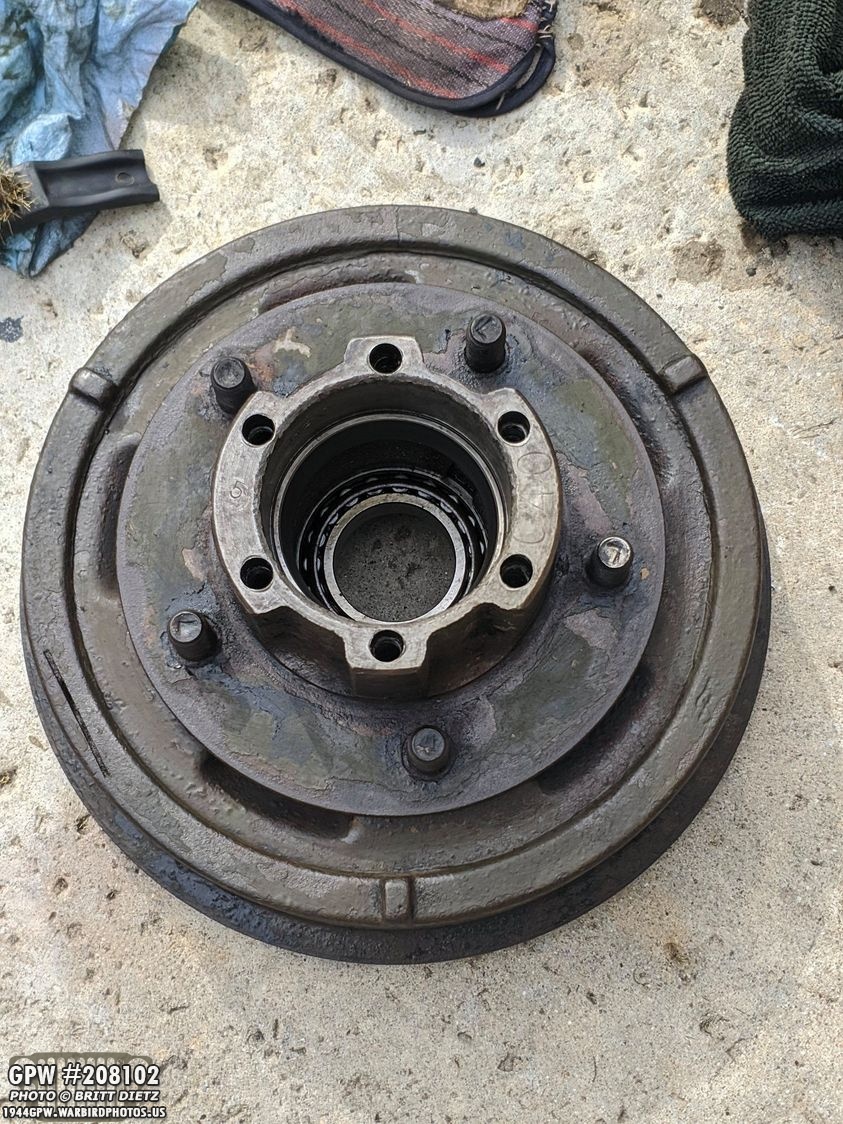
Compared to the rear axle drums, which this is before I started working on the first one. I could tell right away that the rear drums might be way out of spec.
Getting the grime out of the hub bolt holes was a bit of a pain. I started with a pipe cleaner brush that helped get most things out.
Then I ended up letting some de-grease cleaner soak in all the holes for a while and turned the drum upside-down to drain. That worked well and got them really clean. The two front drums are now ready for painting!
Before and after of the first rear drum from after I let it soak in the ‘bucket-o-fuel’ for a whole day to loosen up the paint, dirt, grime, and remove the oil then wire wheeling and finally sandblasting.
This drum revealed an F stamp on the lip and a C4C number with a 4 stamped on top of that.
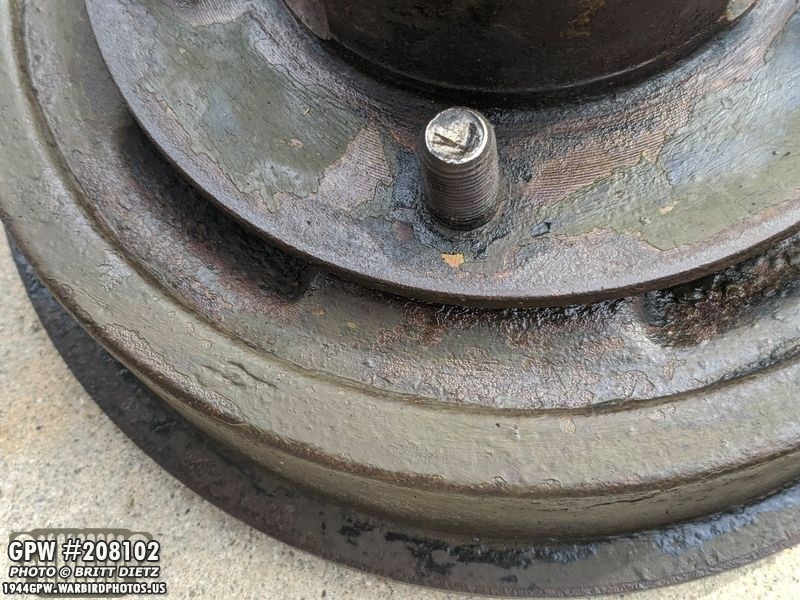
I also let the second rear drum soak in the fuel for a whole day. This had a lot more tough paint on the. That appears to be original wartime OD Green paint.
Here’s a look at the L on the studs (left hand thread for the lug nuts)
And the matching F mark on the lip like the other drum. BUT, this is as far as I went with this drum as I decided to stop and see if it’s worth putting in the time to restore this clean.
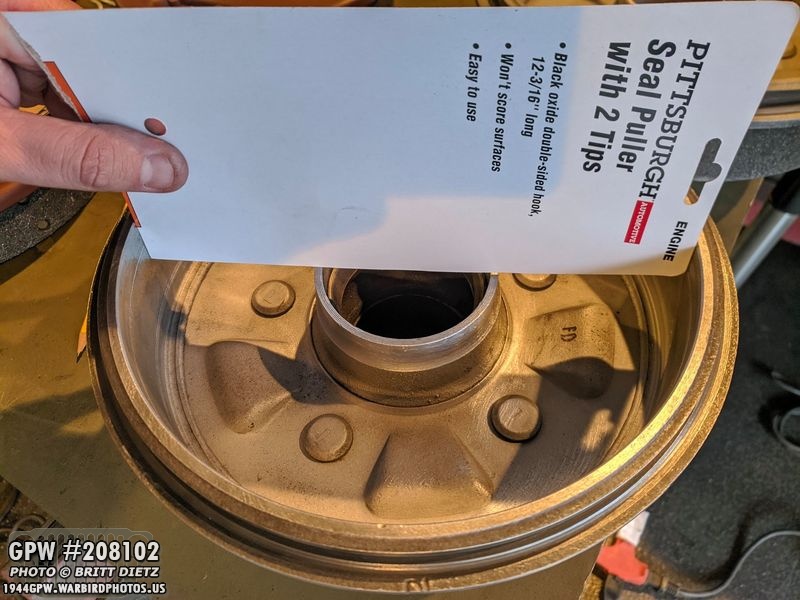
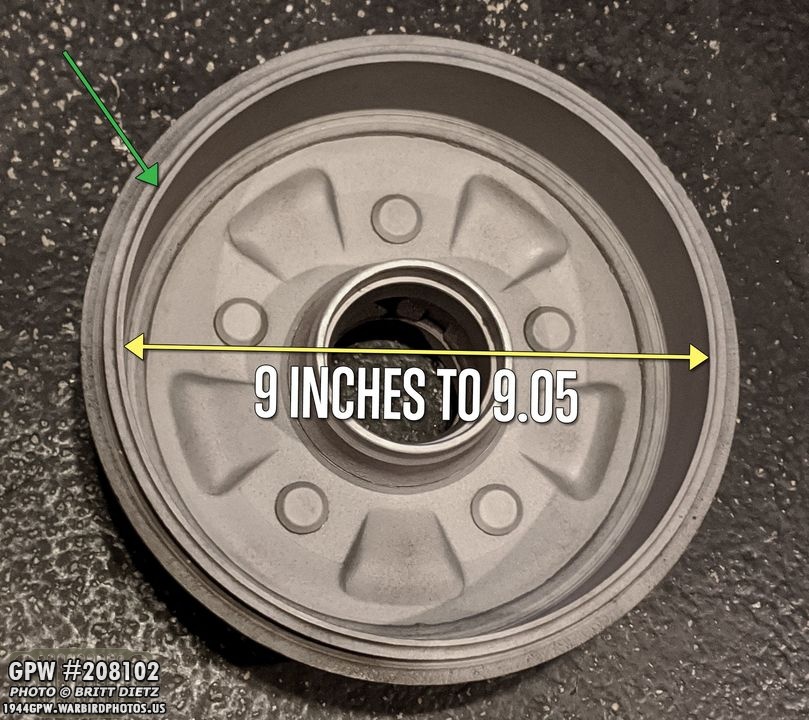
The way to tell if the drum is worth/safe using is by measuring the inner diameter of the drum. I’m using this piece of cardboard here to show where it’s measured. There is a certain amount of tolerance for this measurement for good/bad drums (which I’ll cover in a few)
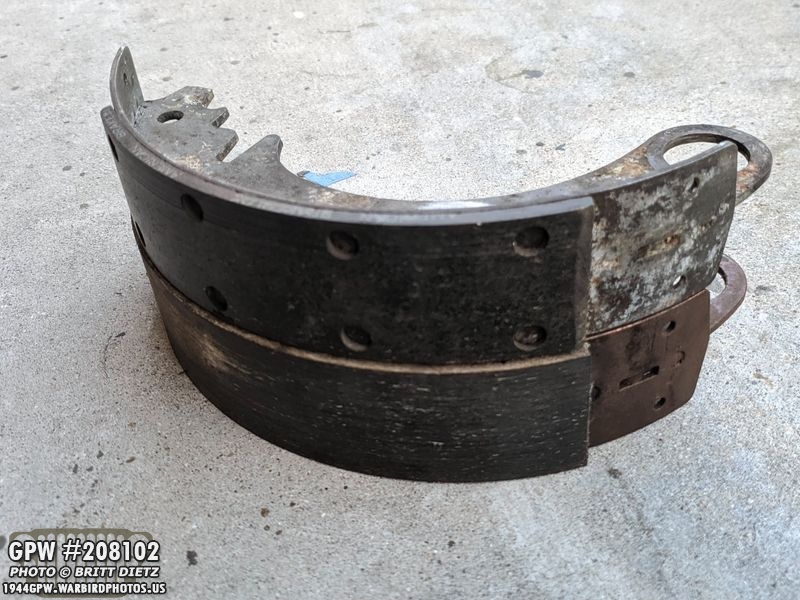
You need a brake micrometer to measure them as it’s .05 of an inch you need to measure it to. Doing a very rough dirty measurement I knew that my rear drums (like the whole axle) were going to be a problem. Just looking at the brake shoes (the top one is from the front axle, the bottom from the rear) you can see someone put thicker lining on the shoes to probably account for worn-out drums.
So, I loaded the four drums into my Jeep and took a drive down to O’Reilly Auto Parts where they measured them for free!
Here are the measurements and what’s considered good/bad according to Roger Smith! The drums were originally made to 9 inches diameter. Over time, the drum wall (green arrow) will be lathed away either by a machine to clean the drum walls or slowly worn away by the brake shoes from braking. If you are between 9 inches and 9.05, you’re good. Anything beyond 9.05 and that’s not good as 9.06 is the limit. So they measured mine to good and bad news…
Front Drums – 9.05
Rear Drums – 9.25+
(YIKES!) So my rear drums are trash. Ugh. BUT, thankfully, Roger is going to trade me two GPW drums he has that are within spec for the axle! So that’s the good news!
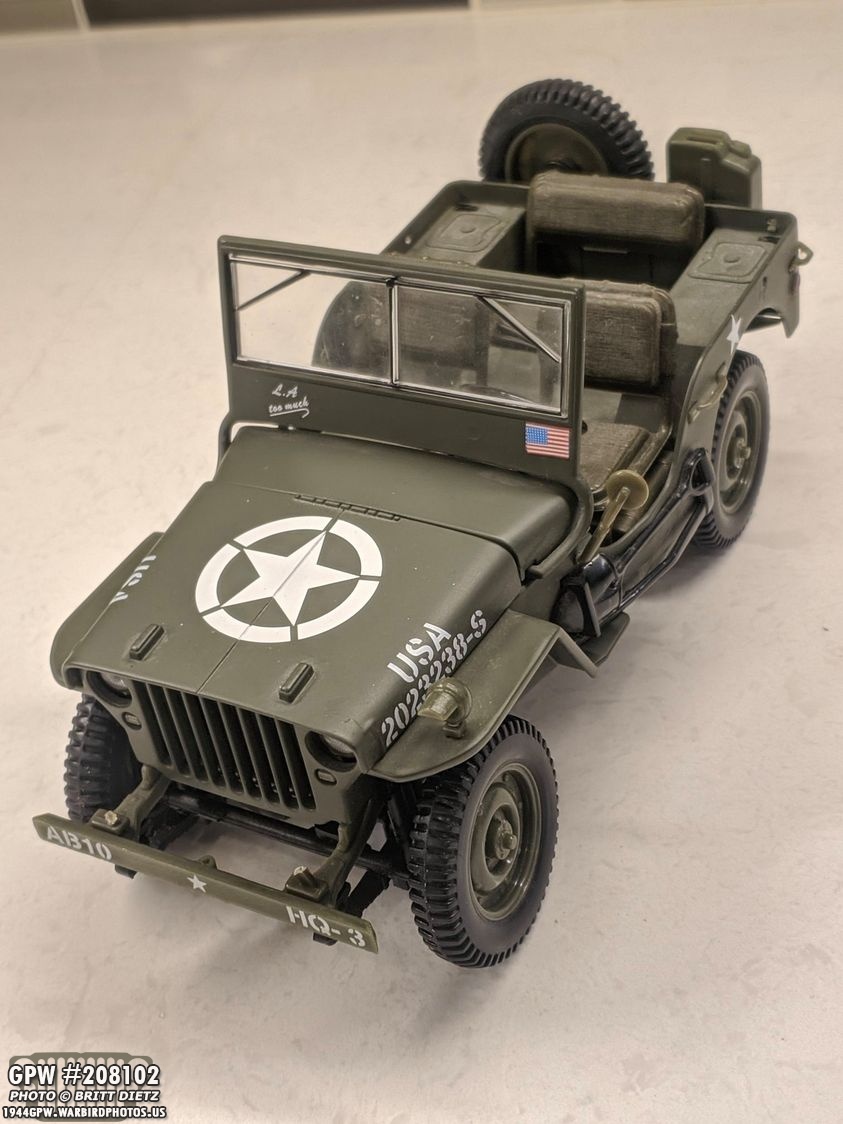
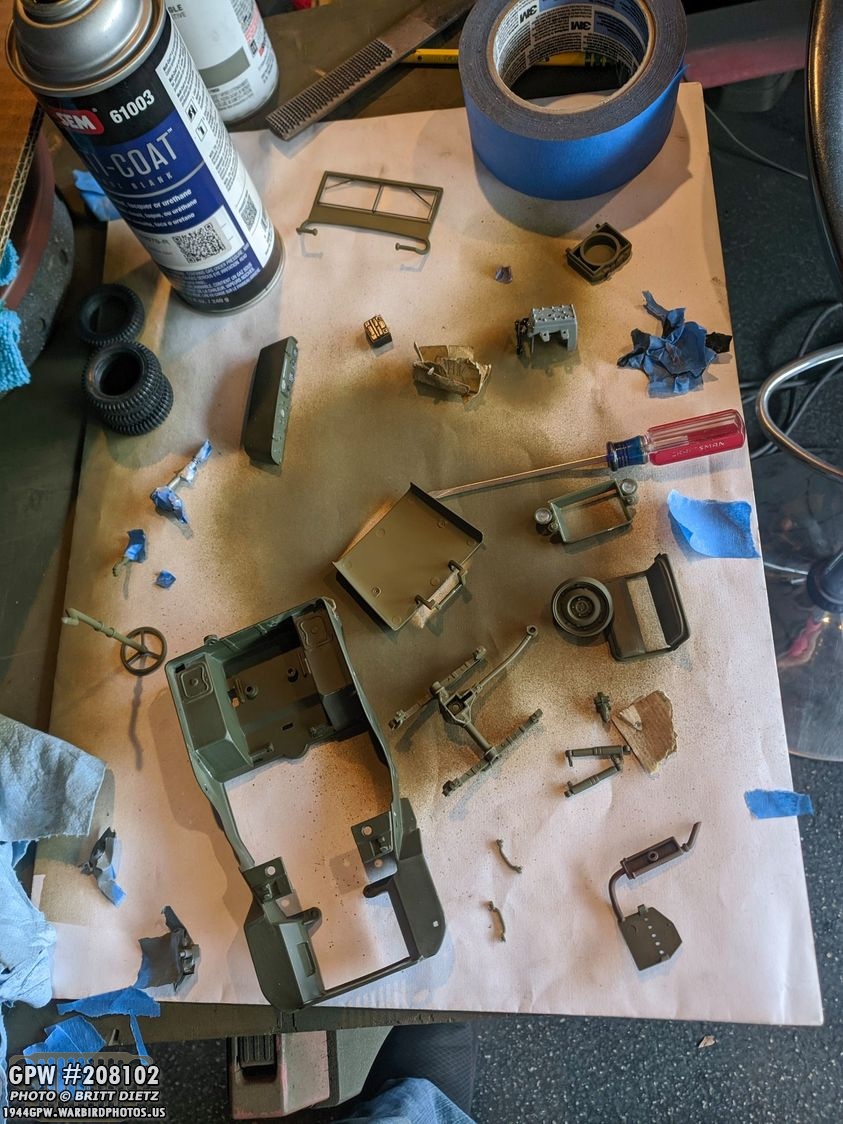
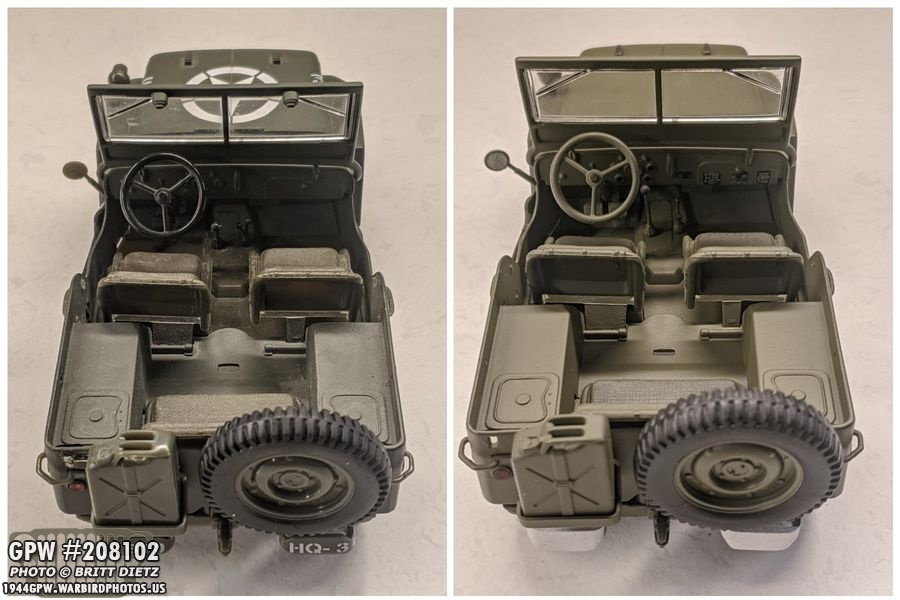
Anyway, moving on for now! I’ve had three of these 1/18 scale Jeeps made by Solido. They are part diecast and part plastic. They normally have the canvas top and a wire rod out front, but I removed them from two of them. I’ve had them for years and have kept one by my desk the last year+ of the restoration of my Jeep as a visual reminder. They are pretty detailed but are painted in many shades of green, not painted in other areas, etc. But, they are GPW jeeps! So I had the idea, what if I take one apart and repaint it using the same paints as my Jeep?
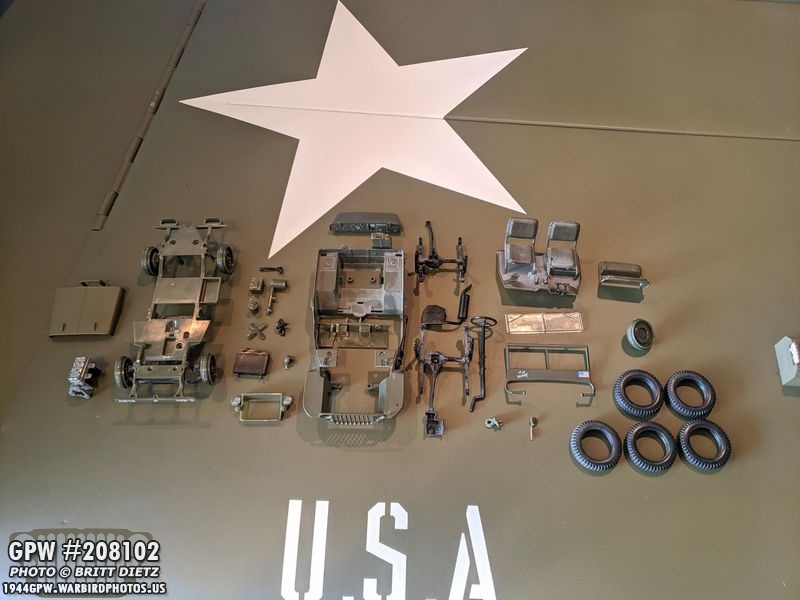
Call it a ‘frame-up’ restoration in one day! I first took apart everything I could. As you can see, it needs a good cleaning. I took the time to sand down things, fix issues with excessive pegs, etc. I was a bit concerned that the Ron Fitzpatrick Jeep Parts 33070 OD Green paint might be too thick for a small detailed model, same with the VHT Ford Engine gray. But hey, it’s worth a shot!
Amazingly, the two paints sprayed on perfect leaving all the little details! I was pleasantly surprised, and already you can see the difference.
I needed a break from working on the real Jeep, so spending the day masking/painting/fixing this Jeep was quite fun.
I’m a stickler for details, even on something this small. Here’s how the engine looked after painting everything. Even weathered the manifolds to look like the paint was burned off. I tried to get it all as close as I could, within reason!
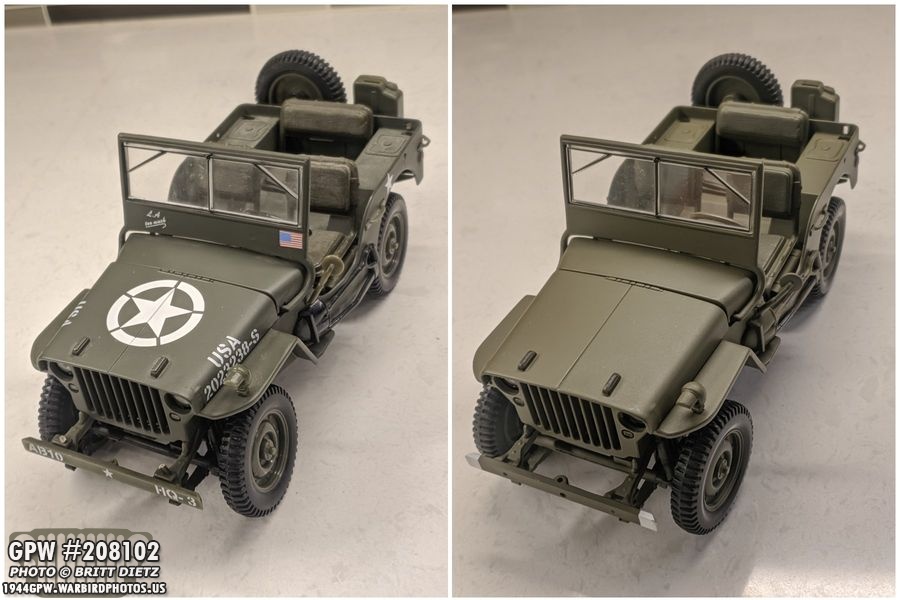
Putting the Jeep back together after the full day of work! One of the other same Jeeps next to it. Late in the evening I finally finished the last part to reveal…
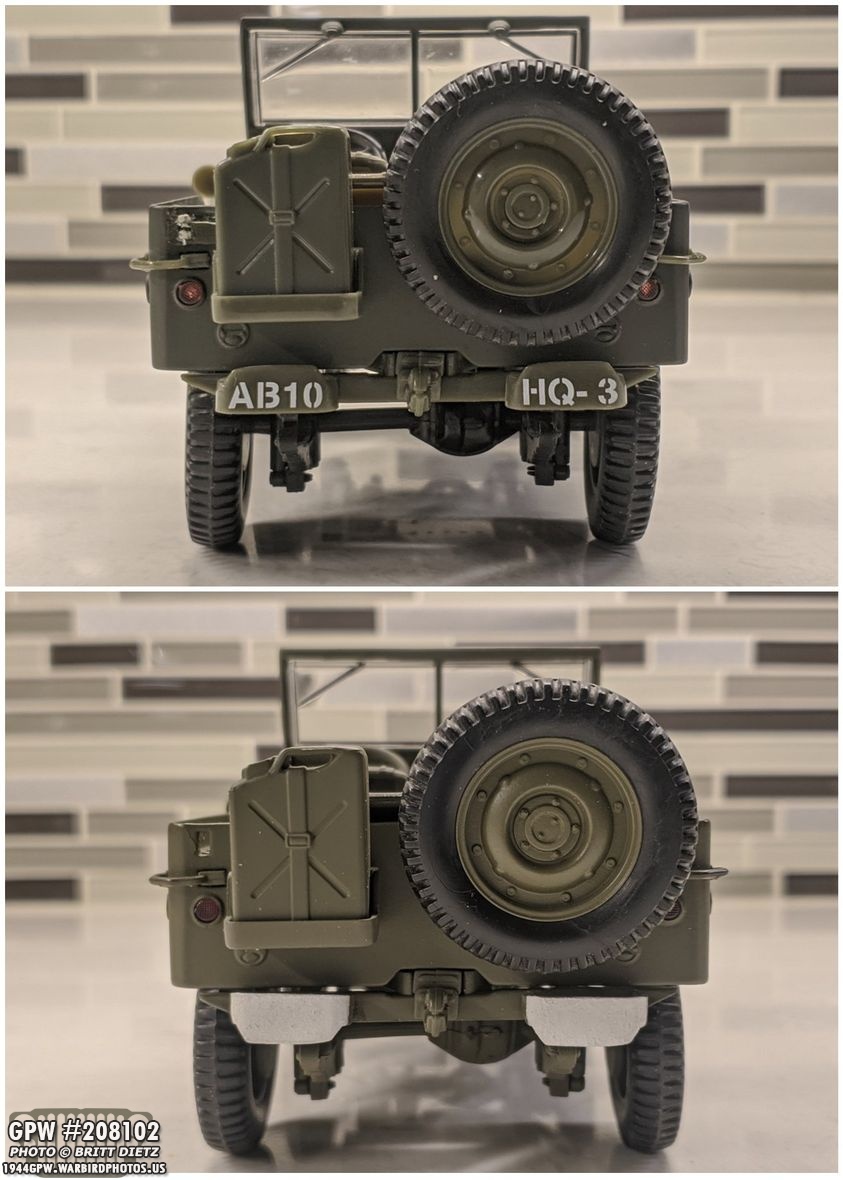
One heck of a nice looking Jeep! On the left is the original, on the right after the rebuild! What a difference that lusterless 33070 paint from Ron Fitzpatrick Jeep Parts makes! (so modelers take note, you can use their paint on fine details!)
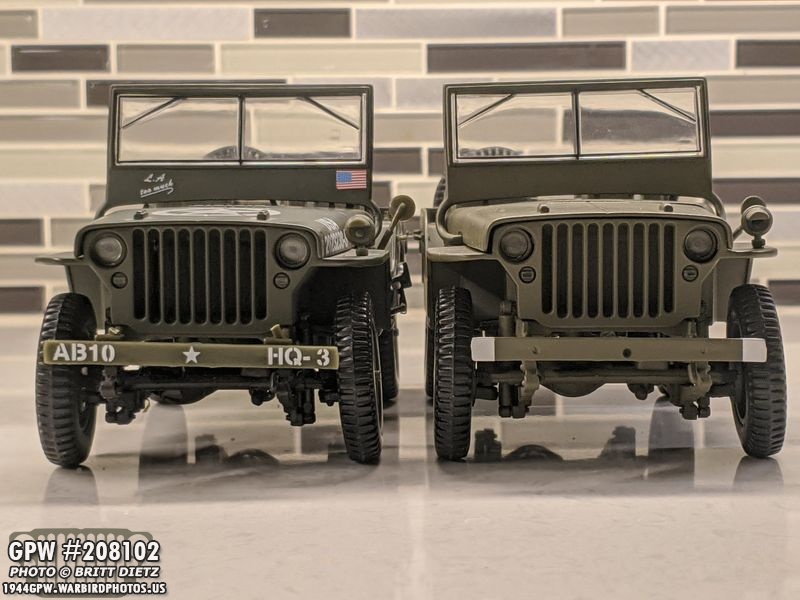
Front comparison. Painted the shocks and leaf springs OD Green, painted the inner marker lights black, blackout drive light on the fender has black, I drilled the correct GPW holes and the large crank hole in the fender, and I painted the white ends to match my Army Air Force jeep’s markings.
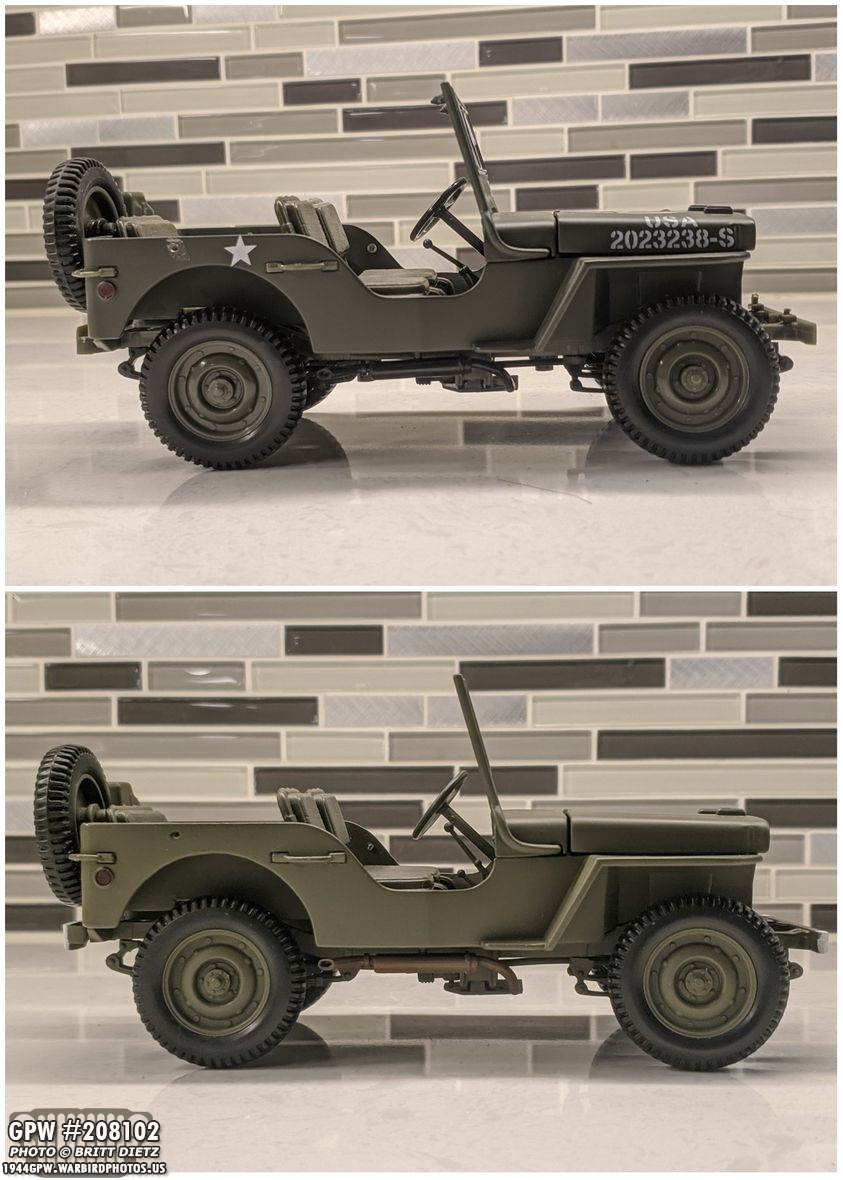
You can see a huge difference on the side. I painted the steering wheel (with a black horn button), I removed the late-war vacuum windshield wiper boxes, painted the shovel an axe with OD green and brown for wood, etc.
One the other side I weathered the muffler to look like it’s burned through paint (hit it with OD green first, then misted some red oxide primer for the ‘burned’ look). Just the lusterless OD Green on the combat rims makes a huge difference.
Looking inside, I dry brushed the canvas to make it darker and dirtier looking, the steering wheel is painted with the black horn button, I masked off the glove box so the data plates are still there after painting (my other Jeep on the left has a misprint and the data plates were put in the engine). I also painted silver on the mirror to make it look somewhat reflective. The shifters all have black painted ball ends.
Looking from the back it’s another huge difference. I could have painted the jerry can strap more of a canvas strap green, but it was good enough. I removed both bumperettes, painted them with the white stripe, and flipped them upside-down like my Jeep (since it’s Army Air Force).
Looking at the engine before and after, it’s a world of difference. I painted everything including the battery, radiator (with a silver cap), the cross over tube with pad and silver straps, etc. Also you can see those totally misprinted data plates in the engine bay on the bottom left image.
And another look at the two together. I was able to find one of the canvas tops I took off and painted it with the same 33070 OD Green and dry brush weathered it like I did the seats and the result is…
Looks pretty good for a die-cast model/toy! I might even get a 1/18 scale Jeep water-slide decal sheet and mark it up like my Jeep at some point. But it was a fun side project to do for a day to give my mind a break!
And here’s a look at Mini-Jeep with Big-Jeep to finish off this week’s update! Next week will begin the reassembly of the axles (at least the front one) and looking at what other projects and parts I need to acquire in order to install the axles. Till next week, stay safe out there!

