 Fake rivets, Fire Extinguisher, and more F stamps!
This week had some fun smaller projects on the Jeep such as adding ‘fake rivets’ to the passenger seat swivel bracket, moving the custom starter switch so I could mount the Fire Extinguisher in the bracket, and getting my safety strap large bolts F stamped! Plus some different looks at the Jeep.
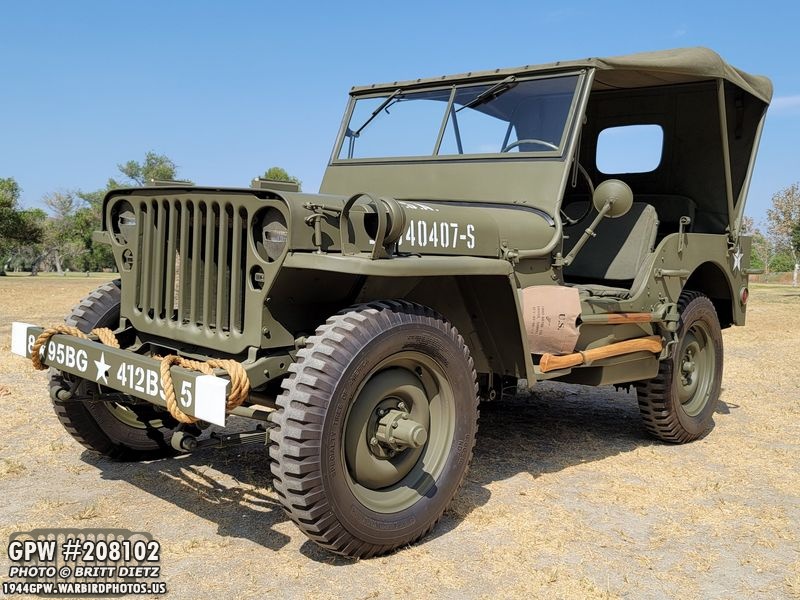
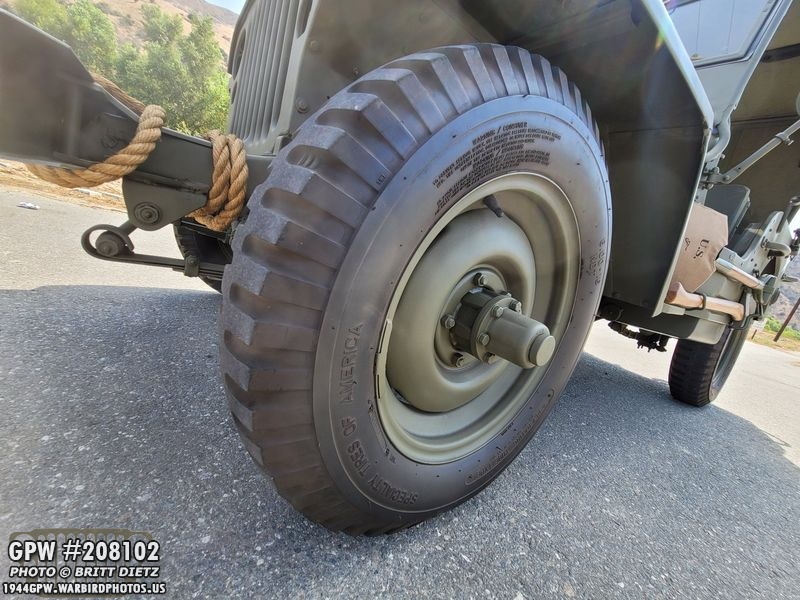
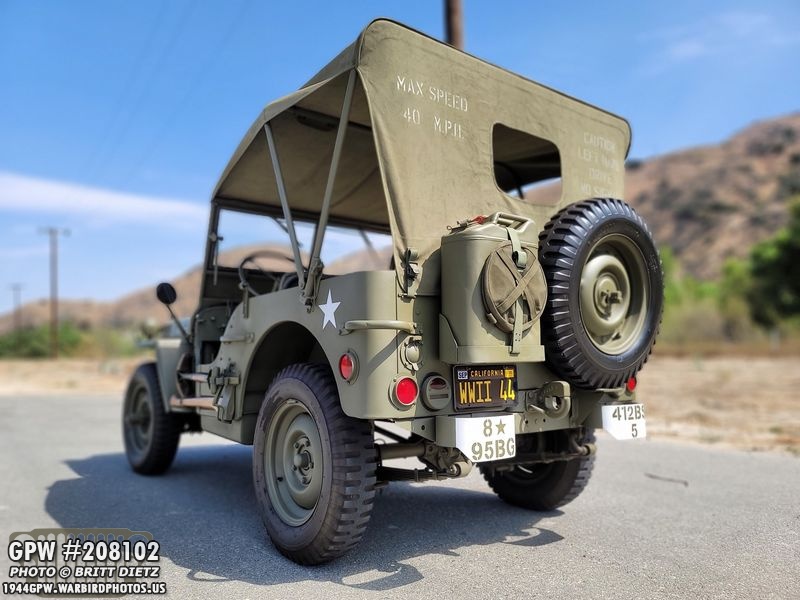
Out for a stroll in the heat on Thursday afternoon. Took the Jeep out to the local golf course. It was HOT out, about 101 with a dry heat in Southern California. Looking forward to the cooler weather (so is the Jeep I’m sure!)
Before I get into this week’s update, I wanted to mention a great small birthday parade the Jeep took part in this past Saturday. USAF Veteran Art Salgado was celebrating his 93rd birthday in Corona, CA. A call went out for people to join a parade for his birthday, which is something I’ve always wanted to do. Since it wasn’t too far, we drove the Jeep over for the parade.
A fire truck, five police cars, two minivans (with signs and flags), the Jeep, and a Corvette showed up for the parade. They seemed overjoyed to see the Jeep as we passed by waving and honking the horn. Hope I’m able to get the Jeep to be a part of more of these, it was fun!
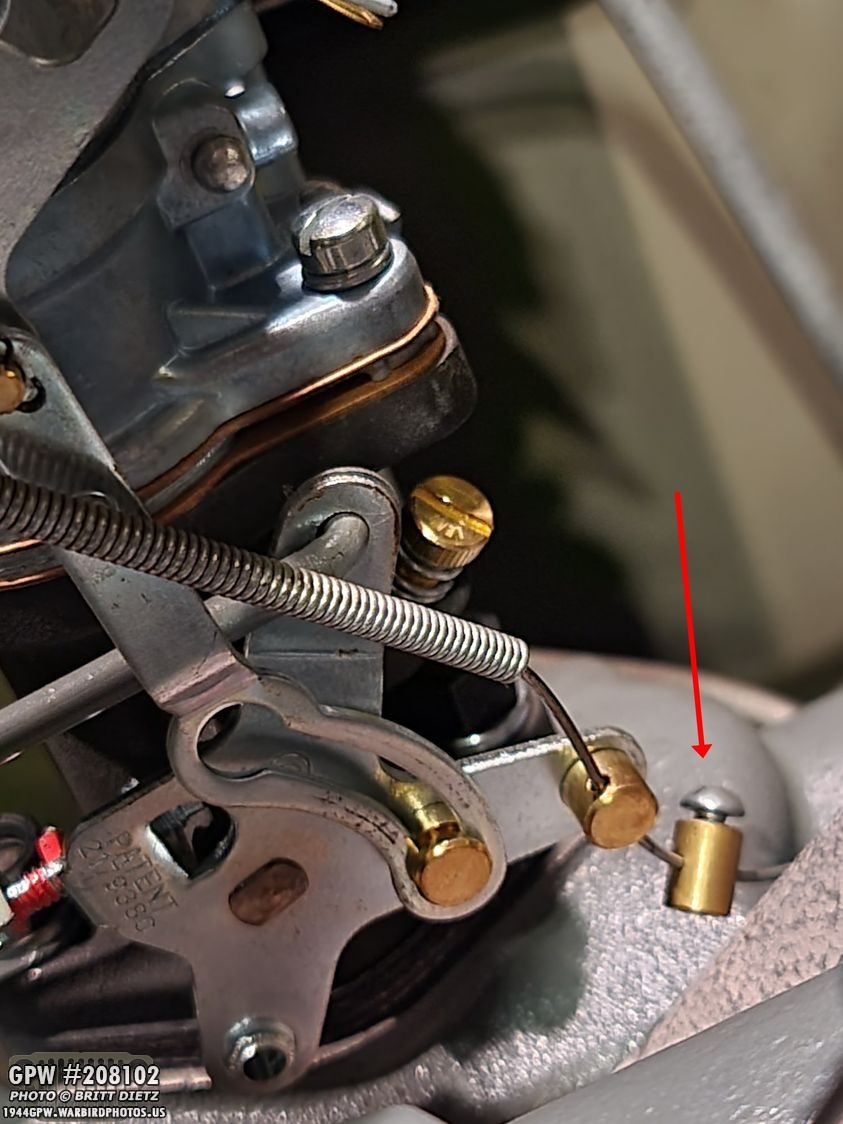
I wanted to begin the update this week with updates on some of the things I did in last week’s update. I installed a Joes Motor Pool Carter WO carburetor since I needed to give back the wartime one I was borrowing (my post-war Carter will not work even after cleaning and rebuild). A week later, it’s been running GREAT with no hiccups! After adjusting the throttle and idle screws, the Jeep is running great. Happy with the purchase!
The one problem (which, if you go back and look at the previous image, you’ll see this is missing) is that my throttle stay screw came off somewhere and is missing. Really bummed about that. I had screwed it down tight, but it must not have been tight enough as it popped off at some point this week, probably when I was heading the birthday parade last Saturday. :-/ So beware for those who purchase a JMP Carb, make sure you really tighten that little screw tight. I’ll have to order another one, sadly.
Last week I fully restored and installed my 1943 dated jerry can. Here are two shots after I re-added the freshly painted octane tags. Happy with how it turned out, especially with the large dents that were in it. You can see some signs of them still, but they are way way better than before. And as some people might say, ‘shows character!’.
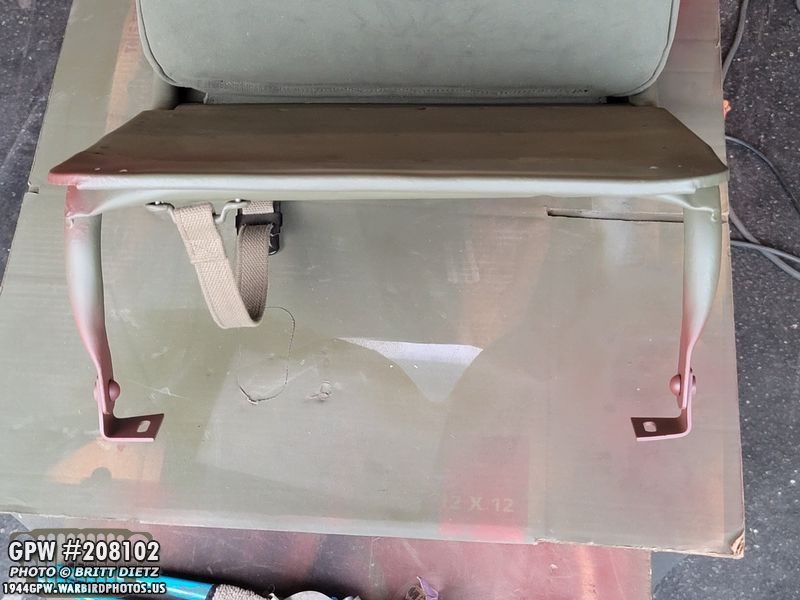
(Ignore all the dust, that’s actually ash from all the fires here in CA) One thing I wanted to change at some point was my passenger seat to body floor bracket and the bolt. Originally, this L bracket was riveted to the front legs of the passenger seat. Mine was missing that, so I just used a hex bolt, washers, and a nut to connect them. But I wanted to eventually do something a bit more ‘correct.’
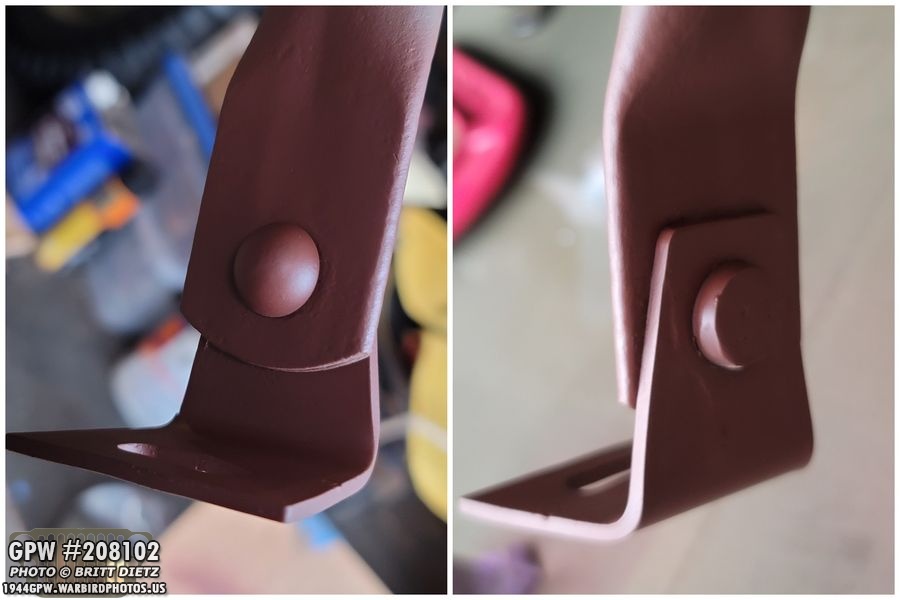
So last week I decided to get to work on it, and ordered the correct GPW style L brackets from Ron Fitzpatrick Jeep Parts. On the bottom, you can see what I had on my Jeep (I figure they were custom made) on the left, and the correct GPW style on the right.
After scuffing up the paint, I hit them with OD Green 33070 to match the Jeep.
The next question is, how can I rivet them brackets to the passenger seat legs? I don’t have the tools to actually rivet them, so I thought of an idea (which apparently I’m not the only one after I looked it up)… what if I used the ‘fake rivets’ that I often see online? What are these fake rivets? I’ll get to that in the next photo. But I went on eBay and got a set of eight ‘crossmember’ fake rivets.
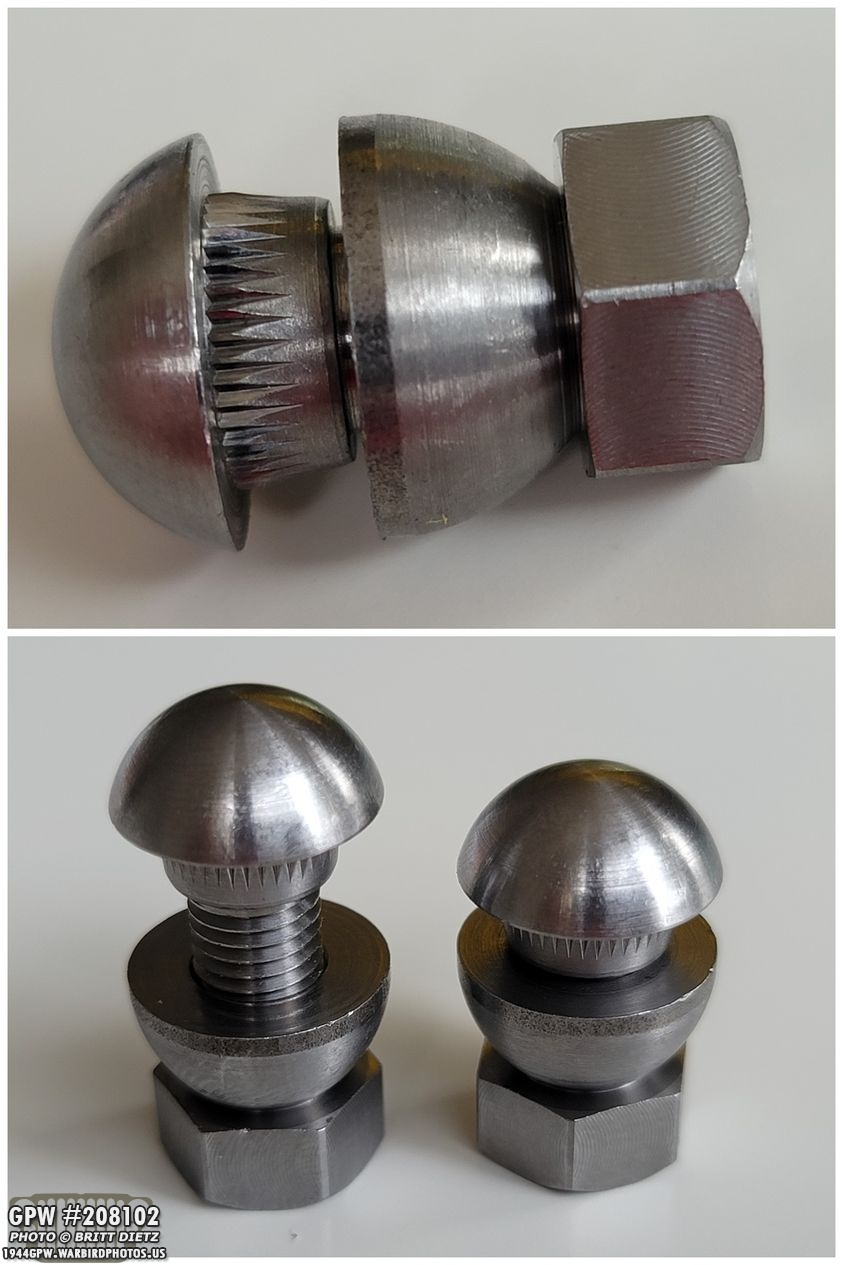
So how they work… there are two parts to these. There’s a round head ‘bolt’ that has a shoulder with some teeth. On the nut side is a reverse rivet head with threads and a nut. After a certain amount of torque when using a rachet on the nut side, the nut will ‘break off’ leaving the rivet head. The teeth help to stop the bolt side from spinning since there’s nothing to grab on there to hold it steady. These crossmember ones are meant for the frame adding various items on, but the shorter size should work for the seat.
Here’s a look at the L bracket with the rivet. I thought this would be an easy project, but it turned out to be quite a bit of a learning curve. At first, I was worried that these rivets will have too much space between the rivet heads when I add the L bracket and the seat foot, but it actually was a perfect width. However, there was a problem…
When putting the bolt through the L bracket, the shoulder was WAY too big for the hole. DOH! I figured I’d have to open the hole on these a bit…
But then I realized that the seat foot is wide enough that the L bracket won’t need to be extended. But, the passenger foot hole would be. As you can see here, it doesn’t quite go in all the way because of the teeth. So I took a Dremel and began to open the hole wider. You have to be really careful here, if you go too wide, the teeth won’t be able to grab and you’ll never be able to torque the other side on. What I tried to do was make it just large enough that I could then drive the bolt into the hole with a hammer.
I’m jumping ahead here because I forgot to take photos, but here’s what it looks like after I drove the bolt in, then screwed on the nut side and torqued it till the nut broke off. As you can see, the bolt side (the full domed head on the left) is not fully driven in… because I couldn’t get it to go in. No matter how much IU whacked it with a hammer, it would not go in beyond a certain point. I didn’t want to open the hole further for fear of it being too much. I screwed up one of these completely by trying to take a regular fine thread 5/16 nut and screwing it on to ‘pull’ the bolt into the hole instead of driving it. That didn’t work so well, and the nut got stuck and wouldn’t come off. I basically had to grind off the rivet head side to get it out. Darn. So after learning from my mistake, I decided I’d drive it in as much as I could, and just leave it be.
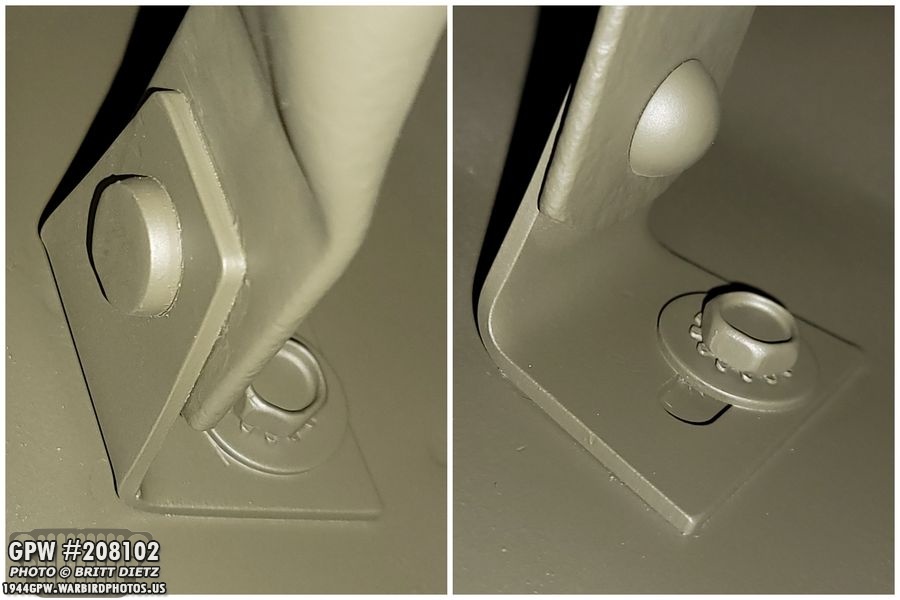
Here’s a look at both sides. As you can see on the right photo, you’ve left with a rivet head with a hole in it. That’s where the threads for the bolt are. You can see the flat end of the bolt side. Some people fill these to make them round, but I decided I wanted to make it look more like a real rivet…
I took my flap wheel and angle grinder and grounded it down to where the end of the bolt was. But that still was too fat to be a rivet…
So I went further. And then It was still a bit much (left photo). But, as you can imagine… getting it that thin means that there’s not many threads to hold the bolt to that 1/4 the size rivet head. So, I took my welder and welded the bolt and the flat rivet side. I then took and cleaned up the weld giving me what is basically now a ‘rivet’ (right photo)! No worrying about that coming apart!
Slapped on some primer after sanding it all smooth…
And I did the other side, which went a lot faster as I had a sense of what I was doing now. Same thing, drove in the head as much as I could, then bolted on the other side till the nut snapped off. Ground down to as thin as I could, then welded the rivet bolt to the rivet nut at the seam. Sanded and primed. Of course, during this whole process, I checked to make sure I could still rotate the L bracket as if they were so tight they couldn’t move, I’d defeated the purpose of this whole project. Note – The rivet heads should be facing inward to be correct like shown here. The flat ‘squished’ side is on the outside.
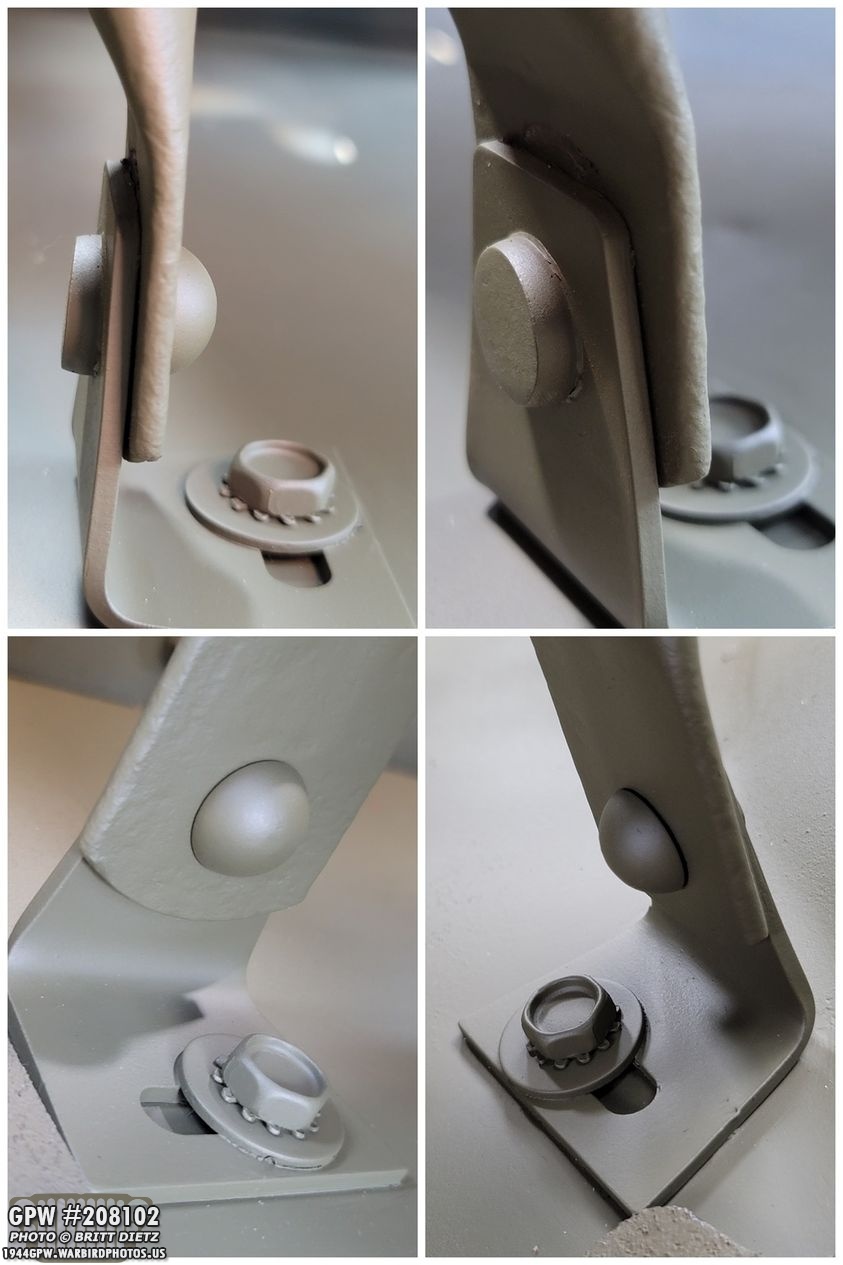
And then I bolted them down using the recessed head bolts, star washer, and washer I used before (which is correct for the GPW). Here’s a look at both sides. I probably could have ground down the flat side even more till it was like 4/16 thick, which would be really how it is, but I wanted something more for it to grab onto. This is good enough, and miles better than it was!
And here’s a look at the other side once finished. Nicked the L bracket a bit, but what can you do?
And to show, it still does pivot! Happy to have them ‘riveted’ to the seat, looks that more correct. I also, while the passenger seat was off, took some time to repaint some nicked areas on the seat and re-did the footman loops under the seat holding the canvas storage straps. Some of them were loose and coming unscrewed from the screw holes being worn. So I actually used some JB weld to partially block the holes and re-drilled them once set. Now they are all nice and tightly secure!
And again, some more looks at them.
One bad thing, however, is that the foot on the left (driver’s side) is a bit tighter than I wanted, so when the seat rotates it takes some of the paint with it. Sigh. I’ll just have to keep that in mind. Oh well!
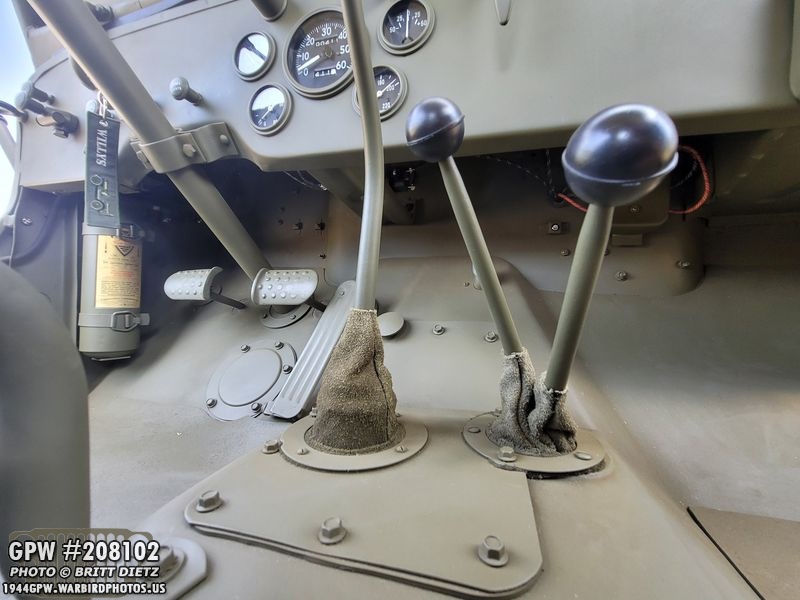
Moving on! Last week, when I added the two safety strap eye bolts to the dash, I talked about how I would need the move the manual push-button start switch I have under the dash as it was blocking me from putting a fire extinguisher in the bracket. You can see the push button switch I’ve custom wired in the top left screwed into the bottom of the dash lip. You’d have to know it was there, or look under the dash. I’ve hidden it pretty well.
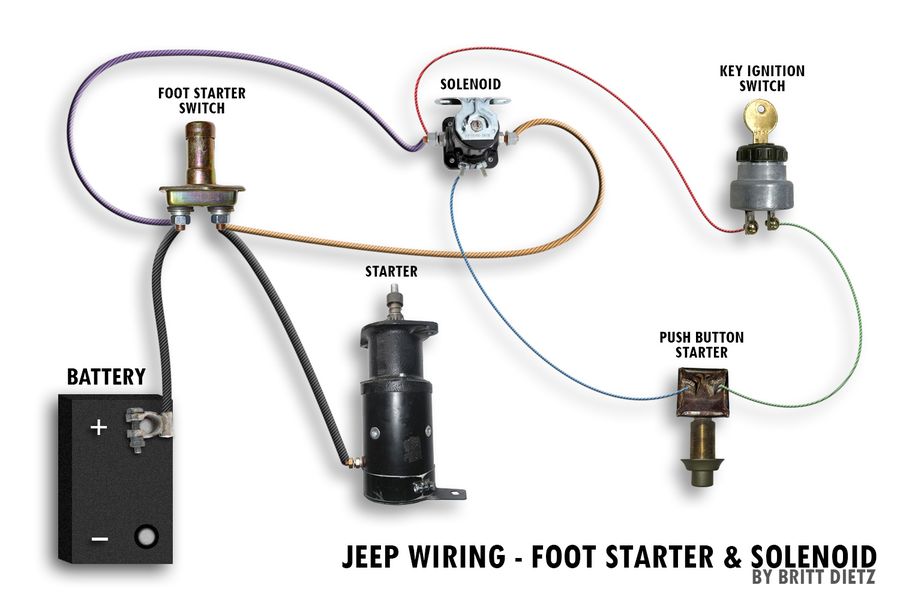
It’s been a while since I’ve shown this graphic, so I figured I’d show it again. My Jeep is 12v (came that way to me), and it was originally wired to start with the push button switch on the dash. I liked the idea of having that, as where I live there’s lots of hills (even my driveway is a hill), so having my feet available to keep one foot on the clutch and one on the brake helps. I went even further, my solenoid is hidden quite well, and with how I custom wired it, you can actually use the foot starter switch OR the push button. You can have your choice, so someone who likes starting Jeeps from the footswitch can do so on mine as well.
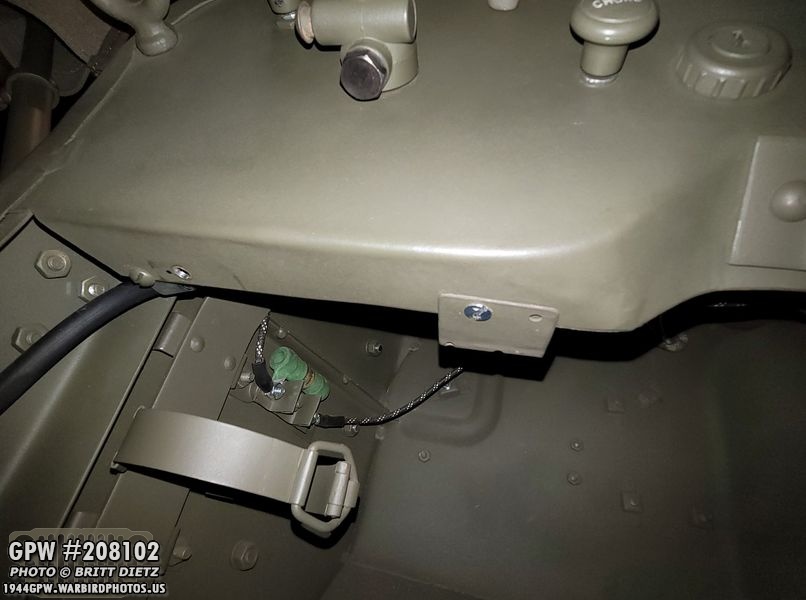
After removing the starter switch, you can see the hole (to the left) but the screw that holds the fuel sender wire clip to the dash. I had to find another spot I could put it under here that doesn’t get in the way of anything else, and it’s pretty crowded behind the dash.
And here’s a look at the starter switch. I made that custom Z looking bracket so it actually puts it up further behind the dash so you cannot see it at all.
I decided to move it over from the original spit (yellow) to almost as far over to the right as I could before the dash lip starts to curve upwards for the steering column bracket. I can’t go any more left as I’d run into the push/pull switch, and any more right I’d hit the choke cable. So right between them it is! I have the spot marked.
In order to rearrange the wires going to the start switch, I undid the screws… and one of the eye ends broke! These were cheapy ends, so I decided to replace them (on both just in case) which nice heavy-duty eye ends, soldering to keep the wire attached to the eye, and heat wrap to make it look pretty.
Here’s the end result! Nice strong wire ends there that are not going to come apart. A slight burn mark keeping the heat a little too long on the shrink tube (whoops), but otherwise great looking! That’ll last a long long time.
And here’s how the new location looks with it screwed down. I need to paint the screw head, but it’s done! And when you look at the Jeep from any angle (but this one), you can’t see it’s down there. I thought about closing up the hole where it previous was, but I don’t see much need to. I’ll paint the bare metal so and I should be done with it. After I shot this, I tested it out and everything works great still. What will take some time is getting used to the button being further over to the right. Muscle memory has me still reaching fro the left side.
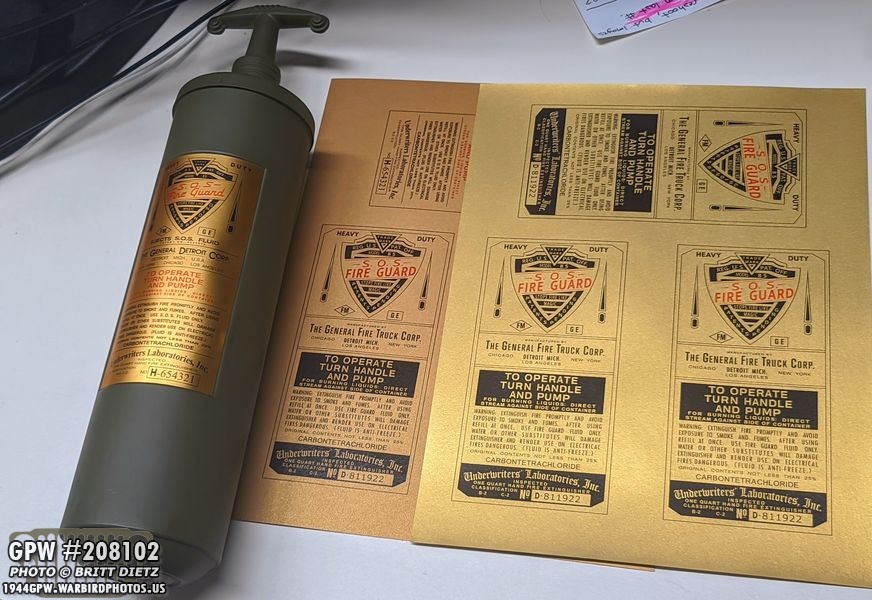
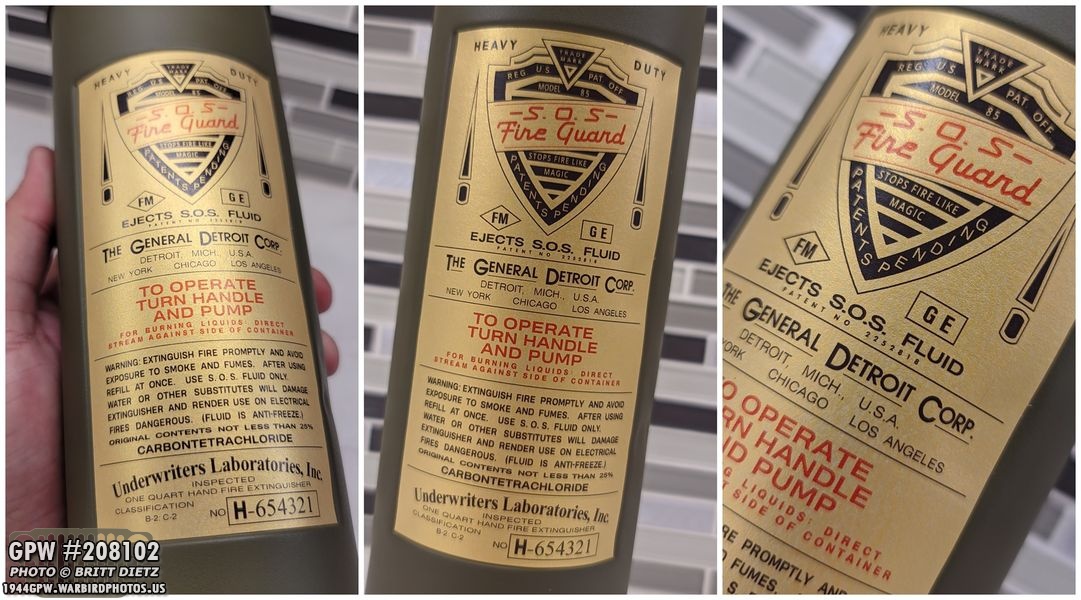
With that done, it was time to finish my Fire Extinsuigher project! As mentioned last week, I’ve been continuing the ongoing search for the right style paper for the customer SOS Fire Guard decals I made. These are for the GPW and MB Jeeps, and are about 95-97%+ accurate down to the fonts and placement of every letter. Here’s some of the different papers I’ve looked at from the super shiny to the dull to the super textured.
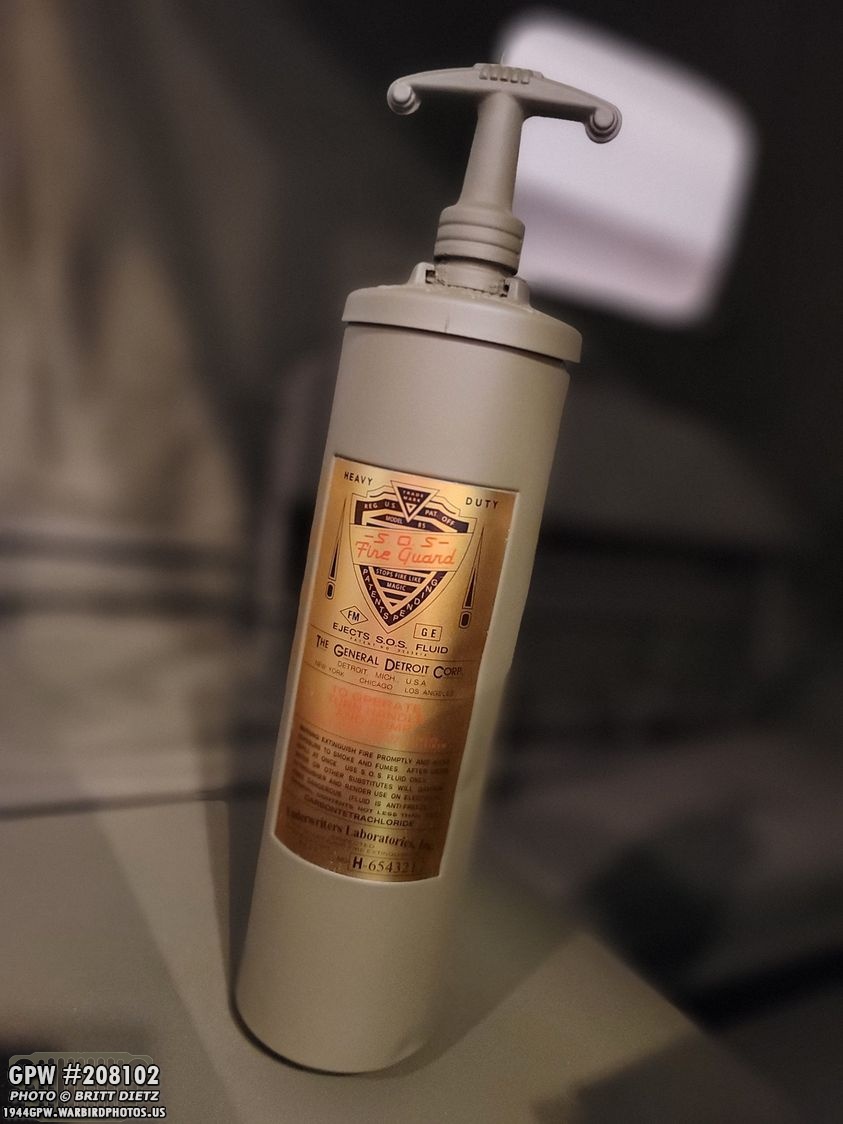
As mentioned before, I’m using a post-war fire extinguisher with the smaller decal/brass plate size until I can find a correct wartime Model 85. Here’s one of the first tests with a very reflective decal test. It ended up being too reflective, so I ditched it.
I then went for more of a subdued sheen paper, which looks much more like what I’ve seen in photos. At the time, I was using spray glue to keep it attached, but that proved to not be powerful enough and it started to curl up.
So I continued trying different papers/stickers. Vinyl was what I thought would be the winner, but it melted in the printer. Whoops. So I tried all sorts of different paper types to see what would work best.
It came down between these two styles. The left was more of a sheen with less of a shine, and the right was very reflective.
After removing the one that didn’t work, I ended up sanding the plate slot to make the paint a bit more rough. I felt that would help the sticker ‘stick’ better to the matte paint.
After looking closely at various photos and talking with Farrell Fox, I went with the more subdued sheen look. It seems to match the original decals the best! Again, this is a smaller version of the decal for the post-war extinguisher. I have the full-size ones ready once I find the right Model 85.
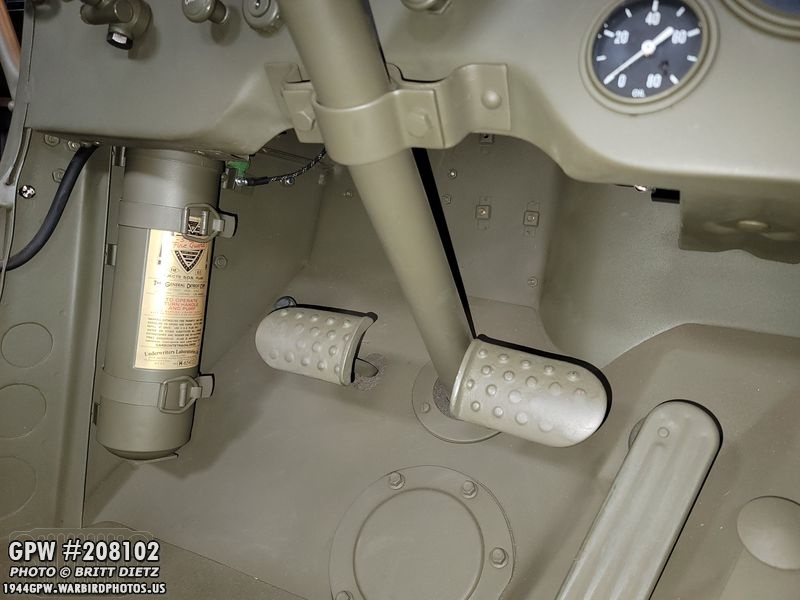
And here it is, installed in the Jeep! A perfect fit.
It’ll do its part until I can get the correct extinguisher.
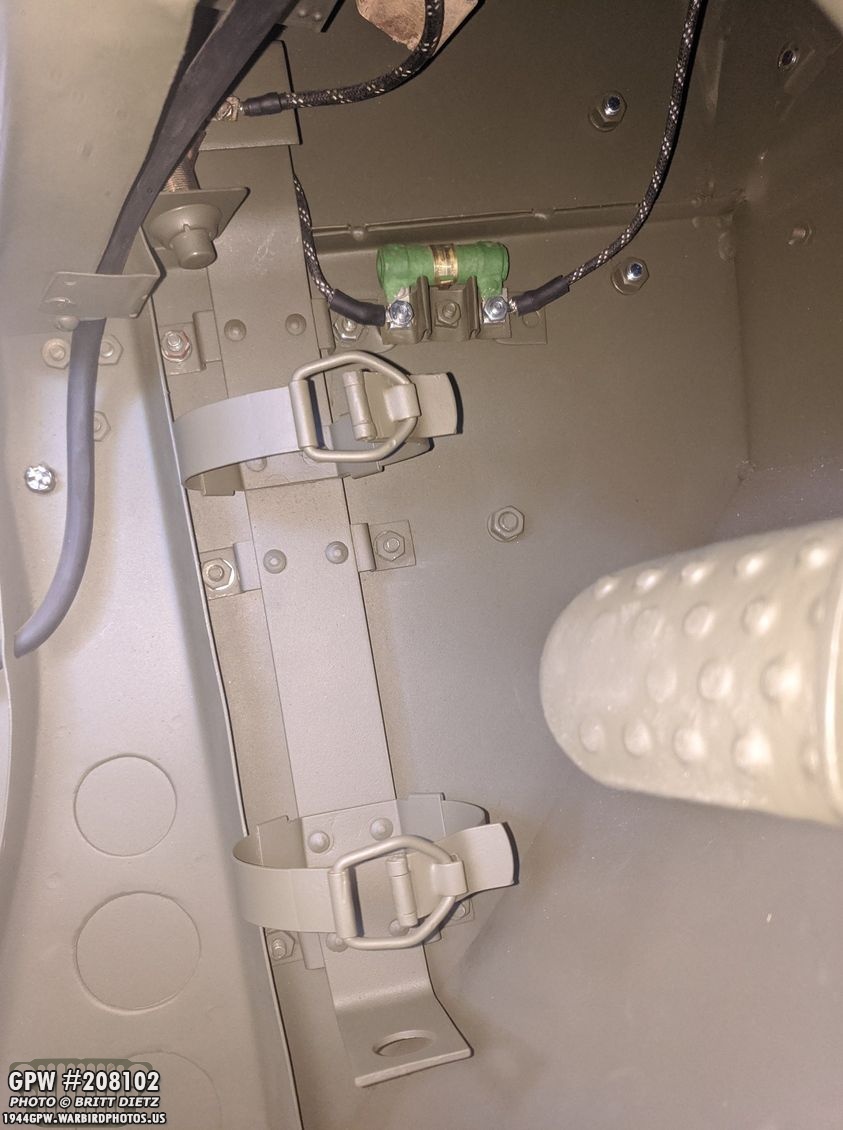
Here’s another look showing the entire extinguisher. It’s a tight fit with everything in there for sure. Often times, original extinguishers with decals are lots of rips and tears where the soldier’s shoes have rubbed against them. Thankfully, I seem to have subconsciously learned to move my foot backward from the clutch instead of to the side, so I haven’t hit it so far!
And here’s a look also showing the push-button starter switch I moved at the top. Everything worked out, which is great!
And with that, even though I still need a correct wartime extinguisher, that pretty much finishes all the extra ‘goodies’ I can add to the Jeep tool wise. With the ORD air pump mounted under the rear seat, the Ford manual hand crank behind the rear seat, and the fire extinguisher and bracket below the dash, there’s really not anything else I can add (perhaps other than a rifle rack, which I’m still on the fence about as nearly all Army Air Force jeeps I’ve seen don’t have one.
Mail Call! Another shipment from Ron Fitzpatrick Jeep Parts! Another can of 33070 OD Green spray paint, a bearing/cup for the NOS pinion I have, a carrier shim set, and something special…
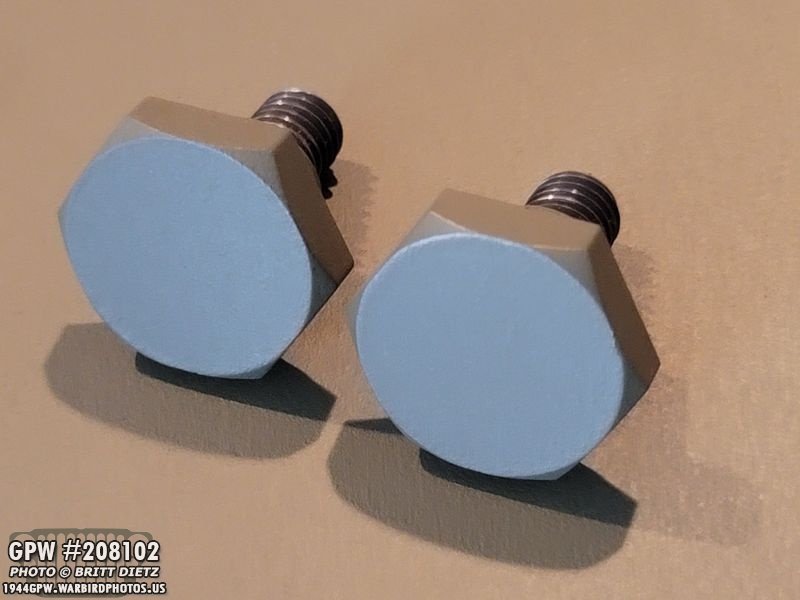
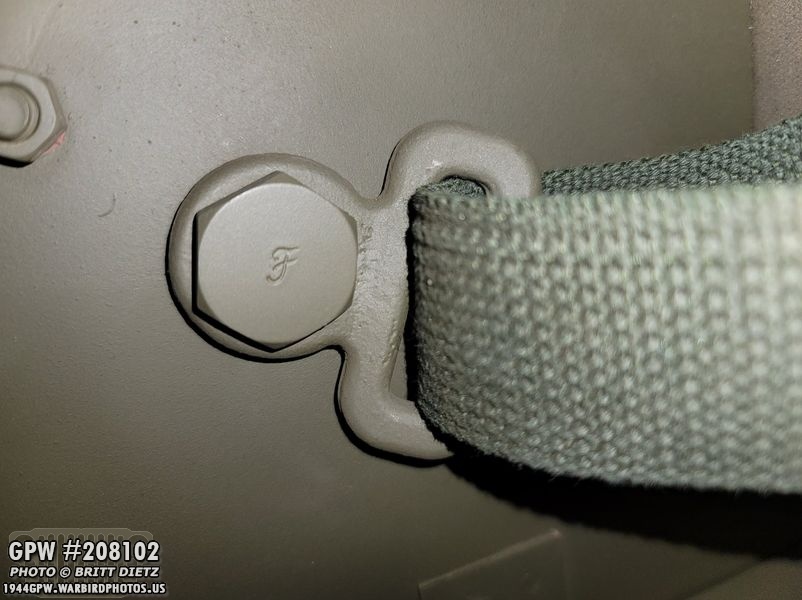
I had mentioned to Ron from Ron Fitzpatrick Jeep Parts that my safety strap bracket bolts were not F stamped (they should be on a GPW). I had bought them from him some time ago, and I regret not getting the F stamped versions. He said, send them up! So I mailed them out to him last week.
In the meantime, I had a hex bolt holding the strap on, which made the side top bow brackets look a bit terrible with the unpainted bolt sticking out!
And here they are, back from being F stamped! They look pretty good, just needs some sanding before repainting!
When I took the Jeep to the birthday parade (earlier in this update), I realized I couldn’t have that ugly bolt sticking out, so I used some spare MD Juan safety strap bolts that I forgot I had (on the left) which I quickly painted. I thought this was interesting to see the difference between MD Juan’s bolts (which are way way too long) and Ron Fitzpatrick Jeep Parts bolt (which might be Joes Motor Pool).
After sanding the top of the safety strap bolts, it was time to prime!
After hitting them with Roed Oxide Barrier III spray paint primer from Ron Fitzpatrick Jeep Parts, I scuffed them up so the OD Green will have something to cling onto.
And here they are all painted with OD Green! Ready for reinstall.
Installed on the passenger side!
Bracket looks much better than that darn bolt.
And here’s the driver’s side (which actually ended up rightside-up, totally unplanned.)
And the driver’s side bracket. There’s 3 F stamps on these… the bracket, the large bolt on the other side, and the small bolt.
Next project, the ongoing coolant system on the Jeep. I have Prestone 50/50 antifreeze in the Jeep (which I don’t really need antifreeze, as it never drops anywhere remotely close to freezing here in Southern California)… but with the rust that was in there, I wanted to add something to help with that.
I got some of this Radiator Ant-Rust from Prestone. It also lubes, apparently, the water pump. I figured it was worth a try. It has a milky appearance. I was able to dump the entire bottle (which is rather small) into the radiator.
I took the Jeep out for a drive that evening, and the engine (at the time) actually stayed cooler than it usually did driving around. I figured that perhaps this was because of the anti-rust I put in there.
But then on Thursday I drove the Jeep around the area for about 30 minutes. It was 100-101 outside (super dry heat), I was in 2nd and 3rd most of the time and going up several hills. The thermostat is rated at 160. The temp started around 170-180, then stayed at 180 for a bit, then went between 180-195. After a bit in 3rd going up a hill, it went to 200 and 205. After slowing down, it went back to 190. But then a bit later, it went to 205-210 for a little. When I’d switch to 2nd gear, it dropped down to 190 again. It then stayed between 180-190 the rest of the day. It could be because of the high temps and driving up hills, but a little concerning. I might need to do a full flush again.
No updates this week on the axles or combat rims/new tires. Oct 3rd is still the target date to continue working on them. Short explanation… My Jeep has post-war CJ axles and CJ rims. I have a pair of GPW 1943 axles I’m restoring to replace them, and I have combat rims on new Firestone tires ready to replace these when I do that.
One thing my Jeep is missing, but would be WAY too much work to do now, is adding the firewall chipboard/cardboard under the dash. In order to add it, I would have to take apart most of the wiring harness and several things under the dash to install it. I think I will wait until I replace the body tub with my original to add it.
I also wanted to note that I actually made custom fonts looking at tons of photos of Army Air Force Jeeps during the war, so next time I redo the markings on my hood (which have an estimated number from the hood estimator online) with the correct number I found by wet sanding my hood, I’ll use those to make my own stencils.
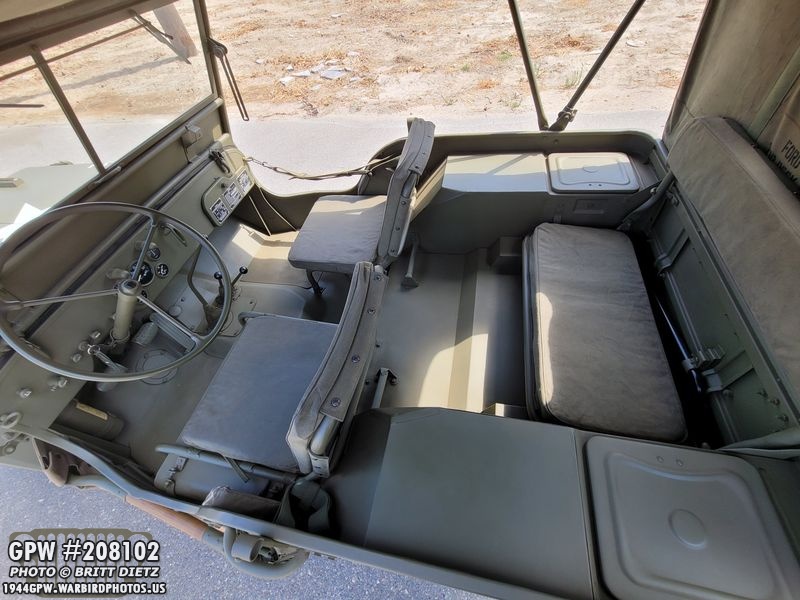
Here’s a fun wide-angle shot taken yesterday while out for the drive. Always trying to find new angles to take photos on the Jeep.
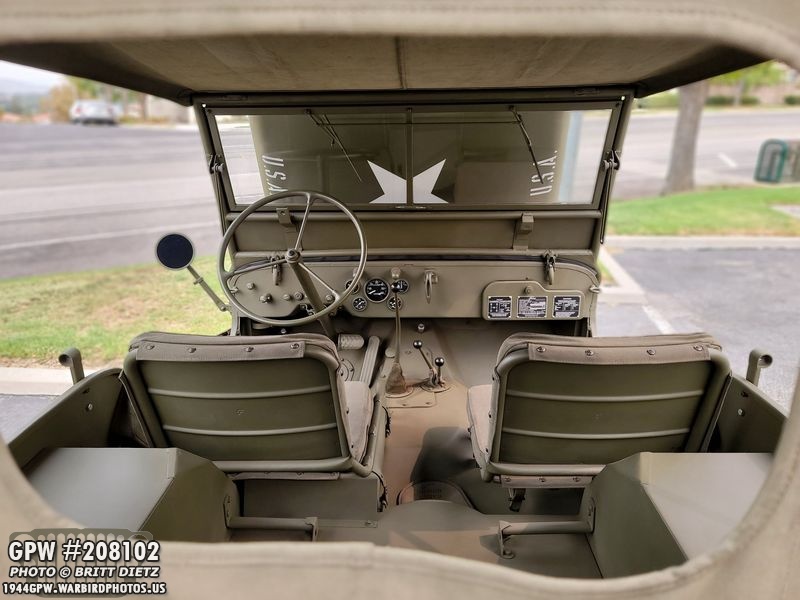
And a final shot showing the inside as I was checking the engine for any leaks on a driver earlier this week. It looks overcast out, but that’s actually all the ash from the fires blocking out the sun.
And that’s it for this week! It’s little battles and upgrades as the days go on as I continue to make the Jeep as complete as I can. Next week I plan on doing the same rivet work I did for the passenger seat on the rear seat, and I have a special project I’ve been working on! Till next week…
