 Rear Axle Extravaganza!
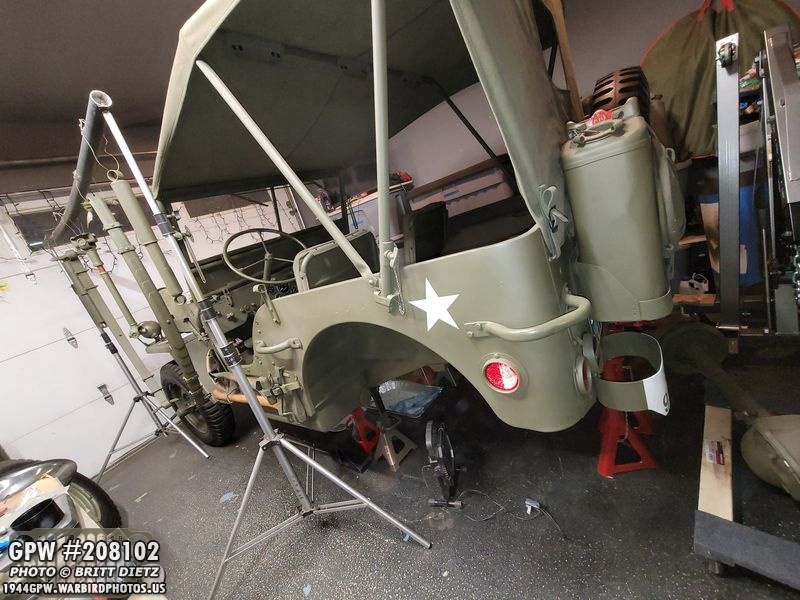
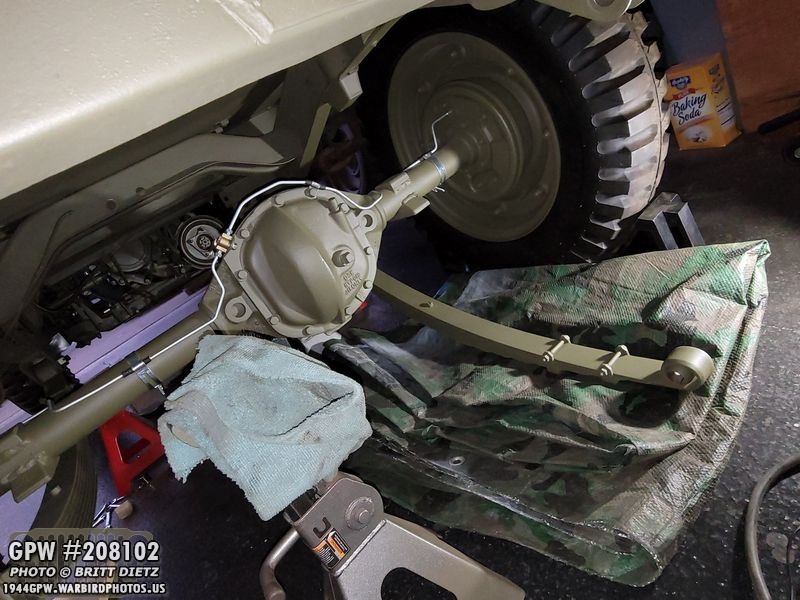
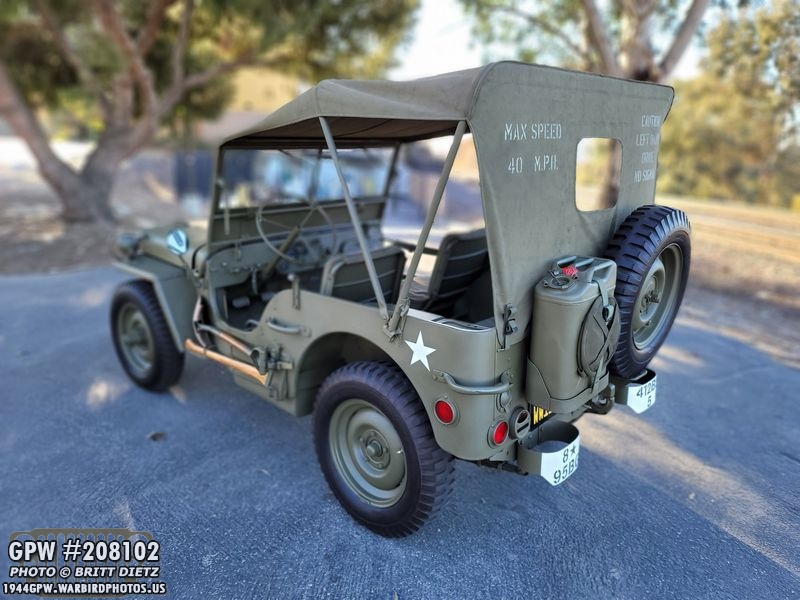
This past week was a whirlwind of work on the rear axle replacement, finally removing the CJ axles and bringing in the wartime GPW one with combat rims and correct Firestone tires! It wasn’t all fun, though, as I had to weld underneath the Jeep, ran into some issues reinstalling the springs, and more. But still, making progress!
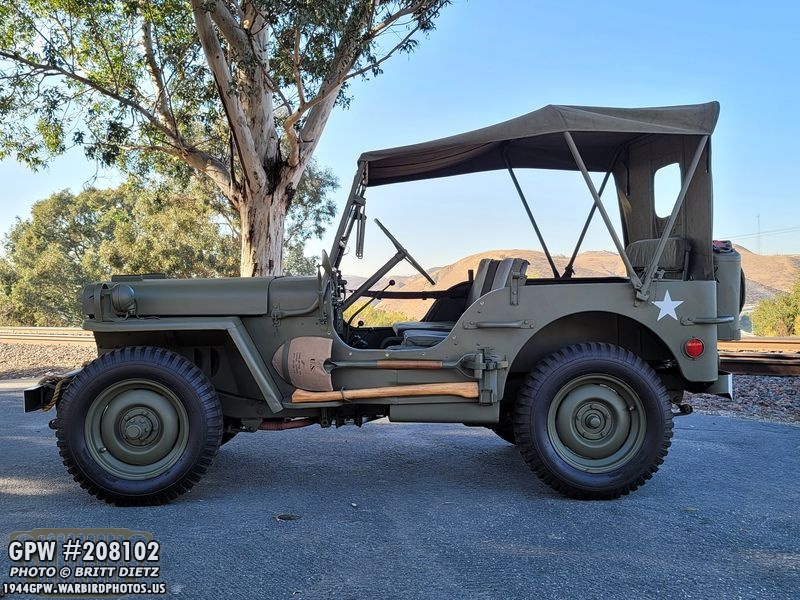
Each day passes, getting closer to having a Jeep that isn’t blaring with post-war rims and tires! Soon this view will look a lot different!
Previously, on the Jeep show, I had removed the rear CJ (post-war Civilian Jeep) axle and was prepping to do work so I could put the restored GPW axle there. It wasn’t a simple swap as I had some extra work to do.
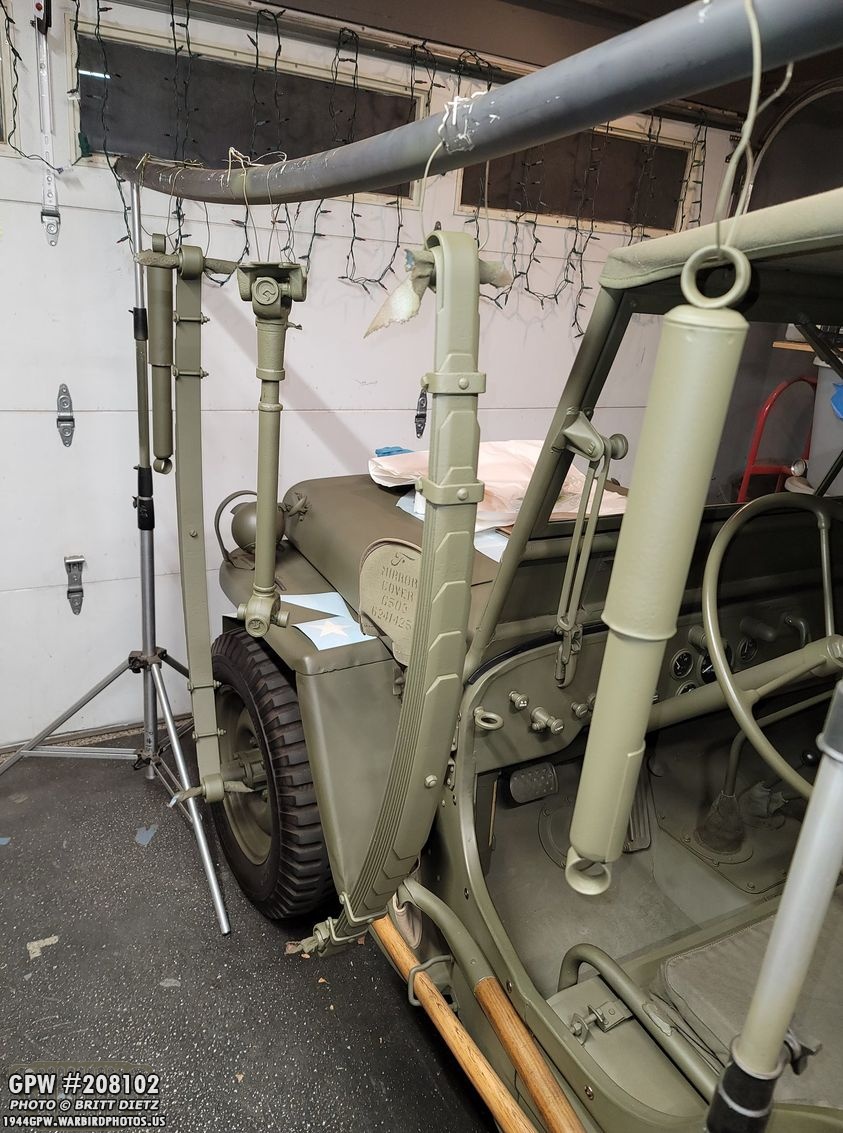
Last week I removed the springs, shocks, and propeller shaft cleaned them all up removing as much paint and any surface rust I could, primed them, and painted them 33070 OD Green.
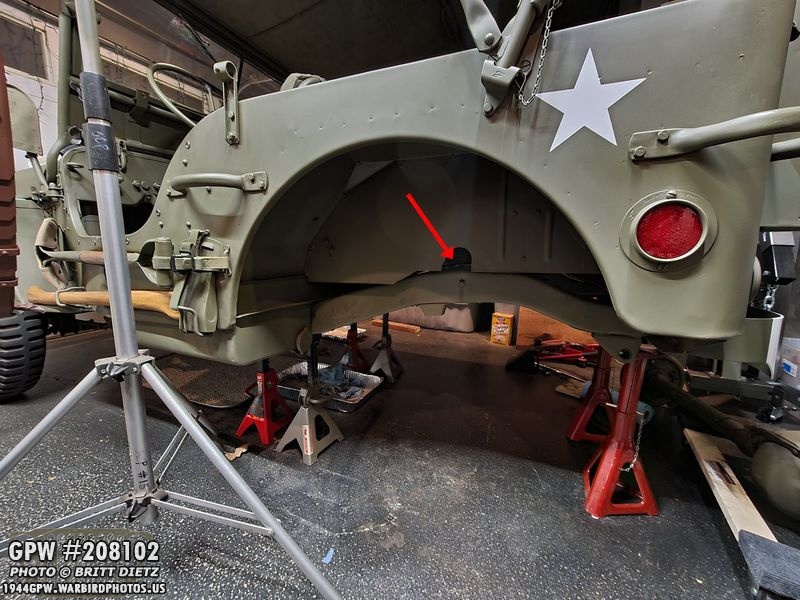
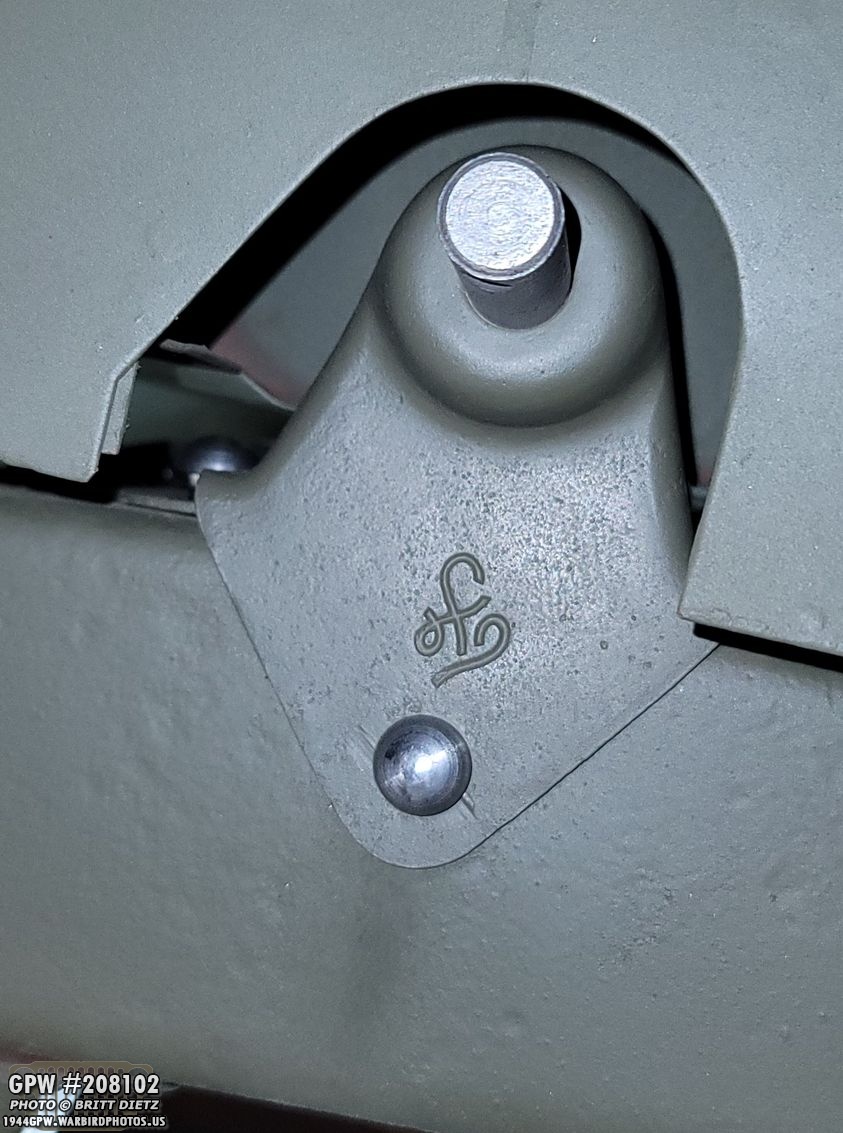
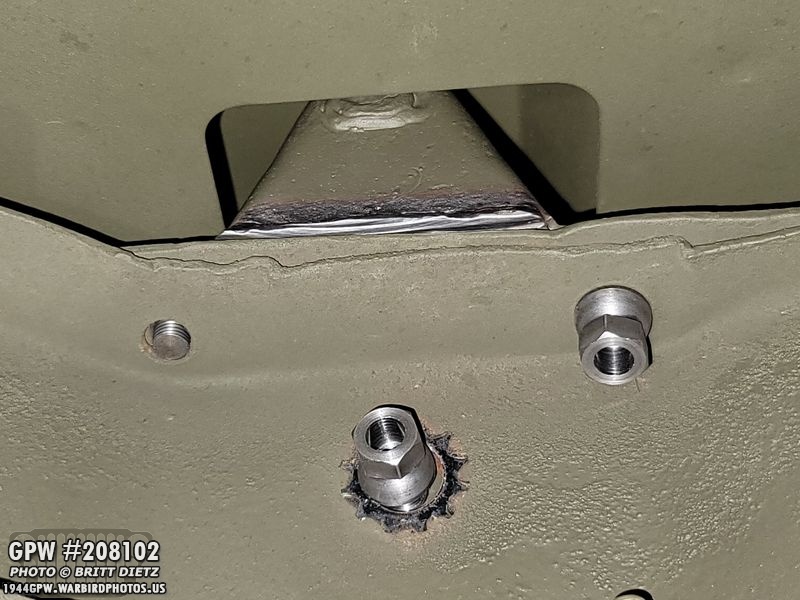
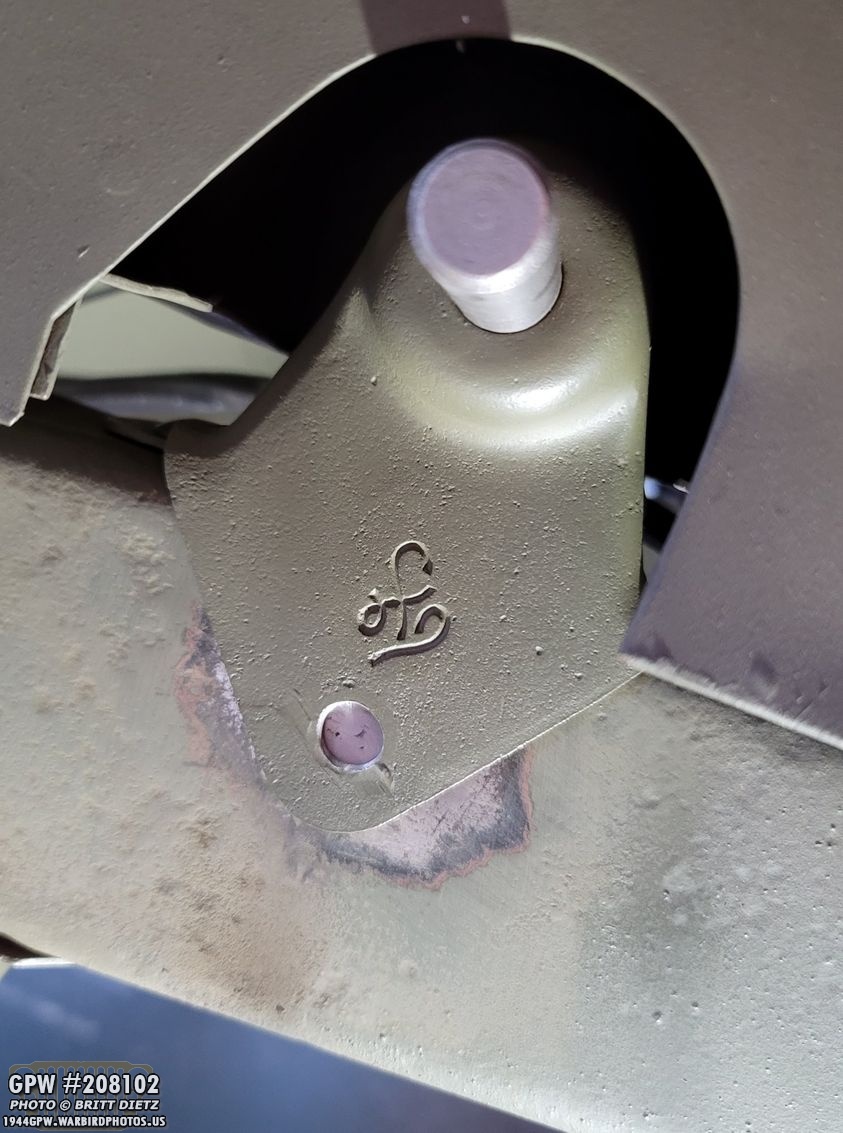
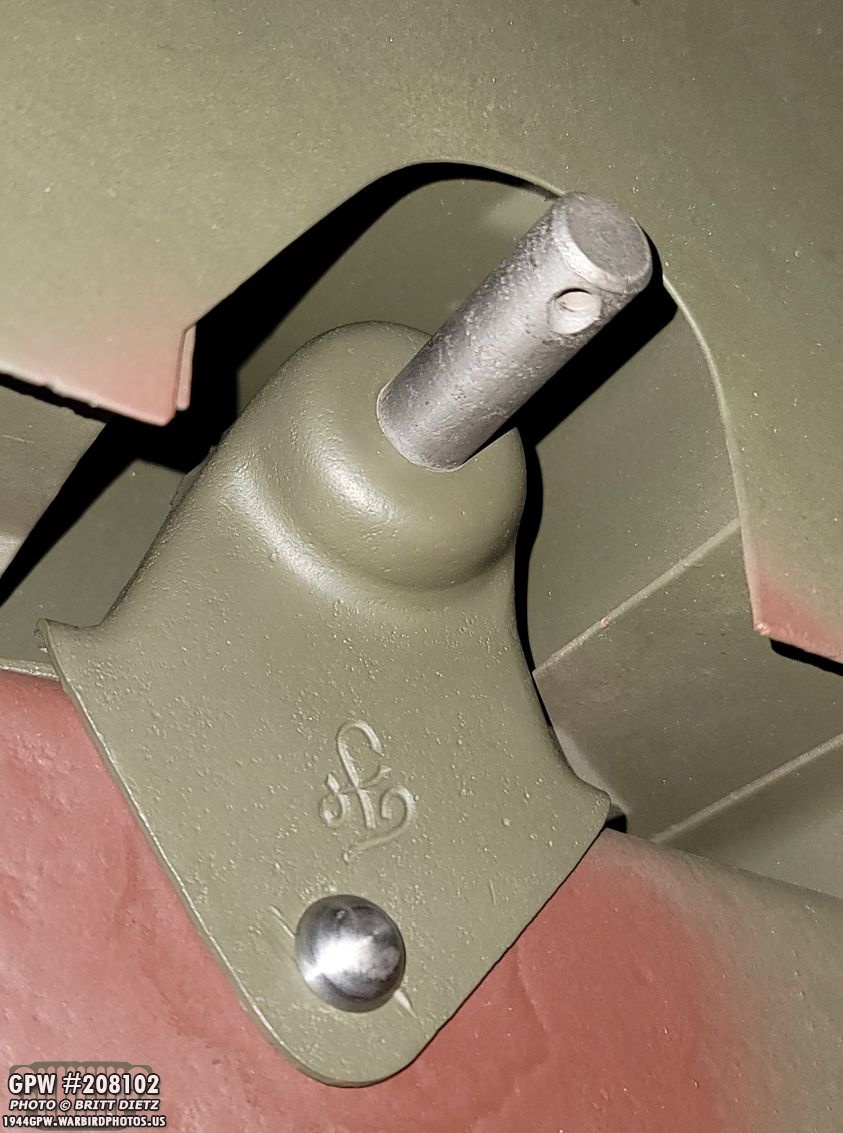
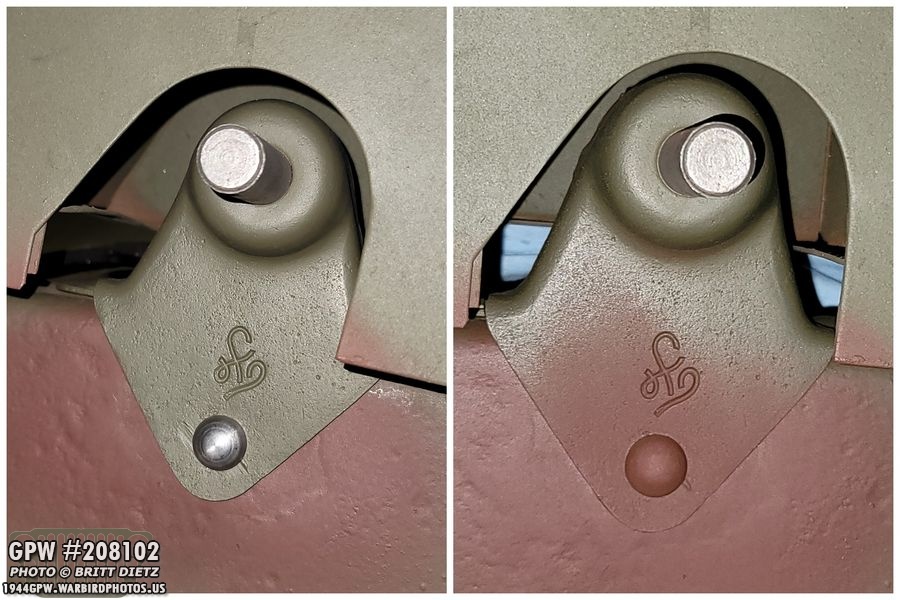
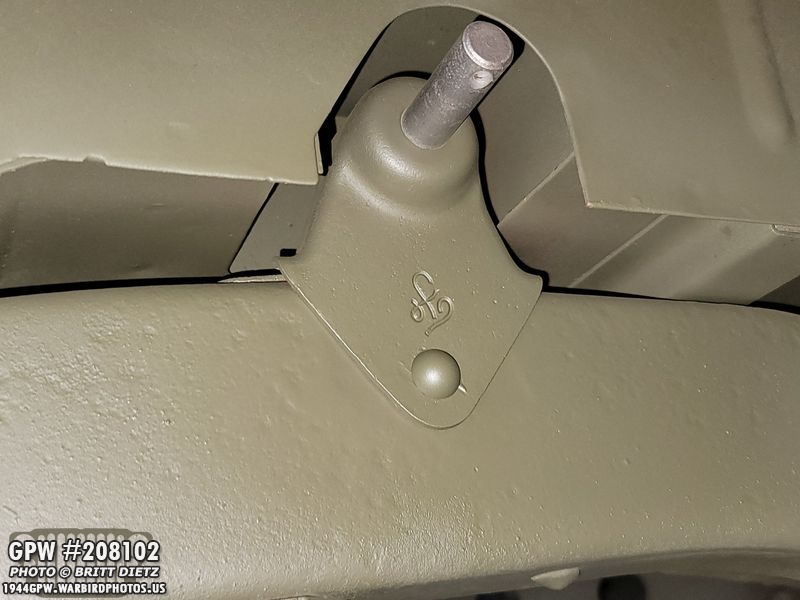
Before I could begin to reinstall things, I needed to address something I’ve been waiting to do. If you look here at the empty slot in my body tub… something should be here attached to the frame. There should be F marked shock brackets riveted and welded to the frame. At some point in the Jeep’s life, those were removed for some reason.
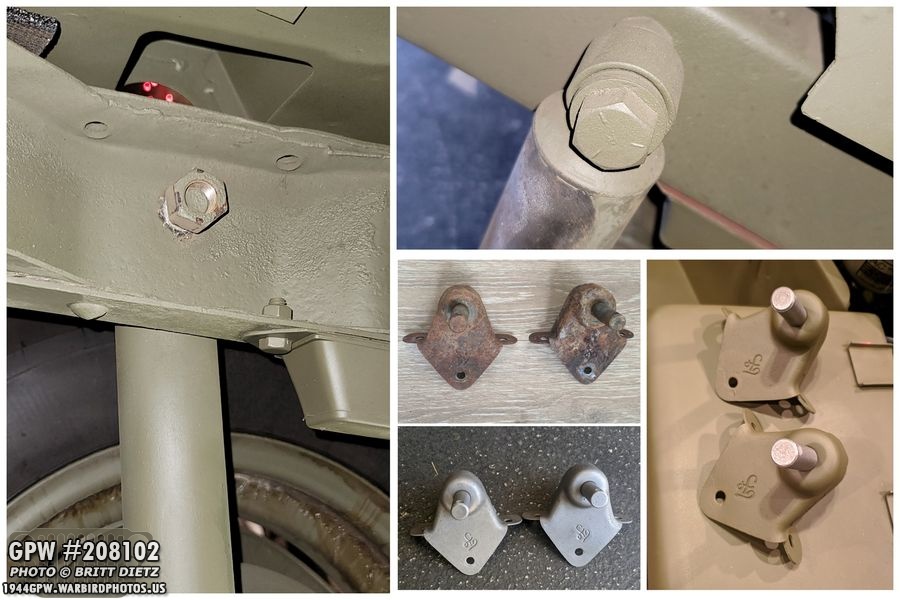
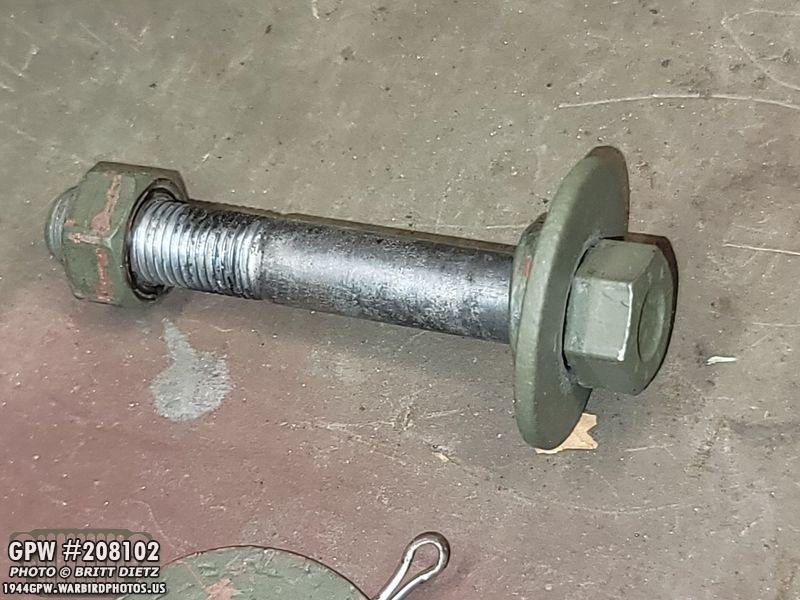
In it’s place, someone had enlarged the lower rivet hole and put a huge bolt and nuts to hold the shock to the frame. I found a pair of take-off original GPW brackets, sandblasted and cleaned them up, and painted them. They’ve been waiting for months now.
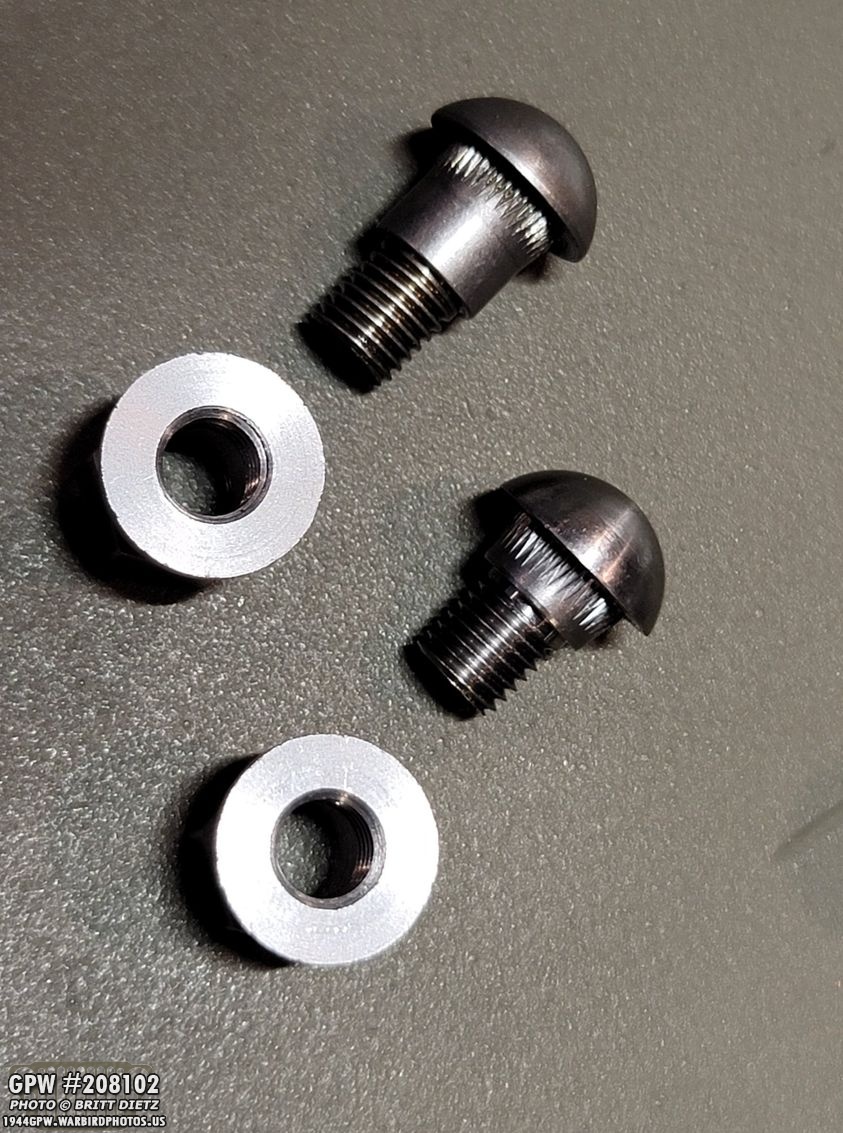
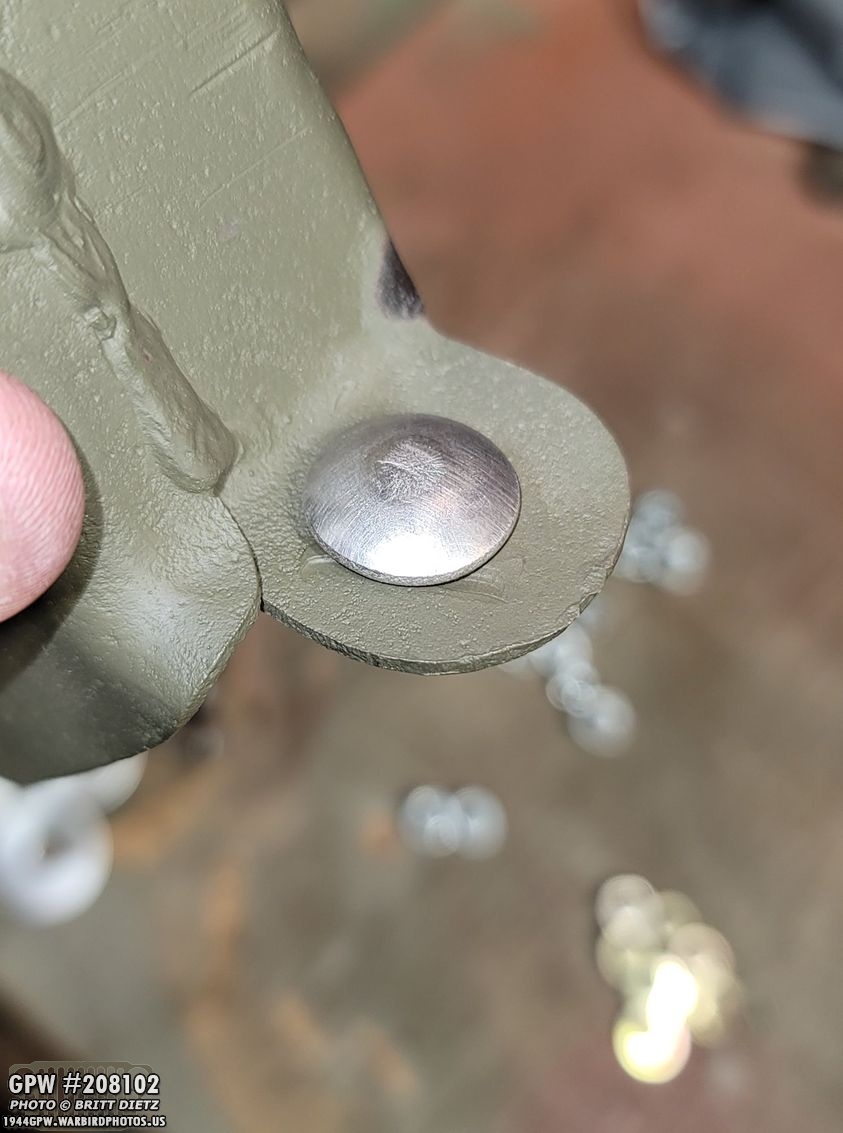
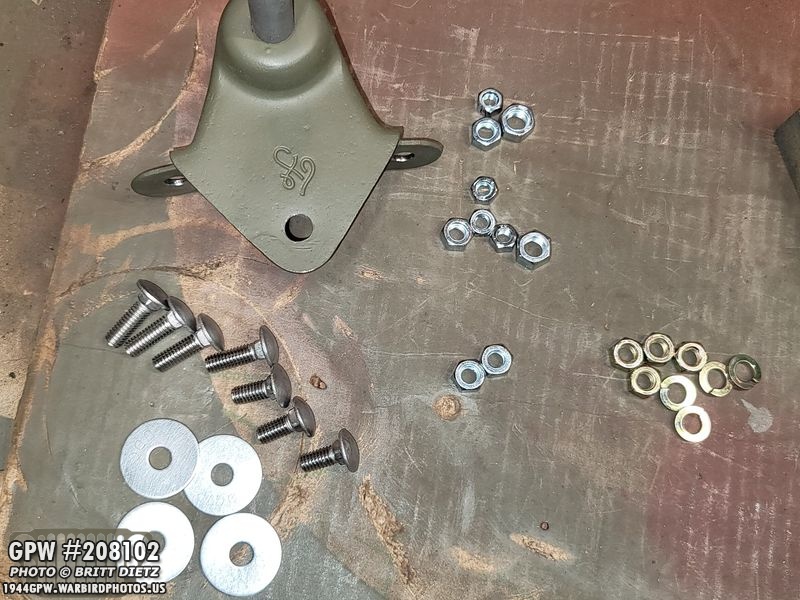
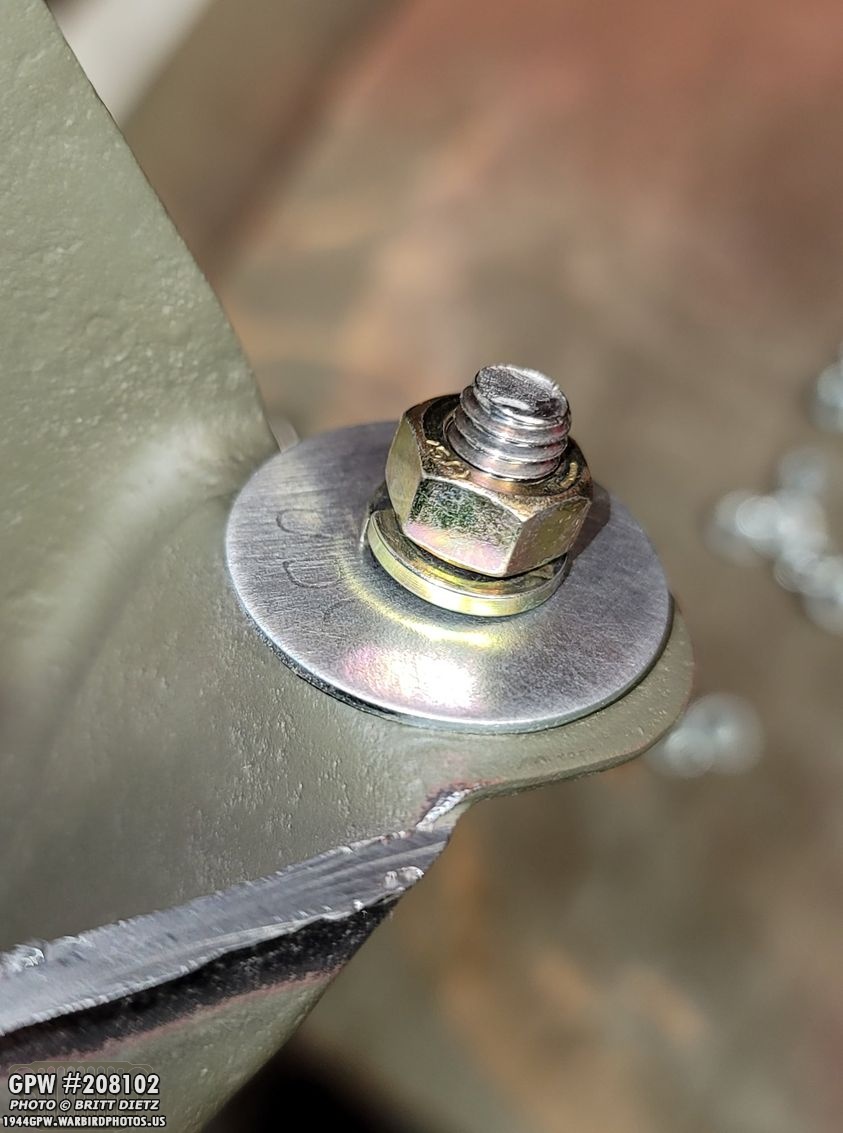
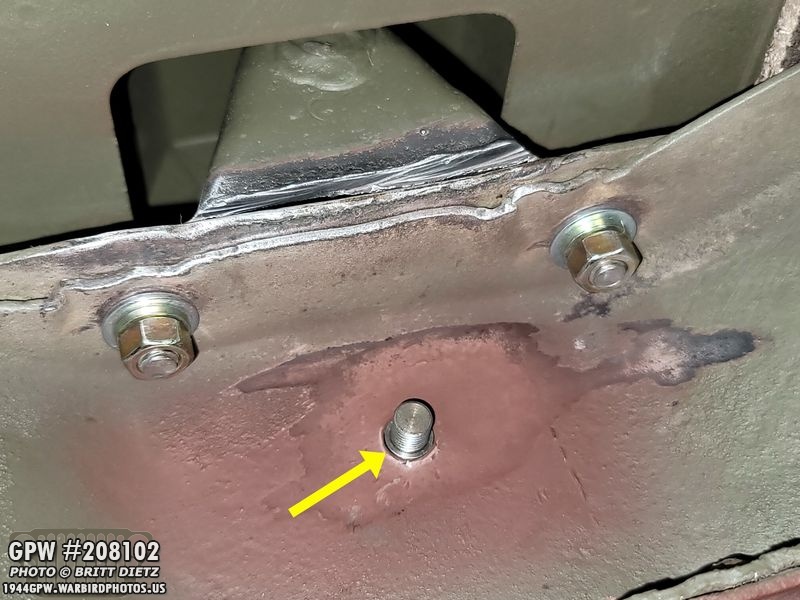
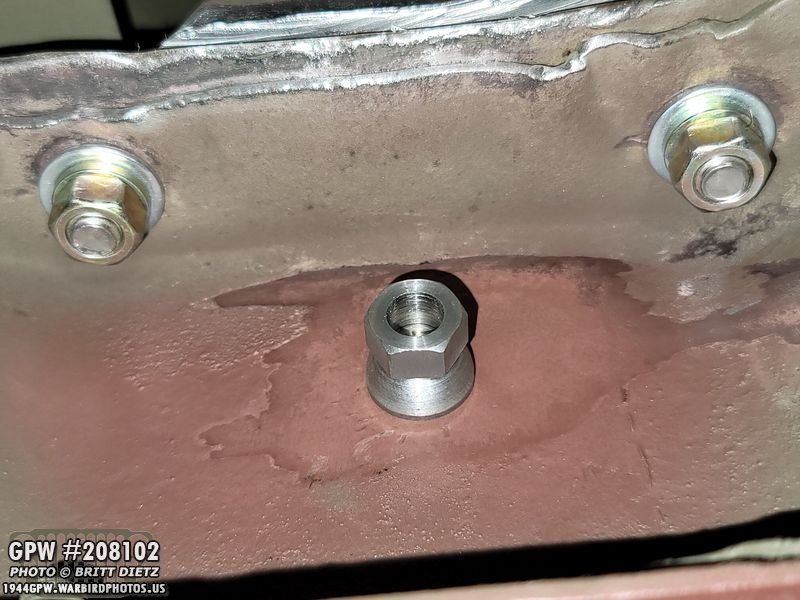
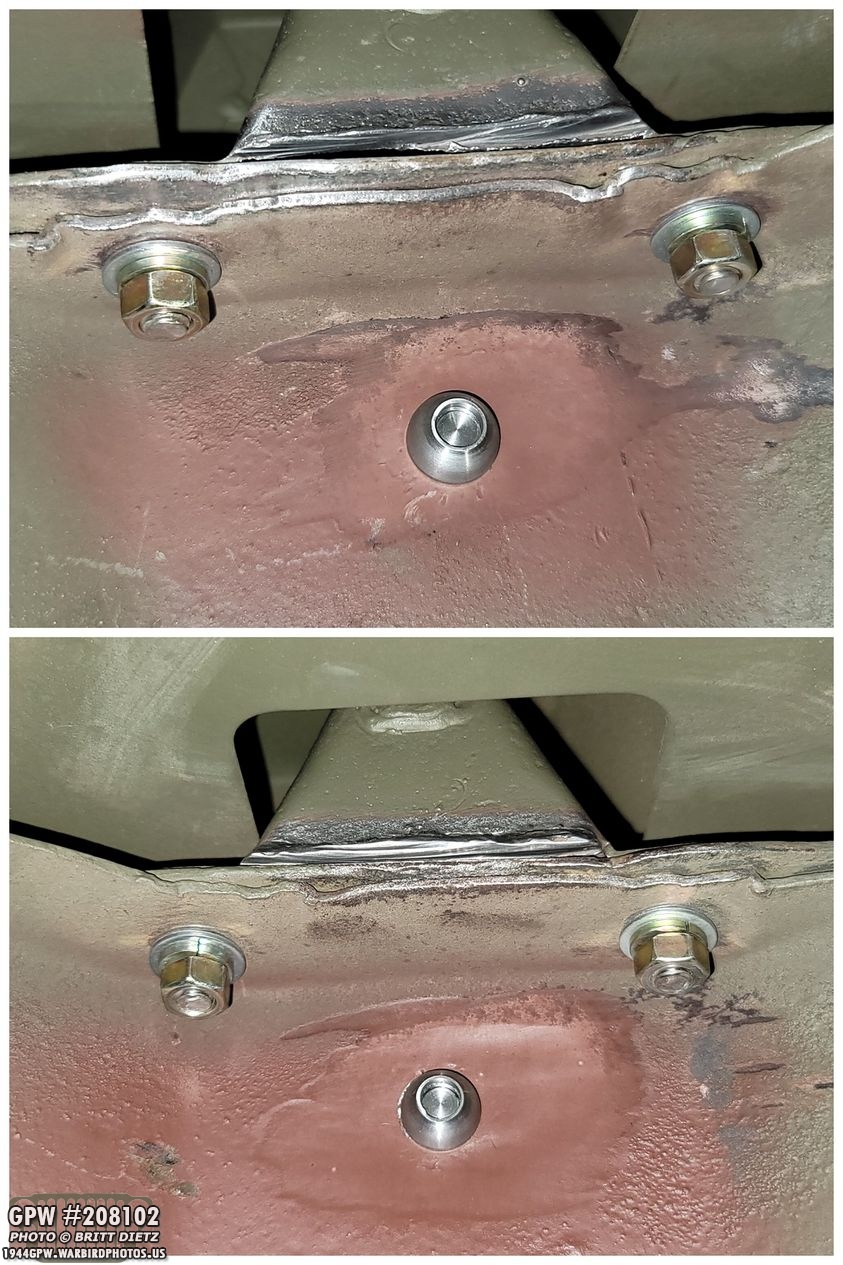
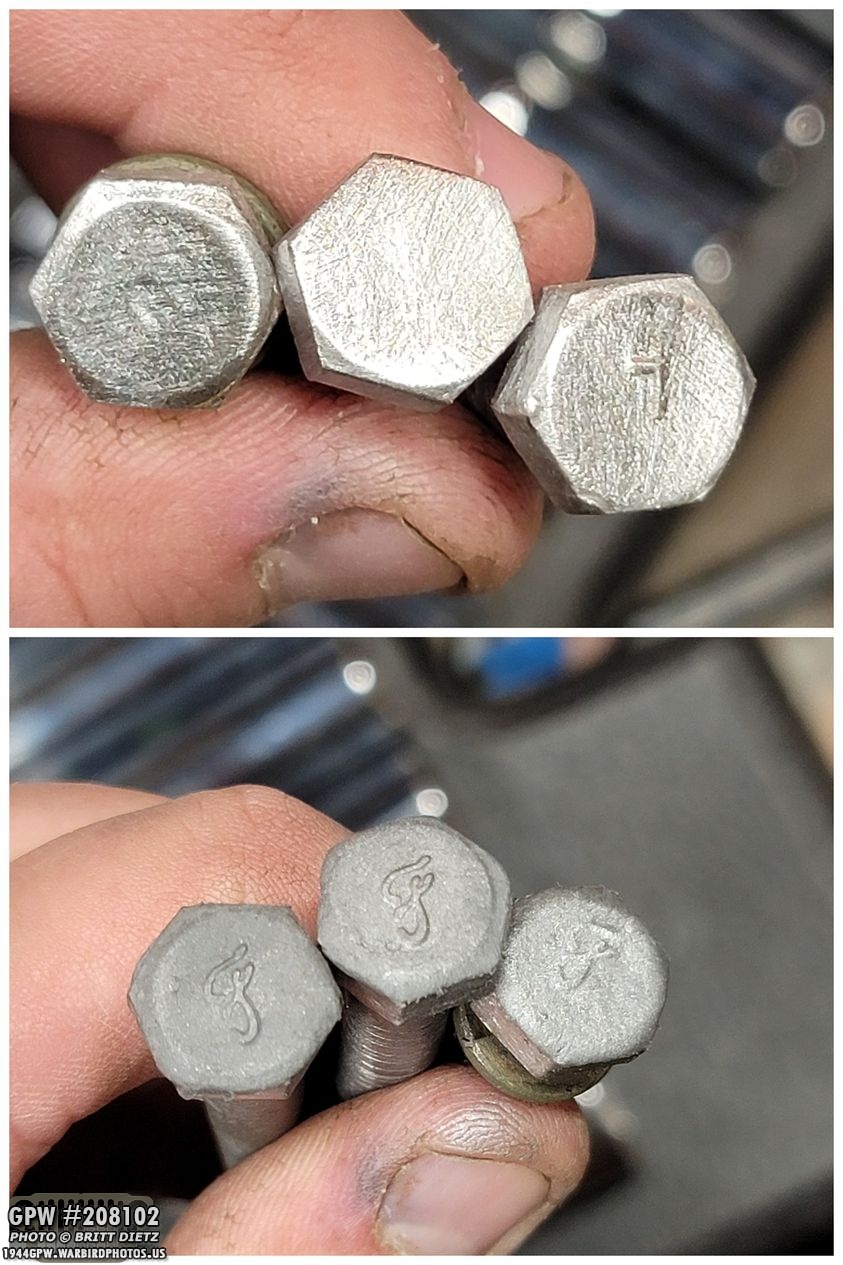
My original idea, since I don’t have a rivet gun or way to do Ford style rivets, was to use these imitation rivets. I’d use the longer ones (top) for the two side flanges of the bracket that sit on top of the frame, and I’d use the shorter one (bottom) for the side of the frame. How these work are on the nut side (which you can’t see well since I have them standing), there’s a nut attached to another rivet head. After a certain amount of torque, the nut snaps off leaving a hollow rivet head on the other side which can be filled.
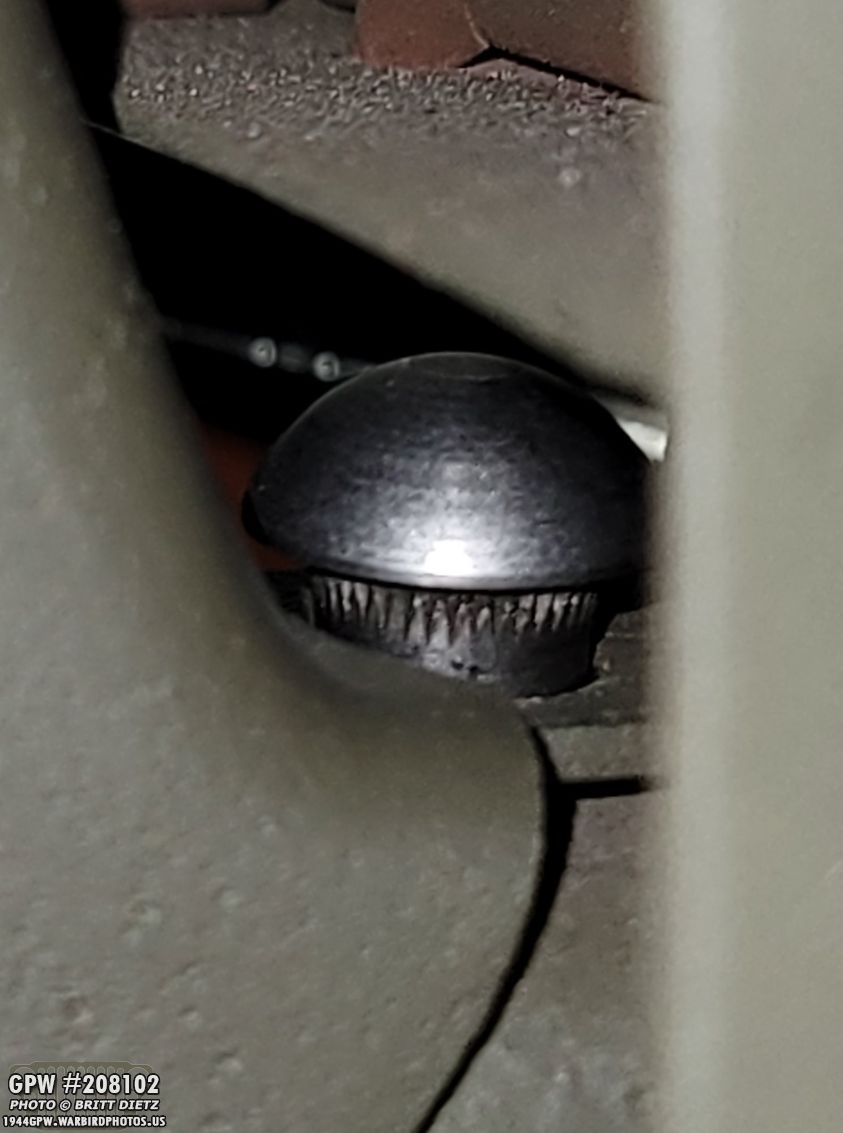
Last week, I realized that the rivets weren’t going through the holes on the bracket flanges, so I had to enlarge the holes to 3/8 size so they would go down. The idea is you want it tight enough so that the teeth you see need to be driven in. That prevents the fake rivet from spinning as you tighten the other side.
Doing a quick test run to see how it would all fit and I found some issues.
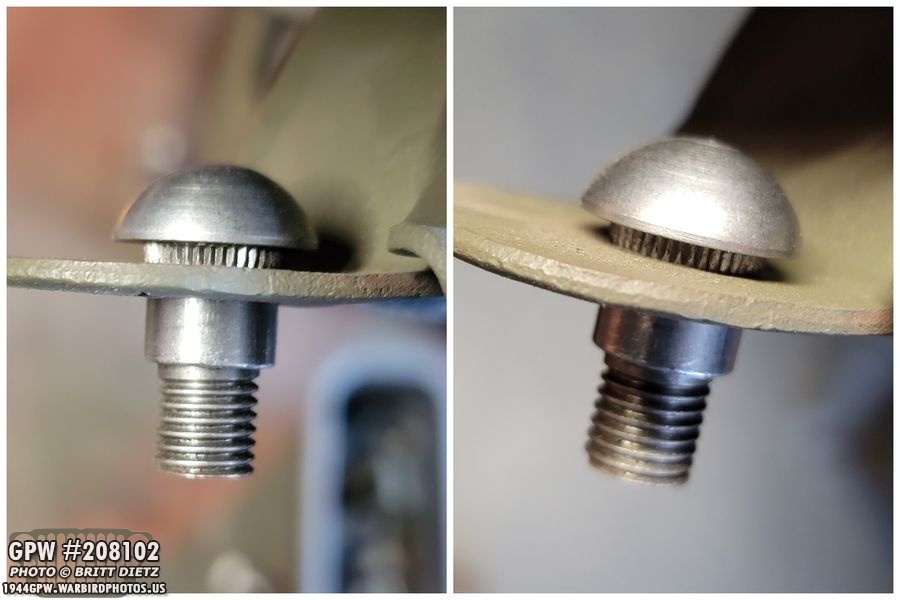
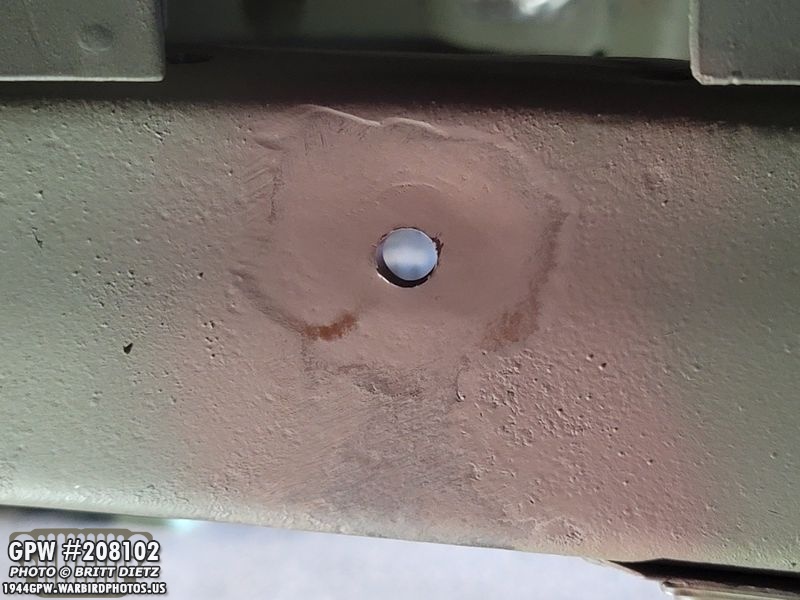
Turns out, the holes on the frame are not 3/8, so I couldn’t get the fake rivets to go down further than this. And with the body tub on, there’s NO way I can enlarge the holes to make it work. :-/
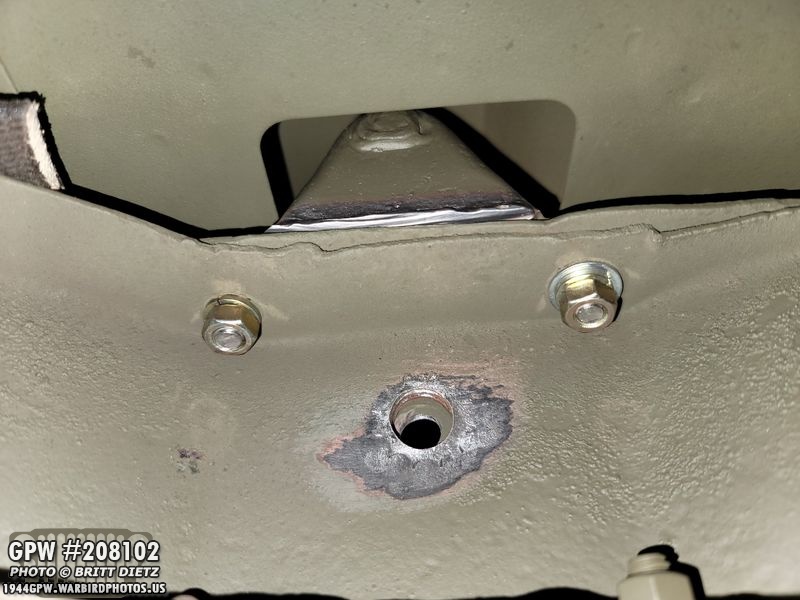
Looking underneath, you can also see that the thread barely comes out because it’s still so high. Also, the bottom one that goes through the side of the frame, with the massive hole whoever made to put that large bolt for the shock meant that the fake rivet was totally ineffective. UGH.
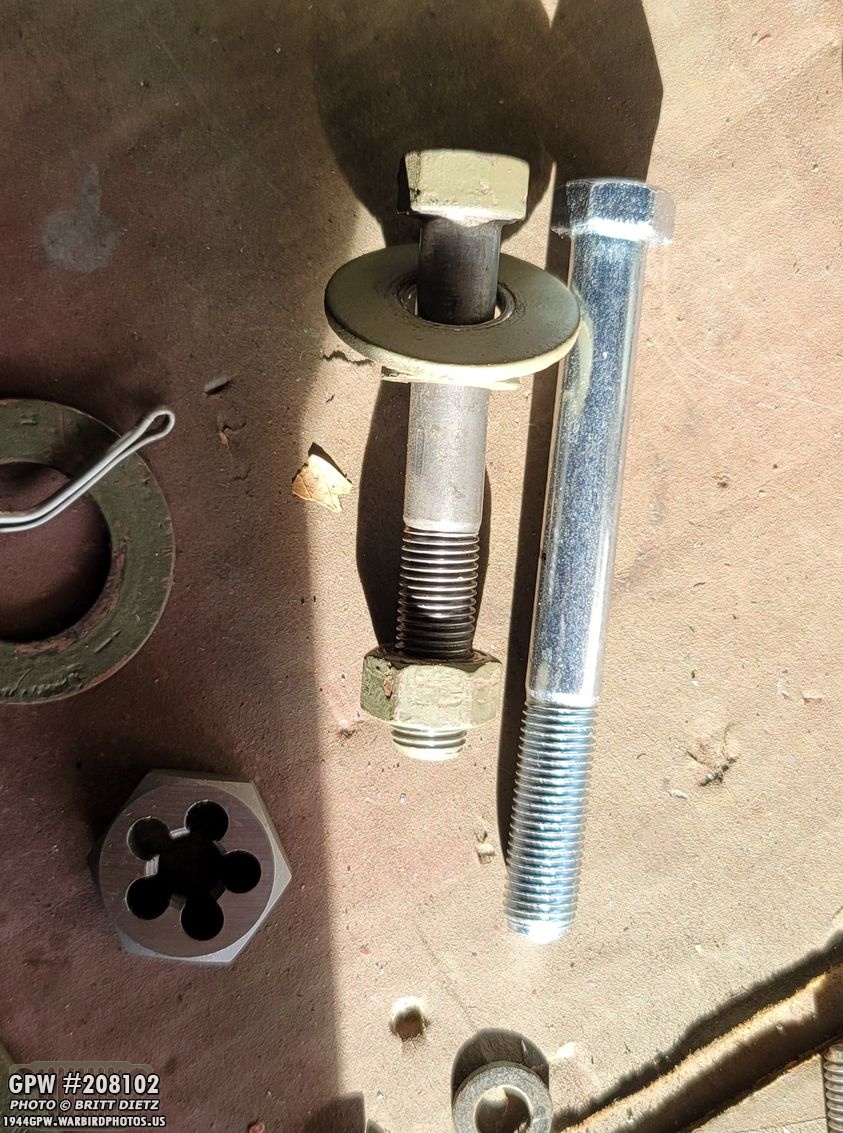
So, solving one issue at a time, I went out and found these carriage bolts, which are slightly large, but look the part. I went with 5/16, knowing they would easily fit through the hole on the frame.
I wasn’t sure what size carriage bolt I would need, so I got a few different sizes. Originally, I was also going to use these large fender washers (bottom corner) and I also got some grade 8 lock washers and nuts for the carriage bolts.
Testing them out, they look the part and go all the way down!
So, while not a rivet head underneath, it would have the lock washer and nut (not the large fender washer, it ended up not fitting).
Here’s a look at the test fitting from inside. Again, yeah it sucks that it’s not a rivet head, but who’s going underneath my Jeep to look at this?? Also, you can see just how large that hole is on the frame side compared to the hole on the bracket.
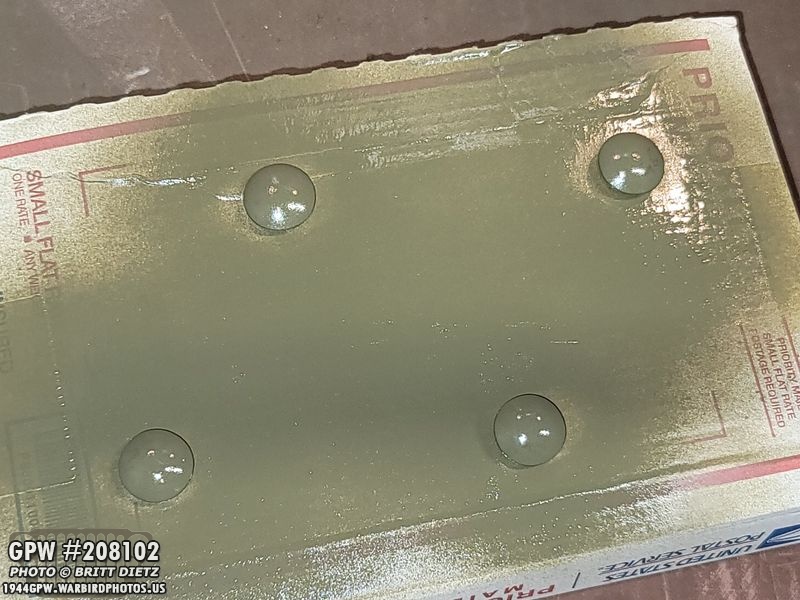
Since I got stainless steel carriage bolts, there were not maker markings on the head (thank goodness), so I just needed to go ahead and prime/paint them!
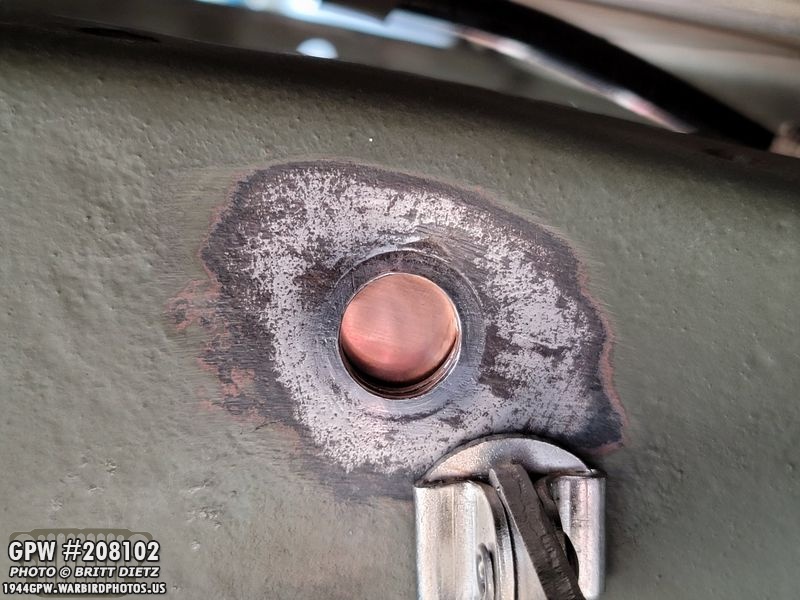
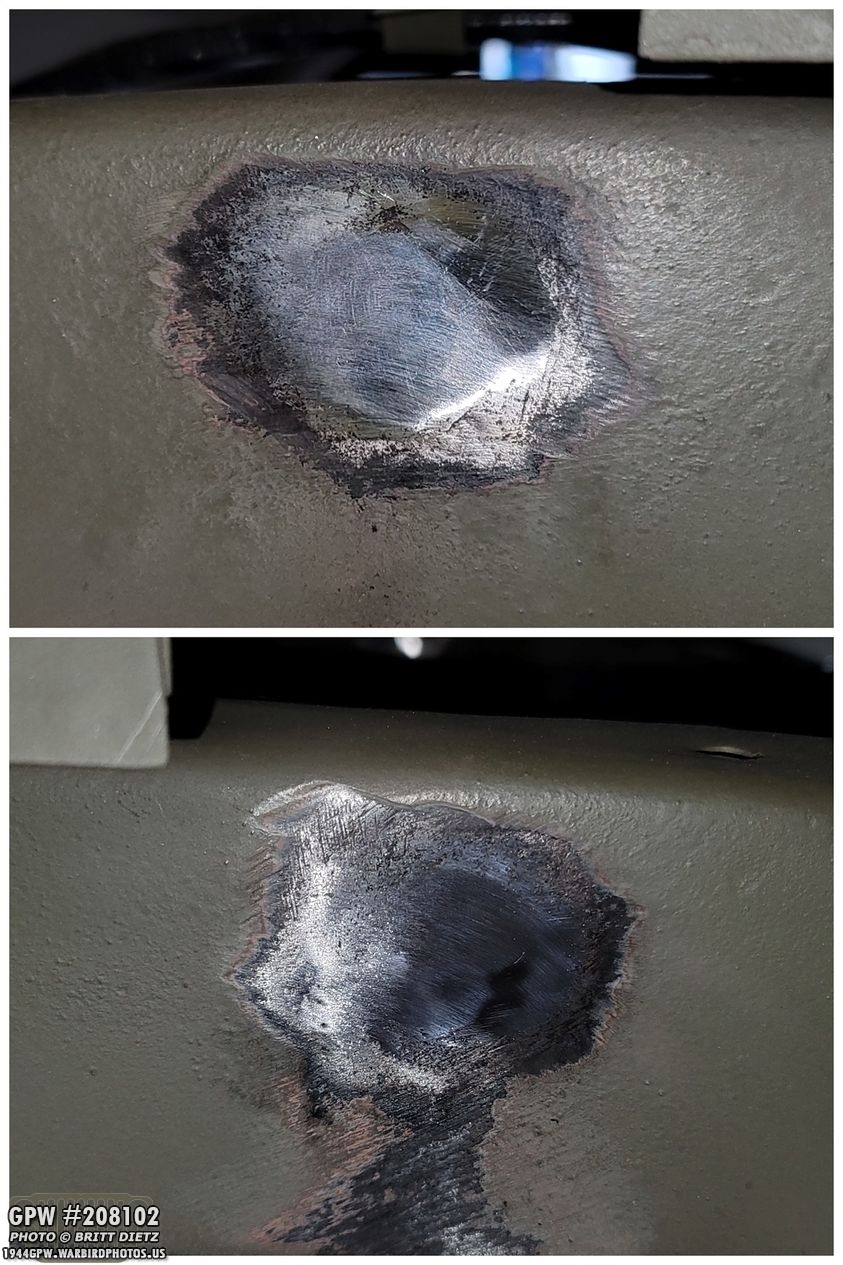
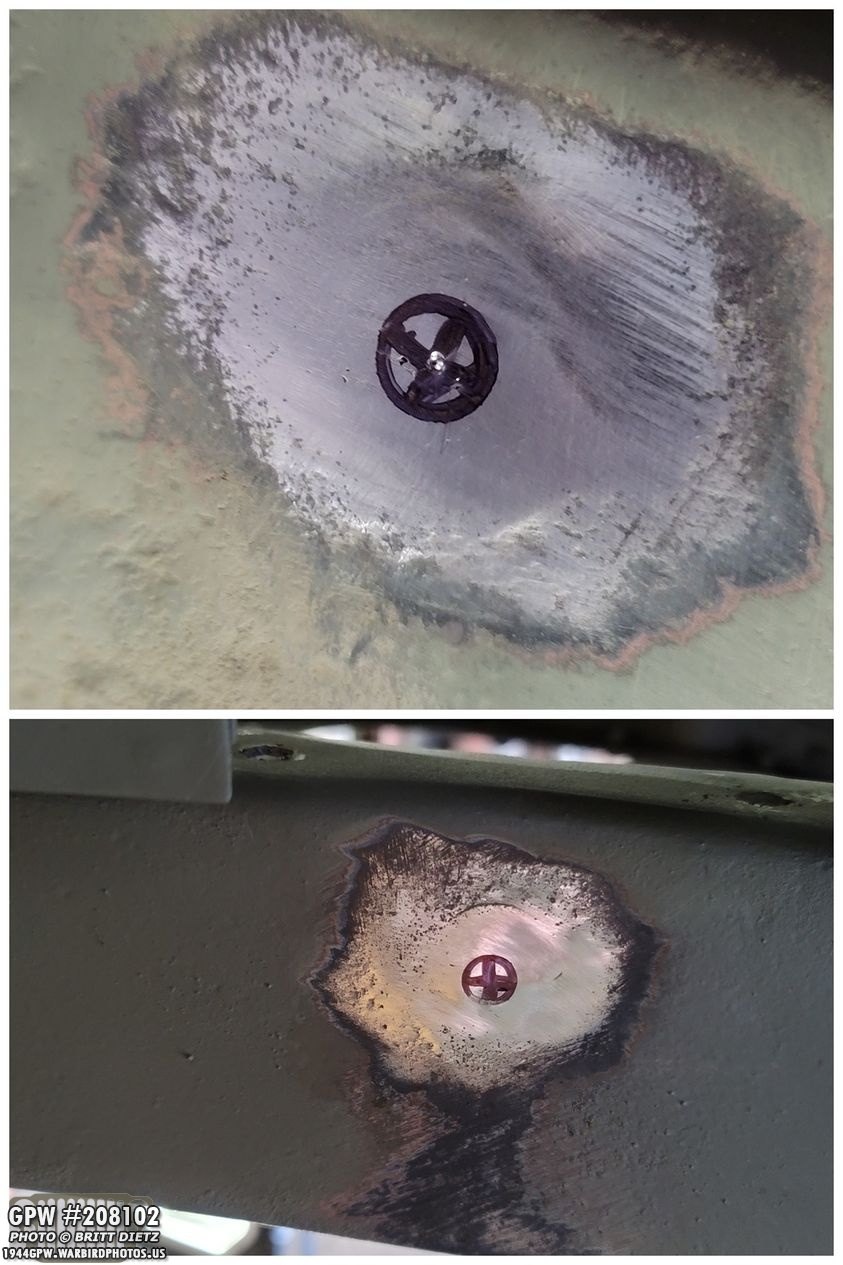
While the bolts were drying, it came time to tackle the other issue, the large hole. I decided to weld it shut and re-drill the hole. First, I got a sheet of copper from Amazon to clamp to the back of the hole. The welding won’t stick to copper, so it should make a ‘somewhat flat’ weld when done. I welded a circular pattern from the outside to the center pausing after a little bit to let it cool down so the frame doesn’t overheat and warp.
After using the flap wheel to grind it smooth, holes begone on both sides!
Now to redrill the hole, for that, I reinstalled both brackets on the frame. That showed me where and how big the hole needed to be.
I used a marker to circle the hole, and used a spring punch to mark the center for drilling.
It wasn’t easy drilling the holes. In fact, it took a long time. I ended up having to go to Harbor Freight and buy a set of higher-end titanium drill bits, as I was destroying the ones I had. I had to slowly step up from small hole to the full size, which was probably about 10 drill bits. This metal was thick and didn’t want to drill. After it was drilled, I hit it with rex oxide primer. I didn’t sand it all that much, as most of this will be hidden behind the bracket.
With the holes drilled, I reinstalled the brackets for the last time. After getting the carriage bolts locked in place, I went to do the imitation rivet on the bottom. I was going to use one of the longer imitation rivets, but as you can see, the shoulder actually stuck through, meaning the other side wouldn’t contact the frame.
So I switched to the shorter imitation rivets (which I was originally going to use there because I didn’t have enough long ones), and that worked perfectly. Here’s the other side just before I tightened it to the torque that nut would break off.
And here’s how it looks once the nut breaks off. After I did the first one, I moved on to the other side and did the same. I spent a LONG time underneath the Jeep. I also wire-wheeled the frame right underneath the bracket, which you can see here. I will be welding the backside of the bracket (which is already wire wheeled) to the frame. You can see how poorly someone removed the original bracket from the frame.
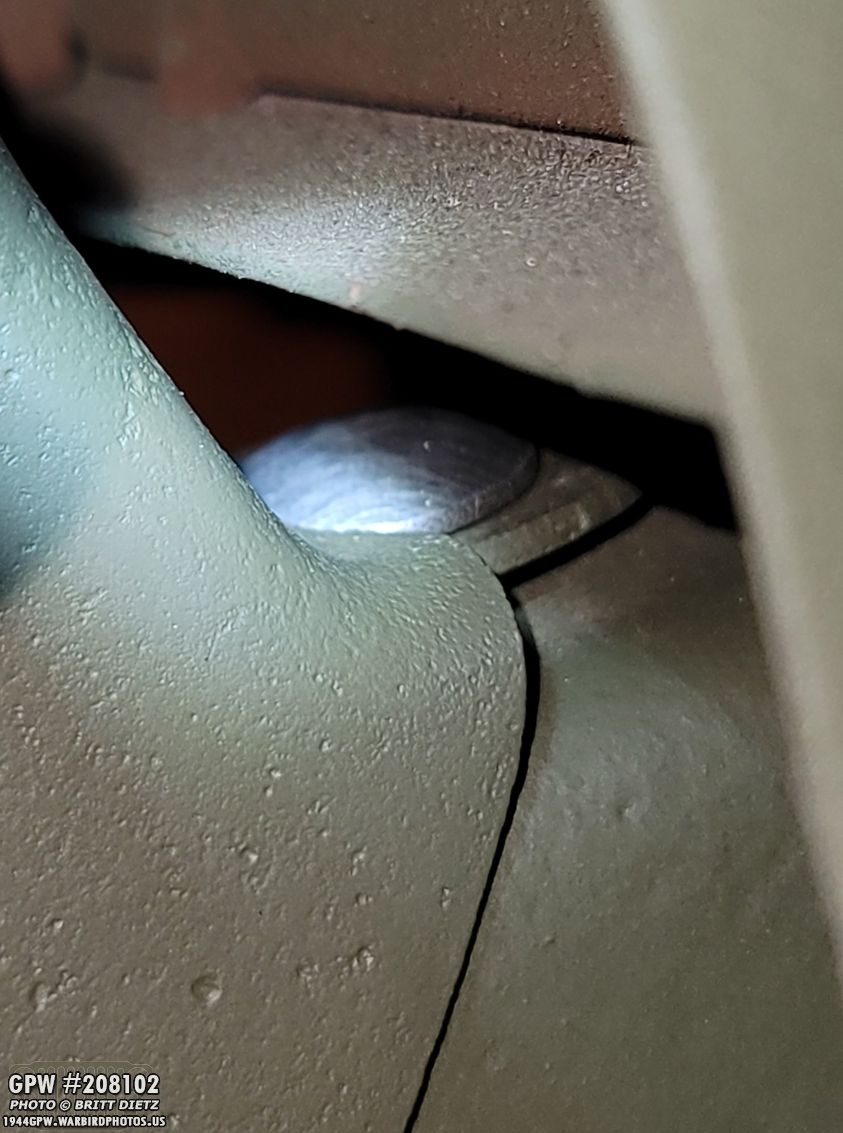
One check of the other side to make sure the imitation rivet is flush, which is is! Looks great.
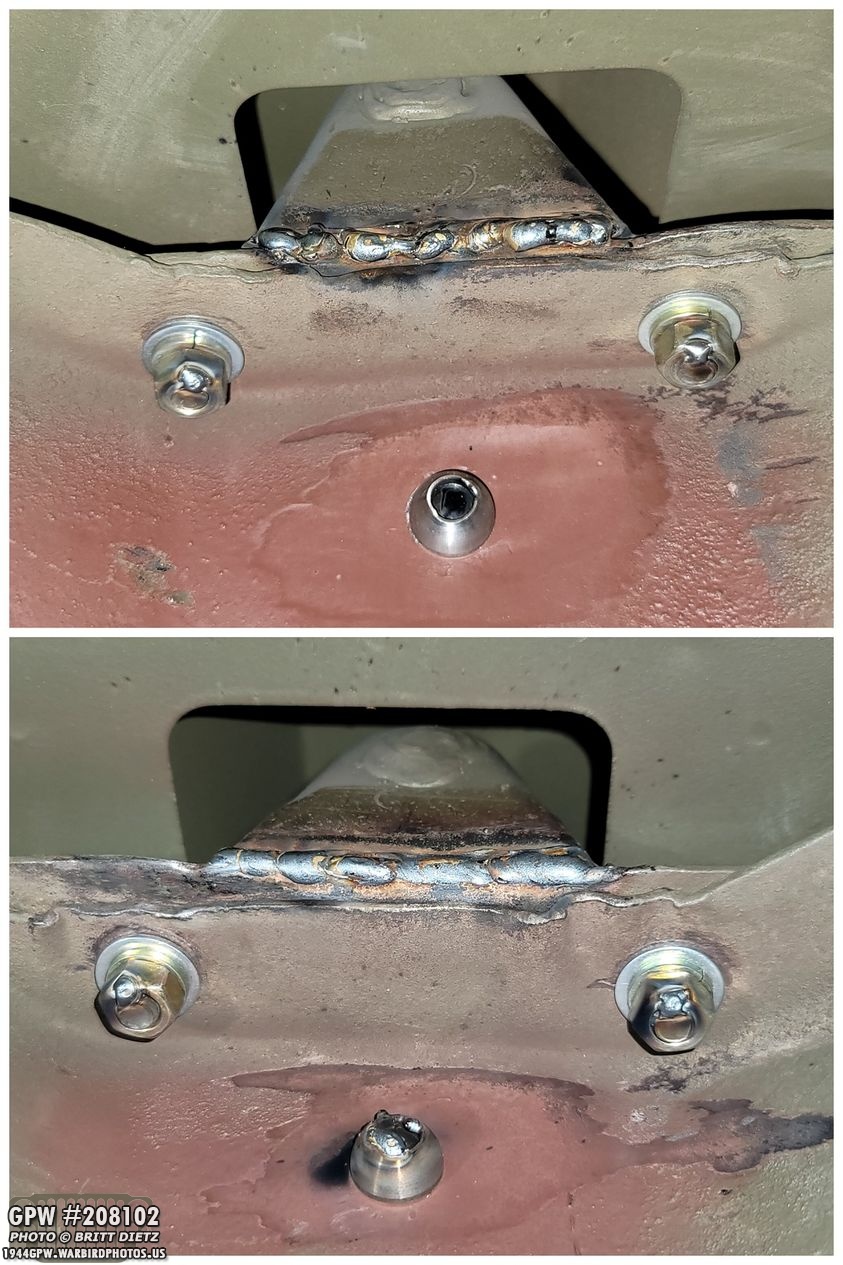
Then I went to work welding… underneath the Jeep, in a super confined area. Have I mentioned I’m also 6 foot 4 inches tall? This was NOT fun, and gave me quite the charlie horse trying to crane my legs and neck to get under there to weld these brackets. The first weld wasn’t the best (remember, I’m a newbie), but the second weld (bottom) I’m pretty proud of considering. I also tap welded the nuts to the carriage bolts, and also tapped the rivet heads. That bracket is NOT going anywhere.
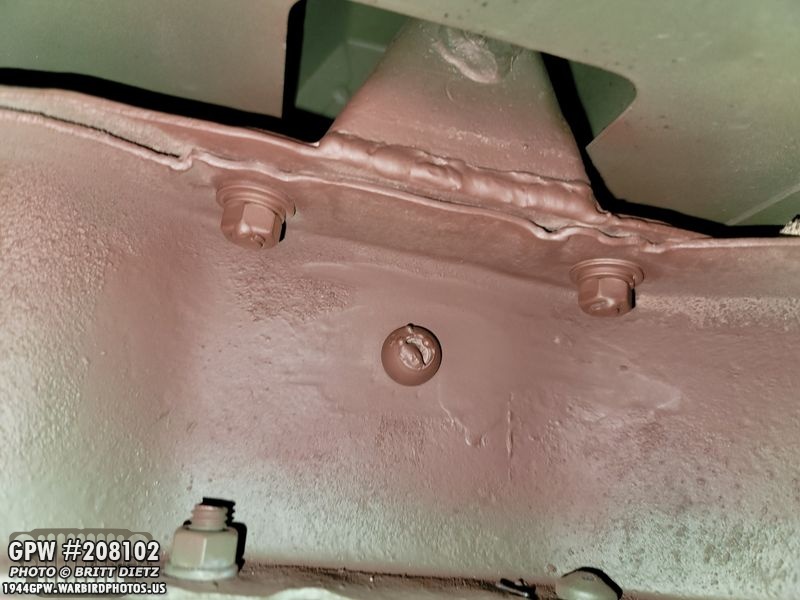
With everything in place, I went ahead and primed the imitation rivet head.
I also primed the backside.
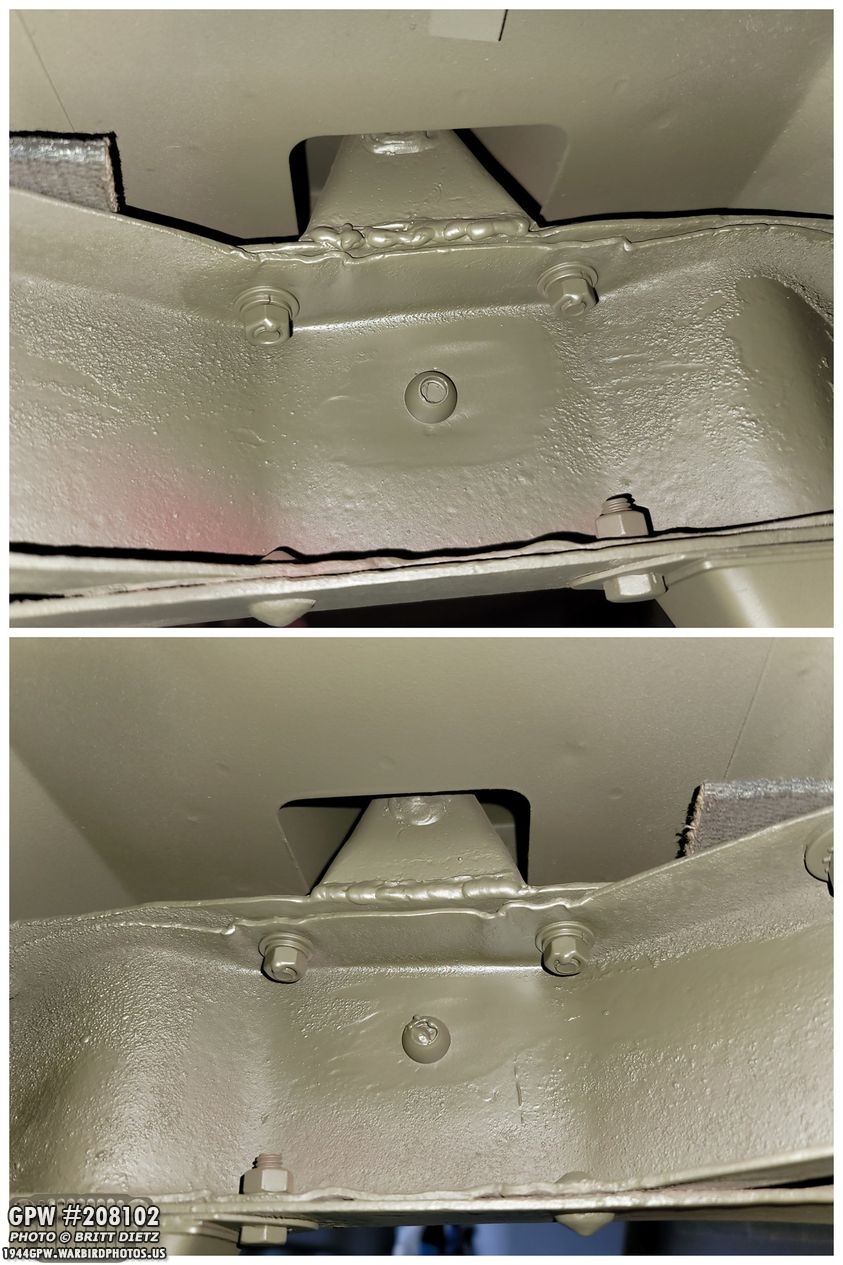
And after that dried, I hit 33070 OD Green inside! (yes, I missed a spot on the top image, I got it soon after).
And painted the front side on both. These brackets are DONE! First time in who knows how long the frame has had these rear brackets. And they are original ones too, which is cool. The front of the frame has the correct brackets, so I only have to do these, thankfully.
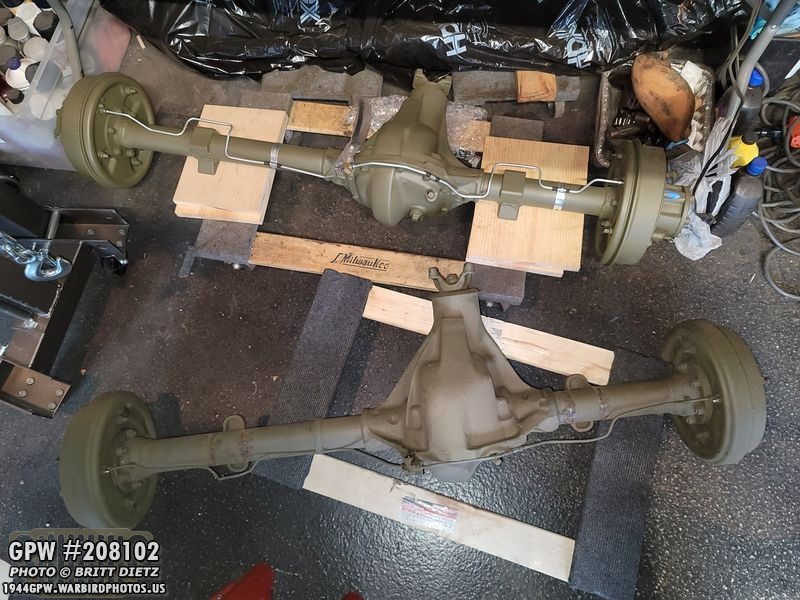
With the brackets done, I could move on to putting the GPW axle underneath the Jeep! Here’s a quick look before I started moving things of the restored 1943 rear GPW axle (top) with the post-war rear CJ axle (bottom) I took off.
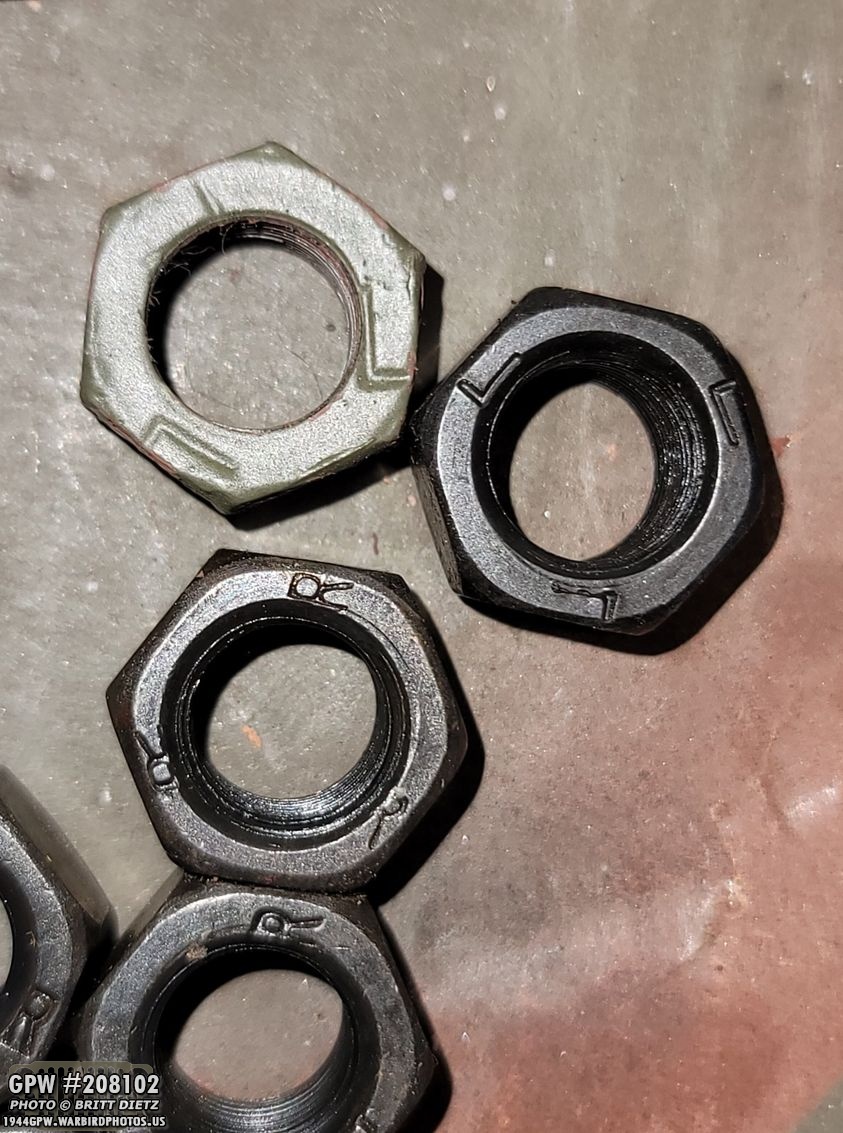
I wanted to get the axle up on the wheels right away, so I grabbed my lug nuts. Jeep axles have LEFT-hand thread and RIGHT-hand thread. One nice thing GPWs had were lug nuts that had stamps of what type of thread they had on them. My CJ axles actually had some original wartime lug nuts with this, but I had to buy two repro sets for the other ones. What’s interesting is the original left-hand thread nut has a correct Ls, but the repros have a backward Ls. Not sure why this is.
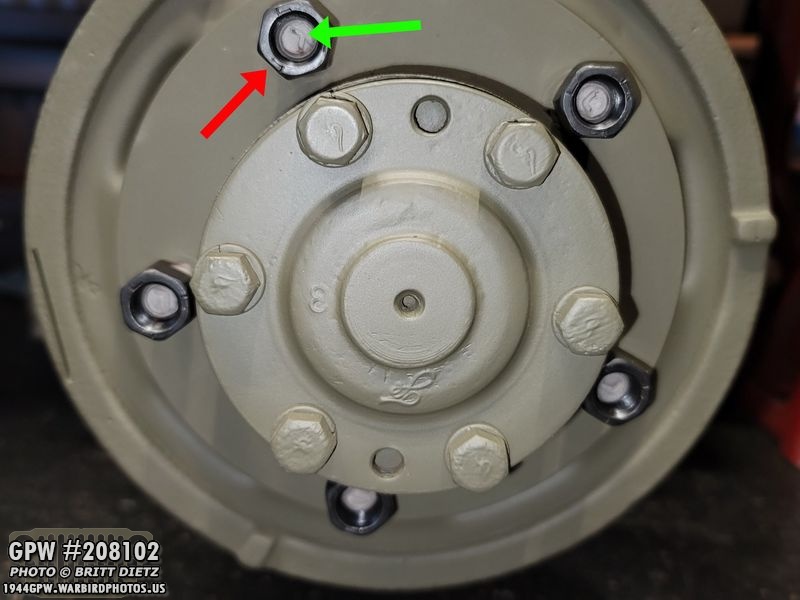
What’s also nice is the wartime GPW drums have L or R also on the lug nuts studs, so you really can’t get them wrong unless you are not paying attention at all.
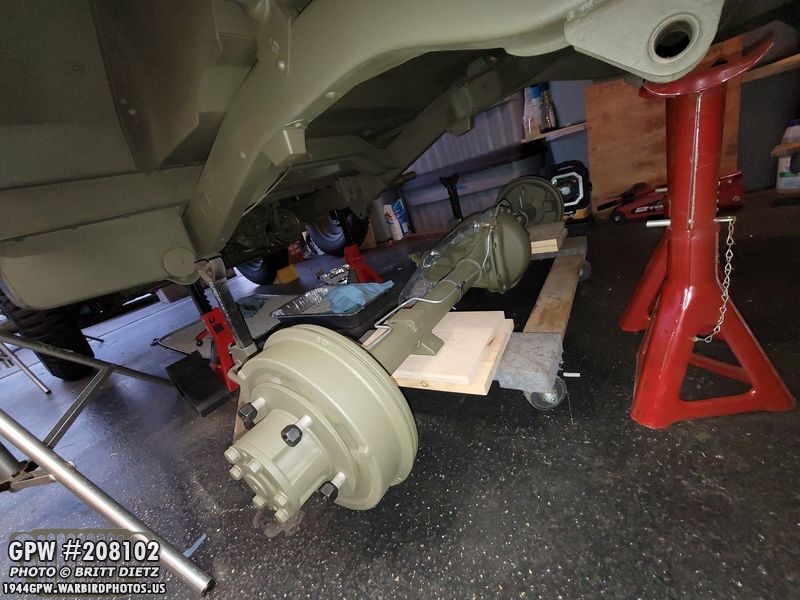
So, with the axle in place under the Jeep, there was on problem. How was I going to get it up high enough to put the wheels on? A floor jack can’t get underneath the dolly… so I decided to get some help. After this photo, I pre-set two spare jacks (which you can see to the left of the axle) to the correct height. I then lifted one side of the axle and my girlfriend put the jack underneath. I then moved over to the other side and did the same thing.
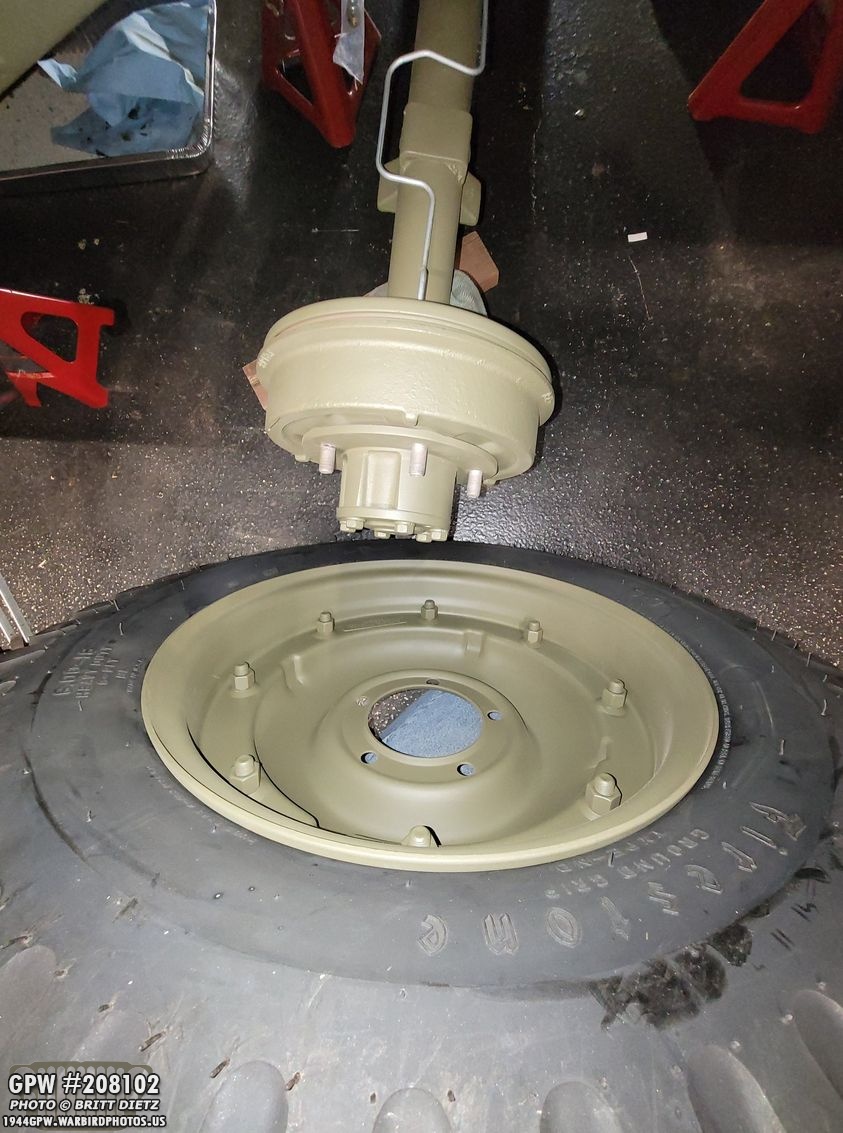
Now on jacks, the axle was high enough that I could get the combat rims on the axle!
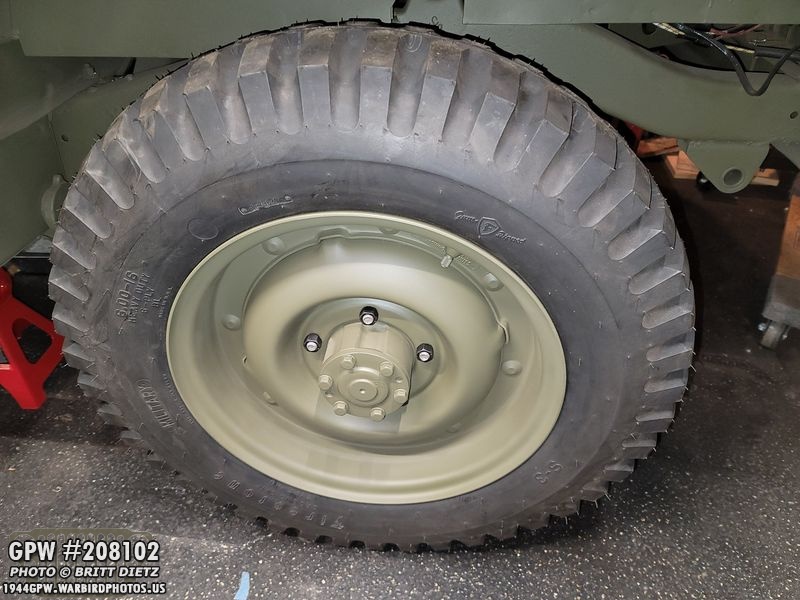
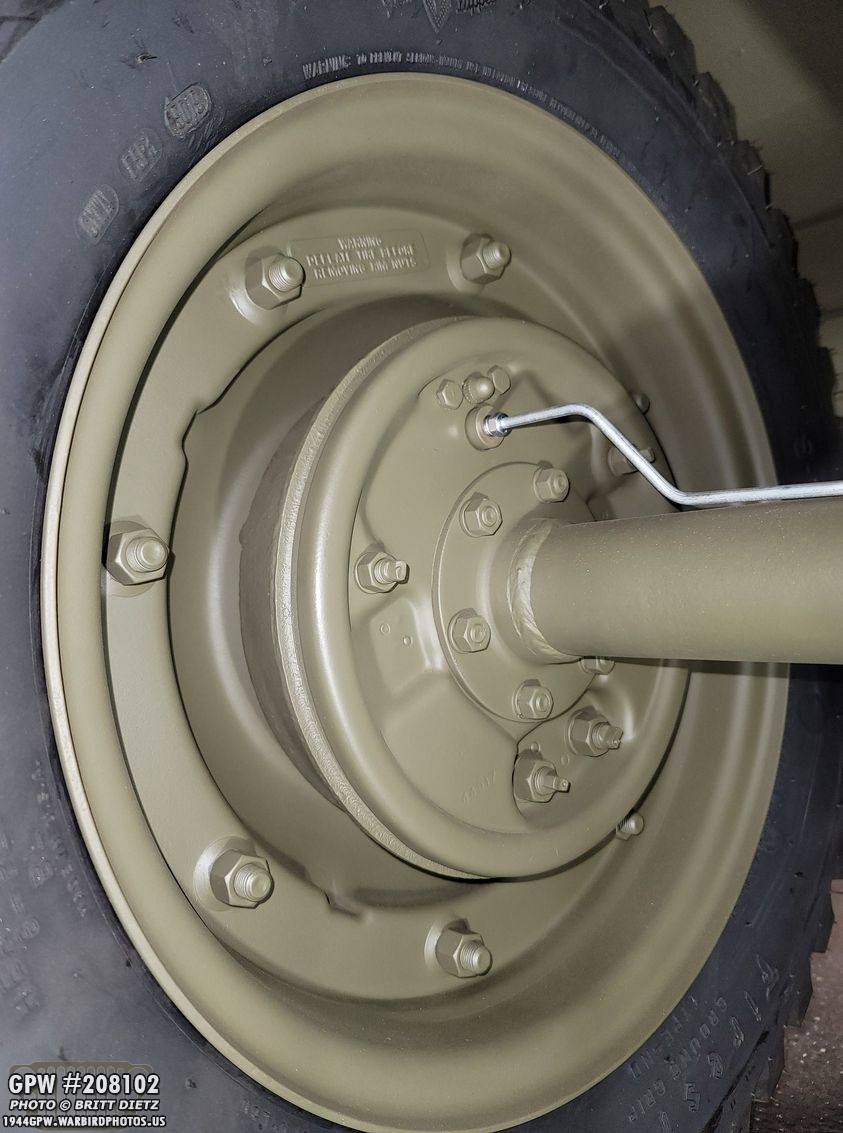
And here it is, the first combat rim/correct firestone tire mated to one of the axles! Super exciting to see the combat rim on there!
I actually had to stop and take a moment, so much hard work over this last year has been to get to this point. Note – I’m using modern valve caps instead of the correct Schrader screw-type caps as I was touching up the paint from adding the better valve protector stems two weeks ago.
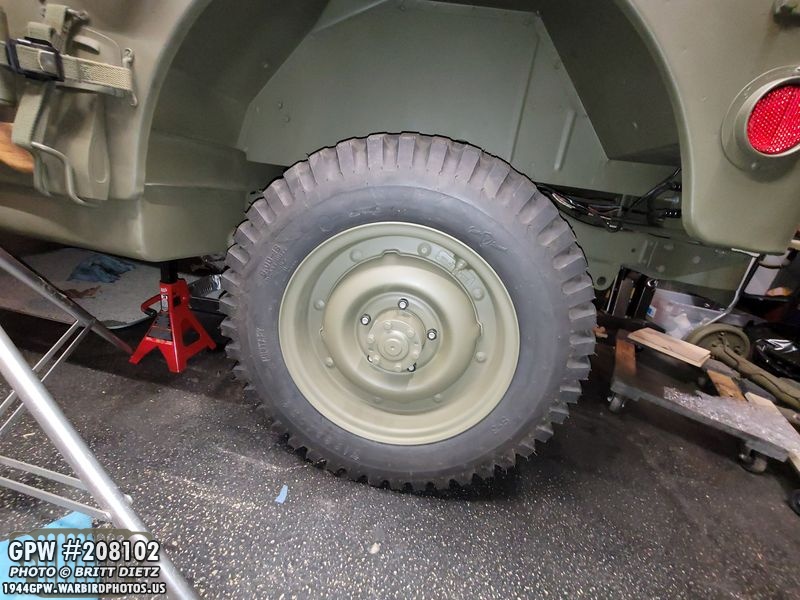
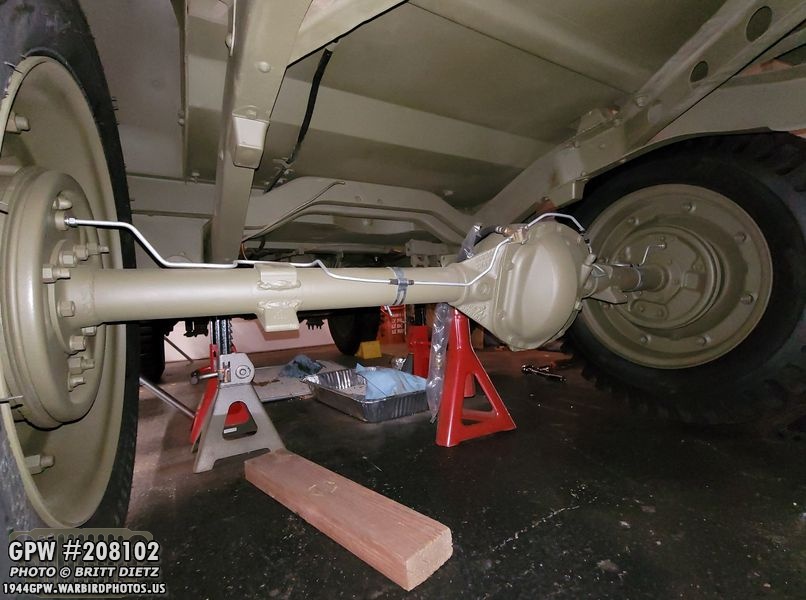
Here’s a look underneath with the jacks removed and the axle now on the wheels! Whoohoo!
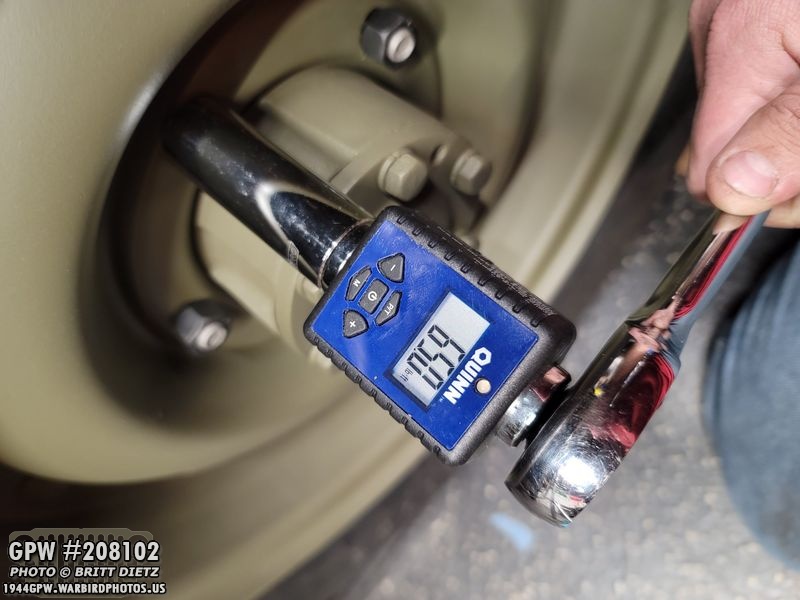
I then went back to the two rims and torqued the lug nuts to the suggested 65 foot-pounds in a cross pattern.
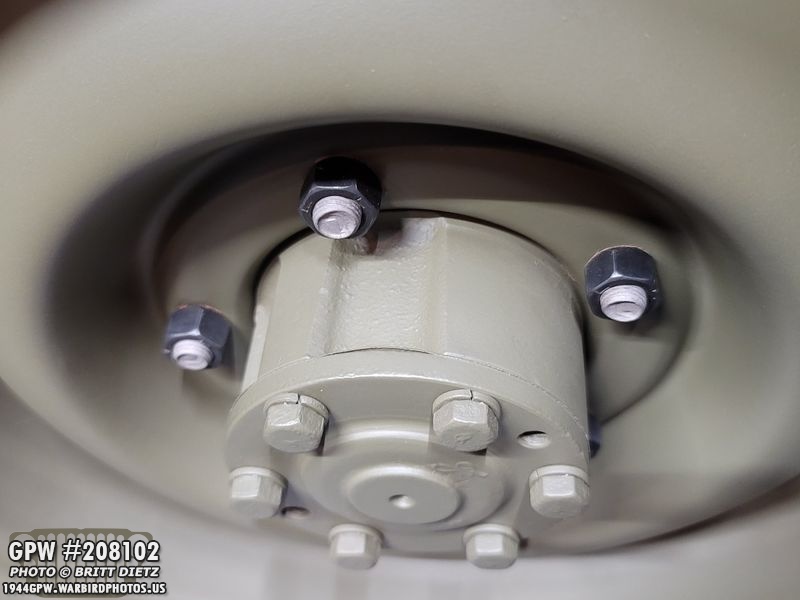
The left-hand threads (driver’s side) all torqued!
The right-hand threads (passenger) all torqued! The flange hub will need some paint touch up where the rim scraped it a bit, and I’ll need to paint the lug nuts/studs… but until I’m sure the tire doesn’t need to some off again for some reason, I’ll leave them as is.
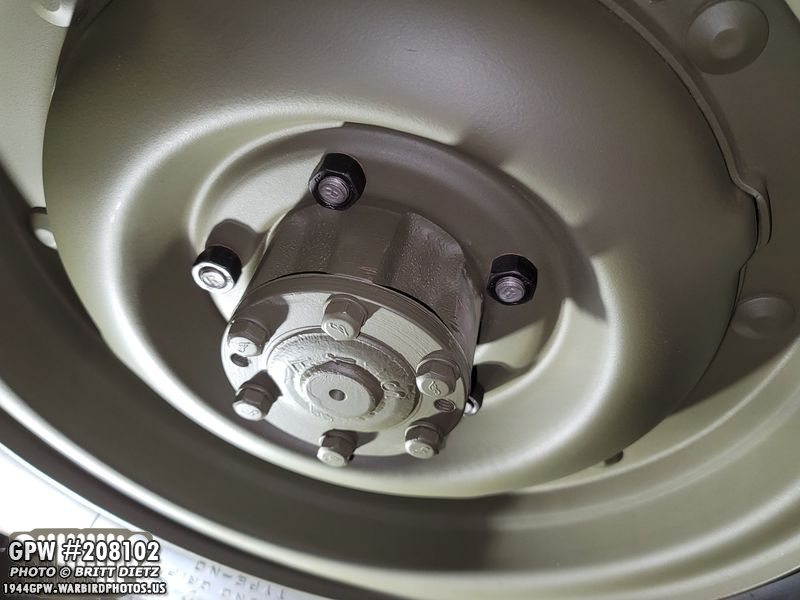
Here’s a look at the backside of the axle with the combat rim.
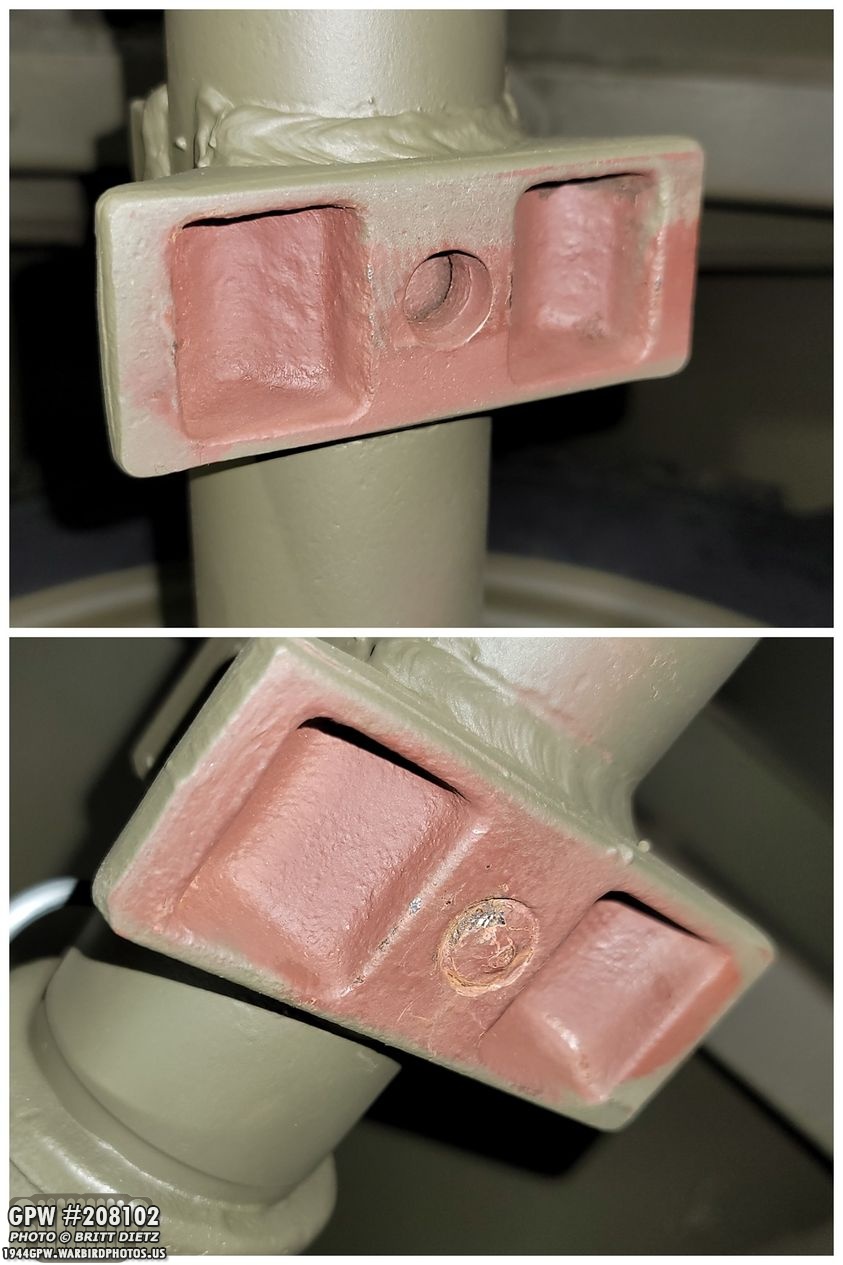
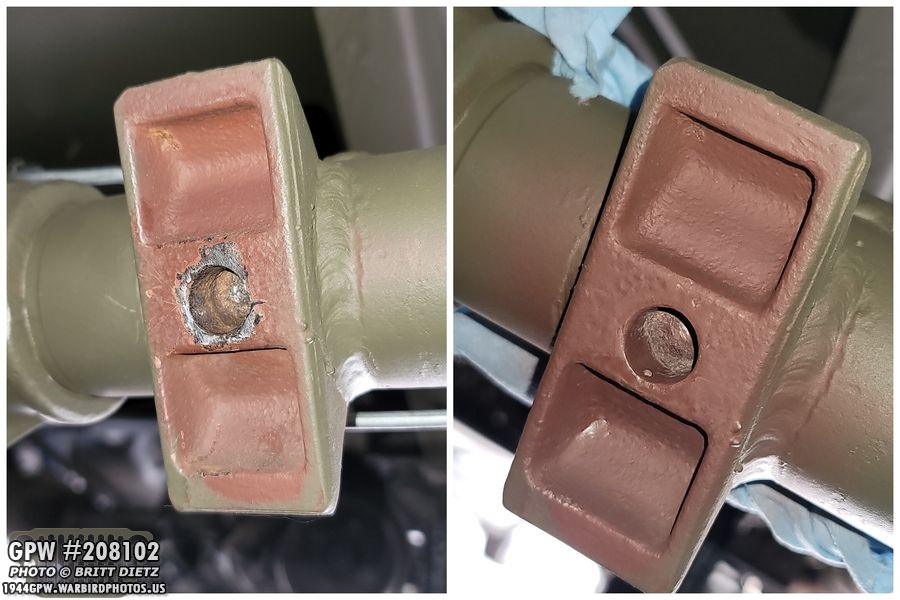
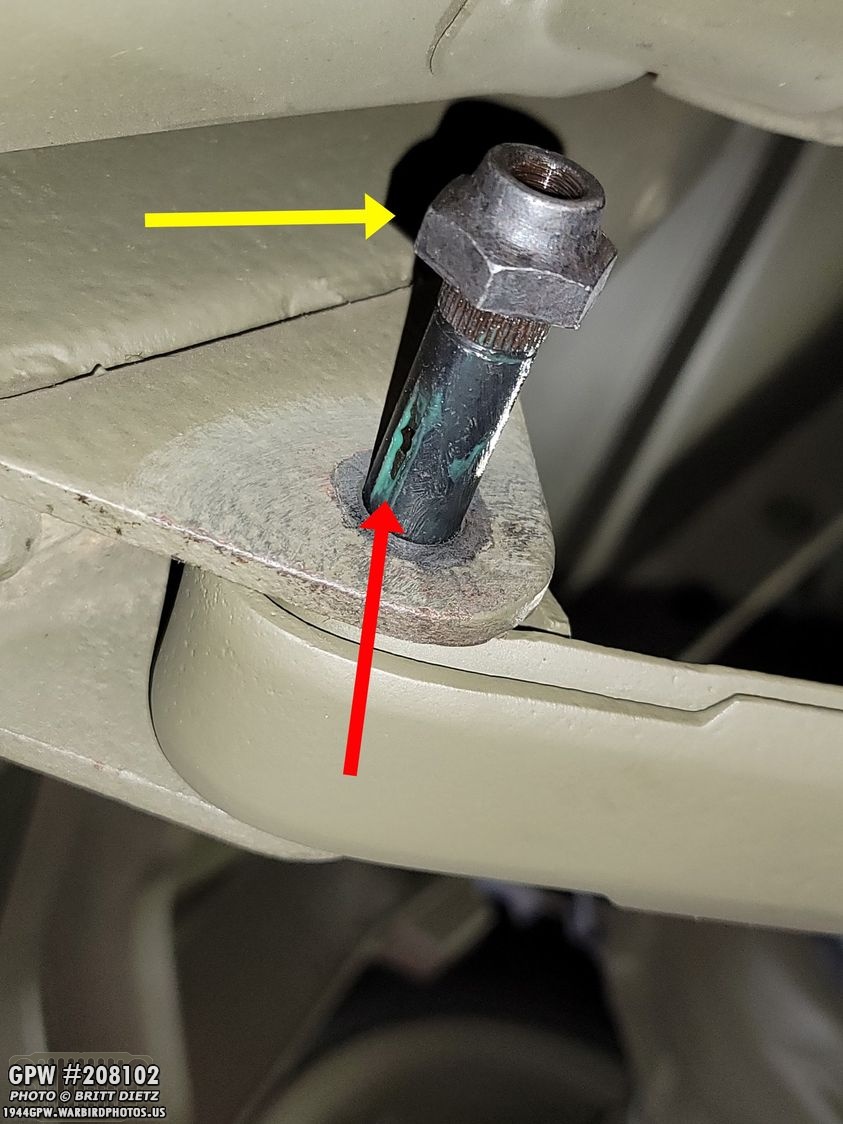
The next day, I was looking underneath the axle in prep for reinstalling the springs, and I noticed something weird with the ‘feet’ on the axle… the top photo shows the driver’s side with the correct center hole for the large nut on the top of the springs to go into… but on the passenger side, something was in that hole. Turns out, it was a previous spring bolt head that was probably rusted/broke off inside there. I was jammed/rusted in there pretty good, and no screwdriver would get it out. UGH.
So, I ended up using my Dremel and a drill to get it out. I was hoping after getting it started, it would just fall out. But I almost had to Dremel the entire thing before only a sliver of it left finally broke free and fell out. After cleaning it up, I primed it.
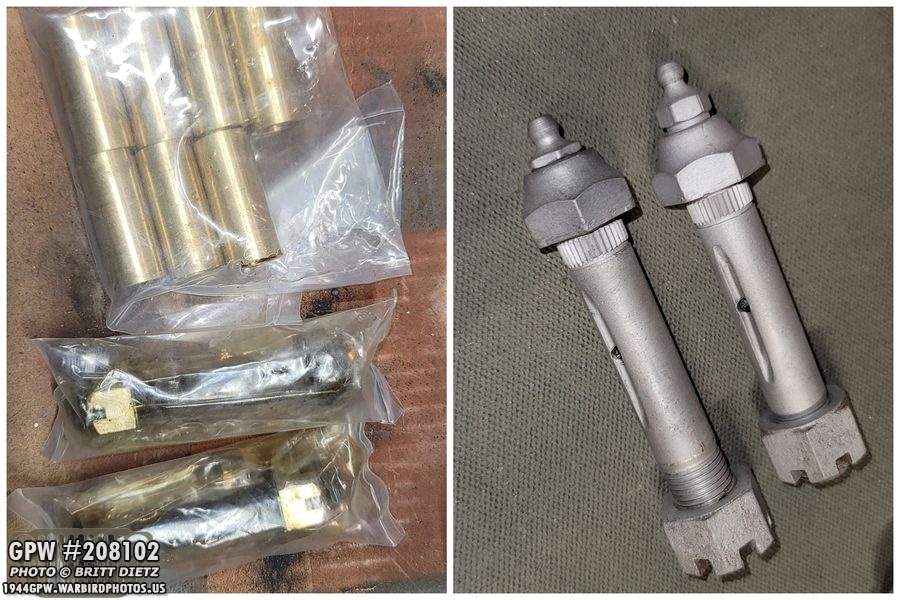
Last week, I mentioned that I bought new repro spring pivot pins, mainly for safety reasons as I don’t know the real condition overall of my originals and it’s a very crucial part. I did, however, clean up the originals just in case I did need them (right photo).
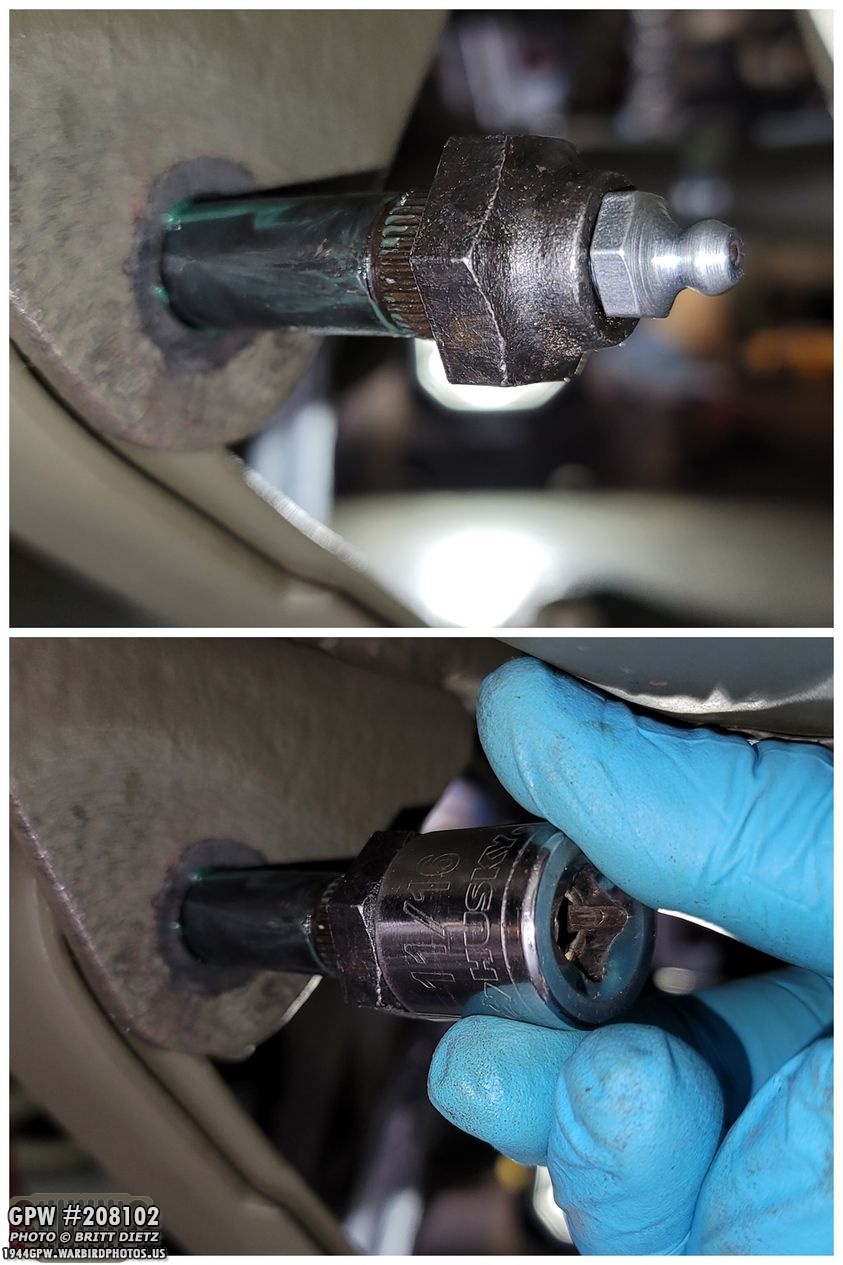
Rookie mistake on my part for the first one, I used a hammer to drive in the repro pin with the spring. 1) I didn’t put the hole for the grease upwards (which I was told is good practice as gravity will help the grease fall down, but maybe not up if it’s not on top), and I also hit the bolt directly with the hammer. It was really really tight as it’s a new bushing in the spring and a new bolt, so the result? I mangled the head of the bolt and I couldn’t get the grease fitting to screw in. UGH. So I had to drive this one out. (I did coat some grease on the bolt to help it drive in, not that it helped much).
So I drove that one back out and took one of my other repros (I got three total). This time I put the grease fitting in there to help keep the shape, I put the grease hole on top, and I used an 11/16 socket to drive in the bolt. That worked perfectly.
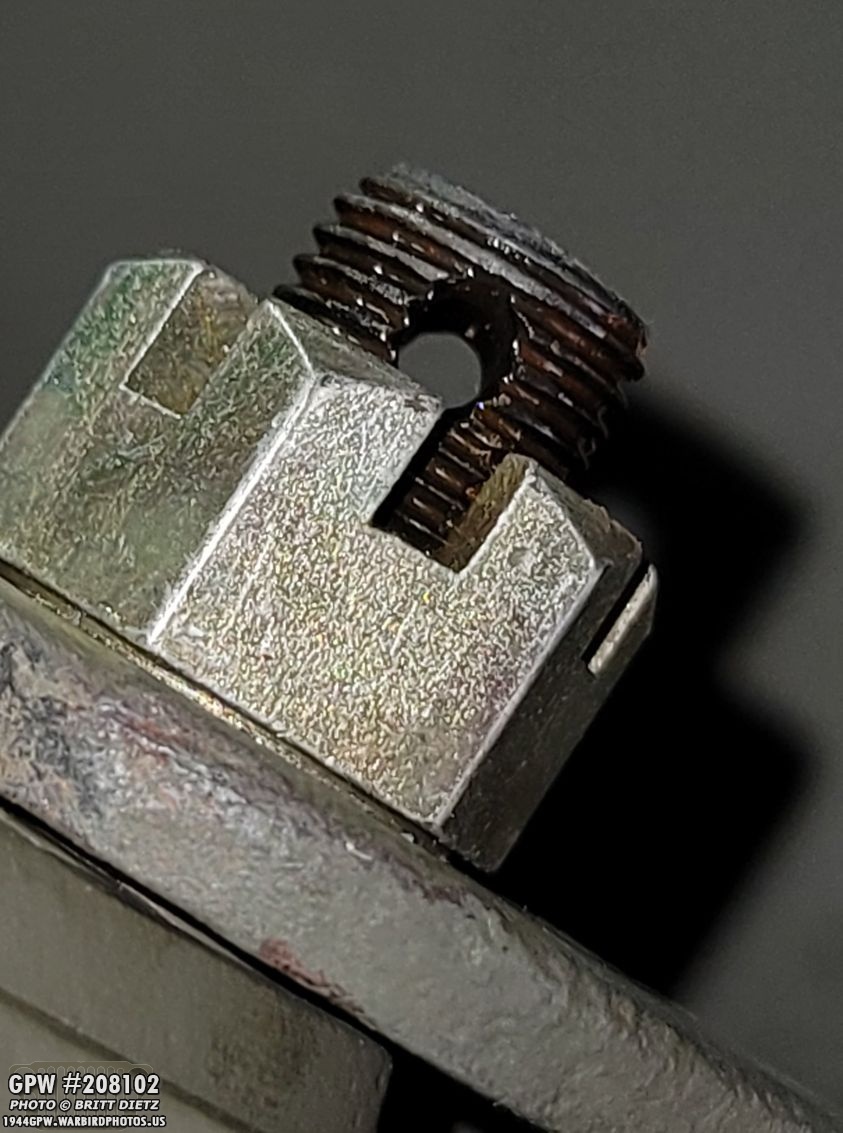
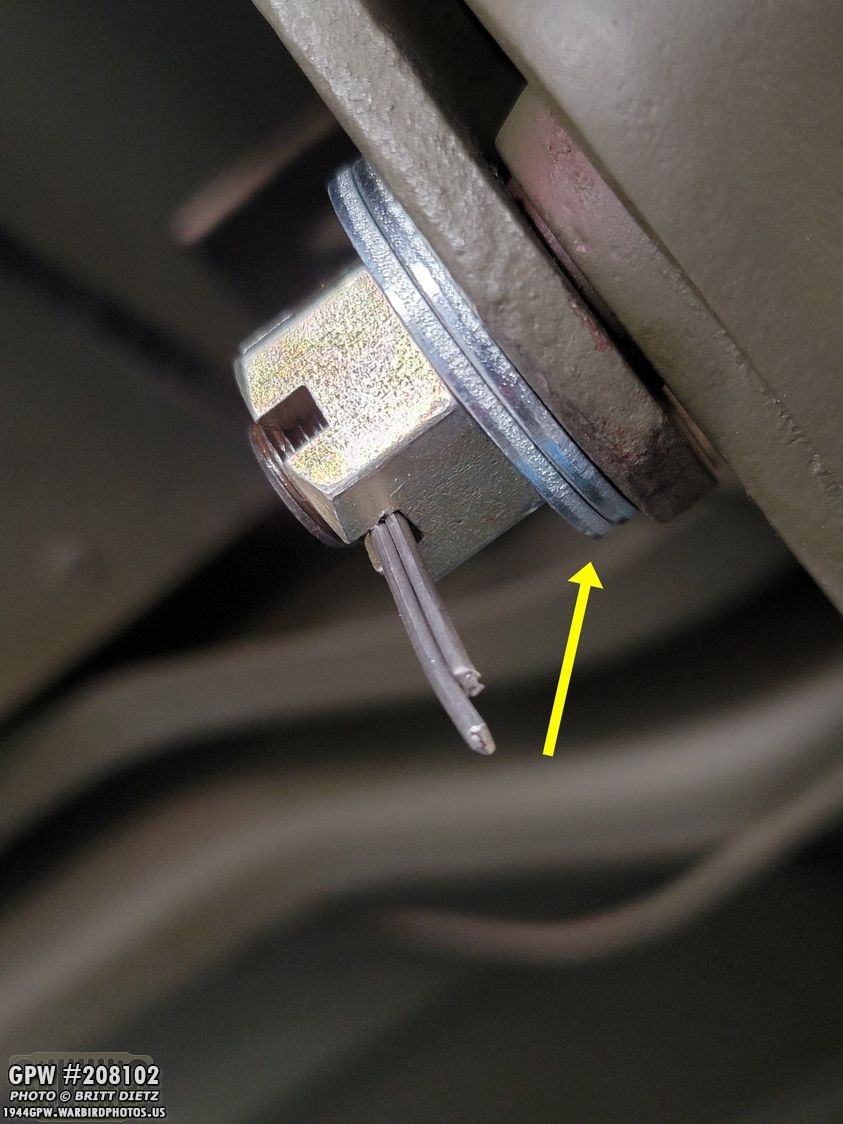
After it was all driven in, I screwed on the castle nut and went to go put the cotter pin in and noticed another problem… the hole for the cotter pin is not even close to where it should be!! Whaaa?
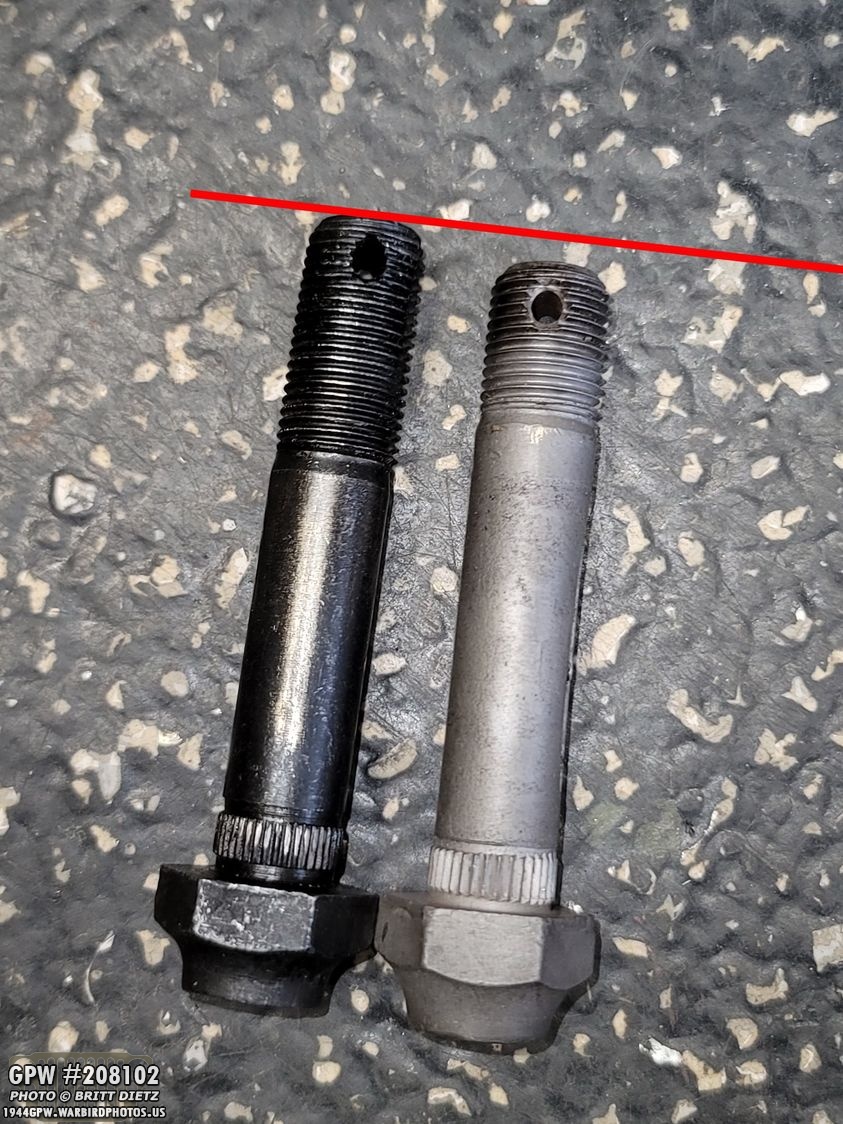
So I took one of my other repro pins and put it next to one of the original pins. Quite a difference! Ugh!
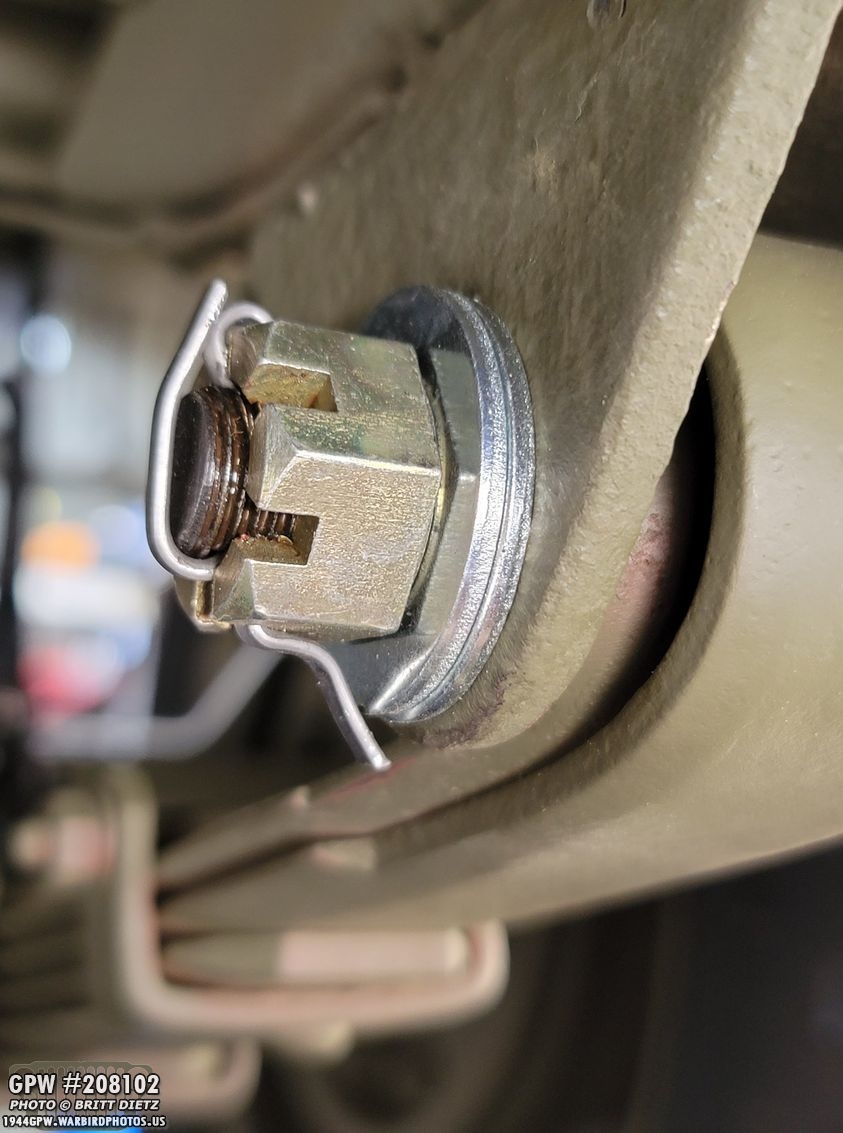
So, at the advice of Roger Smith (who had the same issue), I went and got two 1/2 washers, which lined up the cotter pin hole right where it needed to be with the castle nut.
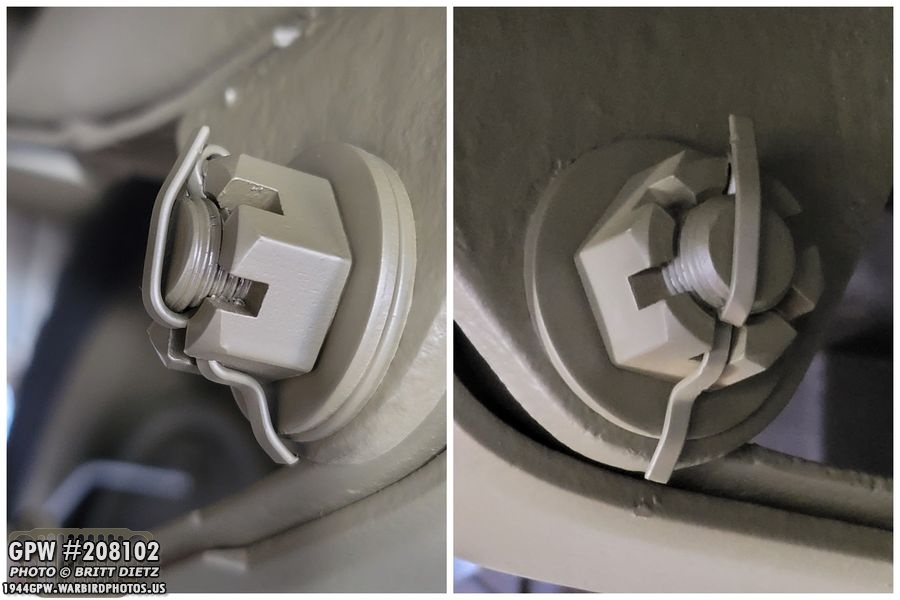
I then bent the cotter pin as I’ve often seen it done for these bolts. I wish I would have shortened the cotter pins but a bit, but oh well.
Now that they were installed on both sides, I hit them with primer and then OD Green paint.
At this point, here’s how everything was looking. The springs were just installed on one side.
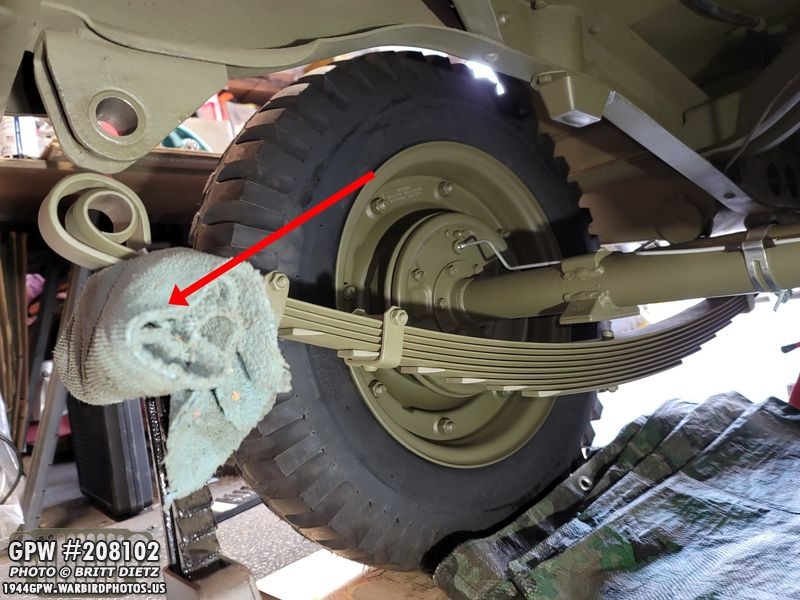
The next step was to install the shackles. I used a jack with a rag (didn’t want to mess up the nice paint job I’d just done to the springs) and got it to just about where the spring needed to be to line up for the shackle.
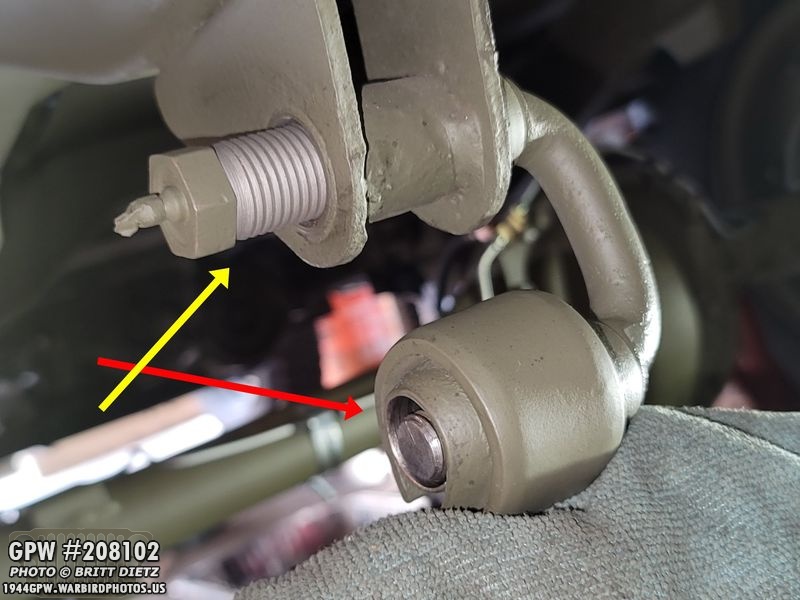
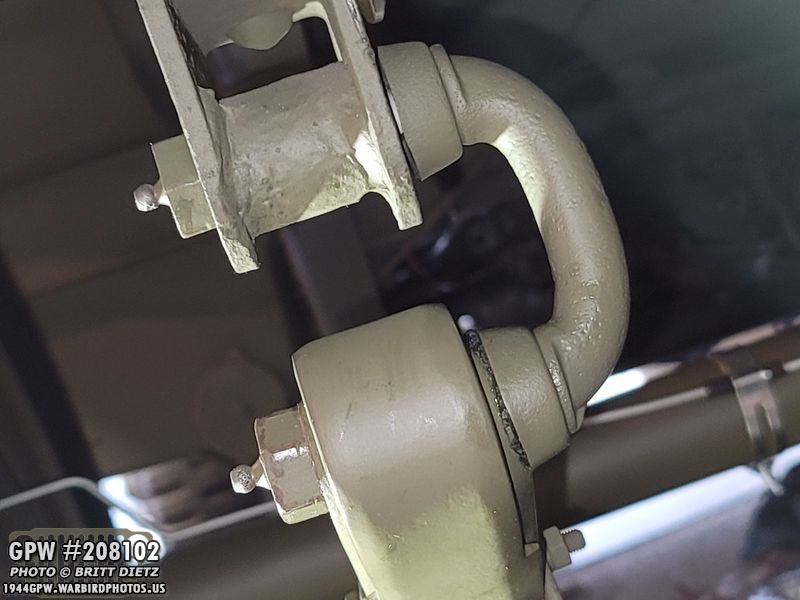
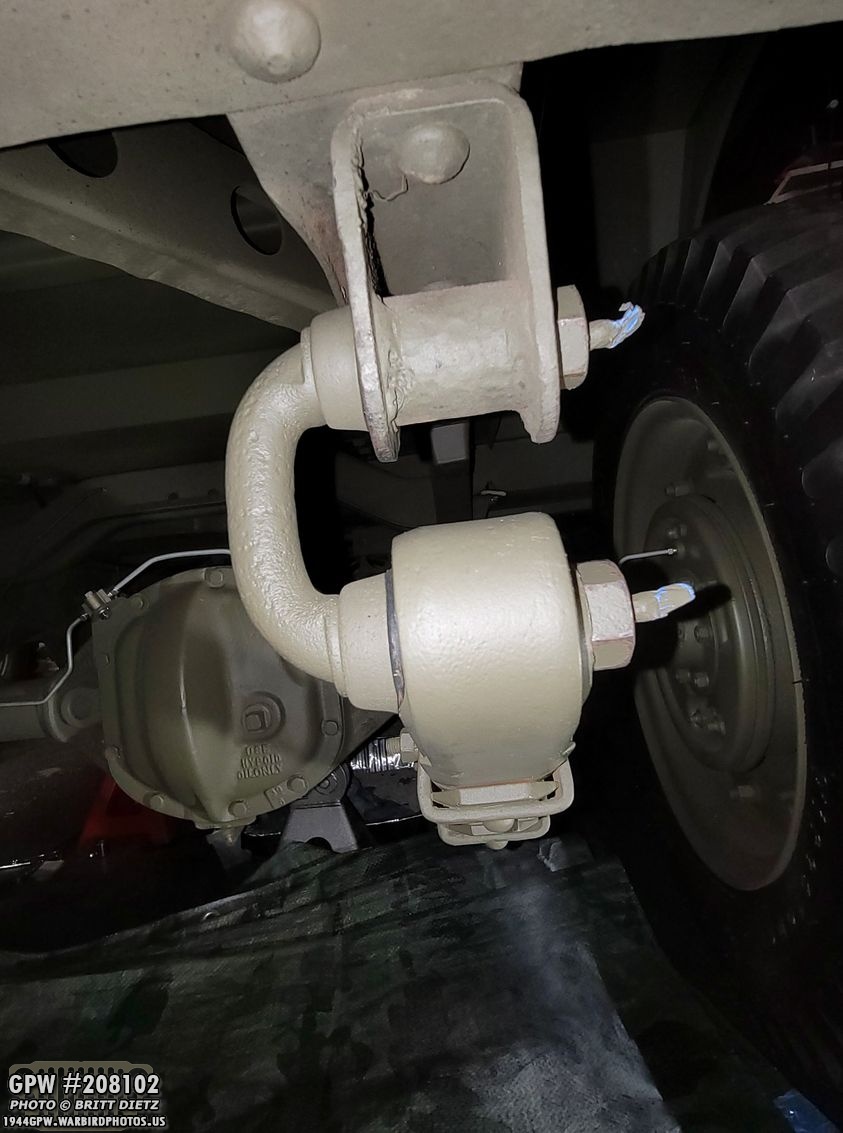
Reusing my original shackles, which were determined to be in good condition still with great thread, I first put the shackle itself in, then I went to work installing the top shackle cap nut. I was told that the top cap nut should be the left-hand thread and the bottom right-hand thread. But for some reason, they are reversed on mine with the left-hand thread on the bottom (red arrow). Not a big deal, just odd. My front ones are the same way with the left-hand thread at the bottom.
Shackle installed and tightened down! I did pre-apply some grease inside the cap nuts as I was screwing them on.
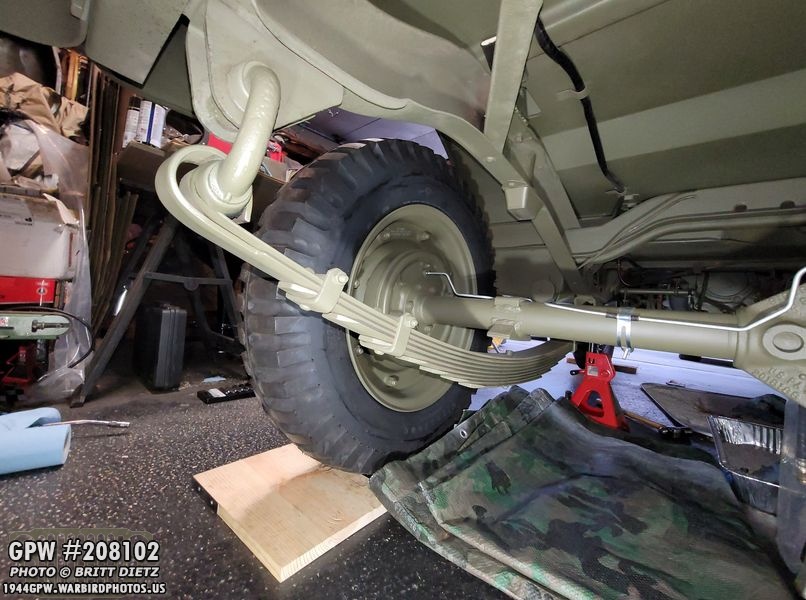
As you can see, the springs (which are the original GPW springs to my Jeep) still have a nice droop. The axle is still well above resting on them, but that’s because the U bolts are not installed clamping the axle to the spring bringing the spring upward.
I then moved over to the passenger side and did the same thing. This side went on easier. I have the grease fittings covered with tape to protect them as I touch up the paint. After this photo, I took my grease gun and loaded all four of the shackle cap nut grease fittings with grease.
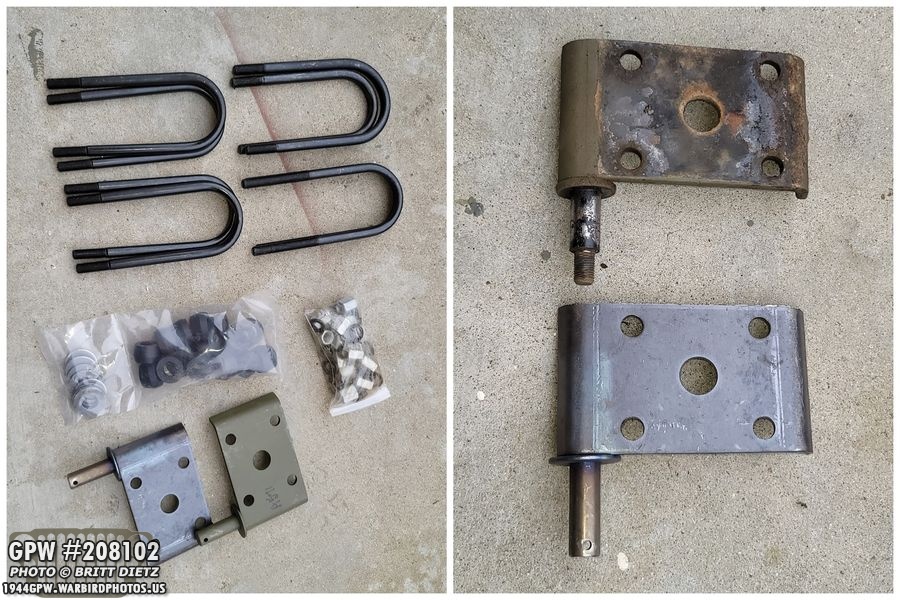
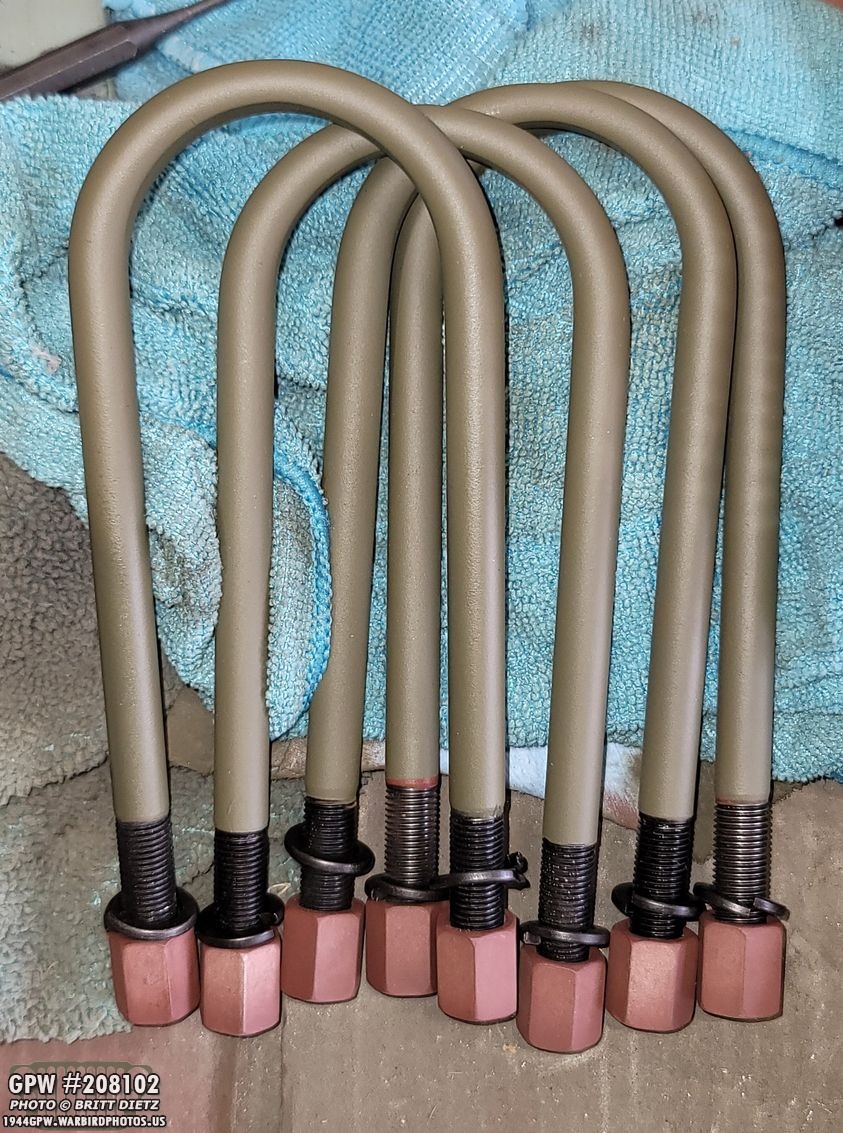
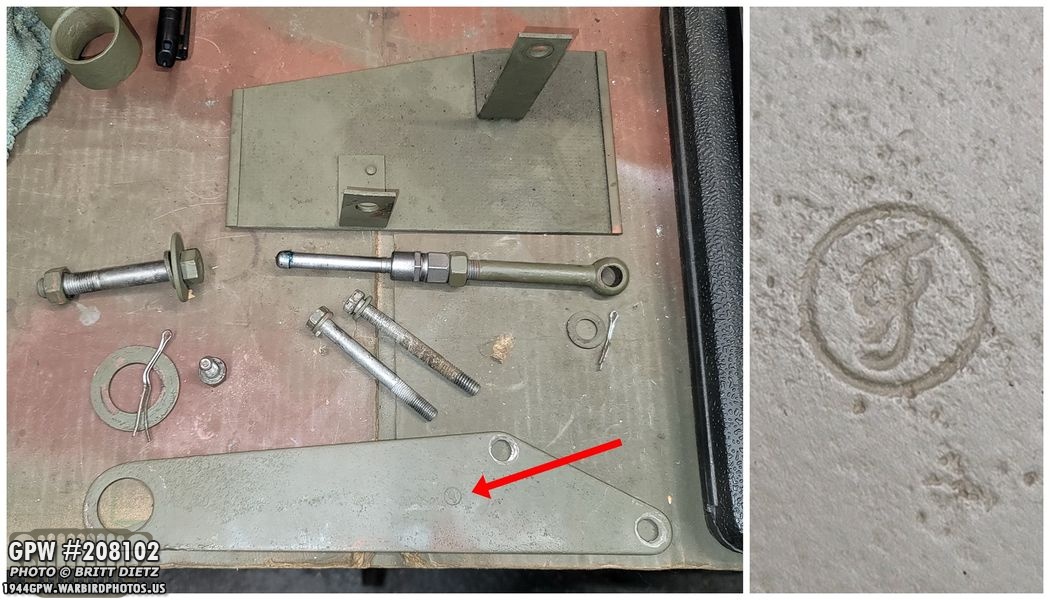
Last week, I discovered that along with the CJ axles, my Jeep had CJ (CJ5 in fact!) shock leaf plates. One the right photo, the top is the CJ plate, the bottom is one of the correct repro plates I had to order. I also got a complete GPW U bolt set since the U bolts on my Jeep were CJ ones and way too long to reuse. I also got new shock bushings and washers.
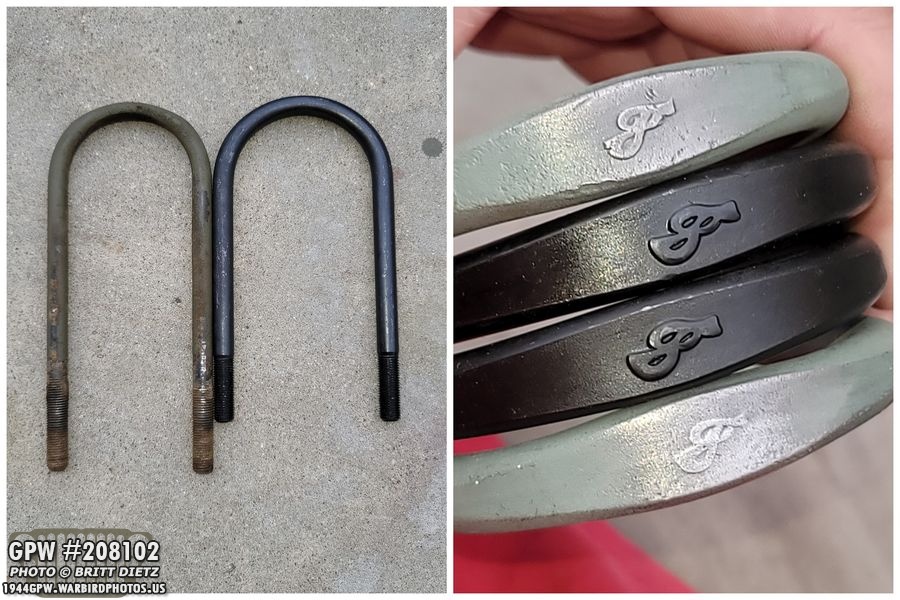
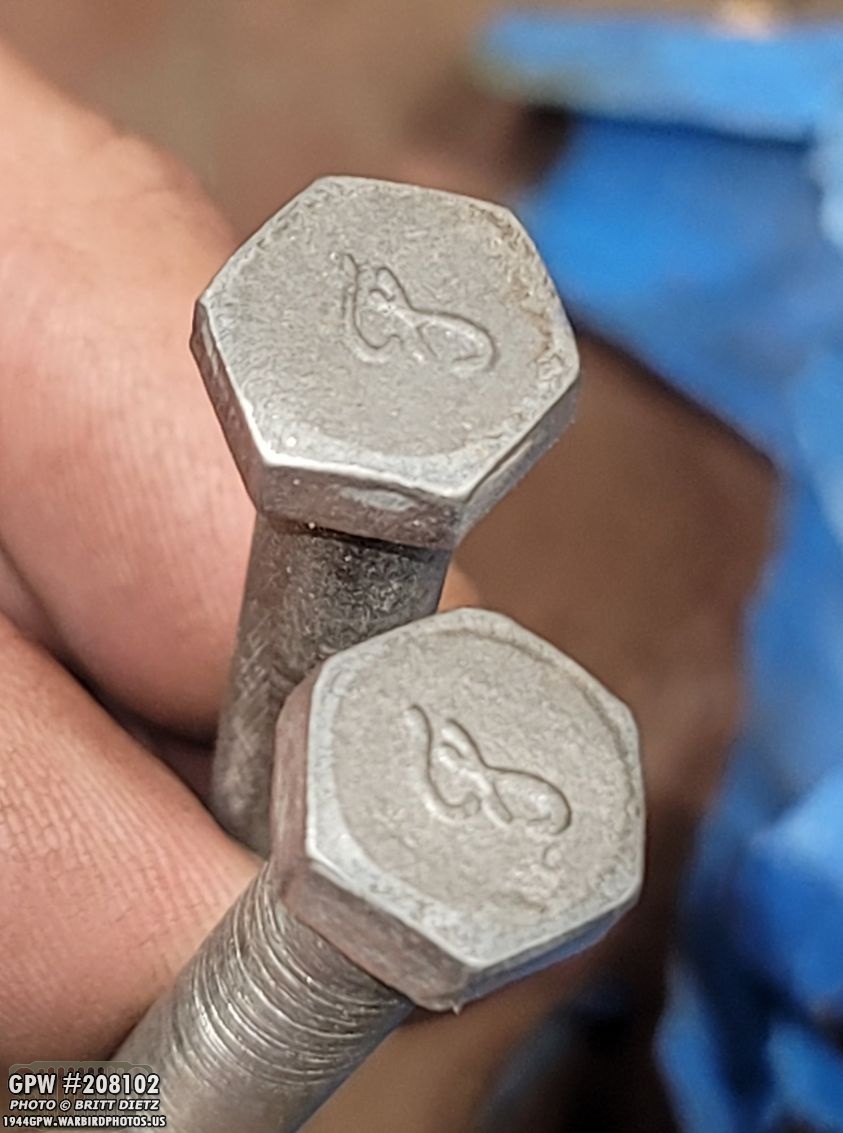
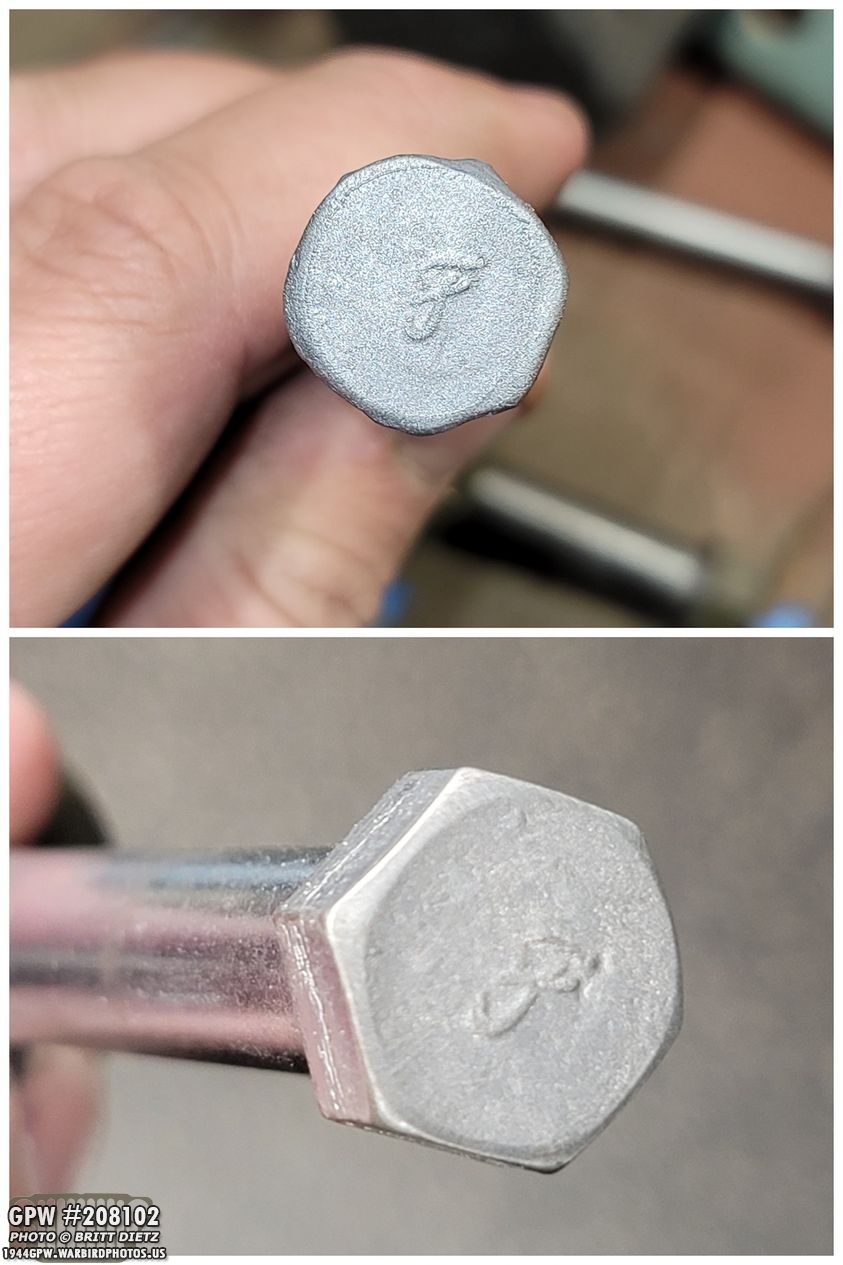
Here’s a look at the CJ U bolt vs the repro GPW U bolt. They have impressively perfect F stamps on them as compared to two original GPW U bolts I had.
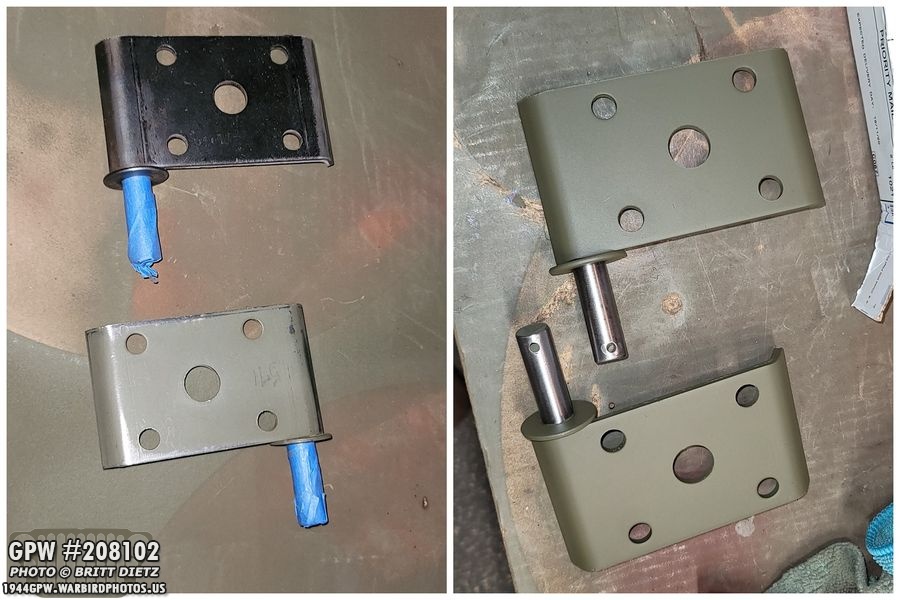
I sanded then primed/painted the two shock leaf plates (protecting the shock rods from paint).
I also painted the U bolts with primer and OD Green. I will cover installing these next week, and the MAJOR problem I ran into installing them.
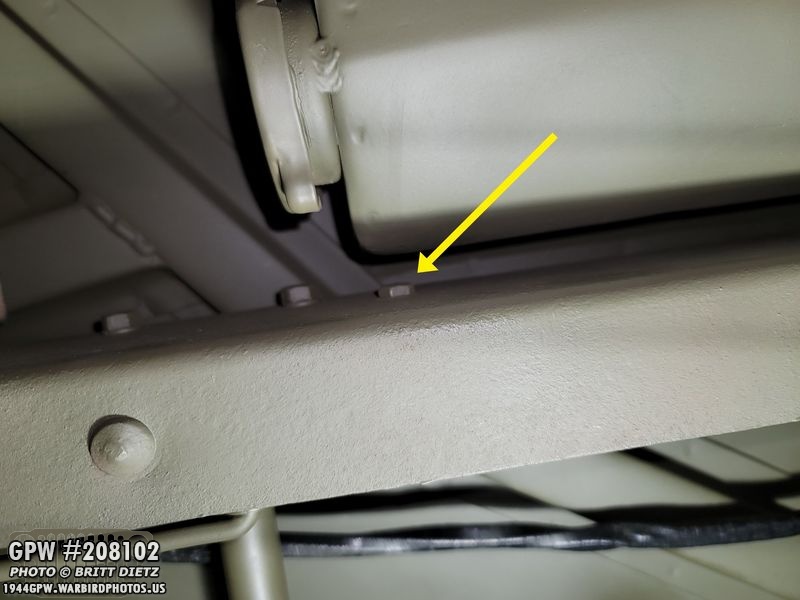
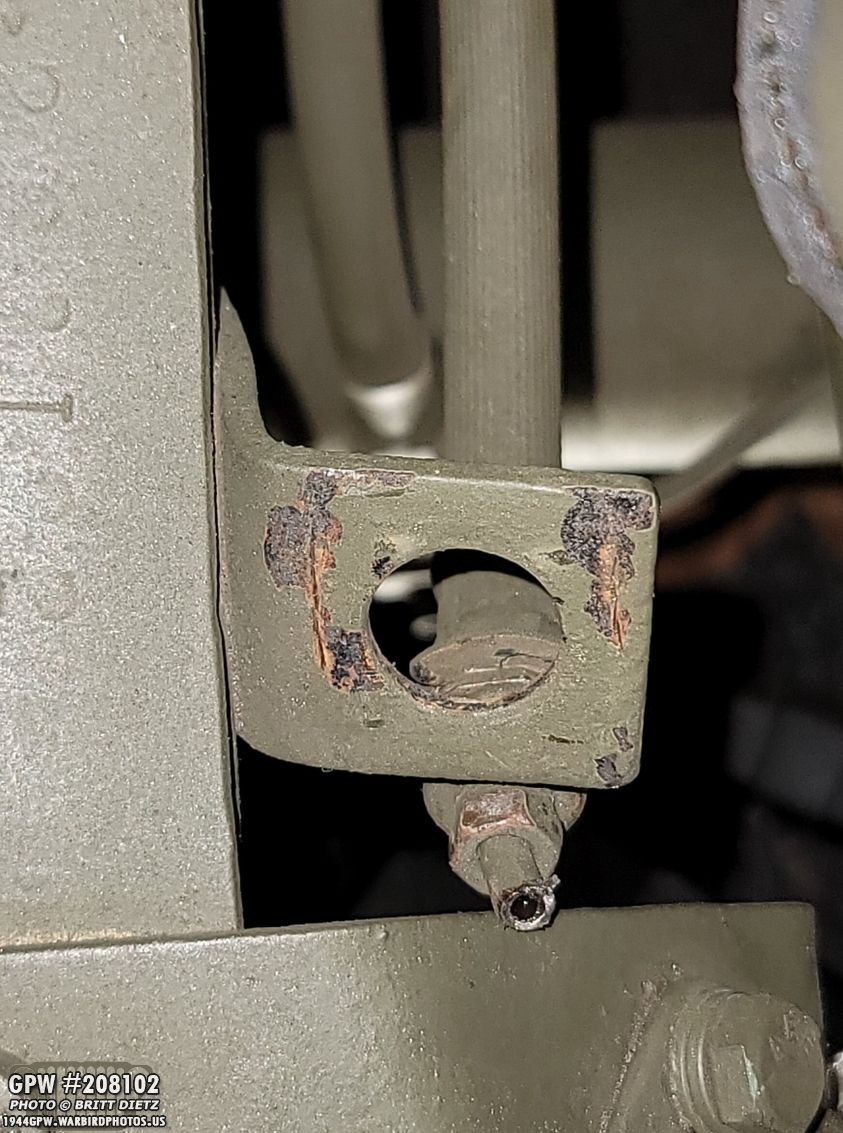
Moving on, I wanted to start removing the old brake lines from the Jeep since I will be putting in brand new ones as I shift from DOT 3 to DOT 5 brake fluid. You CANNOT mix the two, so I went with all new lines (which is a good thing, as mine were getting pretty bad). There are two bolts on the frame with clips holding the long brake line that goes from the rear axle to the master cylinder. One of them is in a tight spot next to the fuel sump.
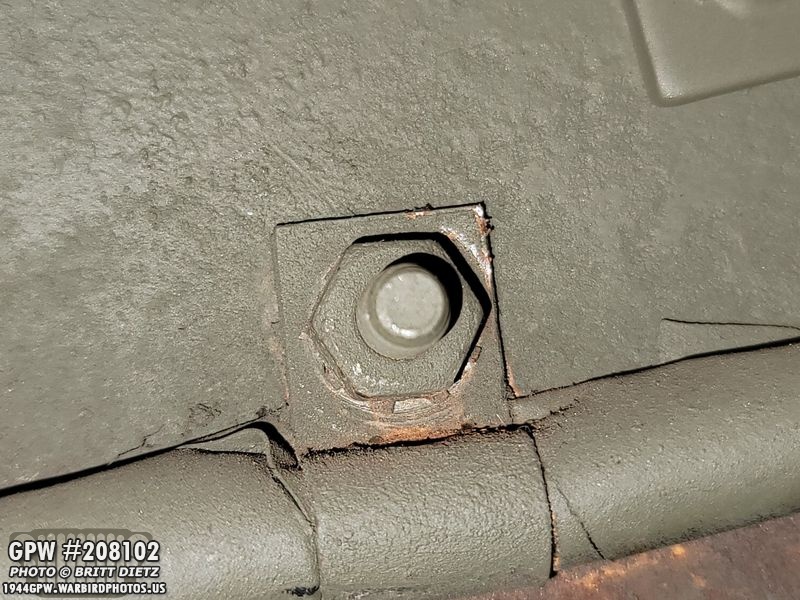
Here’s a look at that same bolt from the inside with the clip.
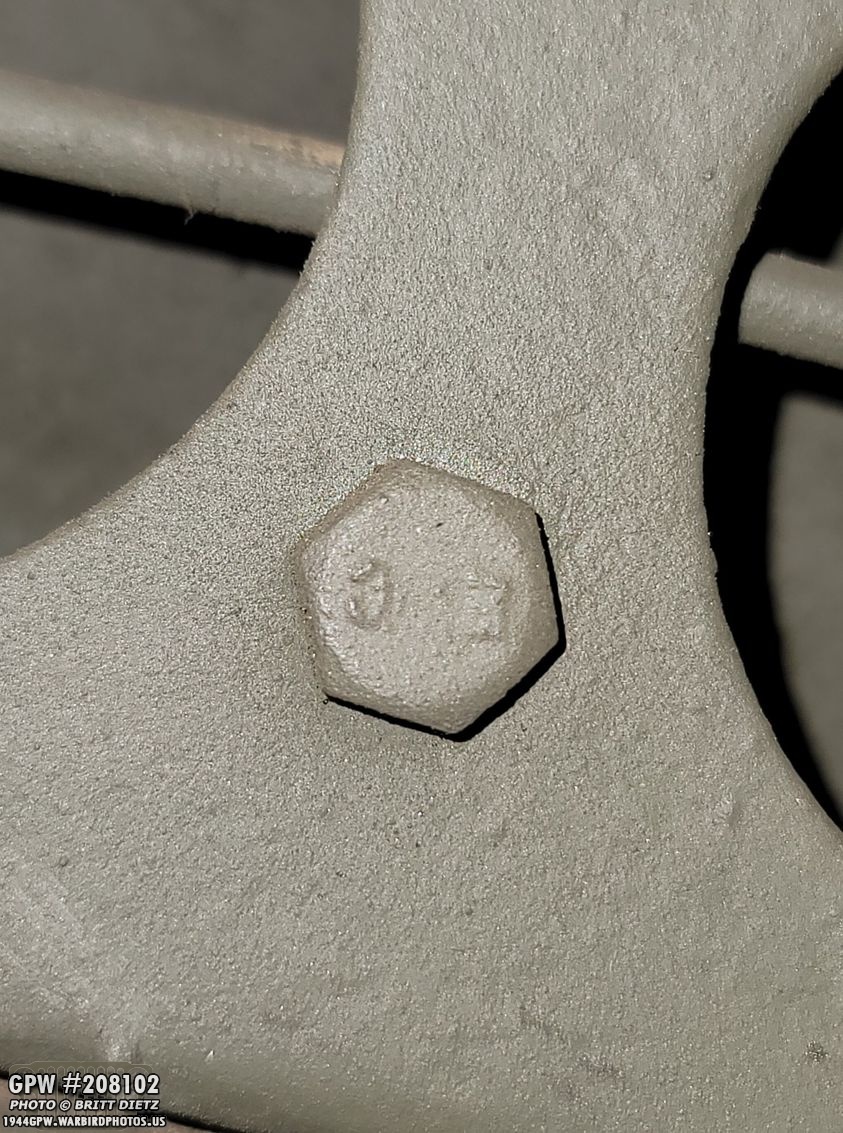
The other bolt is located further towards the rear before the brake line comes out from the inside of the frame and is on the inside. Wait a sec, what bolt is that on there?!
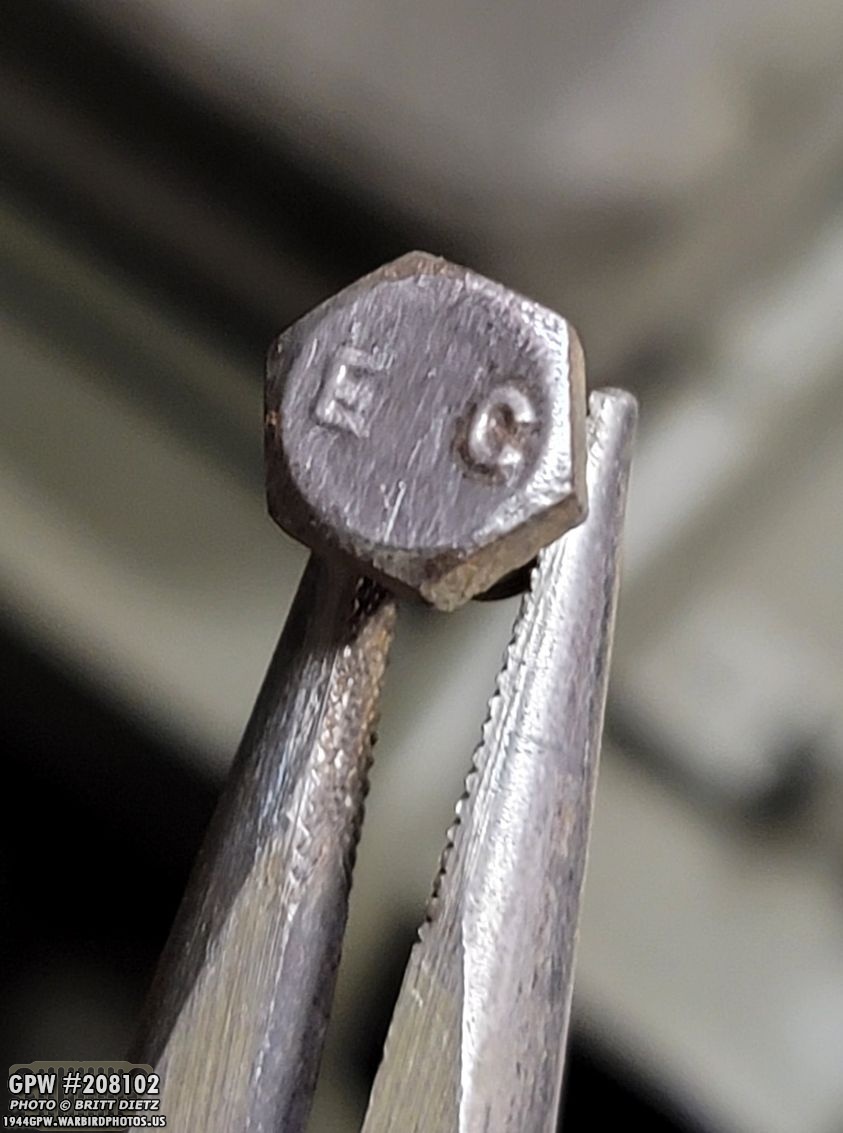
Cleaning it up, I was surprised (and disgusted) to find a WILLYS MB bolt on my Jeep. HOW DARE someone put a Willys MB bolt on my GPW Ford Jeep!!!! I’m kidding, of course, I had some fun with people saying I was going to sand off the EC and put a fake F stamp on much to their horror. I’ll be donating this bolt to a friend who has an MB Jeep and I’ll put an F bolt there instead.
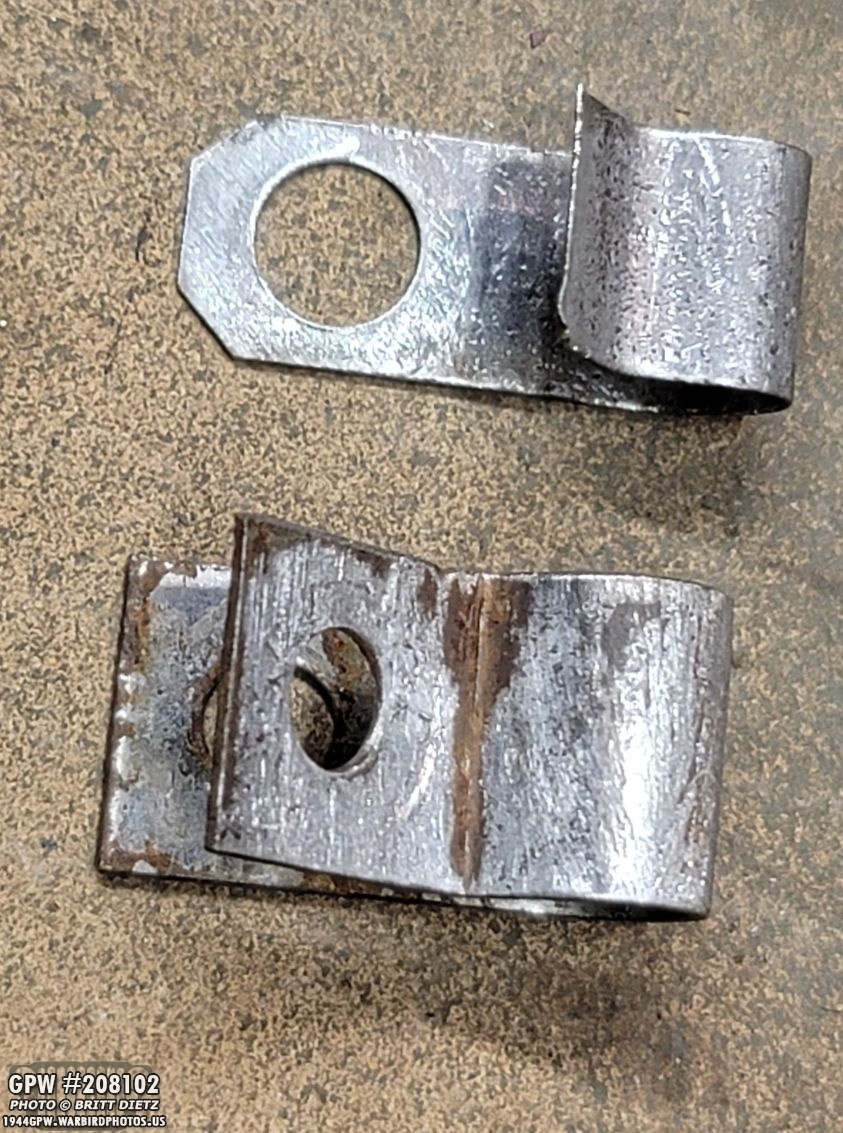
Here’s a look at the two clips. I feel the top one is a custom made one someone put on there, but the bottom one (that had the EC bolt) looks like a wartime style clip. I’ll probably make my own clip to match the wartime style one.
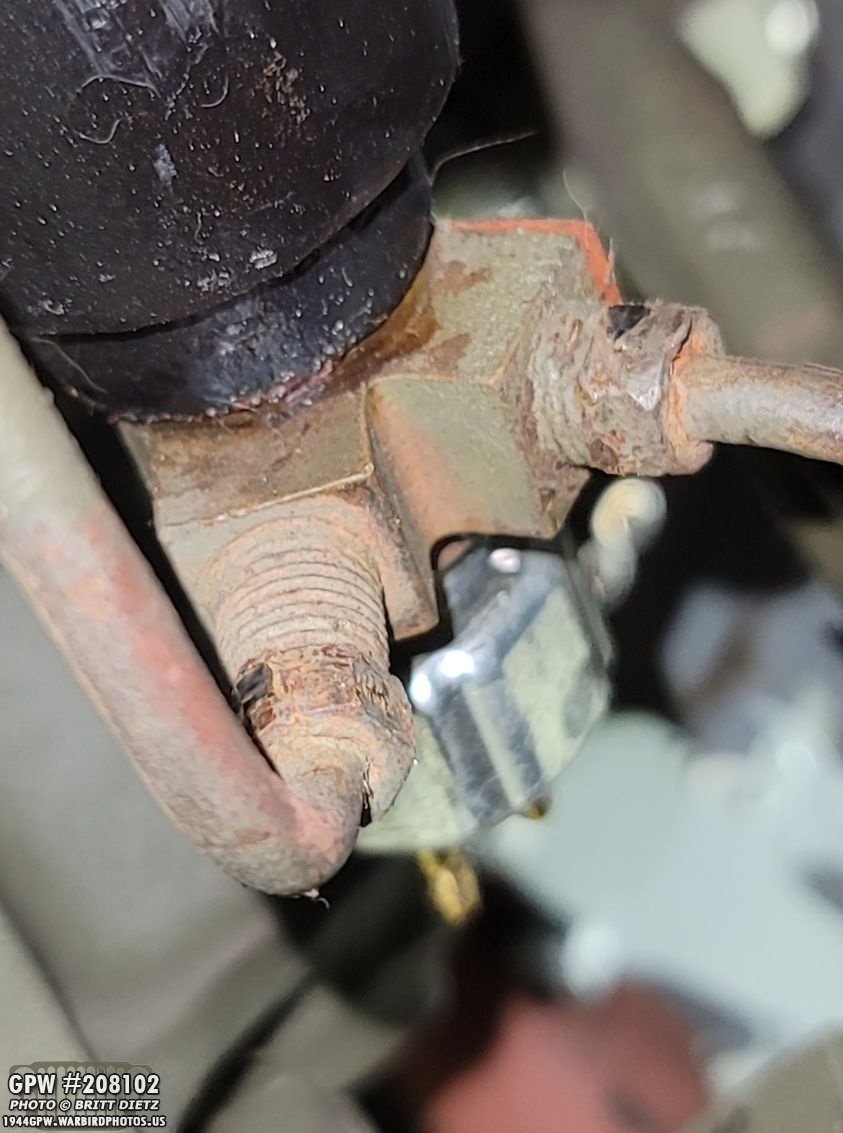
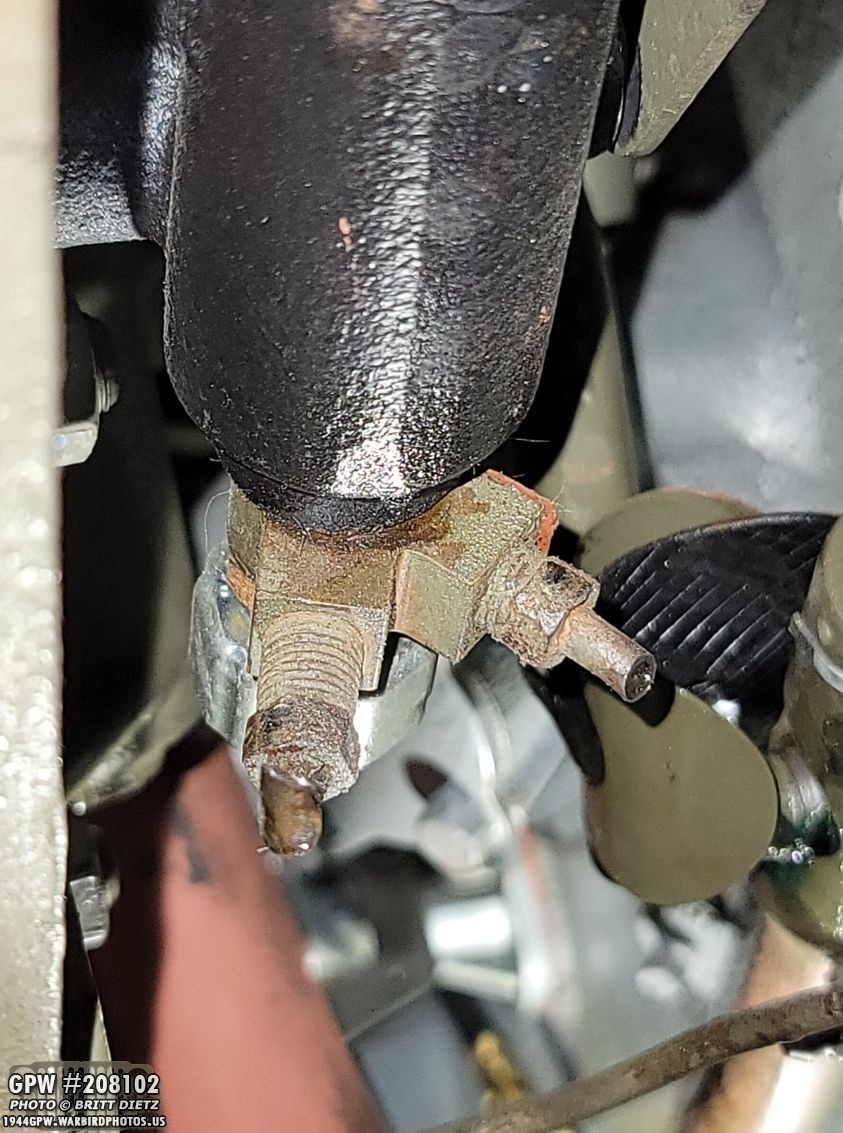
With the clips off, I needed to then get the two lines where they attach to the Y connector on the master cylinder off. But, try and try as I might, those lines were pretty much welded in there it seemed. They would NOT turn whatsoever and instead were just mangling the screw nuts.
So, since I had new lines and the other side of the long line broke when I was disconnecting it from the rear flexible line, I just decided to use my Dremel to cut the lines. I have a replacement Y connector as well. I didn’t really want to do it but had no choice.
The shorter line that goes from the master cylinder to the front axle flexible line wouldn’t disconnect either, so I had to cut it as well.
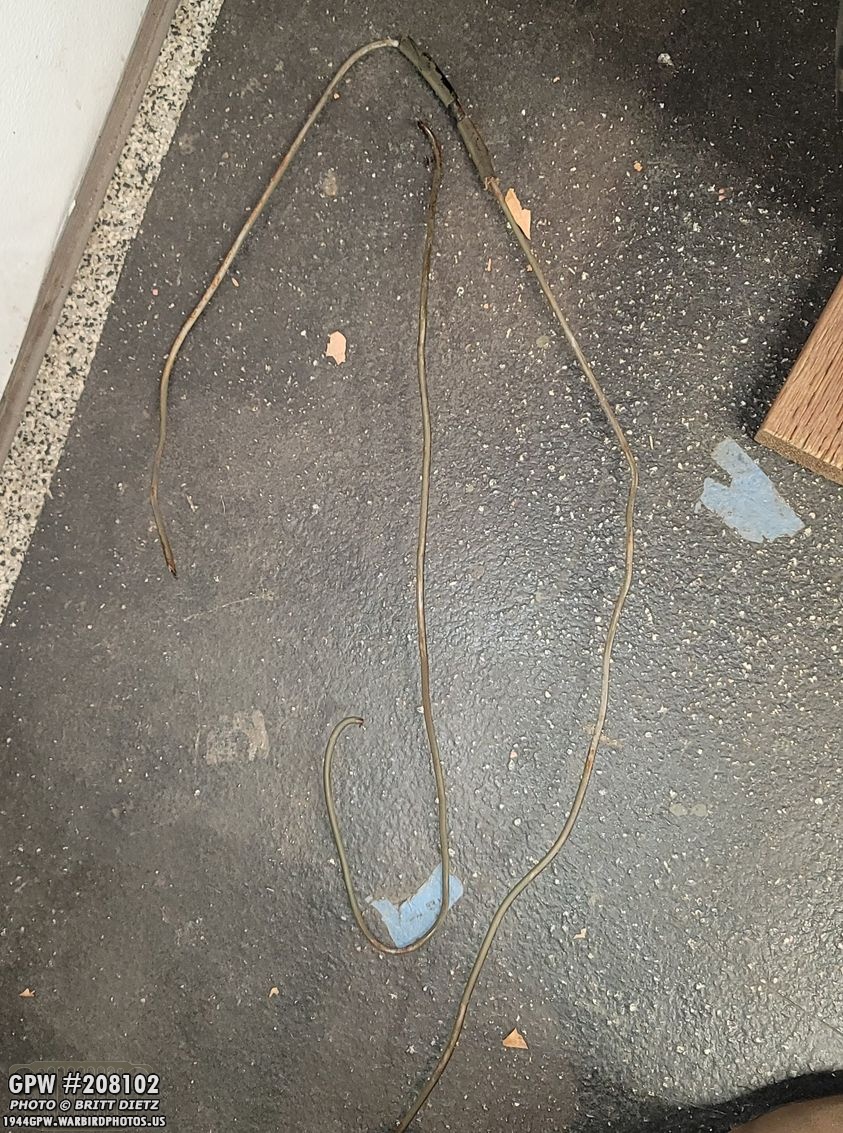
After that, I was able to take out both the long and short brake lines, seen here. As mentioned, it’s a good thing I’m replacing them, in numerous spots it looks like the rust was getting close to possibly (eventually one day) cause a leak.
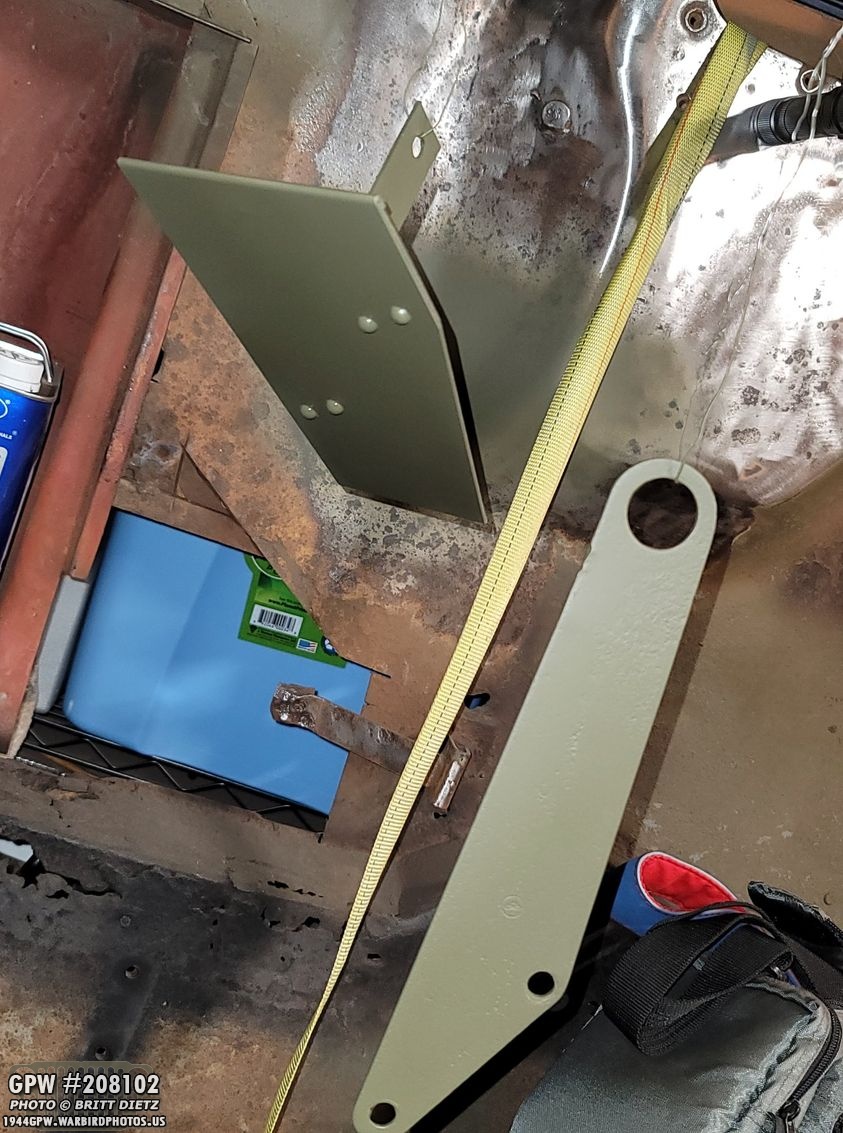
After that, I went to work taking off the master cylinder (which I’ll cover next week). I took off the heat shield (top) and the connector bracket that connects from the master cylinder to the brake pedal. I’ve already restored and painted both of these when I replaced my master cylinder in mid-2019. I had forgotten about the nice F stamp (it’s an original connector bracket). The bolts are from the master cylinder to the frame, and the large plunger is what pushes into the master cylinder from the brake pedal.
After sanding the heat shield and connector bracket, I gave them a fresh coat of paint. A year’s worth of driving and being close to the exhaust tube really dirtied them up.
The two bolts holding the master cylinder to the frame and one short bolt had no head markings (one had an L which I removed with a belt sander after I shot the top photo). I then did my JB weld trick to put F stamps on them. Bottom photo is after adding the F stamps, but before sanding.
The two master cylinder to frame bolts after sanding, looking like perfect F stamps!
I realized once I took out this long 7/16 bolt that goes from the frame to the steering box and heat shield is actually the bolt that will hold the torque reaction spring clamp. It’s a modern bolt, and I knew I’d need a longer one as my Jeep doesn’t have a TRS (with CJ axles). So this was perfect to remove it anyway.
The ORD9 calls for a 7/16-20 bolt that’s 3×3/4 long. I couldn’t find one that long anywhere, but I got a 4 inch one from Ace hardware which should do the job.
I also removed the modern head, sanded it with 80 grit sandpaper, and then did the JB weld Steel fake F stamp. The bottom is after it was all sanded.
That wraps up this week’s update! Look for a lot of work next week as I install the U bolts with the shock leaf plates and hopefully finish the rear axle so I can move on to the front! Till next week…
