 More F Stamps, Hand Crank, Windshield Latch, etc!
This week saw a lot of little projects including changing more things to F stamps, FINALLY getting a Ford Hand Crank, Flea Market finds, adding my original windshield latch, and more!

It’s always good to routinely check the lights on the Jeep and make sure the wiring is still functioning well. I mostly drive the Jeep in daylight, so I rarely turn the headlights, blackout lights, and panel lights on. After this week’s projects, she’s ready for another drive!
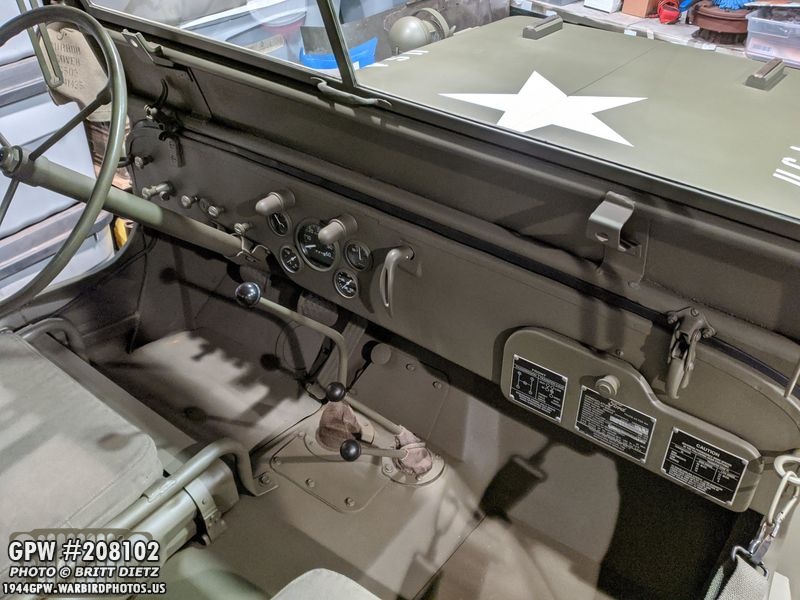
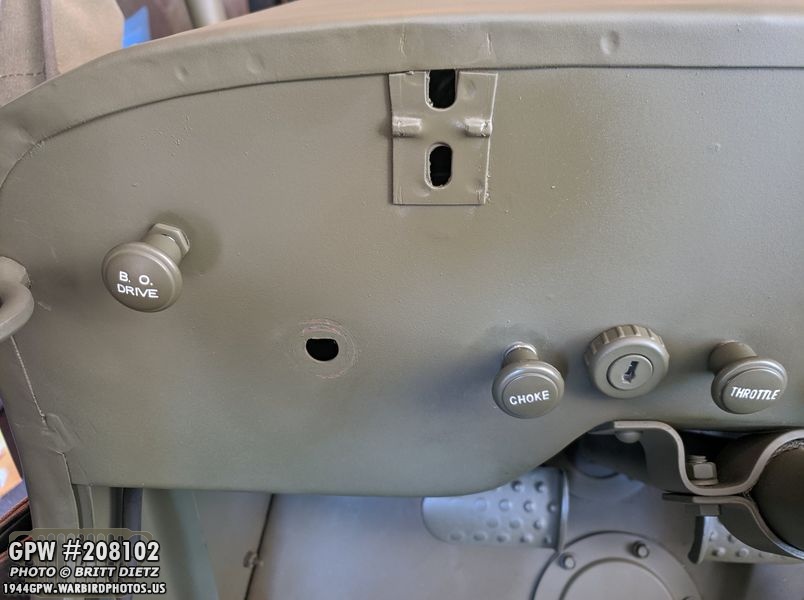
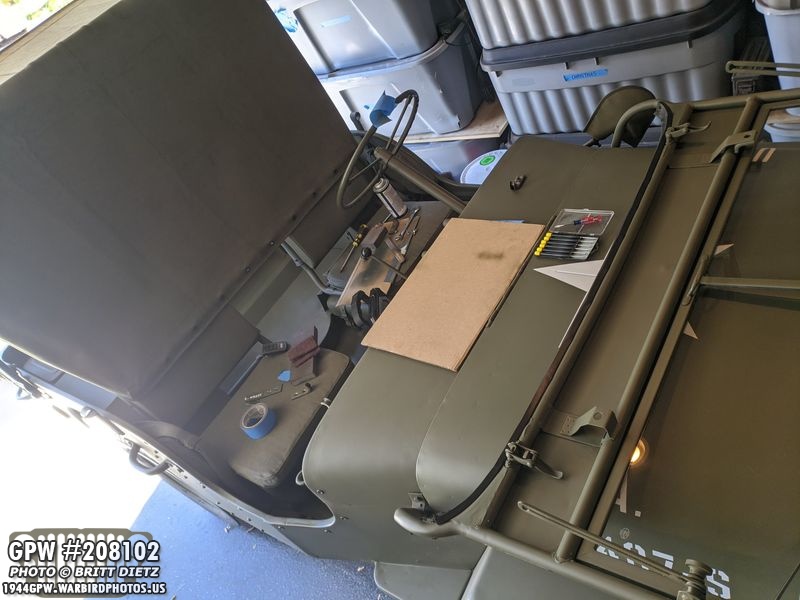
The inside of the Jeep is pretty much finished for now. Not too much else to change at this point! More on this in a bit.

Mail Call! Some awesome parts came from Ron Fitzpatrick Jeep Parts! After several months (6 months to the day!) of trying to get ahold of a Ford Hand Crank, I finally have one! I also got the final top bow bracket with an F stamp needed to finish them off. Finally, I got another can of Red Barrier III Red Oxide Primer spray paint.

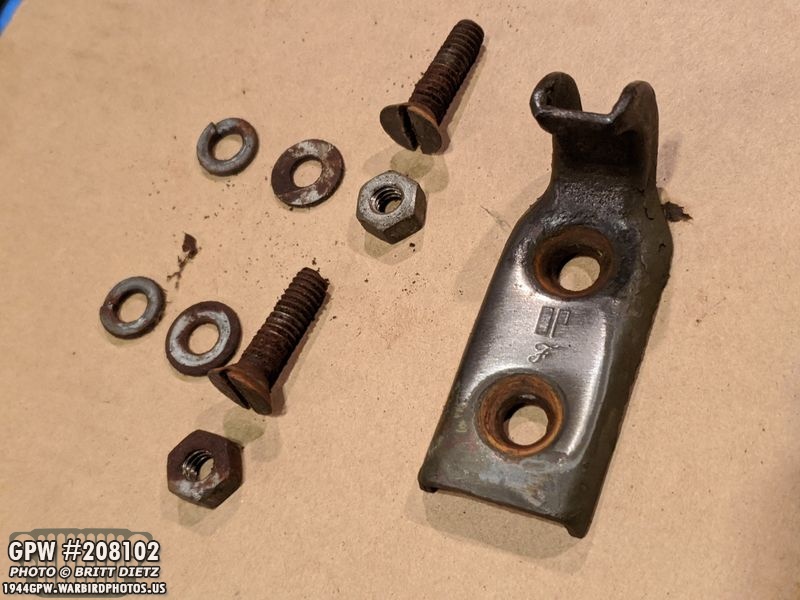
First item on the list is the F stamped passenger side forward top bow bracket! I’d been meaning to get it, but Ron Fitzpatrick Jeep Parts was out. Once they came in, I scooped one up right away.

It came in an incorrect shade of green for my Jeep, so I sandblasted it down to the metal and hit it with red oxide primer.

Here’s the before, and after the initial install. I removed the paint from the nut at the bottom as it was pretty scratched up once I removed it.

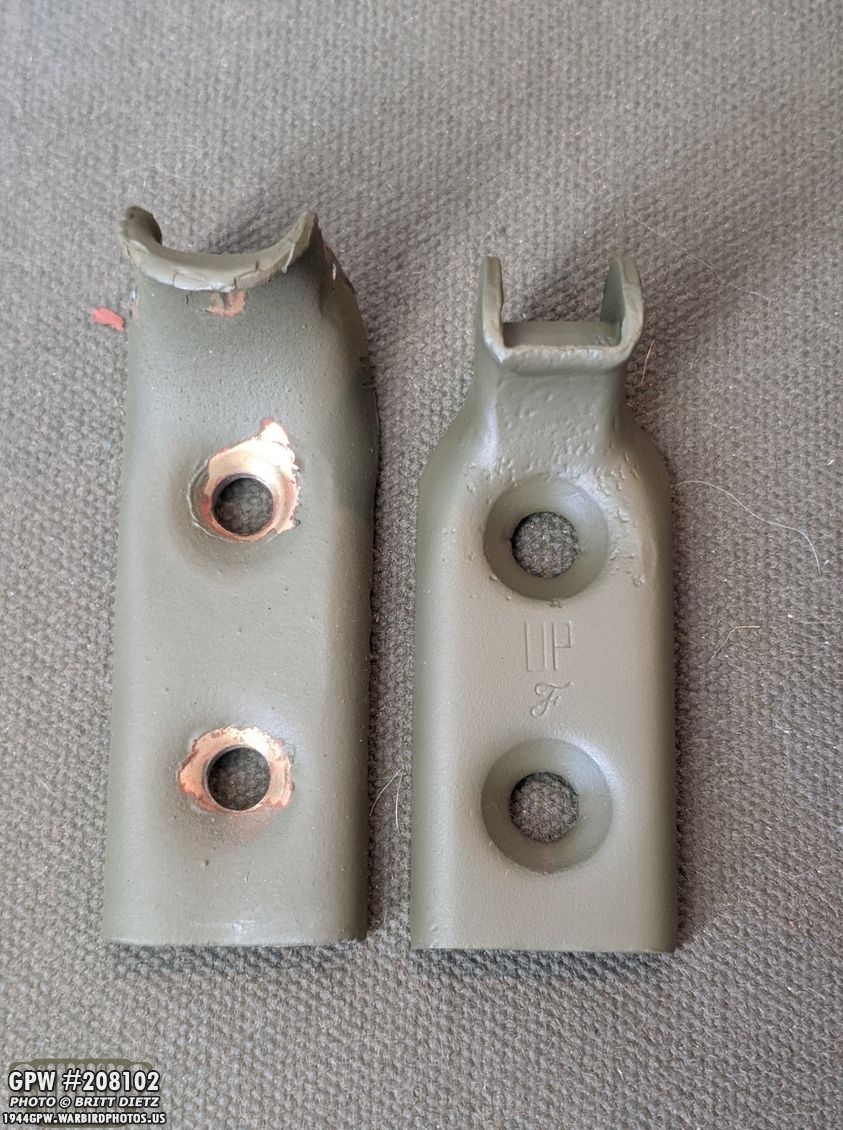
After some touch up 33070 OD Green, it’s finished! This was the last MB-style Top Bow items on my Jeep needing to be replaced with F stamped ones!
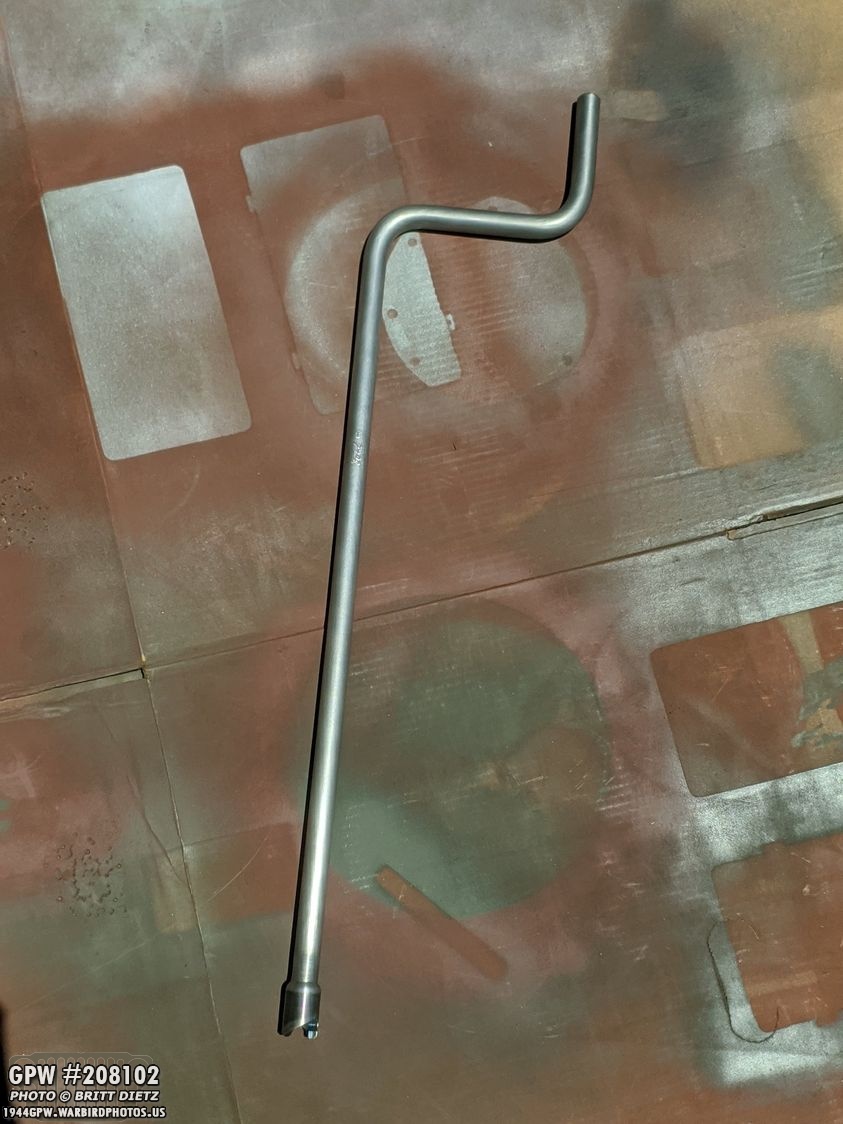
And now the hand crank! While most people don’t bother adding these to their Jeeps, I wanted one to complete the look. I started looking for one last year, but didn’t really start hunting till January of this year. EVERYONE was out of GPW hand cranks (and I mean everyone) and eBay has been bone dry. At times, a non-marked one or a Willys marked one will be available, but if I was going to spend over $50 for one of these, it better be a GPW Ford marked one. I was super excited to finally have one.
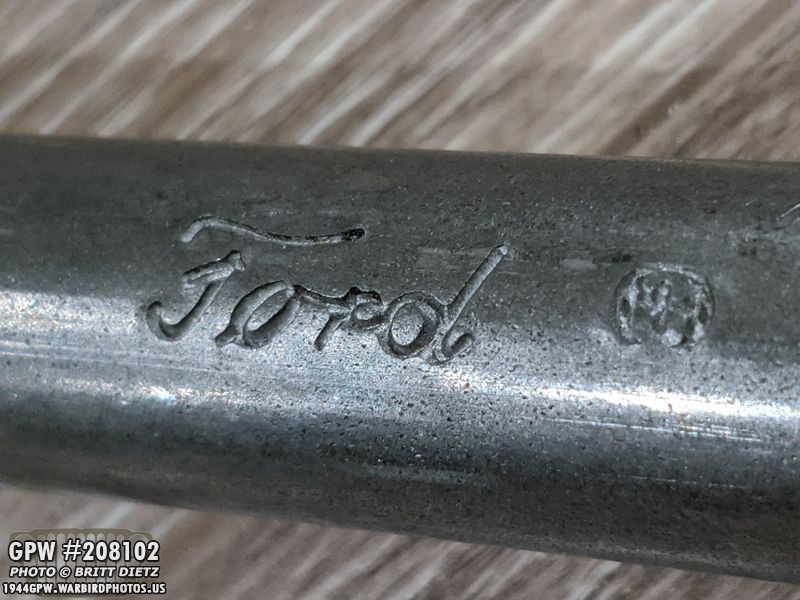
Here’s a close up look at the Ford engraving.

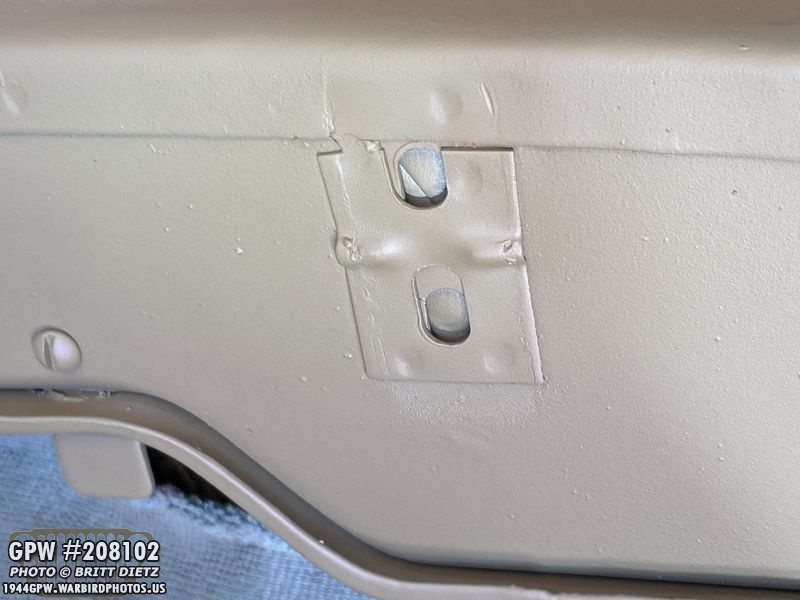
First thing I did was remove the hand crank hold-down bracket from the rear of the Jeep and put it in to test the fit. Took a few tries repositioning it till I figured out exactly how to best put it in there. Once it is in place, the hold-down bracket can go back on. But it’s not ready for install yet…
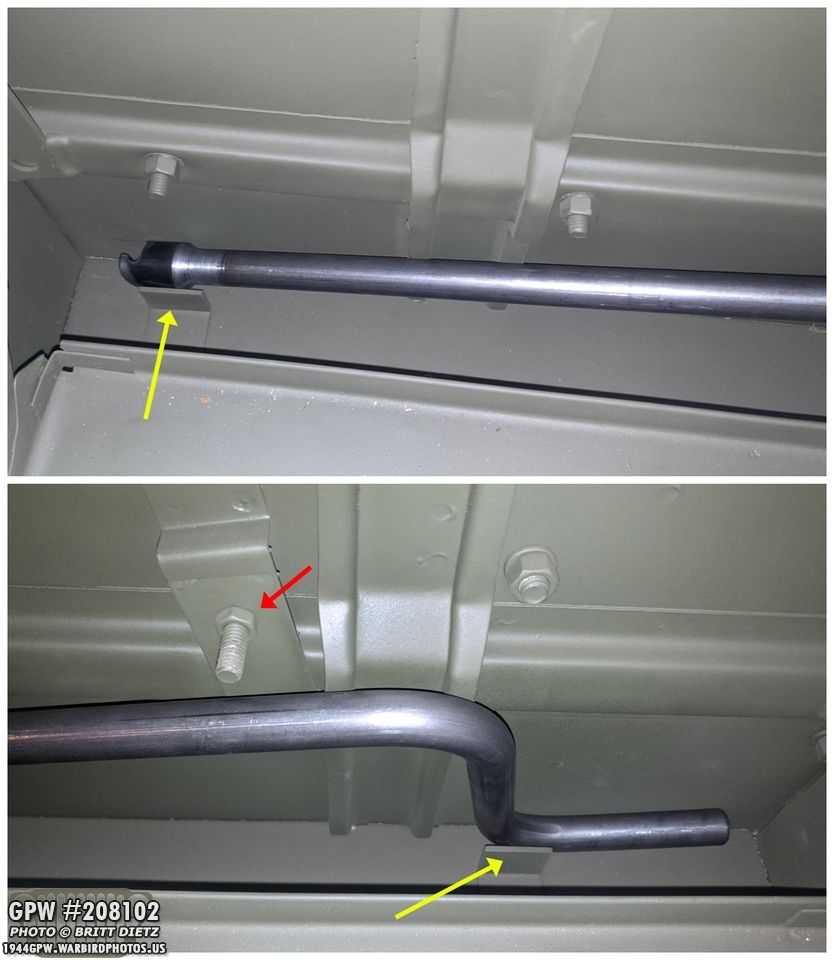
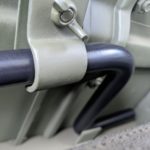
Here’s a closer look at how the crank is attached to the back of the Jeep. There are two L brackets welded to the tub floor of the Jeep. This holds the larger head that goes on the engine crank nut, and the other L bracket holds the end of the handle (yellow arrows). There’s a slanted stud and bracket that is there for the hold-down bracket with a wingnut.

After researching, the GPW hand cranks were painted with black satin. This was quite the process with a lot of delays. First, I used a scotch pad to scuff and clean the metal. I then used what was supposed to be Rustoleum professional black satin, but it just wouldn’t dry completely. It kept scuffing or leaving marks even after 24-hours. So I tried spray painting a satin clear coat on top, and that just made it worse. So I ended up removing ALL the paint from the entire crank which took a while. Then I spray painted it with a flat black high heat spray, which went on very nice and dried almost instantly. After three coats, I sprayed a satin clear coat on top, which perfectly mimicked black satin.

Once the clear coat was dry, it was time to install! I recalled the photos I had taken when test fitting it so I could minimize moving the handle around scratching the OD Green paint or the handle itself.

Here’s a look with the hold-down bracket back on with the crank secured! So nice to have something for that bracket to actually hold down finally! To the left on the crank, you can just barely see the top of the F in Ford.

Here’s a closer look. Leave it to Ford to put the logo in an area where when the crank is mounted to the Jeep you can still see it!

And here’s some other photos of how it’s mounted for reference. I need to touch up the paint a little where I scratched the back wall of the tub on the initial test placement of the crank.
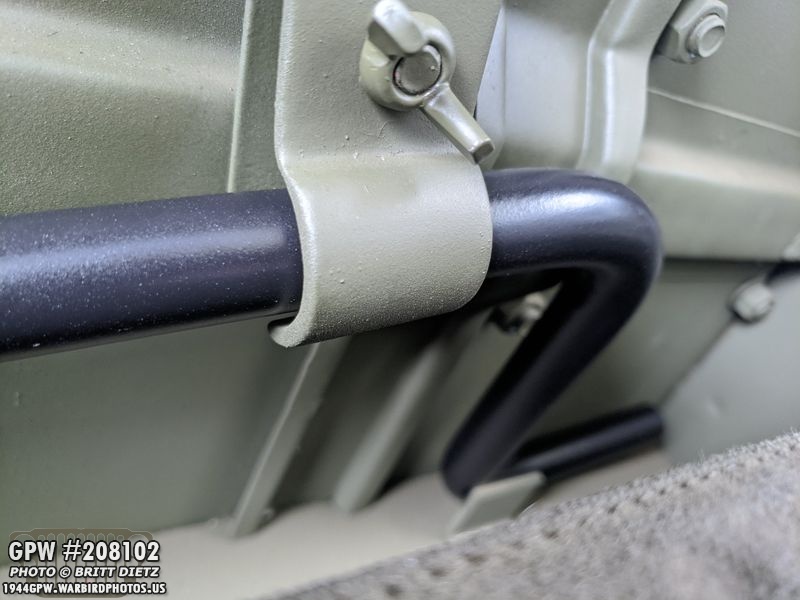
And a close up of the hold-down bracket. It actually takes a little bit of jimmying to get it to seat correct so the hold down bracket will clamp correctly. And that’s it, a six-month journey complete!

As a fun side note, this week I found these fun Ford stamped wrenches at a local flea market. For 50 cents each, it was a steal. Now, you’re either thinking ‘Wait, they had Ford marked tools in Jeeps?’ No, not wrenches at least. These are Model T or Model A kit wrenches. Quite valuable and from the 20s/30s. I figured it would be fun to keep one in the tool kit with the Jeep.

I ended up sandblasting and cleaning one of them as they both are the same size wrench. Came out really nice and will be a great addition to the Jeep’s tool kit. Again, these are not from World War 2, Ford wrenches are from Model T and Model A kits issued before World War 2.
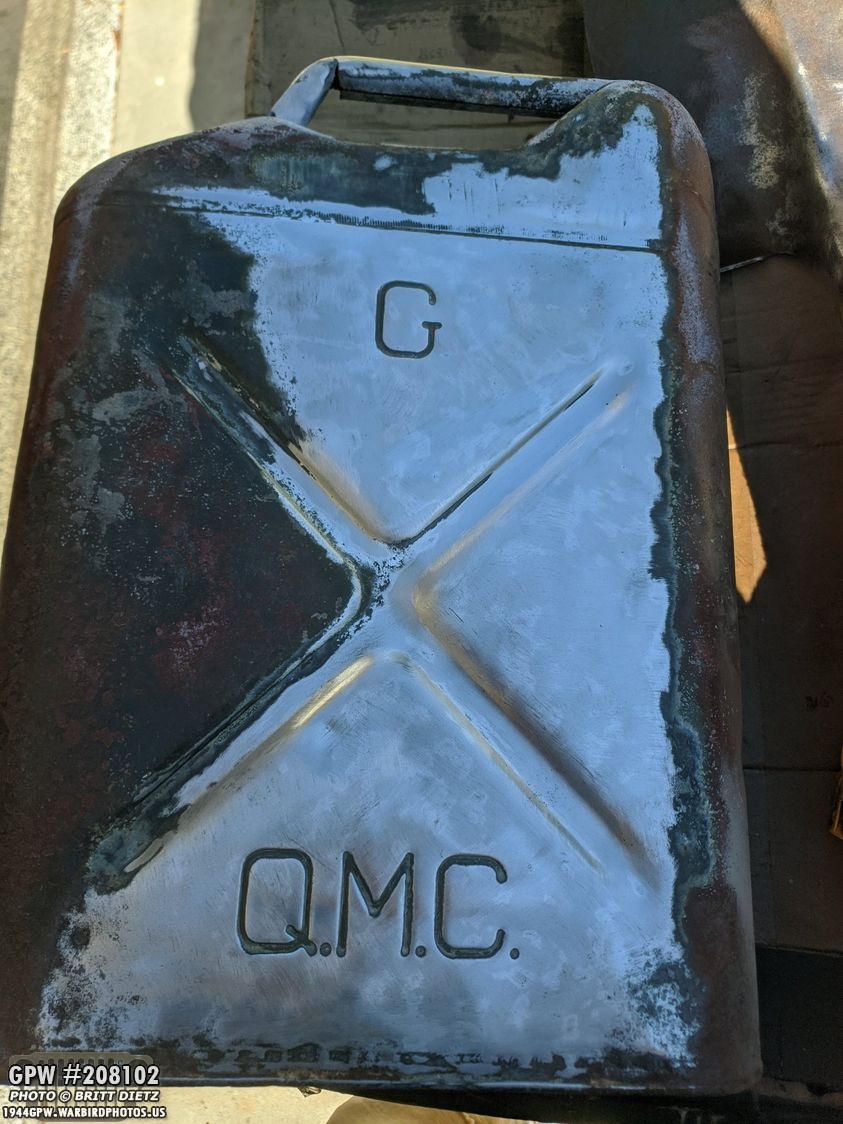
Last month, I picked up an early 1941 dated Jerry Can. I’ve started to slowly clean the many layers (including wartime OD Green) of paint off. It’s a long slow process, that 79 years of paint don’t want to come off. But even with it looking like it was very rusted, as you can see, a bit of elbow grease with a wire wheel makes it look like brand new metal.

Same goes for the True Temper 2 shovel I picked up last month as well which is perfect for a Jeep. I’m still unsure if I’m going to use it on the Jeep or not (I have a repro one on there now that looks great). But I’ll still restore this one just in case.

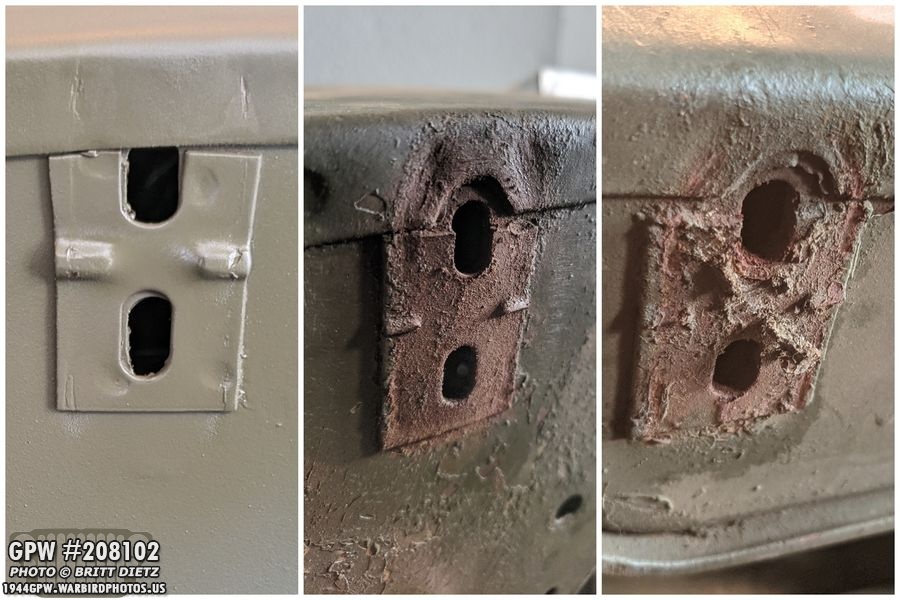
Another big project for this week was one I’ve thought about doing for a while now. On my original ACM II composite tub are the original windshield clamps. I had sanded off the face a bit in order to see if they were original, and both had F stamps. These look like they have not been removed since installed from the factory, and the screws did NOT want to budge, even after several days of PB Blast. So I ended up using the original latches with repro clamps on the new tub.

But I decided I wanted to try again and see if I could get them off. I tried PB Blast again and brute force, but the driver’s side clamp wouldn’t move. So, I used a Dremel and carefully cut both the screws. It was the only way. It wasn’t fun either, with my face being in close quarters with a Dremel and cutting wheel.
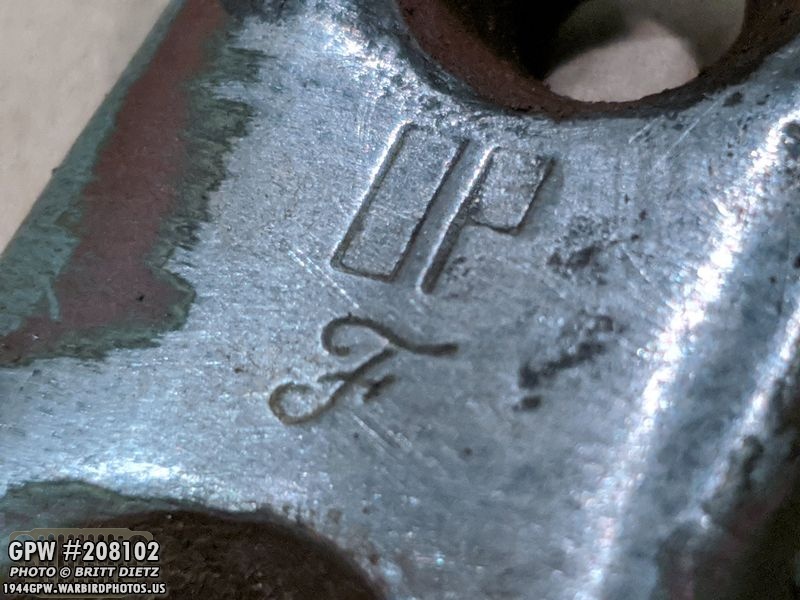
Here’s a close up look at the OP and F stamp markings. Again, these are original to my 1944 GPW.

After some light sanding, the OD Green gave way to remnants of the original WW2 US Navy Gray color. I figured I’d document this before it was removed forever.
Moving on to the other latch, I was a bit more afraid of using the Dremel because I’d have to somehow do that in the small space of the glove box. Amazingly, though, after some more PB Blast and brute force (as best I could in the cramped space) with a rachet, I was able to get the nuts off the screws. It took a while and did a number on the slotted screws.

Here’s a look at both of them now removed from the original tub! Note the backside still has the original red oxide primer paint. Tells me that these were installed when they were primered, but before they were painted OD Green at the factory.

After sandblasting, they look great! Some pitting, but that shows some character (and will be mostly hidden anyway).

The metal wasn’t able to enjoy the first sunlight in 76 years for long as I cleaned them up and sprayed them with the Red Oxide Primer.

And the next day with 33070 OD Green. I made sure to spray a bit more on the hook part as it will be rubbing against the latch a lot and will, inevitably, get scratched.

Now on to the Jeep, here’s a look at the repro clamp. I made sure to note which ‘notch’ the clamp is on.

While prepping things, I took the time to touch up the paint on my original latches.
After removing the repro clamp, I quickly sanded the areas underneath and hit it with some 33070 paint. (painters tape is in the holes so it doesn’t get all over in the glove box).
It was then I noticed something… the original GPW clamps look significantly different than the repro ones. Here’s a comparison. The GPW one is shorter, and when lined up at the bottom, the holes are lower. Uh oh. I’ve been told the repro one is the Willys MB style.
I went ahead and removed the repro clamp on the driver’s side and touched up the paint. This side was a PAIN to remove with all the wiring in there. I took the push/pull light switch out and letting it hang inside the dash helped to get a little more room to get my hand up there, but it was a super tight fit.
Going back to the differences, here’s where I noticed the second issue. If you look at the new tub (left) compared to the original tub (right two), there’s a big difference in how the screw holes are slotted. The slot actually goes up into the lip a bit, which the lip carved out slightly. That’s a good .25 of an inch higher.

To light the original clamps up the same way as the repro ones, I found they’d need to be in notch #5 (compared to notch #2 on the repro one). But putting it there, you can see that the upper hole is halfway blocked by the lip… meaning I’ll need to slot the hole into the lip. Ugh.

What I ended up finding out, after starting to slot the hole higher, is that at notch #5, the windshield isn’t clamped down enough, and at #4 it’s almost too much, but it’s secured well. I decided, since I can’t really move the hump on the dash not redo the notches in the bracket was to slot the holes slightly so it fits nicely on notch #4, which is the very tight secure one. Here’s a look after installation and touch-up of paint. The OP and F stamps came out nice!

And here’s a look at the one on the driver’s side installed and paint touched up. It’s also on notch #4, though it’s not as tight as the passenger side. Could be my windshield is slightly wonky, since it’s original to the Jeep.

And here’s a look at the latch down and secured. Original items back together once again!

And another view. Not a big fan of this particular weather seal under the windshield. It’s always had a gap in the center and I think it’s warped. One of these days I’ll order a new one and replace it.

Doing all this latch work meant the top had to come off and the windshield pulled down. Lots of work for two clamps!

Both clamps finished! The driver’s side one was still drying when I shot this, thus the latch is still up. But happy to have originals, and F stamped originals at that, back on the Jeep!
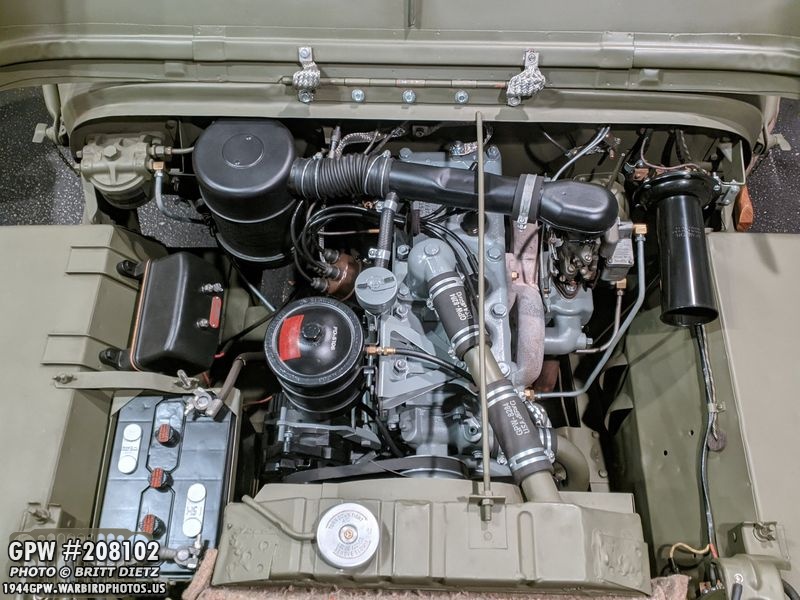
And a week-later update on my engine post-head replacement. Still not signs of any coolant leakage from the freeze plugs, cross over tubes, the engine head, the temperature gauge connector or the bolts/studs! When I drove her earlier this week, the temp was staying around 170-180, which is not bad considering it was upper 80s to 90s out!
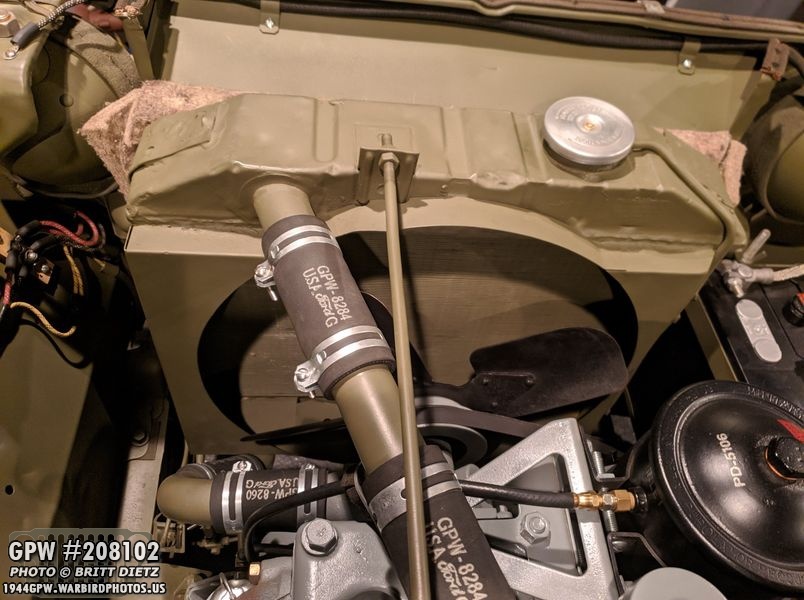
One side note to mention, I had always thought that my radiator was an MB replacement. I thought my Jeep would originally have a GPW style radiator, but I didn’t want to throw down $300-$400 for a GPW replica radiator. So I kept this one. Turns out, someone commented on my updates last week that starting late 1943, GPWs used MB radiators! That would mean that most likely this is the original radiator to my Jeep! Pretty awesome!

One little neat thing on my radiator is a tag where it was rebuilt at some point. It’s from Martin Pivo Radiator Corp based in Los Angeles. The company was formed in March of 1956 and was dissolved in 1982. It appears to be soldered onto the radiator itself.
With the latches done (this was shortly before I finished the driver’s side one), it was time to put the Jeep back together. Wanted to take a quick shot with the windshield down as that doesn’t happen very often due to the canvas top always being on.
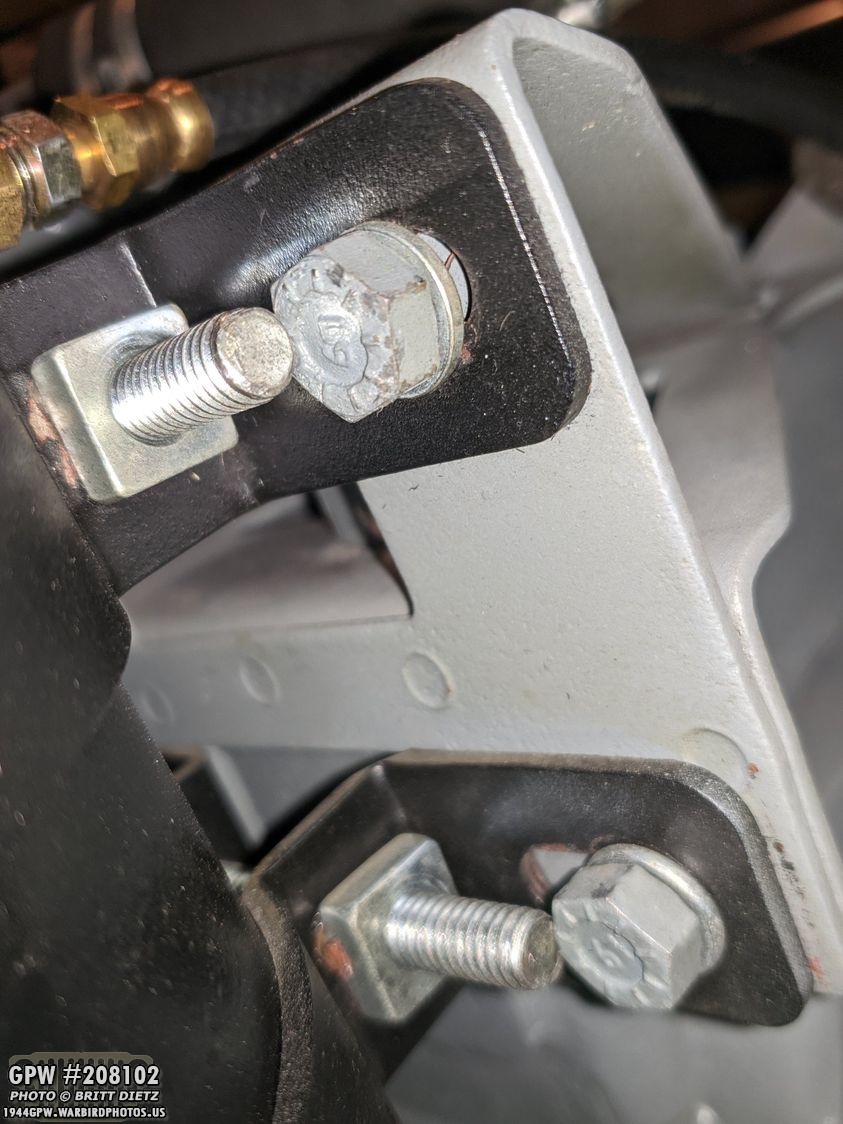
There’s talk on the ‘Ford GPW Only’ Facebook group about how the bolts holding the oil filter canister brackets to the oil filter bracket are actually F stamped bolts. Mine has had these post-war high grade bolts since I got the Jeep, and never bothered to replace them with F stamped ones or even remove the head markings, but that’s something that I’m going to change.

I have four spare F stamped bolts (very different bolts!) ready to replace those sometime next week. Look for that, hopefully, in the next update!

As an addendum from last week’s update with the F stamp guides, I realized I forgot one on the outside of the Jeep.. the fender F stamp! Both fenders should have them, but my passenger fender either never had one or is so faint now I can’t see it anymore. The one on the driver’s side is very faint as well, but still seeable even under paint.

And now back to the beginning, testing out the marker blackout lights. All looks good!

And my original-to-the-jeep 6v fender blackout drive light still works great with the WW2 NOS resistor.
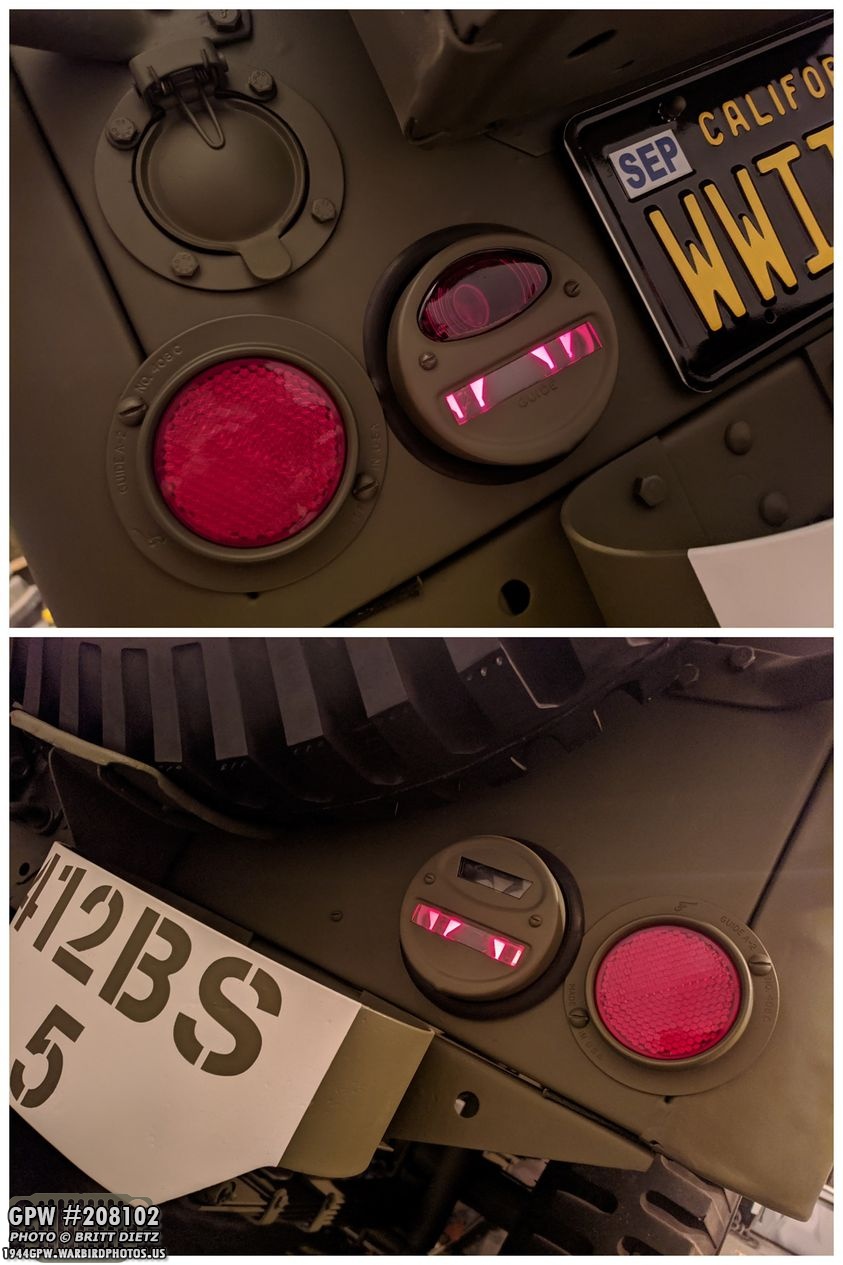
And finally, a look at the two blackout tail lights on the Jeep to end this week’s update. Some fun things this week, lots of little projects as I slowly run out of things to do. I hope to get going back up on the GPW axles once I get a good usable ring and pinion set (anyone have a spare out there?) to put in the rear axle. Then I can set the pinions and work will progress quickly till I can replace the CJ axles with the correct GPW ones! So that it’s for this update. Till next week…