 A solution to night driving in a WW2 Jeep – Part 1
For the past few weeks I’ve been devising a quick and easy way to enhance my Jeep, in a correct one brake light configuration, with a trailer socket plug in stop light that is easy to put on and remove without changing any existing wiring on the Jeep!

Ask almost any WW2 Jeep driver about night driving; most of them will say it can be a bit nerve-wracking. Not because of their driving, but the public’s driving and inability to see the tiny brake lights on the back of a Jeep.

This is especially true on a Jeep such as mine, with a correct rear light setup which means there is only one brake light, and it’s in the bottom left corner under the Jerry Can. Very easy to miss if you’re in a higher vehicle behind me and, in the dead of night, the only light on my Jeep aside from the headlights. Lots of people end up putting this brake light on both sides (dual brake lights) for extra safety, and some have devised ways to add magnetic lights, permanent lights on the spare wheel, etc to try and combat this problem.

I used to use an electronic LED bicycle brake light, but it was hard to attach to the back of the Jeep and always needed battery replacement. So, I had a thought about a year ago… what if there was a way to use the trailer socket plug and the Jerry Can to have a special stop light that is easy to put on and is it to take off… just plug it into the trailer socket and then strap it to the Jerry Can handles.

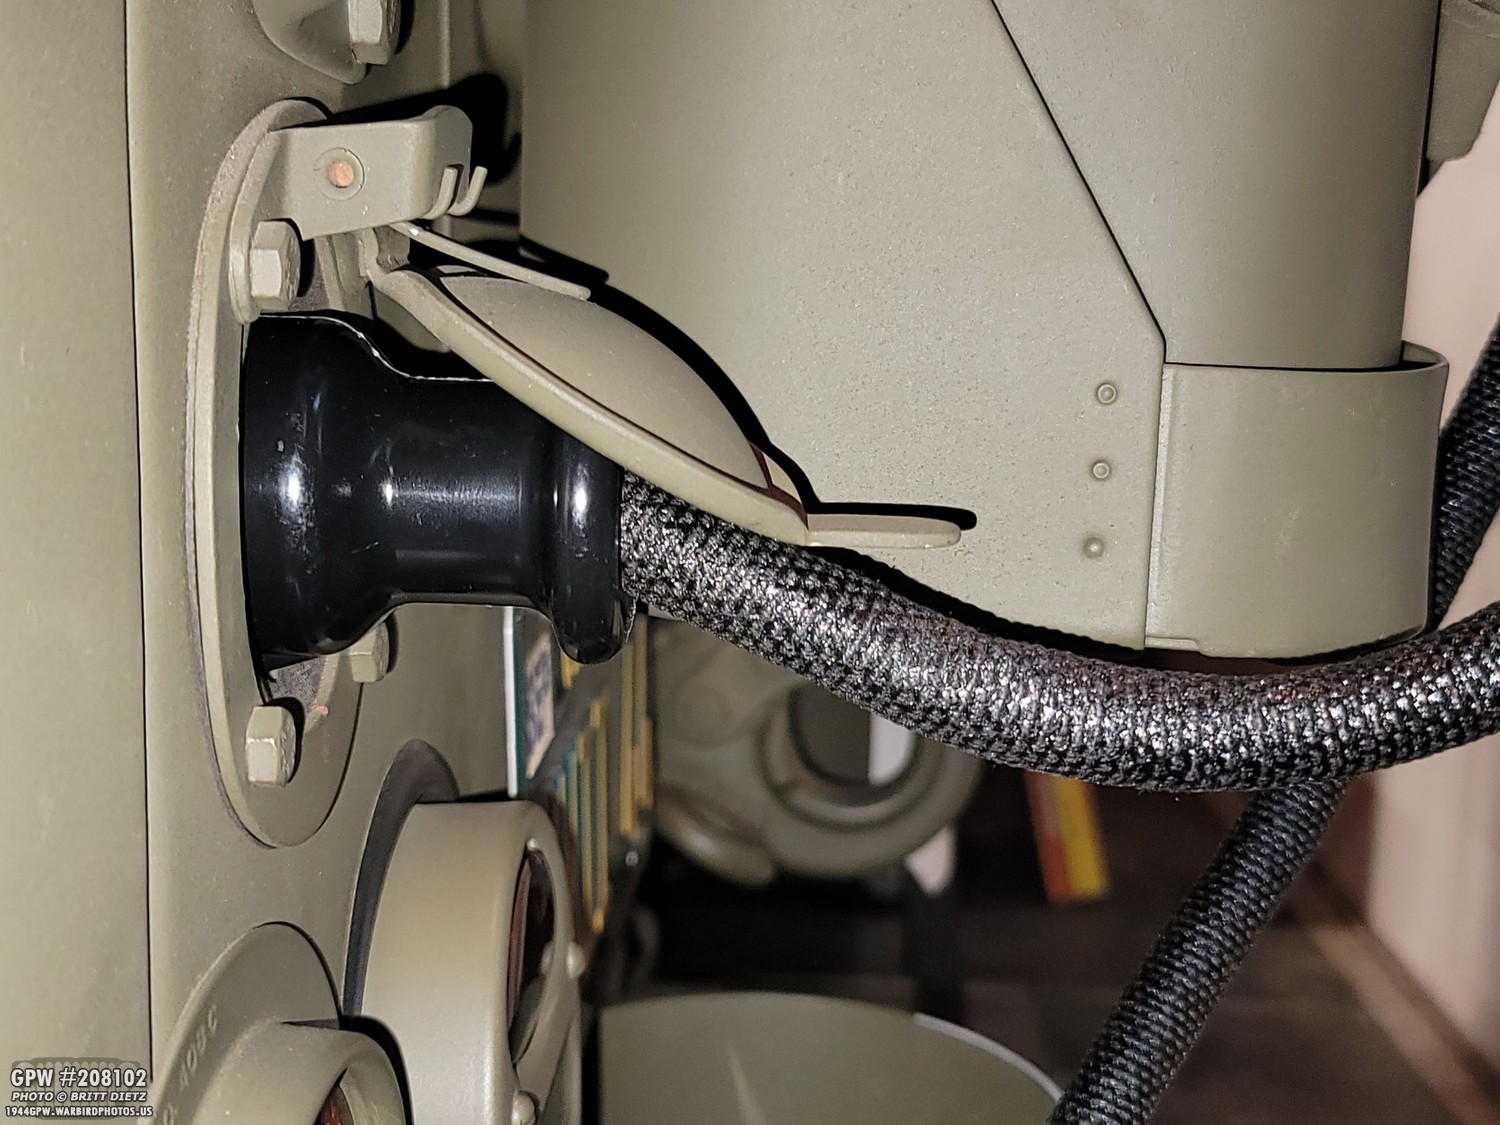
My NOS trailer socket is completely hooked up with correct wiring, and up till now has sat there unused since I don’t have a trailer. Why not make use of this socket?

And strapping something to the Jerry Can handles would be pretty easy, just need a strap with a buckle. Or perhaps little ‘claws’ to grab onto the first handle. I kept this in the back of my mind, but I never really dove into this idea nor had a design in mind.

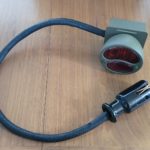
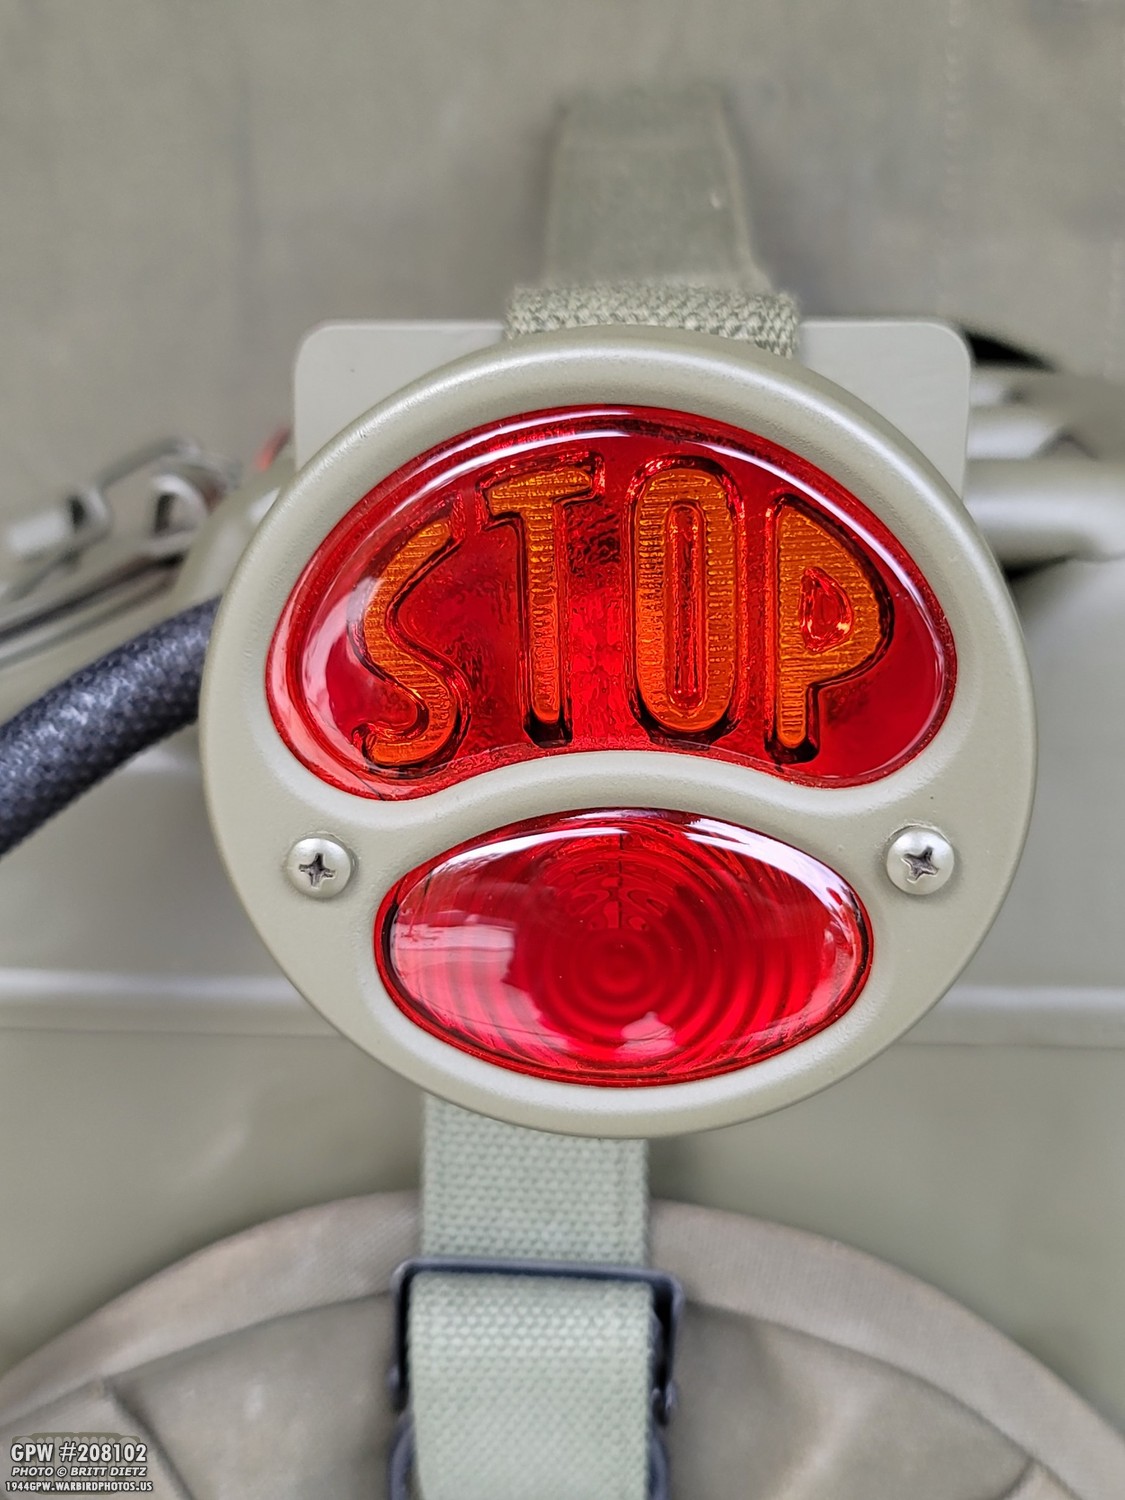
That is, until I came across this on Amazon. It’s a Model T style stop light, with a STOP lens on top, and a red lens on the bottom. This light is pretty cheap, only around $25.

The STOP is in an amber color, while the rest is red. They make two models of this, one which also has a third light that shines down to illuminate a license plate. I just wanted the 2-light setup.

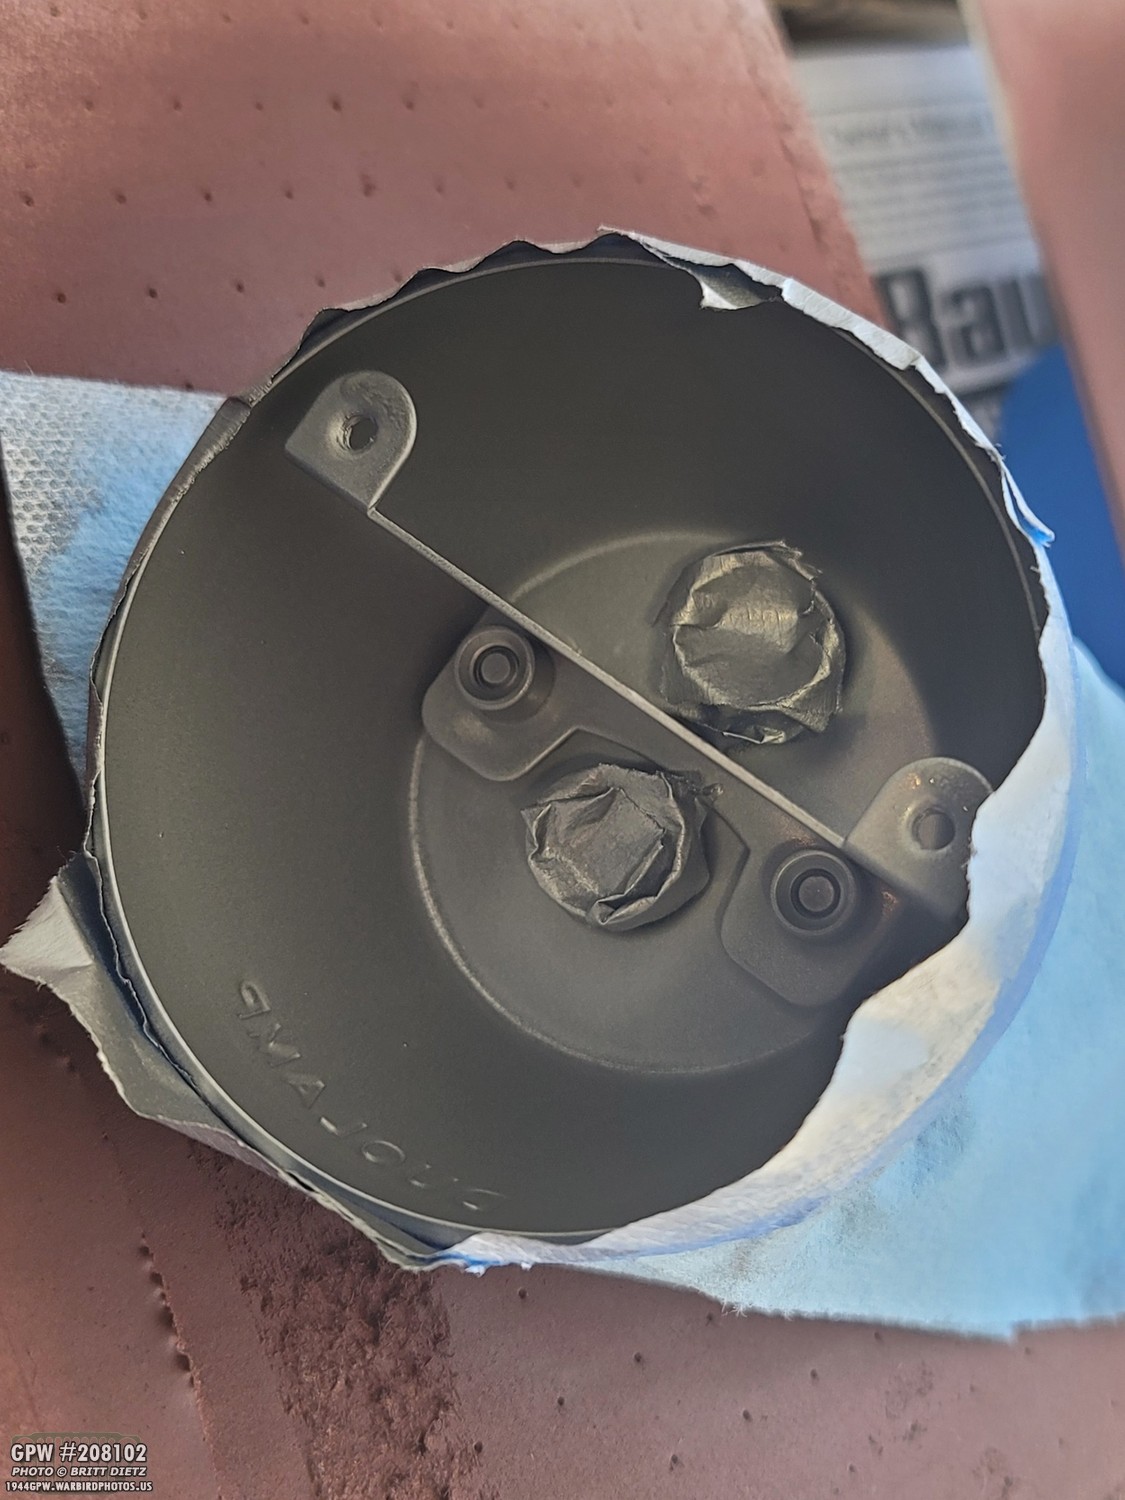
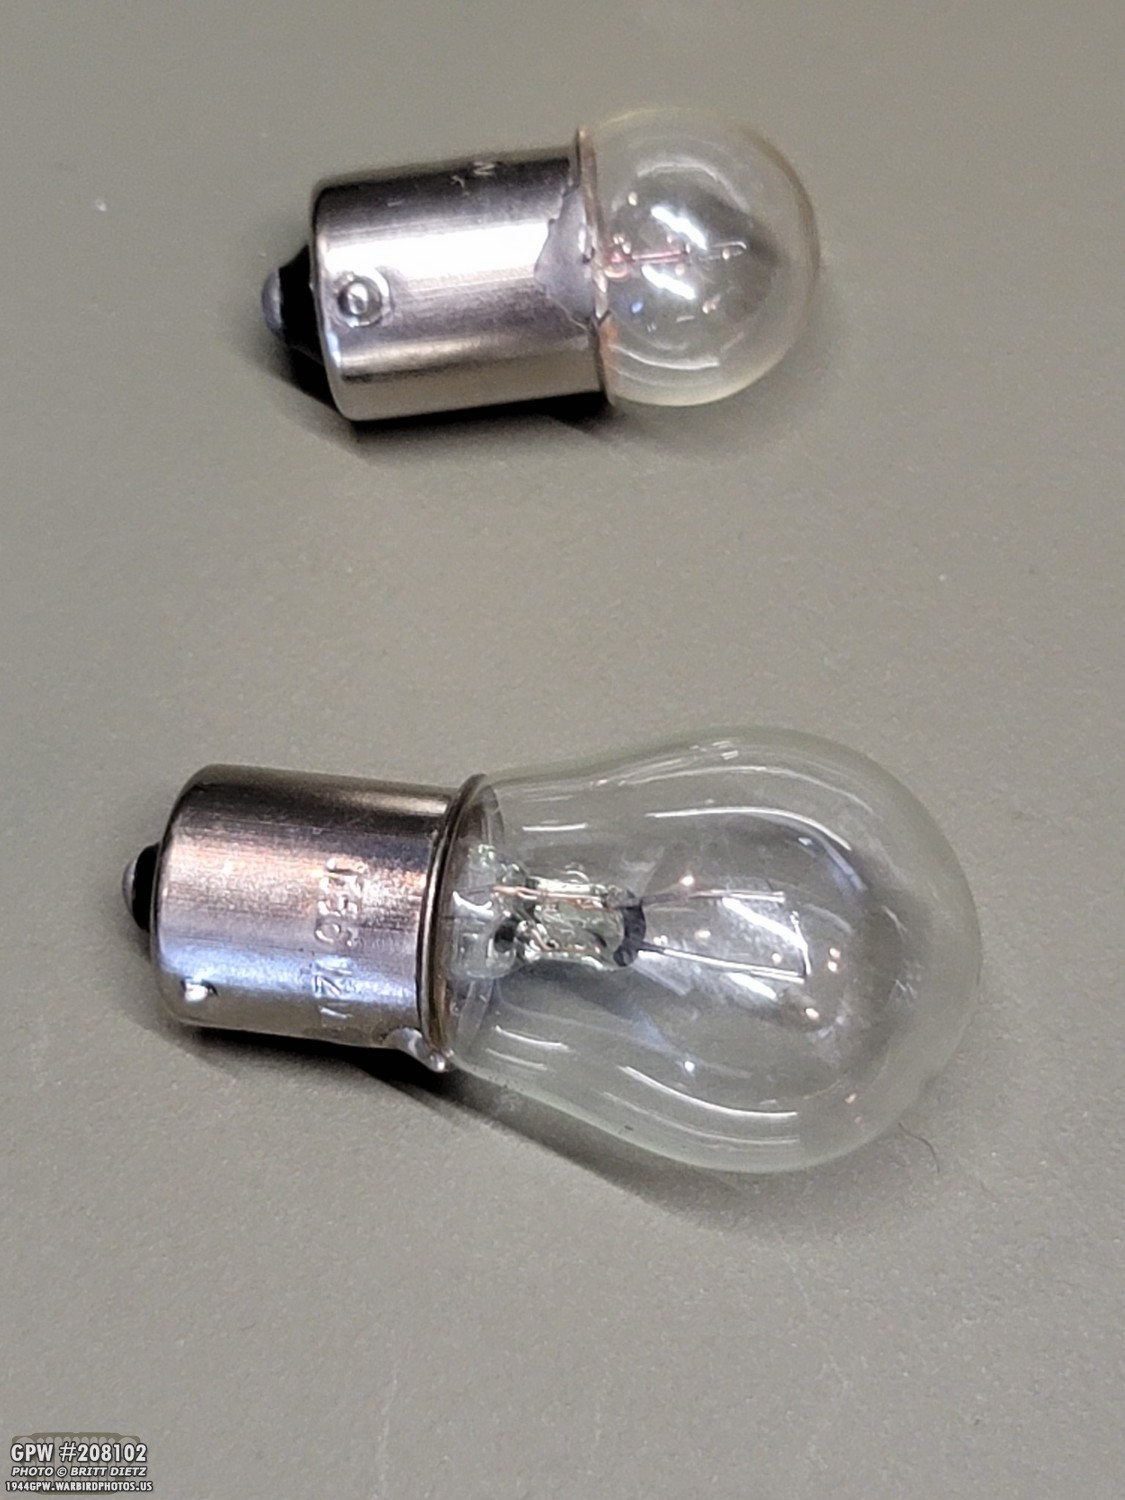
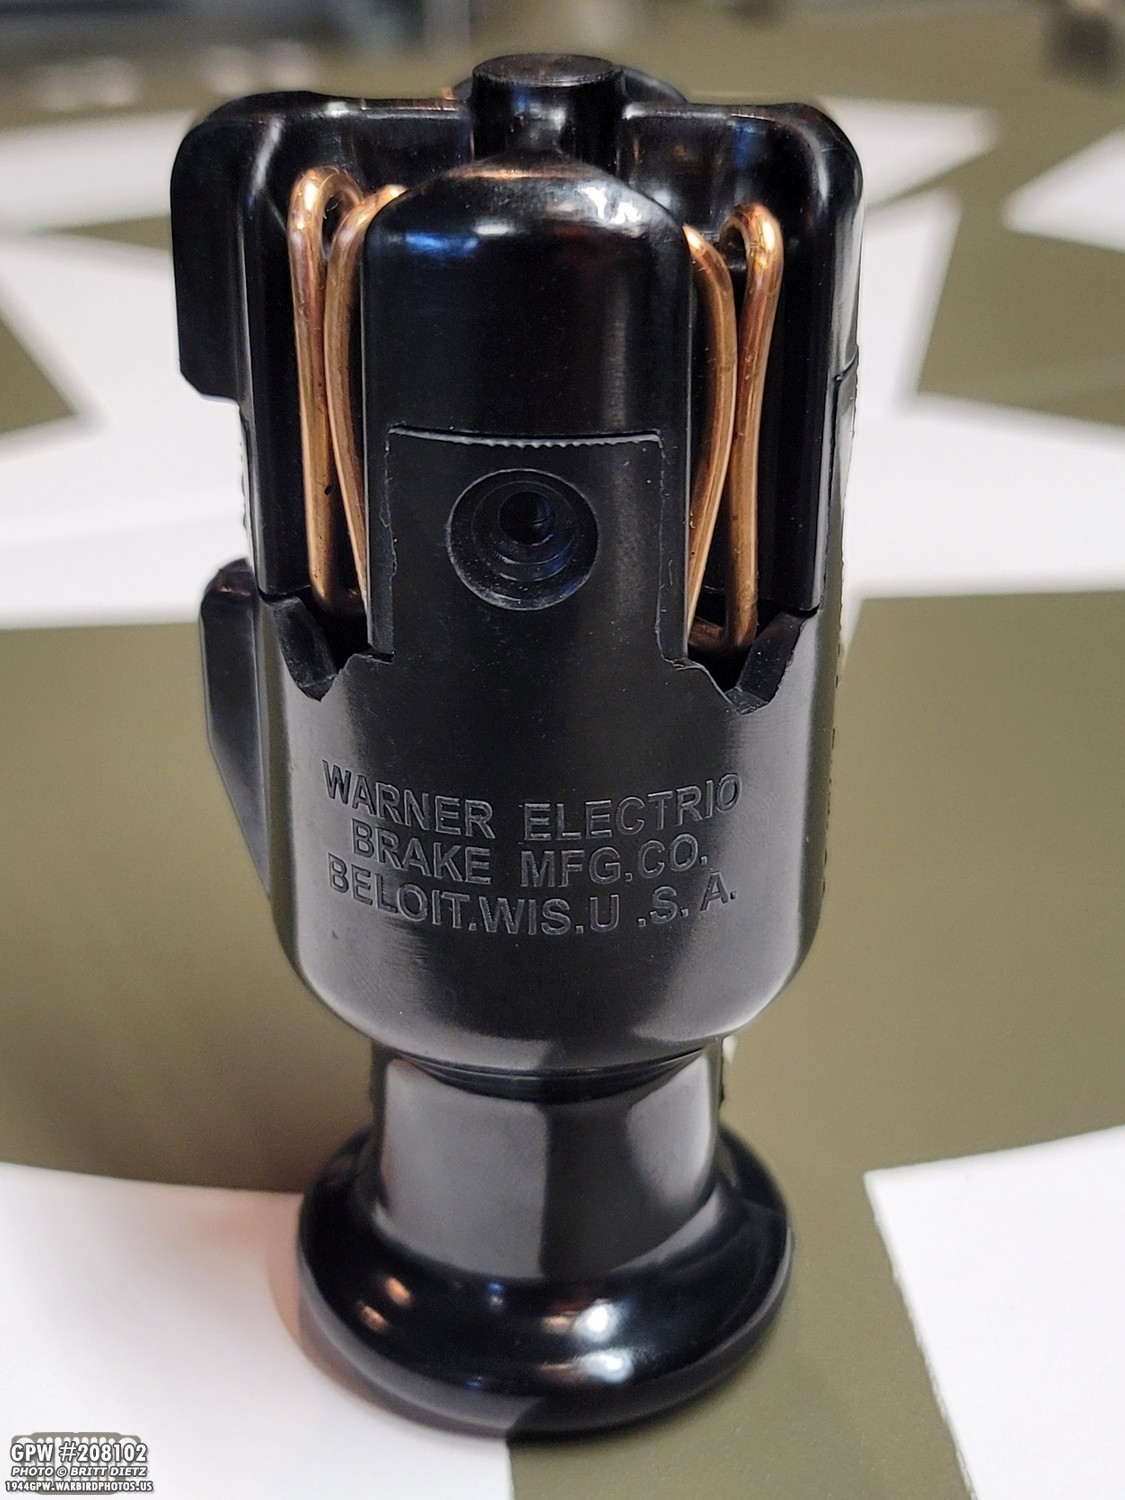
Looking inside, there are two 1156 size (BA15S) bulbs. One large, and one small. The large one illuminates the STOP when the brake is pressed, while the small bulb is the always-on tail light (when headlights are on).

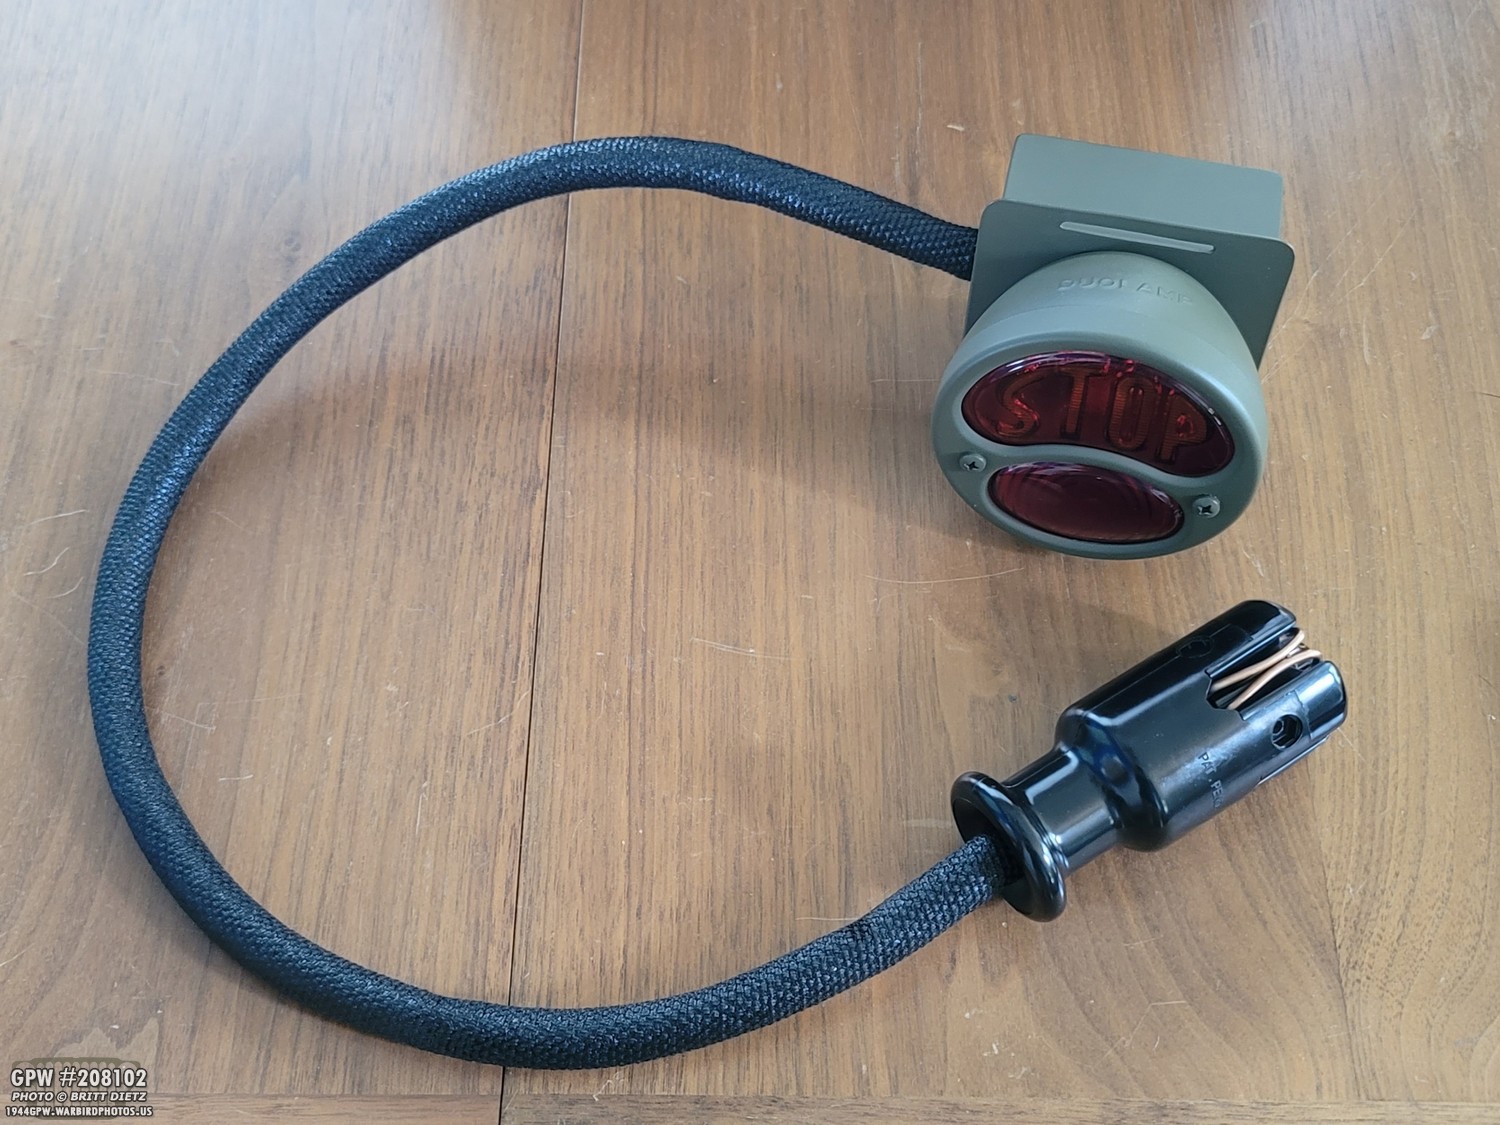
Basically, the light has two cork gaskets, the lens, the cover, the cup with two bulbs, and the wiring for both.
Here are both of the power wires removed. Don’t let the green wire fool you, that’s not ground. That’s the hot line for the bottom bulb. The ground is made, much like the Jeep taillights, through two mounting screws on the back of the cup.
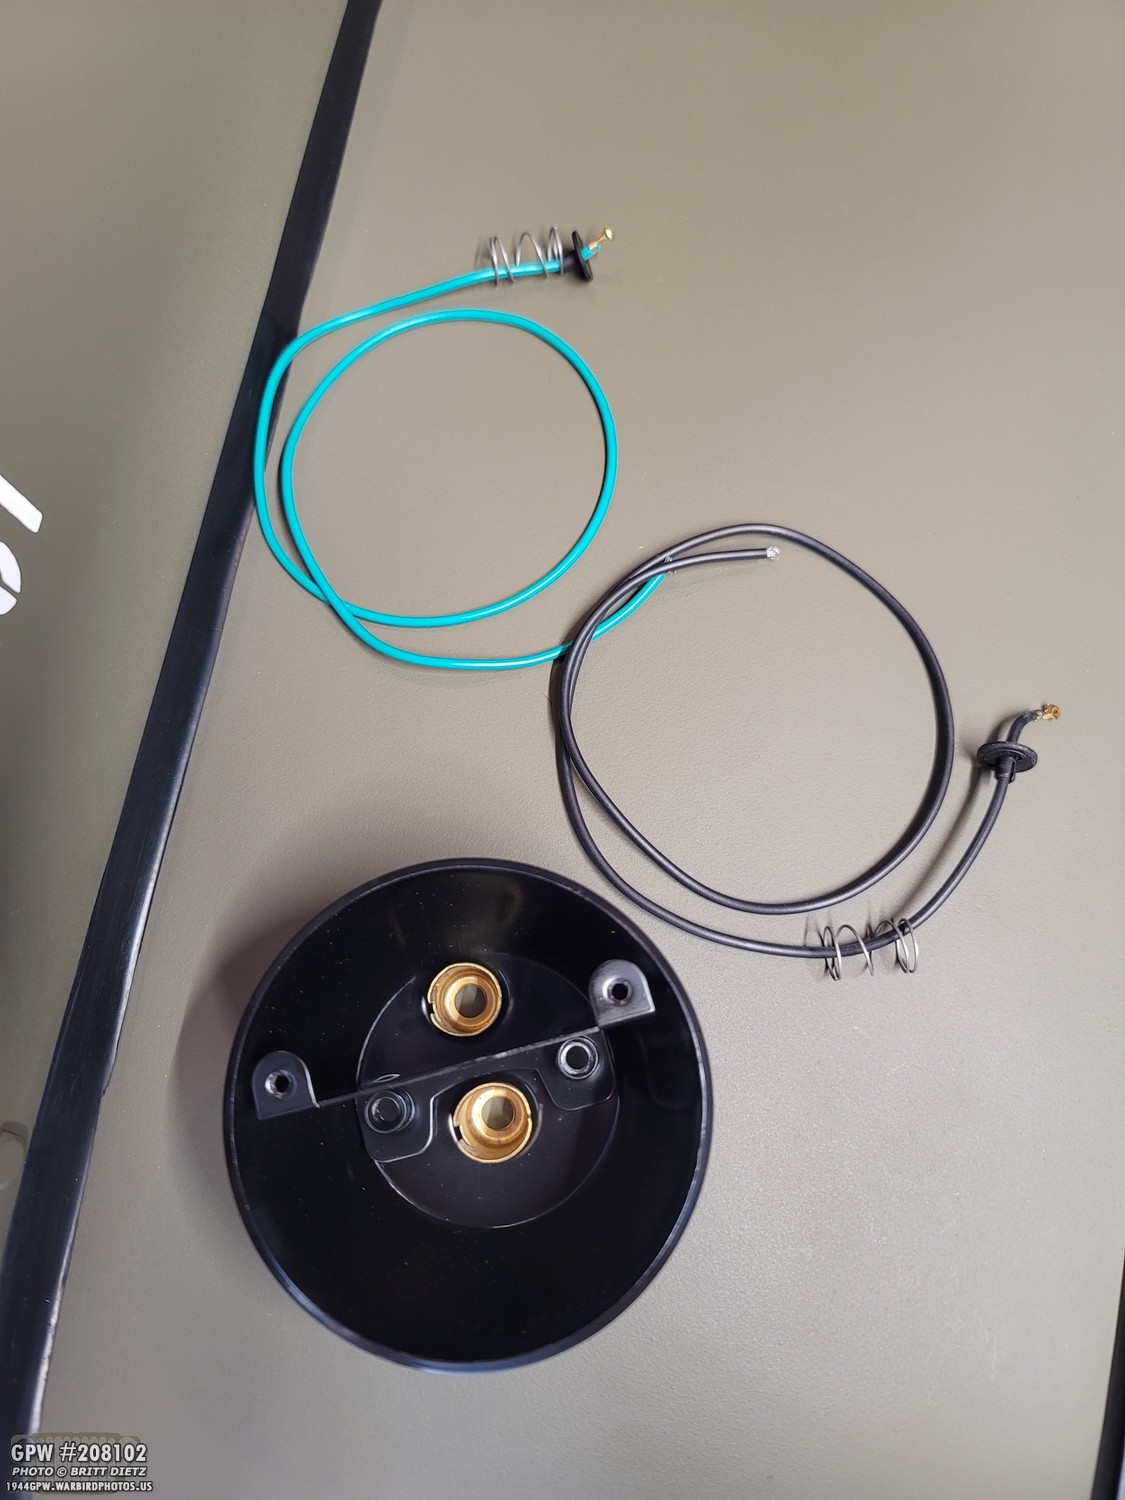
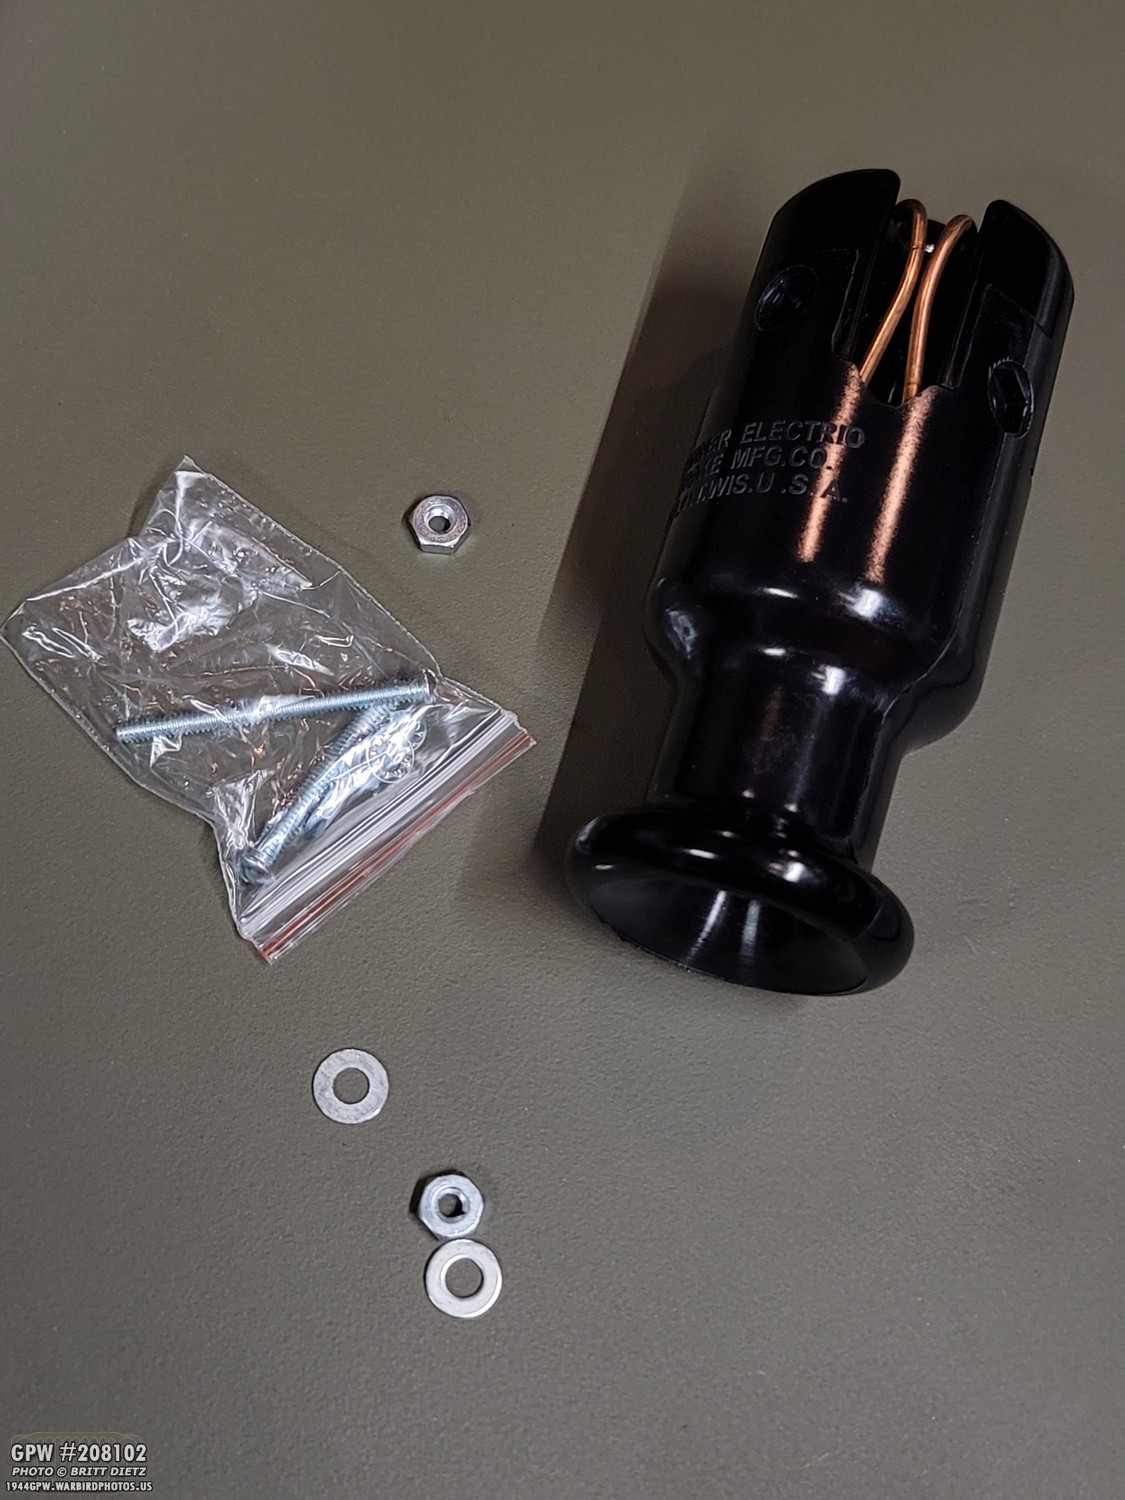
I immediatly got to work. I plugged up the holes going into the cup (which is the contact for the bulbs), and primed the cup after sanding the black paint it came with.

I did the same thing with the cover. I’m using the Red Barrier III Red Oxide primer from Ron Fitzpatrick Jeep Parts.

For the rear screws (which at the time I knew I needed to use them, but not sure how), I ditched the Phillips screws and went with bolts. I thought about using F bolts, for fun, but that was overboard.

Using a thin wire pipe-cleaner brush on a drill, I then cleaned the primer off the threads. I screwed in the bolts with the lock washer.

Then I added another layer of primer to the cup, and also hitting the bolts.

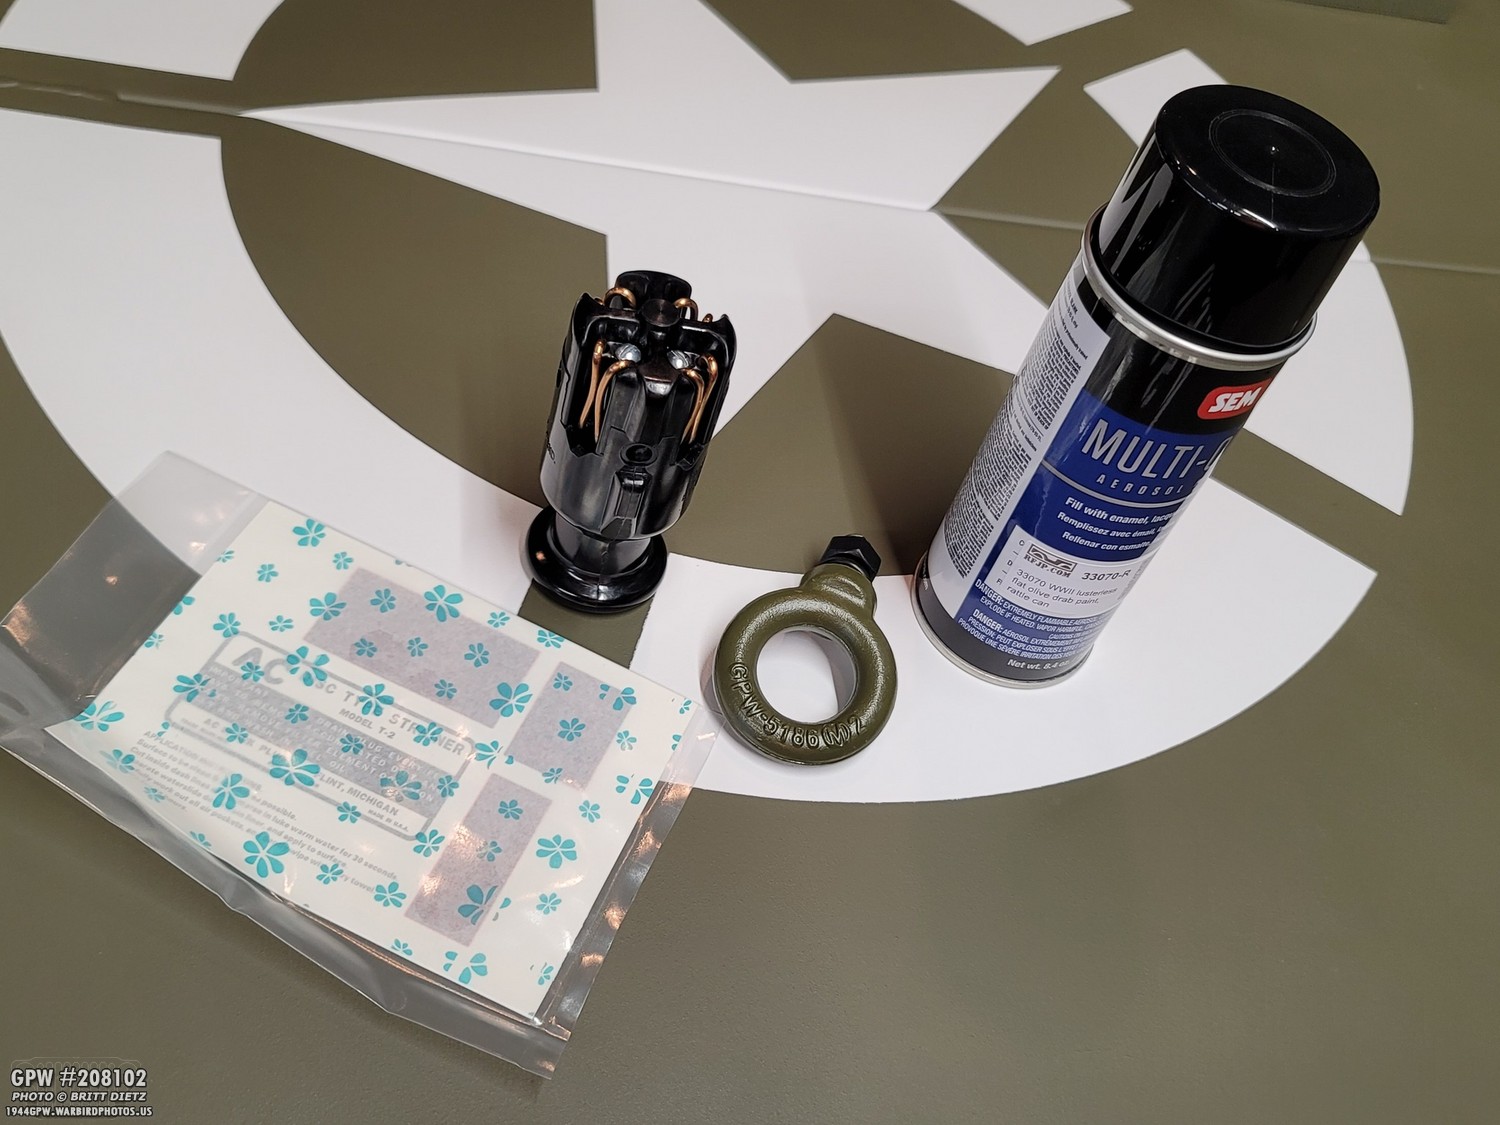
Once dry, I scotch pad sanded both the cover and cup, and then hit them with two layers of 33070 OD Green, the same as the Jeep. Also from Ron Fitzpatrick Jeep Parts.
For more reflectivity, I sprayed metallic silver into the cup. That turned out to be a mistake, as it did reflect as much light as I thought it would.

I then decided to spray it with a white glossy paint, which was MUCH more reflective. Again, I made sure to cover the terminal contacts for the bulbs. If you get paint on/in them, then you will have no electrical connectivity.
While the incandescent bulbs were bright, I knew I could get brighter LEDs that would really get the driver’s attention when they went on. Plus, the LEDs would last for a very very long time. So I started looking on Amazon.
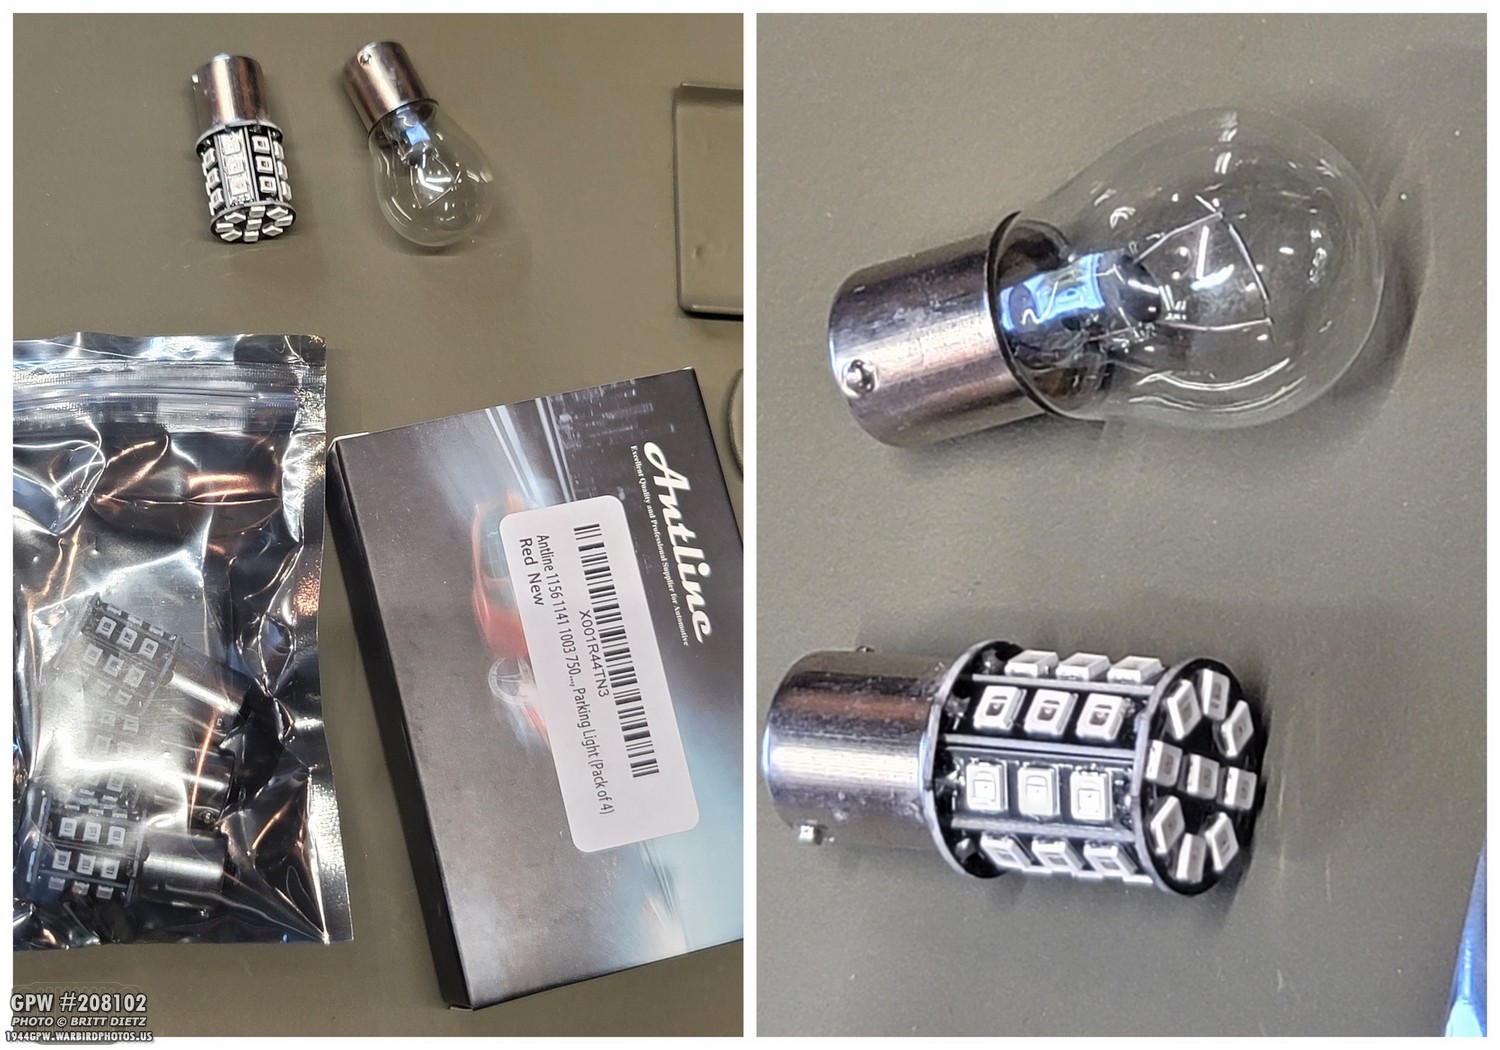
After reading some things online, a lot of people who do a brake light LED conversion say to use RED LED bulbs, as they will shine better through red lenses. So I got these very powerful Red LED lights.

Here’s a comparison. While the red doesn’t look as bright as the incandescent, it’s actually more piercing to the eye.

But then I saw a major problem… with the cap and lens on, as you can see, a red LED shines red through the STOP lettering, which is amber, and makes it red. That would be impossible to see from just a few feet away let along a car length distance. Doh!
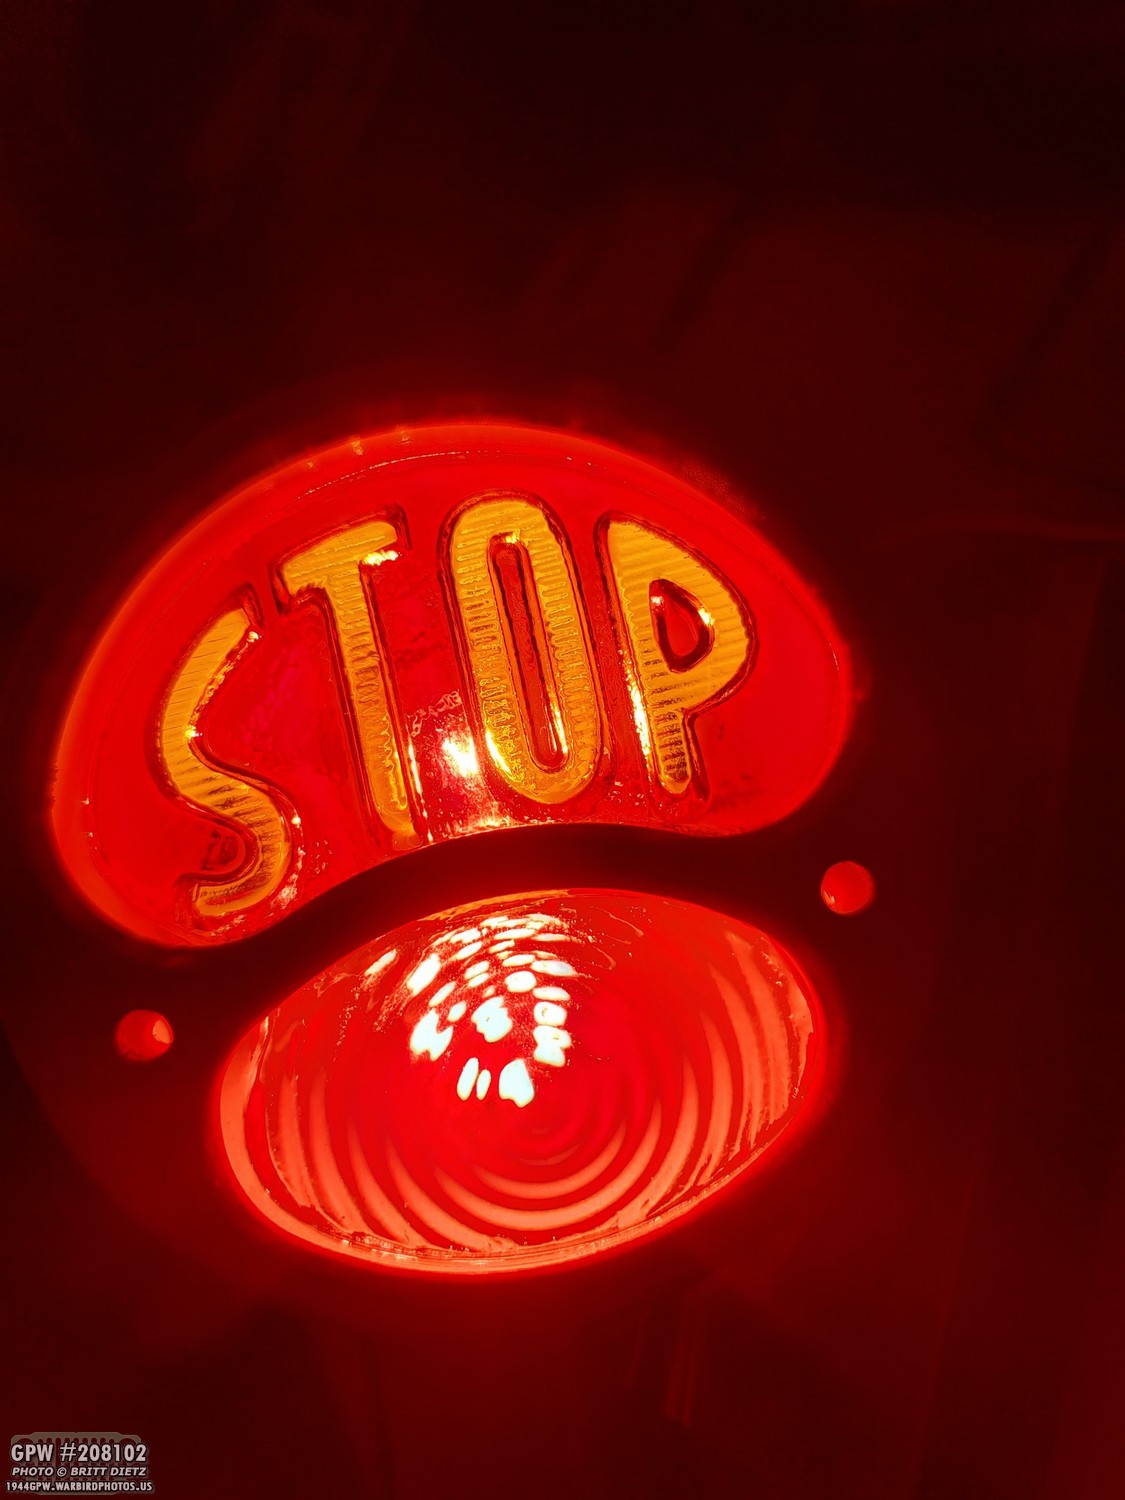
Putting the incandescent warm bulbs back in, you can see the difference. So, I went back to amazon looking for power warm light or amber LEDs.
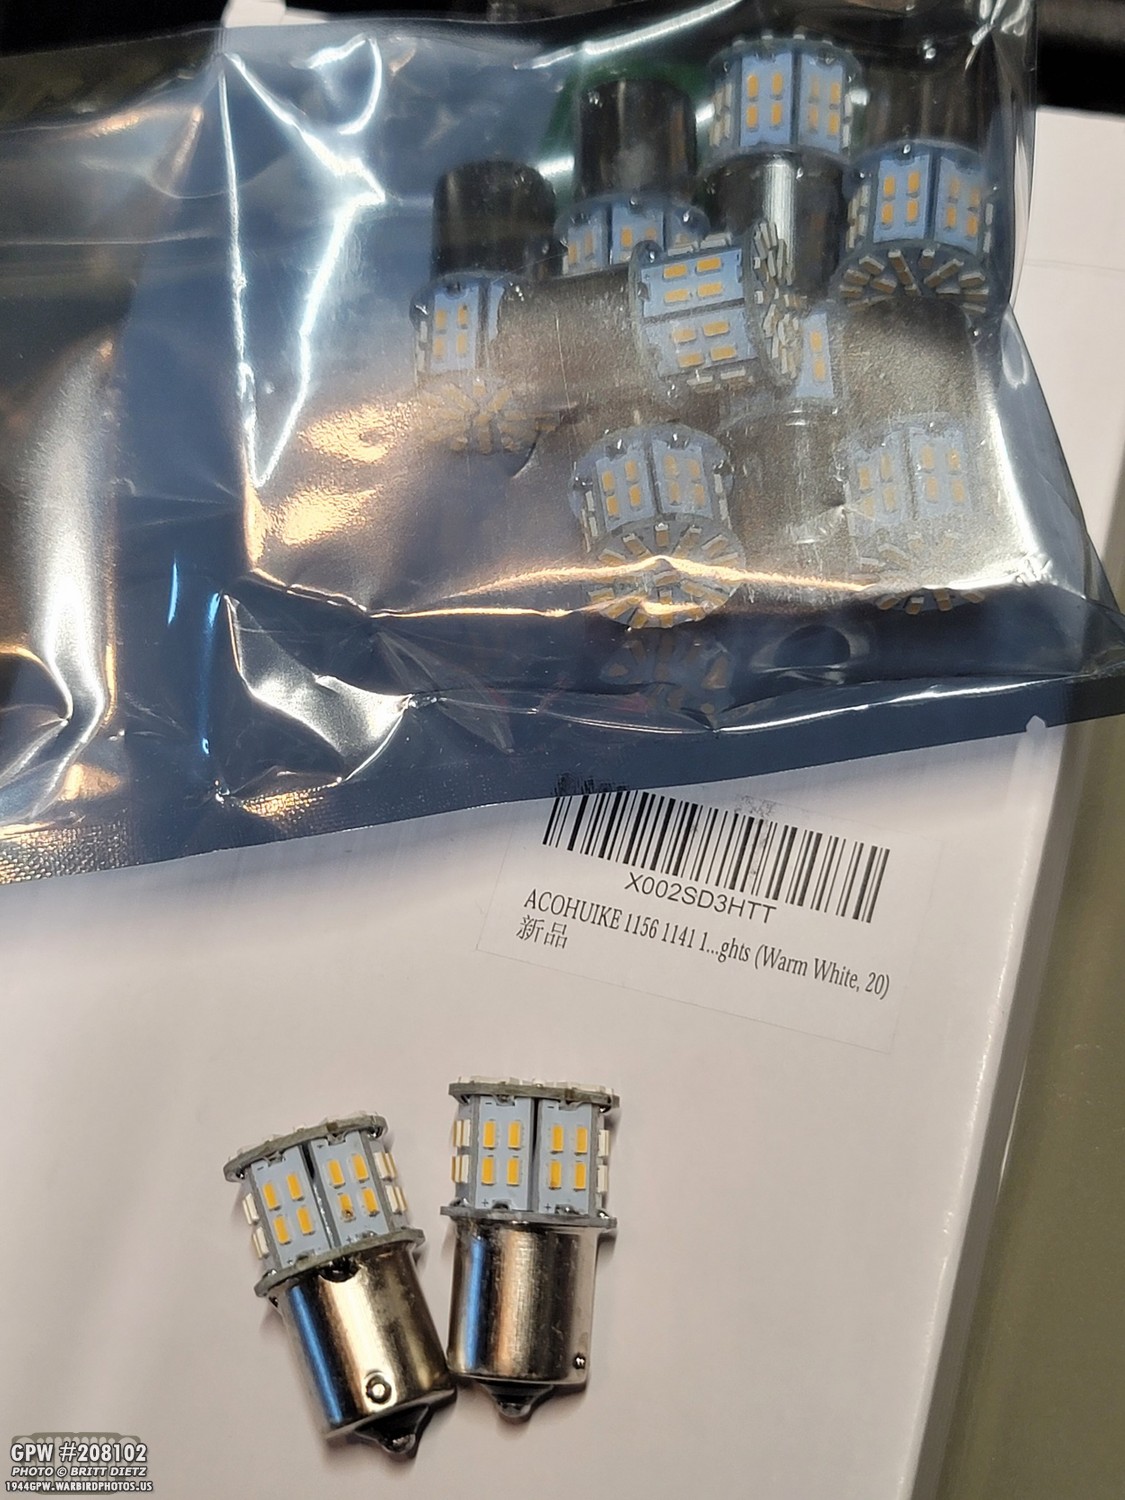
I ended up finding these super bright warm light LEDs that are made for RV light bulb conversions. For the price of the 4 red LEDs, I was able to get a pack of 20! So, I’ll have a lot of spares for this light and other projects, if I need them.

The nice thing about these LEDs is that they have lights surrounding the entire end, much like an incandescent bulb. I also had to be careful, as there is limited room in the cup for the bulbs, so I had to make sure they were under 1.5 inches in length. These are 1.3 inches.

And they are very bright, especially with the inside of the cup painted that glossy white. Here you can see how I was testing everything, using the battery to test the bulbs.

Success! The warm light LEDs work, and they show the STOP lettering perfectly.
As my idea for the light fixture was starting to take shape, next came the difficult task of powering the light. Since I needed a trailer socket plug, I started hunting for one. I settled on a repro one from Ron Fitzpatrick Jeep Parts, who had brand new high-quality new ones.
These things are top-notch, even down to the correct raised lettering. I was very impressed, and they are at a good price of $40 at Ron Fitzpatrick Jeep Parts
Link: https://www.vintagejeeps.com/p-2674-trailer-coupling-socket-cable-plug-a6558.aspx
They come with the correct hardware as well. There are two long screws that go all the way through the plug in a X pattern to hold the two parts together.

The top of the plug pulls out with a little force. Over time, this loosened up a bit, but it is a very snug fit. Pulling the top off is how you wire these plugs.

Next, taking the four bolts/nuts off the head, the four copper contact clips come off.

Now we can see the terminal locations where we will attach the wiring. They are conveniently marked.
GR = Ground
SL = Stop Light (the Brake Light)
TL = Tail Light (Always on Light)
BK = ? (Unused if using a WW2 wartime trailer socket 3-wire setup)
The Ground will connect to the back bolt on the light cup. The Stop Light will connect to the top light with the STOP lettering. And the Tail Light will be the bottom light, which will always be on when lights are engaged from the Jeep.

To test things out, I attached some wire I quickly put terminal ends on. Here’s how they look on the plug head, and then coming out of the plug once it was put back together.

As you can see, the wiring was very crude, but this was just to test that my theory would work.

Success! When I pull the push-pull light switch into any of the three modes, the always on bottom light comes on. When the brake is pressed in the headlight mode or the service light mode, the brake light comes on! My idea was starting to really take shape.
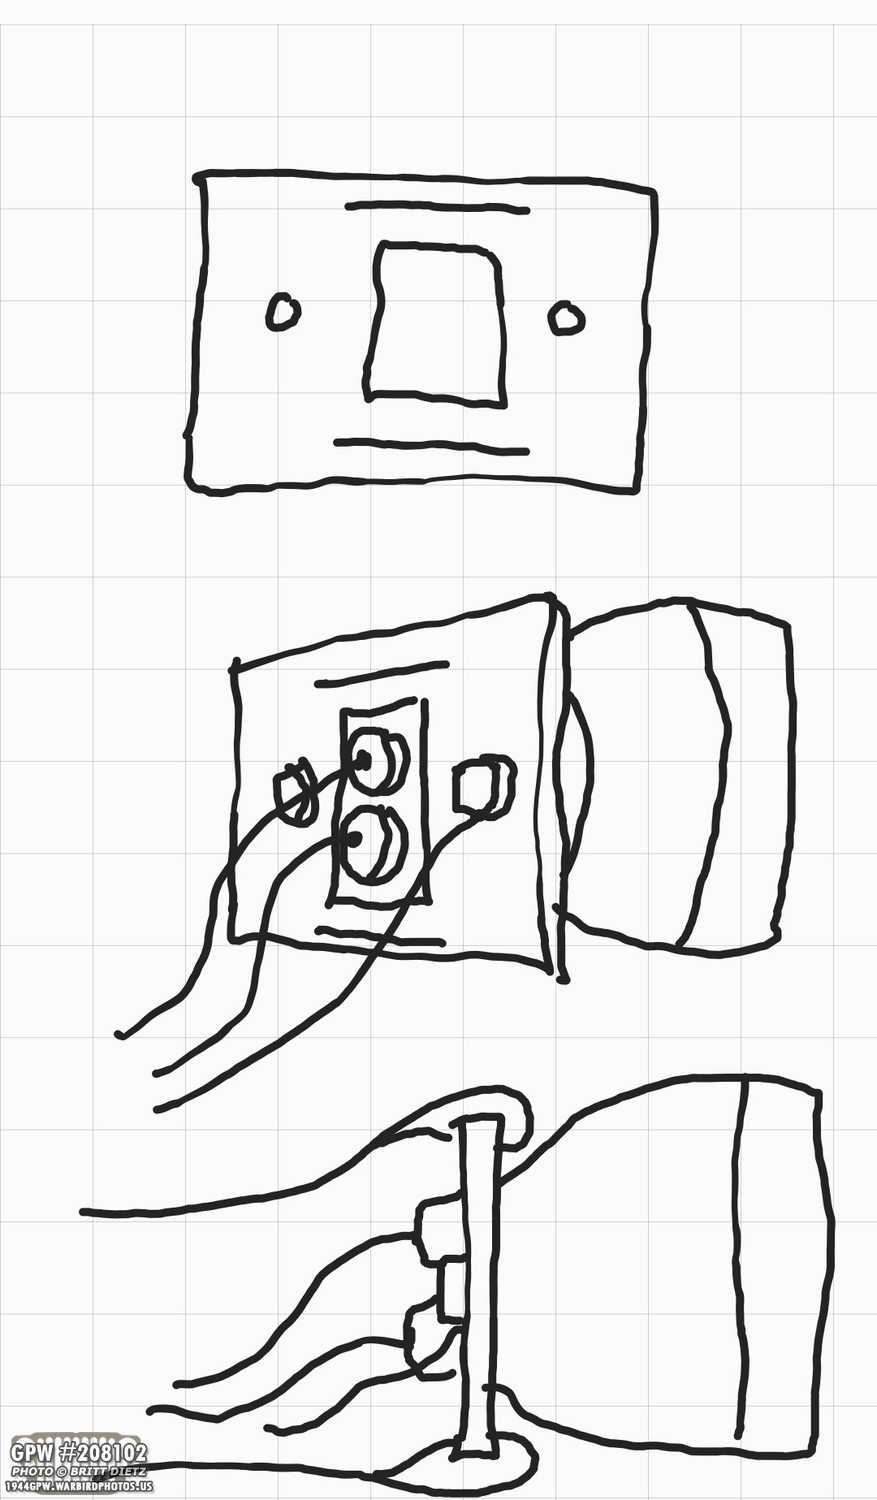
But I needed some sort of base to the cup to not only affix the ground wire, but also hold the straps to put it on the Jerry Can handles. So I drew up this quick design showing how I thought it would work. A simple piece of metal, with a rectangle cut out in the middle for the two light terminals, two holes drilled for the bolts, and two slots at the top and bottom for the straps.
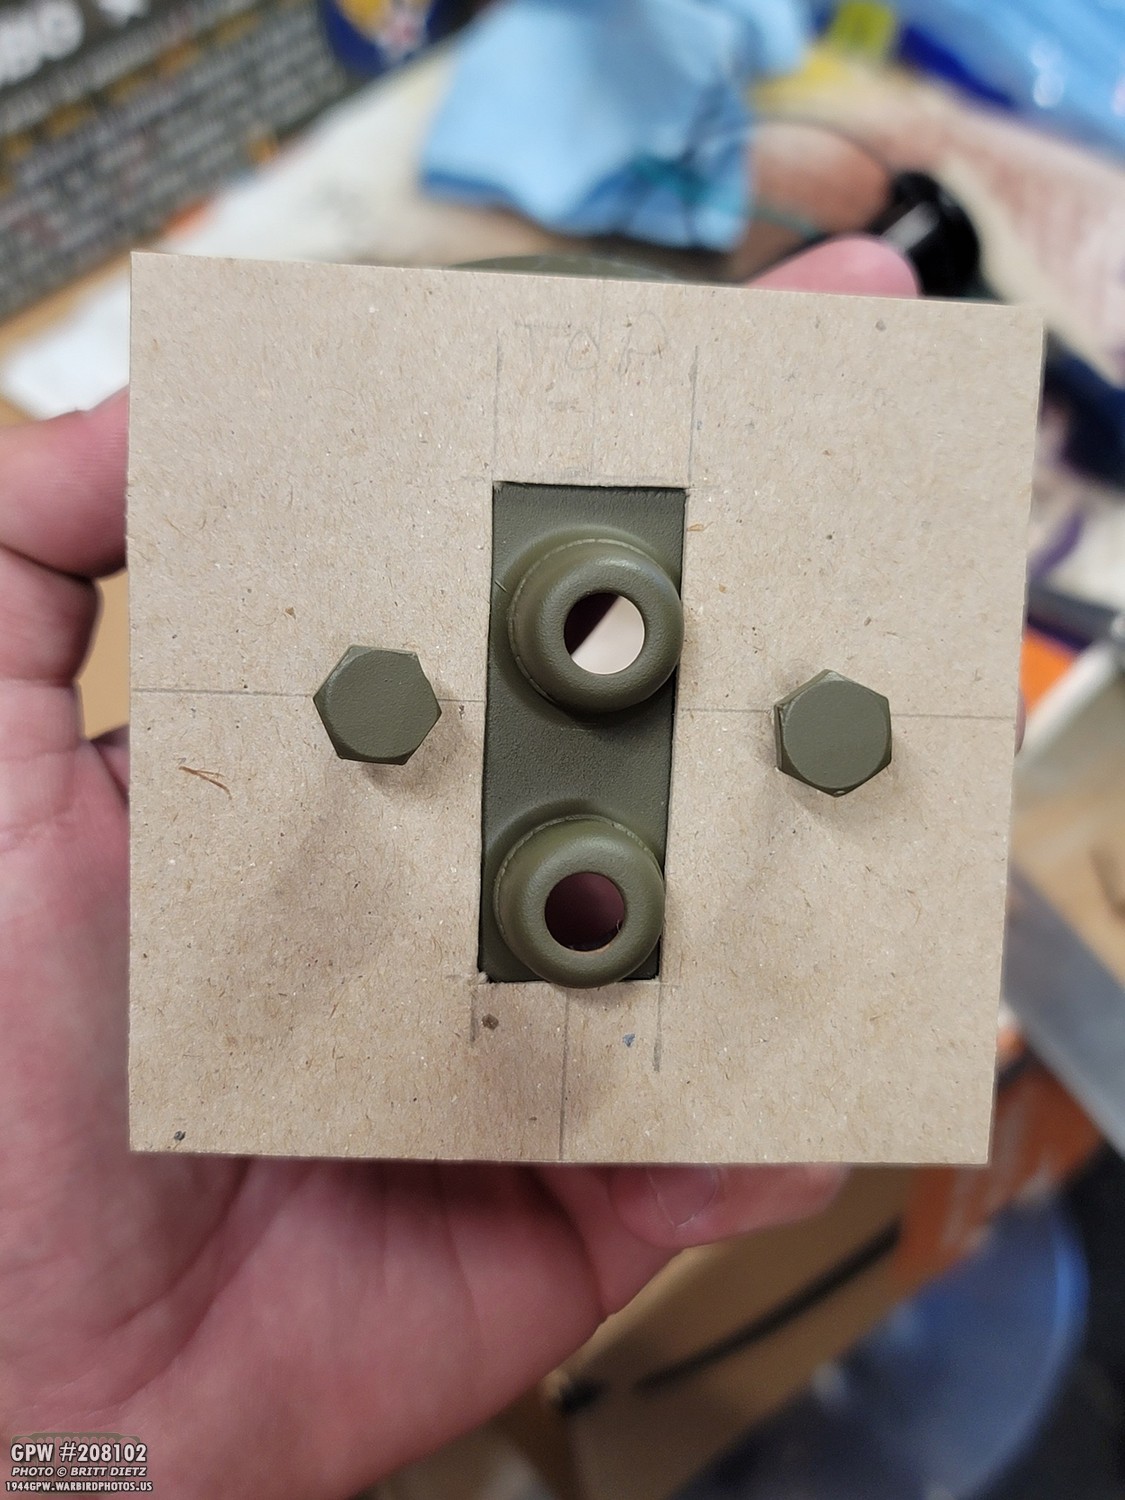
I started with cardboard to get the shape and size correct.

I then got a piece of scrap metal I had around, and cut out the shape using a cut off disk on an angle grinder. I used a combination of angle grinder and Dremel to cut out the center rectangle. Then drilled two holes for the bolts.
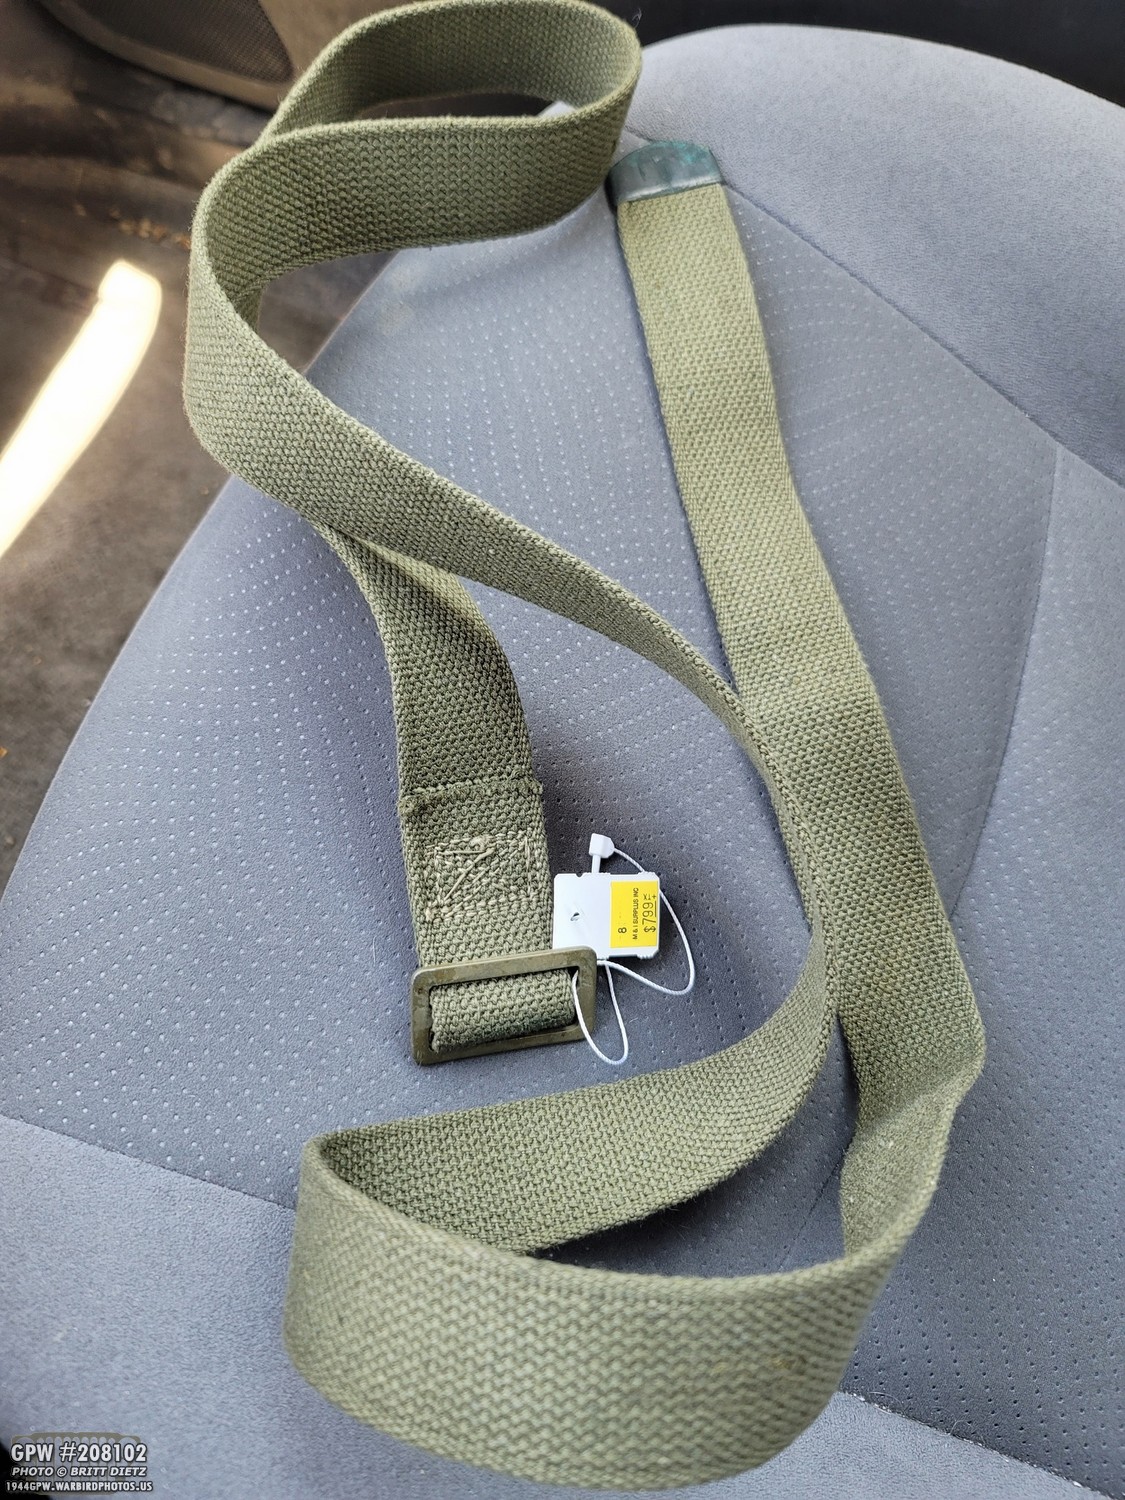
I went down to a Army/Navy Surplus store in Pamona and found this cheap canvas strap with a cap end and buckle. This would be perfect for the strap!

Using a Dremel, I carved out two slots, one on top and bottom. Perfect fit with the canvas strap. I cut the strap in half, with the bottom half containing the end with the cap, and the top having the half with the buckle. I will need to sew the strap like in the right photo so it’s a permanent attachment.

Once I was happy with the design, I primed it and painted it. The back plate is done! Getting closer, or so I thought…
I needed to test and measure how much of the two strap halves I needed, so I used painter’s tape to act as the sewing. I ended up changing over to electrical tape after this as the painters tape kept ripping.
I went ahead and put the two bulb wires back in and attached a terminal end for the ground.
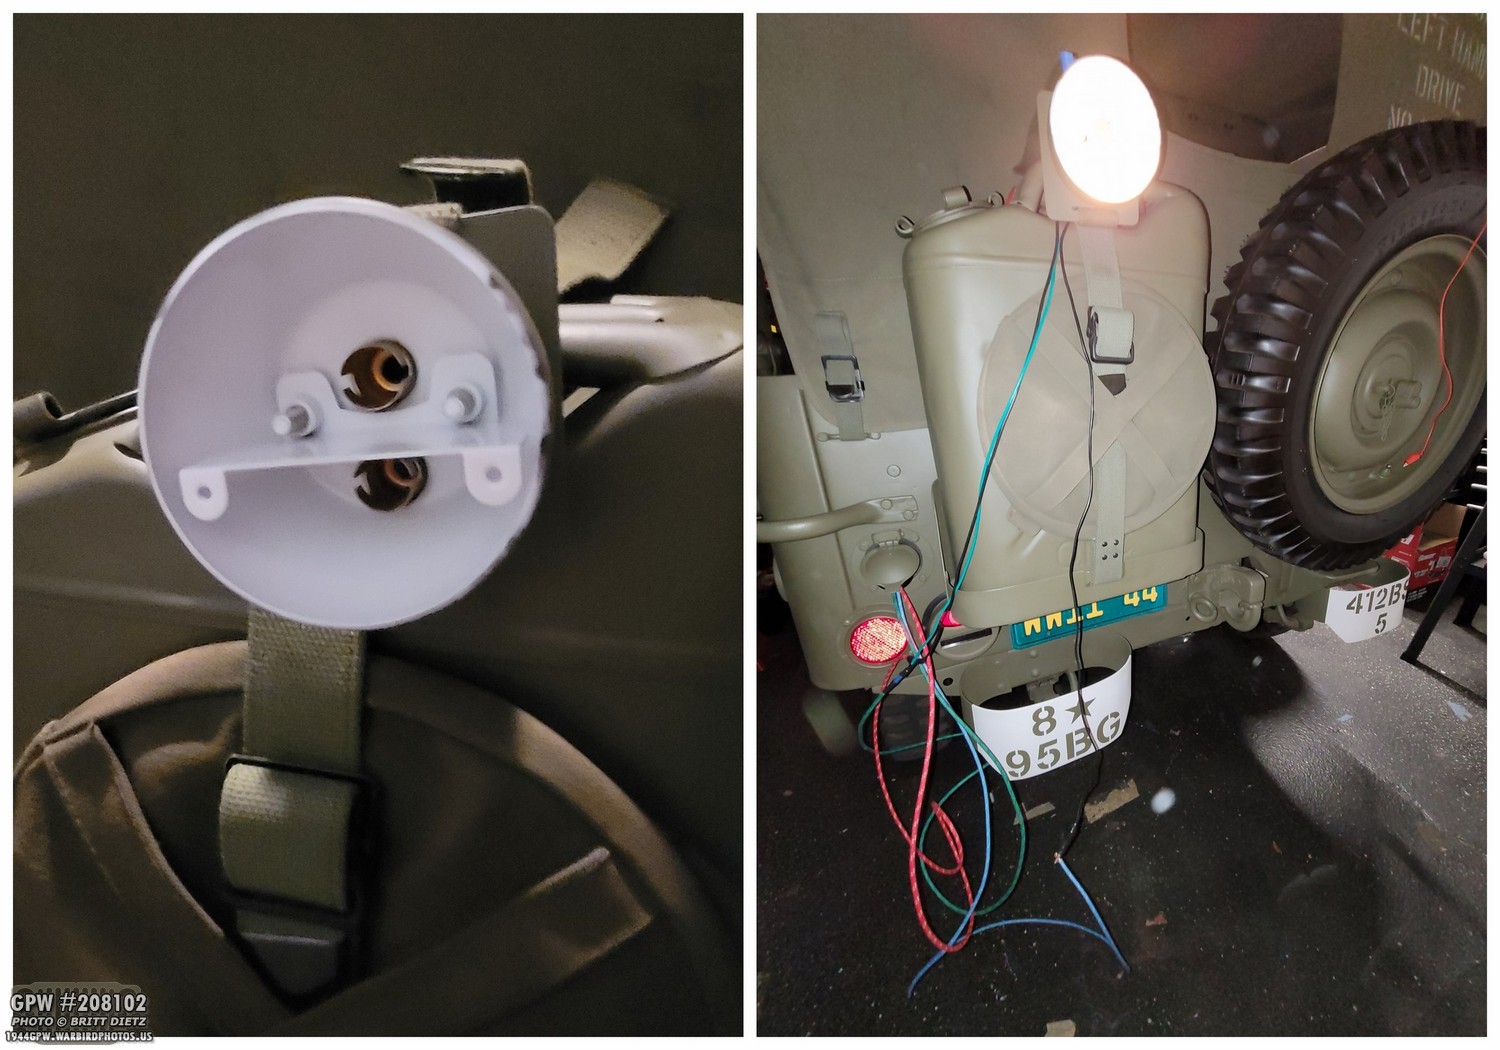
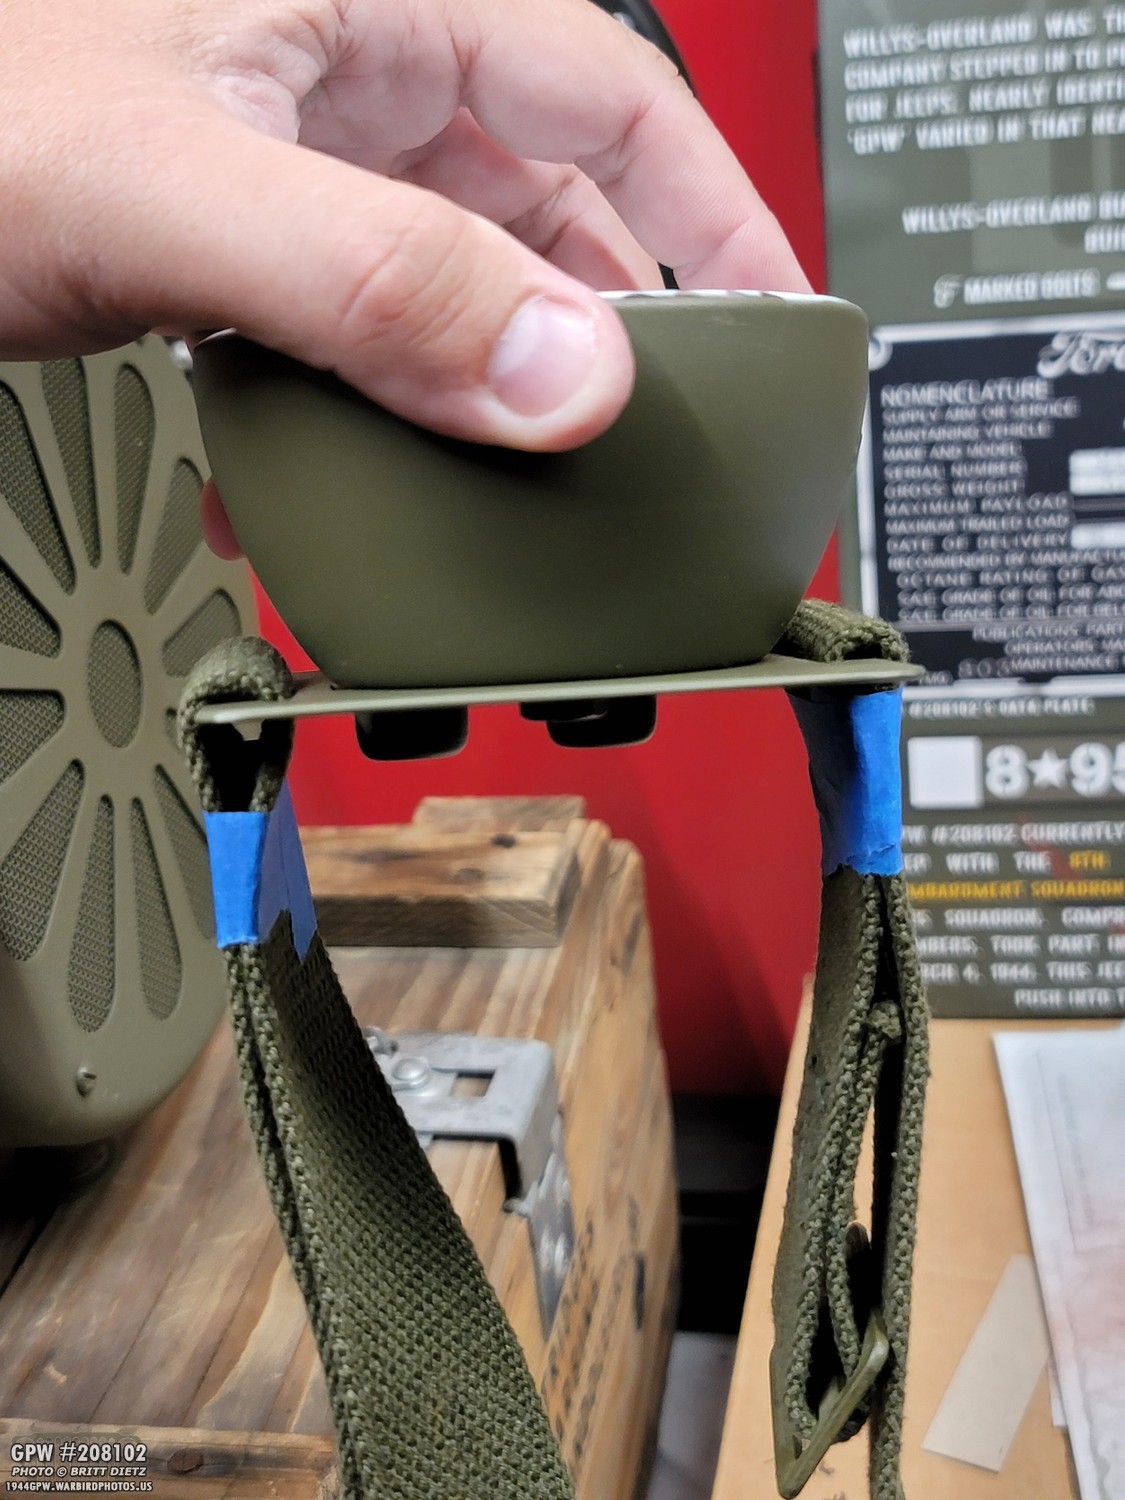
I then strapped it to the handles, and it worked! At least it seemed to work. More on that in a sec. Now, I forgot to take a photo, but you’ll notice I’m using some cloth covered wires (Red, Blue, and Green) coming out of the trailer socket plug. I went and got some 12 gauge cloth covered wire online, just like a real trailer socket plug would have. For the test, I’m using 18 gauge wire with the 12 gauge.
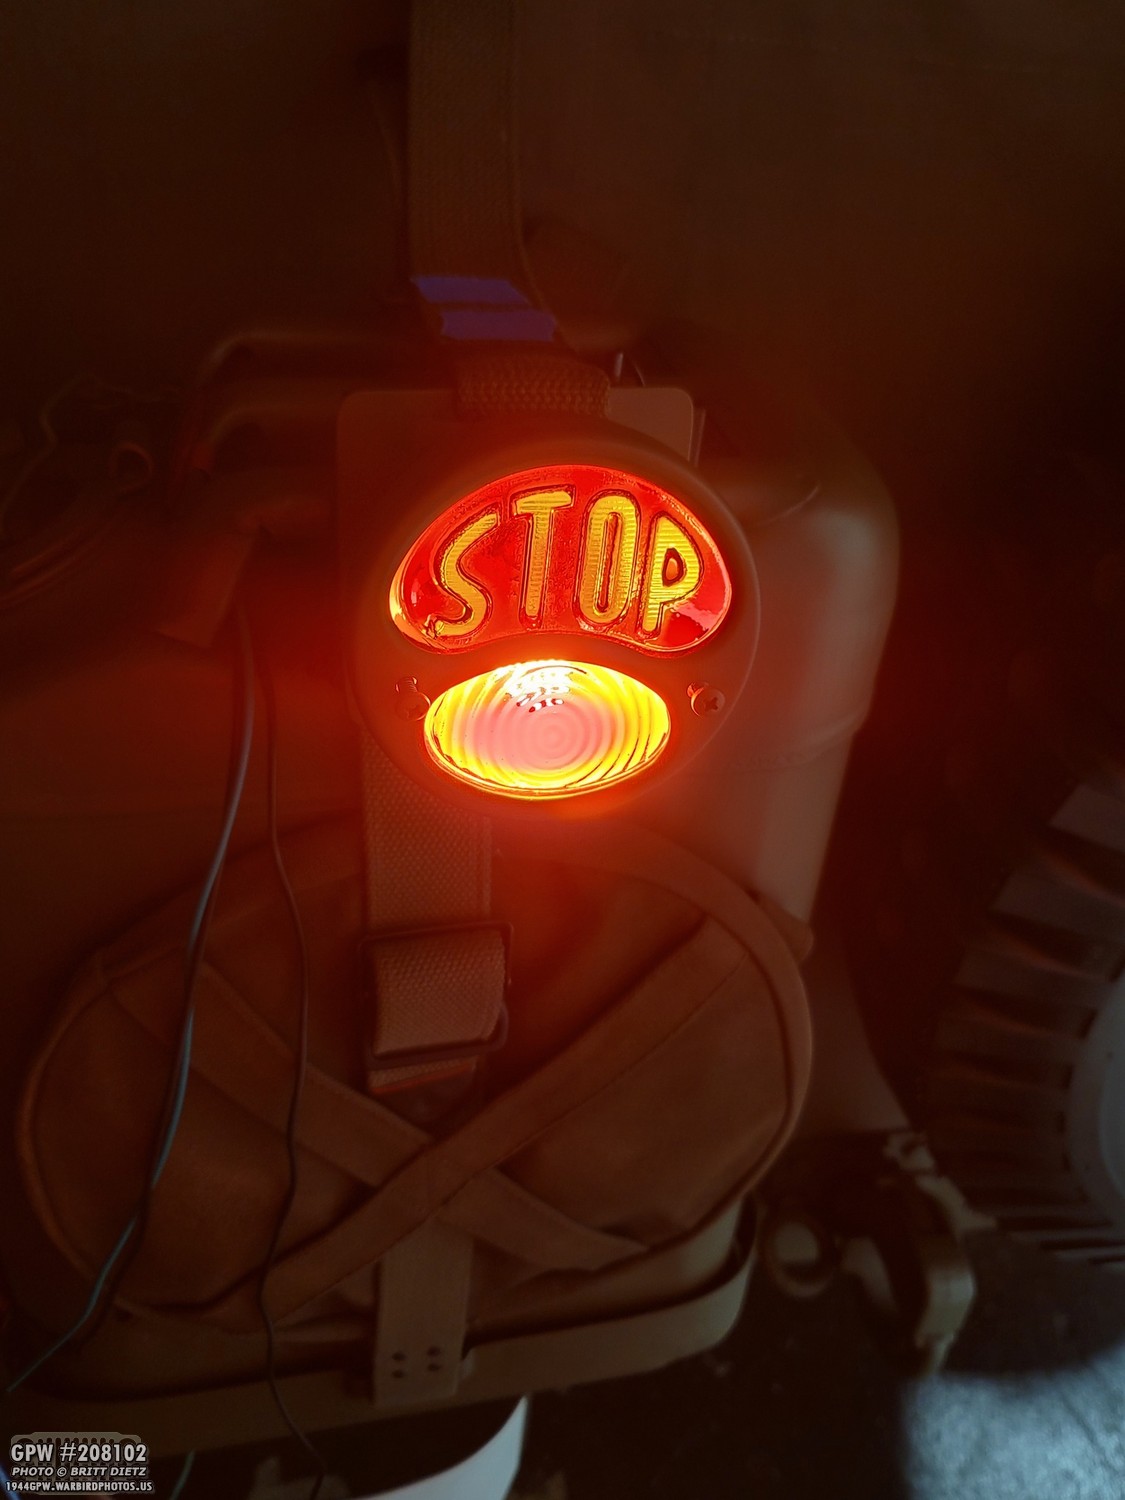
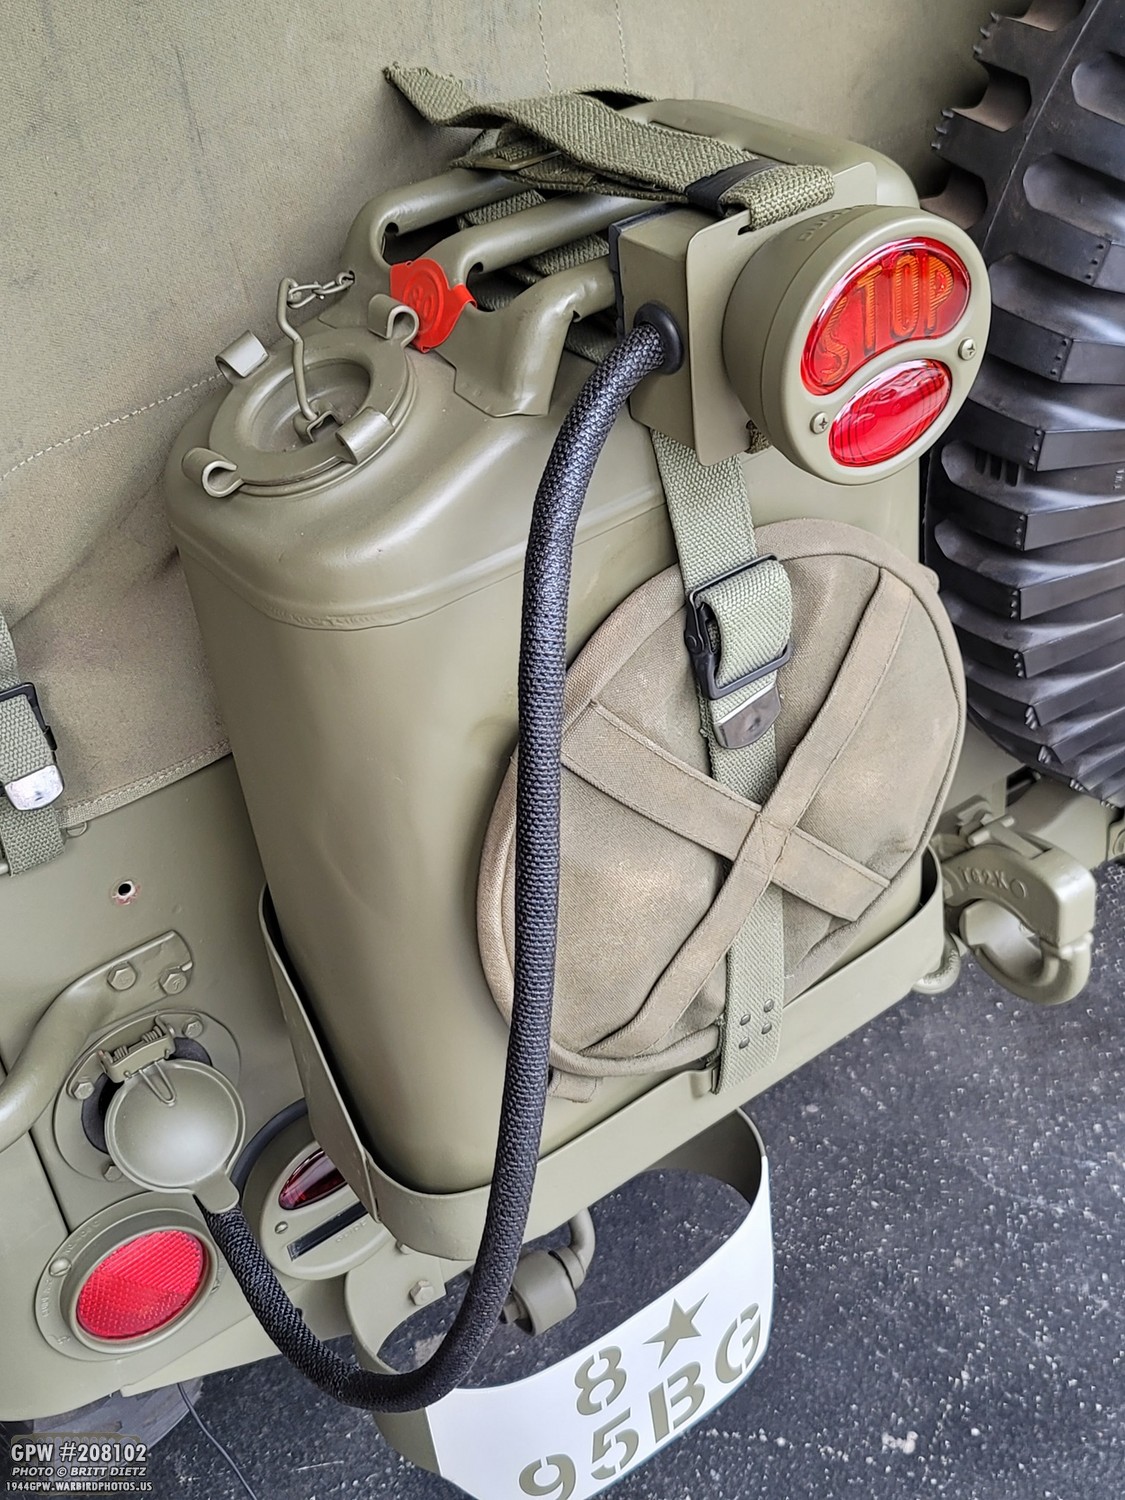
It works! And looks good. Sitting on the Jerry Can handles, it’s pretty much eye level with 90% of the vehicles out there. This will get their attention, and be very bright, for sure.

But alas, that’s when I discovered two problems. 1) The light is heavy, so it lights to droop unless you strap it rightly to the handles. But, that makes it them point upwards. 2) No matter how I positioned the light on the handles, they were crimping the bulb wires coming out the back or, if I go the wires to be good, I couldn’t tighten the straps. UGH.

So, I decided to build a box that I’d weld onto that back plate. That would solve several problems:
– It would protect the wiring from rain
– I would drill a hole on the side of the box and the wires can come in from there from the plug
– I could put some sort of rubber or padding on the back of the box so it’ll hold with friction on the Jerry Can handles and not move/rattle.

Again, I mocked things up with cardboard. This was my initial design. I found a rubber strap that I cut into pieces to use as the friction backing.
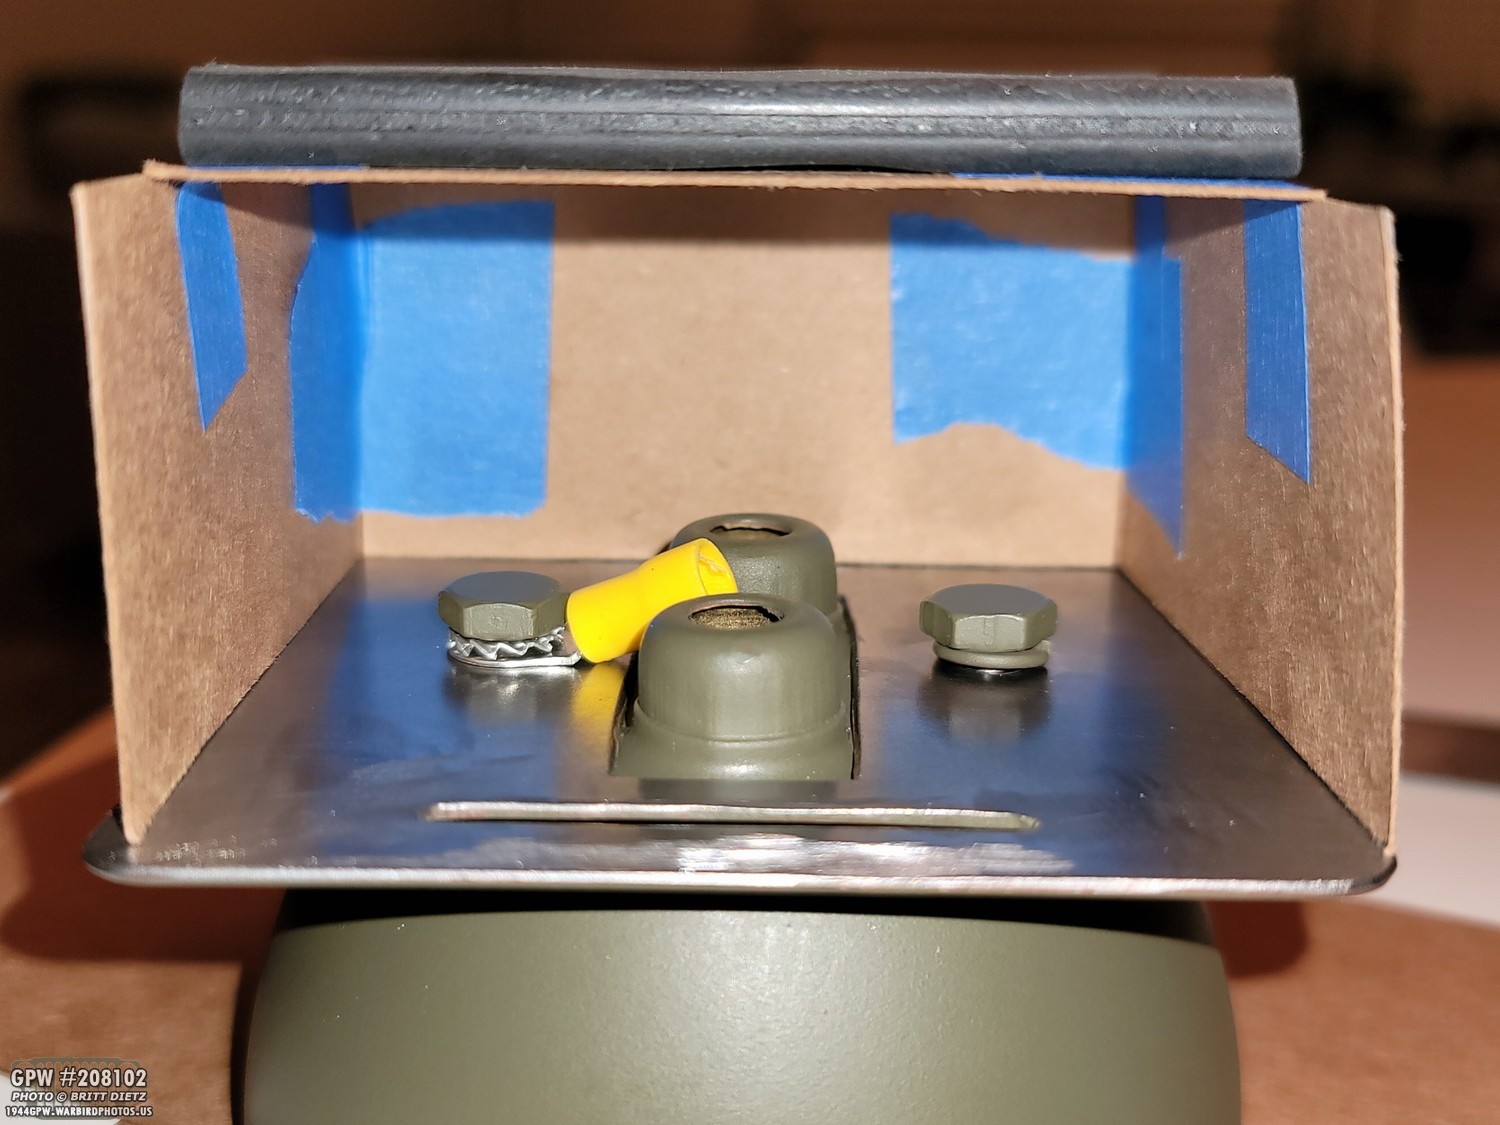
Looking inside the box, the bottom would be open (you’re looking ‘up’ into the box here). The wiring would come through a hole on the right side of the box in this photo.
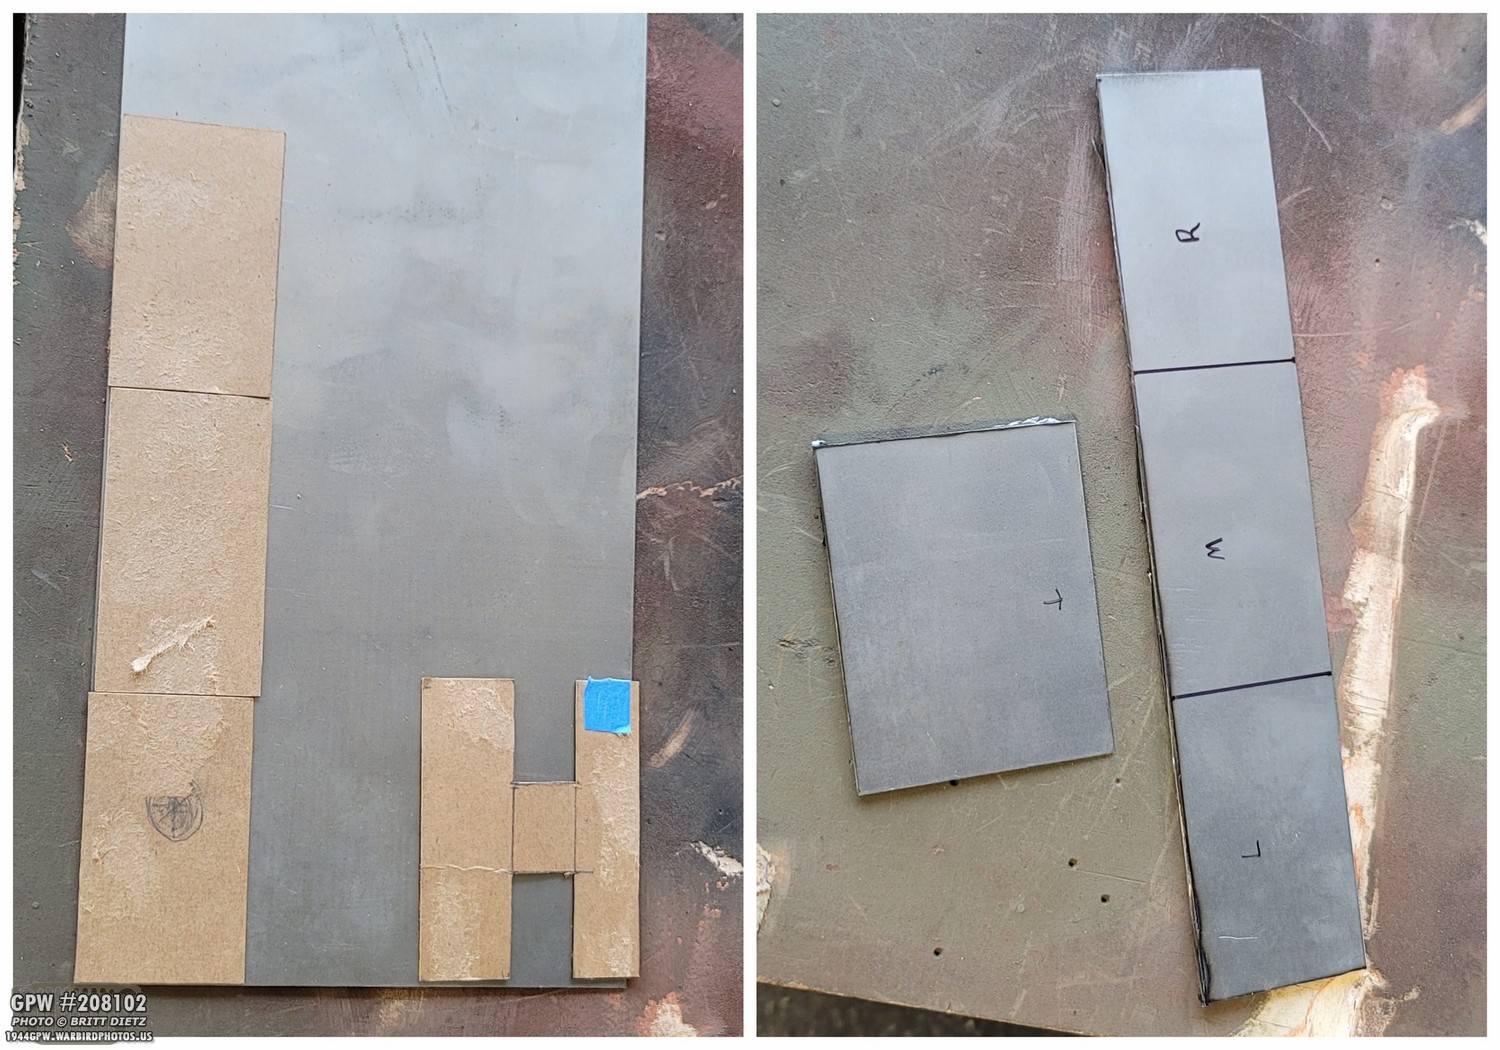
Back to the scrap metal, I used the cardboard as a template to but the metal. Instead of an H shape for the back wall of the box, I made it a solid piece. Originally I thought I would need to make it that H shape so I would have enough room to put the bolts connecting the back plate to the light cup. But there was enough room that it was not needed.
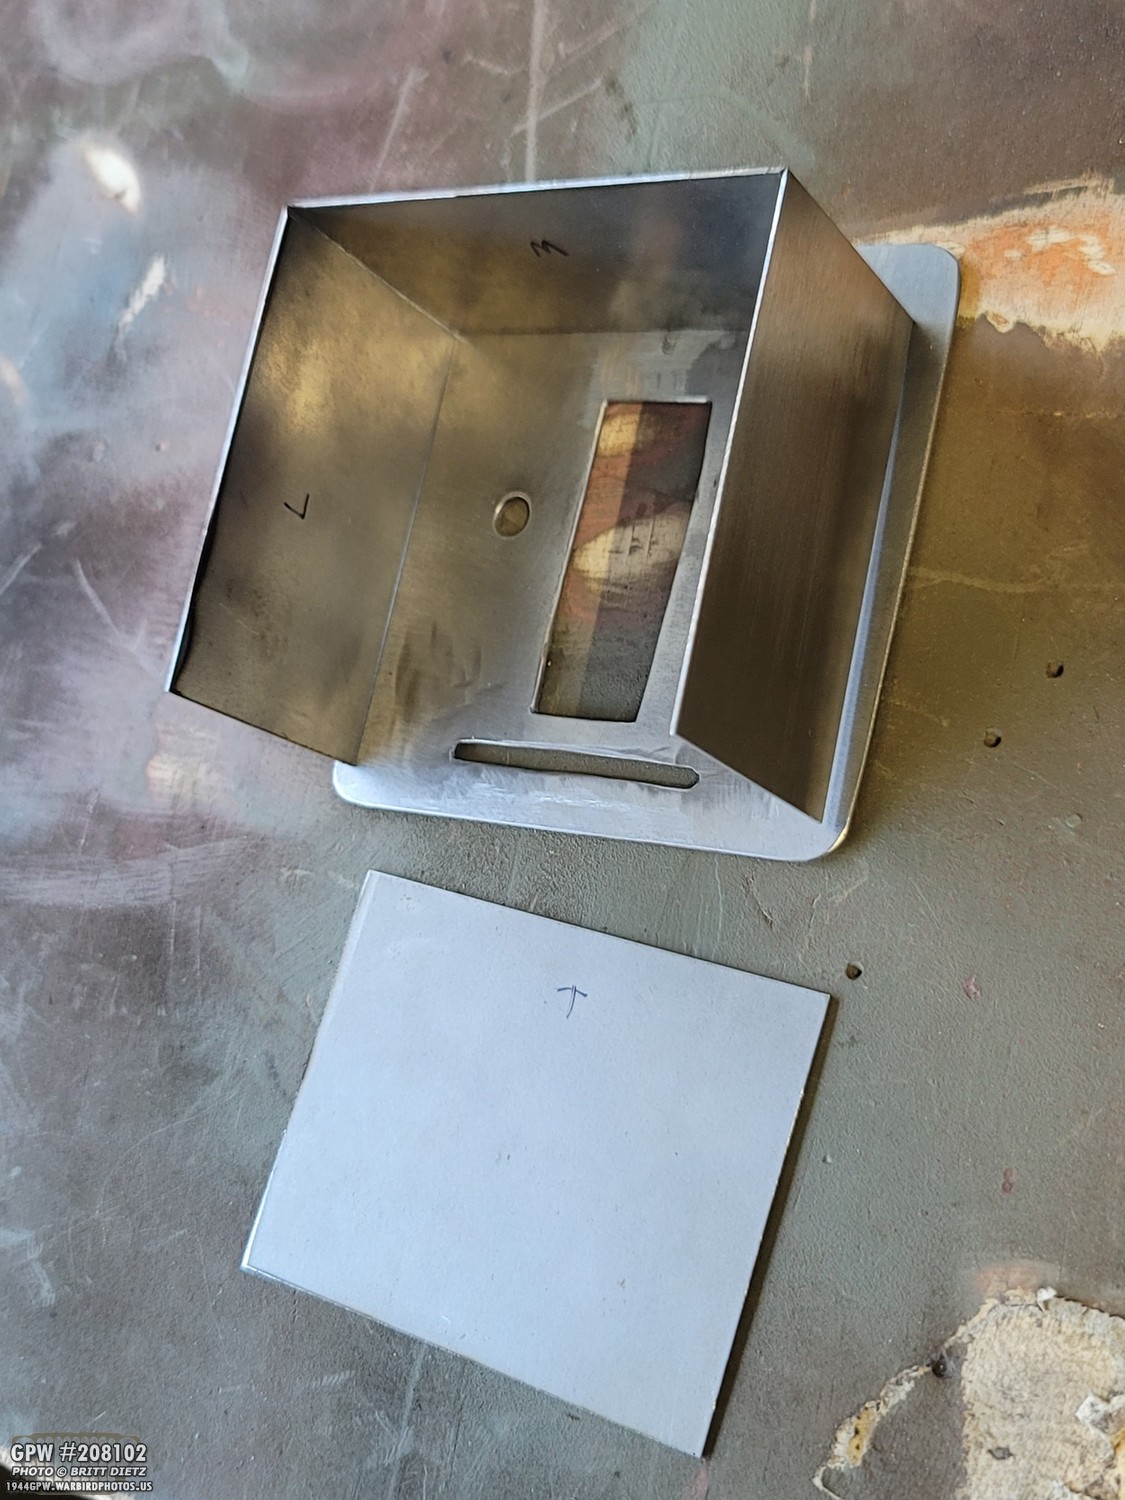
Instead of cutting the left, top, and right walls individually and then welding them together in an upsidedown U shape, I scored the metal allowing me to fold the sides down like flaps.

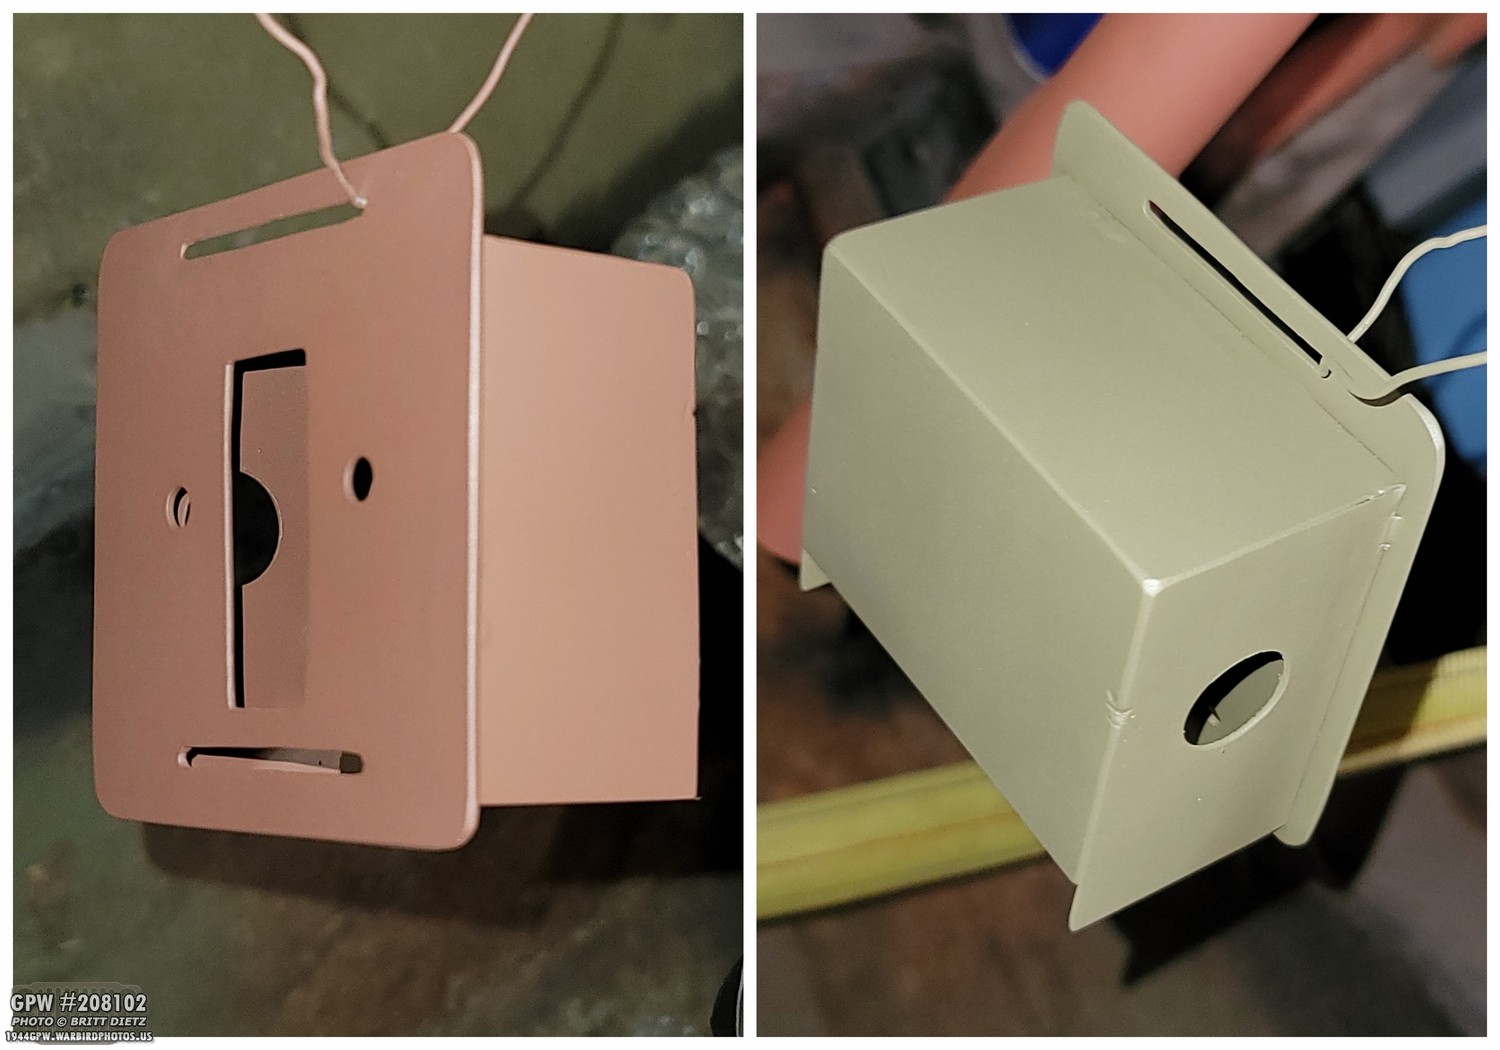
After welding the back wall on and smoothing it out with a flap wheel, here’s the result. If you’re wondering why the back wall does not extend all the way down, that’s because I needed that area for the bottom strap.
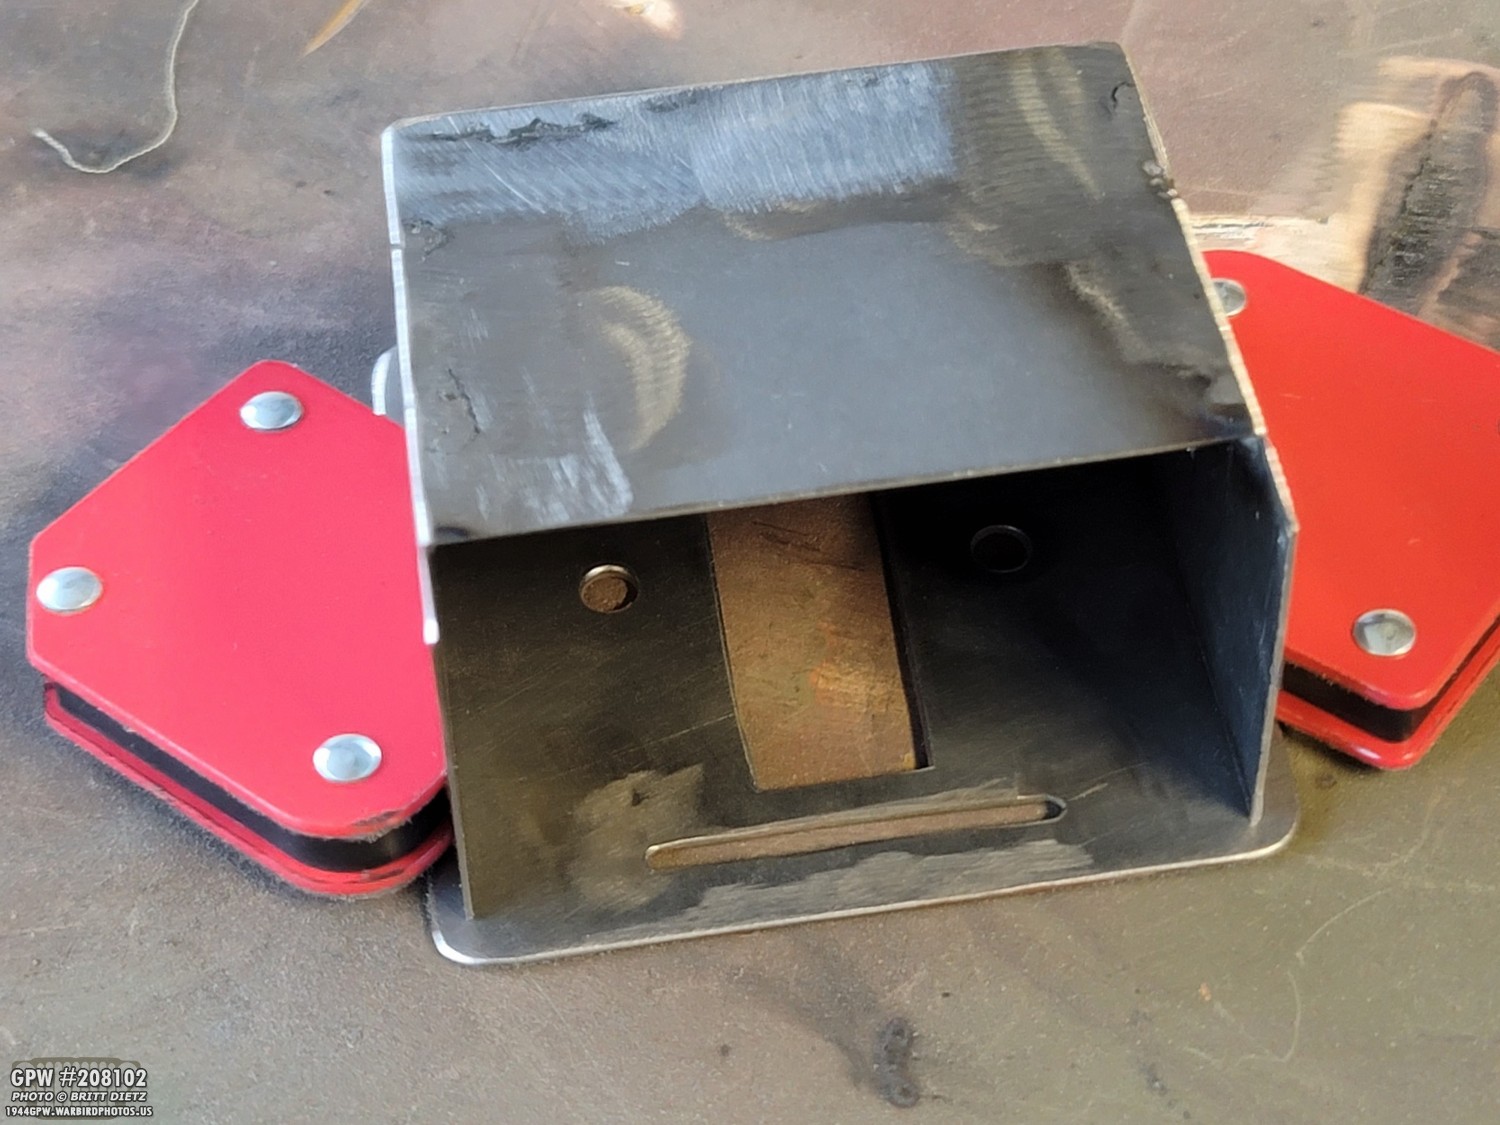
Dry fitting the box to the back of the plate. I had to wire wheel all my primer and paint off this side to weld it.
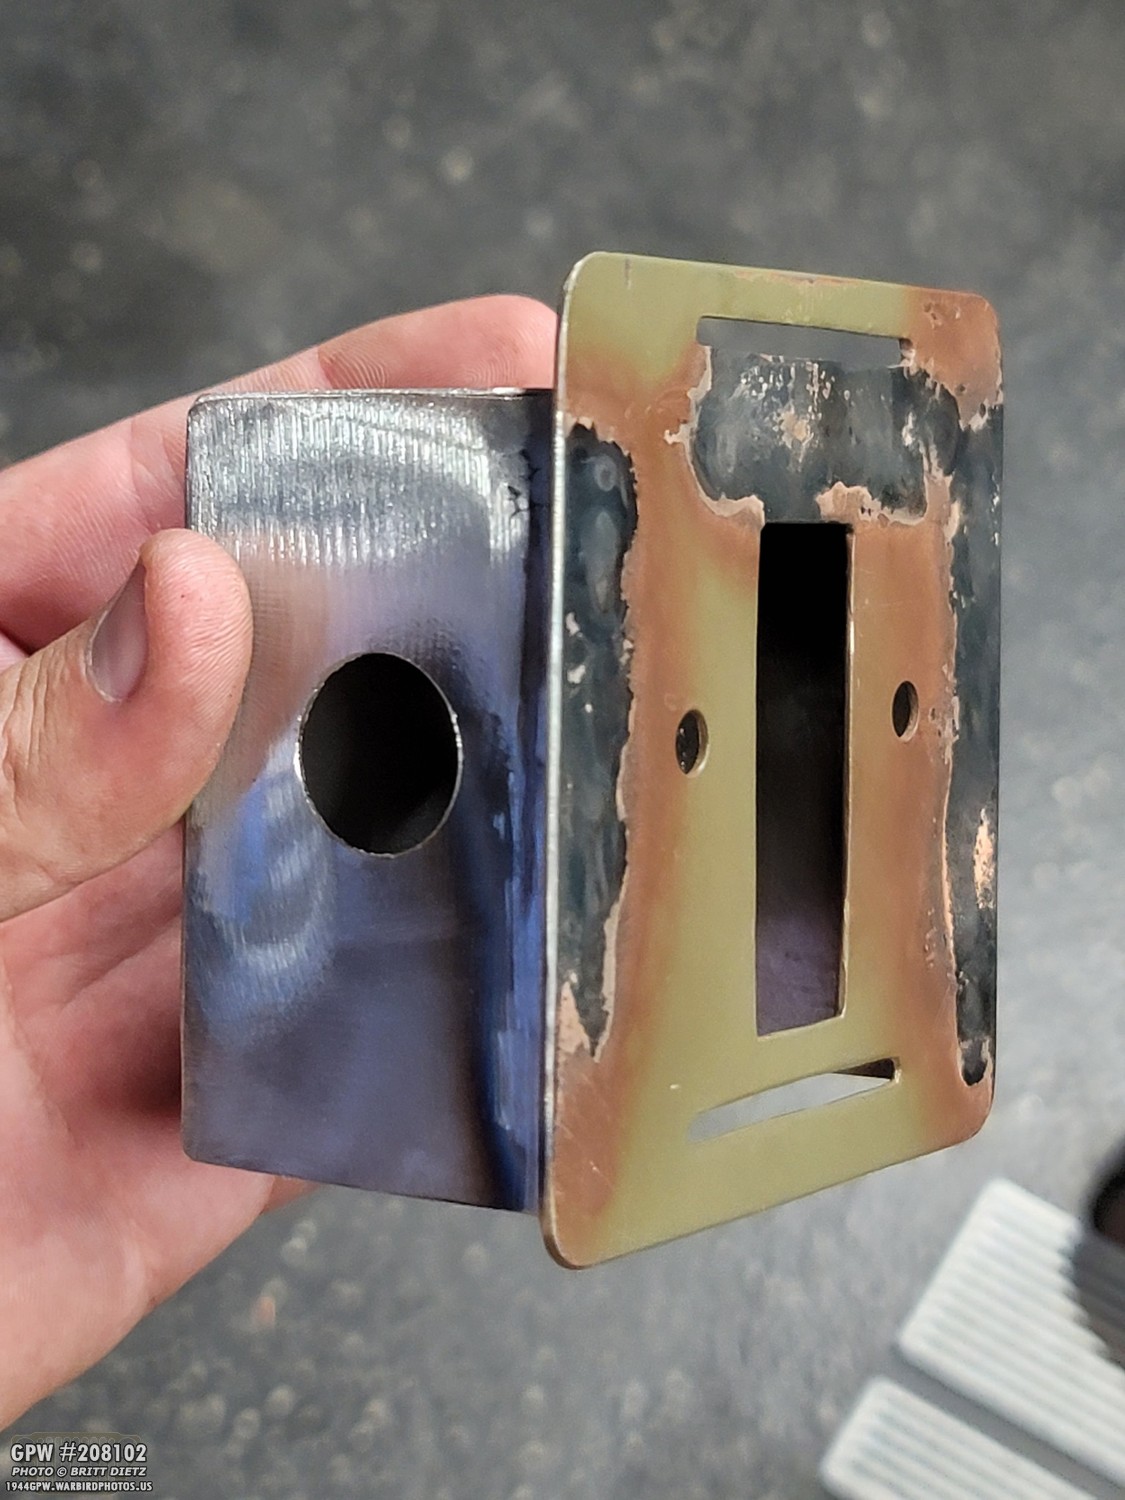
All welded, and I used a step drill to drill a 5/8 sized hole. The welding messed up the paint on the other side, so I had to wire wheel that to the metal again as well.

Here’s how it looks with the cup attached.
Next up, primer and paint like before! Doing this plate/box combo is really advanced. I’m sure there are probably easier ways to attach the light to the Jerry Can handles (perhaps adding claw clips or something to the back of the light), but I wanted something that would look like it belongs on the Jeep from that time period.

With that done, it was time to go back to the wiring! Wiring a trailer socket plug is not easy to do. And researching how to wire it you’ll get VERY limited information and photos out there. In this diagram from Technical Manual TM 9-883 on trailers, this is about the only photo of how a socket plug should be wired that I could find. So the rest of this tutorial can help those of you trying to wire an actual trailer socket plug for a trailer. I wanted to wire this light as is this WAS an actual plug/line for a trailer.
So what we see here is three plugs (discussed earlier) plugging into three of the four terminals. Two carboardish special washers (M) with a + shape in the middle keep the wires in order. A cable clamp (Q) holds the wires together either just before or after those washers to prevent the loom covering and internal wires (A) from being pulled out if you pull on the wires and not the plug.

Since I am using larger 12 gauge wires, I went with larger terminals. You need to pre-bend the terminals upward to they fit in this tight space. I found aiming them towards the middle in a circle pattern is the best way to squeeze them in.

Here’s a shot showing the three 12 gauge cloth-covered wires I used along with the loom covering.

The three cloth-covered wires make things a bit thick, but this is the type of wiring actually in a real trailer socket plug/wire. I picked these colors/dash patterns to match the colors going to my trailer socket.

But then I ran into a problem. The asphalt loom I got was too big! It would not fit into the plug. Doh! This was frustrating as I could not find a definitive source anywhere online on how wide the real loom on a real plug was, so I was ordering blindly. I had a friend who eventually was able to measure the original cable on his 1944 trailer, and it came out to 5/8 inch wide. Since the companies who sell these looms go by inner diameter, NOT outer diameter, you need to order a 1/2 inch inner diameter loom. That gives an out diameter of 5/8 inch.

The 1/2 inch inner diameter loom was PERFECT, fitting nicely into the trailer socet plug. They come in lengths of 5 feet, which for this project is overkill since it only needs to go from the socket to the Jerry Can handles, so I’ll have to cut it to size.
Because I wanted to make sure if I accidentally tub on the wire instead of the plug that it doesn’t rip out of the loom and possibly the wires, I started to look for a cable clip. The problem is, modern clips like this screw type here are too fat and won’t fit in the confined space of the trailer plug.

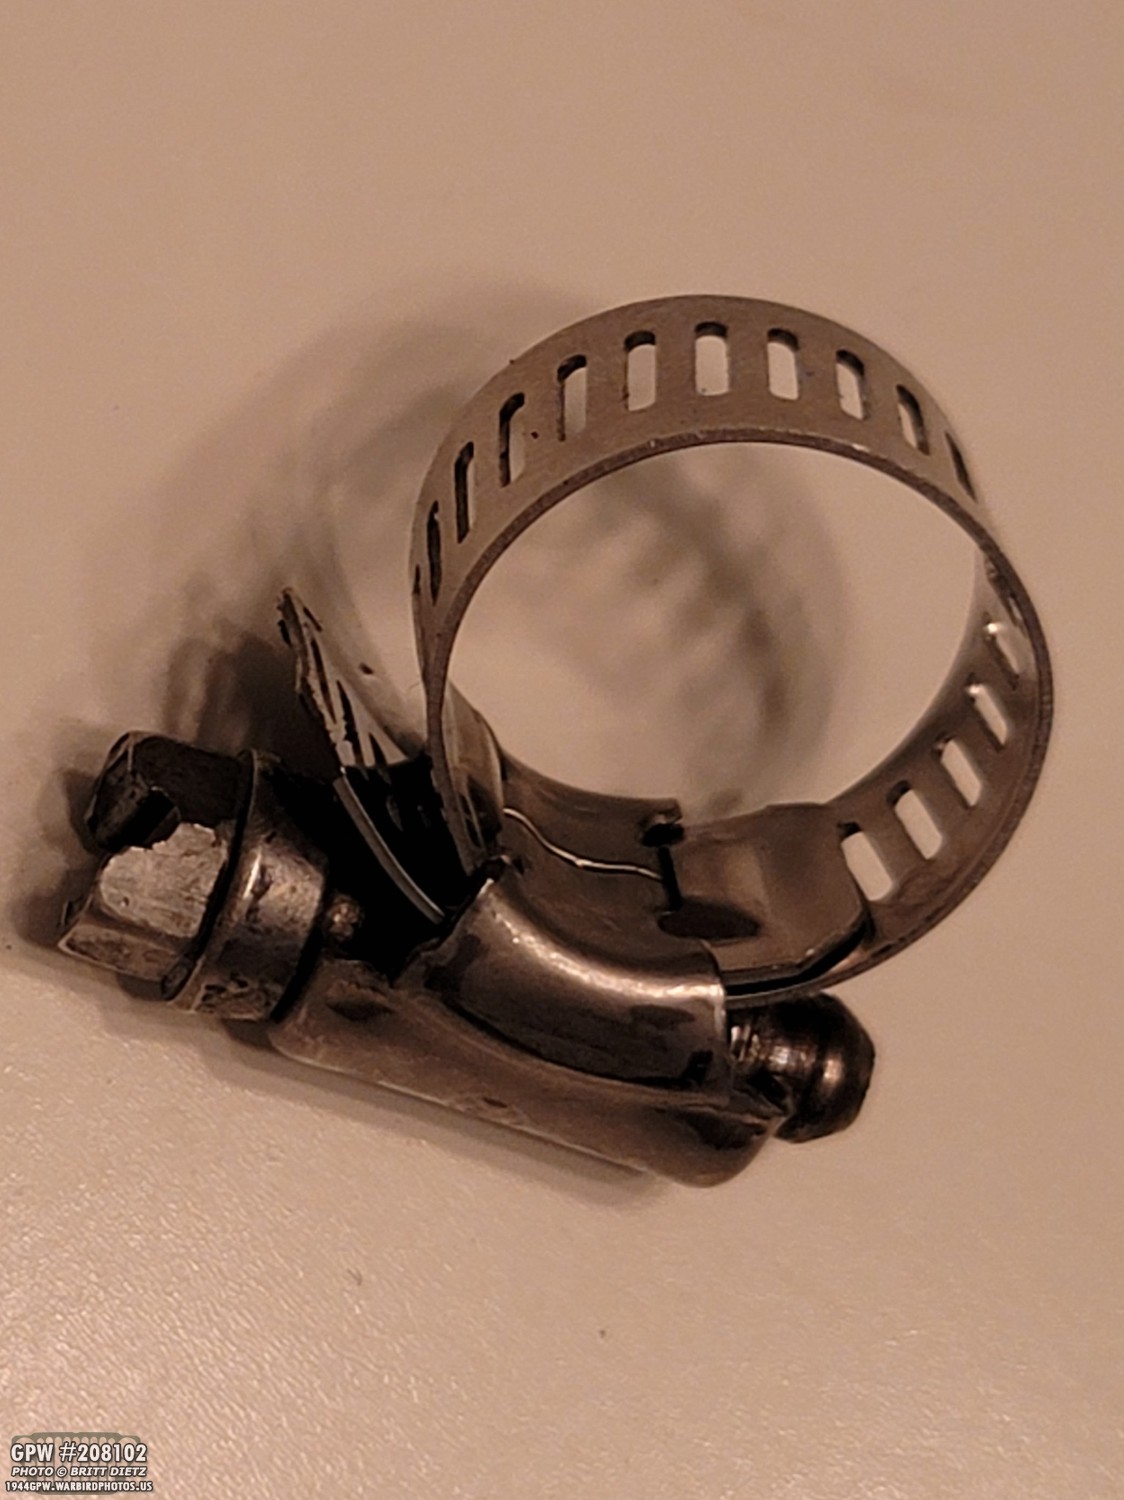
A trip to Harbor Freight Tools, and I found these awesome mini fuel injection hose clamps. They are VERY close to the original ones in a trailer plug and, as you can see from the photo on the right, a PERFECT fit in the plug!

Here’s a look at the clips I used (left) vs the modern bulky clips that don’t fit (right).
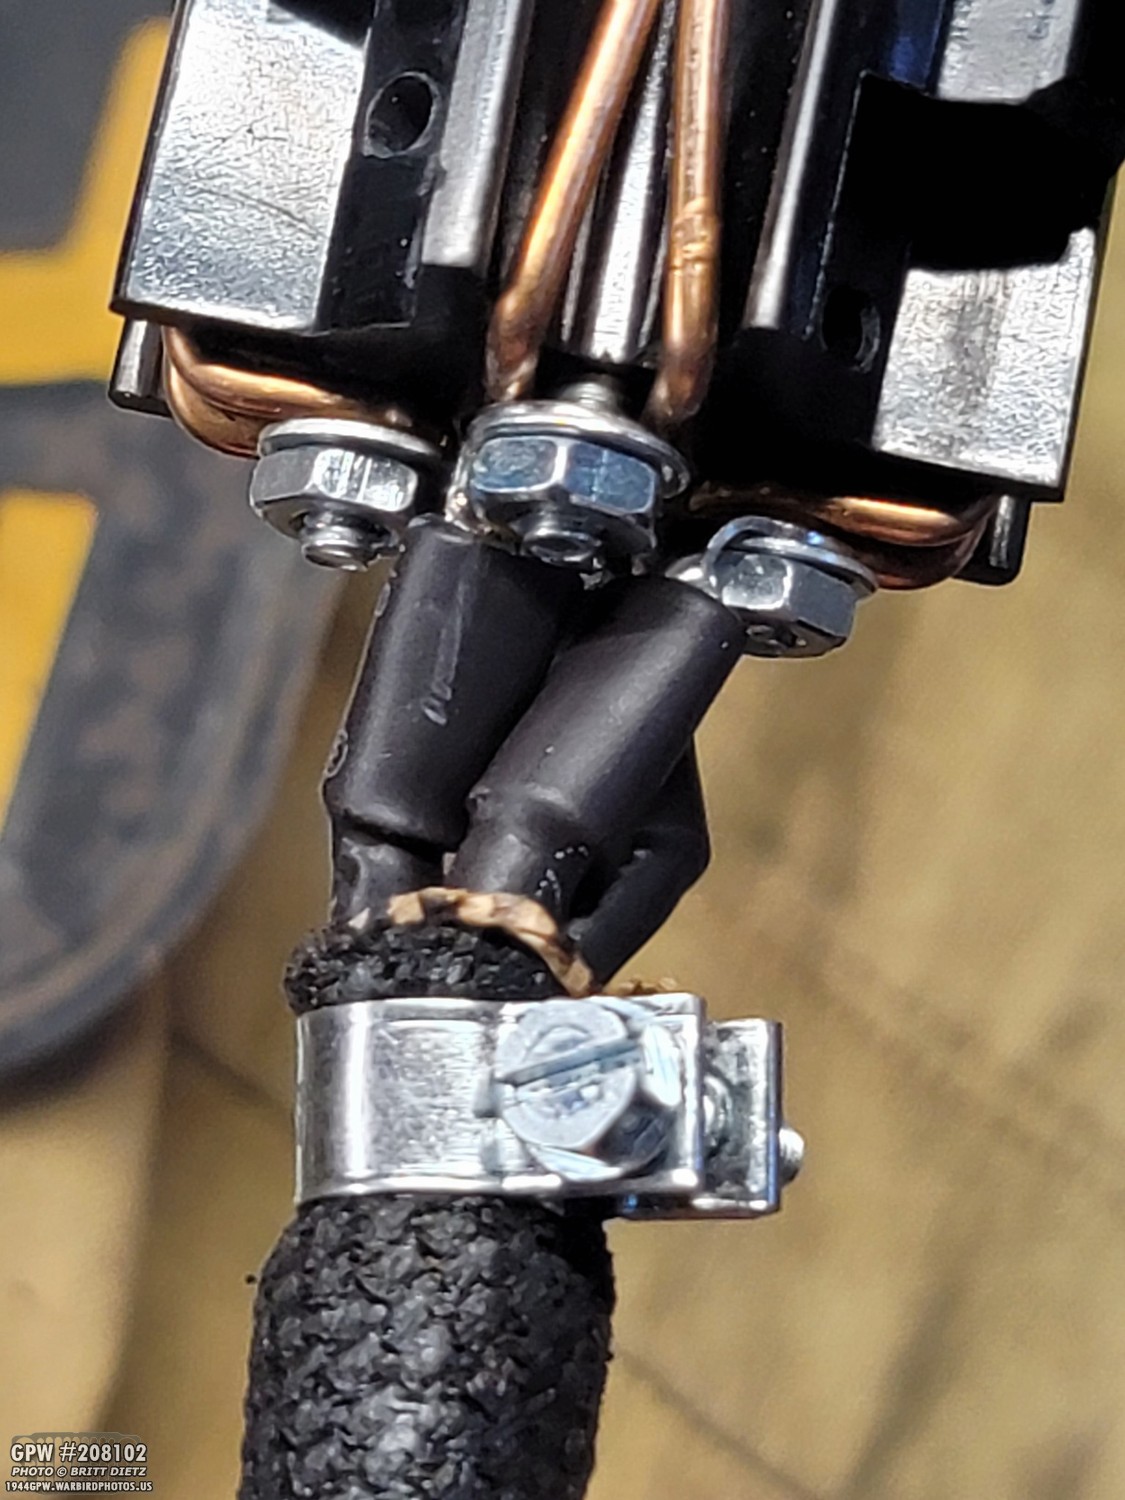
I’m jumping ahead a bit as I didn’t get photos between this, but I took those cloth covered 12 gauge wires and crimped those terminal ends on them. I then used some heat shrink wrap to secure them even more and make them look nicer than the bright yellow. I put the loom on and then added the clamp. You really have to put that clamp as far up as you can since there’s only a short distance between the terminal ends and the base of the bottom part of the plug (which is not put on yet).
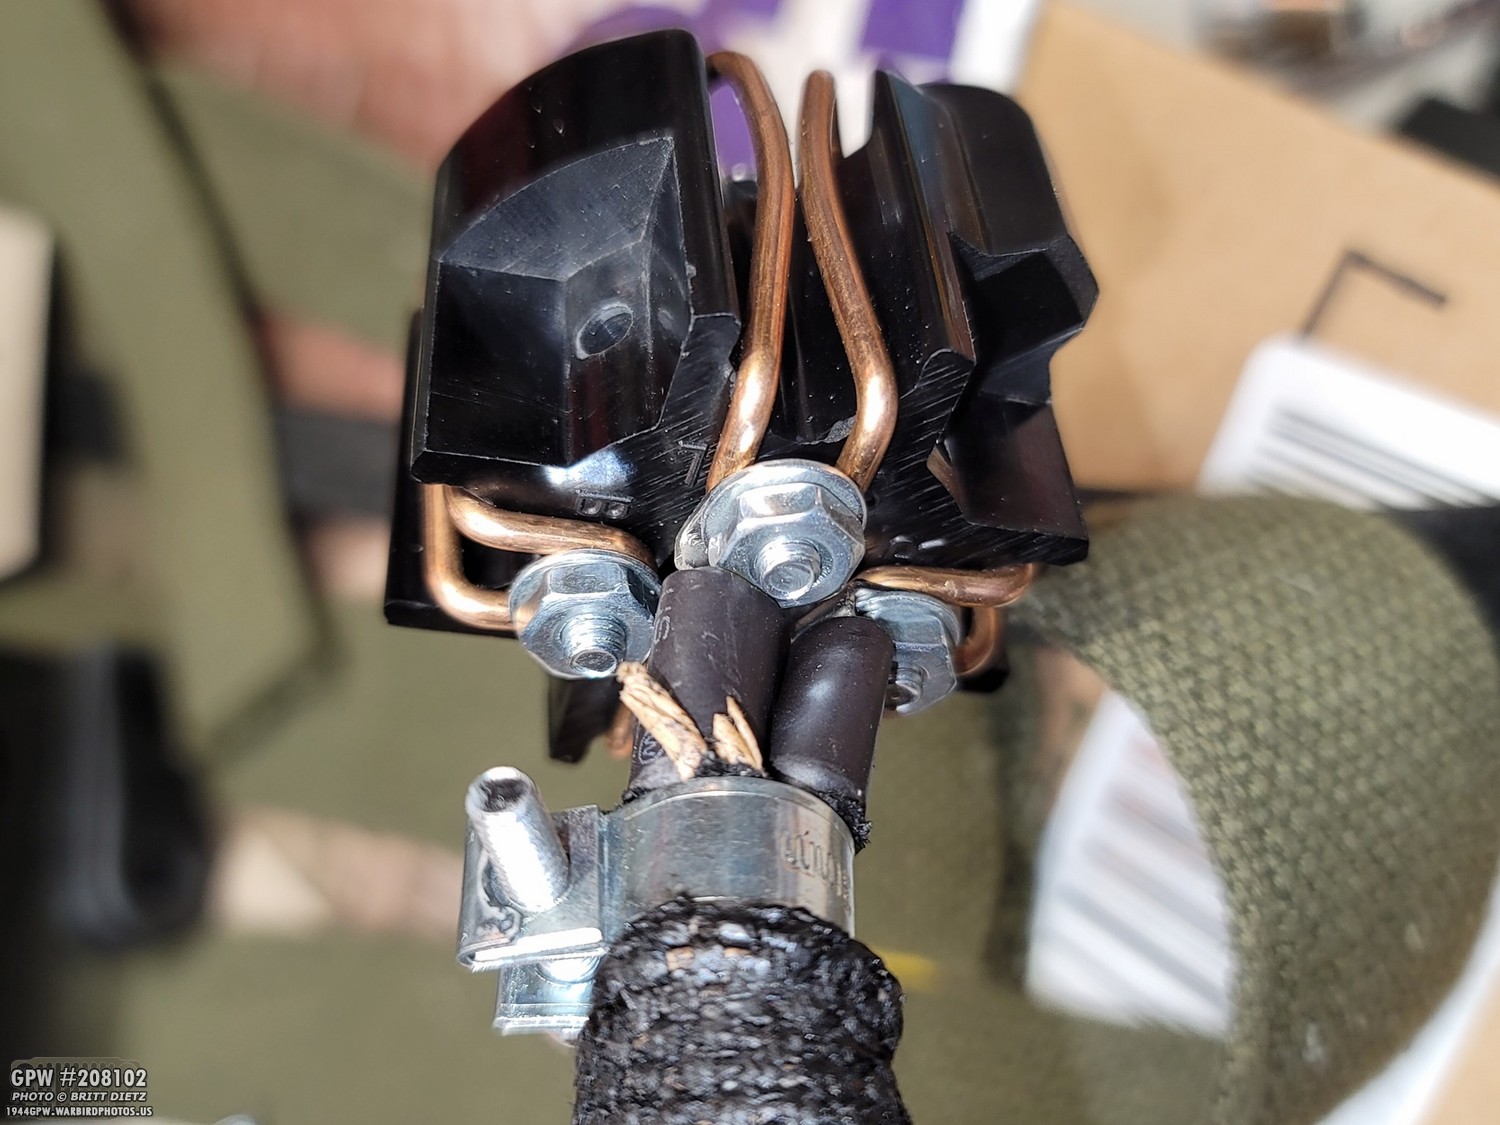
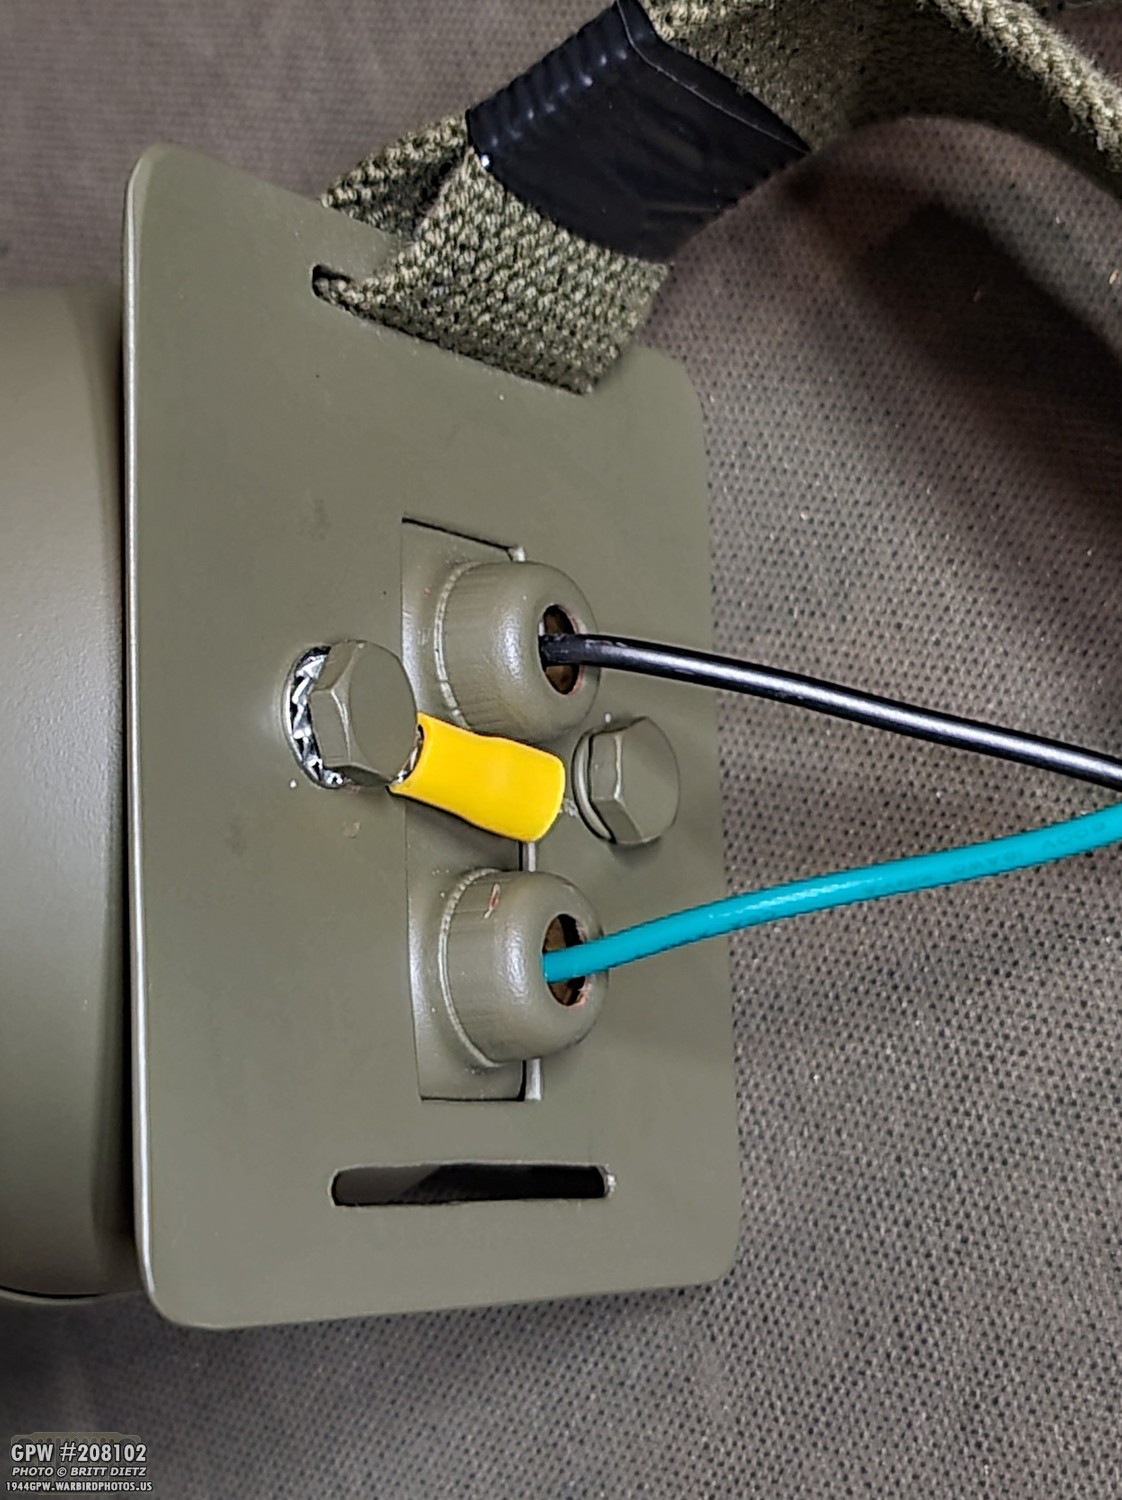
Here’s another angle showing how it’s attached. The only thing I’m missing here, really, is those cardboard washers. Otherwise, this is how a WW2 Jeep trailer socket plug should be wired.
Once I got the other half of the plug together with the top half (you have to push it together a bit and hold it as you slide in the two cross long screws that hold the two halves together), I tested it out. If you ask me, that looks just like an original trailer socket plug!

Pulling on the loom, it’s held in place nice and secure with that clamp inside.

I went to Lowes and got a rubber grommet to protect the loom/wires from the edges of the metal on the box. This is a SUPER tight fit, so I found it easier to put the grommet on the loom first, then squeeze the grommet into the hole on the box. Also, excuse the sloppy welding inside the box. It was VERY hard to get a large welder in there so I just did what I could. The outside looked much better, but I smoothed that out anyway.
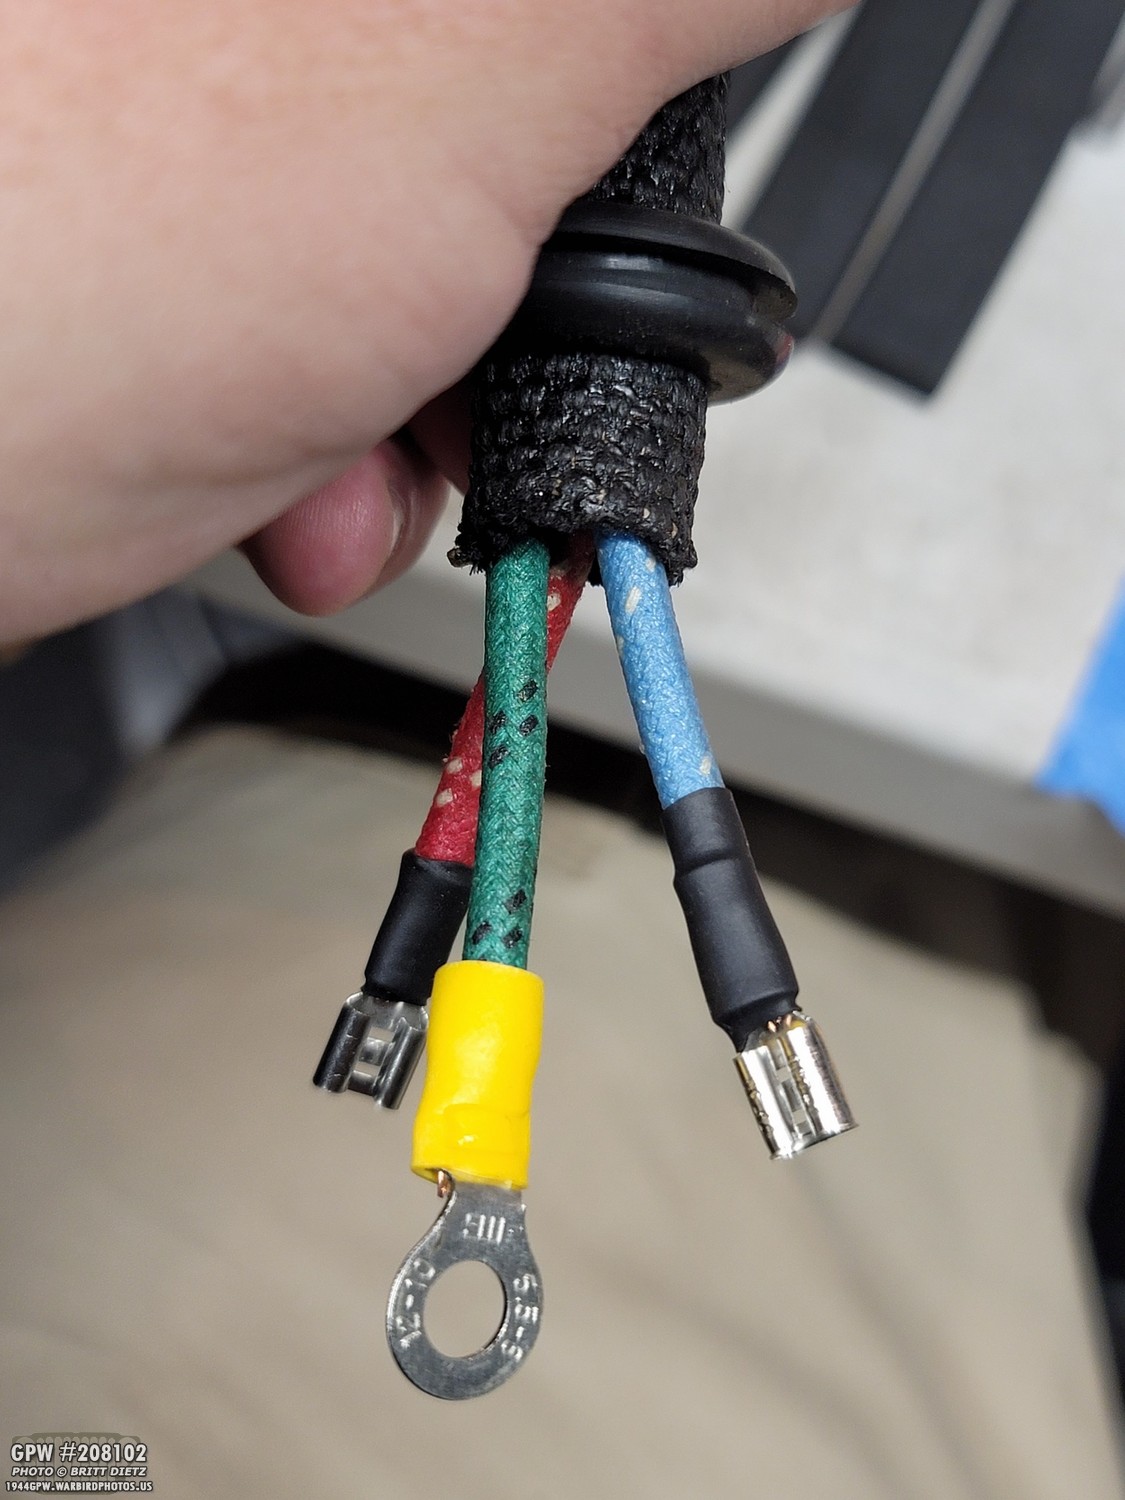
Since I wanted to be able to take this all apart if something breaks at some point in the future, I used these connectors to attach the cloth wiring to the plug wiring. I added a terminal to the end of the ground wire. Ignore the colors, I mixed up the blue and green wires, blue should be ground. But I always think of ground as green, so I added the terminal by accident. Whoops. No big deal, just had to switch them at the plug.

And here’s how the wiring looks inside (again, looking UP into the box from the bottom). You can see the ground wire goes straight into the connector and to the bolt. I used another one of those clamps to keep this side of the loom/wires from coming out of the hole as well.

And here we go! My idea was becoming a reality. Clean, simple, easy to store, and easy to attach/take off with no permanent wiring needed on the Jeep. Now to test it and add the straps.

But there was one last thing I needed to do. I scuffed up the back wall of the box (and exposed some of the metal) so I could JB Weld epoxy glue the rubber strap pieces to the back.

I temporarily put the straps back on with the electrical tape and strapped them on the handles. It was nice and snug on the handles, and with the box/rubber pads, it did not want to point up when strapped tightly and the friction made the light very solid with no movement!
And here’s how it looks! So clean and simple, but so much time went into designing, building, trial/error testing, etc this simple addition! But it looks like it’s something built for a Jeep during the war! All that’s left is to sew the straps and trim them, which I’ll get to in the part 2 update next week. This was a proud moment to see it all come together.
In the next update, I’ll go through testing the light and how it looks to a driver behind me. Plus I’ll get those straps sewen on and add some final thoughts!

Switching gears before I wrap up this update, I finally found an actual Jeep jack at a flea market last weekend! It was only $10, and works great. Aside from bubba drilling two crude holes in the base (which I’ll weld or fill back up), it’s in great shape. In the next update, I’ll clean this up, strip it, and repaint it. I’ll also contrast/compare a wartime jack with the possibly post-war one I already had.

So, that’s it for this week’s update, and a while it’s been a lot of work these last few weeks and I kept having to push back the update week after week since this light project kept getting more in-depth… it’s great to have another project almost finished! Look for part 2 next Friday. Till next week…
1 thought on “A solution to night driving in a WW2 Jeep – Part 1”
Comments are closed.