 A solution to night driving in a WW2 Jeep – Part 2
Continuing the update from last week as I finish the trailer plug stop brake light! I finally finish the project… mostly, with one hiccup! Then, I acquired an actual WW2 Jeep jack (finally!) at a flea market, so I get to work restoring it and comparing it to a post-war jack.

It’s been a hot one these last few weeks here in Southern California. Temps have reached upwards of 104 around here, so I haven’t been driving the Jeep and working as much on it as I want to. Looking forward to winter and much cooler temperatures!

So last week I started a new project with the idea to take a model T style stop brake light (found on amazon for cheap) and turn it into a nighttime driving light for better visibility. See the previous update here: https://www.1944gpw.warbirdphotos.us/blog/a-solution-to-night-driving-in-a-ww2-jeep-part-1/
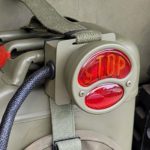
I then further had an idea to take a trailer socket plug, and somehow connect the socket plug and the light so it could just be plugged in to light up! I got a repro trailer socket plug from Ron Fitzpatrick Jeep Parts.
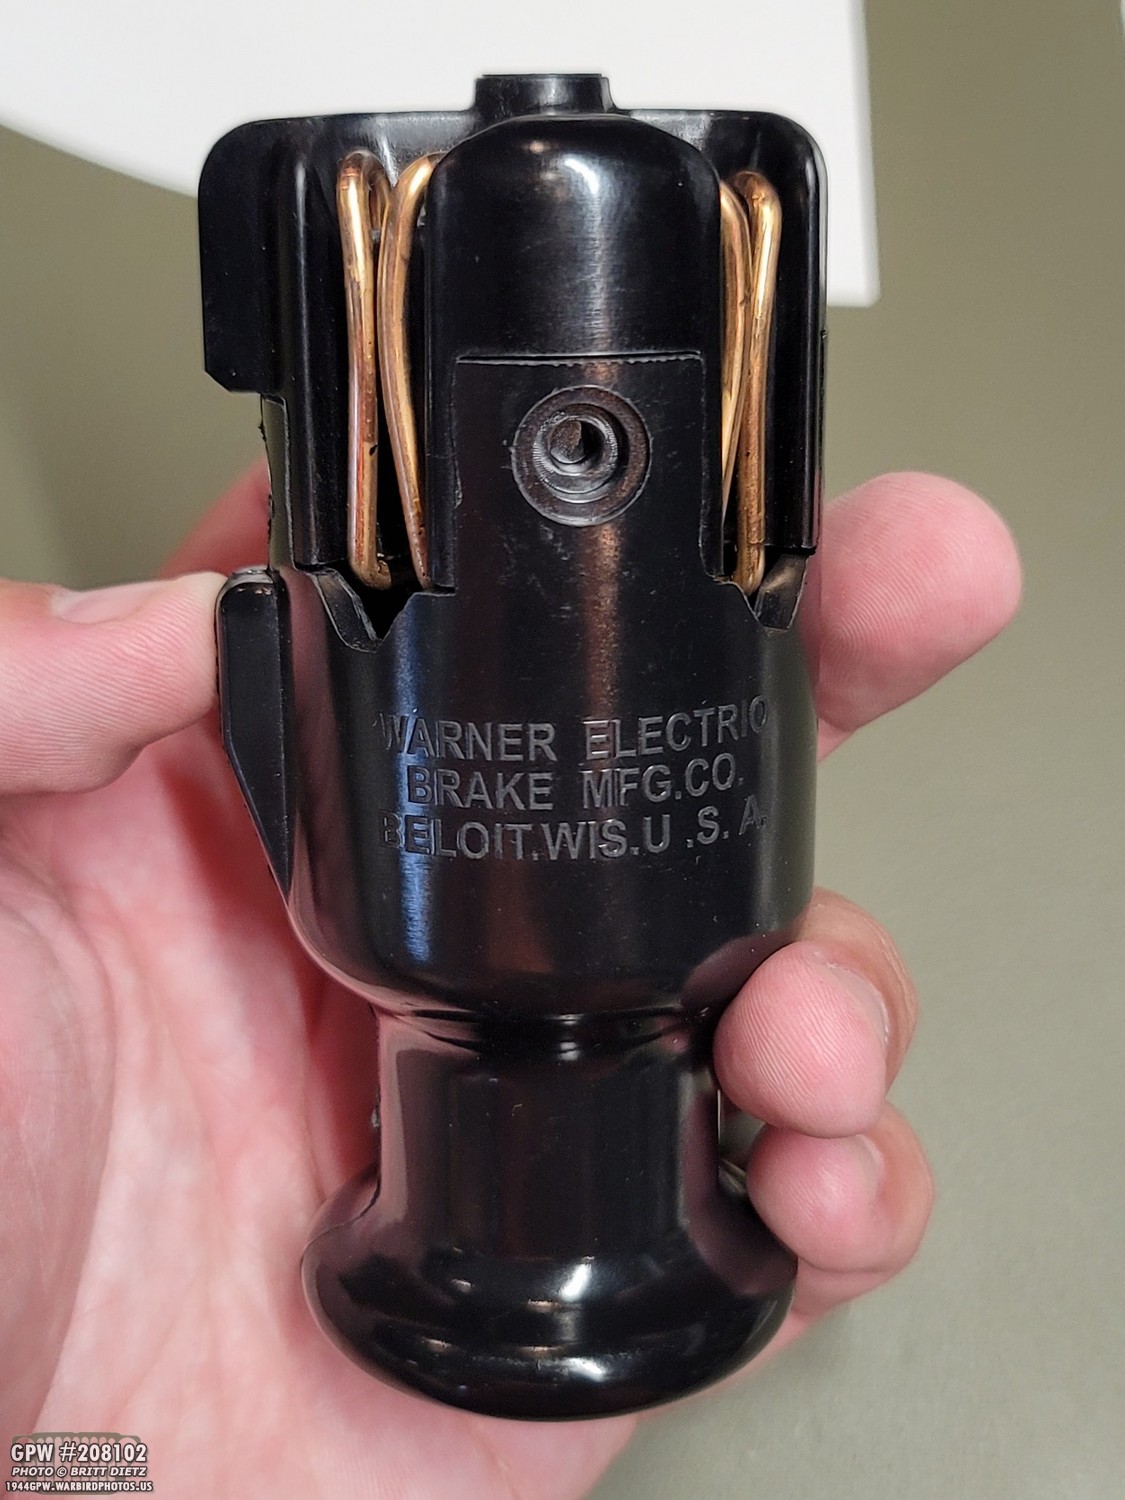
And then for ease of taking it on and off, so I don’t have to modify literally ANYTHING on my Jeep, I wanted to have straps that would attach it to the jerry can handles.

And thus, after a few weeks’ work, my idea came to life! Again, see part 1 here: https://www.1944gpw.warbirdphotos.us/blog/a-solution-to-night-driving-in-a-ww2-jeep-part-1/
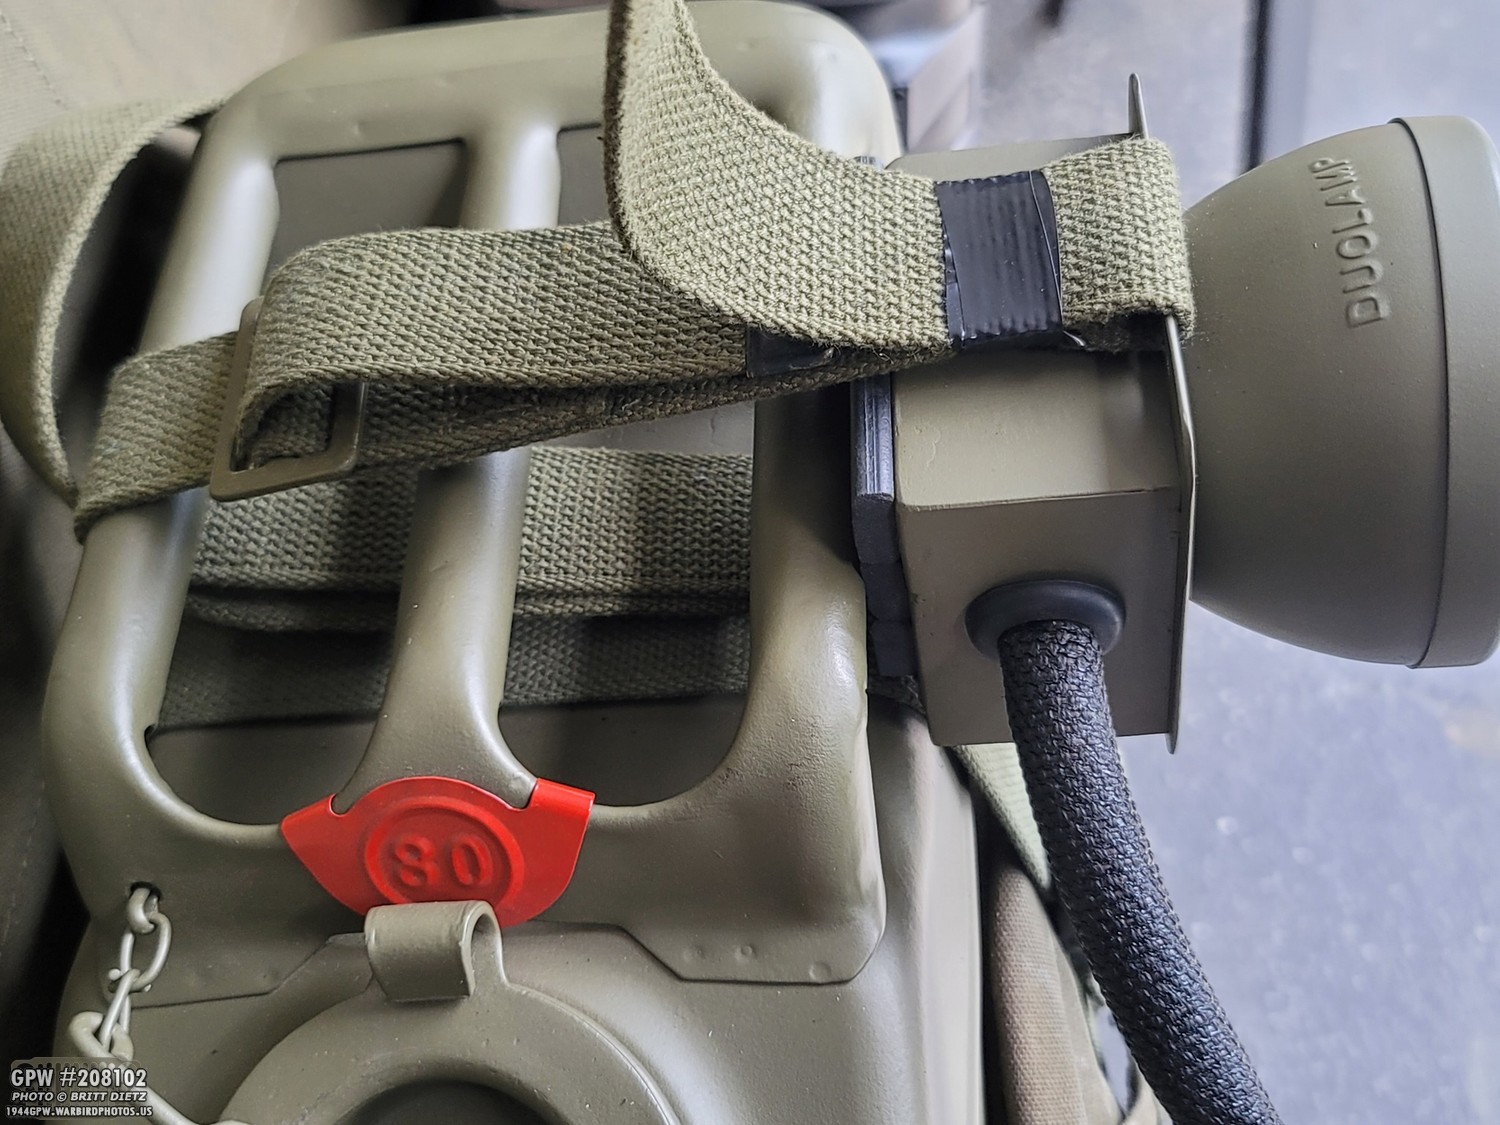
One thing I didn’t take a photo of in the Part 1 update was the wires I got. I splurged and got 12 gauge cloth-covered auto wire from eBay.
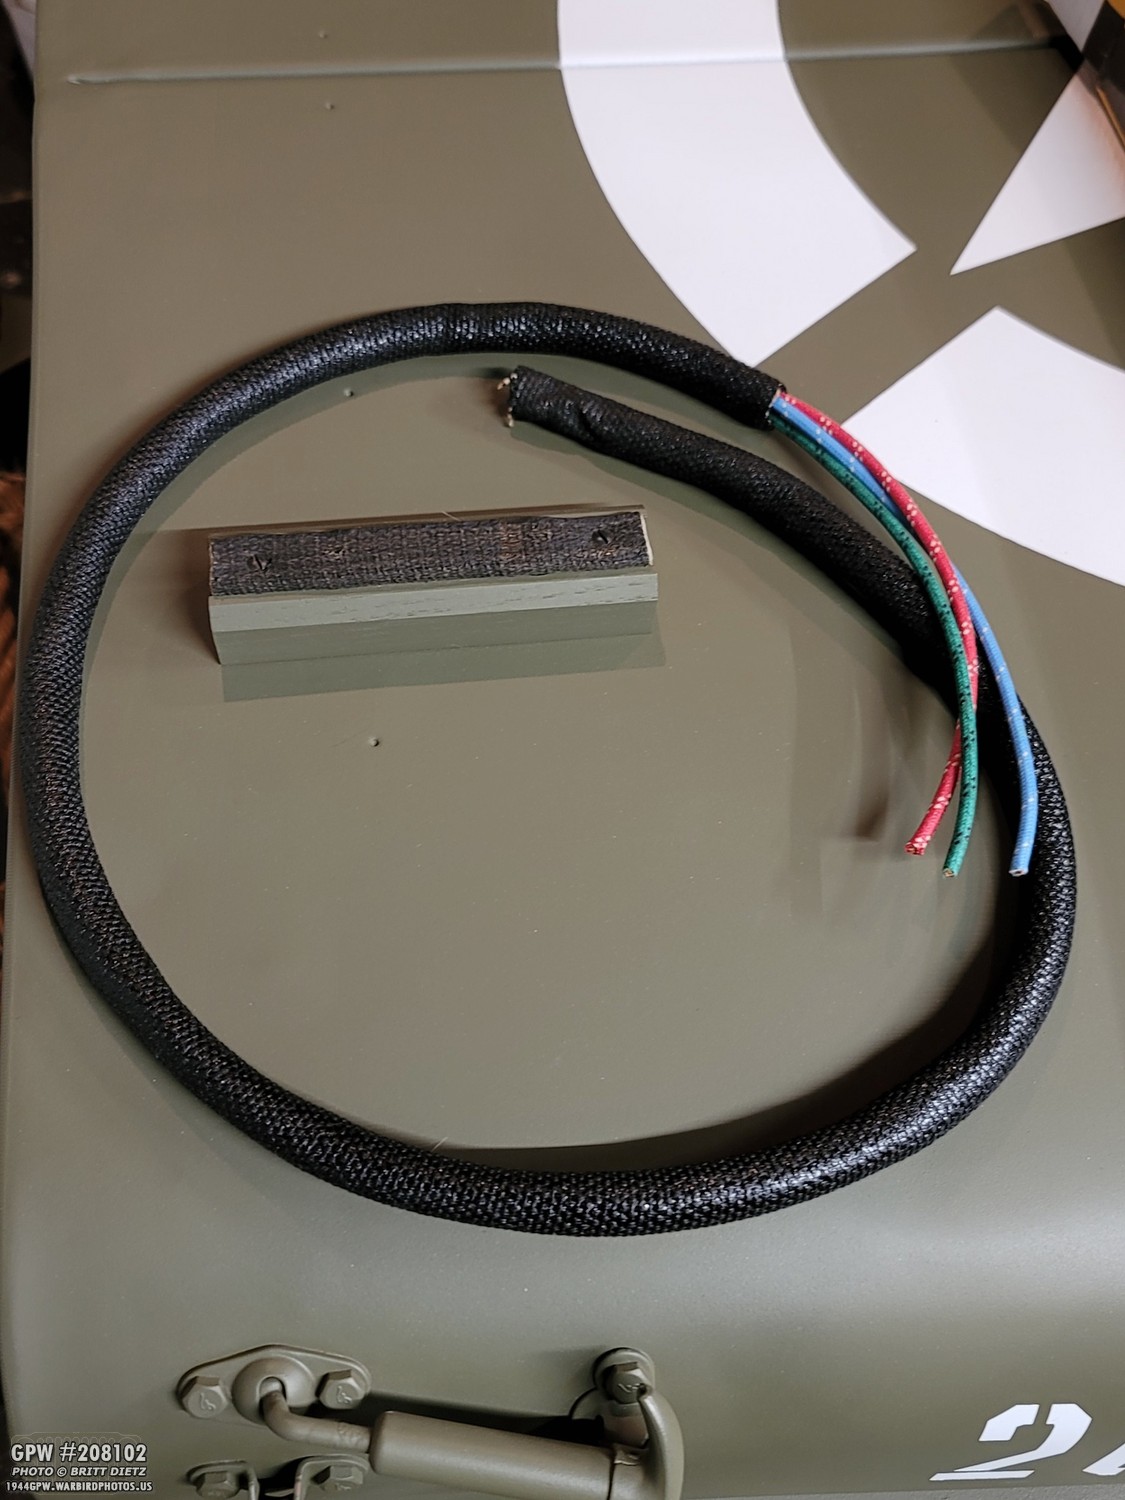
It was a process trying to figure out what size loom I needed as the places that sell it only tell the inner diameter, not the outer. After guessing wrong a few times, I figured out that the correct size is 1/2 inner diameter, which gives you a 5/8 diameter which is perfect for the trailer plug (and useful for those of you restoring an actual trailer and plug)

Before we get into the rest of the project, I wanted to mention that I decided to take out my trailer socket and redo it. I took it completely apart (this is the main housing being primed) to clean it up and do a bit better ground.

It’s also a good time to mention that my socket is a NOS socket, and the large wafer at the end has the terminals stamped with what they should be. I don’t believe modern repro sockets have this. Just like a WW2 trailer plug, we’re using GR (Ground), TL (Always-On Tail Light), and SL (Stop Light – aka Brake Light). BK is not used on WW2 vehicles, nor is it needed for my STOP light project.

After a few days of repainting, cleaning threads, etc, the socket is coming back together.

The main spring cover gets dinged a lot from the pressure of holding it closed, so I repainted that as well.

And then I started to put it all back together. The socket is now grounded in several locations, so it’s really good to go. I didn’t photo the entire reinstall of the socket, as I covered the wiring/installation of this back in 2019 when I installed it the first time.

Once the trailer socket was wired up, it was time to test the light! SUCCESS! This is the TL (Tail Light) which is always on in any of the three modes on the push-pull switch. This is the same for a trailer. Notice how much easier it is to see this light (sorry for the bad focus) compared to the single brake light under the jerry can holder. The new light is eye level with drivers.

The straps have been sewen onto the back plate thanks to my girlfriend. She really struggled to sew the two straps due to the very thick canvas on the straps, but she did the best she could. So this is the final setup! Easy to strap on, easy to take off. Plug it in, strap it to the jerry can handles, and go!
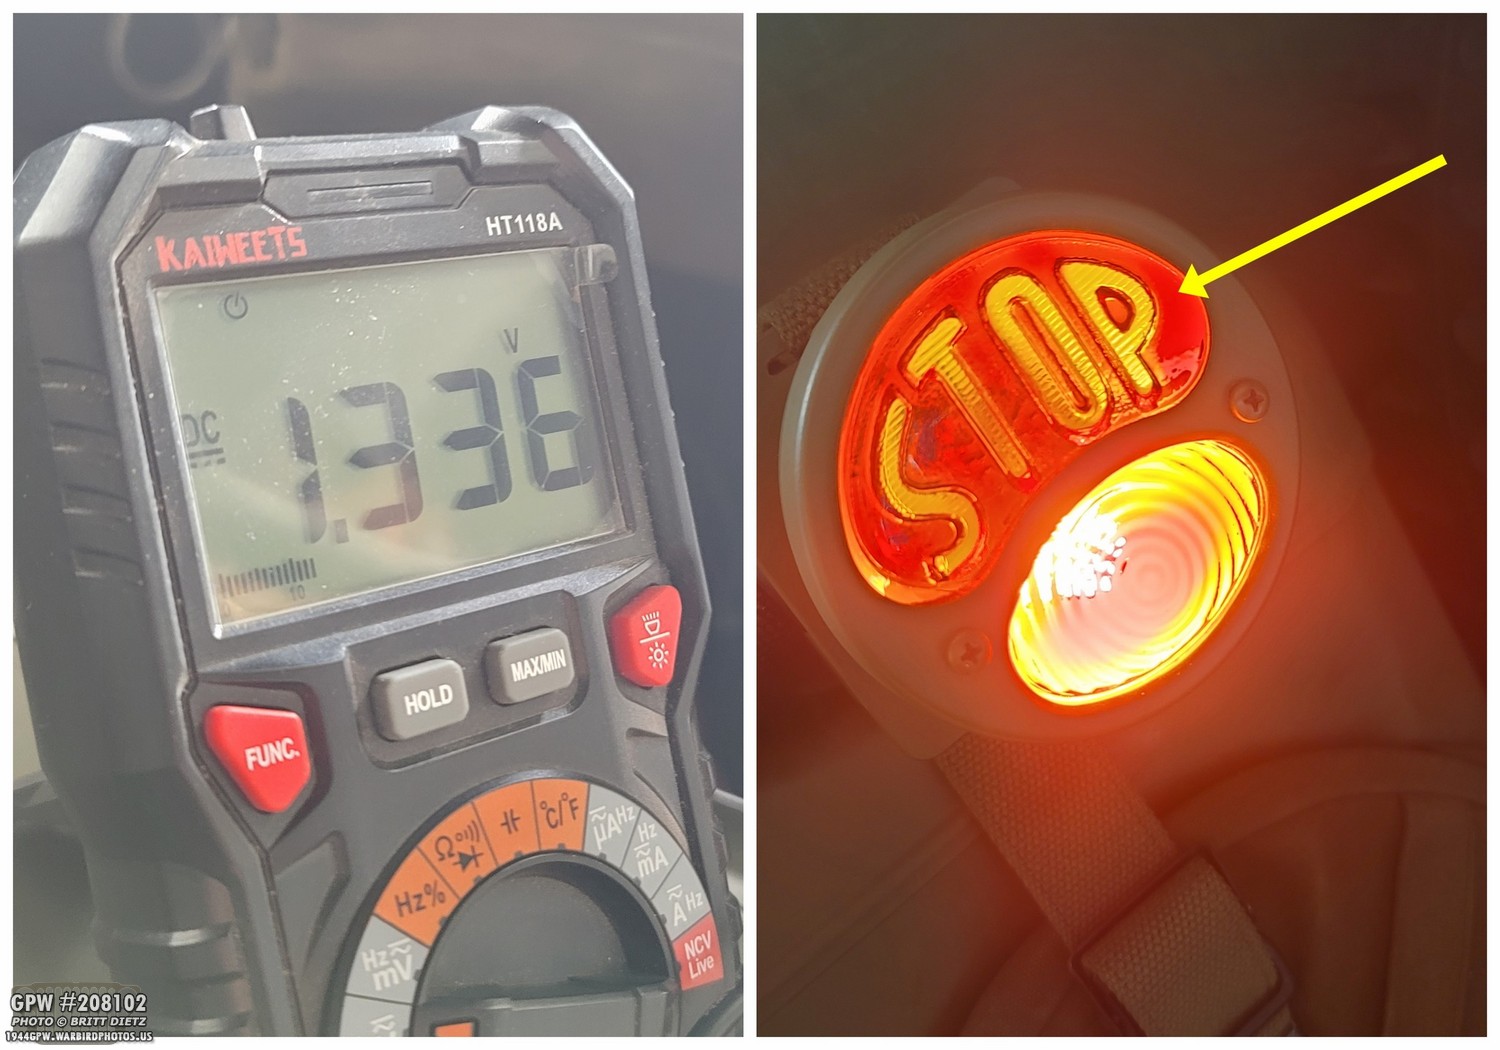
But, that’s not without any issues. I noticed a problem with the top STOP light not illuminating as it should when I’d hit the brake pedal. After testing the electrical current, when I press the brake that top light (via the trailer socket and plug) is only getting 1.3-1.4 volts of power… that should be 11+ volts. So the STOP light is not illuminating as that’s not even enough for the LED bulb in there. :-/ So that will be my next project to figure out why only 1.3 volts are being sent to the trailer socket for the Stop Light (SL).
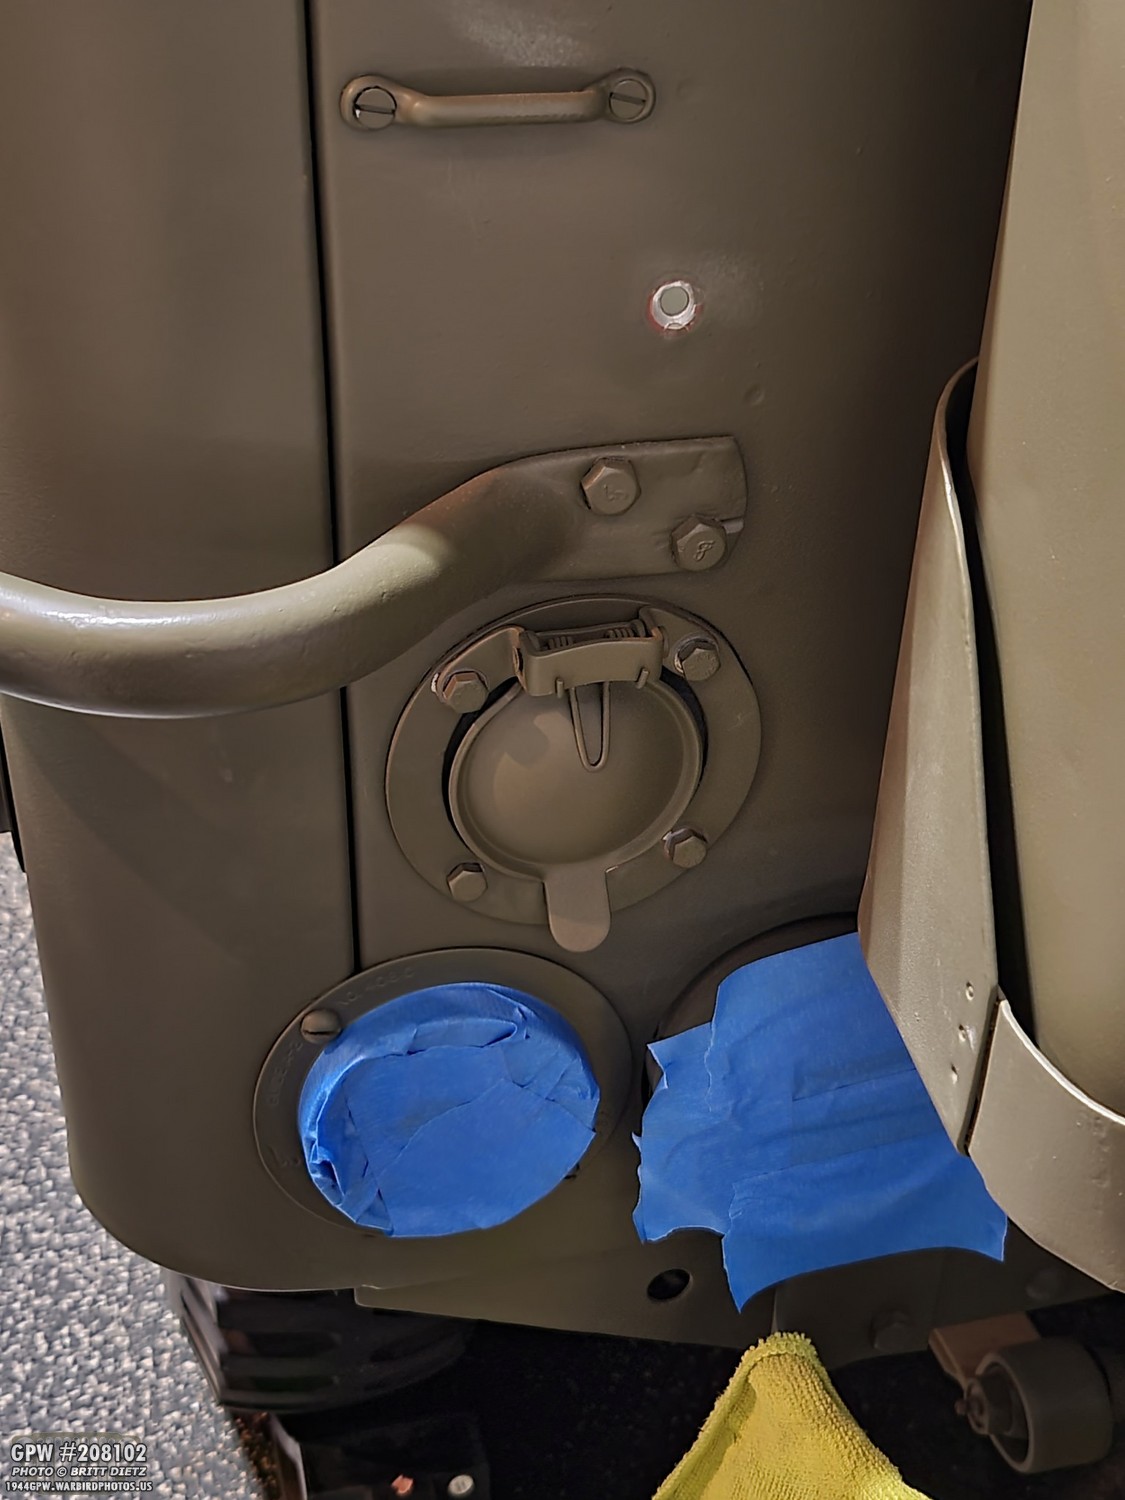
The trailer socket is, at least, all back to being installed! I need to do some paint touch ups, so I have the reflector and brake light covered for overspray. That top hole above the handle is for the weld stud that holds the trailer socket cover with a wingnut.
I didn’t have a welder at the time when I was rebuilding my Jeep, so I found these large head furniture screws that were the perfect head diameter to the original weld studs. I grounded down the heads and filled the hex bit hole. I’ll be using a JB Weld epoxy to glue them in place. Look for that in the next update. So that’s it for now with the Stop Light! Look for more next time. So let’s move on to other things…

I was at another flea market earlier this month, and I lucked upon this beauty! An original WW2 Jeep jack, and for only $10! What a steal. Even though it was dirty and gunked up, it works perfectly.
Let’s quickly compare it to the other Jeep jack I have that I restored. That one was also found at a flea market, and it’s either post-war (it’s very close to that style) or late war from a different vehicle. But until I could get a correct jack, that one would have to do. We’ll compare them more in-depth later in this update.

First thing I did with the new jack is to throw it in my ‘bucket o’ gasoline’ for about 48 hours. This softened up the paint and dirt, plus it loosened up the threads.

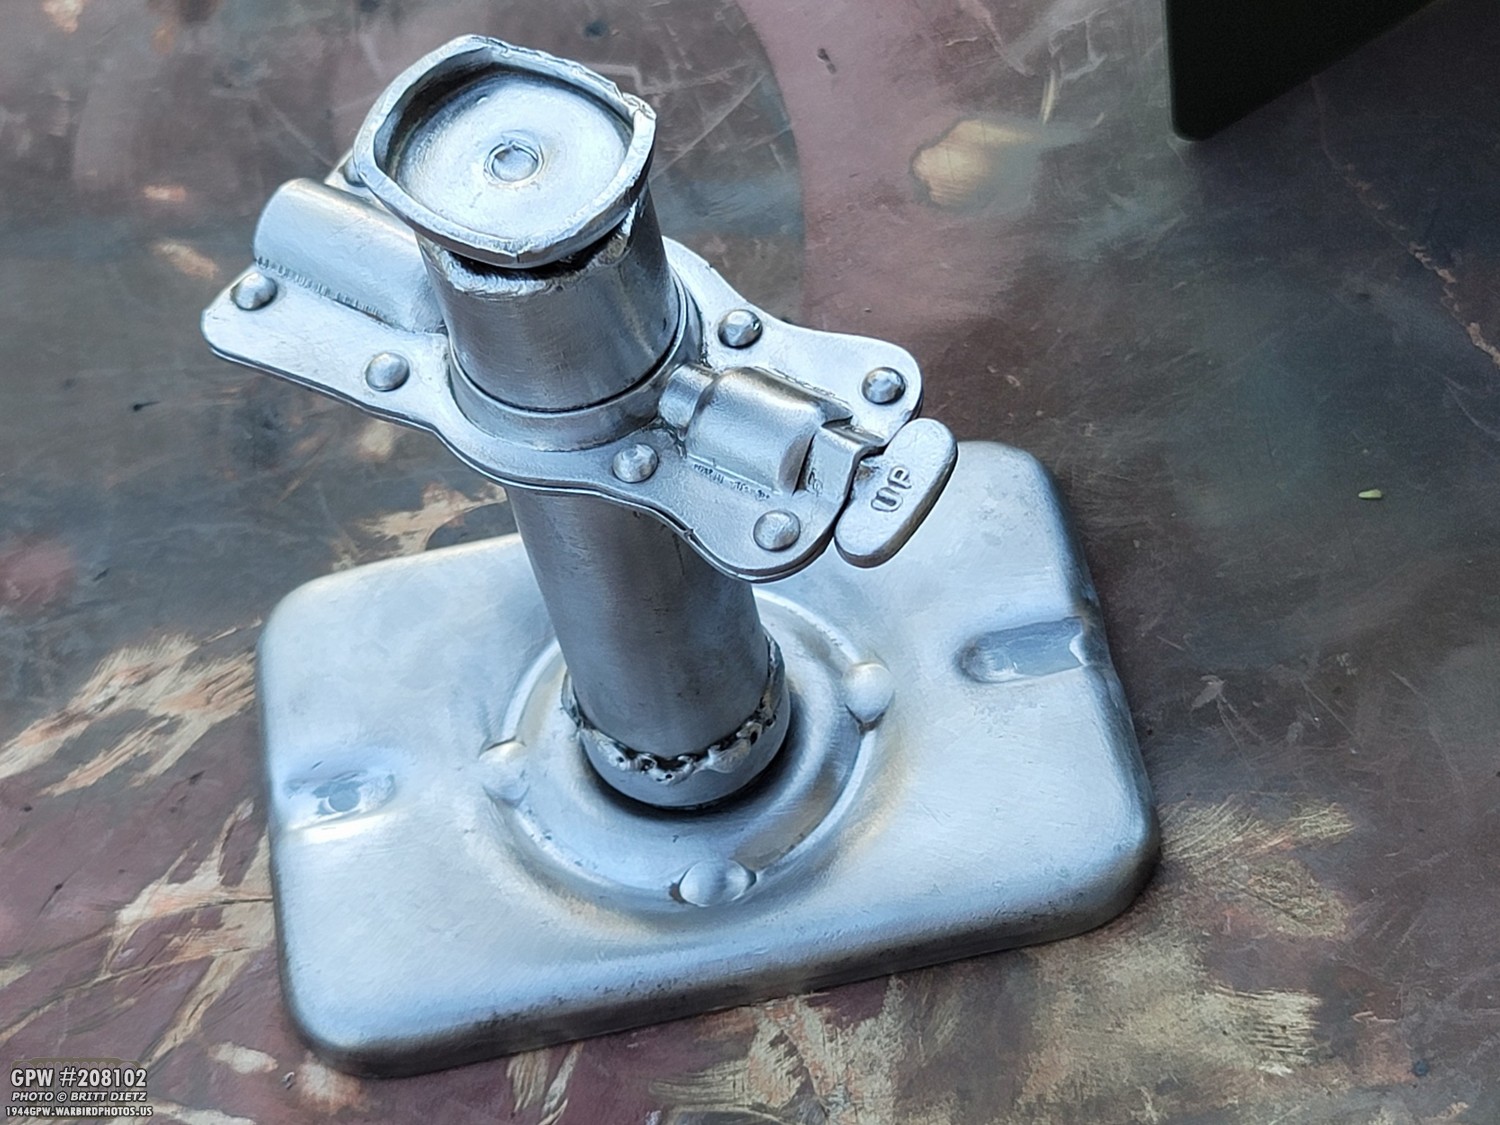
On a very warm afternoon, I went to work and using various wire wheels, nylon wheels, etc I got it all down to the metal. Starting to look better…

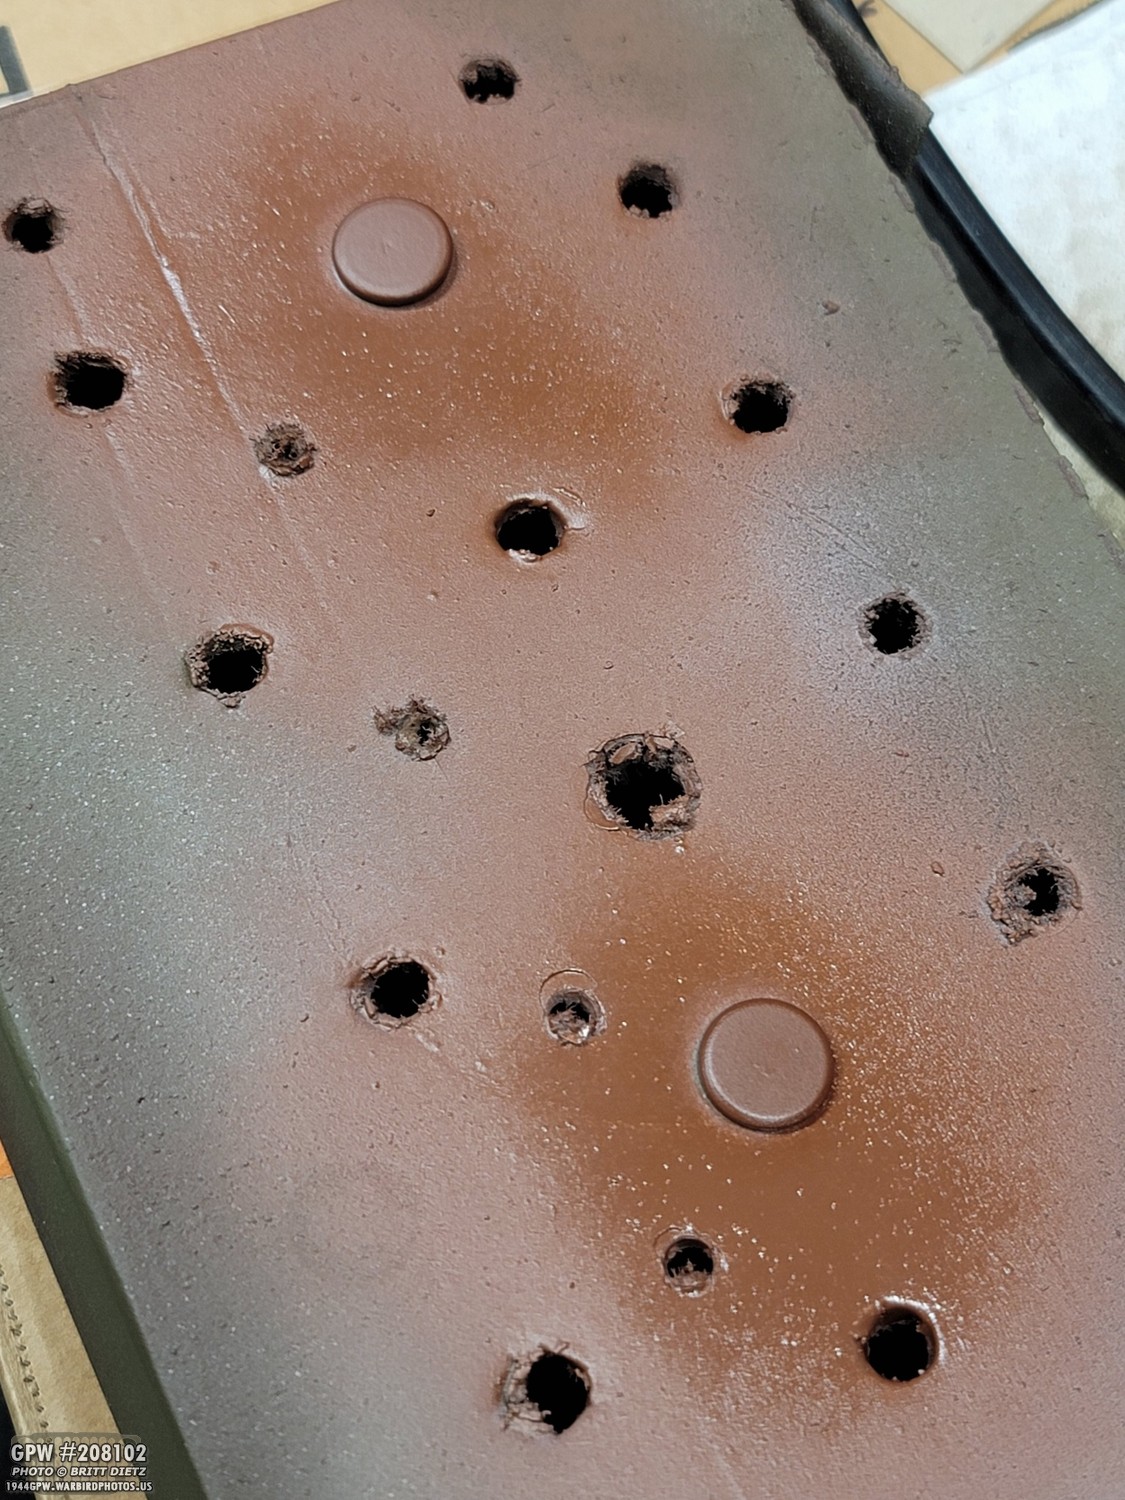
Here’s a good look at the base, one of the quick ways to tell if a jack is correct or not. Bubba, at some point, drilled two crude holes to probably mount this jack onto something. I’ll have to fill those holes up.

Here’s a look at the ratcheting scoket. This is another quick way to tell the difference between wartime and post-war (more on that later).

Here is where you put the wartime Jeep lug wrench. The handle perfectly fits in this hole and allows you the ratchet the jack up or down in tight spaces.

And a look at the base underneath. Note the two drilled holes, not factory installed.

All cleaned up and ready for paint! But one last step, do I weld the holes or fill them with something else?
I decided to use JB Weld steel instead of welding it, as I felt it would be difficult to grind down the welding in those tiny notches.
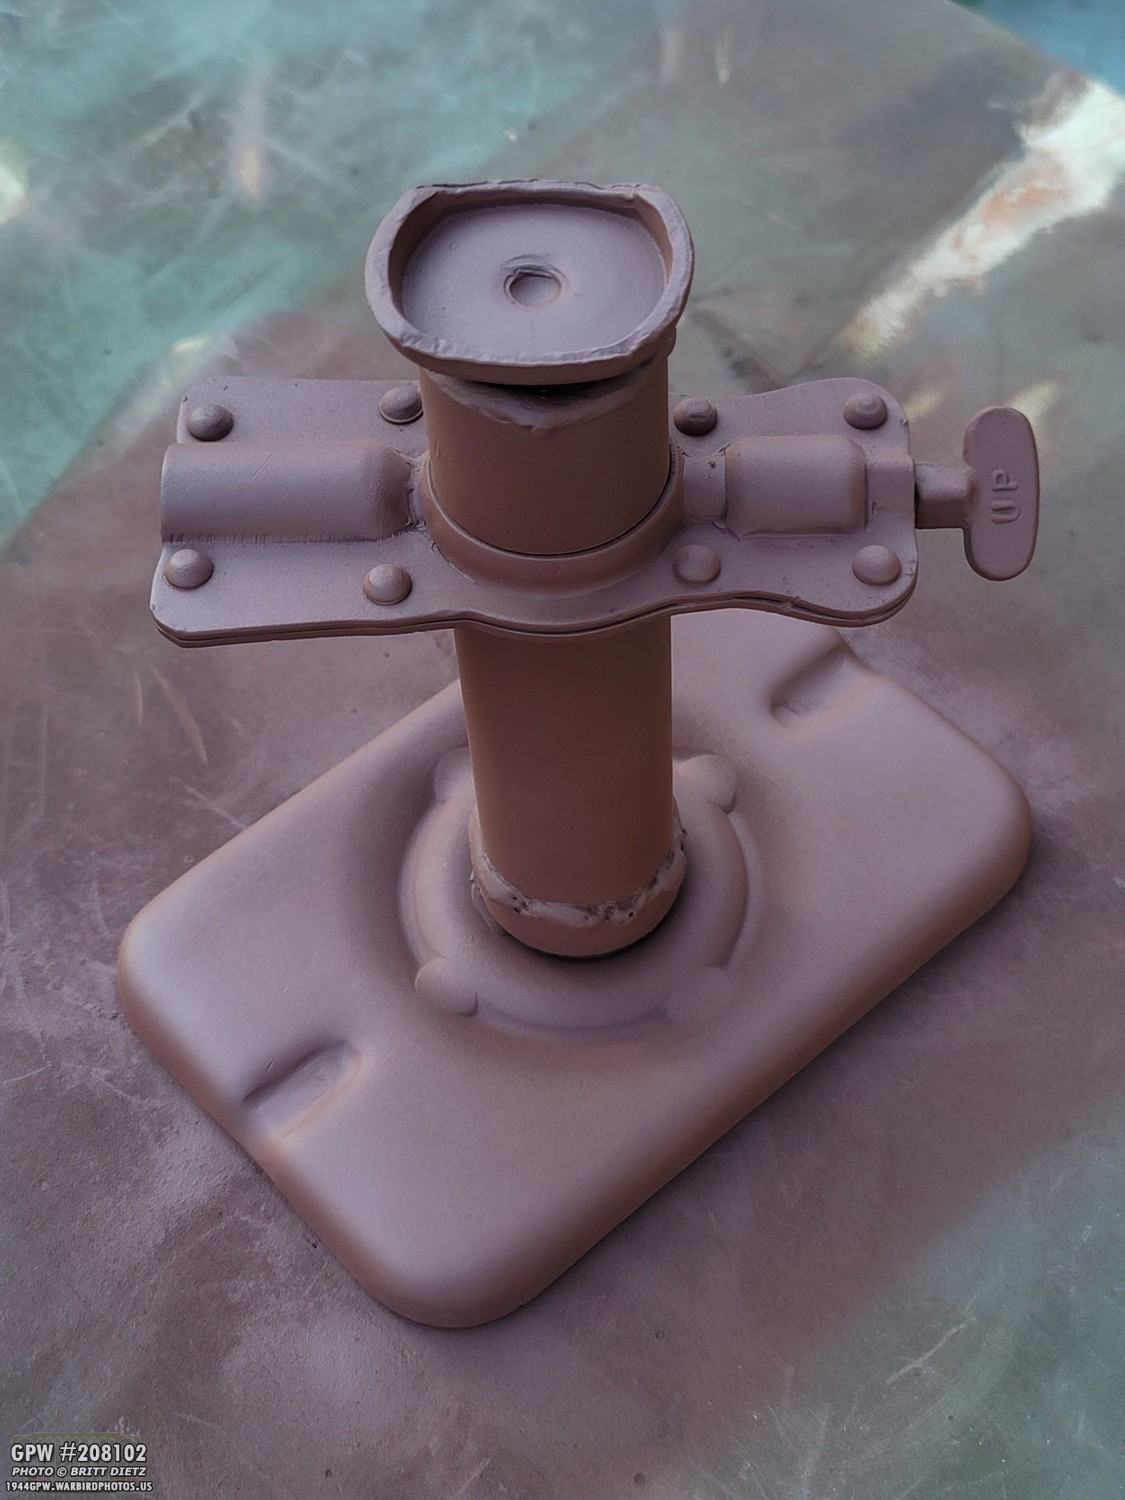
Primed with Red Oxide primer!
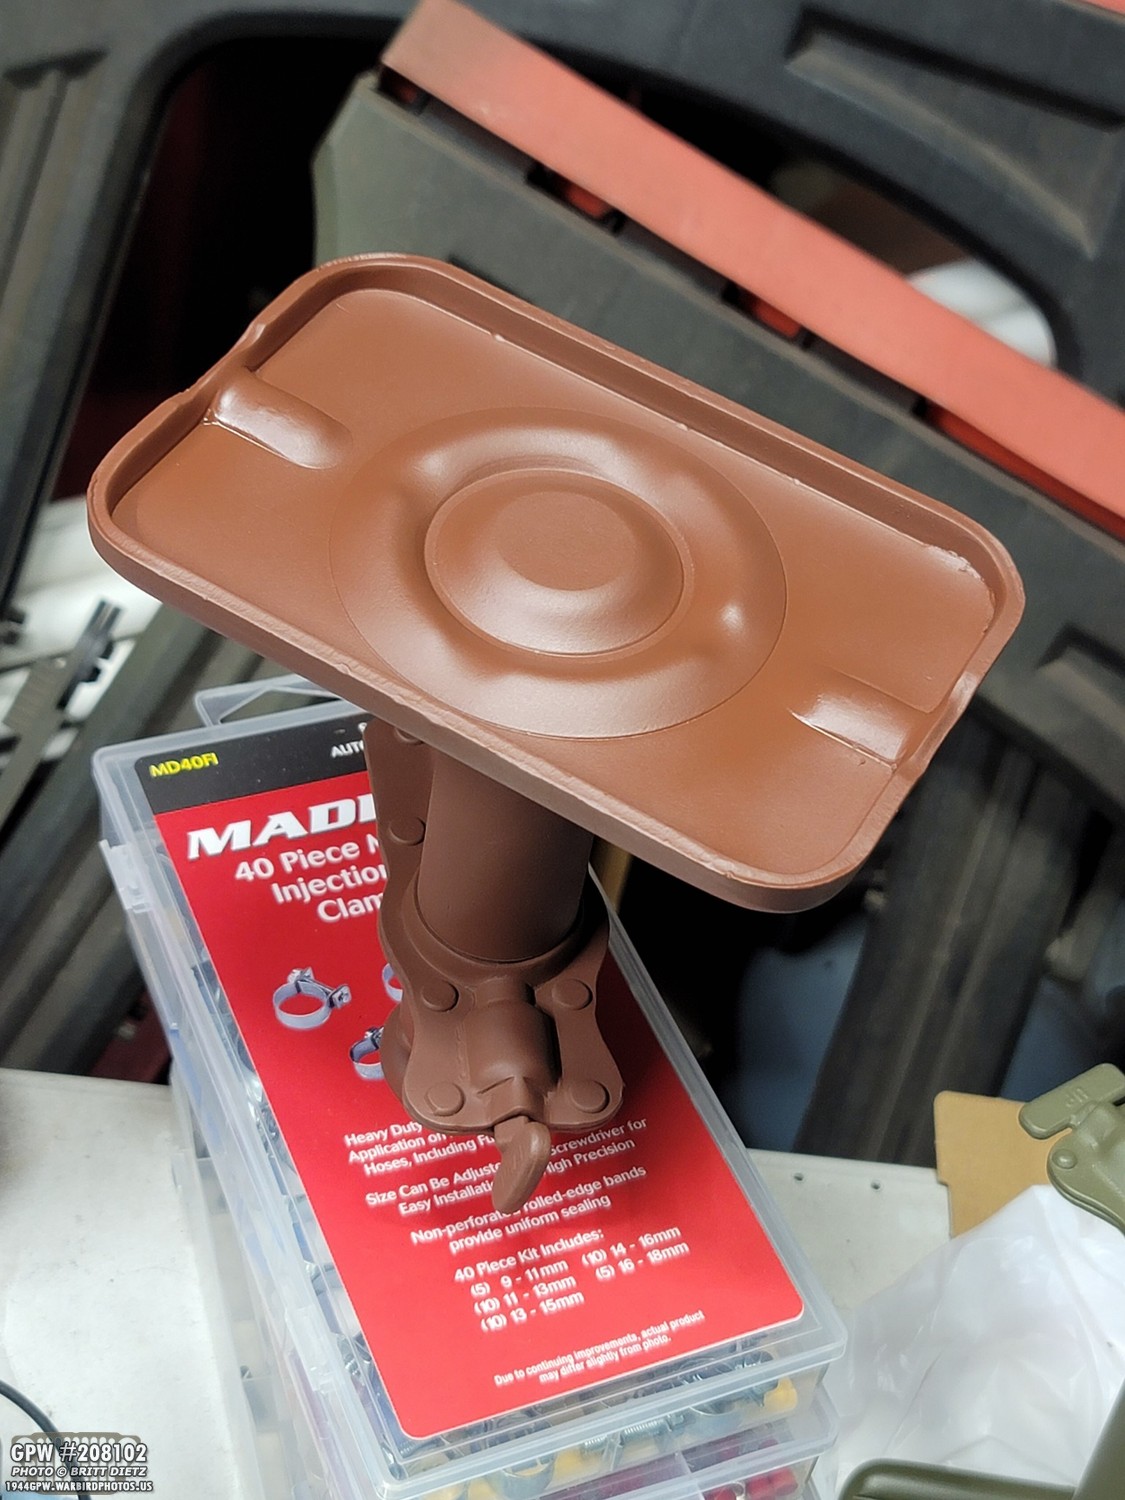
Don’t forget underneath the base!

And boom, all OD Greened! The same 33070 as my Jeep. Looking mighty pretty.
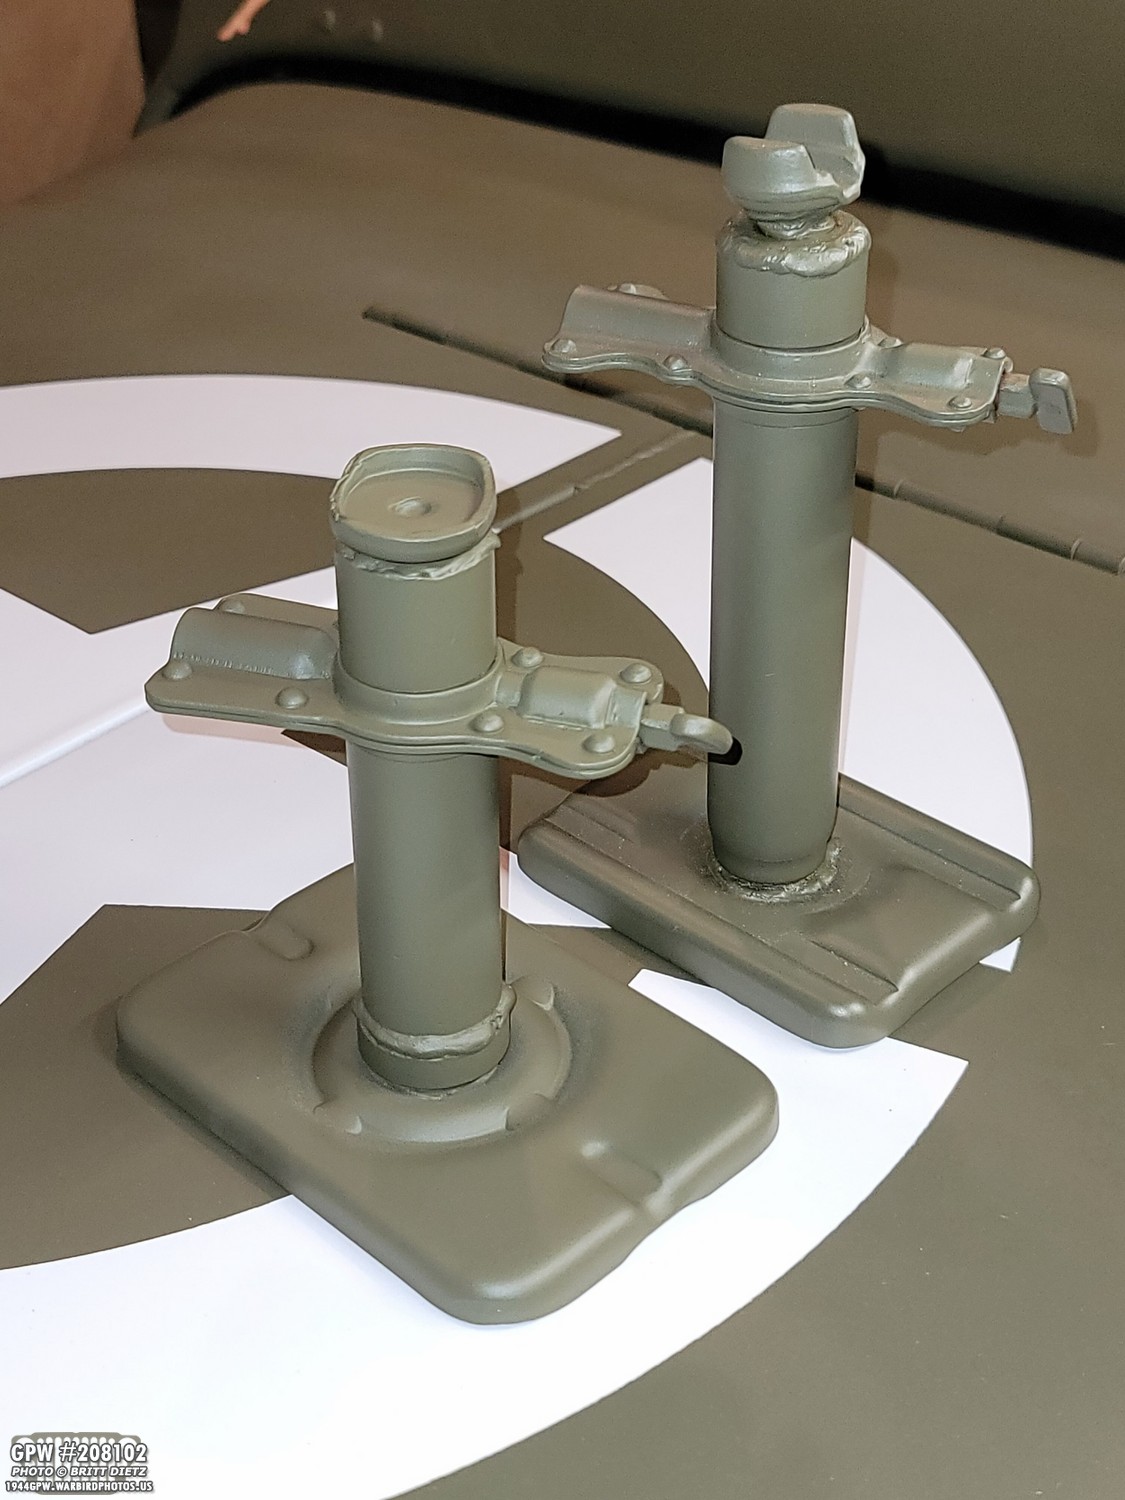
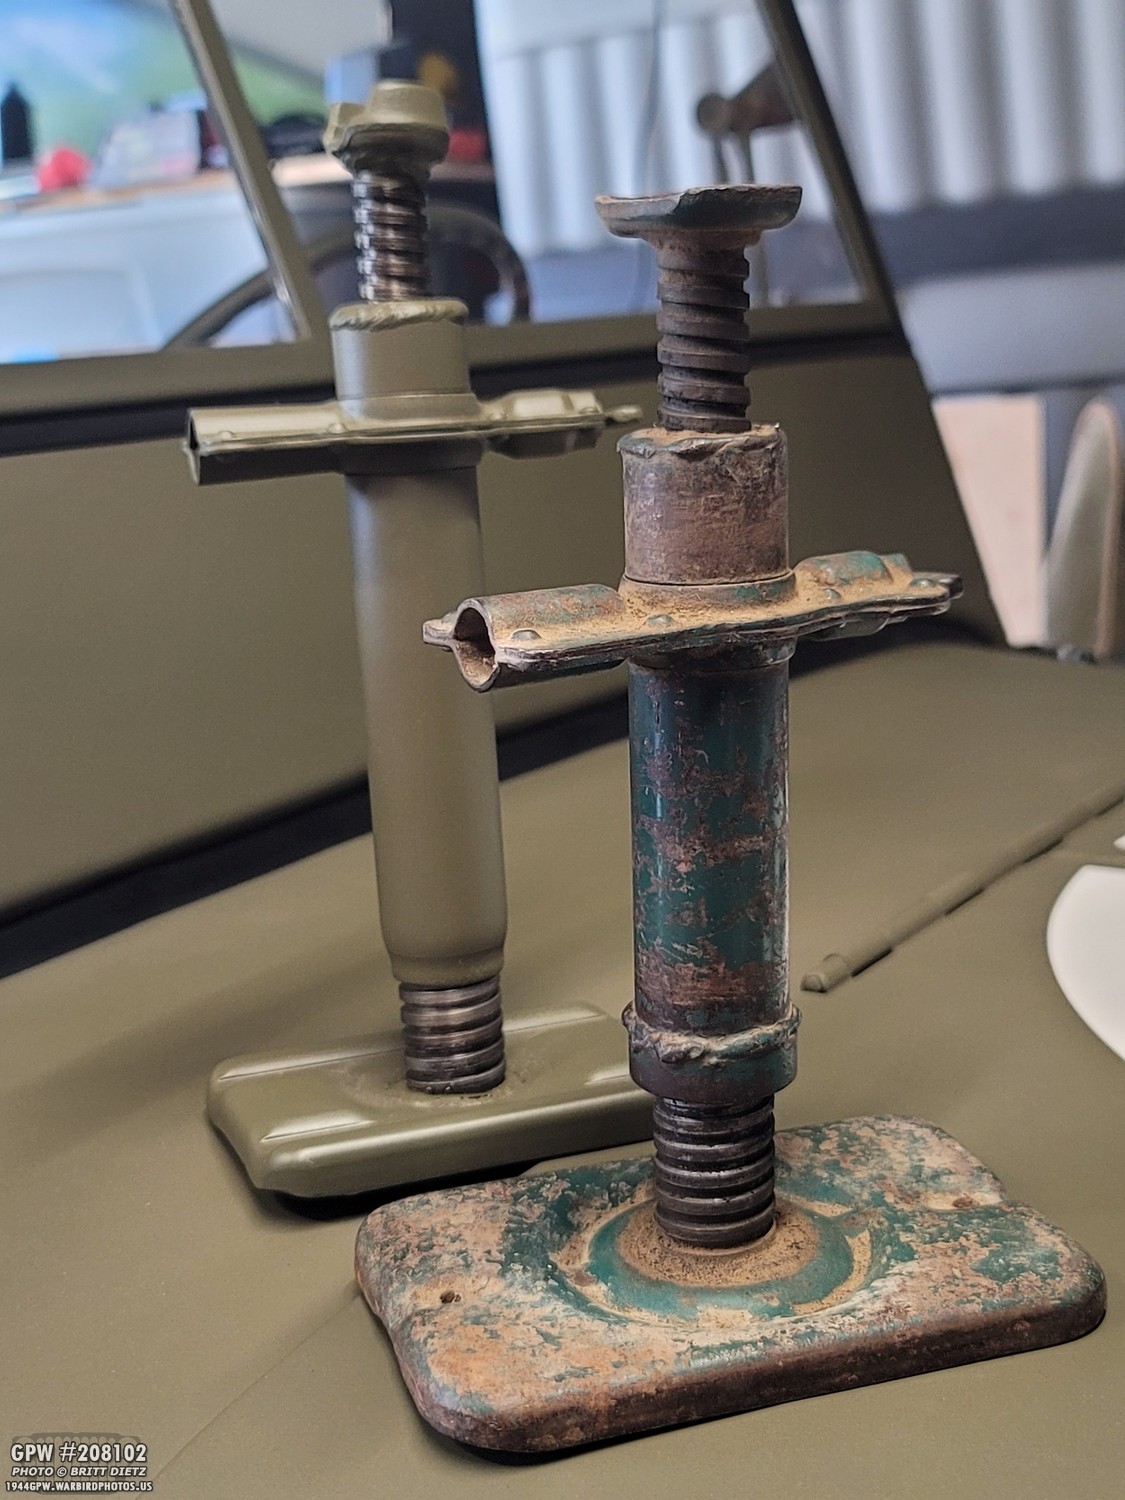
So let’s compare this Jeep jack with the mystery post-war/late war different vehicle one. You can read about that jack’s restoration and how it works here: https://www.1944gpw.warbirdphotos.us/blog/ww2-jack-march-field-museum/
Right away, we can see the post-war one is much taller overall.
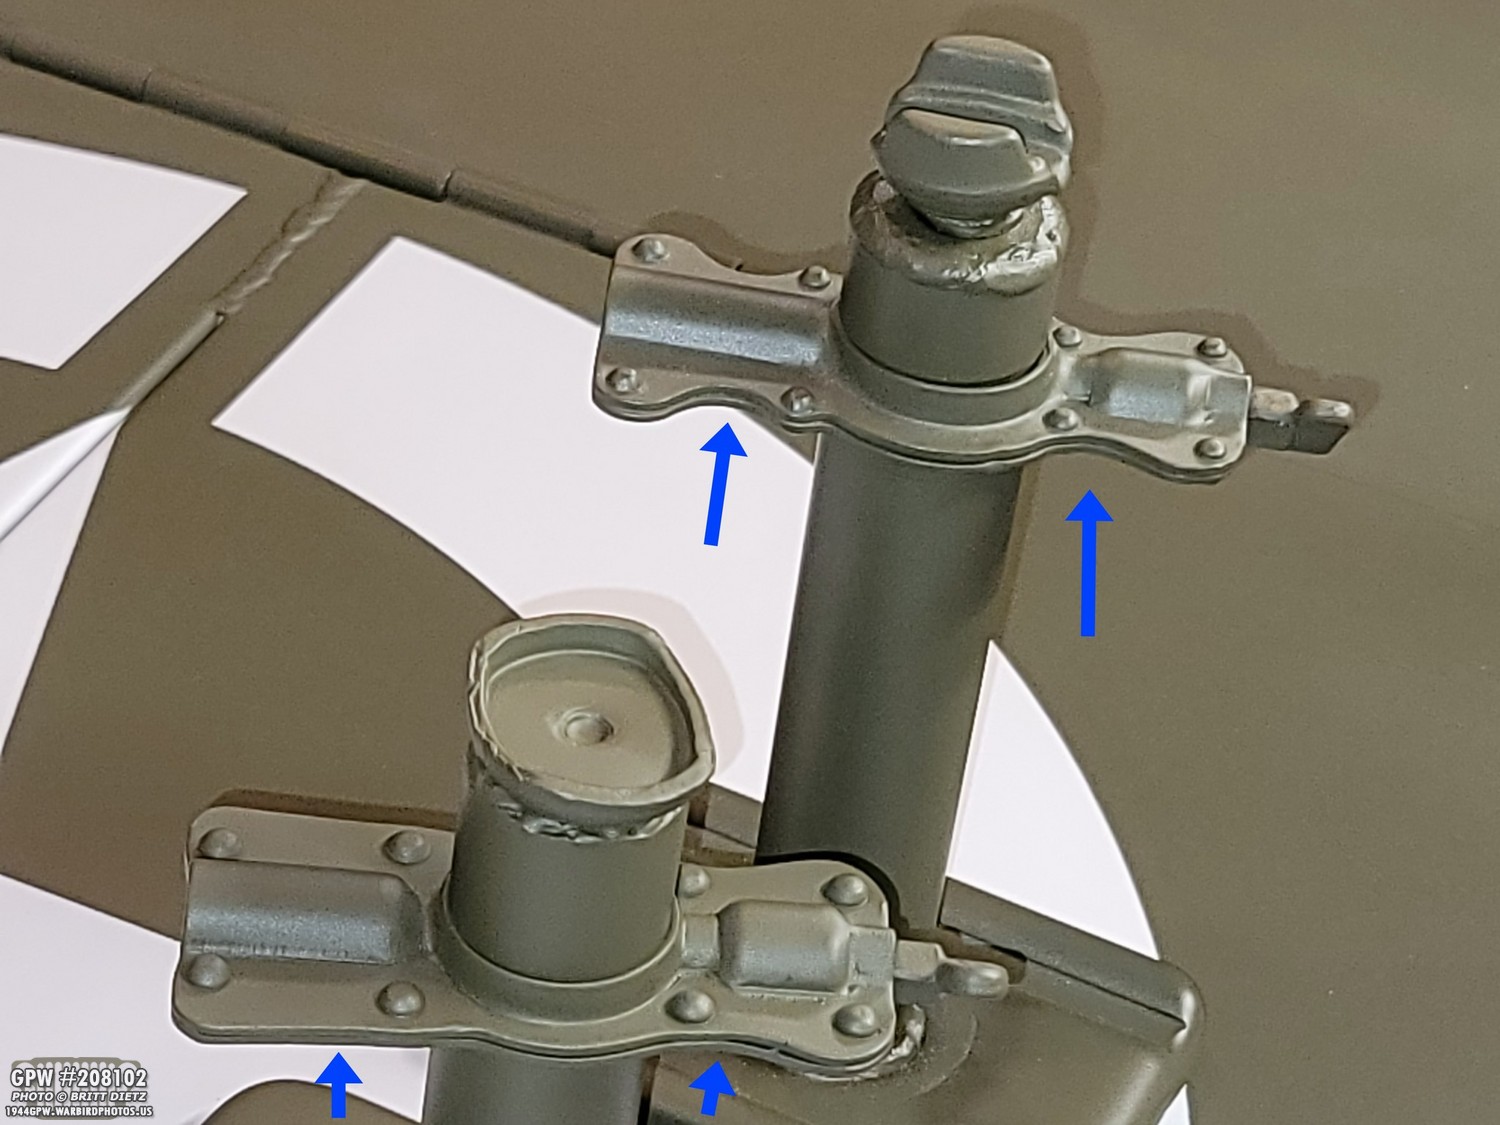
If you want to quickly figure out if a jack is a wartime Jeep one or post-war, let’s start first with the ratcheting sockets. Notice the difference in the shape of the riveted metal.

The wartime (left) one has less of a inward curve than the post-war (right). Also, the DOWN/UP selector tab is more rounded on the wartime one.

On the other side, that difference is more pronounced. The wartime (left) is a straight line, while the post-war (right) is really curved.

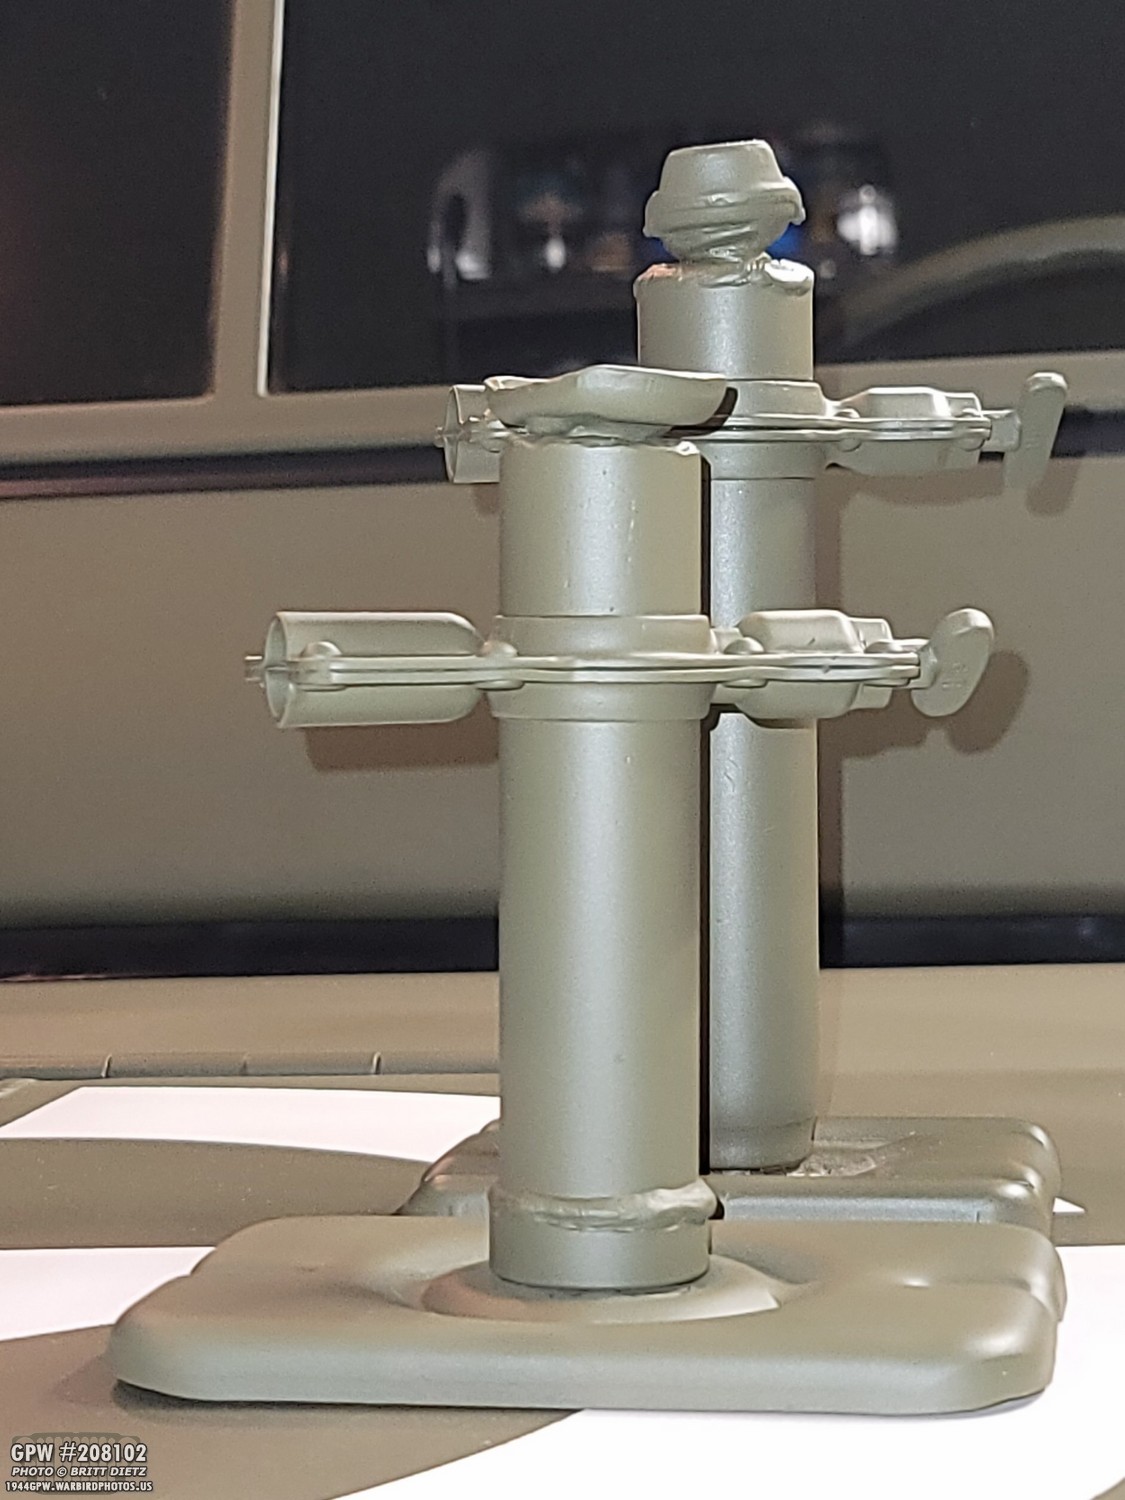
Another very easy way to identify (and the main reason the other jack might be post-war) is the top ‘cup’. The wartime cup (left) is more like an actual cup. The post-war (right) style is this almost U shape.

And finally, the base. The post-war (left) is smaller than the wartime (right). The base of the post-war one is the interesting part, as it does not match any of the post-war styles I’ve seen. Thus why it could be late war from a different vehicle. The wartime jack has two notches, and four spot welds in the center ring.

Fully extended now, the wartime jack looks tiny next to the post-war one.

Looking from the side, it’s a big difference.
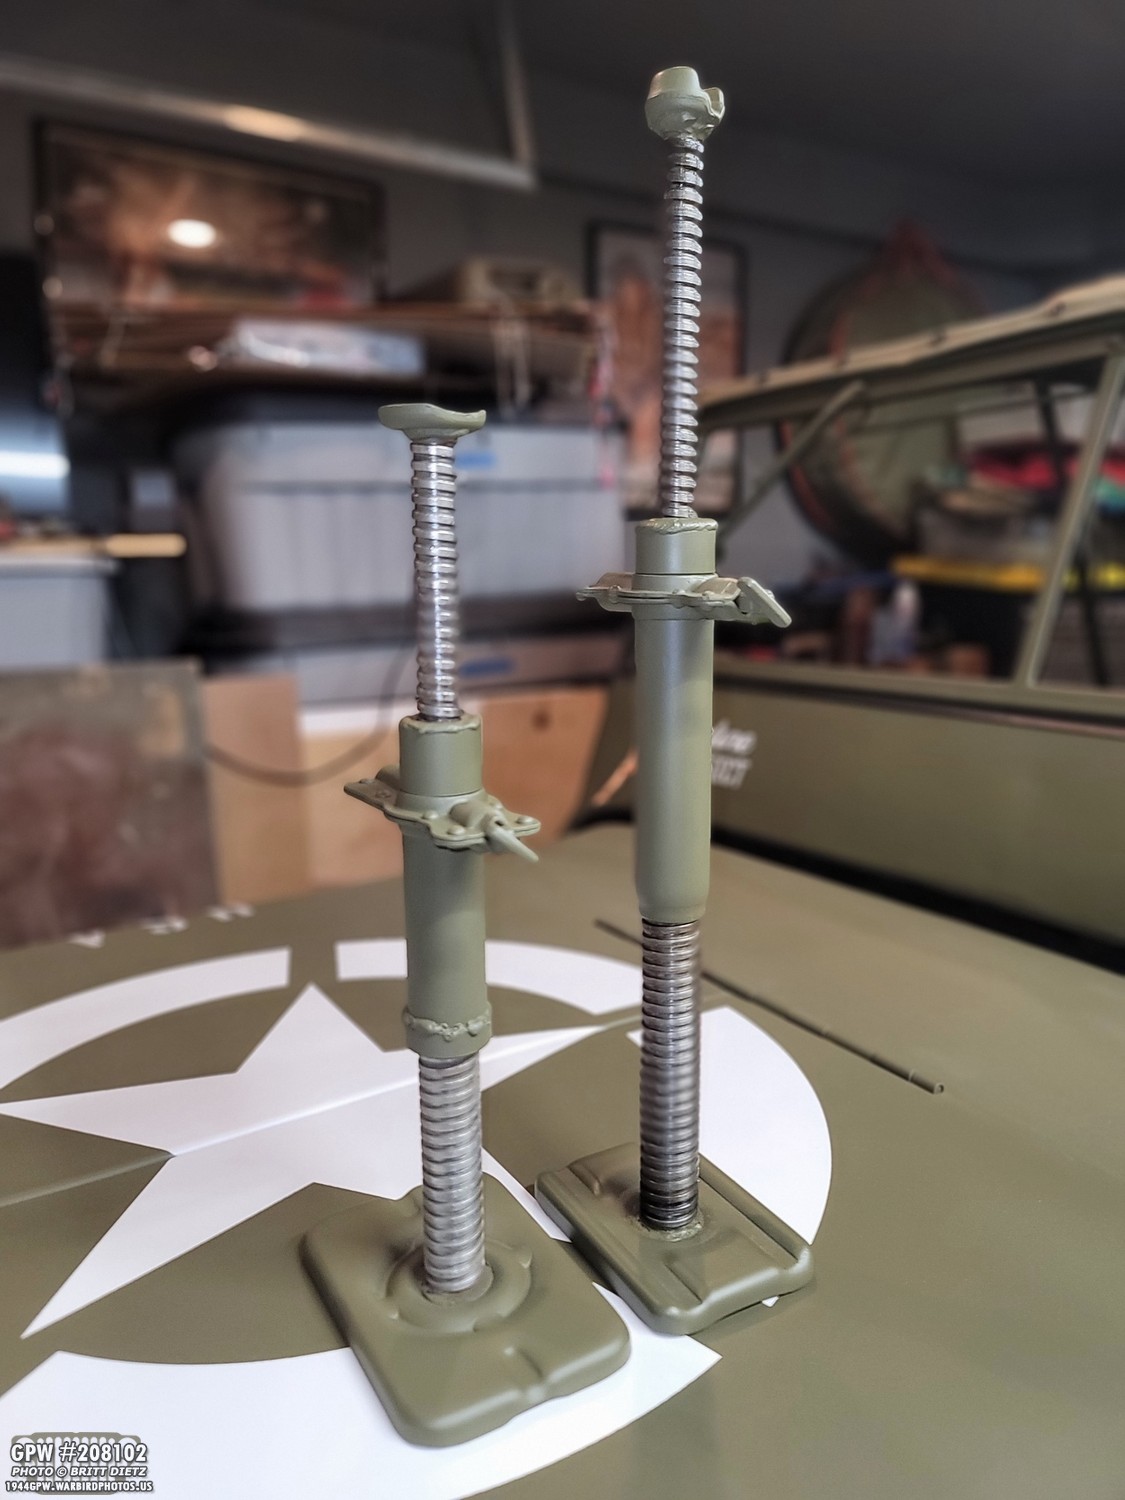
Ironic that the wartime jack, which is not as high, has the larger base. You’d think the taller one would have a larger base for stability. But there’s your look at a wartime and post-war differences in jacks! I’ll swap out the post-war one in my Jeep’s took box with this wartime one. Another accessory to mark off the list!
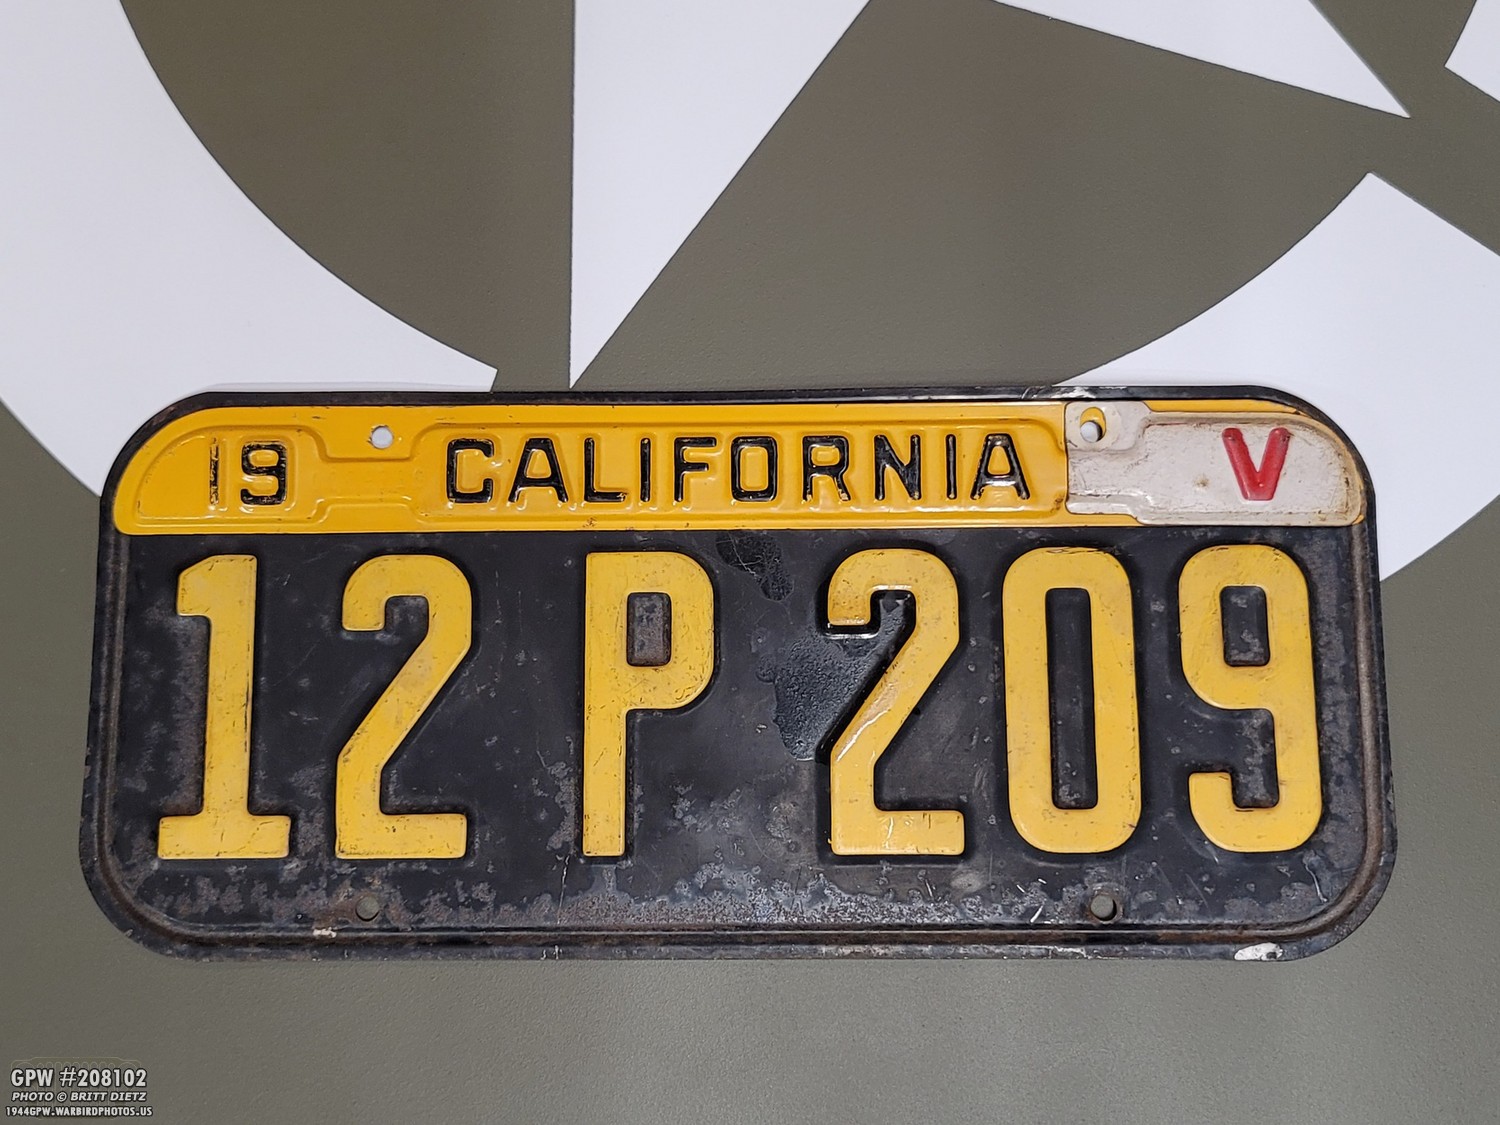
A few weeks ago, I did an in depth look at all the different California license plates from 1940 to 1945. For an upcoming project I plan to work on later this year, I’ve been collecting the different configurations throughout the war. This is what a 1943 plate would look like… a 1941 plate with a 1942 yellow topper and a 1943 white V for Victory tab. But I’m missing something to make this into a 1944 plate…
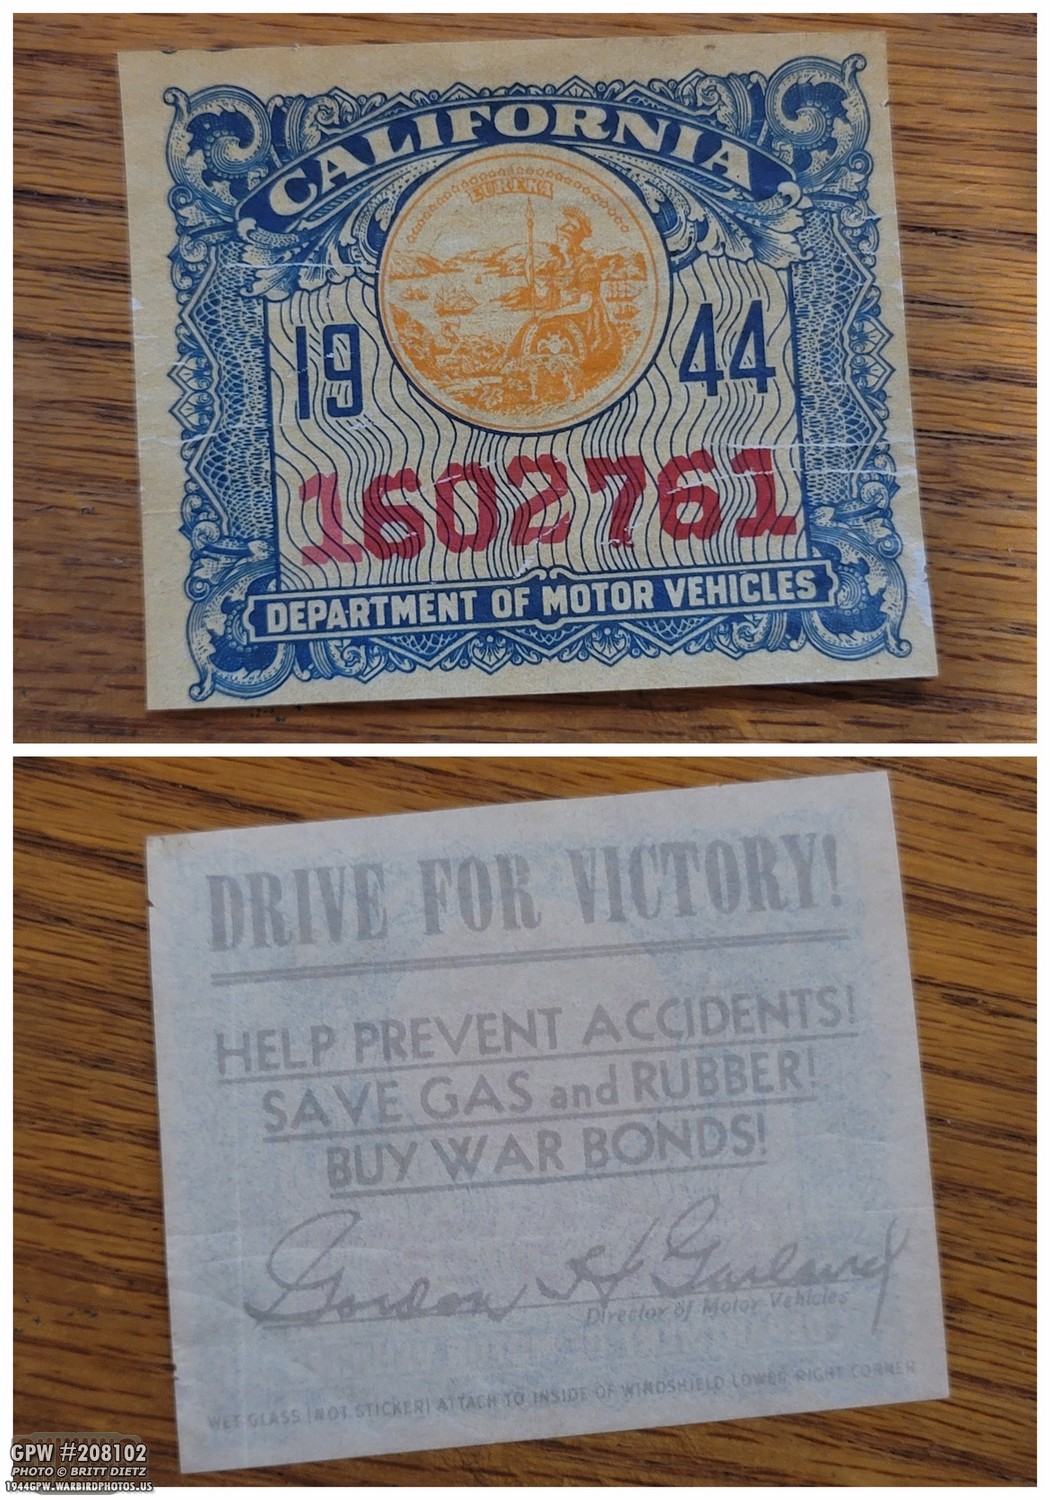
At least I was missing it until the other day I managed to grab the rare window sticker that was issued in 1944 as metal/steel was vital for the war effort. So you’d have the 1943 combination of things, and then this sticker in the front windshield glass of your car. It’s great to have an original one of these stickers, and while not perfect, in pretty good shape. Not to mention I got it for $4 on eBay due to it being labeled incorrectly. I’ll scan this high res and fix it up in photoshop. I might remake it to put in my Jeep as an educational item. This original is a bit too brittle to actually stick on my window!
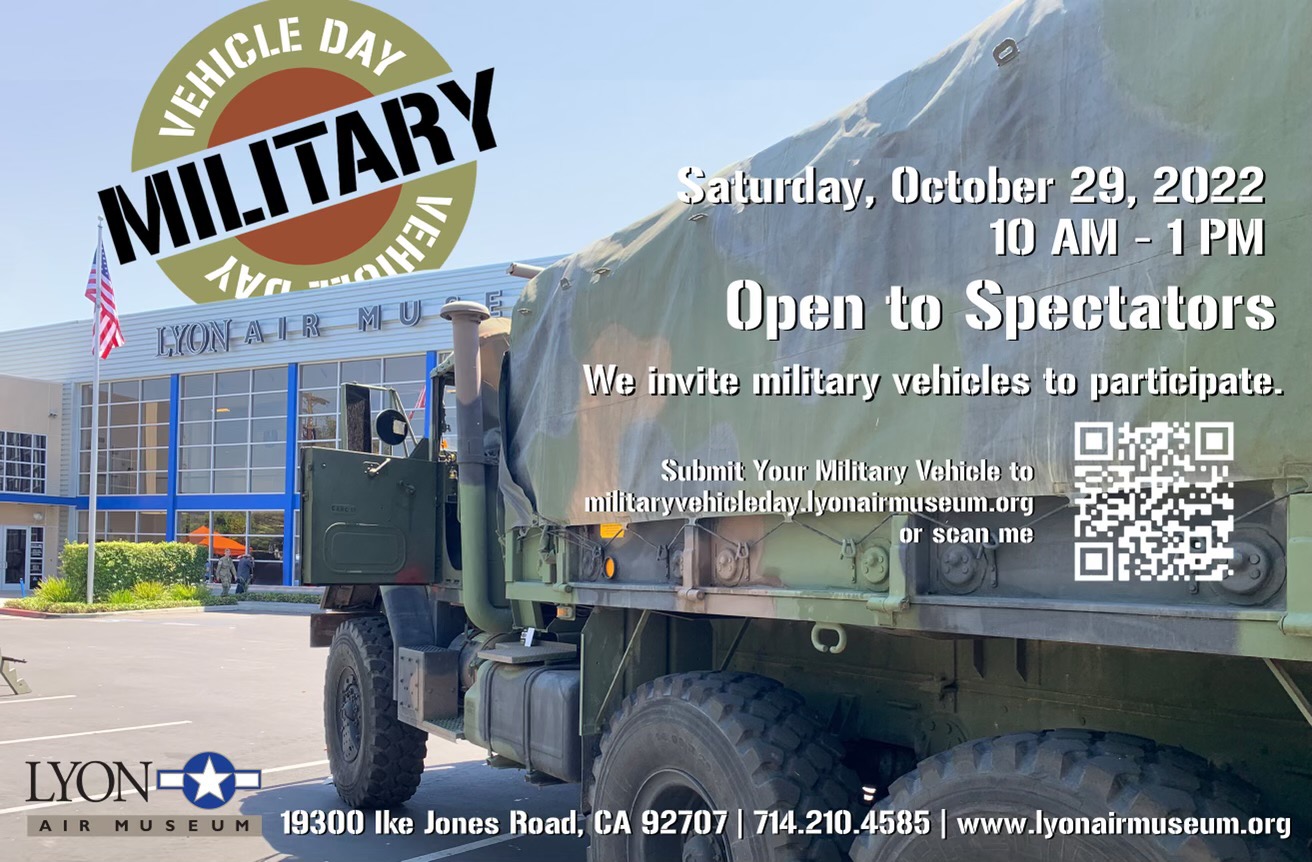
As I wrap up this update, I wanted to mention an upcoming event at Lyon Air Museum in Orange County, CA (John Wayne Airport). Saturday, October 29th they are having a Military Vehicle Day at the museum, and are looking for people with vehicles to attend! I plan on bringing out my Jeep to the event, and I encourage anyone else who has a military vehicle to bring it out! Use the link https://militaryvehicleday.lyonairmuseum.org/ to register and get more info!

So that’s it for this week! In the next update, I’ll get some good shots of the new trailer socket stop light in action and how it looks from another car.
Till the next update…