 Axle Saga Continues and a Speedi Sleeve!
This week saw a couple smaller projects with some continuing work on trying to find the mysterious clackity sound from the rear axle with some interesting conclusions. After seeing gear oil slung all over the bottom of the body tub, I decided to speedi sleeve my rear axle yoke to make it brand-new like! Includes a full speedi sleeve tutorial. Finally, I adjust my gas pedal linkage, start construction of a ‘sign’ display, and get the brake drums honed!

What a wild ride this has been the last few months as I continue to try and figure out where the mysterious ‘clackity’ sound has been coming from under the Jeep. I’ve spent countless hours, lots of money, many phone calls, many posts online, etc trying to figure out this issue, and so far I’m nowhere near closer to solving this issue.
The usual quick recap… in December I replaced the post-war CJ axles that came with my Jeep with two wartime GPW axles. A mysterious clackity sound suddenly appeared when driving in gear and letting off the gas. Several GoPros mounted under the Jeep, and we figured out it’s coming somewhere in the rear axle. After testing what seemed like a thousand things, rebuilding the transmission and transfer case, fixing the driveshaft, and a million other tests/rebuilds/replacements/fixes, the clackity sound is still there. So, I got another wartime GPW rear axle, restored and rebuilt it, and replaced the other GPW rear axle. Sound was STILL there. Rotated the wheels, new bearings, etc etc. It’s a long story, but it comes down to… the sound is still there.

Last week I did a wheel rotation, didn’t fix it. At this point, the ONLY things that are left from the previous axle are the brake plate, drums, and the driveshaft. So that’ll be the focus this week.
I finally had one of the two Jeep experts I know have his schedule line up to where he could come over and finally take a listen/drive on my Jeep. The clackity sound was loud as it’s been, so he heard it for sure. He leaned out of the Jeep trying to locate where it was coming from. We then went back to the house where he went under the Jeep and checked everything. Everything was in perfect shape underneath. He then drove the Jeep for a bit, and said he couldn’t ‘feel’ any vibrations or hesitations related to the clackity sound. So his final thoughts? It’s not something dangerous and I should just drive it.

But, one last check to do was with the drums. Checking them with a fine-tooth comb for wear marks, rubbed areas, etc. So, let’s get to it! First, out goes the axle shafts…

Then off goes the wheels.
Then off goes the drums. I took a close look at the brake plate, looking for anything wrong. Since the inside is painted with the Red Oxide primer, it’s easy to see if anything is striking. There’s a couple of dings in the spindle on the axle, but those were already there.
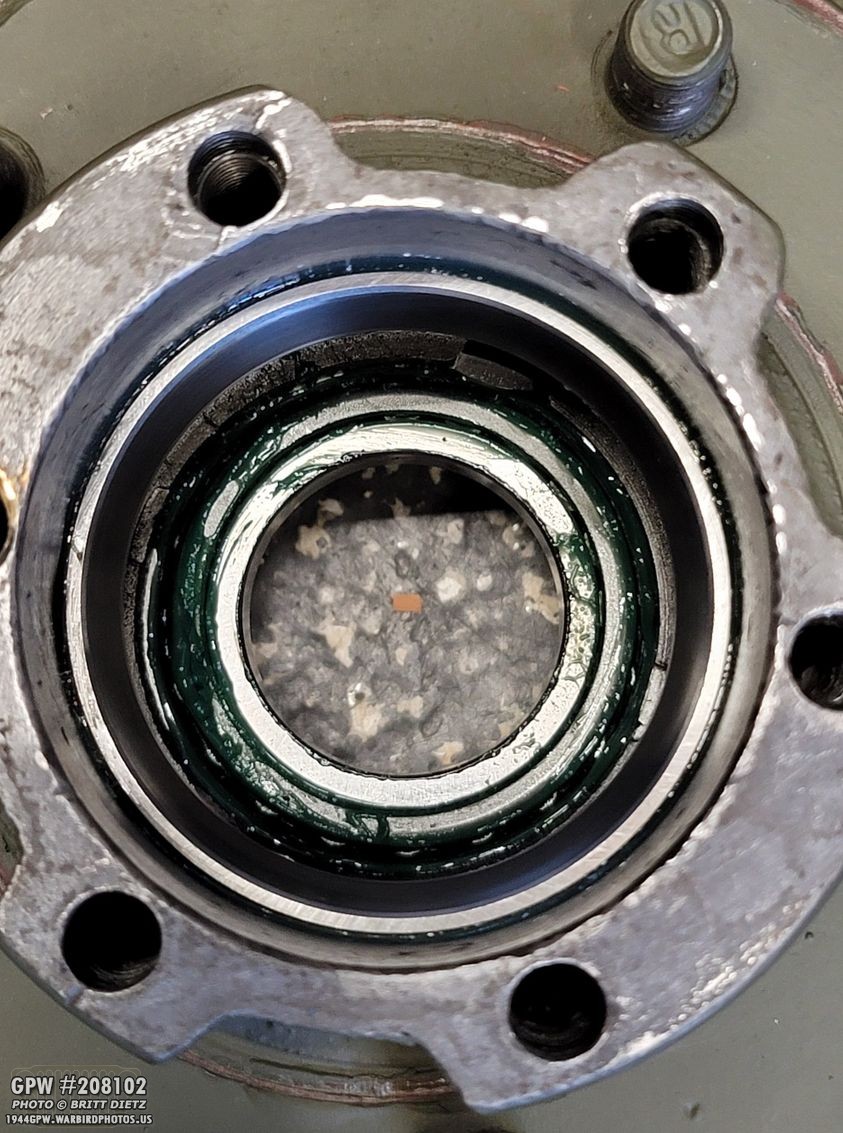
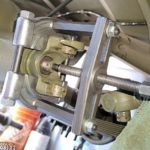
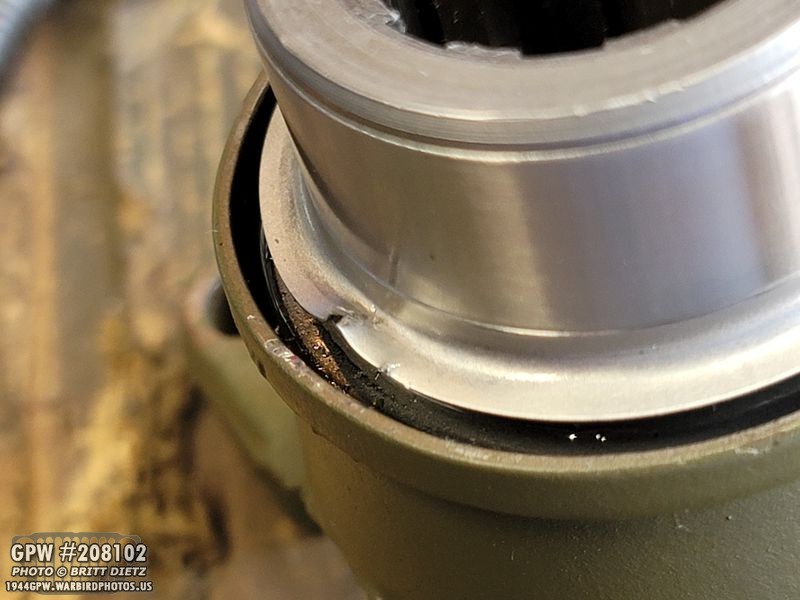
One of the things I would do is take the drums in and have them honed (resurfaced) just in case. Before I can do that, I need to get the bearing and the oil seal out. The oil seal is holding the bearing in.
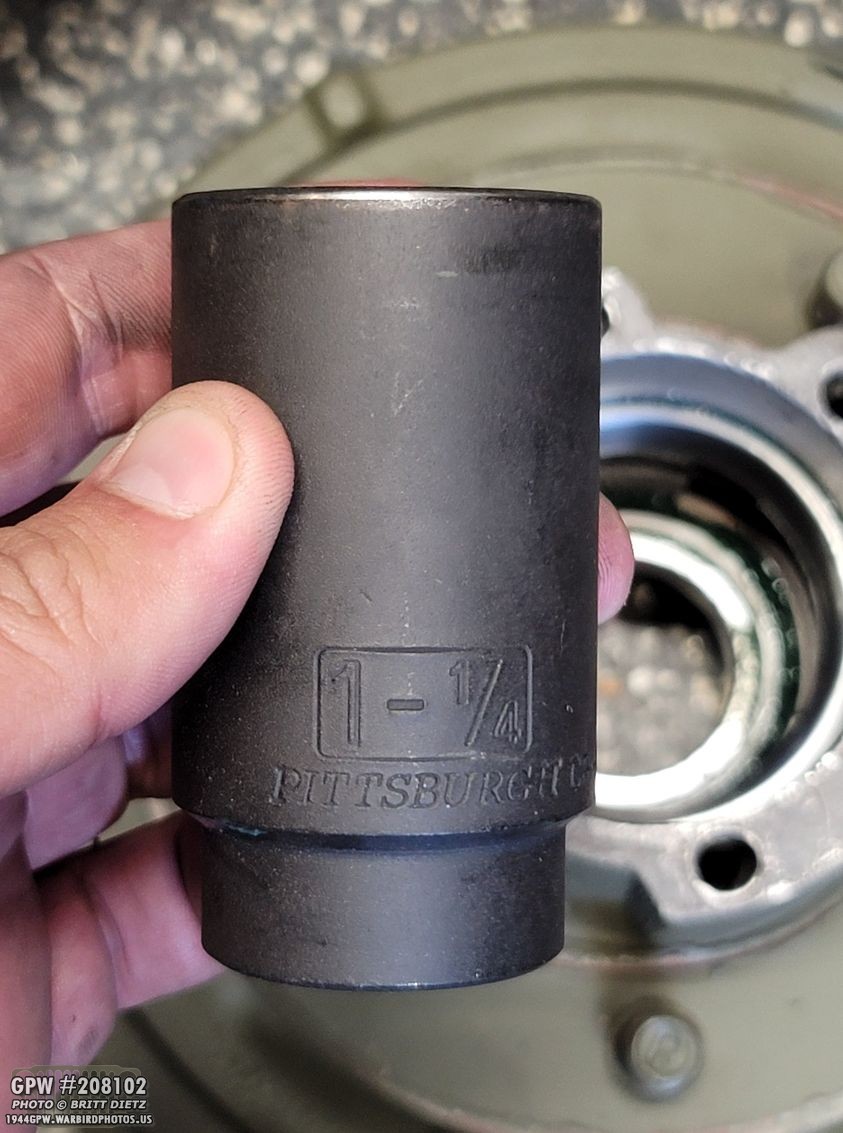
To get the bearing out without damaging it, I used a 1-1/4 deep impact socket that has a nice little shoulder.
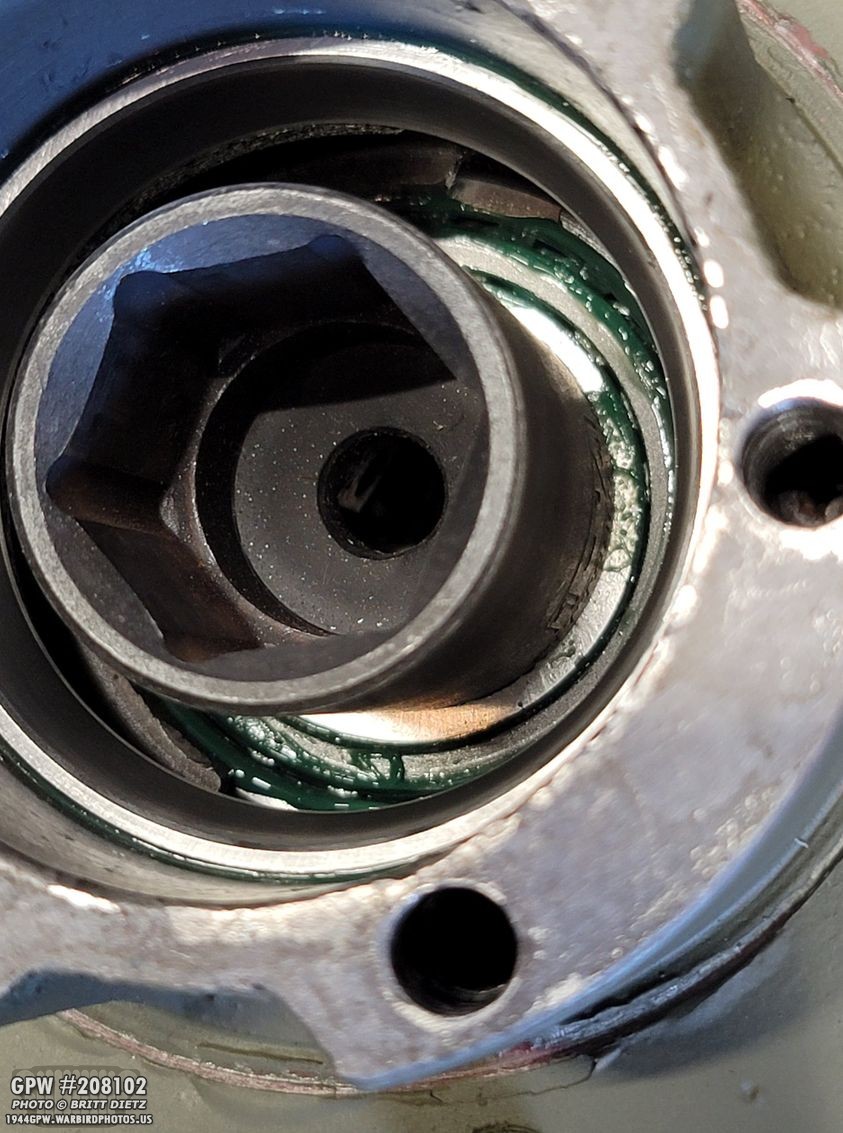
The socket fit perfectly on the bearing, so when hitting the socket, it wouldn’t push on the cage.

I used a large punch to hit the inside middle of the socket. This put even pressure on the bearing coming out.
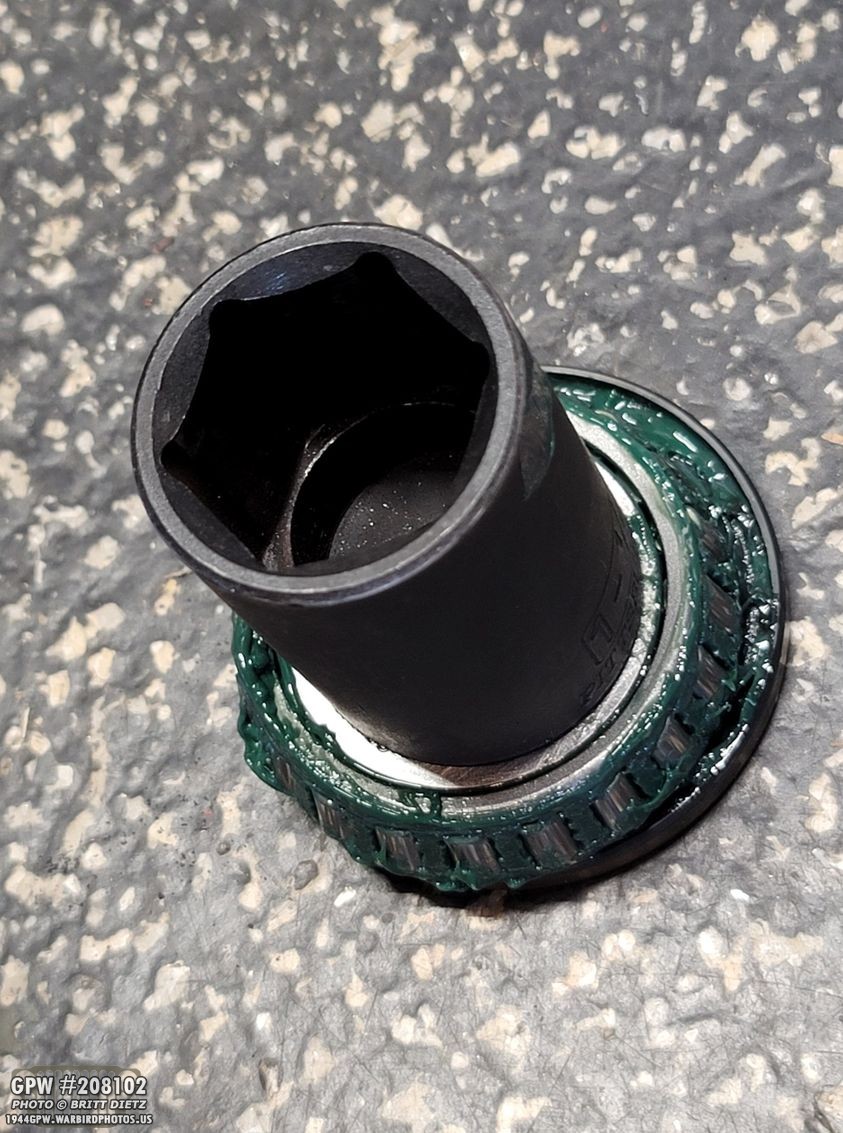
That worked perfect. It drove out the bearing and the oil seal. I could reuse the oil seal, but I decided to get new ones.
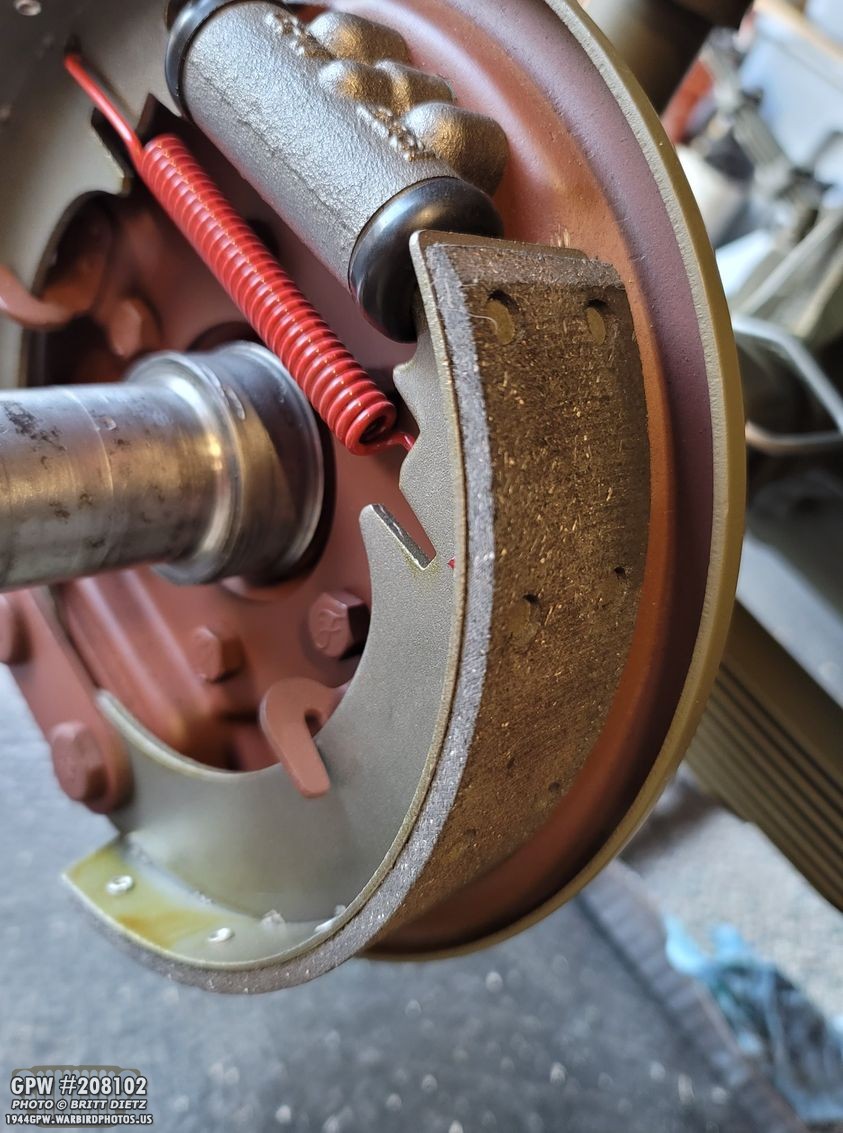
I then took a close look at the brake pads and shoes. There was signs of possible like wear on the shoes, only a tiny bit. So to be sure, I used a dremel to lightly sand down the shoe lip (the less than 1/16 part that is wider than the pads). At this point, I’ll do anything if it helps.

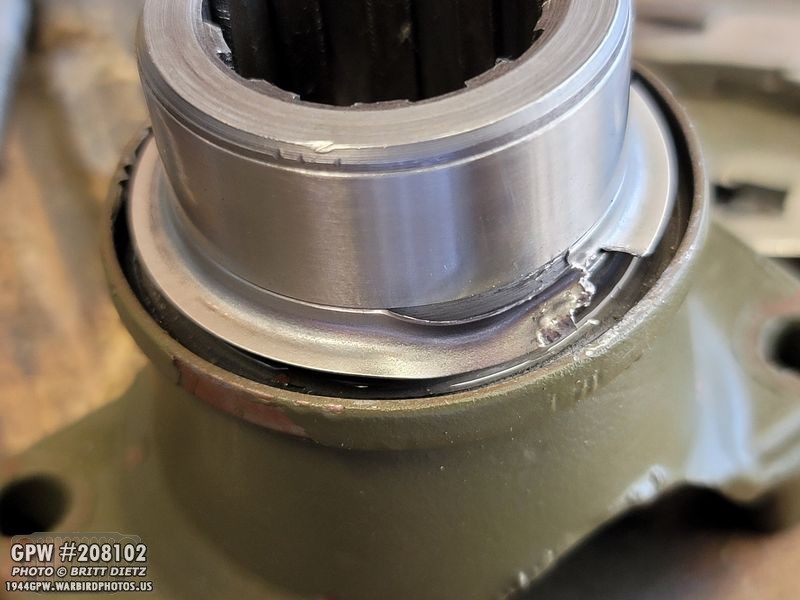
So, with both drums now free of the bearings and oil seal, I took them to get honed. Sadly, several places I initially tried only honed rotary brakes. I had to find a ‘small ma and pa shop’ that would still do it.

Thankfully, Jerry’s Brake & Tire Pros in Corona said they could do it! 24 hours later, I had the drums back all nice and resurfaced. Here’s a look a one of them.
So, that’s where I got to this week with the axles. I ordered oil seals from Ron Fitzpatrick Jeep Parts, but since they arrived yesterday afternoon (Thursday), I’ll be covering the rest of the project in next week’s update.
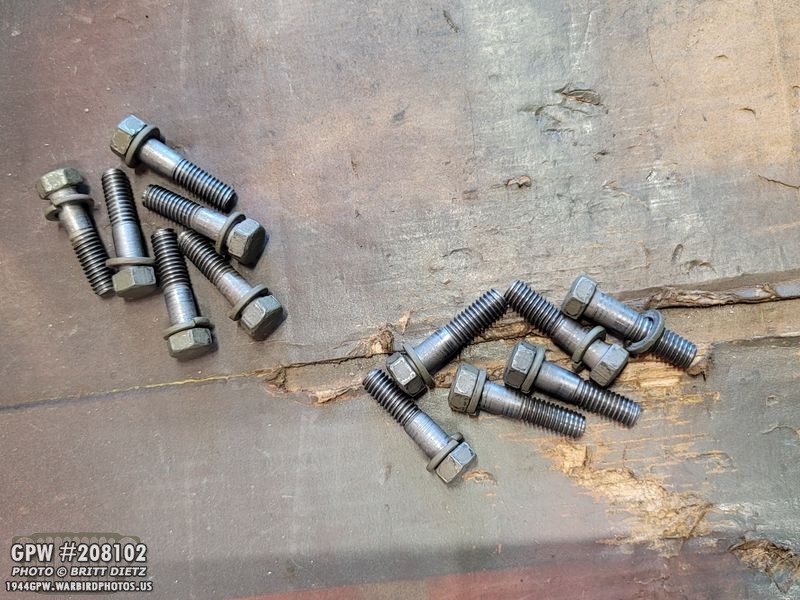
So, some other items I did in prep, I took the axle shaft bolts and used my die to clean up all the threads.
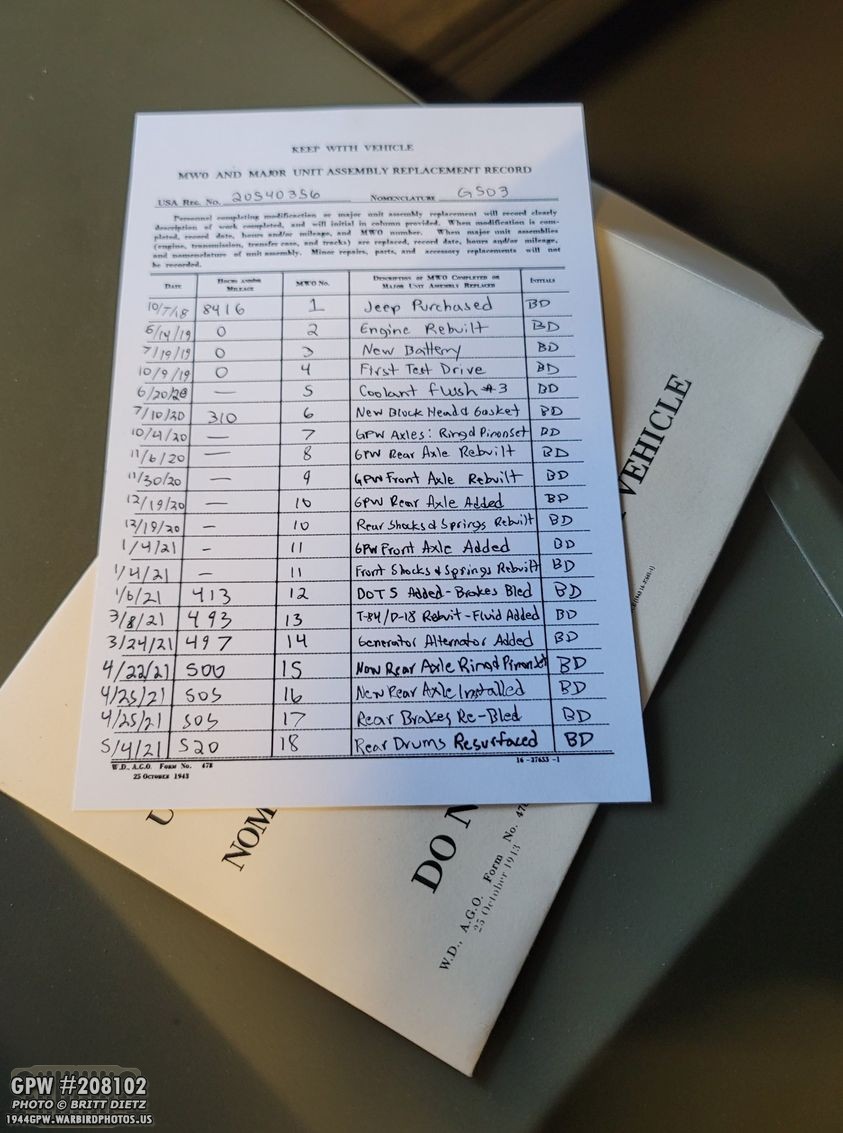
I also updated the MWO form I got from Farrell Fox, which I’ve been filling out with major milestones, repairs, etc for the Jeep since I got it. Jeeps would normally have a record like this of major fixes, repairs, etc. My thought is not only is it a good record of everything I’ve done, but if I need to remember ‘When was the last time I bled the brakes?’, it’s a quick way to check.
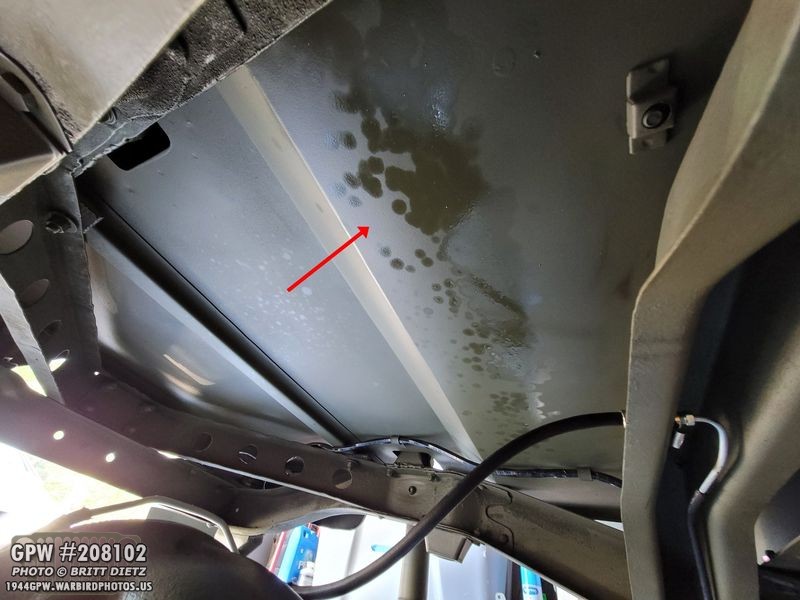
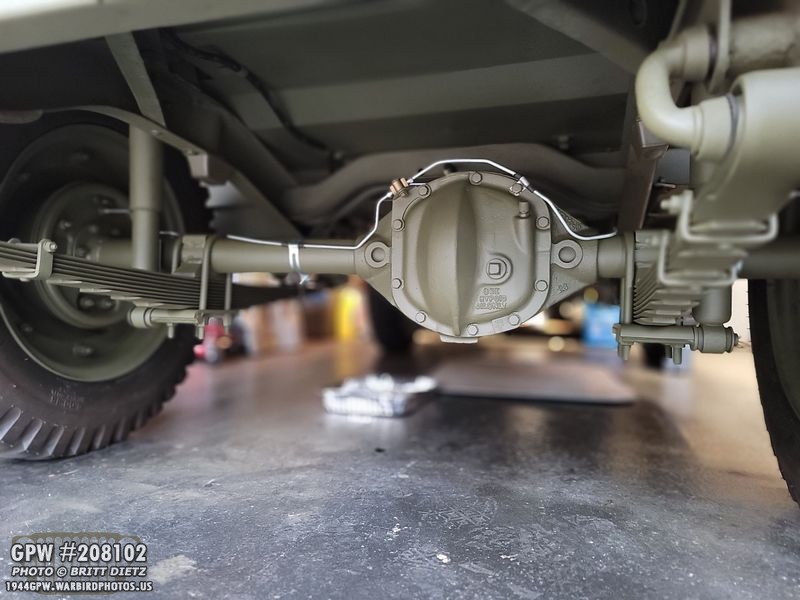
Speaking of fluids, since installing the new rear axle, it’s got a leak shooting gear oil onto the bottom of the tub making quite the mess. I’ve had to clean it up several times. UGH.
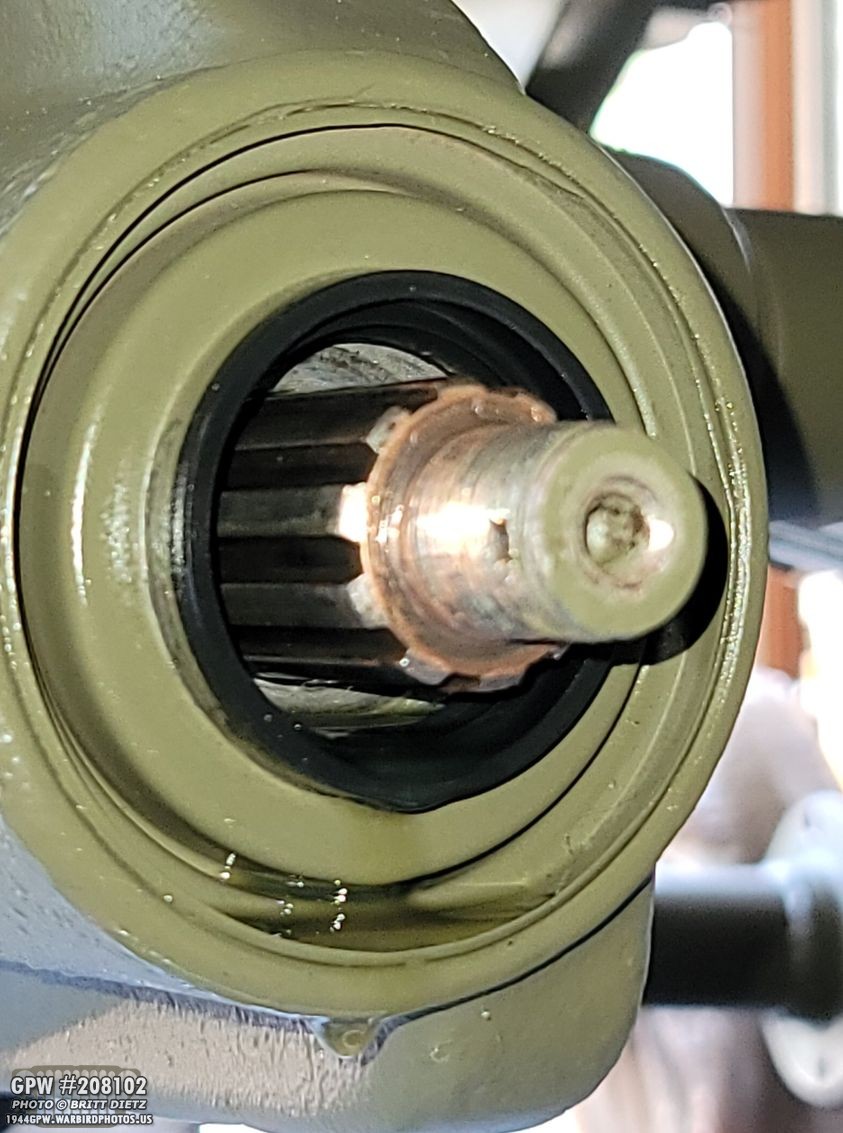
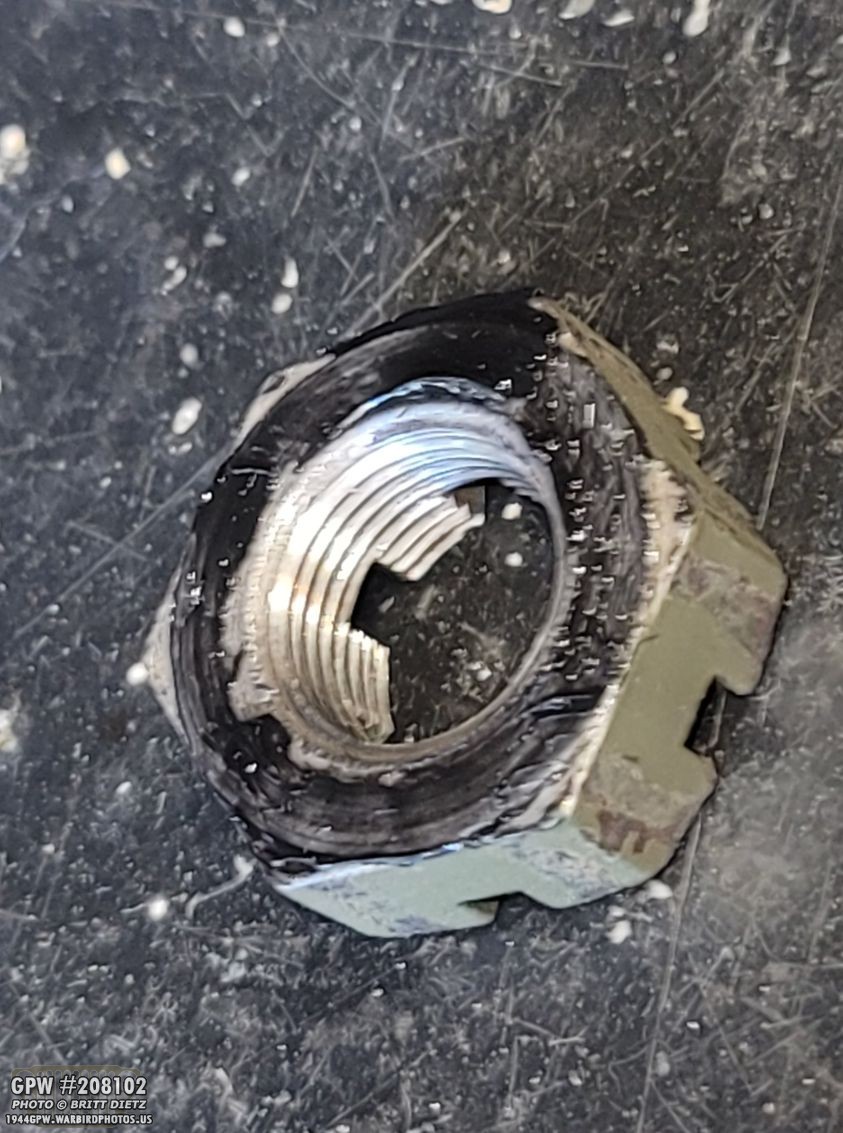
Turns out, the yoke outer shaft on the rear axle has gotten pretty worn. You can’t see it well here because the yoke has a dust shield, but it’s leaking from this area under the dust shield flinging oil all over as it spins. So, I decided to fix it rather than replacing it, since the yoke is an original F-stamped piece. Speedi Sleeve it is!
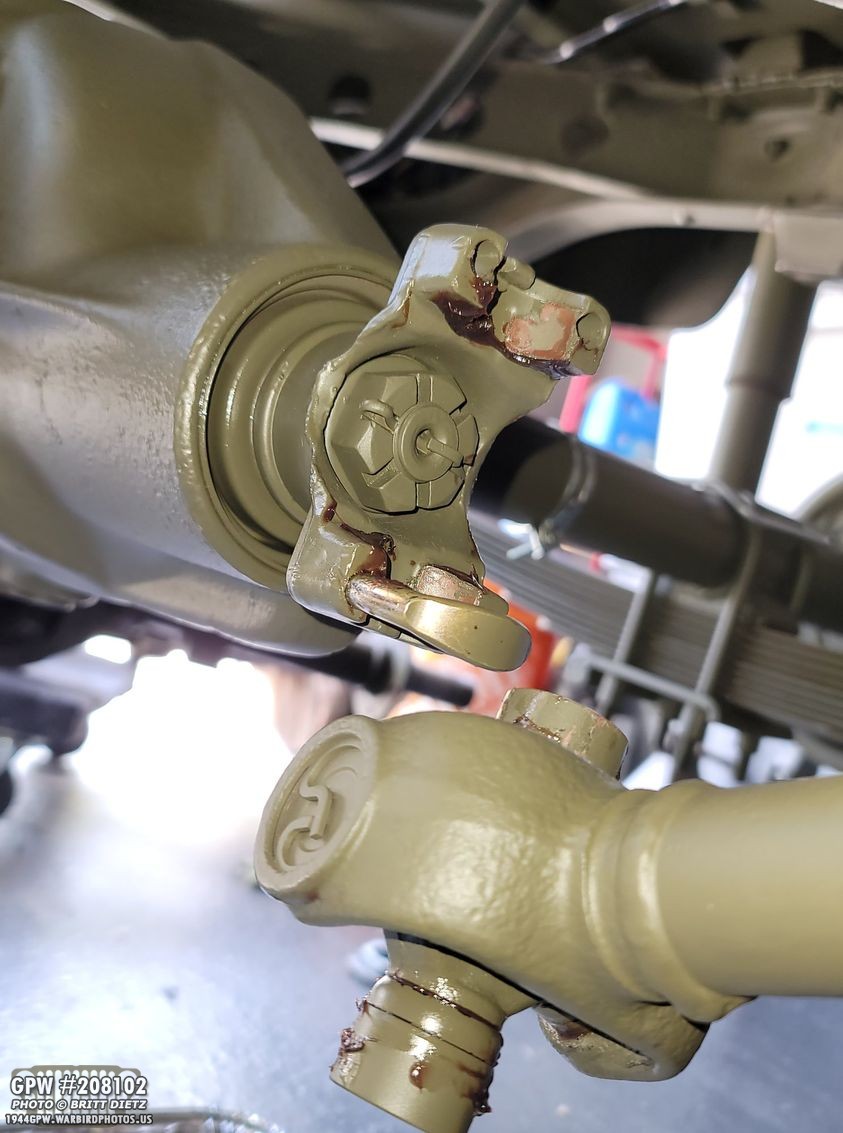
So I went ahead and disconnected the driveshaft. Not the grease oozing out of the universal joint getting everywhere. The driveshaft repair place really overloaded the oil in the driveshaft.
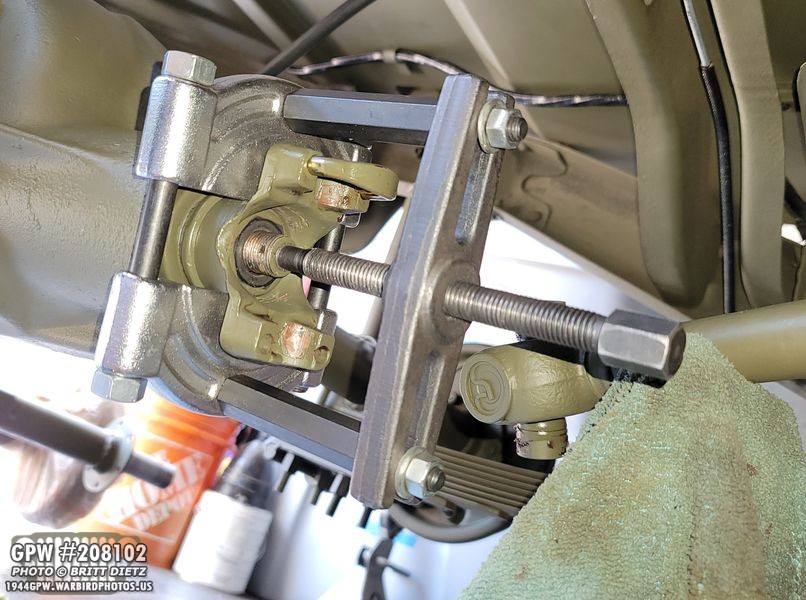
After carefully removing the cotter pin and the castle nut, I used the bearing puller to pull off the yoke.
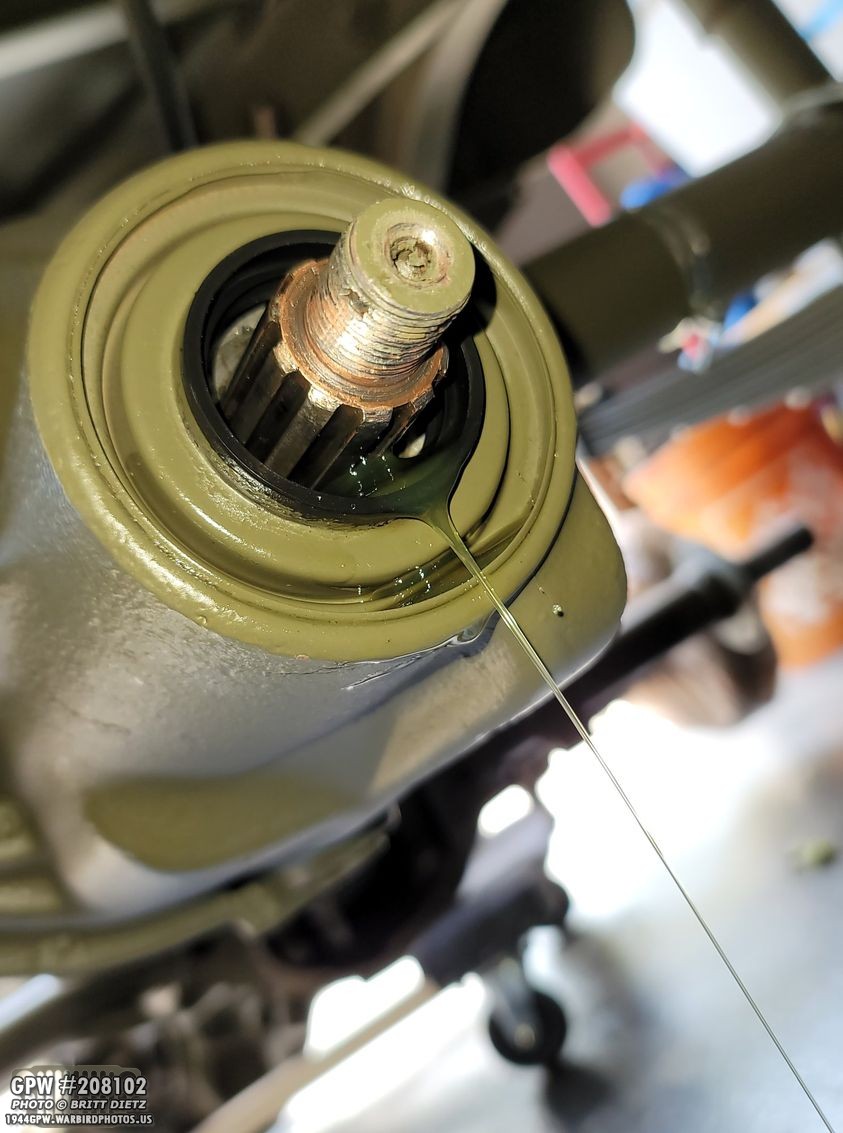
And here you can see why an oil seal is necessary here. The oil started to pour out from the axle. If that yoke is not tight on that oil seal, it will leak.
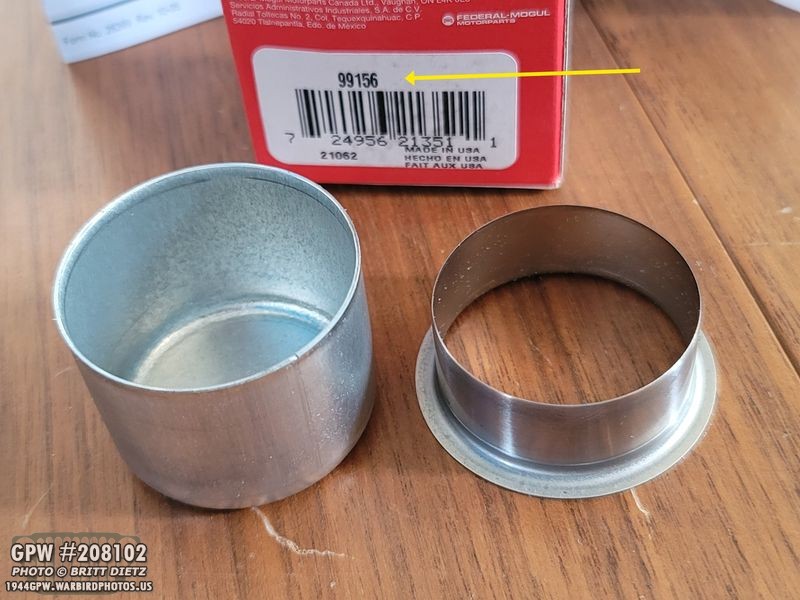
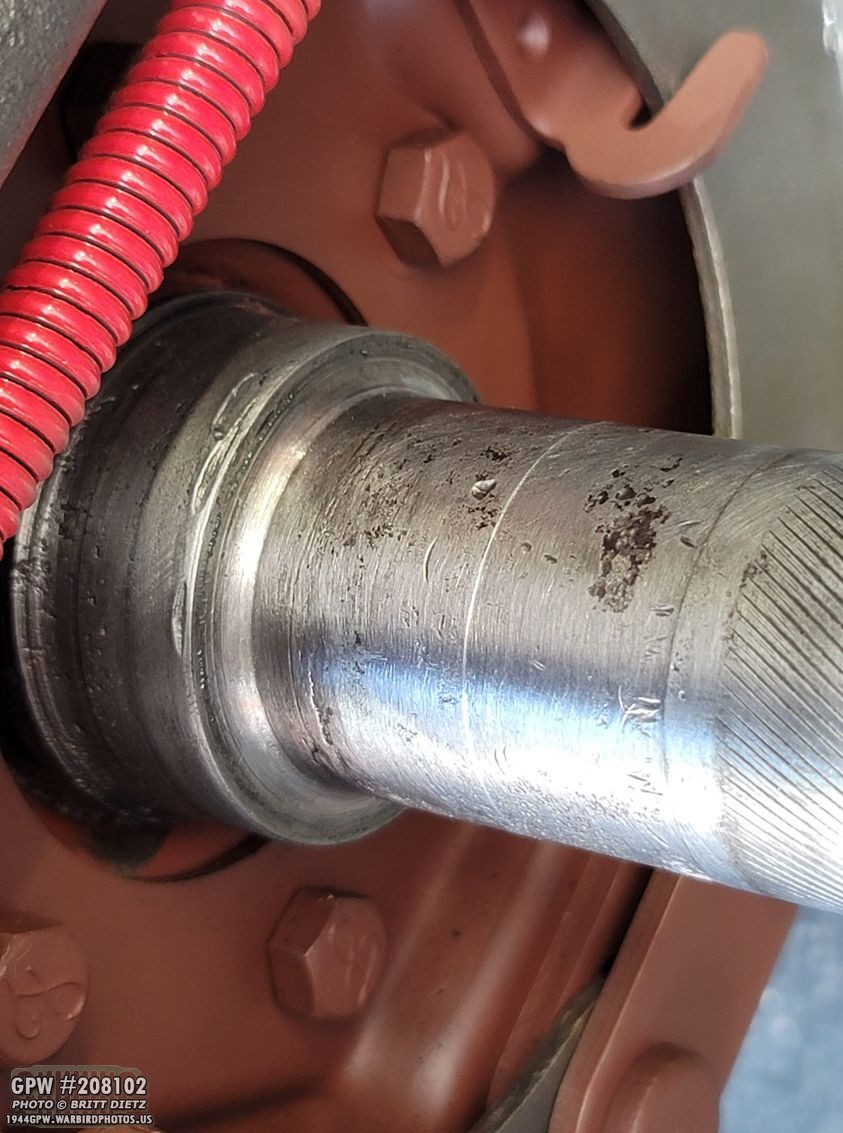
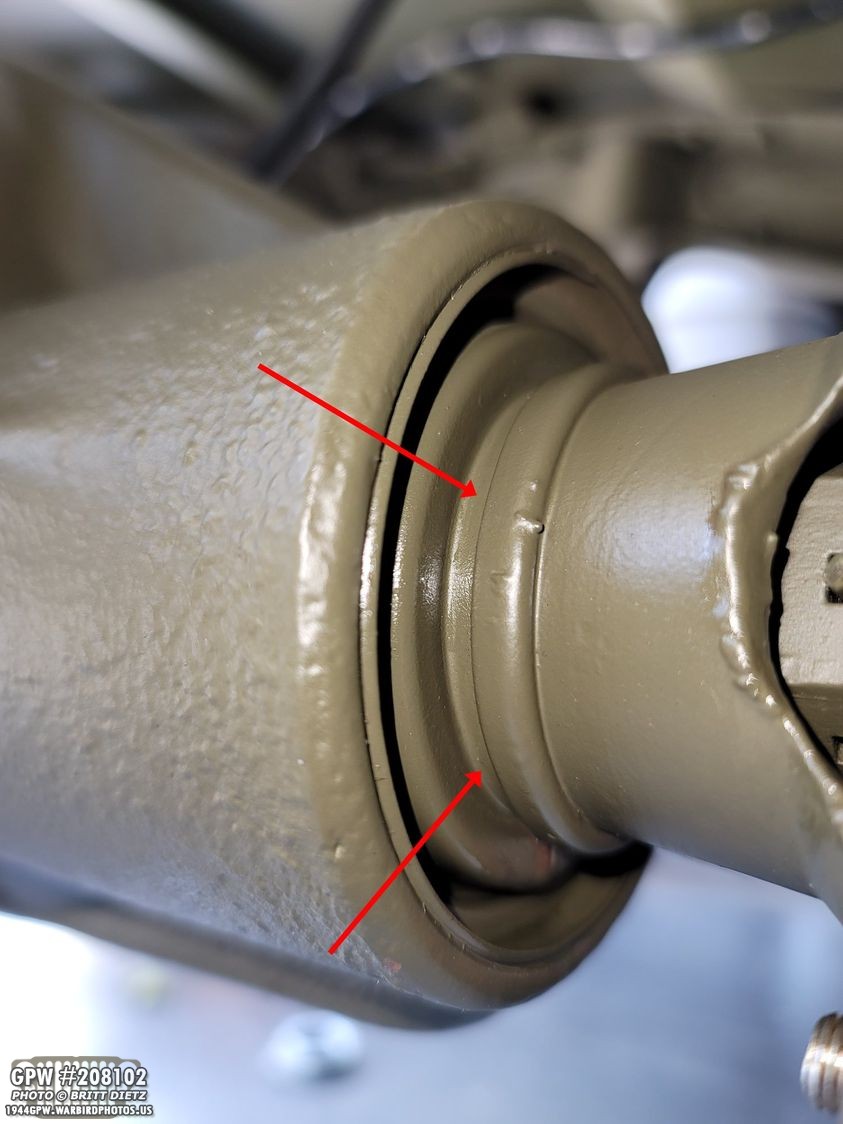
So, what’s a Speedi Sleeve? It’s basically a thin round ‘sleeve’ made of stainless steel that will fit over the yoke shaft making it a nice neat surface. It goes on very tight over the shaft, making it a permanent fix. The Speedi Sleeve for this is part #99156. It comes with two pieces… the right is the sleeve itself, and the left is a ‘cap’ that allows you to pound the sleeve onto the yoke.
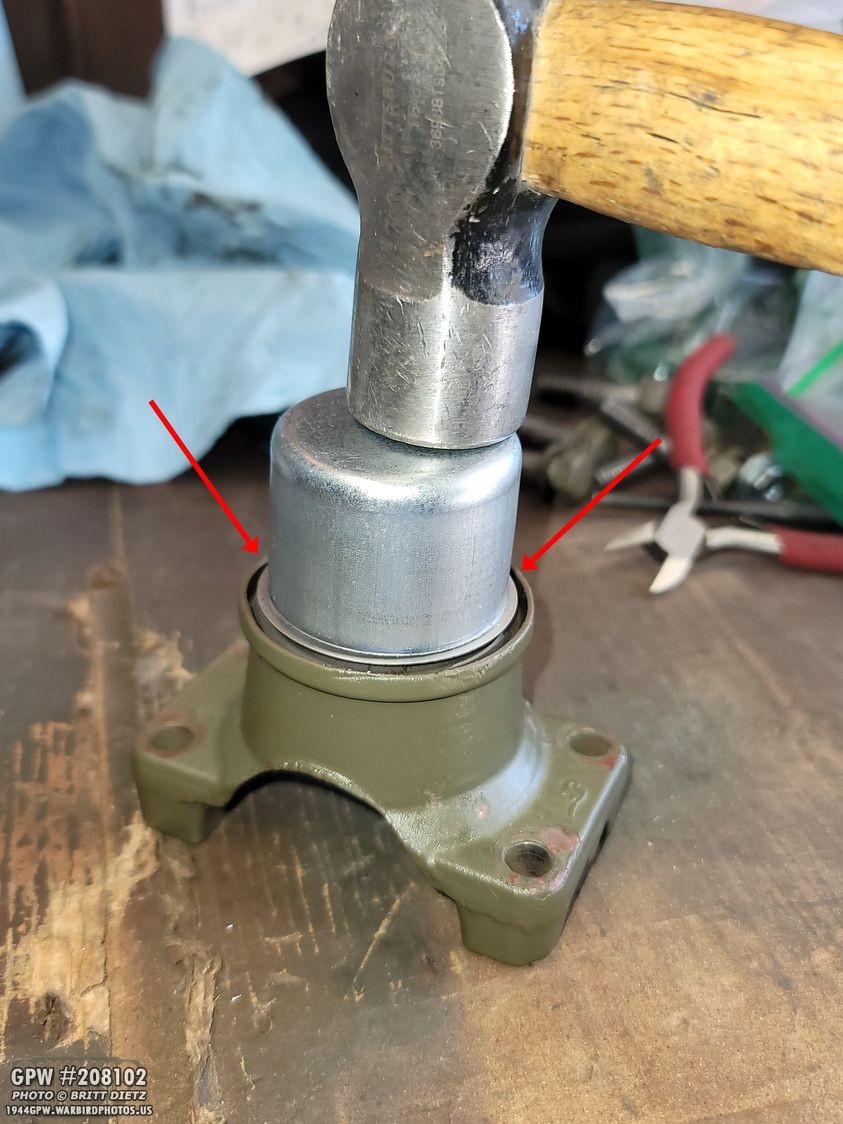
I didn’t get a photo as I was getting the sleeve started, but you can see there as I got it to the end. You put the sleeve on the yoke first, then you put the cap on that. The cap will rest against the little lip on the sleeve (red arrows). Once you get it started (take the cap off the check you are getting it on straight), then you can start hitting it harder with the cap. The cap is what’s driving it down onto the shaft.
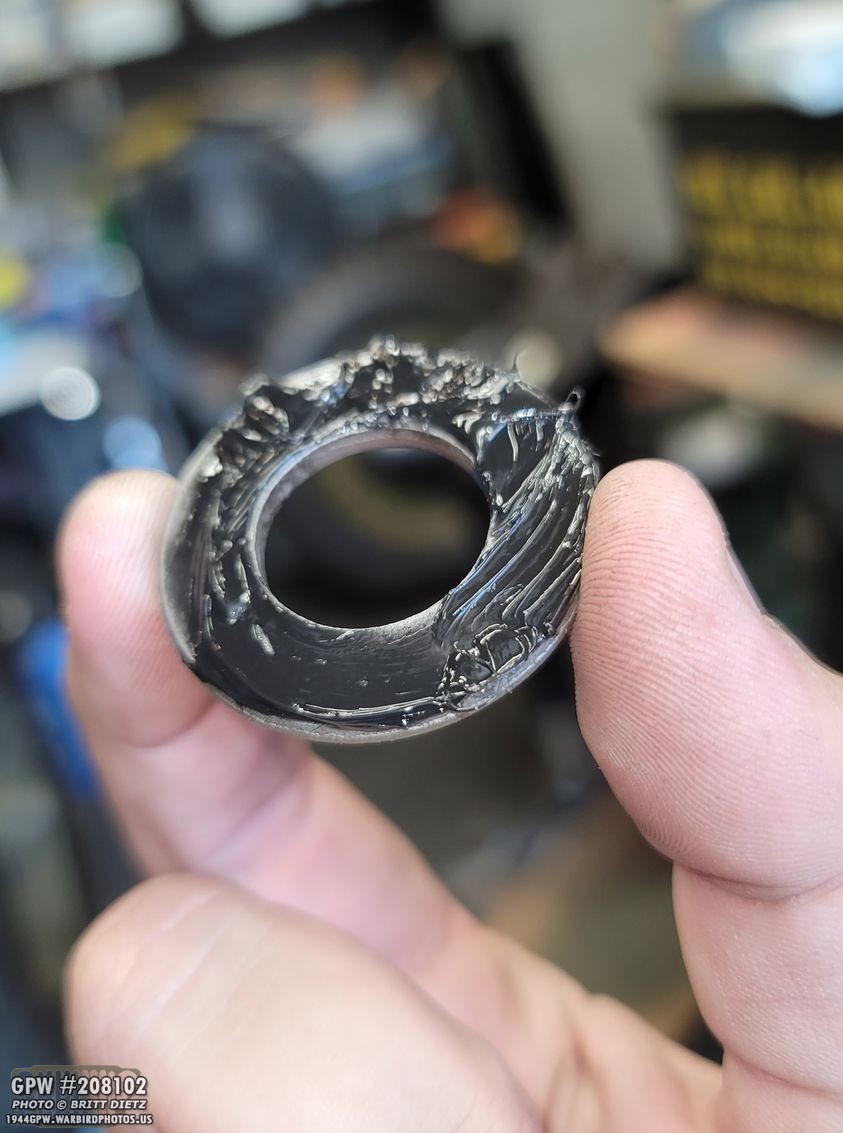
And here’s the sleeve now on the shaft! But, we need to remove that lip so the sleeve is just a ring around the shaft. The red arrow is pointing to a line above the lip. This line is a score in the sleeve where the lip can be pulled apart from the sleeve.
To do this, though, you need to get the cut started. So I used some small cutters to start cutting a slot into the lip.
After I cut it close enough, I was able to use pliers to start pulling and the lip started to break away, as shown.

The lip has now been pulled off (it’s to the right).

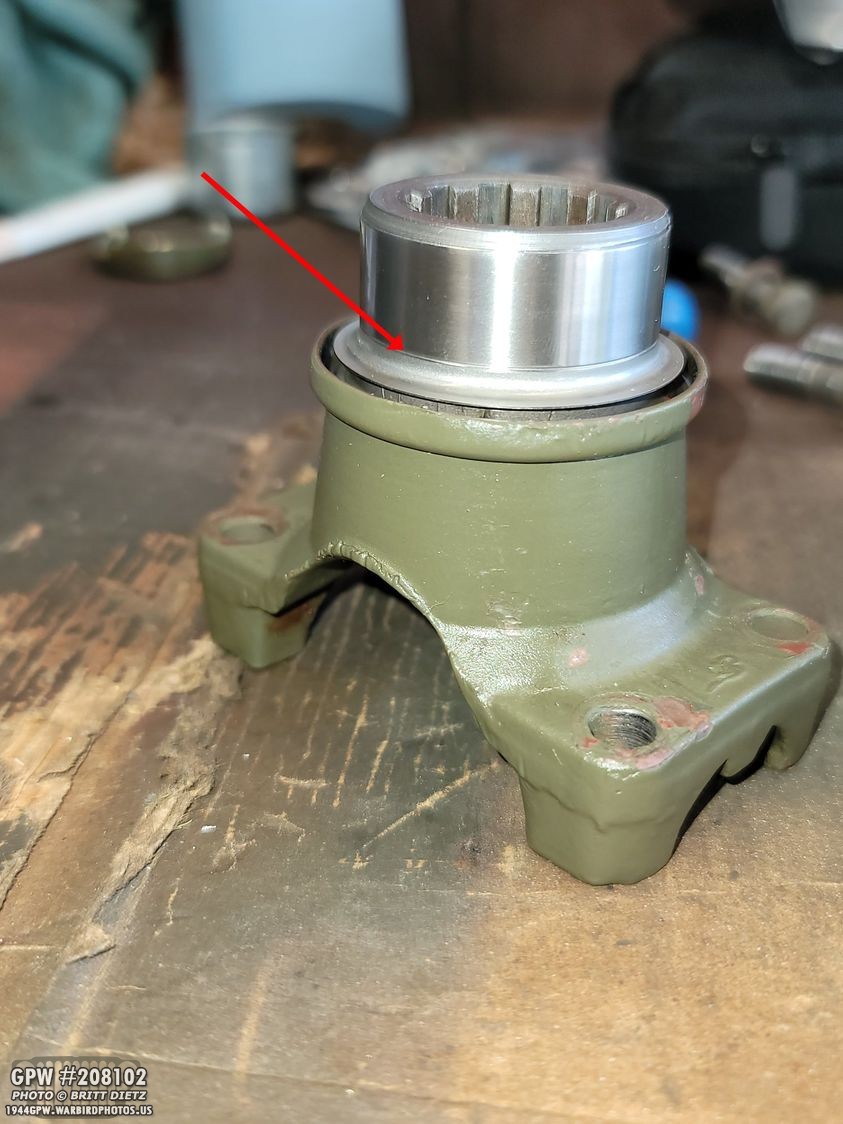
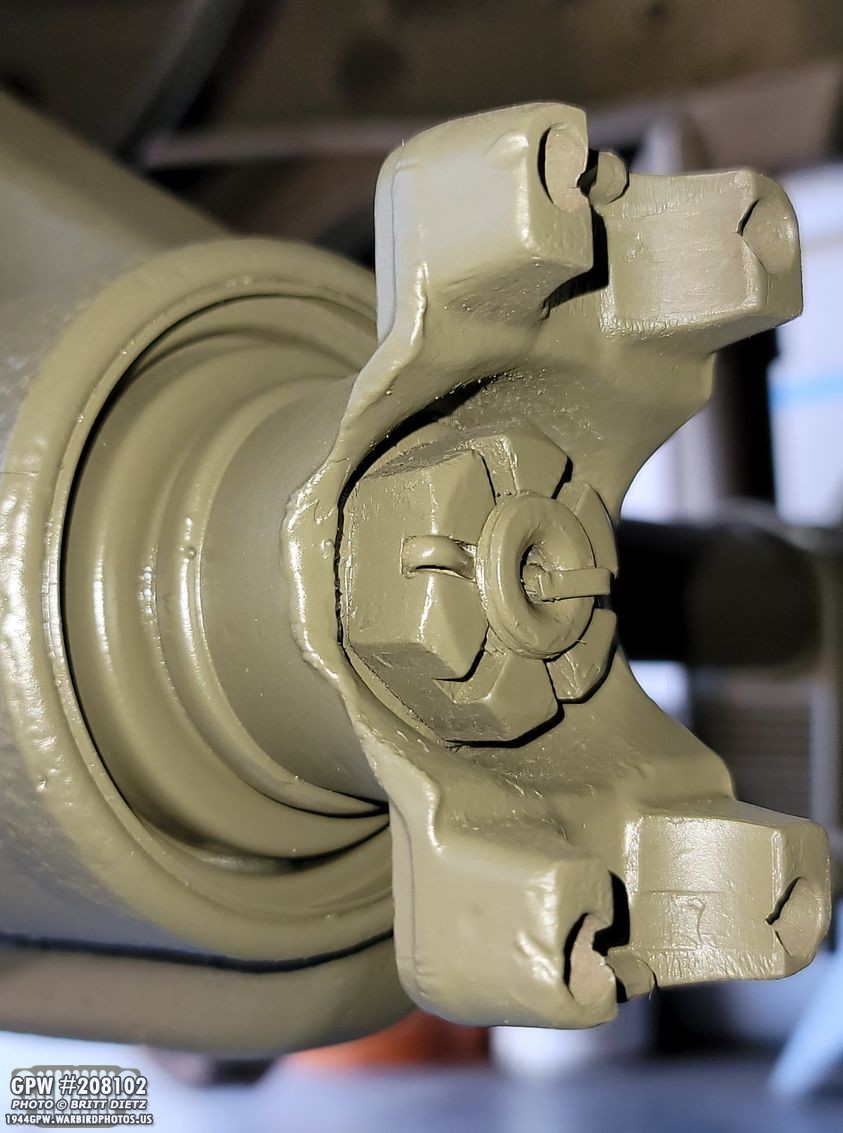
And here’s the final product. This yoke is back to like brand new! This will give it a nice tight seal!
Time to put it back on! Still dripping some oil, so I had to clean that up a bit with a rag.

Before getting the yoke tapped on, I smeared some oil onto the speedi sleeve so it will spin nice and smooth on the oil seal.
After the yoke was on enough for me to put the nut on, I first put some RTV on the back of the washer. This will also help seal in the oil.
I also put some RTV on the castle nut, which, again, will help seal in the oil.
I then was able to drive the yoke down with the castle nut.
After it was nice and tight, I put in the cotter pin. Finally, I painted it all OD Green.
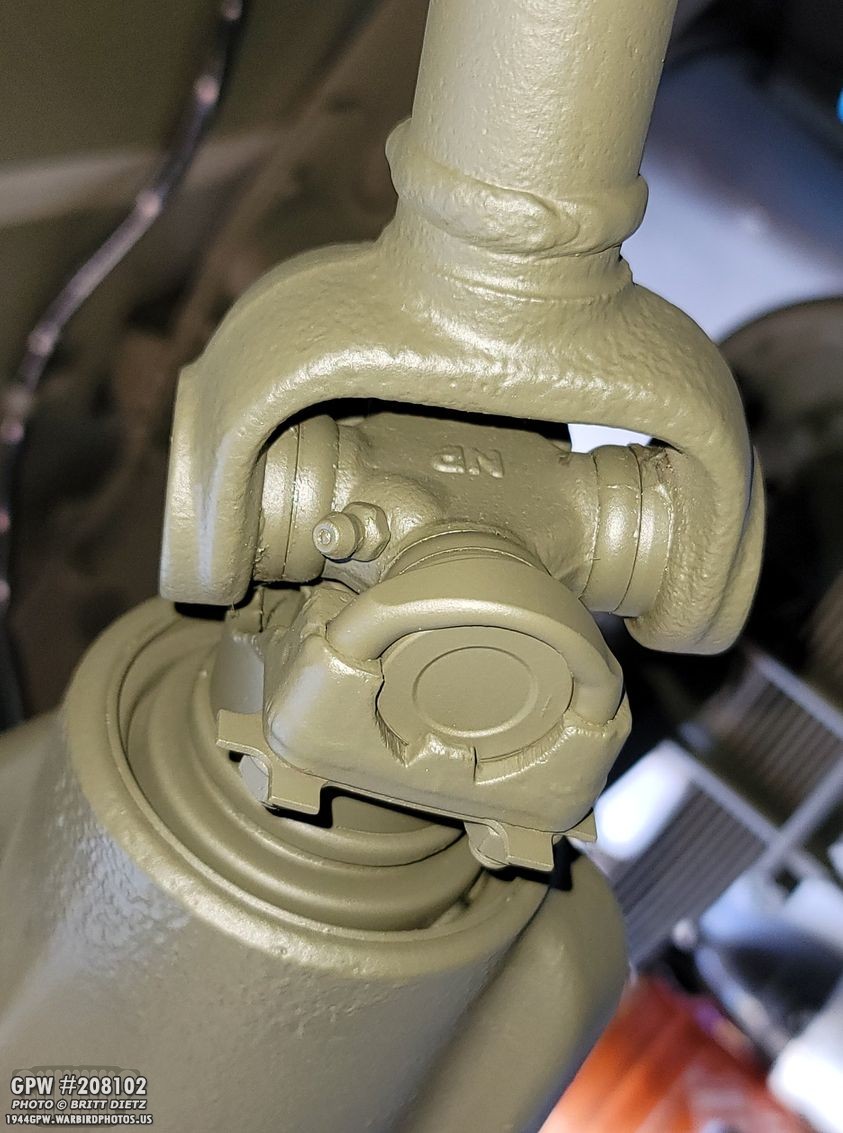
Finally, I put the driveshaft back on and tightened down the nuts. I still need to peen over the taps on the lock tabs, but just in case I have to take the driveshaft off again, I’ll wait to do that until I’m sure I’m not taking it apart again.
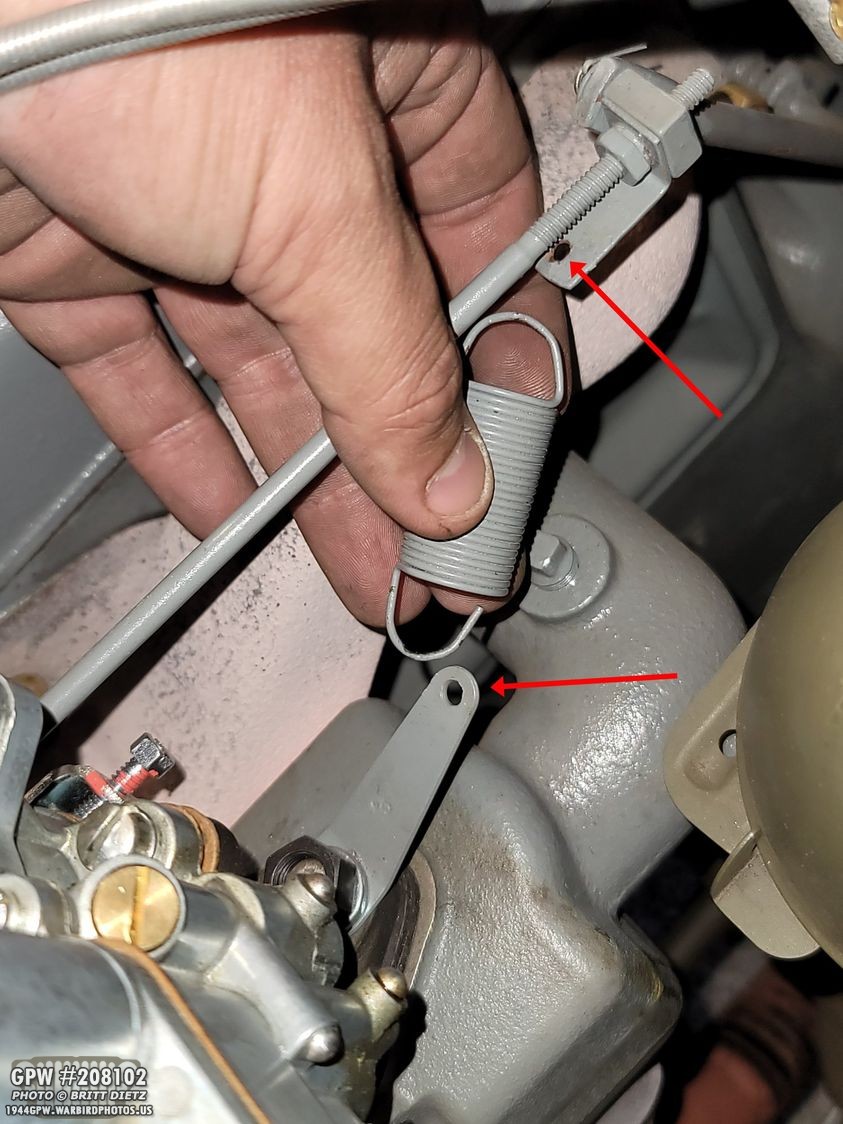
Moving on to the next project! One thing that’s been bothering me lately, when driving the Jeep and I press on the gas pedal, it’s not springing back fully, so it’s making the RPMs higher when at ‘idle’. I will often have to reach down and pull up on the gas pedal a little. The reason behind this is the spring for the linkage going from the pedal to the carb wasn’t stretched enough. As you can see there, I’ve taken the spring off, but you can clearly see it’s not stretched enough even when connected. There’s not a lot of tension, so it’s not pulling back the linkage fully.
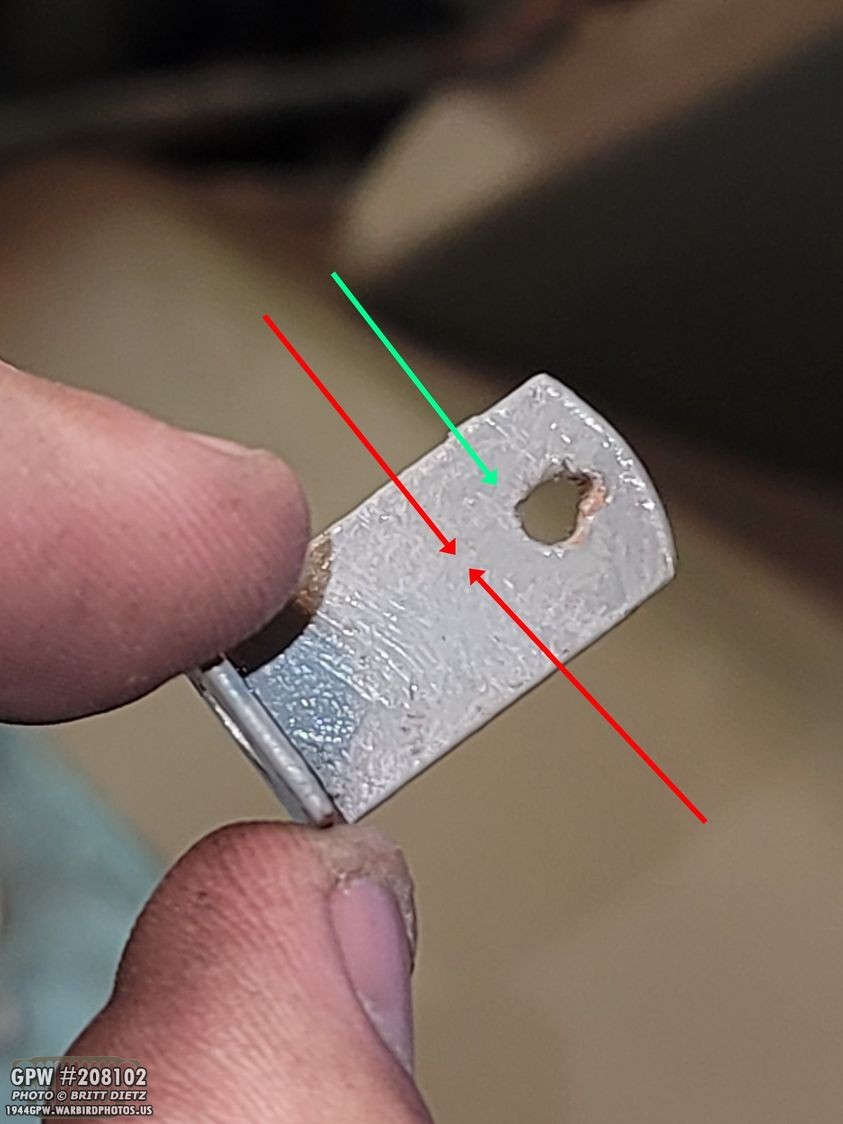
At first, I thought about getting a smaller spring, but I had trouble finding that. Instead, I decided to modify the tiny bracket that holds the spring to the long bar on the linkage. (the top arrow on the previous image). The idea was I would shave the bracket down to the hole (the green arrows), and I’d drill a new hole at the red arrows.

Here it is after being shaved down, drilled, and repainted Ford Gray.
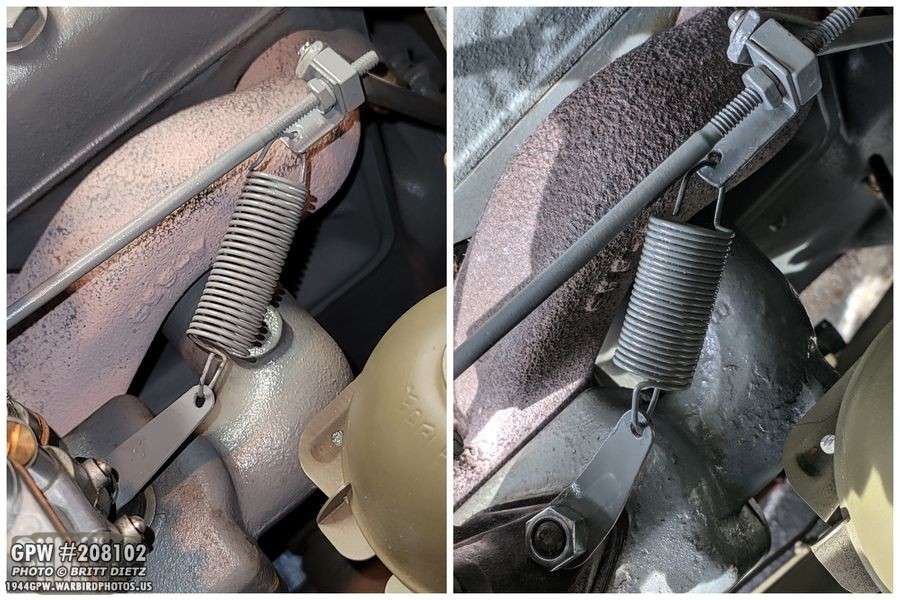
Look at the difference! Now, on the right is an older image before I got the F stamped tab bracket on the bottom… but it’s the same length in the two brackets. The spring is stretched much more now! When I get the Jeep back together this weekend, I’ll test this out during the test drive! I’ll report on this next week.

Another side project I started this week was a display for a sign I made about my Jeep. I wanted to make it military-themed and will be easy to take apart and make smaller. I got this modern-style ammo can at a flea market. Since I’m going to be messing up the can, I didn’t want to ruin a WW2 one.

I cut off the handle, and drilled a large hole into the lid.
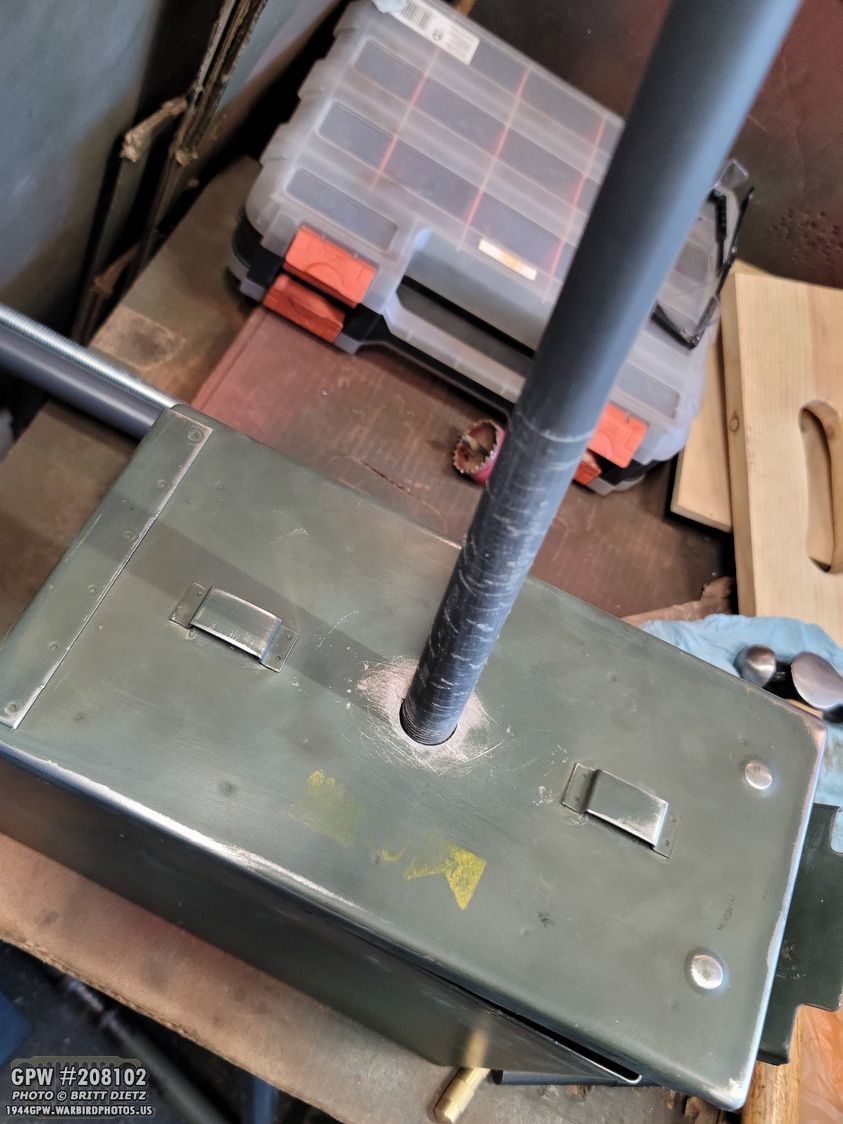
I then got some threaded sprinkler pipe that fit perfectly in the hole I drilled.
I then filled the inside of the ammo box with quick-dry concrete. This will be the base of the display. I wanted it heavy so in windy conditions, it would stay put. It is quite heavy now! And, the pipe is not permanently in the concrete. The threaded adapter at the top will attach the next part.
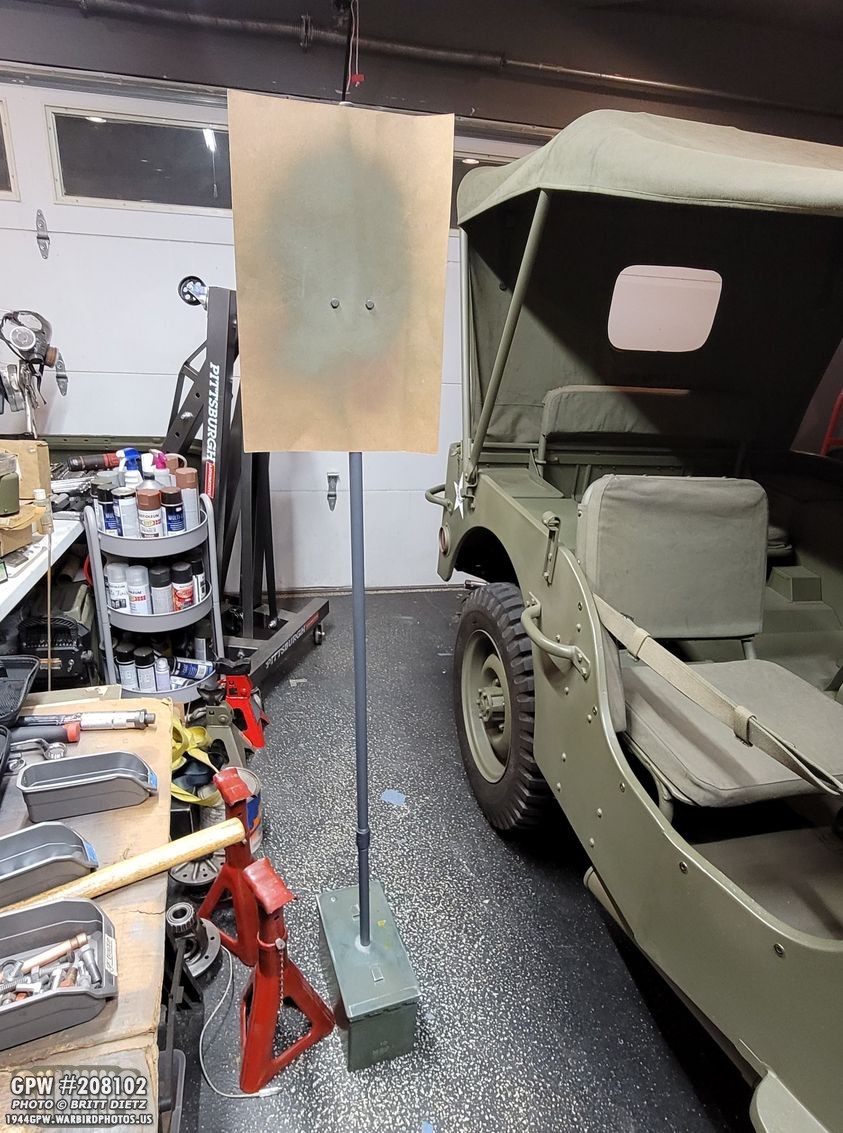
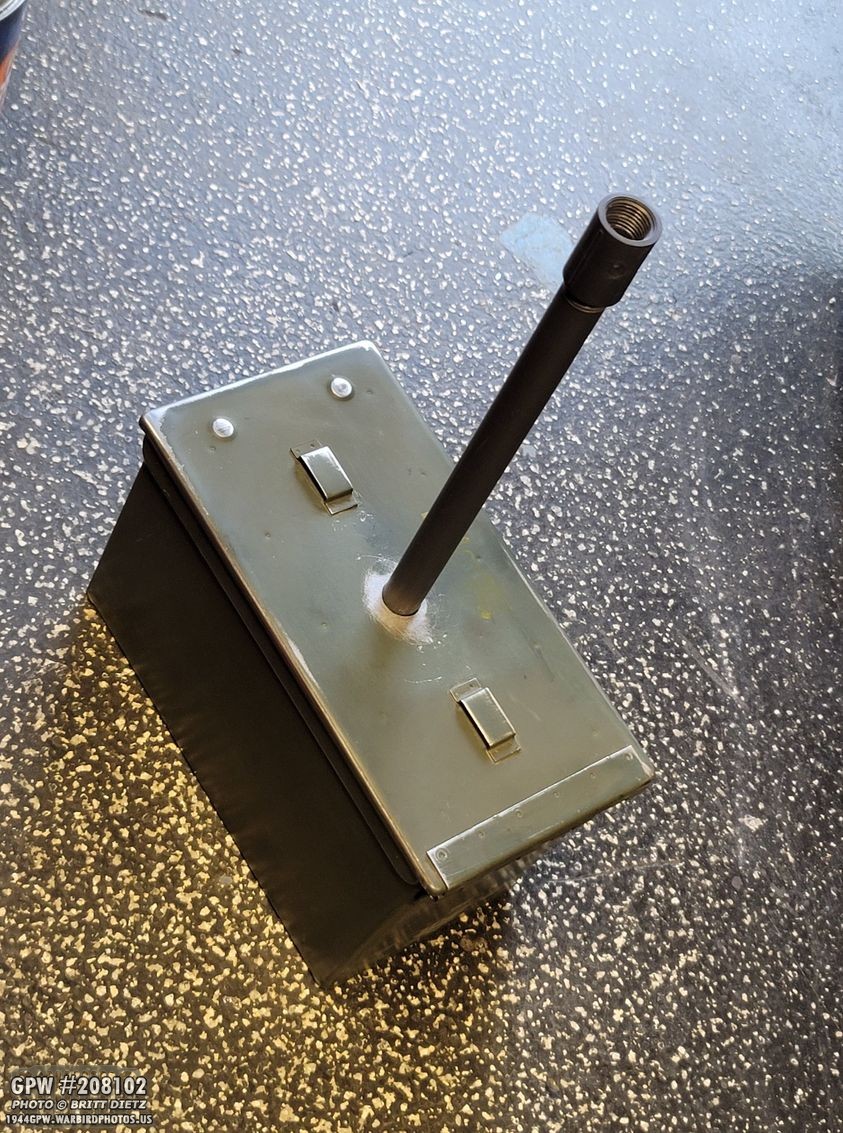
Here’s the basic idea. The base with the base pipe and adapter are one part, then there’s a longer 4 foot pipe that screws into the adapter. This makes everything just about 6 feet tall. Then, the sign (which I don’t have yet) mounted to gator board will be bolted to a clip that bolts to the top long pipe. Overall, I can break it up to the base with the base pipe, the long pipe, the mounted sign, and the clip.
And here’s the sign I designed. It goes through a brief history of the Jeep, a brief history of my Jeep, and the markings of my Jeep. It also has a recreated dataplate (I did in photoshop using my real original dataplate matching every font, letter spacing, etc), and a recreation of my front bumper markings. I even have a spot for the two bolts for the clip.
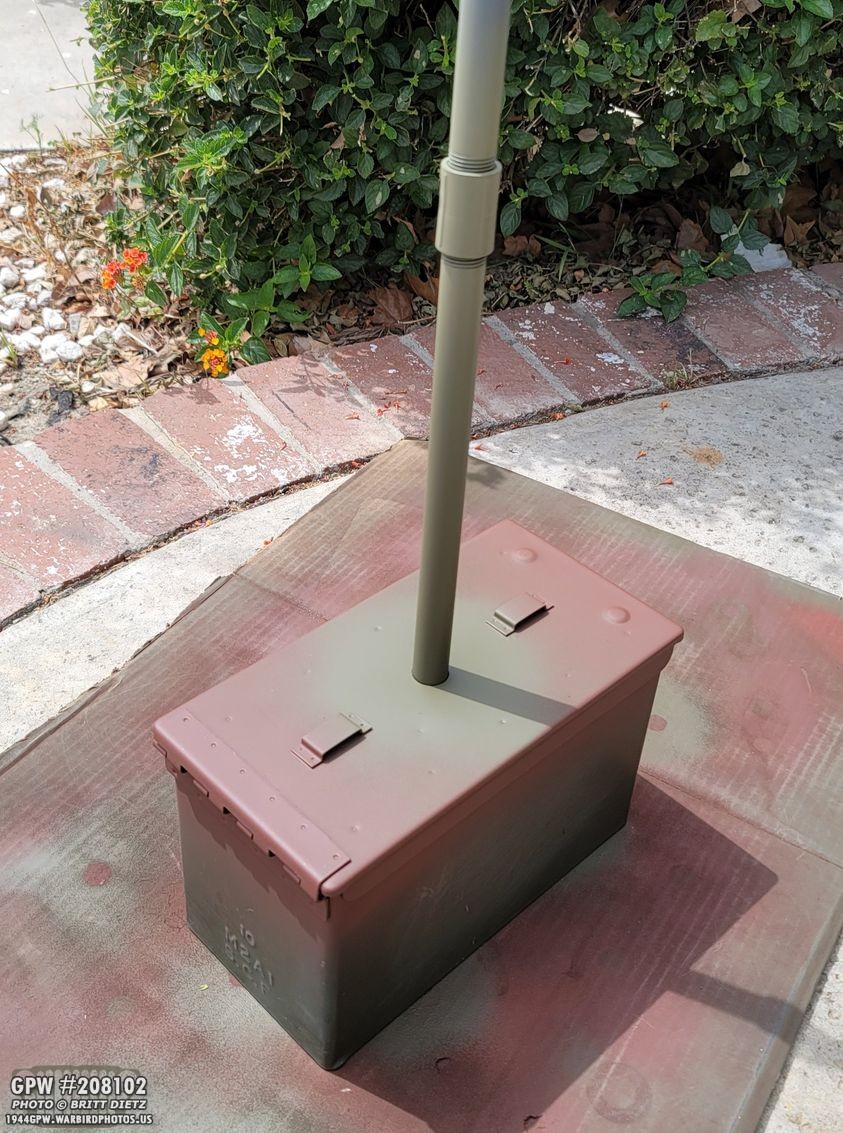
With the concrete all dry, I went ahead and primed the ammo box. I also painted the pipe the same 33070 OD Green as the Jeep.
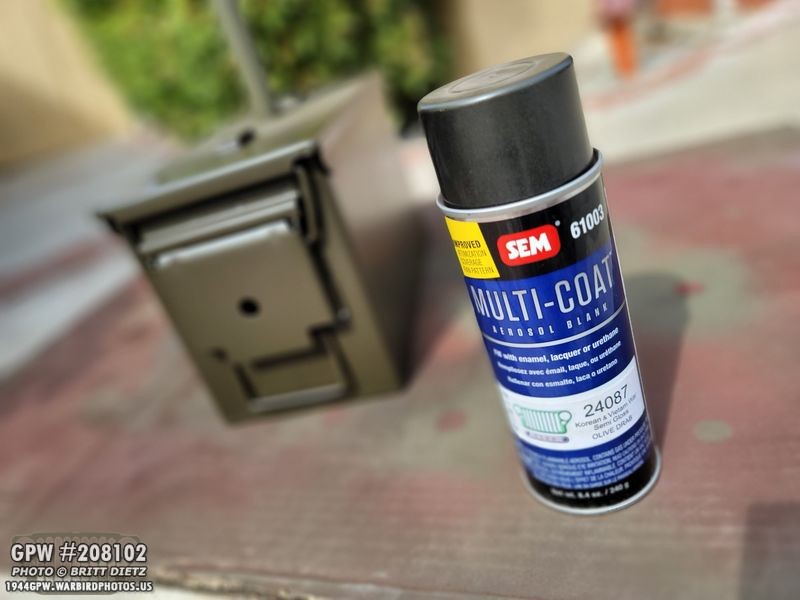
I find the 24087 Korean War semi gloss olive drab from Ron Fitzpatrick Jeep Parts is a PERFECT color for ammo cans.

All painted with the Korean War color! Looks great. But, it needs something.
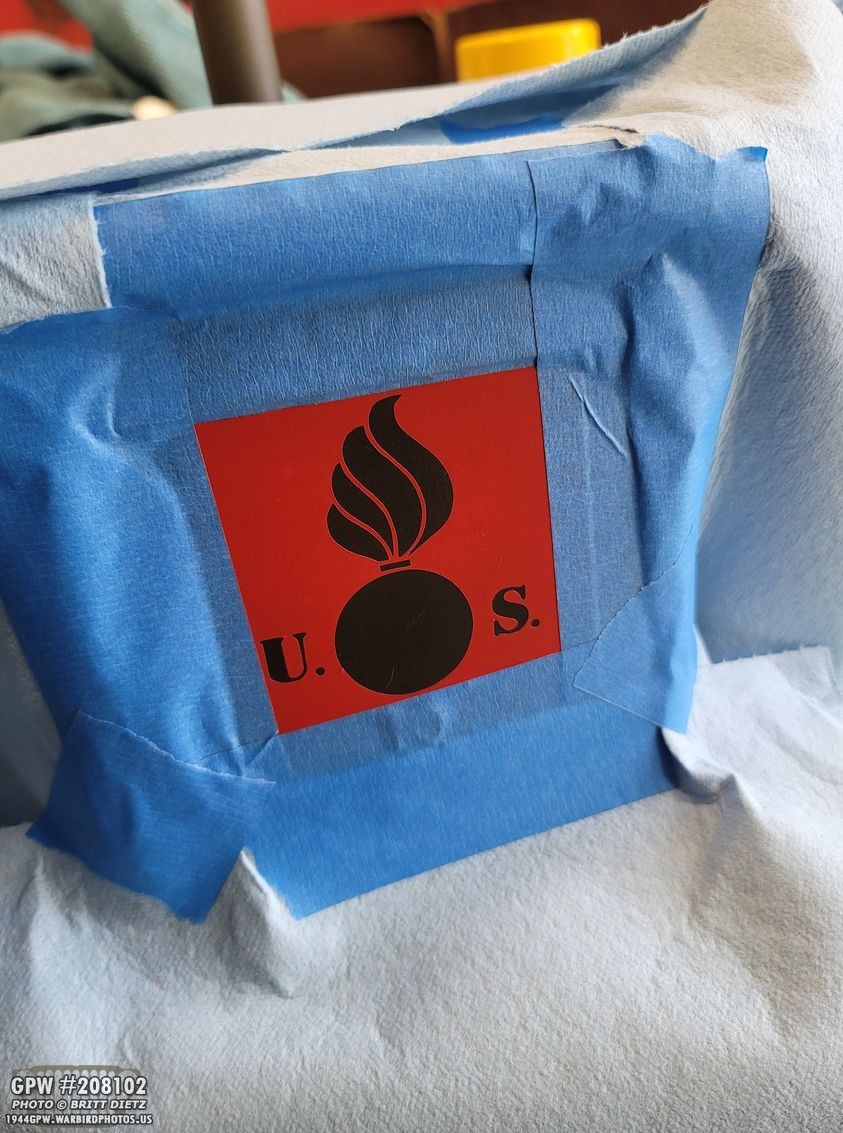
So, I whipped up some fun markings for the ammo can and cut them out as stencils with the cricut. Here’s a US Ordnance logo.

I then tried to somewhat recreate the WW2 .50 Cal ammo can stenciling.

Here’s how both of those stencils came out. Looks pretty good.
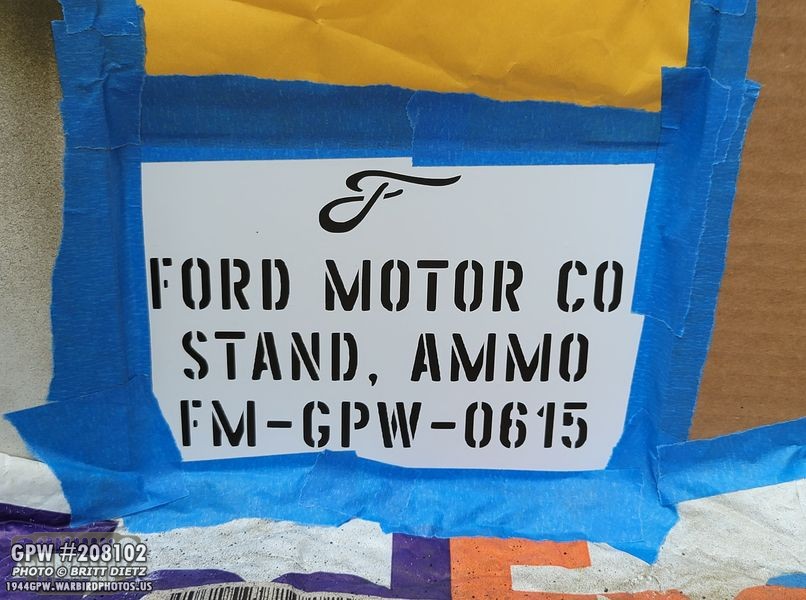
And just for fun, a ‘fantasy’ Ford stamping! 😉
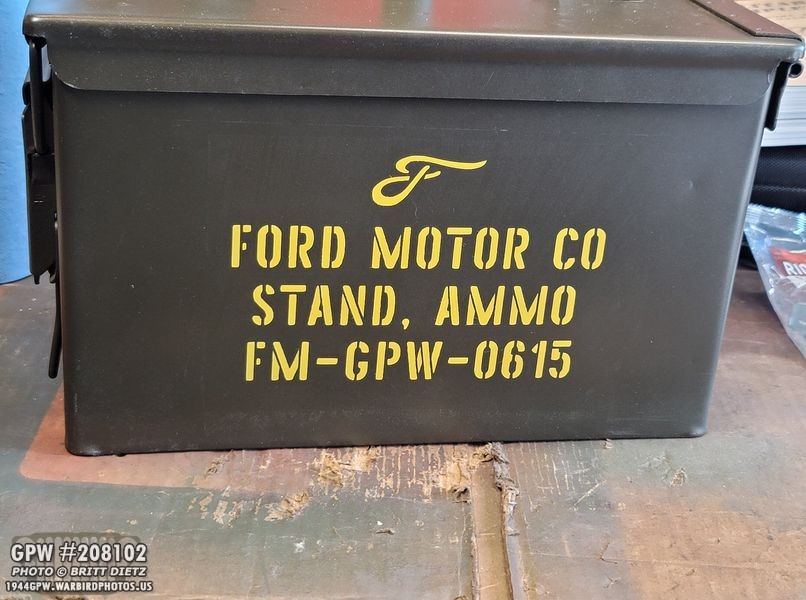
Perfect!
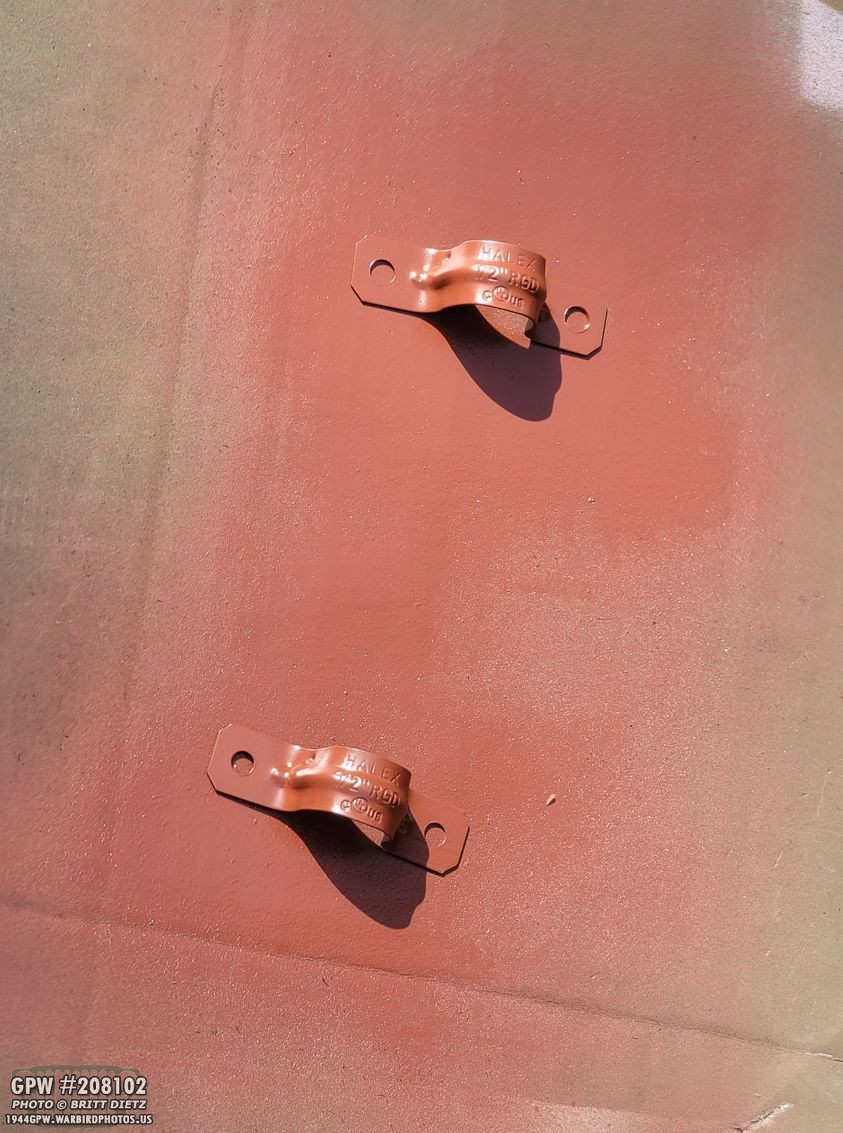
And here are the clips (I did two, but will only use one). They will be painted 33070 OD Green as well.
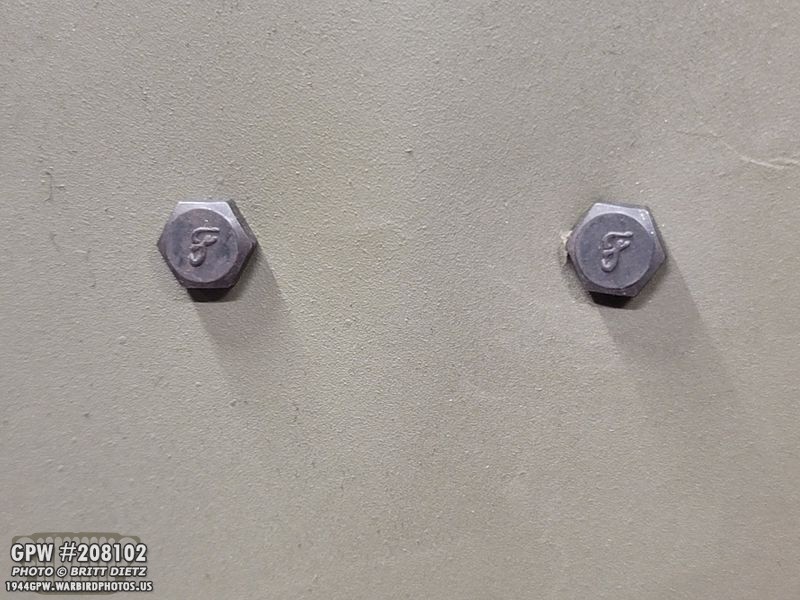
And yes, for the two clip bolts, I’m using extra repro F stamped bolts. A good way for me to show people F bolts.
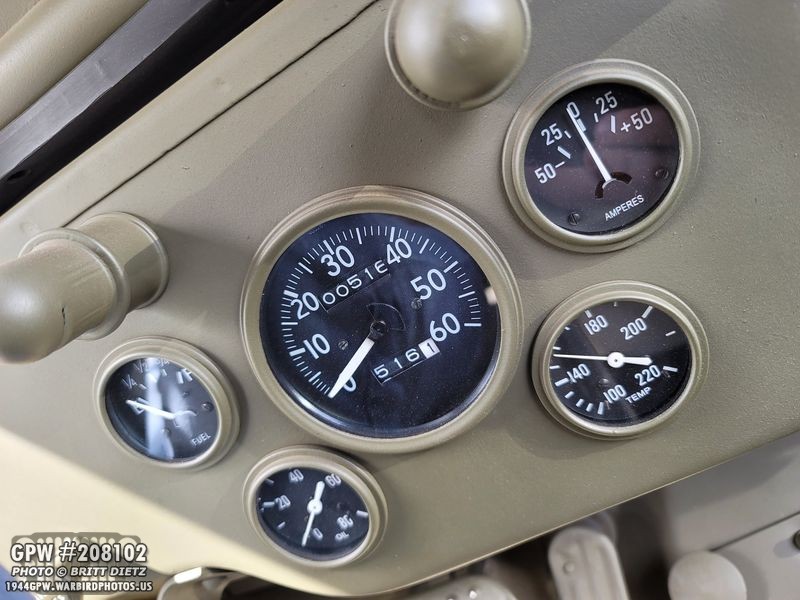
I’m up to 516 miles on the Jeep since the main restoration in 2019! Might not seem like much, but with a pandemic, and lots of down time as I work on projects with the Jeep on jacks or not driveable, plus most of the driving just around the neighborhood, that’s a lot.

Here’s a shot from late Thursday with my shipment from Ron Fitzpatrick Jeep Parts including the oil seals for the drums, and another can of Red Oxide Primer and 33070 OD Green. I’ve probably been through 40 of these by now! They are SO handy!
(This photo was before I took apart the rear drums)
So, where do I go from here if the drums don’t fix the clackity sound? After I put the drums back on, adjust the brakes, and put the wheels on… if I still have a clackity sound, I’m really not sure where to go from here.

Today (Friday) I’ll put in the oil seals and, hopefully, get everything back on the Jeep. If I’m lucky, I’ll be able to test drive it as well.
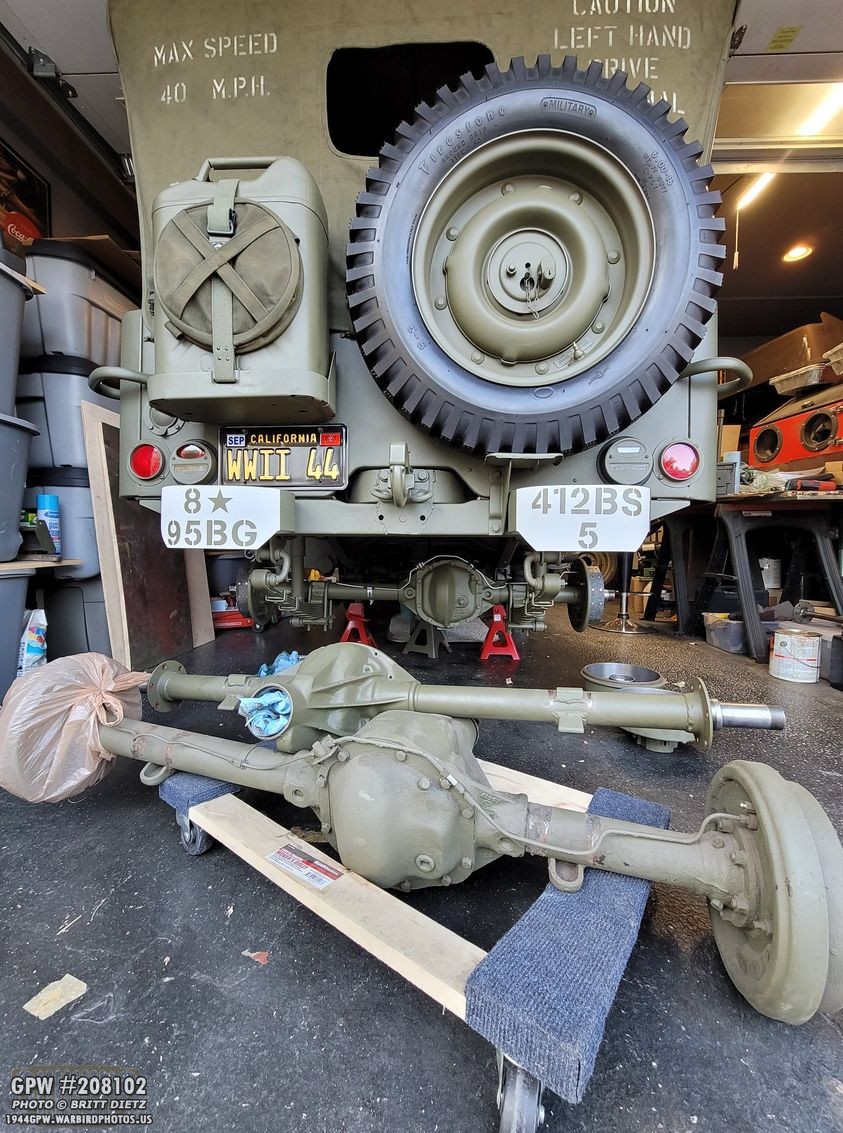
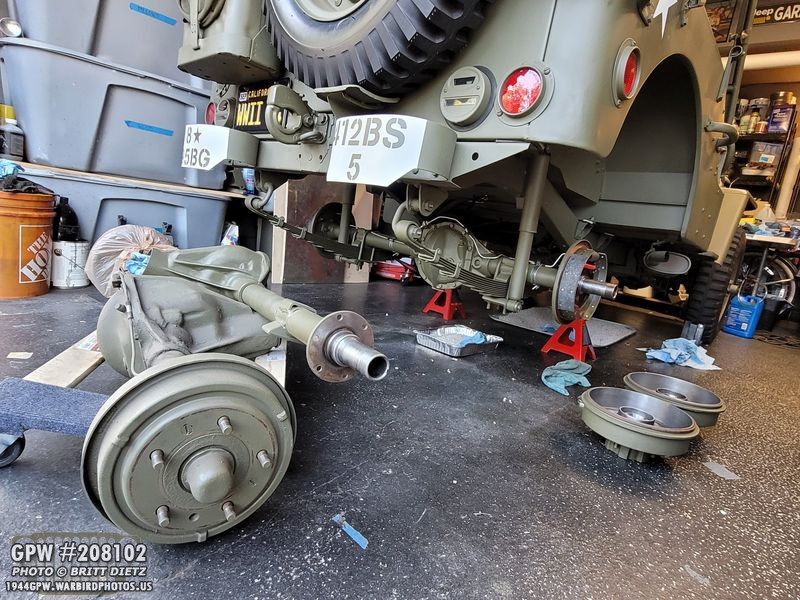
But after this point, there’s really not much more I can do. I’ve checked everything. There’s nothing left to check at this point. I appreciate all the help and suggestions people have been giving me with this ongoing annoying issue. While everything has wound up not working or leading to dead ends, I do appreciate it. Here’s the rear axle saga in one photo… the CJ axle, GPW #1, and the installed GPW axle #2. So, let’s cross our fingers for the best!
Till the next update…