 Replacing the Water Pump, Thermostat Redo, & Flea Market Finds!
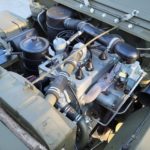
After another lull in updates on the Jeep, this week I finally have things to show! I’d been meaning to replace my post-war water pump with a GPW wartime-style water pump, and this was the week it happened! I also re-did my thermostat which was leaking slightly. I also worked out a way to do some temporary markings, and I go through some more recent Jeep flea market finds!
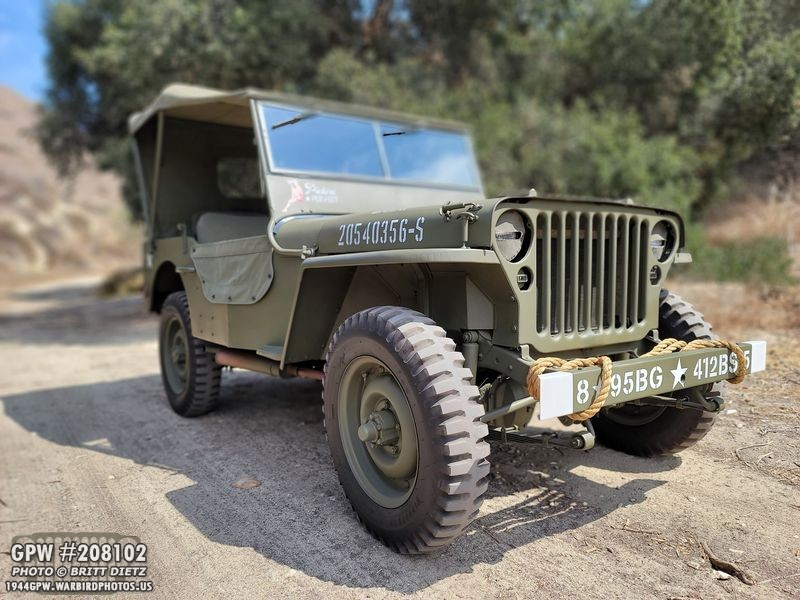
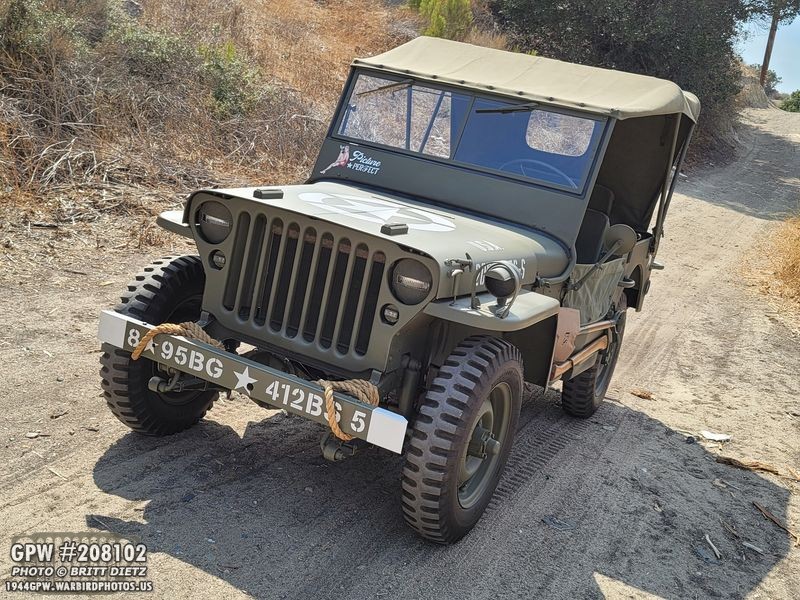
I found a new area to take the Jeep ‘off-roading’ (per se) this week to get some photos without roads and buildings! Not the best area, but still not bad. It’s tough to find good photo spots in the urban jungle that is Southern California!
Looking back to the beginning, when I got the Jeep in late 2018, the water pump on the engine had a terrible leak.
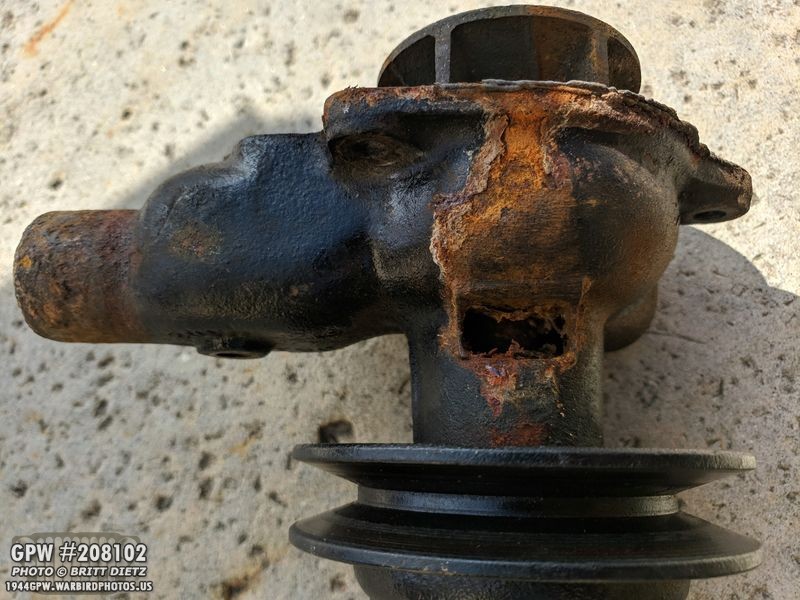
When I was taking the Jeep apart for restoration, I found the cause of the coolant leak… the water pump was totally busted! You couldn’t see this unless you take off the water pump. Yikes.
The previous owner had bought a brand new repro water pump from Kaiser Willys Auto Supply and gave it to me with the Jeep. I painted it Ford Engine Grey, and installed it even though it was also designed in the post-war style. I figured, it’s a new water pump, why should I drop $100 for another one?
Well, jump to a month ago, I decided it was time to replace that post-war water pump with a GPW one to make it correct. I picked one up from Ron Fitzpatrick Jeep Parts.
Even though it came in Ford Grey, I used my VHT Ford Engine Grey as I love the nice finish and the way it repels liquids. It holds up really well. After scotch pad sanding the water pump and painting it with the VHT, here’s the result.
Before I could get started, I needed to drain the coolant out of the engine and radiator. I use a plastic tub to collect it, and then I’ll pour it into the empty gallons of coolant I eventually put back in. The ‘used’ coolant will end up going to a hazardous waste facility. Animals like to drink coolant and can get sick so I make sure not to spill any and do it this way. It takes a while for the coolant to drain from both the radiator and block.
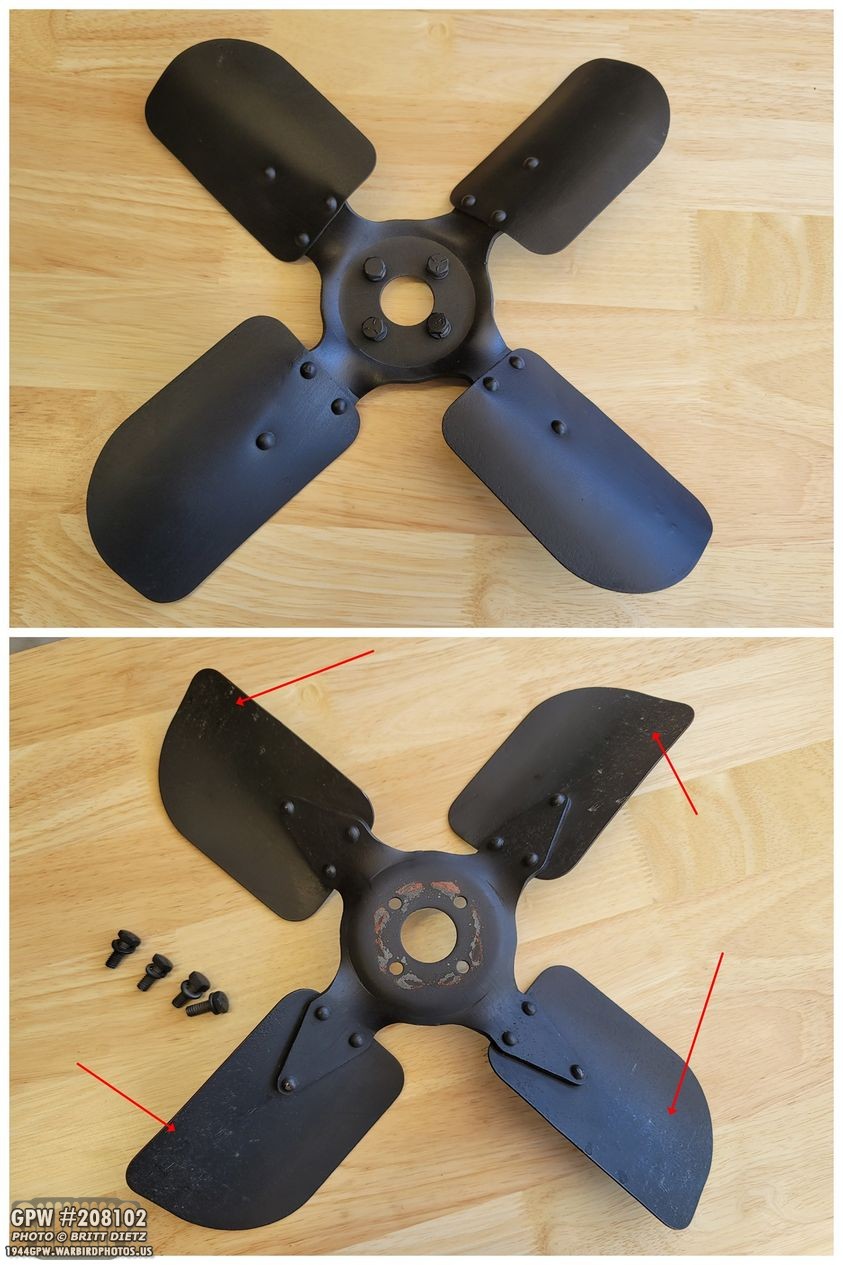
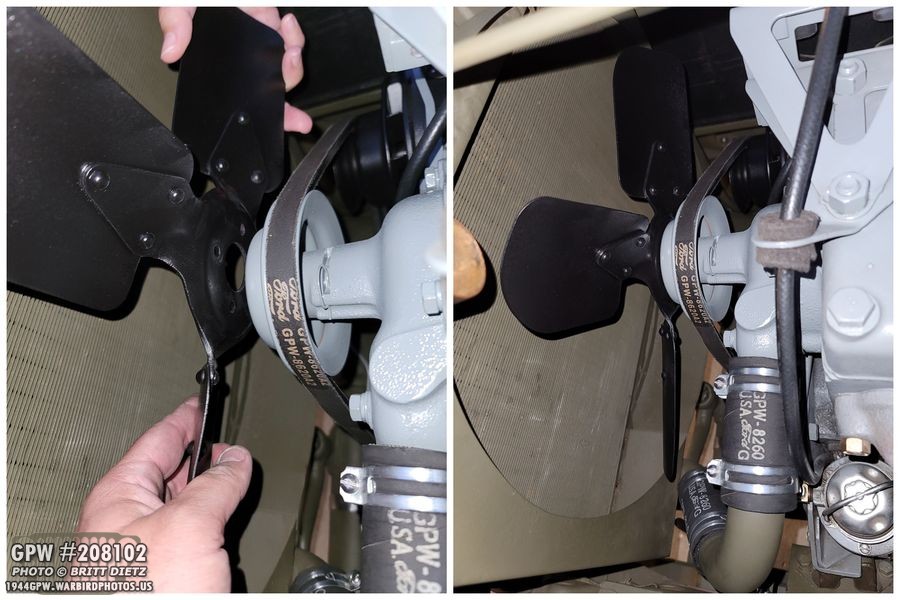
As I was waiting for the coolant to drain, I took off the fan from the water pump. The black paint had mostly held up well since I first painted it in early 2019, but after 700 miles, rocks, bugs, debris, etc have struck the fan causing scratches on the backside. I decided instead of a thin layer of black paint, I would paint it black then add a satin finish which will help protect it even longer. Pictured here is just after taking it off the Jeep.
I originally thought that I would have to take out the radiator, but after the fan was carefully taken out, there was a lot more room and I realized I could do it without all that extra work.
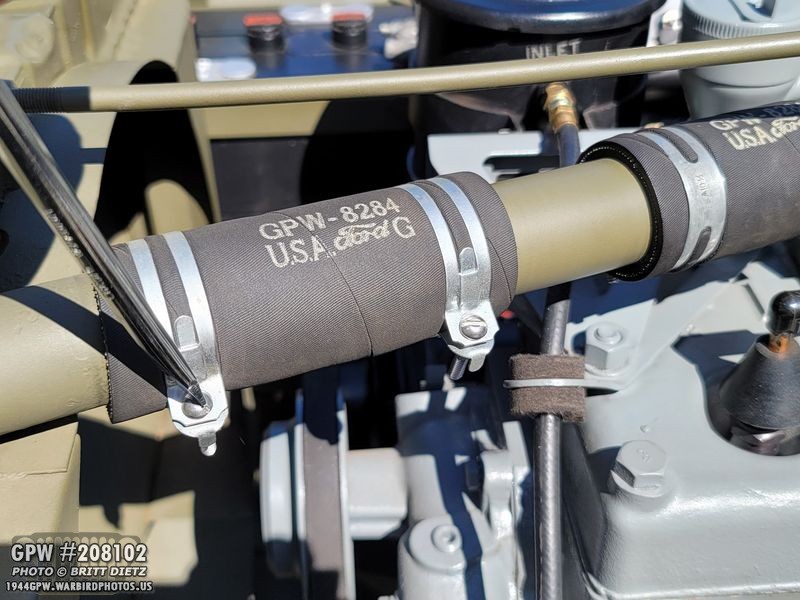
With the coolant all drained, I could now start to take the cross-over tubes off. The clamps were the first to be removed.
The rubber connector tubes often get stuck to the radiator, inner tube, or the thermostat elbow, so it can take a bit of work to rotate the rubber tubes a few times before they will break free and you can get it off.
The lower crossover tube is the hardest to break free, there’s not a lot of leverage room. I found that I could not break free the top rubber tube from the water pump or the curved inner tube. I could get it free from the radiator…
So I decided to just take the water pump off with the whole tube. That way I could separate them once they were off.
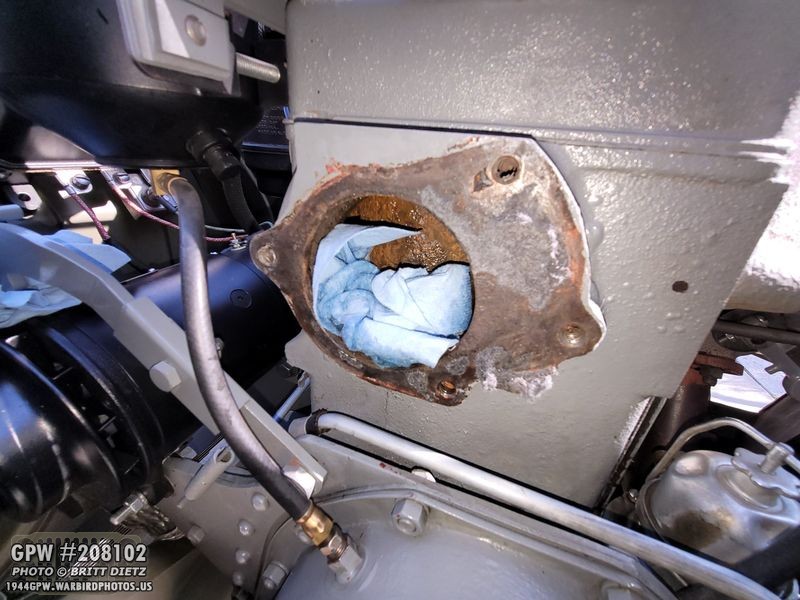
Here’s how it looks minus the water pump. I put a shop towel in the hole to help from crud getting in there since it was a rather windy day.
Sadly, I didn’t realize this photo was out of focus, but you can see here what’s left of the water pump gasket partially still on the engine block. I’ll have to scrape that off and make a very clean surface.
Once I got cross-over tubes free, I went ahead and touched up the paint on them.
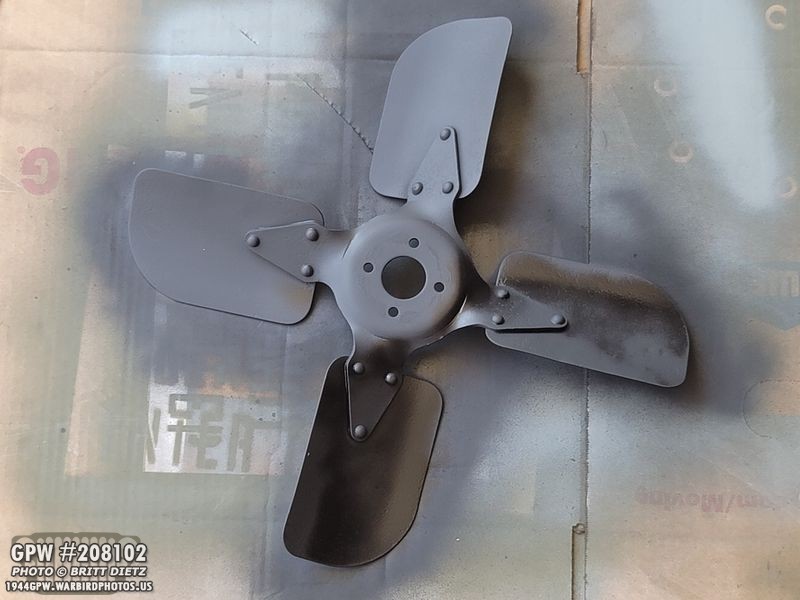
After sanding the fan to smooth out the scratches, I went ahead and hit it with a high temp flat black paint.
And here it is after two coats of clear satin spray giving it a sheen and making it nice and protected.
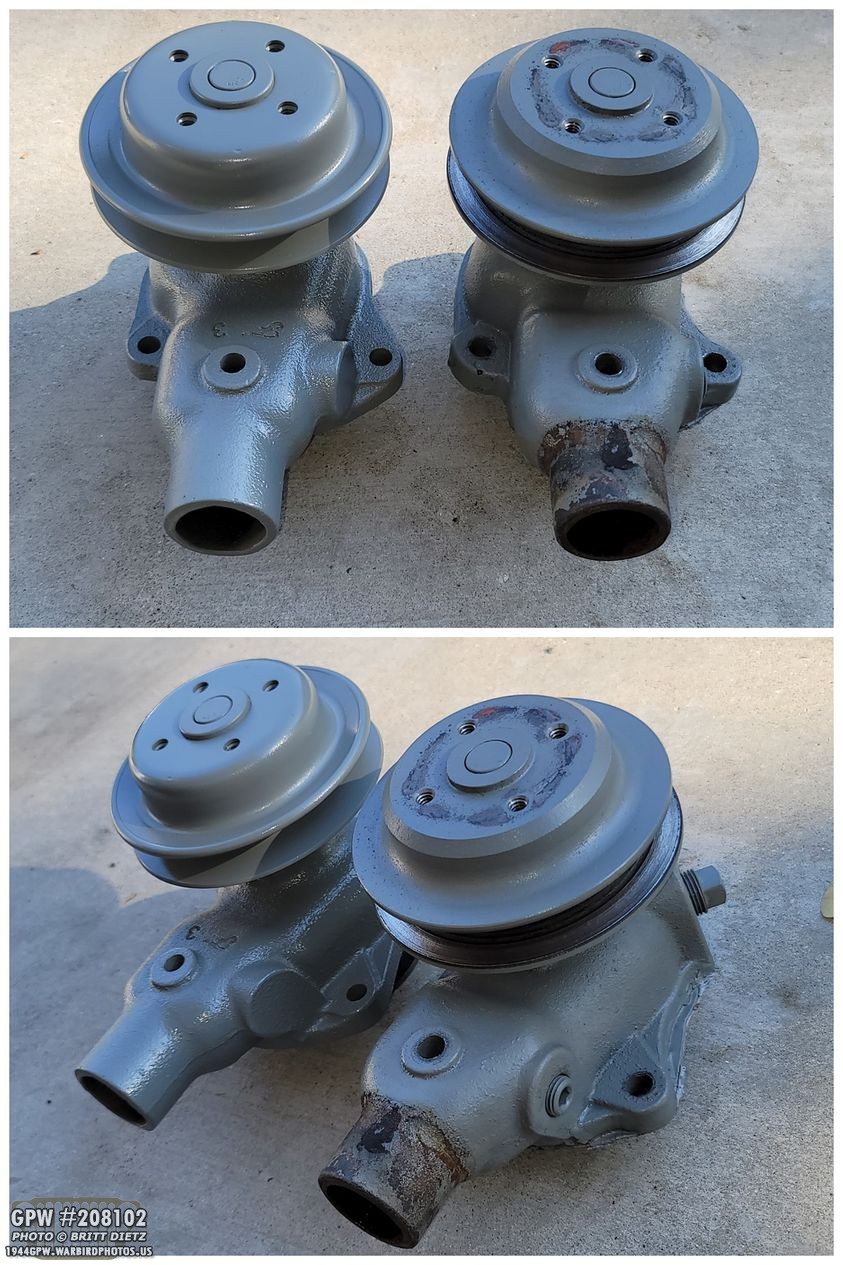
Let’s take a look at the two water pumps. On the left is the new GPW wartime-style pump while on the right is the post-war more common one you’ll find out there. The main difference is the two outlet ports on the top of the body. You can see that really well in the bottom photo.
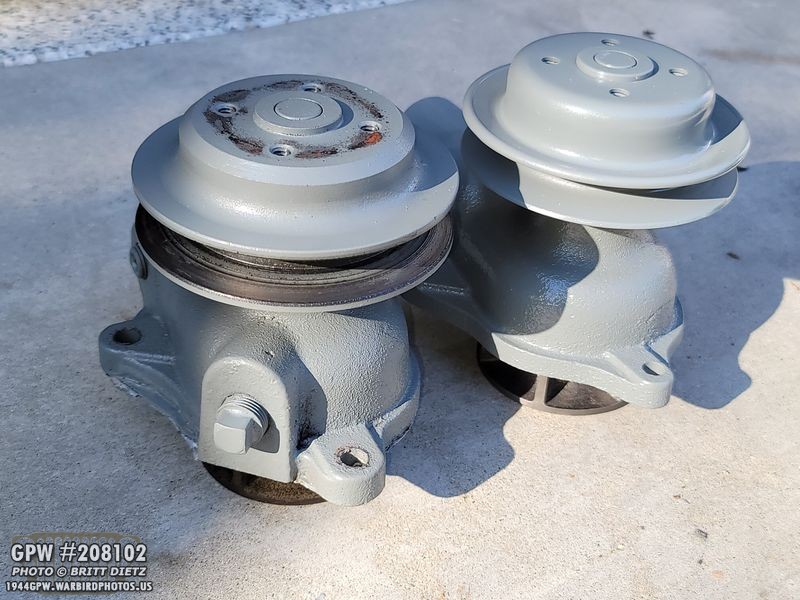
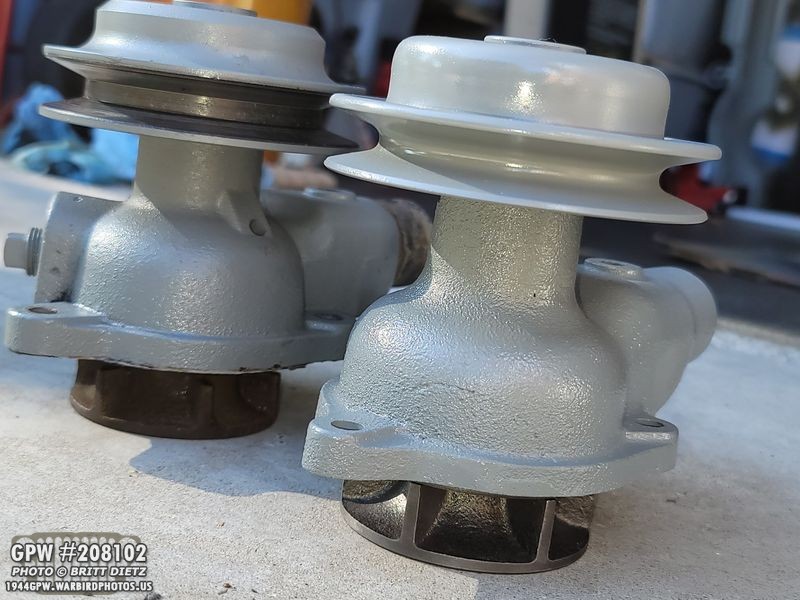
Again, looking at the behind on both the post-war style (left) and the wartime style (right), you can see the output port that was added.
But other than the ports, much of the rest of the pumps are the same.
After taking a sharp spreader to scrape off the gasket remnants and sanding the area underneath, it’s all cleaned and ready for a new gasket and water pump!
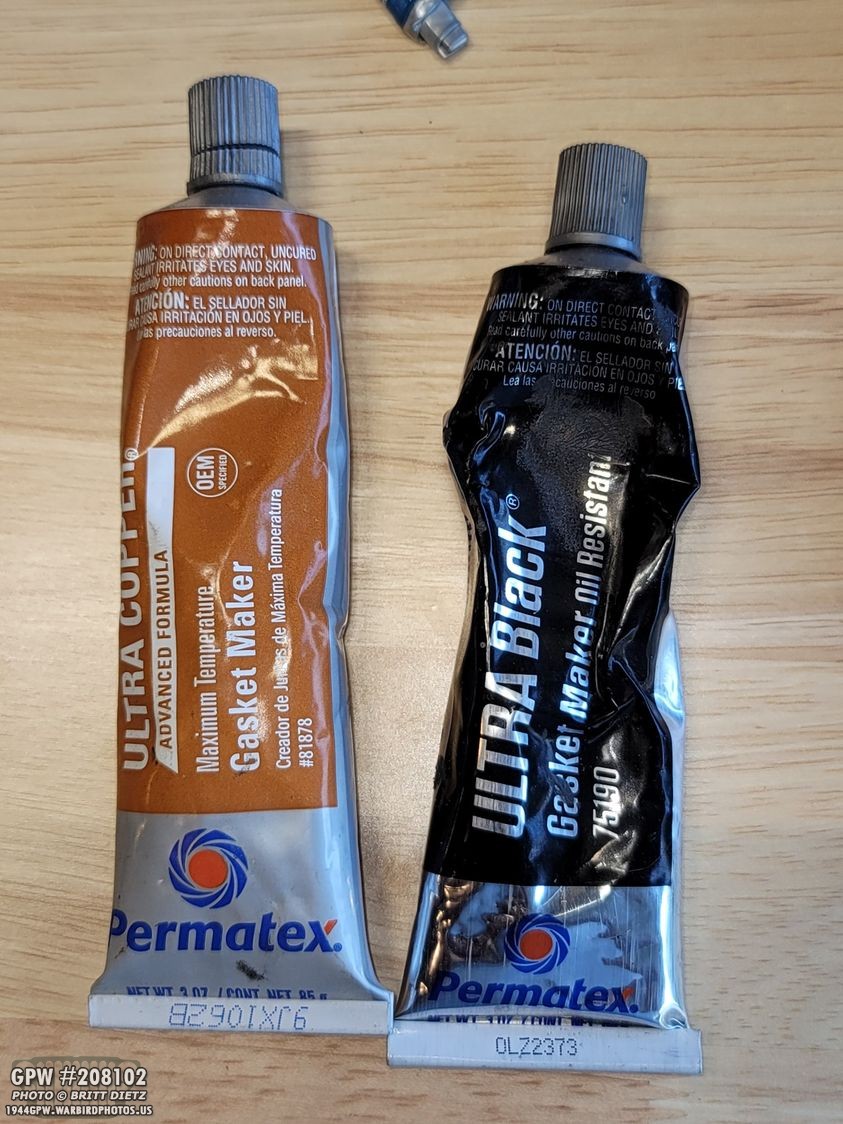
I realized I was out of the Permatex Water Pump gasket I used last time, but I wasn’t happy with how it wroked. Both the water pump and the thermostat elbow had little pinhole leaks, so I wanted to do something different anyway. I had these two gasket makers, and after consulting my friend Roger Smith, he said he uses the Ultra Black RTV, so I went with that.
The first thing I did was put a good coat (not super thick) on the new gasket.
After pressing the gasket onto the block (which will stay in place because of the RTV), I put another layer of RTV Ultra Black on the other side of the gasket. I let it sit for just a little bit of time for it to start to slightly set, then I went to push on the new water pump.
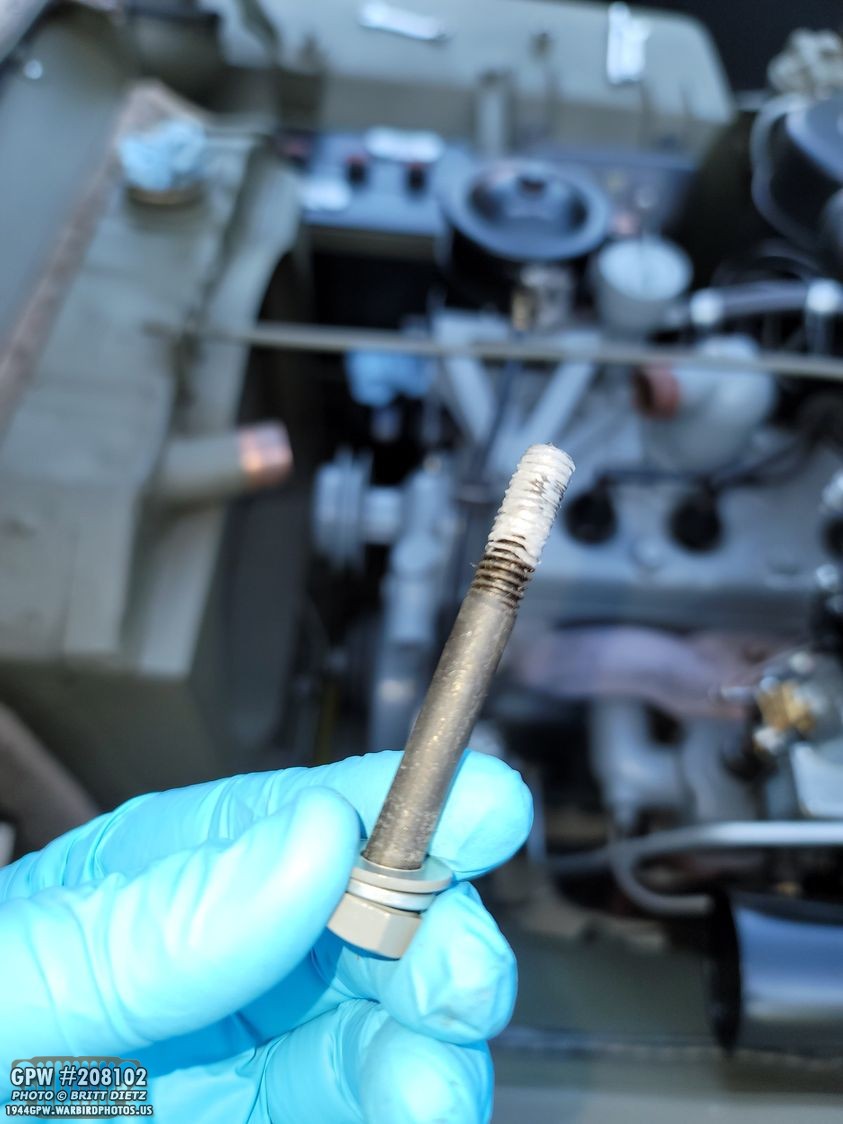
Now comes the time to hurry, as you want to get the bolts into the water pump so it can compress the gasket and the RTV. Because the bolts for the water pump penetrate into the block and the coolant, you want to put some thread sealer. I had just enough of the Permatex water pump gasket maker to put on the end of the bolts.
I then ran out of the water pump gasket maker, so I instead used the generic high-temperature thread sealer on the long bolt that goes through the water pump.
It takes a bit of wiggling to get the bolts through and started into the block. But the idea is to get them at least started so you can let go of the water pump.
The third smaller bolt goes underneath on the bottom of the water pump.
I got everything finger tight, then went in with a wrench and tightened them to torque specs. The RTV was oozing out of the seal, which is good. I then took a shop towel and carefully wiped away the excess RTV. Even though you can still see it here, it helps to seal the gasket, so I won’t remove it all. Instead, once it’s dry I’ll paint it with the same Ford Engine Grey.
The water pump is all installed and tightened down!
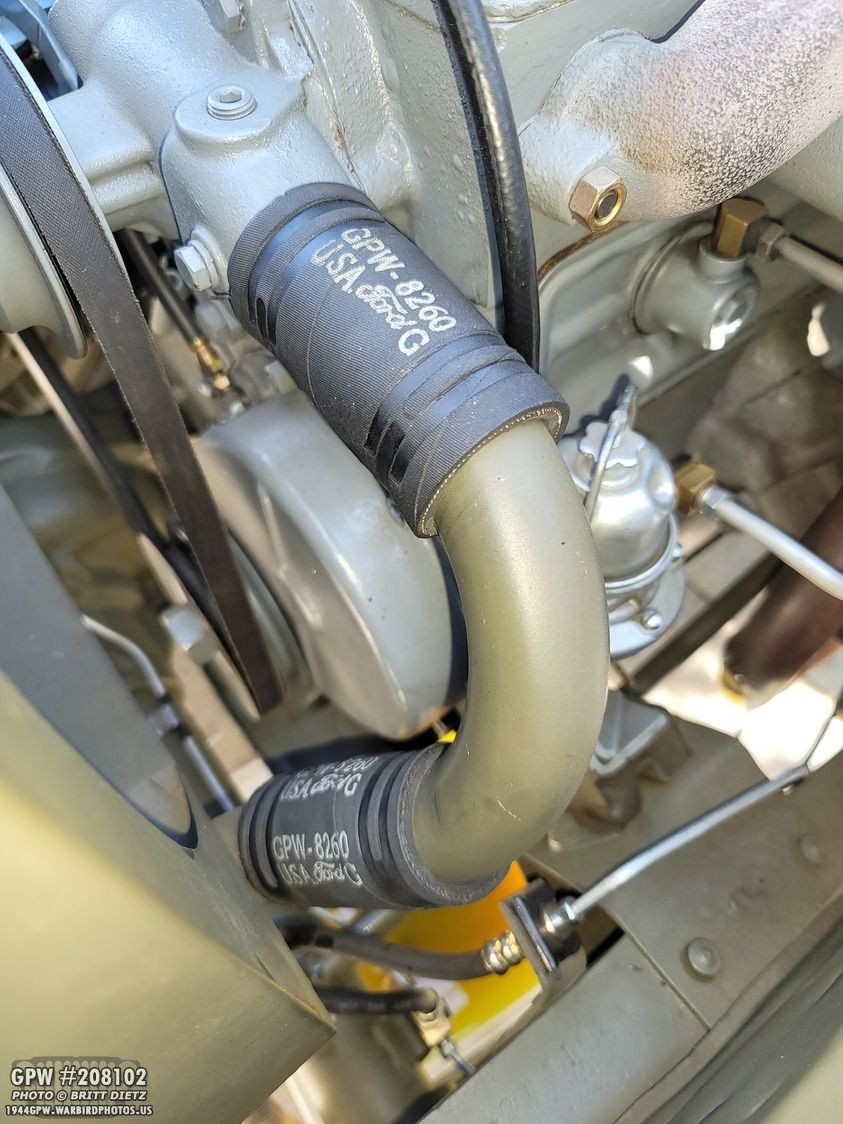
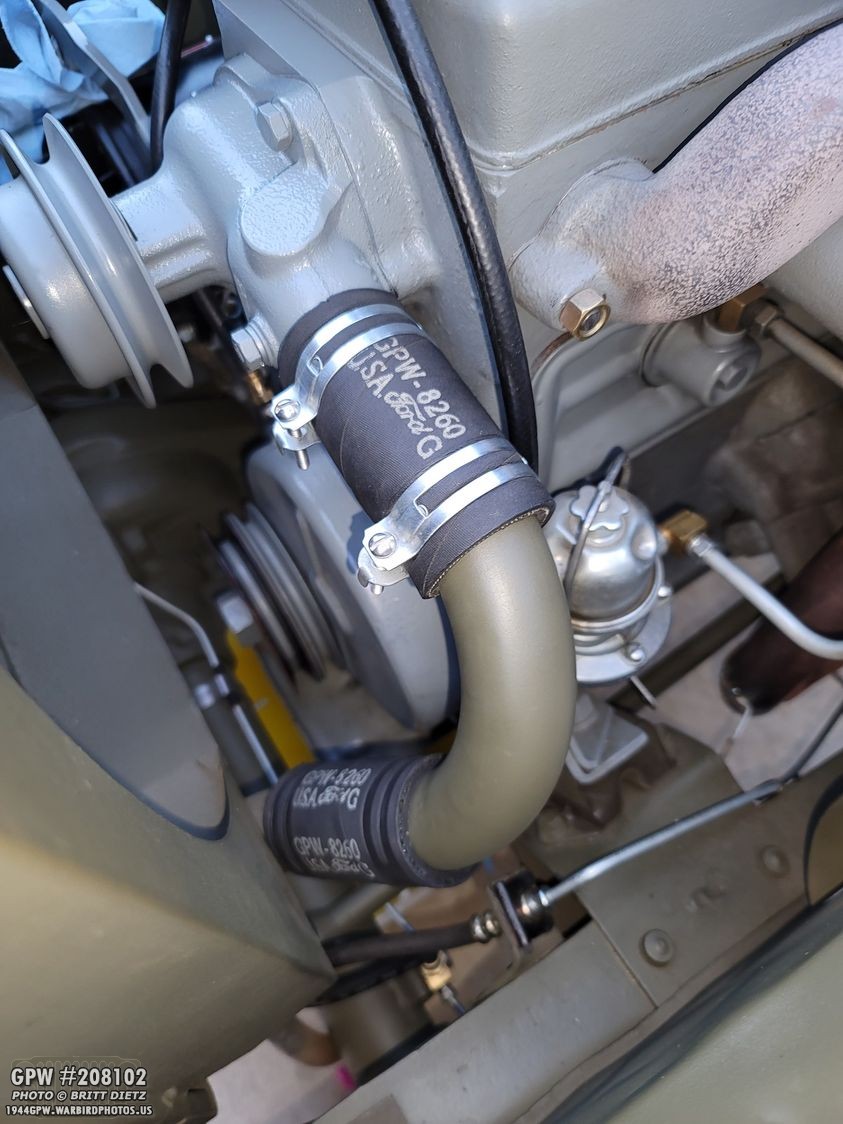
Getting the lower cross-over tube back on was a HUGE pain. This one is the hardest to get back in as nothing wants to line up or compress enough to get over both sides. I dread having to reinstall this each time. I always eventually get it, but it takes a bit of time!
After letting the RTV dry for a bit, I masked off the areas around the water pump to touch up the Ford Engine Grey.
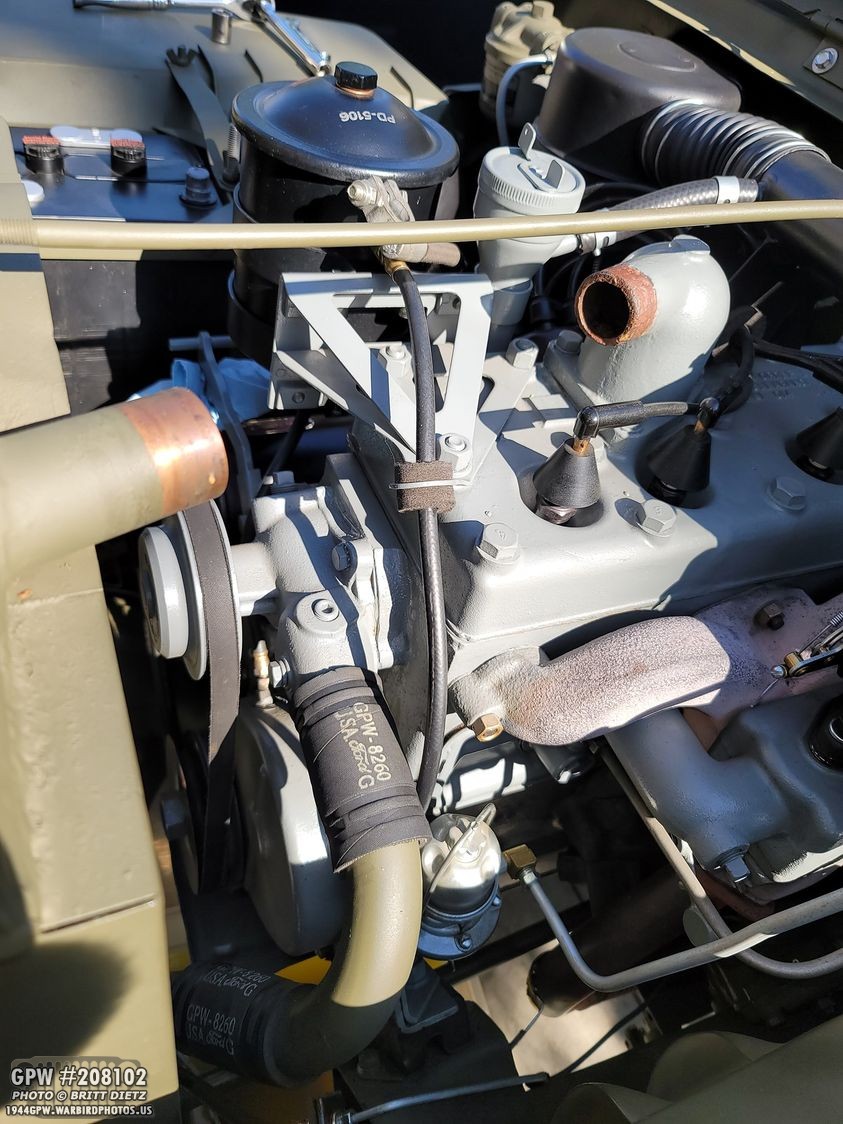
I didn’t snag a shot after it was all painted, but you can see it all nice and Ford Engine Grey at the top here! I’ve added the first two clamps back on.
I then added the GPW fan belt back on and installed the freshly painted fan (now dry).
Now everything has been readded back on and all clamped down! But, before I could just throw in new coolant and take her for a drive, there was one more project I wanted to do. I only added the top cross-over tube as I knew it would take a few days to get to the next project… redoing the thermostat elbow!
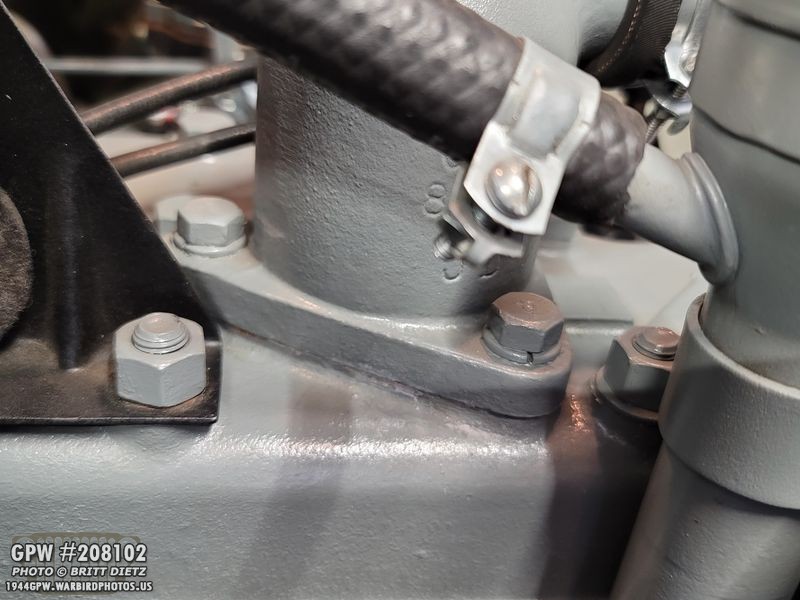
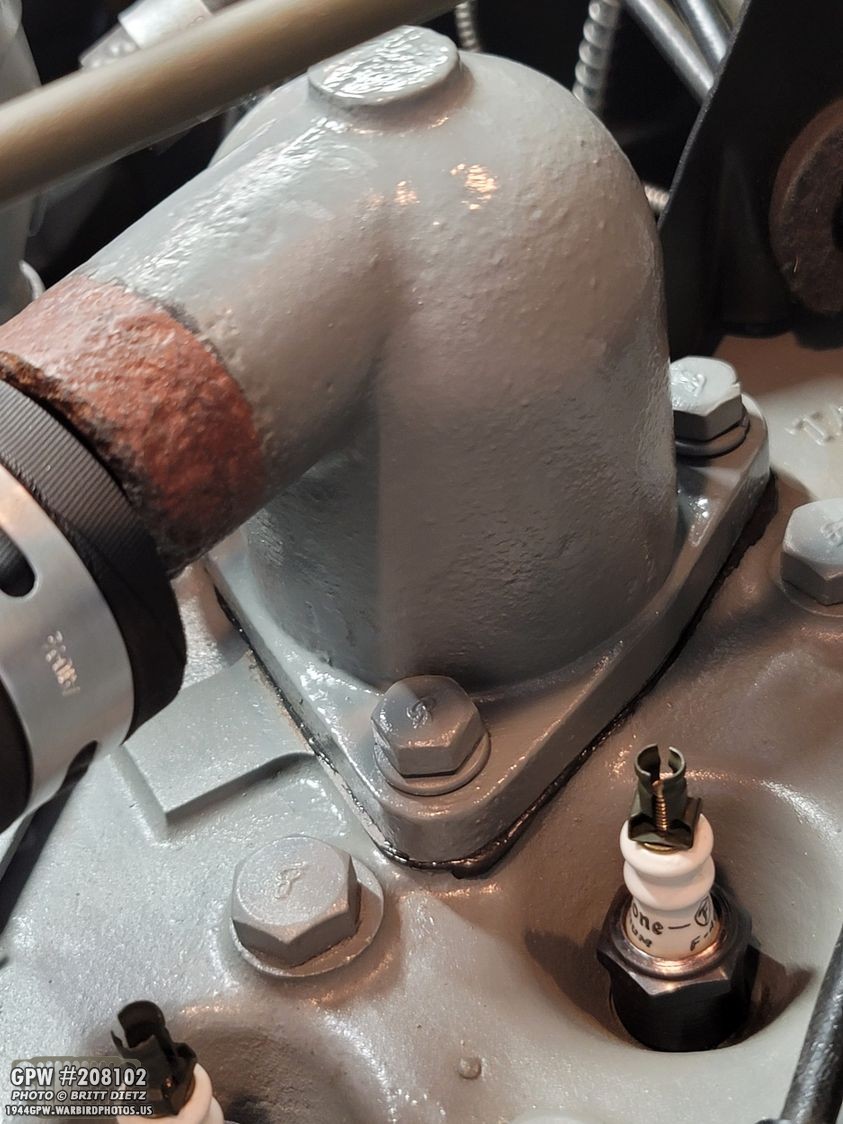
A few days later, I got to work. You can see under the thermostat elbow, it would often leak (only a little tiny bit) in this area. The Permatex water pump gasket maker just didn’t really work well. Even the non-GPW elbow that used to be on here (which I replaced) also leaked from the water pump gasket maker. So I wanted to redo the entire thing.
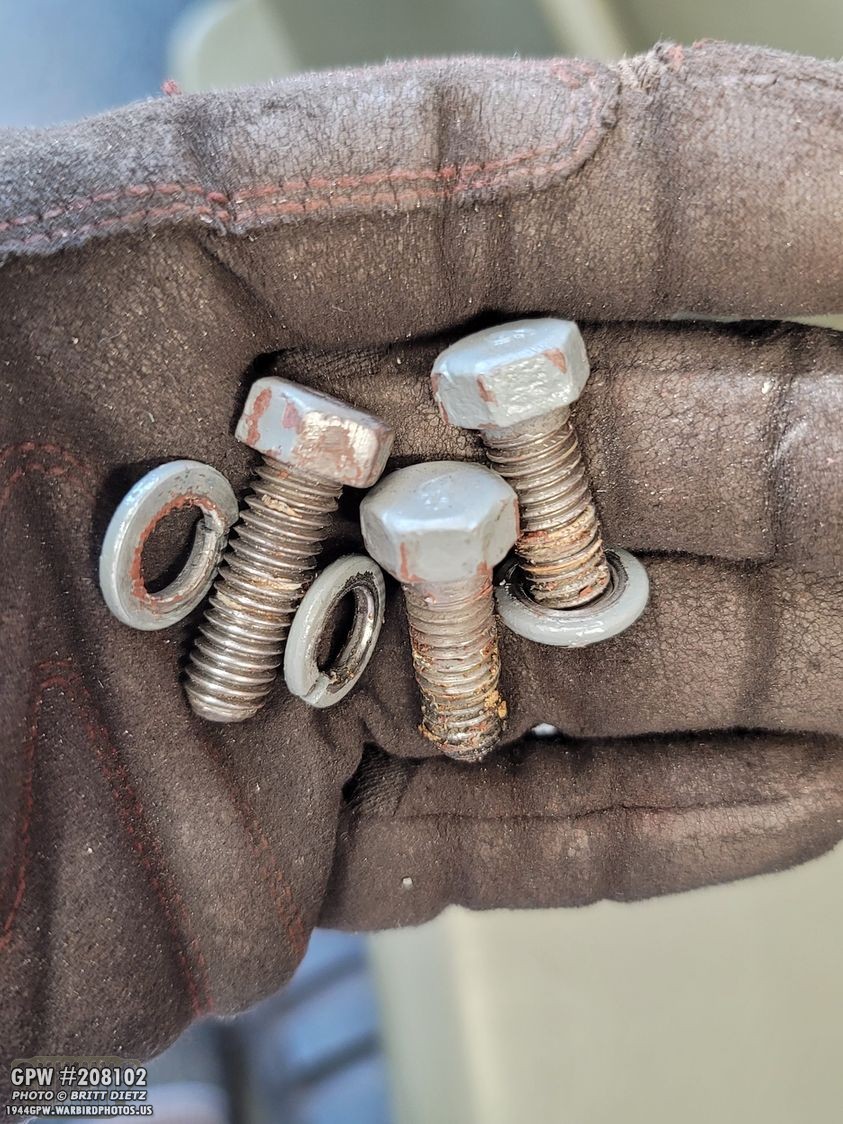
Taking out the three thermostat bolts, you can see the Permatex Water Pump gasket maker WAS actually doing its job here keeping the coolant from leaking around the bolt heads. I’ll have to clean up the threads and repaint the heads.
With the thermostat elbow bolts removed, it was time to get the elbow off, but it’s stuck on there really good.
Hitting it gently with a rubber hammer on both sides will eventually break the old gasket maker free.
And here’s a look with the elbow off. You can see where the coolant was leaking out. I’ll have the scrape off that old gasket and clean up the metal on both the block and the bottom of the elbow.
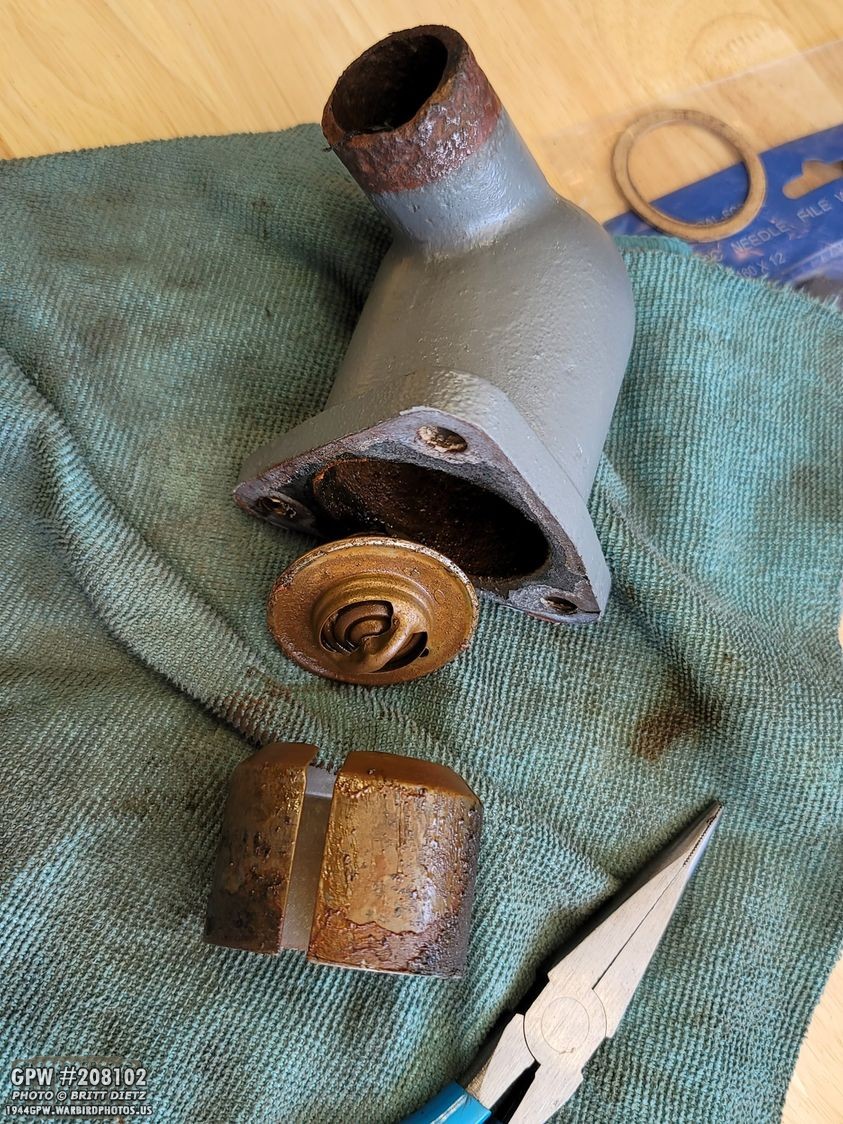
Looking inside the elbow, you can see the thermostat and the retainer. Both will have to be cleaned as there’s still some gunk in the coolant system.
And here’s a look at the thermostat removed from the elbow along with the retainer.
After the throughout cleaning, here’s how they look. I also cleaned the bottom of the elbow and sanded it back to a nice metal finish.
After cleaning up the three bolts (original GPW bolts!), I painted the heads back to Ford Engine Grey.
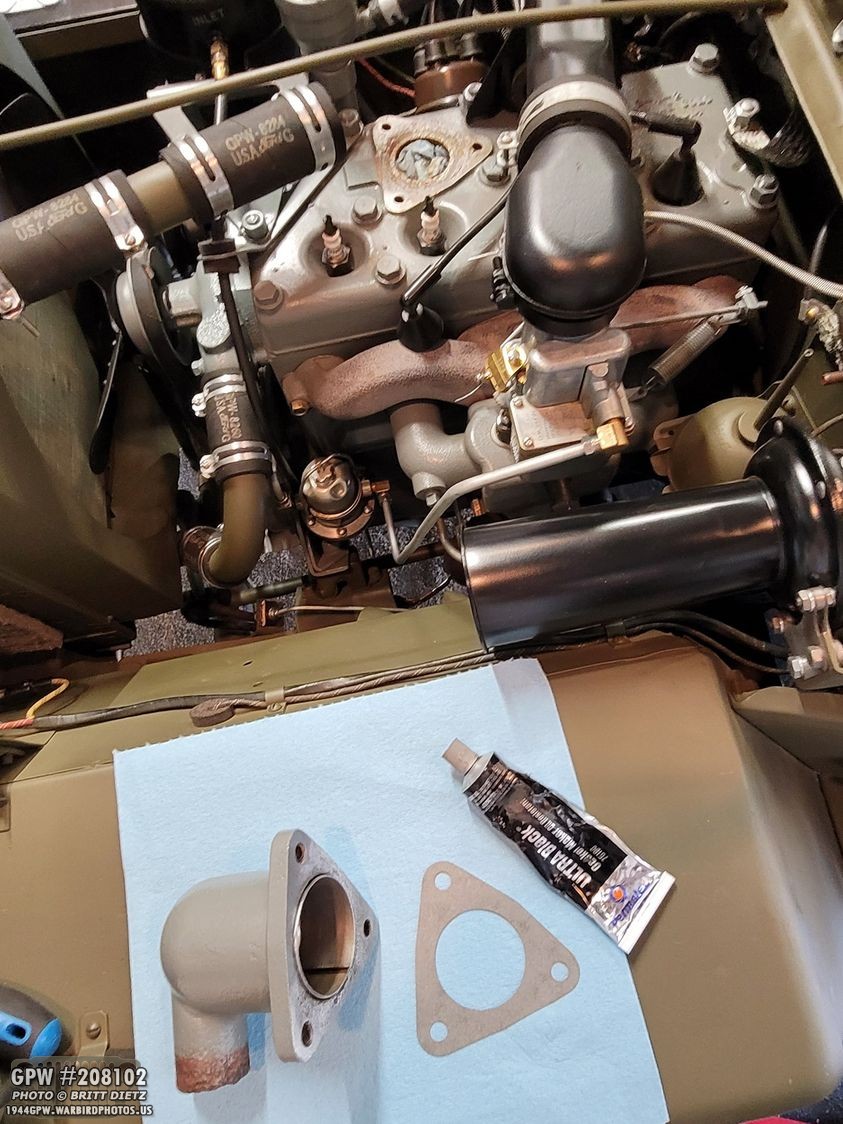
I decided to use the same Permatex Ultra Black RTV this time for the gasket.
All ready to go!
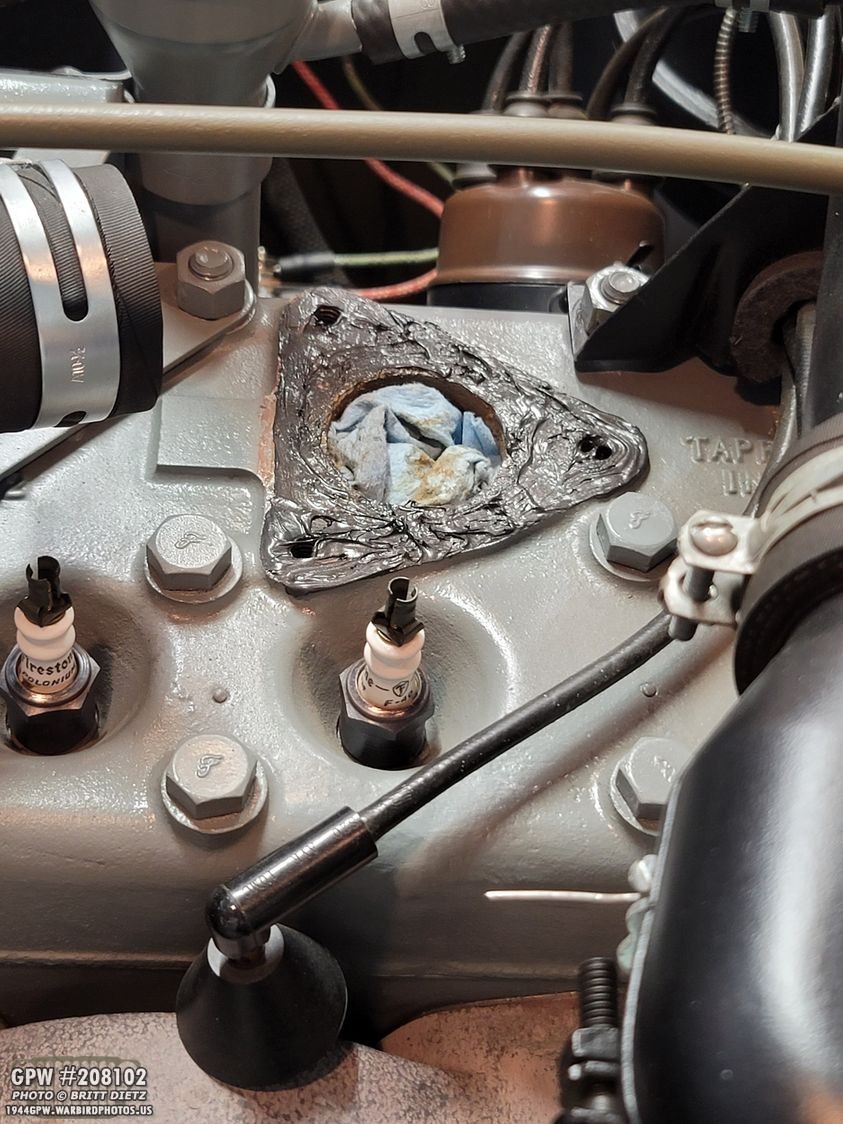
While it still looks dirty, trust me that I’ve scraped off all the rest of the gasket left and sanded as much as I could down to the metal. There is still some former permatex in the pitting, but that shouldn’t be an issue. Again, shop towel is in there to keep stuff from getting inside.
First step, adding the Ultra Black RTV to the head. Not super thick, but not super light either.
After letting it sit for just a little bit to set slightly, I went ahead and pressed on the gasket. These gaskets have only one way to correctly fit on so all the holes line up and the shape matches the head.
Next, I added some Ultra Black to the bottom of the elbow. The thermostat and the retainer are installed as well. Don’t forget those!
Same as the water pump, I added some of the high temperature thread sealer to the end of the bolts as they will penetrate into the block and could leak.
Finger tight, then use the rachet to tighten and torque them down. Again, the RTV squeezed out.
It’s a lot more difficult to remove that excess RTV off the elbow and head, so I’ll have to touch up the paint for sure. Other than that, the Thermostat is now back installed and (I hope) totally sealed!
Now it’s time for the test drive, but first I needed to put new coolant in. I use the modern Prestone 50/50 anti-freeze and coolant. Using a funnel to do this in the radiator makes things a lot easier. Also, make sure you have closed the radiator and block petcock valves otherwise the coolant will just spill right out! Ask me how I know… 😉
It takes just over two of the gallon coolant containers to fill the radiator and block. I will often fill it a bit, then stop and let it flow/fill the various areas of the radiator and block. Slightly shaking the Jeep will help that and you’ll hear gurgle sounds from the block. Eventually, that gurgle will stop and you’ll just be filling the radiator. I decided to fill it until I just started to see the coolant stay in this top area here. That’s a bit fuller than it should be, but I knew that once the Jeep gets going, that level will lower more as things settle all over in the block and radiator.
And with that, she’s ready for a test drive! First, I fired her up and made sure there were no issues with the fan belt, water pump, and fan. After that was successfully checked, it was time for the drive.
And that’s when I took the Jeep to the new dirt road location. Everything was working as it should! No leaks and the thermostat was working. Unfortunately, the Jeep was still overheating a bit (it was about 99 degrees in a dry heat, and I was going over some hills, but still). So the next step will be to take my radiator to a radiator shop and have them do a full recondition making sure none of the tubes are blocked. This will happen in the next month or so.
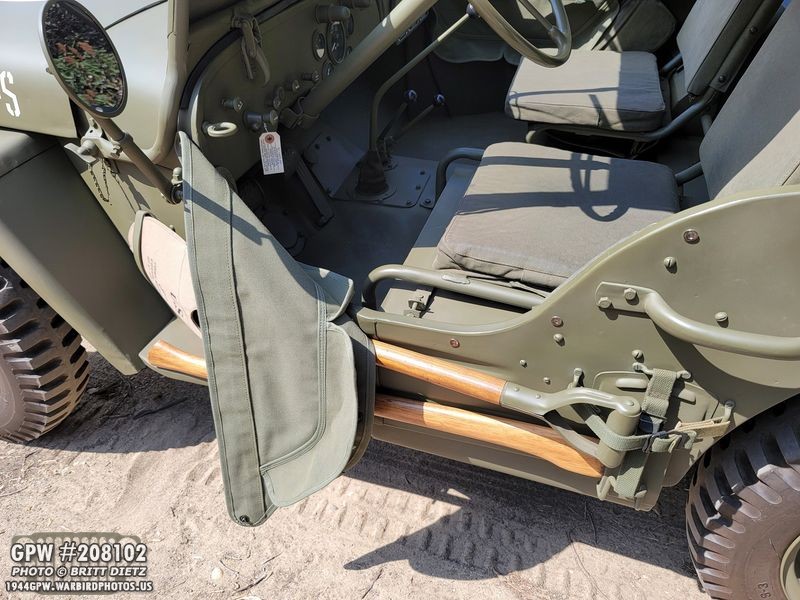
One thing I was asked after my last update on the canvas half-door curtains is if I’m tired of getting them on and off yet. Actually, I still rather enjoy them and found it’s pretty easy to get them on and off this way. Just push the buttons on the rear three, then lean the door this way. Easy to get out of the Jeep and in this way!
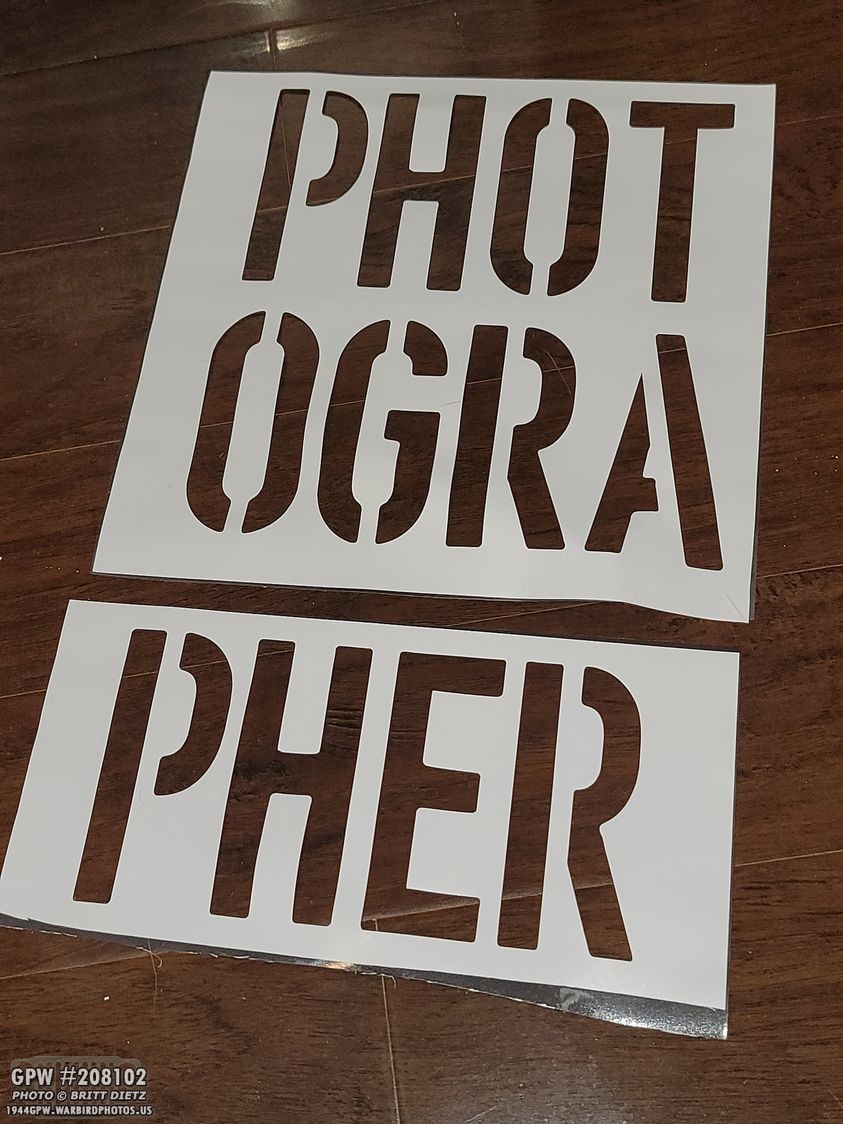
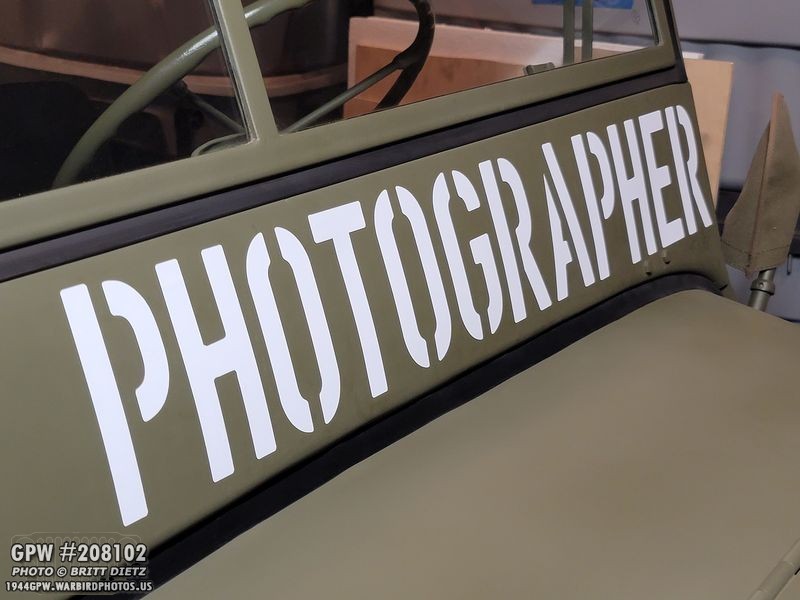
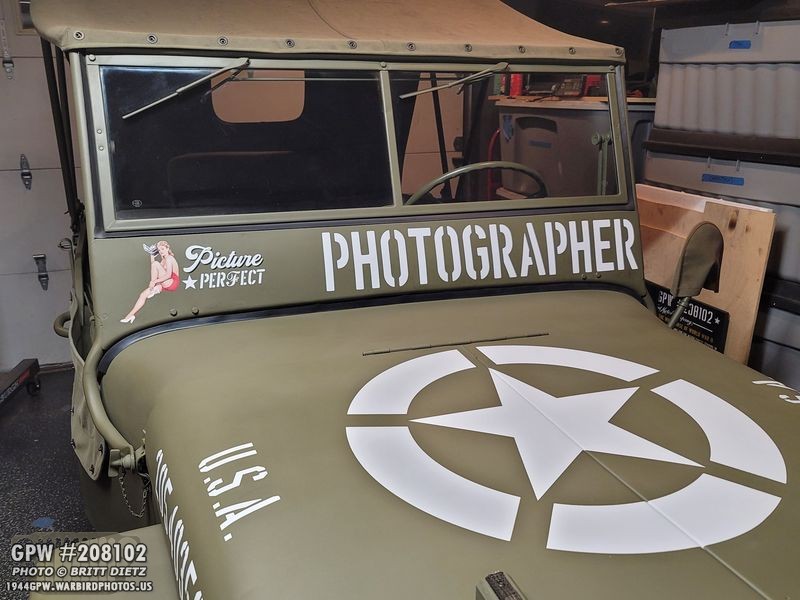
For an upcoming airshow in October, I will be using my Jeep as a ‘golf cart’ of sorts as I’m one of the photographers for the show itself. Getting around the airport will be a lot easier with the Jeep. But to ‘look the part’, I wanted to add PHOTOGRAPHER like Press Jeeps during World War 2 would have. I got an idea to get a roll of magnetic sheet paper and add some white vinyl on top of it. I then put it into my Cricut machine, and with photoshop I made a set of stencil letters in a font I thought that closely resembled the WW2 styles.
And here’s how it looks once added! It’s a bit of a pain trying to line everything up piece by piece, but this should work perfectly for when the Jeep is on the airfield for the airshow. Once the show is over, I’ll be able to easily pull off the magnetic letters and store them in the Jeep for another time.
It’s nice and large as well, so you can’t miss it! I would like to experiment more with magnetic sheets in the future like having the ability to change the pinup artwork if I wanted.
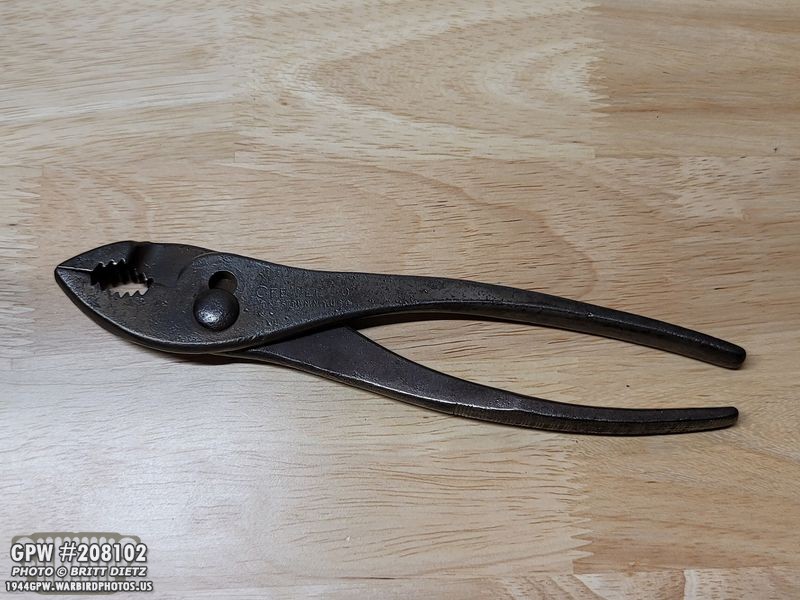
Now to the Flea Market finds! I’m always on the hunt for Jeep and WW2 items at flea markets, especially Jeep tools. In past updates, I’ve shown a correct Fairmount hammer and IRWIN screwdriver. I found a correct Cee Tee Co pliers!
It’s a bit pitted, but the markings match up with the Jeep tools from JeepDraw. I keep photos of all the different types of tools (makes, styles, etc) on my phone for reference. It’s hard to see here, but it says:
Cee Tee Co.
Jamestown, N.Y. U.S.A.
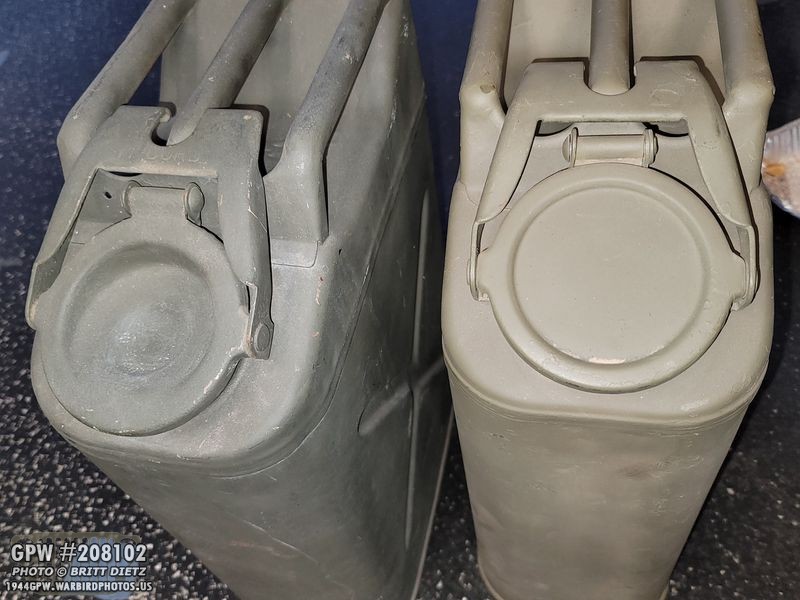
Another item I just happened to find is another correct jerry can spout! The wartime style is a bit longer than the post-war one, but the easiest way to know the difference is the screw on the latch near the bottom. Post-war it was riveted. The one on the left is the wartime one I found earlier this year in February and restored. The right one is the one I found at the flea market. It’s really rusted, but I think after some wire wheeling and work, it can look really good! I’ll post updates in the future once I tackle it!
I feel that every Jeep owner will eventually amass a large collection of gas and water jerry cans. Not because we want to, but because we’re often trying to find that perfect jerry can that’s the date we want! I stumbled across a second water can by a totally different manufacturer than the first one.
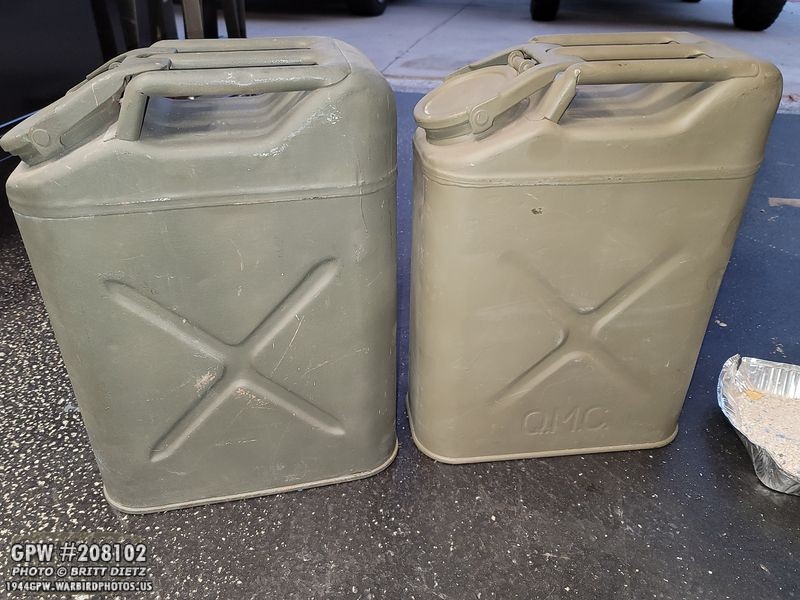
Comparing the two water cans, you can see the caps are the same design, but different styles.
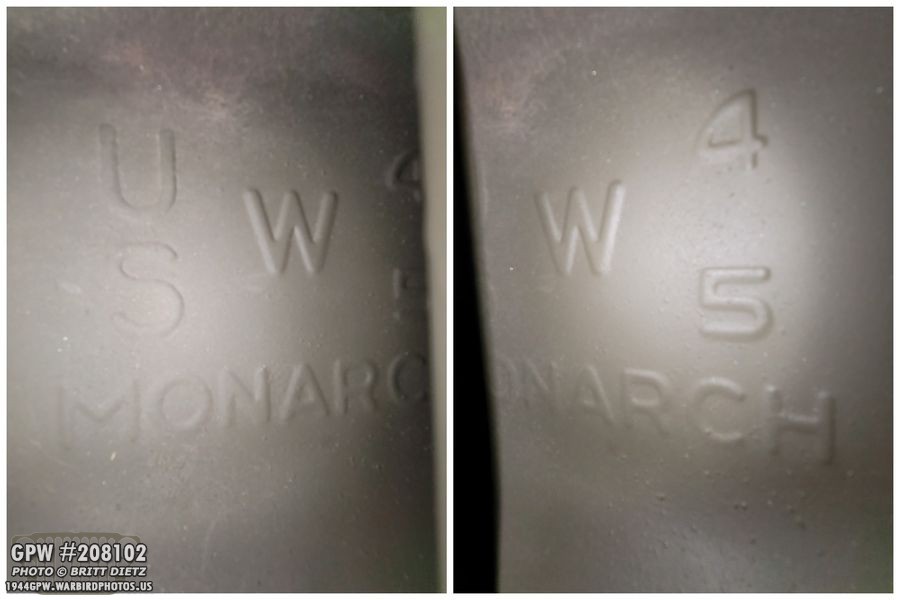
Looking at the original water can I got, you can see it’s made by Monarch. The US is, of course, United States. W is for Water. And 45 means it was built in 1945.
The new can also has the U.S., W for Water, and was build by Cavalier. It has a 43 for 1943.
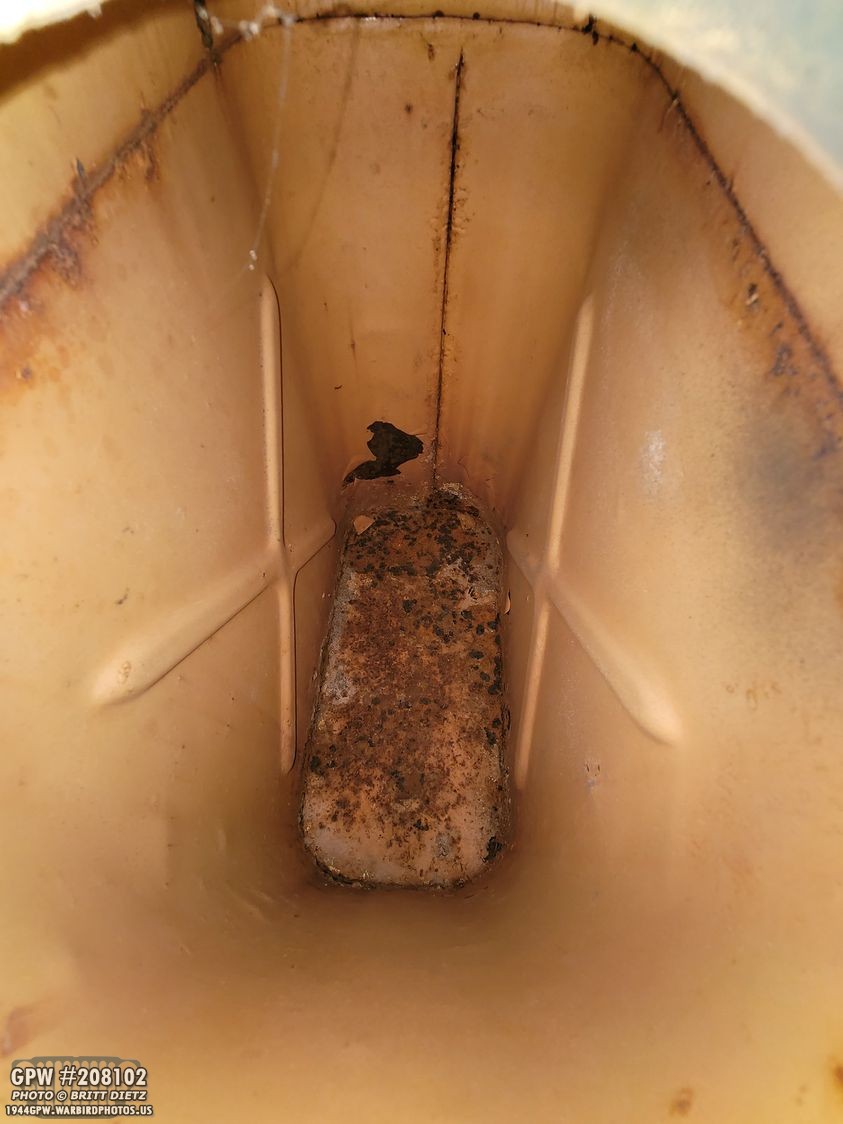
Inside the Monarch one, it’s a bit rusty. Water cans were given a special liner coating to help seal the water from leaking. While the liner is still there, it is being eaten away by the rust.
The new water can is in much better shape. Though I’m not about to put water in it for drinking!
I’m not sure what I’m going to with either of these, but they are nice to have! They both appear to have original paint on them from what I can tell.
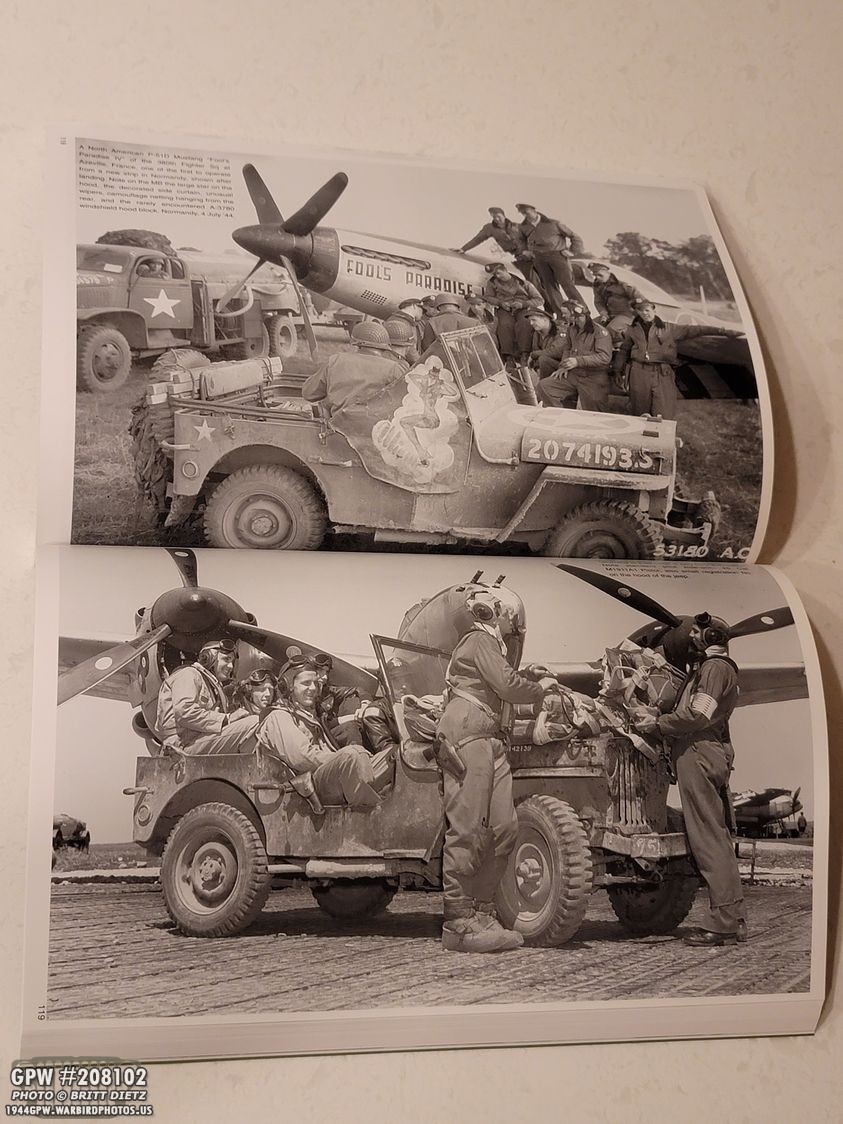
Moving on to another item I got this week, yet another Jeep book to add to the collection! I saw this book in someone’s collection online, and looked into it. Found it was still being sold on Amazon! It’s Jeep Jeep Jeep No. 2 by Yasuo Ohtsuka.
I read on Amazon it had a section on Army Air Force Jeeps, and I was sold! It’s in english, and was only about $27 shipped.
There’s a lot of great photos in it, many I’ve not seen before in great detail!
It’s worth the cost for sure, with lots of pages of wartime Jeeps (and some post-war Korean War-era service Jeeps)! Another great reference book for the library!
And that’s it for this week! Another project completed. I’m still looking to dive into the rear axle sound again, but I’ve been putting it off. For now, I’ve just been enjoying the Jeep! I hope to get it out at more events in the next few months.
Till the next update…
