Overheating Results, Alternator Issues, Ammeter Replacement, & more!
Finally catching up on the last year and a half of updates, tweaks, changes, issues, etc. on the Jeep! From the final results of the overheating issue to major issues with the PowerGen Alternator, which looks like a generator. Plus, some minor improvements along the way!

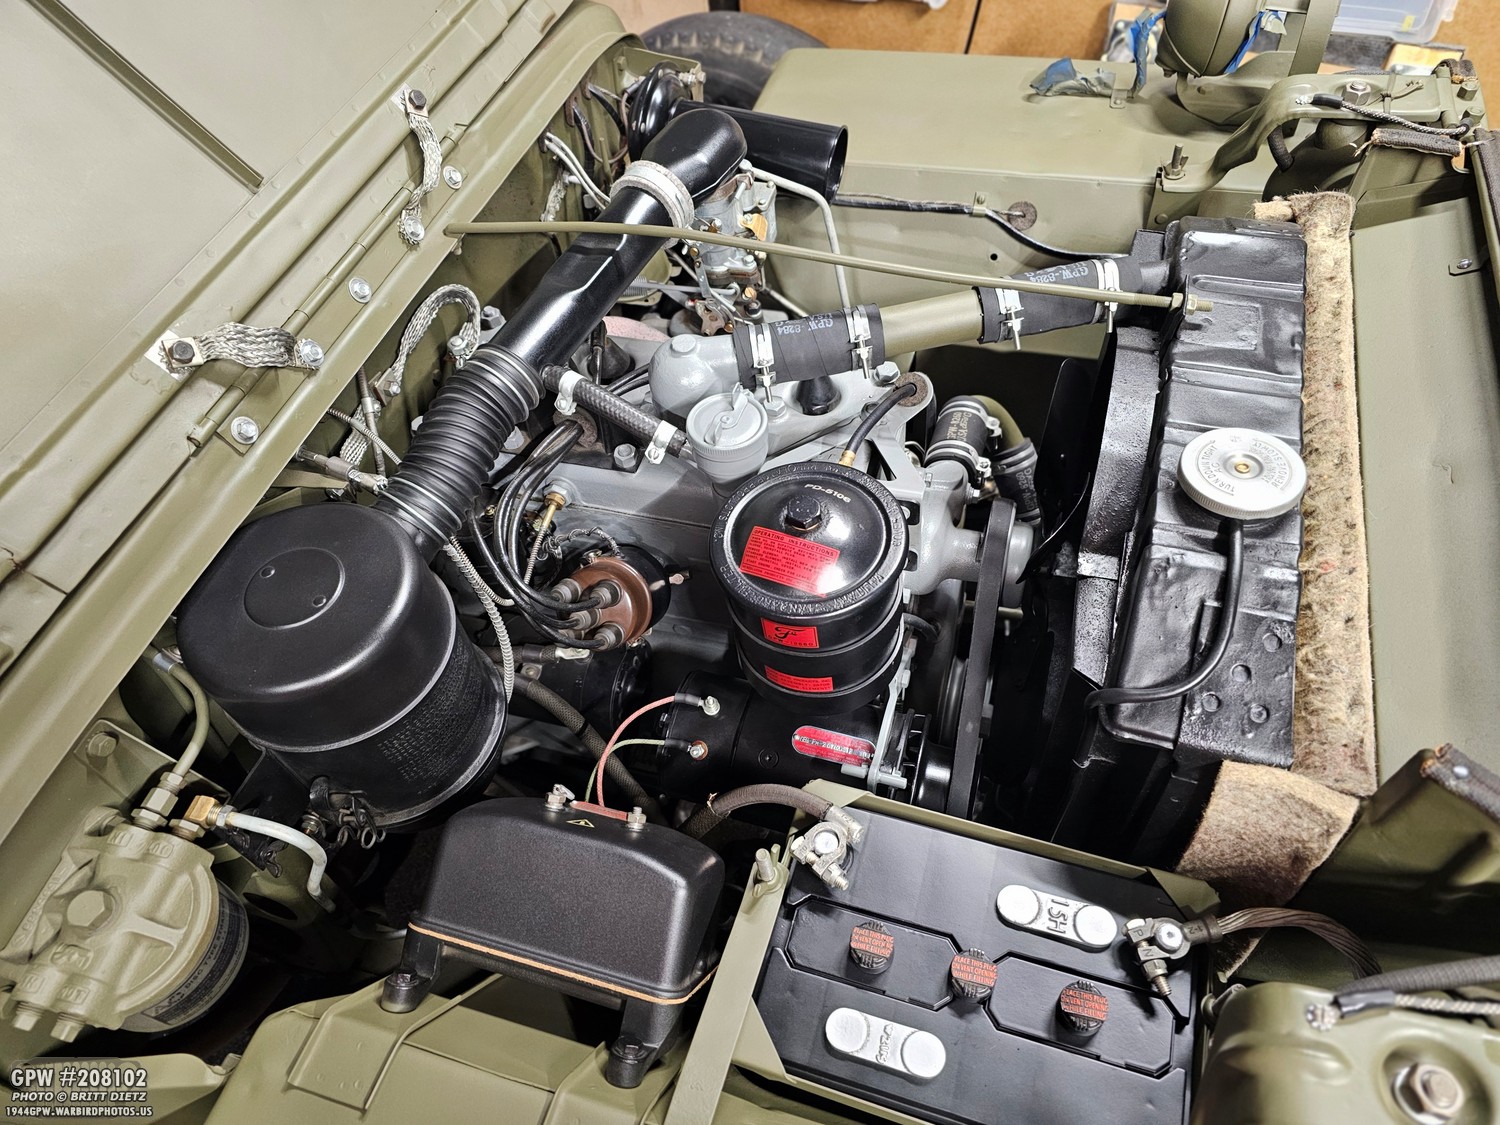
One of the most recent shots of the Jeep as it was undergoing a deep cleaning after the recent Wings, Tracks, and Wheels event. This update has been a long time coming! I’ve spent so much time on my 1940 Ford restoration, which is going at a snail’s pace compared to the Jeep, that I haven’t had much time or willpower to sit down and write about the various Jeep things. I have been driving the Jeep and, in fact, I try to drive her at least once a week if not once every other week for a few miles. This keeps the fluids flowing and combats the number one killer of vehicles… sitting sedentary! So, let’s play catch-up on what’s been happening…

So, the last non-event update about the Jeep was actually September 21, 2023! The update was Part 3 about tackling the overheating issue my Jeep was having. That last update, I had replaced the original radiator with a new original radiator off another Jeep that I purchased from Scott Schiller (Team G503). In that update, I had replaced the top rubber crossover tubes that had worn out (with a custom GPW stamp). I also resealed the thermostat and checked all the connections.

The new rubber tubes worked well, tightening nice and snugly on the thermostat, metal cross-over tube, and the radiator. I filled the radiator up with coolant and went out for a test drive…

When I took her out on her first post-radiator replace test drive, it was about 79 degrees out. Not super hot, but a warm day. I decided to really open her up and take her around the block several times to get her really warmed up.

So, normally, on a not-too-hot day like 79 degrees, the Jeep would almost instantly be in the 190 degrees if not higher. I carefully watched the temp gauge… it was staying just above 160! So far so good…

Even when I pushed the Jeep to go faster and in third gear… she stayed at 170 degrees. If she ever got any hotter, switching to first gear for a bit brought her quickly back down to 160-170 degrees. That test drive seemed like a success! And that continued for the next few months as we went into 2024, with the Jeep doing really well even on hot days. But the ONE DAY I was concerned about was coming up… July 4th. That’s when I’d take the Jeep from home into Corona, CA on what’s usually one of the hotter days (90s to 100s).

On the day of the show, it was already in the upper 70s when I pulled the Jeep out to leave for the parade. This would be the real test as I drove through some hills, a lot of stop lights, and about 35 miles round trip (not including the parade itself).

Speaking of the parade, I had signed my Jeep and another Jeep (we hoped to have four originally, but two dropped out) to be in the parade. Here they are in the vehicle staging area. This parade is a fun local community parade, and the best part is that the parade route is DOWN HILL! So, just put the vehicle in neutral and let it coast all the way down, only using the brakes! I have my custom ammo crate radio on the hood, generally blaring 1940s music as we go. It’s always a fun time! The Jeep performed well on the drive over and had no issues with the parade itself. So far, so good!

Coming home from the parade, however, was when it was hot… getting into the upper 90s with a dry heat and the Jeep going up several hills. The Jeep would occasionally pop up over 180, but generally, after stopping at a stop sign and switching into first gear, after a little bit, it would drop back down to 175. It pretty much held 175-180 most of the time, unless going up a hill or going for a bit in third gear… but each time putting it into first would drop the temps back down to 175-180.

So, I think the mission was accomplished! Between cleaning up the system, redoing the rubber tubes, the thermostat seal, and the new radiator, it finally fixed the overheating problem! I figure it was mostly the old original radiator with clogged core tubes. And while I’m sad I’m not using my original radiator anymore, it is still AN original radiator I have instead of a reproduction one! So, unless another issue pops up (which it hasn’t since I replaced anything, and it’s now been almost two years since I started it), I think this closes the book on the Jeep overheating!

I sometimes get asked what I do when I’m prepping for an event like a parade or the Wings, Tracks, and Wheels event out at Chino Airport that I attend. So I figured I’d talk about some of the things I check and often repaint. I will often start with the engine bay, cleaning up any oil spots, dust, and debris that’s come through the radiator and hit the fan. That includes bug guts that often splatter on the underside of the hood. Fun times.

I often check for heavy wear areas and give them quick hits with 33070 OD Green spray paint. This includes the clutch/brake/gas pedals, the fender-mounted blackout light, the hood catch/latches, and the safety strap eyelet.

Other areas include the fenders (especially if you often place things on the fenders… they made good shelf space!), the top bow thumb screw (I often rub against this as I walk past the Jeep in the garage), the front top bow bracket (same reason), and the rear of the fenders.

One great item that’s come in handy several times now is using a little inspection camera to help get into the fill holes of the various oil/fluid reservoirs to see the level. It’s a long bendable snake camera that connects to the USB-C on the bottom of my phone, where I can see the image. It has a bunch of tiny LEDs on the end that light up what I’m seeing. It’s handy for sure!

It’s always a good idea to check the fluid levels… the coolant, the engine oil, the transmission/transfer case oil, and the axle differential oil levels. Using the snake camera, it’s easy to see the current level!

I also check for any new leaks and any rusting on things in the engine bay. And that’s most of what I check before big events. So, let’s get into some of the bad things that have happened in the last year.

The majority of the big issues happened at last year’s Wings, Tracks, and Wheels event in May 2024. The drive over to the Planes of Fame Air Museum went well (and it was an overcast cold day, so the Jeep stayed really cool!)

The first major issue was one that’s a bit of a head scratcher involving the spark plugs.

As a reminder, I replaced the modern autolite spark plugs I was using with original 1940s Firestone F-40 spark plugs. These are actual real original NOS spark plugs that work perfectly on the Jeep (and I swear it ran better after adding them). I ended up buying a complete set of them and a few spares. GPW Jeeps often used the F-40s during the war.

During the Wings, Tracks, and Wheels event, for the Friday set-up day and the pre-event/post-event on the days of the event itself, I use my Jeep as my transport around the museum/event compound. It’s a lot of driving back and forth, leaving the Jeep idling for a while as I hop out to do something, shutting off the Jeep, and firing it back up. At one point during the Friday setup day, I hopped into the Jeep and fired her up to a popping sound, then a random hissing noise coming from the engine as it stumbled a bit. WHOA! I immediately shut off the Jeep and opened up the engine.

Somehow, one of the spark plugs had blown in half! Like literally. This was all that was left in the Jeep on the engine head. The whole top and the middle had blown off somewhere (which I never found). The spark plug wire wasn’t damaged, but it has dislodged from the top of the spark plug! My theory was that there was a small crack in the porcelain top, and that after using it a lot, going over a lot of bumpy and rough terrain, and the constantly starting, idling, stopping, etc, made that crack finally get weak enough that the combustion when starting just blew it apart. Crazy! But, I had those spares… so thankfully I was able to replace it with a different one. No more explosions since then!

Now, for the biggest issue I’ve had with the Jeep in the last two years… the PowerGen PowerMaster alternator that looks like a generator. My installation of that alternator is still one of the most popular and looked at posts on my Jeep restoration Facebook page and the Jeep restoration blog. I still see people using the guide to do the replacement since it looks so convincing as a generator when you need an alternator. And up until the Wings, Tracks, and Wheels event in 2024, it had been working like a dream. Great recharging of the battery and holding up perfectly.

Let’s talk about what went wrong, a little over 3 years after I originally installed the PowerGen in 2021. In doing so, I need to take you back to the original installation. So, the pulley that comes with the power master is way undersized for a Jeep and not long enough. To make it work in a Jeep correctly, you NEED to add a WW2 pulley. Here you can see the original pulley on the PowerGen, and a NOS WW2 pulley on the right. Quite the difference. But the WW2 pulley doesn’t perfectly fit.

The shaft for the PowerGen comes with this large spacer washer. This is removed when you use a WW2 pulley, as the shaft is not long enough to come out the other side of the pulley where the nut is placed to hold the pulley in place.

You can’t just put the pulley on the shaft without some sort of spacer, however. This is due to the longer fins for the air flow, which would strike the face of the PowerGen. So you have to use some smaller spacer washers stacked just enough to leave a tiny tiny clearance between the PowerGen face and the pulley fins.

Even doing this meant you only get about 4-5 threads from the shaft sticking out of the pulley. That’s barely enough to get the nut on.

And even when you get the nut on, if you screw it on too tightly, it’ll push the pulley towards the face and the fins will end up still striking. So, I screwed it in as much as I could, and used some Locktite to hold the nut in place. This has worked fine for several years.

But the problem reared its head at the 2024 Wings, Tracks, and Wheels event… I think (again) due to the constant stopping, starting, and mainly the rough/bumpy terrain. I suddenly heard a loud clunking noise, and the sounds of the engine was different. This was just later in the day, after the spark plug explosion. As you can see here at the end of the shaft, the threads for the nut are not very defined. In fact, they are not very good at all. Super easy to cross-thread if you’re not careful.

And here’s a good look at how little the shaft was engaging with the nut. What was happening was that the nut was finally giving up and stripping the shaft. Trying to put the nut back on caused the already terrible threads on the shaft to cross-thread and get messed up, to the point that we couldn’t even tighten the nut at all on the shaft anymore, meaning I couldn’t drive the Jeep. Unfortunately, I didn’t get any photos of the problem itself, as I was so busy at the event, I didn’t have time to deal with it.

So, the Jeep sat off the one side in the wrong area on the first day of the event. We put it in neutral and just pushed it to the side out of the way. I was still able to make it look like it was on display, and people were checking it out throughout the day, but it was out of commission.

On Saturday night, I removed the PowerGen in the dark and brought it over to the motorpool area of the museum where some of the guys and I took a look at it. Again, no photos, so I’ll explain what we found. First, the threads were so bad that we couldn’t get the nut back on anymore. Second, we had to figure out a better way to get this pulley to fit with more of the shaft sticking out of the pulley so the nut could fully engage. To fix the first problem, we originally thought we’d just re-thread the shaft with a die… but the problem there is that you can’t turn a die without turning the entire shaft. And without taking apart the entire PowerGen, we couldn’t stop it from turning. So, we used hand files and slowly rebuilt the threads by hand and grooved them much deeper. This took a lot of time. The second problem was how to make the pulley fit better on the shaft. I realized that the only way to do this that I could see at the time was to reduce the height of the fins. Buy shaving them down, and event giving them a bit more of an angle, that would make the pulley it further down on the shaft and allow me to remove some of the spacer washers. (this photo was from when I finished the PowerGen originally).

So, my Jeep sat out of commission that night under a large canopy at the museum as I headed home to spend a late night working on fixing the PowerGen. When I got it home, I worked further on cleaning up the threads until they looked better than they did originally.

Again, not many photos of what I did, so I’m explaining it instead. I took my belt sander and slowly sanded down the fins, and then slowly bent the fins to be more at an angle. It was a shave/bend/test fit repetition over and over until I could see enough of the shaft sticking out of the pulley that the nut would fully engage. I had to be VERY careful to perfectly and evenly shave the fins on the belt sander, or one fin might strike the face while the others don’t. This is a shot of the final length and angle that made it to where the nut fit. I removed a bit of the fins and gave them a larger angle, but it still looks good.

This terrible off-center photo shows the nut. While it doesn’t look completely engaged, it’s 95% engaged. Maybe 1/2 a thread is not engaged, but that’s enough to secure it in place tightly. Much better than the 4 threads it was engaging before. This isn’t coming off again! I should have done this in the first place.

And a look at the entire PowerGen with the modified pulley. It still looks great, and no one would really know the fins are modified. I’ve not had any issues with the pulley coming off since then, and it’s been over a year later. I even went over WAY more rough/bumpy terrain for the Wings, Tracks, and Wheels event this year in 2025. No exploding spark plugs, and no issues with the PowerGen pulley! But, we’re not done talking about the PowerGen, as another issue was going to pop up.

Another event I attended in June of 2024 was the Jeep’s first car show entry. I took it out to the Corona Friends Church 2nd Annual Car Show. It’s a small car show (about double what you see here), but it was fun to attend. My Jeep was the only military vehicle there. Sadly, she didn’t win (though I heard she came in close for some awards).

But something I noticed at the car show and even when the Jeep had trouble starting once at Wings, Tracks, and Wheels (the month earlier in 2024)… the battery seemed to be very low. At first, I wasn’t sure what was going on.

I suspected it might be something to do with the PowerGen again. Perhaps it had died or there was now a bad connection somewhere after I took it out to fix the pulley.

So, I ran a test… I had someone sit in the Jeep to help me test the voltage of the battery. I hooked up my digital multimeter to the battery and started the Jeep. Sure enough, at idle… it was only registering 12.79. That means the alternator isn’t charging the battery. UGH.

But then something weird… I had the person just tap the gas pedal lightly… and instantly, the voltage jumped up to 14.32 volts. NOW the PowerGen was recharging the battery! But as soon as they took their foot off the gas pedal and let the Jeep idle, it immediately back down to 12.5 or 12.7 volts. I first thought maybe the PowerGen wasn’t spinning enough (as there is an RPM rating needed to start the power generation)… but, it HAD been working before just fine. And even the slightest hit of the gas starts the recharge.

So, I started to wonder if it’s perhaps a bad battery. It was a Walmart battery I was using that I had dressed up to look like a vintage battery with cast cell connectors and screw plugs. The battery, in 2024, was six years old, so I thought maybe that’s why. Emailing the PowerGen support, they said a bad battery CAN affect the recharge voltage.

So, I went to Harbor Freight and got this nifty battery tester. After letting it run a diagnostic on the battery, it immediately came back with a 16% health and said it was BAD and time to replace it! Ok, we’re getting somewhere!

This time I went with a better name brand, a DIE HARD. Again, like before, I stripped off all the stickers, sanded and filled all the markings, and painted the top black.

For reference, I ran the same battery checker on the new Die Hard battery, and here are the results. All 100%!

I cleaned up the Willard connectors and caps and glued them onto the new battery. Looking like it was again and ready to go!

So, I took it out for a spin, and it started right up! That’s a good sign, but it was also at 100% charge.

But when I would stop at a stop sign… I saw the ammeter dropping to the negative level. Especially when I had the headlights on. Uh oh.

Doing the same test with the digital multimeter… it revealed the same problem. 12.8 volts at idle, and over 14-14.5 volts when even a tiny bit of gas is applied. So something happened with the PowerGen, and it’s not charging at idle, like the idle speeds are not fast enough for it anymore. So, the easy solution is to not let the Jeep idle for too long, or if I need to, just pull out the throttle slightly so the RPMs go up. Or, I can increase the carburetor set screw to make the RPMs higher. So far, I’ve gone with the first option… making sure that when stopped at a signal or idling that I keep the RPMs up a bit more. This ensures the ammeter is always in the positive. I have yet to fully diagnose this issue and find out if the PowerGen has an issue where it needs higher RPMs over what it used to need… or something else. So we will classify this one as ‘ongoing, but working with a workaround’.

Speaking of the ammeter, I’ve noticed over the last few months that the gauge has started to get a permanent fog on the inside of the glass. With the gauge being sealed, I can’t get in there to clean it up. Somehow, the weatherproof seal of this reproduction has failed, and caused a permanent glaze. None of the others have this issue, so it started to really bother me.

So, I went out and bought a new one from Ron Fitzpatrick Jeep Parts. His version is far more accurate for the GPW than the repro I was using (which, at the time, was one of the best out there). Ron’s ammeter has a more accurate font and needle style. And it’s not fogged over!

I went to replace it last weekend. Not an easy task getting behind the dash to replace things, especially when you don’t want to remove the seats to give yourself some room! What helped was, again, that snake inspection camera. I could see what I was doing behind the dash without needing to be able to actually have my head looking up in there. Here’s a shot from the camera of the back of the gauge.

Once I got the gauge out, I snapped this shot where you can see just how fogged/glazed the glass has gotten from the inside. I’d have to take apart the ‘paint lid’ top, which is a HUGE pain and not worth it. Maybe if this were an original gauge, but when a new, more accurate repro is $25.

And the design of this particular reproduction I was using had only two studs/terminals, which was used for both the bracket that holds the gauge to the back of the dash AND the electrical connections. They put this rubberized insulator so the hold-down bracket wouldn’t bridge the two terminal connections for the electrical. I had to tear apart that insulation as over the last few years it’s ‘glued’ itself to the terminal and the bracket. Not the best design.

Here’s a look at the reproduction I took out (bottom) with the new one from Ron Fitzpatrick Jeeps Parts. MUCH better terminal design on the new gauge, with dedicated terminals for the electrical connections and two studs for the hold-down bracket. This design is actually closer to the original gauges.

Now it was time to install the new gauge! Again, using the snake light, it was a lot easier as I could just reach around the dash rather than injure my back trying to see what I was doing. One of the nice things about reinstalling an ammeter is that if you wire it backwards, when you fire up the Jeep and hit the gas, you’ll see it go into the negative. Things are ready to go!

MUCH better looking! Worth the investment of $25. Closer to the correct GPW design, no fogged glass, and better rear terminals. After I shot this photo, I fired up the Jeep and took it for a drive. It worked! It moved into the negative when the ignition was turned on, but the Jeep was not started, then into the positive after I started it and gave it gas.

So, a few other improvements and things I need to take a look at in the next few months… I have a leak coming from my oil bracket on top of the engine. It seems like a lot here, but this was after I had driven many miles home from the Wings, Tracks, and Wheels event. Normally, it’s way less than that.

I believe that it’s because the bracket is not making a good enough seal with the flange on the head. So it’s leaking between.

Not to mention, my oil bracket is not only cracked (and will need some welding to fix the common crack), but someone before I owned the Jeep bent the end of the oil bracket that holds the oil line upwards. It should not be upwards but flat. So, along with fixing the crack, I need to bend it back flat. I could get a repro F-marked bracket, but I’m going to try and repair the bracket. Sometimes these cracks can be impossible to fix, so we’ll see. But this bracket is original to the Jeep, so I’m going to try and keep it.

Moving on, another item that needed some work, the (original) metal horn vibration-dampening bracket, was starting to slowly accumulate surface rust. Note the F stamped bolt, it is an original GPW Ford bolt that came with the original vibration bracket and the original horn!

What I did was I took off the bracket assembly, wire-wheeled all the surfaces with any rust back to metal, then sprayed a steel-looking spray paint. This will retain the metal look but also protect the bracket from future surface rust! Yes, I realize that the bottom bolt isn’t F-stamped (I didn’t have one in that size). One day, I’ll replace it with a proper F-stamped one. I also spray-painted the nuts and the bolt heads to prevent them from rusting.

I did the same thing to the air horn clamp. It was also rusting (and is an original). Spray-painted with the steel paint, looks good as new now!

On an ‘ever improving’ side-note, for the longest time I’ve had a photo I shot of my girlfriend when we did a pinup shoot many years ago. I aged the photo and have had that on my dashboard for several years now. While it turned out great, it always looked just a bit too modern for me. I wanted to update it with something that looks a bit more real.

And here’s the result. I actually used a custom-built AI renderer with some photos of Crystal recently and real 1940s snapshots to come up with this. It looks a LOT more authentic to the 1940s style. I may still refine it further, but I’m happy with the new one so far. It has just enough imperfections to make it look real. And it’s really my girlfriend, just the overall image (and her outfit) is enhanced with AI to make it look from the 1940s.

Something not AI-generated is the pinup on my windshield. One of the more popular things on my Jeep that always gets people taking photos. This is a close friend and model of mine who posed for this during a shoot we did where I replicated actual 1944 pinup artwork (with the addition of the Speed Graphic camera). It’s printed on vinyl sticker paper and was cut with my Cricut. It’s holding up well, but the ‘Picture Perfect’ is starting to slowly peel off. Eventually, I’ll need to replace that.

I’ve seen some people put large pinup gals in this blank area on the passenger side. I’ve even seen wartime photos of a pinup gal (or other artwork) there. I might explore putting something there too, ala in the style of 1940s B-17 nose art, since my Jeep is in a 95th Bomb Group scheme. I like the idea of showcasing my pinup work on the Jeep, and (as mentioned), it’s always a hit!

I haven’t found many Jeep tools recently (I still go to flea markets all the time and look through tools, but I’ve looked through most of the regulars at this point), but I did find this Utica ‘7-6’ 6-inch slip-joint combination pliers. This would be correct for the Jeep toolkit.

Looking at the details, the signs this is correct are the UTICA TOOLS and the UTICA N.Y. U.S.A. markings, plus the diamond design on the grip with rounded corner inset. The 7-6 is correct for an MB vehicle, though I’m sure they found their way onto GPWs during the war as well.

Here’s a look at what’s in my toolkit that I keep in the glove box. A lot of it is modern, as I’ve yet to find a lot of the Jeep tools (or don’t want to pay a small fortune on eBay). But, I do have two original pliers (the Utica just mentioned and a Cee Tee), an original Irwin screwdriver, an original Fairmount hammer, and an original Willys spark plug wrench (missing the handle bar that goes through the top). The brake bleeder wrench and the lug nut wrench (F-marked) are reproductions. The rest of the items are modern. The screw drivers I wanted as there are plenty of smaller screws that the Irwin will be too big for. I have a special brake lug nut wrench, small socket wrench with several sockets, reproduction Carter WO carburetor adjustment tool kit, a full set of SAE wrenches, and a assortment of extra screws/bolts in common sizes with matching lock washers, washers, and nuts just in case I’m in the field and something gets lost or broken.

An extra thing I got to add to the kit is this stubby ratcheting combo wrench set that will come in handy for areas with very little space (I ran into that when trying to use the full size wrenches when trying to get out my PowerGen at night in the near dark over muddy dirt).

Another recent acquisition is this original April 1945 ‘Automotive Trouble Shooting’ guide (Volume 1). I love collecting literature that would go with the Jeep/motorpool and put those items on display with my Jeep at events. While this has a Jeep doodle on the cover, it actually is generic and covers most vehicles with basic troubleshooting. I’m on the hunt for a non-crazy priced Volume 2 to complete the set.

And that brings us to the end! Whew! You’re all caught up now for the last year of the Jeep. As mentioned earlier, I have some work still to do when I get some time (in between working on the 1940 Ford Deluxe restoration). I’ve also got a squeaky brake on the rear driver’s side that needs some attention eventually. But other than those things, she’s running pretty well! So, it might be a bit of time before the next update, but I won’t let it go for an entire year again!
Till the next update….
Till the next update….