 Driving, small adjustments, and Wartime Axles!
It’s been a lot of fun driving the Jeep around the neighborhood the last week, and little projects continue to improve the Jeep! Plus, I get a pair of wartime Jeep axles!

As posted earlier in the week, here’s a look at the Jeep when I took her to the local park. At the time, it was the furthest I’d gone with her yet. Aside from getting the markings applied, she looks all finished!

But, at this point, she’s technically not street legal. She is insured and has a license plate, but the registration wasn’t caught up and had some fines. I went to the DMV not long after this drive and stood in line for a while to get it all sorted out. It took a bit and having to talk to a manager to get some of the fees reduced, but I finally walked out with a street-legal Jeep!

I then ordered a special magnetic and rubberized license plate holder for the Jeep. The screws are recessed in the holder, so with the rubber coating, it doesn’t scratch the Jeep. It also is pretty darn strong, so I’m not worried about it falling off. Perfect for throwing it on the back of the Jeep (which is metal) and then taking it off at shows and events. (This photo shows the back of the plate with the holder attached, the numbers are blurred)

With the license plate added and the Jeep legal on the streets, I took it to the nearby grocery store over last weekend to get some items! It was the first time I’ve driven the Jeep on non-residential streets and with traffic signals.

It was fun taking the Jeep out in public and parking it in a public parking area! The blurred area under the Jerry can is the license plate that’s magnetically held on.
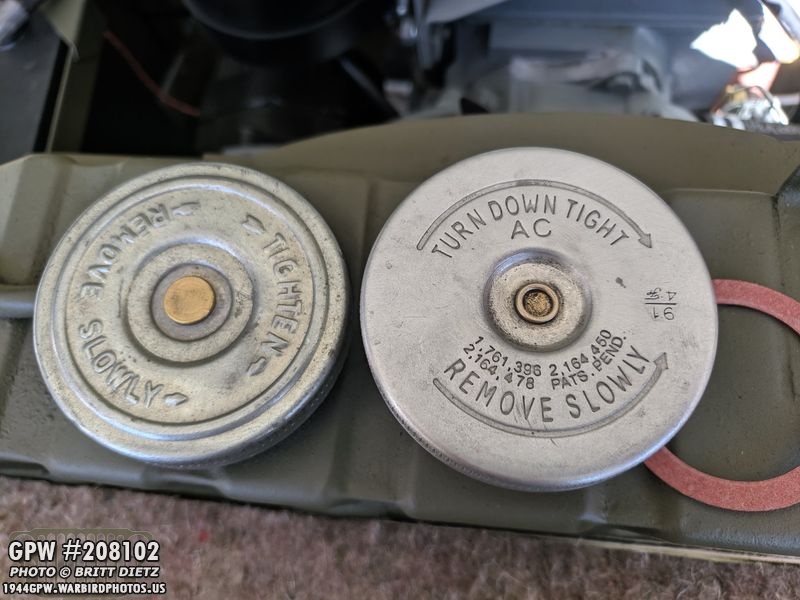
One thing I did notice during one of the longer drives was that I was getting coolant coming out the overflow tube (seen to the left coming out of the cap). It was decided I either 1) had too much coolant in the engine, or 2) had a bad radiator cap. I had been meaning to exchange the radiator cap to a new GPW f stamped one, so this made me go ahead and order one. Here’s the cap I originally had (left) and the new GPW cap (right).

It came from Peter Debella Jeep Parts via eBay in this nice box.
It also came with a new gasket, which mine didn’t even have to begin with.
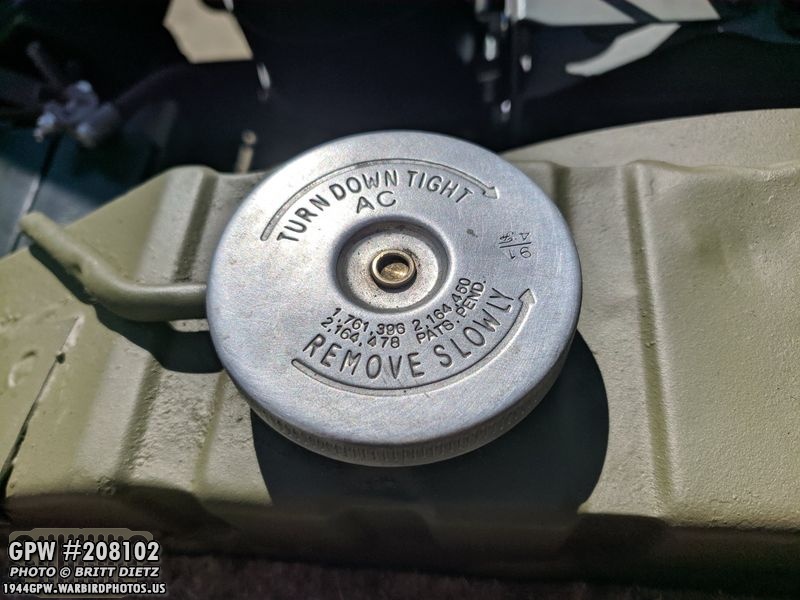
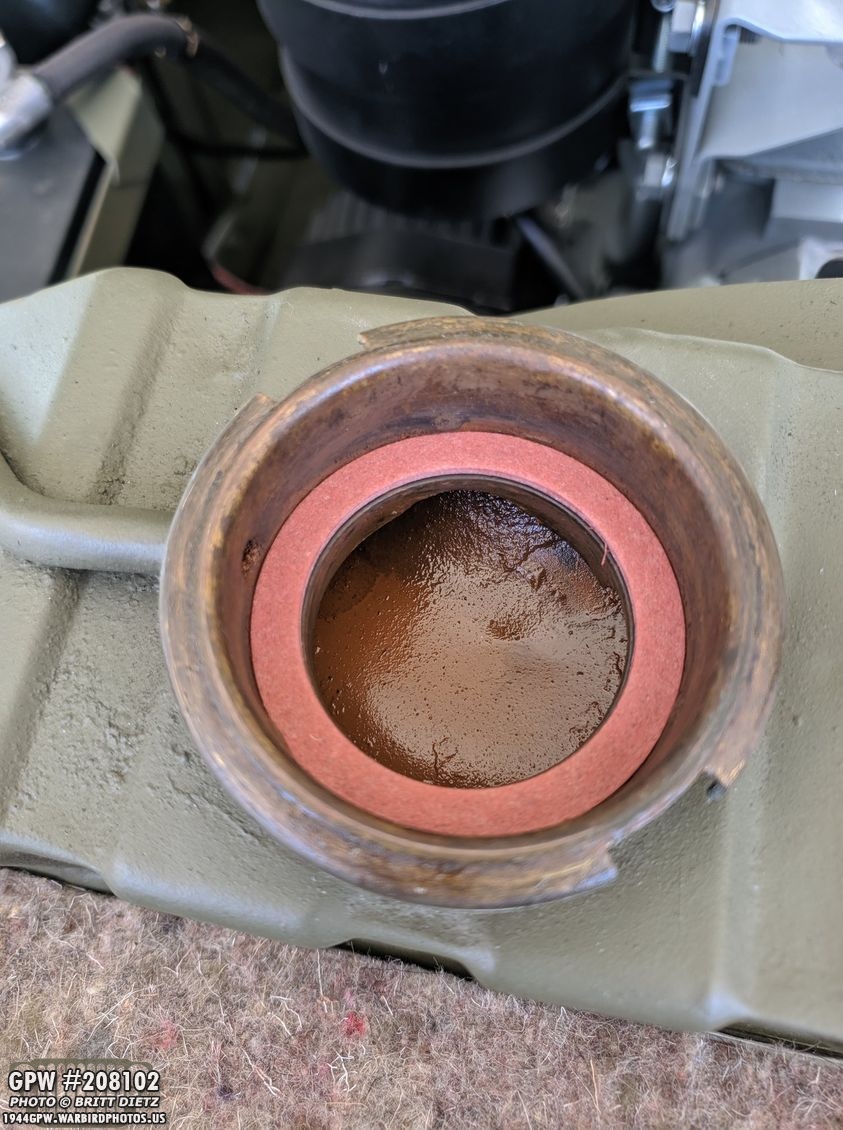
Here’s the new cap all tightened on. After driving the Jeep, I noticed the cap was slightly leaking a little. So it’s possible it’s actually just overfilled (and perhaps not on tight enough).

Here’s a close up look at the small F stamp on the cap.
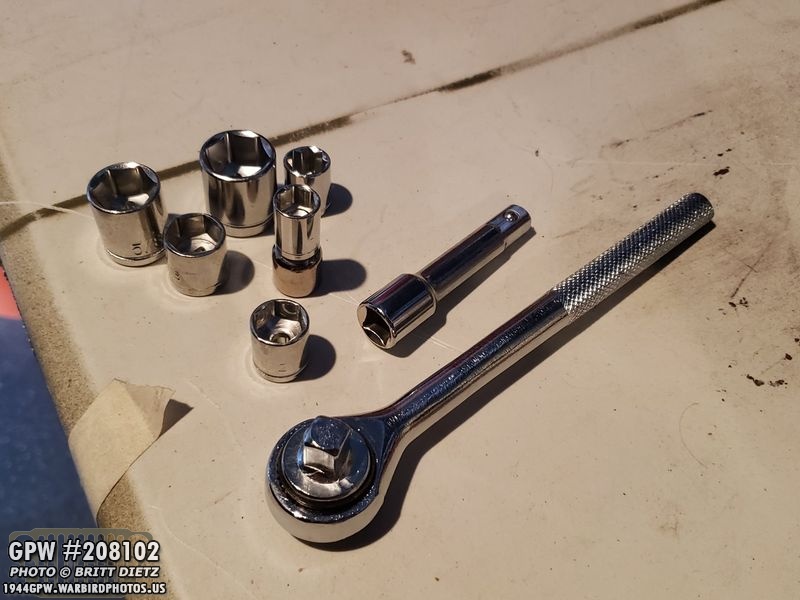
Another thing I wanted to do was make sure I have tools I could keep with the Jeep no matter where I can just in case anything goes wrong. I took a trip to the local Harbor Freight Tools and picked up some hardware, like this mini ratchet set, to put in the tool bag. I took out the most common sizes on the Jeep (9/16, 5/16, 1/2, 3/8, #10, etc) to include.

I also got a double-ended wrench set and a nice foldable tire iron. I’ll add a small hammer, screwdriver, and some other small items eventually. They all fit nicely in the reproduction WW2 tool bag.
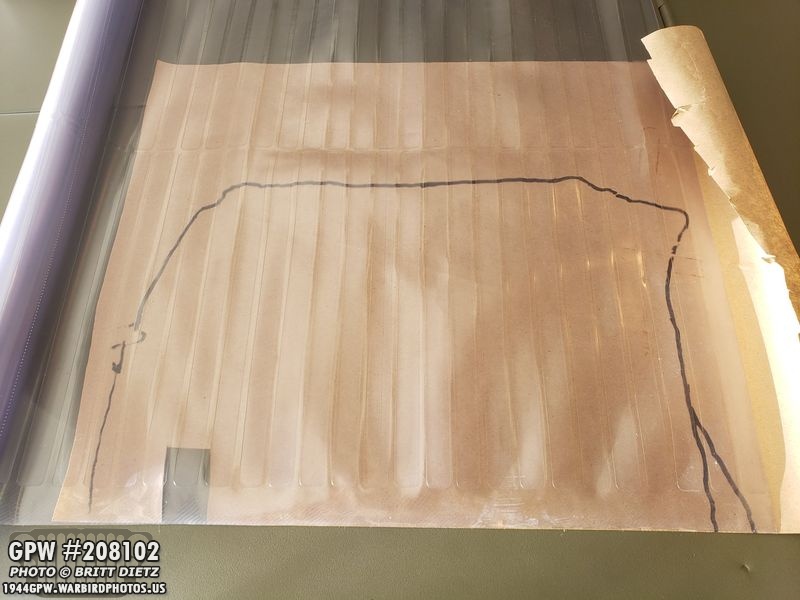
After driving the Jeep for several days now, I decided I wanted to attempt to save the paint job in the Jeep from getting scratched or super dirty. I had an idea for floor mats made out of the plastic you put on carpet for rolling chairs. I took some butcher paper and made a template with a sharpie, then I unrolled the plastic over it to transfer the sharpie.

I then carefully cut it out and test fitted it in the Jeep. Fits perfect! Sadly, I should have just stopped here. But I decided to make it look better.

I first sanded the plastic with some rough sandpaper, then hit it with some red primer, which didn’t work well. The paint took forever to dry, so I went with a filler primer instead that held well and dried fast.

I then hit it with the same 33070 as the Jeep.
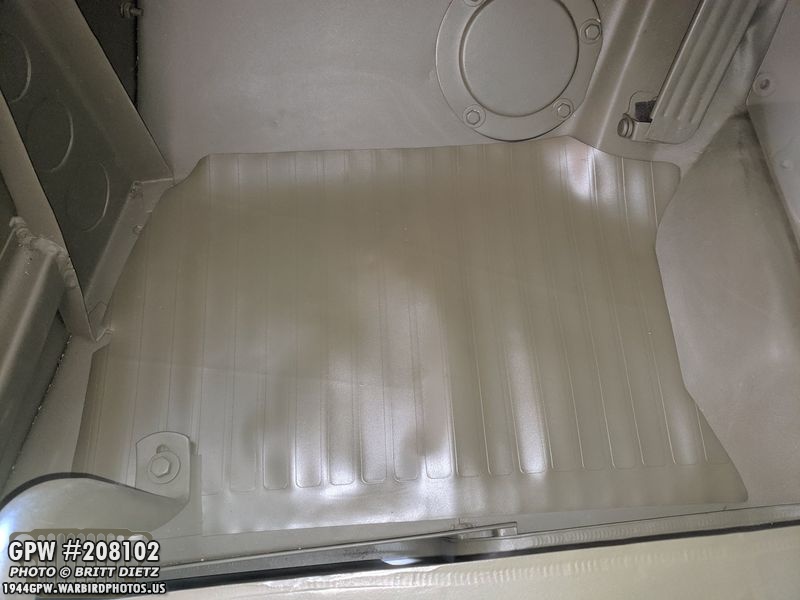
But that took a few days to dry, even on the dry filler primer. I decided to test out how it looks, and it blends really well.
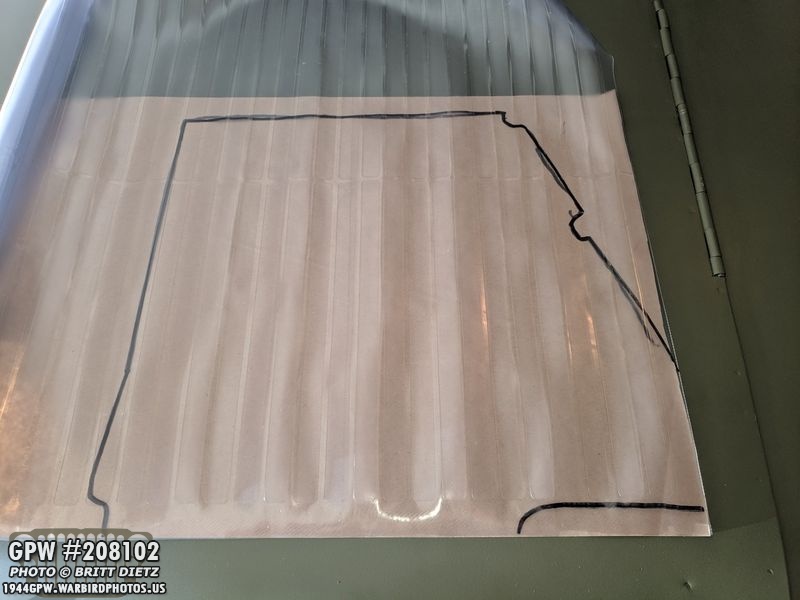
I probably should have tested actually driving with the mat at this point instead of starting a second one, but I instead measured out the passenger side and repeated the process.

After I test fitted it here, I went with the filler primer then the OD Green as well. After they appeared dry, I tested one of them on the passenger side when driving someone on Thursday… that didn’t go well. The paint smudged off, acting like it was dry but wasn’t. Made a mess. So, back to the drawing board on something else it put in there. Any ideas of something that I can paint or get in OD Green that isn’t carpet?

I was able to get another fun project that will bring the Jeep, eventually, closer to being all wartime! Someone on the G503 forums posted that they wanted to get rid of two MB (Willys) axles… a front and back! They said they were in SoCal, and wanted them gone for free. I jumped at them when I saw the post. So on Wednesday evening I went and picked them up! They seem to be in great shape but will need a full restoration. Here’s the front axle once I get it into the garage. My Jeep has CJ axles on it, which are safer I’ve heard, but also not wartime.
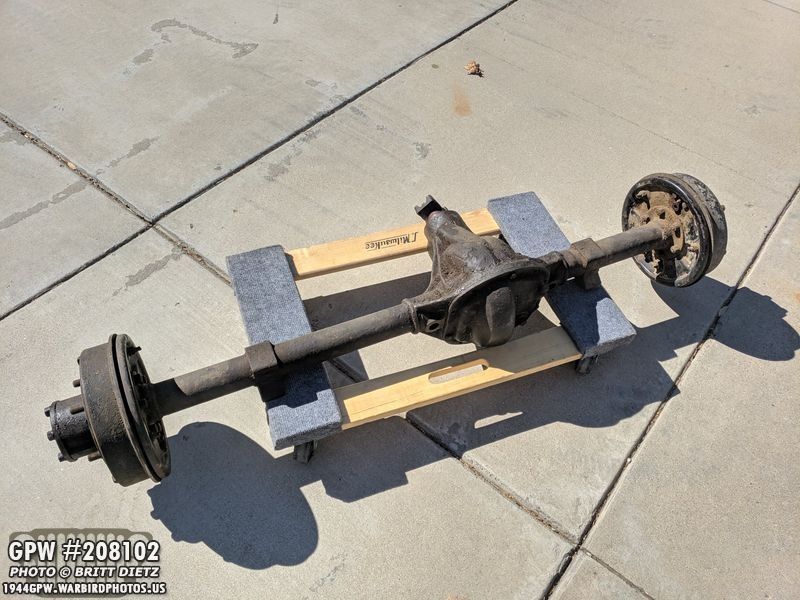
Here’s the rear axle, which I decided to do a little pre-work to in order to verify they are wartime axles.

Here’s a look at one of the hubs. I’m sure it’ll look great after a good cleaning and either wire wheeling or sandblasting.
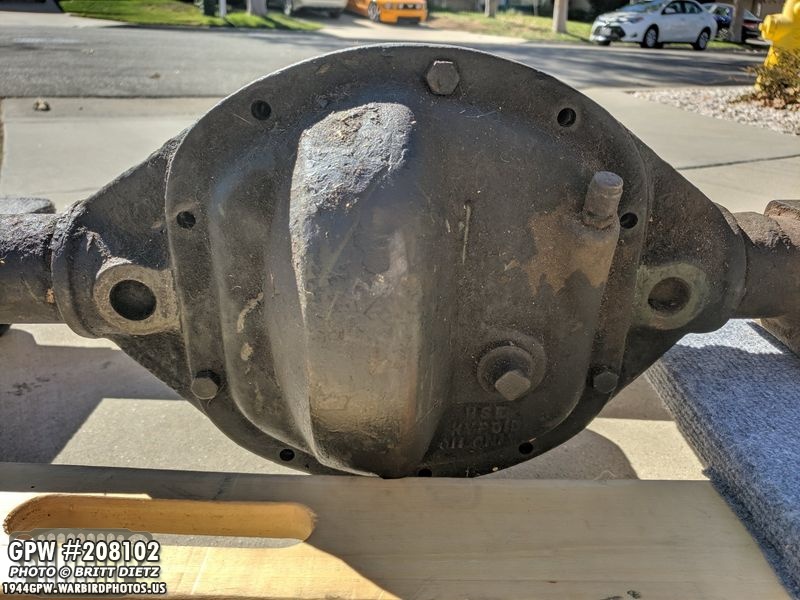
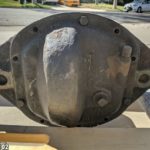
A look at the main housing. I took a nylon wire wheel and went to work on the four corners to find the markings.

On one side I spotted 16378 on the top, and a 23 at the bottom… which I assume means a DANA 23 rear axle which would be correct for wartime MB.
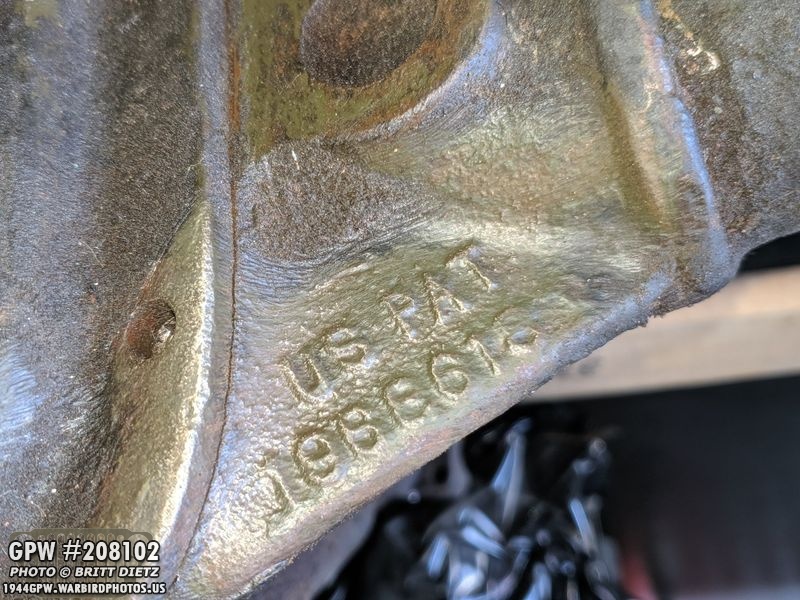
On the other side I found two US Patent numbers… 1988618 which appears to be consistent with these types of axles.

And another Patent of 2018188. I’m pretty sure these are wartime, but I’ll have to do more checking to be 100% sure as I have not done a lot of research. I’m okay with MB axles instead of GPW ones as 1) at least they are wartime and 2) they were free! I’ll be working on these over the next few weeks taking them apart to inspect them. I haven’t decided yet when I’ll be replacing the axles I have on the Jeep now as that is a pretty big project.
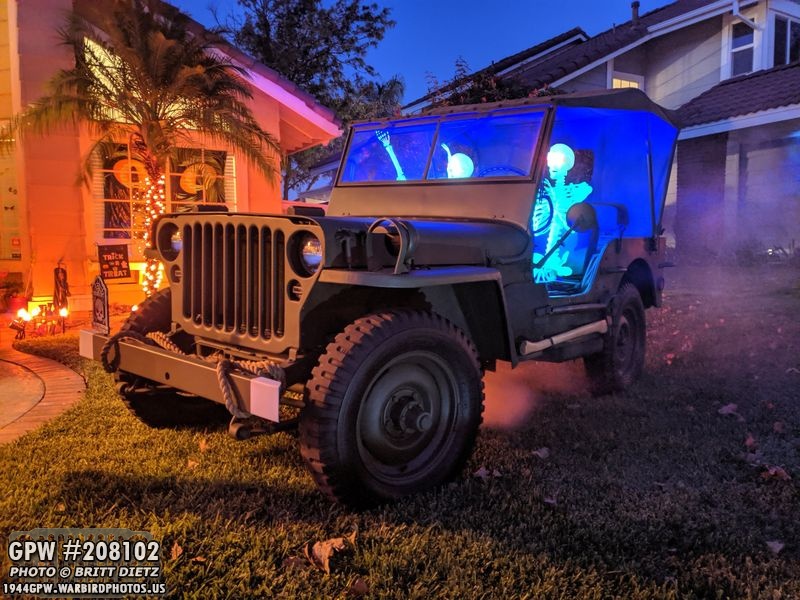
Finally, as many of you saw from last night, I pulled the Jeep out onto the front lawn and added to ‘spooky joy riders’ in the Jeep for Halloween. It was a HUGE hit with the neightborhood. People were taking photos left and right of the Jeep and their kids with the Jeep. It got lots of comments. There was a strobe light hitting the Jeep and a smoke machine underneath.

The two joyriders were lit up with an LED black-lit in the lower passenger area (which worked well as the black light didn’t reflect much off the dull Jeep paint job nor the canvas, so the two riders really glowed brightly. Their eyes had red LEDs in them to add to the effect.

Throw in some gravestones and some Halloween themed music and it was a perfect Halloween display! (it wasn’t this bright in real life, the phone did a great job with a long exposure). This was technically the first public display of the Jeep. Many neighbors mentioned they’d been watching me restore it while driving past/walking the street/etc over the last year and was happy to see it all together looking great. That’s it for this week!